The Enduring Charm of Subway Tile Backsplashes: Your Ultimate Guide
Subway tiles have cemented their status as a cornerstone of interior design, particularly for kitchen and bathroom backsplashes. Their distinctive rectangular shape, clean lines, and remarkable versatility offer a perfect marriage of practicality and classic elegance, fitting seamlessly into almost any home aesthetic, from ultra-modern to rustic farmhouse.
This comprehensive guide delves into the enduring popularity of subway tiles, exploring the vast array of style options available. We’ll also provide essential, practical advice for selecting, installing, and caring for your subway tile backsplash, ensuring a beautiful and long-lasting finish.
Whether your vision includes a crisp, classic white, a bold splash of color, or a subtle matte finish, subway tiles present endless opportunities to elevate and personalize your living spaces. From a quick weekend DIY project to a major home renovation managed by professionals, this detailed exploration will equip you with the knowledge to make informed decisions and achieve a stunning result.
Why Subway Tiles Remain the Go-To Choice for Backsplashes
More than just a trend, subway tiles have evolved into a fundamental design element for homeowners looking to refresh their kitchen or bathroom walls. Their inherent simplicity and adaptable design make them suitable for virtually any home style, while offering a host of practical benefits that extend far beyond their aesthetic appeal.
1. A Legacy of Classic Design
The history of subway tiles is as rich and enduring as their appeal. Originating in the bustling subway stations of New York City in the early 20th century, these iconic tiles were designed for durability, ease of cleaning, and light reflection. Their journey from public transportation hubs to private residences is a testament to their timeless charm and adaptability.
Today, subway tiles effortlessly complement diverse interior styles. They can infuse a modern kitchen with sleek sophistication, lend a cozy and authentic feel to a farmhouse setting, or capture the essence of a vintage-inspired space. Their ability to remain relevant across generations and evolving design trends underscores their status as a true design classic.
2. Unrivaled Ease of Cleaning and Maintenance
One of the most compelling advantages of subway tiles, especially in high-traffic areas like kitchens and bathrooms, is their exceptional ease of cleaning. The flat, non-porous surface of ceramic or porcelain subway tiles repels splashes and stains, allowing food splatters, cooking grease, and water marks to be wiped away with minimal effort.
For even greater practicality and to minimize visible wear, many homeowners opt for darker grout colors, such as charcoal or gray, between classic white tiles. This clever choice helps to camouflage potential staining over time, significantly reducing the perceived cleaning burden and keeping your backsplash looking pristine with less effort.
3. Superior Affordability and Widespread Availability
Subway tiles offer outstanding value, often proving to be a more budget-friendly option compared to many other popular backsplash materials. Their basic, standardized shape contributes to lower manufacturing costs, which translates into more accessible retail prices.
Furthermore, their widespread popularity ensures that subway tiles are readily available. You can find an extensive selection at virtually any home improvement store, specialized tile shop, or online retailer. They come in a vast array of materials—including cost-effective ceramic and porcelain, elegant glass, and even luxurious natural stone—and are offered in various sizes, finishes, and price points to accommodate every budget and design preference.
4. Incredible Versatility in Application
Beyond their classic appeal and practical benefits, subway tiles are incredibly versatile. They aren’t limited to just backsplashes. Their adaptability means they can be used to create stunning shower surrounds, feature walls, fireplace facings, or even wainscoting. This flexibility allows for a cohesive design language throughout your home, connecting different spaces with a consistent, stylish element. Whether you’re aiming for a subtle backdrop or a bold statement, subway tiles can be arranged and customized to fit your unique vision.
Exploring Subway Tile Styles and Finishes for Your Backsplash
The beauty of subway tiles lies in their simplicity, which also makes them a perfect canvas for a myriad of styles. Choosing the right subway tile can dramatically influence the overall ambiance of your kitchen or bathroom. From a spectrum of colors to a variety of finishes and edge styles, each option creates a distinct feel while preserving the clean, uncluttered look that subway tiles are celebrated for.
Classic White Subway Tiles: The Epitome of Timelessness

White subway tile remains the most popular and enduring choice for backsplashes across various regions. Its pristine, neutral appearance harmonizes effortlessly with virtually any kitchen color scheme, cabinet style, and countertop material. This makes it an incredibly safe yet stylish choice that will stand the test of time.
White subway tiles are renowned for creating a bright, open, and airy feeling, making them an excellent choice for both compact bathrooms and expansive kitchen spaces. They serve as an ideal, unobtrusive backdrop that allows other design elements—such as vibrant cabinetry, unique hardware, or statement lighting—to truly shine and take center stage.
Colored Subway Tiles: Adding Personality and Depth
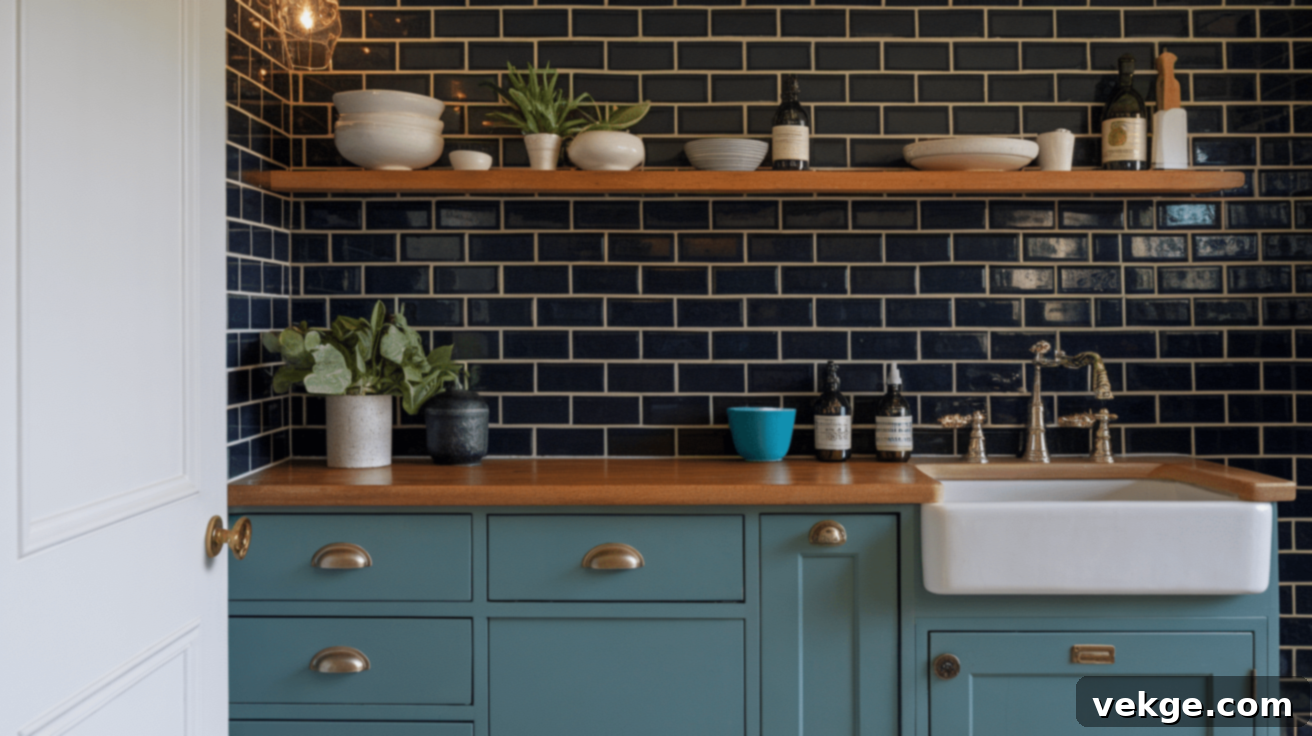
For those seeking to inject more character and visual interest into their space beyond traditional white, colored subway tiles offer a fantastic solution. Gray subway tiles, for instance, provide a sophisticated, modern, and subtle variation. They maintain a neutral appeal but introduce a welcome layer of depth and texture.
Black tiles, on the other hand, create a dramatic and bold contrast, particularly striking when paired with light-colored cabinets or marble countertops. Options in soft blues, tranquil greens, or even earthy terracotta can introduce a refreshing splash of color, effectively tying together other design elements in your kitchen or bathroom while always maintaining a tasteful and refined appearance.
Tile Finish, Edges, and Size: A Detailed Comparison
The texture and edges of your subway tiles, along with their size, play a significant role in the overall aesthetic and functionality of your backsplash. Understanding these distinctions is key to making the perfect selection.
| Feature | Glossy Finish | Matte Finish | Beveled Subway Tiles | Flat Subway Tiles |
|---|---|---|---|---|
| Appearance | Shiny, highly reflective surface, often enhances color. | Soft, non-reflective, subtle, and sophisticated look. | Slanted, chamfered edges creating depth and shadow lines. | Clean, straight edges for a smooth, uniform surface. |
| Light Reflection | Maximizes light, making spaces appear larger and brighter. | Absorbs light, contributing to a warm, cozy, and understated feeling. | Varied light reflection due to angled surfaces, adding dimension. | Consistent, uniform light reflection across the surface. |
| Maintenance | Prone to showing water spots, fingerprints, and smudges easily. | Effectively hides smudges, water marks, and minor imperfections. | Edges can trap grime, requiring more thorough cleaning. | Very easy to wipe clean due to a smooth, flat surface. |
| Durability & Wear | May show scratches and imperfections more readily under direct light. | Excellent at concealing minor wear and tear, highly durable in appearance. | The beveled edges offer a degree of protection, but corners can chip. | Edges are more susceptible to visible damage if struck. |
| Best For | Small spaces needing brightness, modern, or glamorous designs. | High-traffic areas, industrial, contemporary, or minimalist designs. | Traditional, vintage, classic, or art deco inspired designs. | Modern, minimalist, Scandinavian, or transitional spaces. |
| Installation | Standard installation process. | Standard installation process. | Requires meticulous alignment to ensure consistent grout lines and avoid awkward transitions. | Straightforward installation due to uniform tile shape. |
| Visual Impact | Bold, eye-catching, and can add a sense of luxury. | Subtle, understated elegance, providing a calm backdrop. | Defined tile borders and a rich, textured appearance. | Minimal emphasis on individual tiles, focusing on the overall pattern. |
Beyond finishes and edges, consider the size of your subway tiles. While the classic 3×6 inch dimension is popular, smaller tiles (e.g., 2×4, 2×6) can create a more intricate, detailed look, ideal for smaller areas or specific patterns. Larger formats (e.g., 4×8, 4×12) offer a more contemporary, expansive feel, reducing grout lines and emphasizing the sleekness of the tile itself.
When making your final choice, it’s essential to consider how the tiles will interact with your existing cabinets, countertops, and ambient lighting. Always take home several samples and test them in your space at different times of day to observe how light and shadow affect their appearance. The right subway tile selection can harmoniously tie your entire kitchen or bathroom design together while offering low-maintenance durability for many years to come.
Inspired Design Ideas: Pairing Subway Tiles with Your Space
Integrating subway tiles into your home offers a unique opportunity to enhance its aesthetic while providing practical, durable wall protection. The key is to consider how they will complement your existing decor and functional needs.
Subway Tile Backsplash in Kitchens: A Culinary Canvas
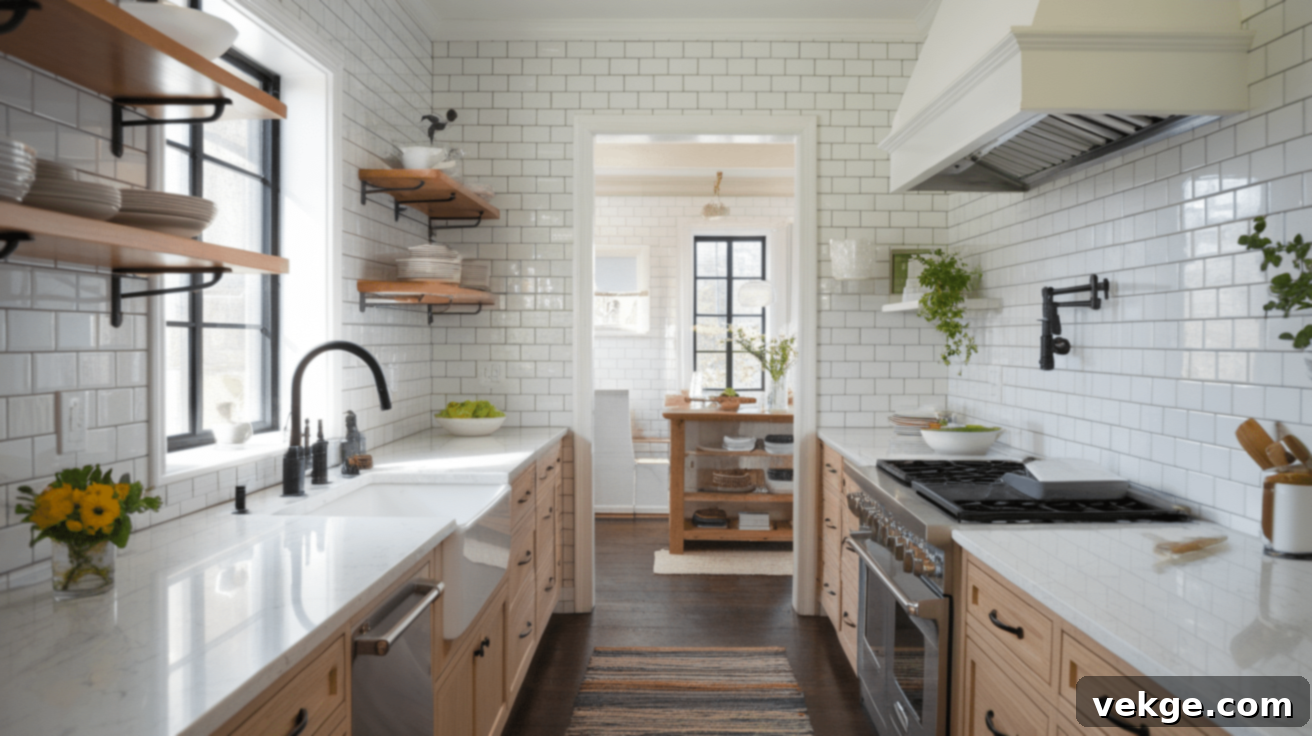
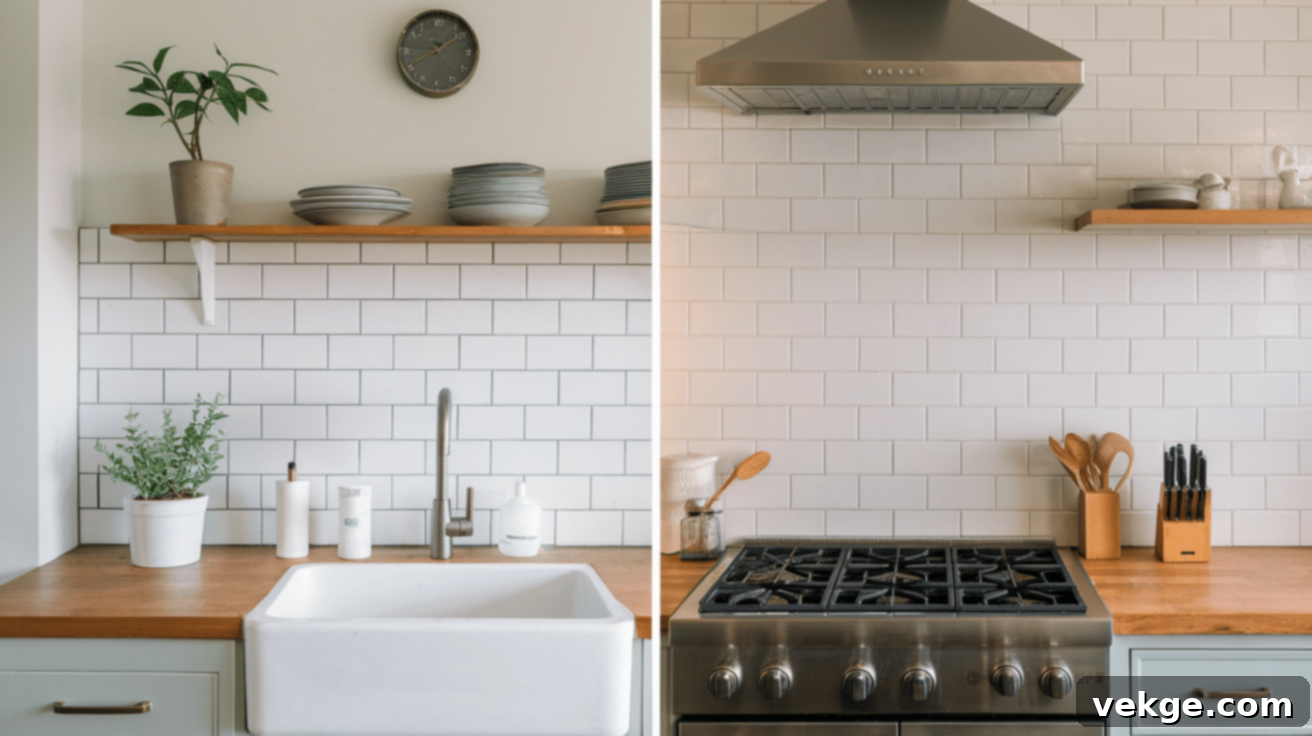
In the kitchen, white subway tiles paired with contrasting black grout deliver a crisp, modern aesthetic that is particularly striking alongside white cabinetry and dark countertops. They serve as an ideal, neutral backdrop for showcasing open shelving, allowing decorative items, cookware, and plants to stand out without visual competition. This combination also perfectly complements farmhouse sinks, enhancing their rustic charm.
For areas behind the stove, consider extending the tiles all the way up to the range hood or ceiling. This not only offers maximum splash protection but also creates a dramatic focal point. Around countertops, ensure the use of high-quality, waterproof grout and proper sealing to prevent moisture infiltration and maintain hygiene.
Subway Tiles in Bathrooms: Crafting a Serene Sanctuary
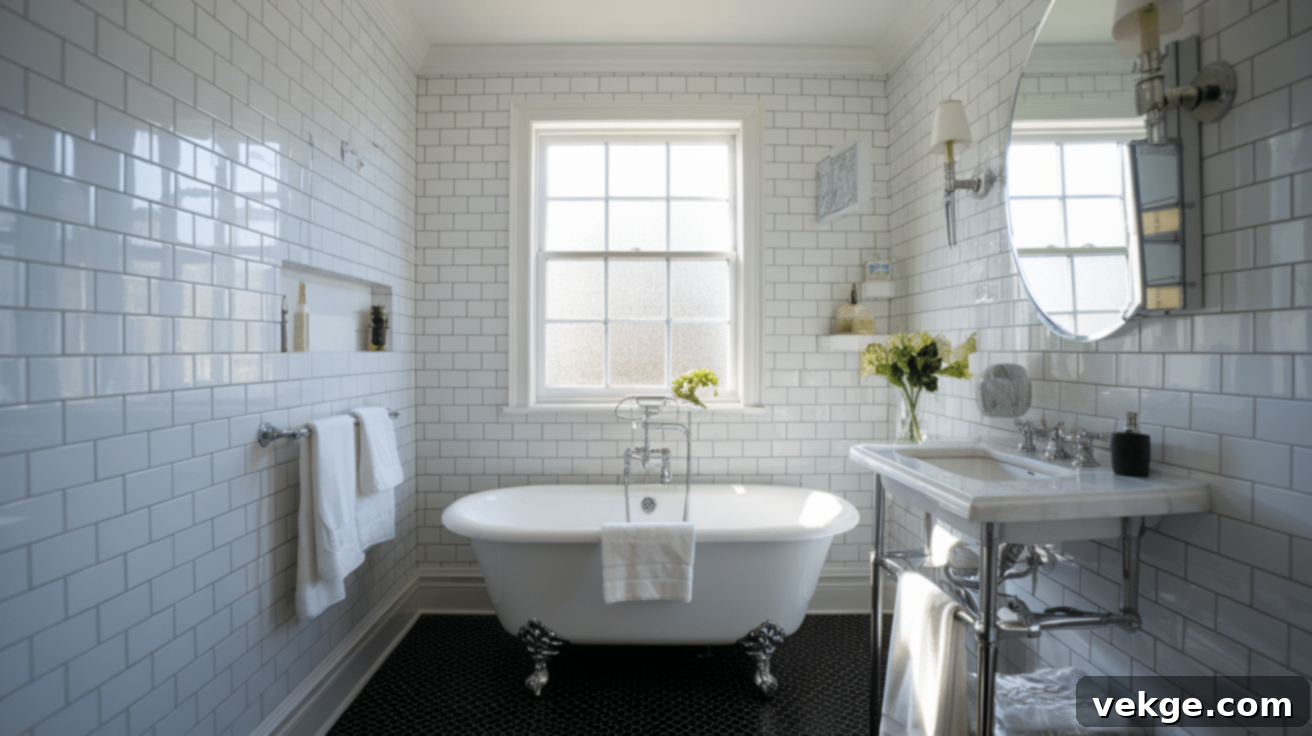
Subway tiles are particularly effective in bathrooms, where they contribute to a clean, bright, and expansive feeling, making even small bathrooms appear larger and more inviting. The visual effect of horizontal tile lines can perceptibly widen narrow spaces, while light-colored tiles are excellent at reflecting ambient light, brightening the entire room.
To personalize a bathroom without changing the tiles themselves, experiment with colored grout – a soft blue or green grout with white tiles can add a subtle pop of color and definition. For those desiring more color, selecting subway tiles in soothing pastel blues, greens, or even earthy beige tones can transform a bathroom into a tranquil, spa-like retreat.
Subway Tile for Statement Walls & Dynamic Patterns: Beyond the Standard

The chosen pattern for your subway tiles can profoundly alter the perception and feel of your space, adding depth, texture, and visual interest.
- Herringbone Layouts: This intricate pattern creates a striking sense of movement and rich texture. It’s an exceptional choice for shower walls, fireplace surrounds, or kitchen backsplashes where a bold visual statement is desired. The interlocking V-shapes add a dynamic quality that elevates any room.
- Vertical Arrangements: By stacking tiles vertically, you naturally draw the eye upwards, making ceilings appear higher and spaces feel more expansive. This pattern is particularly effective in small bathrooms, powder rooms, or narrow hallways that benefit from a sense of increased height.
- Diagonal Patterns: For an unexpected and artful twist, diagonal patterns offer unique visual interest. They can work beautifully on accent walls, within recessed niches, or around fireplaces, providing a contemporary edge to a classic tile.
- Basketweave Arrangements: For a more traditional and charming look, the basketweave pattern adds a classic elegance to bathroom floors, wainscoting, or even kitchen backsplashes. This timeless design evokes a sense of artisanal craftsmanship and refined taste.
- Offset (Running Bond): The most common and classic pattern, where each tile is offset by half its length from the one below it. This creates a staggered, brick-like appearance that is versatile and timeless.
- Stack Bond (Straight Lay): Tiles are laid directly on top of each other, creating perfectly aligned horizontal and vertical grout lines. This modern, minimalist pattern emphasizes the clean lines of the tiles and works well in contemporary settings.
How to Install Subway Tiles for Your Backsplash: A Step-by-Step Guide
Installing subway tiles might initially appear to be a daunting task, but with the right tools, careful planning, and a methodical approach, it can be a highly rewarding DIY weekend project. Achieving a professional-looking finish that withstands the test of time hinges significantly on thorough preparation.
Preparing the Surface and Planning Your Layout
Before any tiles can be set, your wall surface must be meticulously prepared. Begin by removing all outlet covers, light switches, and any existing trim. Ensure the wall is completely clean, free from dust, grease, grime, and loose paint chips. For kitchen backsplashes, the wall should be smooth and flat; you may need to sand down any bumpy areas, fill in holes with spackling compound, or apply a skim coat of thin-set mortar for an even surface. Allow any fillers to dry completely.
Precise measuring and planning are paramount for an aesthetically pleasing result. Locate the center point of your wall and mark clear vertical and horizontal guidelines. This crucial step ensures that your tiles will be laid straight, evenly spaced, and that any cut tiles at the edges will be of equal size, creating a balanced appearance. It’s highly recommended to perform a “dry lay” first – arranging tiles on the floor or a large piece of cardboard to visualize your pattern and plan cuts, helping to avoid awkward small pieces in highly visible areas.
Step-by-Step Installation Process
- Apply Adhesive: Using a notched trowel (the notch size depends on your tile size, typically 1/8 to 1/4 inch), apply an even layer of tile adhesive (thin-set mortar) to a small section of the wall, working in manageable areas of about 2-3 feet wide. Avoid covering too much area at once, as the adhesive can dry.
- Set the First Tile: Place your first tile firmly at your marked center point, pressing it gently but securely into the adhesive. Start from the bottom row and work your way up.
- Use Spacers: Insert tile spacers (typically 1/16 or 1/8 inch) between each tile to maintain consistent and even gaps for your grout lines. This is critical for a uniform look.
- Continue Tiling: Continue adding tiles in rows, following your chosen pattern (e.g., offset/running bond is common for subway tiles). Frequently check your work with a level, both horizontally and vertically, to ensure all rows are perfectly straight.
- Make Cuts: For edge pieces, corners, or cuts around outlets, use a wet saw or a manual tile cutter. Always wear appropriate safety gear, including eye protection.
- Curing Time: Once all tiles are installed, allow the adhesive to dry and cure completely. This typically takes 24 to 48 hours, depending on the adhesive type and humidity. Refer to the product manufacturer’s instructions.
- Grout Application: Mix your chosen grout according to the package directions to achieve a consistent, smooth paste. Apply the grout to the tile surface using a rubber float, pushing it firmly and diagonally into all the gaps between the tiles, ensuring they are completely filled.
- Clean Excess Grout: Within 15-30 minutes (before it fully hardens), begin wiping away excess grout from the tile surface with a damp (not soaking wet) sponge. Rinse the sponge frequently in clean water. Multiple passes may be needed to remove the “grout haze.”
- Curing and Sealing: Allow the grout to cure fully (usually 48-72 hours, check product instructions). Once cured, apply a grout sealer (if using cement-based grout) to protect against stains and moisture. Finally, replace all outlet covers and switch plates.
DIY vs. Professional Installation: Weighing Your Options
Installing subway tiles is a project that many homeowners with basic tools and a good dose of patience can successfully undertake. The simple rectangular shape of subway tiles makes them generally easier to work with compared to more intricate or irregularly shaped tiles.
Opting for DIY installation typically results in significant cost savings, as you only pay for materials and avoid professional labor charges. For an average kitchen backsplash, this can mean a substantial reduction in overall project expenses.
However, hiring a professional tile installer often makes sense for larger spaces, complex patterns like herringbone or chevron, or if your walls require extensive preparation and repair. Professionals bring invaluable experience, particularly with tricky cuts around outlets, windows, and corners, ensuring a clean, precise finish. They also work much faster—what might take an experienced DIYer a full weekend could be completed by a professional in a single day. If you’re uncomfortable using specialized tools like wet saws, lack confidence in your precision, or simply have limited time, professional help will save you stress and potentially costly mistakes.
Popular Grout Options for Subway Tile Backsplashes
While often seen as a minor detail, grout plays a surprisingly significant role in the final appearance and durability of your subway tile backsplash. The right grout choice can either subtly highlight each individual tile or create a more cohesive, unified look, dramatically influencing the overall aesthetic.
Light vs. Dark Grout: A Visual and Practical Choice
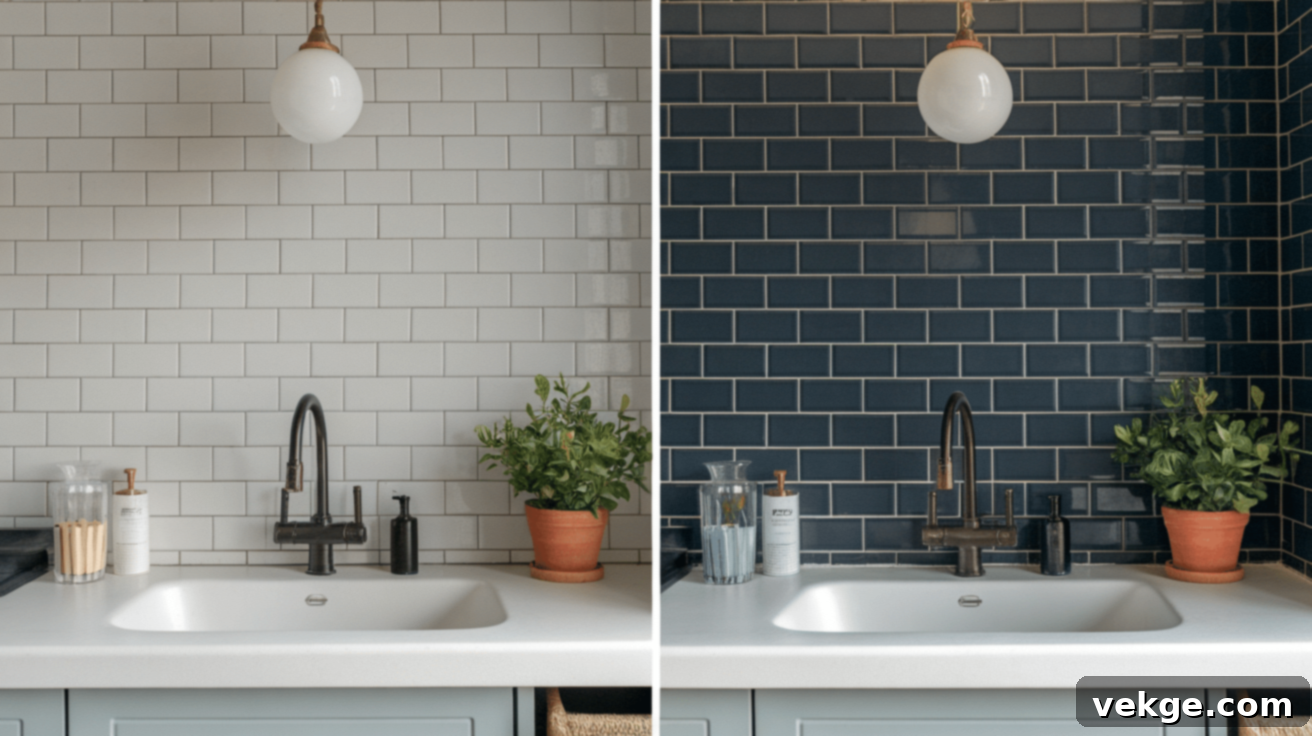
The color of your grout has a profound impact on both the visual outcome and the long-term functionality of your tiled surface.
- Light Grouts (e.g., white, cream, light gray): These create a seamless, expansive, and clean aesthetic. They are ideal for modern kitchens, contemporary designs, and making smaller spaces feel larger and brighter by minimizing the visual breaks between tiles. The drawback is that light grouts tend to show stains, dirt, and mold more readily, requiring more frequent and diligent cleaning.
- Dark Grouts (e.g., charcoal, black, dark gray, brown): These emphasize individual tiles and highlight the chosen tile pattern, adding definition and architectural interest. Dark grouts are perfect for industrial, farmhouse, or high-contrast styles. Practically, they excel in busy cooking areas or bathrooms where stain resistance and concealing grime are crucial, making them lower maintenance in terms of visual cleanliness.
Consider using light grout for a continuous, subtle look with colored tiles, or opt for dark grout to really make your tile pattern pop while effectively concealing everyday cooking stains.
Epoxy Grout vs. Cement-Based Grout: Durability Meets Ease of Use
The type of grout material you select also impacts performance and installation:
- Epoxy Grout: This type of grout is highly resistant to stains, water, chemicals, and cracking. Its superior durability and non-porous nature make it an ideal, long-lasting choice for kitchen backsplashes and wet areas like showers, where hygiene and easy maintenance are paramount. While epoxy grout is typically more expensive and can be more challenging to work with during installation (it sets quickly and requires careful cleanup), many homeowners find its long-term benefits and minimal maintenance requirements well worth the initial effort and cost.
- Cement-Based Grout: More traditional and widely used, cement-based grout is generally easier to apply and more forgiving during the installation process. It’s also more affordable. However, traditional cement-based grout is porous and requires sealing to resist stains and water penetration effectively. Regular maintenance, including re-sealing every 1-2 years, is necessary to keep it looking fresh and protected. There are also newer “modified” cement grouts that contain polymers for improved stain resistance, reducing the need for sealing.
Subway Tile Backsplash Maintenance Tips: Keeping Your Tiles Pristine
Maintaining your subway tile backsplash in pristine condition requires only minimal but consistent effort. Regular care is essential not only to prevent staining and grime buildup but also to extend the lifespan of both your tiles and grout, ensuring your backsplash retains its fresh, clean appearance for many years to come.
For Tile Cleaning: Simple Steps for a Sparkling Surface
- Daily Wipe Down: After cooking or showering, quickly wipe the tiles with warm water and a soft cloth or sponge to remove fresh splatters and moisture.
- Regular Cleaning: For general cleaning, use a solution of mild dish soap and warm water. Apply with a soft cloth, then rinse and dry thoroughly to prevent water spots.
- Tackling Stubborn Stains: For tougher food stains or grease, a paste made from baking soda and water (apply, let sit for 15-20 minutes, then scrub gently and rinse) can be highly effective.
- Mineral Deposit Removal: In areas with hard water, mineral deposits can accumulate. A solution of equal parts white vinegar and water applied and left for a few minutes before scrubbing can help dissolve these. Always test vinegar on an inconspicuous spot first, as it can be harsh on some natural stone tiles or certain grouts if left too long.
For Grout Maintenance: Protecting and Refreshing Grout Lines
- Annual Sealing: If you have cement-based grout, seal it annually or biennially (depending on usage) to create a barrier against stains and moisture.
- Grout Whitening: For discolored or yellowing grout, a solution of oxygen bleach (following package directions) applied with a soft brush can help restore its original color. Avoid harsh abrasive cleaners or wire brushes, which can damage grout.
- Prompt Repair: Address any cracks or crumbling grout immediately. Repairing these areas prevents moisture from seeping behind the tiles, which can lead to more significant damage.
Preventing Mold and Mildew: Essential Habits
- Ventilation is Key: Always run exhaust fans during cooking and showering to reduce humidity and moisture buildup in the air.
- Wipe Down After Use: After activities that generate steam (cooking, hot showers), give your backsplash a quick wipe-down to remove surface moisture.
- Fix Leaks: Immediately address any nearby plumbing leaks. Excess moisture from leaks is a prime breeding ground for mold.
- Squeegee Shower Walls: In bathrooms, using a squeegee on shower tile walls after each use dramatically reduces moisture and helps prevent mold and mildew growth.
Common Mistakes to Avoid When Installing Subway Tiles
Even experienced DIY enthusiasts can encounter pitfalls when installing subway tiles. By being aware of these common mistakes, you can navigate your project more smoothly and achieve a truly professional-looking backsplash that you’ll be proud of.
For the best possible results with your subway tile installation project, keep these crucial tips in mind:
- Incorrect Starting Point: Always begin tiling from the wall’s center or the most visible point, working outwards. This creates a balanced, symmetrical pattern and ensures that any necessary cuts are pushed to less conspicuous edges. Starting from a corner can lead to an unbalanced look and awkward small cuts in prominent areas.
- Neglecting Your Level: Consistently check your tile rows with a level, both horizontally and vertically, as you work. Even a slight deviation can become very noticeable over several rows, resulting in crooked lines and an unprofessional finish.
- Skipping Grout Sealing: If using traditional cement-based grout, it is imperative to seal it 2-3 days after application (once fully cured). Skipping this step leaves the grout porous and highly susceptible to stains, dirt, and water damage, compromising its appearance and longevity.
- Improper Grout Application: When applying grout, use a rubber float at a 45-degree angle, pressing firmly to ensure the grout is fully pushed into the joints. Inadequate application can lead to air pockets, weak grout lines, and a patchy appearance.
- Delayed Grout Cleanup: Clean excess grout from the tile surface within 15-30 minutes of application using a damp sponge. Waiting too long will allow the grout to harden, making it significantly more difficult to remove and potentially damaging the tiles or leaving a stubborn “grout haze.”
- Over-filling Grout Lines: Ensure that the grout sits slightly below the tile edge, forming a subtle recess. Over-filling or allowing grout to cover the tile corners can obscure the tile’s clean lines and make the backsplash look bulky or poorly finished.
- Insufficient Surface Preparation: Failing to clean, flatten, and properly prime the wall surface before tiling can lead to poor adhesion, uneven tiles, and premature tile failure. A well-prepared surface is the foundation of a successful tile installation.
- Ignoring Dry Time: Rushing the process by not allowing sufficient drying time for the tile adhesive before grouting, or for the grout before sealing, can lead to tiles shifting, grout cracking, or moisture issues. Patience is key.
Conclusion: Subway Tiles – A Smart, Stylish, and Enduring Choice
Subway tiles continue to be an exceptionally smart and stylish choice for backsplashes in both kitchens and bathrooms. Their undeniable appeal stems from a powerful combination of their clean, classic aesthetic, remarkable durability, and unparalleled design flexibility. Whether your personal preference leans towards a crisp and timeless white, a vibrant splash of bold color, or the creation of an intricate and eye-catching pattern, subway tiles offer a versatile solution that can seamlessly match your home’s unique style while providing robust and practical wall protection.
When embarking on your subway tile project, carefully consider your tile material, finish, and grout choices based on both your desired design vision and the level of ongoing upkeep you are prepared for. For simpler layouts and smaller areas, you might feel confident tackling the installation yourself, leveraging the detailed tips provided in this guide.
However, for more complex patterns, challenging angles, or larger renovation projects, enlisting the expertise of a professional installer can ensure a flawless, precision finish. Regardless of whether you choose a DIY approach or professional installation, a well-executed subway tile backsplash is a valuable investment that will enhance your home’s beauty and functionality for many years to come.
