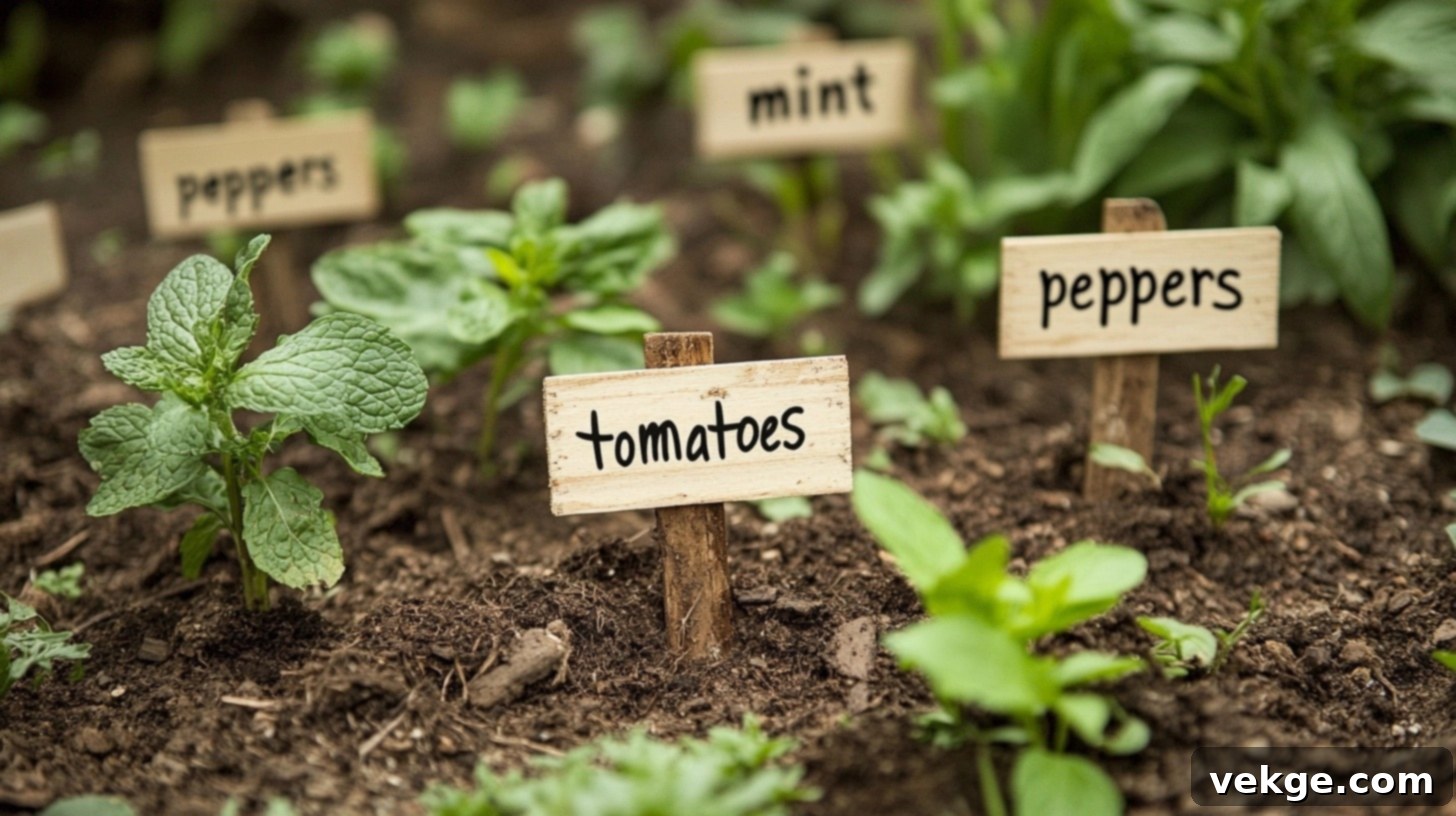
15 Creative & Affordable DIY Plant Markers: Boost Your Garden’s Organization and Style
Every gardener, from novice to seasoned expert, understands the sheer joy of nurturing plants from seed to harvest. Yet, amid the lush greenery and diverse foliage, a common frustration often arises: remembering exactly what you planted where, and when! I’ve lost count of the times I’ve found myself pondering if a particular seedling was a tomato or a pepper, or trying to recall which variety of basil I sowed in that crowded patch.
This common dilemma highlights the essential role of clear, durable plant labels. While store-bought options are readily available, creating your own DIY plant markers offers numerous benefits. Not only does it save money, but it also infuses your garden with a unique, personal touch that reflects your creativity. More importantly, it provides an invaluable system for tracking your garden’s progress, noting planting dates, and monitoring the specific needs of each plant. This level of organization simplifies maintenance, enhances understanding of your plants’ growth cycles, and helps you plan for future successful harvests.
Over the years, I’ve experimented with a myriad of methods to mark my plants effectively. I’m thrilled to share a curated collection of my absolute favorite homemade garden marker ideas – simple, practical projects that primarily utilize materials you likely already have around your home. By the time you finish reading this comprehensive guide, you’ll be equipped with 15 inspiring and practical ways to craft long-lasting, aesthetically pleasing plant markers that will undoubtedly become a charming and functional addition to your garden.
Why Are Plant Markers Essential for Every Gardener?
Plant markers are more than just decorative elements; they are fundamental tools for effective garden management. They contribute significantly to a well-organized, thriving, and enjoyable gardening experience. Here’s a closer look at their key benefits:
- Organize Your Garden Space: Plant markers are crucial for preventing confusion, especially when young seedlings look remarkably similar. By clearly identifying each plant, they establish order and structure within even the busiest garden beds. This visual clarity makes daily tasks like watering, weeding, and pruning much more straightforward and efficient, reducing the risk of accidentally removing a prized plant.
- Track Growing Progress: For diligent record keepers, garden markers are indispensable. They serve as immediate reference points for noting planting dates, specific varieties, and unique care requirements. This detailed information allows you to meticulously monitor plant development, identify which methods or varieties are most successful in your environment, and make informed decisions for future garden layouts and crop rotations. Understanding your plants’ journey from seed to maturity becomes a much clearer process.
- Simplify Garden Maintenance: With clearly labeled plants, routine garden maintenance becomes a breeze. You can quickly identify what needs water, fertilizer, or pest control without guesswork. This not only saves time but also ensures that each plant receives the appropriate care, preventing accidental damage or neglect. Knowing exactly what’s growing where streamlines your entire gardening workflow throughout the season.
- Share Garden Knowledge: Plant markers act as silent educators. They enable family members, friends, or anyone assisting in the garden to quickly identify plants and understand their basic needs. This makes it simple for others to lend a hand with watering, harvesting, or other fundamental garden tasks, fostering a shared appreciation for your green space and empowering others to contribute effectively.
15 Best DIY Garden Marker Ideas for Creative Plant Lovers
Ready to add some personalized charm and functionality to your garden? Here are my top 15 favorite DIY plant marker projects, designed to be both easy to make and durable enough to withstand the elements.
1. Painted Stones: Natural & Enduring Plant Labels
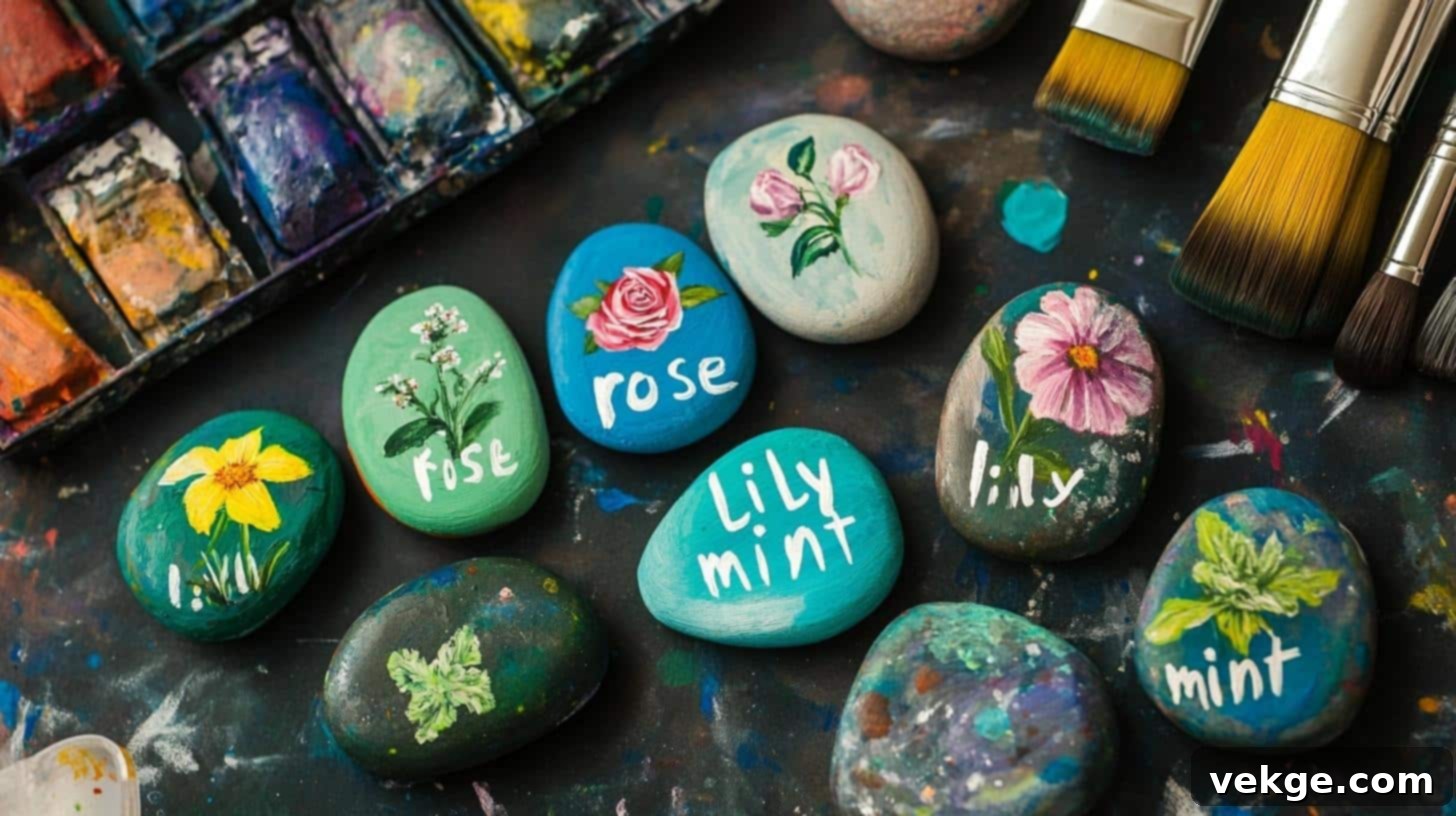
Painted stones are a classic for a reason. They blend seamlessly with the natural aesthetics of a garden, are incredibly durable, and offer a wonderful canvas for artistic expression. This method is perfect for adding a rustic yet charming touch.
| Material | Quantity/Details |
|---|---|
| Smooth flat stones | As many as needed for your garden |
| Acrylic paint | Multiple vibrant or earthy colors |
| Paintbrushes | Various sizes, including fine-tipped for detail |
| Sealant (optional but recommended) | Clear outdoor sealant, UV-resistant |
| Cleaning cloth | Any soft cloth for preparing stones |
| Container | For washing and soaking stones |
Step-by-Step Guide:
- Prepare Your Canvas: Gather smooth, flat stones from your yard or a craft store. Clean them thoroughly using warm water and a cleaning cloth until all surface dirt and debris are removed. For rougher stones, a light sanding can create a smoother surface for painting, ensuring a professional finish. Allow them to dry completely before proceeding.
- Apply Base Coat: Paint a light-colored base coat on your clean, dry stones. Lighter colors provide a fantastic contrast, making plant names stand out clearly. Allow this base coat to dry for at least 30 minutes to ensure it’s set before adding details.
- Personalize and Decorate: Using a fine-tipped brush and weather-resistant paint, carefully write the plant names on the stones. Feel free to add simple, charming decorations like small leaves, flowers, or vines to enhance their aesthetic appeal. Wait at least 15 minutes between applying different colors to prevent smudging and ensure crisp lines.
- Seal for Longevity: Once all paint is completely dry (this may take up to 2 hours, depending on paint thickness), apply a clear outdoor sealant. Do this in a well-ventilated area to protect your beautiful artwork from the elements. Allow the sealant to cure overnight before placing your personalized markers near your plants in the garden.
2. Wine Cork Labels: Upcycled Elegance for Herbs
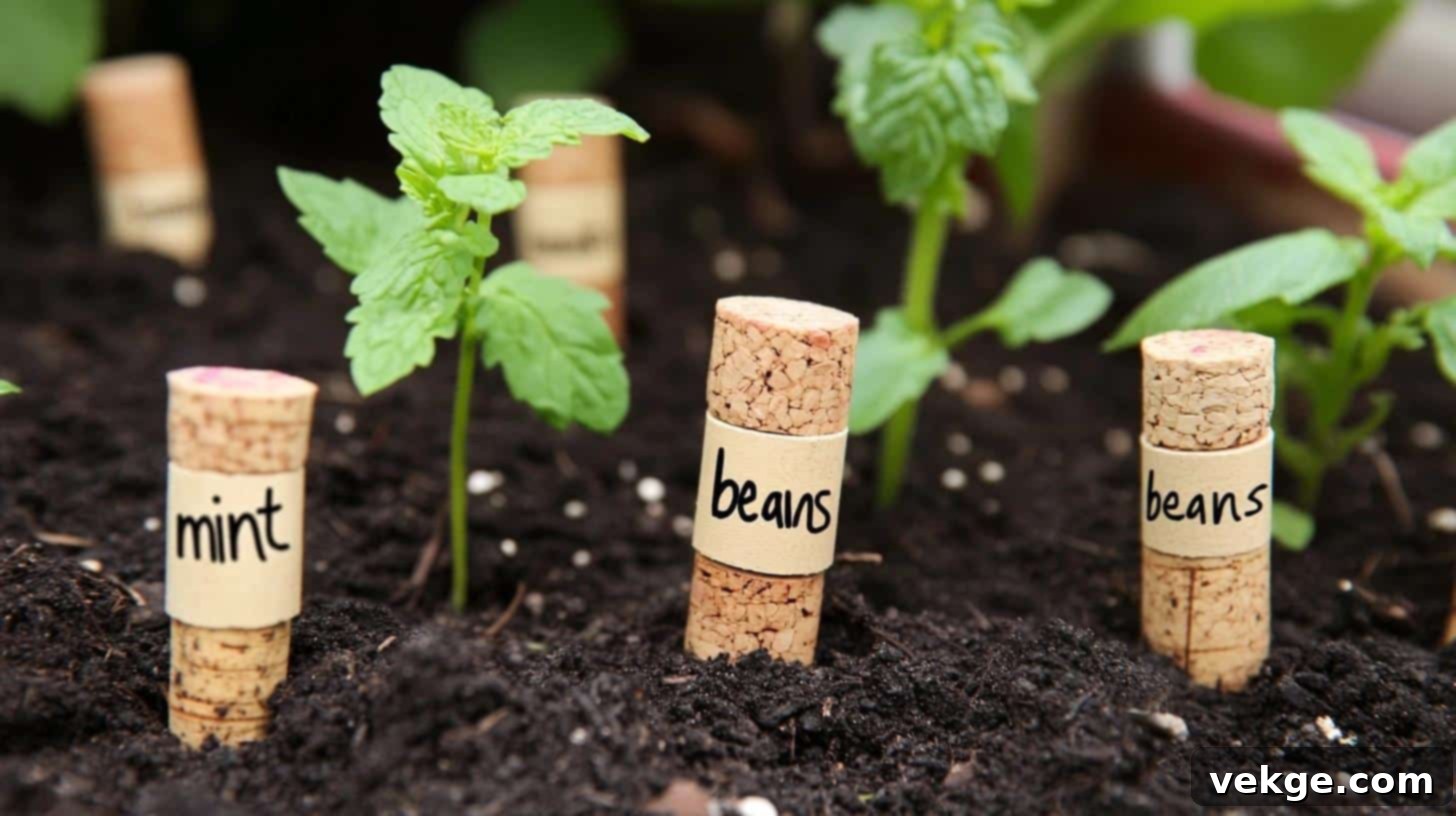
Wine corks offer a delightful, rustic charm and are an excellent way to upcycle. Paired with bamboo skewers, they create elegant and sustainable markers, particularly perfect for herb gardens or smaller potted plants.
| Material | Quantity/Details |
|---|---|
| Used wine corks | One per plant you wish to label |
| Bamboo skewers | Approximately 6-8 inches long for stability |
| Permanent marker | Waterproof, fade-resistant type (e.g., Sharpie) |
| Clear sealant | Outdoor-grade spray sealant for protection |
| Drill or screwdriver | For creating pilot holes in corks |
Step-by-Step Guide:
- Prepare Corks: Ensure your wine corks are clean and dry. Using a small drill bit or a sharp screwdriver, carefully create a small hole in the bottom center of each cork. The hole should be slightly smaller than your bamboo skewer to ensure a snug and secure fit, preventing the cork from spinning or falling off.
- Assemble and Label: Gently insert a bamboo skewer into the prepared hole in the cork, pushing it approximately halfway through for good stability. On the side of the cork, clearly write the plant names using a waterproof permanent marker. Ensure your handwriting is legible and prominent.
- Weatherproof and Place: In a well-ventilated area, spray the labeled corks with a clear outdoor sealant. This protective layer will shield the ink and cork from moisture and sun, extending their lifespan. Allow the sealant to dry for at least 2 hours. Once dry, push the skewer stakes into the soil near your plants, ensuring the labeled cork remains well above ground level for easy visibility.
3. Wooden Spoon Markers: Whimsical and Functional
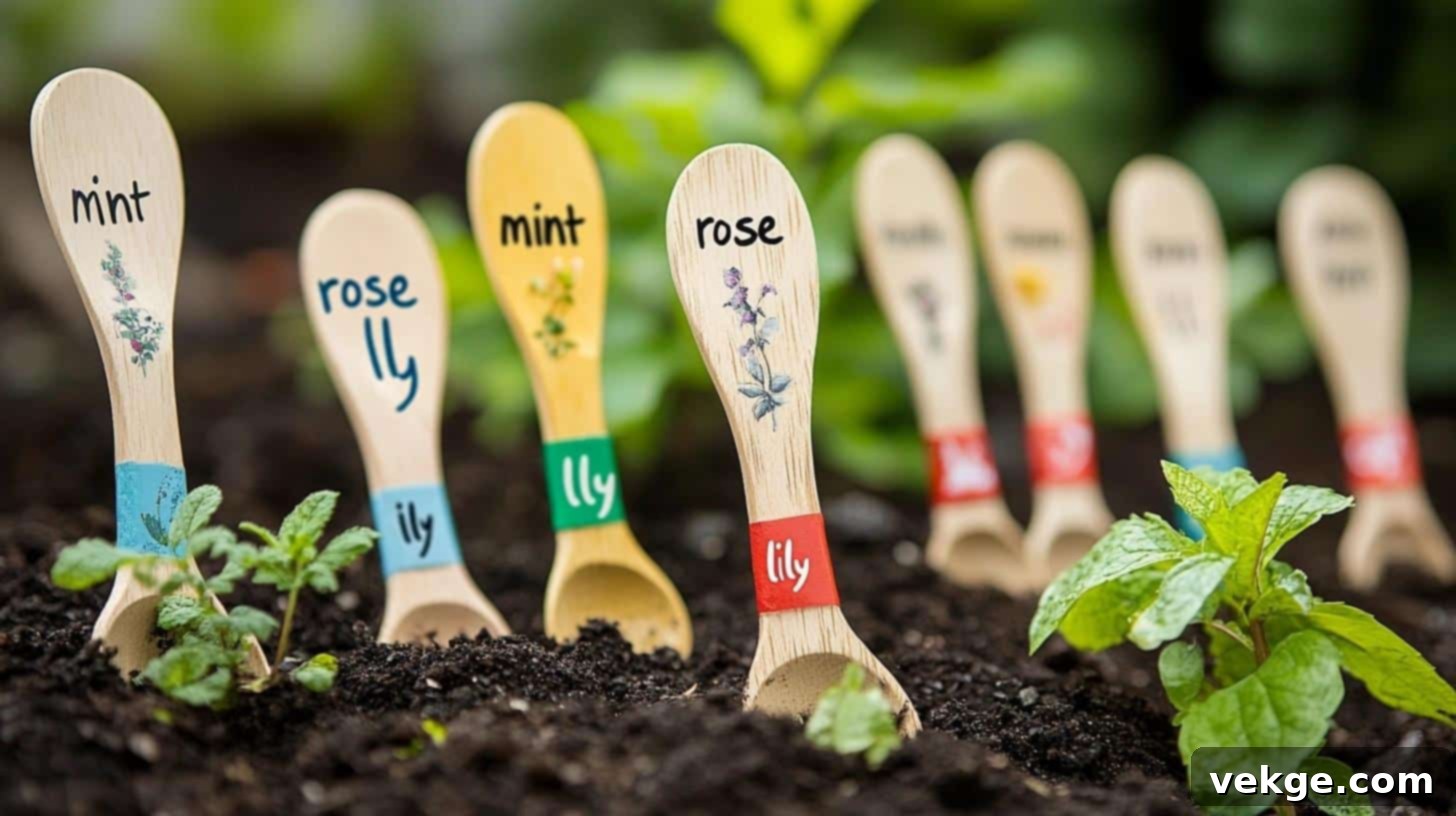
Old wooden spoons, often found languishing in kitchen drawers, can be transformed into incredibly charming and robust garden markers. Their natural shape makes them ideal for sticking into the ground, and the wide handles provide ample space for labeling.
| Material | Quantity/Details |
|---|---|
| Old wooden spoons | One per plant, any size or style |
| Outdoor paint | Light color base coat recommended |
| Permanent marker | Black, outdoor-grade for contrast |
| Wood sealant | Clear, weather-resistant coat |
| Sandpaper | Medium grit for surface preparation |
| Clean cloth | For wiping dust and preparing surface |
Step-by-Step Guide:
- Prepare Spoons: Lightly sand the handles of your wooden spoons to create a smooth surface that will readily accept paint and ink. After sanding, wipe them clean with a damp cloth to remove any dust. Apply a light-colored outdoor paint to the spoon handles and allow them to dry for approximately 1 hour. This base coat will ensure your labels are easily readable.
- Label Clearly: Once the paint is fully dry, use a permanent, outdoor-grade marker to clearly write the plant names on the painted handles. For maximum visibility, consider writing on both sides of the handle, ensuring the label can be read from different angles in the garden.
- Seal for Protection: Apply a clear wood sealant to the entire spoon, paying extra attention to the painted and written areas. This critical step protects the wood from moisture and prevents the lettering from fading. Allow the sealant to dry thoroughly overnight. Finally, place the spoons in your garden with the spoon end firmly in the soil and the labeled handle prominently displayed.
4. Clothespin Labels: Versatile and Reusable
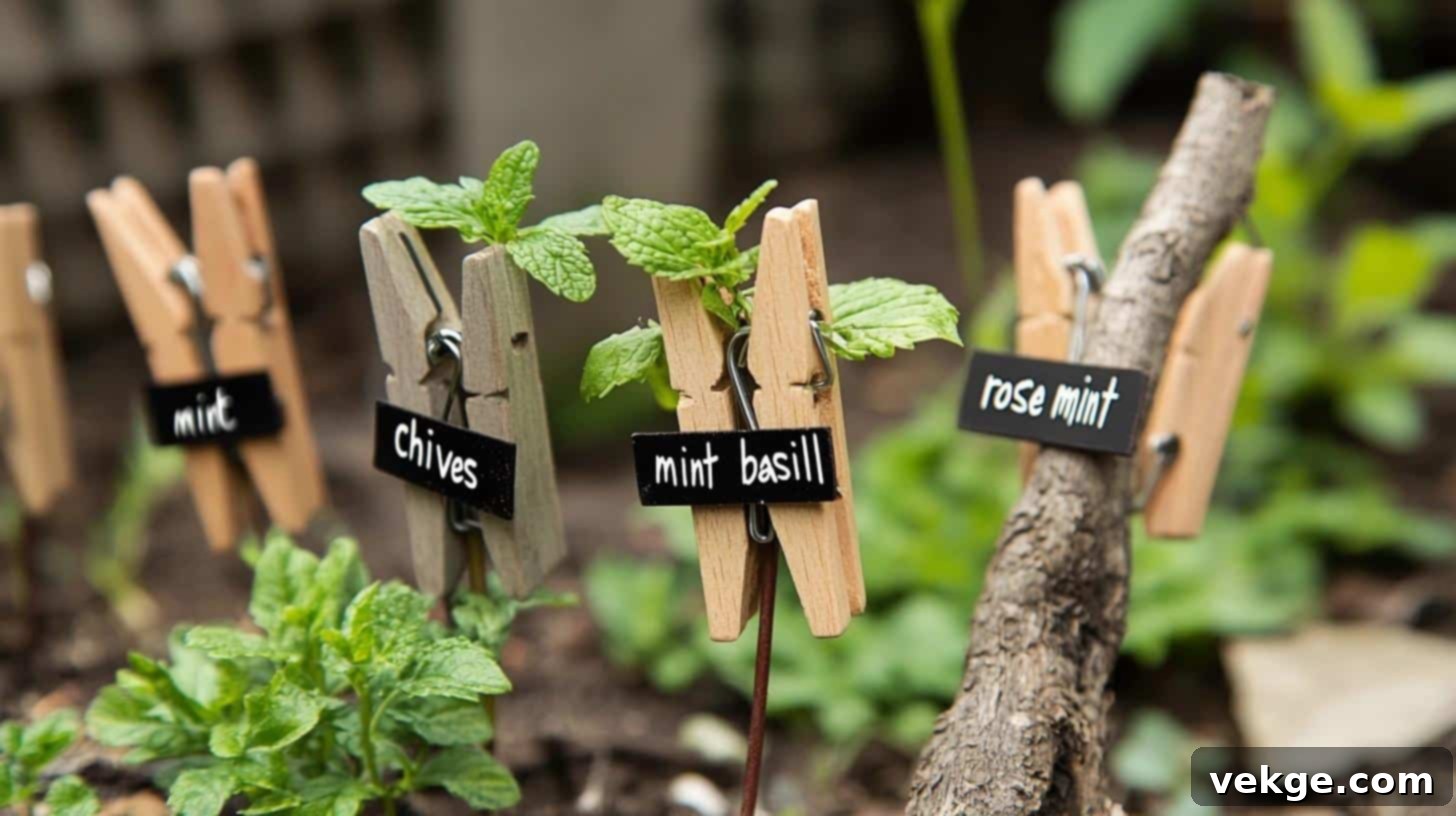
Wooden clothespins are incredibly versatile and can be transformed into delightful, reusable garden labels. Their clip mechanism allows them to be attached directly to plant stakes, trellises, or even thicker stems, making them ideal for a dynamic garden where plants might shift or grow.
| Material | Quantity/Details |
|---|---|
| Wooden clothespins | One per plant or section |
| Outdoor paint | Preferred colors to match your garden aesthetic |
| Small paintbrush | For detailed application |
| Clear sealant | Weather-resistant, UV-blocking spray |
| Plant stake | 6-8 inches long, such as bamboo or craft sticks (optional, if not clipping directly) |
Step-by-Step Guide:
- Paint and Dry: If your clothespins are rough, sand them lightly before wiping clean. Paint the clothespins with your chosen outdoor paint colors. You can paint them solid, or create patterns. Allow them to dry completely for about 30 minutes.
- Label and Decorate: Using a waterproof permanent marker, clearly write the plant names on both sides of the clothespin. This ensures readability from any angle. If you feel creative, add small designs or symbols. Let the ink dry completely to prevent smudging.
- Seal and Attach: Spray the labeled clothespins with a clear, weather-resistant sealant. This will protect them from rain, sun, and general wear. Let them dry overnight to ensure maximum protection. Once dry, you can easily attach them to plant stakes, trellises, or even directly to thicker plant stems or branches in your garden.
5. Clay Pot Labels: Adorable Miniature Markers
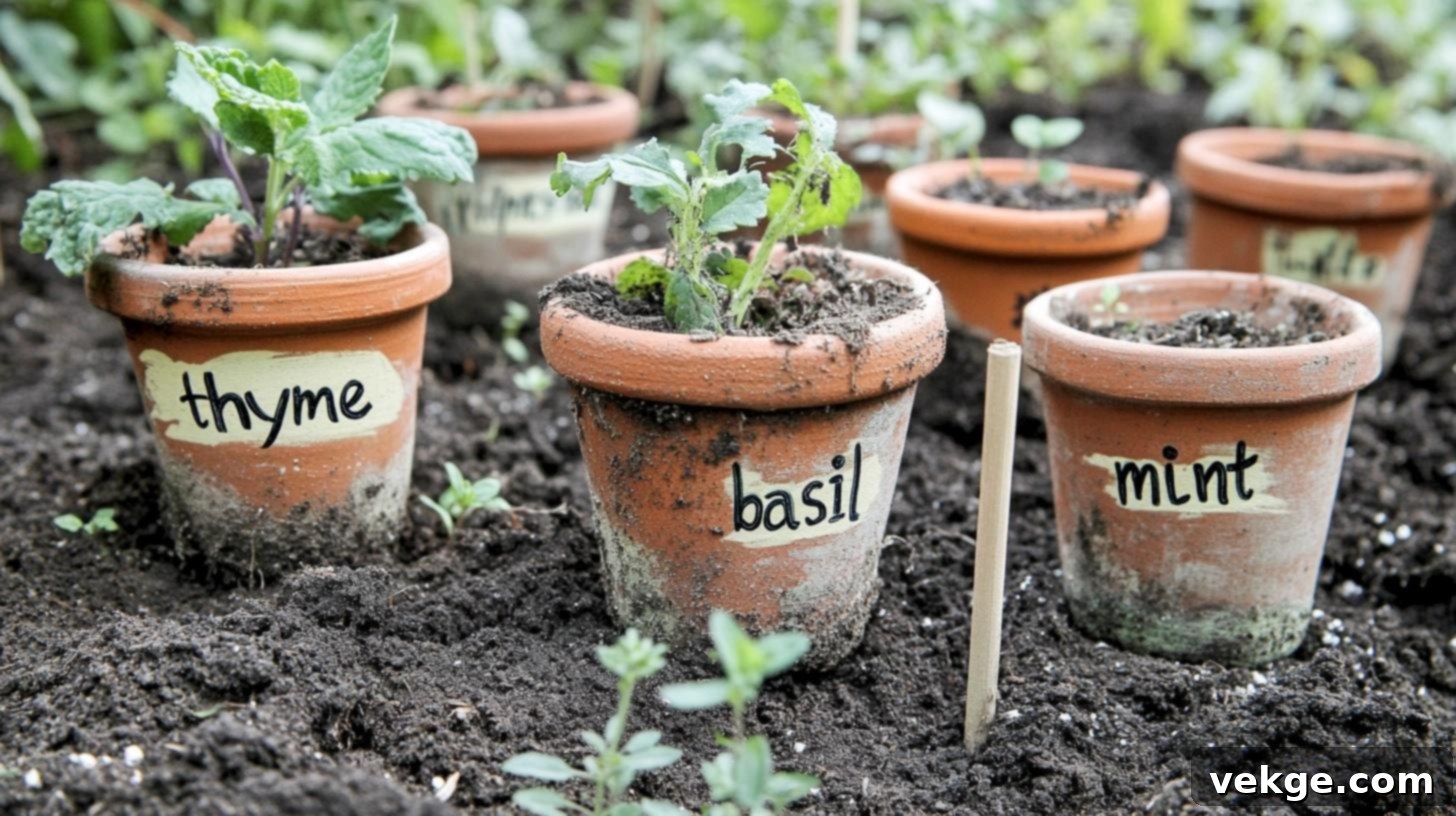
Mini terracotta pots are inherently charming, and when used as plant markers, they bring an undeniable cuteness to your garden. This method is particularly effective for container gardens, raised beds, or for adding a touch of whimsy to your vegetable patch.
| Material | Quantity/Details |
|---|---|
| Mini terracotta pots | Ideally 2-inch size for good visibility |
| Outdoor paint | Base color, if desired, to make names pop |
| Paint pens | Multiple colors, weather-resistant |
| Wooden stakes | 8-10 inches for stability and height |
| Strong adhesive | Weather-resistant, suitable for outdoor use |
Step-by-Step Guide:
- Prepare and Paint Pots: Thoroughly clean your mini terracotta pots and allow them to dry completely. If you wish, apply a base paint color to the pots and let it dry for at least 2 hours. This provides a clean canvas and can make your labels more vibrant.
- Label and Personalize: Using weather-resistant paint pens, write the plant names clearly on the side of each pot. Get creative by adding small decorations like leaves, dots, or stripes. Allow 30 minutes drying time between different colors to prevent smudging.
- Assemble and Display: Once the paint is completely dry, use a strong, weather-resistant adhesive to attach the bottom of each mini pot to the top of a wooden stake. Ensure a firm bond. Allow the adhesive to cure for a full 24 hours before placing your adorable new markers in the garden. Position them so the labels are easily visible along your garden paths.
6. Bottle Cap Stakes: Upcycled & Industrial Chic
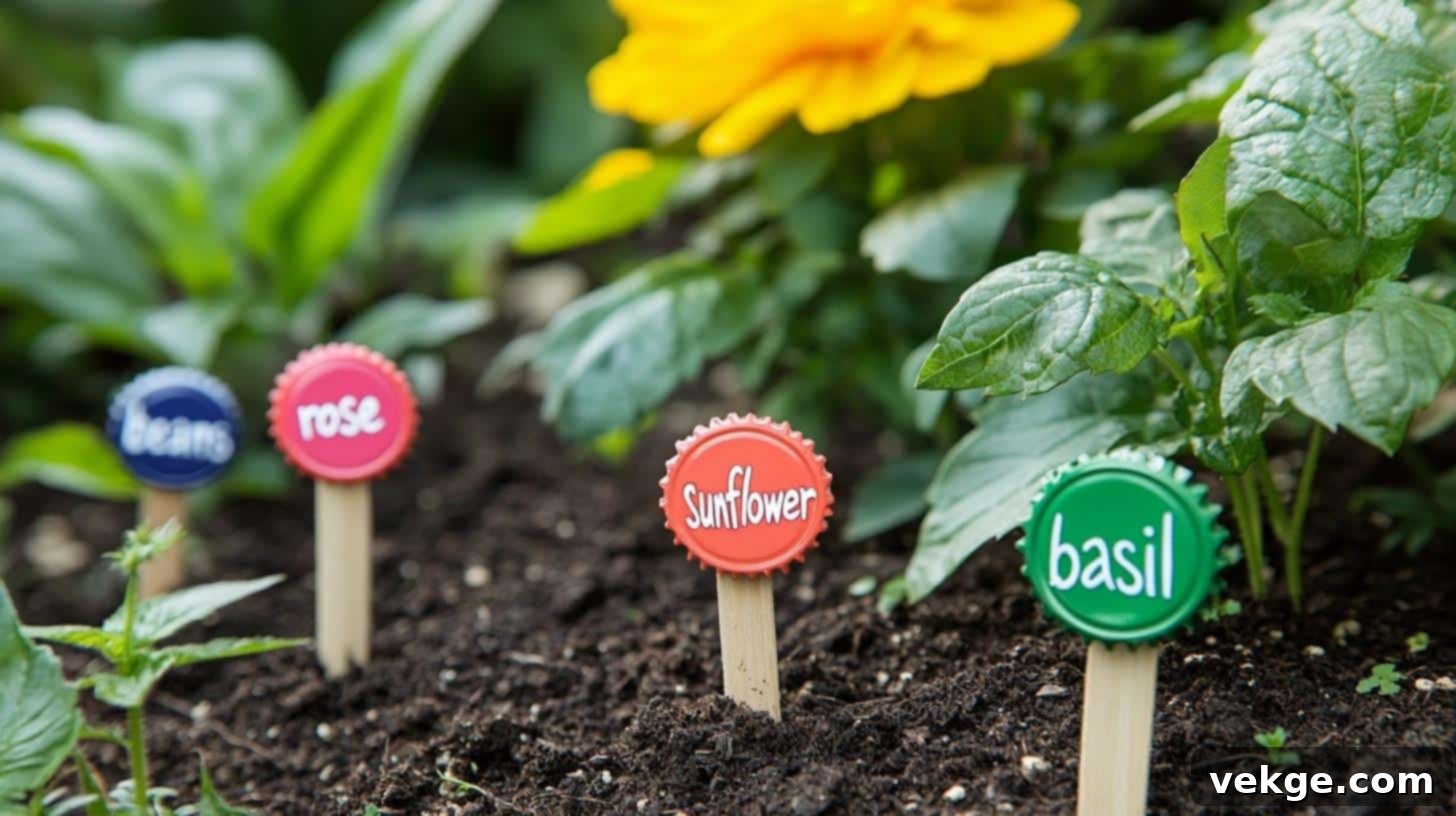
Don’t toss those bottle caps! They can be cleverly upcycled into durable and distinctive garden markers. This method offers a slightly industrial yet playful aesthetic, and the metal caps are inherently weather-resistant, making them a long-lasting choice.
| Material | Quantity/Details |
|---|---|
| Metal bottle caps | One per plant, collected from beverages |
| Small nails | For secure attachment to stakes |
| Wooden stakes | 8-12 inches, for visibility and stability |
| Hammer | Standard household size |
| Paint markers | Weather-resistant, specifically for metal surfaces |
Step-by-Step Guide:
- Prepare Caps: Clean your metal bottle caps thoroughly and remove any rubber lining from the inside. If desired, you can paint the inside of the cap with a base color to create a brighter canvas for your lettering.
- Label Caps: Using weather-resistant paint markers, clearly write the plant names on the inside flat surface of the bottle caps. Ensure the ink is fully dry, which typically takes about 1 hour, to prevent smudging during handling.
- Assemble and Place: Carefully nail each labeled bottle cap to the top or side of a wooden stake. Make sure the cap is securely fastened and faces the direction from which you typically view your garden. Push the stakes firmly into the garden soil, ensuring the labels are at a good readable height.
7. Popsicle Stick Markers: Simple & Effective Seedling Tags
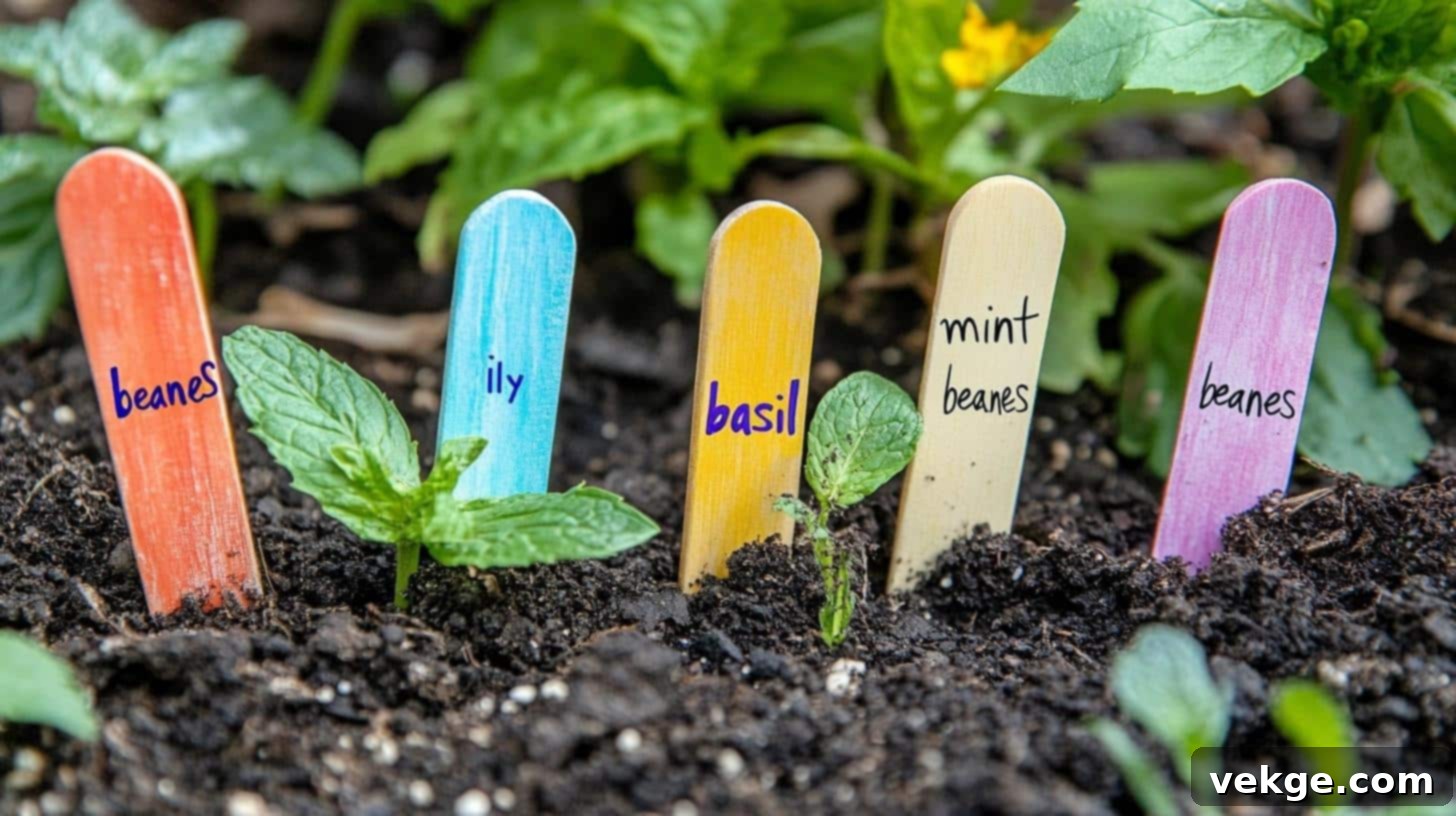
Popsicle sticks (or craft sticks) are perhaps the most ubiquitous DIY plant marker. They are incredibly inexpensive, easy to work with, and perfect for marking seedlings, small plants, or as temporary labels. While simple, with a little weatherproofing, they can last longer than expected.
| Material | Quantity/Details |
|---|---|
| Craft sticks (popsicle sticks) | One per plant or seedling |
| Weather-resistant paint | Light colors for easy readability |
| Paint pens | Dark colors for good contrast |
| Clear sealant | Outdoor-grade spray type for protection |
| Small brush | For applying the base coat |
Step-by-Step Guide:
- Paint Base Coat: Paint your craft sticks with a light-colored, weather-resistant base coat. Applying two thin coats will provide better coverage and durability. Allow each coat to dry for at least 30 minutes before applying the next.
- Label Details: Once the paint is completely dry, use dark-colored paint pens to write the plant names clearly on one side of the stick. If using longer sticks, you can also add planting dates, variety names, or other useful care notes.
- Seal and Insert: Coat the entire labeled stick with a clear outdoor sealant spray. This is crucial for protecting the paint and ink from moisture and sun fade. Let the sealant dry for at least 2 hours, or as per product instructions. Finally, push the sticks into the soil at the base of your plants, ensuring the name is clearly visible.
8. Painted Brick Markers: Robust & Earthy Labels
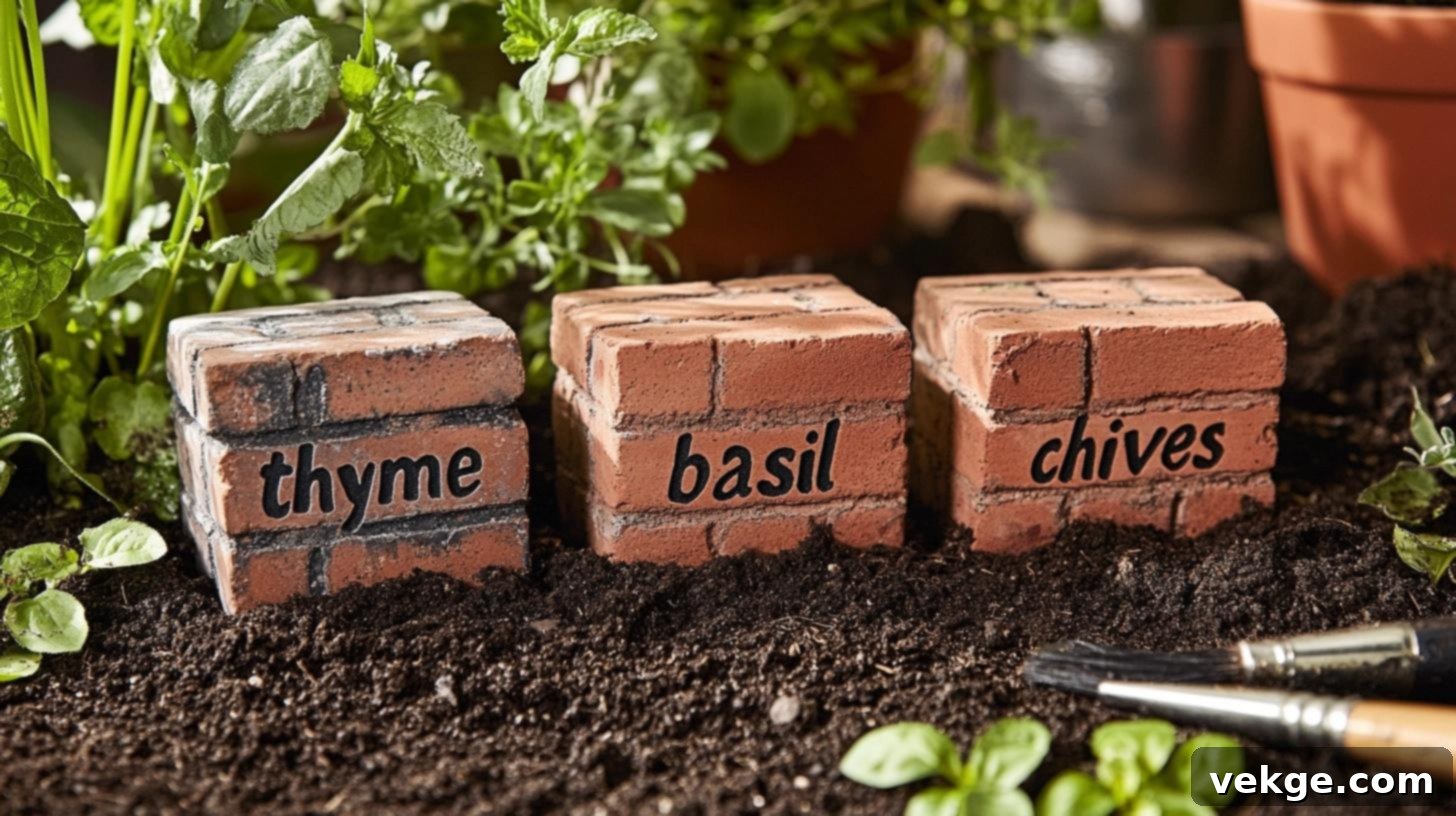
For a truly robust and long-lasting garden marker, look no further than ordinary bricks. Painted bricks offer a substantial, earthy presence in your garden, providing a stable and visible label that can withstand harsh weather conditions year after year.
| Material | Quantity/Details |
|---|---|
| Small bricks | One per plant or garden section |
| Outdoor paint | Multiple colors suitable for exterior use |
| Paint brushes | Various sizes, including detail brushes |
| Outdoor sealant | Weather-resistant, masonry-compatible |
| Cleaning brush | Wire brush recommended for tough grime |
Step-by-Step Guide:
- Prepare Bricks: Begin by thoroughly cleaning your bricks. Use a wire brush to scrub away any dirt, moss, or loose debris, then rinse them well. It’s essential that the bricks are completely dry, so allow them to air dry for a full 24 hours before painting.
- Paint and Personalize: Apply your chosen base color of outdoor paint to the brick and let it dry for at least 2 hours. Once dry, use contrasting paint to write the plant names clearly. Feel free to add simple designs or a border to enhance the look.
- Seal and Position: After the paint is completely dry, apply a generous coat of outdoor sealant designed for masonry. This will protect your artwork from rain, sun, and frost. Once the sealant is dry, position the bricks near your plants. You can slightly bury them in the soil for added stability, ensuring the label remains prominently visible.
9. Stick and Twine Tags: Rustic & Natural Hanging Labels
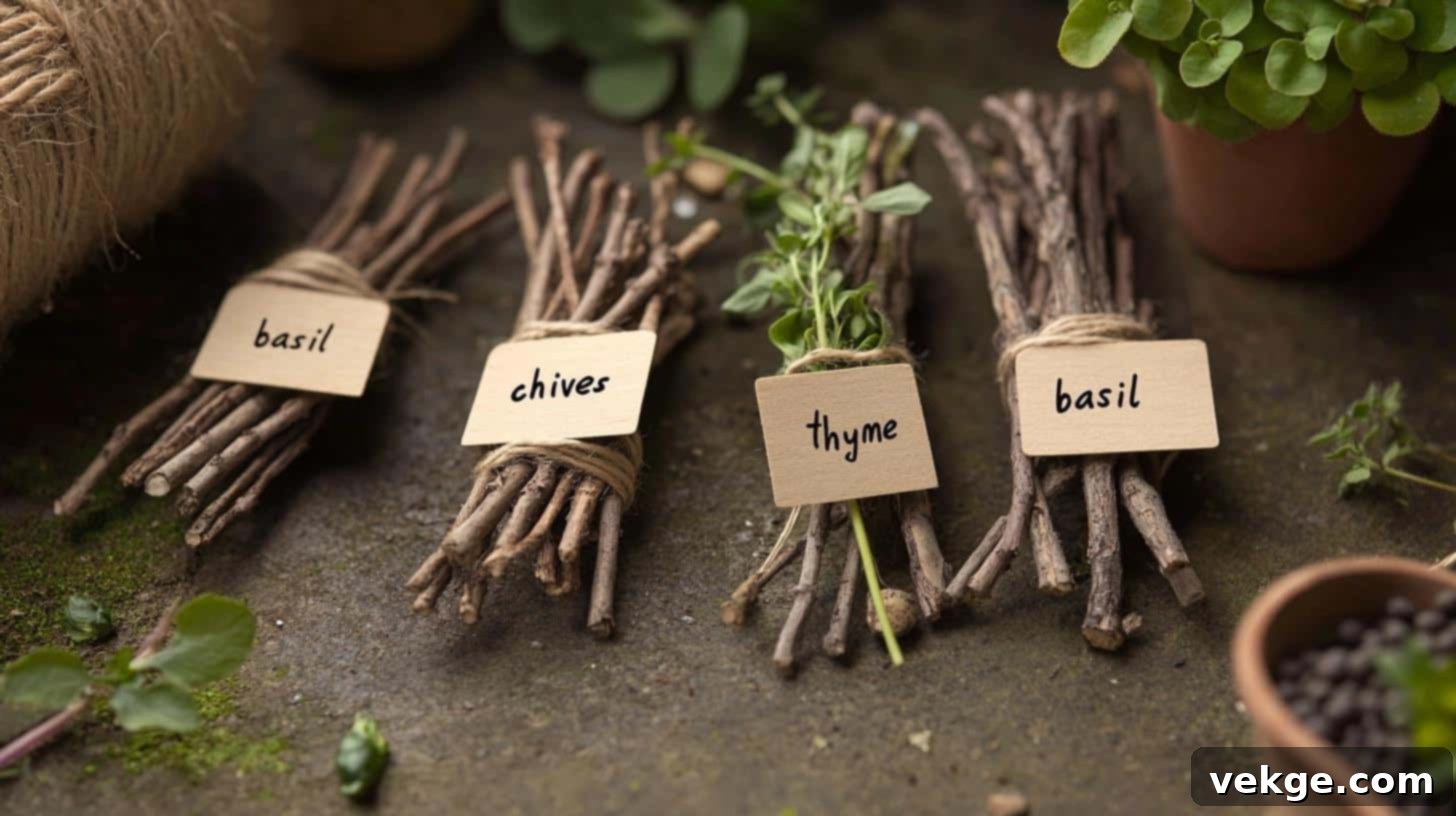
Embrace a rustic, natural aesthetic with these charming stick and twine tags. This method uses readily available natural materials to create elegant hanging labels, perfect for an organic garden feel. They add a touch of woodland magic.
| Material | Quantity/Details |
|---|---|
| Small twigs | 6-8 inches long, sturdy and relatively straight |
| Garden twine | Natural fiber, weather-resistant (e.g., jute or hemp) |
| Card stock | Thick paper (90lb weight or higher) for durability |
| Hole punch | Small size for clean holes |
| Scissors | Sharp, for precise cuts |
| Clear spray sealant | Weather protection, water-resistant |
Step-by-Step Guide:
- Prepare Twigs and Tags: Select sturdy twigs and trim them to a length of 6-8 inches, removing any rough spots. Cut your card stock into uniform 2×3 inch tags. This size offers ample space for writing and ensures good visibility.
- Label and Protect Tags: Write plant names clearly on each card stock tag using a waterproof permanent marker. You might also want to add planting dates or specific care notes. Punch holes at the top corners of each tag. Spray both sides of the tags with a clear protective coating to make them weather-resistant. Allow to dry thoroughly.
- Assemble and Place: Thread a piece of garden twine through the holes of each tag. Create a loop around one end of your prepared twig and secure it firmly with a double knot, ensuring the tag hangs freely. Push the un-tagged end of the twig about 3 inches into the soil near your plants, positioning the tag to be easily read.
10. Paint Chip Markers: Colorful & Modern Labels
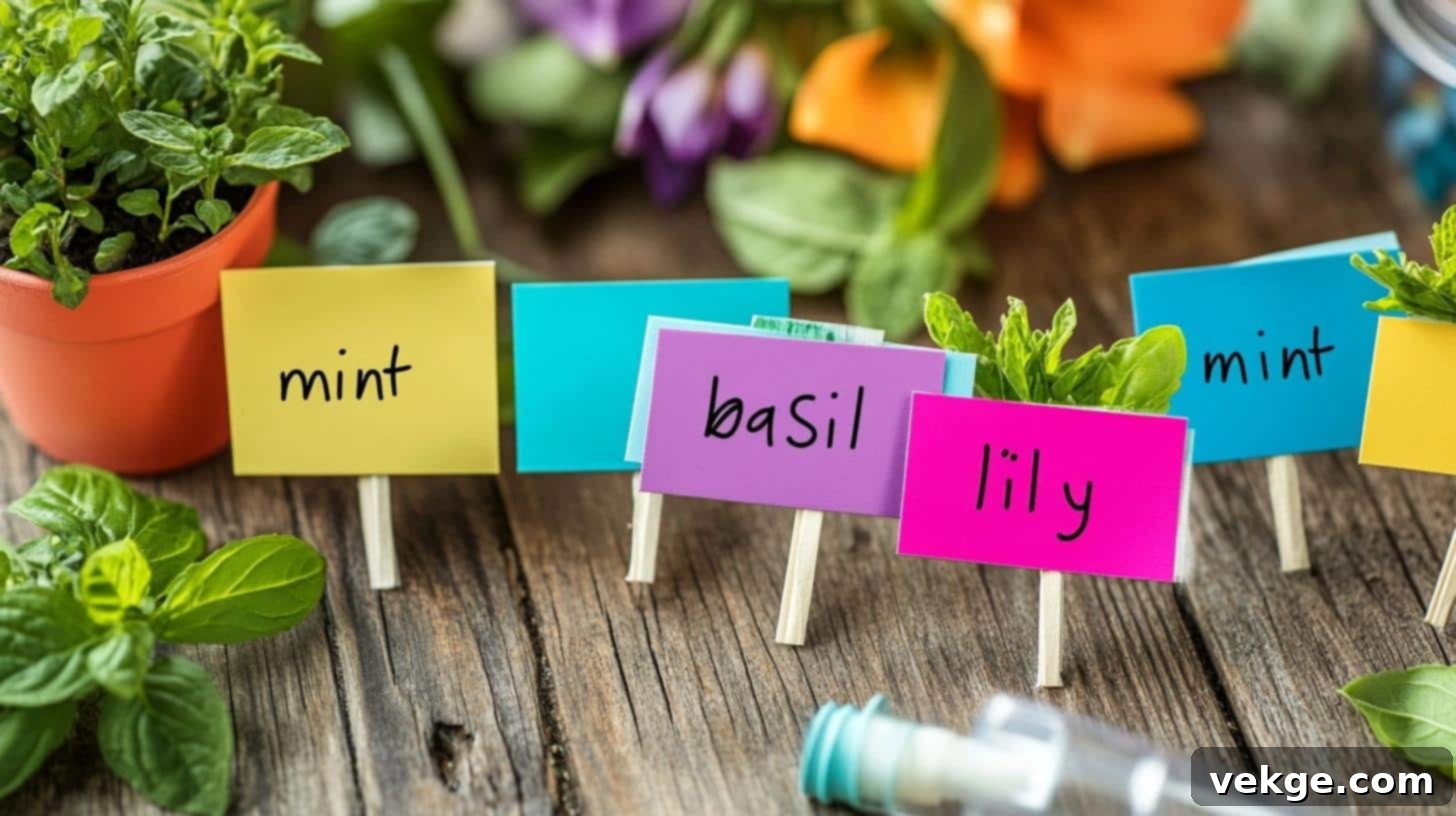
For a burst of color and a modern touch, paint chip markers are a surprisingly effective and fun DIY option. They are free from hardware stores, come in an endless array of colors, and can be easily laminated for weather resistance.
| Material | Quantity/Details |
|---|---|
| Paint samples (paint chips) | Multiple colors, ideally with light sections for writing |
| Clear tape | Wide, strong, and UV-resistant packing tape is ideal |
| Garden stakes | 8-10 inches, such as bamboo or wooden craft sticks |
| Scissors | Sharp, for clean cuts |
| Marker | Black permanent marker for clear lettering |
Step-by-Step Guide:
- Prepare Paint Chips: Choose paint chips that have lighter sections where you can easily write. Cut them into consistent, manageable sizes. If any color names on the chips happen to match your plants, you can strategically keep those visible!
- Label and Dry: Using a black permanent marker, clearly write the plant names and any relevant growing information on the light sections of the paint chips. Allow the ink to dry completely for a few minutes to prevent any smearing while you handle them.
- Laminate and Attach: Cover both sides of each labeled paint chip thoroughly with wide, clear, UV-resistant tape. Press firmly to eliminate air bubbles and create a waterproof seal. Use additional strips of tape to securely attach the protected paint chips to your garden stakes. Finally, place them near your plants at a height that’s easily readable.
11. Clay Tag Markers: Handcrafted & Enduring
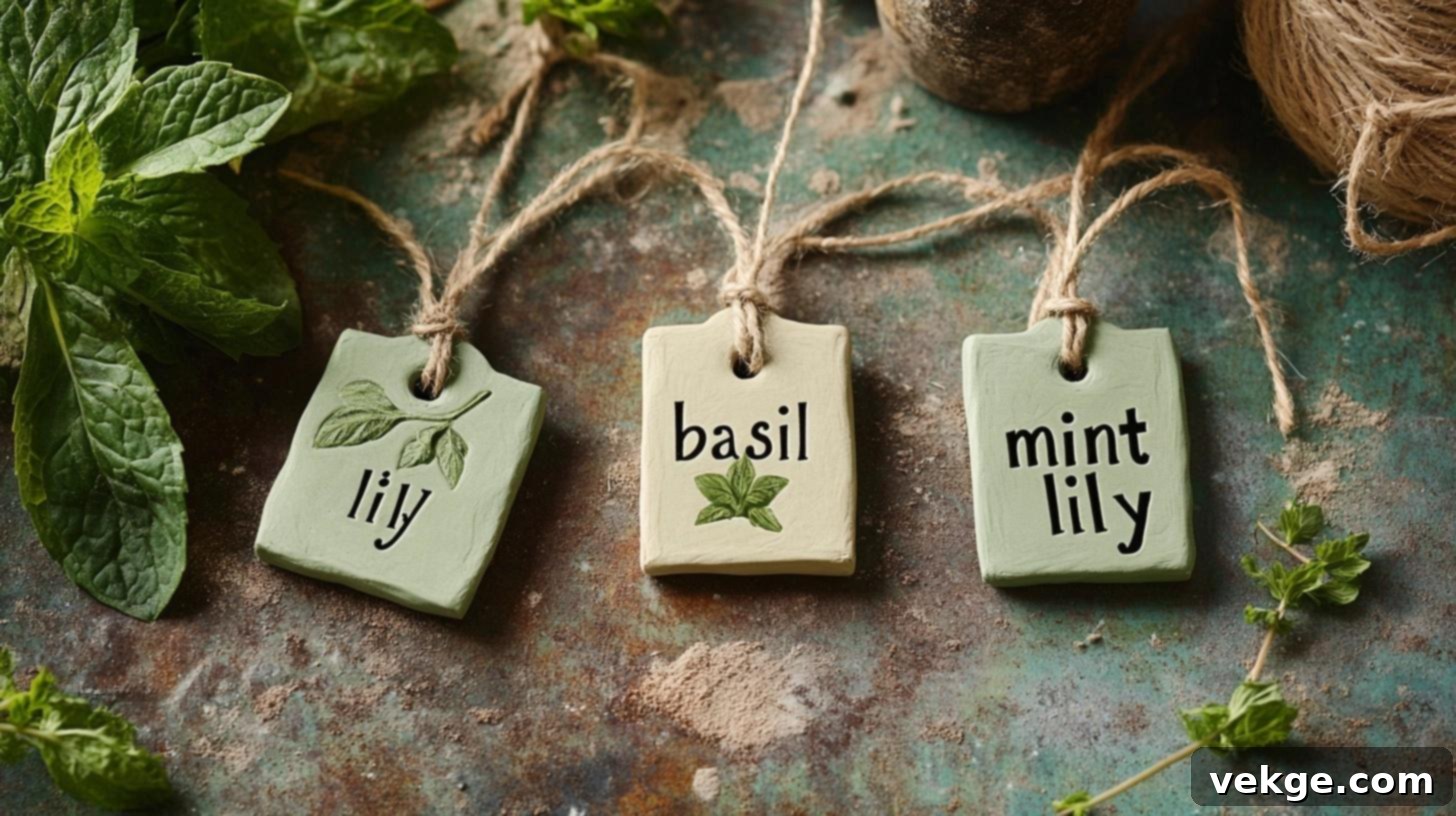
Air-dry clay offers a wonderful medium for creating customized, handcrafted plant tags that boast an artisanal quality. These tags are not only beautiful but, when properly sealed, can be quite durable, adding a touch of rustic elegance to any garden.
| Material | Quantity/Details |
|---|---|
| Air-dry clay | White or natural color, sufficient quantity |
| Letter stamps | Complete alphabet set for customization |
| Twine | Weather-resistant natural fiber |
| Rolling pin | For creating an even clay surface |
| Skewer or straw | For making holes |
| Optional: Clear sealant | Outdoor-grade for waterproofing |
Step-by-Step Guide:
- Roll and Cut Clay: Roll the air-dry clay to an even thickness, about ¼ inch. Use cookie cutters or a knife to cut the clay into your desired tag shapes (rectangles, circles, leaves, etc.). Smooth any rough edges with a wet finger for a polished look.
- Stamp and Hole Punch: While the clay is still soft, use letter stamps to firmly press the plant names into the surface of each tag. Then, use a skewer or a straw to carefully create a hole at the top of each tag for hanging.
- Dry and Finish: Allow the clay tags to dry completely for 48 hours, or as instructed by the clay manufacturer. For added durability and weather protection, you can apply a clear outdoor sealant once they are fully dry. Finally, thread weather-resistant twine through the holes and hang the tags on plants or attach them to stakes in your garden.
12. Bamboo Slice Labels: Engraved & Organic
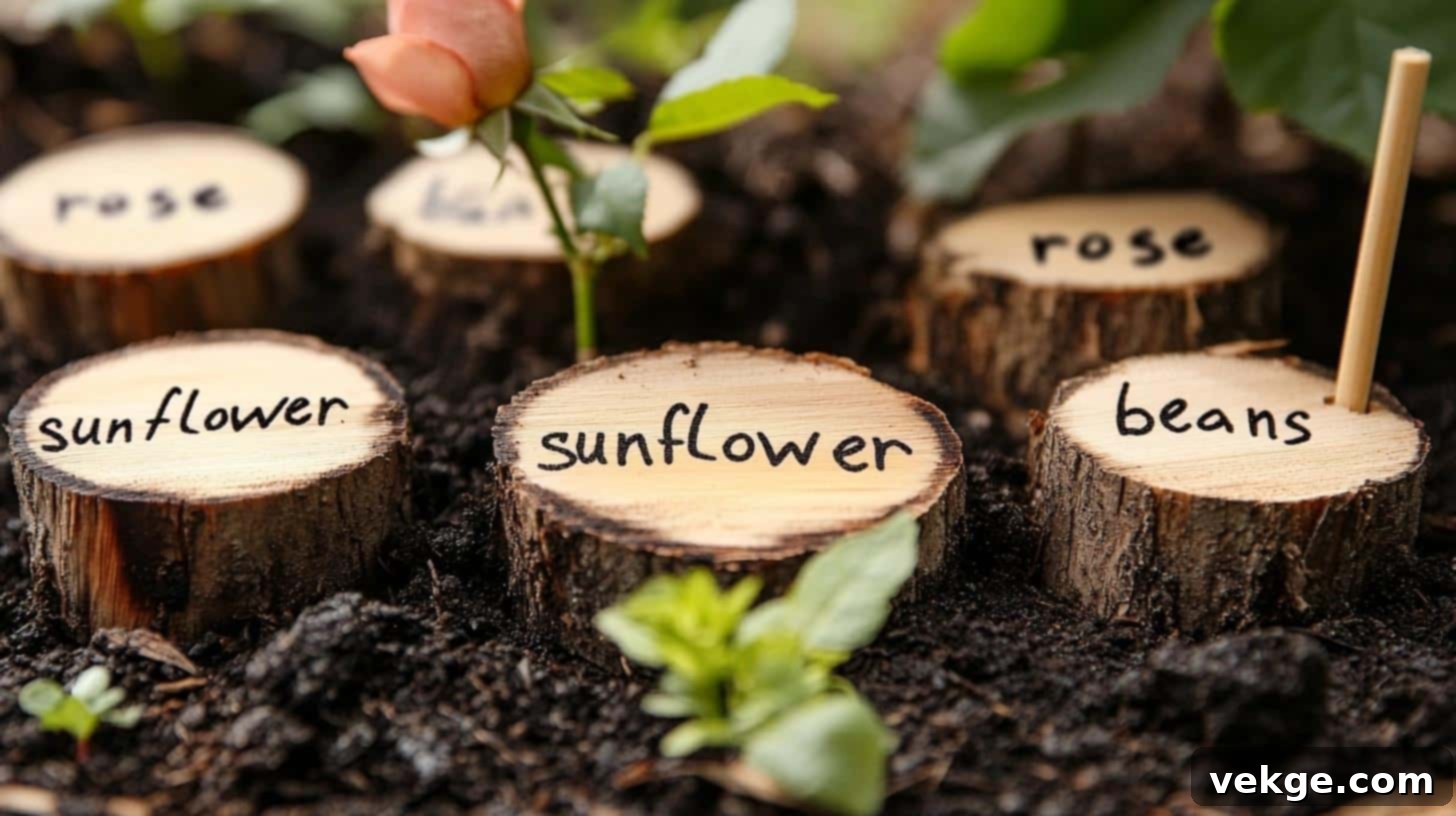
Bamboo slices provide a beautiful, organic base for plant labels, especially when paired with a wood burner. This method creates elegant, naturally aesthetic, and incredibly durable markers where the names are permanently etched into the material, lasting for years.
| Material | Quantity/Details |
|---|---|
| Bamboo pieces | Fresh or dried, sturdy sections |
| Wood burner | With a fine tip for detailed lettering |
| Small saw | Sharp blade for clean cuts (e.g., a hand saw or miter saw) |
| Sandpaper | Medium grit for smoothing surfaces |
| Safety gear | Gloves, safety glasses, and a well-ventilated area are essential |
| Optional: Clear sealant | Outdoor-grade for extra protection |
Step-by-Step Guide:
- Prepare Bamboo Slices: Using a small saw, carefully cut the bamboo into 1-inch thick slices, ideally at a 45-degree angle on one end to create a pointed stake. Sand the cut edges and the flat surface of each slice until smooth. Always wear safety gear (gloves, glasses) when cutting and sanding.
- Engrave Labels: Heat your wood burner and test it on a spare piece of bamboo to get a feel for the pressure and speed. With steady pressure, carefully burn the plant names onto the smooth surface of each bamboo slice. The engraved letters will be permanent and highly visible.
- Cool and Place: Allow the wood-burned slices to cool completely. For additional protection, you can apply a clear outdoor sealant. Push the angled end of the bamboo slices firmly into the soil or, for larger plants, attach them to existing stakes with weather-resistant glue or wire.
13. Glass Jar Tags: Unique & Protective Labels
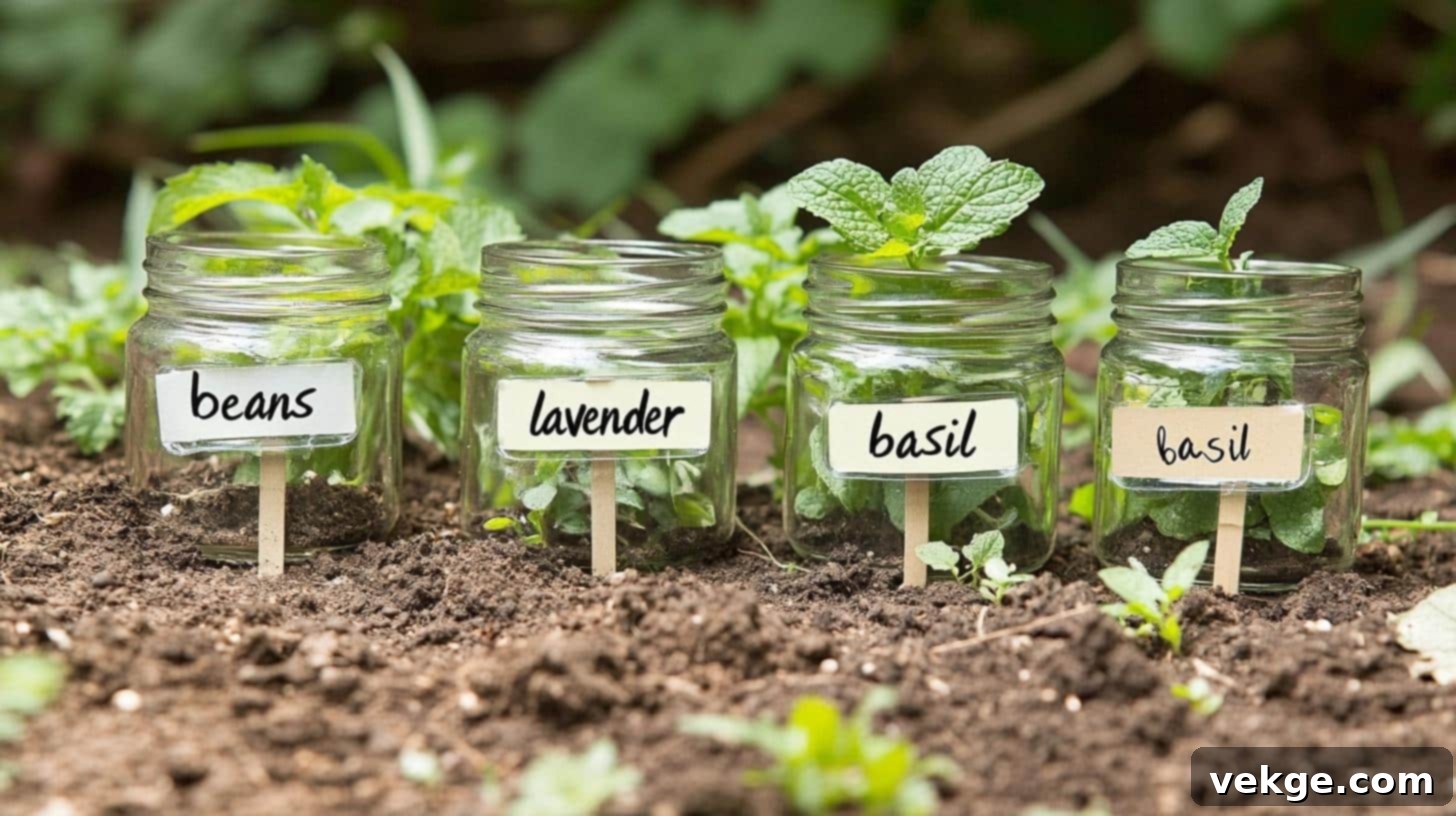
Transform small glass jars into ingenious and weather-protected plant labels. This method ensures your labels remain pristine and legible, shielding them from rain, sun, and dirt. It offers a unique, curiosity-bottle aesthetic to your garden.
| Material | Quantity/Details |
|---|---|
| Small jars | Clean, dry, with tight-fitting lids |
| Paper | Water-resistant paper (or regular paper, if jars are perfectly sealed) |
| Wooden stakes | 12-inch or longer for good visibility |
| Strong glue | Outdoor-grade, weather-resistant adhesive |
| Markers | Waterproof, permanent markers for paper |
Step-by-Step Guide:
- Prepare Jars and Labels: Thoroughly clean your small jars and remove any existing labels, then ensure they are completely dry. Cut pieces of water-resistant paper (or regular paper that will be protected by the jar) to fit inside each jar. Using a waterproof marker, clearly write the plant names on the paper.
- Insert and Seal: Carefully insert the labeled paper into each jar, positioning it so the writing faces outward and is easily readable through the glass. Seal the lids tightly to prevent any moisture from entering. You can gently shake the jar to test the seal.
- Attach and Position: Using strong, outdoor-grade glue, securely attach the sealed jars to the top of your wooden stakes. Allow the glue to dry and cure for the recommended time. Finally, place these unique markers in your garden, ensuring the labels are facing your common walking paths for easy identification.
14. Shell Markers: Coastal Charm for Your Garden
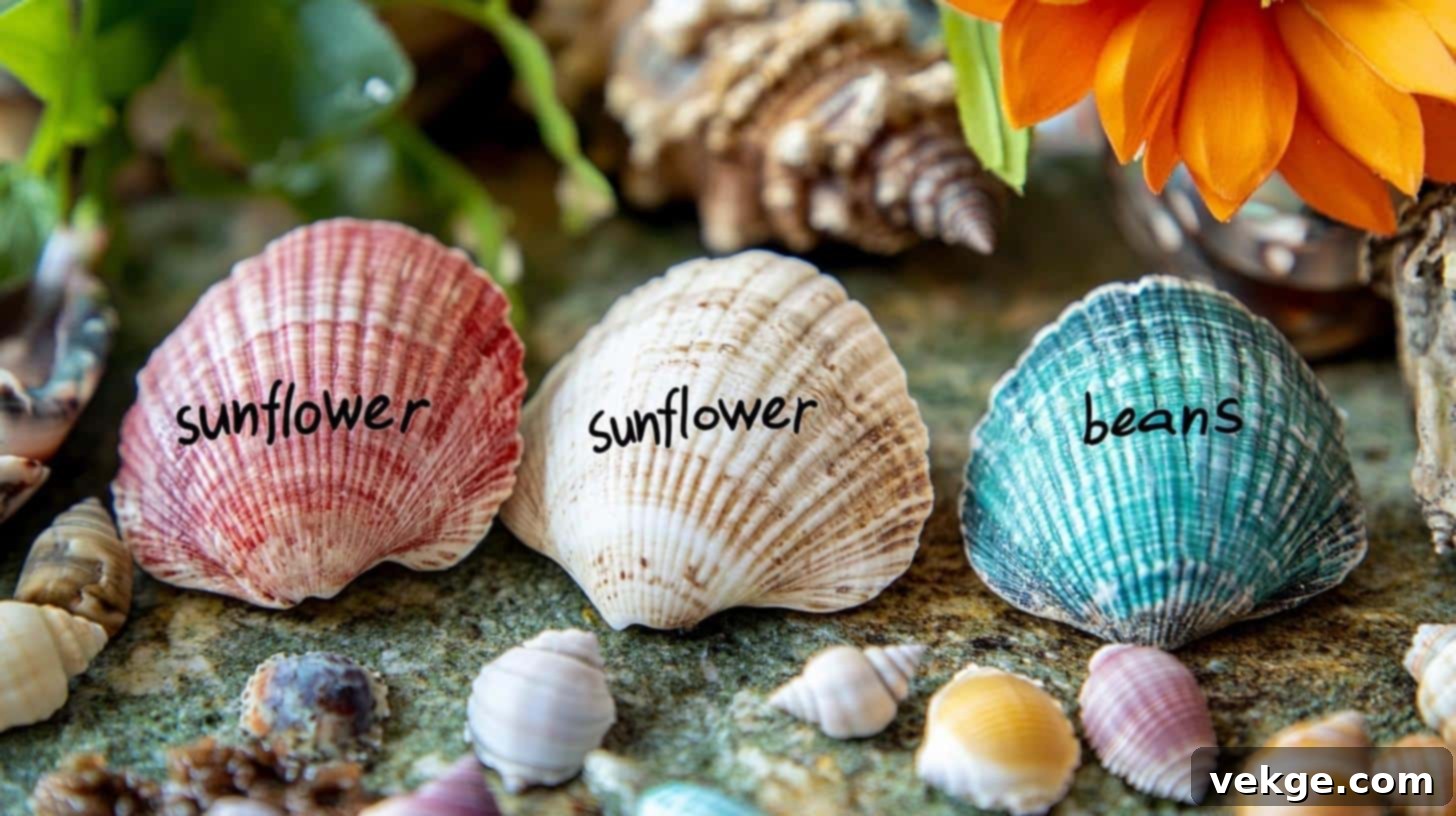
If you live near the coast or simply adore nautical themes, large shells can make exquisite and durable plant markers. Their natural curves and textures add an organic, seaside charm to your garden. Choose shells with a relatively flat surface for optimal labeling.
| Material | Quantity/Details |
|---|---|
| Large shells | With a relatively flat surface suitable for writing |
| Paint pens | Multiple colors, outdoor-grade for durability |
| Sealant | Outdoor-grade, clear, UV-resistant spray |
| Small stakes | Optional, for elevating shells or if gluing is preferred |
| Waterproof glue | Optional, for attaching shells to stakes |
Step-by-Step Guide:
- Clean and Prepare Shells: Clean your collected shells thoroughly and allow them to dry completely. Select the flattest side of each shell for writing. If there are any particularly rough spots that might interfere with writing, you can lightly sand them.
- Label and Decorate: Using outdoor-grade paint pens, write the plant names clearly on the chosen flat surface of the shells. Get creative by adding small, simple designs like waves, seaweed, or dots around the name. Allow the paint to dry fully before handling.
- Seal and Place: Apply two thin coats of a clear outdoor sealant to protect the painted names from the elements. Once dry, you can simply place the shells directly in the garden soil near your plants. Alternatively, for better visibility or if your shells are smaller, you can glue them to small wooden stakes using waterproof adhesive.
15. Button Markers: Playful & Personal Garden Accents
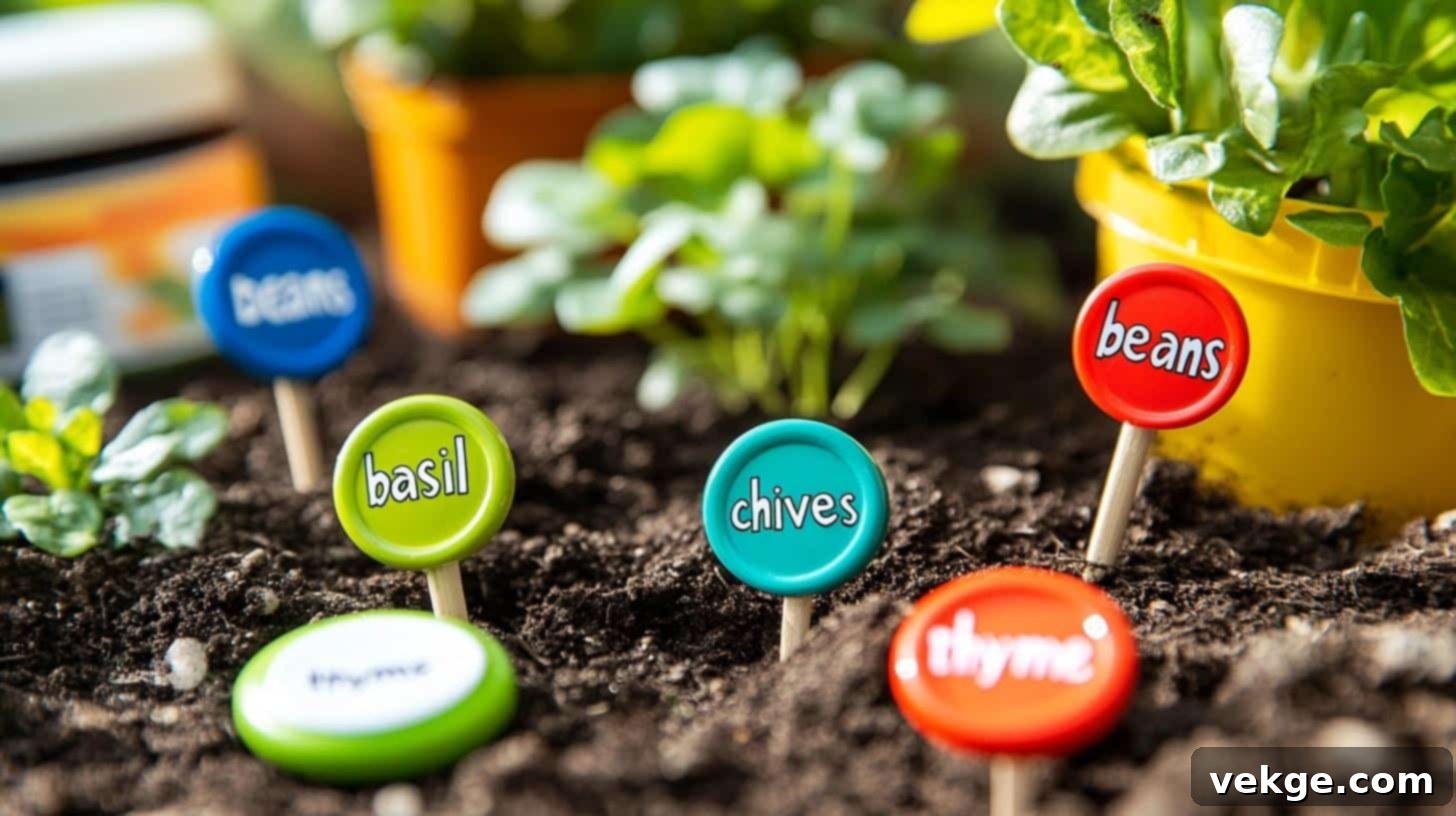
Dive into your button stash! Large, flat buttons can be transformed into surprisingly cheerful and distinctive plant markers. This project is quick, adds a playful pop of color, and is especially engaging for gardeners of all ages. They are perfect for small pots or to add whimsy to a larger bed.
| Material | Quantity/Details |
|---|---|
| Large buttons | Minimum 2-inch diameter, with a flat surface |
| Paint markers | Multi-color set, outdoor-grade for weather resistance |
| Garden stakes | 8-inch wooden stakes, like bamboo or craft sticks |
| Strong glue | Weather-proof, suitable for outdoor use |
| Clear sealant | UV-resistant, spray type is easiest |
Step-by-Step Guide:
- Clean and Label Buttons: Ensure your large buttons are clean and dry. Using outdoor-grade paint markers, write the plant names clearly on the flat surface of each button. If space allows, add small, simple designs or patterns around the name to enhance its appeal.
- Seal and Assemble: Once the paint is completely dry, apply a clear, UV-resistant sealant over the writing. This crucial step will protect your labels from fading and weather damage. Allow the sealant to dry thoroughly. Once dry, use strong, weather-proof glue to attach the labeled buttons to the top of your wooden garden stakes.
- Place in Garden: Push the assembled button markers into the garden soil. Make sure the buttons are facing your main walking paths or viewing areas for easy and quick reading. These charming markers will add a delightful and personal touch to your garden space.
Simple Weather Protection Tips for Long-Lasting DIY Plant Markers
No matter how creative your DIY plant markers are, they won’t serve their purpose if they fade or fall apart after a few weeks. Proper weather protection is key to ensuring their longevity and readability throughout the growing season, and often for many seasons to come. Here are some effective and affordable methods:
| Method | Materials Needed | Cost Range | Key Benefits |
|---|---|---|---|
| Clear Sealant Spray | UV-resistant clear coat (e.g., Mod Podge Clear Acrylic Sealer) | $8-12 | Excellent all-around protection against moisture and UV rays. Easy application. |
| Lamination | Clear contact paper or a home laminator with outdoor pouches | $5-7 | Best for paper-based markers, creates a complete waterproof barrier. |
| Natural Oil Treatment | Linseed or tung oil (for wood markers) | $6-10 | Penetrates wood, enhances natural grain, provides water resistance. Eco-friendly. |
| Mod Podge Outdoor | Brush-on, waterproof sealer and glue | $7-12 | Versatile for various surfaces, durable, dries clear. |
| Clear Packing Tape | Wide, heavy-duty, UV-resistant tape | $3-5 | Budget-friendly, quick fix for paper or painted surfaces. |
Step-by-Step Protection Methods:
- For Painted Items (stones, wood, pots, buttons, shells): Always opt for an outdoor-grade, UV-resistant clear sealant spray. Apply 2-3 thin, even coats in a well-ventilated area, holding the can at the recommended distance. Allow each layer to dry for at least 1 hour between coats to ensure maximum adhesion and a smooth finish. This layering builds up a strong protective barrier against moisture and sun damage.
- For Paper-Based Markers (paint chips, card stock): Lamination offers the best protection. If you don’t have a laminator, clear contact paper is an excellent alternative. Cover both sides of your paper marker completely, pressing out any air bubbles to create a tight seal. Trim the edges, leaving a small border (about ¼ inch) around the paper for an even better, more secure seal that prevents water from seeping in. Heavy-duty clear packing tape can also work in a pinch for temporary solutions.
- For Wooden Items (spoons, sticks, bamboo, twigs): Natural oils like linseed oil or tung oil are fantastic for wood. Brush on a generous coat and let it soak into the wood for about 30 minutes. Wipe off any excess oil with a clean cloth. Allow the wood to dry for a full 24 hours. For best results and continued protection, repeat this process yearly, especially before the harshest weather. Outdoor wood sealants are also highly effective.
Extra Protection Tips for All Markers:
- Strategic Placement: Position your markers where they are less likely to sit in standing water. Elevate them slightly if possible, or place them in areas with good drainage. This prevents waterlogging, which can degrade even the most robust materials over time.
- Regular Cleaning: Once a month, gently clean your markers with a soft brush or damp cloth to remove accumulated dirt, moss, or mildew. This not only keeps them looking good but also prevents organic growth from compromising their integrity or readability.
- Winter Storage for Delicate Markers: During harsh winters or periods of extreme weather, consider bringing more delicate markers (like those made from clay or certain types of wood) indoors. This simple act can significantly extend their lifespan, allowing you to enjoy your handmade creations for many seasons.
- Seasonal Refresh for Paper Labels: While laminated paper labels offer good protection, it’s often best practice to replace paper-based labels at the start of each new growing season. This ensures crisp readability and a fresh look for your garden, avoiding any faded or worn-out appearances.
Conclusion
Throughout this guide, I’ve shared my favorite DIY garden marker ideas, and I genuinely hope you feel inspired and excited to try them out in your own green space. As a fellow gardener, I know the profound satisfaction that comes from a well-organized and beautifully presented garden. These simple, budget-friendly projects offer much more than just labels; they infuse your garden with character, tell a story of your dedication, and serve as a constant reminder of the growth and life you are nurturing.
From the enduring charm of painted stones and the whimsical appeal of wooden spoons, to the creative upcycling of shells and clay tags, each marker type brings its own unique aesthetic and functionality. The true beauty of these projects lies in their accessibility: most utilize materials you likely already have at home, helping you save money while actively reducing waste – a win-win for both your wallet and the environment.
Remember, the key to long-lasting homemade garden labels is proper weatherproofing. A little bit of sealant or lamination goes a long way in protecting your efforts from the elements. Don’t feel pressured to try every method at once! Start with one style that particularly resonates with your garden’s look and your personal taste, or mix and match different types for an eclectic and added character.
I am always thrilled to see fellow gardeners bring their creativity to life. I’d absolutely love to see your garden marker creations! Please feel free to share your photos in the comments below, or tell me which design you plan to try first. Happy gardening, and may your garden be ever organized and inspiring!
Frequently Asked Questions About DIY Plant Markers
How Do You Make Homemade Plant Markers?
Making homemade plant markers is surprisingly easy and fun! You can use a variety of common household items such as smooth stones, old wooden spoons, or craft sticks (like popsicle sticks). The process generally involves cleaning the item, painting or writing the plant name clearly on its surface using outdoor-grade paint or a waterproof marker, and then applying a weather-resistant sealant to protect it from the elements. Once dry, simply place your personalized marker firmly in the soil near your plant.
How Do You Make Weatherproof Plant Labels?
To make plant labels truly weatherproof, it’s crucial to use materials and techniques designed to withstand outdoor conditions. Always use outdoor-grade paints and permanent, waterproof markers. For painted items, generously spray several thin coats of a clear, UV-resistant outdoor sealant. For paper-based labels, fully cover them with clear contact paper or use a lamination machine. Natural wood markers can be treated with linseed or tung oil, or a marine-grade wood sealant. Choosing naturally durable materials like stone, metal, or engraved bamboo also contributes significantly to weather resistance.
What Can I Use Instead of Plastic Plant Labels?
There are numerous eco-friendly and aesthetically pleasing alternatives to plastic plant labels! Consider using natural materials such as smooth river stones, sturdy wooden sticks or spoons, handcrafted clay tags, or even repurposed metal items like bottle caps. Other creative options include engraved bamboo slices, upcycled wine corks on skewers, painted bricks, or even sealed paint chips. These options not only reduce plastic waste but often add a more charming and integrated look to your garden.
How Do You Make Vegetable Garden Labels?
For a vegetable garden, clear and informative labels are key! Choose larger label options like painted stones, wooden spoons, or even small painted bricks, which provide ample space for writing. Clearly write the vegetable name, and consider adding extra details such as the specific variety, planting date, and anticipated harvest time. Place these labels prominently at the start of each row or next to individual plants, ensuring they are at a readable height. For row crops, a single, clear label at the beginning of the row is often sufficient.
