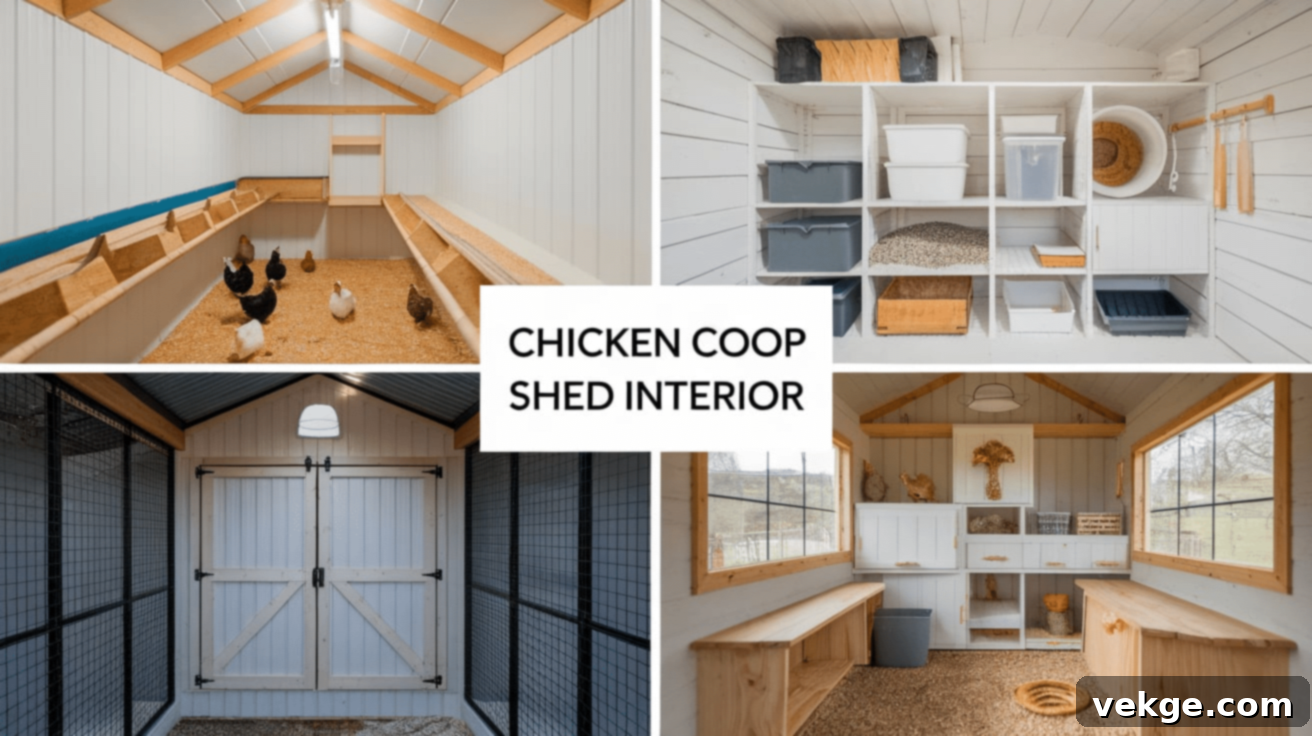
Ultimate Guide to Designing & Organizing Your Chicken Coop Shed for Happy Hens and Easy Care
Creating a functional and comfortable home for your flock is a cornerstone of successful chicken keeping. A chicken coop shed offers an ingenious solution, seamlessly blending a secure living space for your chickens with practical storage for all your essential supplies. This integrated approach simplifies daily chores, keeps your property tidy, and ensures your feathered friends thrive in a safe, well-organized environment.
Unlike traditional small coops that often necessitate separate storage areas, a chicken coop shed combines these vital functions into one efficient structure. This innovative setup centralizes everything, from nesting boxes and roosting bars to feed, bedding, and tools, making routine care significantly more convenient. Inside this versatile shed, you can meticulously plan for excellent ventilation, natural and artificial lighting, and robust predator-proofing, all while maintaining an orderly space with shelves, hooks, and dedicated storage bins.
Whether you’re embarking on a brand-new construction project or transforming an existing shed into a bespoke chicken haven, thoughtful design is paramount. The right layout and features will dramatically enhance the well-being of your chickens and streamline your daily operations. A meticulously planned chicken coop shed not only provides a clean, secure, and comfortable abode for your flock but also transforms chicken keeping into a more manageable and enjoyable experience for you.
Planning Your Chicken Coop Shed Interior for Optimal Health and Comfort
The interior design of your chicken coop shed is crucial for fostering a healthy and happy flock, while simultaneously simplifying your daily tasks. A well-considered layout ensures your chickens have everything they need for their comfort and safety, and that your supplies are always organized and within reach. Here’s a detailed look at key elements to consider when designing your ultimate chicken coop shed interior.
1. Choose the Right Shed Size
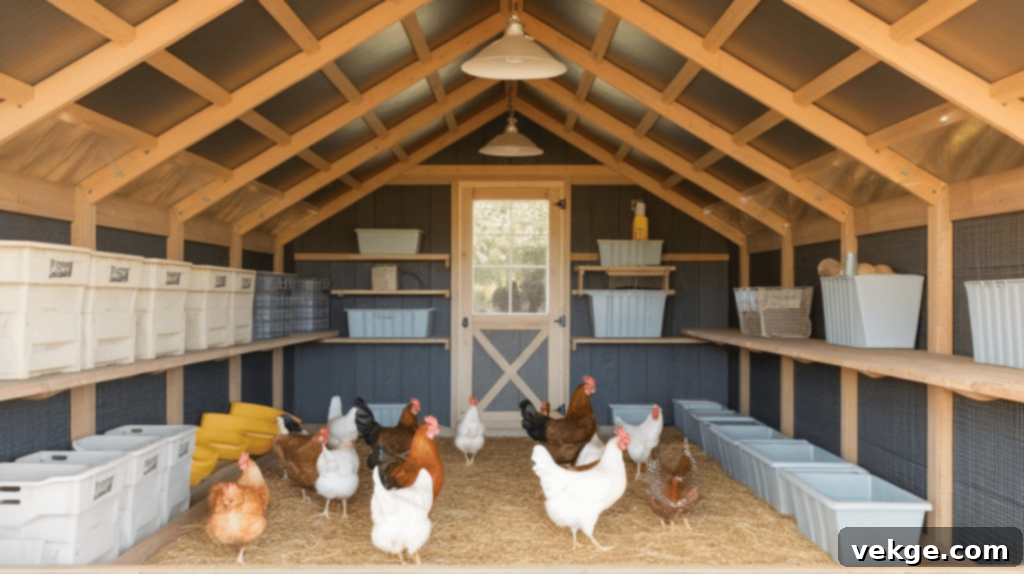
The overall size of your chicken coop shed is dictated by two primary factors: the number of chickens you intend to keep and the amount of storage space you require. A good rule of thumb is to allocate at least 3-4 square feet of indoor coop space per chicken, and an additional 8-10 square feet per chicken in the outdoor run. This ensures adequate room for movement, reduces stress, and minimizes territorial disputes. Furthermore, if you plan to store bulky items such as multiple bags of feed, bedding bales, cleaning tools, and other supplies within the shed, it’s essential to factor in extra square footage for shelving units, bins, and accessible walkways. Overcrowding can lead to health issues and behavioral problems, so always err on the side of providing more space rather than less.
2. Create a Smart Layout
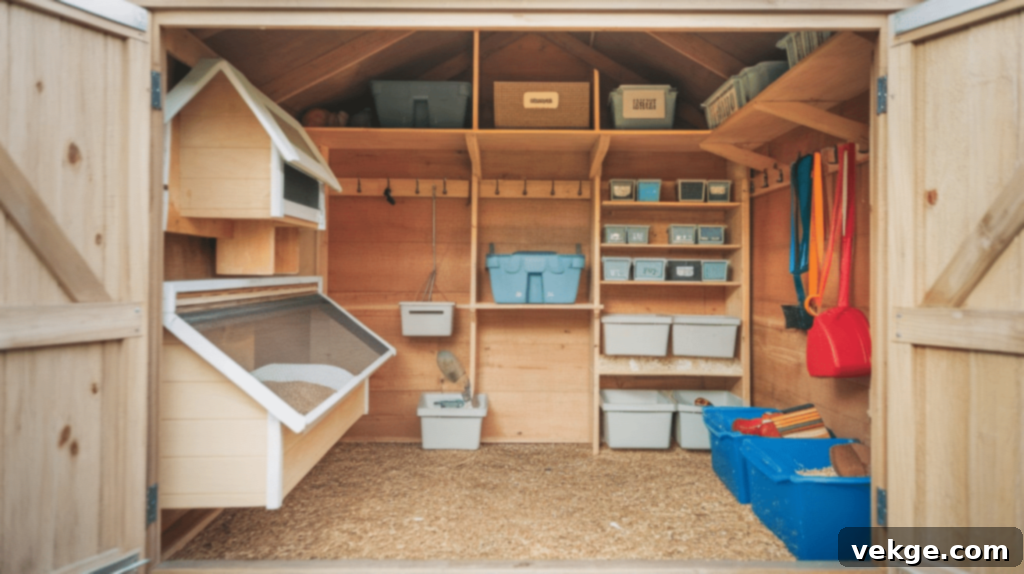
An intelligently designed layout will significantly streamline daily tasks such as feeding, cleaning, and egg collection. The key is to clearly separate the chicken living area from the dedicated storage space, promoting both hygiene and organization. Consider these elements:
- Nesting Boxes: These should be positioned in a quiet, slightly darker corner of the coop, away from high-traffic areas. Hens prefer privacy when laying, and a secluded spot encourages consistent egg production.
- Roosting Bars: Install roosting bars higher than the nesting boxes. Chickens instinctively prefer to sleep at the highest point for safety, and placing roosts above nests discourages them from sleeping in the nesting boxes, thus keeping eggs cleaner. Ensure they are away from food and water to minimize droppings contamination.
- Feed & Water Stations: Locate feeders and waterers in an easily accessible area for both chickens and caretakers. However, keep them away from bedding and roosting bars to prevent contamination from droppings and minimize messes. Raised or hanging feeders and waterers are excellent for maintaining cleanliness.
- Storage Area: Designate a clear zone for your storage needs. Utilize sturdy shelves, stackable bins, and wall-mounted hooks to keep feed, bedding, tools, and other supplies neatly organized and off the floor, preventing pests and moisture damage.
3. Make Sure There’s Good Ventilation
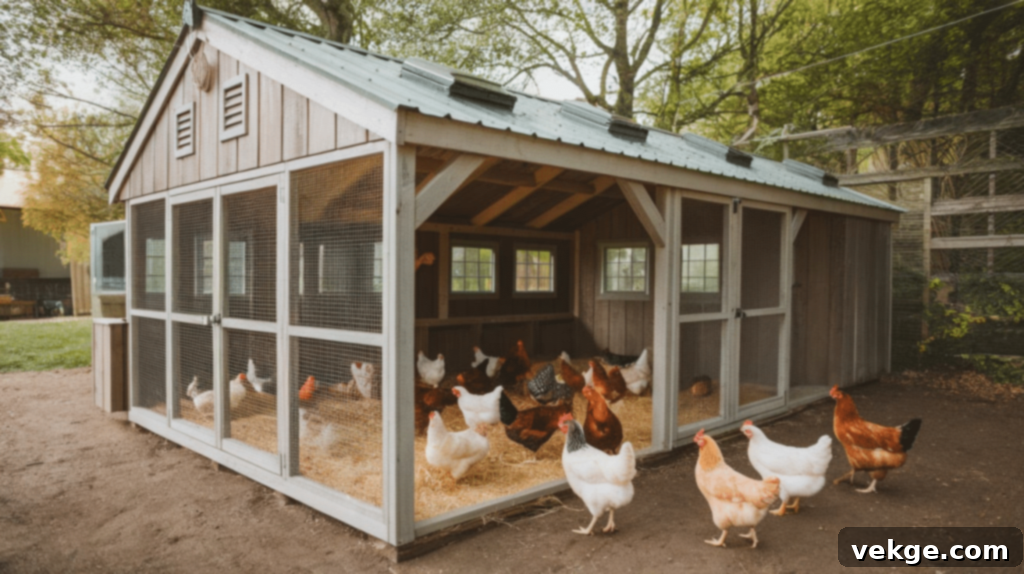
Adequate airflow is vital for the health and comfort of your chickens throughout the year. Poor ventilation leads to a buildup of ammonia from droppings, excess moisture, and extreme temperatures, all of which can cause respiratory issues and other illnesses. To ensure proper ventilation, incorporate vents near the roofline (soffit vents or gable vents) to allow hot, stale air to escape. Complement these with lower vents or windows covered with sturdy wire mesh (like hardware cloth, not flimsy chicken wire) to facilitate fresh air intake while preventing predator entry. This cross-ventilation system helps regulate temperature, removes harmful gases, and prevents moisture accumulation, keeping the coop fresh, dry, and odor-free.
4. Plan for Natural and Artificial Light
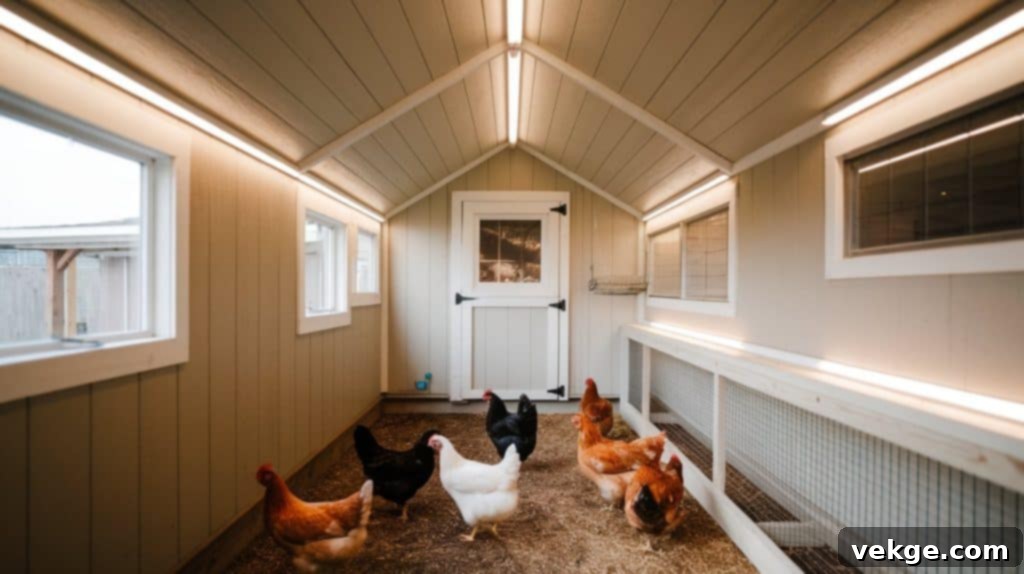
Chickens require sufficient light to maintain their activity levels, well-being, and consistent egg production. Natural light, provided through windows, is ideal and should be maximized. During shorter winter days, when natural light is limited, you may need to supplement with artificial lighting to ensure hens receive at least 14-16 hours of light per day to prevent a drop in egg laying. Soft LED lighting on a timer is an excellent choice, as it’s energy-efficient and provides a gentle illumination. It’s crucial to avoid harsh, bright lights, especially at night, as chickens prefer a calmer, more natural light cycle for a stress-free environment and proper rest. The goal is to simulate natural daylight patterns.
5. Use Easy-to-Clean Flooring
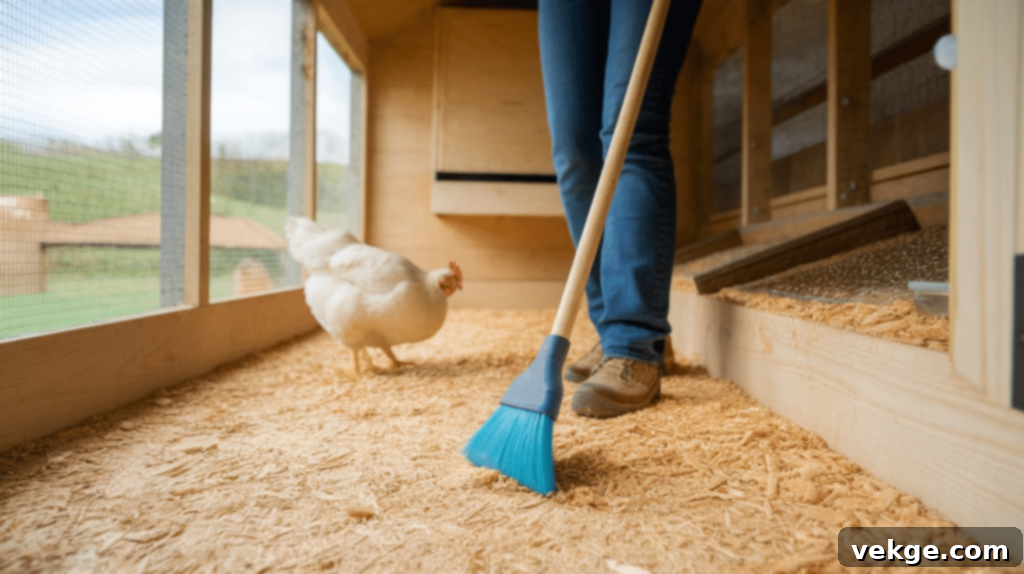
Selecting the right flooring material is critical for maintaining hygiene and simplifying the cleaning process. The ideal flooring should be non-porous, durable, and resistant to moisture and odors. Here are some excellent options:
- Plywood with a waterproof seal: This is a common and affordable choice. Ensure the plywood is exterior grade and thoroughly sealed with multiple layers of a non-toxic, waterproof paint or sealant to prevent moisture absorption, which can lead to rot and unpleasant odors.
- Vinyl flooring: Easy to install over a plywood subfloor, vinyl sheets or tiles provide a smooth, waterproof surface that is incredibly easy to wipe clean. It’s a great option for minimizing bacteria buildup and controlling odors.
- Concrete: While requiring more effort to install initially, a concrete floor is highly durable, predator-proof, and very easy to clean and sanitize. It’s an excellent long-term solution that holds up well to heavy use and moisture. Ensure it’s slightly sloped for drainage and finished smoothly.
Regardless of the choice, layering with absorbent bedding (straw, pine shavings) will further aid in moisture control and comfort.
6. Build Safe and Comfortable Nesting Boxes
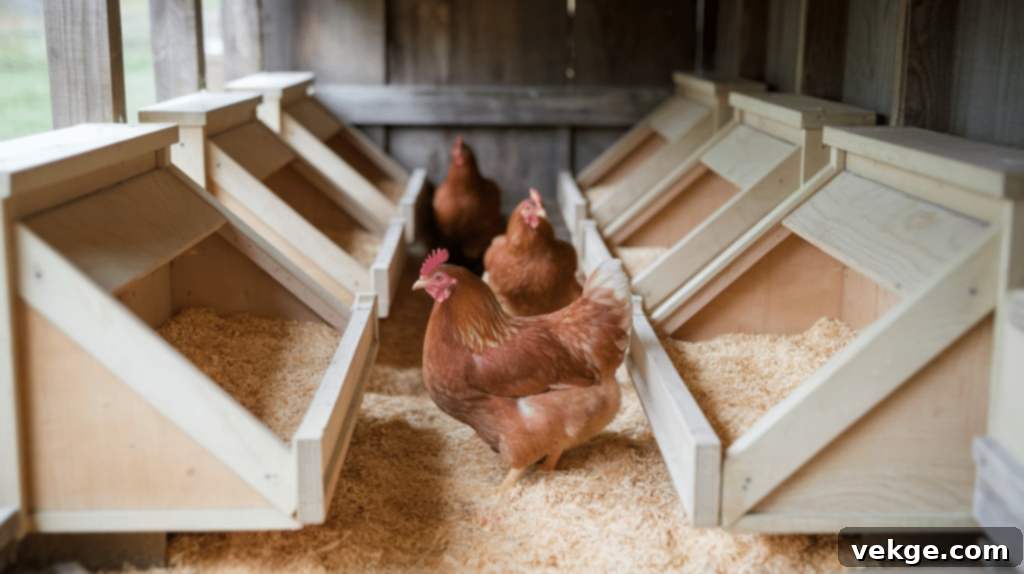
Hens require a secure, quiet, and private space to lay their eggs comfortably. Nesting boxes should be positioned in a calm, slightly darker area of the coop, away from direct sunlight and busy thoroughfares. A good ratio is one nesting box for every 3-4 hens, which is usually sufficient to accommodate the flock’s needs without excessive competition. Each box should measure approximately 12x12x12 inches, providing ample space for a hen. Line the boxes generously with soft, clean bedding such as straw, pine shavings, or shredded paper to create an inviting cushion for eggs and encourage laying. Crucially, position the nesting boxes lower than the roosting bars. This strategic placement discourages chickens from sleeping in them overnight, which keeps the nesting material clean, the boxes dry, and the eggs free from droppings.
7. Set Up Roosting Bars for Sleeping
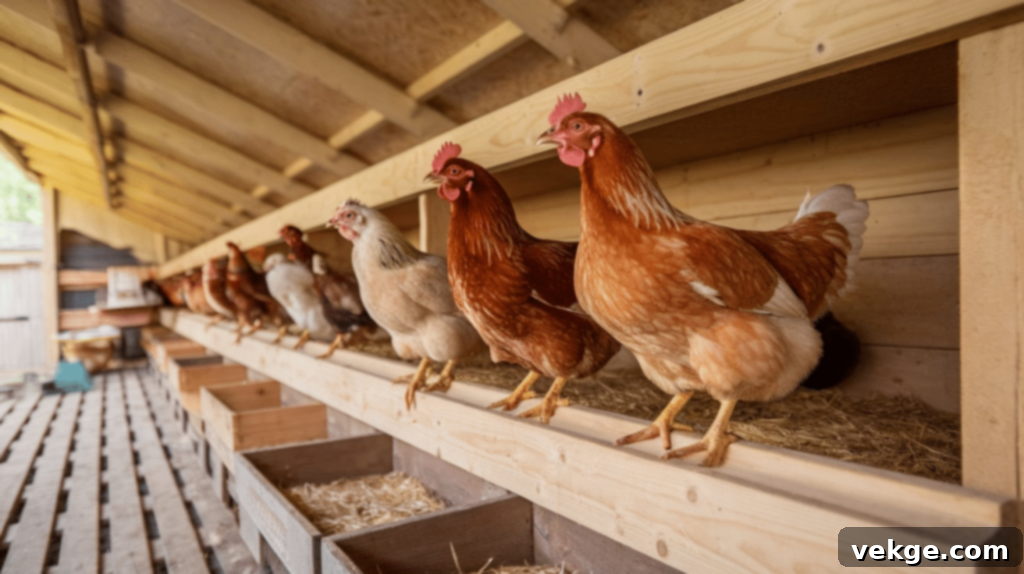
Chickens instinctively seek elevated spots to sleep, primarily for safety from ground predators and to maintain their body temperature. They do not sleep on the ground. Therefore, providing sturdy and comfortable roosting bars is non-negotiable. Use smooth wooden bars (2×2 or 2×4 lumber with rounded edges) or thick, sanded branches that are free of splinters. Position them at least 12-18 inches off the ground and, as mentioned, higher than the nesting boxes to encourage proper roosting behavior. Ensure each chicken has at least 8-10 inches of linear roosting space. The bars should be wide enough for chickens to comfortably grip without straining their feet, allowing them to fully cover their feet for warmth. Removable roosting bars can also simplify cleaning.
8. Keep Feed and Water Stations in the Right Spot
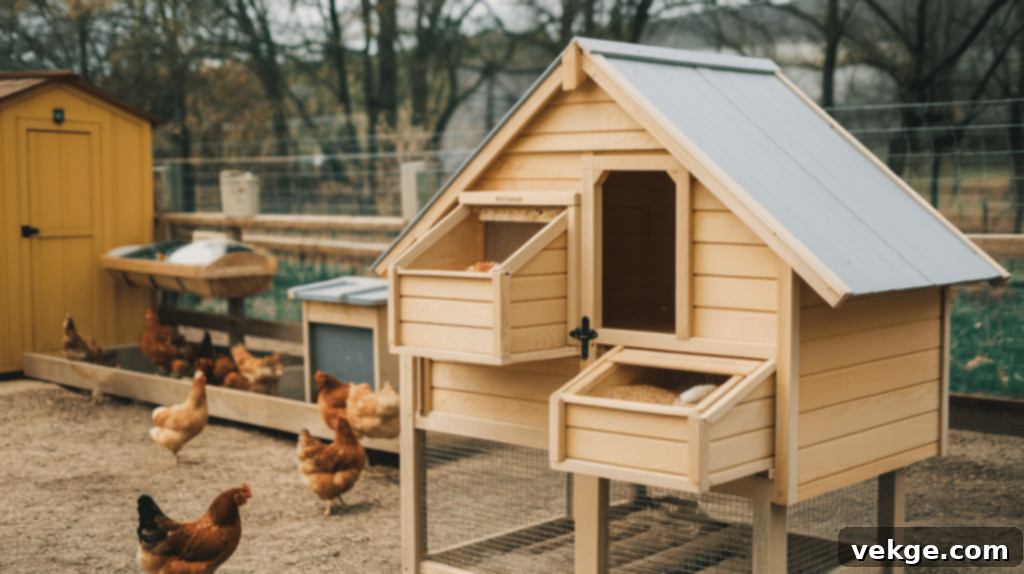
Proper placement of feed and water stations is crucial for hygiene and efficiency. Position them off the ground but within easy reach of your chickens. This elevated placement helps keep the food and water clean, free from bedding, droppings, and dirt, thereby reducing waste and preventing contamination. Crucially, keep them away from roosting bars to avoid direct droppings into the food and water supply. Using hanging feeders and waterers, or placing them on raised platforms, are effective strategies. There are various feeder types available, from simple gravity feeders to more advanced nipple drinkers, all designed to maintain freshness and minimize bacteria buildup. Daily cleaning of these stations is paramount to prevent mold and bacterial growth, ensuring your flock always has access to fresh, clean sustenance.
9. Make the Coop Predator-Proof
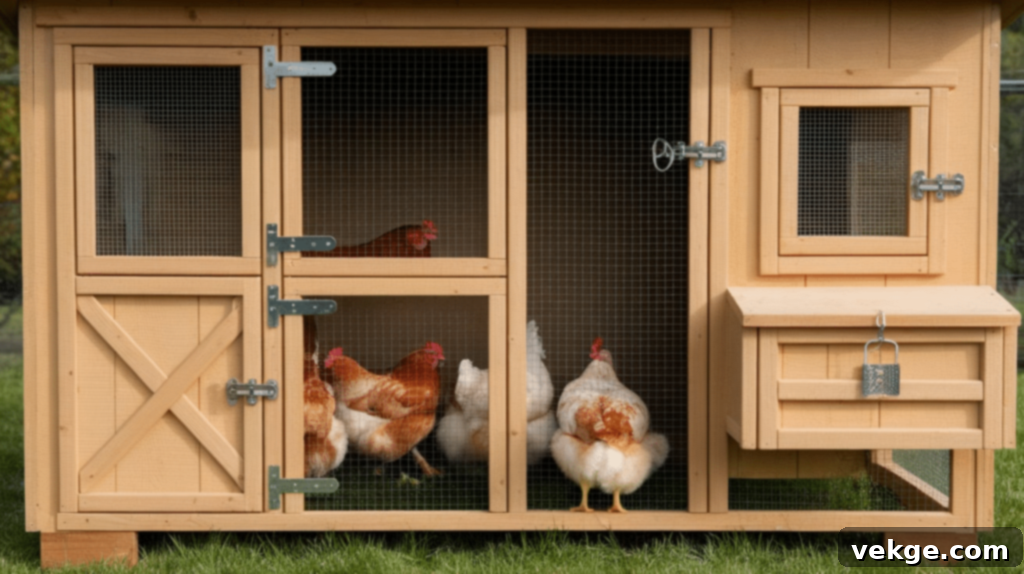
Protecting your chickens from common predators like raccoons, foxes, opossums, and even stray dogs and cats is a top priority. A predator-proof coop ensures the safety and security of your flock around the clock. Implement these critical measures:
- Use strong hardware cloth (1/2-inch or 1/4-inch galvanized steel mesh) for all openings, windows, and vents. Chicken wire, with its wider holes and weaker gauge, is easily torn or chewed through by determined predators and is not suitable for predator protection.
- Install sturdy, reliable locks and latches on all doors and windows. Raccoons are notoriously clever and can often open simple hook-and-eye latches, so opt for more secure options like barrel bolts or carabiner clips.
- Raise the coop slightly off the ground on concrete blocks or sturdy skids. This makes it more difficult for digging predators to tunnel underneath. Alternatively, you can bury hardware cloth about 12-18 inches deep around the perimeter of the coop, forming a “skirt” to deter burrowing animals.
- Regularly inspect the shed for any gaps, cracks, or weak spots and seal them immediately with wood, wire mesh, or caulk. Even a small opening can be an entry point for a persistent predator.
By meticulously planning the inside of your chicken coop shed, you’ll not only simplify chicken care but also ensure your flock remains safe, comfortable, and thriving. With good ventilation, strategically placed roosting and nesting areas, and an organized storage system, your setup will be a harmonious and efficient space for both you and your cherished chickens.
Storage and Organization for A Chicken Coop Shed: Maximizing Efficiency
Maintaining an organized chicken coop shed is paramount for efficient flock management, cleanliness, and pest prevention. A well-thought-out storage system keeps all your feed, bedding, and tools neatly in one designated area, eliminating the frustration of searching for supplies when you need them most. This integrated approach saves time, reduces waste, and contributes to a healthier environment for your chickens. Here are some effective strategies to optimize your storage and organization.
1. Store Feed Properly
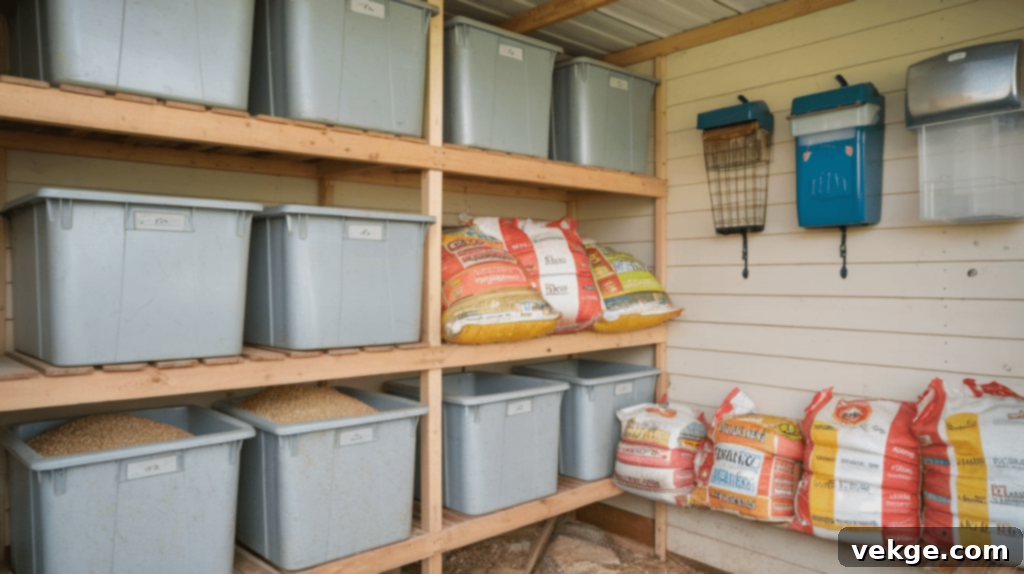
Chicken feed must be kept dry, fresh, and securely protected from pests like mice, rats, and insects. Improper storage can lead to spoiled feed, infestations, and wasted resources. The most effective methods for feed storage include:
- Metal or heavy-duty plastic bins with tight-fitting lids: These containers are rodent-proof and airtight, crucial for keeping feed fresh, preventing moisture absorption, and deterring pests. Ensure the lids create a tight seal.
- Wall-mounted dispensers or small barrels: For smaller quantities or daily access, wall-mounted dispensers can be very convenient, allowing for easy scooping and refilling. These also keep feed off the floor.
- Raised storage shelves: Store feed bins on elevated shelves to keep them off the floor, protecting them from ground moisture and making them less accessible to crawling pests.
Always buy feed in manageable quantities to ensure it’s consumed before it loses nutritional value or spoils, typically within 2-3 months of milling.
2. Keep Bedding Neat and Accessible
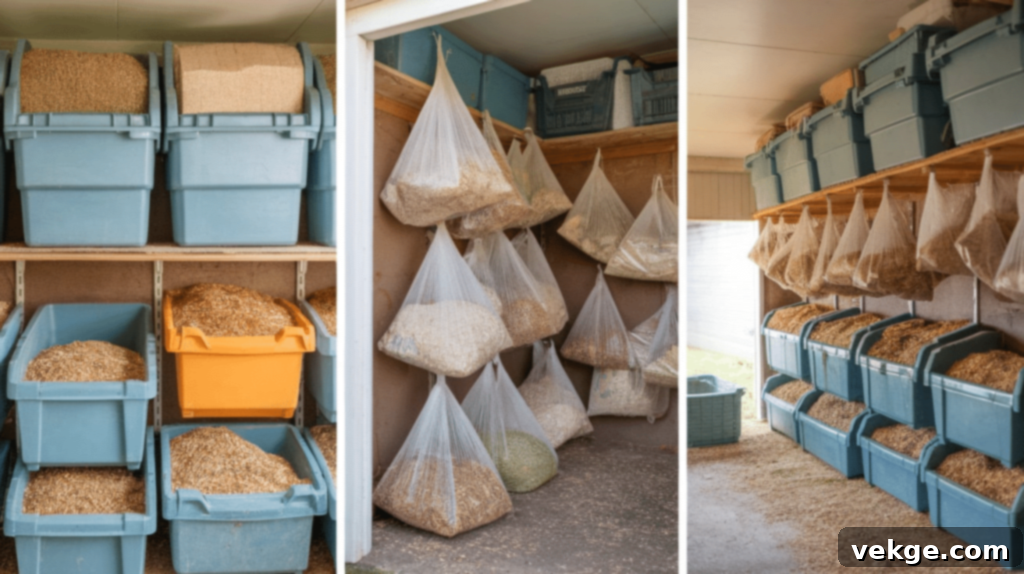
Bedding materials such as straw, pine shavings, or sand must be stored in a dry environment to prevent mold growth, decomposition, and unpleasant odors. Damp bedding not only smells bad but can also harbor bacteria and fungus, posing health risks to your chickens. Consider these effective storage solutions:
- Large plastic bins or barrels with lids: These are excellent for storing loose bedding materials, keeping them fresh, dry, and protected from pests and moisture.
- Wall hooks or strong shelving for bagged bedding: If you purchase bedding in large bags, hanging them on robust wall hooks or stacking them on dedicated shelves keeps them off the floor and prevents them from becoming a haven for pests.
- A dedicated wooden storage chest or cabinet: This provides a neat and contained solution for all your bedding, keeping the area tidy and materials protected.
Easy access to fresh bedding simplifies the regular refreshing of nesting boxes and coop floors.
3. Organize Tools and Cleaning Supplies
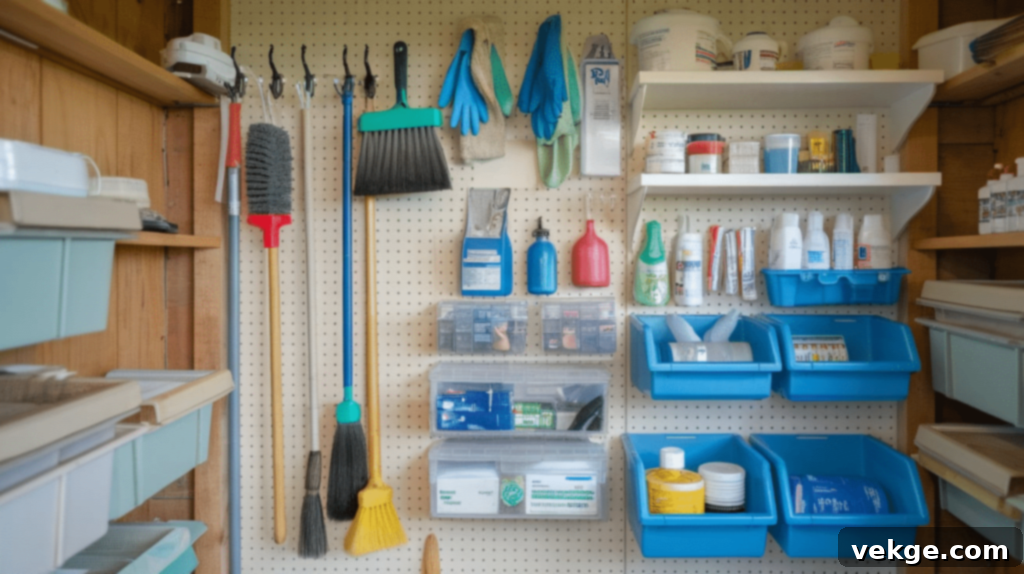
Having your cleaning tools and supplies readily available significantly reduces the effort and time required for coop maintenance. Instead of letting tools clutter the floor or getting misplaced, implement a systematic storage solution:
- Wall-mounted hooks or tool organizers: Perfect for hanging long-handled items like rakes, brooms, shovels, and droppings scoops, keeping them off the floor and easily accessible.
- A pegboard system: Ideal for smaller items such as scrub brushes, gardening gloves, feed scoops, and small hand tools. Pegboards allow for flexible arrangement and clear visibility.
- Dedicated plastic bins or buckets: Use these for storing cleaning solutions, disinfectants, pest control products (like diatomaceous earth), and a chicken first-aid kit. Keep these items contained and labeled for safety and easy retrieval.
Designate a “coop cleaning station” within your shed to centralize these essentials.
4. Use Shelving for Extra Storage
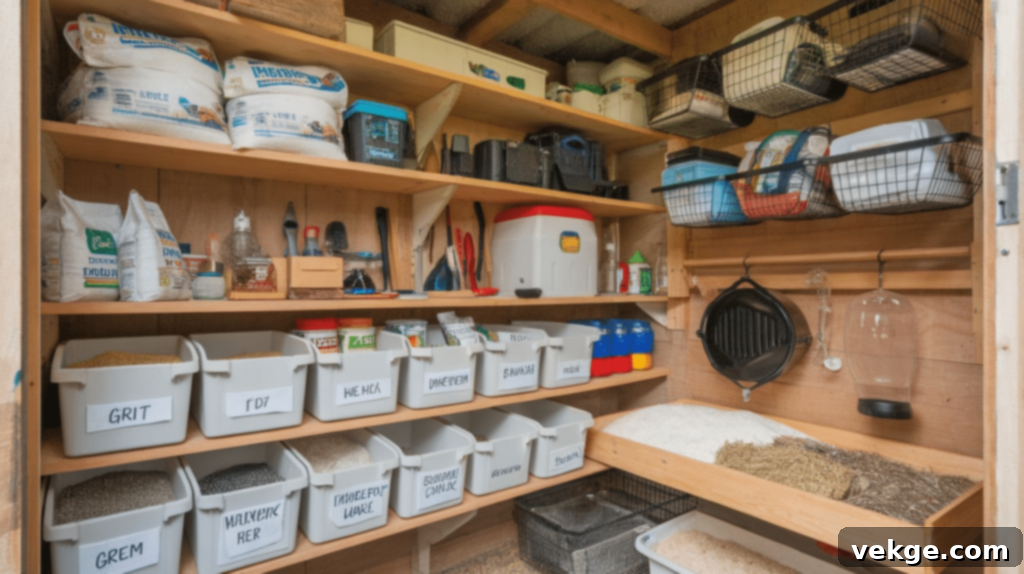
Maximizing vertical space with shelving is one of the most effective ways to enhance storage capacity in your chicken coop shed. Shelves help keep items off the floor, reducing clutter and making cleaning easier. Consider these options:
- Open shelves: These provide convenient access to frequently used items. Sturdy metal or wooden shelving units are ideal.
- Labeled storage bins: Use clear, stackable, and labeled bins on shelves to organize smaller items such as egg cartons, grit, oyster shell, supplements, and medication. Labels ensure quick identification and help maintain order.
- Hanging baskets or mesh bags: These can hold extra feeders, waterers, temporary nesting materials, or even freshly collected eggs, utilizing otherwise unused space.
Custom-built shelving can fit perfectly into unique shed dimensions, while freestanding units offer flexibility.
5. Keep Eggs Safe and Organized
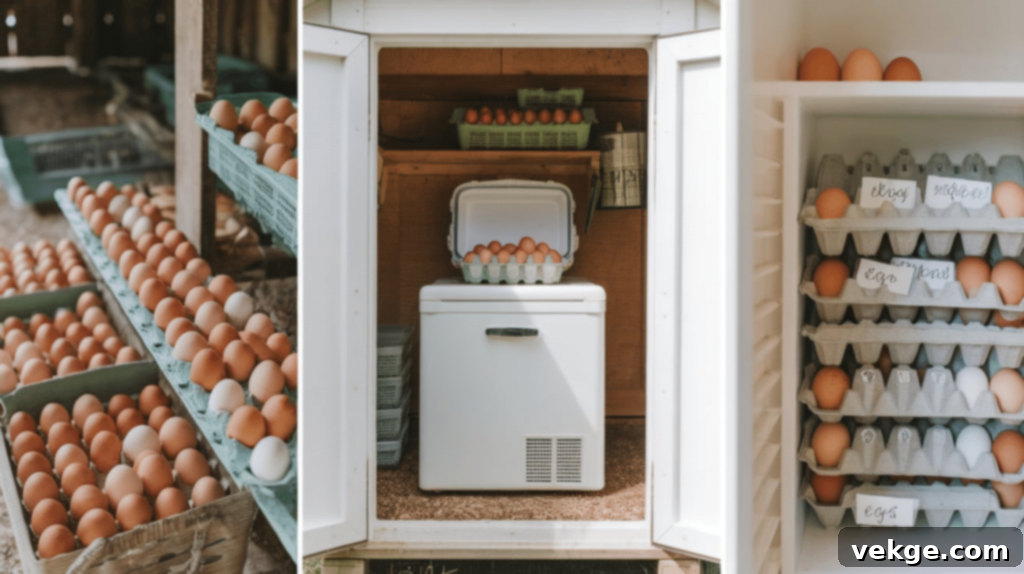
For those collecting eggs daily, establishing a dedicated, clean, and easily accessible egg storage area within the shed is highly beneficial. This prevents eggs from being misplaced or damaged and keeps them separate from other chicken-related items. Consider these options:
- Collection baskets or egg trays: These are perfect for holding freshly collected eggs before they are moved to longer-term storage in the house or refrigerator. Opt for sturdy, washable materials.
- A small, dedicated refrigerator: If you collect a large volume of eggs or plan to store them for an extended period directly within the shed, a mini-fridge can be a convenient addition, especially in warmer climates.
- Labeled cartons or containers: If you sell eggs or give them away to friends and family, having a supply of labeled cartons ready simplifies the process of packaging.
Ensure the egg collection area is clean and protected from dust and potential pests.
6. Make Use of Wall Space

The walls of your chicken coop shed are valuable, often underutilized, storage real estate. By strategically using wall space, you can significantly reduce floor clutter and improve overall organization. Consider these ideas:
- Magnetic strips or tool holders: Ideal for small metal tools like screwdrivers, wrenches, or even egg scales, keeping them secure and visible.
- Hanging fabric organizers or mesh bags: Perfect for storing lightweight items such as extra gloves, zip ties, small rolls of rope, or spare hardware cloth scraps.
- Chalkboard or dry-erase board: Mount one on the wall to keep track of important information, such as feed purchase dates, cleaning schedules, medication records, or daily egg counts. This visual aid is a practical management tool.
- Vertical shelving units: Slim, tall shelves can fit into narrow wall spaces, providing additional surface area for smaller bins or supplies.
With the right storage and organization strategies, your chicken coop shed will transform into a remarkably clean, efficient, and easy-to-manage hub. Simple additions like durable shelves, versatile hooks, and clearly labeled bins can make an enormous difference in maintaining order and simplifying your chicken-keeping routine.
DIY or Repurposing an Existing Shed for a Chicken Coop: A Sustainable Approach
Transforming an existing shed into a chicken coop shed is an excellent, cost-effective, and sustainable way to provide a safe and comfortable home for your flock. Rather than investing in a new build, repurposing an old shed requires a few practical upgrades and modifications. This approach saves money, reduces waste, and allows you to create a customized coop tailored to your specific needs. Here’s a step-by-step guide on how to successfully convert a shed into a functional chicken coop shed.
1. Clean Out and Inspect the Shed: Begin by completely emptying the shed. Remove all existing clutter, sweep out dust and debris, and thoroughly clean the interior surfaces. This is also the ideal time to inspect the shed’s structural integrity. Check for any signs of mold, rot, or leaks in the roof, walls, and floor. Repair any weak spots, replace damaged wood, and ensure the foundation is solid and level. A sound structure is fundamental for the safety and longevity of your coop.
2. Add Essential Ventilation: Good ventilation is non-negotiable for a healthy chicken coop. Cut small vent openings near the roofline, such as gable vents or soffit vents, to allow hot, stale air and ammonia to escape. Install windows covered with sturdy hardware cloth (1/2-inch or 1/4-inch mesh) to facilitate fresh air intake and cross-ventilation. Ensure all openings are securely covered with this strong wire mesh to prevent predators from gaining entry while allowing air to circulate freely.
3. Install Secure Doors and Windows: Chicken coops must be impenetrable to predators. Reinforce existing doors and windows with robust locks and latches. Simple hook-and-eye latches are often insufficient; opt for barrel bolts, heavy-duty hasps with padlocks, or automatic coop doors. Replace any flimsy window screens with hardware cloth. If there are any noticeable gaps or cracks in the shed’s walls, floor, or around door/window frames, seal them tightly with wood, wire mesh, or appropriate caulk to block access for pests and predators.
4. Create a Dedicated Coop Area: Inside the shed, clearly define the space for your chickens. Partition a section of the shed to serve as the main coop area where the chickens will live. Within this area, install roosting bars at varying heights (at least 12-18 inches off the ground) for sleeping, and build or place nesting boxes in a quiet, darker corner for egg-laying. Ensure the coop area’s flooring is easy to clean, such as sealed plywood, vinyl, or concrete, to facilitate regular maintenance.
5. Set Up an Entry for Chickens: Cut a small, easily accessible pop door at ground level on one side of the shed, allowing your chickens to move freely between the coop and their outdoor run. Construct a sturdy ramp with horizontal slats to provide easy traction for chickens to walk up and down. Install a sliding or hinged door on this pop door that can be securely closed and latched each night, providing vital protection against nocturnal predators. An automatic door opener can further enhance convenience and security.
6. Customize Your Setup: Every chicken keeper has unique needs and preferences. Utilize the remaining space in your repurposed shed to create a highly organized storage area. Install shelves, hooks, and bins to neatly store feed, bedding, cleaning supplies, and egg collection baskets. If your shed offers ample room, you might even consider adding a small workbench or potting area for mixing feed, inspecting eggs, or performing minor repairs. Personalization ensures the shed works optimally for your specific flock size and management style.
Repurposing an existing shed into a dedicated chicken coop shed is a highly practical and budget-friendly method for creating a safe, comfortable, and efficient home for your flock. With these essential upgrades—focusing on proper ventilation, robust predator protection, and a smart, easy-to-clean interior setup—your old shed can be transformed into the perfect, integrated chicken coop shed that benefits both you and your happy, healthy chickens for years to come.
Benefits of Combining a Coop and Storage Shed: The Ultimate Efficiency
The concept of a chicken coop shed represents a highly intelligent and efficient approach to backyard chicken keeping. By integrating the chickens’ living quarters with a dedicated storage area, this combined structure offers a multitude of advantages over separate coop and storage units. This unified solution not only provides a safe and comfortable haven for your flock but also significantly streamlines your daily routines and optimizes your property’s footprint. Here are the key benefits of adopting this integrated setup.
1. Everything in One Place: The most immediate benefit is unparalleled convenience. With your coop and storage shed combined, all your chicken-keeping essentials—feed, bedding, grit, supplements, cleaning tools, and even medical supplies—are consolidated in one accessible location. This eliminates the need to trek between separate buildings, saving you considerable time and effort, especially during inclement weather or busy mornings.
2. Saves Space: For individuals with limited backyard space or smaller farms, a combined chicken coop shed is a highly effective space-saving solution. Instead of requiring two distinct structures, you only need one, which significantly reduces the physical footprint. This makes your yard appear neater, less cluttered, and allows more room for other gardening or recreational activities. It’s an efficient use of your property’s valuable real estate.
3. Easier Cleaning and Maintenance: A well-designed chicken coop shed inherently simplifies cleaning and maintenance tasks. By having cleaning tools and fresh bedding stored adjacent to the coop area, you can efficiently scoop droppings, refresh bedding, and sanitize surfaces without delay. The integrated design promotes a logical workflow, ensuring that your coop remains hygienic and odor-free with minimal fuss.
4. Better Weather Protection: A sturdy shed structure offers superior protection against a wider range of weather conditions compared to smaller, standalone coops. The enclosed and often insulated nature of a shed helps keep your chickens warm and shielded from harsh winds, snow, and extreme cold in winter. Conversely, it provides excellent shade and protection from intense sun and heat during the summer months, while also keeping all your valuable supplies dry and protected from the elements.
5. Cost-Effective: From a financial perspective, combining a coop and storage into one shed can be more economical. You avoid the expense of purchasing or constructing two separate structures, and often, the combined building materials and labor (if hiring) are less than for two individual projects. Furthermore, repurposing an existing shed is a particularly affordable DIY project, maximizing value from an existing asset.
6. Keeps Pests Away: A well-sealed and organized storage area within the shed is instrumental in keeping feed and bedding secure from rodents, insects, and other pests. Storing supplies in robust, airtight containers inside a dedicated section of the shed significantly reduces the likelihood of infestations. This integrated design also allows for comprehensive predator-proofing for the entire structure, offering enhanced security for both your flock and your supplies.
7. Customization and Adaptability: The flexibility of a shed allows for extensive customization to perfectly fit your specific chicken-keeping needs. You can design the interior layout with tailored shelves, hooks, partitions, and even a small utility sink or workbench. This adaptability ensures that the chicken coop shed is not just a dwelling for your birds but a truly functional and personalized hub that evolves with your flock and management practices.
In essence, a chicken coop shed is a remarkably intelligent and multifaceted solution that simplifies chicken care, enhances organization, and provides an optimal living environment for your flock. It’s an investment that pays dividends in time saved, money conserved, and the overall health and happiness of your backyard chickens.
Maintaining a Clean and Healthy Coop: A Practical Guide
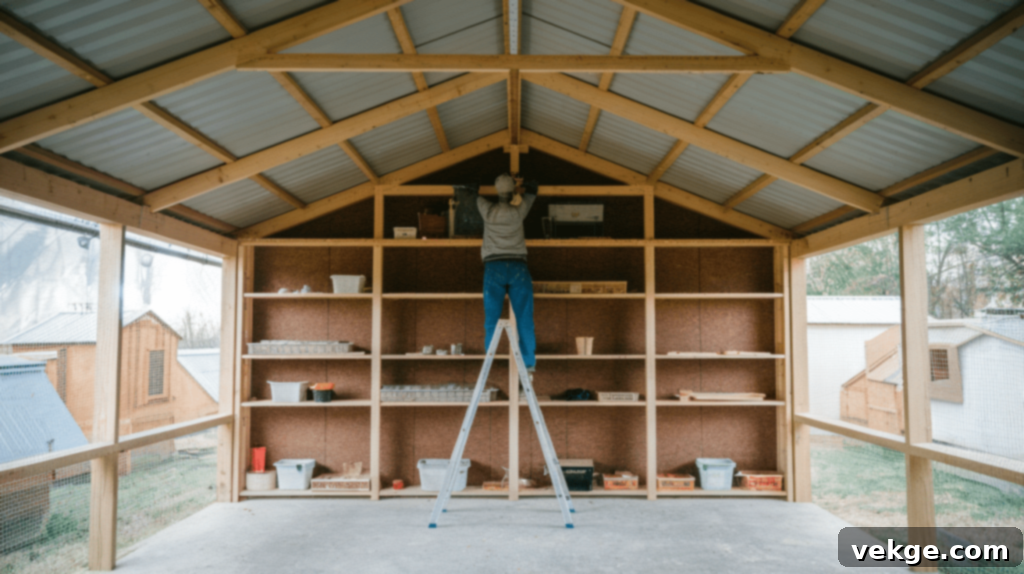
The health and well-being of your chickens are inextricably linked to the cleanliness of their living environment. A dirty chicken coop shed can quickly become a breeding ground for harmful bacteria, parasites, and pests, leading to unpleasant odors, various diseases, and compromised flock health. Fortunately, establishing a consistent and effective cleaning routine is straightforward and highly rewarding. With a few simple steps, you can ensure your coop remains fresh, safe, and conducive to a thriving flock.
1. Establish a Regular Cleaning Schedule: Consistency is key. Implement a multi-tiered cleaning schedule: daily quick checks, weekly tidy-ups, and a thorough deep clean every few weeks or months. This systematic approach prevents waste from accumulating and ensures minor issues are addressed before they escalate.
2. Remove Droppings Frequently: Chickens produce a significant amount of waste. Daily removal of droppings, particularly from under roosting bars and in nesting boxes, is crucial. Installing dropping boards beneath roosts can make this daily task much faster and more efficient, allowing for easy scraping and disposal.
3. Change Bedding Consistently: Regularly replace soiled or damp bedding. Fresh bedding—such as straw, pine shavings, or sand—is vital for maintaining a dry environment, absorbing moisture, reducing ammonia odors, and inhibiting the growth of harmful bacteria and fungi. The frequency will depend on the “deep litter method” you may employ, or simply how quickly it gets dirty.
4. Keep Feed and Water Clean: Always provide your chickens with fresh, clean food and water. Inspect feeders and waterers daily, refilling as needed and ensuring they are free from dirt, droppings, or debris. Perform a thorough weekly cleaning of all feed and water containers to prevent the buildup of algae, mold, and bacteria, which can be detrimental to chicken health.
5. Control Moisture and Ensure Good Ventilation: Damp conditions are an enemy to chicken health, leading to respiratory problems and pest infestations. Ensure your coop has excellent year-round ventilation to remove humid air and introduce fresh air. Combine this with highly absorbent bedding to manage internal moisture levels effectively. Proper airflow is your best defense against humidity and ammonia buildup.
6. Monitor and Control Pests: A clean coop is the first line of defense against unwanted visitors like mice, rats, mites, and lice. Store all feed in sealed, rodent-proof containers. Keep bedding dry and inspect the coop regularly for any signs of pest activity, such as droppings, gnaw marks, or insects. Employ natural pest control methods, like sprinkling food-grade diatomaceous earth in dusty areas, and address any pest issues promptly and humanely.
By diligently adhering to a simple, consistent maintenance routine, your chicken coop shed will remain a clean, fresh-smelling, and healthy sanctuary for your flock. This proactive approach minimizes hassle for you and provides your chickens with the comfortable and safe home they deserve, promoting their vitality and productivity for years.
Conclusion
The creation of a well-designed chicken coop shed stands as a testament to efficient and compassionate chicken keeping. This integrated solution provides your flock with a secure, comfortable, and stimulating living environment, while simultaneously centralizing and organizing all the essential tools and supplies needed for their care. By meticulously planning the interior layout, you can significantly simplify daily tasks such as feeding, cleaning, and the satisfying ritual of collecting fresh eggs.
Incorporating fundamental features like optimal ventilation, strategically placed roosting bars and nesting boxes, easy-to-clean flooring, and robust predator-proofing are not mere luxuries but necessities for a thriving flock. These elements collectively contribute to a hygienic, stress-free, and healthy atmosphere within the coop. Furthermore, establishing a consistent cleaning routine, regularly refreshing bedding, and ensuring proper food and water storage are critical practices that effectively prevent common issues such as unpleasant odors, pest infestations, and potential sickness among your birds.
Whether you choose the path of constructing a chicken coop shed from the ground up or opt for the sustainable approach of repurposing an existing shed, even small, thoughtful upgrades can yield immense benefits. A carefully designed and diligently maintained chicken coop shed is more than just shelter; it’s an investment in the health and happiness of your chickens, and a commitment to simplifying your life as a chicken keeper. This integrated approach ensures a harmonious and productive environment for your feathered companions for many years to come.
Frequently Asked Questions About Chicken Coop Sheds
How Big Should My Chicken Coop Shed Be?
The ideal size for your chicken coop shed depends on your flock size and storage needs. A good baseline is to provide at least 3-4 square feet of indoor coop space per chicken, plus an additional 8-10 square feet per chicken in an attached outdoor run. If you plan to store feed, bedding, and tools inside the same shed, remember to allocate extra square footage for shelving units, storage bins, and clear walkways. Overcrowding can lead to stress, pecking orders, and health problems, so always aim for generous space.
How Do I Add Ventilation to My Chicken Coop Shed?
Proper ventilation is crucial for removing ammonia, excess moisture, and regulating temperature. Install high vents (e.g., soffit or gable vents) near the roofline to allow hot, stale air to escape. Complement these with lower vents or windows that can be opened to allow fresh air in, creating a cross-breeze. All vent openings and windows must be securely covered with sturdy 1/2-inch or 1/4-inch hardware cloth to prevent predator entry while ensuring continuous airflow. Avoid direct drafts on roosting chickens in winter.
What Type of Lighting Should I Use in My Chicken Coop Shed?
Maximize natural light by incorporating windows or translucent roof panels. Natural light is essential for chicken well-being and consistent egg production. During winter months, when daylight hours are short, you might consider supplementing with soft LED lighting on a timer to extend the “daylight” to 14-16 hours, which helps maintain egg laying. Avoid harsh, bright lights, especially at night, as chickens require natural darkness for their sleep cycle and to prevent stress. Red-spectrum lights are sometimes used for night checks as they are less disturbing to chickens.
How Can I Keep My Chicken Coop Shed Warm in Winter?
Chickens are naturally resilient to cold, especially when healthy and dry. The best ways to keep your coop warm are through natural methods: use the deep litter method for bedding (which generates warmth as it composts), seal any drafts around doors and windows (but ensure high ventilation remains), and consider adding extra insulation to walls and ceilings. It’s generally advised to avoid using electric heaters, as they pose a significant fire risk and can create an unhealthy dependency if power fails. Focus on keeping the coop dry, draft-free, and well-ventilated to prevent moisture buildup, which is more detrimental than cold temperatures.
