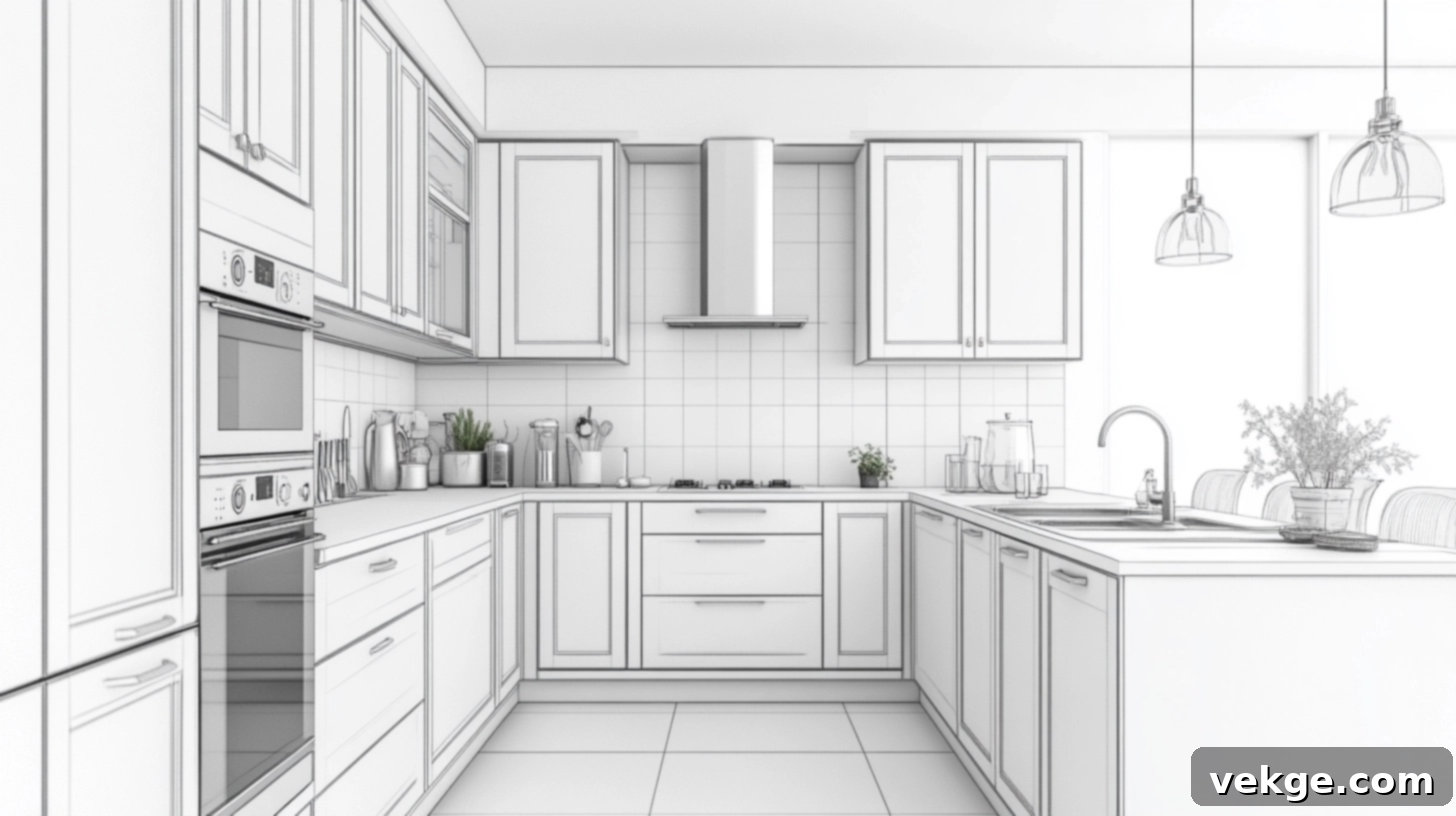
Mastering Kitchen Cabinet Hardware Placement: The Ultimate Guide for Function and Style
The placement of cabinet hardware is a critical detail that significantly impacts both the aesthetic appeal and daily functionality of your kitchen. It’s more than just an accent; properly positioned knobs and pulls can transform a kitchen, making it a joy to use while enhancing its overall design coherence. Many homeowners experience frustration when their otherwise beautiful new cabinets are marred by awkwardly positioned or misaligned handles, which not only look visually jarring but also make opening and closing cabinets less intuitive and comfortable.
This comprehensive guide to cabinet hardware placement is designed to help you avoid those common pitfalls and empower you to create a kitchen that is both stunning and exceptionally practical. We’ll delve into everything from foundational rules to specific recommendations tailored for various cabinet types and styles, ensuring you have the confidence and knowledge to make informed, smart design decisions that stand the test of time.
General Rules for Optimal Cabinet Hardware Placement
Achieving good hardware placement is essential for creating a clean, orderly look while simultaneously ensuring your cabinets and drawers are easy to open and close. Before diving into specific cabinet types, let’s explore some fundamental guidelines that will help you position your knobs and pulls correctly throughout your kitchen.
Knobs vs. Pulls: When to Use Each for Balanced Design
When selecting between cabinet knobs and pulls, it’s crucial to consider both the intended style of your kitchen and the practical function of each cabinet or drawer. A common and highly effective approach, favored by many interior designers and homeowners alike, involves a thoughtful mix of both:
- Knobs excel for upper cabinets and smaller drawers: Their more compact footprint looks elegantly balanced on cabinet doors that don’t typically store heavy loads. Knobs offer a subtle touch, perfect for creating a classic or minimalist look on smaller fronts.
- Pulls are ideal for lower cabinets and wider, heavier drawers: Their elongated design provides a more substantial grip, which is invaluable for accessing heavier items often stored in base cabinets, such as pots, pans, or dishware. Pulls also offer more comfortable handling for wider drawer faces that require a stronger, more even pull.
While some homeowners prefer a uniform look by using all knobs or all pulls, mixing them strategically often results in a more dynamic, visually interesting, and ultimately more functional kitchen design. For instance, using pulls on all drawers and knobs on all cabinet doors can create a cohesive yet varied aesthetic.
The Ergonomic 2–3 Inch Rule for Cabinet Doors
The “2–3 inch rule” serves as an excellent starting point for placing hardware on most cabinet doors. This guideline ensures optimal ergonomics and a consistent visual line throughout your kitchen:
- For upper cabinets: Position knobs or pulls 2-3 inches from the bottom corner of the door, on the vertical stile. This placement makes the hardware easily accessible and comfortable to reach when you’re standing and opening overhead cabinets.
- For lower cabinets: Place knobs or pulls 2-3 inches from the top corner of the door, again on the vertical stile. This height feels most natural and comfortable when you’re bending down to access items in base cabinets.
Maintaining this 2-3 inch measurement consistently across all your cabinet doors creates a remarkably clean, aligned, and professional look that appears planned and intentional. This subtle consistency contributes significantly to the overall perceived quality of your kitchen design.
The 1/3 Rule for Balanced Drawer Hardware Placement
The “1/3 rule” is a valuable principle for determining the most visually pleasing and functional placement of hardware on drawer faces, especially for different drawer sizes and styles:
- For standard drawers (up to 24-30 inches wide): Center the knob or pull horizontally on the drawer face. This classic placement creates a balanced look and provides the most comfortable and intuitive pulling point for everyday use.
- For tall drawer faces (particularly slab styles, like deep pot drawers): For the best leverage and a modern aesthetic, place pulls at approximately 1/3 of the height from the top of the drawer. This position not only offers superior grip when pulling open heavy drawers but also looks visually balanced against the larger drawer front.
- For very wide drawers (over 30 inches): To ensure both visual balance and improved functionality, consider using two pulls or knobs. Divide the drawer face into visual thirds and place one hardware piece at the center of each outer third. This distributes the pulling force, making wide, heavy drawers easier to operate.
Consistent application of these rules across all your drawers ensures a neat, organized appearance that seamlessly ties your kitchen design together, elevating both its form and function.
Upper Cabinet Hardware Placement: Eye-Level Aesthetics and Access
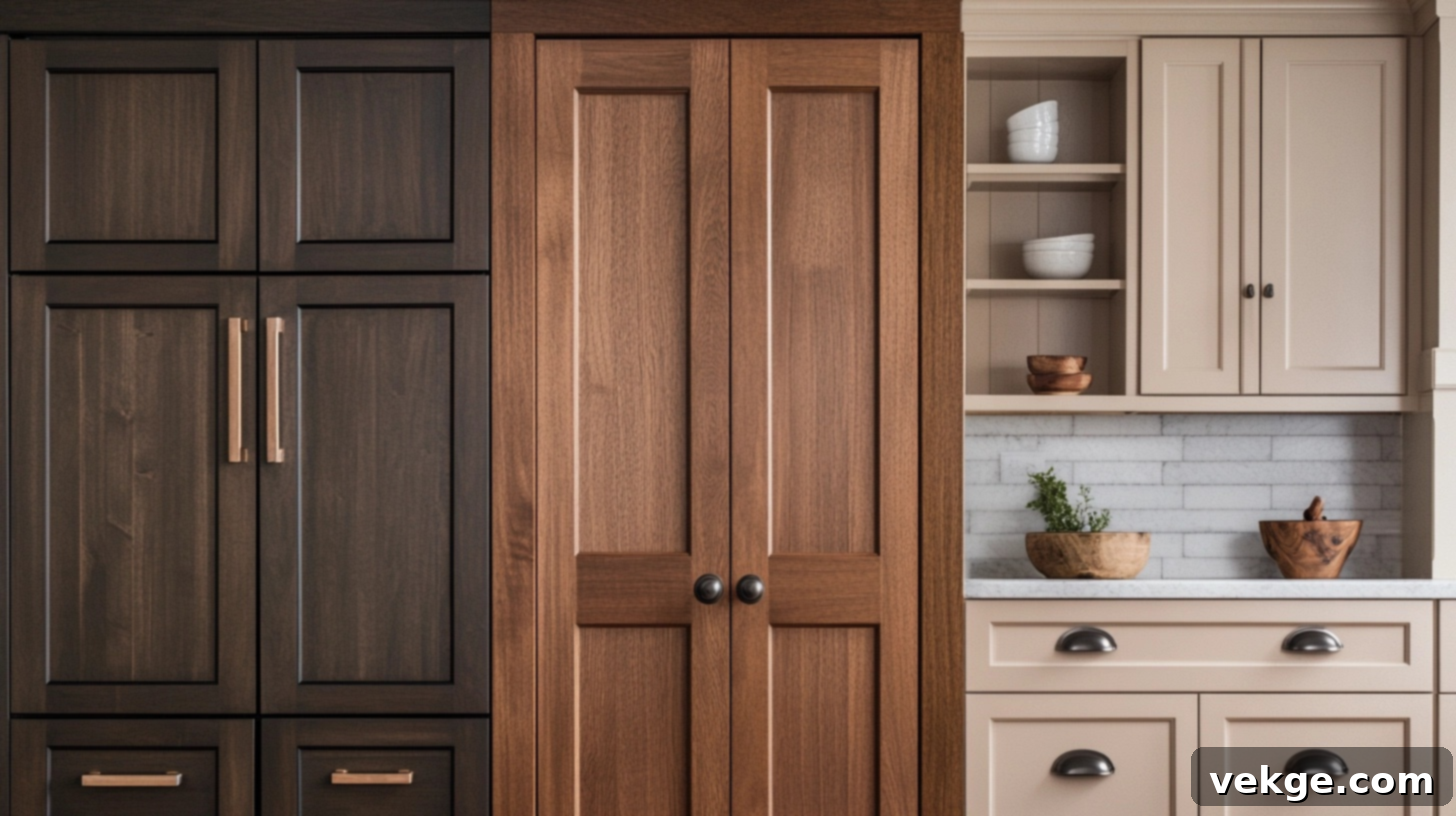
The hardware on your upper cabinets is highly visible, often at eye level, playing a pivotal role in both the visual appeal and daily function of your kitchen. Careful planning here ensures both beauty and ease of access.
Framed Doors: Classic and Defined Placement
For upper cabinets featuring traditional framed doors (where there’s a distinct rail and stile structure), the placement of hardware is typically guided by these frame elements. The most common and classic approach is to place knobs vertically on the stile (the vertical piece of wood within the door frame) and align them with the inside edge of the door’s frame rail. This creates a clean, traditional look.
For a slightly updated or more ergonomic take, you can set the knob 2-3 inches from the bottom corner of the door, still centered vertically on the stile. If you opt for pulls instead of knobs on framed upper doors, mount them vertically along the stile, maintaining alignment with the edge of the door for a crisp and tidy appearance.
Shaker Cabinets: Versatility in Placement
Shaker cabinets, with their clean lines and simple recessed panel, offer a degree of versatility in hardware placement. The most popular approach is to center the knob or pull on the vertical stile, positioning it even with the edge of the frame rail. This method accentuates the vertical lines of the shaker style and provides a balanced look.
Another increasingly popular option, particularly for a more contemporary feel, is to place the hardware on the bottom rail, centered horizontally. Stile placement creates strong vertical lines that can visually enhance a kitchen’s height, making the space feel taller. In contrast, rail placement can create more horizontal lines, subtly suggesting a wider space. The choice often depends on your desired aesthetic and the overall proportions of your kitchen.
Slab Doors: Modern and Minimalist Approaches
Slab doors, characterized by their flat, unframed surface, lend themselves to modern and minimalist hardware placements. For these sleek fronts, the standard recommendation is to place the hardware 2-3 inches from the bottom edge of the door. A key design principle for slab cabinets is consistency: aligning all hardware along the same horizontal plane across all upper cabinets creates a striking, grid-like appearance that enhances the contemporary aesthetic.
For wider slab doors, especially those that might be taller, consider centering the hardware horizontally along that bottom edge for perfect balance. If you’re using long, horizontal pulls, ensure they are placed parallel to the bottom edge of the door, maintaining that consistent 2-3 inch distance from the edge. This consistent alignment is crucial for achieving a polished, cohesive modern kitchen look.
Lower Cabinet Hardware Placement: Balancing Aesthetics with Robust Functionality
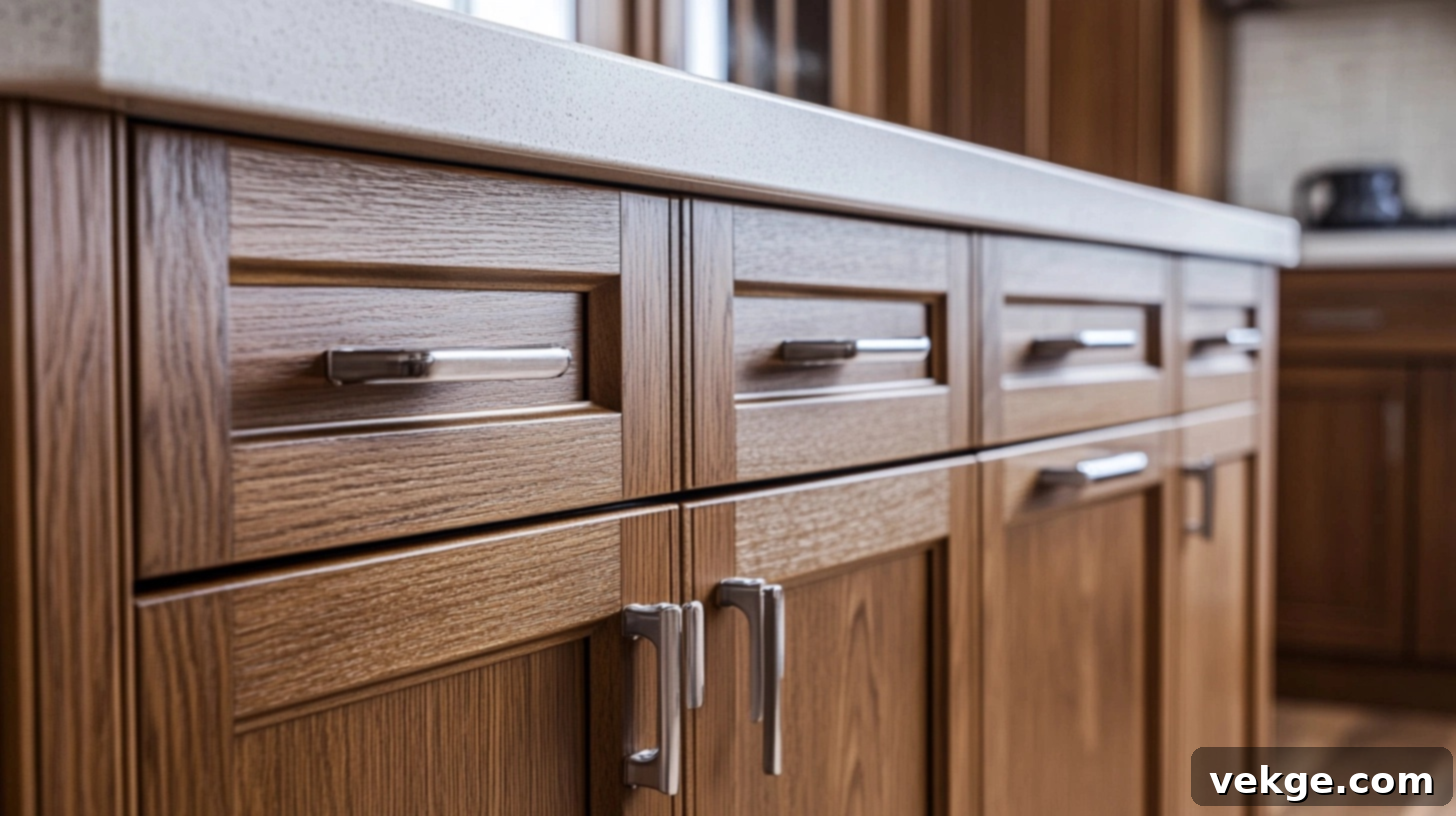
Hardware on lower cabinets needs to effectively balance visual appeal with robust, practical function. Given that these cabinets frequently store heavier items and endure more daily use, correct hardware placement is paramount to ensuring your kitchen operates smoothly while looking its absolute best.
Horizontal vs. Vertical Pulls: A Style and Ergonomics Choice
For a clean, modern aesthetic, horizontal pulls are an excellent choice for lower cabinet doors. Position them parallel to the top edge of the door, typically about 2-3 inches down from the top. This creates strong, uninterrupted horizontal lines that lend your kitchen a contemporary, updated feel, often visually expanding the space.
However, vertical placement of pulls significantly improves usability in several practical scenarios. For cabinet doors situated immediately next to appliances (like a dishwasher or oven) or in tight corner spaces, vertically oriented pulls prevent clothing from catching and make movement around the kitchen much smoother. Vertical pulls are also highly effective on taller lower cabinet doors, such as those for a trash pull-out or a single-door base cabinet, as they provide better leverage for opening. To install vertical pulls, center them on the stile and align with the door’s inner frame edge. For slab lower doors, place them 2-3 inches from the top corner, maintaining the vertical orientation.
Matching with Countertop Style: A Subtle Harmony
The style and thickness of your countertops can subtly influence optimal hardware placement on lower cabinets. When you have particularly thicker countertops, such as a chunky butcher block or a substantial slab of natural stone, consider placing pulls slightly lower than the standard 2-3 inches from the top of the cabinet. This slight adjustment prevents the hardware from appearing cramped or visually “squished” against the prominent countertop edge, allowing both elements to breathe.
For thinner, more delicate countertops, the standard 2-3 inch placement from the top edge works perfectly. Furthermore, with busy or heavily patterned countertops, a simpler and more consistent hardware placement helps to prevent visual overload, allowing the countertop to remain the primary focal point. Conversely, with solid, understated countertops, you have more creative freedom to experiment with hardware placement, perhaps even creating interesting patterns or unique alignments to add visual intrigue.
Drawer Hardware Placement: The Key to Seamless Operation
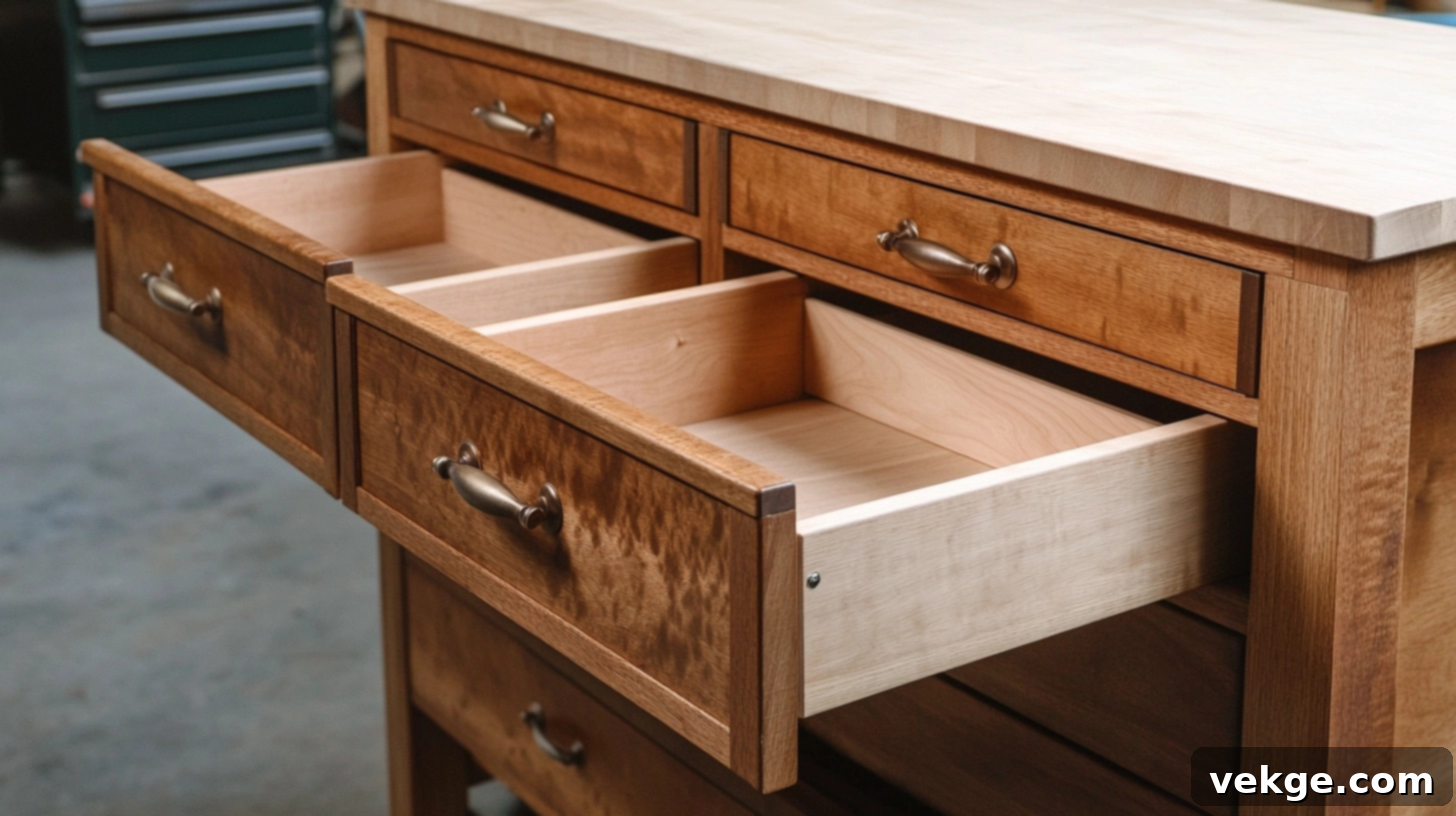
Achieving correct drawer hardware placement makes a substantial difference in both the visual harmony and daily functionality of your kitchen. Since drawers often house heavy items like cookware, dishes, or pantry staples, well-placed hardware facilitates effortless daily use while significantly contributing to the overall design sophistication.
Single vs. Double Pulls on Wide Drawers: Practicality Meets Proportion
For drawers of standard width (typically up to 24-30 inches), a single, centrally placed pull or knob is usually sufficient and looks well-proportioned. However, for wider drawers, especially those exceeding 30 inches, actively consider using two pulls or knobs. This choice offers several benefits:
- Improved Visual Balance: A single pull can look lost or disproportionate on a very wide drawer, whereas two pulls create a more balanced and substantial appearance.
- Enhanced Functionality: Distributing the pulling force across two points makes it significantly easier to open heavy, wide drawers, preventing racking or awkward leverage.
When implementing two pulls on a wide drawer, the “rule of thirds” is an excellent guiding principle: visually divide the drawer face into three equal sections and place each pull centrally within the outer two thirds. This creates an aesthetically pleasing and highly functional arrangement. For extra-wide drawers, such as those often found under a cooktop or spanning 36 inches or more, double pulls are almost invariably the superior and more practical choice.
Centered vs. Top Third Placement: Traditional to Contemporary
The vertical placement of drawer hardware can significantly influence the perceived style of your kitchen:
- Centered Placement (Traditional): For a classic or traditional look, centering pulls vertically on the drawer face is the go-to method. This timeless placement works beautifully in most kitchen styles, creating a balanced and harmonious appearance that resonates with traditional and transitional designs.
- Top Third Placement (Modern): For a more contemporary or sleek approach, placing pulls in the top third of the drawer face is highly effective. This style choice is particularly well-suited for slab-front drawers in modern and minimalist kitchens, contributing to a clean, architectural line.
The height of your drawer also plays a role in influencing pull placement. For standard-height drawers (typically 4-6 inches tall), centering the hardware vertically usually works best. For taller drawers, such as deep pot drawers or filing drawers, placing the pull in the top third of the drawer front makes the drawer much easier and more comfortable to open without requiring excessive bending down.
Tall Cabinet and Pantry Door Hardware: Ergonomics for Height
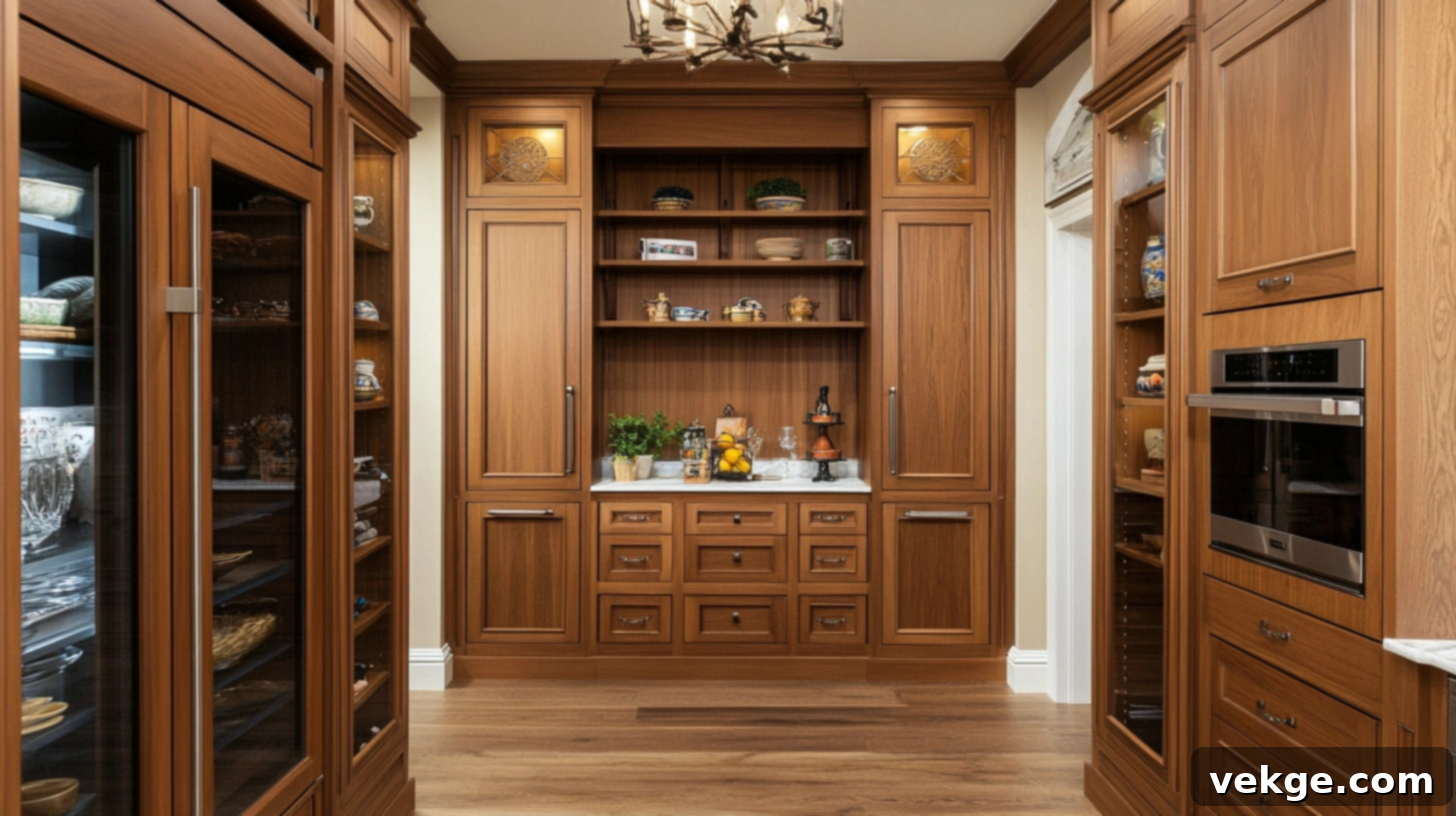
Tall cabinets and pantry doors, by virtue of their height, demand special consideration when it comes to hardware placement. Their sheer verticality presents unique challenges and opportunities for optimizing both function and style within the kitchen.
Optimizing Vertical Pull Placement for Tall Doors
For tall cabinet and pantry doors, vertical pulls are almost always the most practical and aesthetically appropriate choice. The key is to position the pull at a height that is comfortable and intuitive for the majority of users, typically falling within the range of 36 to 42 inches from the finished floor. This measurement generally aligns with countertop height or slightly above, ensuring easy access for most adults without excessive reaching or bending.
Another sophisticated approach for very tall doors is to place the vertical pull starting approximately one-third of the way down from the top of the door. This method not only creates good visual proportion, especially for extra-tall units, but also keeps the handle comfortably within reach for frequent use. It’s crucial to avoid placing pulls excessively high or too low on tall doors; when positioned too high, they become cumbersome to reach, and when too low, they force users to bend unnecessarily and can create an awkward, unbalanced visual appearance.
Choosing Long Pulls for Grand Tall Doors
The length of pulls chosen for tall cabinets is a significant factor, impacting both the visual scale and functional ease. As a general guideline for achieving good visual proportion, the pull length should ideally be about one-third the overall height of the door. For standard pantry doors, which typically range from 80-84 inches tall, pulls in the 24-30 inch range often look best, providing a substantial yet elegant presence.
When utilizing long pulls, ensure they are centered along the stile for framed doors, maintaining a classic, aligned look. For slab or flat-panel tall doors, centering the long pull vertically on the door face achieves the most balanced and modern appearance. While some avant-garde designers might choose to place long pulls slightly off-center for a unique visual interest, it is generally advisable to maintain consistency across all tall doors to project a purposeful and polished design.
Cabinet Style and Finish Considerations: Integrating Hardware into the Overall Design
The style of your cabinets and the finish of your chosen hardware are not isolated decisions; they work in concert with hardware placement to craft the overarching look and feel of your kitchen. Understanding this intricate interaction allows you to make choices that are not only functional but also deeply intentional and beautifully designed.
Traditional vs. Modern Placement Aesthetics: A Design Philosophy
Hardware placement conventions differ significantly between traditional and modern kitchen styles. These distinctions extend beyond just the form of the hardware itself, encompassing exactly where and how it is positioned on various cabinets and drawers, reflecting different design philosophies. Here’s a comparative overview of key visual differences:
| Feature | Traditional Placement | Modern Placement |
|---|---|---|
| Upper Cabinets | Knobs placed vertically on stile, aligned with door’s inner frame edge (or 2-3″ from corner). Pulls vertical. | Pulls mounted horizontally on the bottom rail or 2-3″ from bottom edge for slab doors. Clean, consistent lines. |
| Lower Cabinets | Knobs on stile, pulls typically mounted vertically. Emphasis on individual door features. | Pulls mounted horizontally, consistently 2-3″ from the top edge for slab or shaker doors. Strong horizontal lines. |
| Drawers | Hardware centered vertically and horizontally on the face. Uniform classic look. | Hardware often placed in the top third of the drawer face, or centered in a long horizontal orientation for minimalist appeal. |
| Wide Drawers | Single pull centered (unless very wide, then two centered). | Long single pull for a streamlined look, or two pulls meticulously divided in thirds for robust function. |
| Alignment | Varied placement, often dictated by door frame features and individual cabinet type. | Precise, grid-like alignment across all cabinet fronts, creating visual continuity. |
These distinct placement philosophies are fundamental in defining your kitchen’s overarching style. A traditional kitchen often embraces ornate details and individual character, while a modern kitchen prioritizes clean lines, symmetry, and understated elegance through consistent, deliberate placement.
Matching Hardware Finish to Placement: A Cohesive Look
The finish of your chosen hardware can either draw attention to its placement or allow it to blend seamlessly with your cabinetry, depending on your desired effect. Understanding this interaction is key to a cohesive design:
- Polished Finishes (e.g., chrome, polished nickel, brass): These finishes inherently catch and reflect light, making them stand out. They are excellent choices when you want your hardware placement to be a distinct design feature, drawing the eye and adding sparkle. They can highlight consistent grid-like placements in modern designs or accent classic central placements in traditional settings.
- Brushed Finishes (e.g., brushed nickel, satin brass, satin chrome): Offering a more subtle and diffused luster, brushed finishes provide visual interest without being overtly flashy. They work beautifully with both traditional and transitional placement styles, blending elegance with understated charm.
- Matte Finishes (e.g., flat black, oil-rubbed bronze, matte gold): These finishes absorb light and tend to blend more with the cabinetry itself, placing less emphasis on the hardware as a standalone element. They are perfect for achieving a minimalist, industrial, or farmhouse aesthetic where the hardware supports the overall look without dominating.
For dark cabinets (like navy, charcoal, or black), lighter hardware finishes such as brushed brass or chrome create a striking contrast regardless of placement, making the hardware pop. Conversely, for light cabinets (white, cream, light grey), darker hardware like matte black or oil-rubbed bronze provides definition and anchors the visual space. When utilizing statement hardware with unique shapes or intricate designs, a centered placement often puts the spotlight directly on the special hardware pieces themselves, allowing their form to be fully appreciated.
Tools and Tips for Precise Cabinet Hardware Placement
Achieving perfectly placed cabinet hardware can be surprisingly challenging. Even the smallest errors in measurement or alignment become glaringly noticeable when repeated across multiple cabinet fronts. Investing in the right tools and employing smart techniques will help you achieve precise, professional-looking results that elevate your entire kitchen.
The Indispensable Role of Templates and Jigs
Using cabinet hardware templates and jigs is arguably the most crucial step for accurate and efficient installation. These ingenious tools allow you to precisely mark where to drill holes without guesswork, ensuring flawless consistency from one cabinet to the next. The primary benefits include:
- Unwavering Consistency: Guarantees that every knob or pull is placed at the exact same height and distance across all your cabinets and drawers.
- Speed of Installation: Drastically reduces the time required for measuring and marking, making the entire process faster.
- Pinpoint Accuracy: Minimizes the risk of drilling mistakes, which can be costly and difficult to rectify on new cabinetry.
Most quality templates are adjustable, accommodating various placement options (like the 2-3 inch rule) and different hardware center-to-center measurements. Investing in a good jig is highly recommended for anyone undertaking a hardware installation project.
DIY Tricks with Painter’s Tape and Cardboard for Visualization
Before committing to drilling a single hole, take advantage of simple household items to visualize and preview your hardware placement. This step is invaluable for preventing costly mistakes:
- Painter’s Tape Mock-ups: Apply strips of painter’s tape where you plan to install your hardware. Mark the exact hole locations on the tape. This allows you to stand back, evaluate the look, and easily make adjustments without damaging your cabinets.
- Cardboard Templates: Cut out small cardboard templates that mimic the size and shape of your actual pulls or knobs. Temporarily tape these to your cabinets. This provides a three-dimensional preview, helping you assess scale, proportion, and overall visual impact from various angles.
You can also use a pencil to lightly mark your planned hardware locations directly on the cabinet, then live with it for a day or two. This “test drive” period allows you to get a feel for the placement in different lighting and during daily routines before making permanent holes.
Common Mistakes to Avoid for Professional Results
Even seemingly minor placement errors can detract significantly from your kitchen’s overall appeal and perceived quality. Being aware of these common mistakes will help you achieve a truly professional finish:
- Misaligned Handles: Always use a level to ensure pulls are perfectly straight, both horizontally and vertically. A crooked pull is an immediate visual distraction.
- Uneven Spacing: Maintain consistent distances from cabinet edges and between hardware pieces for a balanced and harmonious look throughout the kitchen.
- Wrong Scale: Choosing hardware that is too small or too large for the cabinet or drawer front can throw off the entire aesthetic. Aim for pulls that are approximately one-third the width of the drawer for proper proportion.
- Forgetting Clearance: Before drilling, always check that newly installed hardware will not collide with neighboring cabinets, walls, or appliances when doors and drawers are opened, especially in tight corners or next to dishwashers.
- Inconsistent Placement: Resist the urge to eyeball placement. Stick to your chosen rules and measurements consistently across all cabinets and drawers for visual unity.
- Ignoring Function: While aesthetics are vital, never compromise on functionality. Consider how each cabinet and drawer will be used daily before finalizing hardware placement; easy access is paramount.
Hardware Size Guide by Cabinet Type: Achieving Perfect Proportion
Choosing the correct size hardware for your cabinets is just as crucial as ensuring proper placement. Hardware that is too diminutive can look lost and insignificant, while overly large pieces can overwhelm your cabinetry and detract from its design. Here’s a guide to ideal pull lengths based on drawer and door sizes:
- Small Drawers (up to 12 inches wide): These drawers work best with pulls between 3-4 inches in length. This size provides sufficient grip for easy opening while maintaining proper proportion to the modest drawer face, ensuring it doesn’t look too heavy.
- Medium Drawers (12-24 inches wide): For this common drawer size, pulls between 4-8 inches long typically look balanced. The exact size within this range can vary based on your kitchen style: more traditional kitchens often lean towards shorter pulls, while contemporary designs frequently utilize longer, more streamlined ones for a modern aesthetic.
- Large Drawers (24-36 inches wide): These wider drawers demand more substantial hardware to appear proportional. Opt for pulls between 6-12 inches long. For drawers over 30 inches wide, using two smaller pulls (as discussed in the 1/3 rule for drawers) often functions better and looks more balanced than a single, very long pull.
- Extra-Large Drawers (over 36 inches wide): For these expansive drawers, two pulls are almost always recommended. Choose pulls in the 6-12 inch range, placed according to the “rule of thirds” for optimal balance and ease of use.
- Standard Cabinet Doors: For typical upper and lower cabinet doors, knobs are generally 1-1.5 inches in diameter. Pulls usually range from 3-6 inches in length, depending on the door size and style preference.
- Tall Pantry Doors: These require pulls that are about 1/3 the total height of the door for proper scale and visual impact. For standard pantry doors (around 80-84 inches tall), pulls between 8-12 inches (or even longer, up to 24-30 inches for very tall doors) create a well-balanced and grand look. Position these longer pulls vertically at a comfortable height for daily use, typically 36-42 inches from the floor to the bottom of the pull.
Remember that these are guidelines. Ultimately, the best way to determine the ideal size is to hold potential hardware pieces against your cabinet fronts and assess the visual impact. Combining the right size with thoughtful placement will create a harmonious and highly functional kitchen.
Conclusion: The Art of Thoughtful Hardware Placement
Achieving exemplary cabinet hardware placement is a nuanced art that seamlessly merges visual appeal with practical functionality. The right placement doesn’t just make your kitchen look polished and sophisticated; it significantly enhances its usability, making daily tasks smoother and more enjoyable. It’s a detail that, when done correctly, contributes immensely to the overall satisfaction and value of your home.
Before you commit to drilling any permanent holes, remember the cardinal rule: measure twice, or even three times. Take the time to experiment with different hardware options and placements using painter’s tape or cardboard templates. This small investment of effort upfront is a powerful safeguard against permanent mistakes that would otherwise be glaringly visible across your meticulously designed kitchen.
Use the comprehensive measurements, rules, and expert tips outlined in this guide as your essential starting point. Then, feel empowered to adjust and fine-tune these recommendations to perfectly align with your specific needs, personal style, and the unique architectural characteristics of your kitchen. A thoughtfully appointed kitchen, where every detail serves a purpose, is a truly inspiring space.
For more insights into creating your dream kitchen, be sure to explore our other informative blogs on various cabinet styles, optimal kitchen layouts, and the latest trends in home design.
