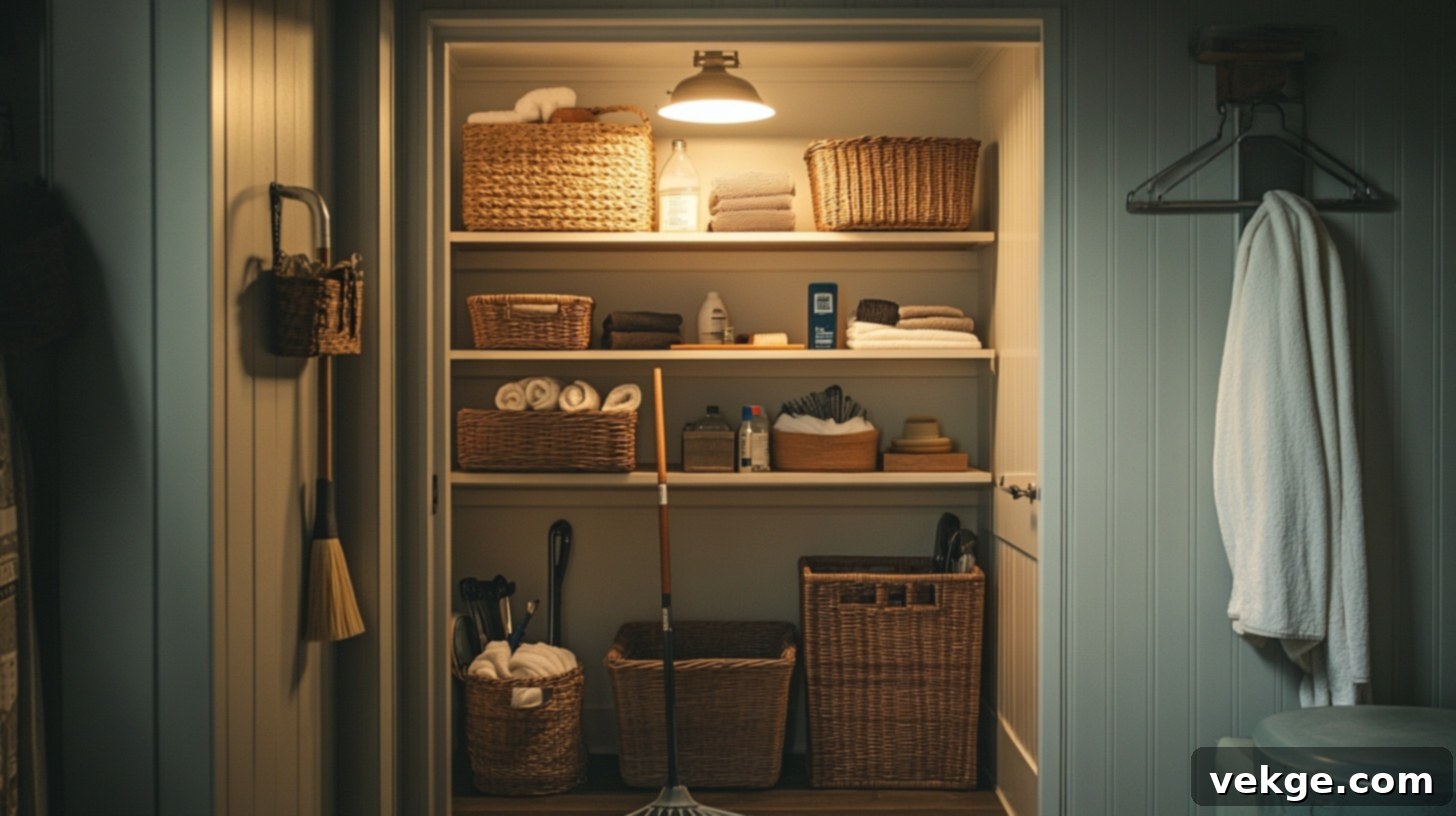
Master Your Mess: The Ultimate Guide to an Organized Utility Closet
Do you ever open your closet door only to be greeted by a chaotic jumble of cleaning supplies, tools, and miscellaneous household items? Brooms leaning precariously, bottles tipping over, and things you haven’t seen in months buried under piles? If this sounds all too familiar, then you’re not alone. That was once my utility closet, a space that desperately needed a systematic overhaul.
A utility closet, despite its often small footprint, is a crucial storage area in any home. It’s designed to house those everyday essentials – from mops and vacuums to lightbulbs and spare batteries – that keep our households running smoothly. However, when this vital space becomes disorganized, it can quickly turn from a convenience into a source of daily frustration and wasted time.
In this comprehensive guide, I’m excited to share the journey of how I transformed my own utility closet from a messy catch-all into a model of efficiency and order. We’ll delve into what a utility closet truly entails, explore its significant role in maintaining a tidy home, and uncover the numerous benefits that come from a well-organized storage solution. You’ll gain practical, actionable tips and creative strategies to make your utility closet not just neater, but also faster to navigate, and significantly less stressful to manage. Prepare to reclaim your space and bring a renewed sense of control to your daily routines!
What Exactly is a Utility Closet? Understanding its Purpose and Place
At its core, a utility closet is a dedicated, often compact, storage area within a home designed to house practical items required for household maintenance and cleaning. Think of it as the control center for your home’s upkeep, a place where essential tools like brooms, mops, dustpans, and vacuums reside, alongside a variety of cleaning solutions, spare parts, and other sundry items. Its primary function is to consolidate these necessities, preventing them from cluttering other living spaces and ensuring they are readily accessible when needed.
While often used interchangeably, it’s important to distinguish a utility closet from a utility room. A utility room is typically a much larger, full-sized room, frequently equipped with appliances such as washing machines, tumble dryers, and sometimes even a sink or a dedicated workbench. These rooms are designed for active household tasks like laundry, ironing, or minor DIY projects. In contrast, a utility closet is a smaller, enclosed space – akin to a deep cabinet, a built-in cupboard, or a compact alcove with shelving – whose sole purpose is storage.
The key differences lie in size, functionality, and the types of items stored. Utility rooms are expansive and task-oriented, whereas utility closets are compact and purely storage-focused. You’ll commonly find utility closets strategically located in various parts of the house: in hallways for easy access to cleaning supplies, near kitchens for quick clean-ups, tucked away in garages for tools, or even beneath staircases, maximizing otherwise unused architectural nooks. Their placement is usually determined by convenience, ensuring that cleaning agents or everyday tools are close to where they will be most frequently required.
Despite their often modest dimensions, a well-managed utility closet can profoundly impact the overall tidiness and efficiency of your home. By providing a dedicated “home” for these essential items, it prevents clutter from spilling into other areas, saves invaluable time searching for misplaced tools, and ultimately contributes to a feeling of greater control and calm within your living environment. It’s a small space with the potential for massive organizational impact.
The Undeniable Benefits: How a Neat Utility Closet Makes Life Easier
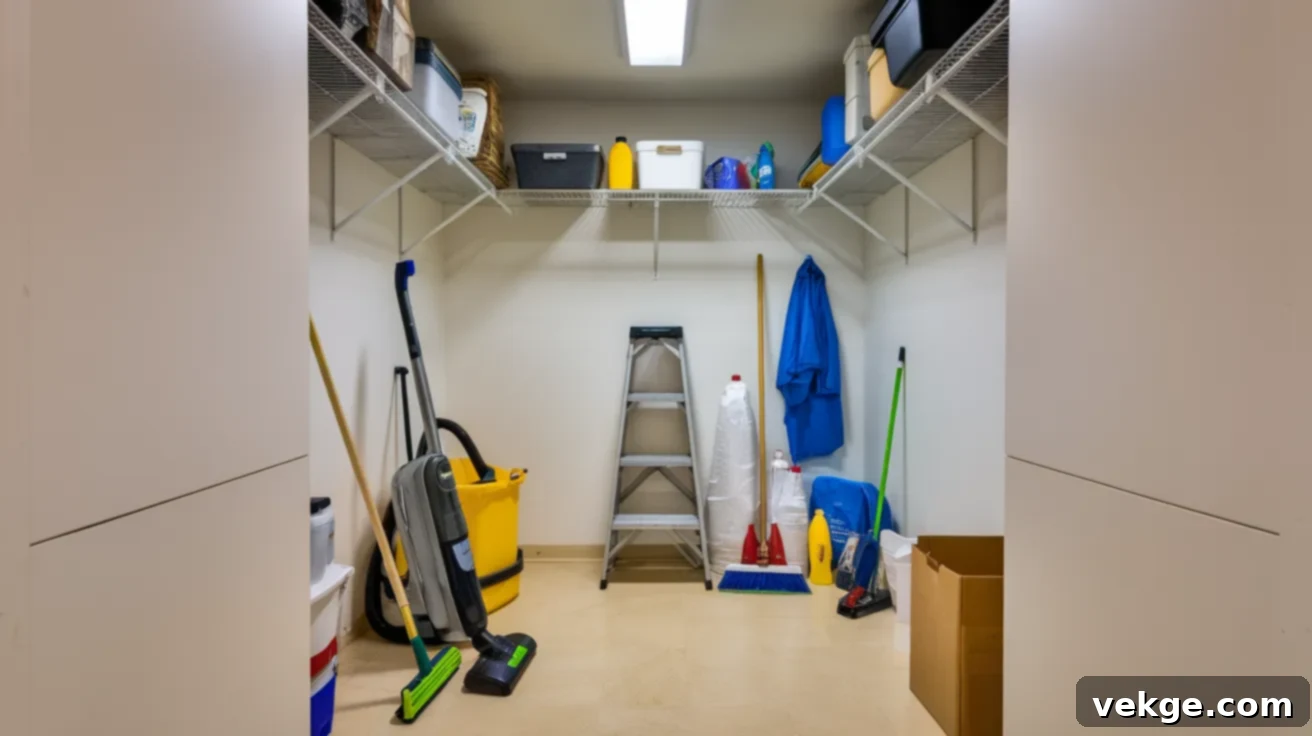
Imagine needing to quickly clean up a spill or tackle a minor repair, only to spend five frustrating minutes rummaging through a dark, overflowing closet. Now, picture yourself opening that same closet, and instantly spotting exactly what you need, neatly placed and within easy reach. The difference is stark, and it highlights the immense power of a well-organized utility closet. This small, often overlooked space can profoundly impact the efficiency and tranquility of your entire household.
Firstly, an organized utility closet is a significant time-saver. No more frantic searches for the elusive dustpan, the right type of cleaning spray, or that specific screwdriver. When every item has a designated spot and is easily visible, you can grab what you need in seconds, allowing you to complete tasks faster and move on with your day. This efficiency translates into more free time and less daily stress, making routine chores feel less like a burden.
Secondly, it dramatically reduces clutter throughout your home. Without a proper home, cleaning supplies, spare lightbulbs, and various tools tend to migrate to countertops, under sinks, or into random drawers, creating visual noise and disarray. A functional utility closet acts as a centralized hub, ensuring these items are stored out of sight, thereby contributing to a cleaner, more minimalist aesthetic in your main living areas.
However, many utility closets sadly fall victim to neglect, transforming into notorious “clutter zones.” This often happens due to an accumulation of old, half-used supplies, broken tools, or items that simply don’t belong there. This poor utilization of space means shelves become overcrowded, vertical space is ignored, and the closet’s potential is severely wasted. Another common issue is a lack of clear purpose or “confusion” about what the closet should hold. Is it purely for cleaning? For tools? For emergency supplies? When categories are mixed and undefined, chaos inevitably ensues.
Taking the initiative to organize this small but mighty space yields significant returns. It not only eliminates mess and saves precious time but also instills a greater sense of control over your home environment. Even implementing just a few of the organizational strategies we’ll discuss can make everyday chores noticeably simpler, quicker, and considerably less stressful, proving that a little effort in this often-forgotten corner can make a world of difference.
Easy Steps to Organize Your Utility Closet for Lasting Order
Tackling your utility closet might seem daunting, but it doesn’t have to be. By following these straightforward, actionable steps, you can transform even the most disorganized space into a highly functional, visually appealing, and easy-to-maintain area. Let’s dive in and create a system that works for you every single day.
Step 1: Completely Empty and Clean the Closet
The first and most crucial step is to completely empty your utility closet. Pull out every single item – all the brooms, mops, cleaning sprays, tools, and any forgotten odds and ends. Lay everything out on the floor, a bed, or a large table so you can see exactly what you’re dealing with. This “blank slate” approach is vital; it allows you to assess the true volume and variety of your items and also provides an opportunity to give the empty closet a thorough cleaning. Wipe down shelves, vacuum the floor, and clean any dusty corners. Starting with a clean, empty canvas is essential for building an effective organizational system.
Step 2: Choose the Right Storage Bins and Containers
Once your closet is empty and clean, it’s time to think about containment. Select storage bins and containers that are appropriate for the size of your closet and the items you need to store. Prioritize reusing bins you already own if they are suitable and in good condition; this is both eco-friendly and budget-conscious. For a cohesive and tidy aesthetic, consider using bins of matching styles or colors, which instantly elevates the look of your space. Opt for open-top bins for items you grab frequently, such as daily cleaning sprays or sponges, as they offer easy access. For items used less often, like spare lightbulbs or seasonal cleaning products, bins with lids will protect them from dust and keep the visual clutter contained. Think practically about your daily routine and choose bins that enhance, rather than hinder, your ability to access items.
Step 3: Sort, Categorize, and Declutter Your Items
With everything out in the open, it’s time for the critical sorting and decluttering phase. Begin by grouping similar items together. Create distinct categories such as “cleaning supplies,” “tools,” “light bulbs,” “shoe care,” “candles,” “pet supplies,” or “small appliances.” This categorization makes future retrieval incredibly simple. As you sort, be ruthless in your decluttering efforts: discard anything broken, expired, or no longer used. If an item doesn’t belong in the utility closet (e.g., mail, clothes, or kitchen gadgets), move it to its correct home immediately. This step is about ensuring that only truly useful and relevant items return to your utility closet, preventing future accumulation and maintaining the space’s core purpose.
Step 4: Implement Smart Bin Placement for Accessibility
Strategic placement of your sorted and binned items is key to an efficient utility closet. Place bins containing frequently used items at eye level or in easily accessible spots on lower shelves. Heavy items, such as large cleaning solution bottles or smaller vacuums, should always be stored on lower shelves to prevent accidents and make them easier to lift. Items that are used rarely, like seasonal cleaning tools or extra bulk supplies, can be stored on higher shelves. Crucially, keep related bins together; for instance, all tool-related items (screwdrivers, hammers, nails) should be in proximity, and all cleaning products should be grouped. This logical arrangement makes your closet intuitive to use, ensures items are returned to their proper place, and significantly reduces the effort required to keep things neat.
Step 5: Maximize Space with Internal Dividers and Organizers
Even within your chosen bins, small items can quickly become disorganized. To combat this, utilize internal dividers, small boxes, or drawer organizers within your larger bins. These are perfect for keeping tiny items like batteries, extra plugs, charging cords, remotes, or various tech accessories neatly separated and easily identifiable. Preventing these smaller components from tangling or getting lost at the bottom of a bin makes a huge difference in functionality. Internal organization within bins maintains external tidiness, ensuring that when you reach for a bin, you find exactly what you need without further rummaging.
Step 6: Review, Refine, and Maintain Your System Over Time
Once everything is neatly in place, take a step back and assess your newly organized utility closet. Walk through your daily routines mentally: is there anything that feels awkward to reach? Do certain items not quite fit? Is the labeling clear enough? It’s perfectly normal and expected to make small adjustments in the first few weeks as you get accustomed to the new system. Don’t be afraid to tweak the layout or move items around until it feels truly intuitive and functional for you and your household. Remember, an organized closet isn’t a one-time project; it’s an ongoing relationship. The most useful and enjoyable closet is one that you can effortlessly maintain and use every single day.
If you’d like to see a visual of these steps in action and gain further inspiration, you can check out the full setup guide here: Full Setup Guide (Note: Actual URL for demonstration. Replace with relevant link.)
Smart Utility Closet Layout Ideas to Boost Efficiency
Beyond simply organizing, strategic layout design can dramatically enhance the functionality and accessibility of your utility closet. These ideas focus on maximizing space and creating logical zones, making sure every item has a purpose-built home.
1. The Everyday Access Layout: Your Daily Essentials at Hand
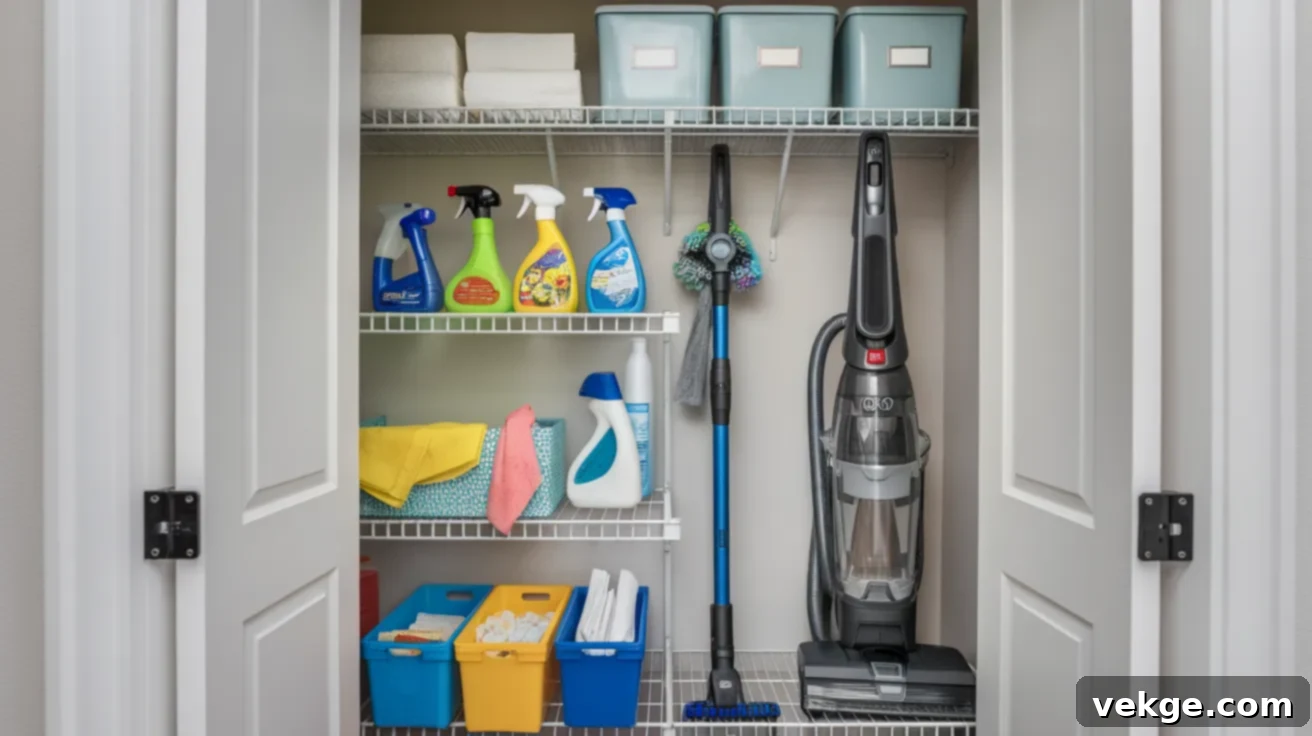
This layout prioritizes convenience for frequently used items. Position your daily essentials like all-purpose sprays, cleaning wipes, dusters, and sponges at eye level or within easy arm’s reach. This ensures you can grab them quickly without bending or stretching. Heavier items, such as your vacuum cleaner, buckets, or large bottles of detergent, should be placed on the bottom shelf or floor space for stability and ease of lifting. Conversely, items used only occasionally, like seasonal cleaning products, specialty tools, or bulk paper towels, are best stored on the highest shelves. This logical arrangement keeps your most-needed supplies front and center, minimizing effort and making daily chores feel less like a hassle.
2. The Category Zone Layout: Everything in Its Own Domain
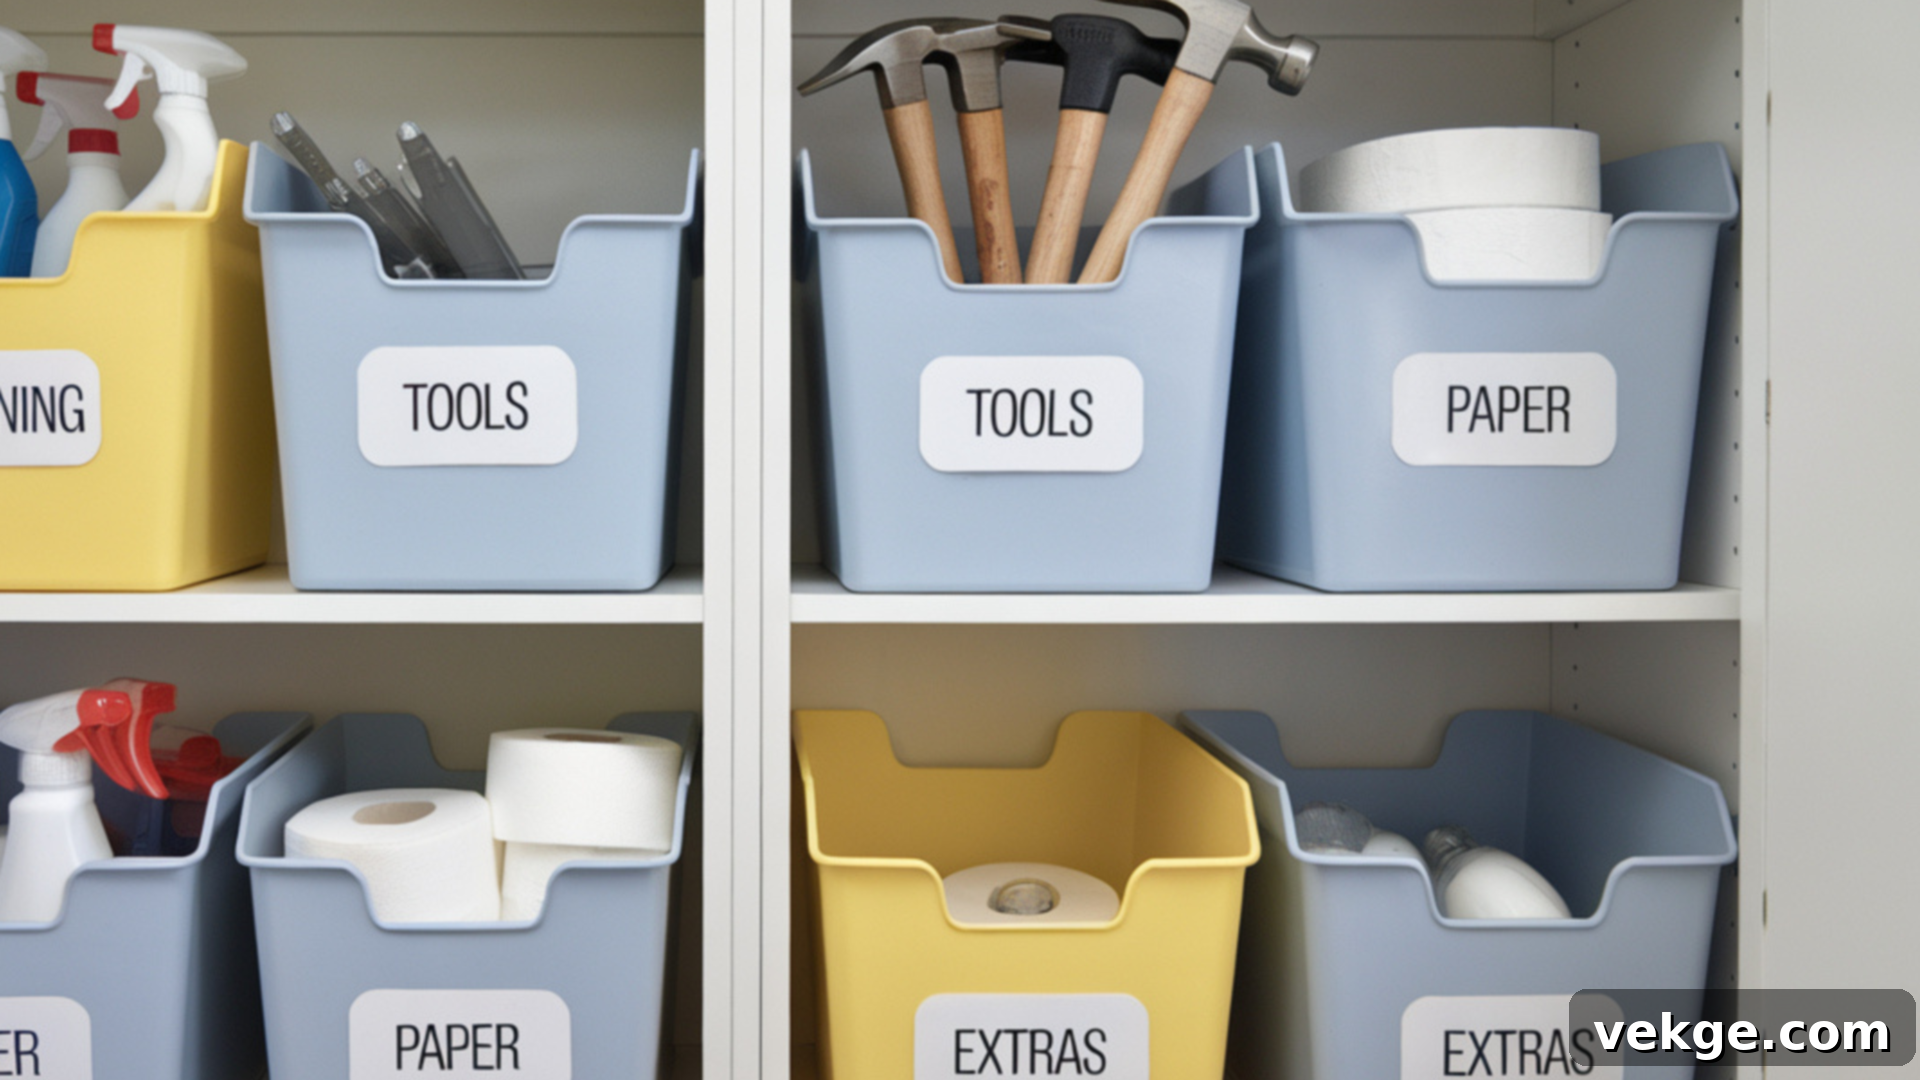
For those who love clear distinctions, the Category Zone Layout is ideal. Divide your closet into distinct functional zones: a “Cleaning Zone” for all your sprays, cloths, and brushes; a “Tool Zone” for screwdrivers, hammers, and measuring tapes; a “Paper Products Zone” for extra paper towels and toilet paper; and an “Extras Zone” for miscellaneous items like light bulbs or batteries. Utilize separate bins, clear containers, or even dedicated shelves for each category. Crucially, label each zone and bin clearly with simple, easy-to-read tags. This systematic approach makes it incredibly simple to locate specific items, ensures everything is returned to its correct place, and effectively prevents items from getting mixed up, maintaining long-term order.
3. The Family-Friendly Layout: Engaging Everyone in Organization
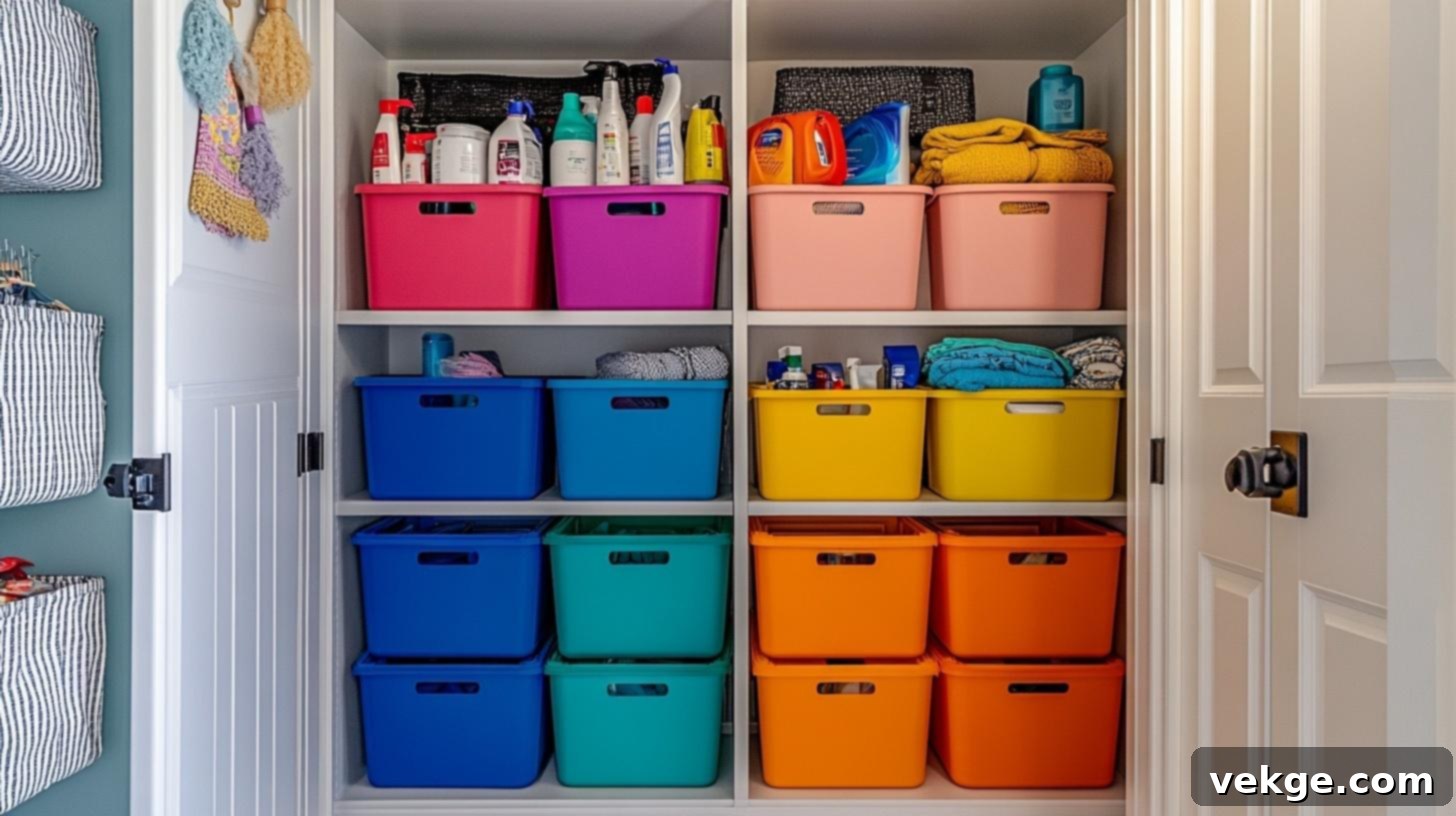
Encourage everyone in the household to participate in maintaining organization with a family-friendly layout. Assign each family member a specific color-coded bin or section for their personal items or assigned cleaning tasks. For instance, kids’ safer, lighter cleaning tools (like small dusters or spray bottles with water for “helping”) can be stored on lower shelves where they can easily access them, promoting independence. Adult-specific or hazardous items, such as strong chemicals or sharp tools, are best kept on higher shelves, safely out of reach of children. This layout not only adds a fun, colorful element but also makes cleanup and daily chores a collaborative and simpler effort for everyone, fostering good organizational habits from a young age.
4. The Wall Saver Layout: Harnessing Vertical and Door Space
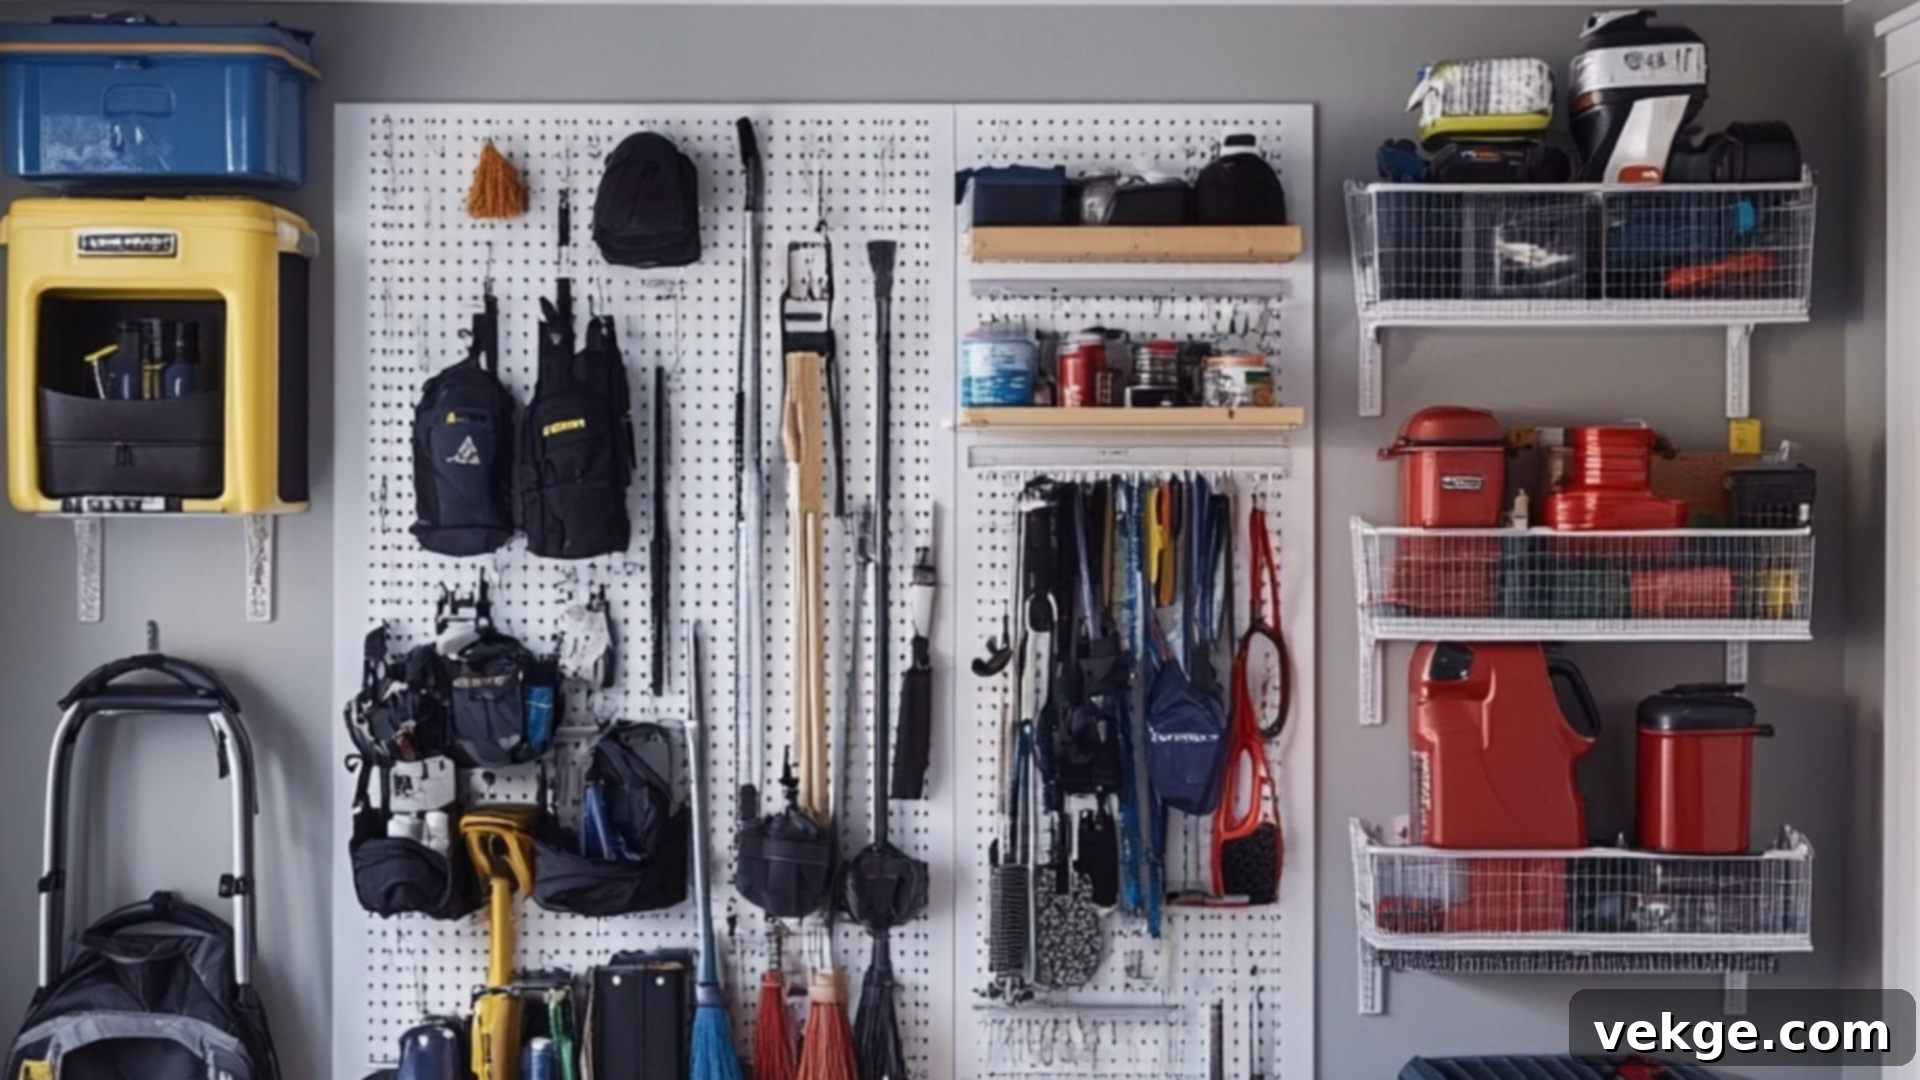
When floor and shelf space are at a premium, the Wall Saver Layout becomes invaluable. This strategy focuses on maximizing every vertical inch of your closet. Install hooks on the back of the door for hanging dusters, small hand brushes, or garbage bags. Utilize pegboards or wall-mounted racks on the side walls to hang brooms, mops, long-handled cleaning tools, and even coiled extension cords. Over-the-door organizers can also provide additional pockets for smaller items. This intelligent use of vertical space effectively clears up floor space, makes items easy to see and grab, and keeps bulky tools tidy without consuming precious shelf real estate, making it perfect for narrow or unusually shaped closets.
5. The Tech & Tools Combo Layout: Streamlining Gadgets and Gear
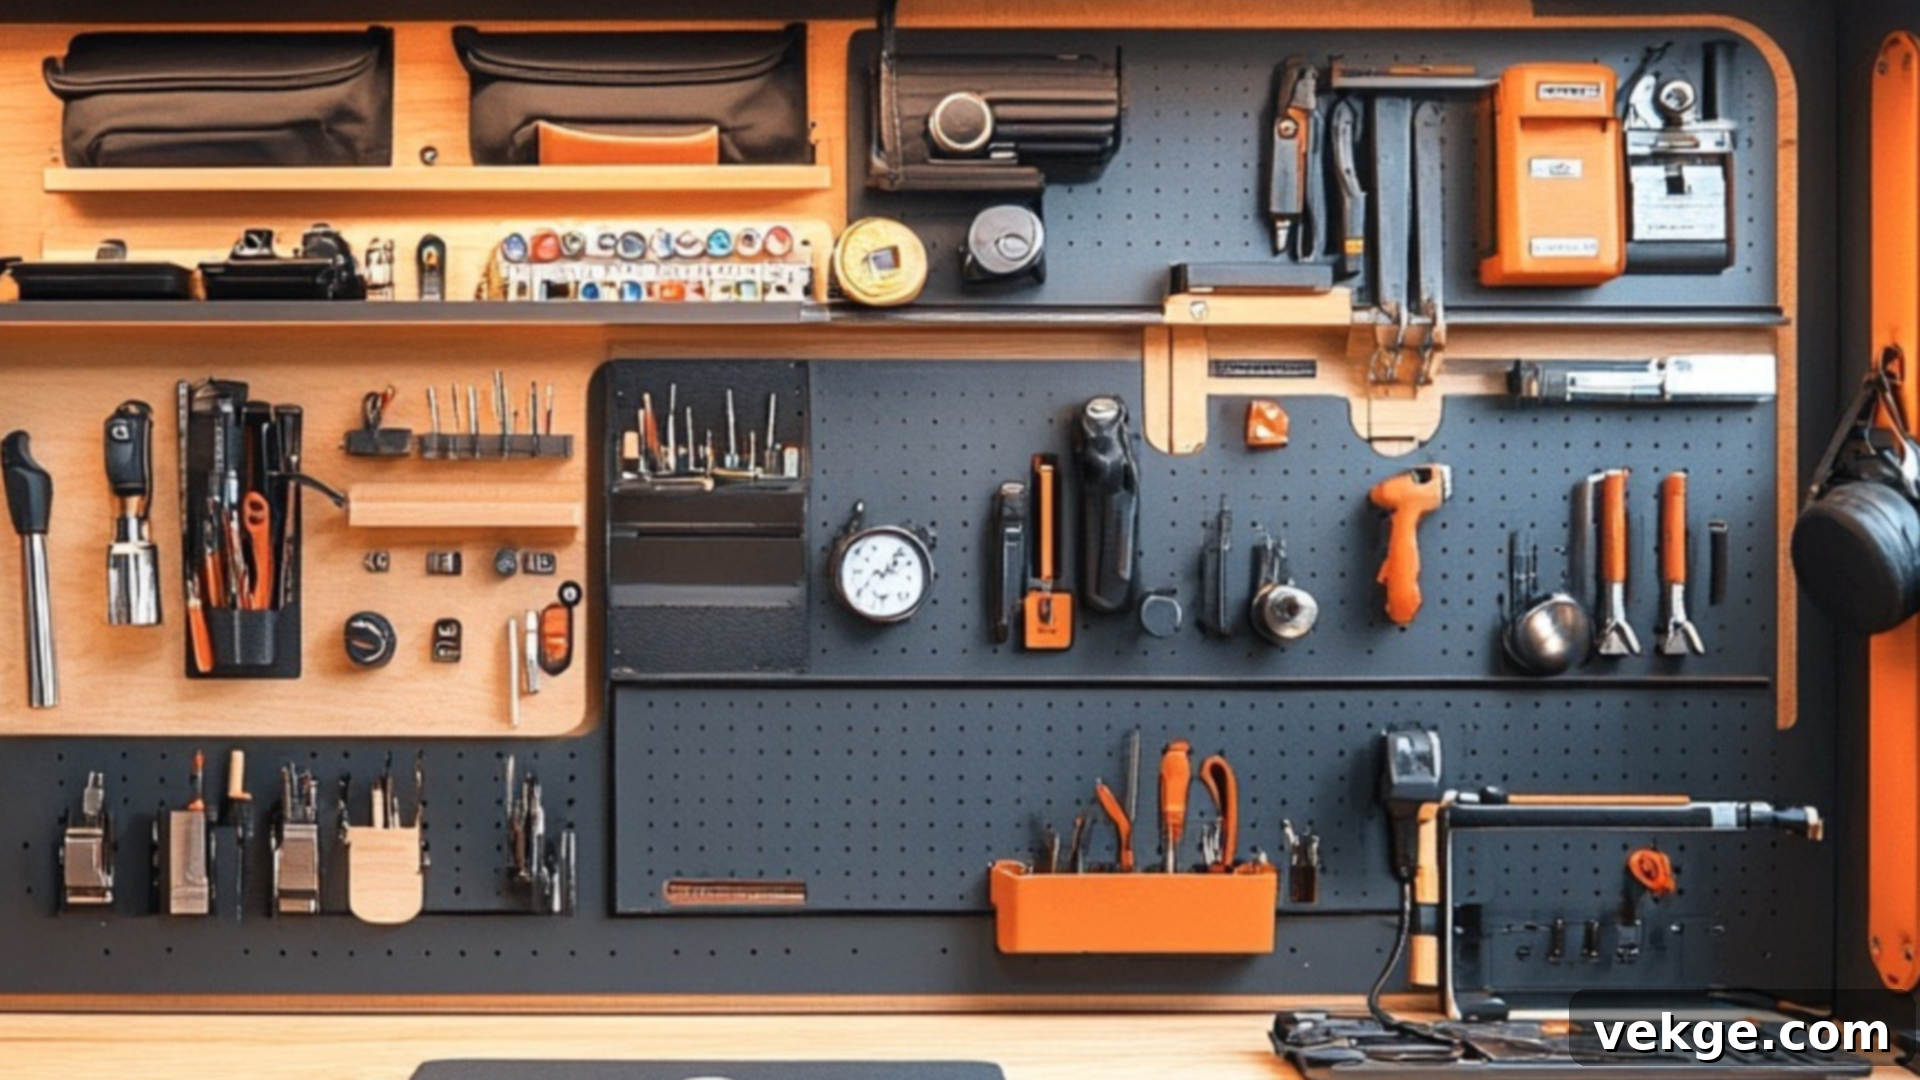
In modern homes, utility closets often house more than just cleaning supplies; they can also be a hub for gadgets and tools. This specialized layout divides the space into two primary, distinct zones. One side is dedicated to technology accessories: smart plugs, an assortment of charging cords, power banks, and other tech-related items, perhaps stored in clear, labeled pouches or small drawer units. The other side is allocated for household tools and fix-it gear, organized into labeled drawers or small modular containers for easy identification and access. Consider adding a small corkboard on the inside of the door where you can pin helpful information, such as emergency contact numbers, appliance manuals, or frequently used instructions. This integrated approach keeps both your high-tech and practical items perfectly organized, making them easy to find and reach whenever you need them.
Essential Safety Guidance Around Utility Closet Appliances and Supplies
Beyond mere aesthetics, ensuring safety within your utility closet is paramount. This space often houses items that, if improperly stored or used, can pose significant risks. Adhering to simple safety guidelines will protect your household members and maintain a secure environment.
Always make it a habit to **unplug all electrical appliances** such as irons, handheld steamers, vacuums, or power tools before returning them to the closet. Leaving them plugged in, even if switched off, can be a fire hazard or lead to accidental activation. Furthermore, **wrap cords tightly and neatly** around their designated hooks or using cord ties. This not only prevents dangerous tripping hazards but also reduces tangling and damage to the cords themselves.
When storing items that generate heat, such as irons or hair styling tools, ensure they are completely cool before putting them away. Crucially, **keep these heat-generating items away from flammable materials** like paper towels, aerosol sprays, cloths soaked in cleaning solutions, or even excess packaging. Maintain adequate space between such items to prevent any accidental ignition.
If your utility closet is equipped with an electrical outlet, exercise extreme caution. **Never overload the outlet** by plugging in multiple high-wattage appliances simultaneously; always use one item at a time. Consider using a surge protector if multiple low-power items need to be charged, but be mindful of the closet’s ventilation. **Store batteries in a dry, cool spot**, preferably in a dedicated battery organizer, to prevent short circuits or leakage. Keep them away from direct sunlight or extreme temperatures.
Finally, for households with children or pets, **store sharp tools, small parts, and all cleaning chemicals completely out of reach**. Use child-proof latches on cabinet doors or place hazardous items on the highest shelves. Avoid placing heavy bins or objects on high shelves where they could potentially fall and cause injury. Using sturdy bins with secure lids can further contain items and prevent spills. By incorporating these few smart habits, your utility closet will not only remain impeccably organized but also consistently safe for everyone in your home.
Maintenance Tips to Keep Your Utility Closet Functional Long-Term
Even the most meticulously organized utility closet can revert to chaos without a bit of ongoing attention. Think of organization not as a one-time event, but as a lifestyle. Implementing these quick, low-effort maintenance tips will help you preserve your system and ensure your utility closet remains a source of efficiency, not frustration, for years to come.
- Perform a Monthly Check-Up: Dedicate just 10-15 minutes once a month to a quick closet review. Wipe down any dusty shelves, check for expired cleaning products or broken tools that need to be tossed, and restock any essential supplies that are running low. This routine prevents minor issues from snowballing into major disarray.
- Adopt the “5-Minute Tidy” Rule: Implement a habit where, at least once a week (or whenever you notice things getting a bit messy), you spend just five minutes returning everything to its designated spot. This proactive approach prevents items from accumulating out of place and reinforces your organizational system.
- Keep Extra Labels Handy: As your needs evolve or new products are introduced, categories might shift slightly. Keep a small supply of blank labels and a marker nearby so you can easily update bin names or create new ones as needed. Clear labeling is the backbone of easy retrieval and consistent placement.
- Teach the System to Everyone: For household organization to be truly sustainable, every member of the family needs to understand and ideally, participate in it. Clearly communicate where items belong. A simple visual chart or a quick demonstration can go a long way in ensuring everyone knows “the rules” for your organized closet.
- Avoid Overfilling Bins and Shelves: Resist the temptation to cram too many items into one bin or onto a single shelf. Leave a little breathing room – about 10-20% empty space – in each container. This makes it effortless to take items out and, more importantly, put them back without creating a mess or struggling with overloaded compartments.
- Strictly Adhere to Your Zones: Once you’ve established specific zones (e.g., cleaning, tools, tech), commit to them. Avoid placing an item from the “tool zone” into the “cleaning zone” just because it’s convenient at the moment. Consistency is key to preventing clutter from slowly creeping back in.
- Embrace Simplicity: Remember that the most effective organizational systems are often the simplest. Don’t overcomplicate it with too many tiny containers or overly specific categories if it feels like too much work. A system that is easy to understand, implement, and maintain is far more likely to remain neat and functional long-term.
Common Mistakes to Avoid for a Perfectly Organized Utility Closet
While the goal of an organized utility closet is clear, it’s surprisingly easy to fall into common pitfalls that can undermine your best efforts. Being aware of these mistakes can help you sidestep them, ensuring your space remains functional and tidy.
- Overfilling Without Clear Zones: The most common error is simply cramming too much into the closet without establishing distinct categories or zones. This instantly defeats the purpose of organization, making items hard to find and difficult to put away. Always prioritize clear segmentation over maximal stuffing.
- Ignoring Vertical Space: Many people only use the shelves, completely neglecting the valuable real estate on the back of the door and the side walls. Hooks, pegboards, and over-the-door organizers are game-changers for brooms, mops, duster, and smaller tools, freeing up precious shelf and floor space.
- Choosing Bulky or Mismatched Bins: While bins are essential, selecting containers that are too large for the items, don’t fit the shelves properly, or are a chaotic mix of styles and colors can make the closet look more cluttered, not less. Opt for streamlined, appropriately sized bins that complement each other.
- Storing Appliances Without Checking Safety: Forgetting to unplug appliances, failing to wrap cords, or placing hot items back into the closet are significant safety hazards. Always prioritize safety protocols for electricals and heat-generating devices.
- Forgetting to Label Containers: Even if you know what’s inside, others in the household might not. Lack of labels leads to confusion, misplaced items, and ultimately, disorganization. Clear, consistent labeling is crucial for everyone’s understanding and for maintaining the system.
- Placing Rarely Used Items in Front: Prime real estate in your closet should be reserved for items you grab almost daily. Storing seasonal or infrequently used items at the front means you have to constantly move them to access what you actually need, adding unnecessary friction to your routine.
- Leaving Old or Broken Items: Allowing expired cleaning products, broken tools, or items that no longer serve a purpose to linger in the closet wastes valuable space and contributes to mental clutter. Regular decluttering is key to keeping your inventory lean and effective.
Final Thoughts: Reclaim Your Space, Simplify Your Life
You’ve now uncovered the true potential of your utility closet – transforming it from a neglected, messy corner into a streamlined, highly functional asset for your home. Understanding its purpose, embracing effective organizational steps, and implementing smart layouts can genuinely make a tangible difference in your daily life, reducing stress and boosting efficiency.
Remember, you don’t need a massive budget or a complete home renovation to achieve these results. A few well-chosen bins, some clear labels, and a commitment to a logical plan are often all it takes. The most successful organizational systems are those that are simple, intuitive, and easy to maintain, ensuring you can enjoy a tidy and accessible utility closet every single day.
Take a moment to consider what aspects of your utility closet need the most attention and start there. Even small, consistent changes can lead to remarkable improvements over time. By investing a little effort into this often-overlooked space, you’ll gain a greater sense of order, save time on daily chores, and enjoy a calmer, more controlled home environment.
Hungry for more practical tips to enhance your home? Explore my other blogs for a wealth of smart, everyday home ideas. They are brimming with easy-to-implement tricks and strategies that you can apply immediately to make your home life feel a little more harmonious and effortlessly managed. Happy organizing!
