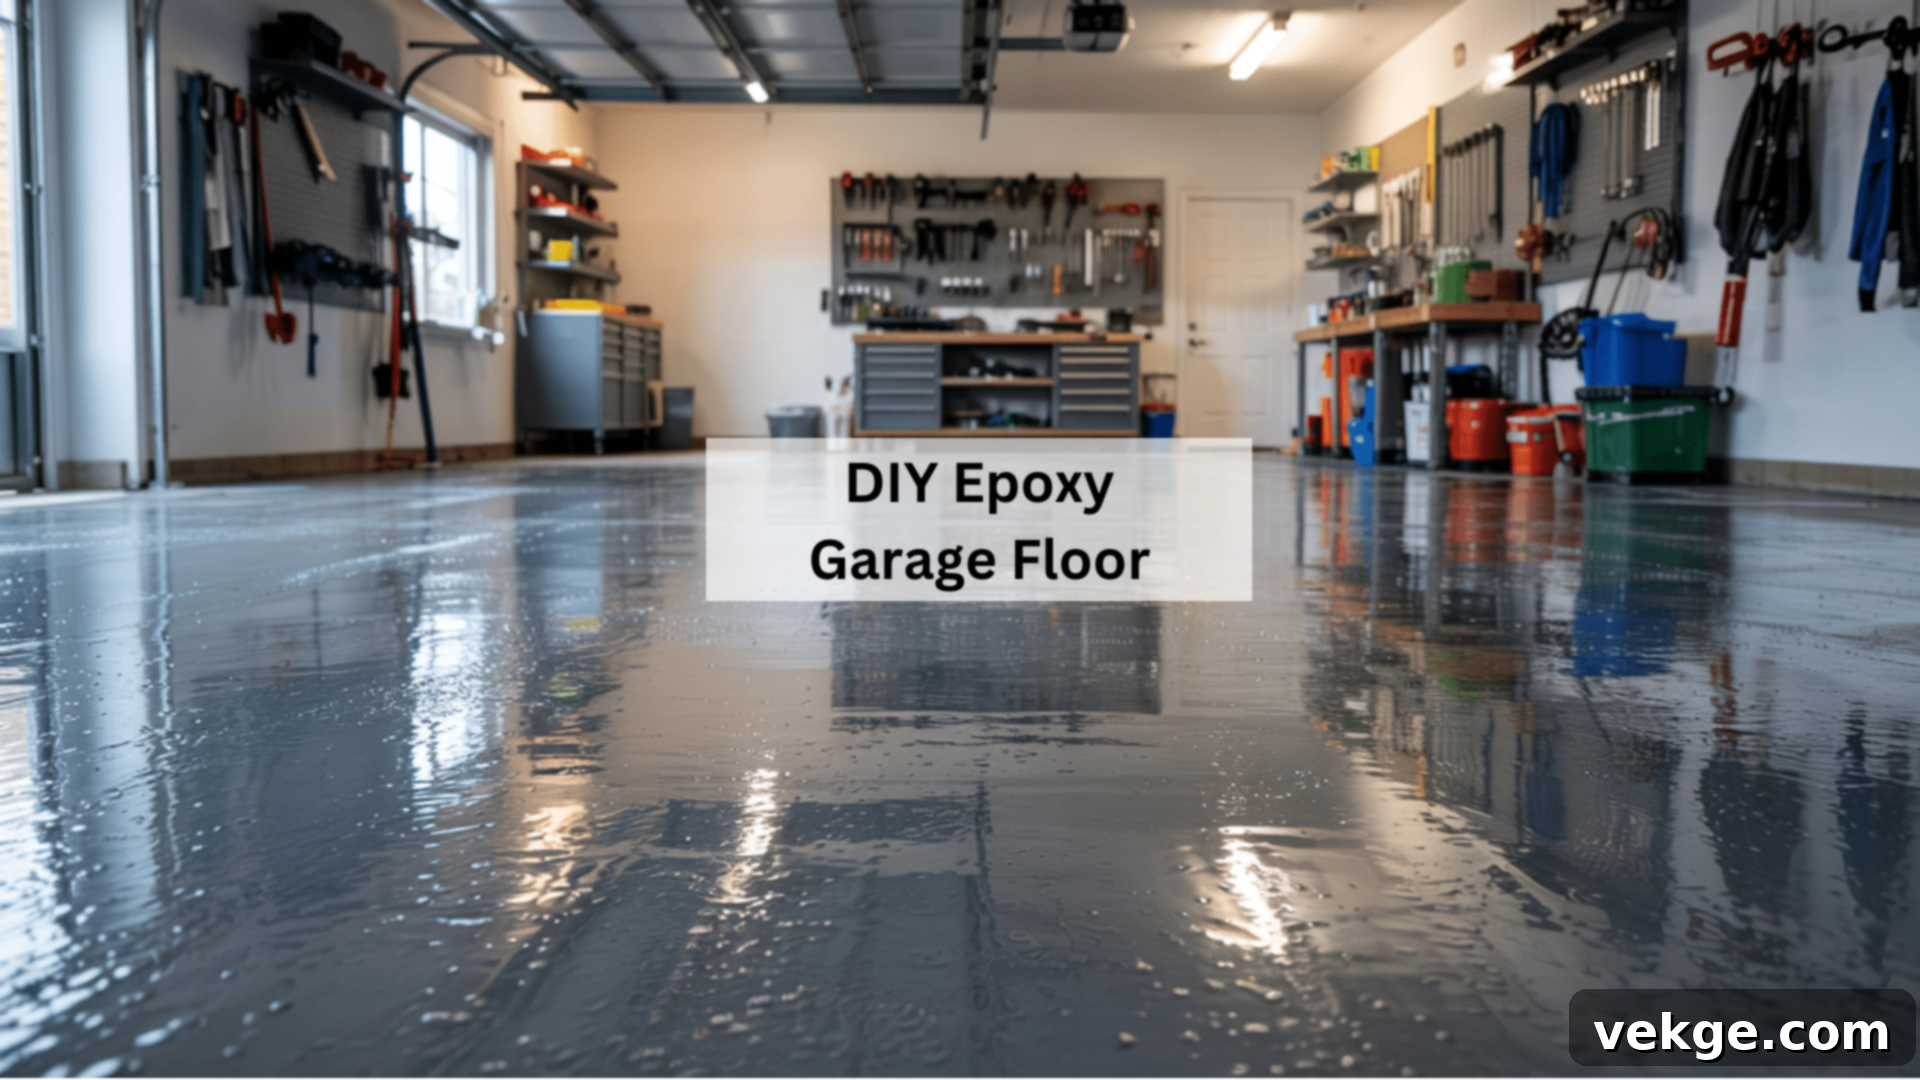
Transform Your Garage: The Ultimate DIY Epoxy Floor Installation Guide for Durability and Style
Is your garage floor looking tired, stained, or cracked? It’s time to stop enduring a drab, uninviting space and start envisioning a garage that’s both functional and visually appealing. A DIY epoxy garage floor is more than just a quick fix; it’s a transformative home improvement project that can revitalize your entire garage, providing a durable, attractive, and easy-to-maintain surface.
This comprehensive guide will walk you through everything you need to know about installing an epoxy floor yourself. From selecting the right materials and meticulously preparing your concrete surface to the precise application techniques and essential aftercare, we’ll cover every detail. We’ll also help you understand the cost implications and compare epoxy with other popular garage flooring options, ensuring you make the best decision for your home.
Get ready to learn how a DIY epoxy garage floor can protect your concrete, enhance your garage’s appearance, and even save you money in the long run. Let’s turn that worn-out concrete slab into a resilient, showroom-quality floor!
Why Opt for an Epoxy Garage Floor? Unlocking Durability, Aesthetics, and Value
Epoxy garage floors have become an increasingly popular choice among homeowners, and for good reason. They offer a unique blend of strength, beauty, and practicality that few other flooring options can match. Investing in an epoxy coating means you’re not just covering your floor; you’re upgrading your entire garage environment.
Exceptional Durability and Protection
One of the primary advantages of epoxy flooring is its incredible resilience. Unlike bare concrete, an epoxy coating creates a robust, non-porous seal that provides superior protection against a myriad of threats:
- Stain Resistance: Epoxy is virtually impenetrable to common garage spills such as oil, grease, gasoline, brake fluid, and other chemicals. Spills simply sit on the surface, making them easy to wipe away without leaving unsightly stains.
- Abrasion and Impact Resistance: It can withstand heavy foot traffic, dropped tools, and the constant movement of vehicles without chipping, cracking, or peeling. This makes it ideal for busy workshops or multi-purpose garages.
- Moisture Barrier: The sealed surface prevents moisture from penetrating the concrete, reducing the risk of mold and mildew growth and protecting the structural integrity of your slab.
- Concrete Dust Reduction: Bare concrete constantly sheds dust, which can accumulate on tools, vehicles, and storage items. Epoxy encapsulates the concrete, eliminating this dusty nuisance and making your garage a much cleaner space.
Enhanced Aesthetics and Customization
Beyond its protective qualities, epoxy flooring significantly elevates the visual appeal of your garage. It transforms a dull, utilitarian space into a vibrant and inviting area. The design possibilities are extensive:
- Sleek, Glossy Finish: Epoxy naturally provides a high-gloss, reflective finish that brightens the entire garage, often reducing the need for additional lighting.
- Wide Range of Colors: Available in countless colors, you can choose a shade that complements your home’s exterior or personal style.
- Decorative Flakes and Metallic Effects: For those seeking a unique look, decorative vinyl flakes can be broadcast into the wet epoxy for a speckled, granite-like appearance. Metallic epoxies offer stunning, marbling effects that mimic natural stone.
- Clearly Defined Spaces: Different colors can be used to delineate parking zones, walkways, or workshop areas, enhancing organization and safety.
Effortless Maintenance and Long-Term Value
Epoxy floors are remarkably easy to maintain, saving you time and effort:
- Simple Cleaning: The smooth, seamless surface means dirt, dust, and debris have nowhere to hide. A quick sweep or vacuum is usually sufficient, and spills can be wiped up with a damp cloth or mop using mild detergent.
- Increased Home Value: A beautifully finished and functional garage adds curb appeal and can be a significant selling point for potential buyers, increasing your home’s overall market value.
- Cost-Effective Solution: While there’s an initial investment, the longevity and low maintenance requirements of epoxy often make it a more cost-effective choice compared to constantly repairing or replacing other flooring types.
In summary, choosing an epoxy garage floor means opting for a solution that combines exceptional resilience with stunning aesthetics and straightforward upkeep, making it an ideal choice for any homeowner looking to upgrade their garage.
Comparing Epoxy Flooring with Other Popular Garage Options
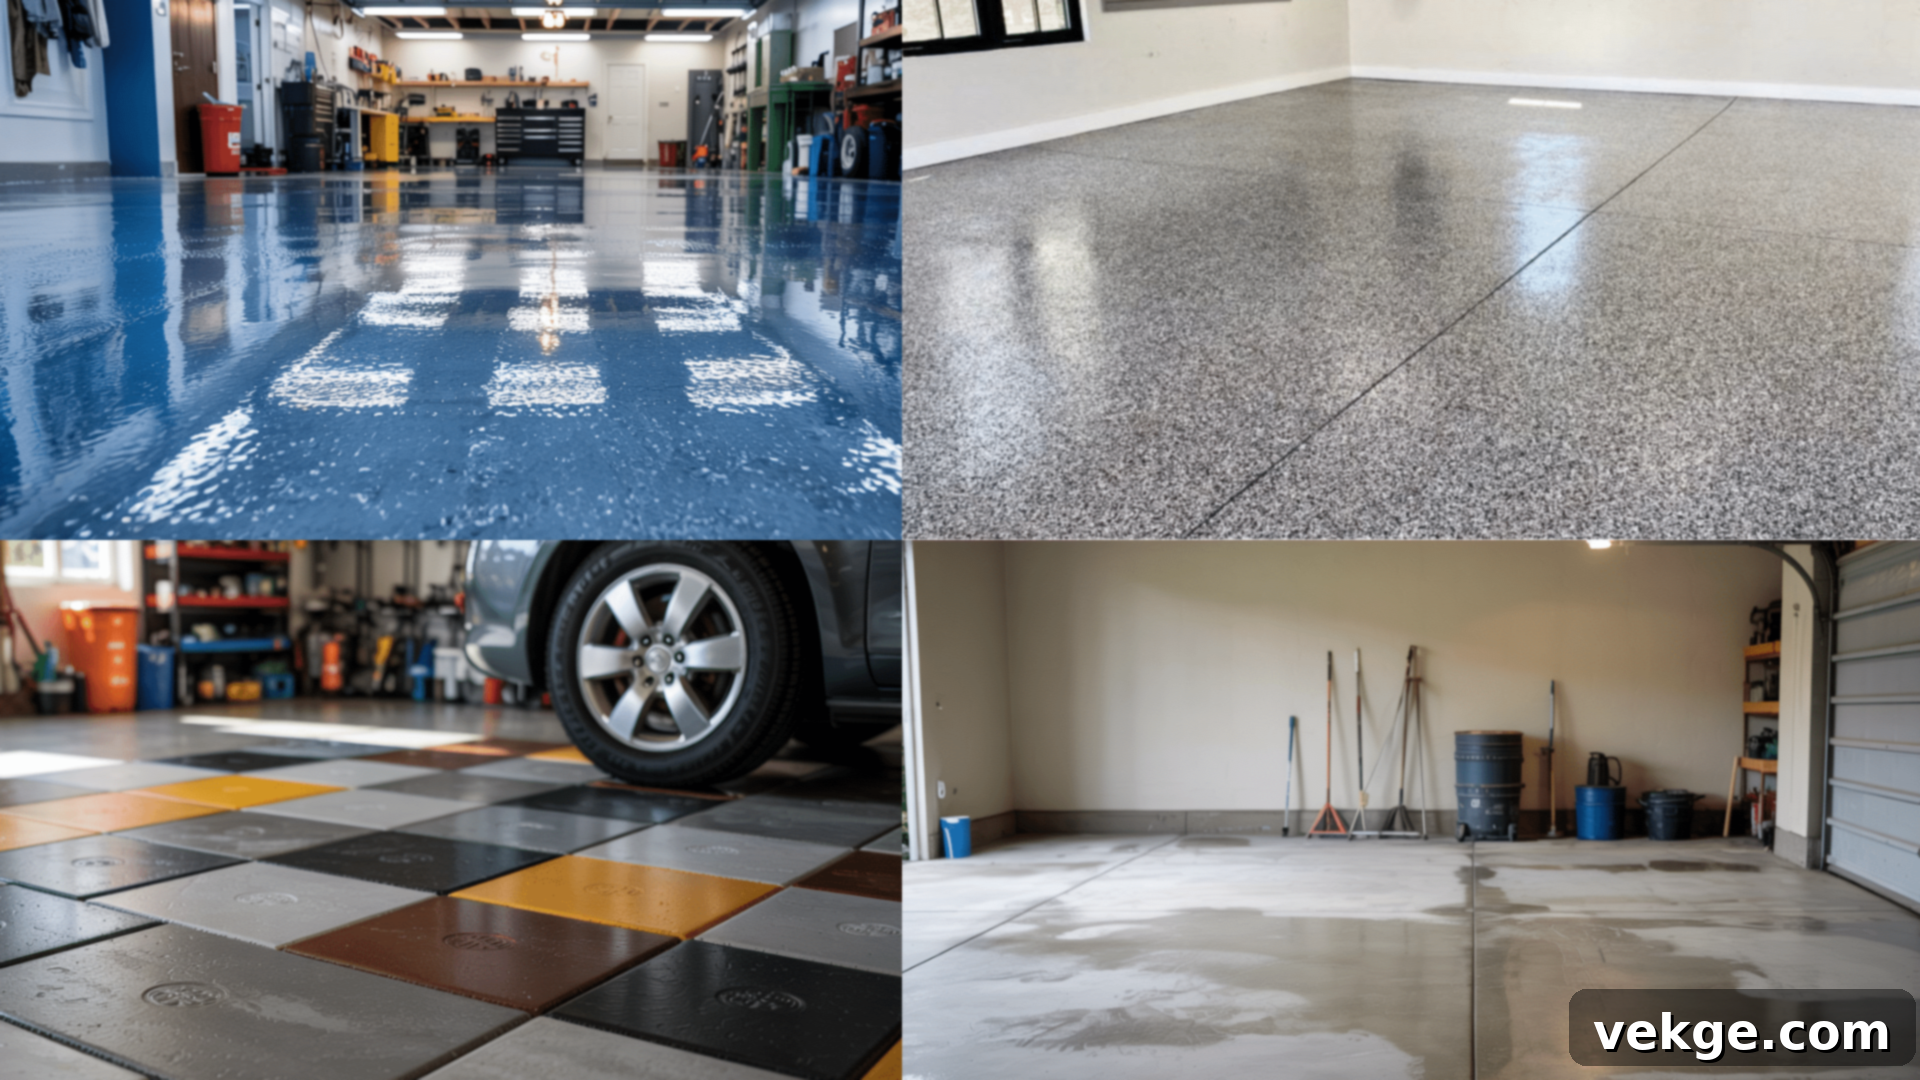
While epoxy flooring stands out for its unique benefits, it’s wise to consider other common garage flooring options to ensure you make an informed decision based on your specific needs, budget, and desired outcome. Here’s a comparative overview:
| Flooring Type | Durability | Aesthetic | Cost ($ per sq ft) | Maintenance |
|---|---|---|---|---|
| Epoxy Flooring | Highly resistant to stains, chemicals, and heavy traffic. Offers a hard, protective layer. | Sleek, shiny finish with extensive customization options like color and decorative flakes. Brightens the space. | $2-$5 for DIY, $5-$12 for professional installation | Easy to clean with regular sweeping and mopping. Resists most spills. |
| Polyurea Flooring (e.g., Polyaspartic) | Extremely durable, more resistant to cracks, UV damage (non-yellowing), and temperature fluctuations than traditional epoxy. Cures faster. | Similar to epoxy but often with a slightly more flexible and resilient finish. Can be applied in colder temperatures. | $8-$12 for professional installation (DIY kits less common) | Similar low maintenance to epoxy, with better performance in extreme hot/cold temperatures and sunlight exposure. |
| Interlocking Tiles | Good resistance to stains and damage from light to moderate equipment. Can be prone to movement under heavy loads. | Various colors, patterns, and textures (e.g., coin top, diamond plate). Lacks the glossy, seamless finish of epoxy. | $3-$8 depending on material (PVC, rubber, polypropylene) | Requires regular cleaning of seams where dirt can accumulate. Individual tiles can be easily replaced if damaged. |
| Concrete Sealer (e.g., Acrylic, Silicate) | Provides basic protection against water and some stains but is more vulnerable to scratches, chemicals, and tire marks. Not as durable as coatings. | Typically a matte or satin finish with minimal customization. Can enhance natural concrete color. | $1-$3 (often requires periodic reapplication) | Easier to clean than bare concrete but offers less protection. Requires reapplication over time, especially in high-traffic areas. |
When choosing, consider these factors:
- Budget: DIY epoxy offers excellent value, while professional polyurea is at the higher end.
- Durability Needs: If your garage sees extreme temperatures or heavy industrial use, polyurea might be a better long-term investment. For most residential garages, epoxy is more than sufficient.
- Aesthetic Preference: Do you prefer a seamless, high-gloss look (epoxy/polyurea) or a modular, textured appearance (tiles)?
- DIY Aptitude: Epoxy kits are readily available for DIYers, whereas polyurea often requires professional application due to its fast cure time.
In summary, epoxy flooring remains a robust, visually appealing, and cost-effective choice for most residential garages, offering a fantastic balance of durability, aesthetics, and manageability. However, if extreme conditions or specialized requirements are paramount, exploring polyurea or specific interlocking tile systems might be beneficial.
The Ultimate DIY Epoxy Floor Installation Process: A Step-by-Step Guide
Embarking on a DIY epoxy garage floor installation can seem daunting, but by breaking it down into manageable steps, you’ll find it’s an achievable and rewarding project. Meticulous preparation is the cornerstone of a successful and long-lasting epoxy floor. Let’s gather your arsenal and dive into the process.
Tools and Materials You’ll Need for Your Epoxy Project
Before you begin, ensure you have all the necessary items on hand. A well-stocked workspace makes the process smoother and prevents frustrating interruptions.
- Epoxy Kit: Your chosen product, typically including a resin (Part A) and a hardener (Part B), sometimes with an optional topcoat or decorative flakes.
- Rollers: High-quality, lint-free epoxy rollers (usually 3/8″ nap) for even application.
- Brushes: Smaller brushes or cut-in pads for edges, corners, and vertical surfaces.
- Concrete Cleaner/Degreaser: A heavy-duty alkaline cleaner to remove oil, grease, and grime.
- Concrete Patch/Repair Kit: For filling cracks, spalls, and divots.
- Concrete Etching Solution: An acid-based solution to open up the concrete’s pores for better adhesion (unless you opt for grinding).
- Painter’s Tape: High-quality, wide tape to mask off walls, baseboards, and doorways.
- Protective Gloves: Chemical-resistant gloves (nitrile or neoprene) to protect your hands.
- Respirator Mask: A high-quality respirator with organic vapor cartridges to protect against fumes, especially during mixing and application.
- Safety Glasses/Goggles: To protect your eyes from splashes and dust.
- Plastic Sheeting: To protect walls and any items that cannot be removed from the garage.
- Stiff Bristle Brush/Push Broom: For scrubbing the floor during cleaning.
- Pressure Washer (optional but recommended): For thoroughly rinsing the floor.
- Shop Vacuum (Wet/Dry): For cleaning up debris and excess water.
- Mixing Buckets and Stir Sticks: For accurately mixing epoxy components. A drill with a mixing paddle is highly recommended.
- Spiked Shoes (optional but recommended): Allows you to walk on wet epoxy without leaving marks.
- Squeegee: For spreading etching solution or evenly distributing epoxy.
Once your supplies are ready, let’s begin the transformation!
1. Prepare the Garage Floor: Clear and Assess
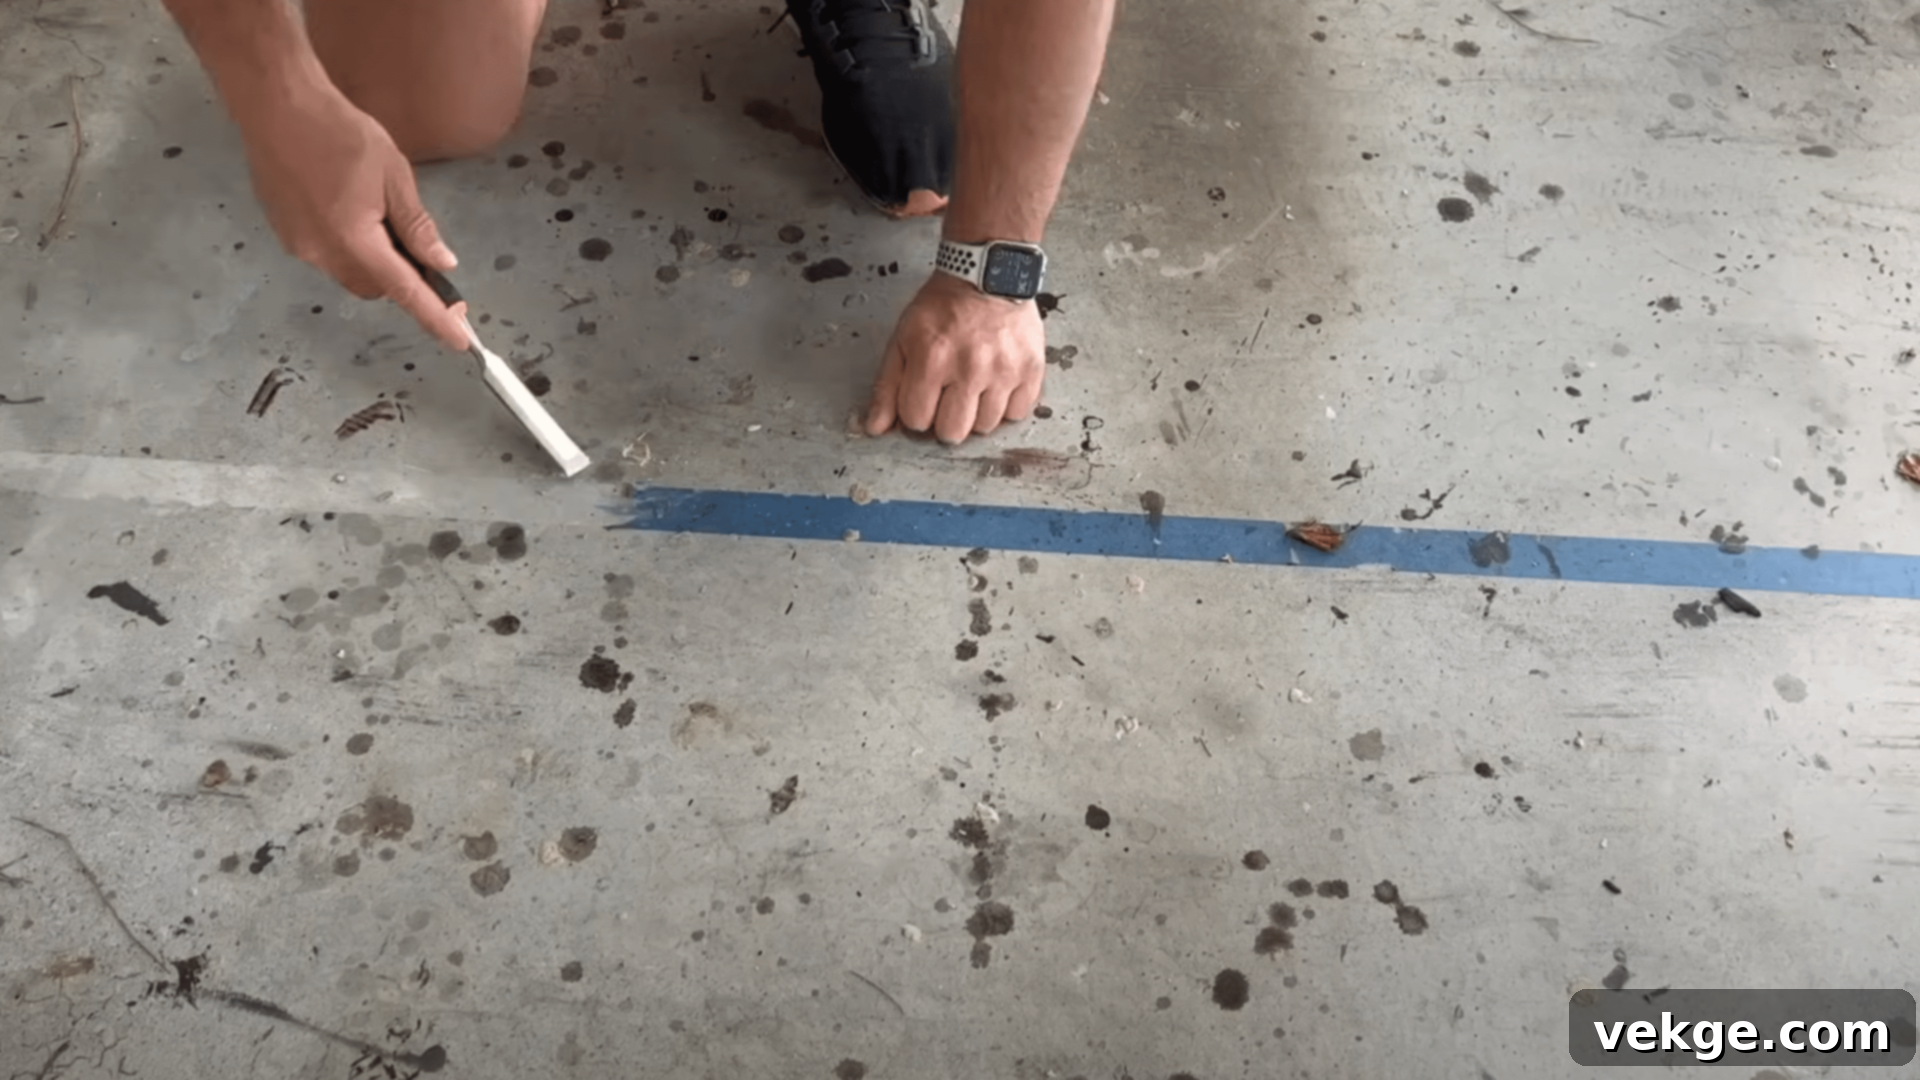
This initial phase is arguably the most crucial for a successful epoxy application. Start by completely emptying your garage. Every item, from tools and storage bins to vehicles, needs to be removed. This provides an unobstructed workspace and ensures no dust or debris can settle on the wet epoxy.
Next, meticulously inspect your concrete floor. Identify any existing tape, glue, or old adhesive residues and remove them using a scraper or appropriate solvent. Pay close attention to any oil or grease stains that have soaked into the concrete.
Crucial Moisture Test: Before proceeding, perform a moisture test. Tape a 2’x2′ piece of plastic sheeting tightly to the floor on all four sides. Leave it for 24 hours. If you observe condensation or moisture beneath the plastic, your concrete has high moisture content. In such cases, a specialized moisture vapor barrier or primer must be applied before the epoxy to prevent future peeling and ensure proper adhesion. Skipping this step can lead to costly failures.
2. Repair Cracks and Imperfections
Before any cleaning or etching, address any damage to your concrete. Epoxy will mimic the surface beneath it, so imperfections will remain visible. Use a concrete patch or repair kit to fill all cracks, chips, and spalling. Follow the product’s instructions for mixing and application, ensuring the repairs are flush with the surrounding concrete. Allow ample time for these repairs to fully cure and dry according to manufacturer guidelines, typically 24-48 hours, before moving to the next step.
3. Clean the Floor Thoroughly
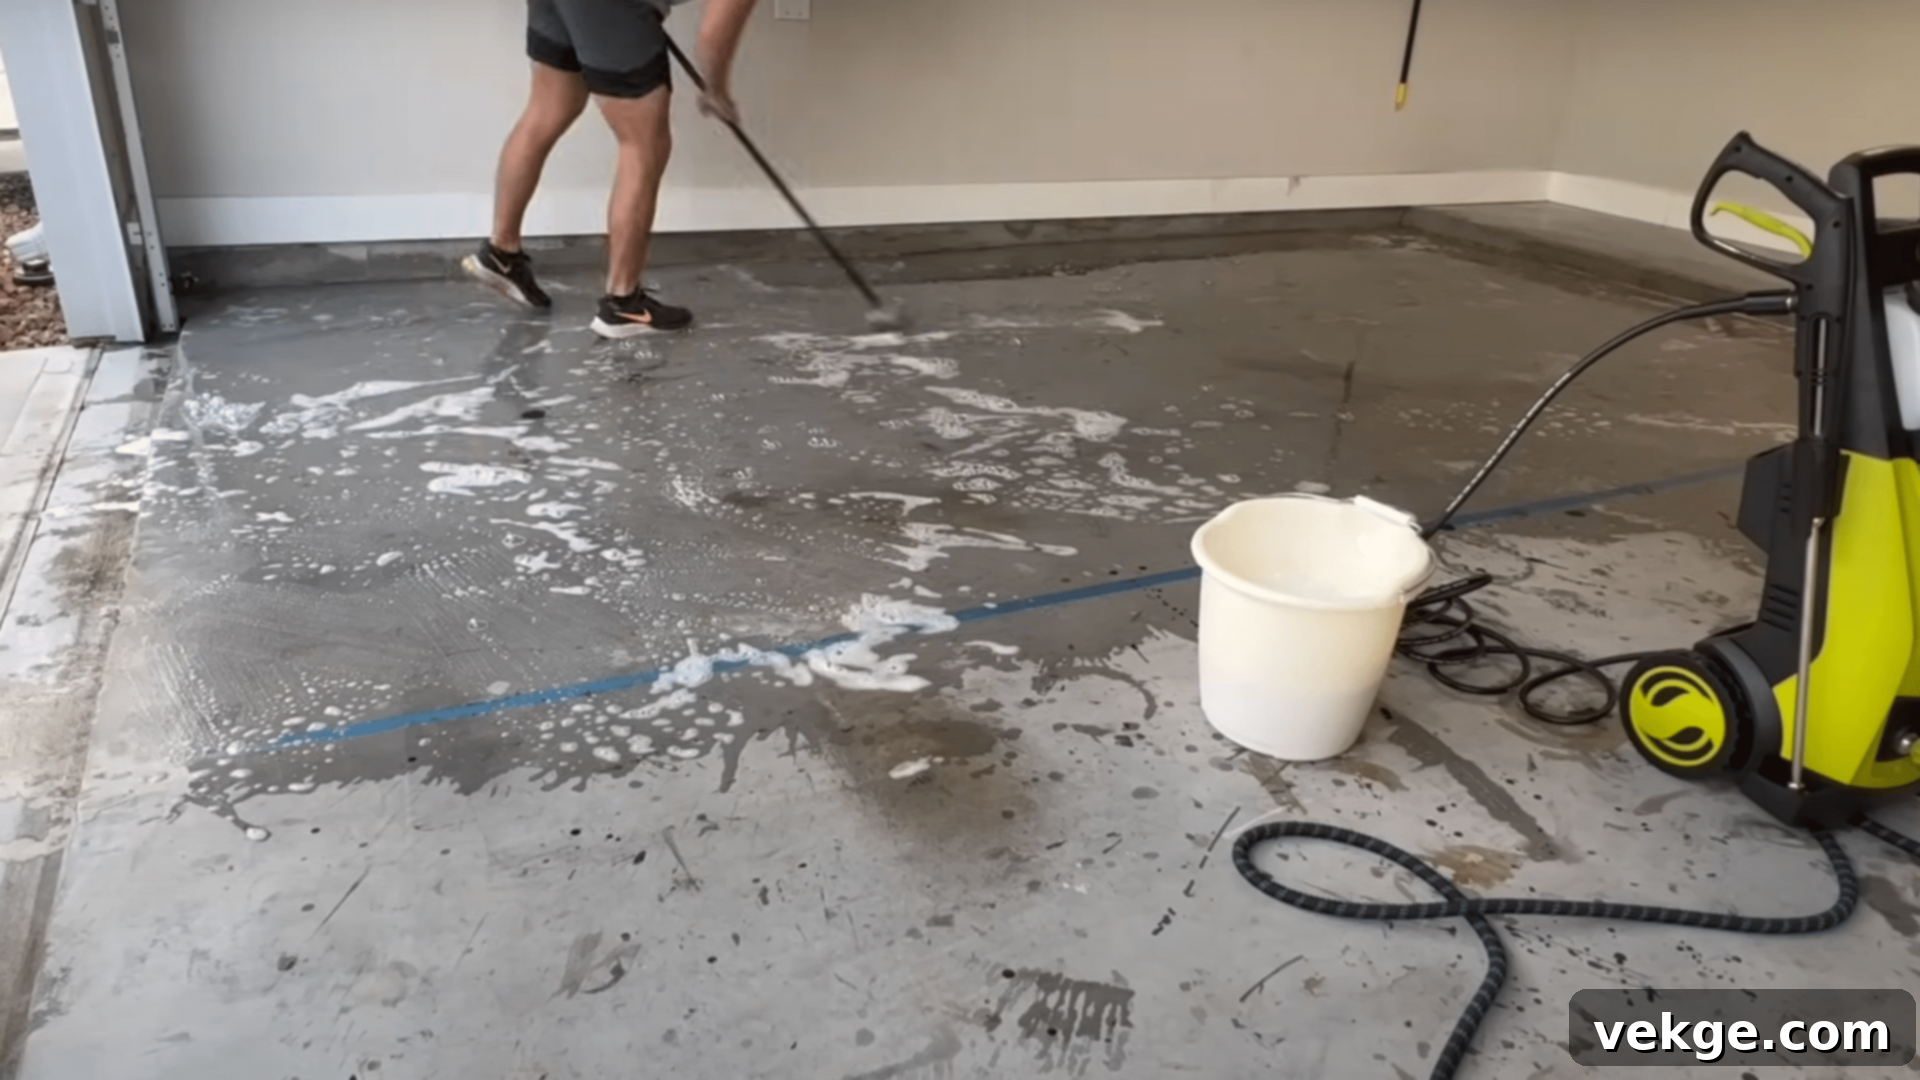
With repairs complete, it’s time for an intensive cleaning. This step removes surface contaminants that could compromise epoxy adhesion. Use a heavy-duty degreaser or concrete cleaner designed to tackle oil, grease, and tire marks. Apply the cleaner liberally, scrub the entire floor with a stiff-bristle brush or power scrubber, paying extra attention to heavily soiled areas. Allow the cleaner to dwell for the recommended time.
After scrubbing, rinse the floor thoroughly. A pressure washer is highly recommended to blast away all cleaning solution residue and dislodged grime. Ensure all suds are gone. The floor must then be allowed to dry completely. This is critical – any residual moisture can lead to adhesion issues. Open garage doors and use fans to accelerate drying, which can take 24-48 hours depending on humidity and ventilation. Perform another moisture test if you have any doubts about dryness.
4. Choose and Execute a Concrete Prep Method: Etching or Grinding
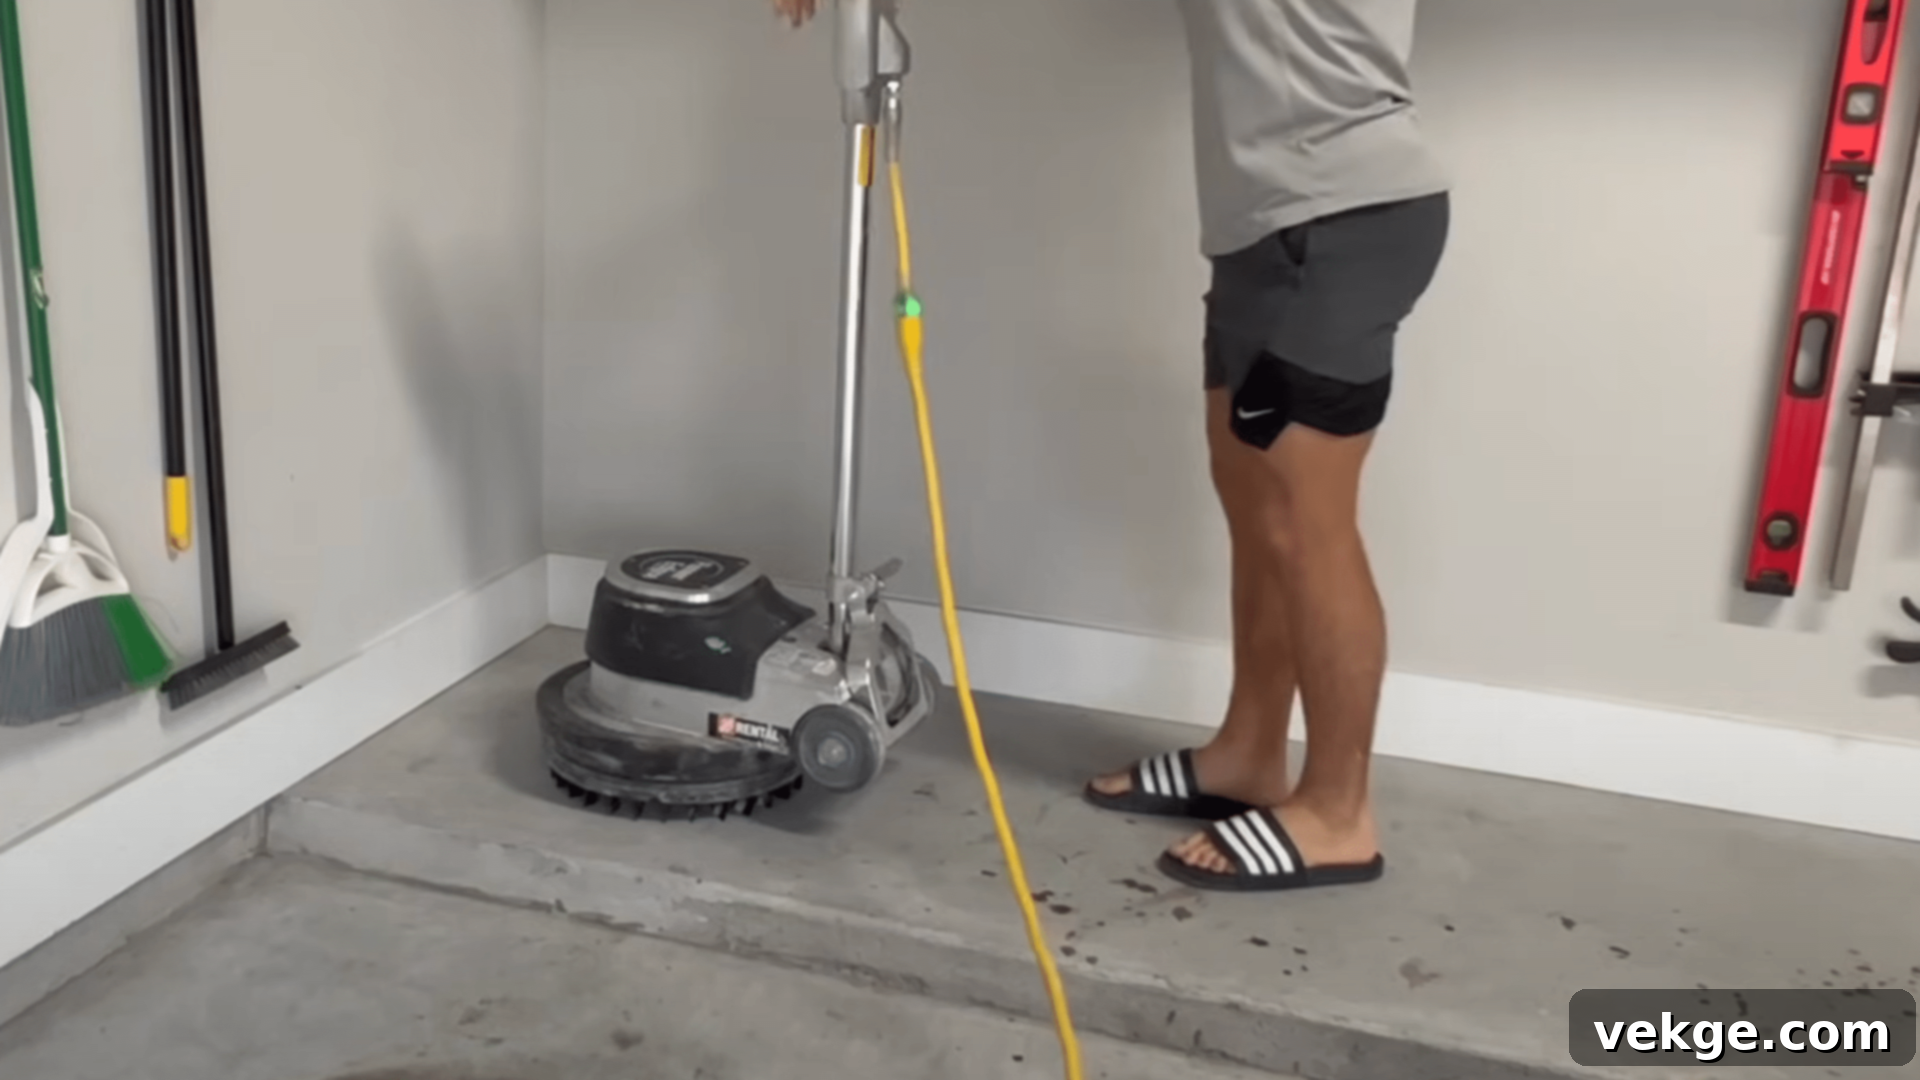
To ensure the epoxy strongly bonds with the concrete, the surface needs to be “profiled” – meaning its pores must be opened up. There are two primary methods for this:
- Acid Etching: This is the more common DIY method due to its relative ease and lower cost. An acid-based solution (often citric acid or phosphoric acid) is applied to the wet concrete, causing a chemical reaction that lightly roughens the surface.
- Pros: Less labor-intensive than grinding, requires fewer specialized tools.
- Cons: Less effective on very dense or previously sealed concrete. Can be messy and requires careful handling of chemicals. May not create as strong a bond as grinding, potentially leading to delamination over time if not done properly.
- Process: Mix the etching solution according to instructions, apply evenly, scrub, and then thoroughly rinse. Ensure all acid residue is removed.
- Safety: Always wear a respirator, safety glasses, and chemical-resistant gloves. Ensure adequate ventilation.
- Concrete Grinding: This is considered the professional gold standard for surface preparation. A diamond grinder physically removes the top layer of concrete, exposing fresh, porous concrete.
- Pros: Creates the strongest possible bond for epoxy, ideal for dense, previously coated, or very smooth concrete. More consistent profile.
- Cons: More labor-intensive, requires renting specialized and expensive equipment (concrete grinder and industrial vacuum). Generates significant dust.
- Process: Systematically grind the entire floor.
- Safety: Always wear a respirator, safety glasses, and hearing protection.
Regardless of the method chosen, the goal is a surface that feels like 100-grit sandpaper. After etching or grinding, vacuum the floor thoroughly to remove all dust and debris. The floor must then be completely dry before mixing epoxy.
5. Mix the Epoxy Components
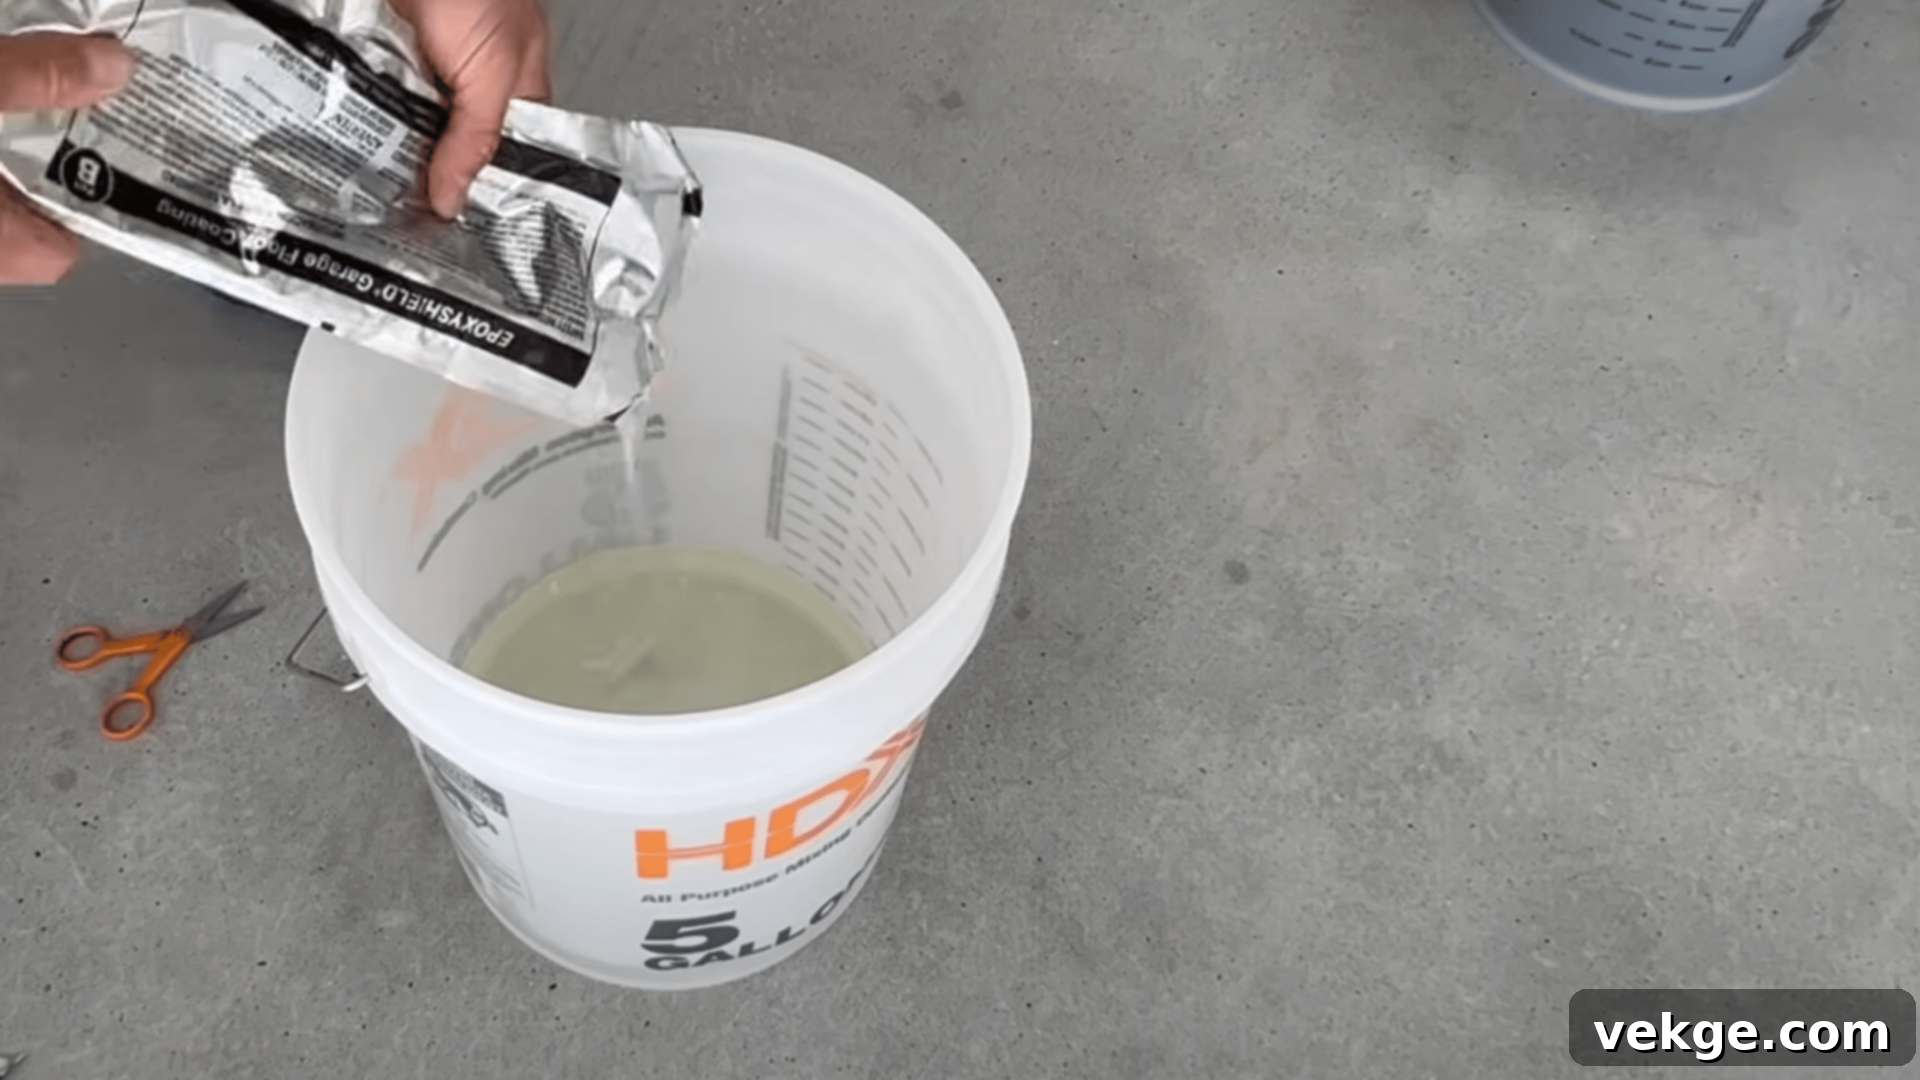
This step is where precision is paramount. Epoxy is a two-part system: a resin (Part A) and a hardener (Part B) that react chemically when combined. Strictly follow the manufacturer’s instructions for mixing ratios and timing. Incorrect mixing will lead to improper curing, resulting in a sticky, soft, or easily damaged floor.
- Pour Part B into Part A in a clean mixing bucket.
- Use a drill with a mixing paddle attachment for thorough blending. Mix at a slow to medium speed for 2-3 minutes, scraping the sides and bottom of the bucket to ensure all components are fully incorporated.
- Once mixed, the epoxy has a limited “pot life” – the time you have before it starts to harden in the bucket. This can range from 30 minutes to an hour, so work efficiently. Do not mix more epoxy than you can apply within this timeframe.
- If your kit includes decorative flakes or an anti-skid additive, mix them into the epoxy now, ensuring even distribution.
6. Apply the Epoxy Coating
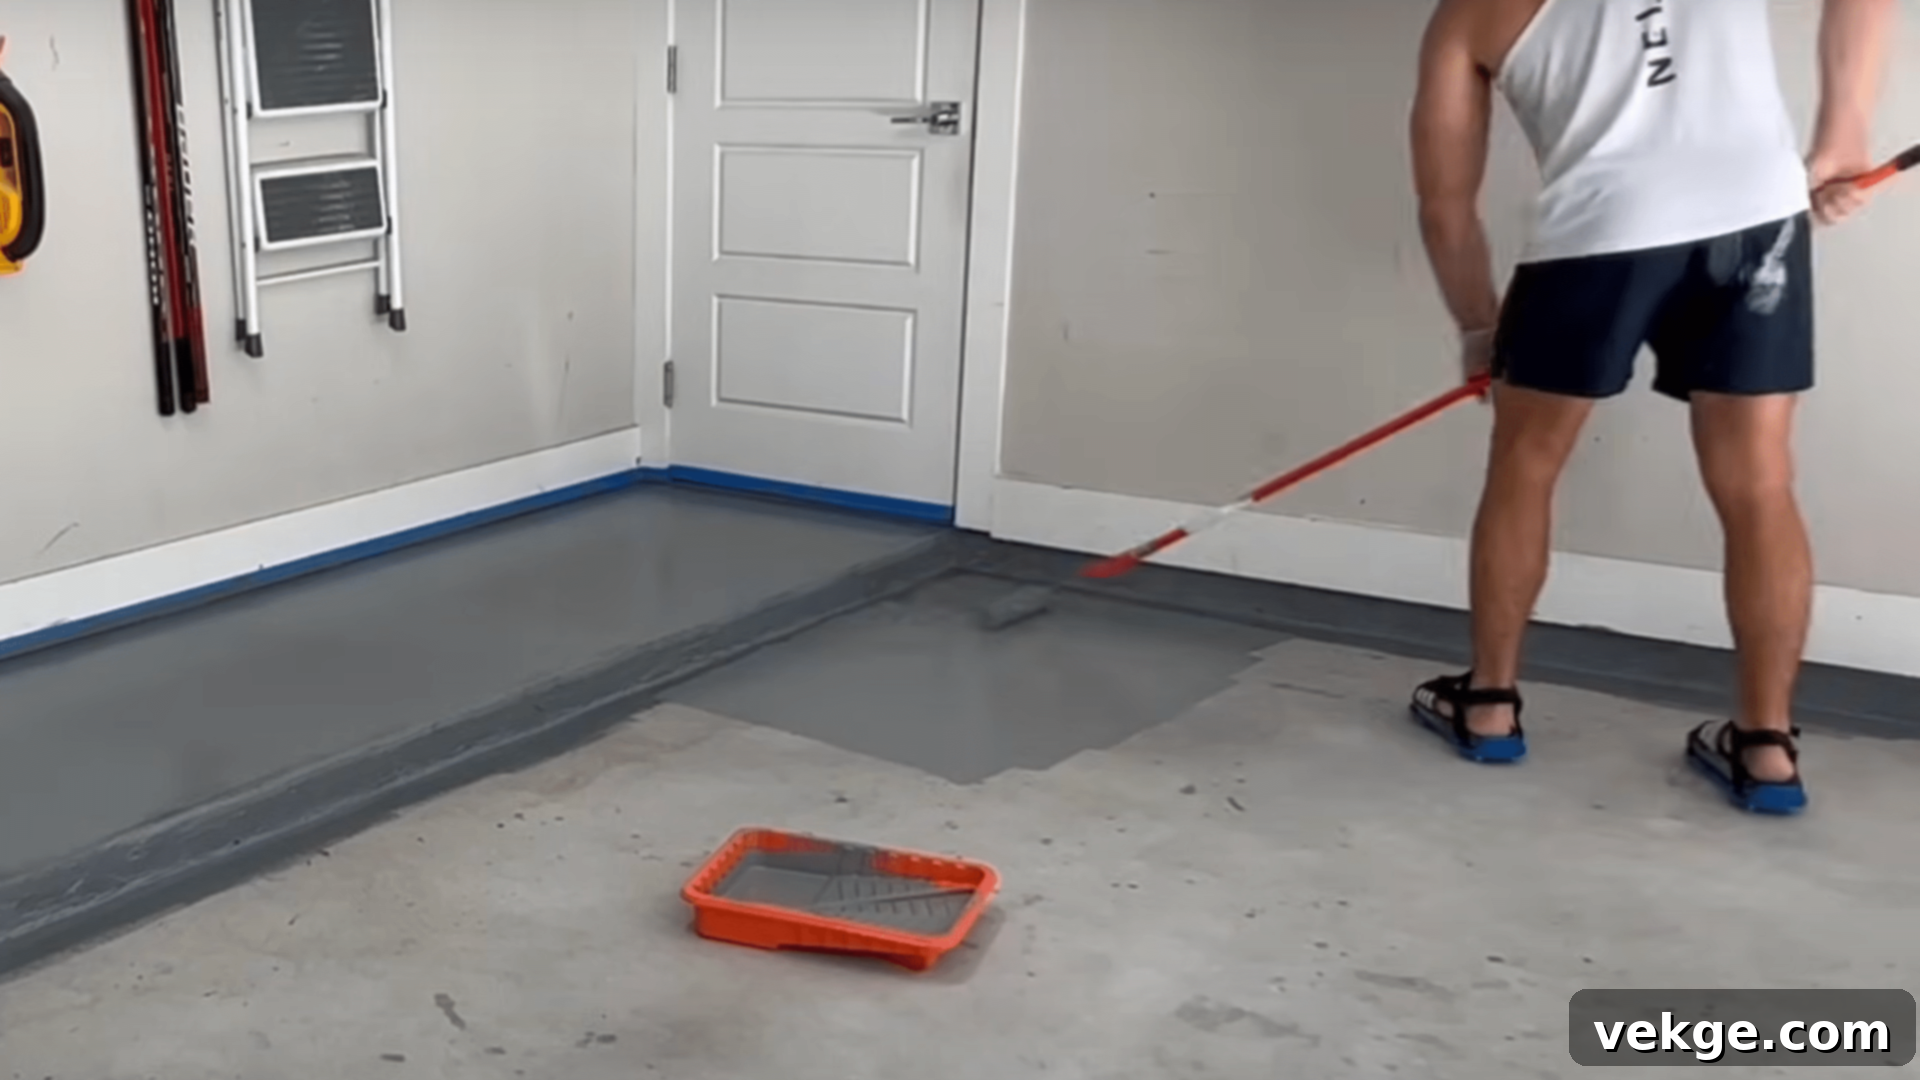
With the epoxy mixed and your floor prepped, it’s time to apply the coating. Work methodically and quickly, keeping the pot life in mind.
- Edge Work First: Begin by using a brush or cut-in pad to “cut in” along the edges of the garage walls, around doorways, and any vertical surfaces you want coated. Work in small sections, approximately 1-2 feet wide, along the perimeter.
- Rolling the Main Floor: Pour a small ribbon of mixed epoxy directly onto the floor in a manageable section. Using your roller, spread the epoxy in a “W” or “M” pattern, ensuring even coverage. Work your way across the floor, maintaining a “wet edge” – meaning you always overlap into previously applied wet epoxy. This prevents roller marks and ensures a seamless finish.
- Apply in Sections: Divide your garage into manageable sections, working your way out of the garage towards the main exit. If using spiked shoes, you can walk on the wet epoxy to access different areas.
- Decorative Flakes (Optional): If you are broadcasting decorative flakes, do so immediately after rolling each section while the epoxy is still wet. Gently toss them upwards, allowing them to fall naturally for even distribution. Do not over-apply.
Aim for a consistent, thin coat. Thicker coats can lead to bubbling, peeling, and longer cure times. Most DIY kits are designed for a single application, but some professional systems might involve multiple coats. Consult your specific kit’s instructions.
7. Allow it to Cure and Clean Up
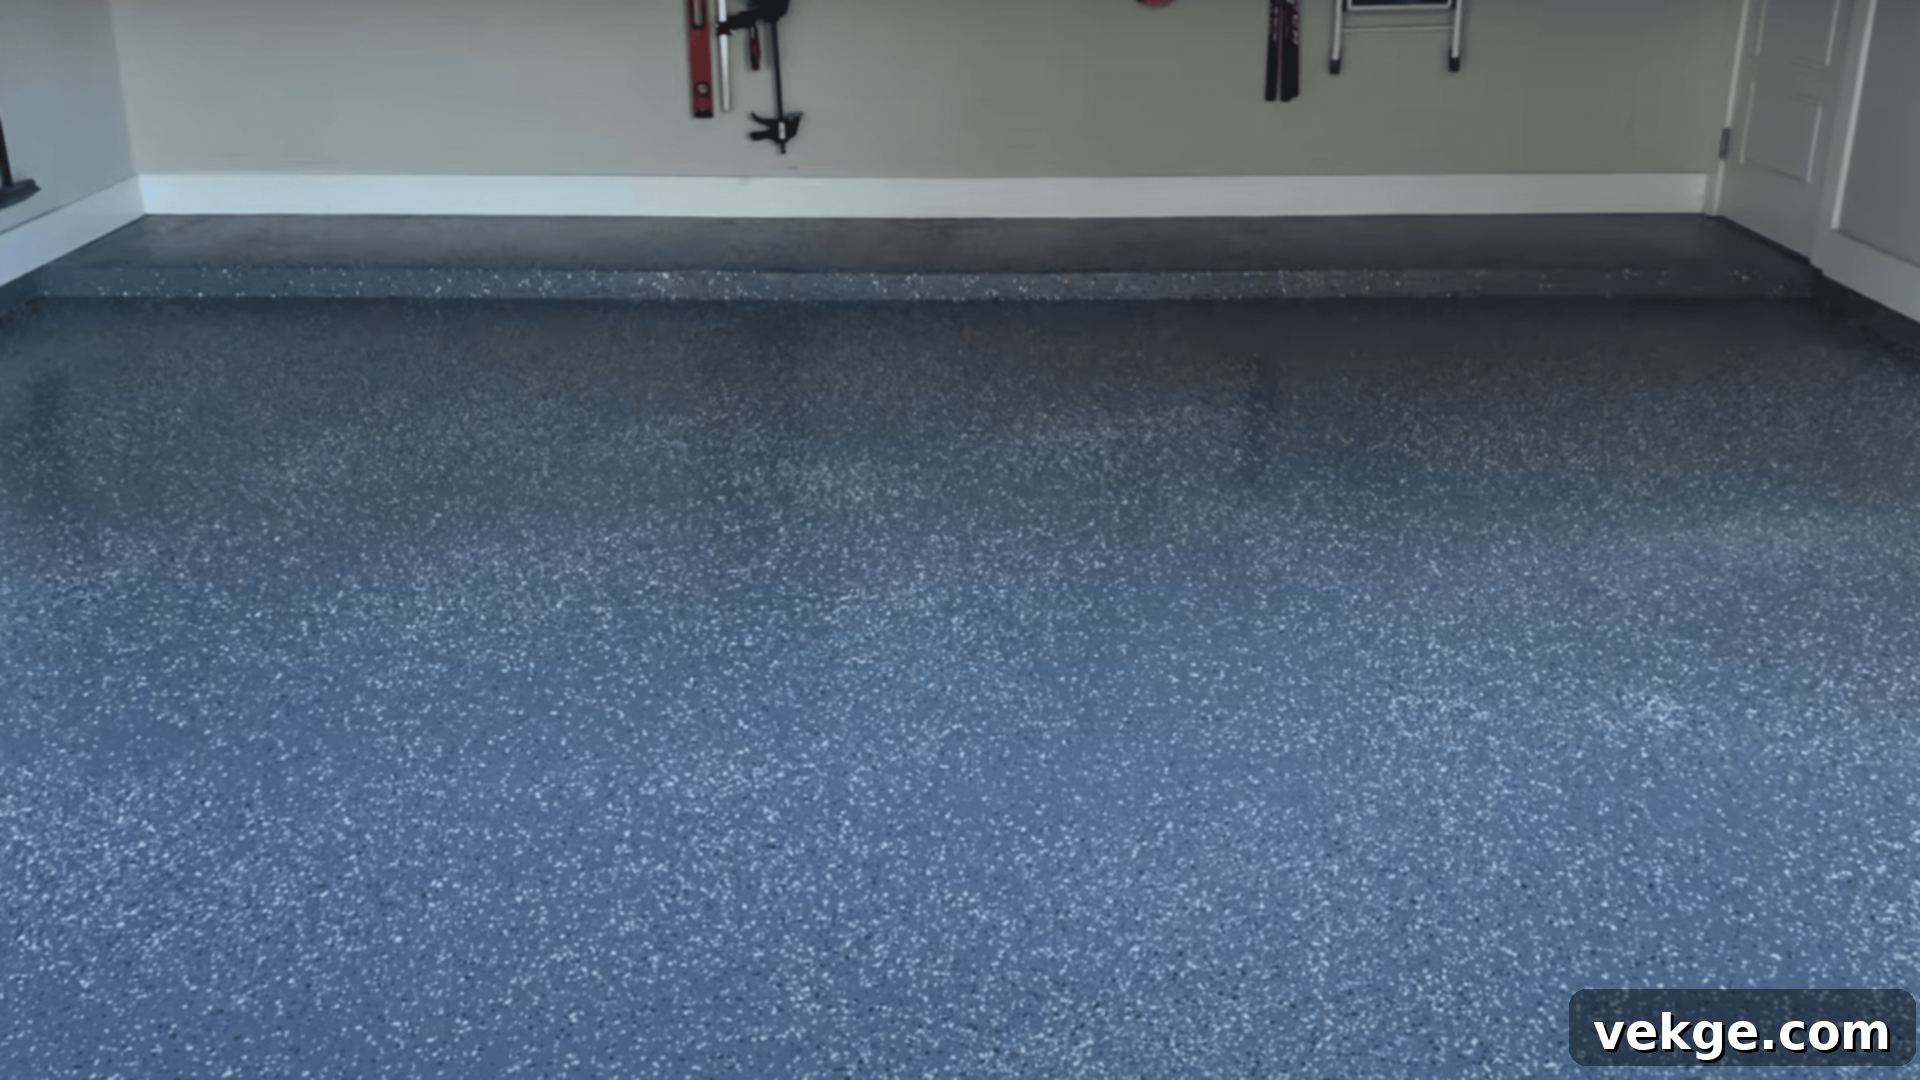
The curing process is critical for the epoxy to achieve its full hardness and durability. Patience is key here; rushing this stage can compromise the longevity of your new floor.
- Foot Traffic: Most epoxy floors are safe for light foot traffic after 24 hours, but always refer to your product’s specific guidelines, as environmental factors like temperature and humidity can affect cure times. Cooler temperatures and higher humidity will extend the curing period.
- Vehicle Traffic: For optimal results and to prevent tire marks or damage, wait a full 3 to 7 days before driving your car back onto the epoxy floor. This allows the coating to fully harden and bond with the concrete.
- Heavy Objects: Avoid placing heavy objects, such as floor jacks or car lifts, on the floor for at least 7-10 days.
- Cleanup: Once the floor has cured sufficiently for light foot traffic, gently vacuum or sweep away any loose decorative flakes that did not embed in the epoxy. Carefully remove all painter’s tape to reveal crisp, clean lines. Dispose of all used materials, rollers, and brushes according to local regulations.
Congratulations! Your garage floor is now transformed with a durable, long-lasting epoxy coating that will stand up to years of use.
To understand the process in detail, you can refer to the YouTube video below for a visual demonstration.
Cost Breakdown for Epoxy Flooring: DIY vs. Professional Installation
Understanding the financial aspect is crucial when planning your garage floor project. The total cost of epoxy flooring can vary significantly based on several factors, including the type of epoxy kit, the size of your garage, the condition of your existing concrete, and whether you choose to install it yourself or hire professionals.
DIY Epoxy Installation Costs
For homeowners willing to put in the labor, DIY epoxy installation offers a cost-effective solution. Expect to pay between $2 to $5 per square foot for materials. This typically includes the epoxy kit (resin, hardener, and sometimes flakes), basic cleaning supplies, rollers, brushes, and protective gear.
Additional DIY costs might arise from:
- Concrete Repair: Patching materials for cracks and holes.
- Surface Preparation Equipment: Renting a pressure washer, concrete grinder, or shop vacuum if you don’t own them (can add $50-$200 per day).
- Premium Kits: High-solids or 100% solids epoxy kits, which offer superior durability, will be at the higher end of this range.
For an average 500-square-foot two-car garage, a DIY epoxy project could range from $1,000 to $2,500, depending on the kit quality and the amount of preparation needed.
Professional Epoxy Installation Costs
If you prefer to leave the job to experts, professional installation typically ranges from $5 to $12 per square foot. This price includes all materials, labor, specialized equipment, and often a warranty on the work. Factors that influence professional costs include:
- Complexity of Design: Standard solid-color epoxy will be less expensive than multi-color flake systems, metallic finishes, or custom designs.
- Concrete Condition: Extensive concrete repair or grinding required by the contractor will increase labor and material costs.
- Type of Epoxy: High-performance commercial-grade epoxies or polyaspartic coatings (often applied by professionals) are more expensive than basic consumer-grade kits.
- Geographic Location: Labor rates vary by region.
For a 500-square-foot garage, professional epoxy installation can range from $2,500 to $6,000, with more elaborate or premium systems potentially reaching $7,000 or more.
While DIY saves on labor, professional installers bring expertise, industrial-grade materials, and specialized equipment that often result in a more flawless and durable finish. Weigh your budget against your desired outcome and confidence in your DIY skills.
Common Mistakes to Avoid for a Flawless Epoxy Garage Floor
Even with the best intentions, certain missteps can compromise the integrity and appearance of your epoxy garage floor. Recognizing and actively preventing these common mistakes will ensure a successful, long-lasting result.
- Skipping or Insufficient Prep Work: This is the single biggest cause of epoxy failure. Failing to properly clean, repair, and etch (or grind) the concrete surface can lead to poor adhesion, premature peeling, bubbling, and a drastically reduced lifespan for your floor. The epoxy needs a clean, porous, and dry surface to bond effectively.
- Prevention: Dedicate ample time to each prep step. Don’t rush. Perform the moisture test, thoroughly degrease, repair all cracks, and ensure the concrete is properly profiled and completely dry before mixing any epoxy.
- Incorrect Epoxy Mixing: Epoxy is a chemical reaction. If the resin and hardener are not mixed precisely according to the manufacturer’s instructions (ratio, duration, and thoroughness), the epoxy will not cure properly. This can result in soft spots, sticky areas, or a coating that never fully hardens.
- Prevention: Use accurate measuring tools if required, and always use a drill with a mixing paddle to ensure thorough blending for the specified time, scraping the sides and bottom of the bucket. Do not mix more than you can apply within the product’s pot life.
- Not Allowing Full Cure Time: Impatience can be costly. Driving on or placing heavy objects on the epoxy before it has fully cured can cause smudging, indents, tire marks, or even peeling, especially in the early stages of hardening.
- Prevention: Strictly adhere to the manufacturer’s recommended cure times for foot traffic, light vehicle traffic, and heavy loads. Factor in environmental conditions (temperature, humidity), as they can extend curing.
- Using Low-Quality Materials: Opting for the cheapest epoxy kit on the market might save a few dollars upfront but can lead to a finish that chips, cracks, stains, or yellows more easily, requiring early reapplication.
- Prevention: Invest in a reputable, high-solids or 100% solids epoxy kit designed for garage use. Research brands and read reviews to ensure you’re getting a durable, long-lasting product.
- Overapplying or Underapplying Epoxy: Applying too thick a coat can lead to bubbling, uneven curing, and wasted material. Conversely, applying too thin a coat can result in poor coverage, reduced durability, and a less appealing finish.
- Prevention: Follow the manufacturer’s coverage rates per square foot. Use the recommended roller nap size and apply in even, consistent strokes. Work in small, manageable sections to ensure even distribution.
- Ignoring Ventilation and Safety Gear: Epoxy fumes can be strong and harmful. Working in an enclosed space without proper protection poses health risks.
- Prevention: Ensure excellent ventilation by opening garage doors and windows, and using fans. Always wear a high-quality respirator with organic vapor cartridges, safety glasses, and chemical-resistant gloves throughout the entire process, especially during mixing and application.
By being mindful of these pitfalls, you can significantly increase your chances of achieving a beautiful, professional-grade epoxy garage floor that provides years of reliable service.
Post-Application Care and Maintenance for Your Epoxy Garage Floor
Once your DIY epoxy garage floor has fully cured, its low-maintenance nature is one of its greatest assets. However, a little ongoing care will go a long way in preserving its pristine appearance and extending its lifespan for decades. Proper maintenance ensures your floor remains durable, shiny, and resistant to damage.
Here are some essential tips to care for your new epoxy floor:
- Regular Sweeping and Vacuuming: To prevent dirt, dust, and abrasive grit from accumulating and scratching the surface, sweep or vacuum your epoxy floor regularly, ideally once a week or more frequently if it sees heavy use.
- Prompt Spill Cleanup: While epoxy is highly stain-resistant, it’s always best practice to clean spills immediately. Use a damp cloth or sponge to wipe up oil, chemicals, or other liquids as soon as they occur. This prevents any potential etching or discoloration, especially from harsh chemicals.
- Use Mild Cleaning Solutions: For a deeper clean, mop the floor with warm water and a pH-neutral cleaner. Avoid harsh, acidic, or abrasive cleaning chemicals (like bleach, citrus cleaners, or vinegar) as they can dull the finish or potentially compromise the epoxy coating over time. Soapy water with a gentle detergent is usually sufficient.
- Avoid Abrasive Tools: Do not use steel wool, abrasive scrubbing pads, or harsh bristle brushes that could scratch the epoxy surface. Stick to soft brushes, mops, or microfibre cloths.
- Protect from Heavy Impacts and Scratches: While epoxy is tough, extreme impacts or sharp objects can still cause damage. Place protective mats or rubber pads under heavy equipment, jack stands, and workshop areas where tools might be dropped. For vehicle tires, use good quality tire stoppers or protective mats, especially if you experience hot tire pick-up issues (though less common with high-quality epoxy).
- Regular Inspection: Periodically inspect your floor for any signs of wear, minor chips, or scratches, especially in high-traffic zones. Addressing small issues early can prevent them from becoming larger problems. Minor scuffs can often be buffed out, and small chips can sometimes be repaired with a clear epoxy patch kit.
- Snow and Ice: In colder climates, avoid using metal shovels to clear snow or ice from your epoxy floor, as they can scratch the surface. Opt for plastic shovels or snow blowers with rubber blades.
By following these simple maintenance guidelines, your epoxy garage floor will continue to look fantastic and provide superior protection for many years to come, truly making it a worthwhile investment.
Wrapping Up Your Garage Transformation: Embrace the DIY Difference
Embarking on a DIY epoxy garage floor project is an incredibly rewarding endeavor that significantly upgrades the functionality and aesthetics of your space. As we’ve explored, a properly installed epoxy coating offers unparalleled durability, resistance to stains and chemicals, and a visually appealing finish that brightens your entire garage.
From the critical steps of thorough surface preparation and precise mixing to the careful application and essential curing time, each stage contributes to the long-term success of your project. Whether you choose the hands-on approach of DIY or opt for the expertise of professional installation, understanding these fundamental principles ensures a high-quality, lasting result.
You now have a comprehensive guide at your fingertips, detailing everything from selecting materials and comparing options to avoiding common pitfalls and maintaining your beautiful new floor. The benefits – from enhanced property value and effortless cleaning to superior concrete protection – make this home improvement a truly smart investment.
Ready to finally banish that plain, dusty concrete and welcome a garage that works as hard as you do, while looking great doing it? Gather your materials, prepare your space, and give your garage the fresh, new look it deserves. It’s an accessible, affordable project that will leave your garage looking exceptional and standing up resiliently to everyday wear and tear for years to come.
