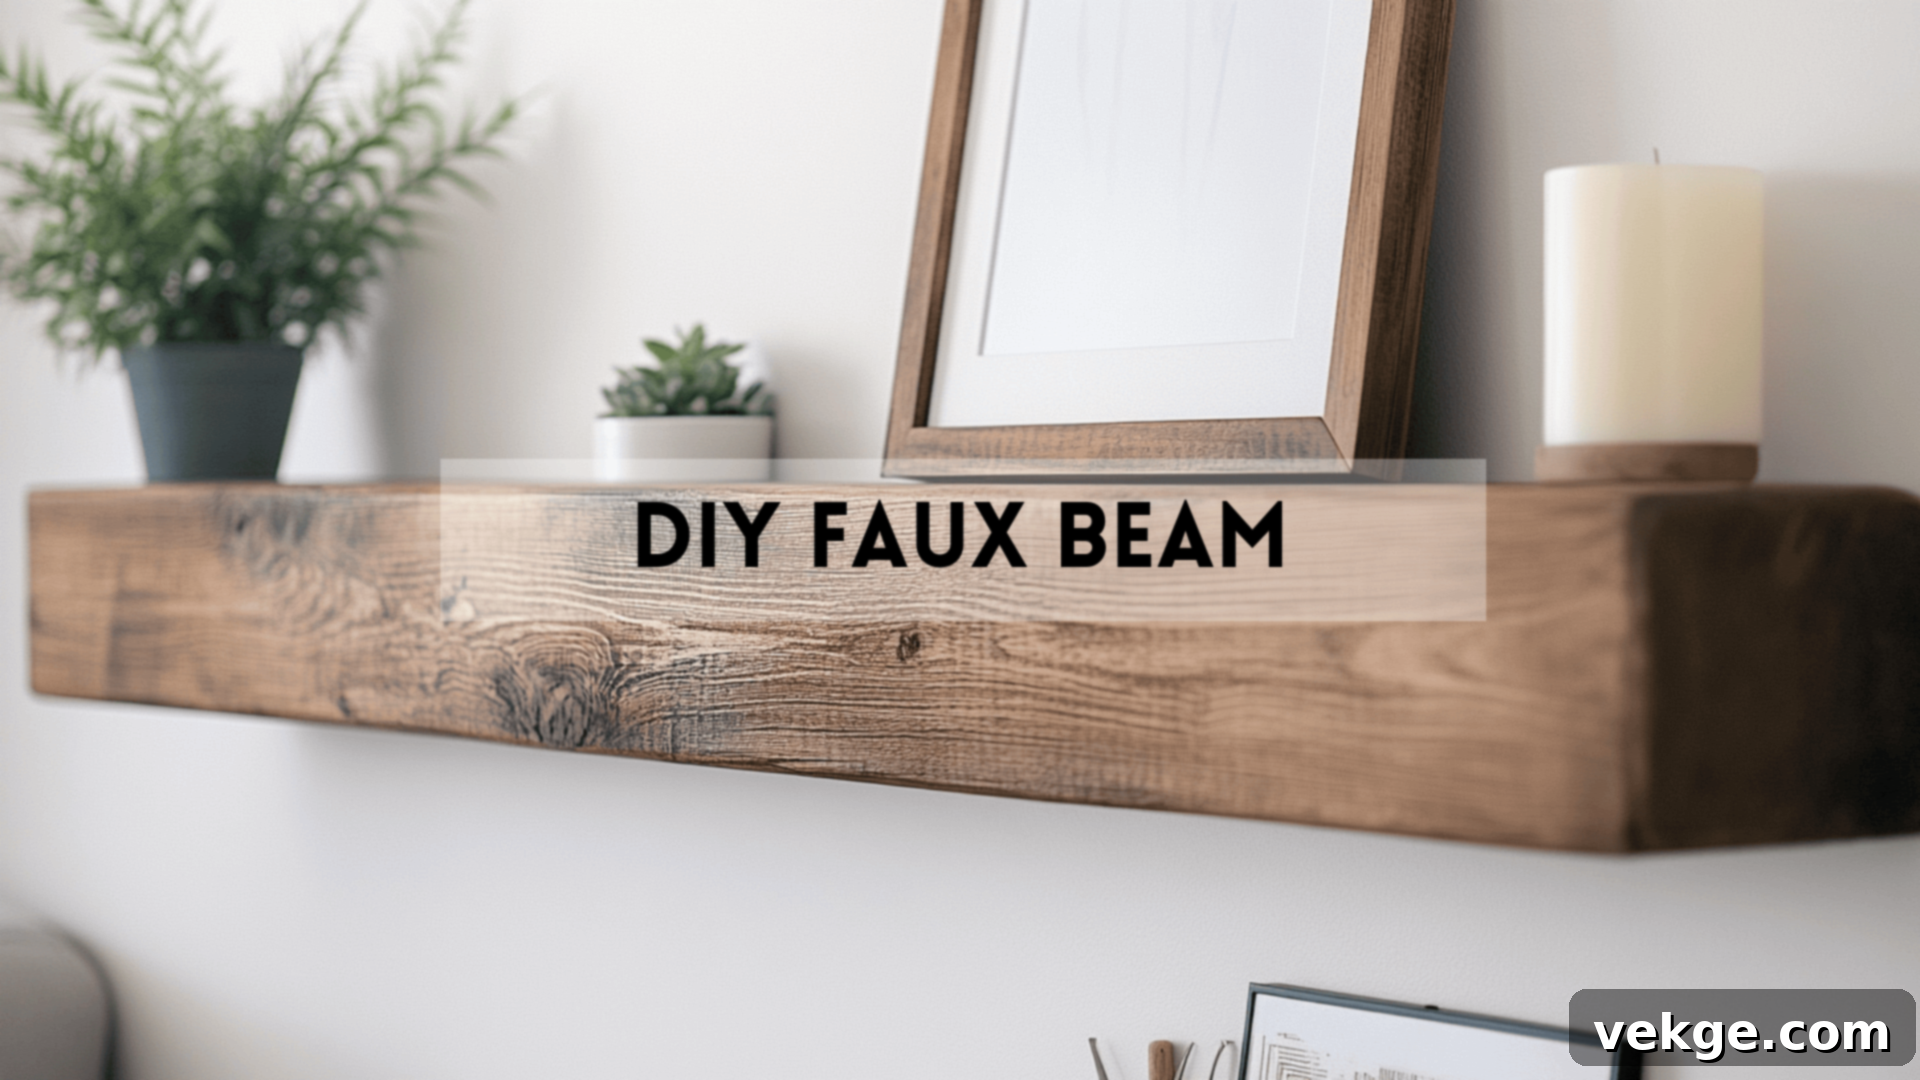
DIY Faux Wood Beams: Transform Your Space with Rustic Charm & Easy Installation
Are you tired of plain ceilings and blank walls that feel like they’re missing something? You’re not alone. Many homeowners desire the authentic warmth and architectural beauty of real wood beams but are often deterred by the significant cost, immense weight, and complex installation they entail.
This is where DIY faux beams offer a brilliant solution. This comprehensive guide will show you precisely how to craft your own decorative beams, bringing rustic elegance or modern sophistication to any room – even if you’re a complete beginner with no prior construction experience.
We’ll walk you through every essential step: from selecting the right materials and gathering your tools, to precisely cutting boards, assembling the beam, and mounting it securely. You’ll also discover various techniques for staining, distressing, and finishing your faux beams to perfectly complement your unique home decor style. By the end of this tutorial, you’ll possess the skills to transform any space with a custom, high-end look, all while keeping costs down. Ready to add that missing touch of charm? Let’s dive in!
What Are Faux Beams?
Faux beams are essentially decorative, non-load-bearing architectural elements designed to mimic the appearance of solid wood beams. Crafted from lighter materials such as pine, cedar, MDF, or high-density foam, they offer the coveted aesthetic of authentic timber without any of the structural challenges or heavy lifting. Their primary purpose is purely aesthetic, adding warmth, depth, and character to various areas of your home.
These versatile elements are popular for enhancing ceilings, accenting walls, framing doorways, or creating stunning fireplace mantels. By introducing the visual interest of beams, you can effortlessly make a room feel more finished, cozier, or dramatically styled, whether you’re aiming for a rustic farmhouse vibe or a sleek modern appeal.
Why Not Use Real Beams?
While genuine solid wood beams are undeniably beautiful, they come with significant drawbacks that make faux alternatives a far more practical choice for most homes:
- Lighter: Real structural beams are incredibly heavy, requiring specialized equipment and multiple people to lift and install. Faux beams, made from materials like lightweight pine, MDF, or even foam, eliminate the need for heavy lifting. This makes them safer and much easier for a DIY enthusiast to handle, especially when working overhead on ceilings.
- Easier to Install: Installing real beams often demands extensive structural modifications to your home, including additional framing and engineering assessments to ensure the house can bear the load. Faux beams, being purely decorative, require no such structural support. They simply attach to existing walls or ceiling joists, simplifying the installation process dramatically.
- Cheaper: The cost of sourcing, transporting, and installing authentic solid wood beams can be astronomical. Faux beams provide the exact same visual impact and aesthetic appeal at a fraction of the price. You get the desired look without the hefty investment, making this a budget-friendly way to upgrade your home.
Common Styles to Choose From
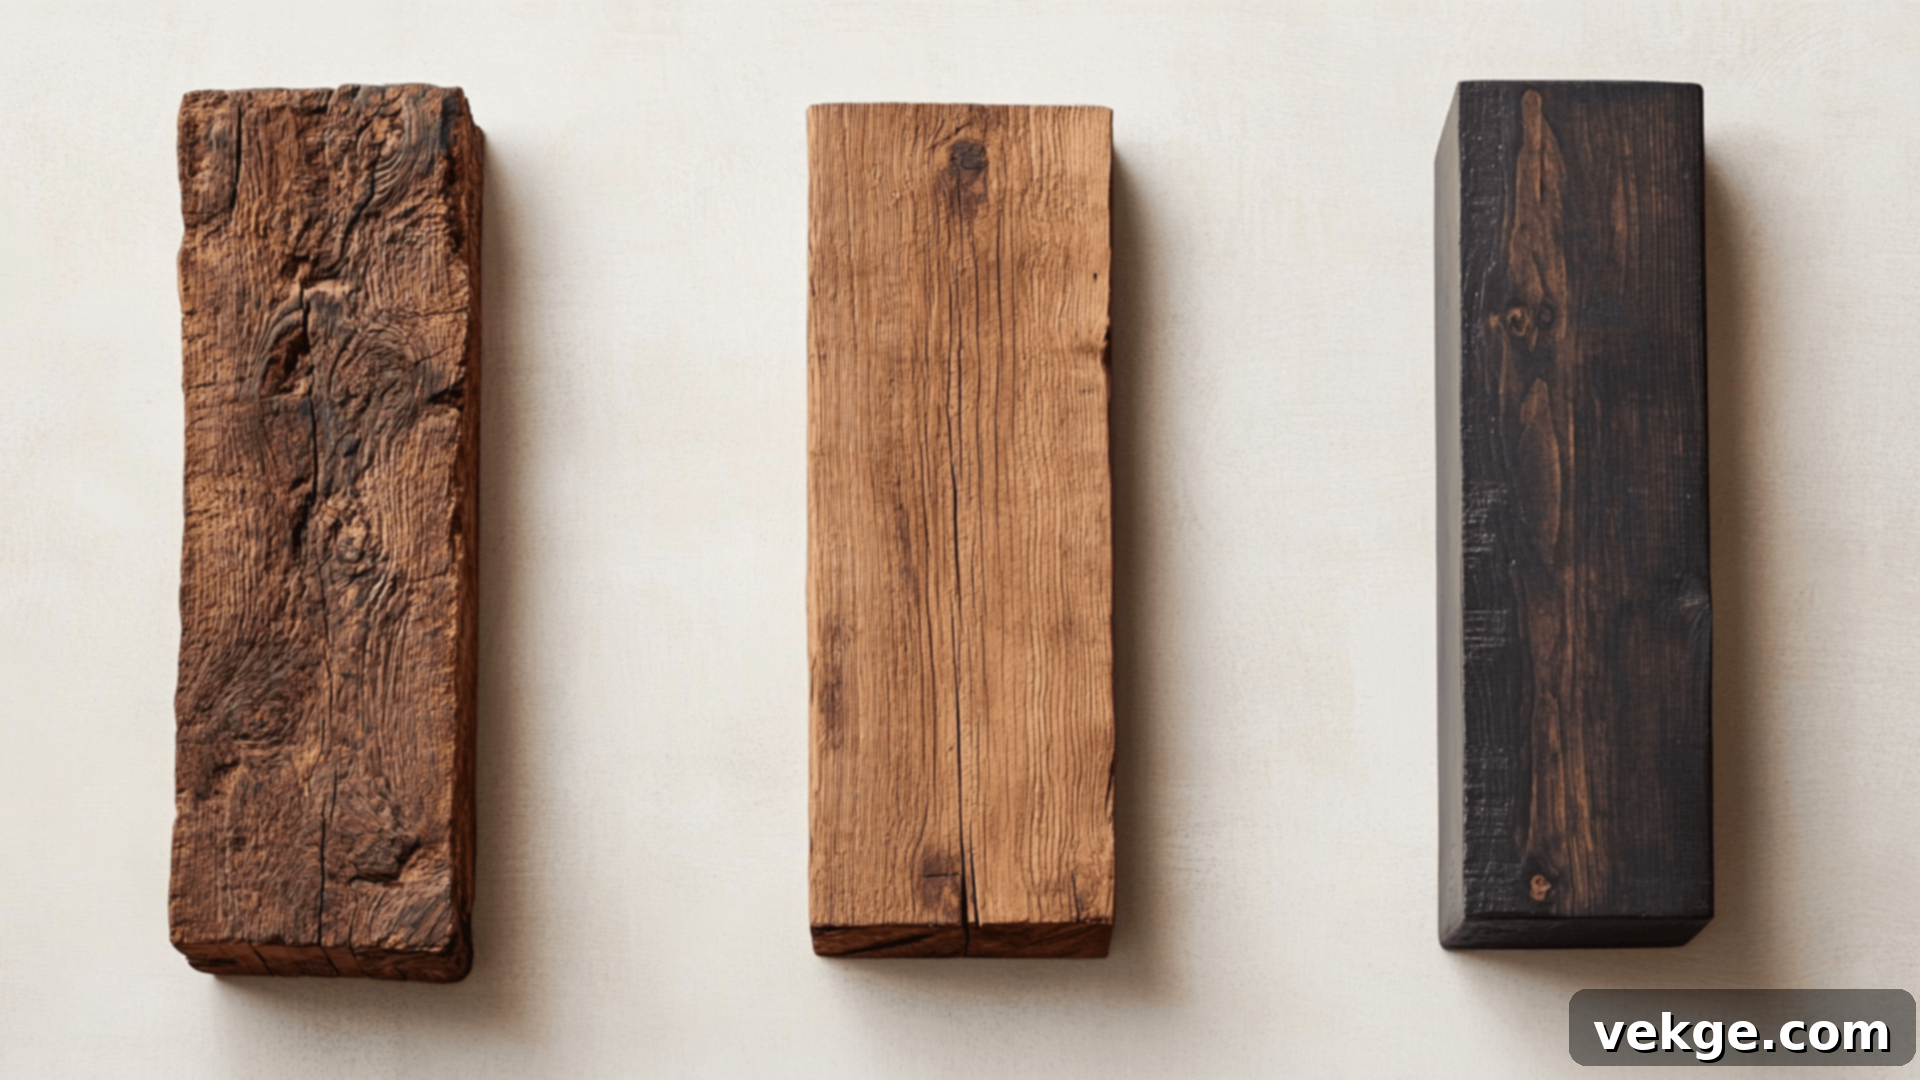
Faux beams are incredibly versatile, adaptable to nearly any interior design scheme. By choosing the right shape, finish, and color, you can perfectly integrate them into your existing decor. Here are some of the most popular styles:
- Rustic: This timeless style evokes the charm of an old cabin or barn. Rustic faux beams typically feature a rough, distressed, or hand-hewn texture, often with visible knots, gouges, and aged marks. They’re usually finished with warm, natural wood stains that enhance their rugged appeal.
- Farmhouse: A blend of rustic and refined, farmhouse beams offer a clean yet weathered aesthetic. They might be lightly distressed and are frequently finished with whitewashes, light grays, or natural, muted wood tones to create a bright and airy feel while retaining country charm.
- Modern: For contemporary spaces, modern faux beams boast smooth lines, sharp edges, and minimal texture. They are typically stained in darker, richer tones like deep walnuts, espressos, or even painted black, providing a striking contrast and sophisticated focal point in a sleek environment.
No matter your home’s aesthetic, faux beams can be customized to complement it beautifully, adding a layer of architectural interest and character.
Choosing the Right Material for Your Faux Beams
The success of your DIY faux beam project begins with selecting the appropriate material. Your choice will significantly influence the beam’s final appearance, texture, installation difficulty, and overall cost. Generally, the two primary options for crafting faux beams are natural wood and high-density foam, each presenting distinct advantages.
Wood Faux Beams
For DIY enthusiasts seeking the most authentic look and feel, natural wood remains the most popular and recommended choice for crafting faux beams. Using real wood ensures that the grain, texture, and inherent character of timber are genuinely present, resulting in an exceptionally realistic finished product.
Several types of wood are commonly used, each offering unique qualities:
- Pine: This is an excellent, budget-friendly option, widely available and easy to work with. Pine takes stain well and can be distressed to achieve a rustic aesthetic.
- Cedar: Known for its beautiful, distinctive grain and aromatic qualities, cedar adds a touch of natural elegance. It’s also lightweight and resistant to decay, though typically more expensive than pine.
- MDF (Medium-Density Fiberboard): If you plan to paint your beams for a smooth, uniform finish (common in modern or minimalist designs), MDF is ideal. It provides a flawless surface without knots or grain, though it lacks the natural character of solid wood.
- Reclaimed Wood: For an unmatched rustic and aged appearance, reclaimed wood (from old barns or fences) is perfect. It often comes with inherent distressing, unique imperfections, and a rich history, providing unparalleled character.
Wood beams are inherently sturdy and durable, ensuring a long-lasting addition to your home. Their natural properties make them incredibly versatile for customization: you can distress them with tools to create a hand-hewn effect, stain them in virtually any color to match your decor, or simply seal them to highlight their natural beauty. If your goal is a faux beam that truly looks and feels indistinguishable from a solid timber beam, wood is undoubtedly the superior material.
Foam Faux Beams
Foam beams present a fantastic lightweight alternative, allowing you to achieve the coveted wood aesthetic without the physical demands of handling heavy lumber. Typically crafted from high-density foam, these beams are exceptionally easy to cut, shape, and install, making them an ideal choice for solo projects or installations on high ceilings where weight is a major concern.
You have the option to purchase pre-made foam beams, which often come molded with realistic wood grain textures and shapes, ready for finishing. Alternatively, you can create your own from rigid foam insulation boards. With a combination of strategic cutting, clever texturing techniques (like using a wire brush), and a realistic paint job (often involving a base coat followed by transparent stains), foam can be transformed into surprisingly convincing wood-look beams.
This method is particularly suitable for beginners, individuals seeking a quick and less-messy project, or anyone looking to avoid power tools and the need for robust structural supports. Foam beams are especially popular for vaulted ceilings, where their light weight greatly simplifies the installation process.
Tools & Materials You’ll Need for Your DIY Faux Beams
To ensure your faux beam project proceeds smoothly and efficiently, it’s crucial to gather all necessary tools and materials before you begin. Most of these items are readily available at any local hardware store. We’ve also included a few optional extras that can help you achieve a truly custom or authentically distressed finish.
Main Materials:
- Boards: Choose your preferred wood (pine, cedar, MDF, or reclaimed wood) based on your desired look and budget. Ensure boards are straight and free of major defects.
- Wood Glue: A strong, reliable wood glue is essential for creating robust joints that hold the beam pieces together permanently.
- Screws (1¼”–2” wood screws): These are used for securing the French cleat and adding extra reinforcement to your beam’s construction.
- Wood Filler or Wood Plugs (optional): Great for concealing screw holes or small imperfections, providing a seamless finish.
- Wood Stain or Paint: Select a color that complements your home decor. Stain will enhance natural wood grain, while paint offers a solid, uniform finish.
- Polycrylic or Polyurethane Finish: A clear topcoat is vital for protecting your beam from wear, scratches, and moisture, ensuring its longevity.
- French Cleat Mounting Hardware (or L-brackets): This system provides a secure and often hidden way to mount your beam. L-brackets offer a more visible, industrial look.
Tools:
- Table Saw or Circular Saw: Essential for ripping boards to consistent widths and ensuring straight, precise cuts. A circular saw can be used with a guide for similar accuracy.
- Miter Saw: Crucial for making accurate 45-degree angle cuts (miters) that create seamless joints, giving your beam the appearance of solid wood.
- Brad Nailer or Finish Nails (18-gauge): Used to temporarily hold wood pieces together while the wood glue dries, ensuring tight joints.
- Drill and Drill Bits: For pre-drilling holes to prevent wood splitting and for driving screws securely into studs or mounting hardware.
- Power Sander or Sandpaper: For smoothing rough edges, preparing the surface for staining, and achieving a professional finish. Various grits will be useful.
- Measuring Tape and Pencil: For accurate measurements and marking cuts, critical for a well-fitting beam.
- Level: Absolutely necessary to ensure your beam is installed perfectly straight and plumb on your wall or ceiling.
Optional Extras for Customization:
- Chains, Screws, or Other Tools for Distressing: For creating authentic-looking dents, scrapes, and wormholes to achieve a rustic or aged aesthetic.
- Paint Can Opener or Screwdriver: Useful for specific distressing techniques, such as creating deep gouges or aged marks.
- Beam Straps or Metal Brackets: Decorative additions that can enhance the industrial or rustic look of your finished faux beam, often used to conceal mounting points.
Having all these items ready at hand will streamline your building process, allowing you to focus on craftsmanship rather than interruptions. A well-prepared workspace contributes significantly to a successful DIY project.
Step-by-Step: Building Your DIY Faux Wood Beam
This comprehensive guide will walk you through the entire process of constructing a stunning faux wood beam, designed to mimic the aesthetic of solid timber without the prohibitive weight or expense. Whether your vision is a rugged, rustic centerpiece or a sleek, modern accent, these steps will help you achieve a professional-looking result. We’ll cover everything from precise board cuts to secure mounting and flawless finishing.
Step 1: Measure and Cut Your Boards to Size
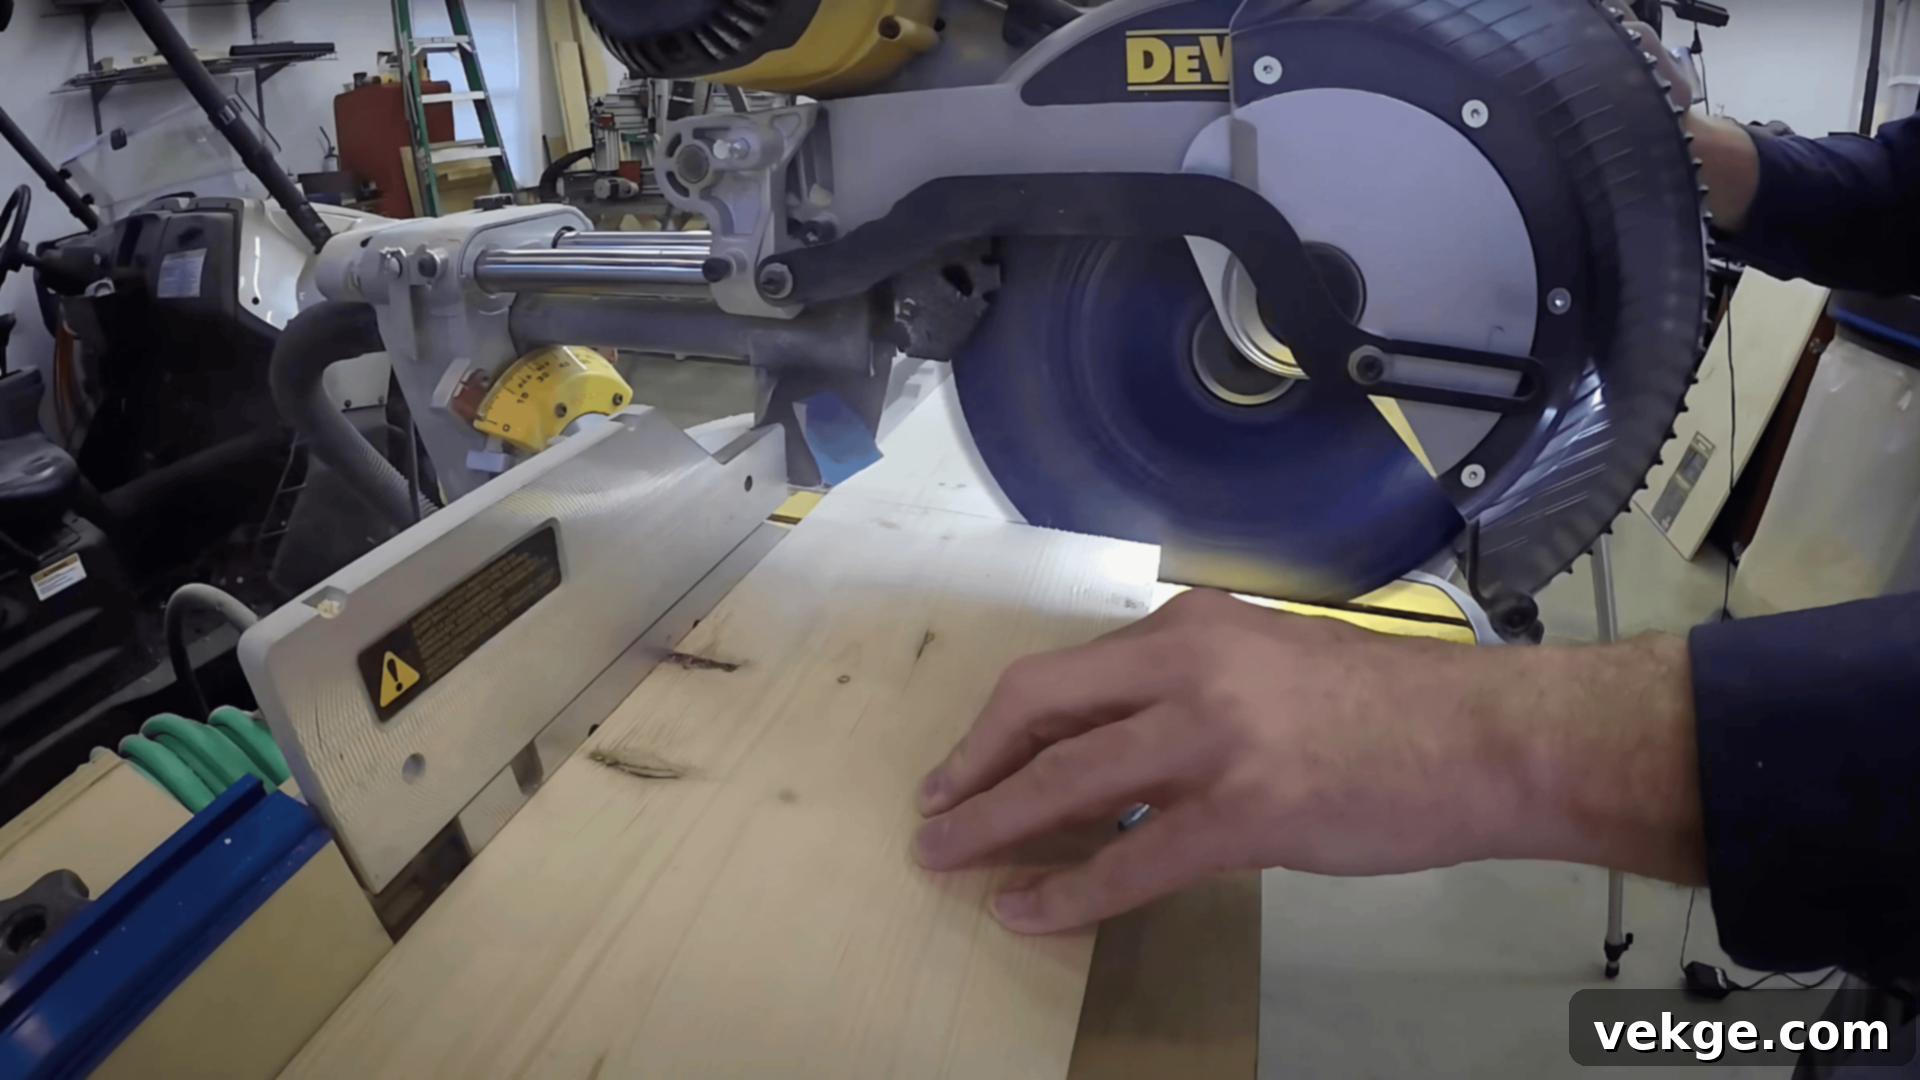
The first critical step is to determine the exact dimensions for your faux beam. Consider the desired length, height, and depth, ensuring these proportions complement your room’s scale. While a common decorative beam size might be 6 inches tall, 6 inches deep, and 48 inches long, feel free to customize these measurements to perfectly fit your specific space and design vision.
Once you’ve finalized your dimensions, you’ll need to cut three primary boards from your chosen material (pine, cedar, etc.):
- One board for the front face: This will be the most visible part of your beam.
- One board for the top: This forms the top surface of your hollow beam.
- One board for the bottom: This completes the U-shaped structure from below.
Ensure that all three of these main boards are cut to the identical desired length of your beam. The width of these boards will dictate the final height and depth of your beam. For example, to achieve a 6-inch deep beam, you might rip your boards to approximately 6 inches wide. Precision in these cuts is paramount for a professional finish.
Optional: For a completely enclosed and polished appearance, especially if the ends of your beam will be visible, cut two additional small pieces from your leftover wood to serve as end caps. These will meticulously close off the open sides of the beam, contributing to a more realistic and finished look.
After all pieces are cut, lay them out on a flat surface to visually confirm that all dimensions are correct and that the pieces align perfectly with your intended design. This preliminary check can save significant time and effort later on.
Step 2: Miter the Edges for Seamless Appearance
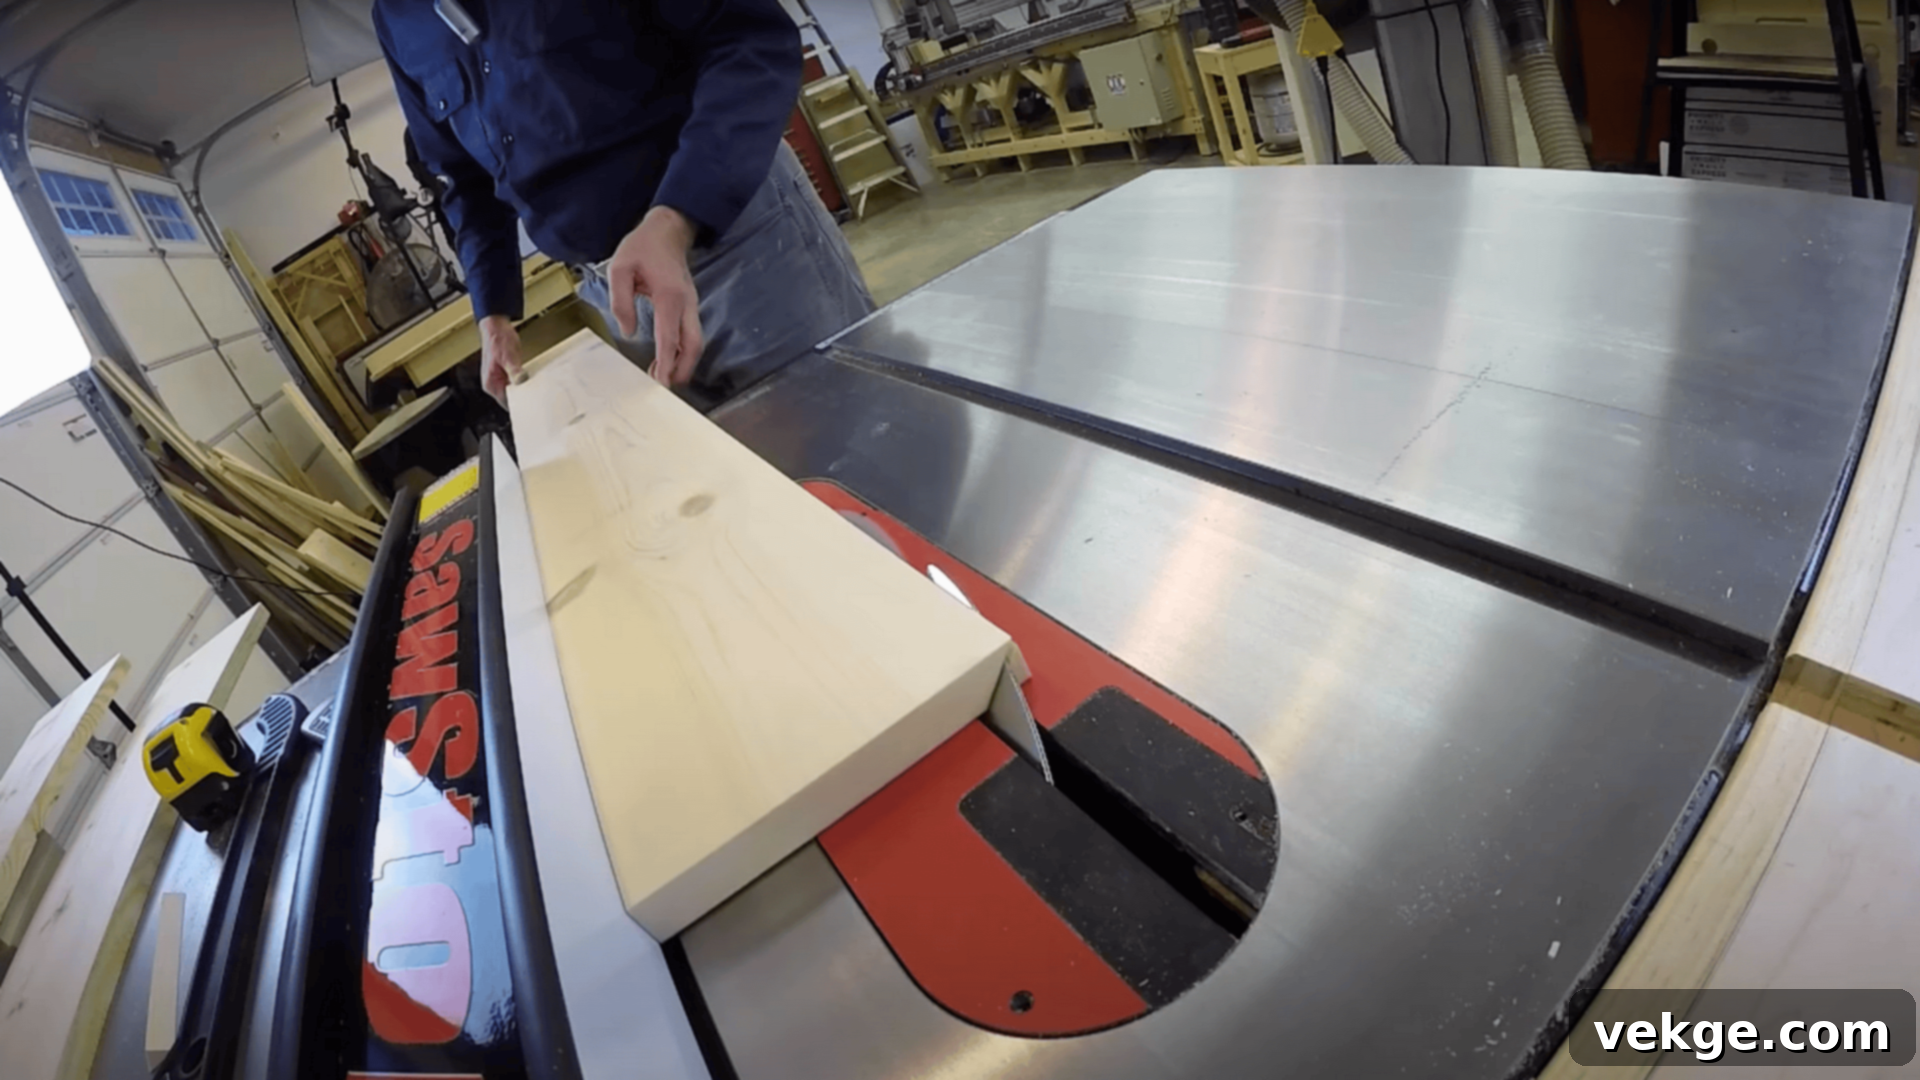
To truly achieve the illusion of a solid timber beam, you’ll need to miter the edges of your boards. Mitering involves cutting an edge at a precise 45-degree angle, which, when joined with another 45-degree mitered edge, forms a perfect 90-degree corner. This technique eliminates visible end grain and creates a smooth, continuous surface, making your assembled beam appear as if it were carved from a single piece of wood.
Here’s how to execute the miter cuts:
- Front Board: Miter both of the long edges. These angles will face inwards, ready to meet the top and bottom boards.
- Top and Bottom Boards: Miter one long edge on each of these boards. The mitered edge will align with the front board, while the un-mitered edge will be the side that attaches to the French cleat (or remains flat if not using a cleat on that side).
- End Caps (if using): For a truly snug and finished fit, miter all four edges of your small end cap pieces. This will allow them to neatly fit into the open ends of your beam box, creating crisp corners.
Accuracy is key here. Even slight inaccuracies in your 45-degree cuts can result in gaps or misaligned corners. Take your time, use a sharp miter saw, and test your cuts on scrap wood if you’re new to this technique. Properly mitered edges are fundamental to achieving that professional, solid-wood look for your faux beam, ensuring the corners blend together beautifully without unsightly seams.
Step 3: Build and Attach the French Cleat System
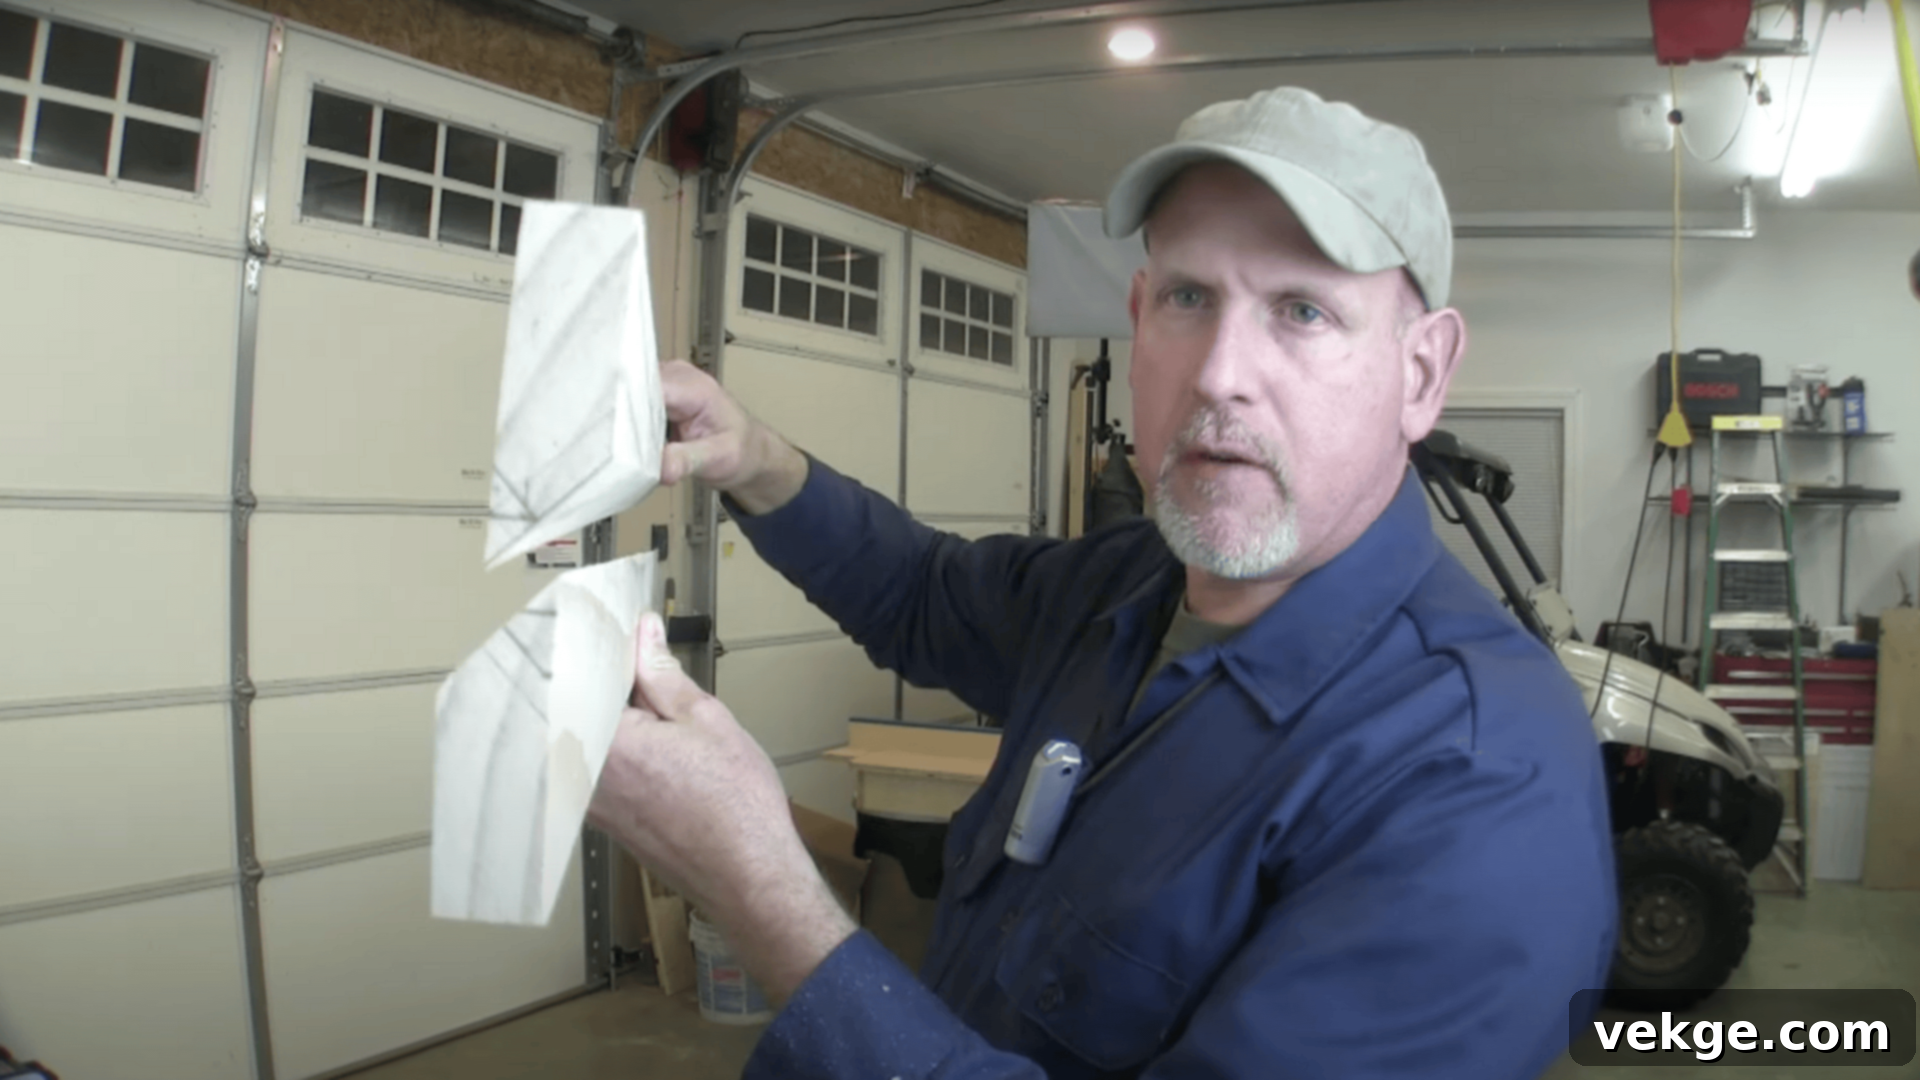
The French cleat is an ingenious and highly secure mounting system, perfect for hanging faux beams. It consists of two interlocking pieces, one attached to the wall and the other to the beam, designed to cradle and firmly hold your decorative element in place. This method provides exceptional stability and makes installation relatively straightforward.
Here’s how to craft your French cleat:
- Prepare Your Cleat Board: Begin with a sturdy piece of wood, ideally the same type as your beam, cut a few inches shorter than the overall length of your beam. This prevents the cleat from being visible at the ends.
- Make the 45-Degree Cut: Using a table saw, carefully rip this board down its middle at a precise 45-degree angle. This cut will divide the board into two mirror-image pieces, each with one beveled edge.
- Identify the Mating Pieces: You’ll now have two complementary pieces. One will be permanently attached to the inside of your faux beam, and the other will be secured to your wall or ceiling studs.
Next, you’ll attach one half of the cleat (the “beam-side” cleat) to the top inside edge of your future beam:
- Mark Placement: Measure and mark the precise placement for the beam-side cleat. A good rule of thumb is to position it approximately 4 inches in from each end of your beam, ensuring it’s centered along the top interior edge.
- Apply Adhesive: Apply a generous amount of strong wood glue to the flat back surface of the cleat piece that will be against the beam.
- Secure with Nails: Carefully align the cleat and use a brad nailer (with 18-gauge nails) to firmly pin it in place. The nails will hold it while the glue cures, creating a very strong bond.
- Reinforce with Screws: For maximum security, flip the top board of your beam over and drive wood screws through from the top surface into the cleat. This combination of glue and screws ensures the cleat will not separate from the beam over time.
Optional: If you prefer an exceptionally clean finish, especially if the top of your beam might ever be visible, you can cover the screw heads with decorative wood plugs or fill them with wood filler. Once sanded smooth and stained, these imperfections will vanish, enhancing the solid-wood illusion.
Step 4: Assemble the Hollow Beam Box
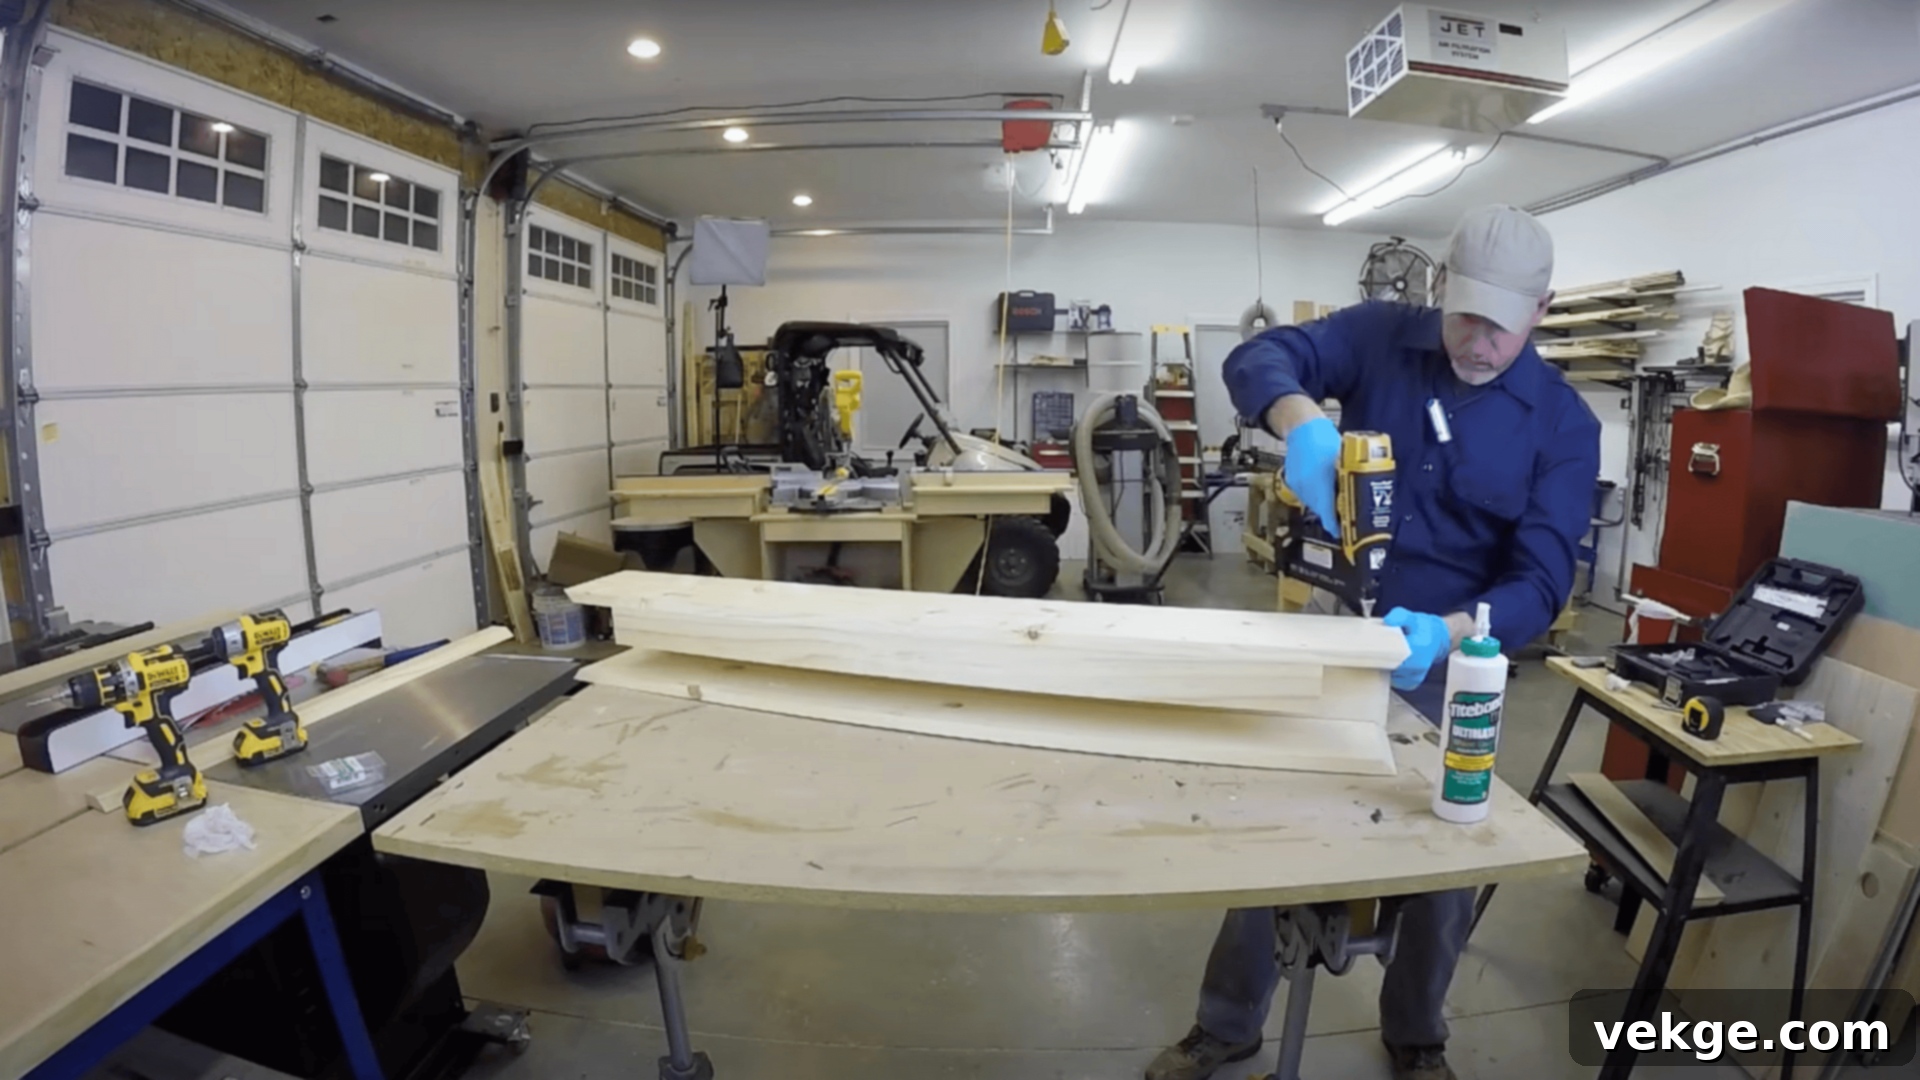
With your boards meticulously cut and mitered, it’s now time to bring your faux beam to life by assembling its core hollow box structure. This step requires precision and careful handling to ensure strong, seamless joints.
Follow these assembly instructions:
- Prepare Your Workspace: Lay the main front board of your beam flat on a clean, stable surface, ensuring it’s well-supported.
- Apply Wood Glue: Liberally apply a continuous bead of wood glue along the entire length of the mitered edges of the front board. Be sure to get good coverage, as this is crucial for a strong bond.
- Attach Top and Bottom Boards: Carefully position the mitered edge of one of your top boards onto the glued edge of the front board. Repeat this process for the bottom board, creating a distinct “U” shape. Take care to align the edges perfectly to maintain the illusion of a solid piece.
- Secure with Brad Nails: While the wood glue is still wet, use a brad nailer to fire 18-gauge finish nails through the outside of the front board into the mitered edges of the top and bottom boards. These nails act as clamps, holding everything securely in place while the glue sets and forms a permanent bond. Space your nails every 6-12 inches for optimal hold.
After tacking the pieces together, gently stand the partially assembled beam upright. Inspect all joints and corners to ensure they are perfectly aligned and flush. Any minor adjustments needed should be made immediately before the wood glue begins to set. Using clamps during this stage can also help achieve tighter, stronger joints, especially if you’re working with longer beams. Allow the glue to cure fully according to the manufacturer’s instructions before proceeding to the next step, typically several hours or overnight.
Step 5: Add the End Caps (Optional for a Fully Enclosed Look)
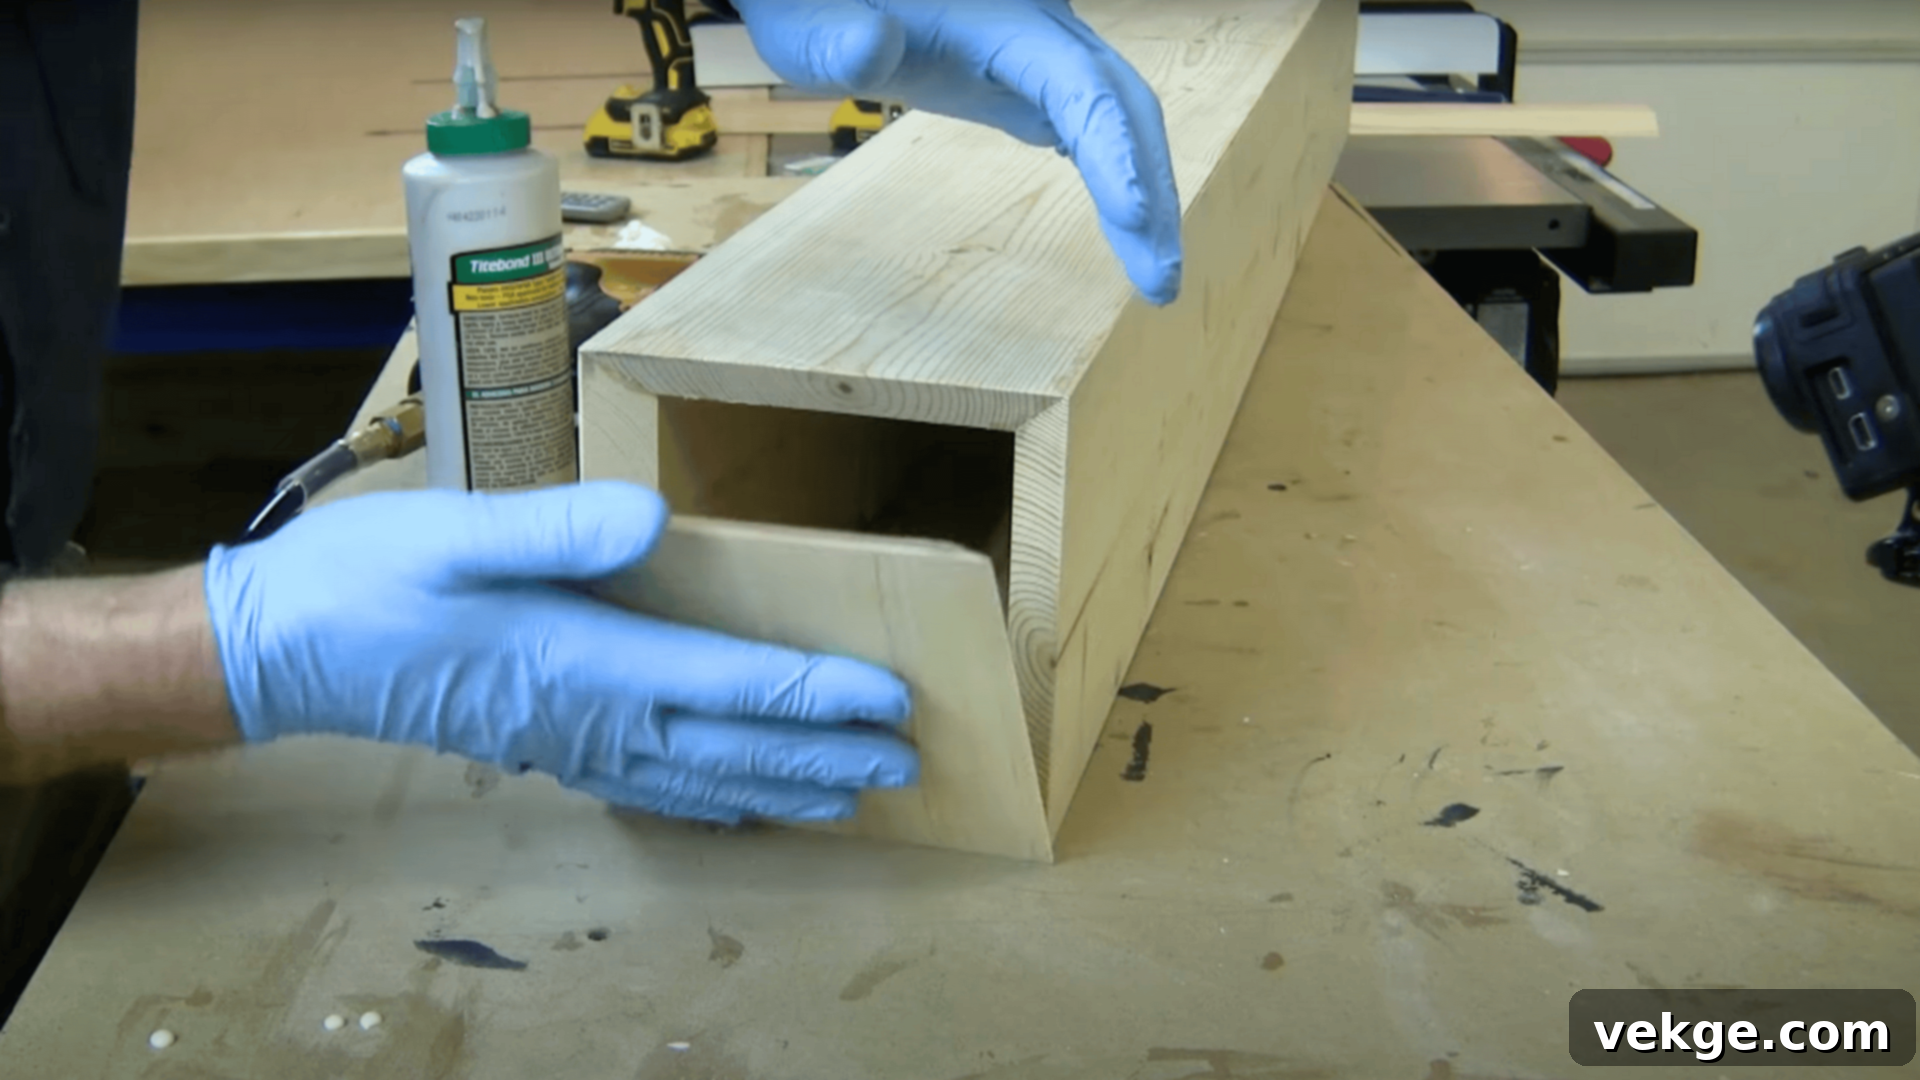
If your faux beam is positioned where its ends will be exposed (e.g., as a mantel or a floating ceiling beam not butting against a wall), adding end caps is essential. These small but crucial pieces complete the “box” structure, significantly enhancing the realism and polished appearance of your beam, making it truly look like a solid piece of timber from all angles.
Here’s how to attach them:
- Retrieve End Cap Pieces: Take the two small, mitered pieces you cut during Step 1 for the end caps.
- Apply Wood Glue: Apply a bead of wood glue along all mitered edges of each end cap piece. Ensure even coverage to create a strong seal.
- Position and Slide: Carefully slide each end cap piece into the open end of your assembled beam box. The mitered edges should align perfectly with the mitered edges of the main beam boards.
- Secure in Place: Gently tap the end caps with a rubber mallet or a hammer (using a block of wood to protect the surface) to ensure a snug fit. If necessary, use a few brad nails (from the top, bottom, and front) to temporarily hold the end caps in position while the glue dries completely.
Don’t be overly concerned if the fit isn’t absolutely flawless with minor gaps. As you’ll discover in subsequent steps, any small imperfections can be effectively hidden during the distressing, sanding, and finishing phases. The goal at this stage is to create the basic enclosed shape, knowing that aesthetic refinement will come later. Allow the glue to dry thoroughly before proceeding.
Step 6: Sand the Beam for a Smooth, Refined Surface
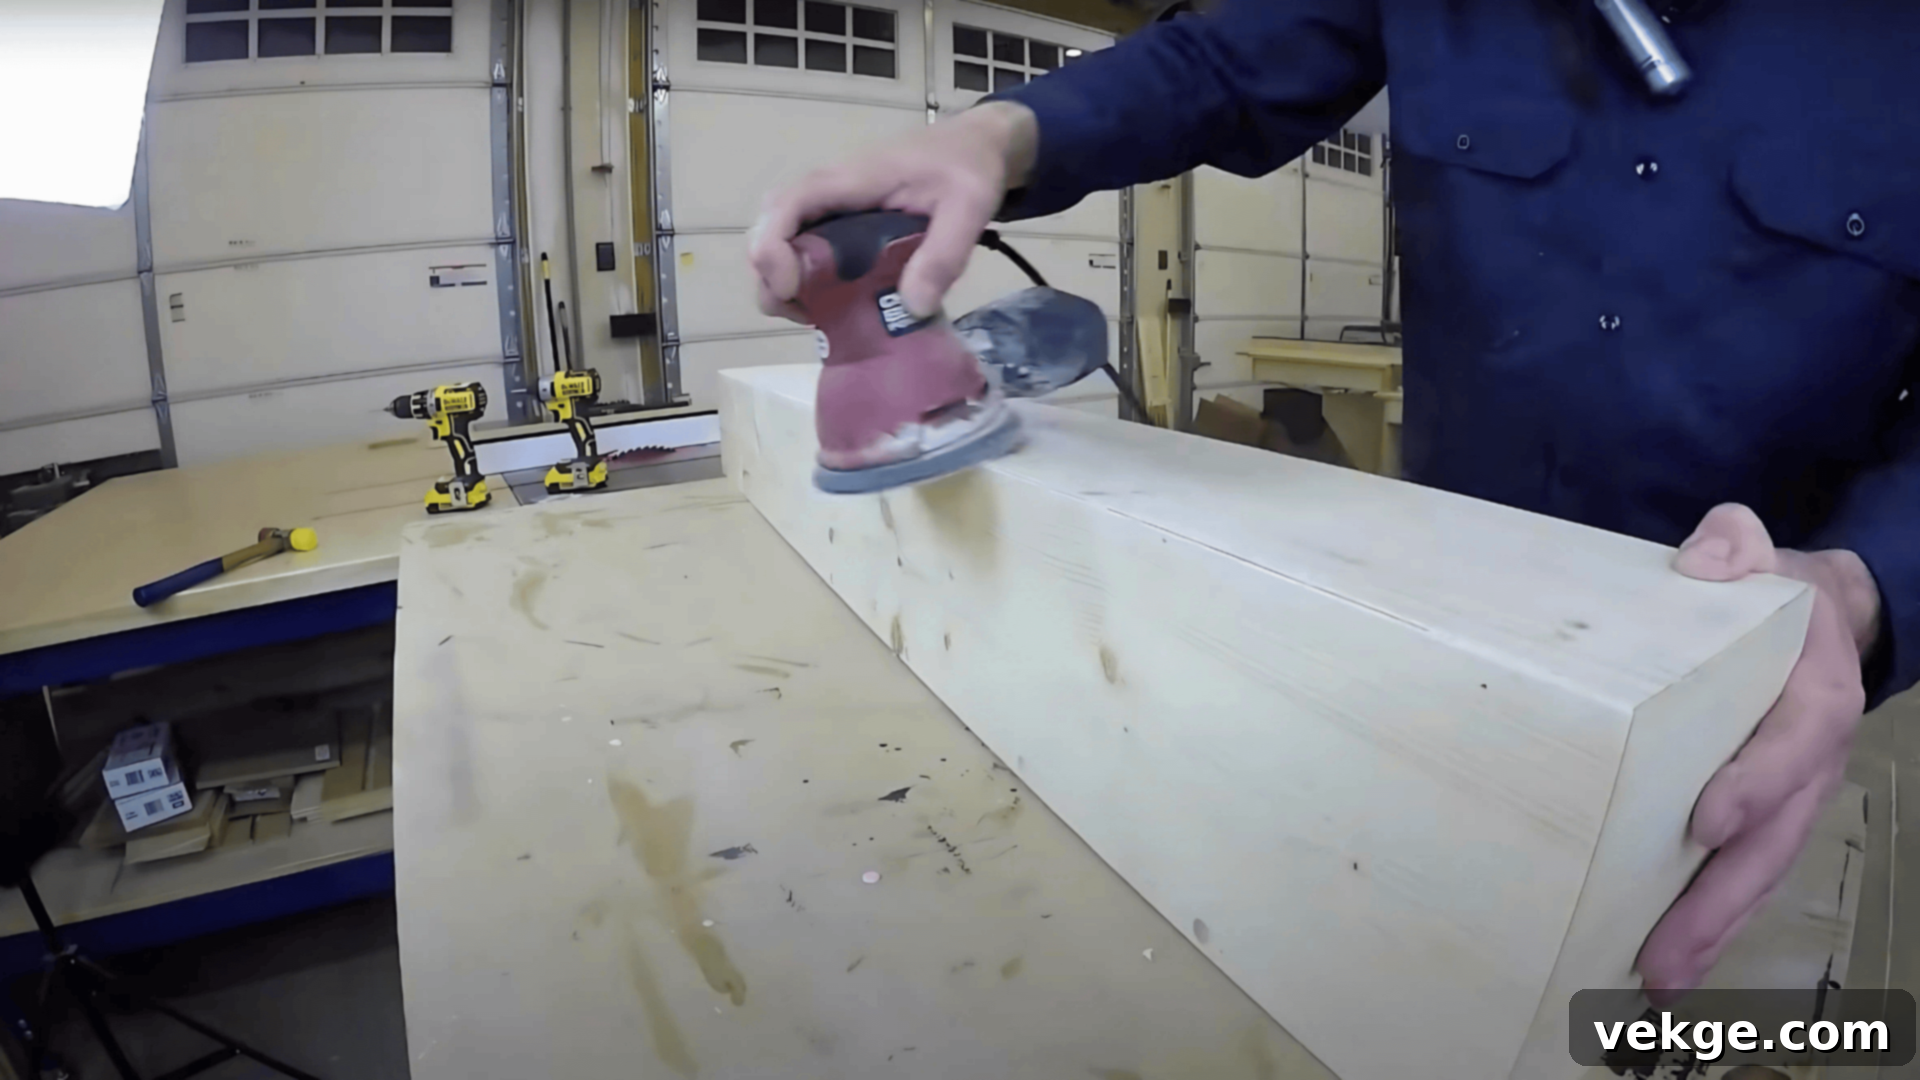
Proper surface preparation is crucial for a professional-looking finish. Before applying any stain or protective coating, thoroughly sand your assembled faux beam. This process accomplishes several vital tasks: it eliminates rough edges, smooths out any minor imperfections, and most importantly, prepares the wood surface to evenly absorb your chosen stain or paint.
Utilize a power sander (such as an orbital sander) for efficiency on larger surfaces, or a sanding block for more controlled work on edges and corners. Focus on these areas:
- Soften Sharp Corners: Gently round off any overly sharp edges to create a more natural, weathered feel or a smoother, safer profile, depending on your desired style.
- Smooth Over Joints and Seams: Pay extra attention to where the mitered boards meet. Sanding these areas helps to blend them together, further concealing the seams and enhancing the illusion of solid wood.
- Level Any Uneven Spots: Address any slight variations in height or texture across the beam’s surface, aiming for a consistent, smooth feel.
If you opted to use wood filler or wood plugs to cover nail or screw holes, ensure these areas are sanded perfectly flush with the surrounding wood. Start with a medium-grit sandpaper (e.g., 100-120 grit) to address major imperfections, then progress to a finer grit (e.g., 180-220 grit) for a super smooth finish. After sanding, meticulously wipe down the entire beam with a tack cloth or a damp rag to remove all dust, as any leftover dust can interfere with stain absorption and the final finish.
Step 7: Distress the Beam for an Aged, Rustic Look (Optional)
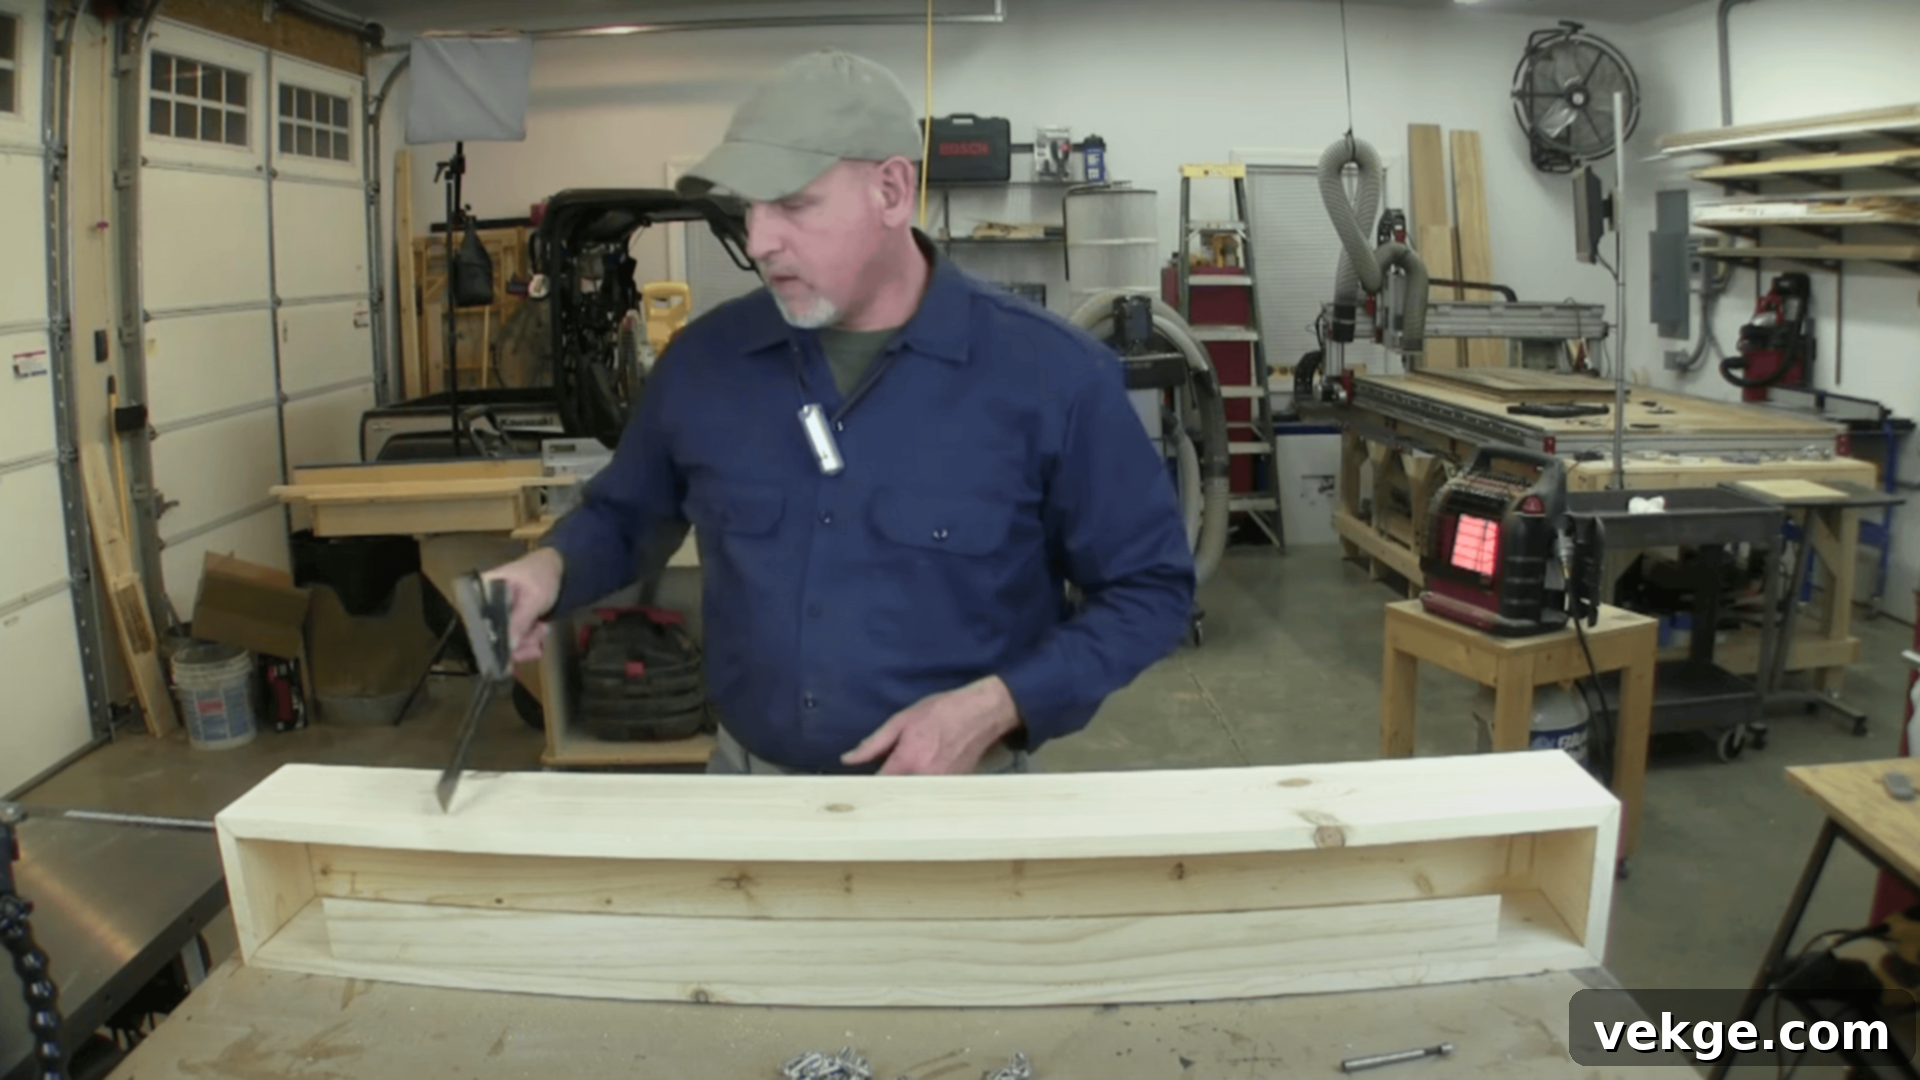
If your design vision leans towards a rustic, farmhouse, or industrial aesthetic, the distressing process is where your faux beam truly gains its character and authenticity. This optional but highly recommended step involves intentionally adding “wear and tear” to the wood, making it appear as though it has naturally aged over decades. It’s a creative and satisfying part of the project!
Here are several effective techniques to achieve a convincing distressed look:
- Create Dents and Dings: Use a hammer, a heavy chain, or even a rock to gently (or not so gently, depending on the desired effect) tap and strike the wood surface. Focus on edges and corners where natural wear would occur.
- Add Scrapes and Gouges: Drag a screwdriver, a paint can opener, or the edge of a chisel across the surface to create realistic scrapes and gouges. Vary the pressure and direction for a natural, random pattern.
- Mimic Wormholes: Use a small drill bit (like a Forstner bit) to drill shallow, irregularly spaced holes. These can convincingly replicate the look of insect damage, adding to the aged illusion.
- Introduce Texture and Scratches: Drag screws, nails, or even a wire brush across the wood grain to create fine scratches and additional texture that enhances the natural ruggedness.
- Chop Edges (Hand-Hewn Look): For a truly hand-hewn appearance, carefully use a hatchet or chisel to “chop” and soften the sharp edges of the beam, creating a more organic, uneven profile.
Remember, the goal is to create a naturally worn appearance, so avoid uniform or patterned distressing. Work intuitively across the entire beam, paying extra attention to the edges, corners, and ends, which would typically experience the most wear. There’s no single “right” way to distress; experiment until you achieve a look that feels authentically aged and unique to your design.
Step 8: Apply Your Chosen Wood Stain
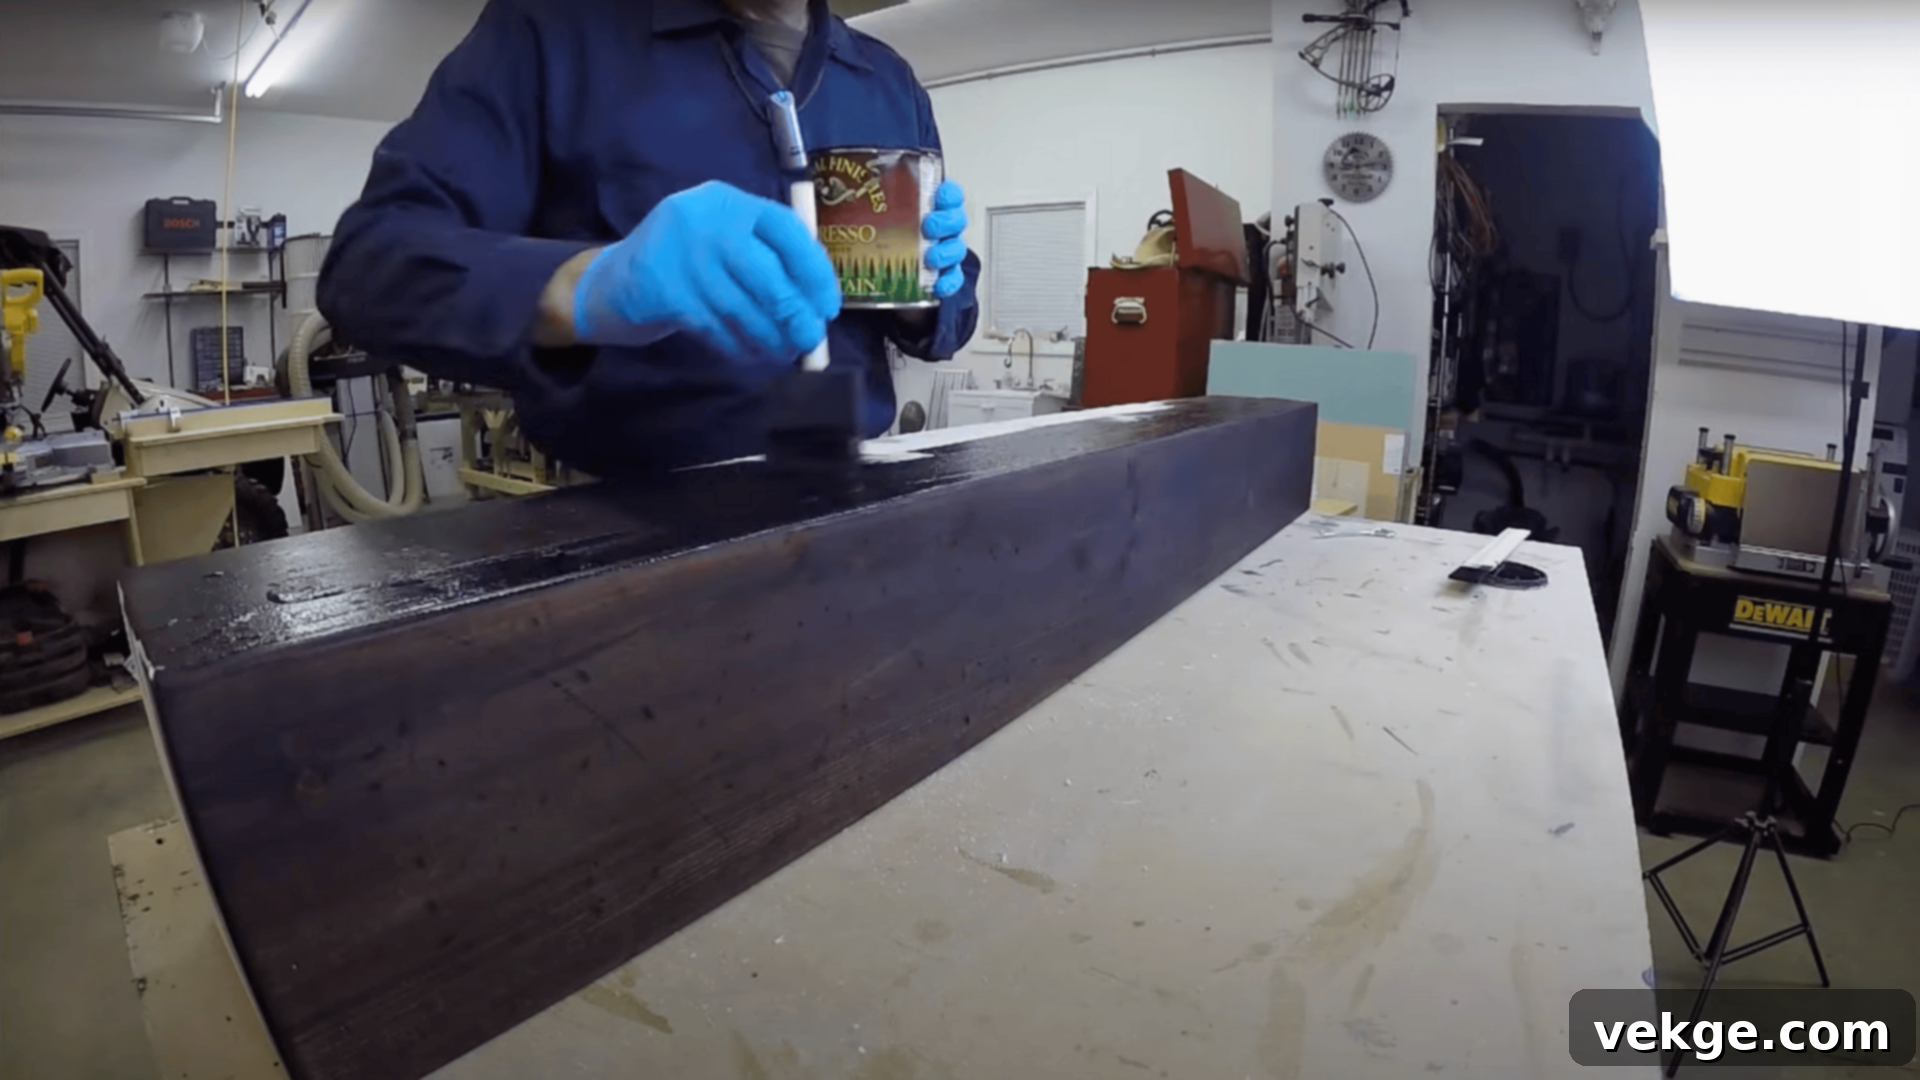
This is the exciting stage where your raw wood beam begins to truly transform, gaining color, depth, and character. Applying wood stain enhances the natural grain patterns and highlights any distressing you’ve added, giving your faux beam an authentic, finished wood aesthetic. The choice of stain color is paramount in defining your beam’s style, from light and airy to rich and dramatic.
Follow these steps for effective stain application:
- Apply Stain Evenly: Using a clean brush, a foam applicator, or a lint-free cloth, generously apply your chosen wood stain to the entire surface of the beam. Work in manageable sections, always moving with the direction of the wood grain for the best results.
- Allow for Penetration: Let the stain sit on the wood for a few minutes. The longer the stain remains on the surface, the deeper and richer the color will be. Always test your stain on a scrap piece of the same wood to determine the ideal penetration time for your desired shade.
- Wipe Off Excess: After the desired penetration time, use a clean, dry cloth to wipe off any excess stain. Wiping against the grain initially can help push pigment into the wood, followed by wiping with the grain for a smooth finish. Ensure all excess is removed to prevent stickiness or uneven drying.
If, after wiping, the stain appears too dark for your preference, you can immediately dampen a cloth with mineral spirits (for oil-based stains) or water (for water-based stains) and gently wipe the beam again to lift some of the pigment. Water-based stains generally offer easier cleanup and allow for more control over color depth, making them a good choice for beginners. Allow the stained beam to dry completely, which typically takes several hours or, ideally, overnight, before proceeding to the next step. Proper drying time ensures the protective finish adheres correctly.
Step 9: Apply a Durable Protective Finish
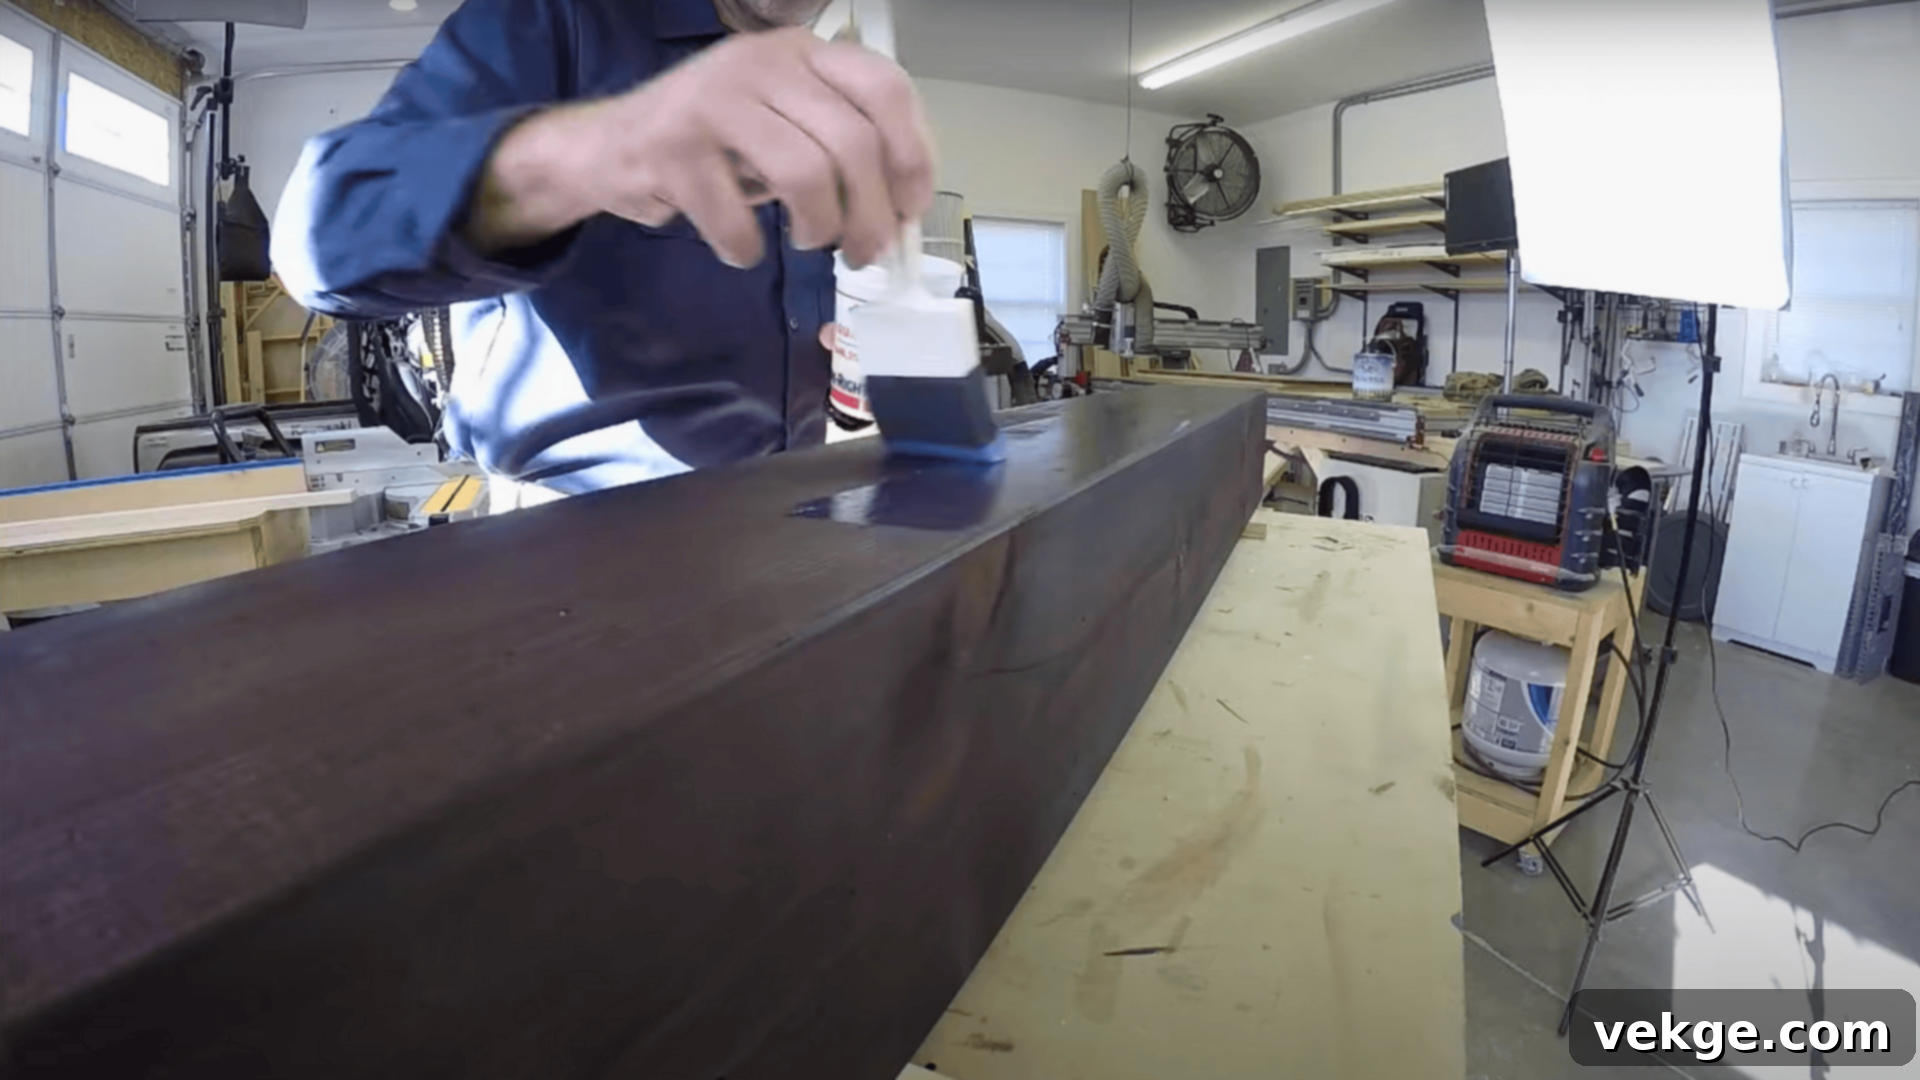
The final step in beautifying your faux beam is applying a clear protective topcoat. This crucial layer safeguards your handiwork from everyday wear, dust, minor scratches, and moisture, ensuring your beam maintains its stunning appearance for years to come. Popular choices for this protective finish include polycrylic (water-based) and polyurethane (oil-based).
Here’s how to apply a smooth, even protective layer:
- Choose Your Applicator: Select a high-quality foam brush or a clean, fine-bristle brush. Foam brushes are excellent for minimizing brush strokes, while bristle brushes provide good coverage.
- Apply a Thin, Even Coat: Dip your brush into the chosen finish and apply a thin, consistent coat over the entire surface of the beam. Work methodically, always brushing in the direction of the wood grain. Avoid applying too much product at once to prevent drips and uneven pooling.
- Allow for Thorough Drying: Let the first coat dry completely according to the manufacturer’s instructions. This is essential before adding subsequent coats to ensure proper adhesion and a smooth finish.
Optional but Recommended: Light Sanding Between Coats: For an exceptionally smooth, professional-grade finish, lightly sand the beam between coats using very fine-grit sandpaper (e.g., 220-400 grit). This process, often called “de-nibbing,” removes any dust particles or raised grain, helping the subsequent coats adhere better and creating a silky-smooth surface. After sanding, wipe away all dust with a tack cloth before applying the next coat.
For optimal durability and protection, aim for 2–3 thin coats of your chosen finish, allowing each coat to dry completely before applying the next. This multi-layered approach provides superior resistance to everyday challenges and enhances the overall beauty of your finished faux beam.
Step 10: Securely Mount Your Finished Faux Beam
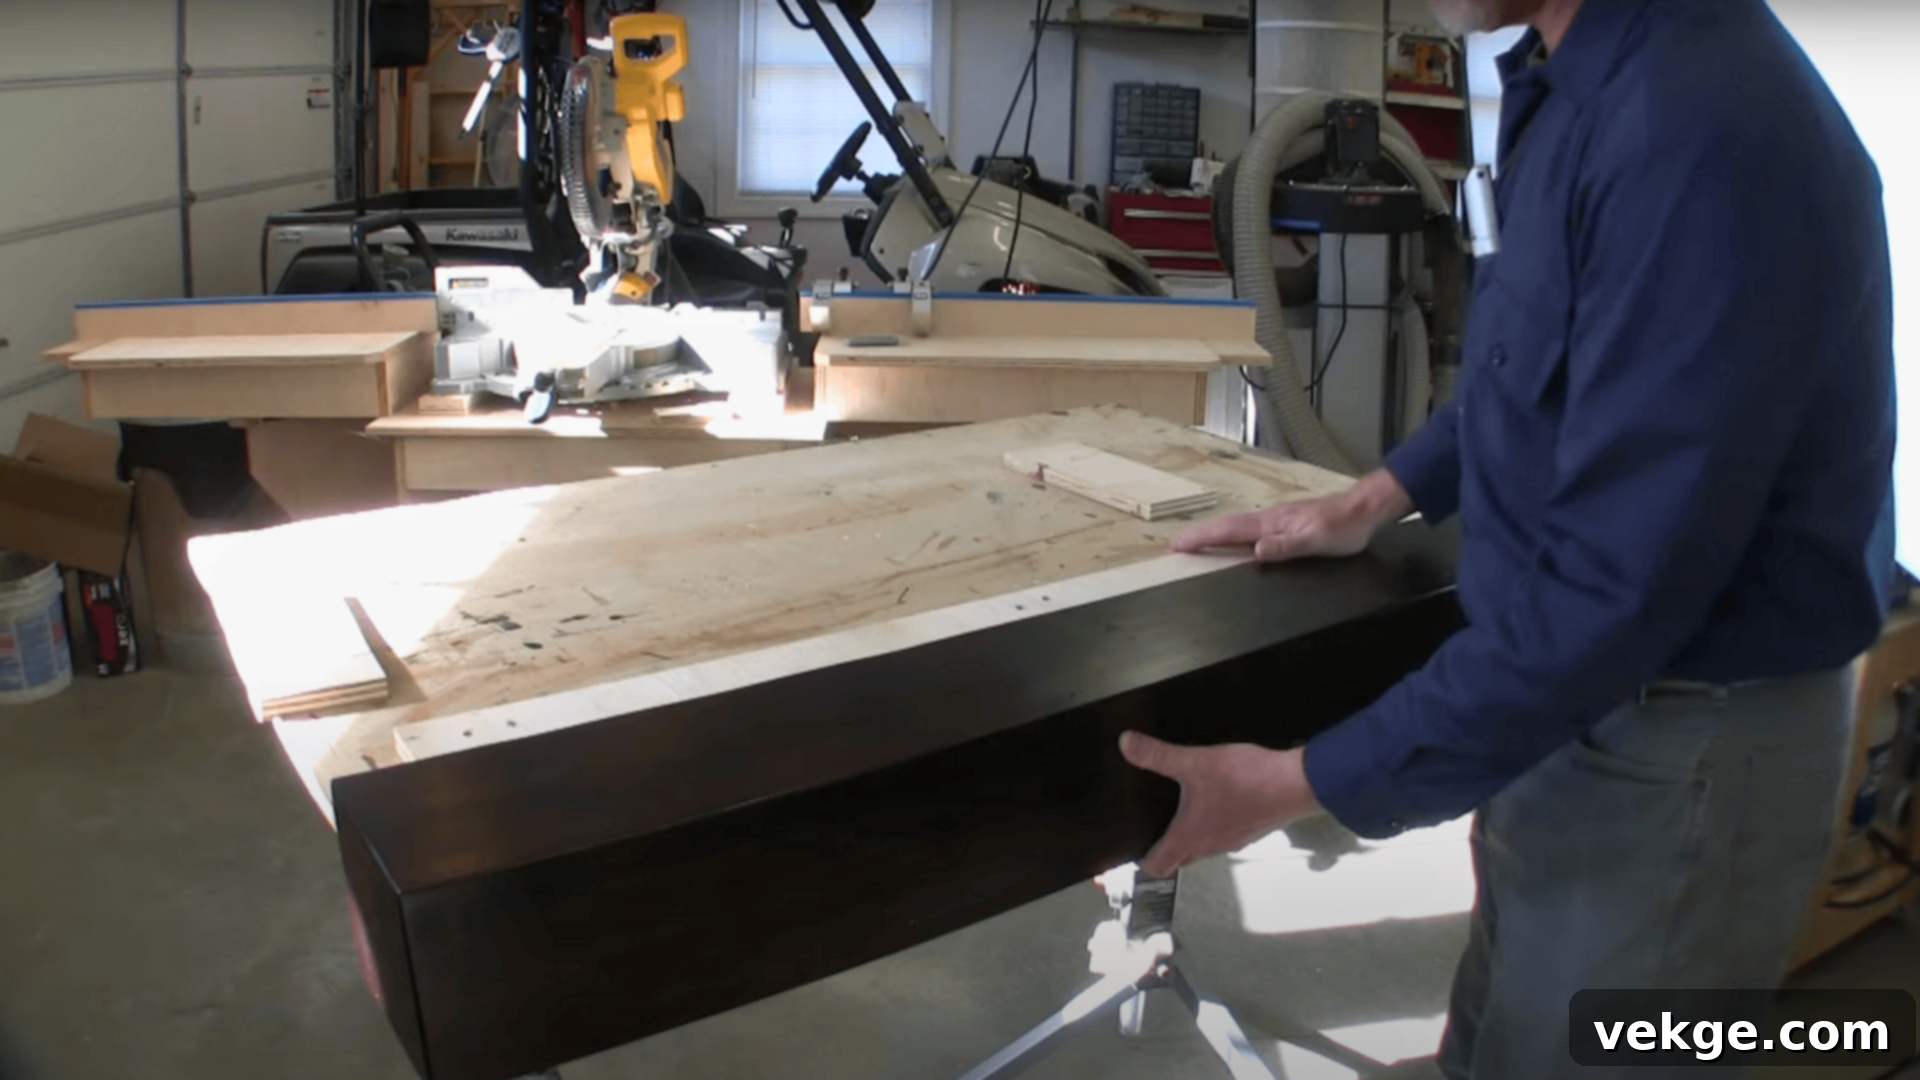
The moment of truth has arrived! With your faux beam beautifully constructed and finished, it’s time for installation. If you’ve followed our guide and incorporated a French cleat system, you’re in for a quick, straightforward, and incredibly sturdy mounting process.
To mount your faux beam using a French cleat:
- Install the Wall-Side Cleat: Locate the studs in your wall or ceiling using a stud finder. Mark their positions precisely. Attach the remaining cleat piece (the “wall-side” cleat) to the wall or ceiling, ensuring it is perfectly level. Use robust wood screws driven directly into the studs. If studs aren’t available at all mounting points, use heavy-duty wall anchors appropriate for the weight of your beam. This cleat must be absolutely secure.
- Align and Lock the Beam: Carefully lift your finished faux beam and align the beam-side cleat (attached in Step 3) with the wall-side cleat. Gently slide the beam downwards onto the wall cleat. You should feel it lock securely into place, creating a strong, hidden connection. Double-check with a level that the beam remains perfectly horizontal.
While the French cleat system is highly recommended for its hidden strength, other mounting options are available depending on your preference and the beam’s location:
- L-Brackets: For a visible, often industrial or rustic look, you can use decorative L-brackets installed directly beneath the beam. These are typically screwed into studs and then into the bottom of the beam.
- Floating Shelf Mounts: If you desire a cleaner, completely hidden look without a French cleat, specialized floating shelf mounts can be installed into wall studs, and the hollow beam then slides over them. This method requires very precise internal measurements of your beam.
Regardless of the method you choose, always prioritize safety and stability. Ensure that your wall-mounting hardware is adequately rated to support the full weight of your faux beam, plus any potential decorative items you might place on it. A securely mounted beam is not only safer but will also look more professional and last longer.
Watch the full video tutorial here for a closer look at each step:
How to Make Faux Beams Using Foam (A Quick Overview)
For those seeking an even lighter, often more budget-friendly, and less labor-intensive approach, crafting faux beams from high-density foam (such as pink insulation foam) is an excellent alternative. This method achieves a remarkably convincing wood beam aesthetic without the need for heavy lumber or extensive power tools, making it ideal for solo DIYers or installations on high or vaulted ceilings.
The process generally involves these key steps:
- Cutting and Shaping: Begin by precisely cutting the rigid foam boards into the desired U-shape for your beam. You can use a utility knife or a hot wire cutter for clean edges.
- Texturing the Surface: To mimic natural wood, use tools like a stiff wire brush or even crumpled aluminum foil to create realistic wood grain patterns and faux knots on the foam’s surface. Don’t be afraid to add some distressing marks for extra authenticity.
- Painting and Staining: Apply a lighter base coat of paint, such as a tan or light brown, as your foundation. Once dry, follow with a darker, semi-transparent stain or paint. This layering technique allows the base color to show through the “grain,” creating a deep, natural wood effect. Experiment with dry brushing and wiping techniques to enhance the realism.
- Assembly: Glue the foam panels together using a foam-safe construction adhesive or spray glue, ensuring tight, flush joints. Once the glue cures, any visible seams can be filled with lightweight joint compound, sanded smooth, and re-textured to blend seamlessly.
- Mounting: Due to their minimal weight, foam beams are incredibly easy to mount. A common method involves securing small wood blocks or cleats to your ceiling joists (or wall studs) and then simply sliding the hollow foam beam over these blocks. This provides a hidden and secure attachment. Foam beams are particularly well-suited for decorative applications on ceilings, in vaulted rooms, or when you need to minimize structural strain.
This foam method offers a quick, low-mess project that delivers significant visual impact. For a complete visual guide, check out this helpful video: Foam to Faux Ceiling Beams: DIY.
Versatile Applications: Where to Use Faux Beams in Your Home
One of the greatest advantages of DIY faux beams is their incredible versatility. These decorative elements can be strategically incorporated into numerous areas throughout your home to instantly infuse warmth, create visual depth, and add a bespoke, custom-designed touch without the need for costly structural renovations. Here are some of the most popular and impactful places to install faux beams:
- Fireplace Mantels: A faux beam makes an exceptional and often cost-effective fireplace mantel. It can instantly elevate your fireplace, adding rustic charm, a modern edge, or a cozy focal point to your living space.
- Doorways and Entryways: Framing open doorways or archways with faux beams can dramatically define transitional spaces. This creates a more finished and architecturally interesting appearance, making a simple opening feel more substantial and inviting.
- Ceilings (Flat or Vaulted): Perhaps the most classic application, running faux beams across flat or vaulted ceilings introduces significant texture, visual interest, and a sense of grandeur. They can define zones, make high ceilings feel cozier, or accentuate the height of a vaulted room.
- Floating Shelves: Cut shorter sections of your faux beams and mount them as robust, stylish floating shelves. This creates functional storage with a custom, high-end look, perfect for displaying decor, books, or plants in kitchens, living rooms, or bathrooms.
- Decorative Trusses: On tall or angled ceilings, constructing decorative trusses from faux beams can replicate the impressive look of structural support elements. This is particularly effective in large open-plan areas, adding a majestic, architectural statement.
Each of these applications allows you to inject significant character and style into your home, leveraging the aesthetic benefits of beams without any of the major construction hassles or the need for inherently heavy, load-bearing materials.
Common Mistakes to Avoid When Building Faux Beams
While constructing DIY faux beams is a rewarding project, being aware of common pitfalls can save you time, frustration, and ensure a professional-looking result. Even seemingly minor missteps can impact the beam’s appearance and longevity. Here’s what to watch out for:
- Using Warped or Bowed Boards: This is perhaps the most critical mistake. Always inspect your lumber carefully before purchasing and cutting. Warped or bowed wood will make it nearly impossible to achieve tight, seamless mitered joints, resulting in a crooked or unsightly beam that is difficult to assemble and mount correctly. Invest in straight, quality lumber.
- Inadequate Mounting to Studs: Never rely solely on drywall anchors, especially for longer or heavier wood beams. Always locate and securely fasten your French cleat or mounting blocks directly into wall or ceiling studs using appropriate wood screws. If the beam isn’t solidly attached, it runs the risk of sagging, shifting, or even falling over time, posing a safety hazard and ruining your aesthetic.
- Visible Seams and Imperfections: The illusion of a solid beam relies heavily on seamless construction. Poorly mitered edges or visible gaps between boards can break this illusion. Take your time with cuts, ensure tight glue-ups, and don’t hesitate to use wood filler (for wood beams) or joint compound (for foam beams) to meticulously fill any gaps. Sand and re-texture these areas for a flawless blend.
- Skipping the Distressing Step (for rustic looks): If your goal is a rustic, aged, or farmhouse aesthetic, omitting the distressing step can leave your beam looking too “new” or artificial. Fresh, smooth lumber won’t convey the character of old timber. Embrace the distressing techniques discussed in Step 7 to add authentic textures, dents, and imperfections that bring your beam to life.
- Neglecting Proper Sealing: After staining, it’s easy to rush to installation, but skipping the protective topcoat is a major oversight. Without polycrylic or polyurethane, your stain will be unprotected, vulnerable to dust accumulation, moisture, and scratches. A proper seal not only protects the finish but also enhances the wood’s depth and ensures your beam maintains its beauty for years.
By taking a little extra care and attention to these potential issues, you can ensure your DIY faux beam project yields a stunning, durable, and professional-grade addition to your home that you’ll be proud of.
Conclusion: Achieve Stunning Results with DIY Faux Beams
You’ve now mastered the essential techniques for crafting beautiful DIY faux beams, whether you choose the authentic appeal of wood or the lightweight convenience of foam. Both methods offer incredibly smart, cost-effective solutions to dramatically transform the aesthetic of any room without the significant expense, weight, or structural challenges associated with real timber beams.
With the detailed step-by-step instructions provided in this guide, you are fully equipped to embark on your own project. Imagine adding a rustic fireplace mantel, enhancing your ceiling with elegant architectural details, or creating custom floating shelves – the possibilities for elevating your home’s decor are limitless. You now possess the knowledge, from selecting the right materials and gathering your tools, to executing precise cuts, assembling the beam box, applying custom finishes, and securely mounting your masterpiece.
Remember that the true beauty of faux beams lies in their versatility and affordability. They are not only budget-friendly but also incredibly adaptable, allowing you to personalize every aspect – from dimensions and style to unique distressing and stain colors – to perfectly match your personal taste and the existing decor of your space.
Always keep in mind that attention to detail, such as meticulous sanding, thoughtful distressing, and proper sealing, will make all the difference in achieving a professional and long-lasting finish.
We encourage you to share your creativity! If you undertake this rewarding DIY project, please consider sharing photos of your finished faux beams or dropping any questions you might have in the comments section. We genuinely love seeing what our readers build! For more inspiring ideas and practical guides for enhancing your home, don’t hesitate to explore our other DIY and home improvement blog posts.
