Transform Your Home: 25 Creative DIY Repurposing Projects for Unique and Sustainable Living
Welcome to a world where creativity breathes new life into forgotten treasures. This guide will reveal how transforming everyday items into extraordinary pieces can revolutionize not only your living spaces but also your perspective on what constitutes ‘waste.’ For years, I’ve witnessed firsthand the incredible potential hidden within the most overlooked objects, just waiting for a second chance to shine. Join us as we explore these inspiring transformations, demonstrating how to unearth beauty and possibility in the ordinary, crafting unique, sustainable home decor that tells a story while serving innovative new purposes.
Embracing the art of repurposing is more than just a crafting trend; it’s a commitment to sustainability, a celebration of individuality, and an ingenious way to personalize your environment without breaking the bank. Each project presented here combines practical function with unique aesthetic appeal, allowing you to create one-of-a-kind items that truly reflect your personal style and values. From vintage finds to common household objects, these DIY upcycling ideas will inspire you to look at your possessions with fresh eyes and unlock their hidden potential.
Creative Repurposing Projects for Your Home
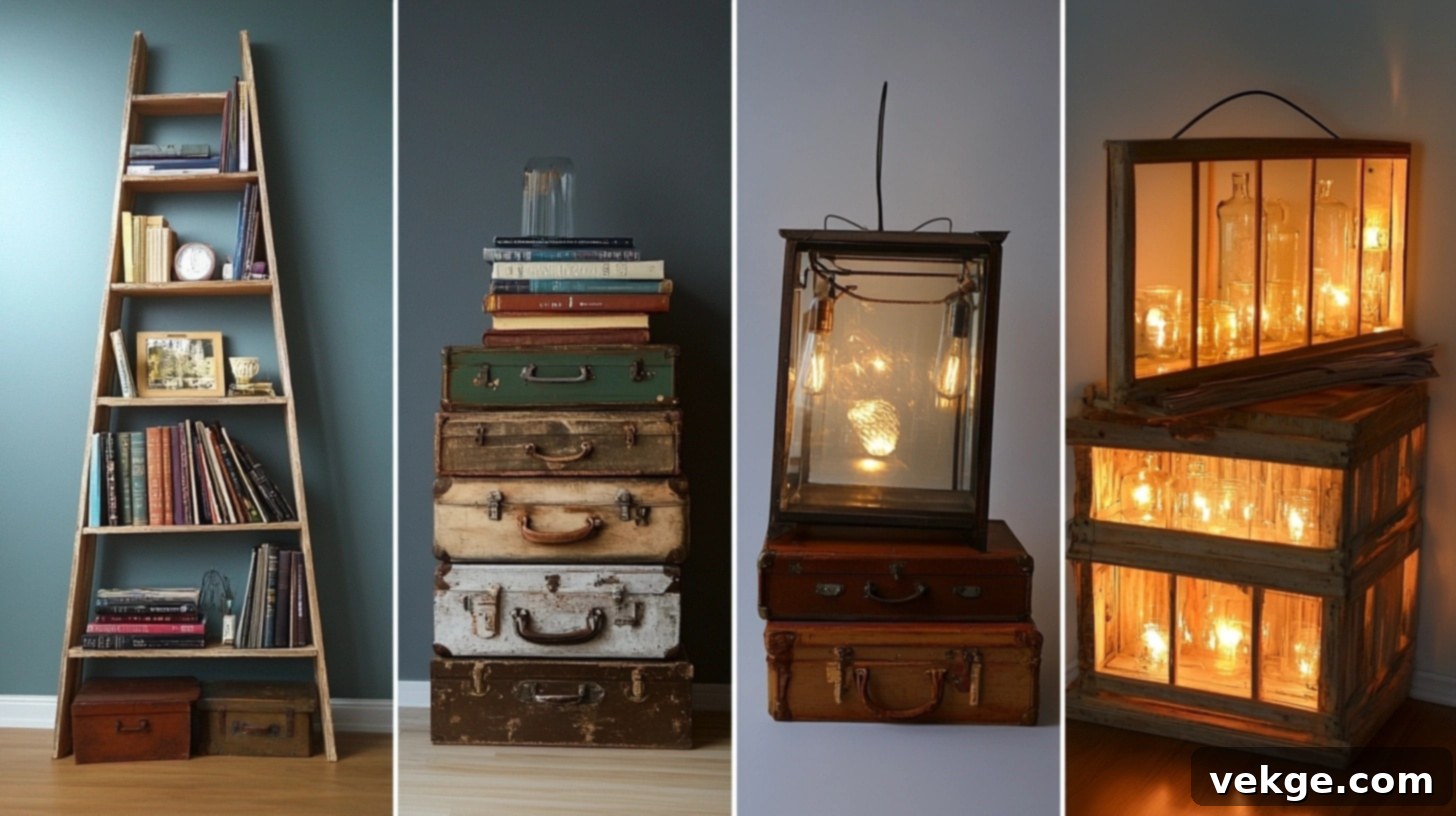
1. Vintage Ladder Library: A Unique Bookshelf Display

Transform an old, forgotten ladder into a captivating and functional library. By creating shelves of varying depths, you can beautifully accommodate different book sizes and an array of decorative objects, turning each rung into a unique display opportunity. Strategically integrated lighting will not only highlight your cherished collections but also cast a warm, ambient glow, perfect for evening reading or simply enhancing the room’s atmosphere. Custom-built bookends ensure that all your items remain perfectly positioned on their new, angled perches, adding both stability and aesthetic appeal to this remarkable repurposed piece.
Complete DIY Guide for Your Ladder Library
- Begin by thoroughly cleaning and sanding all ladder surfaces. This crucial step removes dirt, grime, and rough spots, ensuring safe handling and preparing the wood for a new finish.
- Reinforce each rung with additional support brackets. This is essential for weight-bearing stability, especially when the ladder will hold numerous books and decorative items.
- Install rubber feet on the ladder base to prevent any floor damage and to enhance overall stability, especially on slick surfaces.
- Create custom shelf platforms that sit securely on each rung level. These platforms will provide flat, stable surfaces for your books and decor.
- Build an integrated LED lighting system with hidden wiring along the ladder sides. This offers subtle illumination without visible cords, enhancing the display and creating ambiance.
- Install a safety securing system to attach the ladder firmly to the wall. This prevents accidental tipping, which is vital for safety in any home environment.
- Design and create custom bookends that clamp securely to the ladder rungs, ensuring books remain upright and organized.
- Build removable catch trays for small items beneath each shelf, offering extra storage and preventing clutter.
- Install anti-slip surfaces on each shelf platform to keep items firmly in place and prevent them from sliding.
- Design and follow proper weight distribution guidelines for each level, ensuring the ladder’s structural integrity is not compromised.
- Add a protective coating suitable for expected wear patterns, such as a clear sealant or paint, to extend the life and beauty of your ladder.
- Create a maintenance schedule for regular stability checks, especially for the wall attachments and rung supports.
- Build an integrated cord management system for all lighting, keeping wires out of sight and maintaining a clean aesthetic.
- Design an emergency support system, if necessary, for exceptionally heavy loads, offering an extra layer of security.
- Install humidity monitoring for book preservation, especially if the library is in an area prone to moisture fluctuations.
2. Time-Traveling Suitcase Tables: Vintage Charm & Storage
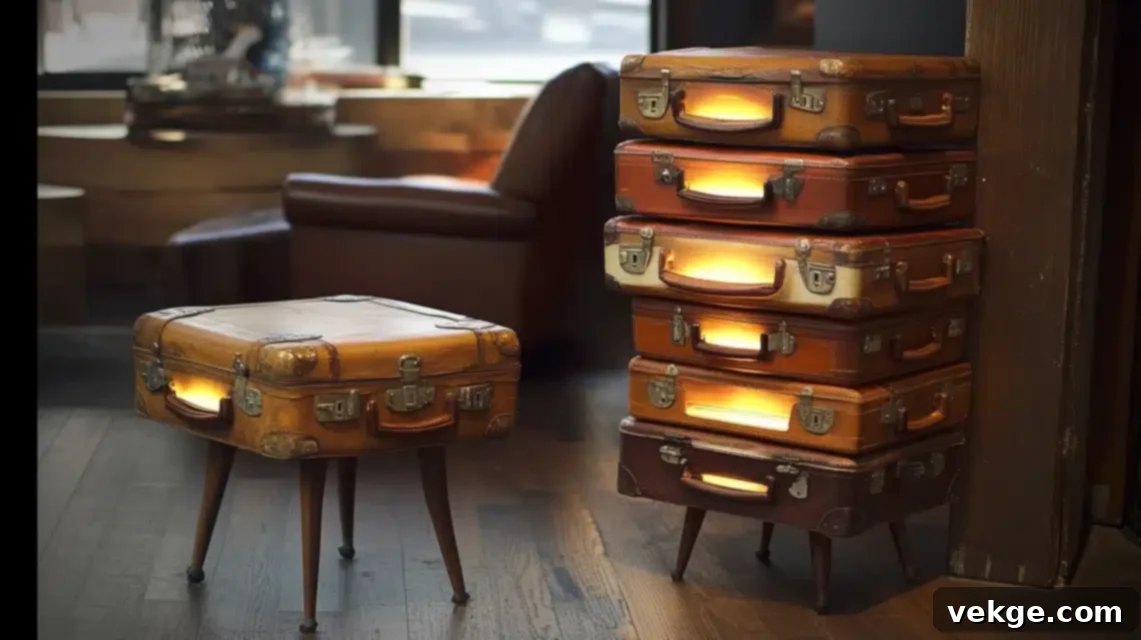
Give forgotten vintage suitcases a new lease on life by transforming them into enchanting and functional tables. By selecting suitcases of various heights, you can create delightful nesting opportunities, perfect for maximizing both surface area and hidden storage. Installing discreet support structures ensures robust stability without detracting from their authentic, time-worn charm. Furthermore, crafting removable interior platforms allows you to maintain the valuable storage capacity while providing a firm base for items placed on the tabletop. Subtle, integrated lighting within the suitcases can create a truly magical evening ambiance, with light gently filtering through the leather or fabric gaps, adding a unique and nostalgic glow to your space.
Complete DIY Guide for Suitcase Tables
- Begin by constructing a sturdy internal wooden frame for each suitcase. This frame is crucial for providing structural support and preventing sagging.
- Install adjustable legs with proper leveling mechanisms. This ensures stability on uneven floors and allows for custom height adjustments.
- Create reinforced corners with hidden steel brackets for enhanced durability and to protect the suitcase’s original structure.
- Design and build removable interior organization systems. These can include dividers or smaller compartments to maximize storage efficiency.
- Install LED strip lighting with hidden battery compartments. This provides ambient light without the need for external power sources, preserving the aesthetic.
- Build protective glass or acrylic top surfaces for daily use. These safeguard the suitcase material from spills and wear while offering a smooth tabletop.
- Create a ventilation system to prevent moisture buildup inside, especially important for preserving any stored items.
- Install soft-close support struts for easy access to the interior. This adds a touch of modern convenience to your vintage piece.
- Design an interlocking system for stacked configurations, ensuring stability and preventing the tables from shifting.
- Build custom protective pads for delicate flooring, preventing scratches when the tables are moved.
- Install hidden wheels for mobility when needed, making it easy to rearrange your furniture layout.
- Create a moisture barrier between the suitcase and its contents, protecting textiles or papers from humidity.
- Design proper weight distribution guidelines for placing items on the tabletop and inside the suitcase.
- Build an integrated cable management system if you plan to charge devices on the table, keeping cords tidy and out of sight.
- Install anti-slip mechanisms between stacked cases to ensure they remain securely in place.
3. Rustic Wine Crate Gallery: Charming Wall Storage
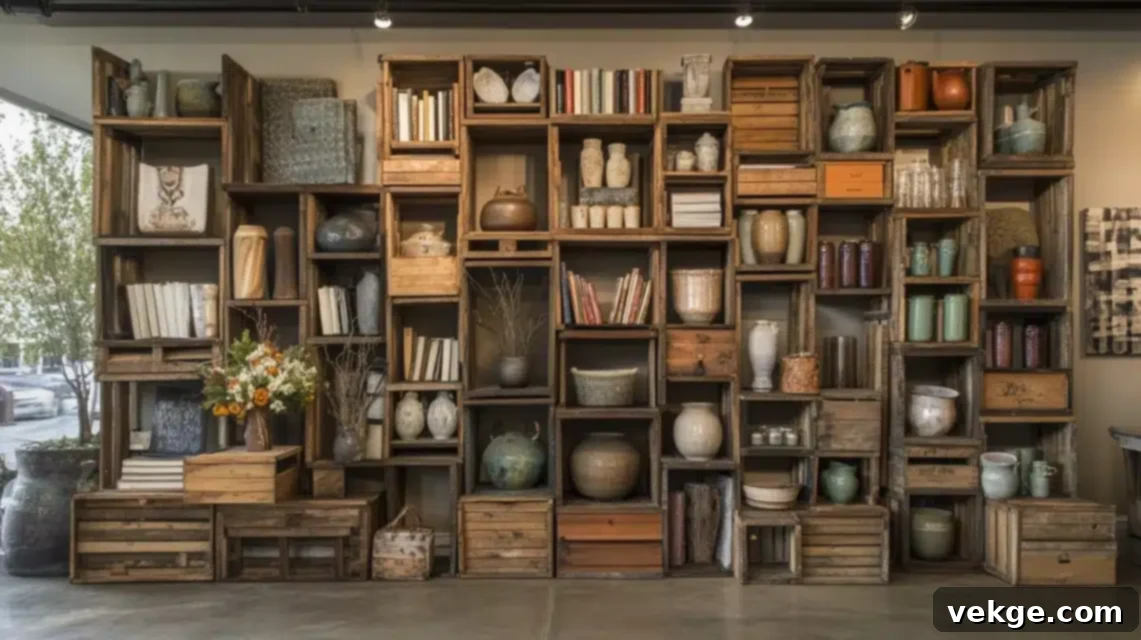
Transform discarded wine crates into a captivating rustic gallery wall, offering both visual intrigue and maximized storage potential. By arranging the crates in asymmetrical patterns, you create dynamic focal points that draw the eye. Installing proper backing ensures stable weight distribution, making these shelves ideal for displaying heavier items like books, pottery, or treasured keepsakes. Designing varied depths within your arrangement allows for layered displays and versatile storage options, catering to items of all sizes. Thoughtfully placed spot lighting can further enhance this gallery, highlighting special pieces and creating a warm, inviting ambiance that complements the natural charm of the wood.
Complete DIY Guide for a Wine Crate Gallery
- Begin with a thorough cleaning and wood preservation treatment for each wine crate. This removes debris and protects the wood from pests and decay.
- Install heavy-duty wall mounting brackets. These should be rated for the full weight of the crates when filled with items, ensuring safety and stability.
- Create custom backing panels for additional support. These can also serve to protect your wall surface from direct contact with the crates.
- Design an integrated lighting system with hidden wiring. This could involve small LED puck lights or strips to illuminate displayed items without visible cords.
- Build reinforced joints for long-term stability of the crate structure, especially if they are stacked or connected.
- Install adjustable shelf inserts within the crates for flexibility in displaying items of different heights.
- Create removable dividers for organization options, allowing you to customize the internal space as needed.
- Design proper ventilation for enclosed spaces within the crates, particularly if storing sensitive items or electronics.
- Build custom trim pieces around the edges of your gallery for a professional, polished finish.
- Install a protective coating, such as a clear varnish or wax, for daily use, safeguarding the wood from dust and minor wear.
- Create a template system for perfect alignment when mounting multiple crates, ensuring a cohesive and visually pleasing arrangement.
- Design proper spacing between crates for aesthetic appeal and to allow easy access to items.
- Build integrated connection systems between crates if you plan to create a large, continuous display, enhancing structural integrity.
- Install moisture barriers between the crates and the wall, protecting your wall from any potential moisture from wood or stored items.
- Create maintenance access points behind crates for easy wiring adjustments or wall cleaning.
4. Mason Jar Bathroom Organization: Stylish & Functional
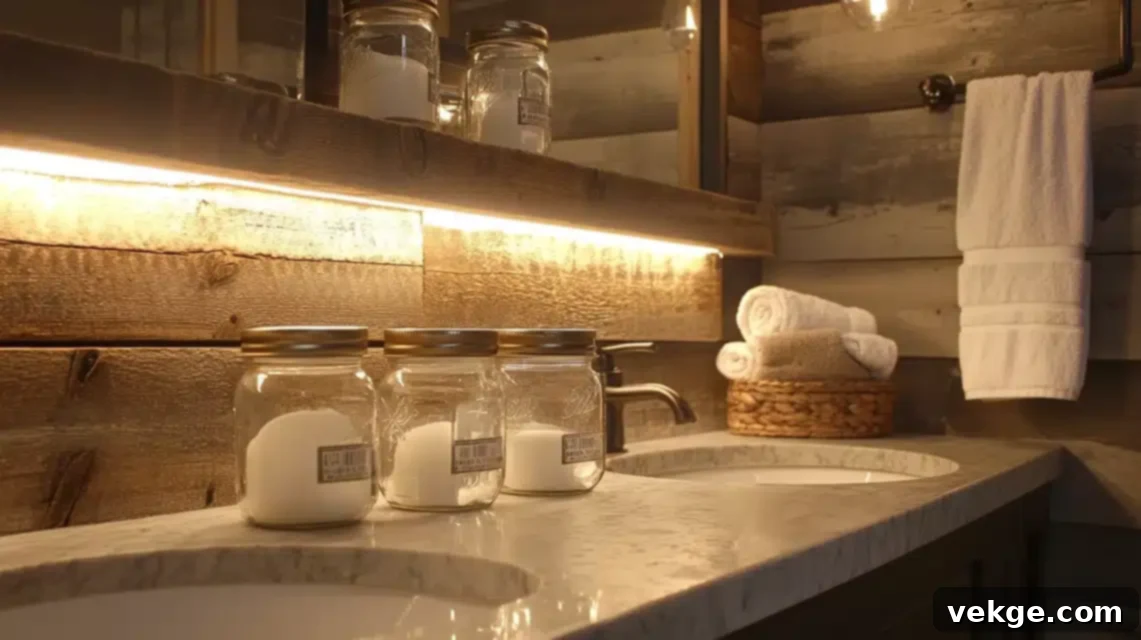
Revitalize your bathroom with charming and practical organization solutions using simple mason jars. Customize the lids with various colors and finishes to perfectly complement your bathroom décor, turning ordinary jars into stylish accents. Wall-mounted holders are an ingenious way to keep your counters clear and clutter-free while beautifully displaying the contents of each jar. For added convenience and a touch of luxury, consider incorporating LED underlighting, which provides subtle, gentle illumination for those late-night bathroom visits. Furthermore, building tiered platforms effectively maximizes corner space, creating accessible and visually appealing storage for all your bathroom essentials.
Complete DIY Guide for Mason Jar Bathroom Organizers
- Begin by creating custom mounting brackets for wall installation. These brackets should securely hold the jars and be appropriate for bathroom humidity.
- Design and build specialized lid systems for different contents, such as dispenser pumps for soap, slots for toothbrushes, or solid tops for cotton balls.
- Install waterproof seals on all lids and attachments for humidity protection, preventing moisture from affecting contents.
- Create an integrated LED lighting system under shelving or within wall-mounted units, providing subtle, functional illumination.
- Build a custom label system for content identification. Labels can be elegant vinyl decals or simple chalkboard labels for easy changes.
- Install anti-slip base materials for counter placement, preventing jars from sliding or tipping over.
- Create a drainage system for wet item storage, like toothbrushes or razors, to prevent water accumulation and mildew.
- Design proper ventilation for moisture control within any enclosed or tightly grouped jar arrangements.
- Build specialized cleaning brush storage solutions that integrate seamlessly with your jar organizers.
- Install UV protection for light-sensitive items, like certain essential oils or medications, if jars are exposed to direct sunlight.
- Create a removable liner system for easy cleaning of the jars, making maintenance simple and quick.
- Design proper spacing for easy access to each jar, ensuring that items can be removed and replaced without difficulty.
- Build integrated refill measurement systems, such as internal markings on jars, to help track product levels.
- Install antimicrobial coating on high-touch areas, like pump tops or jar rims, for enhanced hygiene in the bathroom.
- Create a backup storage solution for refills, keeping larger supplies tidy and out of sight until needed.
5. Vintage Door Headboard: A Statement Piece
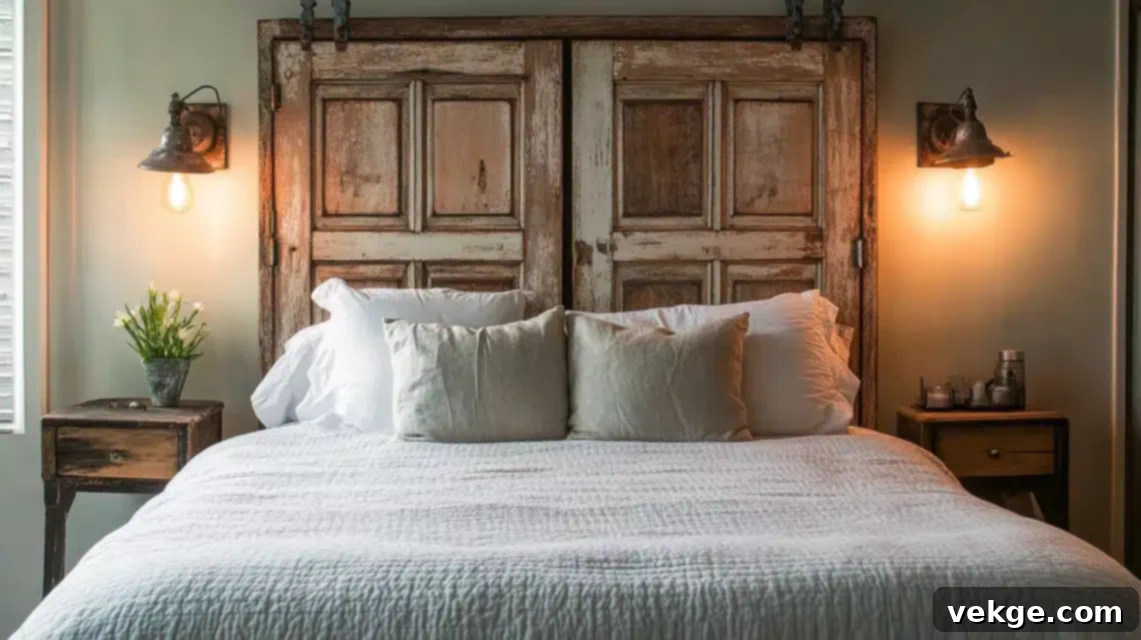
Elevate your bedroom with a unique and striking focal point by repurposing a vintage door into a captivating headboard. Crafting a robust and proper mounting system is essential, not only to ensure the headboard’s stability but also to protect the integrity of your wall. For an added layer of functionality and design, consider installing hidden storage compartments discreetly behind the door panels, offering a clever spot for bedside essentials or linens. Soft, integrated lighting can transform this decorative piece into a functional element, providing the perfect ambient glow for reading without the need for additional fixtures. Furthermore, building proper ventilation behind the structure is key to preventing any moisture accumulation, ensuring the longevity of both your headboard and your wall.
Complete DIY Guide for a Vintage Door Headboard
- Begin by thoroughly cleaning and treating the wood for any insects or mold. This ensures the door is safe and ready for indoor use.
- Install a French cleat mounting system for secure and robust wall attachment. This allows for easy hanging and ensures the heavy door is held firmly.
- Create a custom frame support to prevent the door from warping over time, maintaining its structural integrity and aesthetic.
- Design an integrated lighting system with dimmer controls. This can involve LED strips along the edges or small lights recessed into panels for ambient or reading light.
- Build hidden storage compartments behind decorative panels. These clever spaces can store small items, remotes, or books, adding functionality.
- Install protective padding along all edges for safety, preventing bumps and protecting the wall from scratches.
- Create proper spacing from the wall for ventilation. This prevents moisture accumulation and allows air circulation, important for both the wood and your wall.
- Design a cable management system for the lighting, ensuring all wires are neatly tucked away and out of sight.
- Build reinforced mounting points for stability, especially for larger or heavier vintage doors.
- Install a moisture barrier between the wall and the door, further protecting against humidity and potential damage.
- Create custom trim to match the room’s aesthetics, blending the repurposed headboard seamlessly into your bedroom design.
- Design proper height adjustments for different mattress sizes, ensuring the headboard is proportionate and comfortable.
- Build integrated reading light controls, allowing easy access to adjust lighting without leaving your bed.
- Install sound-dampening materials, especially if the door is hollow, to improve the acoustics of your bedroom.
- Create maintenance access points as needed, particularly for lighting components or hidden storage.
6. Frame Service Station: Elegant Serving Tray
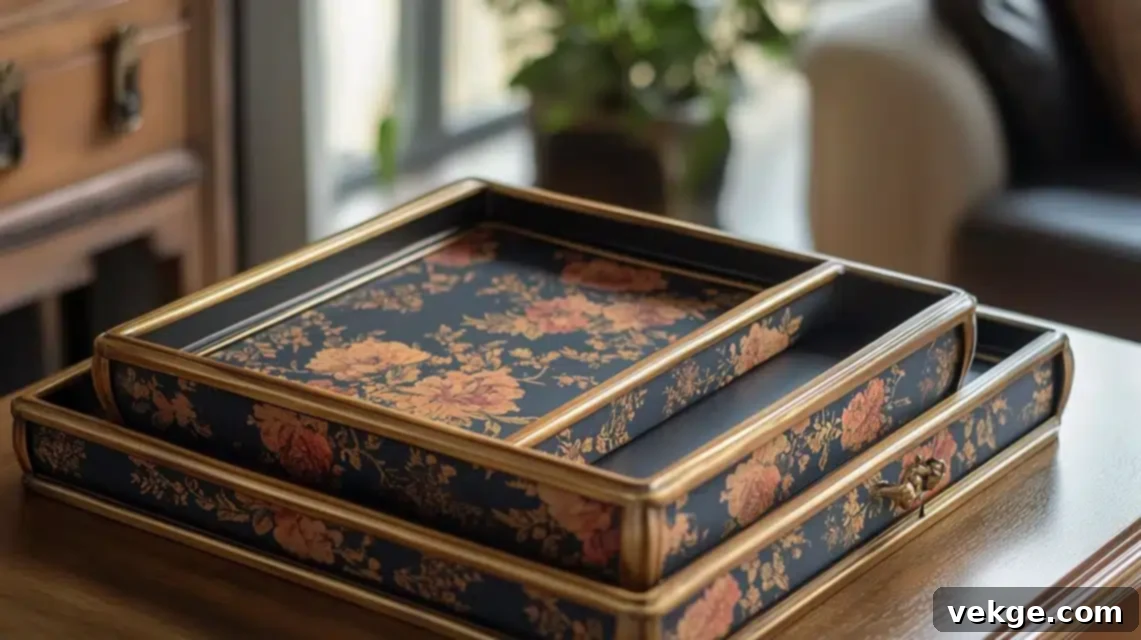
Give an old picture frame a stylish and practical transformation by turning it into an elegant service station or serving tray. The key to this repurposing project is creating durable, waterproof surfaces that not only protect the frame’s inherent beauty but also ensure its longevity during regular use. Installing well-designed handles provides a secure and comfortable grip for transport, while also complementing the frame’s original aesthetic. Incorporating non-slip surfaces is crucial for keeping items stable and secure during movement, preventing accidental spills. Finally, building protective feet will prevent any surface scratching and provide essential stability when the tray is placed on various tables or countertops, making it both beautiful and highly functional.
Complete DIY Guide for a Frame Service Station
- Begin with thorough frame restoration and reinforcement. This includes repairing any damage, cleaning, and strengthening the joints to ensure it can bear weight.
- Install a waterproof base material rated for food service. This could be a sealed wooden panel, a laminated board, or a custom-cut acrylic sheet.
- Create a custom handle mounting system, ensuring the handles are securely attached and distribute weight evenly for comfortable carrying.
- Design decorative insert options for different occasions. You can swap out papers, fabrics, or even small tiles to change the tray’s look.
- Build the integrated non-slip surface application, such as applying a rubberized mat or a textured paint to the base, keeping items secure.
- Install protective corner reinforcements, both for durability and to prevent potential damage to walls or other furniture.
- Create a subtle drainage system for condensation control, especially if serving cold beverages, which might involve a slightly sloped base or small channels.
- Design proper weight distribution guidelines for the items placed on the tray, preventing it from tipping or becoming unwieldy.
- Build a custom storage solution for the tray’s protection when not in use, such as a soft bag or a dedicated shelf.
- Install an antimicrobial coating for food safety, especially if serving directly on the tray surface.
- Create a replacement insert system for variety, allowing you to easily change the look and theme of your serving tray.
- Design proper cleaning protocol materials, providing clear instructions for maintaining the tray’s appearance and hygiene.
- Build integrated stabilizing feet system, using felt pads or small rubber bumpers, to protect surfaces and provide stability.
- Install a moisture barrier between layers of the base, preventing water from seeping into the frame structure.
- Create a protective storage bag or box to keep your elegant serving tray safe from dust and damage when not in use.
7. Jewelry Display Innovation: Organized Elegance

Reinvent an unassuming object into a stunning and highly functional jewelry display that keeps your precious accessories organized and beautifully showcased. By creating specialized hooks, you can accommodate a diverse range of jewelry types, from delicate necklaces to chunky bracelets, all without the frustration of tangling. Installing a mirror backing serves a dual purpose: it aids in the selection process by allowing you to instantly see how pieces look on you, while also adding significant visual depth to the display. Thoughtfully integrated LED lighting will not only highlight your most cherished pieces but also assist in making quick, confident selections. To protect your collection, building protective covers will prevent dust accumulation, ensuring your jewelry remains sparkling and ready to wear.
Complete DIY Guide for Jewelry Display Innovation
- Begin by reinforcing the rack structure to ensure it can handle the weight capacity of all your jewelry, preventing sagging or breaking.
- Install various hook styles tailored for different jewelry types, such as small hooks for necklaces, pegs for rings, and bars for bracelets, to optimize organization.
- Create a custom mirror backing with a protective coating. This not only adds aesthetic appeal but also allows for quick try-ons and visual depth.
- Design an integrated LED lighting system with a timer. This illuminates your jewelry, making it sparkle, and helps you select pieces easily.
- Build specialized compartments for small items like earrings and studs, preventing them from getting lost or mixed up.
- Install a protective clear cover system, such as a hinged acrylic panel, to keep dust away and provide security for your collection.
- Create proper spacing between items, especially for necklaces and bracelets, to prevent tangling and allow for easy access.
- Design anti-tarnish surface treatments for any metal components that come into direct contact with your jewelry, preserving its luster.
- Build an integrated earring organization system, perhaps using a mesh or perforated panel, to keep pairs together and visible.
- Install hidden storage for special pieces or valuable items, offering an extra layer of security and discretion.
- Create proper ventilation for moisture control, especially important for preventing tarnish in humid environments.
- Design security features for valuable items, such as a lockable section or hidden compartment, for peace of mind.
- Build a necklace length organization system, perhaps with varying hook heights or layered bars, to accommodate different chain lengths.
- Install proper wall mounting reinforcement if your display is wall-mounted, ensuring it can safely bear the weight of your entire collection.
- Create a maintenance cleaning schedule system, including tips for dusting and polishing, to keep your display and jewelry looking their best.
8. Rolling Drawer Storage: Mobile Organization Solution
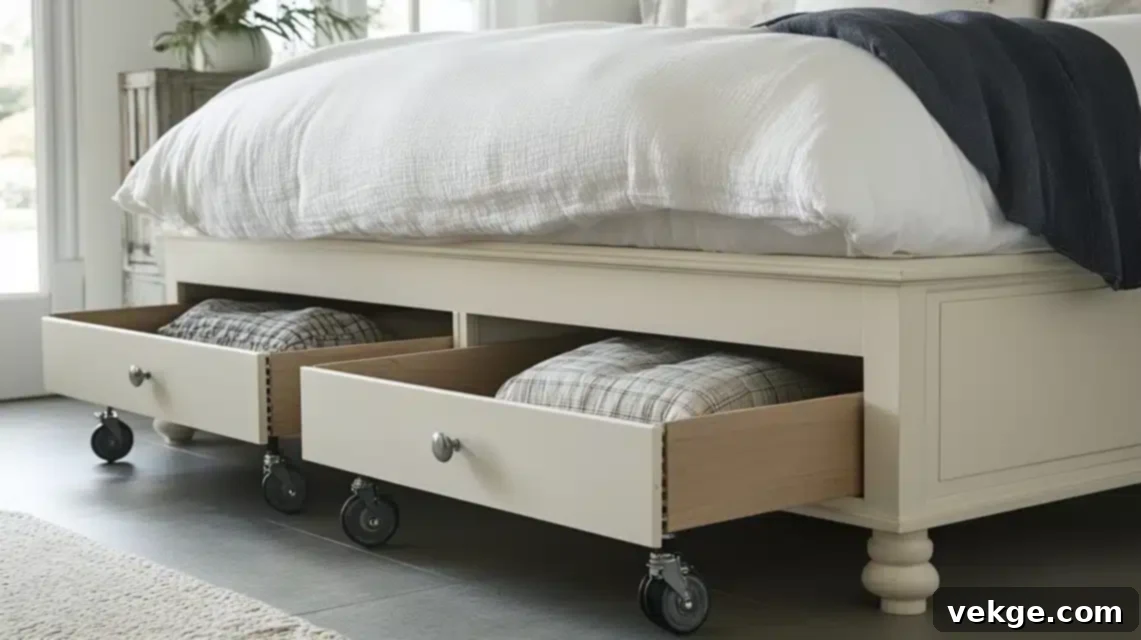
Transform old, standalone drawers into versatile and mobile storage units, blending practicality with a touch of industrial charm. The creation of sturdy wheel systems is paramount, ensuring smooth and effortless movement across various floor surfaces while simultaneously protecting them from scratches or damage. Installing appropriate handles is crucial for easy access and comfortable pulling, all while preserving and enhancing the drawer’s original character. Integrating smart divider systems within the drawers allows you to create meticulously organized sections for a variety of items, maximizing storage efficiency and flexibility. Additionally, building dust covers is a thoughtful touch, preventing accumulation during storage periods and keeping your contents clean and pristine.
Complete DIY Guide for Rolling Drawer Storage
- Begin by reinforcing the drawer structure for mobility. This might involve strengthening the base and corners to withstand movement and weight.
- Install heavy-duty caster wheels with locking mechanisms. Locking wheels are essential for keeping the unit stationary when needed.
- Create custom handle installation for easy pulling, ensuring they are sturdy and comfortable to grip.
- Design an internal divider system with adjustability. This allows you to reconfigure compartments to suit different items and storage needs.
- Build an integrated dust cover with easy access, such as a hinged lid or a sliding panel, to protect contents from dust and debris.
- Install a moisture barrier on the drawer bottom. This is especially useful if storing items in areas prone to humidity or spills.
- Create a proper ventilation system, particularly for drawers that will hold linens or items sensitive to stagnant air.
- Design wheel placement for optimal balance. This prevents tipping and ensures smooth, stable movement even when the drawer is full.
- Build protective corner reinforcements to prevent damage to the drawer or walls during movement.
- Install drawer stop mechanisms if the drawer itself is part of a larger unit, preventing it from being pulled out too far.
- Create a label system for content identification. Clear labels on the front or side make it easy to find what you need.
- Design proper height clearance guides, especially if the rolling drawers will be stored under furniture or in specific niches.
- Build an integrated braking system, in addition to wheel locks, for extra security on sloped surfaces or in high-traffic areas.
- Install protective floor buffer strips along the bottom edges of the drawer (above the wheels) to prevent contact with the floor if the wheels get stuck.
- Create a maintenance schedule for wheels, including cleaning and lubrication, to ensure continued smooth operation.
9. Shutter Mail Center: Organized Entryway Solution
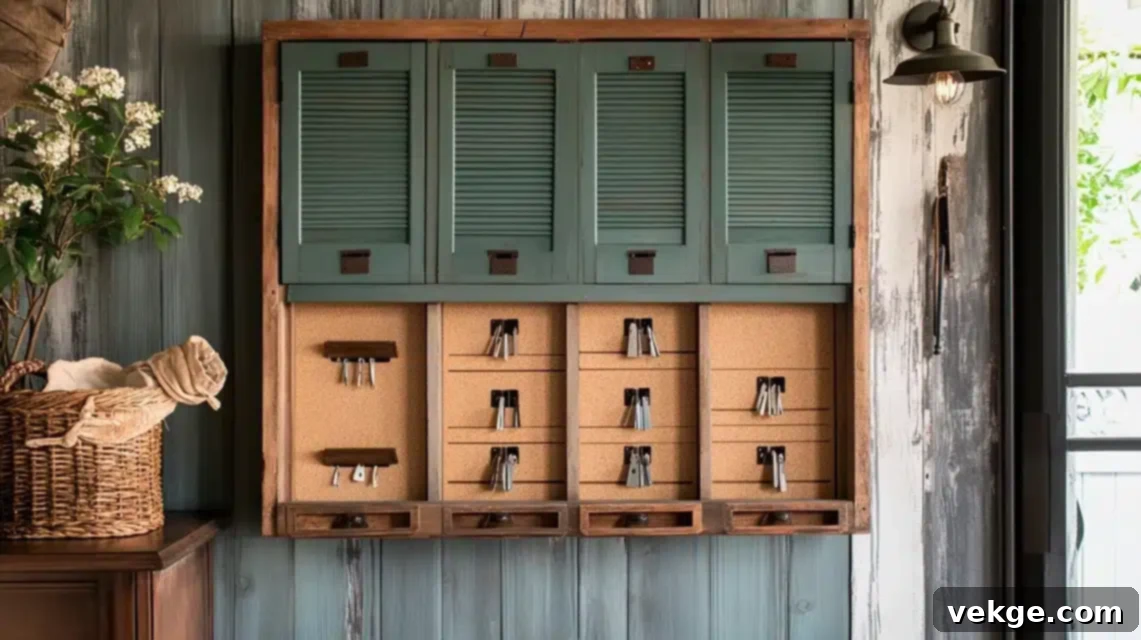
Transform a charming old shutter into a highly functional and aesthetically pleasing mail center, perfect for decluttering your entryway. By creating specialized slots, you can efficiently sort and accommodate different sizes of mail, documents, and even small magazines. Installing cork sections provides a convenient and versatile space for important reminders, notes, and photos, keeping crucial information front and center. For ever-changing information or a flexible display, adding magnetic strips offers a practical solution. To complete this organization hub, building a dedicated key storage section ensures all your entry essentials are neatly organized and always within easy reach, bringing order and style to your daily routine.
Complete DIY Guide for a Shutter Mail Center
- Begin by stripping and sanitizing all shutter surfaces thoroughly. This removes old paint, dirt, and prepares the wood for a fresh finish.
- Install reinforced mounting brackets for robust wall stability. These should be strong enough to hold the shutter and its contents securely.
- Create custom mail slot dividers with rounded edges. These ensure easy insertion and retrieval of mail without damaging envelopes.
- Design integrated cork board sections with proper adhesive. These panels provide a functional space for pinning notes, photos, and reminders.
- Build hidden key storage with security features, such as small hooks behind a discreet panel, keeping keys out of sight but accessible.
- Install magnetic strips with a protective coating. These offer flexible display areas for cards, photos, or small memos.
- Create proper spacing for easy access to all slots and sections, ensuring no part of the mail center feels cramped.
- Design a weatherproof coating system if the mail center is intended for an outdoor or semi-outdoor location, protecting it from elements.
- Build an integrated letter sorting system within the slots, allowing for categories like “To Do,” “Bills,” or “Important.”
- Install LED task lighting with a motion sensor. This provides convenient illumination when approaching the mail center, especially in dim entryways.
- Create removable catch trays for small items like pens, stamps, or loose change, preventing clutter at the bottom of the slots.
- Design proper angle for mail insertion, making it intuitive and easy to deposit mail into the correct slot.
- Build a protective cover for weather exposure if the mail center is positioned where it might get wet, such as near a front door.
- Install anti-scratch wall spacers. These small bumpers prevent the shutter from rubbing directly against the wall, protecting both surfaces.
- Create a maintenance cleaning schedule for regular dusting and upkeep, ensuring your mail center remains neat and functional.
10. Teacup Garden Collection: Whimsical Planters
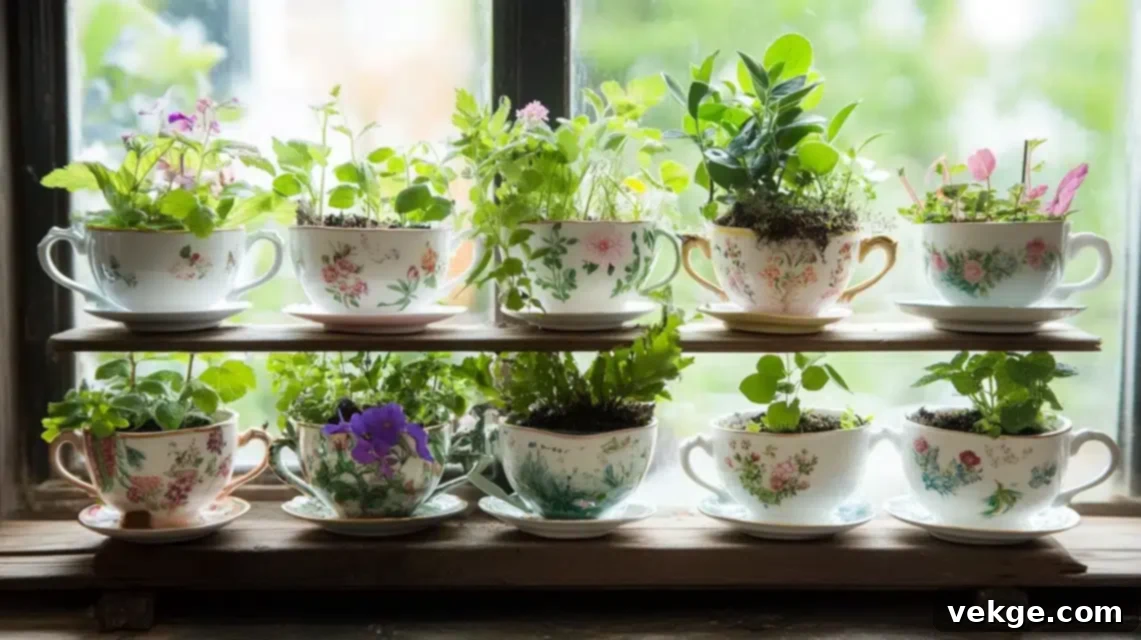
Infuse charming elegance into your home by transforming delicate vintage teacups into whimsical planters, ideal for bringing a touch of greenery to any windowsill or shelf. The key to successful teacup gardening is creating proper drainage systems to prevent root rot, ensuring your plants thrive, while simultaneously protecting your surfaces from water damage. Installing hidden saucers beneath each teacup is a clever solution for catching excess water, maintaining the pristine aesthetic of your display. To provide the best environment for your tiny botanical inhabitants, adding specialized soil mixtures is essential for plant health in these small containers. Finally, building display risers of varying heights creates dynamic visual interest, allowing you to showcase your teacup garden collection with elegance and flair.
Complete DIY Guide for a Teacup Garden Collection
- Begin by carefully drilling small drainage holes into the bottom of each teacup using proper bits for ceramics or porcelain. This prevents root rot and ensures plant health.
- Install a hidden water collection system in saucers. This could involve an absorbent layer or a slightly elevated base within the saucer to keep the teacup dry.
- Create a custom soil mixture specifically formulated for small container success. This often includes perlite or sand for improved drainage and aeration.
- Design a multi-level display platform with stability. This allows you to arrange your teacups at varying heights, creating visual interest and maximizing space.
- Build an integrated watering measurement system, such as small water level indicators or a gentle pour spout, to prevent overwatering.
- Install protective feet for surface safety beneath each teacup or saucer, preventing scratches on your furniture.
- Create a proper plant rotation schedule. This ensures all plants receive adequate light and can be checked for health regularly.
- Design a humidity retention system, such as using small cloches or grouping plants together, especially for humidity-loving species.
- Build specialized fertilizer application tools, like small droppers or slow-release pellets, suitable for precise feeding in small containers.
- Install a moisture monitoring system, such as a tiny hygrometer or moisture meter, to accurately gauge soil dampness.
- Create a proper cleaning protocol guide for teacups and saucers, advising on gentle cleaning to preserve their delicate beauty.
- Design winter protection measures for your teacup garden, such as bringing them indoors or providing insulation for outdoor displays.
- Build an integrated pest prevention system, using natural deterrents or systemic treatments suitable for small-scale gardening.
- Install UV protection filters on nearby windows or use grow lights with appropriate spectrums to optimize plant growth.
11. Pallet Vertical Garden: Eco-Friendly Green Wall
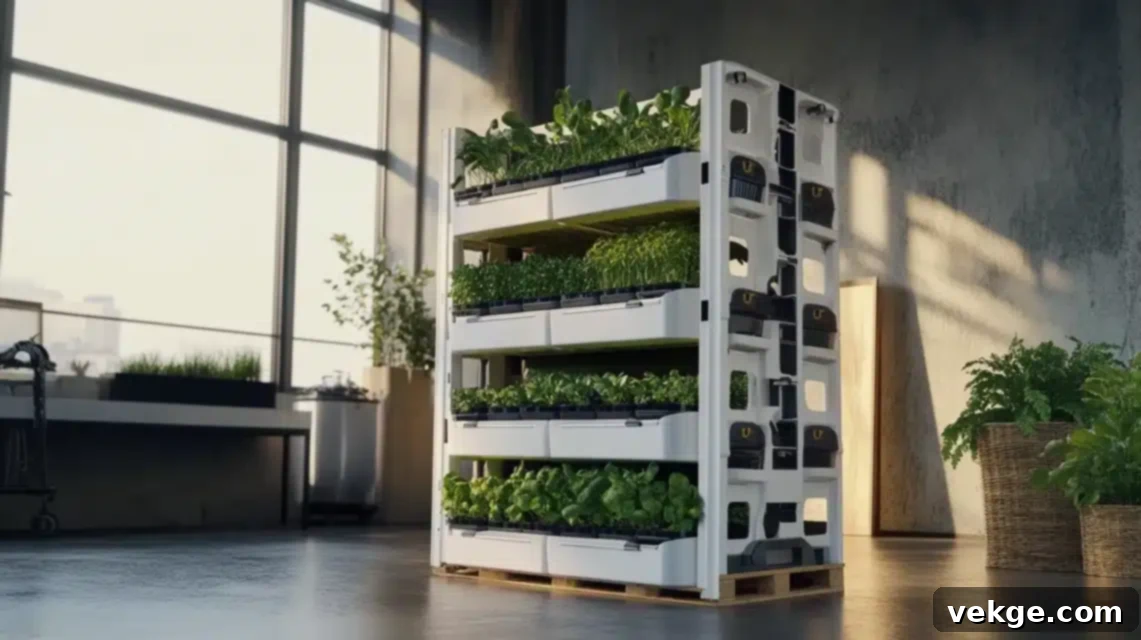
Revolutionize your gardening space by transforming discarded shipping pallets into vibrant living walls. This ingenious repurposing technique allows you to maximize growing area within a minimal footprint, making it perfect for small patios, balconies, or even indoor spaces. By creating multiple growing pockets, you open up possibilities for diverse plant combinations, textures, and colors, turning your wall into a dynamic botanical display. Installing efficient irrigation systems is critical to ensure even water distribution across all levels, promoting consistent plant health. Furthermore, adding waterproof backing not only prevents wall damage but also helps maintain optimal moisture levels for your plants. Finally, building removable catch trays simplifies maintenance and cleaning procedures, ensuring your vertical garden remains pristine and thriving with minimal effort.
Complete DIY Guide for a Pallet Vertical Garden
- Begin by thoroughly cleaning and sanitizing the pallet wood. This removes dirt, debris, and any potential contaminants, preparing it for safe plant growth.
- Install heavy-duty waterproof backing with proper sealing. This protects the wall behind the garden from moisture and prevents water leakage.
- Create tiered growing pockets with reinforced edges. These pockets can be made from sturdy fabric, plastic liners, or additional wood planks.
- Design an integrated irrigation system with individual controls for each tier. This allows for precise watering based on plant needs.
- Build a removable drainage collection system at the base of the pallet. This catches excess water, making cleanup easy and preventing puddles.
- Install proper wall mounting brackets that can support the significant weight of the pallet, soil, and plants, ensuring safety and stability.
- Create soil retention barriers for each pocket. This prevents soil from washing out during watering and keeps plants securely in place.
- Design proper air circulation pathways within the pallet structure to prevent mildew and ensure healthy plant growth.
- Build an integrated fertilizer distribution system, such as slow-release capsules or a drip-feed system, for consistent nutrient delivery.
- Install moisture monitoring probes in various pockets. These help you accurately gauge soil dampness and avoid over or under-watering.
- Create an accessibility system for maintenance, such as hinged sections or removable panels, to easily reach all plants for pruning or harvesting.
- Design winter protection options, such as covers or insulation, if the vertical garden is located in a cold climate.
- Build an integrated pest barrier system, like fine mesh or netting, to protect your plants from insects.
- Install proper lighting supplements, such as LED grow lights, if the garden is indoors or in a shaded area, ensuring adequate light exposure.
- Create a seasonal rotation planning guide, helping you switch out plants based on seasonal conditions and optimize your garden’s beauty and yield.
12. Memory Window Display: Personalized Photo Gallery
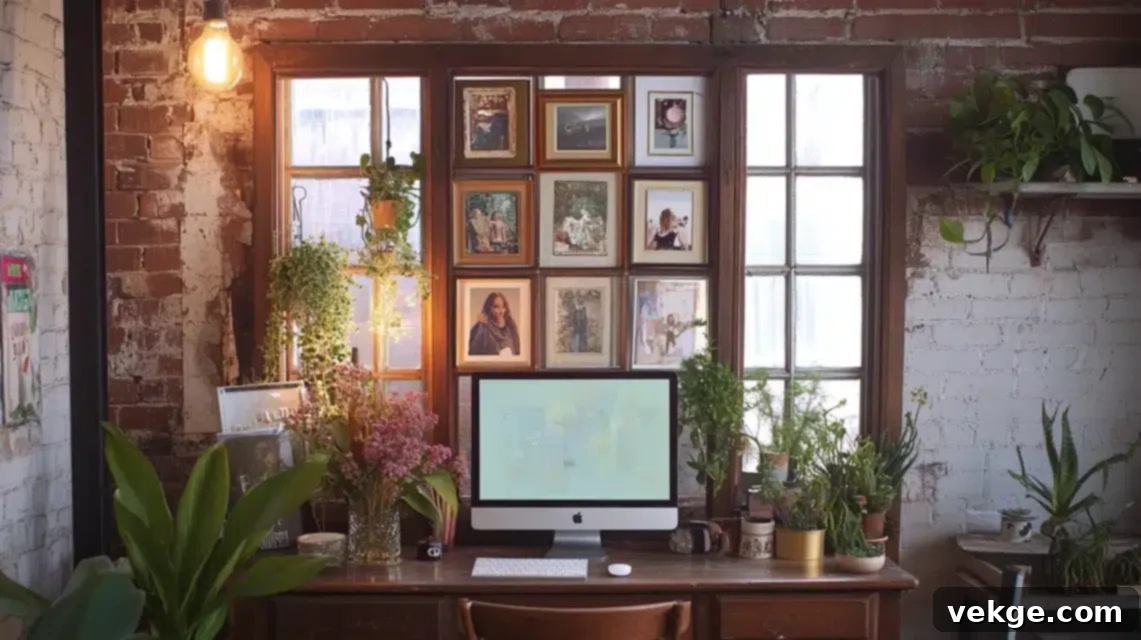
Give antique window frames a beautiful second act by transforming them into dynamic photo galleries that lovingly preserve cherished family memories. The key to this charming repurposing project is creating removable backing, which allows for effortless photo updates whenever you desire, while simultaneously providing essential protection for your images. Installing UV-protective glass is a crucial step that safeguards your precious photos from fading due to sunlight exposure, ensuring their clarity and vibrancy endure for years to come. For an added touch of elegance, consider incorporating LED accent lighting, which creates a warm, inviting evening ambiance around your displayed images. Finally, building robust wall supports guarantees that the weight is distributed evenly, ensuring a stable and secure mounting for your unique memory display.
Complete DIY Guide for a Memory Window Display
- Begin by meticulously restoring the window frame while preserving its original character. This includes cleaning, minor repairs, and possibly a fresh coat of paint or sealant.
- Install UV-protective glass with proper sealing in each pane. This crucial step prevents photo fading and ensures longevity of your displayed memories.
- Create an easy-access photo mounting system for each pane. This could involve small clips, adhesive dots, or custom-cut mat boards for quick photo changes.
- Design an integrated LED lighting system with a dimmer. This allows you to highlight specific photos and adjust the ambiance for evening viewing.
- Build a robust wall mounting support system that can safely bear the weight of the entire window frame and its contents.
- Install a moisture barrier between the wall and the frame, protecting both from humidity and condensation.
- Create a ventilation system to prevent condensation buildup behind the glass, which could damage photos over time.
- Design photo arrangement templates to help you plan and execute visually appealing layouts within each pane.
- Build integrated cleaning access points, allowing you to easily clean the inside of the glass without disassembling the entire frame.
- Install anti-sag support for large frames. This ensures the frame remains perfectly level and stable over time.
- Create a protective coating for wood preservation, especially if the frame will be exposed to varying temperatures or humidity.
- Design a seasonal photo rotation system, allowing you to refresh your display with new memories throughout the year.
- Build an integrated power supply hiding mechanism for the LED lighting, ensuring a clean and professional appearance.
- Install proper spacing from the wall, if desired, to create a floating effect and add dimension to the display.
- Create maintenance schedule documentation, detailing how to clean the glass, change photos, and check the mounting system.
13. Suspended Garden Collection: Aerial Greenery Display
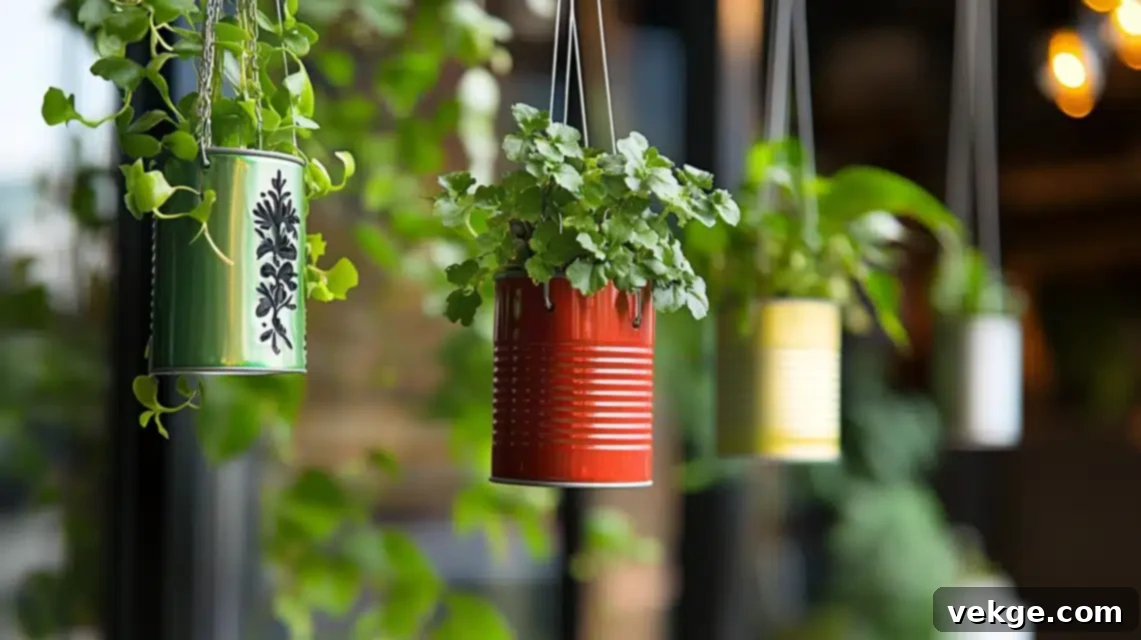
Elevate your indoor or outdoor space with a breathtaking suspended garden collection, turning ordinary containers into artistic elements that defy gravity. The critical first step in this innovative design is creating proper drainage systems within each container, not only to prevent damaging root rot and ensure plant vitality but also to protect the surfaces below from water damage. Installing reinforced hanging systems is paramount for both safety and stability, ensuring your lush arrangements remain securely in place. By adding decorative finishes, you can transform utilitarian pots into captivating artistic elements that perfectly complement your existing decor. For effortless maintenance, consider building automated watering systems, simplifying plant care routines and allowing you more time to enjoy your aerial oasis.
Complete DIY Guide for a Suspended Garden Collection
- Begin by properly cleaning and sterilizing all containers. This removes dirt, pathogens, and prepares them for healthy plant growth.
- Install drainage holes with protective grommets in each container. Grommets prevent soil loss and add a finished look to the drainage.
- Create a reinforced hanging system with safety cables. This ensures the containers are securely suspended and prevents accidental falls.
- Design an integrated watering system with timers. This could be a drip system or wicks that deliver water automatically, simplifying maintenance.
- Build decorative exterior finishes with weatherproofing, such as painting with outdoor-grade paint or applying a clear sealant, to enhance aesthetics and durability.
- Install a proper weight distribution system for multiple containers. This prevents strain on single hanging points and maintains balance.
- Create a plant rotation planning guide. This ensures all plants receive adequate light and helps in managing their growth and health.
- Design winter protection measures, such as temporary enclosures or easily removable systems, if the garden is outdoors in a cold climate.
- Build an integrated fertilizer delivery system, like slow-release pellets or a liquid fertilizer reservoir, for consistent nutrient supply.
- Install moisture monitoring probes in the soil of each container. This helps you accurately gauge water needs and prevent over or under-watering.
- Create proper spacing templates for hanging containers, ensuring each plant has enough room to grow and light access.
- Design maintenance access points, such as adjustable hanging ropes or a pulley system, to easily reach plants for care.
- Build an integrated pest prevention system, utilizing natural deterrents or plant-safe treatments to keep your garden healthy.
- Install proper light reflection systems, such as reflective surfaces around the plants, to maximize light exposure for optimal growth.
- Create seasonal care documentation, outlining specific plant needs and tasks for each season to ensure a thriving garden year-round.
14. Mobile Storage Crates: Flexible & Stylish Organization
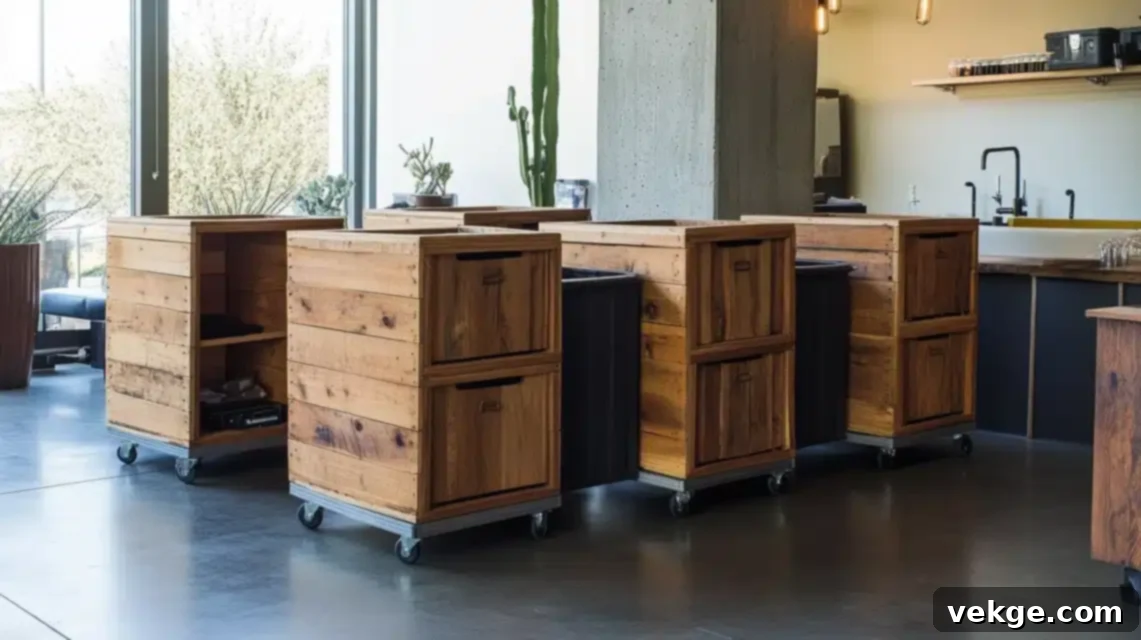
Transform ordinary wooden crates into versatile and stylish rolling storage solutions that effortlessly blend practical function with an appealing industrial aesthetic. Establishing sturdy wheel systems is essential to ensure smooth and easy movement across any floor surface, while simultaneously providing vital protection against scratches or damage. Implementing smart divider systems inside the crates significantly enhances organization, allowing you to categorize and store items efficiently while maintaining flexibility for various needs. Adding cushioned corners offers a thoughtful protective measure for your walls during movement, preventing unsightly scuffs. For added versatility, building removable tops on these crates creates invaluable extra surface space, perfect for impromptu side tables or display areas when needed, making them truly multi-functional pieces.
Complete DIY Guide for Mobile Storage Crates
- Begin by reinforcing the crate structure for mobility. This might involve adding internal bracing or corner blocks to enhance durability.
- Install heavy-duty locking casters rated for the expected weight of the crate and its contents. Locking mechanisms ensure stability when stationary.
- Create an adjustable divider system with removal options inside the crate. This allows you to customize compartments for different-sized items.
- Design protective corner bumpers with style. These can be decorative metal or rubber elements that prevent wall damage during movement.
- Build a removable top surface with stability. This can serve as an extra tabletop or work surface when the crate is not actively being accessed.
- Install a moisture barrier on the bottom surface of the crate, protecting contents from potential dampness from the floor.
- Create a proper ventilation system, especially if storing items that require airflow, to prevent mustiness or mold.
- Design a clear label system for contents on the exterior of the crate. This makes identification easy and speeds up retrieval.
- Build an integrated brake mechanism for added safety, especially if the crates will be used on slightly uneven surfaces.
- Install proper handle placement for easy pulling and maneuvering. Handles should be robust and comfortable to grip.
- Create a maintenance schedule for wheels, including cleaning and lubrication, to ensure smooth and effortless mobility over time.
- Design proper height calculations, especially if the mobile crates need to fit under desks, beds, or other furniture.
- Build an integrated stacking system if you plan to stack multiple crates, ensuring they interlock securely and safely.
- Install floor protection strips along the bottom edges of the crate (above the wheels) to prevent any accidental floor contact.
15. Glass Bottle Illumination: Enchanting Light Fixtures
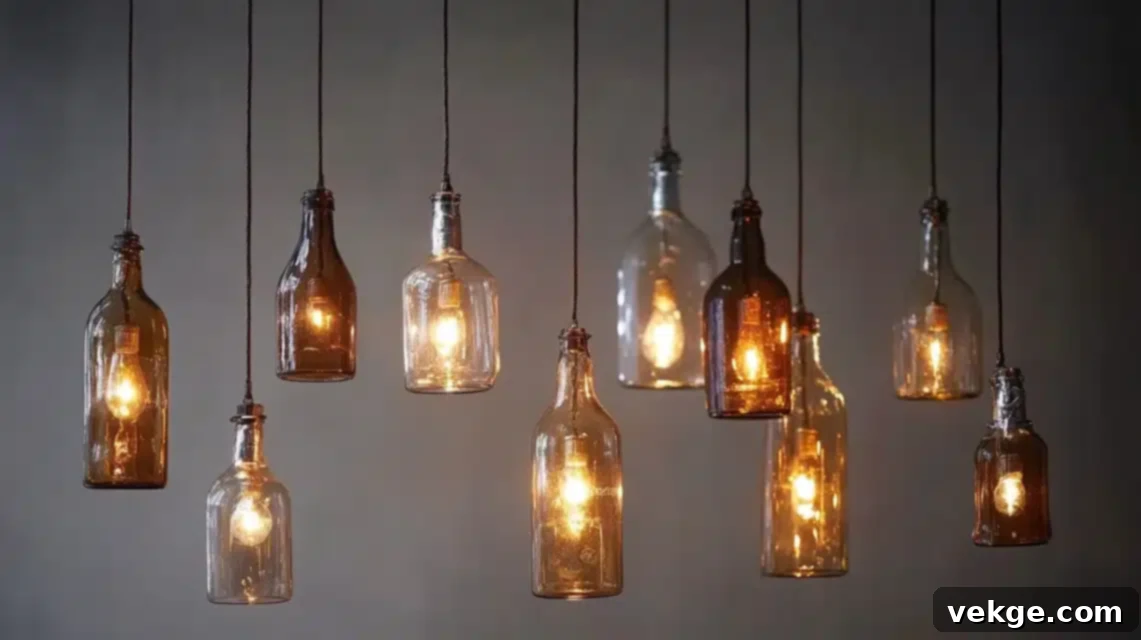
Unleash the captivating potential of vintage glass bottles by transforming them into enchanting light fixtures that cast unique and mesmerizing shadow patterns across your space. Crafting proper wiring systems is paramount, ensuring not only electrical safety but also maintaining the delicate integrity and aesthetic of each bottle. Installing dimmer controls provides perfect flexibility, allowing you to adjust the ambient lighting to suit any mood or occasion, from bright task lighting to a soft, romantic glow. For an added layer of visual interest, incorporating decorative elements inside the bottles, such as colored glass beads or small botanicals, can enhance their charm even further. Finally, building specialized mounting systems is crucial for properly distributing weight, especially for ceiling suspension, ensuring stability and safety for these beautiful, upcycled luminaries.
Complete DIY Guide for Glass Bottle Illumination
- Begin by carefully cleaning and removing all labels from the glass bottles. Ensure the glass is spotless for optimal light dispersion.
- Install a UL-listed wiring system with proper grounding. This is crucial for electrical safety and compliance.
- Create a custom mounting plate for ceiling attachment, ensuring it is sturdy enough to support the weight of multiple bottles if creating a cluster.
- Design an integrated dimmer system with a remote option. This allows for flexible control over light intensity and ambiance.
- Build proper glass cutting techniques for wiring entry points. This requires specialized tools to create clean, safe holes without shattering the glass.
- Install heat-resistant wire guards inside the bottles where wires might come into contact with the glass. This prevents potential heat damage or stress.
- Create a proper balance testing protocol for each fixture to ensure it hangs level and securely.
- Design an emergency release system, such as a quick-release hook, for safety during maintenance or in case of an incident.
- Build an integrated bulb replacement access system. This might involve a removable base or a clever hinge design for easy bulb changes.
- Install anti-sway mechanisms, such as thin guide wires, to keep suspended bottles from swinging or bumping into each other.
- Create proper cleaning access points for the inside and outside of the bottles, ensuring they remain sparkling and dust-free.
- Design multiple height adjustment options for individual bottles, allowing for a dynamic and customizable cluster arrangement.
- Build integrated surge protection into the wiring system to protect your lighting and electrical components.
- Install backup support cables in addition to the main suspension for an extra layer of safety, especially for heavier glass bottles.
- Create maintenance documentation system, including wiring diagrams and bulb specifications, for future reference and repairs.
16. Bicycle Clock Creation: Industrial Wall Art

Inject industrial charm and unique character into your home by transforming an old bicycle wheel into a striking wall clock. Crafting perfectly balanced clock hands is key, ensuring accurate timekeeping while beautifully preserving the intricate aesthetics of the wheel’s spokes. Installing a robust mounting system is essential to guarantee stability without causing any damage to the wheel’s original structure or your wall. For a dramatic visual effect, consider adding LED backlighting, which creates captivating evening shadows that dance through the spokes, turning your clock into a true art piece. Finally, meticulously building specialized number placement around the wheel transforms it into a fully functional and highly personalized timepiece, a testament to creative repurposing.
Complete DIY Guide for a Bicycle Clock Creation
- Begin by thoroughly cleaning and treating all metal surfaces of the bicycle wheel. This removes rust, grime, and prepares it for any desired finish or anti-corrosion treatment.
- Install a high-torque clock mechanism with proper support in the center of the wheel. A high-torque mechanism is necessary to move potentially heavier or custom-made hands.
- Create custom clock hands from matching materials, ensuring they are lightweight yet sturdy and proportionate to the wheel size.
- Design an integrated lighting system with a timer, such as LED strips around the rim or behind the spokes, to create a stunning backlit effect.
- Build a robust wall mounting bracket system that can securely hold the bicycle wheel, ensuring it is safely affixed to the wall.
- Install balance weights for smooth operation of the clock hands, preventing stuttering or inaccurate timekeeping.
- Create a number placement template. This ensures that the numbers (or markers) are evenly spaced and accurately indicate time.
- Design proper spacing from the wall, if desired, to allow for the backlighting effect and prevent the wheel from rubbing against the surface.
- Build an integrated battery compartment for the clock mechanism and lighting, keeping power sources hidden for a clean aesthetic.
- Install anti-vibration padding between the wheel and the wall mount. This minimizes any potential noise from the clock mechanism.
- Create a proper cleaning protocol for the metal and any added components, ensuring the clock remains in pristine condition.
- Design seasonal position adjustment if you wish to change the orientation of the clock for aesthetic reasons throughout the year.
- Build an integrated level monitoring system or provide clear instructions on how to ensure the clock is perfectly level during installation.
- Install a protective coating system, such as a clear lacquer or rust-inhibiting paint, to preserve the metal and prevent wear.
- Create a maintenance schedule guide, including battery replacement reminders and cleaning tips, for the longevity of your bicycle clock.
17. Cozy Sweater Cushions: Warmth & Texture

Give beloved, worn-out sweaters a delightful new purpose by transforming them into wonderfully cozy cushions, adding unparalleled warmth and texture to your living space. Crafting proper backing is essential to prevent stretching and maintain the original, intricate patterns of the sweater, ensuring its beauty endures. Installing cleverly hidden zippers allows for effortless cleaning access, making maintenance simple and convenient. To ensure your cushions retain their inviting shape through regular use, integrating internal structural elements is a smart design choice. Additionally, building waterproof barriers will protect the cushion filling from any moisture damage, guaranteeing comfort and longevity for these charming, upcycled home accents.
Complete DIY Guide for Cozy Sweater Cushions
- Begin by properly cleaning and treating the sweater material. This might involve washing or dry cleaning to ensure freshness and prevent shrinking after construction.
- Install reinforced backing fabric for stability. Choose a sturdy, non-stretch fabric like canvas or denim to provide support and prevent the sweater from losing its shape.
- Create an invisible zipper closure system. This allows for easy removal of the cushion cover for cleaning while maintaining a seamless, professional look.
- Design internal support structure placement, such as an inner lining or separate batting layers, to help the cushion maintain its desired shape.
- Build an integrated moisture barrier system around the cushion filling, perhaps using a water-resistant fabric liner, to protect against spills.
- Install proper corner reinforcement for durability, especially for square or rectangular cushions, to maintain sharp edges and prevent wear.
- Create a template for consistent sizing. This ensures all your sweater cushions are uniform in dimension and fit standard cushion inserts.
- Design proper filling distribution, using high-quality cushion stuffing, to achieve a plush and comfortable feel without lumps.
- Build an integrated shape maintenance system, like a removable inner cover, to keep the filling evenly distributed and prevent it from shifting.
- Install an anti-slip bottom surface on the cushion, such as a non-skid fabric, to prevent it from sliding off sofas or chairs.
- Create proper cleaning instruction tags to sew into each cushion, detailing specific care for the sweater material.
- Design seasonal storage solutions, such as breathable storage bags, to protect your cushions during warmer months.
- Build an integrated ventilation system if the cushion filling is particularly dense, ensuring air circulation to prevent odors.
- Install shape recovery features, such as rebound foam or specific stuffing techniques, to help the cushion regain its loft after compression.
- Create a care guide documentation, including tips for stain removal and gentle washing, to ensure your sweater cushions last for years.
18. Garden Tag Collection: Personalized Plant Markers
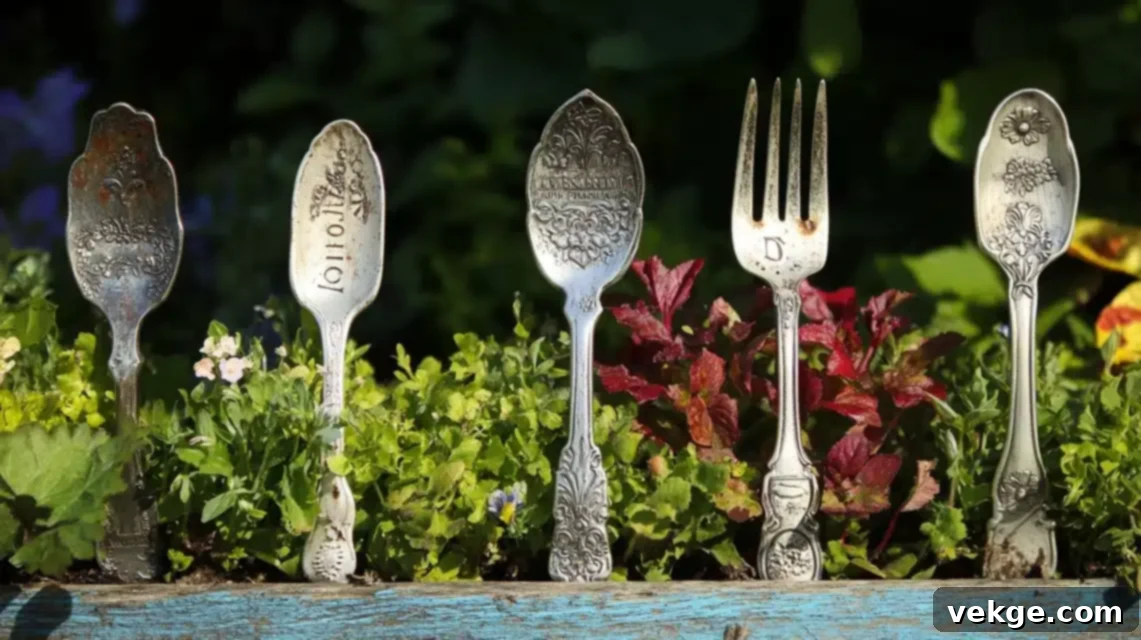
Add a touch of vintage charm and clear identification to your garden by transforming old silverware into delightful garden markers. These unique markers will weather beautifully over time, developing a lovely patina while effectively identifying your plants. Creating proper letter stamping is crucial, ensuring long-lasting and legible plant identification that stands up to the elements. Installing protective coatings will prevent excessive tarnishing, allowing a gentle patina to develop naturally while maintaining the marker’s integrity. For a personal touch, adding decorative elements can customize each marker without compromising its essential function. Finally, building robust ground anchors is vital to prevent markers from shifting or being dislodged during inclement weather events, keeping your garden perfectly organized.
Complete DIY Guide for a Garden Tag Collection
- Begin with thorough cleaning and metal preparation of the silverware. This removes any food residue, tarnish, or dirt, ensuring a clean surface for stamping.
- Install letter stamps with proper depth control. Use a hammer and metal stamps to clearly imprint plant names onto the silverware without deforming it.
- Create a weatherproof coating application system. This might involve dipping the stamped silverware in a clear sealant or applying multiple coats of an outdoor-grade varnish.
- Design a robust ground anchor mechanism for stability. This could be a sturdy stake attached to the silverware or a shaped end that pushes firmly into the soil.
- Build protective tip reinforcement for the part that goes into the ground. This prevents bending or breakage when pushing markers into tough soil.
- Install an anti-corrosion treatment process, such as a rust-inhibiting primer before the final coating, especially for non-stainless steel silverware.
- Create a proper spacing measurement guide for placing markers in your garden, ensuring readability and aesthetic appeal.
- Design a seasonal maintenance protocol, including cleaning and reapplying protective coatings if necessary, to preserve the markers’ appearance.
- Build an integrated angle adjustment system if you want the markers to face different directions or be easily read from various viewpoints.
- Install a UV-resistant coating layer over the weatherproof sealant. This prevents the coating itself from degrading due to sun exposure.
- Create a proper cleaning schedule for the markers, advising on how to gently remove dirt without damaging the stamping or coating.
- Design a replacement tracking system for plants and their corresponding markers, useful for re-planting or updating your garden layout.
- Build a storage solution for off-season, such as a labeled box or hanging rack, to protect markers from extreme winter weather.
- Install height adjustment features, perhaps using adjustable stakes, to position markers perfectly above various plant heights.
- Create maintenance documentation, including the type of sealant used and reapplication frequency, for long-term care.
19. Spice Organization Station: Efficient Kitchen Storage
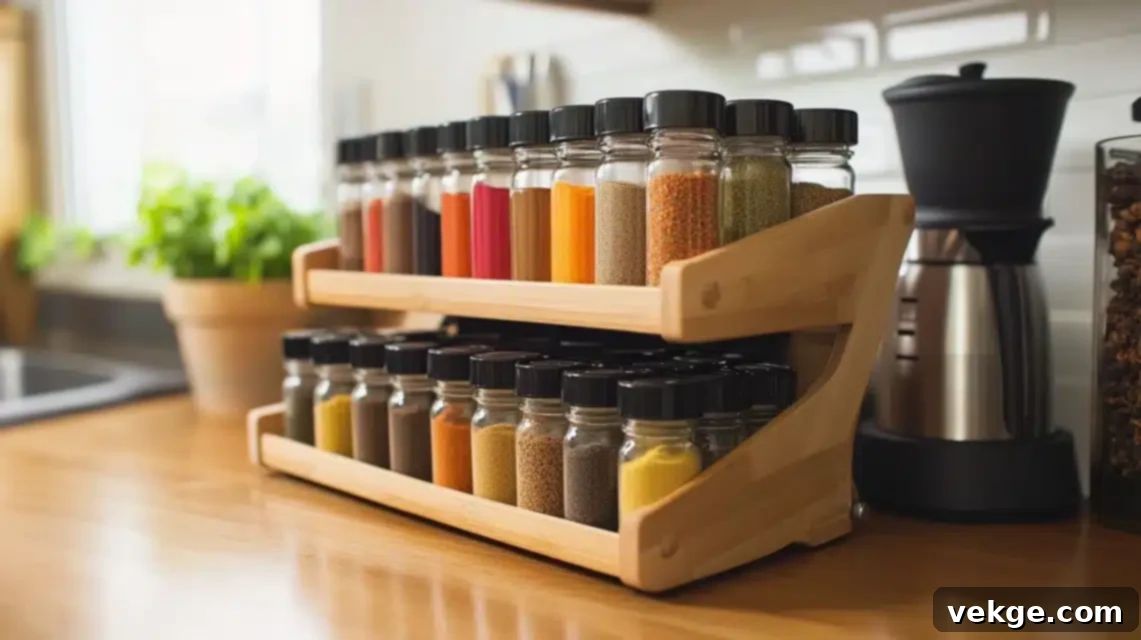
Bring order and efficiency to your kitchen by transforming a simple rack or shelf into a highly organized spice station. Creating clearly labeled sections ensures effortless identification of similar spices, streamlining your cooking process and eliminating frantic searches. Installing proper ventilation is a crucial step that prevents moisture accumulation around your spice containers, thus preserving their freshness and potency. For optimal flavor and reduced waste, integrating rotation tracking helps you maintain freshness through regular use, ensuring no spice goes bad unnoticed. Finally, building adjustable shelving is a practical design choice that accommodates various jar sizes and shapes, allowing your organization system to evolve with your culinary needs.
Complete DIY Guide for a Spice Organization Station
- Begin by thoroughly sanitizing the rack structure. This ensures a clean and hygienic environment for storing food-related items.
- Install adjustable shelf brackets for flexibility. This allows you to customize shelf heights to fit different spice jar sizes.
- Create a custom label system with clear visibility. Use waterproof labels that are easy to read and update.
- Design an integrated ventilation system, especially if the station is enclosed, to prevent moisture buildup and keep spices fresh.
- Build proper wall mounting support if your spice station is wall-mounted, ensuring it can safely hold the weight of all spice jars.
- Install jar security features, such as small lips or railings on each shelf, to prevent jars from falling during everyday use.
- Create an inventory tracking system, perhaps a small whiteboard or digital list, to keep track of spice levels and expiration dates.
- Design a proper angle for easy reading of labels. Slanted shelves can make it easier to see all spice names at a glance.
- Build an integrated dating system for spices, such as a small writable surface on each jar or a date reminder system on the station.
- Install a proper lighting solution, such as an under-cabinet LED strip, to illuminate the spices and make selection easier.
- Create cleaning access points, ensuring all parts of the station are easy to reach and wipe down regularly.
- Design moisture control features, like small desiccant packets in enclosed sections, for climates with high humidity.
- Build a backup storage solution for refills or bulk spices, keeping them neatly stored until needed.
- Install temperature monitoring, especially if the station is near a heat source, to ensure spices are stored at optimal conditions.
- Create a maintenance schedule for cleaning, inventory checks, and label updates to keep your spice station perfectly functional.
20. Creative Station Evolution: Upcycled Craft Hub
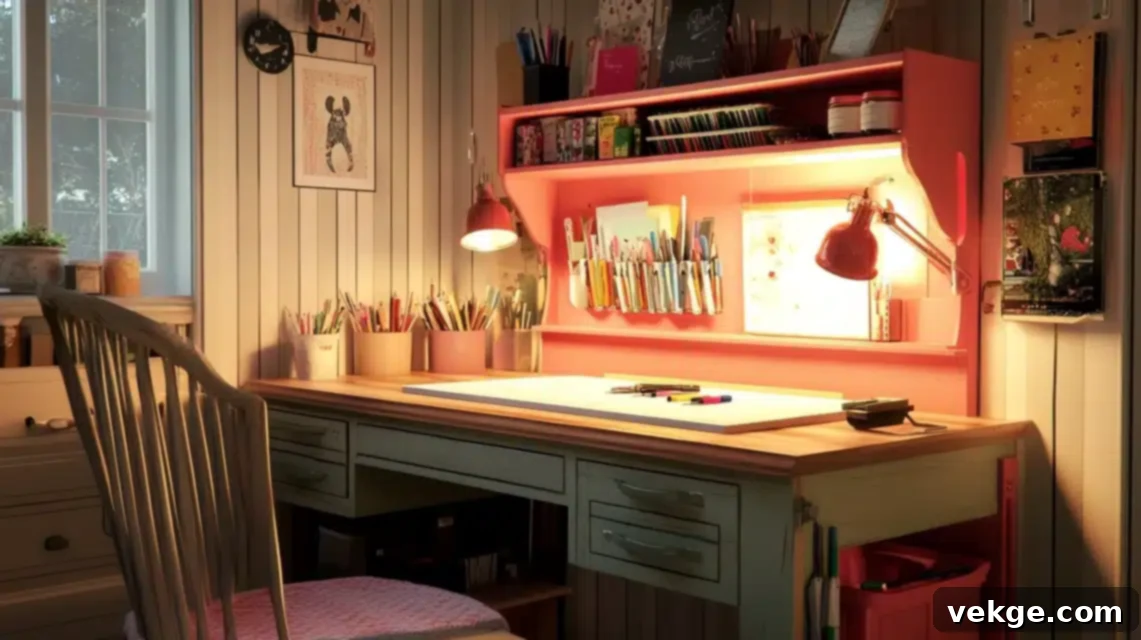
Reimagine an old crib into an inspiring and highly organized craft center, ingeniously maximizing vertical storage to keep all your supplies tidy and accessible. By creating multiple storage zones, you can perfectly accommodate various craft supply sizes, from tiny beads to large fabric rolls. Installing proper lighting is crucial, ensuring excellent visibility for intricate and detailed work, reducing eye strain and enhancing precision. For those moments when you need extra space, adding a convenient fold-down work surface provides valuable additional area without permanently occupying floor space. Finally, building specialized tool storage keeps every implement within easy reach, transforming what was once a crib into a dynamic and efficient creative hub.
Complete DIY Guide for a Creative Station Evolution
- Begin by reinforcing the crib structure for its new use. This might involve tightening joints, adding cross-braces, or strengthening the base to support craft supplies.
- Install a fold-down work surface with proper support. This provides extra workspace when needed and can be neatly tucked away afterward.
- Create a modular storage system with adjustability. Utilize shelves, bins, and hooks that can be rearranged to fit various craft supply sizes.
- Design an integrated task lighting system, such as LED strips or adjustable spotlights, to provide bright, focused illumination for detailed work.
- Build specialized tool organization panels. This could include pegboards, magnetic strips, or custom holders for scissors, brushes, and other tools.
- Install proper ventilation for supply storage, especially if storing paints, glues, or fabrics that require air circulation.
- Create a supply inventory system, perhaps with labeled containers or a digital checklist, to keep track of your craft materials.
- Design proper height adjustments for the work surface and shelves, making the station ergonomic for different users or types of projects.
- Build an integrated power supply system with multiple outlets and USB ports for charging tools or operating hot glue guns.
- Install mobility features with locks, such as caster wheels, to easily move the craft station and then secure it in place.
- Create a proper cleaning protocol, including designated waste areas and wipe-down routines, to keep the station tidy.
- Design safety feature integration, such as rounded edges or covers for sharp tools, to prevent accidents.
- Build a supply rotation system, especially for perishable items like glues or paints, to ensure materials are used before expiring.
21. Wine Cork Innovation: Unique Coasters & Trivets
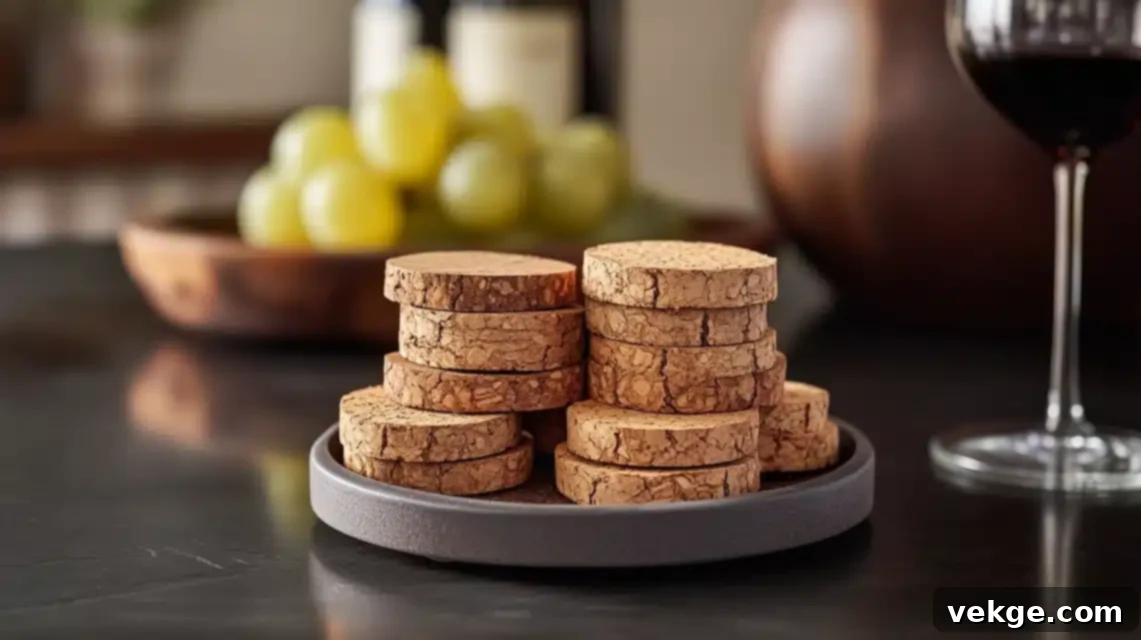
Give discarded wine corks a sustainable and stylish new life by transforming them into innovative household items like coasters or trivets. Creating proper sealing is essential, ensuring waterproof protection while beautifully maintaining the natural character and texture of the corks. Installing reinforced edges prevents separation over time and provides an opportunity to add decorative elements that enhance the overall design. By incorporating protective backing, you can effectively prevent surface scratching during regular use, safeguarding your furniture. Furthermore, building clever drainage channels helps direct any condensation or spills away from surfaces, making these repurposed cork creations both highly functional and aesthetically pleasing additions to your home.
Complete DIY Guide for Wine Cork Innovation
- Begin by thoroughly cleaning and sanitizing all wine corks. This removes any residue and ensures they are ready for crafting.
- Install a waterproof bonding system between corks. Use a strong, flexible, waterproof adhesive to securely join the corks together.
- Create a decorative edge finishing system. This could involve wrapping the edges with twine, adding a wooden frame, or applying a sealant for a clean look.
- Design an integrated drainage pattern within the cork arrangement, such as small gaps or channels, to allow condensation to evaporate or run off.
- Build a proper protective base layer, such as a thin piece of felt or cork sheet, to prevent scratching surfaces below.
- Install a moisture barrier coating over the entire cork surface, such as a clear polyurethane spray, to enhance its waterproof properties.
- Create a proper spacing template. This helps ensure uniformity and a professional finish when gluing multiple corks together.
- Design a pattern arrangement guide. Experiment with different orientations (horizontal, vertical, circular) to create unique visual effects.
- Build an integrated stabilizing system if making larger items like trivets, such as a hidden frame, to prevent warping over time.
- Install non-slip surface features on the bottom, such as small rubber feet or additional felt, to keep the item securely in place.
- Create a proper cleaning protocol, advising on gentle wiping with a damp cloth rather than immersion, to maintain the cork’s integrity.
- Design a storage solution system for when the items are not in use, such as a decorative box or hanging rack, to prevent damage.
- Build a cork preparation station, including a cutting guide or jig, if you plan to slice corks for different patterns.
- Install a protective finish coating that is food-safe if the item will be used as a trivet for hot dishes.
- Create a maintenance schedule, including reapplication of sealants if necessary, for long-term durability and appearance.
22. Wall-Mounted Storage Display: Upcycled Drawer Fronts
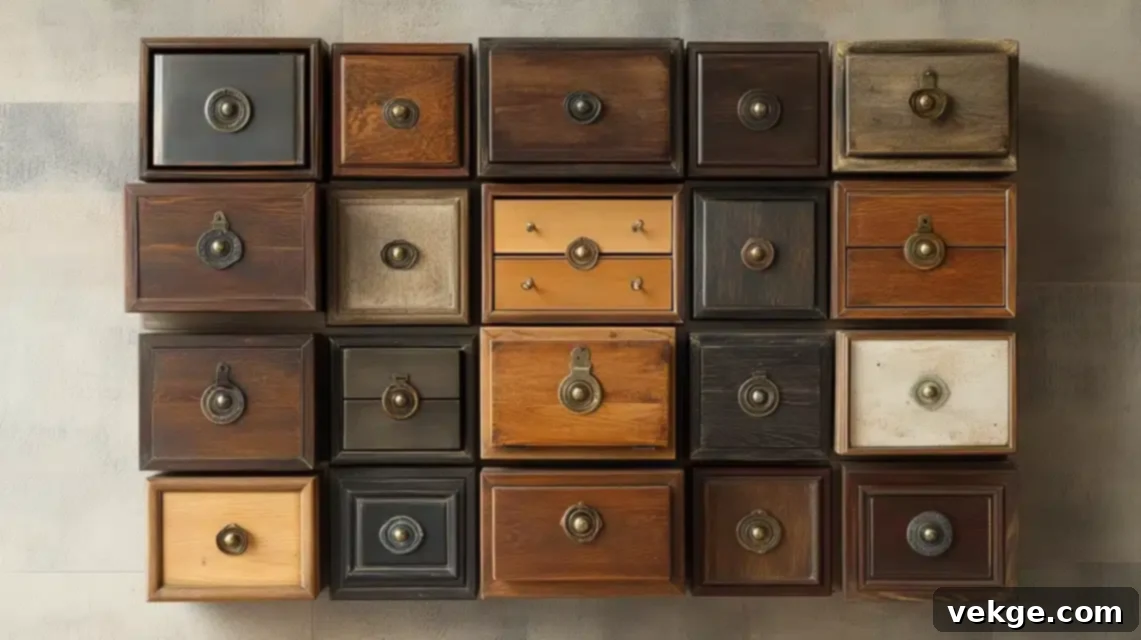
Give old drawer fronts a stylish second life by transforming them into captivating wall-mounted storage displays that perfectly blend practical function with vintage charm. Creating secure mounting systems is paramount, ensuring robust stability for daily use and guaranteeing that your display remains firmly in place. Installing proper spacing between each drawer front allows for effortless access to hung items, making retrieval and organization a breeze. Enhance the original character of each drawer by thoughtfully adding decorative elements, such as antique knobs, stenciled designs, or a fresh coat of paint. Additionally, building protective corners helps prevent any unsightly wall damage during use, making these upcycled pieces both beautiful and highly functional additions to your home organization.
Complete DIY Guide for a Wall-Mounted Storage Display
- Begin by meticulously restoring the drawer front surfaces. This involves cleaning, sanding, repairing any damage, and applying a fresh finish or paint.
- Install a heavy-duty mounting hardware system. French cleats, keyhole hangers, or strong D-rings are excellent choices for secure wall attachment.
- Create a proper wall anchor placement guide. This ensures that the anchors are positioned correctly to bear the weight of the drawer front and its contents.
- Design an integrated hook installation system. Add coat hooks, cup hooks, or small pegs to the drawer front for hanging items.
- Build a corner protection system, such as small rubber bumpers or felt pads on the back corners, to prevent wall damage when hanging or moving.
- Install proper weight distribution. Ensure that the mounting points are spread out enough to handle the anticipated load without stressing the wall.
- Create a template for mounting holes. This ensures accurate drilling and alignment when attaching multiple drawer fronts to create a cohesive display.
- Design proper spacing between units if you are mounting several drawer fronts. This enhances aesthetic appeal and maintains accessibility.
- Build an integrated level monitoring system or provide clear instructions on how to ensure each drawer front is perfectly level during installation.
- Install protective wall spacers. These small standoffs create a consistent gap between the drawer front and the wall, protecting the wall surface.
- Create proper cleaning access, making it easy to wipe down both the drawer fronts and the wall behind them.
- Design seasonal rotation options for decorative elements. You can easily swap out hooks or small ornaments to match holidays or seasons.
- Build an integrated support system for heavier items if necessary, such as a small hidden bracket behind a drawer front.
23. Rustic Light Fixture: Industrial Farmhouse Glow
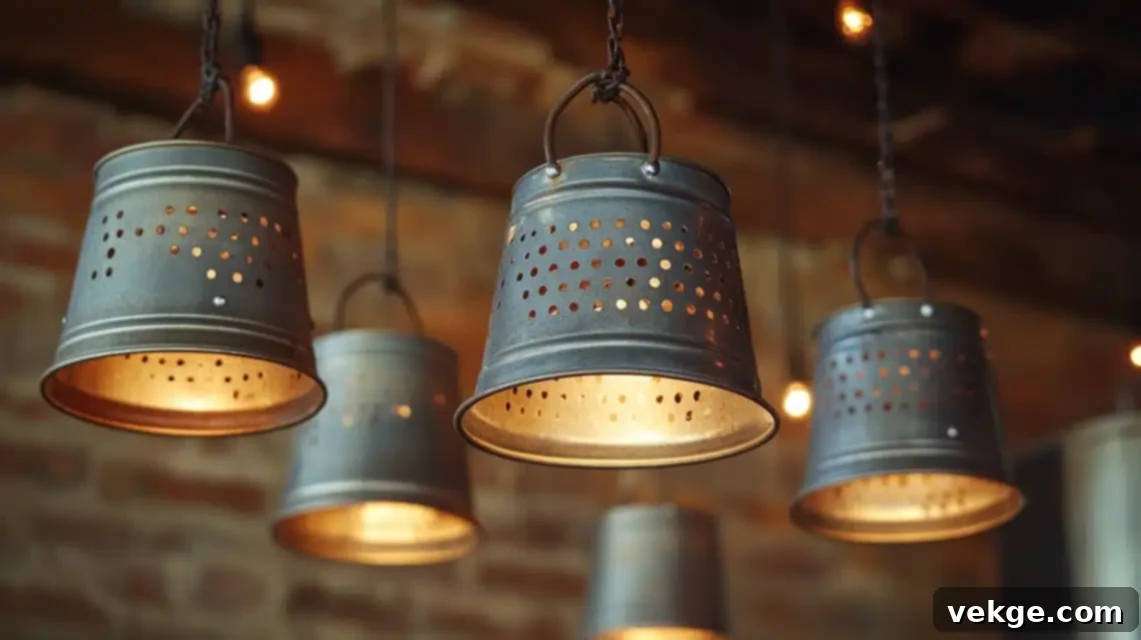
Introduce a touch of industrial farmhouse charm to any space by transforming ordinary galvanized buckets into distinctive statement pendant lights. Crafting proper wiring pathways is paramount, ensuring not only electrical safety but also maintaining the rugged aesthetics of the bucket without compromise. Installing adjustable hanging systems offers invaluable flexibility, allowing for perfect height positioning to suit your room’s dimensions and lighting needs. For a truly unique visual effect, consider adding decorative punched patterns to the bucket, which will create mesmerizing light dispersion effects across your walls and ceiling. Furthermore, building proper ventilation around the bulbs is essential, preventing heat buildup and ensuring the longevity of your upcycled rustic luminaries.
Complete DIY Guide for a Rustic Light Fixture
- Begin by cleaning and preparing the bucket surface. This involves removing any rust, dirt, and ensuring it’s ready for drilling and wiring.
- Install UL-listed electrical components properly. This includes the lamp holder, wire, and plug or junction box connections for safety and compliance.
- Create a custom mounting plate for ceiling attachment. This plate should be robust enough to support the bucket’s weight and securely fasten to the ceiling.
- Design a proper heat ventilation system. This could involve drilling small holes at the top of the bucket or using a heat-resistant inner lining to prevent heat buildup.
- Build integrated light diffusion panels if desired. These could be frosted acrylic inserts or reflective materials placed inside to soften the light.
- Install an adjustable chain mounting system. This allows you to easily raise or lower the pendant light to achieve the perfect height.
- Create a proper pattern template guide for any decorative punched patterns. This ensures uniform and aesthetically pleasing perforations for light dispersion.
- Design bulb replacement access. This might involve a removable bottom plate or a simple method for unscrewing the bulb without dismounting the fixture.
- Build a backup support cable system in addition to the main chain. This provides an extra layer of safety, especially for heavier buckets.
- Install a proper grounding connection to prevent electrical hazards, as required by electrical codes.
- Create cleaning access points, allowing you to easily wipe down the interior and exterior of the bucket.
- Design multiple height adjustments, offering versatility in where and how the fixture can be used.
- Build proper wire management, ensuring all wires are neatly tucked away and secured, preventing tangles or damage.
- Install heat shield protection around the bulb socket, especially if using a higher wattage bulb, to prevent overheating of the bucket material.
- Create safety protocol documentation, detailing installation steps, bulb compatibility, and maintenance tips for safe operation.
24. Vintage Window Treatment: Upcycled Shutter Headboard
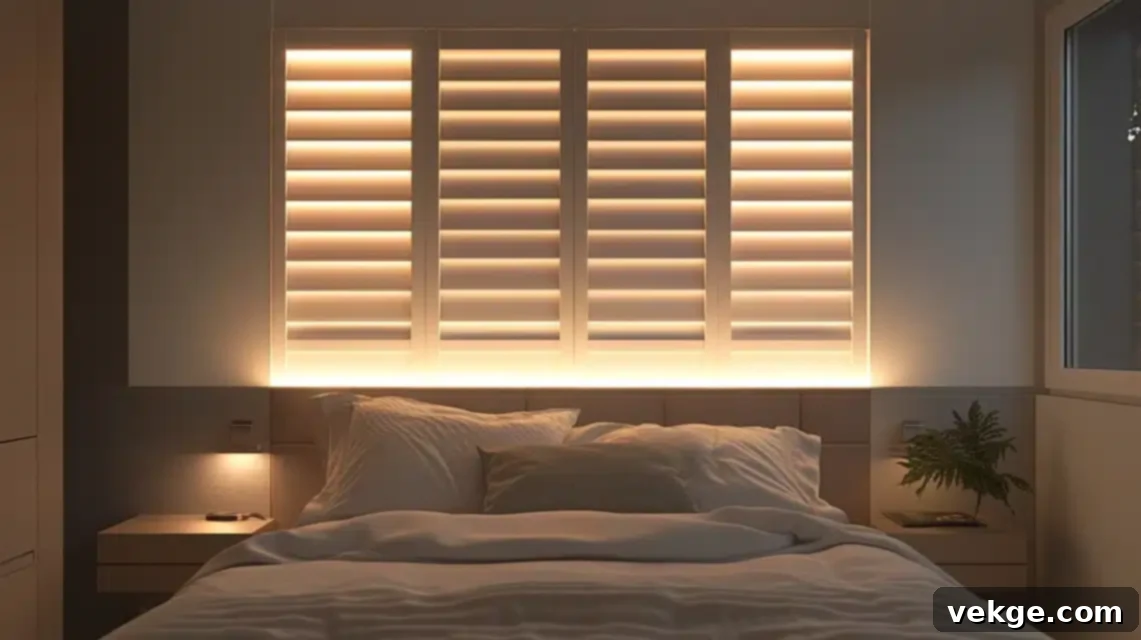
Transform old shutters into a stunning and unique headboard, framing your bedroom with architectural interest and a touch of rustic elegance. Creating a secure mounting system is crucial, not only to ensure the headboard’s stability but also to protect the integrity of your wall from any damage. For an enhanced aesthetic and a touch of modern luxury, consider installing LED backlighting, which adds depth and a beautiful ambient glow to the room. Thoughtfully adding decorative hardware can further enhance the vintage character of the shutters while also ensuring their secure positioning. Finally, building proper spacing from the wall is vital, preventing any wall damage and allowing for essential air circulation behind the structure, contributing to both its longevity and the overall health of your bedroom environment.
Complete DIY Guide for a Vintage Window Treatment (Shutter Headboard)
- Begin with thorough restoration of the shutter surfaces. This includes cleaning, sanding, and applying a fresh coat of paint or protective sealant.
- Install a French cleat mounting system for safety and secure wall attachment. This allows for easy hanging and ensures the heavy shutter is held firmly.
- Create an integrated lighting system with a dimmer, such as LED strips along the back or edges, to provide ambient light and depth.
- Design a proper wall spacing mechanism using standoffs or blocks. This allows air circulation behind the headboard and prevents wall scuffs.
- Build a corner reinforcement system for durability, especially if the shutters are older or show signs of wear.
- Install protective wall barriers (e.g., felt pads) on any parts of the shutter that might touch the wall, preventing scratches.
- Create proper ventilation gaps behind the headboard to prevent moisture accumulation and ensure air flow.
- Design a seasonal maintenance plan, including dusting and checking mounts, to keep your headboard looking its best.
- Build an integrated support structure if multiple shutters are joined, ensuring a seamless and stable appearance.
- Install proper angle brackets if the shutters are not perfectly flat, ensuring they lie flush against the wall or at a desired angle.
- Create cleaning access points, making it easy to clean the front and back of the shutters.
- Design proper height placement adjustments to ensure the headboard is proportionate to your bed and mattress size.
- Build a wire management system for the LED lighting, keeping all cords hidden and tidy.
- Install a protective coating that is suitable for bedroom environments, offering durability and a beautiful finish.
- Create a maintenance schedule, detailing all necessary checks and cleaning routines for the longevity of your repurposed headboard.
25. Plant Stand Innovation: Dynamic Greenery Display
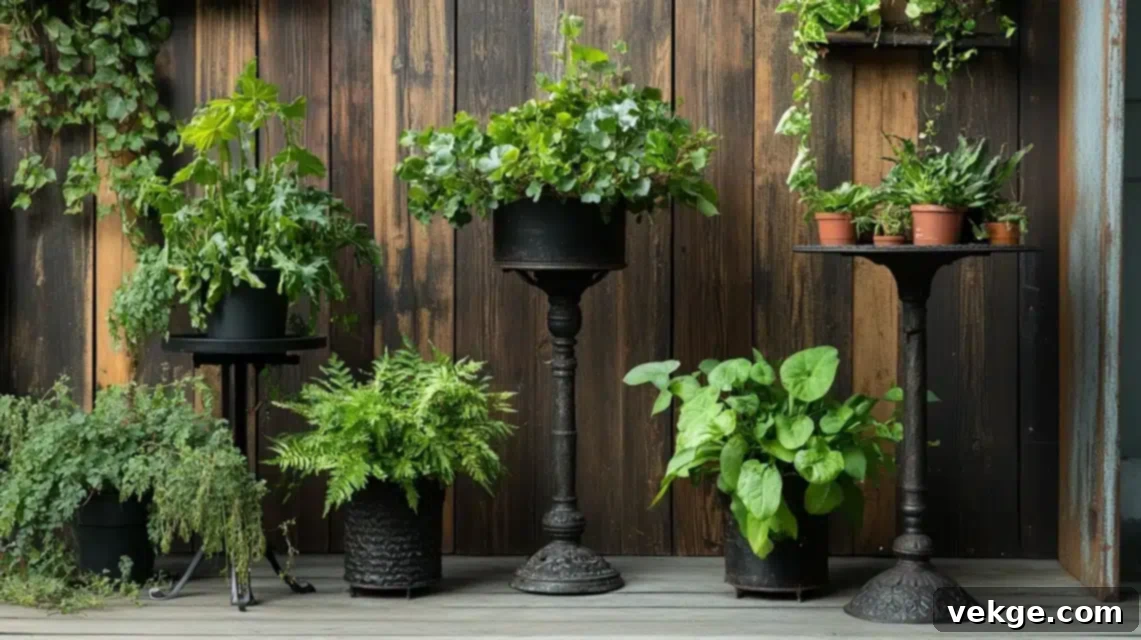
Reimagine an ordinary item into a dynamic and artistic plant stand, creating a captivating display for your beloved greenery. Designing proper drainage systems is paramount, not only to prevent damaging water accumulation and root rot for your plants but also to safeguard your floors from any water damage. Installing adjustable plant platforms offers invaluable flexibility, allowing you to perfectly accommodate different pot sizes and plant heights, creating a versatile display. Thoughtfully adding decorative elements can significantly enhance the original character of the stand, transforming it into a unique piece of home decor. Finally, building robust stabilizing systems is crucial to prevent tipping, especially when showcasing tall or top-heavy plants, ensuring the safety and beauty of your living display.
Complete DIY Guide for a Plant Stand Innovation
- Begin by weatherproofing the entire structure of the plant stand, especially if it will be used outdoors. Apply suitable sealants or outdoor paint.
- Install a drainage system with a removable tray. This collects excess water, preventing spills and making cleanup easy.
- Create an adjustable platform system for the plants. This allows you to raise or lower platforms to accommodate different pot sizes and plant heights.
- Design proper weight distribution across the stand. Ensure heavier pots are placed on lower or more central platforms for stability.
- Build an integrated stabilizing base, such as wider feet or a weighted bottom, to prevent tipping with tall or large plants.
- Install moisture barrier protection on all surfaces that will directly contact pots, preventing water damage to the stand itself.
- Create proper cleaning access points, ensuring all levels and nooks of the stand are easy to reach for wiping down.
- Design multiple height options for the stand itself, allowing for versatility in display and placement within your home or garden.
- Build a plant rotation system, either by making platforms movable or by having a designated spot for rotating plants for even light exposure.
- Install protective floor pads on the bottom of the stand to prevent scratching delicate indoor or outdoor surfaces.
- Create proper ventilation around and through the stand, especially for densely packed plants, to prevent mildew and promote air circulation.
- Design seasonal adjustment options, such as easily removable sections for winter storage or adding specific accessories for holidays.
- Build an integrated watering system, like a small drip system or a wicking mechanism, to simplify watering routines.
- Install humidity monitoring, perhaps a small hygrometer on the stand, to ensure ideal conditions for tropical plants.
- Create a care guide documentation, detailing the types of plants suitable for the stand and specific watering or light needs.
Final Thoughts on Creative Repurposing
These diverse transformations vividly prove that human creativity knows no bounds when it comes to giving new life to old items. Each carefully executed project demonstrates how practical function can seamlessly merge with personal style, culminating in unique pieces that tell captivating stories while serving innovative new purposes in your home. Embracing the art of repurposing is a journey of discovery, where discarded objects are seen not as waste, but as canvases for your imagination and ingenuity.
Remember that successful repurposing always begins with careful planning and thorough preparation. Before embarking on your next DIY adventure, take the time to consider each item’s structural integrity, its intended new use, and all the required modifications. This thoughtful approach ensures both the safety and durability of your creations. Most importantly, allow your imagination to be your guide, experimenting with colors, textures, and new functionalities, all while maintaining unwavering attention to safety and functionality in every piece you bring to life. These projects not only contribute significantly to saving valuable resources and reducing landfill waste but also enrich your living space with truly distinctive pieces that infuse character, warmth, and a profound sense of purpose.
Frequently Asked Questions About Repurposing
What Are Some Easy Repurposing Ideas for Beginners?
For those just starting their repurposing journey, simple transformations are the perfect way to build confidence and skills. Begin with straightforward projects like turning ordinary mason jars into elegant bathroom organizers for cotton swabs or stylish candle holders. Another excellent starting point is to paint and repurpose wooden crates; these can become versatile storage solutions for books, toys, or pantry items. Wine bottles, with their elegant shapes, can easily be transformed into chic vases or unique bookends. These beginner-friendly projects typically require minimal tools, such as screwdrivers, basic paint, and adhesives, allowing you to achieve satisfying results with ease. Focus on projects that allow you to practice fundamental DIY techniques without requiring extensive craftsmanship.
How Can I Repurpose Household Items Creatively?
To approach household items with a creative repurposing mindset, shift your perspective. Instead of seeing an item solely for its original function, observe its inherent shape, material, and structural potential. For instance, glass jars are not just for food; their transparent nature makes them ideal bathroom organizers or even small terrariums. An old, sturdy ladder can transcend its utility to become a charming bookshelf or a unique towel rack. Even humble tin cans, once cleaned and decorated, can be transformed into beautiful and functional planters. Always consider an item’s potential for storage, its aesthetic qualities for display, or how it might serve an entirely new functional purpose. Remember that a fresh coat of paint, new hardware, or a simple decorative addition can dramatically alter an item’s appearance, making it feel brand new and perfectly integrated into your home decor.
What Is the Difference Between Upcycling and Repurposing?
While often used interchangeably, “repurposing” and “upcycling” have distinct nuances. Repurposing typically involves giving an item a new function while maintaining its basic form or structure. An example is turning an old door into a coffee table or a vintage suitcase into a side table. The core identity of the object is largely recognizable, but its use has changed. Upcycling, on the other hand, involves transforming an item into a higher-value piece through significant modifications, often involving deconstruction and reconstruction. This process typically requires more extensive changes and a greater creative vision, enhancing the item’s aesthetic or functional quality beyond its original state. Both practices share the common goal of reducing waste and promoting sustainable living, but upcycling generally entails a more intricate and transformative process, while repurposing often requires less modification, keeping the item’s original character more prominent.
How Can I Make Money by Selling Repurposed Items?
To successfully monetize your repurposed creations, begin by honing your skills in a specific type of transformation. Become an expert at turning old windows into decorative mirrors or crafting unique furniture pieces from wooden crates. Focus relentlessly on quality materials and achieving a professional finish, as this significantly impacts perceived value. Research your target market’s preferences by visiting local vintage shops, craft fairs, and exploring online marketplaces like Etsy or local classifieds. Understanding what sells and for how much is crucial. Document your entire process with compelling “before and after” photos, as these visually tell the story of your craftsmanship and value. When pricing your items, carefully consider the cost of materials, the time invested in your labor, and the current market demand for similar upcycled goods. Effective storytelling around the item’s history and transformation can also add significant value and appeal to potential buyers.
What Are Some Repurposing Ideas Specifically for Home Decor?
For enhancing your home decor, the possibilities for repurposing are endless and truly inspiring. Consider transforming vintage suitcases into charming side tables that double as unique storage, or converting old picture frames into elegant serving trays for entertaining guests. Decorative shutters can become captivating wall art, adding architectural interest to any room. You can create unique lighting fixtures from unexpected items like old galvanized buckets for a rustic look or various glass bottles for an enchanting glow. Integrate architectural salvage pieces, such as antique corbels or ornate moldings, directly onto your walls for a touch of historical grandeur. Beyond permanent fixtures, think seasonally: turn old sweaters into cozy winter pillow covers, or repurpose garden tools into rustic summer wall art. The goal is always to create pieces that beautifully combine aesthetic appeal with practical function, infusing your living space with character and individuality.
