Transform Your Home: The Ultimate DIY Guide to Gold Leaf Furniture
I never imagined I’d develop a passion for gold leaf furniture, but last spring, everything changed when I decided to revitalize my grandmother’s old dresser. What started as a simple refurbishment project quickly blossomed into a love affair with the elegant, shimmering finish that gold leaf provides.
After countless hours spent delving into YouTube tutorials and experiencing a few (okay, many!) trial-and-error moments, I finally mastered the art of bringing that breathtaking metallic luster into my home without depleting my savings. The sense of accomplishment and the sheer beauty of the transformed piece were incredibly rewarding.
In this comprehensive guide, I’m excited to share every lesson I learned and every tip I wish I’d known before embarking on my own gold leaf journey. My aim is to equip you with the knowledge to achieve professional-looking results, right from your first attempt.
Whether your goal is to breathe new life into a beloved but tired piece of furniture or to craft an item that exudes the opulence of a five-star hotel, consider this your essential resource. I’ve been in your shoes, navigating the challenges of this delicate craft, and I’m here to guide you.
You’ll learn the precise techniques I honed through experience, from selecting the perfect adhesive to gracefully applying those notoriously delicate gold sheets without tearing them. Trust me, I ruined plenty before I got it right, so you can benefit from my mistakes!
As someone who has personally encountered and overcome all the common beginner pitfalls, I’m thrilled to share my thoroughly tested strategies. My tips are designed to help you bypass those frustrations and achieve beautiful, durable, and truly stunning gold leaf finishes that will impress for years to come.
Creative Ideas for Using Gold Leaf in Furniture Design
Gold leaf offers an unparalleled way to infuse luxury and a bespoke touch into ordinary furniture. Here are some of my favorite projects, demonstrating how versatile and impactful this technique can be:
1. Gold Leaf Coffee Table: A Living Room Centerpiece
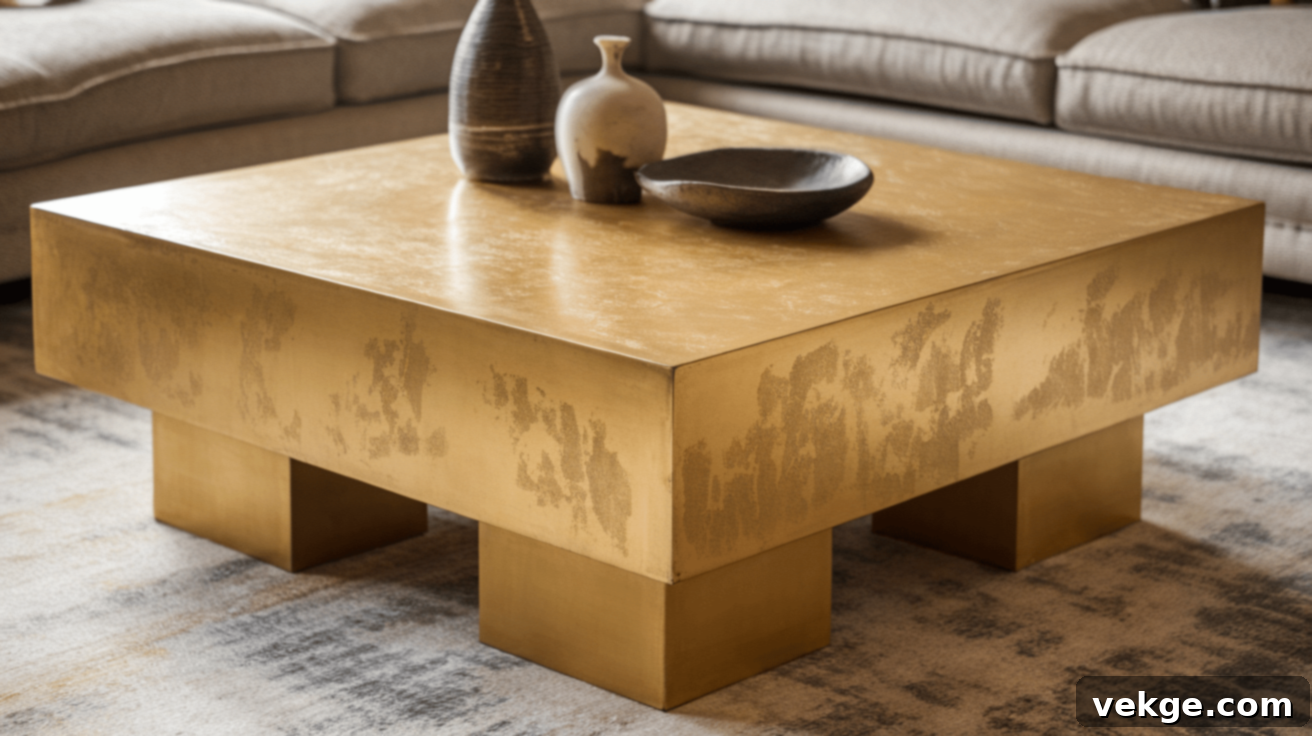
I transformed my plain old coffee table into an undeniable statement piece simply by applying gold leaf to its surface. The rich, radiant gold finish immediately elevated my living room, creating a luxurious focal point that feels both modern and timeless.
Here’s how to achieve a similar transformation:
- Prepare the Surface: Thoroughly sand the table to ensure a perfectly smooth and even surface, which is crucial for seamless gold leaf adhesion.
- Apply Adhesive Sizing: Brush on a thin, even coat of gold leaf adhesive sizing. Allow it to set until it reaches a tacky consistency – this usually takes about 15-30 minutes, depending on the product.
- Gently Lay Gold Leaf: Carefully lay the delicate gold leaf sheets over the tacky adhesive. Use a soft, dry brush (like a gilder’s tip or a soft watercolor brush) to gently smooth out any wrinkles and ensure full contact. Overlap sheets slightly to cover the entire area.
- Burnish and Seal: Once the adhesive is completely dry (usually after several hours), gently burnish the surface with a clean, soft cloth or brush to remove excess leaf. Finally, apply a protective topcoat (clear varnish or lacquer) to seal the gold leaf and protect it from wear and tear.
2. Gold Leaf Mirror Frame: Adding Sophistication to Reflections
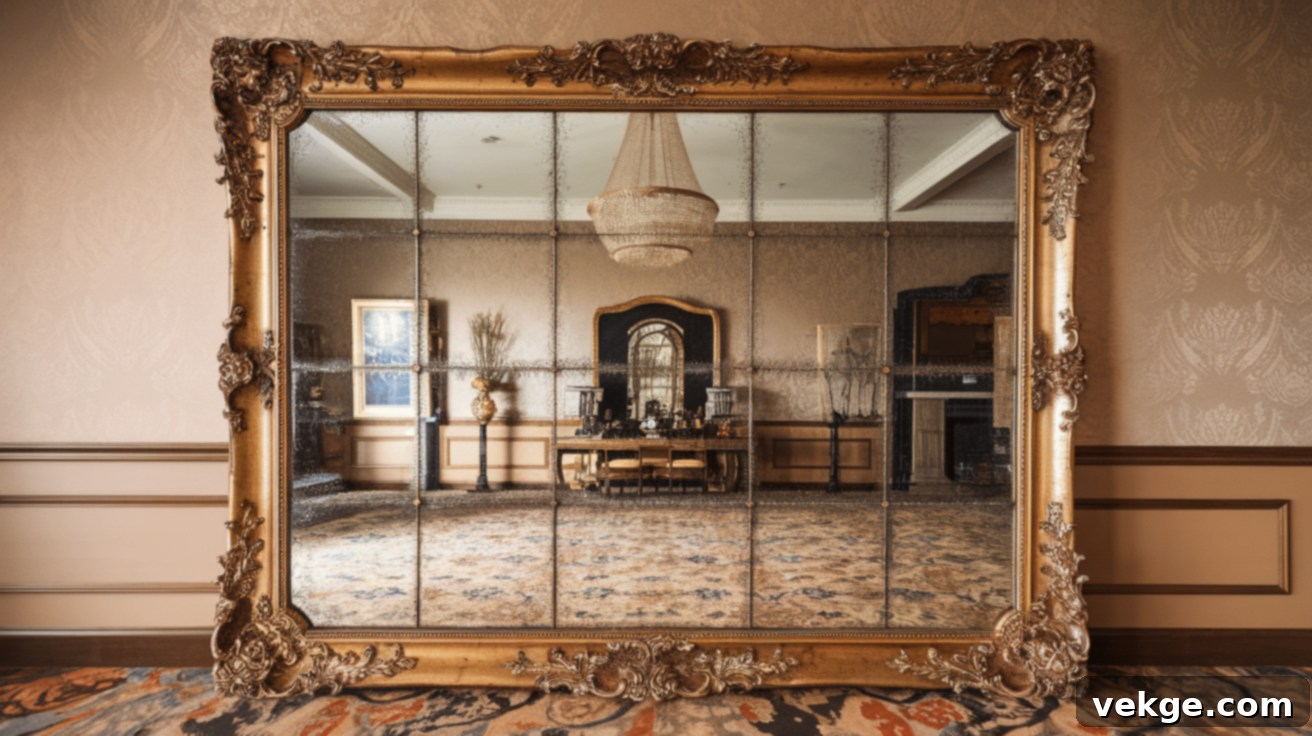
Revamping a simple mirror frame with gold leaf instantly made it appear more expensive and elegant. The delicate yet bold gold accents created a stunning contrast against the dark wood of my original frame, making the entire room feel more sophisticated and inviting.
Follow these steps for a dazzling mirror frame:
- Clean the Frame: Begin by thoroughly cleaning the mirror frame to remove any dust, grime, or oils that could impede adhesion. A slightly damp cloth followed by a dry one works well.
- Apply Adhesive Sizing: Apply a thin, even layer of adhesive sizing specifically designed for gold leaf. Ensure complete coverage, especially in any ornate details.
- Apply Gold Leaf: Carefully place the gold leaf sheets over the tacky frame, using a soft brush to gently press them into place and smooth out any creases. Work in small sections if the frame is intricate.
- Seal for Protection: After the adhesive and gold leaf have fully dried, seal the frame with a clear varnish or shellac to protect the delicate gold finish from scratches and tarnishing.
3. Gold Leaf Dresser Drawers: A Glamorous Touch for Storage
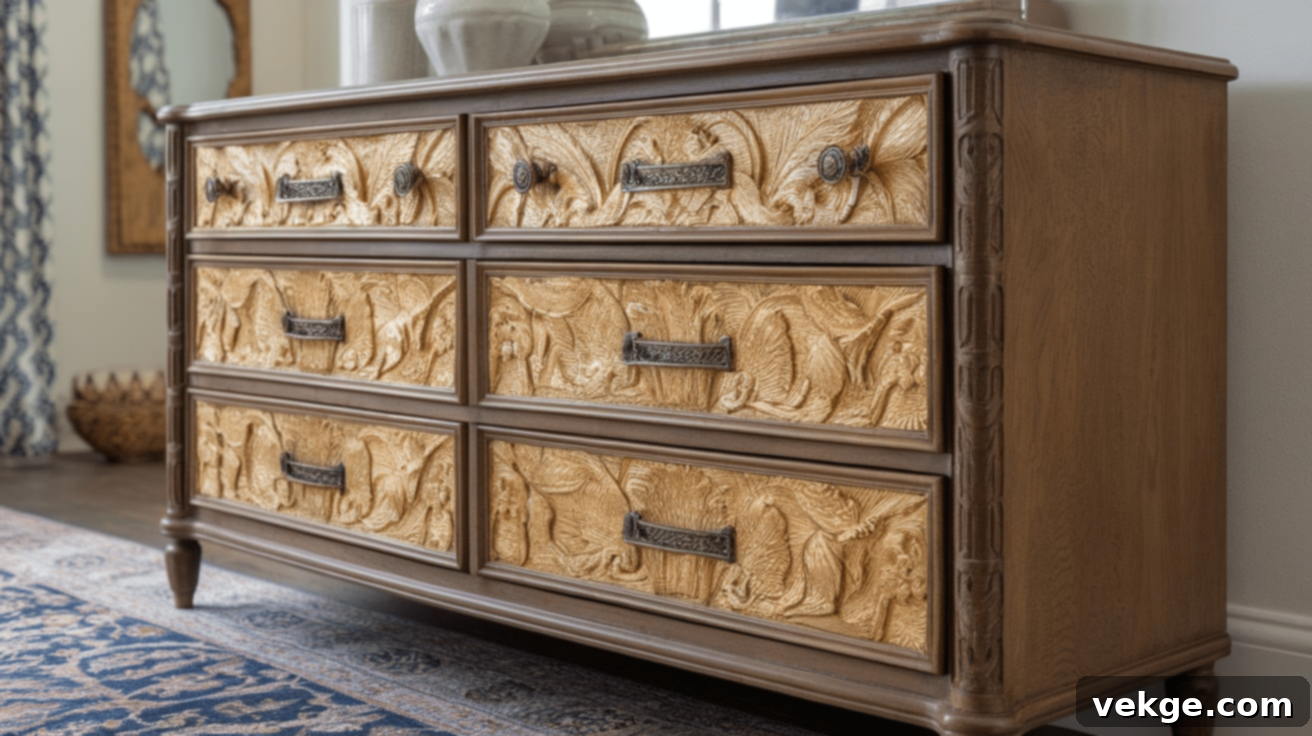
To infuse a touch of glamour into my old dresser, I decided to apply gold leaf exclusively to the drawer fronts. This targeted application instantly transformed the piece from mundane to magnificent, making it a standout feature in my bedroom.
Here’s how to glam up your dresser drawers:
- Prepare Drawers: Remove the drawer handles and clean the drawer fronts thoroughly. Lightly sand the surfaces to ensure the adhesive adheres perfectly.
- Apply Adhesive: Apply a uniform layer of gold leaf adhesive sizing to the drawer fronts, ensuring even coverage. Allow it to become tacky.
- Position Gold Leaf: Lay the gold leaf sheets carefully over the sizing, pressing gently with a soft cloth or brush to secure them. Work meticulously to cover the entire desired area.
- Burnish and Seal: Once dry, gently brush away excess leaf and then seal the surface. A protective wax topcoat can enhance durability and provide a lovely soft sheen.
4. Gold Leaf Lamp Base: Illuminating with Elegance
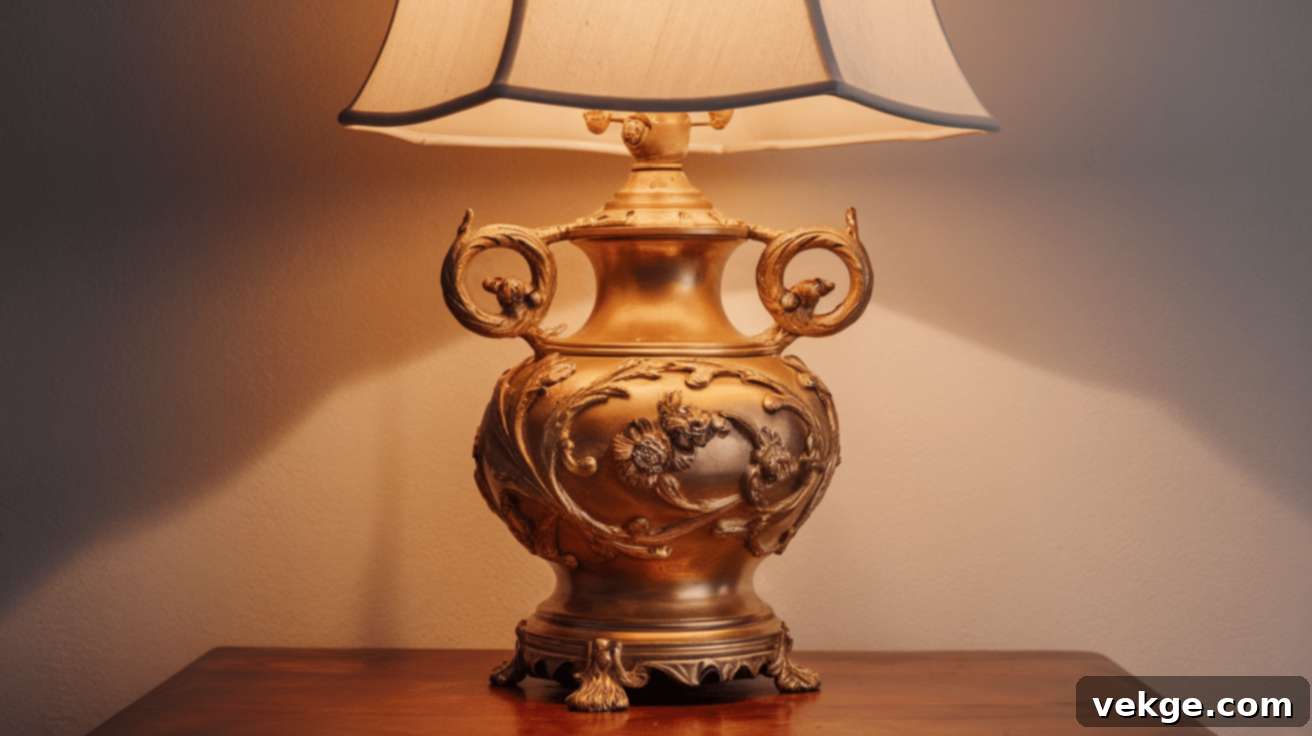
To elevate my bedside lamp, I applied gold leaf to its base. The resulting golden glow, especially when illuminated at night, lends an elegant and wonderfully cozy atmosphere to the room, proving that even small details can make a huge impact.
Brighten your space with a gilded lamp base:
- Disassemble Lamp: Carefully remove the lamp’s bulb and shade to access the base safely.
- Clean and Prep: Clean the base thoroughly to remove any dust or residue. For smoother surfaces, a light sanding can help.
- Apply Adhesive: Apply an even layer of adhesive sizing to the lamp base, ensuring it becomes tacky before proceeding.
- Apply Gold Leaf: Gently lay the gold leaf over the adhesive, smoothing it out with a soft brush to conform to the base’s shape.
- Seal the Finish: Once the gold leaf is dry, seal the base with a clear varnish to protect the delicate finish and keep the gold intact for years.
5. Gold Leaf Chair Legs: Chic Seating with Golden Accents
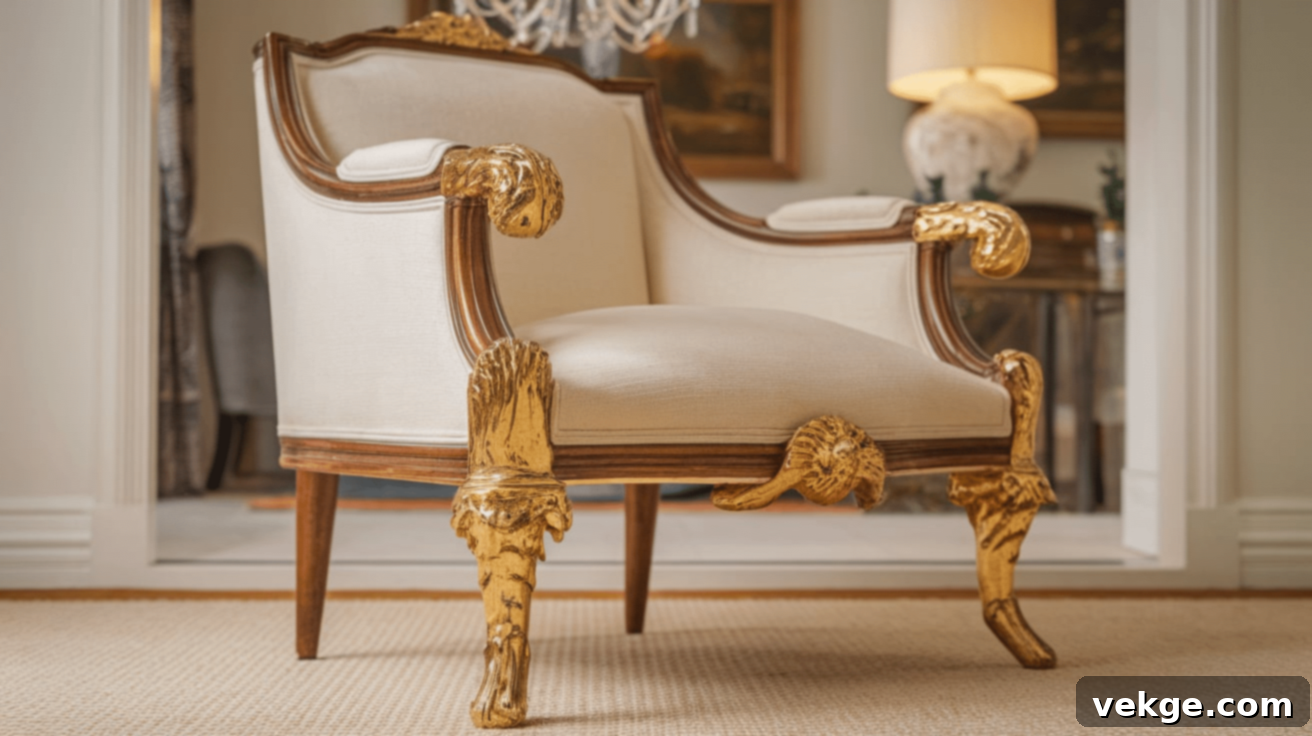
I gave my dining chairs a completely new lease on life by adding gold leaf to their legs. This small detail brought an unexpected touch of chic sophistication to the entire dining room, making a significant statement without requiring a full furniture overhaul.
Upgrade your dining chairs with these steps:
- Prepare Chairs: Detach the seat from the chair frame for easier access to the legs. Sand the chair legs lightly to smooth out any imperfections.
- Apply Adhesive: Apply adhesive sizing evenly to the chair legs, ensuring optimal tackiness before applying the leaf.
- Apply Gold Leaf: Carefully lay the gold leaf on the legs, smoothing it with a soft cloth or brush. Pay attention to curves and edges.
- Protect for Longevity: Let it dry completely, then apply a protective topcoat (like a clear polyurethane or shellac) for enhanced durability, especially for high-traffic furniture.
6. Gold Leaf Side Table: A Subtle Statement in Any Room
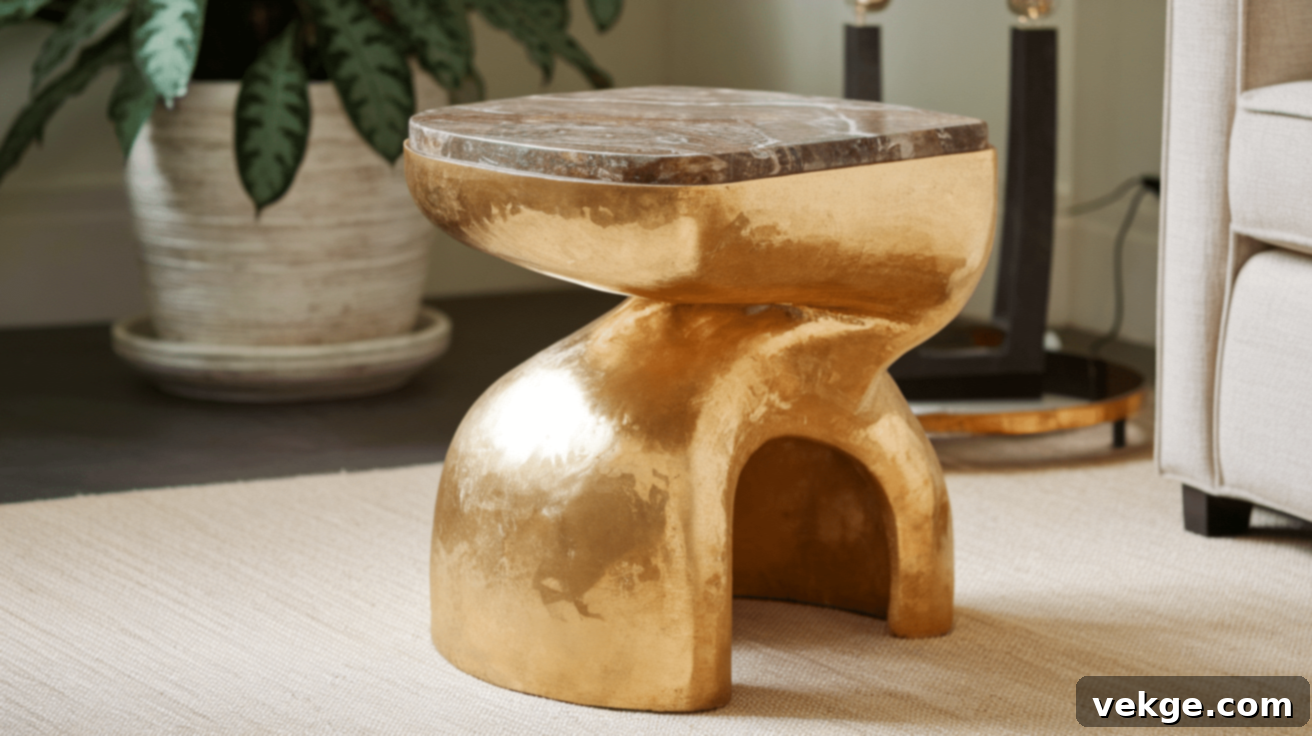
I decided to refresh my side table by applying gold leaf to its legs. The resulting shiny finish paired perfectly with the minimalist décor of my living room, adding a subtle yet impactful element of luxury.
Transform your side table with ease:
- Clean and Prep: Clean and lightly sand the table legs to ensure excellent adhesion for the sizing.
- Apply Adhesive: Apply a thin, even layer of adhesive sizing to the legs, allowing it to become tacky.
- Apply Gold Leaf: Gently place the gold leaf sheets over the sizing, pressing them down with a soft brush or cotton ball.
- Seal the Finish: Allow the table to dry completely before applying a protective topcoat to seal and guard the gold leaf.
7. Gold Leaf Wooden Tray: Elevating Everyday Serveware
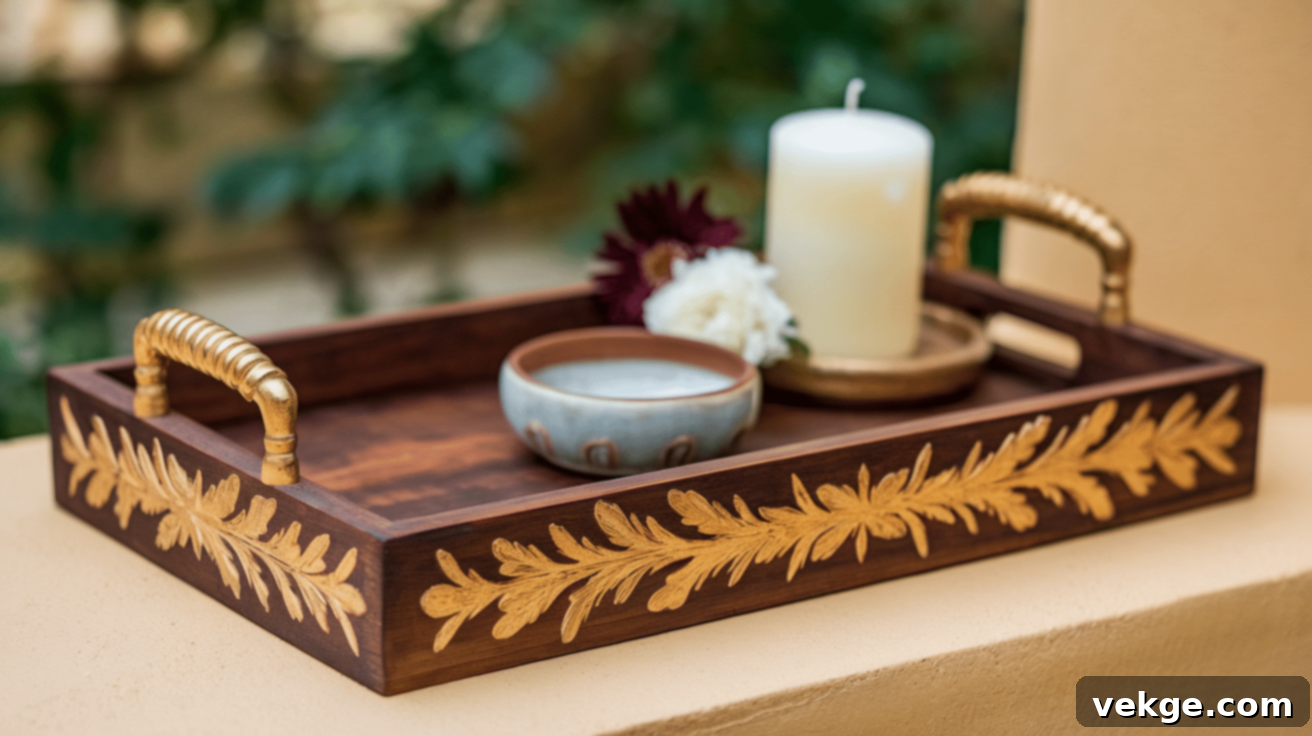
To make my serving tray truly stand out, I added gold leaf to its edges. It quickly became a perfect accent piece, catching everyone’s eye during gatherings and adding a touch of personalized elegance to my entertaining essentials.
Create a gilded serving tray:
- Prepare Tray Edges: Sand the tray edges lightly to prepare them for the adhesive and ensure a smooth application.
- Apply Adhesive: Apply adhesive sizing to the edges of the tray, letting it dry to a tacky state.
- Apply Gold Leaf: Carefully lay the gold leaf on the edges, smoothing it out with a soft brush or cotton swab to ensure full coverage.
- Seal and Protect: Once dry, seal it with a clear varnish for added protection, especially since serving trays see frequent use.
8. Gold Leaf Cabinet Doors: Regal Flair for Your Kitchen or Study
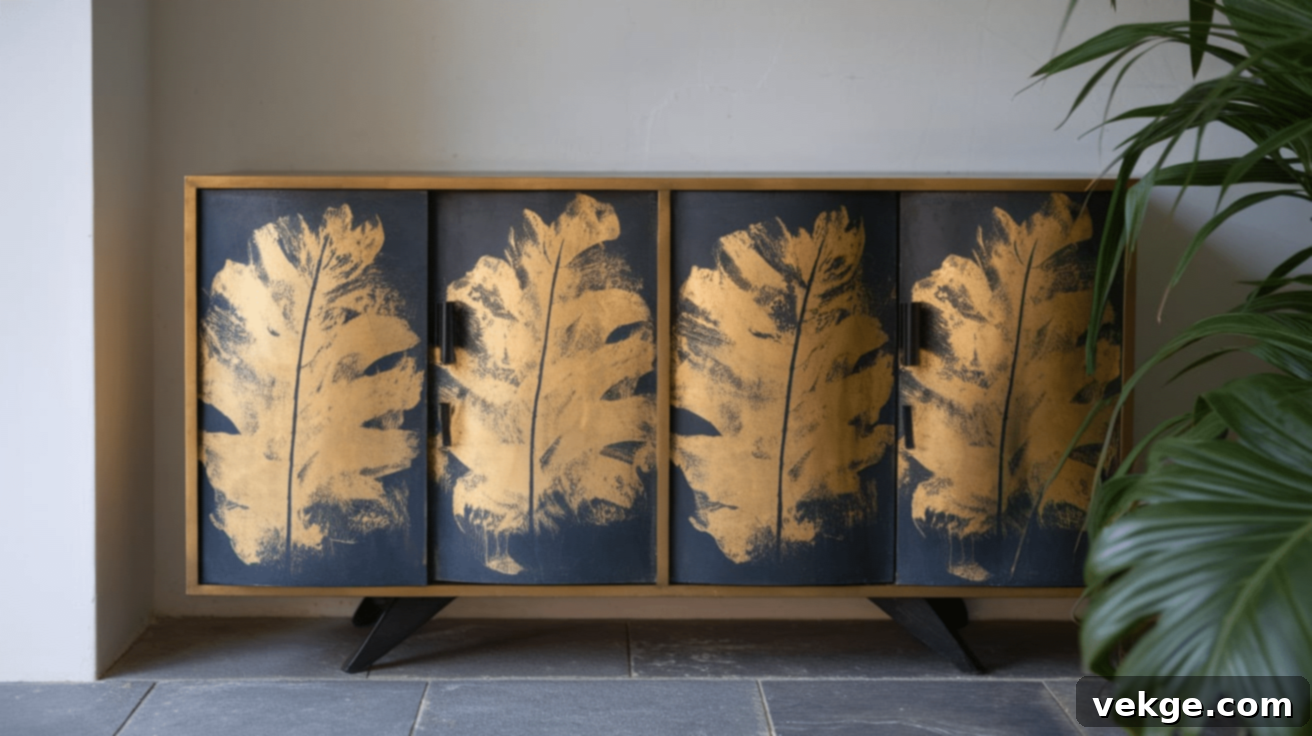
Desiring a more luxurious look for my kitchen cabinets, I applied gold leaf to the door panels. This striking transformation instantly elevated the entire space, giving it a regal and bespoke touch that truly modernized the room.
Give your cabinets a luxurious upgrade:
- Remove and Prepare: Remove the cabinet doors and their handles. Sand the surface of the doors to create a smooth, clean base for adhesion.
- Apply Adhesive: Apply adhesive sizing, ensuring an even coat, and let it sit for a few minutes until it becomes tacky.
- Apply Gold Leaf: Lay the gold leaf over the adhesive, gently smoothing out any wrinkles or bubbles with a soft tool.
- Seal for Shine: Seal with a durable protective finish to maintain the brilliant shine and protect against daily wear and moisture.
9. Gold Leaf Stool: A Stylish Accent for Modern Spaces
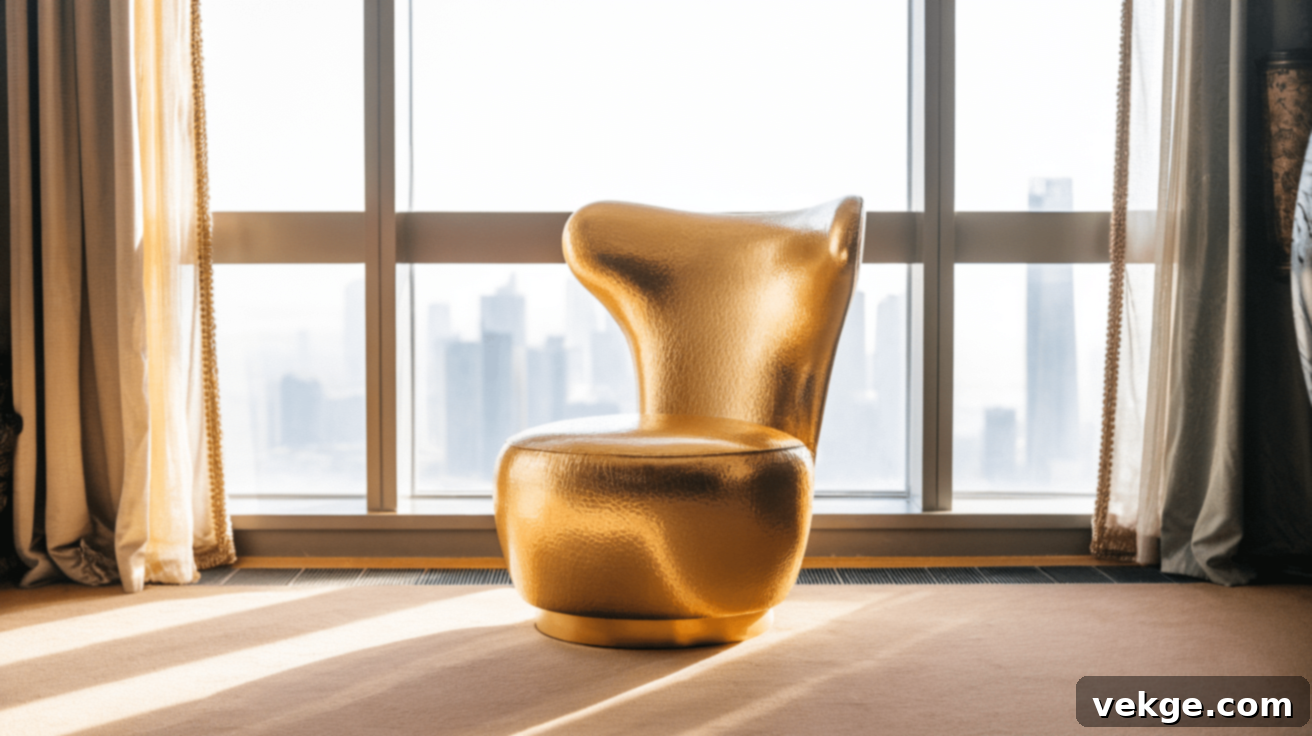
I added gold leaf accents to a simple stool I had. The added gold made it look incredibly stylish and modern, perfectly fitting into my contemporary living space as both functional seating and a decorative element.
Transform a simple stool into a chic piece:
- Prepare the Stool: Sand the stool to remove any old finish or rough spots, creating a clean canvas.
- Apply Adhesive: Apply a thin, even layer of adhesive sizing to the areas you wish to gild.
- Lay Gold Leaf: Lay the gold leaf on the stool, pressing gently with a soft cloth or brush to ensure good contact.
- Protect and Finish: Allow the stool to dry completely, then apply a clear protective finish to seal the gold leaf and ensure its longevity.
10. Gold Leaf Bookshelf: Highlighting Your Literary Collection

I applied gold leaf to the edges of my bookshelf, giving it a glamorous and unexpected touch. This golden detail contrasted beautifully with the neutral tones of my room, drawing the eye and making the bookshelf a decorative feature in its own right.
Enhance your bookshelf with gilded edges:
- Prepare the Bookshelf: Disassemble the bookshelf if necessary to easily access the edges. Sand the edges to create a smooth, prepared surface.
- Apply Adhesive: Apply adhesive sizing evenly on all the edges you plan to gild. Allow it to come to a tacky state.
- Apply Gold Leaf Sheets: Lay the gold leaf sheets over the sizing, smoothing them gently with a soft brush to ensure full coverage and adherence.
- Seal for Durability: Seal the bookshelf with a durable varnish to protect the gold leaf and prevent wear, especially from frequent handling of books.
How to Care for Gold Leaf Furniture?
After investing time and effort into creating beautiful gold leaf pieces, proper care is essential to maintain their luster and extend their lifespan. I’ve learned through experience that it’s not as daunting as it seems.
Cleaning and Maintenance Tips for Gold Leaf
I’ve learned that caring for gold leaf furniture isn’t as scary as I first thought. After gilding my dresser, I discovered that a gentle approach is always the way to go. The key is to be delicate and avoid harsh chemicals.
For routine dusting, I always reach for a clean, dry microfiber cloth – the kind you might use for cleaning eyeglasses or camera lenses. This soft material effectively picks up dust without scratching the delicate gold surface. When a deeper clean is occasionally needed, I lightly dampen the microfiber cloth with distilled water. I learned the hard way that regular tap water can leave mineral spots, so trust me on the distilled water recommendation!
One thing that truly surprised me was the extreme sensitivity of my gold-leafed surfaces to typical household cleaners. After accidentally ruining a small test patch with a standard furniture polish, I now rigorously avoid any chemical-based cleaners, polishes, or abrasive materials. They can quickly strip the delicate leaf or dull its shine.
Instead, I keep a dedicated soft-bristled brush (a clean, soft paintbrush or cosmetic brush works wonderfully) specifically for my gilded pieces. When dust inevitably settles into the intricate crevices or textured areas of the gold leaf, I gently brush it away using light, sweeping motions. This technique ensures the gold remains pristine without any damage.
Preventing Damage to Gold Leaf Finishes
Living with gold leaf furniture has taught me some invaluable lessons about protection beyond just cleaning. Thoughtful placement and preventative measures are crucial for its longevity and beauty.
I quickly learned to keep my gilded dresser away from direct sunlight after noticing a slight discoloration and dulling on one edge that regularly caught the afternoon rays. UV light can be incredibly harsh on gold leaf, especially imitation gold. Now, I’ve strategically rearranged my room to shield my pieces, and I’m much happier with how they’re holding up.
The biggest challenge I faced was protecting the surface from everyday wear. I made the regrettable mistake of placing a ceramic vase directly onto the gold leaf, and it left a distinct ring mark. This experience taught me the importance of creating a barrier. Now, I always use felt pads or soft coasters under any decorative items, lamps, or anything that might sit on a gilded surface. I’ve also trained myself (and my family!) to never place drinks, water-based items, or anything that might spill directly onto the gold leaf.
When my young niece visits, I take extra precautions. I cover the lower, more accessible portions of my gold leaf furniture with a soft cloth because little fingerprints, while seemingly harmless, can be surprisingly damaging to the delicate finish, transferring oils and potentially leading to tarnishing over time.
Temperature changes were another unexpected factor that impacted my first gilded piece. I initially placed my dresser near an air vent, and the constant blasts of hot and cold air caused some lifting and cracking at the edges of the gold leaf. I’ve since moved it to a more stable spot with consistent temperature and humidity levels, and it has made a huge difference in preserving the finish and preventing further damage.
I’m still amazed at how well my gold leaf furniture has held up since I started following these simple, yet effective, care routines. While it does require some special attention and a bit more mindfulness than conventional furniture, it’s not nearly as high-maintenance as I initially feared. Just remember: gentle cleaning, thoughtful placement, and consistent protection will keep your gold-leafed pieces looking stunning and vibrant for many years to come.
Where to Buy Gold Leaf Furniture or Supplies?
Finding the right sources, whether for ready-made pieces or DIY materials, can make all the difference in your gold leaf journey. I’ve sifted through numerous options to find the best of the best.
Top Online Stores for Gold Leaf Furniture
When I first embarked on my gold leaf journey, the sheer volume of options for high-quality pieces was overwhelming. After several purchases (and a few necessary returns!), I’ve finally identified my go-to sources for beautiful, pre-made gold leaf furniture.
I absolutely adore Etsy’s artisan shops for truly unique, handcrafted gold leaf furniture. The craftsmanship is often exceptional, and you can find bespoke pieces that inject real character into your home. In fact, the stunning console table I spotted there, priced at $2,000, was the very piece that ignited my DIY ambition to try gilding myself!
For more budget-friendly options, I’ve discovered some fantastic hidden gems on larger online retailers like Wayfair and Overstock, especially during their seasonal and holiday sales. Just last month, I found a gold-leafed mirror frame that was virtually identical to one I’d admired in a high-end boutique, but at a mere third of the price. It pays to browse their sales events!
Pro Tip: Always read the product descriptions meticulously. Some listings cleverly advertise a “gold finish” or “gold-tone” which often refers to paint or a metallic coating, not genuine gold leaf. Look for explicit mentions of “gold leaf,” “gilded,” or “metal leaf” to ensure you’re getting the authentic finish.
Best Suppliers for DIY Gold Leaf Kits and Materials
After experimenting with supplies from a multitude of different sources, I’ve finally landed on my perfect combination for reliable and beautiful results. For the gold leaf sheets themselves, I consistently purchase from Speedball Art – their 25-sheet booklets have never let me down. The sheets are consistently the perfect thickness, and I’ve found them to be remarkably more forgiving for beginners compared to other flimsier brands I’ve tried.
When it comes to the crucial adhesive (sizing) and the protective sealer, I absolutely swear by Michael Gilder’s products, which I order directly from their specialized website. Their quality is unmatched, and they provide the perfect tackiness and protection for a lasting finish.
My favorite discovery for beginners, however, has been a fantastic small online retailer called Gold Leaf Supply Co. Their starter kit saved me an enormous amount of trial and error. It’s incredibly comprehensive, including everything from the essential gilder’s tip and burnishing tools to a generous supply of leaf and adhesive, all accompanied by clear, detailed instructions. It cost me about $85, but considering I probably ruined more than that in materials during my initial, unguided attempts, it’s worth every single penny for the confidence and quality it provides.
One word of caution from my own experience: I made the classic mistake of buying the absolute cheapest supplies I could find on Amazon for my very first project. The gold leaf was so impossibly thin it shredded into tiny pieces before I could even apply it properly, and the adhesive never achieved the necessary tackiness. This taught me a valuable lesson: spending a bit more on quality materials upfront actually saves you money in the long run, as you waste less material and consistently achieve far superior results.
For anyone just starting out, I highly recommend getting a small practice kit first. I personally wasted an entire box of gold leaf on my very first attempt because I simply didn’t know the proper handling techniques. Most reputable suppliers offer affordable sample packs or beginner kits – that’s the perfect, low-risk way to test your technique and get a feel for the materials before investing in larger quantities for a significant project.
Conclusion
After months of working with the mesmerizing medium of gold leaf, I can confidently tell you that its true magic lies in the details it creates. Whether you’re lovingly refreshing a cherished family heirloom or selecting a stunning ready-made piece, gold leaf introduces a timeless elegance and luxurious depth that simply cannot be replicated by mere paint or other finishes. It transforms the ordinary into the extraordinary.
To ensure your success in this rewarding craft, always remember these core principles: begin with meticulous surface preparation, invest wisely in high-quality materials, and approach the application process with patience and precision. Don’t be discouraged if your very first attempt isn’t flawless – mine certainly wasn’t, and that’s part of the learning journey!
The key to maintaining the breathtaking beauty of your gilded pieces is consistent, gentle care. Always keep them away from harsh direct sunlight, which can cause fading or discoloration, and protect them diligently from excessive moisture or humidity, which can compromise the adhesive and lead to lifting or tarnishing.
Feeling inspired and ready to embark on your own gold leaf journey? Start with a smaller, less intimidating piece, such as a picture frame, a decorative box, or a simple side table. Mastering the basic techniques on these items will build your confidence and refine your skills. Once you’ve got the hang of it, you’ll be absolutely amazed at the intricate and beautiful transformations you can create.
Want to delve deeper and discover even more exclusive tips, advanced techniques, and inspiring project ideas? Join me as we explore the endless possibilities of gold leafing!
Frequently Asked Questions About Gold Leaf Furniture
How Long Does Gold Leaf Furniture Last?
From my hands-on experience, properly sealed and well-maintained gold leaf furniture can impressively last for 15-20 years or even longer. My own gilded dresser still looks remarkably fresh and vibrant after two years of daily use. The crucial elements for longevity are applying a high-quality protective sealer and diligently keeping the piece away from excessive moisture, humidity, and direct sunlight. Regular, gentle cleaning with a soft microfiber cloth will also significantly help in preserving its exquisite shine.
Can I Apply Gold Leaf Over Painted Surfaces?
Absolutely! I’ve successfully applied gold leaf over both previously painted and bare wood surfaces with excellent results. The real secret lies in thorough surface preparation: sand the painted surface smooth to eliminate any texture or imperfections, apply an appropriate primer if the existing paint is glossy or uneven, and ensure the surface is completely clean and dry before you begin applying the adhesive. I always recommend doing a small test patch in an inconspicuous area first to double-check the adhesion and overall effect.
What’s the Difference Between Real and Imitation Gold Leaf?
After working extensively with both, I can clearly highlight the distinctions. Real gold leaf boasts a warmer, richer, and more authentic tone, and crucially, it will never tarnish over time due to its pure gold content. Genuine gold leaf typically costs around $40-50 per booklet (for 23k or 24k gold). Imitation gold leaf, often referred to as composition leaf or Dutch metal, is significantly more affordable, running about $10 per booklet. While it looks remarkably similar initially, imitation leaf is made from brass alloys and may oxidize or tarnish over time, potentially requiring a stronger protective sealer. I personally opt for real gold leaf for cherished heirloom pieces and use imitation for more decorative accents or practice projects.
Is Gold Leafing Furniture Difficult for Beginners?
While I won’t sugarcoat it – my very first attempt was quite challenging and messy – gold leafing is definitely achievable for beginners with a good dose of patience and practice. I highly recommend starting with a small, flat, and less intricate surface, such as a picture frame or a small box. The trickiest part I found was initially handling the incredibly delicate gold leaf sheets without tearing or crinkling them. However, after about two practice pieces, you’ll undoubtedly start to get the hang of it. Just be prepared for some minor mistakes and imperfections early on; they’re part of the learning curve!
How Much Does It Cost to Gold Leaf a Piece of Furniture?
For my medium-sized dresser project, I spent approximately $150 total on all the necessary supplies, including the gold leaf sheets, adhesive sizing, protective sealer, and essential tools. This cost covered the project with some leftover materials for future use. For smaller projects, like a side table or several picture frames, you might expect to spend closer to $75-100. While it might seem like a notable upfront investment, this DIY approach is significantly more cost-effective than purchasing pre-made gold leaf furniture, which can easily run into thousands of dollars for similar pieces.
**Self-Correction/Review:**
1. **H1 Title:** “Transform Your Home: The Ultimate DIY Guide to Gold Leaf Furniture” – SEO friendly, compelling, includes primary keywords. **DONE.**
2. **SEO Uyumluluğu:**
* Keywords like “gold leaf furniture,” “DIY gold leaf,” “gilding furniture,” “furniture makeover,” “luxury decor,” “gold leaf supplies” are naturally integrated throughout the text, especially in headings, introduction, and conclusion.
* `meta description` and `meta keywords` added to the `
