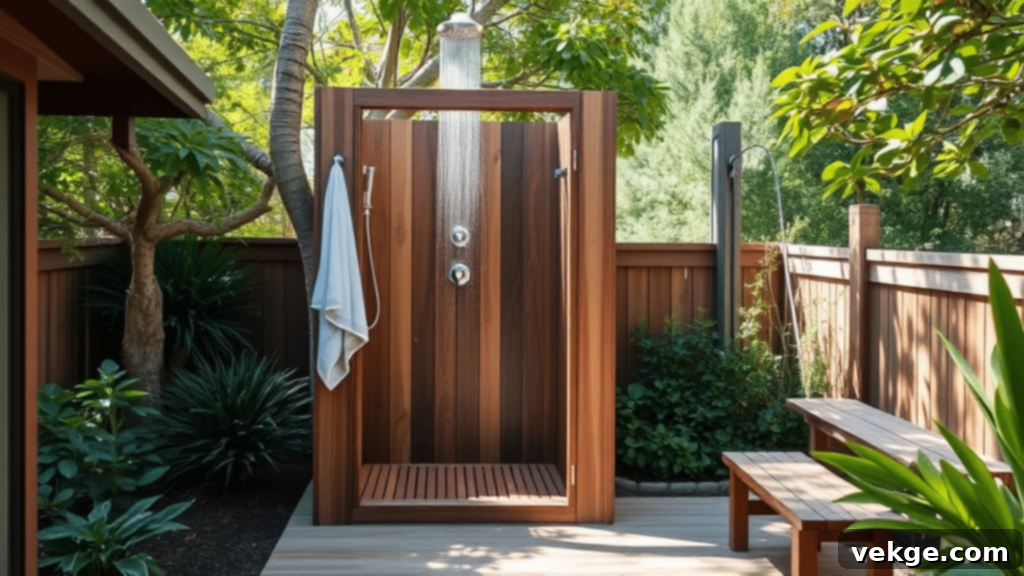
Revitalize Your Outdoor Space: 11 Stunning Outdoor Shower Ideas & Design Tips
Imagine stepping out of your home into a refreshing haven, a private outdoor oasis where you can wash away the day’s stresses under the open sky. An outdoor shower isn’t just a luxury; it’s a transformative addition that can significantly enhance your home’s value and elevate your daily life. Whether you’re rinsing off after a dip in the pool, cleaning up muddy hands after gardening, or simply enjoying a revitalizing wash after a workout, an outdoor shower offers unparalleled convenience and a unique connection to nature.
Beyond the practical benefits, these al fresco bathing spaces provide an aesthetic appeal that can turn a mundane backyard into a resort-like retreat. From simple, functional setups to elaborate, spa-inspired designs, the possibilities are endless. But before you dive in, some thoughtful planning ensures your outdoor shower is both beautiful and functional for years to come. Consider these crucial aspects as you dream up your perfect outdoor sanctuary:
- Sun Exposure: Where does the sun hit your yard throughout the day? This can impact the warmth of your shower water if you’re considering a solar setup, and also affect drying times to prevent mold and mildew.
- Water Source Proximity: How close is your chosen spot to existing water pipes? This will influence the complexity and cost of plumbing installation, whether connecting to a hot/cold line or just a garden hose.
- Material Durability: What materials will best withstand your local weather conditions, including sun, rain, wind, and even salt air if you live near the coast? Durability is key for longevity and minimal maintenance.
- Privacy Needs: How much seclusion do you require? Consider your neighbors, nearby windows, and public viewpoints to ensure your outdoor shower remains a private escape.
- Drainage Solutions: Where will the wastewater go? Proper drainage is vital to prevent pooling, erosion, and damage to your home’s foundation or surrounding landscaping.
With a bit of foresight and inspiration, you can create a highly functional, visually stunning, and supremely inviting outdoor space. Let’s explore some of our favorite outdoor shower ideas that blend practicality with breathtaking design, helping you find the perfect match for your home and lifestyle.
Outdoor Shower Ideas We Love
1. Rustic Wood & Bamboo Shower
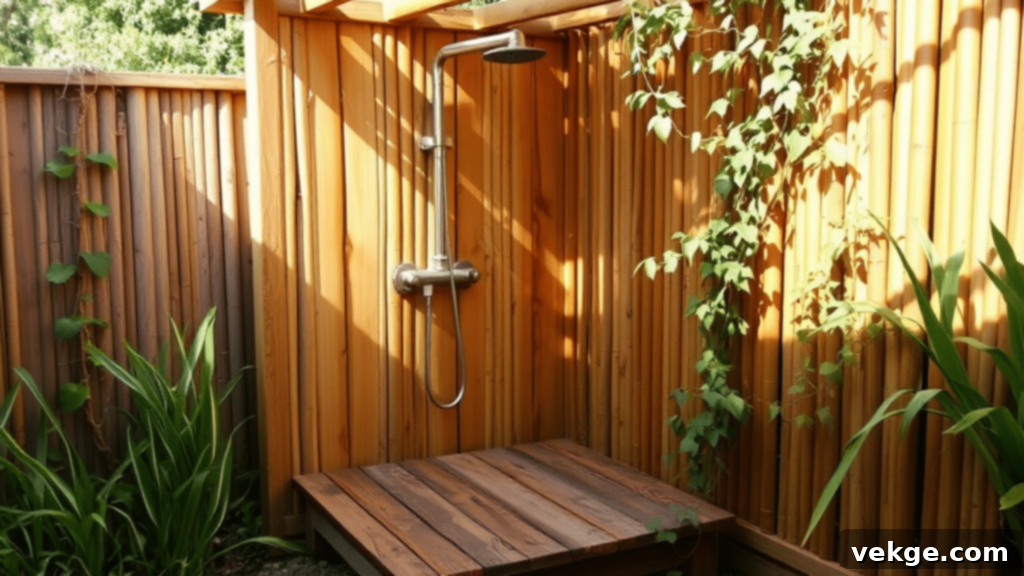
Infuse your backyard with a warm, organic charm by opting for a rustic wood or bamboo outdoor shower. These designs seamlessly blend into natural landscapes, making them ideal companions for lush gardens, tranquil poolsides, or charming beach houses. The inherent textures and tones of wood create an inviting, earthy aesthetic that feels both authentic and soothing.
You can achieve this look by salvaging old barn wood, repurposing weathered fence panels, or even using fresh, sustainably sourced cedar or redwood for its natural rot resistance. Bamboo is another exceptional choice, prized for its rapid growth, eco-friendliness, and striking visual appeal. Both materials are relatively easy to work with for DIY enthusiasts and can be surprisingly cost-effective, especially if you source reclaimed timber.
Why Choose This Style?
- Natural Aesthetic: Creates an immediate sense of calm and connection to the outdoors.
- Versatile: Fits beautifully with various home styles, from farmhouse to coastal.
- Budget-Friendly: Can be built with reclaimed or inexpensive materials.
- Sensory Experience: The look and feel of natural wood, sometimes even its scent, enhance the showering experience.
Tips to Keep Your Rustic Shower Looking Good for Years
- Seal All Wood Surfaces: Apply a high-quality marine-grade sealer or exterior stain to all wood surfaces. This protects against moisture, UV damage, and extends the life of the wood. Reapply every 1-2 years.
- Opt for Stainless Steel Hardware: Use stainless steel screws, hinges, and other fasteners to prevent rust stains and ensure structural integrity.
- Ensure Excellent Drainage: Design the floor with ample spaces between boards to allow water to drain quickly and prevent pooling, which can lead to rot.
- Elevate the Base: Place the shower base on a gravel bed, concrete blocks, or sturdy pavers to lift the wood off the damp ground, significantly reducing the risk of rot.
- Annual Inspection: Conduct a thorough check each spring for any signs of damage, wear, or peeling sealer, and perform necessary touch-ups promptly.
To enhance the rustic appeal and functionality, consider adding simple yet effective touches. Install robust hooks for towels and robes, and a small, sturdy shelf for soaps and shampoos. For an extra layer of privacy and to truly integrate your shower into its natural surroundings, plant fast-growing climbing vines like jasmine or clematis nearby, allowing them to gently entwine around the structure and create a hidden, verdant sanctuary.
2. Modern Minimalist Shower
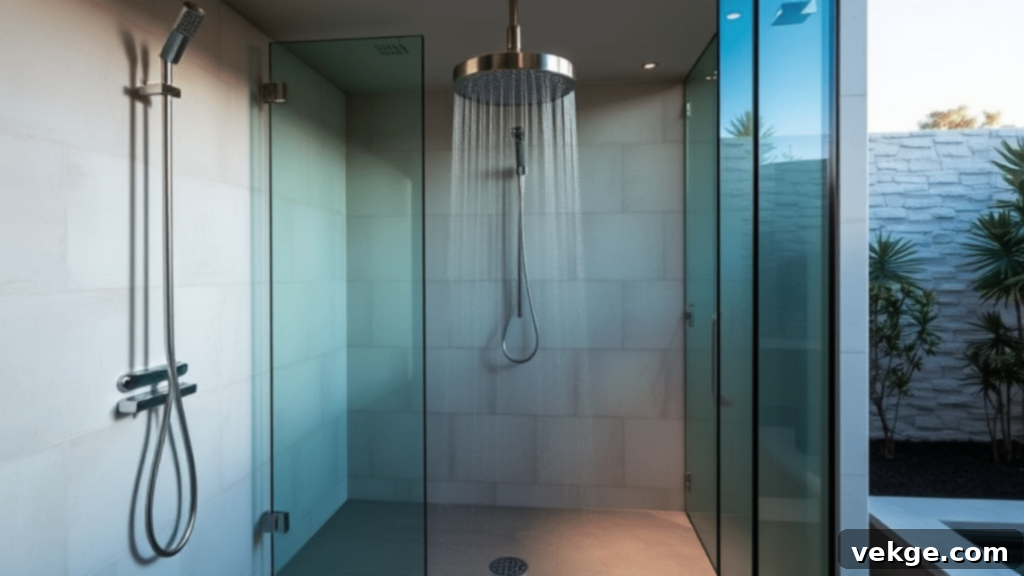
Transform your backyard into a sophisticated retreat with a modern minimalist outdoor shower. Defined by its clean lines, basic geometric shapes, and smooth, refined materials, this style exudes elegance and creates a striking architectural statement. It’s the perfect choice for contemporary homes or anyone seeking to introduce a sleek, high-end hotel vibe to their outdoor space.
Materials like stainless steel are paramount for this aesthetic due to their inherent resistance to rust and their perpetually pristine appearance. Frosted or clear glass panels can further elevate the design, providing a touch of luxury while effectively containing water spray. Concrete, polished stone, and even composite panels are also excellent choices, known for their low maintenance requirements and exceptional durability against the elements.
Why Choose This Style?
- Sleek Aesthetics: Offers a sophisticated, uncluttered look that complements modern architecture.
- Durability: Utilizes robust, weather-resistant materials that require minimal upkeep.
- Architectural Statement: Becomes a focal point that enhances the overall design of your outdoor area.
- Luxurious Feel: Creates a spa-like experience with carefully chosen fixtures and finishes.
Tips to Get that High-End Feel
- Invest in a Rainfall Shower Head: Select a large, wide rainfall shower head for a luxurious, immersive showering experience with generous water coverage.
- Incorporate a Handheld Sprayer: Add a sleek handheld sprayer for added convenience, perfect for rinsing specific areas or cleaning the shower enclosure.
- Choose Streamlined Controls: Opt for single-handle mixer controls with a minimalist design, ensuring ease of use and a tidy appearance.
- Select Modern Finishes: Go for matte black, brushed nickel, or polished chrome finishes for your fixtures to achieve a truly contemporary and sophisticated look.
- Install Thoughtful Lighting: Integrate subtle, waterproof LED strip lighting or recessed fixtures to create an inviting ambiance, making your shower usable and attractive even after dark.
This style truly shines in updated outdoor spaces that feature other modern elements, such as concrete patios, geometric stone pathways, or minimalist metal furniture. Its simplicity is its strength, allowing it to make a powerful, understated statement in any contemporary garden or yard.
3. DIY Pallet Shower
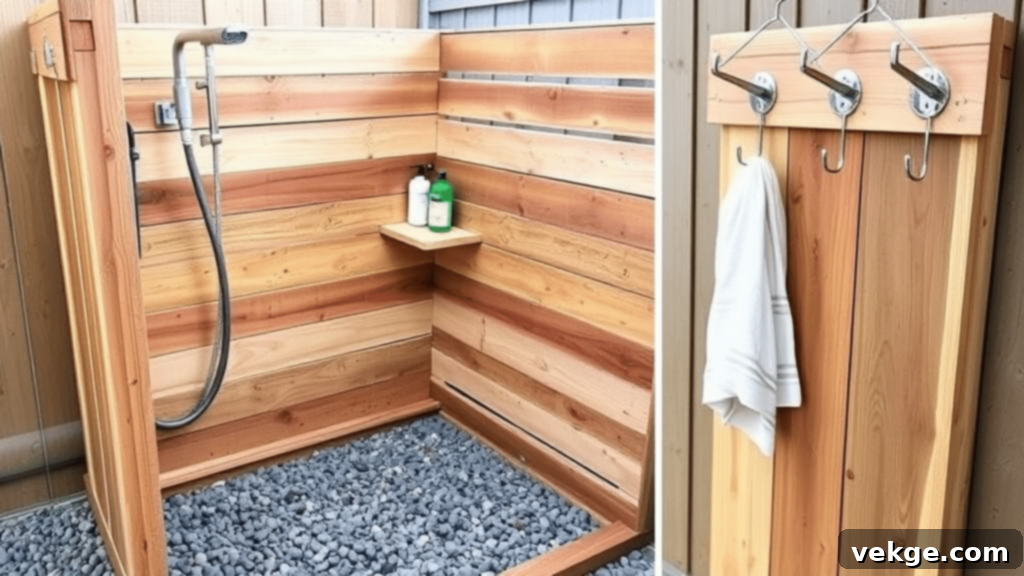
For those on a budget or with a love for upcycling, a DIY outdoor shower constructed from wooden pallets is an incredibly cost-effective and rewarding project. Pallets are often available for free or at very low cost from local businesses, construction sites, or online marketplaces, allowing you to transform them into a fully functional and charming shower enclosure in just a single weekend.
Why Choose This Style?
- Economical: Uses readily available and often free materials.
- Eco-Friendly: Repurposes materials, reducing waste.
- Beginner-Friendly: A relatively simple construction project for DIY enthusiasts.
- Customizable: Offers a rustic, adaptable base that can be easily personalized.
Tips to Build a Basic Pallet Shower
- Source and Clean Pallets: Obtain 3-4 sturdy, heat-treated (HT) pallets (avoid chemically treated MB pallets). Thoroughly clean them with a stiff brush, soapy water, and a good rinse.
- Sand for Safety: Sand down any rough spots, splinters, or sharp edges to ensure a smooth, user-friendly surface.
- Seal for Durability: Apply 2-3 coats of a high-quality marine-grade sealant (like Thompson’s WaterSeal or Rust-Oleum Marine Spar Varnish) to protect the wood from water damage, rot, and UV rays.
- Construct the Walls: Stand two pallets upright in an L-shape or U-shape, securing them together and to the ground with sturdy posts or stakes. If privacy is key, you might need 3-4 pallets to create a full enclosure.
- Create a Draining Floor: Use another pallet as the floor, ensuring it’s elevated off the ground and has sufficient gaps for water to drain away effectively. A gravel bed underneath will further aid drainage.
- Optional Roof: For added shade or a more enclosed feel, consider adding a fourth pallet as a simple roof, securely fastened to the wall structure.
For the showering mechanism itself, a simple garden hose attachment with an on/off nozzle can be perfectly adequate. For a more permanent feel, consider connecting it to a basic outdoor faucet. Remember, the key to longevity with a pallet shower lies in thorough sealing and proper drainage. Beyond the essentials, you can add personal touches that reflect your creativity. Fashion a simple soap dish from a recycled plastic bottle, or bend old metal coat hangers into functional hooks for towels and clothes. These small details make your DIY pallet shower uniquely yours.
4. Stone & Rock Wall Shower
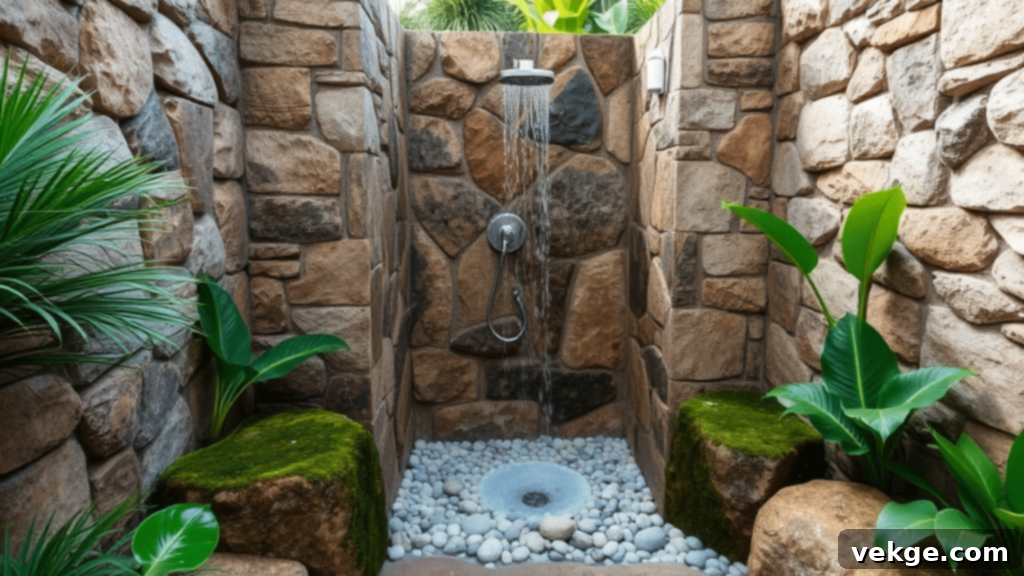
A stone or rock wall outdoor shower instantly elevates your backyard into a tranquil, spa-like sanctuary. The natural beauty of stone, combined with the gentle sound of running water, evokes a sense of peace and luxurious relaxation. This design seamlessly integrates with the landscape, creating a focal point that appears as if it has always belonged there, much like a feature in a high-end resort.
Why Choose This Style?
- Natural Beauty: Adds an organic, timeless aesthetic that blends with natural surroundings.
- Thermal Properties: Stone absorbs and retains heat from the sun, making showers feel warmer.
- Durability: Extremely long-lasting and resistant to weather elements.
- Low Maintenance: Once built, stone requires very little upkeep.
- Sound Dampening: The dense material can help muffle sounds, enhancing privacy.
Tips to Build a Stone Shower in a Few Ways
- Stacked Stone Walls: Create a rustic yet elegant enclosure by dry-stacking flat stones like slate or flagstone. For stability, these often require a strong foundation and careful layering, or even mortar for a more permanent structure.
- River Rock Finish: Achieve a smooth, organic look by adhering river rocks to mesh sheets, which are then cemented onto a backing wall. This method is great for creating a textured, natural surface.
- Stone Veneer Panels: For a quicker installation, use stone veneer panels that are designed to snap or interlock together. These offer the look of natural stone with less labor.
- Pebble Base: Construct a stunning and effective drainage base by setting smooth, flat pebbles into a concrete or mortar bed. Ensure a slight slope for proper water runoff.
One of the unique advantages of stone is its thermal mass; it naturally absorbs heat from the sun throughout the day, providing a subtly warm surface that enhances the showering experience, even as the evening chill sets in. This type of shower complements almost any yard design and often improves with age, gaining character from a bit of natural moss growth or carefully placed nearby plants, further cementing its place as a natural masterpiece.
5. Enclosed Outdoor Shower for Privacy
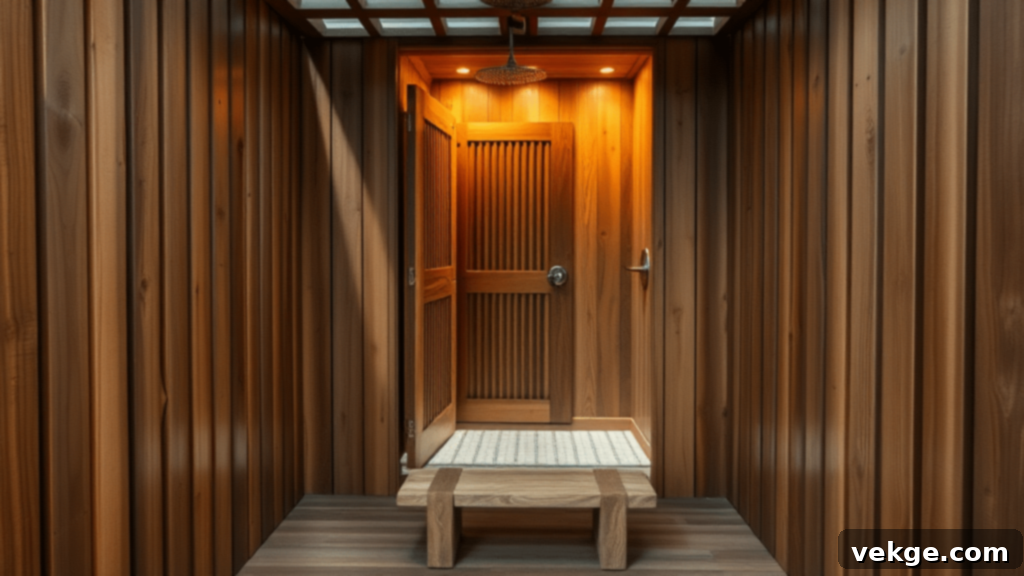
For those who desire the refreshing experience of showering outdoors without sacrificing personal space, an enclosed outdoor shower is the perfect solution. This setup offers complete privacy, making it an ideal choice if you have close neighbors, live on a busy street, or simply prefer the freedom to shower in complete seclusion, whether clothed or unclothed. An enclosed shower transforms a simple washing station into a truly private and intimate outdoor room.
Why Choose This Style?
- Maximum Privacy: Offers complete seclusion from neighbors and passersby.
- Versatile Use: Allows for showering at any time, in any attire.
- Shelter from Elements: Provides some protection from wind and direct sun, enhancing comfort.
- Defined Space: Creates a distinct outdoor “room” that can be highly customized.
Tips to Create Walls Around Your Shower
- Cedar Fence Panels: Known for their natural resistance to rot and insects, cedar panels offer a beautiful, aromatic, and long-lasting (15-20 years) enclosure solution.
- Corrugated Metal Sheets: For a modern industrial or rustic farmhouse aesthetic, corrugated metal sheets are durable, easy to install, and provide excellent privacy.
- Lattice Screens with Climbing Plants: Combine open lattice work with fast-growing climbing plants (like ivy, honeysuckle, or wisteria) for a living green wall that offers privacy and a beautiful, natural touch.
- Vinyl Fence Panels: A low-maintenance option that won’t rot, warp, or need painting. Vinyl panels offer a clean, consistent look and excellent durability.
- Canvas or Outdoor Fabric Curtains: For a budget-friendly and flexible privacy solution, hang heavy-duty outdoor curtains. They can be easily opened or closed and come in various colors and patterns.
When designing the entrance, you can keep it simple with a hinged gate, a flowing shower curtain, or even a strategically placed gap in the wall that prevents direct sightlines. Crucially, ensure there’s adequate space at the bottom of the enclosure for proper water drainage and airflow, which helps prevent mold and rot. The most thoughtfully designed enclosed showers go beyond just walls. Integrate practical features like sturdy hooks for towels and clothes, a small bench or stool for sitting or placing items, and a non-slip floor mat for safety. A built-in shelf for soap and shampoo completes the luxurious and functional outdoor bathing experience.
6. Solar-Powered Outdoor Shower
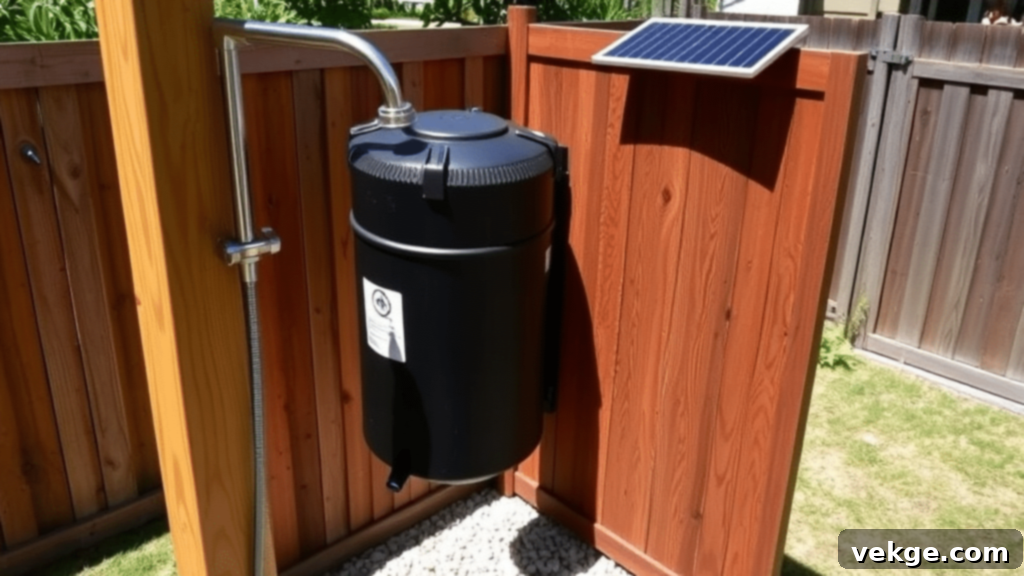
Embrace sustainable living and enjoy warm showers without the energy bill with a solar-powered outdoor shower. These ingenious systems harness the free energy of the sun to heat your water, offering an eco-friendly and cost-effective bathing solution. Perfect for sunny locations, many models can heat water to over 100 degrees Fahrenheit on bright, clear days, providing a delightfully warm shower experience.
The principle behind solar showers is elegantly simple: they feature a dark-colored tank or tube designed to hold water. The black material efficiently absorbs solar radiation, transferring that heat directly to the water inside. After just a few hours in direct sunlight, the water reaches a comfortable temperature, ready for your refreshing outdoor rinse. This simple yet effective technology makes warm water accessible without complex plumbing or electricity.
Why Choose This Style?
- Energy Efficient: Uses free solar energy, saving on utility bills.
- Eco-Friendly: Reduces your carbon footprint by not consuming fossil fuels.
- Simple Installation: Many options are standalone and require no complex plumbing connections.
- Portable Options: Great for camping, beach trips, or temporary setups.
Popular Solar Shower Options
- Basic Camping Bags: Affordable and highly portable, these flexible bags typically hold 5 gallons of water and can be hung from a tree branch or hook.
- Freestanding Solar Towers: More permanent fixtures, these towers integrate a larger water tank and a shower head, often standing tall and sleek in the yard.
- Roof-Mounted Systems: For a more integrated solution, these systems can be connected to standard shower heads, heating a larger volume of water for multiple users.
- Full Shower Kits: Some kits include not only the solar heating element but also a platform and even a basic enclosure for a complete, self-contained unit.
Most solar showers require 2-3 hours of direct, unobstructed sunlight to reach optimal temperatures. For the best results, fill the tank early in the morning, allowing it the full day to absorb heat. While some robust models are designed for year-round use in warmer climates, most residential solar showers are typically drained and stored during winter months in colder regions to prevent freezing and damage, ensuring they last for many seasons of enjoyment.
7. Poolside Outdoor Shower
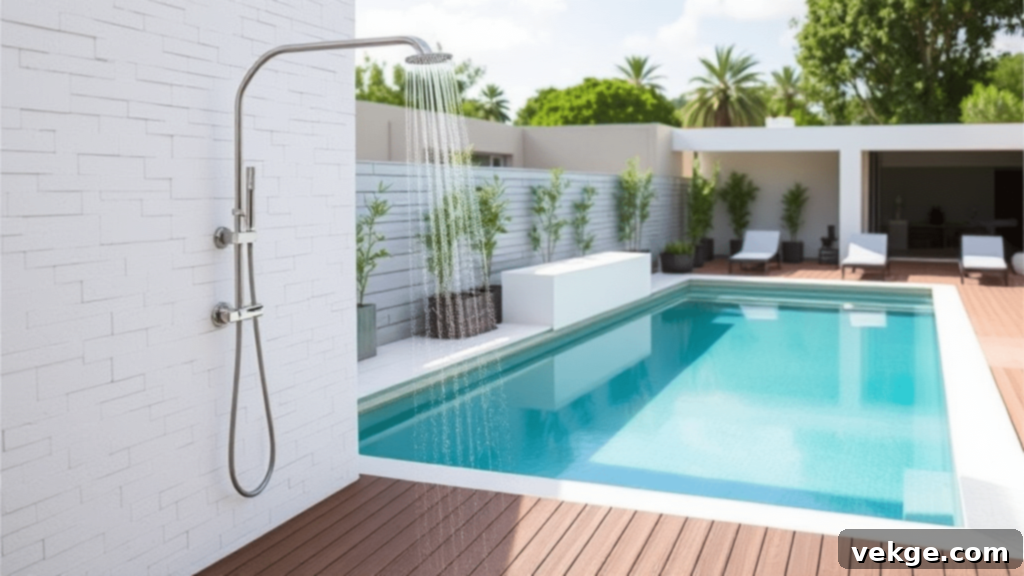
A poolside outdoor shower is an indispensable amenity for any home with a swimming pool. It serves a dual purpose: first, it helps maintain the cleanliness and chemical balance of your pool by allowing swimmers to rinse off sunscreen, sweat, dirt, and body oils *before* entering the water. Second, it provides a convenient and refreshing rinse *after* swimming, washing away chlorine or saltwater and leaving skin feeling fresh.
Integrating a shower into your poolside area significantly enhances the overall experience, making it more hygienic and enjoyable for everyone.
Why Choose This Style?
- Pool Hygiene: Prevents dirt, oils, and chemicals from entering the pool.
- Swimmer Comfort: Offers a quick rinse after swimming to remove chlorine or salt.
- Convenience: Eliminates the need to track water into the house.
- Style Integration: Can be designed to complement pool landscaping and aesthetics.
Two Main Options for Pool Showers
- Built-in Showers: These are permanently plumbed into your home’s water supply, often integrated into a wall or a dedicated structure near the pool. They can offer both hot and cold water and become a seamless, architectural part of your pool area.
- Freestanding Showers: More flexible and often easier to install, these units can be moved if needed and are typically hooked up to a standard garden hose. They are a great solution for quick setup or if you prefer not to undertake extensive plumbing work.
While many pool showers are designed for simple cold water rinses, adding a hot water line dramatically increases their utility, making your shower enjoyable even in cooler weather or for a more comfortable post-swim wash. Popular styles for poolside showers include elegant curved metal poles that blend into modern designs, charming tiki-themed wooden posts for a tropical vibe, or sleek wall-mounted units that can be designed to match your existing pool equipment or contemporary aesthetic. The choice largely depends on your pool area’s overall theme and your specific needs.
8. Rainfall Showerhead for a Spa Feel
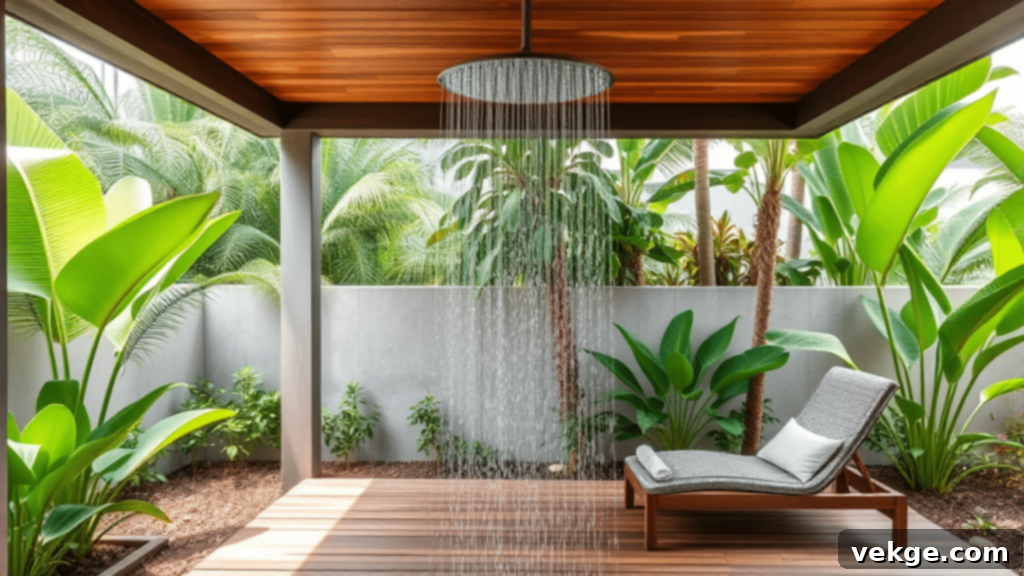
Elevate your outdoor shower experience to a luxurious, spa-like ritual with a rainfall showerhead. Unlike traditional showerheads, a rainfall unit delivers water straight down from above in a wide, gentle cascade, mimicking the soothing sensation of standing in a warm summer storm. This immersive flow envelops your entire body, creating an incredibly calming and peaceful feeling that melts away stress and leaves you feeling thoroughly refreshed.
Why Choose This Style?
- Spa-Like Luxury: Provides a truly indulgent and relaxing showering experience.
- Full-Body Coverage: Wide spray pattern ensures even water distribution.
- Soothing Sensation: Mimics natural rainfall for a tranquil, meditative wash.
- Aesthetic Appeal: Large, overhead design makes a striking visual statement.
Tips to Avoid Rust and Damage From Weather
When selecting a rainfall showerhead for outdoor use, material quality is paramount to ensure durability and resistance against rust, corrosion, and weather-related damage:
- Marine-Grade Stainless Steel (316 grade): This is the gold standard for outdoor fixtures, offering superior corrosion resistance, especially in coastal areas with salt air.
- Solid Brass with a PVD Finish: Brass is highly durable, and a Physical Vapor Deposition (PVD) finish provides an extremely tough, scratch-resistant, and tarnish-proof surface in various colors (e.g., brushed nickel, matte black).
- High-Quality Plastic with UV Protection: While less luxurious, advanced outdoor-grade plastics with integrated UV inhibitors can be surprisingly resilient and cost-effective, especially for temporary or budget-friendly setups.
- Copper: A classic choice, copper develops a beautiful natural green patina over time, which not only adds character but also provides a protective layer against corrosion.
Most rainfall showerheads range from 8 to 12 inches in diameter, providing that signature wide coverage. Be aware that these typically use more water than conventional showerheads. If you live in a drought-prone area or simply wish to conserve water, opt for a model with a built-in flow restrictor. This allows you to enjoy the full-body rainfall sensation while still being mindful of water usage, making your luxurious outdoor shower an eco-conscious choice.
9. Portable Camping Shower
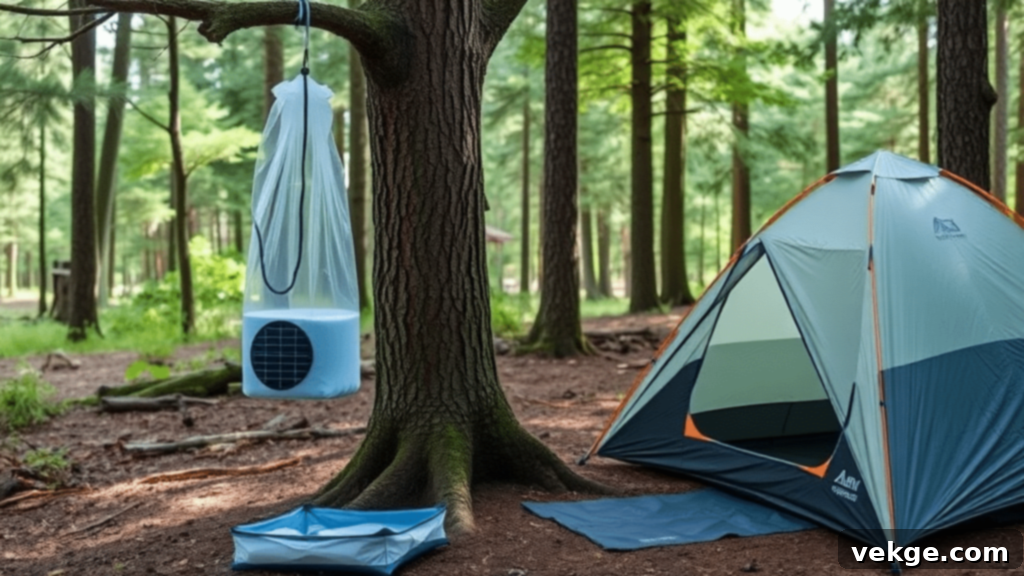
For ultimate flexibility and convenience, portable camping showers are indispensable. These compact, versatile units are ideal when a permanent structure isn’t feasible or desired, or when you need to wash up away from the comforts of home. They excel in various scenarios: from refreshing rinses during camping trips to post-beach cleanups, pet washing, or even in tiny yards where space is a premium and a fixed installation isn’t practical. Their ease of setup and portability make them a go-to for on-the-go hygiene.
Why Choose This Style?
- Unmatched Portability: Easily moved, packed, and set up anywhere.
- No Installation Required: Perfect for renters or temporary needs.
- Versatile Use: Ideal for camping, beach, festivals, pet washing, and more.
- Budget-Friendly: Generally much cheaper than permanent installations.
You can choose from two main types of portable showers, each offering distinct advantages:
- Gravity-Fed Showers: These simple designs rely on gravity for water pressure. A water bag (typically 2-5 gallons) is filled and hung from a high point (like a tree branch or car rack). They are very affordable, usually ranging from $20-50, and are great for basic rinses.
- Battery-Powered Showers: These units feature a small electric pump that draws water from a bucket or container and pushes it through a hose and showerhead. They offer more consistent pressure, often come with rechargeable batteries, and typically cost between $50-150.
Things to Keep in Mind When Picking a Portable Shower
- Water Capacity: Consider how much water you’ll need. Most models hold 2-5 gallons, which is usually enough for a quick 5-10 minute shower.
- Battery Life: For battery-powered models, check the battery life, which typically provides 30-60 minutes of continuous shower time on a full charge.
- Heating Capability: Some advanced portable showers include solar panels or heating elements to warm the water; others simply use ambient water temperature.
- Packability & Weight: Evaluate how easily it folds up, its packed size, and weight, especially if you plan to carry it on hikes or in limited trunk space.
Many outdoor enthusiasts fill their portable showers from natural sources like lakes or streams (always filter and treat water if it’s for personal hygiene). Alternatively, you can bring water from home in large jugs. For privacy, a pop-up shower tent is an excellent accessory, or you can simply hang a tarp between trees. These simple, effective setups can be stowed in a car trunk and deployed in minutes whenever a quick, refreshing clean is needed, making outdoor adventures more comfortable and convenient.
10. Garden-Inspired Outdoor Shower
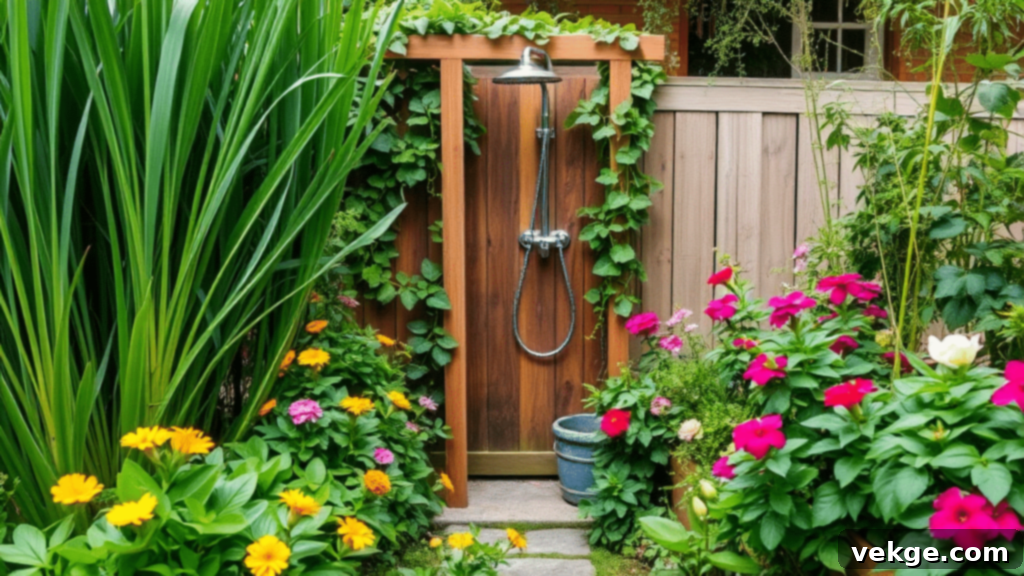
A garden-inspired outdoor shower is more than just a place to wash; it’s a living, breathing extension of your landscape. Tucked amidst lush foliage and vibrant blooms, this style creates a truly enchanting outdoor spot that feels like bathing within nature itself. It’s an ideal choice for any size yard, offering a sense of privacy and seclusion through organic screens rather than solid, imposing walls, truly merging functionality with botanical beauty.
Why Choose This Style?
- Harmonious Integration: Blends seamlessly with your garden landscape.
- Natural Privacy: Plants provide a soft, organic screen.
- Sensory Experience: Surrounded by scents, sounds, and sights of nature.
- Dynamic Beauty: The shower area changes and evolves with the seasons.
Tips to Create Your Plant-Filled Shower Space
- Strategic Placement: Position your shower in a secluded corner of your yard, utilizing existing tall shrubs, trees, or fencing as a natural backdrop and privacy aid.
- Trellis or Lattice Walls: Install simple trellises or lattice panels on two or three sides of your shower. These provide a framework for climbing plants to grow, creating living walls.
- Fast-Growing Vines: Plant vigorous climbing vines such as fragrant jasmine, colorful clematis, cheerful morning glory, or even edible grapes to quickly cover your trellises and create dense privacy.
- Potted Tall Plants: Surround the shower base with large pots containing tall grasses (like Miscanthus or Pampas grass) or slender bamboo varieties. These can be easily rearranged for optimal privacy and aesthetic.
- Hanging Baskets for Canopy Effect: Hang baskets filled with trailing plants (e.g., ferns, petunias, fuchsias) from an overhead beam or pergola to create a lush, green canopy effect, adding to the enclosed, natural feel.
The most delightful aspect of a garden shower is its ever-changing character. As your plants grow, bloom, and shift with the seasons, your shower area will continually transform, offering new sights, scents, and sensations. This natural evolution ensures your outdoor bathing spot feels fresh and inviting throughout the entire year, a true testament to the beauty of outdoor living.
11. Beach-Themed Outdoor Shower
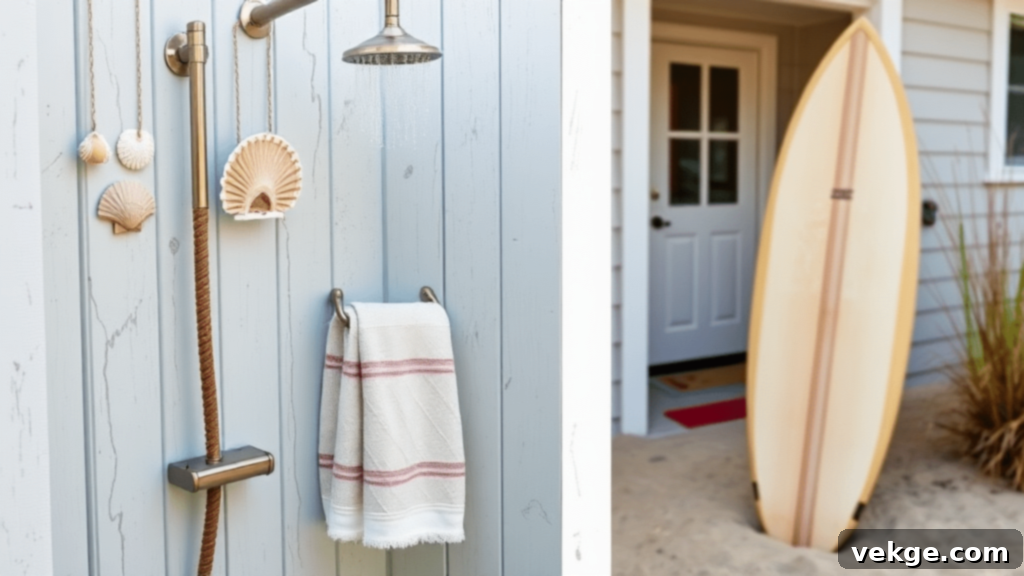
Bring the relaxed, refreshing essence of a coastal getaway right to your backyard with a beach-themed outdoor shower. This style is all about capturing vacation vibes, utilizing a palette of sea-inspired colors and incorporating charming nautical and coastal touches. While it perfectly complements beach houses or homes with ocean views, a well-executed beach-themed shower can infuse a sense of seaside escape into any yard, no matter how far from the shore.
Why Choose This Style?
- Vacation Aesthetic: Creates a constant feeling of being on holiday.
- Bright & Airy: Often uses light colors and natural materials for a fresh feel.
- Salt-Resistant Materials: Designed to withstand coastal environments.
- Evokes Memories: Connects your home to the joy of beach experiences.
Tips to Create a Beach-Feeling Shower
- Weathered Wood & White Paint: Construct the enclosure using weathered gray wood (like cedar or reclaimed barn wood) for a sun-bleached look, or opt for crisp white-painted boards to evoke classic beach cottage charm.
- Driftwood Accents: Integrate authentic driftwood pieces as decorative elements, such as unique hooks for towels, rustic towel bars, or even sculptural wall art.
- Nautical Decor: Hang decorative ropes with intricate knots, a repurposed ship’s steering wheel, or old fishing nets to enhance the maritime theme.
- Shell & Pebble Details: Place large, decorative shells in corners or on shelves. For the shower floor, embed smaller seashells or smooth beach pebbles into concrete for an authentic coastal feel and excellent drainage.
- Coastal Color Palette: Choose a color scheme dominated by soothing blues (aqua, navy, sky blue) and crisp whites for any curtains, painted elements, or accessories.
To ensure longevity, most beach-themed showers utilize materials specifically chosen for their resilience against salt air and high humidity. Cedar and teak are excellent wood choices for their natural durability, as are composite boards, which offer maintenance-free performance. For metal fixtures and hardware, always select marine-grade stainless steel or solid brass. These materials are engineered to resist corrosion and rust, preventing unsightly deterioration from salt spray and ensuring your beach-inspired oasis remains beautiful for many seasons.
Outdoor Shower Mistakes & How to Avoid Them
Building an outdoor shower is an exciting home improvement project, but many people overlook crucial details that can lead to significant problems down the line. By being aware of common pitfalls, you can ensure your outdoor shower remains a source of joy, not headaches. Here’s how to skillfully navigate and avoid the most prevalent mistakes:
Plumbing and Drainage Issues
- No Shut-Off Valve: Always install an easily accessible shut-off valve for your outdoor water line. This is absolutely critical for draining the system in cold weather to prevent pipes from freezing and bursting, and for isolating the shower for maintenance.
- Improper Floor Slope: Design your shower floor with a minimum slope of 1/4 inch per foot, angling away from your house. This ensures that water drains efficiently and prevents it from pooling near your foundation, which can cause structural damage and dampness.
- Unsuitable Pipes: Use only pipes specifically rated for outdoor, subterranean, or cold-weather use (e.g., PEX, copper, or PVC designed for exterior applications). Standard indoor pipes are susceptible to cracking when exposed to freezing temperatures.
- Poor Drainage Planning: Before you even begin construction, have a clear plan for where all the wastewater will go. Ensure it won’t pool around your home’s foundation, flow into a neighbor’s property, or contaminate local water sources. Consider a gravel pit, a French drain, or even connecting to a greywater system for garden irrigation if local regulations permit.
- Ignoring Local Codes: Always check local building codes and environmental regulations regarding outdoor plumbing and drainage. Some areas have strict rules about wastewater disposal, especially for greywater systems or proximity to property lines.
Privacy Problems
- Insufficient Site Analysis: Don’t just pick a spot; thoroughly evaluate your chosen shower location from all angles, including potential viewpoints from neighbors’ windows (especially second stories), public pathways, and even your own house at different times of day.
- Inadequate Wall Height: For full-body privacy, especially when standing, shower walls should be at least 6 to 7 feet tall. Consider the average height of users and add a buffer for comfort.
- Overlooking Sun & Shadows: Observe how sunlight and shadows change throughout the day and year. What feels private at noon might be fully exposed at sunset or in the early morning due to changing light or casting shadows.
- Missing Overhead Protection: If there are higher vantage points nearby (like a two-story neighbor’s house or a tall deck), consider adding a solid or latticed roof to your enclosure for complete overhead privacy.
- Sparse Landscaping: Relying solely on young plants for privacy is a common mistake. While plants will grow, ensure immediate privacy with solid panels or screens, then let the greenery mature to enhance the aesthetic.
Wrong Materials
- Using Untreated Indoor Wood: Never use standard indoor lumber (like untreated pine or fir) for outdoor structures. It will quickly absorb moisture, warp, rot, and become a breeding ground for mold and insects. Always opt for pressure-treated wood, naturally rot-resistant species (cedar, redwood, teak), or composite materials.
- Inappropriate Backing Boards: Avoid materials like regular drywall, particle board, or MDF. These materials are designed for interior, dry environments and will disintegrate rapidly when exposed to outdoor moisture and temperature fluctuations.
- Non-Weather-Resistant Metals: Standard steel will rust quickly and profusely when exposed to constant moisture and elements, leaving unsightly stains. Always choose marine-grade stainless steel (316 grade), brass, or copper for all metal fixtures and hardware.
- Indoor Fixtures: Bathroom fixtures designed for indoor use are not built to withstand UV radiation, freezing temperatures, or continuous exposure to rain and humidity. Always purchase fixtures specifically rated for outdoor use.
- Mold-Prone Fabrics: While some outdoor fabrics are designed for patio furniture, many can still develop mold and mildew in a constantly wet and humid shower environment. If using fabric, ensure it’s a marine-grade, quick-drying, and mold-resistant material, and provide ample airflow for drying.
How to Clean and Maintain an Outdoor Shower
Keeping your outdoor shower in excellent condition is straightforward with a consistent maintenance routine. Regular cleaning not only preserves its appearance but also extends its lifespan and ensures a hygienic experience.
- Rinse after each use: A quick rinse with plain water after every shower helps wash away soap residue, dirt, and prevents the buildup of hard water spots, keeping surfaces cleaner longer.
- Scrub surfaces weekly: Use a mild, eco-friendly soap and a soft-bristled brush or sponge to clean the walls, floor, and fixtures. Avoid abrasive cleaners or harsh chemicals, as these can damage wood sealants, metal finishes, or stone surfaces.
- Check for leaks regularly: Periodically inspect all plumbing connections, hoses, and fittings for any drips, leaks, or loose components. Addressing small leaks promptly prevents water waste and potential damage to the surrounding structure or landscape.
- Clean the showerhead monthly: Mineral deposits from hard water can clog showerhead nozzles. Remove the showerhead and soak it in a solution of equal parts white vinegar and water for a few hours (or overnight) to dissolve buildup. Scrub with an old toothbrush if needed, then rinse thoroughly.
- Keep drains clear: Regularly remove leaves, hair, soap scum, and any other debris from the shower drain or surrounding drainage area. A clogged drain can lead to standing water, which promotes mold growth and can damage your shower’s base.
How to Winterize Your Outdoor Shower
If you reside in a region that experiences cold winters, protecting your outdoor shower from freezing temperatures is paramount to prevent costly damage to pipes and fixtures. Proper winterization ensures your shower is ready to go when warmer weather returns.
- Locate and Close the Shut-Off Valve: Find the main shut-off valve for your outdoor shower’s water line (it should be indoors or in an insulated part of your home) and turn it off before the first expected freeze.
- Drain All Water: Open all shower faucets (both hot and cold, if applicable) to allow any remaining water in the pipes to drain out completely. You may need to use a blow-out plug and an air compressor to force all water out of the lines.
- Disconnect Hoses and Attachments: If your shower has a garden hose attachment or a handheld sprayer, disconnect it and store it indoors to prevent freezing and damage.
- Insulate Exposed Pipes: For any exposed pipes that cannot be fully drained or disconnected, wrap them thoroughly with foam pipe insulation or apply heat tape, especially in extremely cold climates.
- Apply Weatherproof Sealant: If your shower has wooden components, ensure they are well-sealed with a weatherproof sealant to prevent moisture absorption, cracking, and rot during winter months.
- Cover Fixtures (Optional): Consider covering the showerhead and controls with insulated bags or waterproof covers for added protection against the elements.
Preventing Mold, Rust, and Water Damage
The constant presence of moisture in an outdoor shower environment can quickly lead to issues like mold growth, rust formation, and general water damage if not proactively managed. Implementing these preventative measures will keep your outdoor shower in pristine condition:
- Improve Air Circulation: Choose a shower location that receives good airflow and sunlight to help surfaces dry quickly. For enclosed showers, ensure there are gaps at the top and bottom of walls, or consider integrating ventilation grates to promote cross-ventilation.
- Use Weather-Resistant Materials: Select materials that are inherently resistant to moisture and corrosion. Marine-grade stainless steel, naturally rot-resistant woods (cedar, redwood, teak), composite decking, and natural stone are excellent choices that stand up well to the elements.
- Seal Wooden Surfaces Regularly: Apply a high-quality, marine-grade sealant or exterior stain to all wooden components. This creates a protective barrier that prevents wood from absorbing excess water, which leads to swelling, warping, and rot. Reapply according to the product’s instructions, typically every 1-2 years.
- Wipe Down After Use: As a best practice, quickly wipe down key surfaces (like glass panels, showerhead, and controls) after each use. This minimizes standing water, which is a primary cause of mold growth and hard water stains.
- Check for Rust Spots & Treat Promptly: Periodically inspect metal fixtures for any signs of rust. If you spot rust, gently scrub it off with a mild abrasive pad and then apply a rust-resistant clear coating or touch-up paint specifically designed for outdoor metals.
Conclusion
Outdoor showers are much more than just a place to wash; they are versatile additions that can transform your backyard into a functional, beautiful, and deeply relaxing extension of your home. From the rustic charm of a wood and bamboo design to the sleek sophistication of a modern minimalist structure, and from budget-friendly DIY pallet creations to the luxurious feel of a stone enclosure or a rainfall shower, there’s a perfect outdoor shower to suit every taste, space, and budget.
The ideal outdoor shower for you depends on several key factors: the available space in your yard, your budget, how frequently you plan to use it, and your personal aesthetic preferences. Regardless of the style you choose, thoughtful planning and proper maintenance are essential for ensuring its longevity and enjoyment. By considering factors like sun exposure, water access, drainage, and privacy from the outset, you can create a beautiful and functional outdoor oasis that adds significant value and enjoyment to your home for years to come.
Quick Tips for Your Outdoor Shower:
- Material Selection: Always pick weather-resistant materials like marine-grade stainless steel, treated wood (cedar, redwood), stone, or durable composites to ensure longevity and minimal maintenance.
- Efficient Drainage: Design your shower with excellent drainage in mind. A sloped floor, gravel bed, or proper connection to a drain system is crucial to prevent water buildup, mold, and damage.
- Privacy is Key: Choose a design that thoroughly addresses your privacy needs, whether through strategic placement, enclosed walls, or natural landscaping, ensuring a comfortable and secluded experience.
We hope this comprehensive guide has inspired you to consider the exciting possibilities of an outdoor shower. Ready to turn your backyard into a refreshing sanctuary? Dive into our other blogs for more intriguing content on enhancing your outdoor living space!
Do you have questions about specific designs or perhaps a favorite outdoor shower idea of your own? Share your thoughts and questions in the comments below – we’d love to hear from you and provide further insights!
