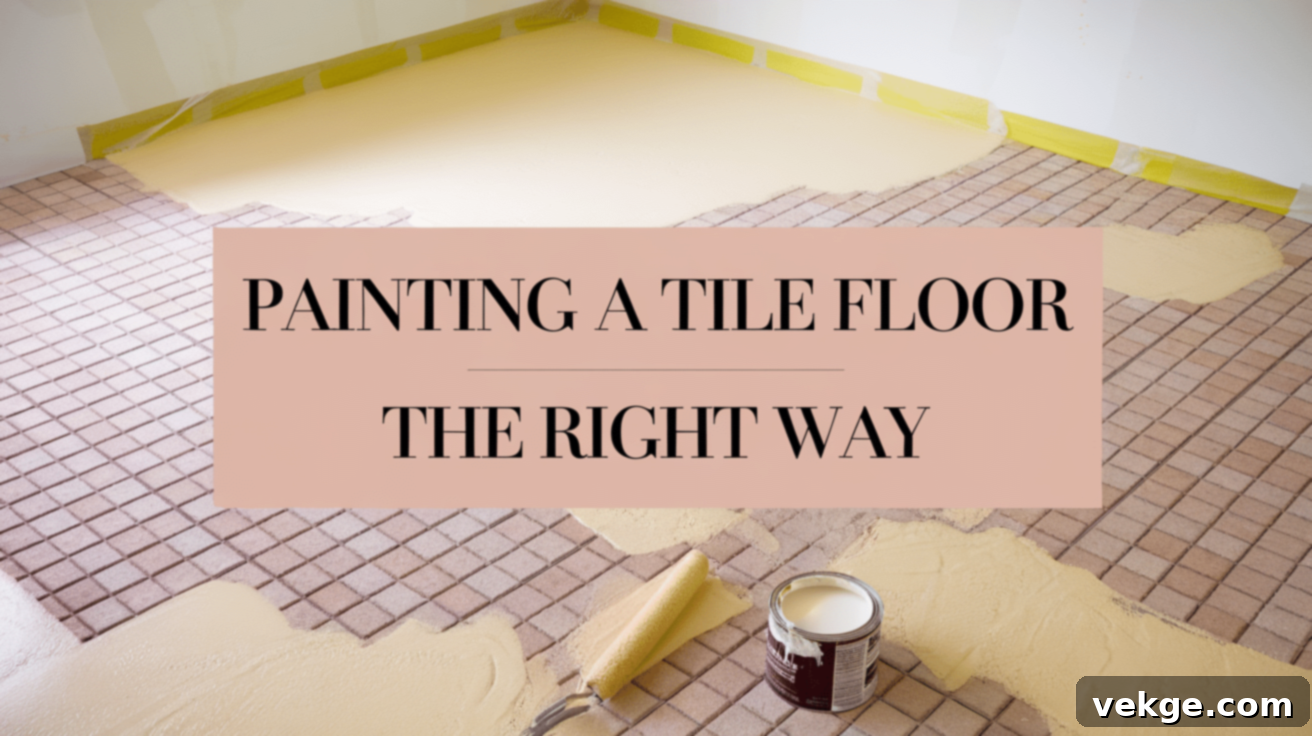
The Ultimate DIY Guide to Painting Tile Floors: Revitalize Your Space on a Budget
Are your tile floors looking dated, worn, or simply not matching your current decor? Replacing them can be an expensive, time-consuming, and disruptive renovation. Fortunately, there’s a simple, affordable, and incredibly effective alternative: painting them! Painting a tile floor offers a fantastic way to refresh any space, allowing you to completely transform its look without the significant cost or hassle of demolition and new tile installation.
One of the most appealing aspects of painting your tile floor is the sheer freedom of choice it provides. You’re no longer limited by existing tile colors or patterns. Imagine being able to select any shade, from a vibrant pop of color to a sophisticated neutral, and give your floor a brand-new identity. This creative control allows for a truly personalized aesthetic, effortlessly blending with your home’s style and bringing your vision to life.
However, painting tile isn’t as straightforward as picking up a brush and rolling on a coat of wall paint. Achieving a professional, long-lasting finish requires meticulous preparation and the right materials. The surface demands proper cleaning, thorough sanding or etching, and a high-quality primer application before any color touches it. Skipping these essential preliminary steps is a common mistake that can lead to frustrating issues such as peeling, chipping, or a finish that simply won’t stand the test of time and foot traffic.
Furthermore, the type of paint and the quality of the sealer you choose play a critical role in the durability and longevity of your painted floor. Using products specifically formulated for floors and high-traffic areas ensures your efforts yield results that last for years to come. While the process requires patience and attention to detail, with the correct preparation techniques and appropriate materials, you can achieve a smooth, resilient, and stunning finish that looks professionally done and dramatically elevates your space.
This comprehensive guide will walk you through each crucial step of painting your tile floor. From initial cleaning and surface preparation to the final protective sealing, we’ll provide expert tips and advice to ensure your painted tile floor not only looks fantastic but also stands up to daily wear and tear for as long as possible. Let’s dive into transforming your floors!
What You Need to Know Before Painting a Tile Floor
Can You Paint a Tile Floor?
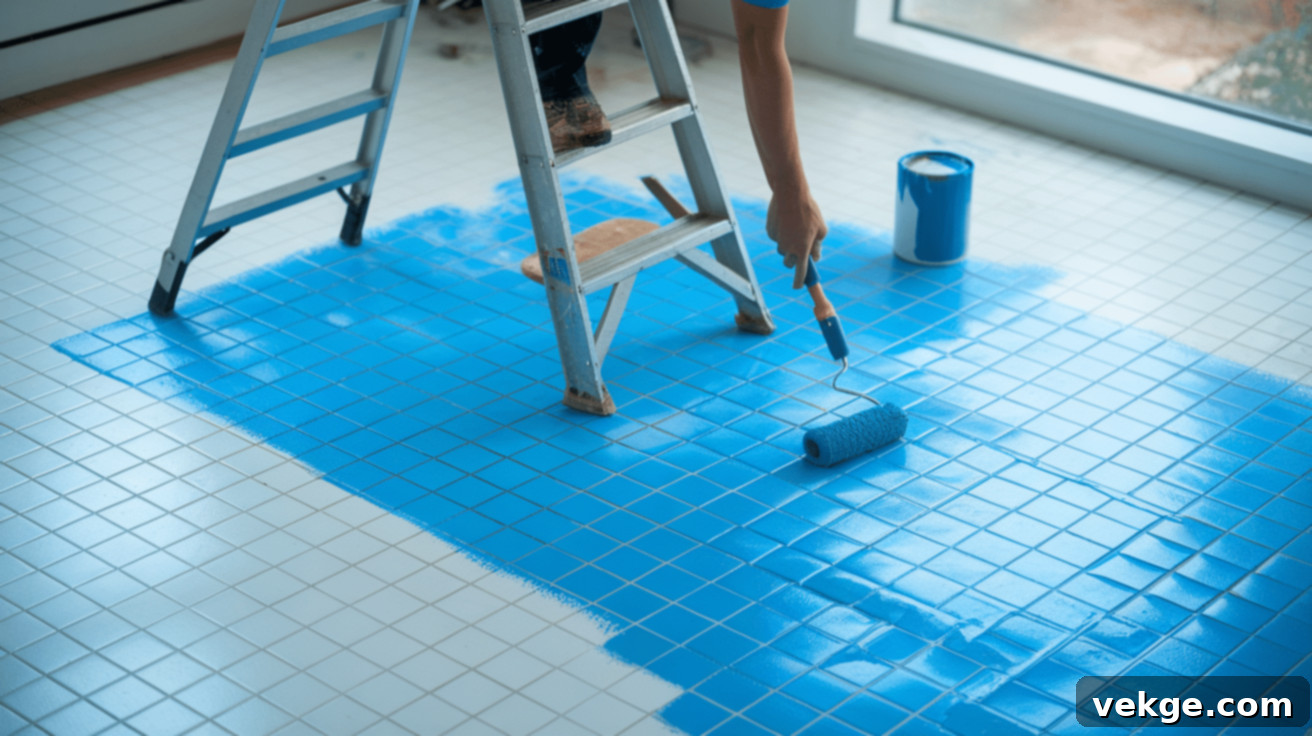
Yes, absolutely, you can paint a tile floor! It’s a popular and effective method for updating worn or outdated flooring. However, the success and durability of your painted floor heavily depend on the type of tile you have and the thoroughness of your preparation. Different tile materials react differently to paint, and understanding these nuances is key to a lasting finish.
Porous tiles, such as unglazed ceramic, terra cotta, or natural stone, are generally easier to paint. Their natural absorbency provides a rougher texture, allowing the primer and paint to grip and adhere more effectively without extensive surface treatment. The paint essentially soaks into the tiny pores, creating a strong bond.
In contrast, glossy, non-porous tiles like polished porcelain, glazed ceramic, or highly polished natural stone present a greater challenge. Their slick, impermeable surface doesn’t offer many anchor points for paint. For these types of tiles, significantly more rigorous preparation is required, typically involving thorough sanding or chemical etching with a liquid deglosser. This creates the necessary microscopic roughness that allows the paint to bond properly, preventing common issues like peeling or flaking.
Another crucial factor to consider is the location of the floor and the expected level of foot traffic. Painted tiles perform best and maintain their appearance longer in low to moderate-traffic areas. Think of spaces like bathrooms, laundry rooms, guest bedrooms, or even a pantry. In these areas, the floor experiences less daily wear, making the painted finish more durable and requiring less frequent maintenance.
For high-traffic areas, such as busy kitchens, entryways, or main hallways, painted tile floors may wear down faster. While it’s still possible to paint these areas, you’ll need to be extra diligent with surface preparation, apply multiple coats of high-quality paint and sealer, and be prepared for more frequent touch-ups and reapplication of sealer over time. The added stress from constant foot traffic means you’ll need to invest more in premium materials and ongoing maintenance to keep the floor looking its best.
Pros and Cons of Painting a Tile Floor
Before committing to painting your tile floor, it’s wise to weigh the advantages against the potential drawbacks. This will help you decide if it’s the right project for your home and lifestyle.
Pros
- Cost-effective: Painting your tile floor is a fraction of the cost of completely replacing your tiles. This makes it an incredibly budget-friendly way to achieve a dramatic transformation, saving you significant money on materials and labor.
- Customizable: With an endless array of paint colors and finishes available, you can achieve any look you desire. This allows for unparalleled customization, ensuring your floor perfectly matches your existing decor or helps you create an entirely new aesthetic.
- Quick transformation: A painted floor can completely refresh and modernize a space, often feeling like a full renovation without the mess, noise, and expense of demolition. The visual impact is immediate and dramatic.
- Minimal downtime: Unlike a full tile replacement, which can render a room unusable for days or even weeks due to demolition, setting, and grouting, the painting process is relatively quick. While drying times are crucial, the room is typically back in commission within a few days, minimizing disruption to your daily life.
- Eco-friendly: Painting existing tiles rather than tearing them out and sending them to a landfill is a more sustainable choice, reducing waste and your environmental footprint.
Cons
- Not as durable as new tile: While highly durable paints and sealers are available, a painted floor will generally not withstand the same level of abuse as brand new, unpainted tile. Over time, especially in high-traffic areas, it may show signs of wear, such as chipping, scratching, or fading.
- Requires regular maintenance: To keep your painted floor looking pristine, you’ll likely need to perform periodic maintenance. This includes touching up small areas of wear, cleaning gently, and reapplying the sealer every 6-12 months, depending on traffic.
- Surface preparation is key: The success of your painted floor hinges almost entirely on meticulous surface preparation. Skipping crucial steps like thorough cleaning, sanding, or priming will inevitably lead to poor adhesion and premature paint failure, making the project a waste of time and effort.
- Can be slippery: Some paints and sealers can create a slick surface, especially when wet. This can be a safety concern, particularly in bathrooms or kitchens. Fortunately, this can be mitigated by choosing non-slip sealers or adding anti-slip additives to your topcoat.
- Curing time: While the painting process itself is relatively fast, the paint and sealer require significant “curing” time – often several days to a week – before they reach their full hardness and durability. During this period, foot traffic and furniture placement must be limited, which can still be an inconvenience.
What You Need: Materials and Tools for Painting Tile Floors
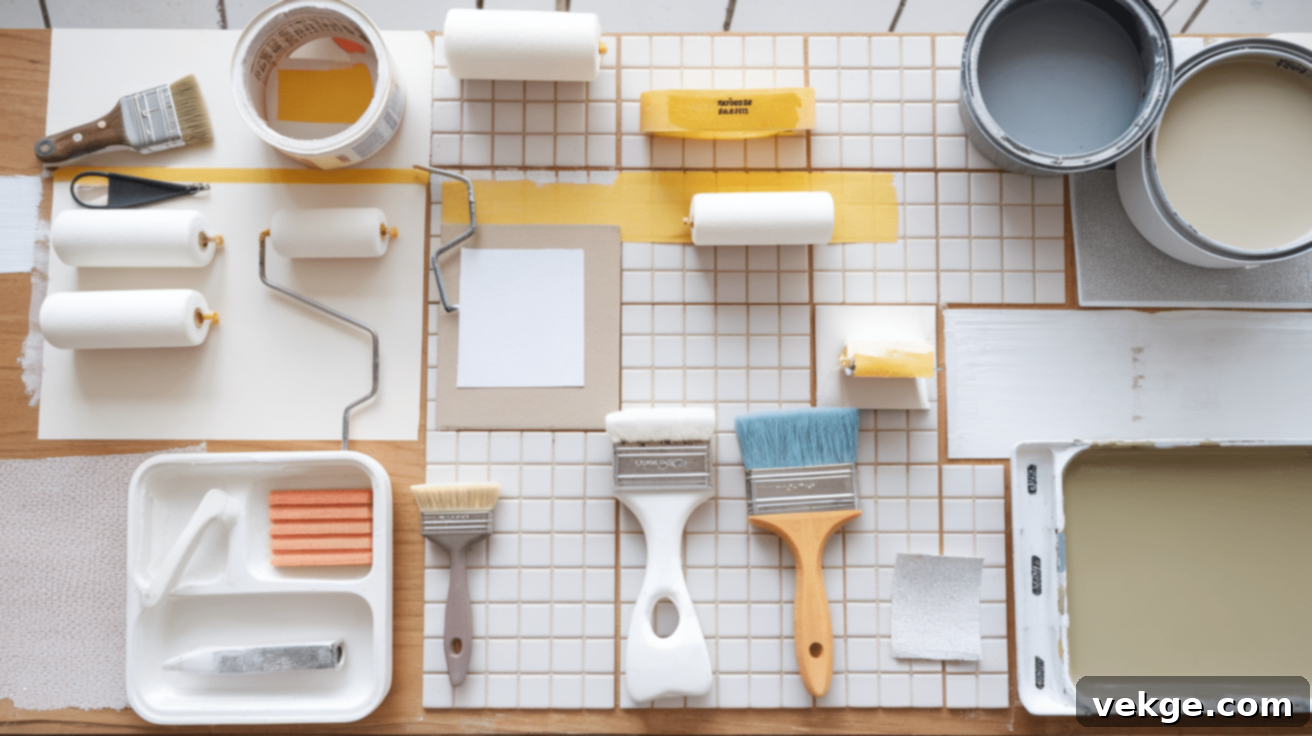
Having the right tools and materials on hand before you begin is essential for a smooth and successful tile painting project. Here’s a comprehensive list of what you’ll need:
- Cleaning Supplies: A heavy-duty cleaner like TSP (trisodium phosphate), a degreaser, or a strong household detergent is crucial for thoroughly removing all dirt, grime, and grease that could prevent paint adhesion. You’ll also need sponges, scrub brushes (especially for grout lines), and a mop.
- Sandpaper (120–220 grit) or Liquid Deglosser: This is vital for roughening glossy tile surfaces. Sandpaper mechanically creates a texture, while liquid deglosser chemically etches the surface, both enhancing primer and paint adhesion.
- Vacuum and Broom: For initial cleaning and removing sanding dust.
- Painter’s Tape: High-quality painter’s tape is essential for protecting baseboards, walls, and any adjacent surfaces from paint drips and ensuring crisp, clean edges.
- Drop Cloths or Plastic Sheeting: To protect surrounding furniture and unpainted areas from spills and splatters.
- Bonding Primer: A specialized bonding primer or epoxy-based primer is non-negotiable. It creates a strong adhesive layer between the slick tile and the paint, preventing peeling and chipping.
- Paint Rollers and Brushes: You’ll need a small angled brush for cutting in edges and meticulously painting grout lines, and a durable, short-nap roller (often 1/4″ or 3/8″) for smooth, even application over larger tile surfaces. Roller extension poles can save your back!
- Paint Trays: For easy loading of paint onto your roller.
- Selected Floor Paint: (See “Best Paint for Tiles” section below for details) Choose a paint specifically designed for floors or high-traffic areas, such as epoxy paint, floor paint, or high-quality acrylic latex with a strong sealer.
- Sealer (Polyurethane or Epoxy-based): A durable, clear topcoat is critical for protecting the painted surface from wear, moisture, and scratches. Opt for an epoxy-based or water-based polyurethane sealer. Consider one with a non-slip additive for safety, especially in wet areas.
- Safety Gear: Gloves, safety glasses, and a respirator or mask, especially when working with strong cleaners, sanding, or oil-based paints/sealers.
- Ventilation Fan: To ensure proper air circulation and aid in drying and curing.
Best Paint for Tiles
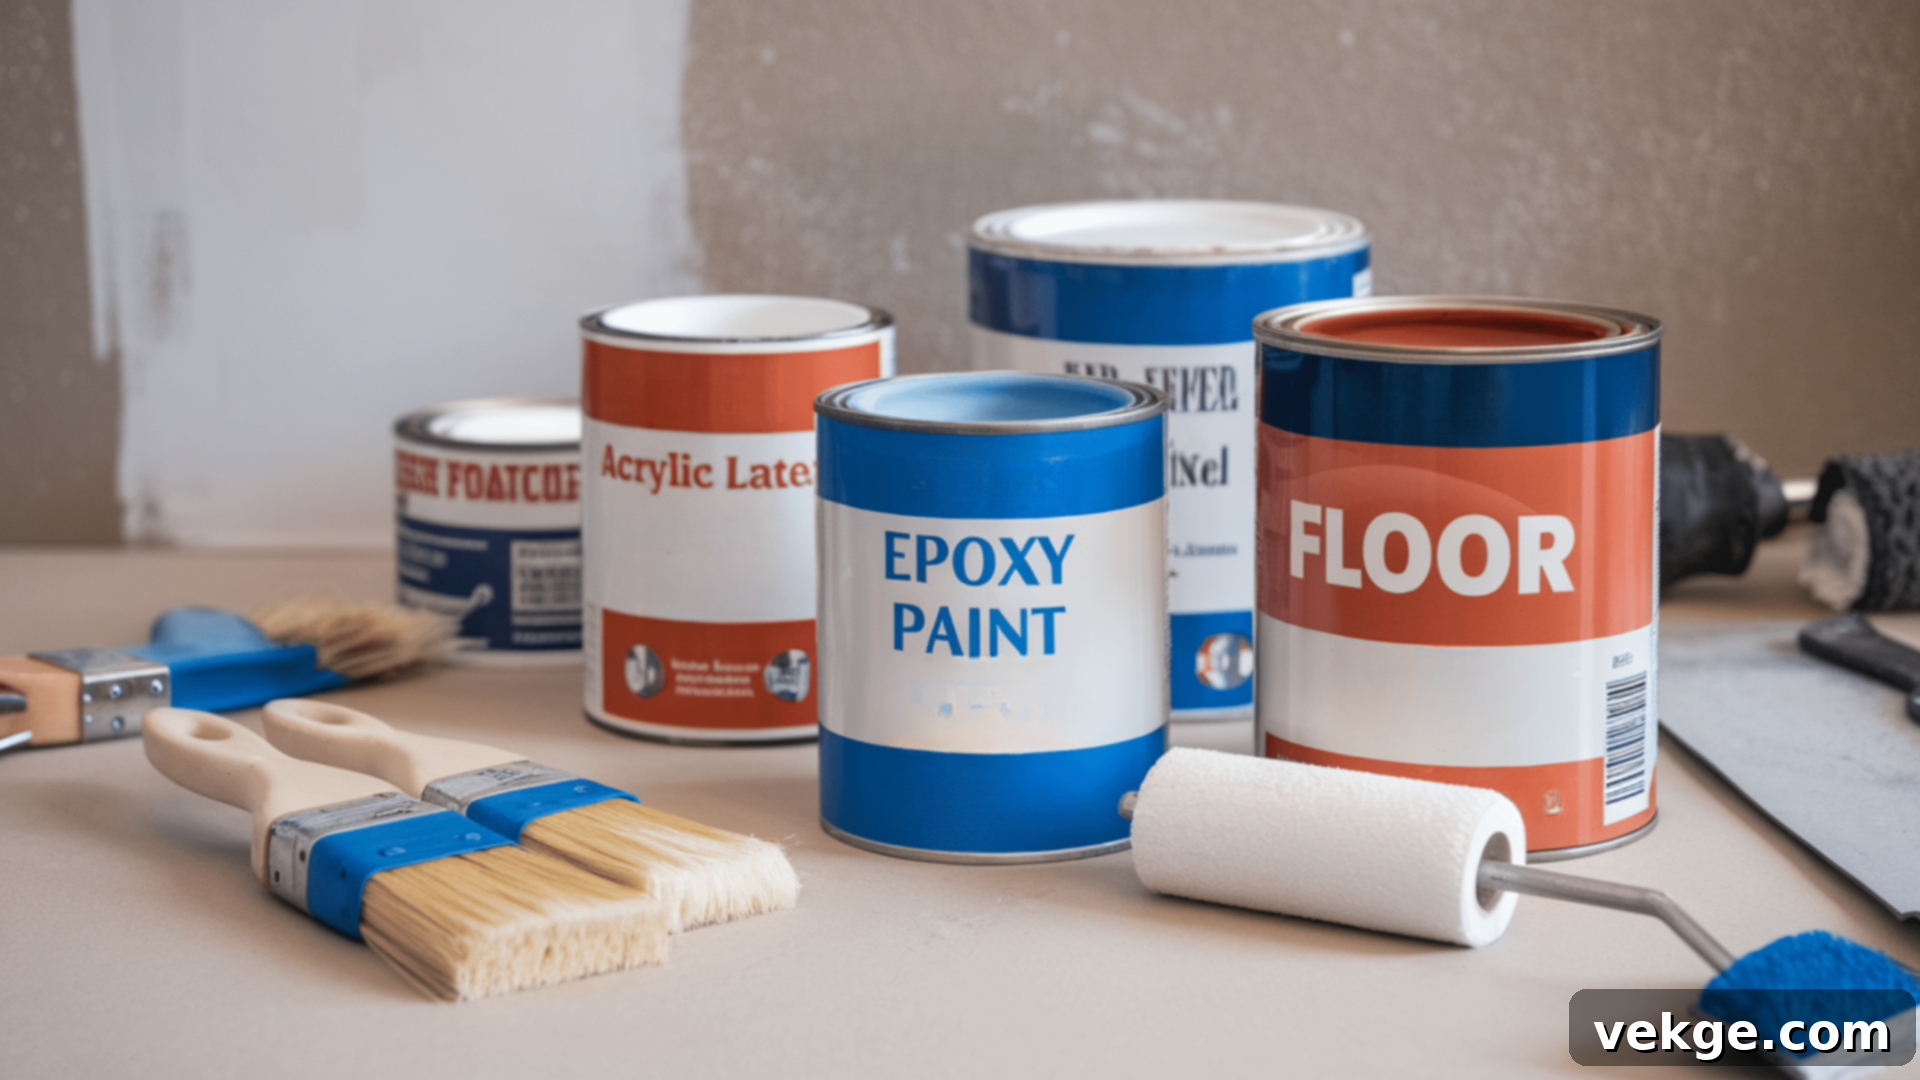
Choosing the right paint is perhaps the most critical decision for the longevity and performance of your painted tile floor. Regular wall paint simply will not withstand the rigors of foot traffic, moisture, and cleaning. Instead, you need a specialized product designed for floors and high-wear surfaces. Here are the best options to consider:
- Epoxy Paint: This is widely considered the most durable choice for painting tile floors, particularly in high-traffic or moisture-prone areas like bathrooms, laundry rooms, and even garages. Epoxy paint is a two-part system (resin and hardener) that, when mixed, creates an incredibly hard, chip-resistant, and moisture-proof finish. It bonds exceptionally well with properly prepared tile and resists peeling, staining, and abrasion. While it requires careful mixing and has a shorter working time, its superior durability makes it a top recommendation.
- Acrylic Latex Paint (specifically for floors): While general acrylic latex wall paint isn’t suitable, high-quality acrylic latex paints designed specifically for floors can be a good, more affordable option. These paints are formulated with enhanced durability and adhesion properties for foot traffic. However, they absolutely require a high-quality bonding primer underneath and a robust, clear sealer on top to achieve sufficient durability and resistance to wear and tear. Always look for products explicitly labeled for “floor paint” or “porch and patio” use.
- Chalk Paint: Known for its excellent adhesion to almost any surface without extensive prep, chalk paint can be used on tiles to achieve a matte, distressed, or vintage look. It’s user-friendly and offers good coverage. However, chalk paint is inherently porous and not very durable on its own. If you choose chalk paint for your tile floor, it is absolutely imperative that it is sealed extremely well with multiple coats of a tough, clear floor-grade sealer (like polyurethane or an epoxy-based topcoat) to prevent chipping, scratching, and moisture damage. Without adequate sealing, it will not last on a floor.
- Floor Paint: This category encompasses various paints specifically engineered for floors, including concrete, wood, and sometimes tile. They are formulated for excellent adhesion, superior wear resistance, and the ability to withstand foot traffic. Many floor paints are either acrylic or oil-based and offer different finishes (satin, semi-gloss). Always check the product label to ensure it’s suitable for tile and consider its durability for your specific area. These often provide a good balance between ease of application and durability.
Regardless of the type of paint you choose, always read the manufacturer’s instructions carefully regarding surface preparation, application, drying times, and recommended topcoats or sealers. This ensures the best results and maximum longevity for your newly painted tile floor.
Step-by-Step Guide to Painting a Tile Floor
Before you even think about opening a paint can, it’s important to understand that painting a tile floor is a multi-step process. Each stage plays a crucial role in achieving a smooth, long-lasting, and professional-looking finish. Rushing or skipping any of these steps will compromise the durability and appearance of your floor. Here’s a detailed, step-by-step breakdown to ensure the best results:
1. Clean and Prep the Floor Thoroughly
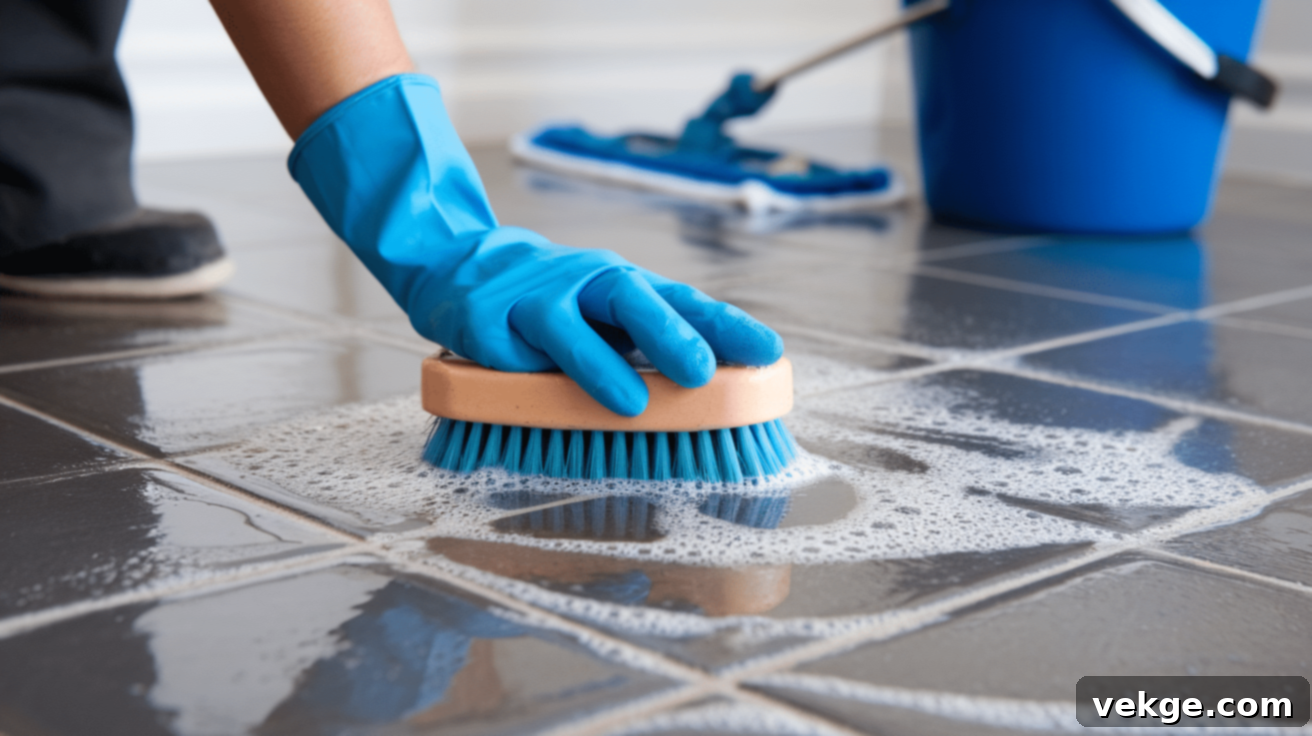
This is arguably the most critical step. Any dirt, dust, grease, wax, or soap scum on the tiles or grout will prevent the primer and paint from adhering properly, leading to frustrating peeling, chipping, or bubbling later on. A truly clean surface is paramount for a durable bond.
- Initial Sweep and Vacuum: Start by sweeping and then thoroughly vacuuming the entire floor. Use a vacuum with a hose attachment to get into grout lines and corners, removing all loose debris, dust, pet hair, and crumbs.
- Deep Cleaning with Degreaser: Next, prepare a solution of warm water mixed with a heavy-duty degreasing cleaner. Trisodium phosphate (TSP) is highly recommended for its powerful cleaning and degreasing properties. Alternatively, a strong household degreaser or even a solution of dish soap and hot water can work for lighter cleaning, but TSP is preferred for maximum adhesion.
- Scrub the Surface: Using a mop or sponge, aggressively scrub the entire tile surface. Pay extra attention to grout lines, as they are notorious for trapping dirt, grime, and mildew. A stiff-bristled scrub brush or even an old toothbrush is invaluable for getting deep into the grout. Work in small sections to ensure thorough cleaning.
- Rinse Thoroughly: After scrubbing, it’s crucial to rinse the floor completely to remove all traces of the cleaning solution. Fill a bucket with clean water and use a clean mop or cloths to wipe down the entire floor multiple times. Any residue left behind can interfere with paint adhesion. Change the rinse water frequently to ensure it stays clean.
- Allow to Dry Completely: This step cannot be rushed. The floor must be absolutely bone-dry before you proceed. Even slight moisture can compromise the primer’s ability to bond. Use fans or open windows to aid air circulation, and allow at least 24 hours, or even longer in humid conditions, for the floor to dry fully. Test inconspicuous areas with a paper towel to ensure no moisture is wicked up.
2. Sand or Etch the Tiles for Adhesion
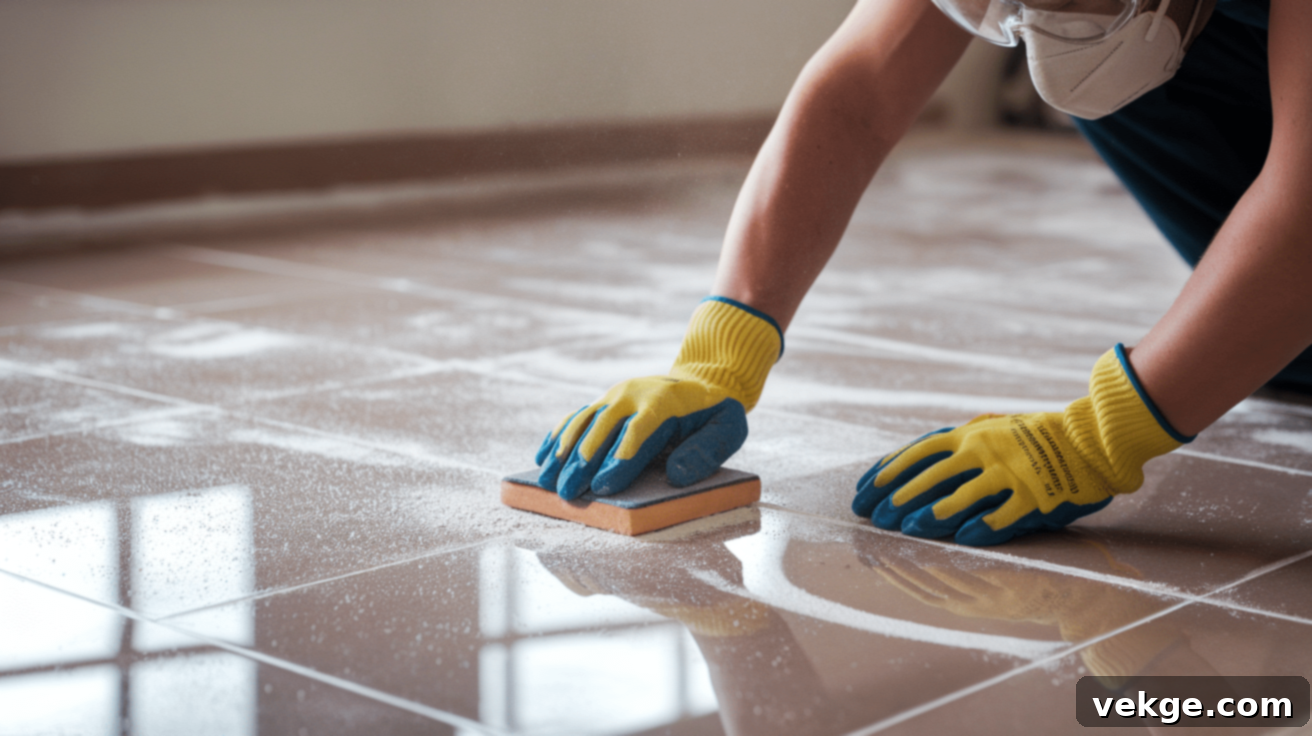
To ensure the paint has something to grip onto, the tile surface must be roughened. This process creates microscopic pores and scratches that allow the primer to penetrate and bond securely. This is especially crucial for glossy or smooth tiles.
- Sanding for Glossy Tiles: If your tiles have a shiny or glazed finish, sanding is essential. Use 120- to 220-grit sandpaper or a sanding block to scuff up each tile thoroughly. You don’t need to remove the glaze completely, but the goal is to eliminate the shine and create a dull, slightly rough texture. For large areas, an orbital sander with a fine-grit pad can save a lot of time and effort. Be sure to wear a dust mask and open windows for ventilation.
- Using a Liquid Deglosser: If you prefer not to sand, or if your tiles are textured where sanding is difficult, a liquid deglosser (also known as a chemical etcher) is an excellent alternative. Apply the deglosser with a clean cloth, meticulously following the manufacturer’s instructions regarding application, dwell time, and ventilation. This product chemically breaks down the glossy finish, allowing the primer to adhere more effectively.
- Clean Up Dust/Residue: After sanding or using the deglosser, it’s critical to clean the floor again. Use a shop vacuum to pick up all sanding dust. Then, wipe the entire floor with a damp (not wet) cloth to remove any remaining fine dust or chemical residue. Let the floor dry completely again before moving to the next step.
3. Apply a High-Quality Bonding Primer
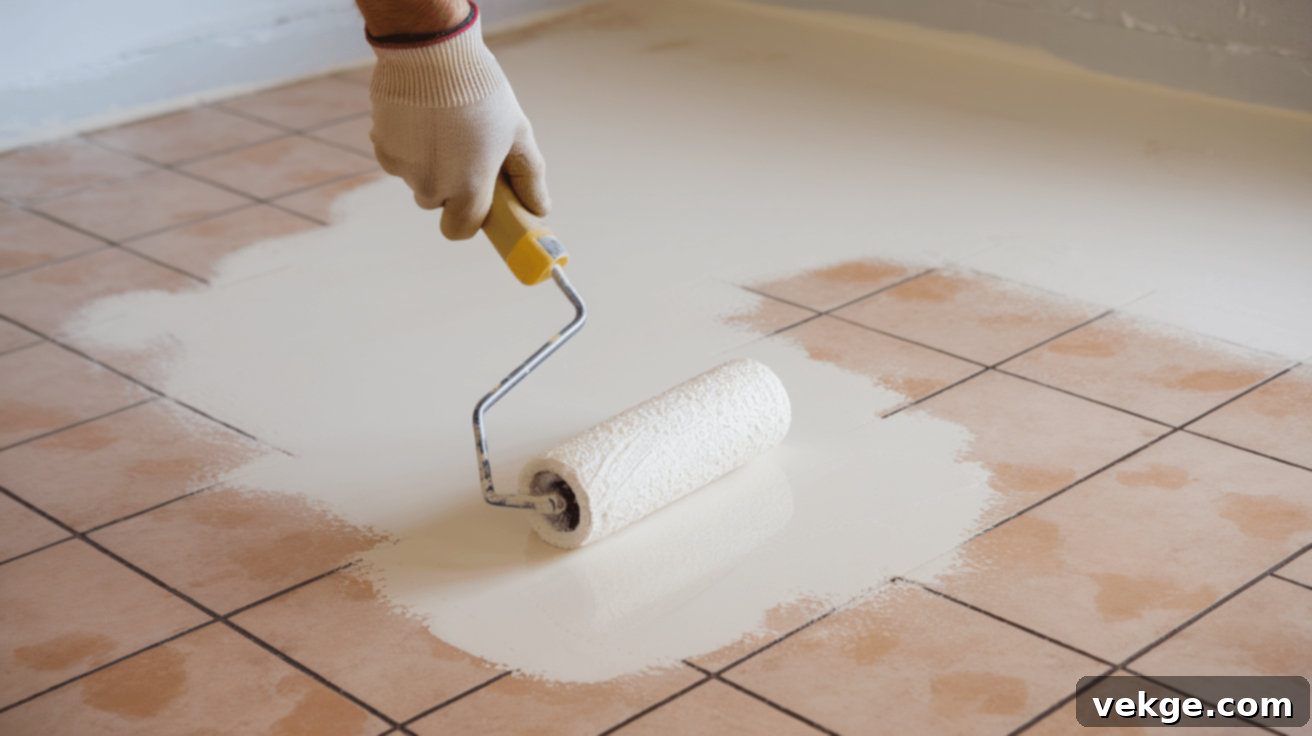
Primer acts as the critical bridge between your prepped tile and the topcoat of paint. It’s the foundation for a long-lasting, durable finish and ensures the paint bonds securely without peeling.
- Choose the Right Primer: Select a specialized bonding primer or an epoxy-based primer. These are specifically formulated to adhere to slick, challenging surfaces like tile and will provide the best possible grip for your paint. Do NOT use a general-purpose primer.
- Tape Off Edges: Use painter’s tape to protect baseboards, trim, and any adjacent flooring that you don’t want to paint. Press the tape down firmly to prevent bleed-through.
- Apply the First Coat: Using a roller, apply a thin, even coat of primer over the entire floor. Work in small sections, moving consistently in one direction. For edges, corners, and grout lines, switch to a small angled brush to ensure complete coverage without pooling. Avoid applying too much primer, as thick coats can create texture or increase drying time.
- Allow Proper Drying Time: This is a non-negotiable step. Allow the primer to dry fully according to the manufacturer’s instructions, which can range from 4 to 24 hours. Rushing this step is a primary cause of paint failure; if the primer isn’t completely cured, the paint won’t adhere properly and will likely peel later. Ensure good ventilation in the room during drying.
- Apply Second Coat (Optional but Recommended): For superior adhesion and coverage, especially on darker tiles or in high-traffic areas, applying a second thin coat of primer is highly recommended. Allow this coat to dry completely as well before proceeding.
4. Paint the Tile Floor with Precision
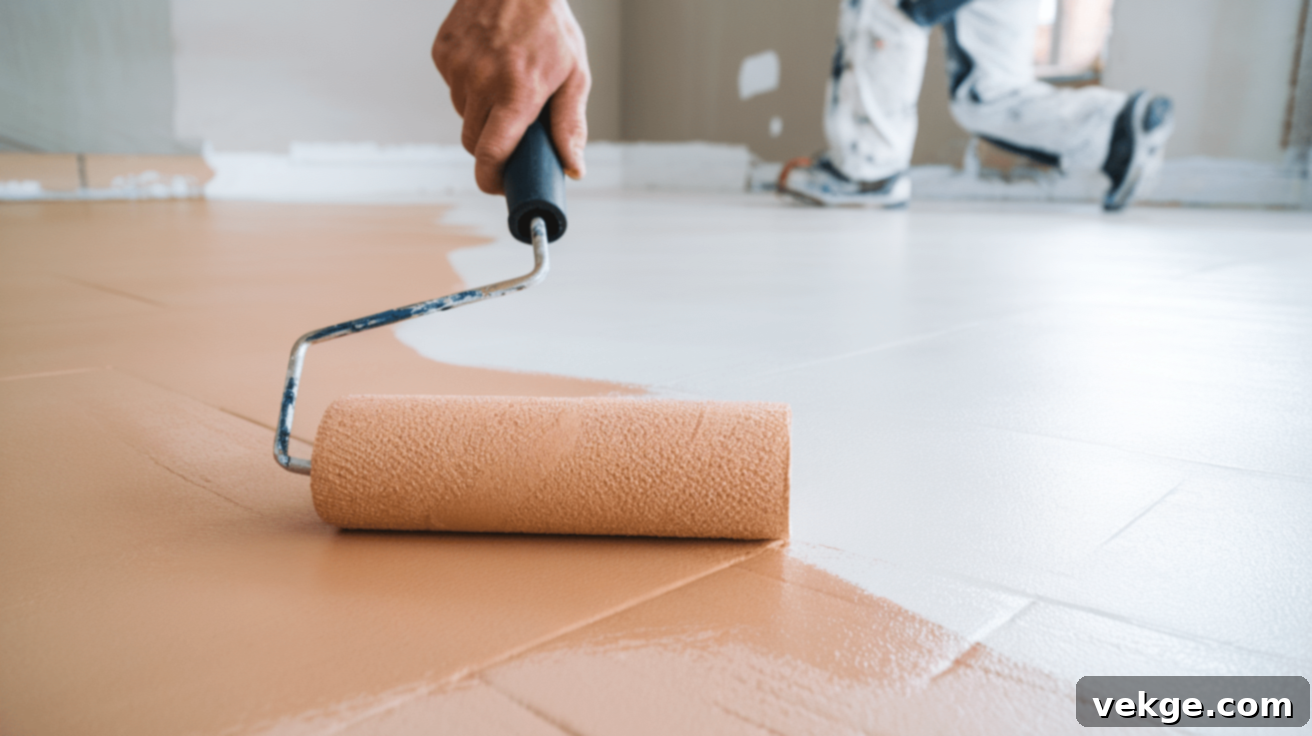
Once your primer is fully cured and dry, it’s finally time to apply the color! Patience and thin coats are key to a beautiful, streak-free, and durable finish.
- Stir Paint Thoroughly: Before starting, stir your chosen floor paint thoroughly to ensure all pigments are well mixed and consistent.
- Paint Grout Lines First: Begin by using a small brush to carefully paint the grout lines. This ensures full coverage and helps create a uniform look, as rollers often struggle to reach the depressions of the grout. Work in small, manageable sections.
- Apply First Coat to Tiles: After the grout lines in a section are painted, switch to your roller. Apply the paint in thin, even layers over the tile surfaces. Avoid applying thick coats, as these can lead to streaking, uneven drying, and a weaker finish prone to chipping. Work in one consistent direction to maintain a uniform appearance. Start from a corner furthest from your exit point and work your way out of the room.
- Allow Adequate Drying Time: Let the first coat of paint dry completely before applying subsequent coats. This drying time can vary significantly (from 6 to 24 hours) depending on the type of paint, humidity levels, and temperature. Consult your paint manufacturer’s guidelines. Ensure good ventilation to aid drying.
- Apply Second (and Third) Coat: Once the first coat is dry, apply a second thin coat, ideally in an opposite or perpendicular direction to the first. This technique helps ensure complete coverage and a smoother finish. If you’re painting over a dark tile with a light color, or if you desire a deeper, more uniform color, a third thin coat may be necessary. Always allow each layer to dry fully before applying the next.
5. Add a Sealer for Ultimate Protection and Durability
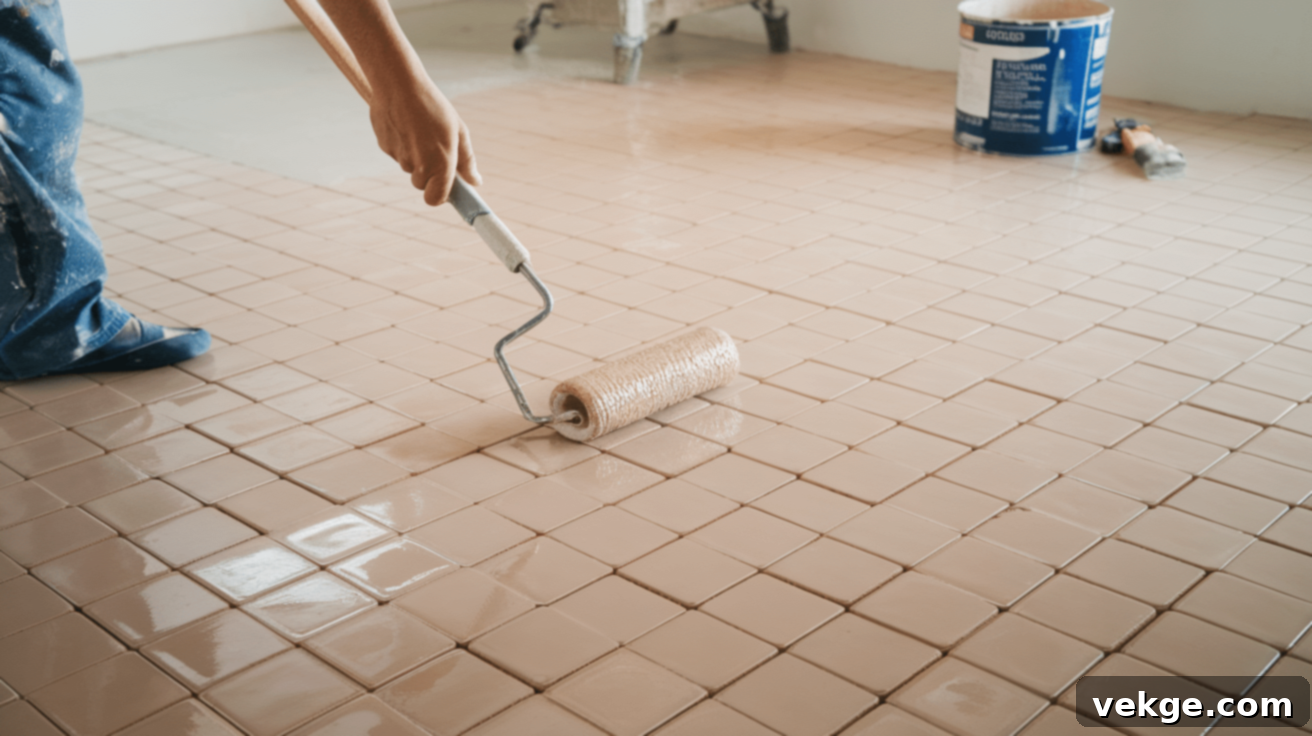
The sealer is the protective shield for your painted floor. It guards against daily wear, scratches, moisture, and ensures the longevity of your hard work. Do not skip this step.
- Choose the Right Sealer: Opt for a high-quality, clear polyurethane or epoxy-based sealer that is specifically designed for floors and heavy traffic. Water-based options are generally easier to clean up and have less odor, while oil-based options can be slightly more durable but yellow over time.
- Consider Non-Slip: Especially in areas prone to moisture like bathrooms, kitchens, or entryways, a non-slip sealer or one with a non-slip additive is highly recommended for safety.
- Apply Thin, Even Coats: Using a clean roller (and a brush for edges), apply the sealer in thin, even layers, just as you did with the paint. Avoid pooling or thick applications, which can lead to bubbles or an uneven finish.
- Multiple Coats are Essential: For optimal durability and protection, apply at least two to three coats of sealer. Allow each layer to dry completely according to the product label’s instructions (typically a few hours) before applying the next.
- Crucial Curing Time: While the sealer may feel dry to the touch in a few hours, it needs time to “cure” and reach its maximum hardness. Avoid walking on the floor for at least 24-48 hours after the final coat. For best results and to prevent scuffs or indentations, wait a full 5-7 days before moving heavy furniture back onto the painted floor or allowing heavy foot traffic. The longer you let it cure undisturbed, the more durable it will be.
What Is the Cost to Paint a Tile Floor?
One of the most compelling reasons to paint your tile floor is the significant cost savings compared to traditional tile replacement. While replacement can easily run into hundreds or even thousands of dollars depending on the size of the area and material choices, painting offers a budget-friendly alternative that delivers dramatic results.
The total cost will depend on the size of your floor, the quality of materials you choose, and whether you already own some of the basic tools. However, for most DIY projects, the investment is remarkably low. Here’s an estimated cost breakdown for painting a standard-sized room:
| Item | Estimated Cost |
|---|---|
| Primer | $10 – $30 |
| Paint (Floor-grade) | $30 – $80 (depending on type and quality) |
| Sealer (Polyurethane or Epoxy) | $25 – $50 |
| Brushes/Rollers | $10 – $25 |
| Sandpaper/Deglosser | $5 – $20 |
| Cleaning Supplies (TSP, sponges, etc.) | $10 – $20 |
| Total Estimated Cost | $90 – $225 |
As you can see, for a minimal investment, you can completely transform the look and feel of a room. This makes painting tile floors an incredibly attractive option for homeowners looking to update their space without breaking the bank, providing excellent value for money and a highly customizable finish.
How to Maintain a Painted Tile Floor for Long-Lasting Results?
Once you’ve invested the time and effort into painting your tile floor, proper maintenance is crucial to ensure its longevity and keep it looking fresh and beautiful for years. With a little care, your painted floor can easily withstand daily use.
1. Clean Regularly but Gently
Consistent, gentle cleaning is the cornerstone of maintaining a painted tile floor.
- Sweep or Vacuum Frequently: Dirt, grit, and debris are abrasive and can act like sandpaper on your painted surface. Regularly sweep or vacuum the floor to remove these particles before they have a chance to scratch or dull the finish.
- Mild Cleaning Solutions: When mopping, always use a damp mop with a solution of mild soap and water. Harsh chemical cleaners, abrasive detergents, or strong acids/alkalis can erode the paint and sealer over time, leading to discoloration or damage. Avoid products containing ammonia, bleach, or harsh degreasers unless specifically recommended by the paint manufacturer for touch-ups.
- Avoid Abrasive Scrubbers: Never use abrasive scrub brushes, steel wool, or scouring pads, as these will inevitably scratch, scuff, or dull your painted finish. Stick to soft cloths or sponges for cleaning spills and gentle mopping.
- Address Spills Promptly: Wipe up spills immediately, especially acidic liquids like juice or vinegar, or oily substances. Allowing them to sit can lead to staining or etching of the painted surface.
2. Protect High-Traffic Areas and Furniture
Strategic protection can significantly extend the life of your painted tile floor in vulnerable spots.
- Use Rugs and Mats: Place area rugs or floor mats in zones that experience the most foot traffic, such as entryways, hallways, in front of sinks, and under dining tables. These act as barriers, minimizing direct impact and wear on the painted surface, and also add warmth and style to the room.
- Felt Pads for Furniture: Always apply felt pads or furniture glides to the legs of chairs, tables, and other movable furniture. This simple step prevents scratches and gouges when furniture is shifted or dragged across the floor. Check and replace these pads periodically as they wear down.
3. Reapply Sealer Periodically
Even the most durable sealers will gradually wear down, especially in areas of high use. Regular reapplication is key to maintaining maximum protection.
- Routine Reapplication: Plan to reapply a clear topcoat of your chosen sealer every 6–12 months, or sooner if you notice dulling or signs of wear. This maintenance layer refreshes the protective barrier and helps maintain the floor’s luster.
- Targeted Touch-ups: In particularly busy spots that show wear more quickly, consider applying touch-up coats of sealer more frequently, even if the rest of the floor doesn’t need it. This proactive approach keeps the entire floor consistently protected.
4. Fix Small Chips and Scratches Quickly
Addressing minor damage promptly is crucial to prevent it from escalating into larger problems.
- Spot Repair: If you notice a scuff, small scratch, or minor chip, clean the area thoroughly. Lightly sand the damaged spot with fine-grit sandpaper (e.g., 220-grit) to feather the edges. Then, apply a small touch-up coat of the original paint, followed by a light reapplication of sealer.
- Prevent Further Damage: Repairing minor imperfections early prevents moisture from seeping under the paint, which could lead to peeling or further degradation of larger sections.
5. Avoid Dragging Heavy Items Across the Floor
Heavy objects can cause significant damage if not handled carefully.
- Lift, Don’t Drag: Whenever possible, lift heavy furniture and appliances rather than dragging them across the painted floor. This eliminates the risk of deep scratches, gouges, or tearing the paint.
- Use Furniture Sliders: For items that are too heavy to lift, use furniture sliders or place thick moving blankets/carpet scraps underneath the legs. This minimizes friction and distributes weight, allowing you to move items safely without damaging the finish.
Tips for a Professional-Looking Painted Tile Floor Finish
Achieving a smooth, durable, and professional-looking finish on your painted tile floor goes beyond just following the basic steps. Incorporating these expert tips will elevate your results and ensure your hard work pays off beautifully:
- Use High-Quality Painter’s Tape: Invest in good quality painter’s tape and apply it meticulously along baseboards, walls, and any adjacent flooring. Press the edges down firmly to create a tight seal and prevent paint bleed-through, ensuring crisp, clean edges. Remove the tape while the final coat of paint or sealer is still slightly tacky to avoid pulling up dried paint.
- Apply Multiple Thin Coats (Paint and Sealer): Resist the urge to apply one thick coat to save time. Thin, even coats are much more effective. They dry faster, adhere better, and are less prone to streaking, bubbling, or peeling. Aim for 2-3 thin coats of primer, 2-3 thin coats of paint, and 2-3 thin coats of sealer for optimal durability and appearance.
- Allow Full Drying Time Between Layers: This cannot be stressed enough. Each layer (primer, paint, sealer) needs to cure and dry completely according to the manufacturer’s instructions before the next is applied. Rushing this step is a primary cause of adhesion issues, bubbling, and premature failure. Good ventilation will aid drying.
- Use the Right Roller and Brush: For smooth tiles, use a short-nap (1/4″ to 3/8″) roller designed for smooth surfaces to achieve an even, lint-free finish. For grout lines and cutting in, a high-quality angled brush provides better control and precision. Don’t overload your roller or brush with too much product.
- Ventilate the Space Properly: Ensure adequate ventilation by opening windows and using fans throughout the entire process, from cleaning to final curing. This not only dissipates fumes (especially important for oil-based products) but also significantly helps the paint and sealer cure faster and more effectively, preventing issues like trapped moisture or slow drying.
- Work in Sections and Plan Your Exit: Mentally divide your floor into manageable sections. Always start painting from the farthest point in the room and work your way towards the exit to avoid painting yourself into a corner.
- Stir Products Frequently: Pigments in paint and solids in primer/sealer can settle. Stir all products thoroughly before starting and periodically during application to ensure consistent color and performance.
Common Mistakes to Avoid When Painting Tile Floors
While painting tile floors is a rewarding DIY project, certain common mistakes can quickly undermine your efforts and lead to a less-than-satisfactory result. Being aware of these pitfalls can save you time, money, and frustration.
- Skipping or Insufficient Surface Preparation: This is the number one mistake. Failing to thoroughly clean, degrease, and sand/etch the tiles will result in poor adhesion, causing the paint to peel, chip, or bubble quickly. The paint needs a perfectly clean, slightly roughened surface to bond.
- Not Using a Bonding Primer: Relying on regular primer or no primer at all is a recipe for disaster. Tile is a notoriously slick surface. A specialized bonding primer or epoxy-based primer is essential to create the necessary grip for the paint, ensuring it adheres strongly and durably.
- Not Allowing Enough Drying/Curing Time Between Coats: Patience is paramount. Applying subsequent coats of primer, paint, or sealer before the previous layer is fully dry and cured will lead to bubbling, peeling, soft spots, and a compromised finish. Always follow manufacturer guidelines for inter-coat drying times.
- Using the Wrong Type of Paint: Regular wall paint or cabinet paint is not formulated to withstand foot traffic, abrasion, or moisture on a floor. Using these will result in rapid wear, scratches, and a short-lived finish. Always use paint specifically designed for floors (e.g., epoxy paint, floor paint, or high-quality acrylic latex floor paint).
- Applying Thick Layers Instead of Thin Coats: Thick coats take longer to dry, are more prone to streaking, sagging, and bubbling, and can result in a weaker bond and an uneven appearance. Thin, multiple coats build up a stronger, smoother, and more durable finish.
- Forgetting to Seal the Paint or Using an Inadequate Sealer: The sealer is your floor’s protective armor. Skipping this step or using a low-quality sealer will leave the paint vulnerable to scratches, moisture damage, and premature wear. Always apply at least two to three coats of a durable floor-grade polyurethane or epoxy-based sealer.
- Not Planning Your Exit Strategy: Painting yourself into a corner seems like a silly mistake, but it happens. Always start painting from the farthest point in the room and work your way towards the door to avoid stepping on wet paint.
- Ignoring Grout Lines: Grout lines need just as much attention as the tiles themselves. Failing to clean, prime, and paint them properly will result in an inconsistent finish and potential adhesion problems in these areas.
Conclusion
Painting a tile floor is an ingenious and accessible way to breathe new life into any space without the financial burden and disruption of a full tile replacement. It’s a project that truly offers significant impact for a relatively modest investment, providing both creative freedom and a refreshed aesthetic. While it is a simple and budget-friendly endeavor, its success absolutely hinges on patience, meticulous preparation, and careful execution.
Underestimating the importance of each step — from thoroughly cleaning and degreasing the surface, to properly sanding or etching, applying a high-quality bonding primer, and finally protecting your work with a durable sealer — is the most common cause of disappointment. Skipping these crucial stages can lead to frustrating issues like premature peeling, unsightly scratches, or a finish that simply fails to stand up to the demands of daily life.
Instead, by dedicating the necessary time to clean the tiles meticulously, applying multiple thin coats of primer, paint, and sealer, and allowing ample drying time between each layer, you are investing in the longevity and beauty of your floor. This diligent approach makes a profound difference in how well the floor holds up over time, ensuring a smooth, resilient, and professional-looking result.
Beyond the initial painting process, regular and thoughtful maintenance is key to preserving your renewed floor. Simple habits like routinely sweeping to remove abrasive grit, using gentle, non-abrasive cleaners for spills and mopping, and strategically placing rugs in high-traffic areas will significantly extend its lifespan and keep it looking pristine. Furthermore, proactively reapplying a clear sealer every few months acts as an added layer of defense, bolstering its durability.
Should minor chips or scratches inevitably appear, addressing them swiftly prevents them from escalating into larger, more noticeable problems. This project, while requiring effort and attention to detail, delivers results that are truly worth the investment. A freshly painted floor can completely transform the atmosphere of a room, offering a custom, modern, and inviting ambiance. With the right steps, quality materials, and a healthy dose of patience, your beautifully painted tile floor will last for years, providing enduring satisfaction and a stylish, updated home.
Frequently Asked Questions About Painting Tile Floors
Can I Paint Any Tile Floor?
Most types of tile floors, including ceramic, porcelain, and even some natural stone tiles, can be successfully painted. However, the preparation required varies significantly. Glossy, smooth, or heavily textured tiles will demand more thorough preparation, such as extensive sanding or the use of a strong chemical deglosser, alongside a high-quality bonding primer, to ensure the paint adheres correctly and durably. Unfinished or porous tiles are generally easier to paint as they naturally offer a better grip for paint.
Do I Need to Sand the Tiles Before Painting?
Yes, sanding is a critical step, especially for glazed or glossy tiles. The purpose of sanding (typically with 120- to 220-grit sandpaper) is not to remove the glaze entirely, but to roughen the tile’s surface. This creates a microscopic texture that provides “tooth,” allowing the primer and subsequent paint layers to adhere much better and prevent peeling. If sanding is not feasible or preferred, a liquid deglosser can be used as an alternative. This chemical product etches the tile’s surface, preparing it for primer adhesion.
How Long Does Painted Tile Last?
With proper surface preparation, the use of high-quality, floor-grade paint, and the application of a durable, protective sealer, a painted tile floor can last for several years. Its longevity largely depends on the amount of foot traffic it receives and how well it is maintained. Floors in low to moderate-traffic areas (e.g., guest bathrooms, laundry rooms) will last longer. High-traffic areas (e.g., kitchens, main hallways) may require more frequent touch-ups, reapplication of sealer every 6-12 months, and consistent gentle cleaning to maintain their appearance and durability.
How Long Should I Wait Before Walking on The Painted Floor?
Patience is key for the paint and sealer to properly cure and reach their maximum hardness. For light foot traffic, it’s generally recommended to wait at least 24–48 hours after the final coat of sealer has been applied. However, for best results and to ensure full curing, which prevents scuffs, indentations, or damage, you should avoid placing heavy furniture on the floor or subjecting it to heavy foot traffic for 5–7 days. Always consult the specific manufacturer’s instructions for your paint and sealer, as curing times can vary.
Can I Change the Color Later if I Don’t Like It?
Yes, one of the benefits of painting your tile floor is that you can change the color again later if your style preferences evolve or if you simply want a new look. However, you cannot just paint over the existing painted layer. The existing paint must first be properly prepared. This typically involves thoroughly cleaning the surface, lightly sanding it (to create adhesion for the new primer), applying a fresh coat of bonding primer, and then proceeding with new coats of your chosen paint and sealer. Applying new paint over an old, unprepared painted layer will likely lead to poor adhesion and premature peeling.
