DIY Rain Chain Installation: A Comprehensive Guide to Enhancing Your Home’s Drainage and Aesthetics
Are you tired of your traditional downspout constantly clogging, overflowing, or simply being an eyesore? Many homeowners seek a more efficient, visually appealing, and low-maintenance solution for managing rainwater runoff. A rain chain might be the perfect answer to these common drainage dilemmas, transforming a functional necessity into an elegant architectural detail.
A rain chain is an innovative and aesthetically pleasing alternative to the conventional enclosed downspout. It gracefully guides rainwater from your roof’s gutters to the ground or a designated collection point, offering both practical benefits and a unique sensory experience. Unlike opaque downspouts that hide the water flow, rain chains allow you to observe the gentle cascade of water, creating a soothing visual and auditory display.
This comprehensive guide will walk you through everything you need to know about rain chains, from understanding their core function to a detailed, step-by-step installation process. By the end, you’ll be equipped to confidently replace your old downspout and elevate your home’s curb appeal while improving its rainwater management.
In this guide, you’ll discover:
- What exactly a rain chain is and how it functions.
- Compelling reasons why more homeowners are choosing rain chains over traditional downspouts.
- A detailed list of essential tools and optional accessories required for installation.
- A clear, step-by-step tutorial on how to install a rain chain, ensuring a smooth and successful DIY project.
Beyond standard installations, we’ll also delve into creative solutions for homes without existing gutters and provide practical tips for caring for your rain chain throughout the year, especially during challenging winter months. Let’s embark on this journey to simplify rainwater management and add a touch of serene beauty to your home’s exterior.
What is a Rain Chain? Understanding This Elegant Downspout Alternative
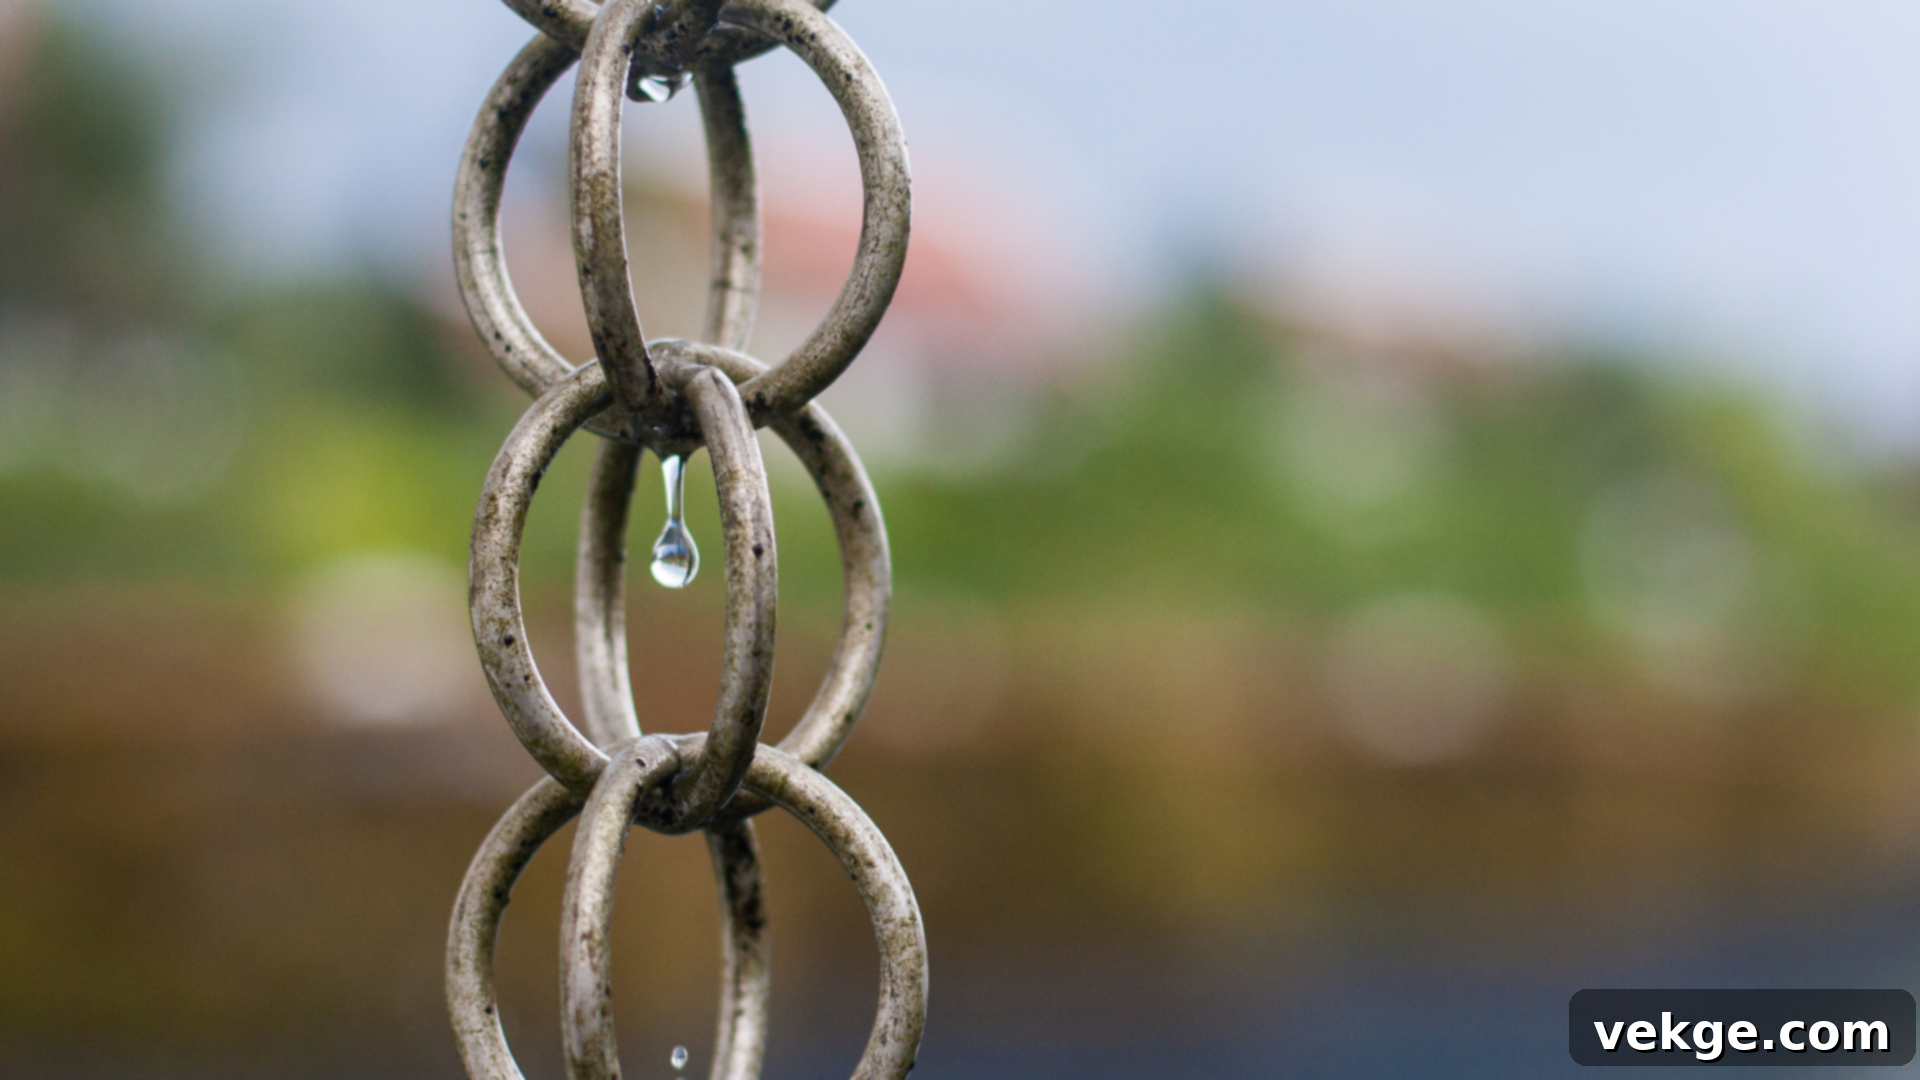
At its heart, a rain chain is a decorative and functional device designed to channel rainwater from your roof’s gutters down to the ground. Unlike traditional downspouts, which are enclosed pipes, a rain chain utilizes an open design, typically made from a series of connected metal cups, links, or a combination of both. This open structure allows water to flow visibly, creating an enchanting water feature for your home.
When rain falls on your roof, it collects in the gutters and flows towards the downspout opening. Instead of entering an enclosed pipe, the water gracefully descends onto the top of the rain chain. Gravity then takes over, pulling the water downwards. In cup-style chains, water fills each cup and spills into the one below, creating a gentle waterfall effect. Link-style chains guide water along their surface tension, forming a shimmering, uninterrupted stream. This process continues until the water reaches the bottom of the chain, where it can be directed into a decorative basin, a bed of river rocks, a French drain, or a practical rain barrel for water collection.
Rain chains are available in various materials, including copper, aluminum, brass, and even stainless steel, each offering different aesthetic qualities and durability. Copper, for instance, develops a beautiful patina over time, adding character to your home. Their simple yet effective design makes them a popular choice for homeowners looking to combine utility with artistic expression.
Why Choose a Rain Chain Over a Traditional Downspout? Beyond Just Looks
The growing popularity of rain chains isn’t just about their visual appeal; they offer several distinct advantages over conventional downspouts. Homeowners are increasingly recognizing the blend of practicality, ease of maintenance, and sensory benefits that rain chains bring to their properties.
- Enhanced Aesthetic Appeal: Traditional downspouts are often seen as necessary but unsightly plumbing fixtures. They can disrupt the visual flow of your home’s exterior with their bulky, industrial appearance. Rain chains, in contrast, serve as elegant vertical accents, enhancing your home’s curb appeal. Available in numerous styles—from ornate cup designs that resemble miniature watering cans to minimalist link chains—they can complement various architectural styles, from rustic to modern. The choice of material, such as gleaming copper or sleek aluminum, further allows for customization, ensuring your rain chain becomes a unique decorative element rather than a hidden utility. Pairing them with a decorative catch basin or a carefully arranged rock bed at the base completes the sophisticated look.
- Significantly Easier Maintenance: One of the most common frustrations with traditional downspouts is their tendency to clog. Leaves, twigs, shingle grit, and other debris frequently accumulate inside the enclosed pipes, leading to blockages, overflows, and potential water damage to your home’s foundation or fascia. Rain chains eliminate this problem almost entirely. Their open design means there’s no enclosed space for debris to collect and create obstructions. You can easily see if anything is caught in the links or cups and quickly remove it. Routine cleaning typically involves a simple rinse with a garden hose, taking only minutes compared to the often cumbersome and dirty task of dislodging a downspout clog. This translates to less effort, less time, and fewer repair costs over the long run.
- Creates a Calming Sensory Experience: Beyond their visual charm, rain chains offer an auditory delight. As rainwater gently tumbles down the cups or shimmers along the links, it produces a soft, rhythmic patter that is profoundly more soothing than the gurgling or rushing sound of water inside a closed downspout pipe. Many homeowners strategically place their rain chains near windows, patios, or outdoor seating areas specifically to enjoy this tranquil sound during a rainstorm. It transforms an ordinary weather event into a meditative and enjoyable experience, bringing a sense of calm and connection to nature right to your doorstep.
- Eco-Friendly Rainwater Harvesting: Rain chains are an excellent component of a sustainable home. By directing water to a specific point, they make it incredibly easy to collect rainwater in a rain barrel or cistern. This harvested water can then be reused for various non-potable purposes, such as watering gardens, washing cars, or even flushing toilets (with proper filtration). This reduces your reliance on municipal water supplies, conserves resources, and can even lower your water bill, making rain chains a smart choice for environmentally conscious homeowners.
- Prevents Erosion and Protects Foundations: Uncontrolled rainwater runoff can lead to soil erosion around your home’s foundation, potentially causing costly damage over time. Rain chains, especially when paired with a proper catch basin, gravel bed, or French drain, help to effectively manage and disperse water, preventing it from pooling directly against your foundation. This directed flow helps to mitigate erosion and protects the structural integrity of your home, ensuring that rainwater is an asset, not a threat.
Step-by-Step Installation of a Rain Chain: A DIY Guide
Installing a rain chain is a rewarding DIY project that can significantly improve your home’s drainage and curb appeal. Most installations can be completed in an afternoon with basic tools and a clear understanding of the process. Follow these straightforward instructions to ensure your rain chain is properly installed, functions effectively, and looks great.
This guide simplifies the process, making it accessible for homeowners of all skill levels. By carefully following each step, you’ll transform your exterior drainage system from a hidden necessity into an attractive and functional outdoor feature.
Basic Supplies Needed for Your Rain Chain Project
To ensure a smooth and secure installation, gather these essential items before you begin:
- Rain Chain: This is the star of the show! Choose a style (cup or link) and material (copper, aluminum, etc.) that complements your home’s aesthetic and meets your desired length requirements. Ensure it’s long enough to reach your desired collection point with a slight allowance for anchoring.
- Gutter Clip or Hanger: This crucial component connects the top of your rain chain directly to the gutter outlet. It’s designed to securely hold the chain and direct water flow effectively. Ensure it’s compatible with your specific gutter type and rain chain.
- Gutter Adapter or V-Hook: If your gutter’s downspout opening is too large or irregularly shaped, a gutter adapter provides a neat, funnel-like transition for the water to flow onto the chain. A V-hook serves a similar purpose, securely suspending the chain within the gutter opening.
- Drill with Hole Saw Attachment: This is helpful if your existing downspout hole needs to be widened or reshaped to accommodate the adapter or the top of your rain chain. Select a hole saw size that matches the adapter or chain’s top link diameter.
- Anchor Stake or Heavy Object: This keeps the bottom of your rain chain stable, especially in windy conditions. It can be a dedicated metal stake, a heavy decorative stone, or the weight of a rain barrel.
Optional Add-Ons for Enhanced Functionality and Aesthetics
While not strictly necessary for functionality, these items can significantly improve the performance, appearance, and utility of your rain chain setup:
- Decorative Basin or Splash Bowl: Placed directly beneath the rain chain, a basin collects the water gracefully, preventing splashing and directing the flow into a desired area. They come in various materials and designs to match your outdoor decor.
- River Rocks or Decorative Gravel: Placing these inside a basin or directly on the ground beneath the chain helps to further soften the splash of falling water, minimize erosion, and create a visually appealing base. They also aid in proper drainage.
- Rain Barrel or Cistern: For environmentally conscious homeowners, a rain barrel connected to the base of the rain chain allows for the collection and reuse of rainwater for gardening, washing, or other non-potable uses. This is a highly sustainable option.
- Splash Guard or Diverter: During exceptionally heavy rainfall, some splash can occur. A splash guard, typically a small deflector installed near the gutter outlet or above the collection basin, can help contain any errant splashes, keeping your home’s siding cleaner and preventing excessive moisture near the foundation.
- Caulk or Sealant: Although not always necessary, a bead of outdoor-grade caulk around the gutter adapter can provide an extra layer of protection against leaks, especially if the fit isn’t perfectly snug.
- Gloves and Safety Glasses: Essential personal protective equipment when working with tools and metal, especially when cutting or drilling.
- Sturdy Ladder: Crucial for safe access to your gutters. Ensure it’s rated for your weight and placed on stable, level ground.
Step 1: Carefully Remove the Existing Downspout
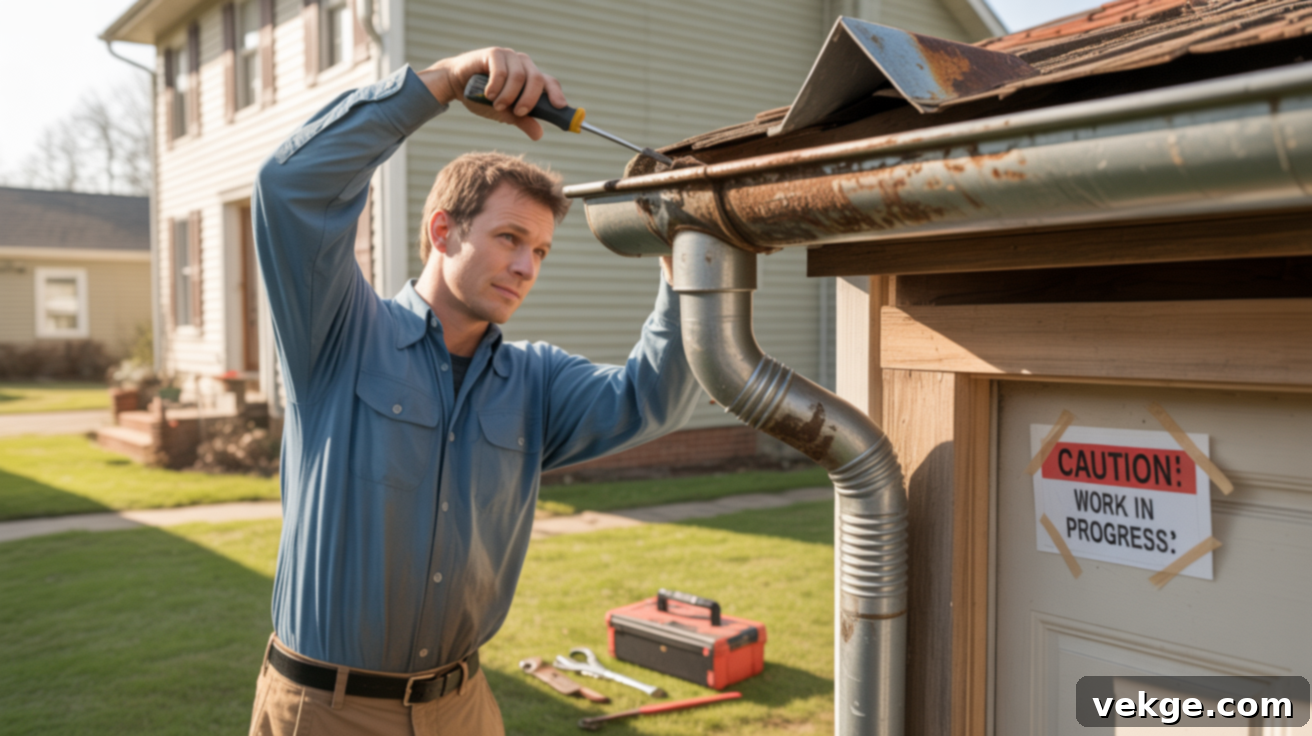
Begin your rain chain installation by detaching the old downspout from your gutter system. Use a screwdriver or nut driver to remove any screws, straps, or brackets that secure the downspout to the gutter outlet and the side of your house. Work slowly and carefully, as older downspouts can sometimes be sharp or heavy, and rusted fasteners might require extra effort.
If the downspout was sealed with caulk or adhesive, gently pry it loose using a putty knife or a utility knife to score the sealant. Once the downspout is completely removed, inspect the gutter opening for any leftover sealant, rust, or debris. Use a stiff brush or scraper to thoroughly clean the area, ensuring a smooth and unobstructed opening. This clean surface is essential for a proper connection to your new rain chain and adapter. Always prioritize safety during this step: use a sturdy, properly secured ladder and wear work gloves and safety glasses to protect yourself from sharp edges and falling debris.
Step 2: Prepare the Gutter Hole for the Rain Chain Adapter
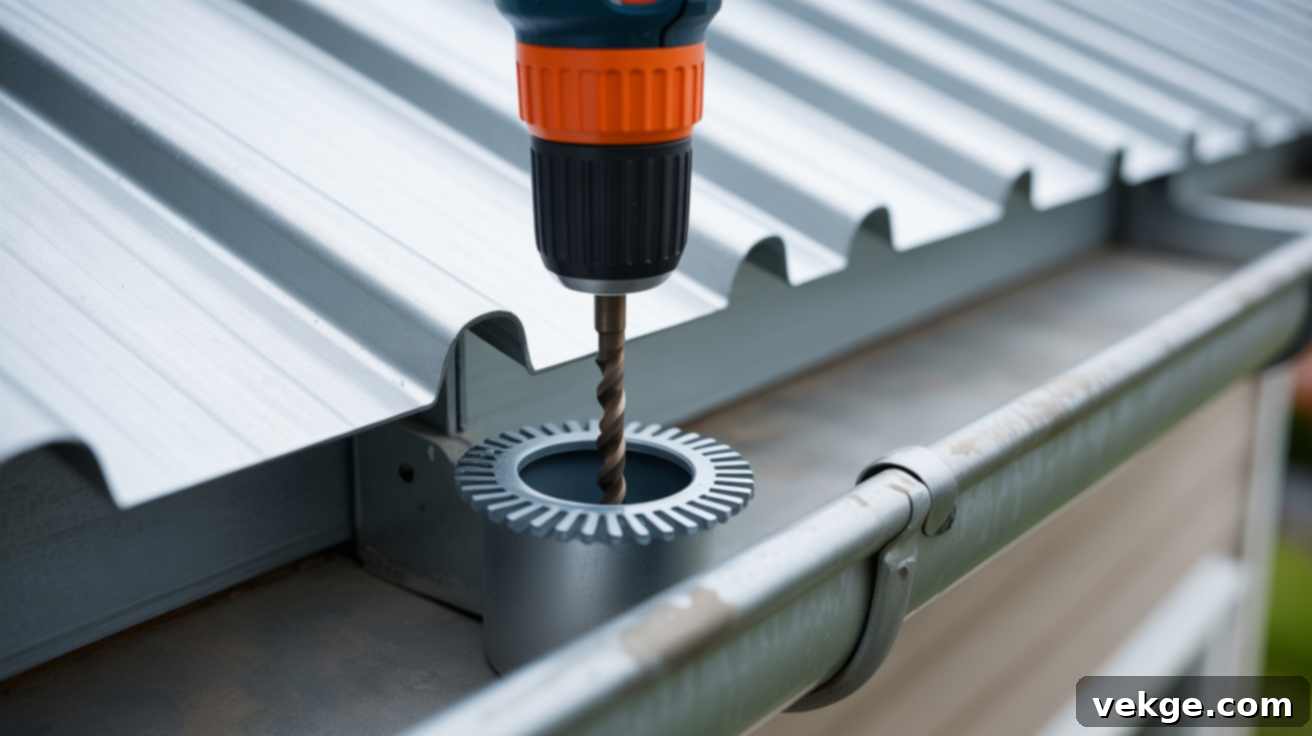
With the downspout removed, your next task is to prepare the gutter hole for the rain chain or its adapter. Carefully inspect the existing opening. Is it wide enough to comfortably accommodate your chosen gutter adapter or the top link/cup of your rain chain? If the hole is too small, you’ll need to enlarge it. Use a drill fitted with a appropriate-sized hole saw attachment (often 2-3 inches in diameter, depending on your adapter) to carefully widen the opening. Avoid making the hole excessively large; it should be just big enough for the adapter or chain to pass through while resting securely on the gutter’s lip.
After widening, meticulously clean the edges of the newly created or enlarged hole. Remove any metal shavings, burrs, or rust that could impede water flow or damage the chain over time. If the gutter opening is bent or misshapen, gently use pliers to reshape it into a smooth, even circle or square. A clean, smooth, and correctly sized hole is crucial for ensuring the rain chain hangs centrally, preventing leaks around the gutter area, and optimizing water flow during heavy rainfall.
Step 3: Insert and Secure the Gutter Adapter or Clip
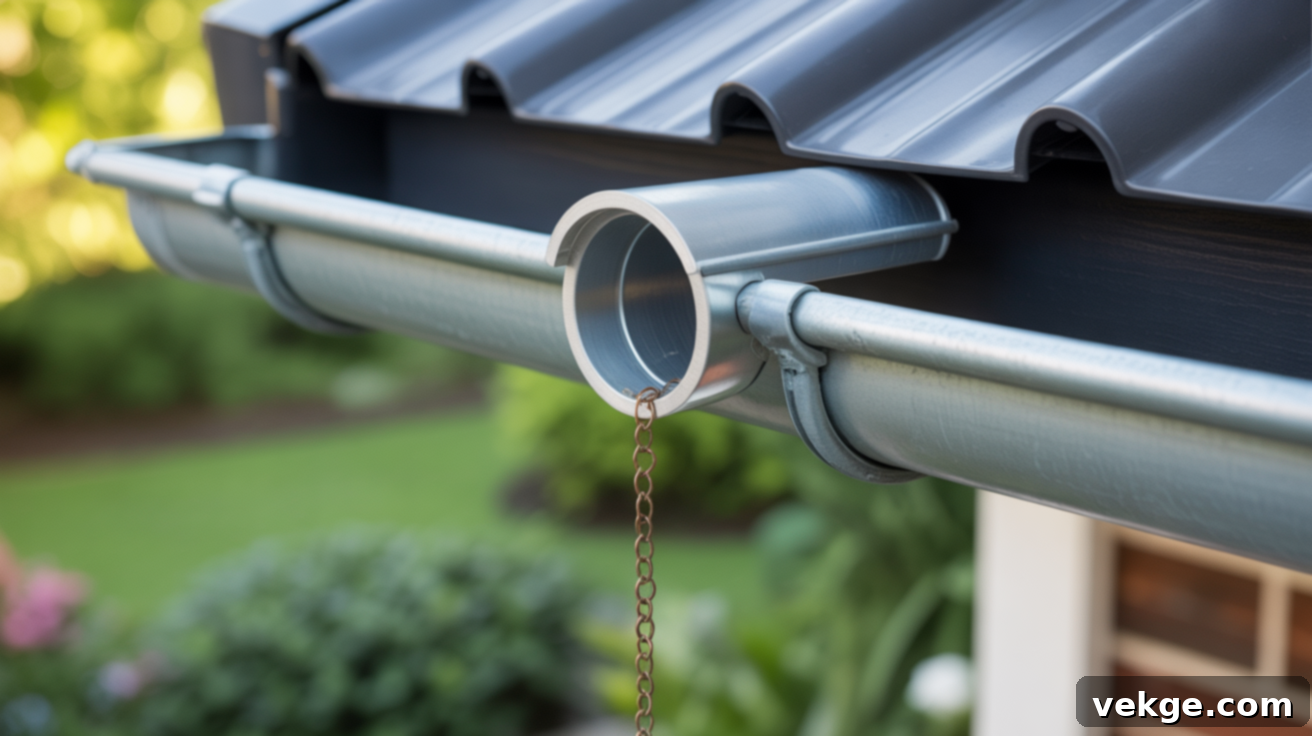
Now, it’s time to install the component that will bridge your gutter and your rain chain. Select the appropriate gutter adapter, V-hook, or rain chain clip that you’ve chosen for your specific setup. Carefully slide the adapter into the prepared hole from inside the gutter, ensuring it rests securely on the lip of the gutter opening. Some adapters may require a slight twisting motion or specific fasteners to lock them into place, so always refer to the manufacturer’s instructions for your particular product.
The adapter’s primary role is to create a stable, funnel-like connection that smoothly directs water from the gutter onto the rain chain below. Ensure it sits level and doesn’t wobble, as any instability could affect water flow and chain alignment. If you are using a V-hook, you might need to gently bend it to ensure it securely hooks into the gutter opening and provides a sturdy hanging point for the top of your rain chain without slipping. Once the adapter or clip is securely in place, double-check its stability; it should feel firm and ready to bear the weight of the chain and water flow.
Step 4: Hang the Rain Chain with Precision
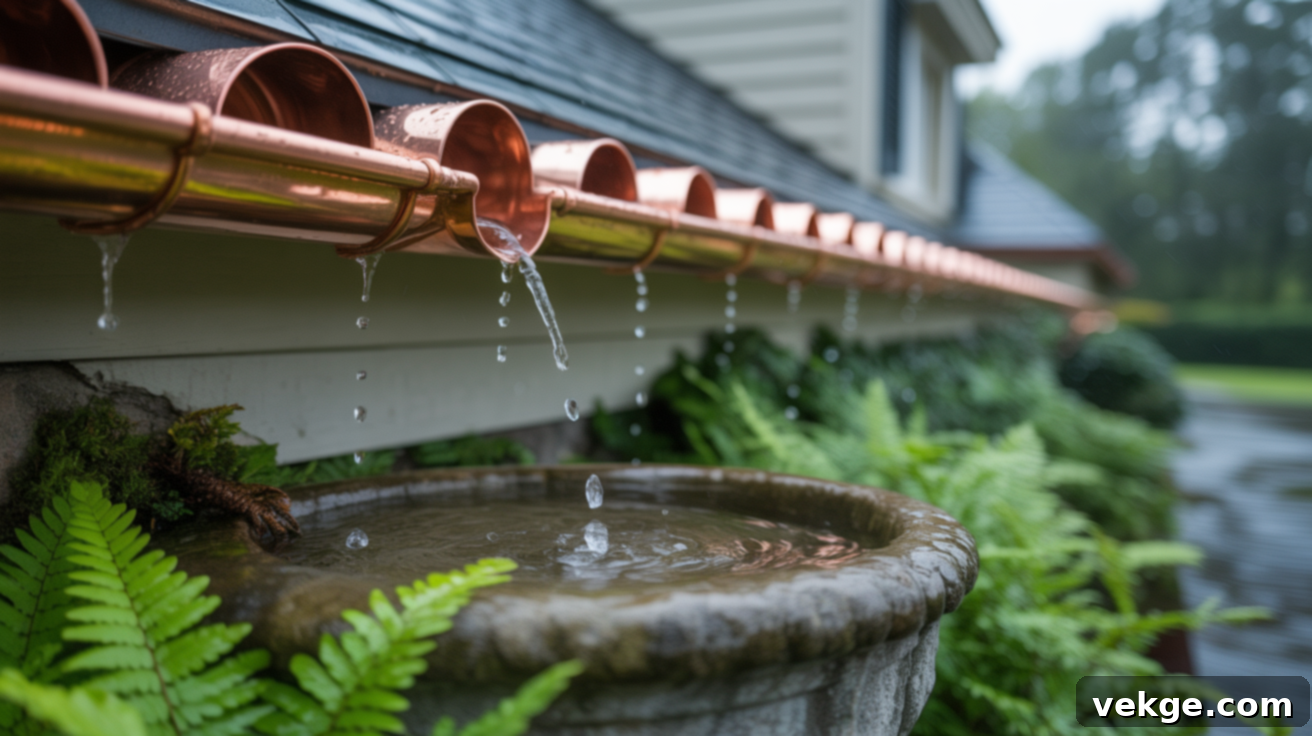
With the gutter adapter firmly in place, you can now hang your rain chain. Take the top end of your rain chain and securely attach it to the adapter, V-hook, or clip that you installed in the previous step. Most rain chains have a loop or a specific attachment point at their top for this purpose. Once connected, slowly lower the rest of the chain, allowing it to hang freely and naturally toward the ground.
As you lower it, ensure the chain is perfectly straight and not twisted or tangled. Any twists can impede water flow and detract from its aesthetic appeal. Adjust the links or cups so they align properly, forming a continuous, vertical path for the water. Step back and observe the chain from a distance to confirm that it falls in a straight vertical line, free of any leans or significant swings. If necessary, make small adjustments to the connection point at the adapter until the chain hangs perfectly plumb. A well-hung rain chain is not only more functional but also significantly more attractive, creating a graceful vertical line that draws the eye.
Step 5: Anchor the Bottom of Your Rain Chain

The final crucial step in installing your rain chain is anchoring its bottom. This prevents the chain from swaying excessively in windy conditions and ensures that rainwater is directed precisely where you want it. There are several effective ways to anchor the base:
- Decorative Basin with Rocks: If you’re using a decorative basin, simply let the bottom of the chain rest inside it. Adding river rocks or small stones to the basin will help absorb the impact of the falling water, reducing splash and creating a more natural, finished look. The weight of the basin and rocks will typically be sufficient to hold the chain in place.
- Anchor Stake: For a more secure ground anchoring, especially in open areas, you can use a dedicated anchor stake. Drive the stake firmly into the ground directly beneath the chain. Most stakes have a loop or a hook where you can attach the bottom link of your rain chain, securing it firmly.
- Rain Barrel: If you’re collecting rainwater, the chain will simply extend into the opening of your rain barrel. The weight of the barrel (especially when partially full) and the chain resting inside it will provide adequate stability.
- Gravel Bed or French Drain: If directing water into a gravel bed or a French drain, ensure the chain extends far enough into the bed to effectively channel the water. You can secure the very bottom link to a hidden, heavy rock or a small, buried anchor point if extra stability is needed.
Properly anchoring the bottom adds essential stability, ensuring your rain chain performs optimally even during heavy rain or strong winds, preventing it from knocking against your house or shifting out of place.
Installing a Rain Chain Without Gutters: Creative Solutions for Unique Homes
Do you love the idea of a rain chain but your home lacks traditional gutters? Don’t fret! Rain chains can still be a beautiful and functional addition to homes without a conventional gutter system. With a bit of creativity and the right approach, you can set up a rain chain to gracefully manage rainwater runoff from various structures, adding charm and utility where you might least expect it.
These alternative installation methods offer flexibility and allow you to incorporate the elegant appeal of rain chains into unique outdoor setups, such as pergolas, sheds, or even directly from roof edges where water naturally sheds.
1. Hanging a Rain Chain from a Tree or Overhead Beam

If your home doesn’t have gutters, you can strategically place a rain chain under a point where water naturally runs off your roof. This could be a corner of the roof, an overhang, or even beneath a sturdy tree branch adjacent to your house. The key is to identify a consistent drip line where water sheds during rain.
To install, choose a strong metal hook, screw eye, or a heavy-duty bracket. For a pergola or exposed beam, drill a pilot hole into the wood and securely screw in the hook or eye. Ensure the wood is sound and capable of supporting the chain’s weight, especially when wet. If attaching to a tree, select a thick, stable branch that is close enough to the roof’s drip edge. Use a tree-safe strap or a very large, open hook that allows for tree growth without girdling the branch. Always ensure that the chain hangs freely and vertically, extending down to a suitable collection point like a rain barrel, decorative basin, or a well-drained gravel bed. This method is particularly effective for creating an organic, integrated look within your landscape.
2. Utilizing a Bracket or Wall Mount for Gutter-Free Installation
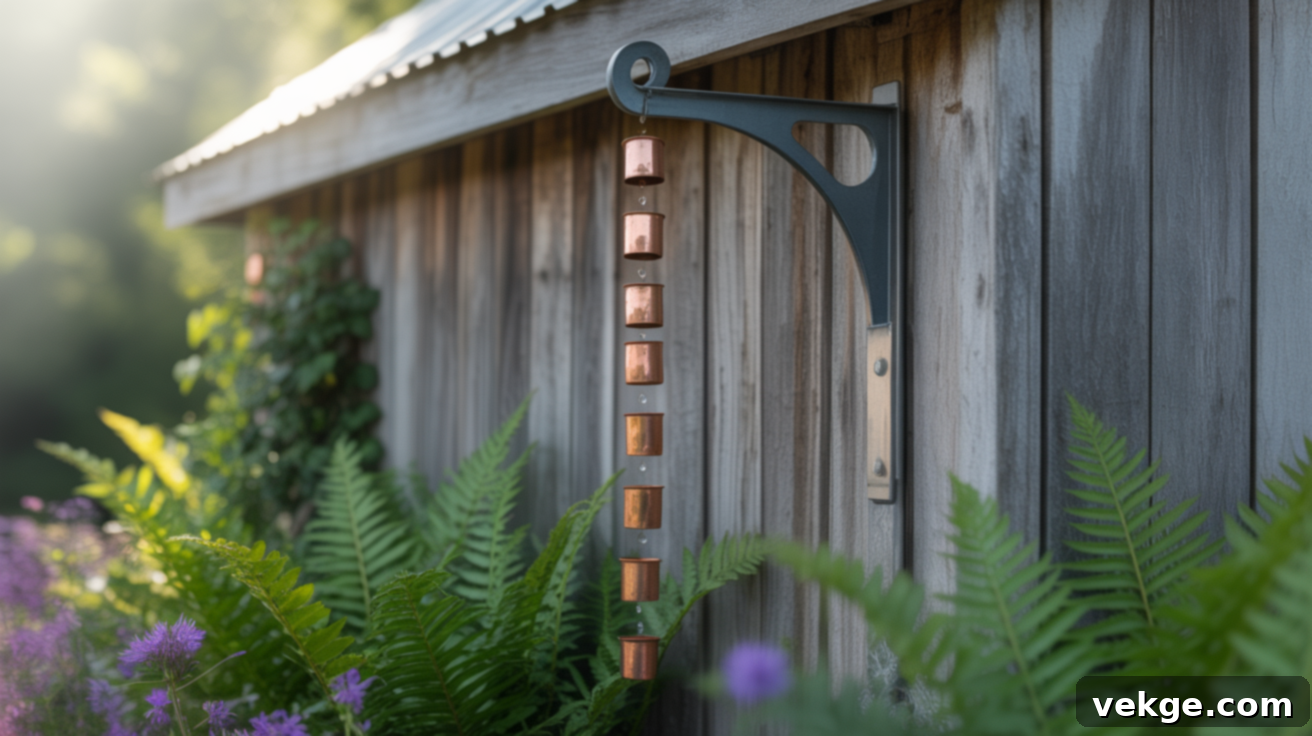
Another excellent solution for homes without gutters involves using specialized wall-mounted brackets. These brackets are designed to be screwed directly into a vertical surface, such as your home’s siding, a fascia board, a robust fence post, or the underside of an overhang. They typically feature an arm that extends out, providing a point from which to hang the rain chain.
When selecting a bracket, ensure it’s made from a rust-resistant material (like powder-coated steel or aluminum) and robust enough to support the weight of the rain chain, which can become heavier when saturated with water. Position the bracket directly underneath a natural runoff point of your roof, ensuring that the majority of the rainwater will drip onto the chain. Once the bracket is securely mounted to a stud or a sturdy part of the wall, simply attach the top of your rain chain to the bracket’s hook or loop. This setup works exceptionally well for sheds, patios, pergolas, or any area where you want to manage roof runoff without the full commitment of a gutter system. It offers significant flexibility in placement and allows you to add a charming water feature where traditional gutters aren’t present or desired.
Troubleshooting and Tips for Optimizing Your Rain Chain Performance
While rain chains are generally low-maintenance, minor issues can occasionally arise. Most common problems, such as splashing or inconsistent water flow, are straightforward to diagnose and fix with a few simple adjustments to your setup. Here are some common troubleshooting tips to ensure your rain chain operates beautifully and effectively:
-
Excessive Splashing: If water splashes out too much at the bottom, especially during heavy rains, consider these solutions:
- Wider Collection Basin: Replace your current basin with a wider or deeper one to better contain the water.
- Add River Rocks: Place a generous layer of river rocks, decorative gravel, or even a splash block inside your basin or directly on the ground. The rocks break the surface tension of the falling water, significantly reducing splash.
- Adjust Chain Length: Ensure the chain extends far enough into the basin or touches the ground. A chain that’s too short can cause more dramatic splashing.
- Install a Splash Guard: A small, strategically placed splash guard or diverter near the gutter outlet or just above the basin can help direct water more precisely onto the chain and prevent initial splash.
- Consider Cup-Style: If you have a link-style chain and persistent splashing is an issue, a cup-style chain generally offers better water containment, especially during heavy downpours.
-
Inconsistent or Poor Water Flow: If water isn’t flowing smoothly down the chain, or it’s bypassing the chain entirely:
- Check for Obstructions: Inspect the gutter outlet and the top links/cups of the rain chain for any leaves, twigs, or debris that might be causing a blockage. Clean them thoroughly.
- Ensure Proper Alignment: Verify that the gutter adapter is correctly inserted and centered in the gutter hole, and that the chain hangs perfectly straight down. A twisted or crooked chain will not guide water efficiently.
- Gutter Adapter Fit: Make sure the gutter adapter is snugly fitted into the gutter opening. Any gaps can cause water to flow around, rather than onto, the chain. You might need to add a bead of outdoor sealant if there are small gaps.
- Ice Build-up (Winter): In freezing temperatures, ice can form, creating blockages. Refer to the winter tips in the maintenance section.
-
Chain Swings Excessively in Wind: If your rain chain is swaying too much during breezy conditions:
- Anchor the Bottom: Re-evaluate your anchoring method. Ensure the bottom of the chain is securely fastened to an anchor stake, a heavy decorative stone, or within a robust rain barrel.
- Add Weight: For link chains, you can sometimes add a small, discreet weight to the very bottom link to help keep it taut.
- Heavier Chain Material: If wind is a persistent issue in your area, consider a rain chain made from a heavier gauge metal or with more substantial cups/links during your next purchase.
Maintenance and Seasonal Care for Your Rain Chain
One of the many benefits of rain chains is their low maintenance requirements. However, a little seasonal care and routine attention will ensure your rain chain continues to function beautifully and last for many years. Regular checks not only prolong its lifespan but also guarantee optimal performance.
Clean Debris Regularly to Maintain Flow
Over time, despite their open design, some leaves, small twigs, pollen, or accumulated dirt can collect within the cups or between the links of your rain chain. While not as prone to clogging as downspouts, these minor obstructions can still impede smooth water flow, leading to some splashing or reduced efficiency. To keep your rain chain performing optimally and looking its best, make it a habit to inspect it every few months, or more frequently during heavy leaf-shedding seasons.
Cleaning is typically very simple:
- Gently rinse the entire length of the chain with a garden hose to dislodge any accumulated dirt or loose debris.
- For stubborn grime, you can use a soft brush or a cloth dipped in mild soapy water to wipe down the cups and links.
- Always ensure the gutter opening where the chain connects is also clear of any debris to facilitate uninterrupted flow.
A clean rain chain ensures that rainwater flows smoothly and silently, maximizing its aesthetic and functional benefits.
Essential Winter Tips for Cold Climates
In regions that experience freezing temperatures and heavy snowfall, proper winterization of your rain chain is crucial to prevent potential damage to both the chain and your gutter system. Ice formation can add significant weight to the chain, stressing its connection point and potentially bending or cracking your gutters, fascia, or even the chain itself.
- Temporary Removal: The safest approach in areas with harsh winters is to temporarily remove your rain chain before the first hard freeze. Store it in a dry, protected area like a garage or shed until spring. This completely eliminates the risk of ice damage.
- De-icing Cables or Heat Tape: If you prefer to leave your rain chain up year-round, consider installing a specialized de-icing cable or heat tape along its length and within the gutter outlet. These low-voltage heating elements prevent ice from forming, allowing water to drain freely and reducing the risk of ice damming in your gutters. Ensure these are installed according to manufacturer instructions and local electrical codes.
- Monitor Ice Build-up: If you leave your chain up without de-icing, regularly monitor for excessive ice build-up. If a heavy ice sheath forms, it might be safer to carefully remove the chain or gently break the ice away (if safe to do so without damaging the chain or gutter).
- Material Considerations: Some rain chain materials, like solid copper, tend to withstand freezing and thawing cycles better than others, though all can be susceptible to damage from extreme ice weight.
Taking these precautions will protect your investment and ensure your rain chain is ready to perform again when warmer weather returns.
Beyond seasonal care, occasionally inspect the chain’s connections for any signs of corrosion, wear, or looseness. Tighten any fasteners as needed, and address minor issues promptly to extend the life and beauty of your rain chain.
Conclusion: Embrace the Beauty and Efficiency of Rain Chains
Installing a rain chain is more than just a functional upgrade; it’s an opportunity to infuse your home’s exterior with both practical efficiency and unique aesthetic charm. By replacing unsightly, clog-prone downspouts, you gain a beautiful water feature that manages rainwater with elegance, reduces maintenance, and even offers a soothing auditory experience during a storm.
This comprehensive guide has equipped you with the knowledge and step-by-step instructions needed to confidently undertake a DIY rain chain installation. From understanding the benefits and gathering the right tools to preparing your gutters and anchoring the chain securely, you now have all the essentials. We’ve also explored creative solutions for homes without gutters and provided vital tips for year-round care, ensuring your rain chain remains a cherished feature for years to come.
Whether you’re seeking to enhance your home’s curb appeal, simplify rainwater management, or simply introduce a unique and calming element to your outdoor space, a rain chain offers an accessible and rewarding solution. Take the first step today to transform your home’s drainage system into an architectural delight. With this guide, you’re ready to get started and enjoy the serene beauty of a functional rain chain.
Looking for more innovative ideas to elevate your outdoor living spaces and improve your home? Explore our other posts for a wealth of DIY tips, smart home improvement projects, and creative ways to maximize your home’s exterior appeal and functionality!
