Unlocking Elegance: Why and How to Paint Your Front Door Black for Lasting Beauty
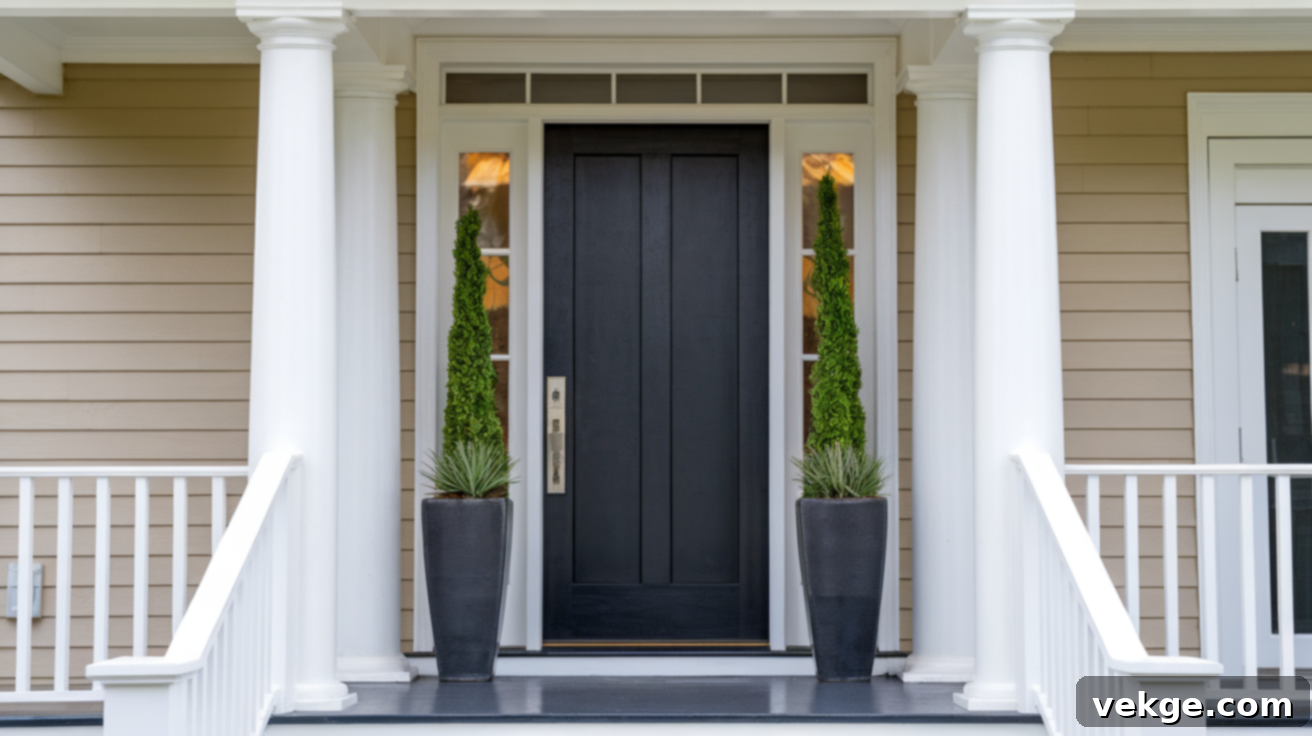
The allure of a black front door is undeniable, captivating homeowners and design enthusiasts alike. This timeless choice instantly elevates your home’s exterior, offering a sophisticated and classic aesthetic that makes a powerful first impression. Beyond its striking visual appeal, a black front door provides a host of practical advantages, from enhanced durability to easier maintenance. Many are discovering that this simple upgrade is a game-changer for curb appeal and property value.
In this comprehensive guide, we’ll delve into the compelling reasons why painting your front door black is a smart investment for your home. We’ll explore the stylistic versatility, the robust practical benefits, and provide you with a detailed, step-by-step tutorial on how to achieve a flawless, professional finish. Get ready to transform your entryway and add a touch of enduring elegance to your residence.
Why Choose a Black Front Door? Elevate Your Home’s Aesthetic and Functionality
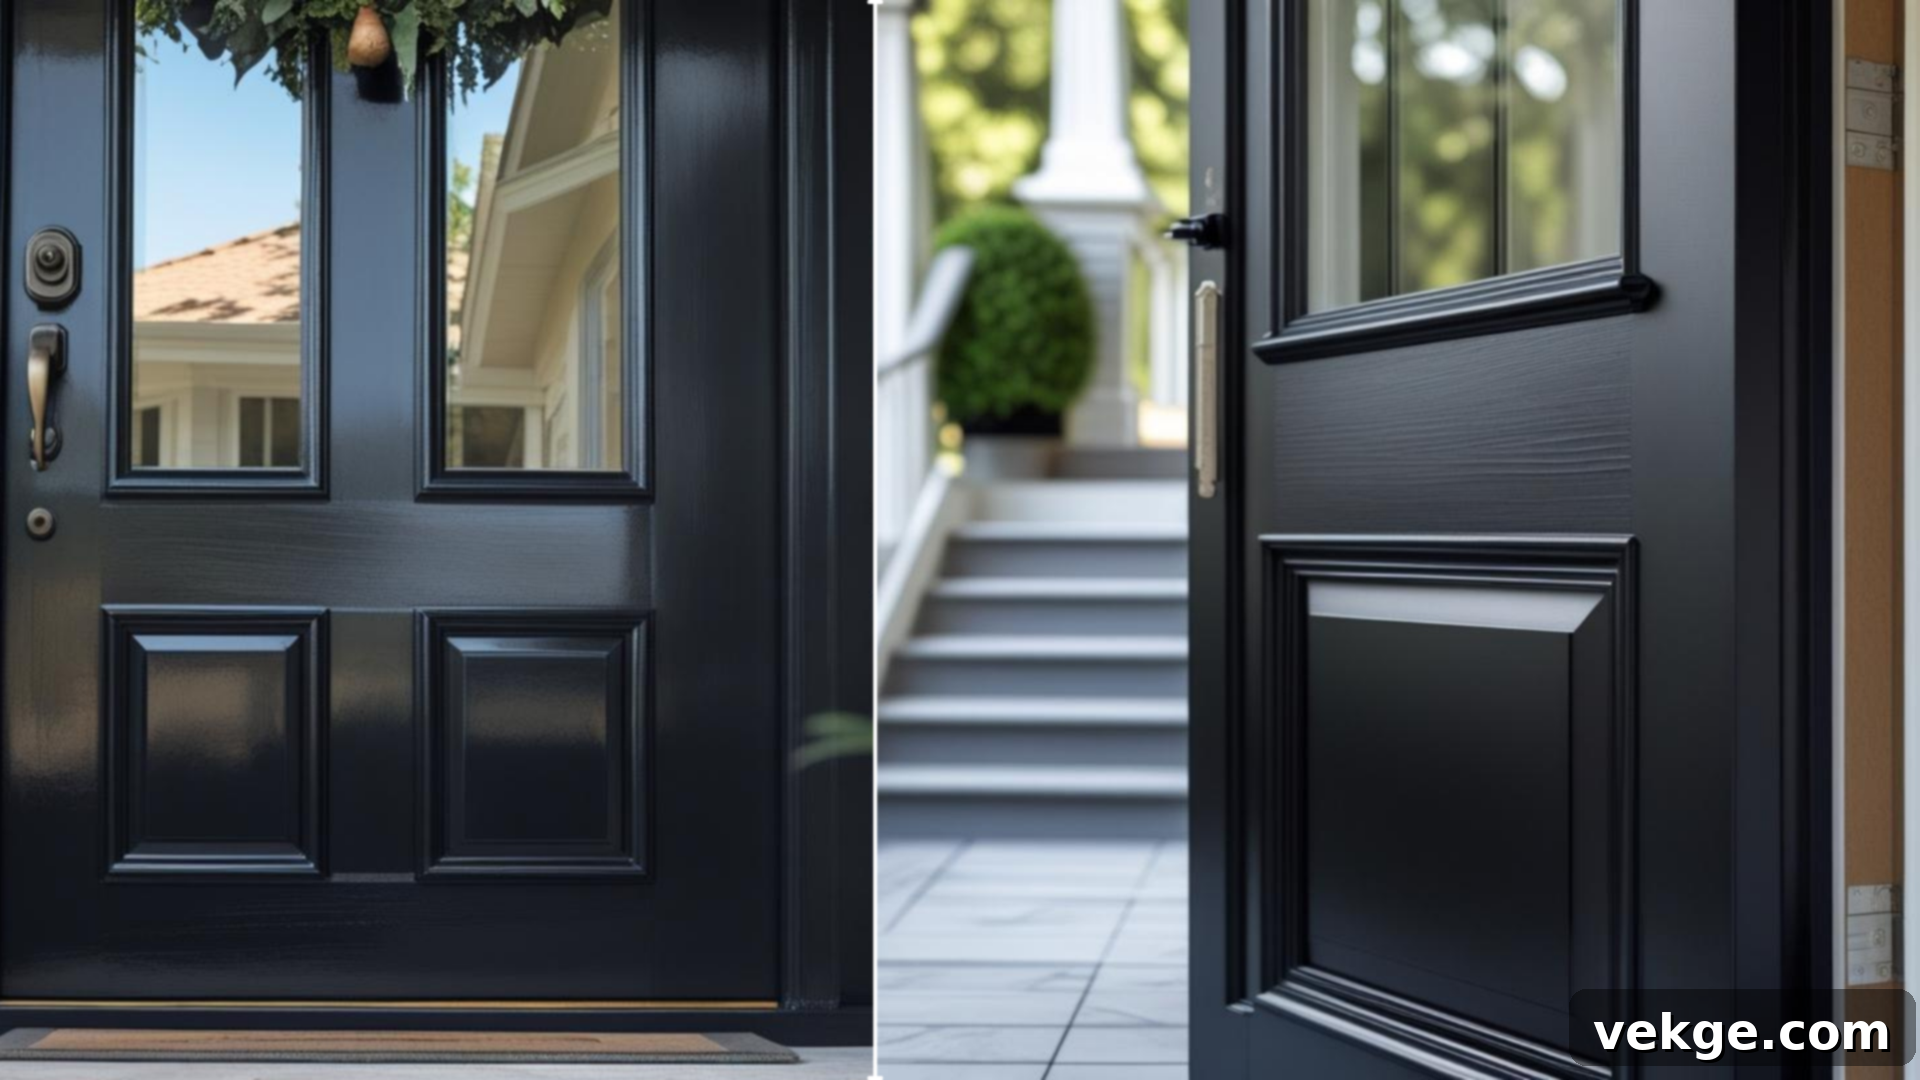
A black front door is more than just a paint choice; it’s a statement. This deep, rich hue instantly provides your home with a distinguished, refined appearance that commands attention. Its inherent versatility means it harmonizes beautifully with a vast array of architectural styles and exterior color palettes, making it a perennially popular option for homeowners looking to enhance their property’s allure.
Unmatched Curb Appeal and Timeless Style
There’s an undeniable charm to a black entryway. It imparts a sense of sophistication and modernity while simultaneously evoking classic elegance. Whether your home boasts a traditional colonial facade, a sleek contemporary design, or a charming farmhouse aesthetic, a black door acts as a perfect anchor. It creates a striking contrast against lighter exterior walls or trim, making your home instantly memorable and significantly boosting its curb appeal. This bold yet understated color is a design chameleon, effortlessly adapting to and enhancing various design schemes, ensuring your home makes a lasting impression.
Exceptional Durability and Resilience
When it comes to exterior applications, black paint offers remarkable resilience. Its dark pigmentation is inherently more robust against the elements compared to lighter shades. Black absorbs more sunlight, which can be beneficial in colder climates by helping to slightly warm the entrance, and its deeper tone naturally masks minor imperfections, fading, and the general wear and tear that outdoor surfaces endure. This makes it an ideal choice for a front door, which is constantly exposed to changing weather conditions, foot traffic, and daily use, ensuring its beauty endures over time.
Practical Benefits and Low Maintenance
One of the most appealing aspects of a black front door is its practical, low-maintenance nature. Unlike lighter colors that quickly highlight dust, smudges, and dirt, a black door effectively conceals these common blemishes. This means your door will maintain a clean and fresh appearance for longer periods, reducing the frequency of extensive cleaning. For a high-traffic area like a front entryway, this characteristic is invaluable, saving you time and effort while ensuring your home always looks its best. Its ability to hide dirt and resist visible scuffs contributes to its long-term aesthetic appeal, making it a truly smart and functional choice for any busy household.
Step-by-Step Guide: How to Achieve a Professional Black Front Door Finish
Embarking on a DIY painting project can be incredibly rewarding, especially when it results in a stunning transformation like a newly painted black front door. To ensure a smooth process and a truly professional, long-lasting finish, meticulous preparation and careful application are key. Follow these detailed steps to achieve a neat and polished result that will make your entryway the envy of the neighborhood.
Essential Tools and Materials for Your Black Door Painting Project
Before you begin, gather all the necessary tools and materials. Having everything on hand will streamline your painting process and help ensure a high-quality outcome. Here’s what you’ll need for your front door transformation:
- High-Quality Paint Brushes: An angled sash brush (2-inch or 2.5-inch) is ideal for cutting in clean lines around edges, panels, and intricate details. Invest in a good quality brush for a smoother, streak-free finish that minimizes brush marks.
- Small Paint Roller and Cover: A 4-inch or 6-inch foam roller or a fine-nap roller cover (e.g., mohair or microfiber) is perfect for achieving a smooth, even coat on the larger, flat surfaces of your door. This helps minimize brush strokes and provides a uniform appearance.
- Painter’s Tape: Crucial for masking off any areas you wish to protect from paint, such as glass panes, door hardware, hinges, or surrounding trim. Choose a high-quality tape that offers sharp lines and easy removal without leaving residue.
- Drop Cloths or Plastic Sheeting: Essential for protecting your porch, flooring, landscaping, and any other surfaces from accidental paint spills, drips, and splatters. Lay them down generously around your workspace to ensure ample coverage.
- Sanding Supplies: Sanding sponges (80-grit and 120/150-grit), sanding blocks, or an orbital sander (for large, flat doors) are needed for proper surface preparation, creating a ‘tooth’ for paint adhesion.
- Cleaning Supplies: Microfiber cloths, a bucket, mild soap (like dish soap), and water for thorough cleaning and degreasing.
- Primer: A high-quality exterior primer, such as Stix Primer, to ensure excellent paint adhesion, block stains, and promote a uniform topcoat color.
- Exterior-Grade Black Paint: Choose a durable, weather-resistant exterior paint in your desired finish (matte, satin, semi-gloss, or gloss). Ensure it’s suitable for the specific material of your door (wood, fiberglass, metal).
- Utility Knife/Box Cutter: For cutting plastic sheeting and tape cleanly.
- Screwdriver/Drill: To remove door hardware like handles and hinges for a cleaner paint job.
- Leaf Blower or Shop Vac: For efficient dust removal after sanding.
- Personal Protective Equipment (PPE): Gloves, safety glasses, and a respirator or mask for protection against fumes and paint splashes.
Step 1: Meticulous Door Preparation for Optimal Paint Adhesion
Proper preparation is the cornerstone of any successful painting project, and your front door is no exception. This critical initial phase ensures that your primer and paint adhere correctly, resulting in a smooth, durable, and long-lasting finish.
Begin by completely clearing the door of any attached items. This includes removing wreaths, hangers, decorative signs, and especially all door hardware like handles, knob sets, kick plates, and hinges. Use appropriate screwdrivers or drills for this task. If any hardware cannot be removed, such as a peep-hole or mail slot, you must meticulously mask it off with painter’s tape in the next step.
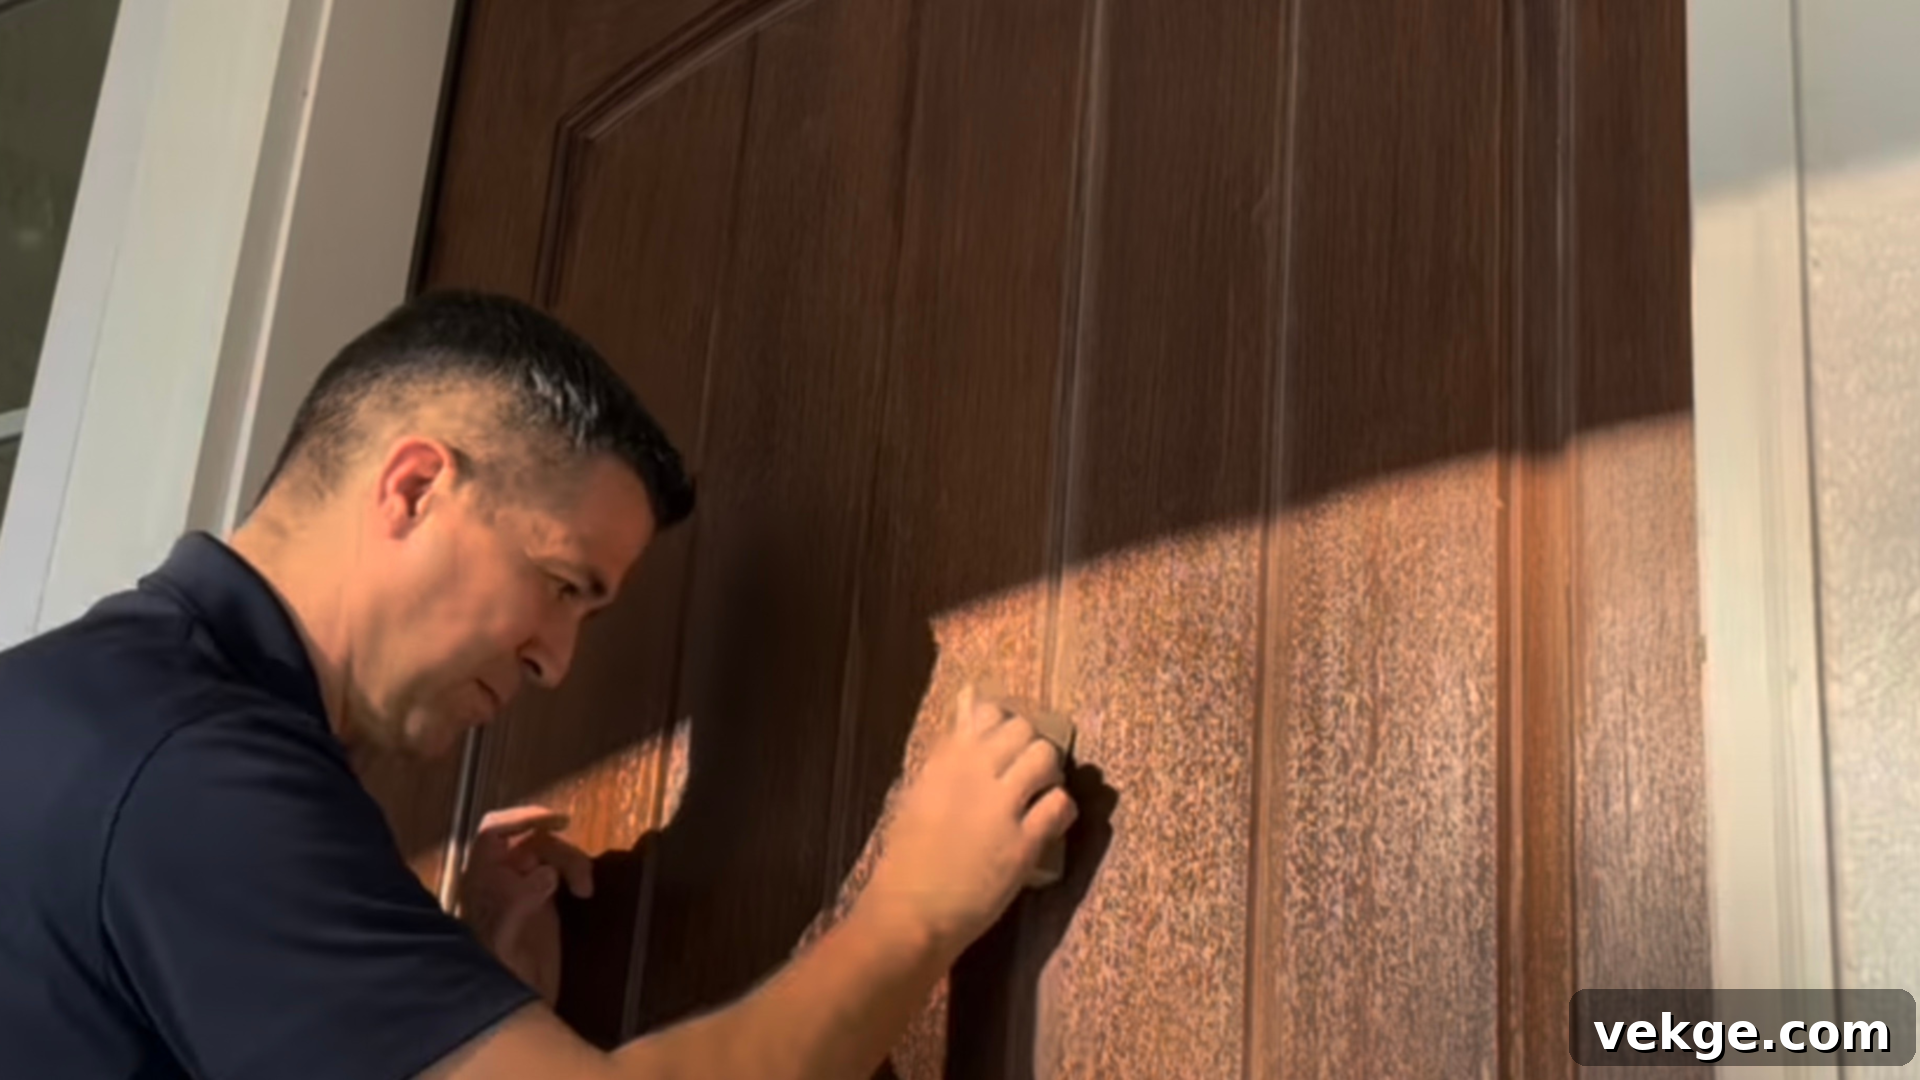
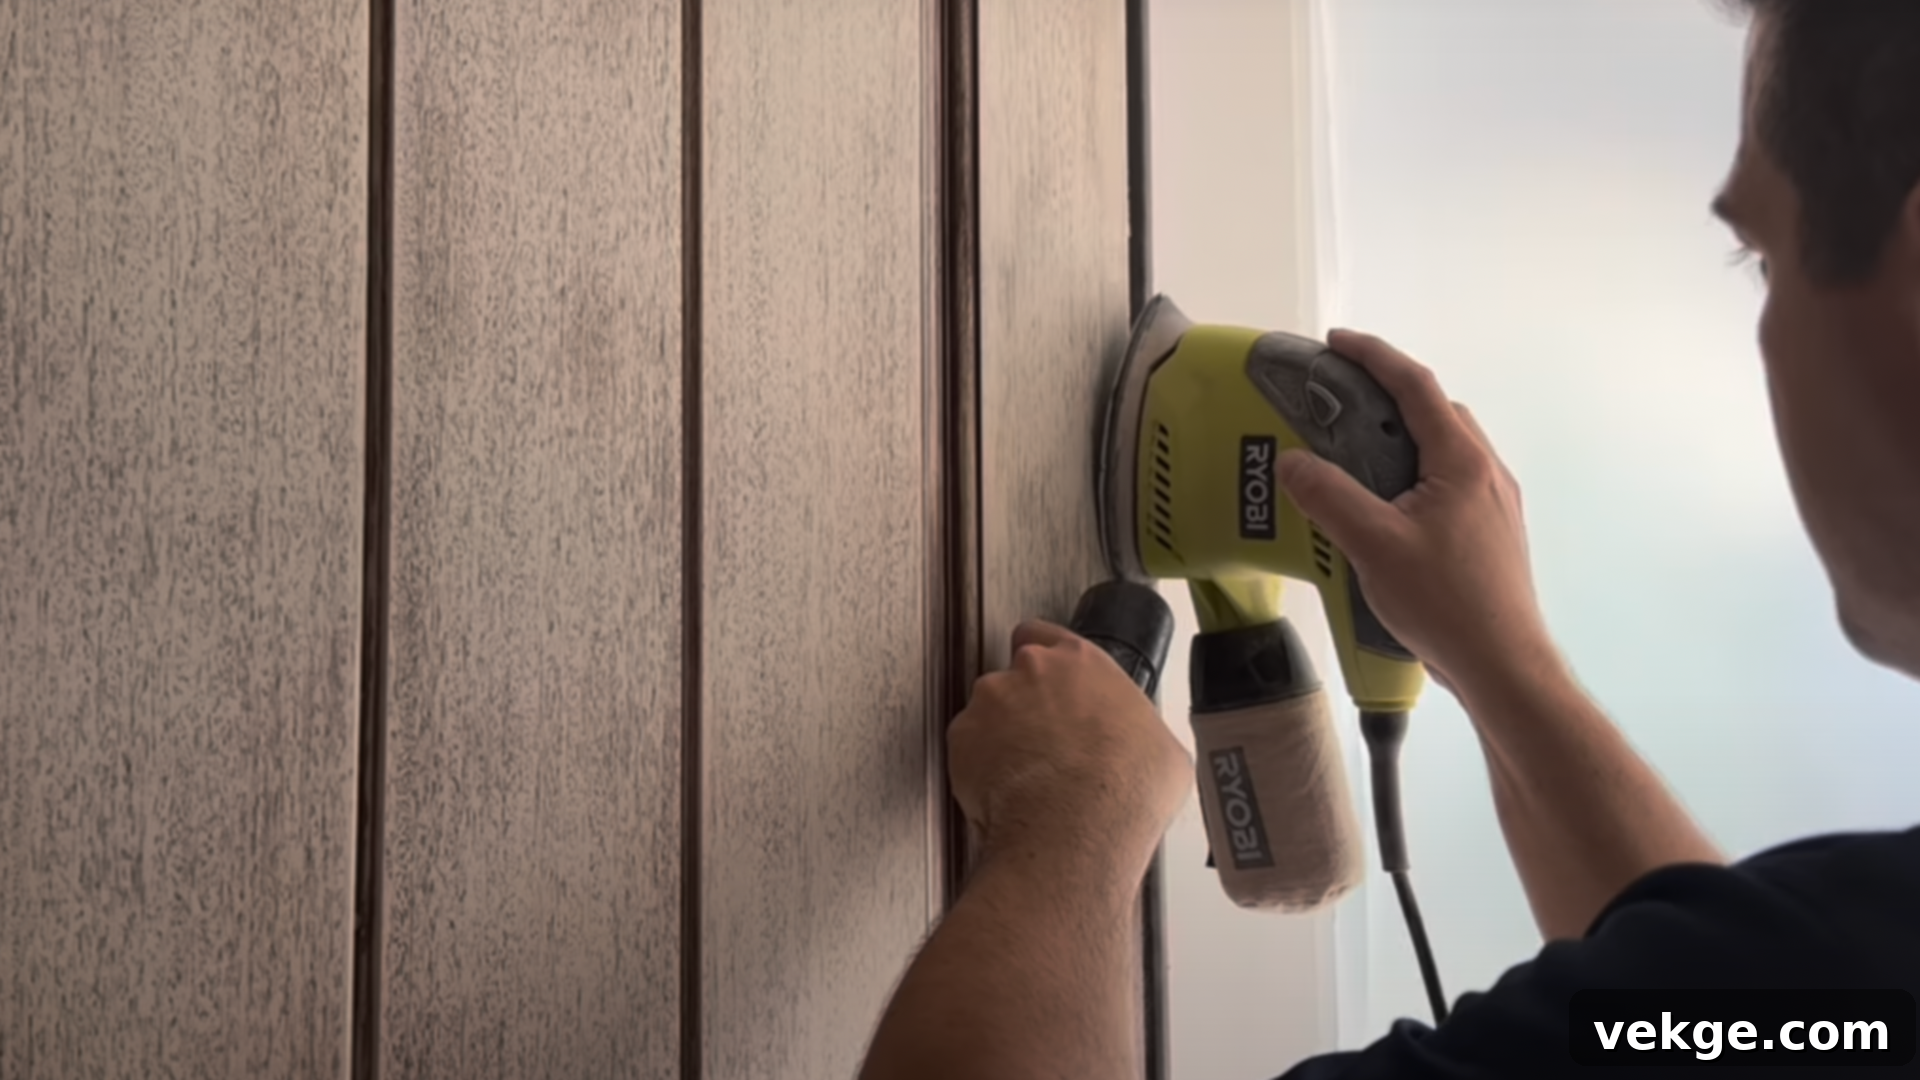
Next, it’s time to sand. Sanding creates a ‘tooth’ on the surface, allowing new paint layers to grip firmly. For newer doors or those with minimal existing paint, an 80-grit to 120-grit sanding sponge or fine-grit sandpaper is usually sufficient to lightly scuff the surface. If your door has old, peeling paint, rough spots, or previous uneven finishes, you might start with a coarser 60-grit sandpaper or block to remove loose material, then follow up with a finer grit (120-150) for a smoother base. Always sand in the direction of the wood grain to prevent noticeable scratches. For large, flat panels, an orbital sander can significantly speed up the process while maintaining an even finish. Pay close attention to any areas where the finish is flaking or where there are minor imperfections, aiming for a consistent texture across the entire door.
After thorough sanding, the door will be covered in fine dust. This dust must be completely removed before proceeding. Use a leaf blower or a shop vac to blast away loose particles from the door and surrounding area. Follow this with a meticulous wipe-down using a clean, damp microfiber cloth, rinsing it frequently. This two-pronged approach ensures all sanding residue is gone, leaving a pristine surface ready for the next steps. Do not skip this cleaning step, as any lingering dust can compromise paint adhesion and create a bumpy texture.
Step 2: Secure and Protect Surrounding Areas with Painter’s Tape and Sheeting
Protecting the areas adjacent to your front door is paramount to achieving a clean, professional finish and avoiding accidental paint splatters. This step is about precision and foresight, saving you significant cleanup time later and ensuring crisp paint lines.
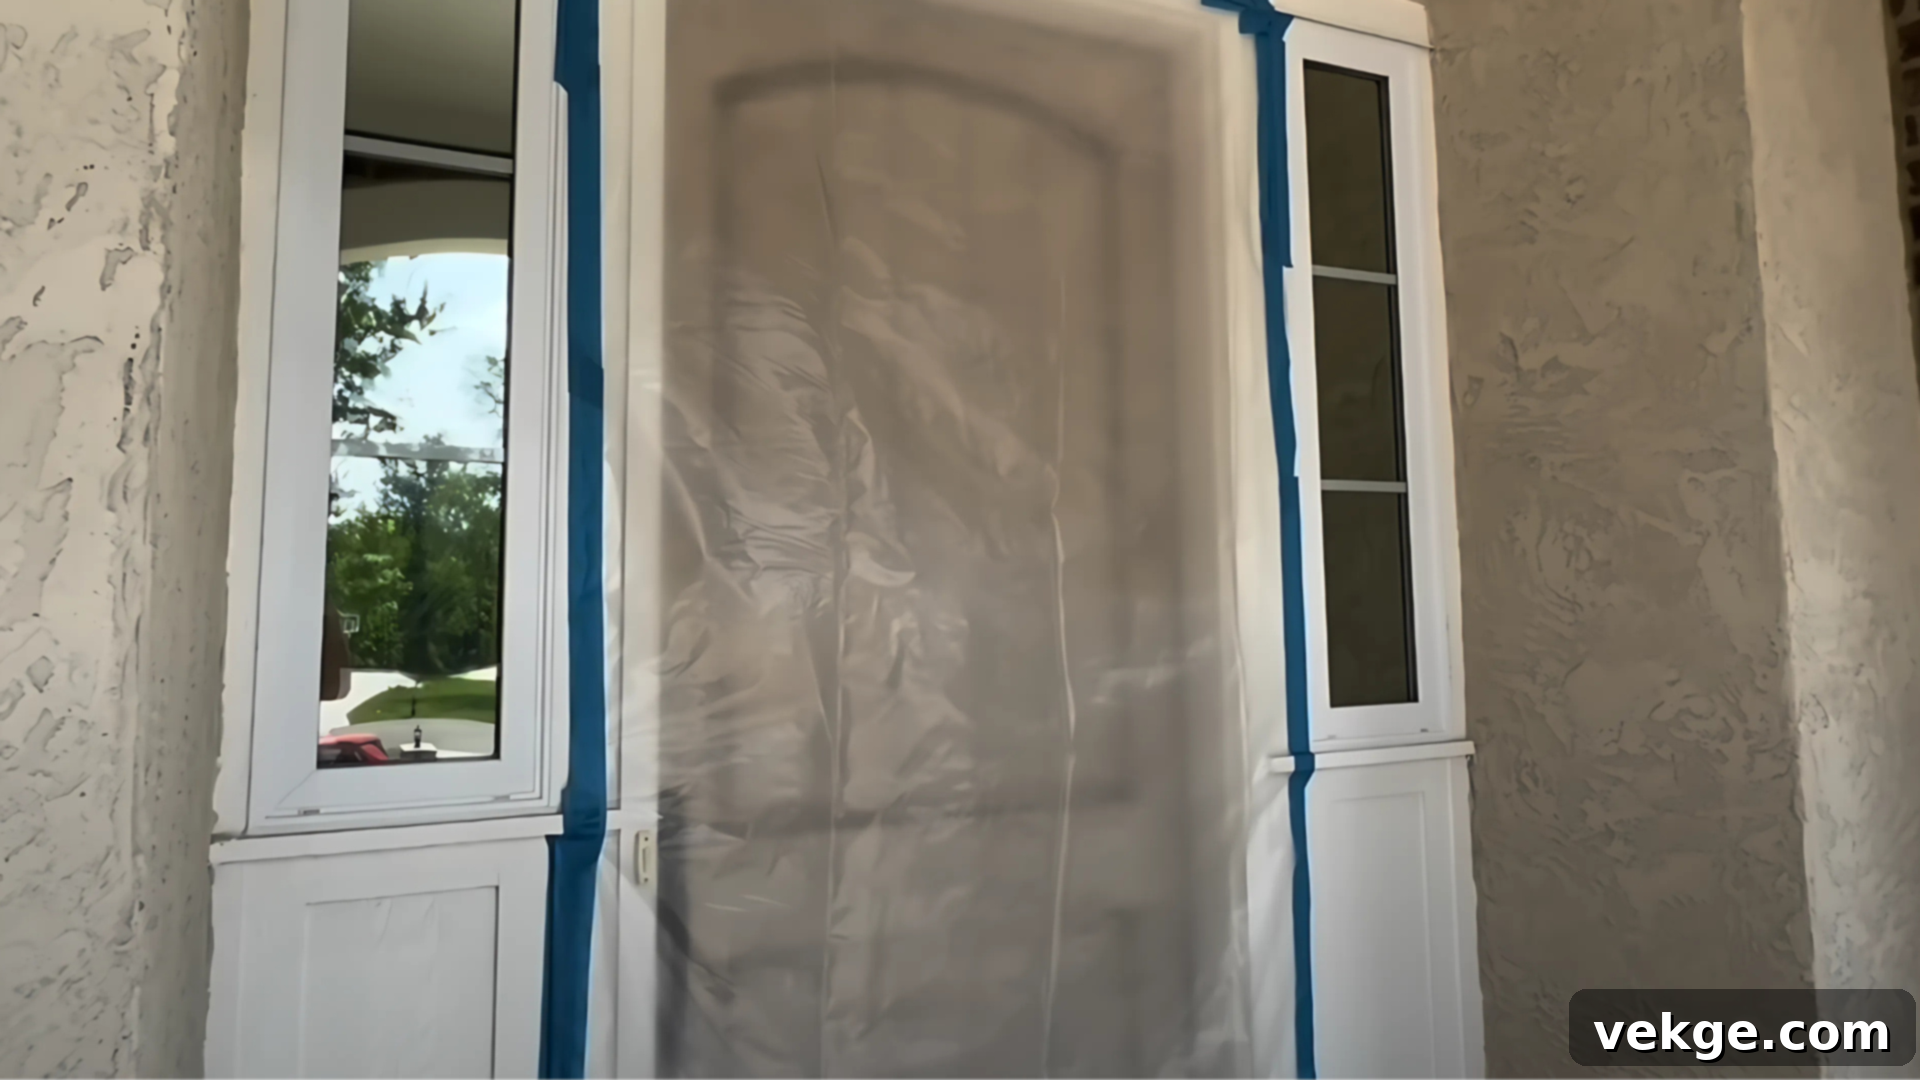
Start by carefully applying high-quality painter’s tape along the edges of any glass panes, the door frame, surrounding trim, and any other elements you do not wish to paint. Press the tape down firmly with a putty knife or your finger to create a crisp, clean line and prevent paint bleed. For areas below and around the door, such as your porch, steps, or landscaping, deploy drop cloths or plastic sheeting.
Measure and cut the plastic sheeting to adequately cover the entire area you want to protect. Secure this sheeting directly to the trim with painter’s tape, ensuring there are no gaps where paint might sneak through. Extend the sheeting well onto the ground, covering a generous perimeter to catch any drips or overspray. If you are painting on a breezy day, use extra tape or weights to firmly anchor the plastic sheeting, preventing it from shifting or blowing onto your freshly painted door. This diligent masking process not only keeps your surrounding surfaces pristine but also allows you to paint with greater confidence and less worry about errant drops.
Step 3: Thorough Cleaning for a Flawless Foundation
Even after sanding and dusting, microscopic particles can remain on the door’s surface, which can lead to an uneven or compromised finish. This cleaning step is essential for creating an impeccably clean canvas for your primer and paint, ensuring optimal adhesion and a truly smooth result.
Take a clean microfiber towel, slightly dampened with water and a tiny amount of mild dish soap (optional, but good for removing any lingering grease or grime). Wipe down the entire door meticulously, paying close attention to crevices, corners, and areas where dust might accumulate. Continue wiping and rinsing your towel until it consistently comes away clean, indicating that all traces of dust, dirt, and any sanding residue have been completely removed. This diligent cleaning is paramount; any remaining contaminants can prevent the primer and paint from bonding properly, potentially leading to peeling or a textured finish, which would detract from your desired elegant black look.
Once you are satisfied with the cleanliness, allow the door to dry completely. This is a critical waiting period; applying primer or paint to a damp surface can cause bubbling, poor adhesion, and an unsightly finish. Ensure the door is bone dry before proceeding, as this lays the foundation for a truly smooth, professional, and long-lasting black front door.
Step 4: Prime for Superior Adhesion and a Flawless Topcoat
Priming is a non-negotiable step that significantly impacts the final look and longevity of your painted front door. A high-quality exterior primer creates a uniform base, enhances paint adhesion, and helps block stains, ensuring your black topcoat looks rich, even, and vibrant without blotchiness.
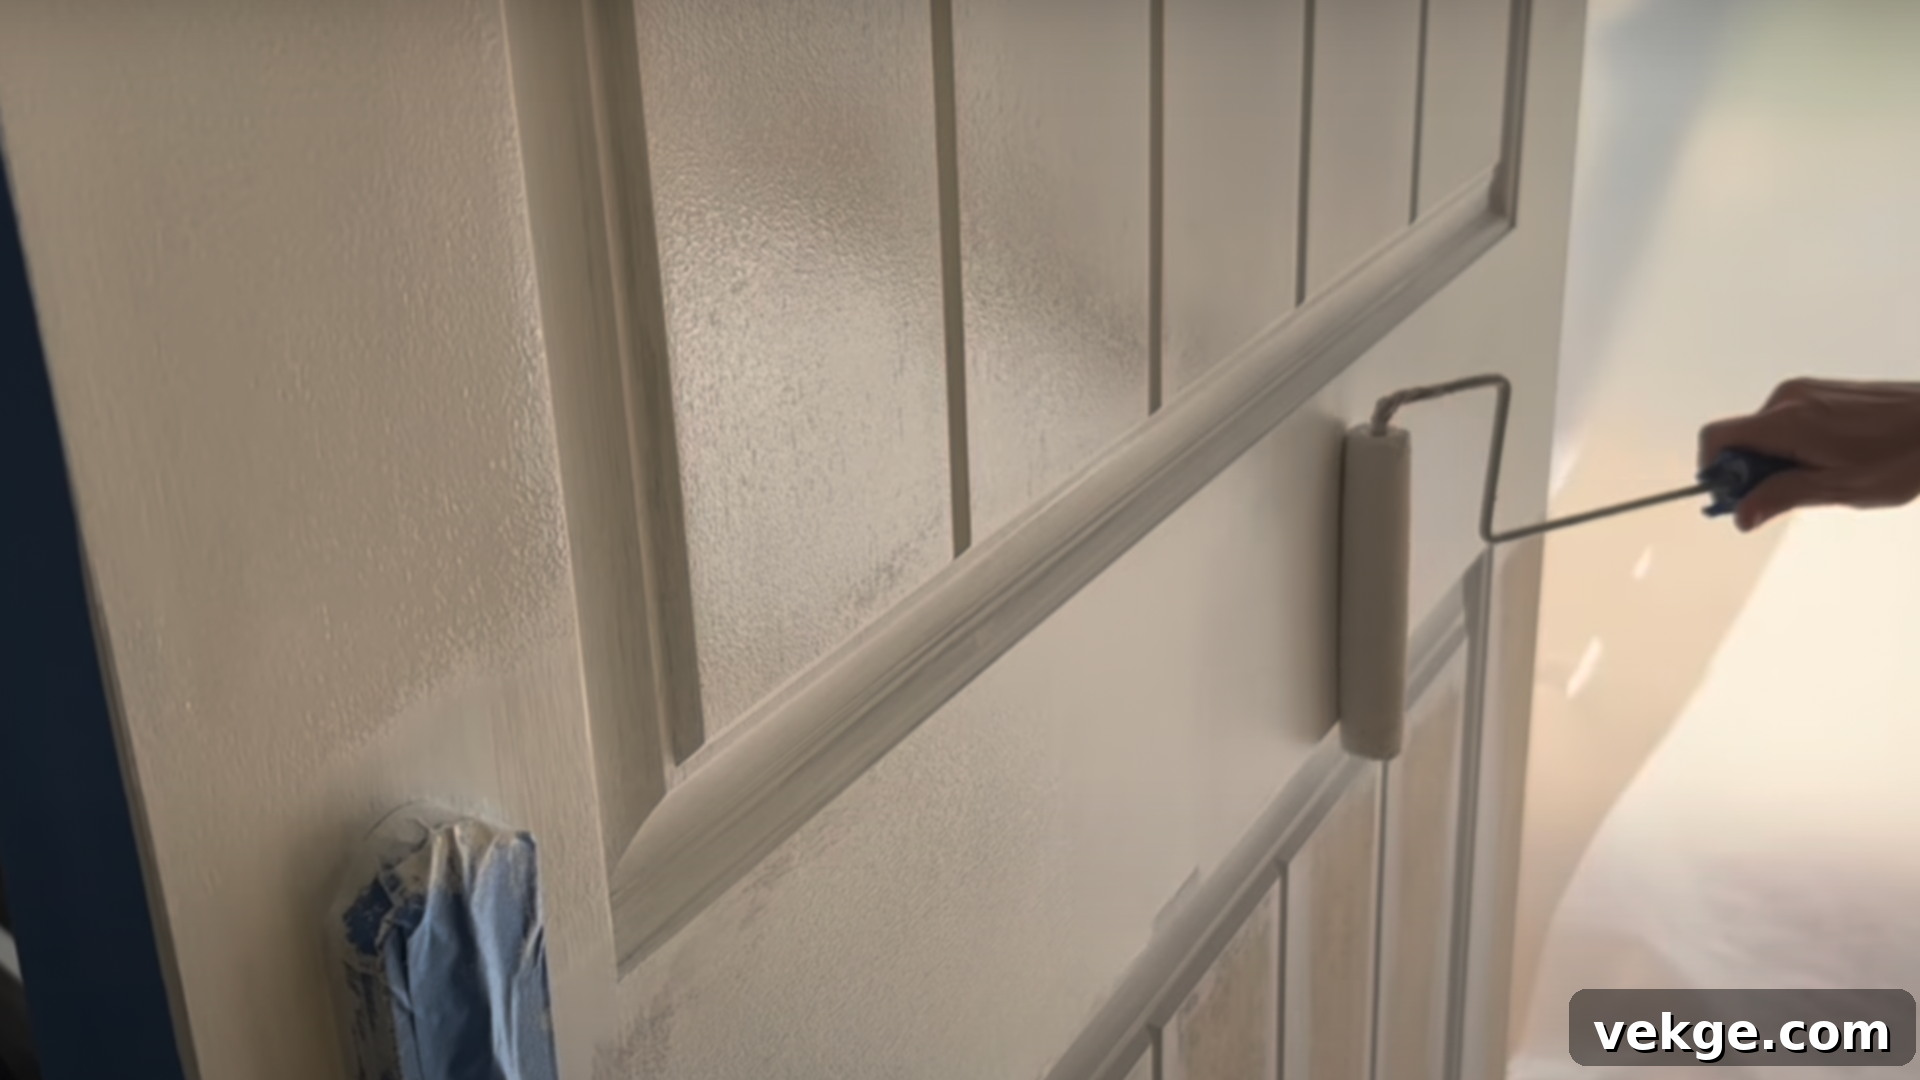
Using an angled brush, carefully apply an exterior-grade primer, such as Stix Primer (known for its excellent bonding properties), to all detailed areas of the door first. This includes the edges, recessed panels, raised trim, and any carved elements. Follow with a small roller for the larger, flat sections of the door, ensuring you apply the primer in thin, even coats. Roll in the direction of the wood grain to minimize texture and achieve a smooth foundation. Overloading your brush or roller can lead to drips, so apply judiciously and smoothly.
Allow the first coat of primer to dry completely according to the manufacturer’s instructions, typically around 2-4 hours, depending on humidity and temperature. Once dry, lightly sand any rough spots or imperfections with a fine-grit sanding sponge (e.g., 220-grit) to create an even smoother surface and wipe away any dust before applying a second coat of primer. Two thin coats of primer are usually recommended, especially if you’re painting a dark color over a light or stained door, as this will provide optimal coverage, adhesion, and a truly uniform base for your black paint, preventing inconsistencies and enhancing the depth of color.
Step 5: Expert Application of Your Chosen Black Exterior Paint
With your door perfectly primed and meticulously prepped, you’re ready for the most exciting part: applying the stunning black paint that will transform your entryway. Consistency and patience are your best allies here to achieve that coveted smooth, factory-like finish that will truly make your door shine.
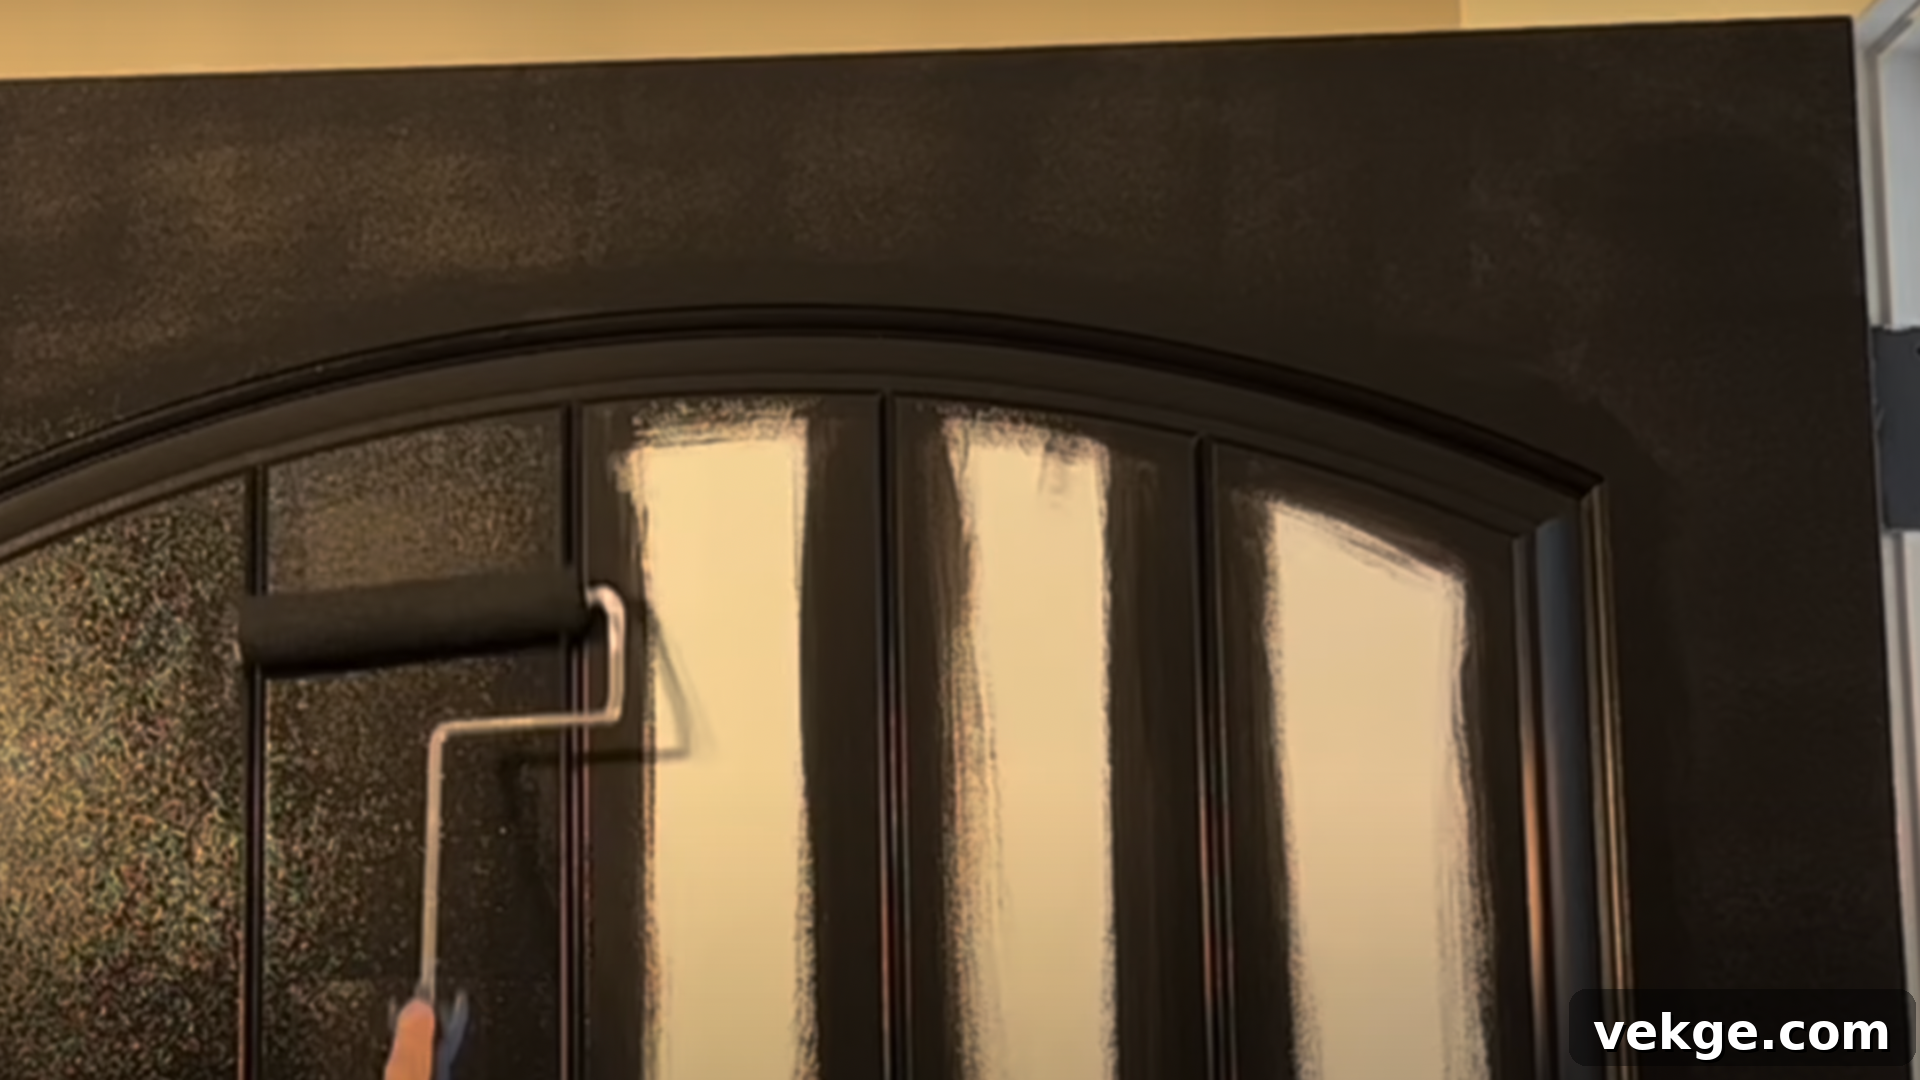
Before you begin, ensure your chosen exterior black paint is thoroughly stirred to mix the pigments evenly. Start with your angled brush, tackling all the intricate areas first – the edges, recessed panels, moldings, and any details. Work methodically to achieve clean, crisp lines, ensuring full coverage in these harder-to-reach spots. Once the detailed work is complete, switch to your small foam roller for the larger, flat sections of the door. Apply the paint in thin, even coats, always working in the direction of the wood grain. Avoid pressing too hard on the roller, as this can create unsightly lines, bubbles, or an uneven texture. The goal is smooth, consistent coverage without drips or heavy spots.
Allow the first coat of paint to dry completely according to the manufacturer’s recommendations (typically 4-6 hours, or longer in humid conditions). It’s crucial to resist the urge to apply a second coat too soon, as this can lead to peeling, blistering, or an uneven finish. Once dry, inspect the door for any light spots, minor imperfections, or dust nibs. If necessary, a very light sanding with a 220-grit sanding sponge can be done to smooth any irregularities before the next coat, followed by a quick wipe-down with a tack cloth to remove dust.
Apply a second thin, even coat of paint using the same technique as the first. Two coats are almost always essential for achieving the full depth of color, maximum durability, and a truly professional, uniform appearance, especially with a rich, dark color like black. In some cases, a third coat might be beneficial for heavily textured doors or if you’re covering a dramatically different underlying color. After the final coat, allow the paint to dry to the touch, but understand that “curing” – the process where the paint hardens completely and achieves its full durability – can take several days to a few weeks, depending on the paint type and environmental conditions. Avoid heavy use or reattaching hardware until the paint has fully cured to prevent damage.
Step 6: The Finishing Touches and Thoughtful Cleanup
Congratulations! You’re almost ready to admire your stunning new black front door. This final stage involves refining the finish, ensuring all elements are perfect, and carefully packing away your tools.
Once the paint is dry to the touch (refer to your paint’s specific dry time, usually a few hours, but check manufacturer guidelines), carefully and slowly remove all painter’s tape. Pull the tape back at a 45-degree angle to minimize the risk of pulling up any fresh paint. If you notice any areas where paint has slightly bled under the tape or where the coverage appears uneven, use a small artist’s brush or a very fine detail brush to perform precise touch-ups. Dip the brush sparingly into your black paint and apply it with a steady hand to blend seamlessly with the existing finish, creating crisp, clean edges.
Allow ample time for the door to dry thoroughly and begin its curing process before even thinking about reattaching the hardware you removed in Step 1. Rushing this step can lead to fingerprints, scratches, or marring of your fresh paint, undoing all your hard work. The exact drying and curing time will vary based on the type of paint used, humidity levels, and ambient temperature, but generally, waiting at least 24-48 hours before handling and reattachment is a safe bet for basic reinstallation, with full curing taking longer. Once fully dry and sturdy, carefully reattach your door handles, locks, and any other decorative elements. Take this opportunity to clean your hardware before reinstallation to ensure it sparkles against your new black door.
Finally, clean all your brushes and rollers immediately with soap and water (for water-based paints) or appropriate solvents (for oil-based paints). Properly cleaning and storing your tools will ensure they are ready for your next home improvement project and extend their lifespan. Your diligent efforts will culminate in a magnificently transformed front door, featuring smooth, even coverage and a striking black finish that dramatically enhances your home’s curb appeal and welcoming aesthetic.
For a more detailed visual walkthrough of the entire painting process, including expert tips and common pitfalls to avoid, watch the comprehensive video tutorial below:
Choosing the Perfect Black Paint Finish and Type for Your Front Door
The choice of paint finish and base type can dramatically influence the final appearance, durability, and maintenance requirements of your black front door. Understanding the distinctions will help you select the ideal product for your specific home and climate conditions, ensuring satisfaction with your new look.
Paint Sheen: Matte, Satin, or Gloss?
The “sheen” refers to how much light the paint reflects, impacting both aesthetics and practicality. It’s a crucial decision for your door’s final look.
- Matte Finish:
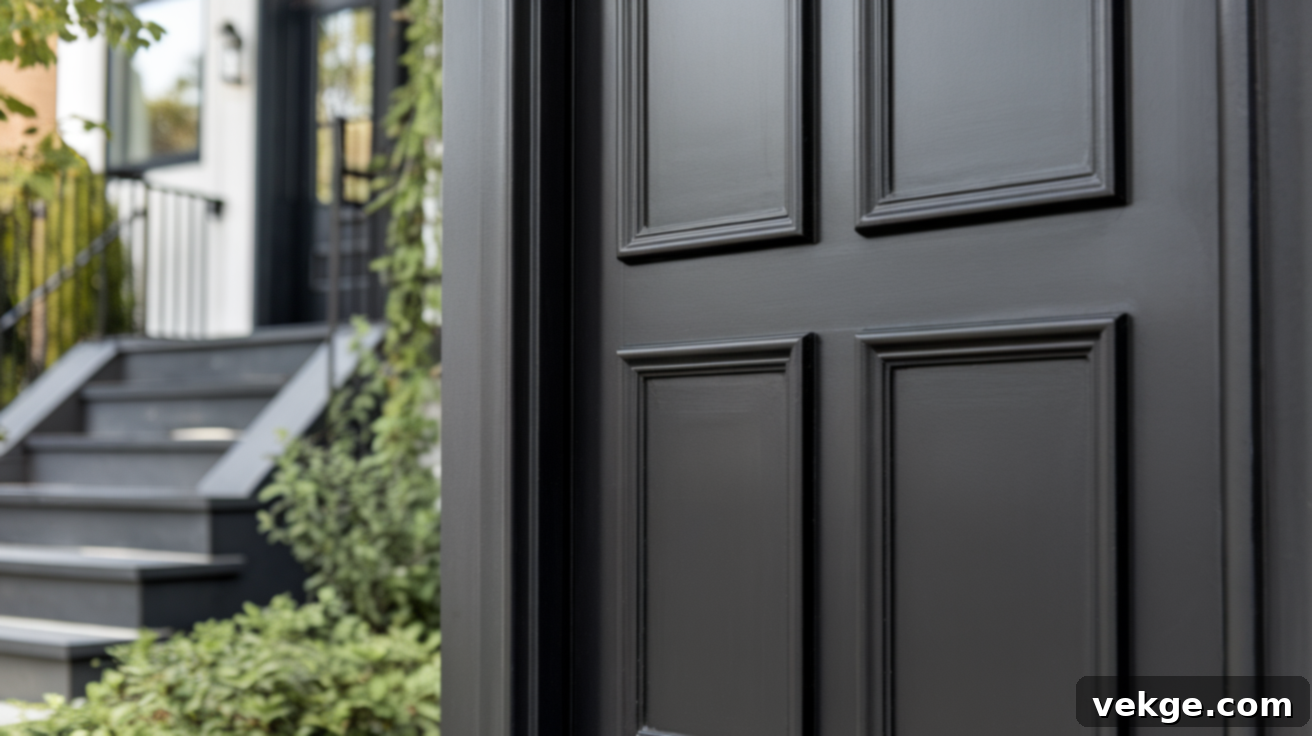
A matte or flat finish offers a sophisticated, understated, and non-reflective appearance. It’s excellent for concealing minor surface imperfections or dents on older doors, giving a rich, velvety depth to the black color. However, matte finishes can be more prone to showing scuffs, easily collecting dirt, and can be slightly harder to clean without altering the finish. They are generally less durable than higher sheens for high-traffic exterior surfaces, requiring more frequent maintenance.
- Satin/Eggshell Finish:
Often considered the sweet spot for exterior doors, a satin or eggshell finish offers a subtle, soft sheen that’s more forgiving than matte but less reflective than gloss. It strikes a perfect balance between elegance and practicality. It’s significantly more durable and easier to clean than matte, making it a very popular choice for front doors. It also helps hide minor imperfections better than a high-gloss finish, providing a balanced and attractive look that works well with most home styles.
- Gloss/Semi-Gloss Finish:
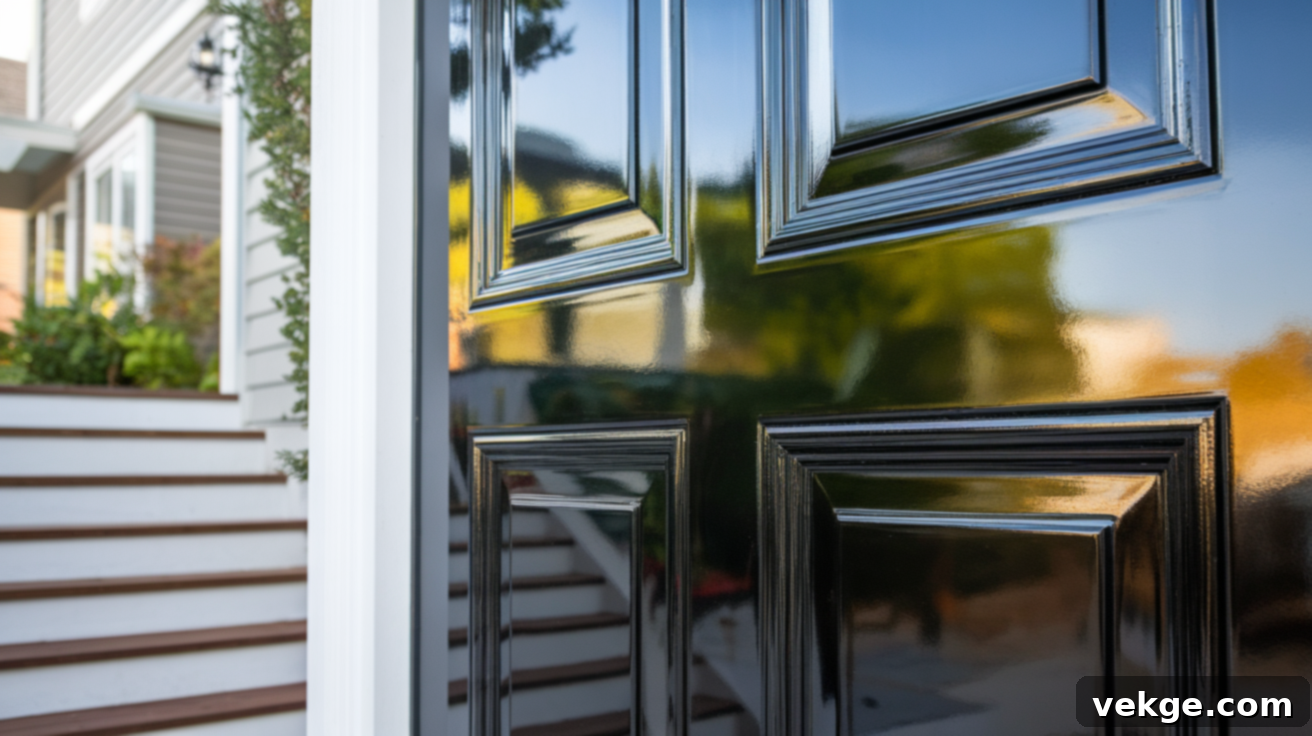
A gloss or semi-gloss finish delivers a striking, shiny, and highly polished appearance that reflects light beautifully, making your black door truly pop and appear almost lacquered. These finishes are exceptionally durable, highly resistant to moisture, and incredibly easy to clean, making them ideal for busy entryways and challenging weather conditions. The trade-off is that their high reflectivity tends to accentuate any surface flaws, brush strokes, or imperfections, so meticulous preparation is absolutely crucial for a truly flawless high-gloss black door.
Paint Base: Oil-Based vs. Water-Based (Latex/Acrylic)
The chemical composition of the paint also plays a significant role in its performance, application, and environmental impact.
- Oil-Based Paint:
Traditionally favored for exterior applications due to its exceptional durability and hardness. Oil-based paints provide a very smooth, level finish that is highly resistant to abrasion, moisture, and extreme weather conditions. They are known for their long-lasting shine and superior adhesion, especially over previously oil-painted surfaces, and often perform exceptionally well on wood. However, they take significantly longer to dry, emit stronger fumes requiring good ventilation, and require mineral spirits or paint thinner for cleanup. They can also yellow slightly over time, though this is less noticeable with black paint.
- Water-Based Paint (Latex or Acrylic):
Modern water-based exterior paints (often acrylic-latex blends) have come a long way and are now excellent choices for front doors. They offer much faster drying times, have low VOCs (volatile organic compounds) and fewer offensive fumes, and clean up easily with just soap and water. While some older formulations might have been less durable than oil-based, today’s high-quality acrylic-latex exterior paints are remarkably tough, flexible (resisting cracking and chipping), and provide excellent color retention without yellowing. They are generally preferred for their ease of use, environmental benefits, and overall great performance for exterior surfaces.
For most homeowners, a high-quality water-based exterior paint in a satin or semi-gloss finish will offer the best balance of durability, ease of application, environmental considerations, and aesthetic appeal for a black front door.
Common Painting Mistakes to Avoid for a Perfect Black Front Door
Even with the best intentions, certain missteps during the painting process can compromise the beauty and longevity of your black front door. Being aware of these common errors can help you achieve a truly professional and enduring finish. Pay close attention to these pitfalls and how to steer clear of them for a successful project:
- Overloading Your Brush or Roller:
A heavy hand with paint is a common culprit for drips, runs, and an uneven, textured finish. Instead of dipping your brush deeply or saturating your roller, aim for smaller, manageable amounts of paint. Apply it in thin, even layers, allowing each coat to dry thoroughly. If you notice a drip forming, gently smooth it out with your brush or roller before it dries. Patience and light coats will yield a significantly smoother, streak-free result.
- Inadequate Surface Preparation:
This is arguably the most critical mistake. Skipping or rushing the cleaning and sanding steps is a direct path to paint adhesion issues, leading to premature peeling, chipping, or bubbling. Remember, paint needs a clean, slightly abraded surface to bond effectively. Always thoroughly clean the door to remove all dirt, grease, and grime, then sand to create a smooth ‘tooth’ for the primer and paint to grip. A well-prepped surface is the undeniable foundation for a durable, long-lasting finish.
- Ignoring Weather Conditions and Temperature:
Exterior painting is highly susceptible to environmental factors. Painting on excessively hot, sunny days can cause the paint to dry too quickly, leading to brush marks, streaks, and poor adhesion. Conversely, painting in cold or overly humid conditions can prevent proper drying and curing, resulting in a soft, susceptible finish prone to damage. Always check the paint manufacturer’s recommended temperature and humidity range. Aim for mild, overcast days with low humidity for optimal results.
- Neglecting Proper Ventilation and Personal Protective Equipment (PPE):
Even low-VOC paints emit fumes, and sanding creates fine dust. Ensure adequate ventilation by opening nearby windows and doors to allow fresh air circulation, especially if you’re working in an enclosed porch area. More importantly, always wear personal protective equipment: a respirator or face mask (specifically designed for paint fumes and dust) to protect your lungs, and safety goggles to shield your eyes from splashes. Gloves are also essential to keep your hands clean and protected from chemicals.
- Rushing Drying and Curing Times:
Each coat of primer and paint needs to dry completely before the next is applied, and the final coat needs to cure before the door is subjected to normal use or hardware is reattached. Rushing these stages can lead to sticky surfaces, smudges, indents, and a significantly shortened lifespan for your paint job. Always adhere strictly to the manufacturer’s recommended drying and re-coat times, which can vary based on paint type, temperature, and humidity. Patience will pay off in durability.
- Using Inferior Quality Tools and Paint:
While it might seem like a way to save money, opting for cheap brushes, rollers, and paint can sabotage your efforts. Low-quality brushes shed bristles, rollers leave lint, and cheap paint often offers poor coverage, inconsistent color, and limited durability. Investing in good quality exterior-grade paint and reputable tools will not only make the job easier and more enjoyable but will also result in a superior, longer-lasting finish that stands up to the elements and retains its beauty.
By consciously avoiding these common painting mistakes and prioritizing safety throughout your project, you’ll significantly increase your chances of achieving a stunning, smooth, and impressively durable black front door that enhances your home for years to come.
Where to Purchase Premium Black Paint for Your Front Door Project
Selecting the right brand of exterior paint is crucial for achieving a beautiful and resilient finish. High-quality paints offer better coverage, durability, and color retention, ensuring your black front door looks fantastic for years. Here are some reputable brands where you can find excellent options for your project, each known for their performance and range of colors:
- Sherwin-Williams: A favorite among professionals and DIYers alike, Sherwin-Williams is renowned for its premium exterior paints. Their lines, such as Emerald Exterior or Duration Exterior, offer exceptional durability, weather resistance, and a vast selection of colors, including iconic blacks like Tricorn Black (SW 6258), a deep and true black that’s highly popular for front doors. Visit their stores for expert advice, color matching, and high-quality primers.
- Behr: Available exclusively at Home Depot, Behr offers a wide range of high-performance exterior paints that are a popular choice for homeowners tackling DIY projects. Their paints, like Behr Premium Plus or Marquee Exterior, are known for excellent coverage, fade resistance, and a variety of finishes, providing robust protection against the elements at an accessible price point. They offer numerous black shades to choose from.
- Rust-Oleum: While often associated with rust prevention and specialty coatings, Rust-Oleum also offers a solid selection of exterior paints, primers, and protective enamels. They are particularly known for their durable, long-lasting protection and convenience, often available in easy-to-use spray paint formulations, which can be great for quick touch-ups or smaller doors, as well as traditional brush-on formulas. Their products are widely available at hardware stores and home centers.
- Benjamin Moore: Known for its rich, deep colors and superior quality, Benjamin Moore offers exceptional exterior paints that stand up beautifully to harsh weather. Their Aura Exterior and Regal Select Exterior lines are highly recommended for front doors, providing excellent hide, superior color retention, and a smooth, luxurious finish. Consider their “Black Beauty” or “Onyx” shades for a sophisticated and deep black look. Benjamin Moore products are typically available at independent paint retailers.
Always choose an exterior-grade paint specifically formulated for doors or trim, and consider a paint-and-primer-in-one option for added convenience and performance, although a dedicated primer (as discussed in Step 4) often yields the best results for longevity and depth of color.
Maintaining the Elegance: Care Tips for Your Black Front Door
A beautifully painted black front door can be a long-lasting asset to your home, but like any exterior feature, it benefits immensely from regular care and attention. Following these straightforward maintenance tips will help preserve its striking appearance and ensure its durability against the elements for many years, keeping your curb appeal at its peak.
- Routine Cleaning is Key:
To prevent dirt, pollen, spiderwebs, and environmental grime from accumulating and dulling your door’s finish, make it a habit to clean your black front door every two to four weeks. Use a soft cloth or sponge with a solution of mild dish soap and warm water. Gently wipe down the entire surface, then rinse thoroughly with clean water using another cloth to remove any soap residue. This simple routine is essential for maintaining its fresh, vibrant, and deep black look.
- Steer Clear of Abrasive Cleaners and Chemicals:
While black paint is durable, harsh abrasive cleaners, strong solvents (like ammonia-based cleaners), or chemical-laden products can strip the finish, cause discoloration, or even permanently damage the paint layers. Always opt for gentle, pH-neutral cleaners specifically designed for painted surfaces. A mild soap and water solution is almost always sufficient and the safest option for long-term paint protection.
- Promptly Address Scratches and Chips:
Accidents happen, and even the most durable paint can get a minor scratch or chip from keys, pets, or everyday use. Inspect your door periodically, especially after storms or heavy foot traffic. For small imperfections, use a fine artist’s brush and your leftover black paint to carefully touch up the affected areas. Early intervention prevents these minor damages from worsening or exposing the underlying material to moisture, ensuring the door maintains a smooth and flawless appearance.
- Monitor for Signs of Wear and Fading:
Exposure to intense sunlight, harsh winds, and precipitation over time can eventually lead to some fading or wear, particularly on the top edge or the side of the door that receives the most sun. Conduct seasonal checks (e.g., spring and fall) for any noticeable dullness, chalkiness, or thinning of the paint. If you observe significant fading or wear, consider applying a fresh coat of paint to restore its vibrancy and protective qualities before issues become severe, extending its lifespan.
- Keep Door Hardware Pristine:
The hardware – doorknobs, handles, hinges, and kick plates – can significantly impact the overall presentation of your black door. Regularly wipe down all metal hardware with a soft cloth and an appropriate cleaner for its material (e.g., brass cleaner for brass, mild soap for chrome). Keeping the hardware sparkling clean will ensure it complements, rather than detracts from, your beautifully painted door, enhancing the overall luxurious feel.
- Consider a Protective Topcoat or Sealant (Optional but Recommended):
Depending on your climate and the level of exposure your door receives, applying a clear protective sealant or a UV-resistant topcoat every few years can add an extra layer of defense. This additional step can provide enhanced protection against sun fading, moisture, and abrasion, significantly extending the life and beauty of your black paint finish. Consult with your paint supplier for compatible clear coat options that won’t alter the desired sheen.
By investing a little time in these straightforward maintenance practices, your elegant black front door will continue to make a welcoming and sophisticated statement, enhancing your home’s curb appeal for many years to come.
Conclusion: Embrace the Enduring Elegance of a Black Front Door
Painting your front door black is a transformative project that offers a remarkable return on investment, significantly enhancing your home’s aesthetic appeal and property value. This bold yet classic choice instantly conveys sophistication, creating a striking focal point that harmonizes with virtually any architectural style, from traditional to contemporary, making a powerful and timeless statement.
Beyond its undeniable visual impact, a black front door offers superior practical benefits, including impressive durability against the elements and wonderfully low-maintenance characteristics. Its ability to withstand harsh weather and cleverly conceal everyday dirt and grime makes it a smart, long-lasting choice for any homeowner seeking both enduring beauty and optimal functionality in their entryway.
By diligently following the detailed, step-by-step guide provided in this article – focusing on thorough preparation, carefully selecting the appropriate paint type and finish, and applying careful technique while consciously avoiding common painting pitfalls – you are now well-equipped to achieve a professional, enduring finish. Remember that patience, precision, and adherence to manufacturer guidelines are your most valuable tools, ensuring your newly painted black door remains a source of pride and a welcoming statement for years to come.
Ready to unlock the full potential of your home’s exterior? Take the leap and give your front door the sophisticated black makeover it deserves, instantly boosting your curb appeal and making a lasting impression. For more inspiring ideas and practical advice on elevating your living spaces, explore our other home improvement blogs and embark on your next rewarding DIY journey!
