Crafting Enchanting Pressed Flower Lanterns: Your Complete DIY Guide
Have you ever paused to admire a beautiful flower, wishing you could capture its delicate charm forever? That very sentiment led me on a journey to discover the art of creating pressed flower lanterns. These exquisite pieces transform humble glass jars and delicate dried blooms into captivating decorative accents or thoughtful, personalized gifts.
In this comprehensive guide, I’ll walk you through every step of crafting your own stunning pressed flower lanterns. From gathering the right supplies to mastering the application techniques and avoiding common pitfalls, you’ll gain all the knowledge needed to illuminate your space with handmade beauty. By the end, you’ll be ready to create a unique lantern that truly reflects your personal style and love for nature.
What Are Pressed Flower Lanterns?
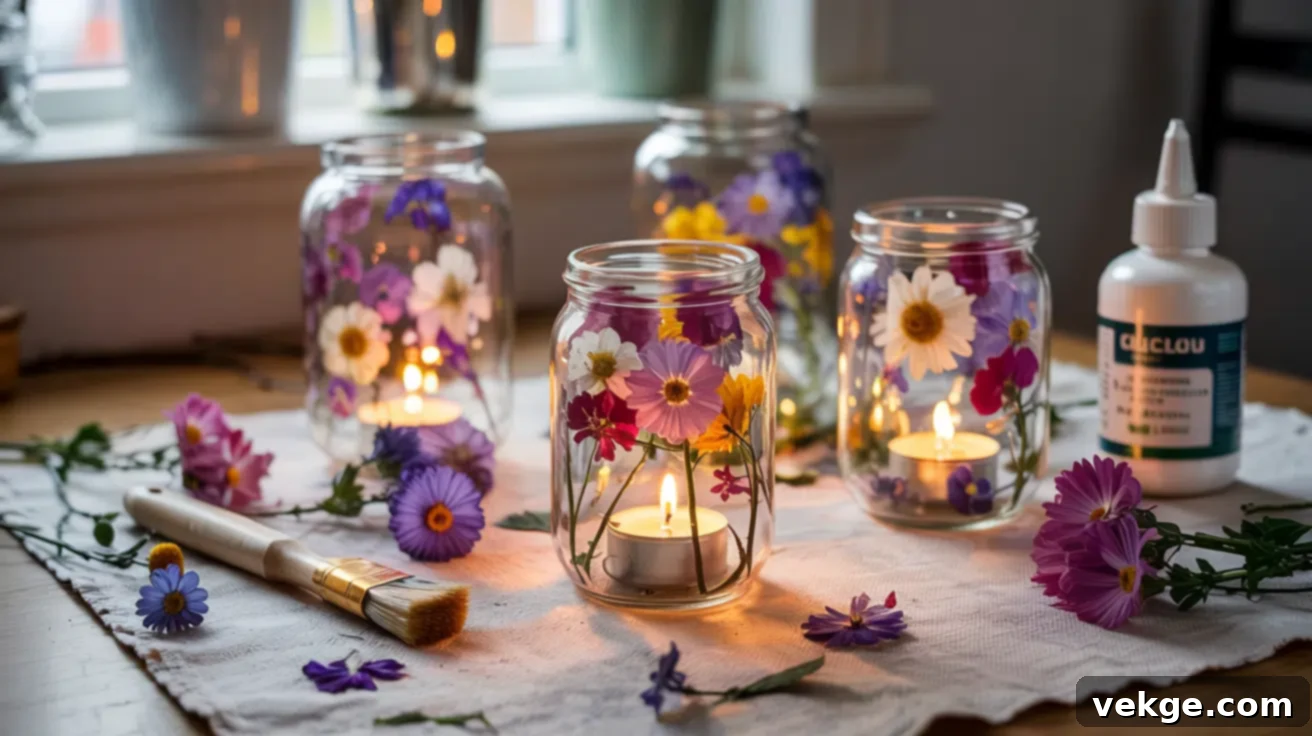
Pressed flower lanterns are charming glass containers meticulously adorned with dried, flattened flowers and foliage. These natural elements are carefully sealed to the surface using a clear adhesive, creating a beautiful, translucent effect. When a light source, typically a safe LED candle, is placed inside, these lanterns cast a soft, ethereal glow, highlighting the intricate patterns and vibrant colors of the pressed botanicals.
Gaining immense popularity through craft blogs, social media, and short-form video tutorials, pressed flower lanterns are celebrated for their eco-friendly approach, often repurposing glass jars and utilizing locally sourced blooms. Their appeal lies deeply in their authentic handmade feel, offering a tangible connection to nature and a sense of calm to any setting.
These versatile lanterns are frequently incorporated into elegant spring table settings, cozy backyard gatherings, and rustic wedding decor. They also make exceptionally thoughtful and personalized seasonal presents for loved ones, bringing a unique touch of natural artistry into their homes.
Making a Pressed Flower Lantern: Step-by-Step Guide
Embark on your creative journey to craft a stunning pressed flower lantern. This detailed guide will lead you through selecting materials, designing your layout, and meticulously assembling your project, ensuring a beautiful and lasting result.
Tools & Materials You’ll Need for Your DIY Flower Lantern
To begin crafting your enchanting flower jar lanterns, gather a few basic yet essential supplies. Each item plays a crucial role in bringing your vision to life:
- Glass Jars: The foundation of your lantern. Opt for smooth-surfaced, clear glass containers. Popular choices include Mason jars, Oui yogurt jars (after thorough cleaning), or any other clear glass vessel you might have. Thrift store finds are often perfect and add a touch of vintage charm. Ensure they are free of any textured designs that might hinder flower adhesion.
- Pressed Flowers: These are the heart of your lantern’s design. You can purchase pre-pressed flowers from craft stores or online, offering a wide variety of colors and shapes. Alternatively, explore the satisfying process of pressing your own using traditional methods like heavy books, a warm iron, or a microwave for quicker results. Look for delicate, flat blooms and greenery.
- Adhesive: A clear-drying craft glue is essential for sealing your flowers. Mod Podge is a highly recommended choice, available in matte for a soft, frosted appearance or gloss for a more vibrant, transparent finish. Ensure it dries completely clear.
- Application Tools:
- Soft brushes (foam or synthetic bristles) for applying glue evenly without leaving streaks.
- Fine-tipped tweezers for delicately handling and positioning fragile pressed flowers.
- An optional sponge applicator can provide even smoother layers of adhesive, especially for larger surfaces.
- Lighting: For safety and longevity, always use LED lighting inside your lantern. Options include small LED tealights, votive lights, or delicate fairy string lights, which can be wrapped around the interior. Avoid real candles as they pose a fire hazard and can damage the dried flowers and adhesive over time.
- Pressing Materials (if pressing your own flowers): Wax paper or parchment paper to absorb moisture and prevent sticking, and a heavy book or a dedicated flower pressing kit for consistent, flat results.
- Recommended Flowers: Choose blooms that are naturally flat or can be easily flattened. Excellent choices include pansies, daisies, cosmos, small violas, verbena, and delicate greenery like ferns, small leaves, or herbs such as rosemary. Avoid thick, fleshy, or multi-layered flowers that tend to lift or spoil.
Step 1: Prepare Your Jar for Decoration
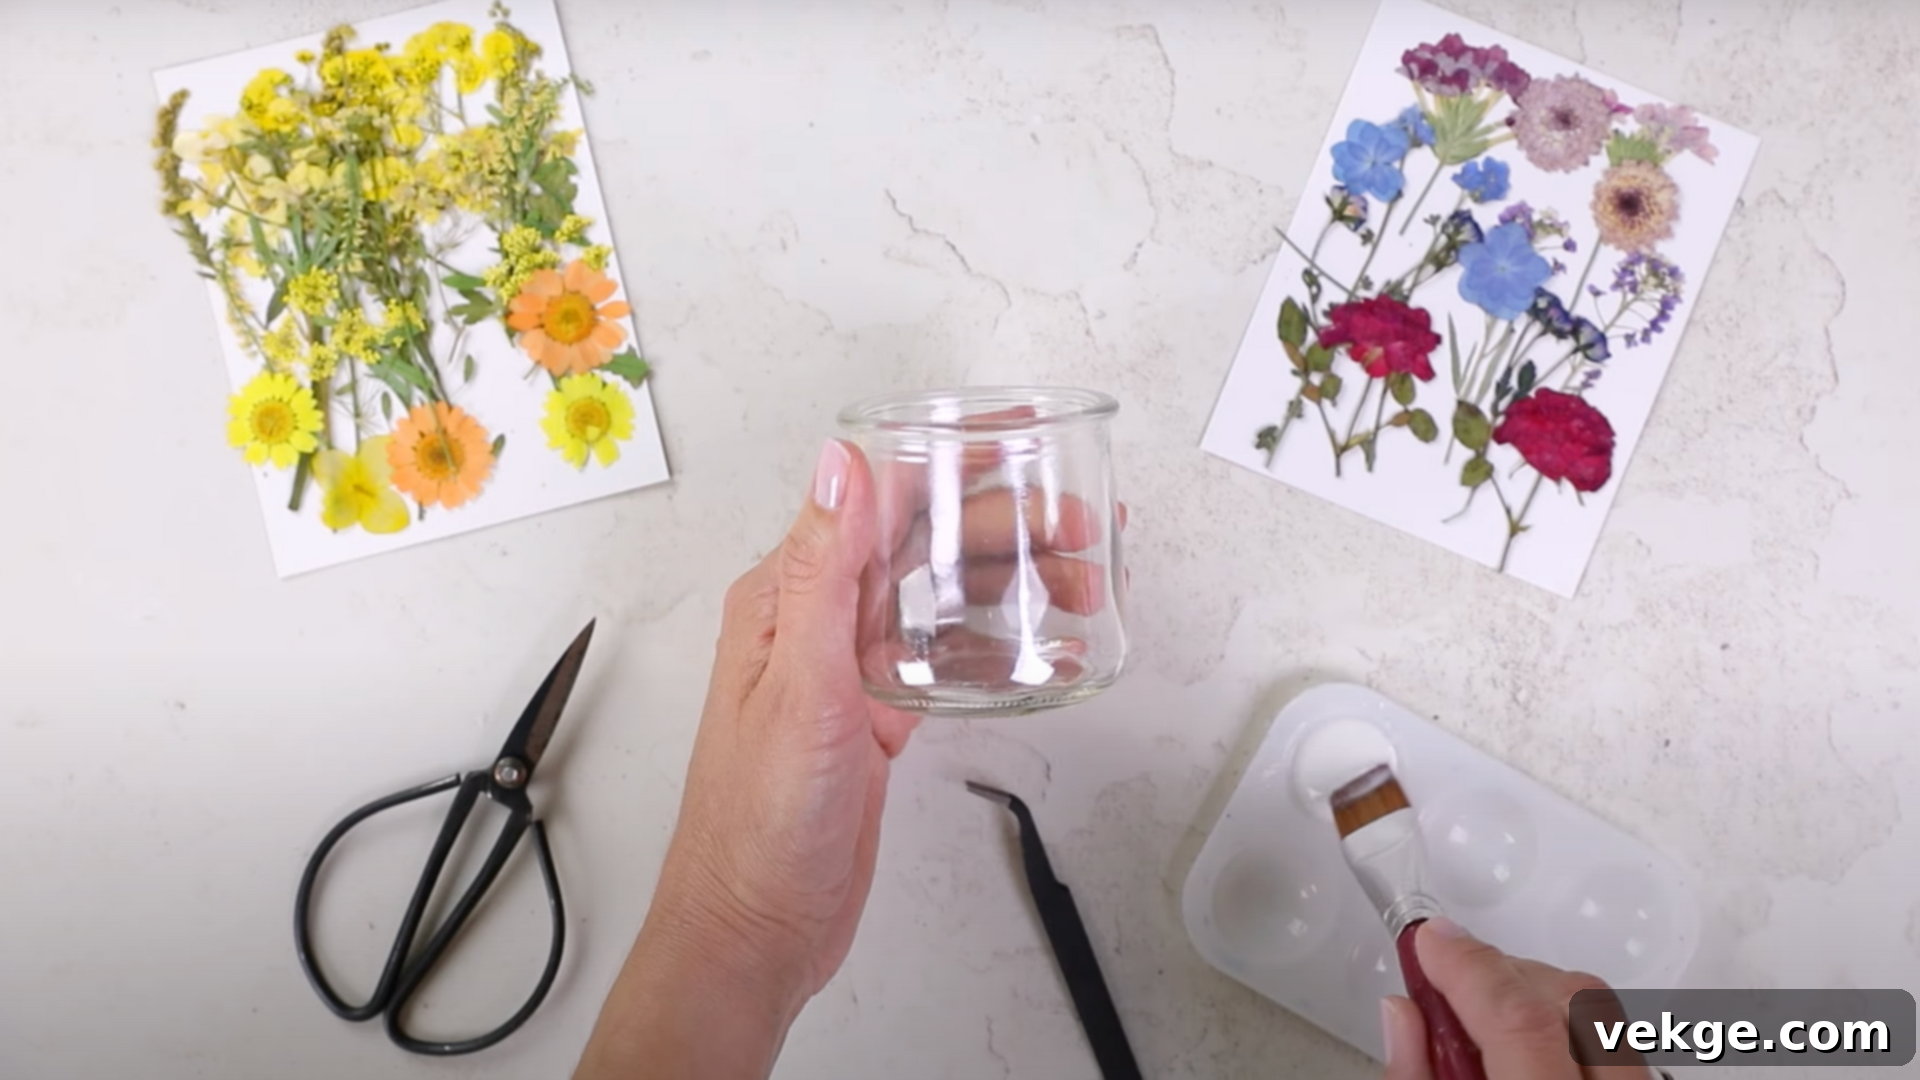
Begin by selecting your glass jar. Oui yogurt jars, with their smooth, cylindrical shape, are particularly well-suited for this craft, but any clear glass container will work beautifully. The first crucial step is to ensure the jar is impeccably clean. Remove all labels thoroughly; for stubborn residue, apply a product like Goo Gone or rubbing alcohol and let it sit before scrubbing. Wash the jar thoroughly with soap and warm water, then rinse completely. For an optimal surface, wipe the entire exterior with rubbing alcohol to remove any remaining oils or film, allowing it to air dry fully.
Before you commit to glue, take time to loosely plan your flower arrangement. Lay your pressed flowers and greenery around the jar, experimenting with different placements and compositions. This “dry run” allows you to visualize the final design, ensuring balance, avoiding overcrowding, and confirming that the flowers lay flat against the curved surface. This preparatory step is vital for a seamless application process and a professional-looking finish.
Step 2: Carefully Apply the Pressed Flowers
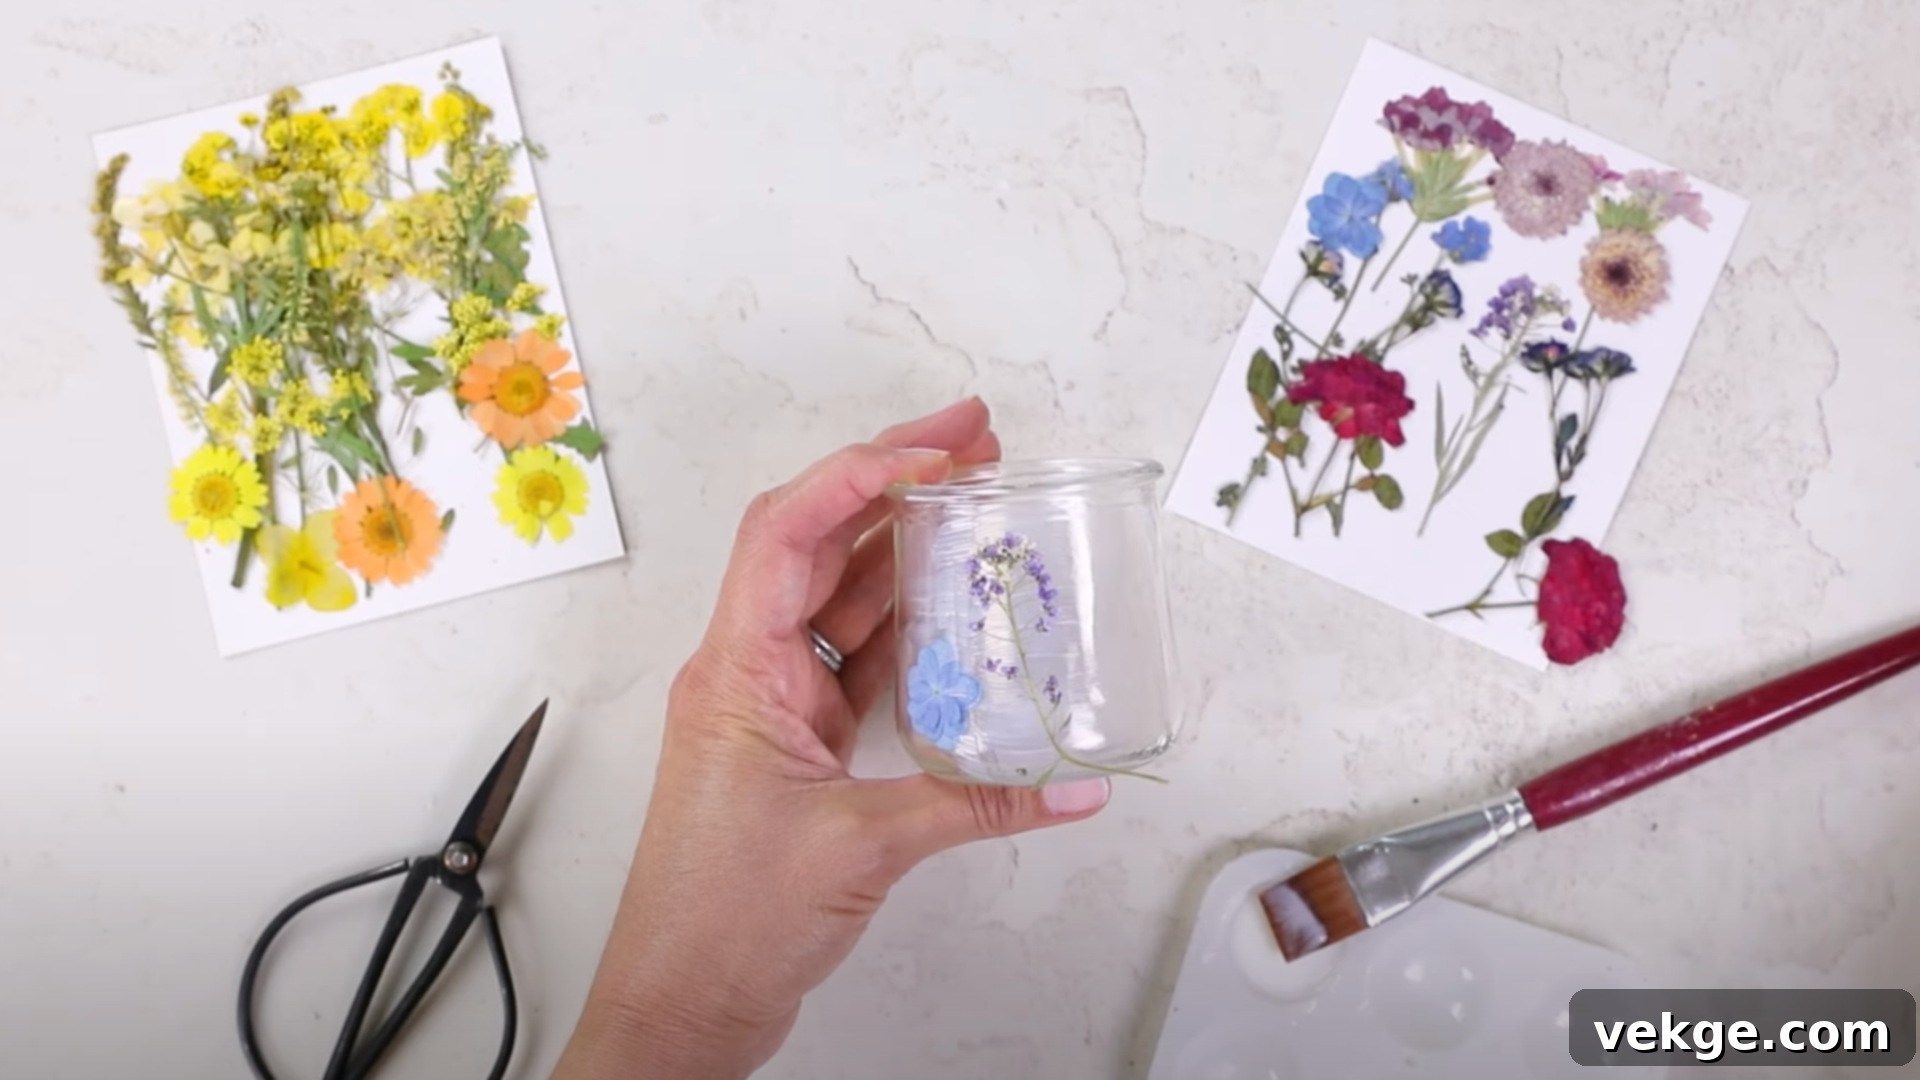
With your design planned, begin the application process. Apply a light, even coat of Mod Podge or clear craft glue to a small section of the jar – just enough area to place one or two flowers. Working in small sections prevents the glue from drying too quickly. Using tweezers, carefully pick up a pressed flower and gently place it onto the wet adhesive. Lightly press the flower down with your fingers or a soft brush, working from the center outwards, to ensure full contact and to smooth out any potential air pockets. This step is crucial for preventing the flowers from peeling or lifting later.
Continue this process, moving around the jar section by section, building your design as you go. For best results, use thinner, flatter flowers with single-layer petals, as they conform to the jar’s curve more easily. If necessary, use small scissors to trim stems or larger leaves to fit your design. Avoid using thick or overly curled blooms, as these are much more likely to lift, creating an uneven surface and compromising the longevity of your beautiful lantern.
Step 3: Seal and Allow to Dry Thoroughly
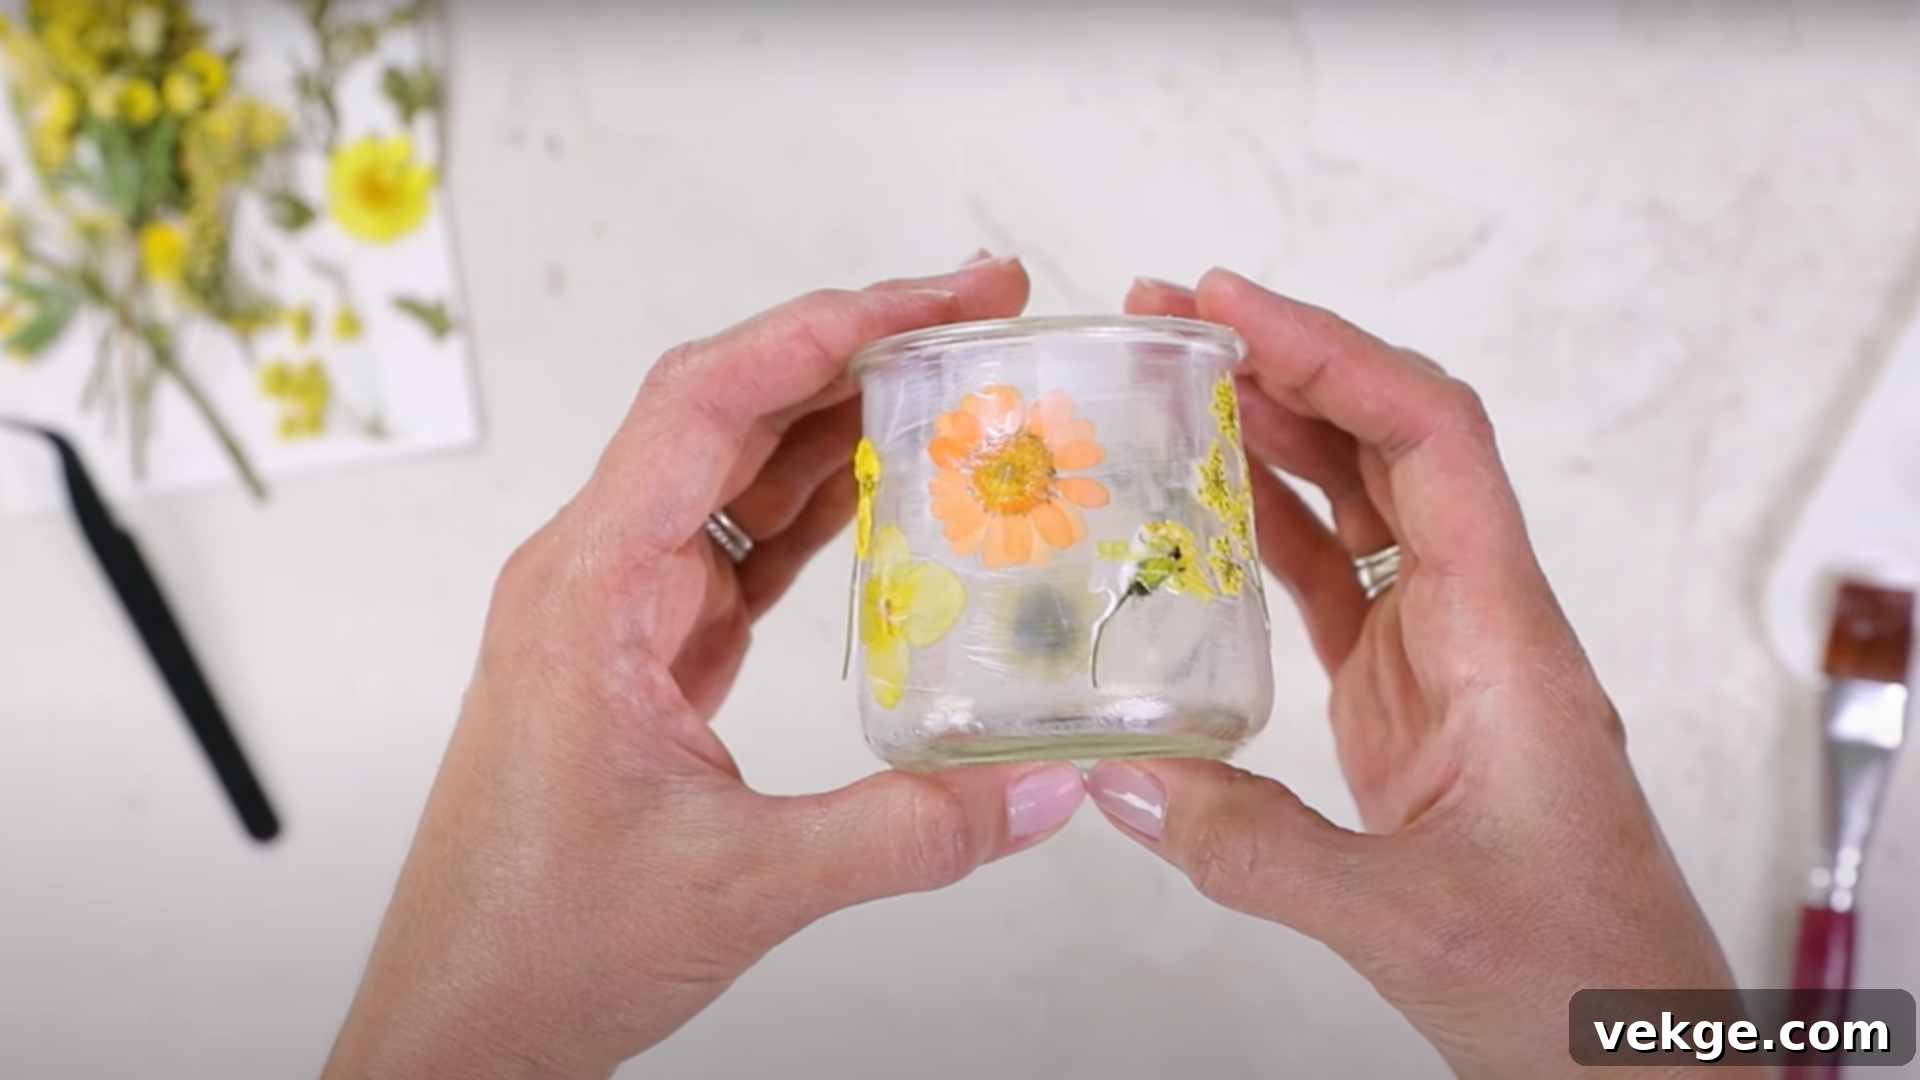
Once all your flowers are meticulously placed and smoothed onto the jar, it’s time to apply the final sealant layer. Using a clean, soft brush, gently apply a generous, even coat of Mod Podge or clear glue over each flower and the surrounding glass. This layer not only protects the delicate botanicals but also creates a unified, sealed surface. Use gentle, overlapping strokes to achieve a smooth, clean finish without visible brush marks. Be sure to cover the edges of each flower thoroughly to prevent lifting.
Allow your newly sealed lantern to air dry completely for an extended period, typically between 12 to 24 hours. Drying time can vary depending on humidity and the thickness of the glue layers. As it dries, you’ll observe a transformation in the finish: a matte Mod Podge will create a soft, frosted, and diffused effect, perfect for a subtle glow. In contrast, a gloss finish will offer a more transparent, highly reflective, and vibrant see-through surface, making the colors of the flowers pop. Ensure the lantern is fully dry and non-tacky to the touch before proceeding. For a charming, rustic touch, consider wrapping jute twine, a delicate ribbon, or lace around the rim of the jar. Finally, carefully place an LED tea light or small string lights inside to bring your creation to life.
Step 4: Style and Display Your Beautiful Lantern
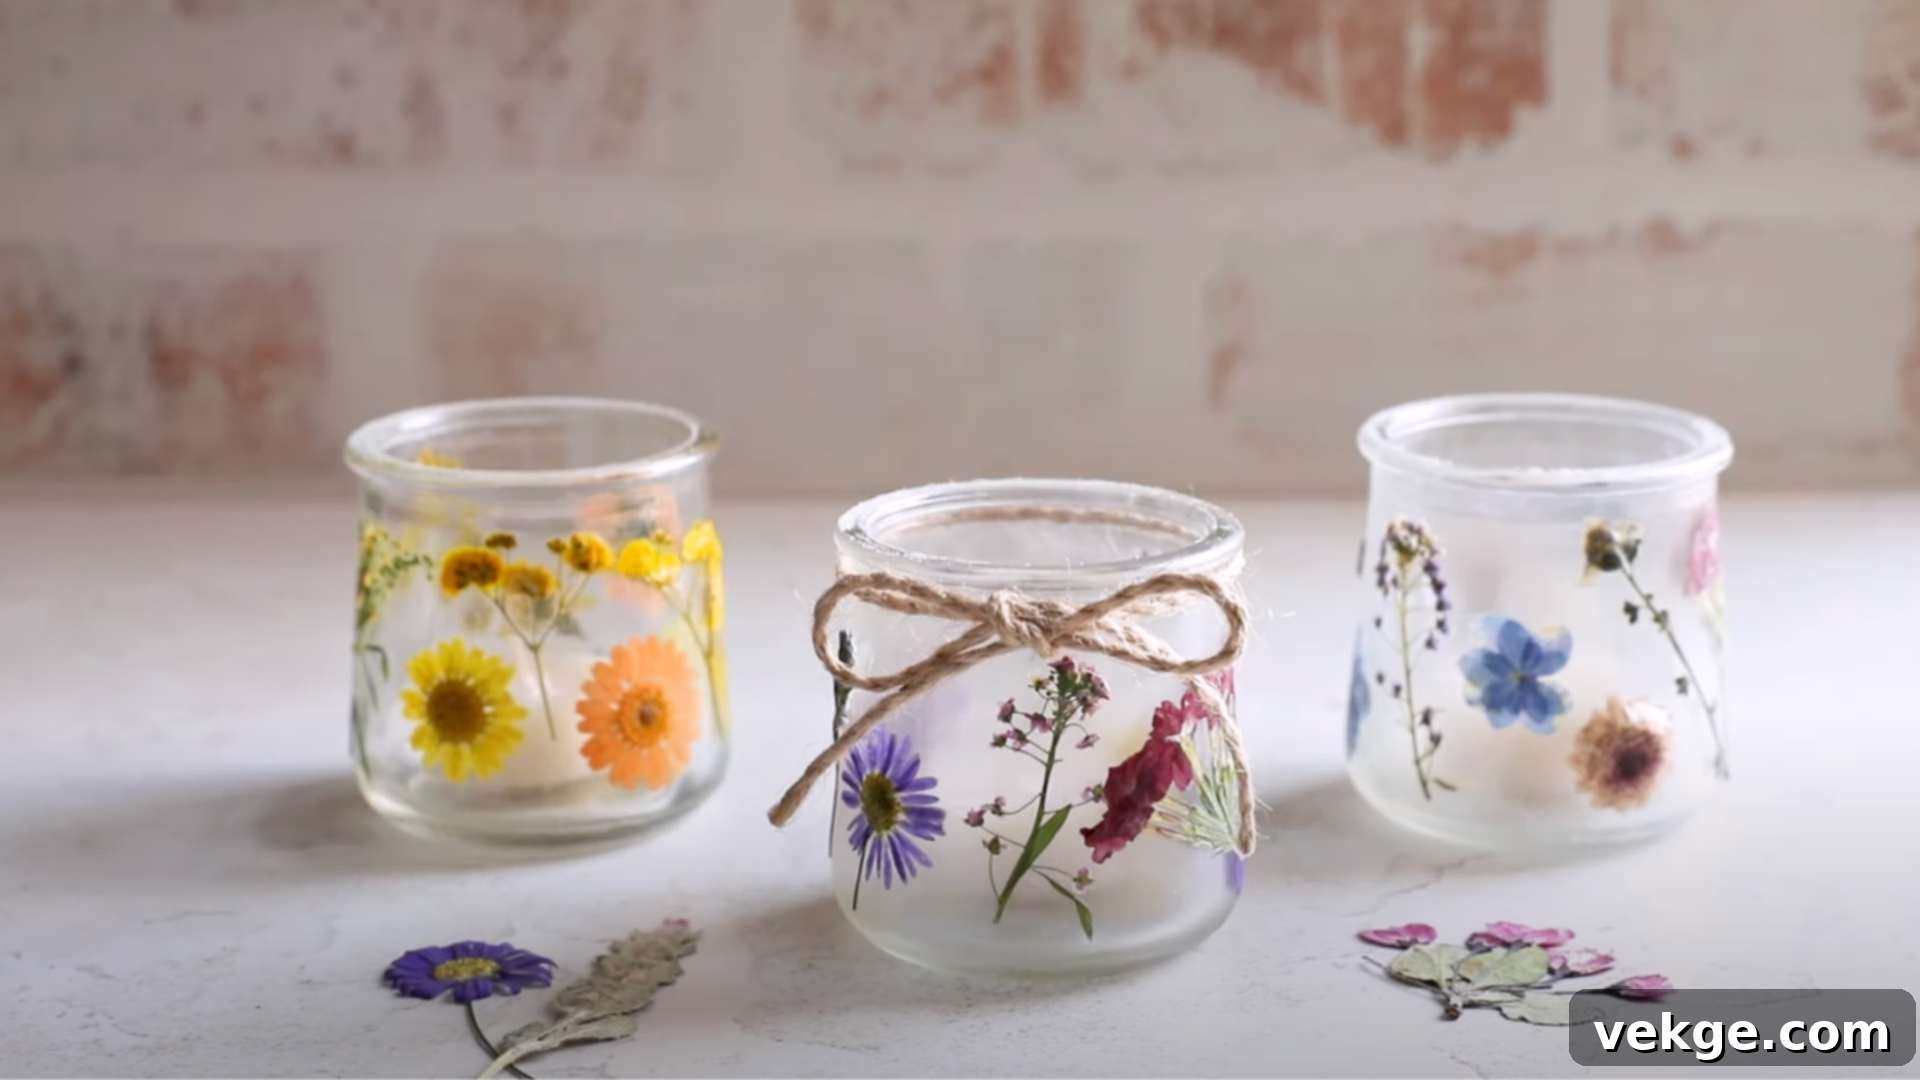
With your pressed flower lantern now complete and thoroughly dry, the exciting part begins: deciding where and how to showcase its beauty. These lanterns are incredibly versatile and can enhance almost any space. Place them on a sunny windowsill where natural light can filter through the delicate petals during the day, creating a stained-glass effect. Alternatively, position them on a shelf, mantelpiece, or tabletop to enjoy their soft, inviting glow in the evenings.
A single lantern can serve as a subtle, elegant accent, drawing the eye with its unique charm. For a more dramatic and striking effect, group several lanterns of varying sizes and designs together, creating a captivating focal point. If your lantern is destined to be a thoughtful gift, consider adding small, personal touches like a hand-tied jute twine bow, a decorative ribbon, or a custom-made name tag. Remember to always use LED candles or string lights for illumination. This ensures the setup remains safe, prevents any heat damage to your beautiful creation, and provides long-lasting, worry-free enjoyment, especially when incorporated into larger decorative arrangements.
For a more detailed visual walkthrough of the entire process, watch the full tutorial here:
Styling Ideas for Every Season with Pressed Flower Lanterns
Pressed flower lanterns offer a unique opportunity to infuse your home with seasonal charm year-round. By thoughtfully selecting specific flowers, colors, and complementary decor, you can perfectly tailor the look of your lanterns to enhance any home aesthetic, special event, or gift presentation.
1. Springtime Blooms: Fresh & Cheerful
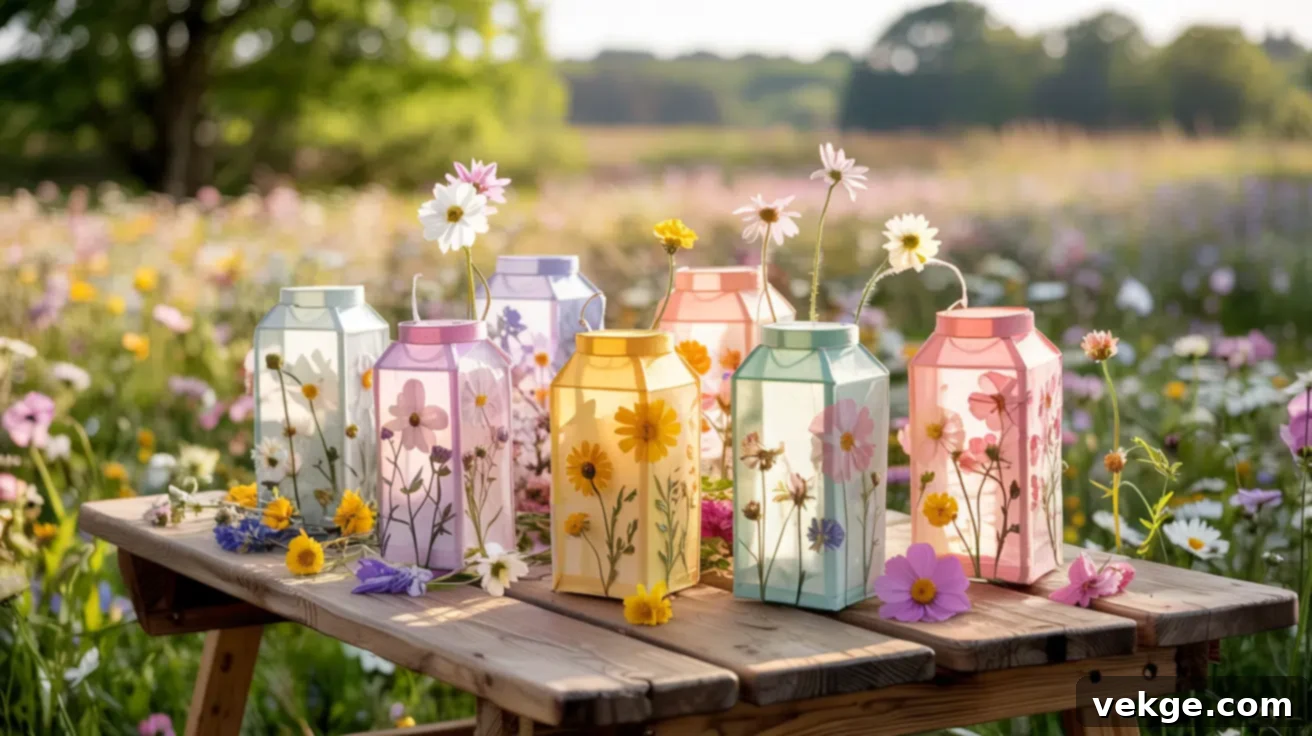
Embrace the renewal of spring by crafting pressed flower lanterns with a soft and cheerful touch. Focus on pastel blooms like delicate daisies, sunny buttercups, vibrant cosmos, tiny violas, or sweet peas. These choices will imbue your space with a fresh, invigorating seasonal look. Spring lanterns make perfect centerpieces for delightful picnic tables, charming additions to Easter displays, or whimsical decor for spring weddings and garden parties. Pair them with light, airy fabrics such as linen, soft wood tones, or floral table runners to create a cohesive and inviting atmosphere. Place them along sunlit windowsills or near entryways to allow natural light to filter through the petals during the day, and let their gentle evening glow perfectly complement the bright, welcoming energy of the spring season.
2. Summer Vibes: Warm & Inviting
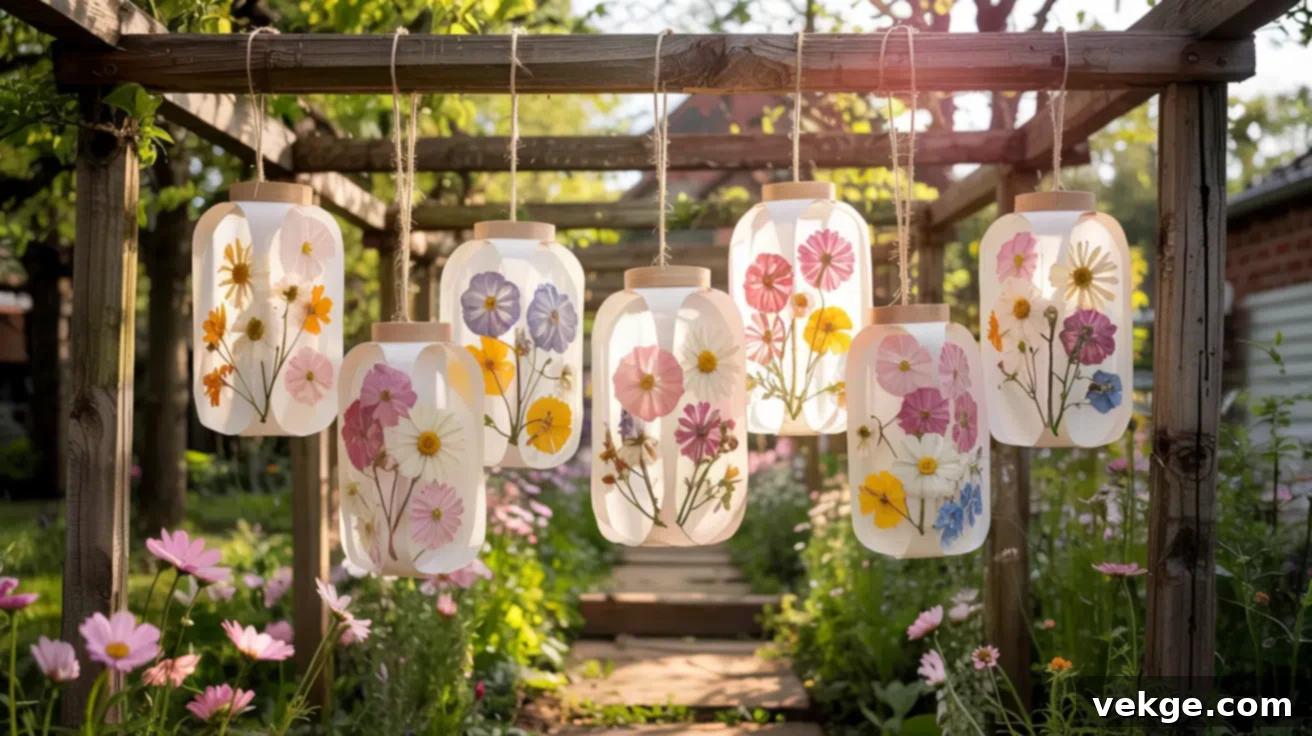
During the glorious summer months, pressed flower lanterns can beautifully complement and enhance outdoor events. Think garden parties, relaxed backyard dinners, or magical sunset gatherings. For this season, opt for pressed wildflowers, aromatic lavender, or blooms in cheerful yellow, orange, or vibrant pink tones to truly capture the joyful essence of summer. Arrange them artfully in clusters on patio tables, along garden paths, or even hang them from pergolas or tree branches using sturdy jute or decorative wire. Pair these lanterns with natural fibers like woven placemats, breezy cotton throws, and fresh greenery to create an authentic summer ambiance. As the sun dips below the horizon, the soft, warm interior light from each lantern will add a relaxed, inviting, and utterly enchanting touch to the summer atmosphere, extending the magic of the evening.
3. Autumnal Glow: Cozy & Rich
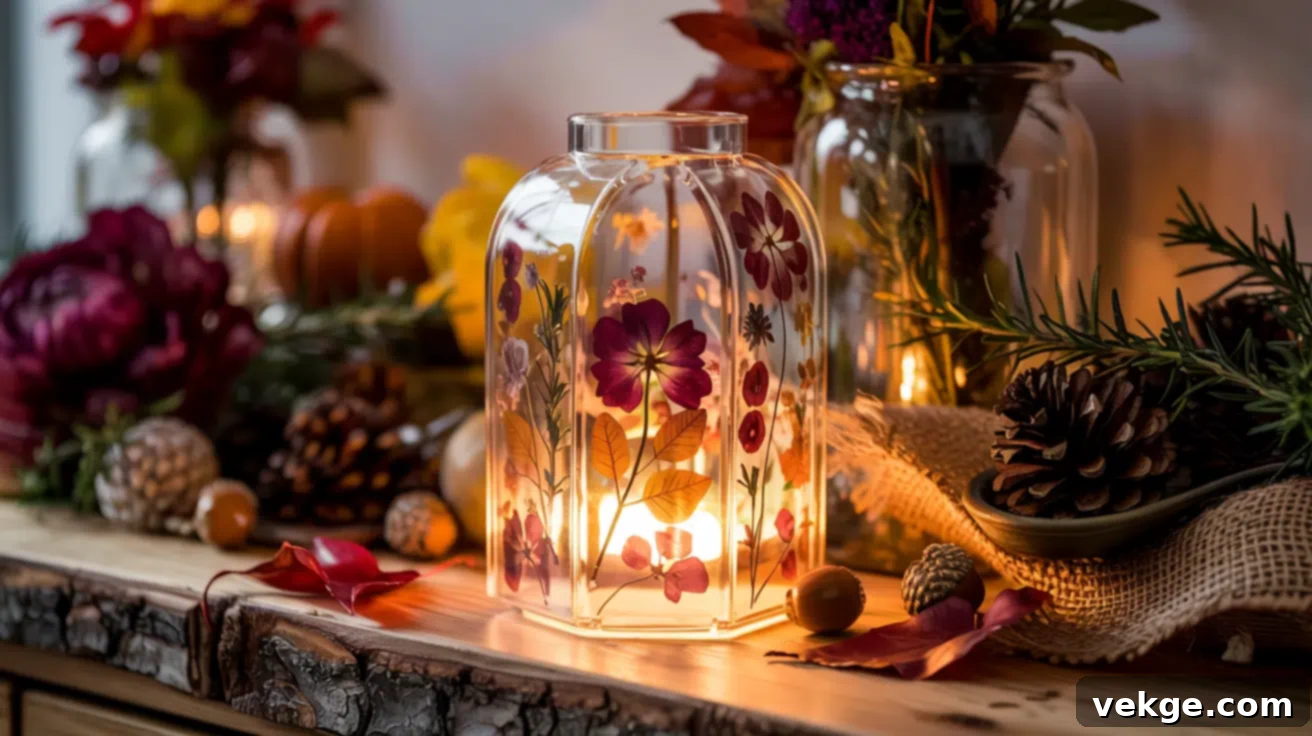
As autumn arrives, shift your focus to deeper, earthy tones to reflect the season’s rich palette. Create stunning fall lanterns using pressed flowers in shades of burgundy, burnt orange, golden yellow, and deep crimson. Consider incorporating dried herbs, small autumn leaves, or delicate seed pods for added texture and an authentic rustic feel. Display these warm-toned lanterns along a cozy mantelpiece, on a welcoming sideboard, or integrate them into a festive Thanksgiving centerpiece. They harmonize beautifully with rustic materials such as burlap, rough-hewn wood, scattered acorns, or decorative pinecones. The soft, inviting glow of these lanterns provides a beautiful contrast with the natural elements of the season, making them ideal for creating a warm, welcoming ambiance for family gatherings or quiet, reflective evenings at home.
4. Winter Wonderland: Subtle & Elegant
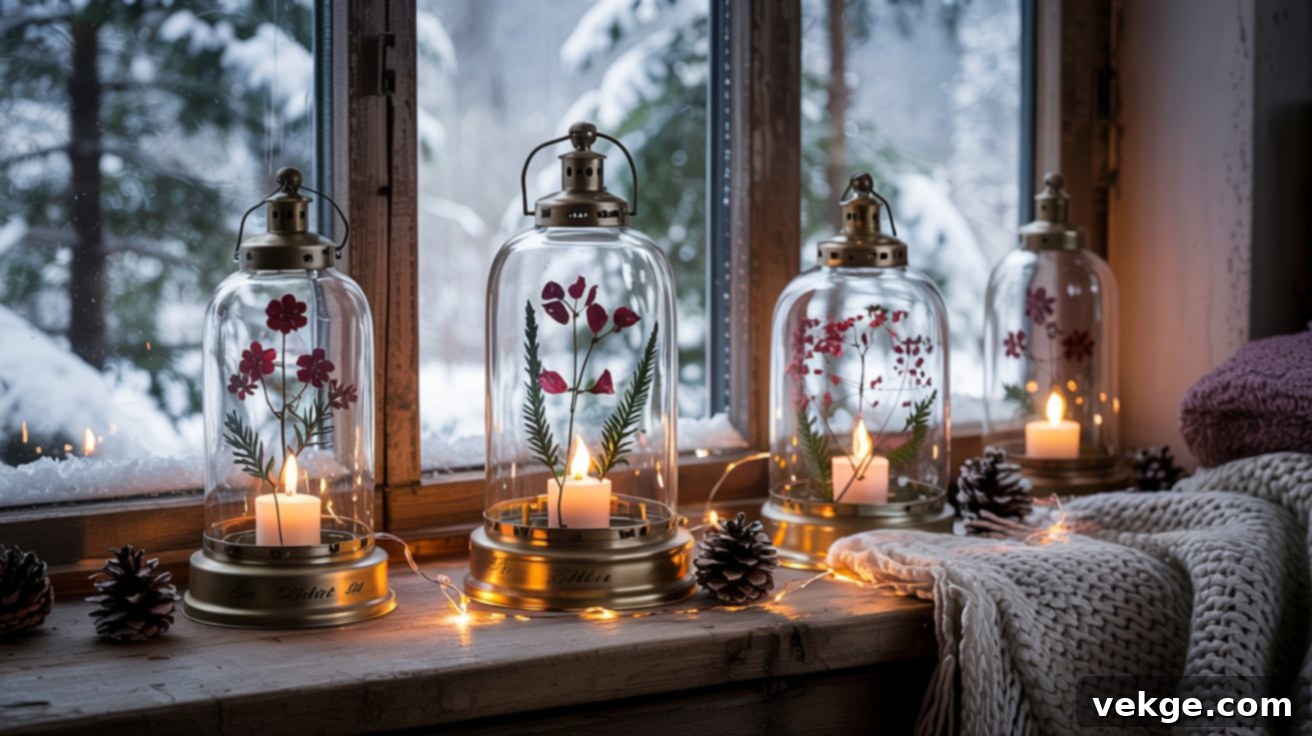
For the serene winter months, pressed flower lanterns can bring a much-needed touch of warmth and color to indoor spaces. Focus on darker, richer blooms or foliage in elegant hues like deep cranberry, lush evergreen, frosty white, or profound purple. You can also artfully incorporate pressed winter greenery such as sprigs of rosemary, delicate holly leaves (ensure they are flat), or even small cedar branches. Place these lanterns on window ledges, warm up coffee tables, or arrange them around a cozy fireplace to create a welcoming glow. Pair them with soft, luxurious textiles like velvet or faux fur, incorporate natural elements such as pine branches, or complement them with seasonal decor like snow-dusted pinecones and sparkling ornaments. These winter-themed lanterns emit a subtle, inviting light that beautifully enhances the calm and comfort of the season, making them perfect for intimate holiday meals or tranquil nights spent indoors.
Maintenance Tips for Preserving Your Pressed Flower Lanterns
To ensure your beautifully crafted pressed flower lanterns remain stunning for years to come, a few simple maintenance steps are key. Regular, gentle care will significantly extend their life and preserve their aesthetic appeal.
- Dusting: Periodically dust the surface of your lanterns using a very soft, dry cloth or a clean, soft-bristled brush. This prevents dust buildup without scratching or damaging the delicate sealed flowers.
- Moisture Avoidance: Keep your lanterns away from areas of high humidity, such as bathrooms or uncovered outdoor spaces. Excessive moisture can cause the pressed flowers to lift, discolor, or even develop mold.
- Storage: When not in use, store your lanterns in a dry, cool, and shaded area. Direct sunlight, especially over prolonged periods, can cause the colors of the pressed flowers to fade significantly.
- Lighting Choice: Always use LED lights (tea lights, votives, or fairy lights). The heat generated by real candles can severely damage the dried flowers and the adhesive, posing both a fire risk and a threat to the lantern’s integrity.
- Touch-Ups: If, over time, a flower begins to lift slightly or the sealed surface appears dull, you can carefully reapply a light, thin coat of clear-drying craft glue (like Mod Podge) over the affected area. This can refresh the finish and reseal any loose elements, extending the life and beauty of your lantern.
Common Mistakes to Avoid When Crafting Pressed Flower Lanterns
While making pressed flower lanterns is a rewarding and relatively simple craft, being aware of common pitfalls can prevent frustration and ensure a beautiful outcome. Pay close attention to these issues during your creative process:
- Using Thick Flowers: This is one of the most frequent mistakes. Bulky, multi-layered, or fleshy blooms will not press flat effectively and will almost certainly lift or peel from the curved surface of the jar once dried. Always opt for naturally flat or easily flattened flowers.
- Applying Too Much Glue: An excessive amount of adhesive, especially in a single layer, can lead to unsightly smearing, visible bubbles, and an uneven, cloudy texture on the finished lantern. Always apply thin, even coats.
- Skipping Layout Planning: Diving straight into gluing without a preliminary dry layout often results in an unbalanced, haphazard, or overcrowded design. Planning your arrangement beforehand saves time and ensures a harmonious look.
- Working Too Fast: Rushing the application process can be detrimental. Craft glue can dry quickly, especially in warmer environments. If you work too slowly across a large area, the glue may become tacky before you’ve finished placing flowers, causing them to lift or stick improperly. Work in small sections.
- Forgetting the Topcoat Seal: Neglecting to apply a final protective layer of glue over the flowers is a common oversight. This crucial step seals the flowers, enhances their durability, and protects them from dust and moisture. Without it, the flowers are vulnerable to damage.
- Using Real Candles: As emphasized, this is a significant safety hazard. The heat from real candles can ignite the dried flowers and the adhesive, leading to a fire. Furthermore, the heat will quickly degrade the integrity and appearance of your beautiful creation. Stick strictly to LED lights.
Where to Buy Pressed Flower Lanterns & DIY Kits
Whether you prefer the convenience of a ready-made piece or the satisfaction of a personalized craft project, you can find both finished pressed flower lanterns and comprehensive DIY kits online. Ready-made lanterns are perfect for immediate gifting or display, while kits provide all the necessary components for you to create your own unique piece from scratch.
Top Ready-Made Pressed Flower Lanterns
A diverse range of beautifully crafted pressed flower lanterns is available from several online retailers, each offering unique styles and distinctive details to suit various tastes. Etsy stands out as a premier marketplace for handcrafted designs, connecting you with independent sellers who pour their creativity into each unique piece. You’ll find a wide array of artistic styles, from whimsical to elegantly rustic, often with customizable options.
For those seeking more curated or high-end decor, renowned brands like Terrain, Havenly (often featuring designer collections), and Jungle Relics offer exquisitely designed ready-made lanterns. These pieces often feature polished finishes, sophisticated botanical arrangements, and distinctive aesthetic appeals. These premium lanterns are ideal for meaningful gifting, adding a touch of seasonal elegance to your decor, or simply enhancing your everyday living space. Take your time to compare the materials used, the intricate design styles, and the color themes to find a lantern that perfectly complements your space, suits its intended purpose, or aligns with your personal decorative preferences.
Best DIY Kits for Pressed Flower Lanterns
If you prefer the hands-on satisfaction of crafting your own pressed flower lantern, numerous DIY kits streamline the process by bundling all the essential materials. These kits are an excellent starting point for beginners or a convenient option for seasoned crafters.
Amazon is a vast resource for various popular options, including kits from brands like Tinideya, Naturely Box, and the Craft Crush Flower DIY Set. These comprehensive kits typically include pre-selected pressed flowers (saving you the pressing step), a suitable glass jar, a clear-drying adhesive, a brush, and often safe LED lighting accessories to complete your project. Some kits are designed with simplicity in mind, making them fun and accessible for children and family craft activities. Others are curated for more refined and sophisticated results, making them ideal for crafting personalized wedding favors, elegant seasonal decor, or bespoke gifts. Review the kit contents and recommended age ranges to choose the best option for your crafting needs and desired outcome.
Conclusion: Illuminate Your Home with Handmade Charm
Pressed flower lanterns offer a truly beautiful and deeply personal way to transform ordinary glass jars into captivating, glowing pieces of decor. By following this comprehensive guide, you’ve gained the knowledge and confidence to create stunning lanterns perfectly suited for every season, utilizing easy-to-find materials and clear, manageable steps.
I’ve personally witnessed the joy and unique charm these lanterns bring to any space. Whether you’re crafting them for your own home to add a touch of natural beauty or making them as heartfelt, thoughtful gifts for friends and family, each lantern tells a story and radiates a gentle warmth. Remember to always prioritize safety by avoiding common mistakes, especially the crucial rule of using only LED lights for long-lasting beauty and peace of mind.
Now that you’re fully equipped and ready to embark on your own pressed flower lantern adventure, don’t stop there! Explore more creative ideas and fun DIY projects in other blogs on the website to continue cultivating your crafting passion!
