The Ultimate Guide to Cleaning Window Sills: Deep Clean & Year-Round Maintenance
Window sills are often overlooked, silently accumulating dust, dirt, dead insects, and even unsightly mold. It’s easy to forget about them until they become noticeably grimy, diminishing the overall freshness and appeal of your living space. However, dedicating a little time to thoroughly clean your window sills can dramatically enhance the cleanliness and brightness of your home.
In this comprehensive guide, we’ll walk you through the entire process of cleaning window sills, from basic dusting to tackling stubborn stains and mold. You’ll discover effective methods using simple tools and everyday household products you likely already own. Whether you’re dealing with delicate wooden sills, sturdy vinyl, or tricky window tracks, we’ve got you covered. We’ll also provide essential tips for ongoing maintenance, ensuring your sills stay pristine all year long. If you’ve been procrastinating this task, worry no more – cleaning your window sills is simpler and more rewarding than you might think.
How to Clean Window Sills: A Step-by-Step Guide for Sparkling Results
Cleaning your window sills and tracks doesn’t have to be a daunting chore. By breaking the process down into manageable, practical steps and utilizing readily available household tools, you can achieve professional-level results with minimal effort and without the need for harsh chemicals or expensive specialized products. Let’s get started on transforming your dusty sills into sparkling clean surfaces.
What You’ll Need to Clean Window Sills
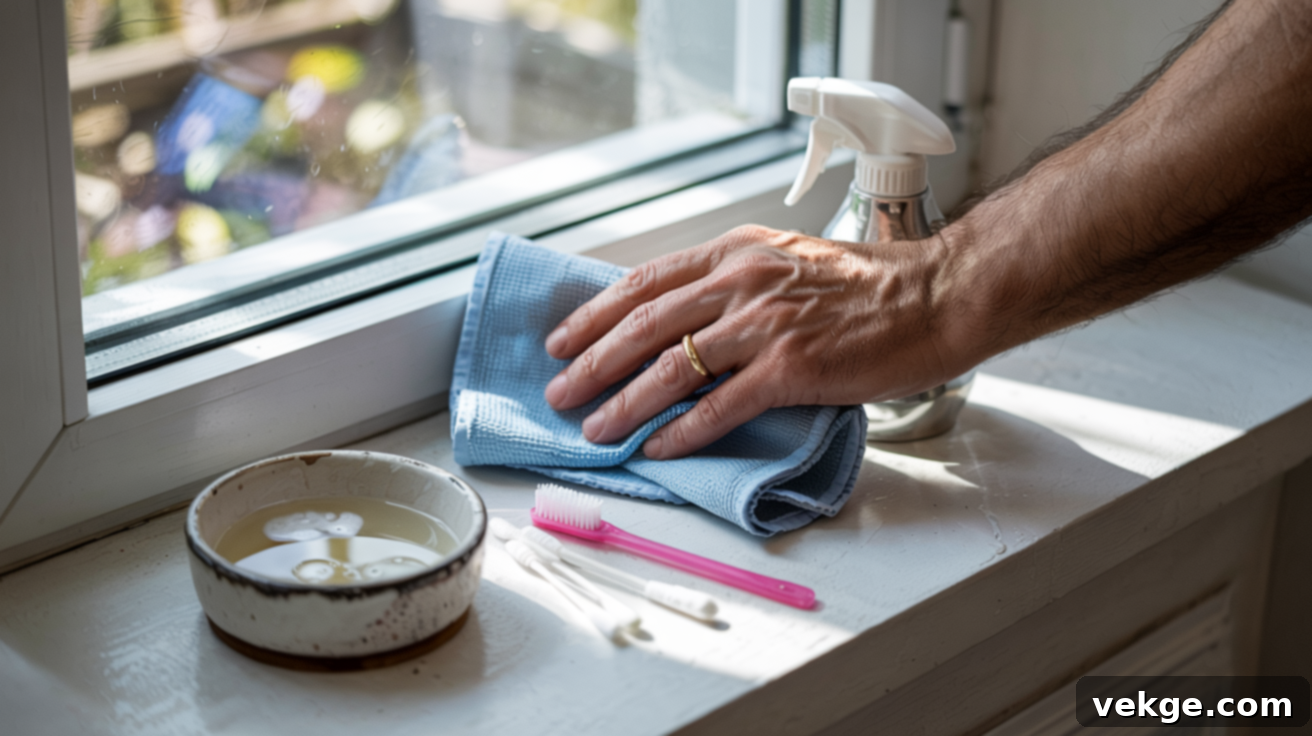
Before you begin, gather these basic cleaning supplies. Most of these items are common household staples, proving that effective cleaning doesn’t require a large investment.
- Soft Microfiber Cloths: Essential for wiping surfaces, absorbing liquids, and preventing streaks.
- Handheld Vacuum or Brush: Crucial for removing loose debris without spreading dust. A shop vac can also be very effective.
- Mild Dish Soap (e.g., Blue Dawn): A gentle yet powerful degreaser, excellent for breaking down grime and dirt.
- White Vinegar: A natural disinfectant and deodorizer, effective against mold, mildew, and hard water stains.
- Baking Soda: A mild abrasive that helps lift stubborn dirt and acts as a deodorizer.
- Old Toothbrush: Perfect for scrubbing tight corners, grooves, and intricate details in window tracks.
- Cotton Swabs (Q-tips): Ideal for reaching extremely narrow crevices and cleaning delicate areas.
- Small Spray Bottle: For mixing and applying your cleaning solutions evenly.
- Small Bowl: For mixing paste-like solutions or holding water for rinsing.
- Gloves (Optional but Recommended): To protect your hands from dirt and cleaning solutions.
You’ll find that these simple supplies are incredibly versatile and effective, allowing you to achieve a deep clean without resorting to expensive, specialized products.
Step 1: Remove Dry Debris — The Essential First Sweep

The very first and crucial step in any successful window sill cleaning endeavor is to meticulously remove all loose, dry debris. This includes dust, dirt, cobwebs, dead bugs, and any other particles that have settled on your sills and within the tracks. Neglecting this step can lead to a messy, muddy situation once you introduce liquid cleaners, making your job harder.
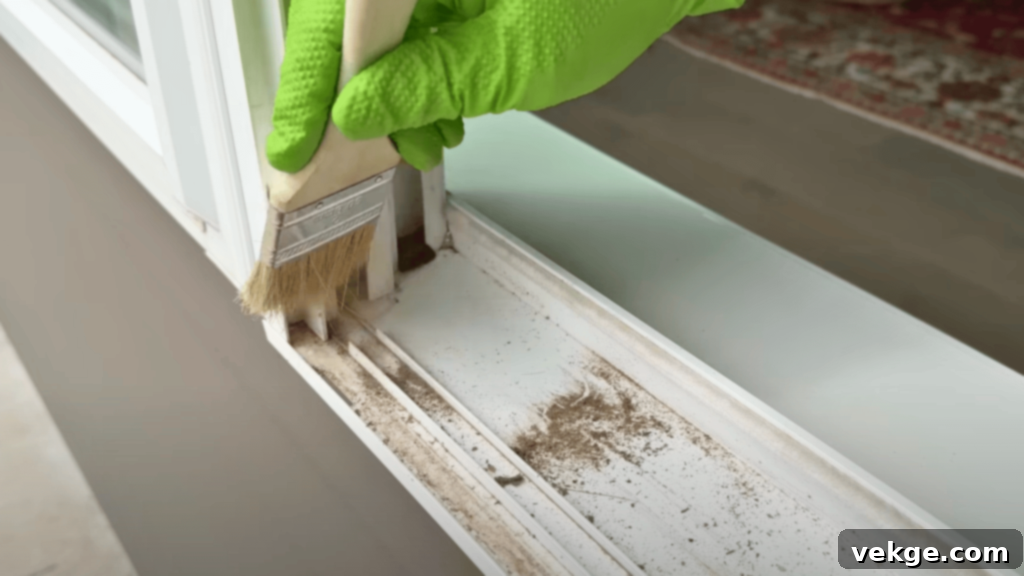
Begin by using a small, dry paintbrush, a stiff-bristled artist’s brush, or an old toothbrush to carefully sweep out dirt and dust. Pay particular attention to the corners, crevices, and the narrow channels of window tracks where debris naturally accumulates. Gently brush all the loosened particles towards the center of the sill or track.
Once you’ve gathered the debris, use a handheld vacuum cleaner with a brush attachment, or a shop vac for larger amounts, to thoroughly suction up all the dirt. This ensures that no dry particles remain to turn into a muddy paste when wet. For optimal results, perform this initial dry sweep on a dry, calm day. Windy or wet conditions can complicate the process, making it harder to contain and remove the debris effectively.
Step 2: Spray and Scrub with the Right Cleaner — Dissolving Grime

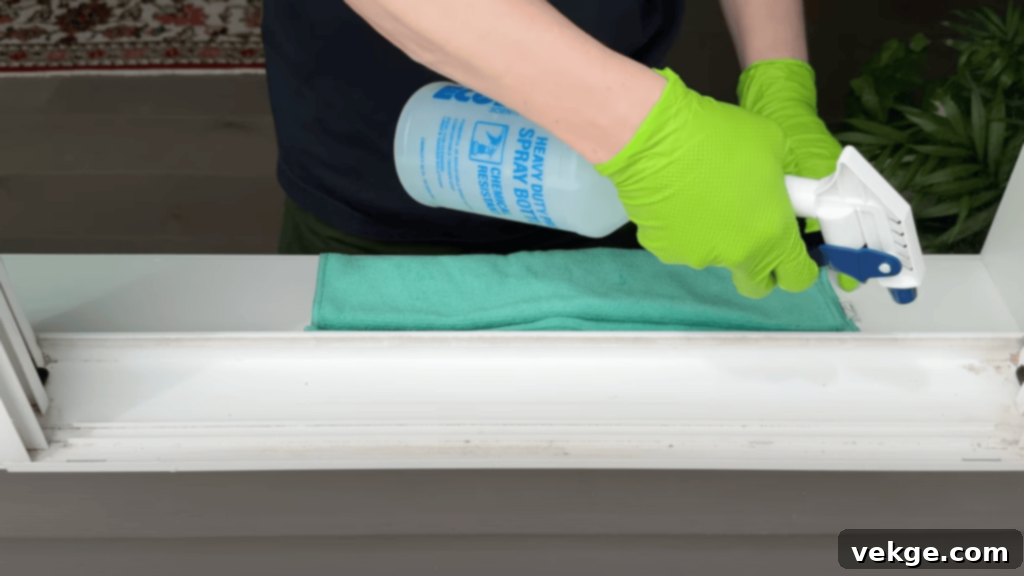
With all the loose debris removed, it’s time to apply your cleaning solution and tackle the stuck-on grime. For most window sill and track cleaning, a simple, effective homemade solution works wonders. Mix 1 cup of white vinegar, 1 cup of warm water, and a teaspoon of mild dish soap (like Blue Dawn) in a spray bottle. White vinegar acts as a natural disinfectant and cuts through grease, while dish soap helps emulsify dirt and oil, and water dilutes the mixture, making it safe for most surfaces.
Liberally spray this mixture directly into the window tracks and along the entire sill, focusing on areas with visible mold, mildew, or stubborn residue. Allow the solution to sit for a few minutes (5-10 minutes) to effectively penetrate and break down the accumulated gunk. This “dwell time” is crucial for the solution to work its magic, softening hardened dirt and making it easier to scrub away.
For scrubbing, use a soft-bristle brush, such as an old toothbrush or a specialized track cleaning brush. The bristles should be flexible enough to reach into tight corners and grooves, yet firm enough to dislodge grime without scratching the surface. This type of brush is particularly useful for textured tracks and hard-to-reach spots where cloths cannot effectively clean. Avoid using overly stiff metal brushes or abrasive scourers, as these can easily damage or scratch delicate sill finishes, especially on painted or wooden surfaces.
Step 3: Rinse, Wipe, and Maintain — The Finishing Touch

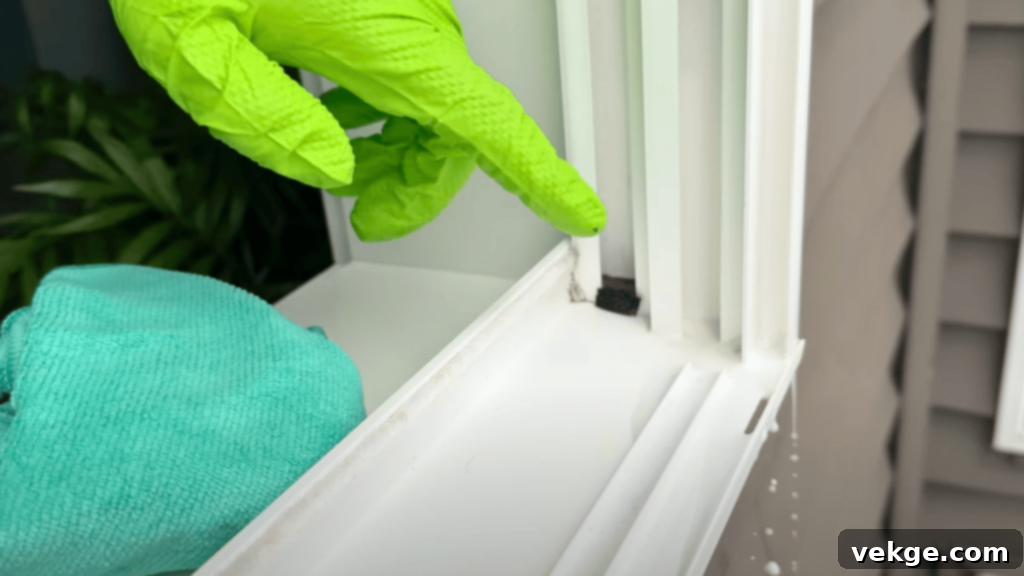
After a thorough scrubbing, you might notice lingering bits of dirt or suds in deeper corners, drain slots, or the very bottom of the tracks. To dislodge these stubborn remnants, you can “flood” the space slightly with your vinegar cleaner or plain water. This helps to loosen and push out any remaining debris. Use cotton swabs or a damp, folded microfiber cloth to carefully extract any remaining gunk.
Next, take a clean, damp microfiber cloth and wipe down the entire sill and track thoroughly. This step is crucial for removing both the cleaning solution and any dislodged dirt, leaving your sills pristine. Don’t forget to wipe the underside of the window frame and any rubber seals, as grime can easily transfer from these areas back onto your freshly cleaned tracks if left untouched.
Once everything is visibly clean, use a dry microfiber cloth to dry the area completely. Ensuring the sill and tracks are bone-dry is essential to prevent future mold growth, mildew, and moisture-related issues, especially in humid environments. Dampness creates an ideal breeding ground for these problems.
For best results and to maintain a consistently clean home, aim to repeat this deep cleaning process once or twice a year, ideally during your spring and fall cleaning routines. Regular maintenance in between these deep cleans will make each future session faster, easier, and less of a chore.
For a detailed visual overview, watch this helpful video:
Cleaning Different Types of Window Sills: Tailored Approaches
Not all window sills are created equal. Different materials require specific care to ensure effective cleaning without causing damage. Understanding your sill’s material will help you choose the best cleaning approach.
1. Wooden Window Sills
Wooden sills, whether painted or natural, require a gentle touch to protect their finish and prevent water damage. Wood is porous and can swell, warp, or crack if exposed to too much moisture. Always use minimal water when cleaning wooden sills.
- Cleaning Method: Wipe down with a microfiber cloth barely dampened with a mild soap solution (a few drops of dish soap in warm water). Avoid saturating the cloth.
- Immediate Drying: After cleaning, immediately dry the entire surface with a clean, dry cloth. Never allow water to pool on wooden sills or sit in cracks and crevices.
- Painted Wood: If your wooden sills are painted, especially if they are older, always test your cleaning solution in an inconspicuous area first. Some older paints can be sensitive and might chip, peel, or fade with certain cleaners.
- Protection: For natural wood sills, consider applying a wood polish or conditioner after cleaning if recommended by the manufacturer. This helps to nourish the wood, protect its finish, and repel dust.
2. Painted or Old Sills
Older painted sills, regardless of the underlying material, demand extra care. The paint may be fragile, prone to chipping, peeling, or fading. Gentle handling is key to avoid exacerbating existing damage.
- Gentle Cleaning: Opt for soft microfiber cloths over stiff brushes when cleaning delicate painted surfaces. Brushes can be too abrasive and scratch or chip the paint.
- Non-Abrasive Cleaners: Stick to mild soap and water solutions. Avoid harsh chemical cleaners or abrasive scrubbing pads that could strip paint or leave marks.
- Loose Paint: If you encounter loose paint chips during cleaning, collect them carefully for proper disposal. Avoid scraping or aggressive scrubbing, which can create more flaking.
- Restoration: For sills showing significant wear, chipping, or fading after cleaning, consider a fresh coat of paint. Repainting not only restores their appearance but also provides a protective layer against future damage. Ensure the surface is clean, dry, and lightly sanded before repainting for best adhesion.
3. Metal or Vinyl Sills
Metal (like aluminum) and vinyl sills are generally more robust and resistant to moisture and stains compared to wood. These materials can withstand stronger cleaning methods.
- Standard Cleaners: Your homemade solution of dish soap, water, and vinegar is perfectly suitable for these surfaces.
- Avoid Abrasives: While durable, avoid using highly abrasive cleaners, scouring pads, or stiff metal brushes that could scratch the finish or leave unsightly marks on vinyl or painted metal.
- Aluminum Caution: For aluminum sills, exercise a bit of caution with highly acidic cleaners like undiluted vinegar, especially if the aluminum is anodized or coated. Always test in an inconspicuous area first to ensure no discoloration or etching occurs.
- Textured Vinyl: Many vinyl sills have textured surfaces that can trap dirt. A soft-bristle brush, like an old toothbrush, is excellent for working the cleaning solution into these grooves and dislodging trapped grime.
- Rinse Thoroughly: Ensure all soap residue is rinsed off, as it can attract more dirt over time.
4. Exterior Window Sills
Exterior window sills are exposed to the elements year-round, accumulating more severe dirt, pollen, bird droppings, pollution, and often heavy mold or mildew growth. They require a more robust cleaning approach than interior sills.
- Initial Rinse: Begin by giving the sills a strong rinse with your garden hose. This first step removes loose dirt, spiderwebs, and surface grime, making subsequent scrubbing much easier.
- Heavy-Duty Scrubbing: Use a stiff-bristle brush (a utility brush works well) and a strong solution of soapy water (a higher concentration of dish soap or an outdoor multi-surface cleaner). Scrub vigorously to remove stuck-on grime, working in manageable sections to prevent the cleaner from drying before you can rinse.
- Mold and Mildew Treatment: Exterior sills, due to constant moisture exposure, are highly susceptible to mold and mildew. For these issues, consider using a specialized outdoor mold and mildew remover, or a solution of equal parts white vinegar and water, allowing it to soak before scrubbing. For very stubborn mold, a diluted bleach solution (1 part bleach to 10 parts water) can be effective, but always test on an inconspicuous area first, and rinse thoroughly afterward to protect surrounding plants and surfaces.
- Pressure Washer (Use with Caution): For extremely dirty exterior sills, a pressure washer set to a low-pressure setting can be effective. However, use extreme caution to avoid damaging the window seals, siding, or paint. Keep the nozzle at a safe distance and use a wide-angle spray tip.
- Final Rinse and Dry: Rinse thoroughly with the hose to remove all cleaning solutions and debris. Allow the sills to air dry completely or wipe dry to prevent water spots.
Popular & “Viral” Ways to Clean Window Sills for Quick Results
Beyond the traditional methods, some clever and highly effective techniques have gained popularity for tackling specific window sill cleaning challenges. These “hacks” can make your cleaning routine even more efficient:
- Dust and Wipe Method: The simplest and most frequent method. Use a dry microfiber cloth or a vacuum brush attachment to quickly remove loose dirt and dust. Follow up with a cloth lightly dampened with soapy water for a quick surface clean. This method is excellent for weekly maintenance.
- Baking Soda + Vinegar Power Duo: This classic combination is a powerhouse for cutting through tough grime and deodorizing. Sprinkle a generous layer of baking soda over the dirty sill and tracks. Follow with a spray of white vinegar (it will fizz!). Let it sit for 5-10 minutes to allow the reaction to lift dirt. Scrub with an old toothbrush, then rinse with a damp cloth and dry thoroughly.
- Hydrogen Peroxide for Mold & Mildew: For localized mold and mildew spots, 3% hydrogen peroxide is a fantastic, non-toxic alternative to bleach. Spray hydrogen peroxide directly onto the affected area, let it sit for about 10-15 minutes, then scrub with a brush. Rinse thoroughly with water and ensure the area is completely dry to prevent recurrence.
- Steam Clean for Deep Penetration: A handheld steam cleaner with a detail nozzle is an excellent tool for loosening embedded grime and sanitizing without chemicals. The hot steam breaks down dirt, making it easy to wipe away. Simply direct the steam into tracks and corners, then wipe clean with a microfiber cloth.
- Tight Corner & Crevice Hacks: For those impossibly narrow spots, get creative. Wrap a microfiber cloth around a butter knife, paint scraper, or even a ruler to reach deep into tight edges. Cotton swabs (Q-tips) are indispensable for precision cleaning in the smallest gaps and corners where brushes can’t reach.
- The “Flood and Extract” Method: For heavily soiled tracks, some homeowners find success by pouring a small amount of warm, soapy water or the vinegar solution directly into the tracks. Let it sit for a few minutes to soak and loosen the grime. Then, use a wet/dry vac (shop vac) or a powerful handheld vacuum to suck up the dirty water, along with the loosened debris. Finish by wiping with a clean, damp cloth and drying.
- Always Rinse and Dry Completely: Regardless of the method used, the final step should always be a thorough rinse with clean water (using a damp cloth) and meticulous drying. This prevents unsightly water spots, residues that attract more dirt, and more importantly, inhibits future mold and mildew growth.
Tips to Maintain Clean Window Sills All Year Long
Regular maintenance is key to keeping your window sills clean and reducing the need for intensive deep cleaning. Incorporating these simple habits into your routine will make a big difference:
- Weekly Dry Wipe: Make it a habit to quickly wipe down your sills with a dry microfiber cloth once a week. This removes accumulating dust, pollen, and surface dirt before it can become embedded.
- Weekly Debris Check: While wiping, take a moment to clear any visible debris (leaves, dead insects, pet hair) from window tracks. This prevents buildup that can impede window function and accumulate grime.
- Monthly Vacuuming: Use your vacuum cleaner’s brush attachment or a handheld vacuum to remove dust from corners, crevices, and hard-to-reach areas of the sills and tracks at least once a month.
- Monthly Mild Wash: Give your sills a quick wash monthly with a mild soap solution (a few drops of dish soap in water). Wipe with a damp cloth, then rinse with a clean, damp cloth, and dry thoroughly to prevent moisture damage and mildew.
- Check for Water Damage & Leaks: During your weekly or monthly checks, look for any signs of water pooling, discoloration, or moisture around the sills and tracks. This could indicate a leak that needs addressing, preventing mold or structural damage.
- Inspect Weather Stripping & Seals Seasonally: Before extreme weather hits (e.g., in spring and fall), inspect the weather stripping and rubber seals around your windows. Damaged seals can let in more dirt, moisture, and pests, accelerating sill deterioration. Replace them as needed.
- Look for Cracks or Gaps Seasonally: Check for any cracks, gaps, or deteriorating caulk on or around your window sills. These can allow air, water, and insects to enter. Repairing them promptly will protect your home and keep sills cleaner.
- Touch Up Paint Seasonally: For painted sills, seasonal touch-ups can protect the underlying material from moisture and wear, while also refreshing their appearance. Clean the area thoroughly before applying new paint.
- Set Phone Reminders: If you struggle to remember your cleaning schedule, set recurring reminders on your phone for weekly, monthly, and seasonal tasks. Consistency is the key to effortless maintenance.
- Use a Sill Protector or Tray: If you often place plants or decorative items on your sills, consider using a small tray or protector underneath. This can catch drips from watering plants or prevent scratches, making cleanup easier.
Conclusion
You embarked on this journey wondering how to effectively clean window sills, and now you are equipped with a comprehensive arsenal of knowledge and practical steps. We’ve guided you through the entire process, from gathering your essential tools and meticulously removing dry debris to scrubbing away tough grime and performing the final rinse and dry. You’ve also learned specific techniques for caring for different materials like delicate wood, durable vinyl, and exposed exterior sills, ensuring you clean without causing damage. Moreover, we’ve explored popular cleaning hacks and provided invaluable tips for maintaining sparkling sills year-round.
Just like me, you probably desire a home that feels fresh and inviting without overwhelming complications. This guide demonstrates that consistent, thoughtful attention to cleaning your window sills, even if just a little at a time, can make a profound difference in your home’s overall cleanliness and ambiance. You truly have all the tools and knowledge required to tackle this often-neglected area of your home. You’ve got this, and your windows (and your home) will thank you for it!
If you’re eager to discover more ways to simplify your cleaning routines or seeking inspiration for other areas of your home, don’t hesitate to explore additional articles and resources on our blog. Happy cleaning!
