How to Age Galvanized Metal: Achieve a Rustic, Vintage, or Industrial Look
Galvanized metal is a popular choice for many DIY projects, home decor, and industrial applications due to its durability and corrosion resistance. However, its signature bright, shiny finish can often clash with aesthetics that call for something more subdued, rustic, or vintage. If you’re looking to incorporate galvanized elements into a space that embraces an aged, worn, or distressed look, that pristine gleam can feel out of place and stark.
The good news is that achieving a beautiful, aged patina on galvanized metal is a straightforward process. By toning down the initial shine, you can give your metal pieces a more natural, authentic, and time-worn appearance that perfectly complements rustic, farmhouse, industrial, or vintage styles. This transformation allows new metal to blend seamlessly with older elements, enhancing the overall character and warmth of your project.
I’ve personally encountered this challenge when new galvanized pieces failed to match the softer, more lived-in aesthetic I was aiming for. That bright, reflective surface often stands out awkwardly, distracting from the intended design. This comprehensive guide will walk you through easy and effective ways to age galvanized metal using readily available materials.
Beyond just dulling the shine, we’ll cover various techniques to create different aged effects, from a subtle matte finish to a more pronounced rusted or distressed look. You’ll also learn essential safety tips to ensure a smooth and secure process, along with advice on how to properly protect your newly aged finish so it lasts for years to come. Whether you’re working on custom shelves, decorative planters, or unique art pieces, these methods will help you achieve a perfectly balanced and beautifully finished look.
Benefits of Aging Galvanized Metal
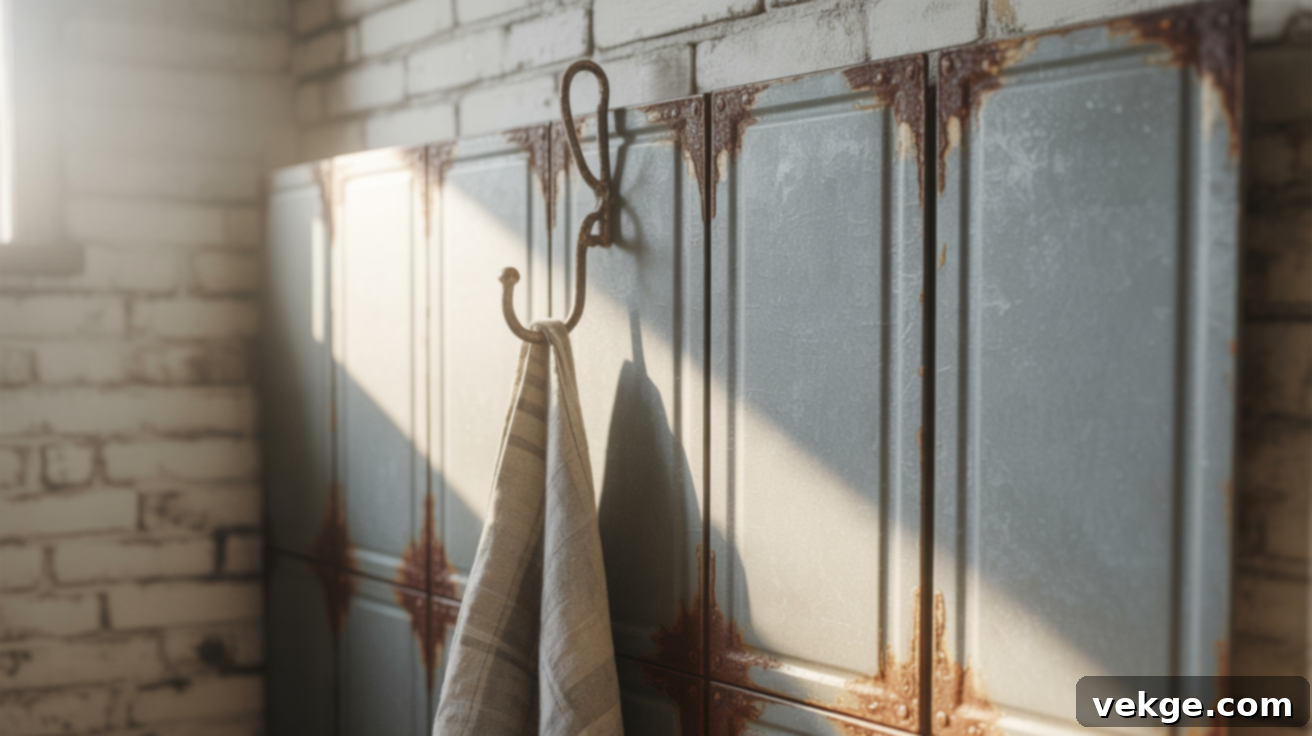
Aging galvanized metal offers a host of advantages beyond just aesthetic appeal. It allows you to tailor the look of your metal items to perfectly suit your creative vision, ensuring they enhance rather than detract from your overall design.
- Achieve a Softer, Worn Appearance: The primary benefit is transforming the bright, reflective surface into a muted, less stark finish. This softer, worn look is ideal for rustic, farmhouse, vintage, or industrial-style spaces, creating an instant sense of history and character. The aged patina gives the metal a more relaxed and familiar feel, making it appear as though it has naturally weathered over time.
- Enhanced Aesthetic Integration: Newly galvanized items can look too “new” or out of place when paired with older, more character-rich pieces. Aging the metal helps it blend seamlessly with existing decor, ensuring that all elements feel cohesive and harmonious. This is particularly useful when combining new purchases with salvaged or antique finds.
- Improved Paint Adhesion: The smooth, shiny zinc coating on galvanized metal can be notoriously difficult for paint to adhere to properly, often leading to chipping or peeling. The aging process, especially methods involving etching or scuffing, effectively roughens the surface. This creates a better “tooth” for paint to grip, resulting in a more durable and lasting finish for any painted galvanized project.
- Customization for Unique Projects: Whether you’re crafting DIY shelves, decorative planters, or bespoke furniture, aging allows for greater customization. You can control the degree of aging, from a subtle dullness to a heavily distressed or rusted effect, tailoring the metal’s appearance to match the specific needs and style of your project.
- Mimic Natural Weathering: For outdoor projects, aging can accelerate the natural weathering process that would typically take years. By intentionally initiating this process, you gain control over the outcome, ensuring the metal develops an appealing patina rather than an unpredictable or unattractive one.
In essence, aging galvanized metal is a simple process that yields clear benefits for both its visual appeal and functional versatility, making it an indispensable technique for many DIY enthusiasts and designers.
How to Age Galvanized Metal Effectively
Over time, I’ve experimented with several methods to age galvanized metal, including natural solutions, intentional distressing, and even clever faux finishes. Each approach offers a unique result, allowing you to select the technique that best aligns with your project’s requirements and your personal aesthetic. Below, we’ll explore these methods in detail, providing you with the knowledge to achieve your desired aged look.
Tools and Supplies You’ll Need
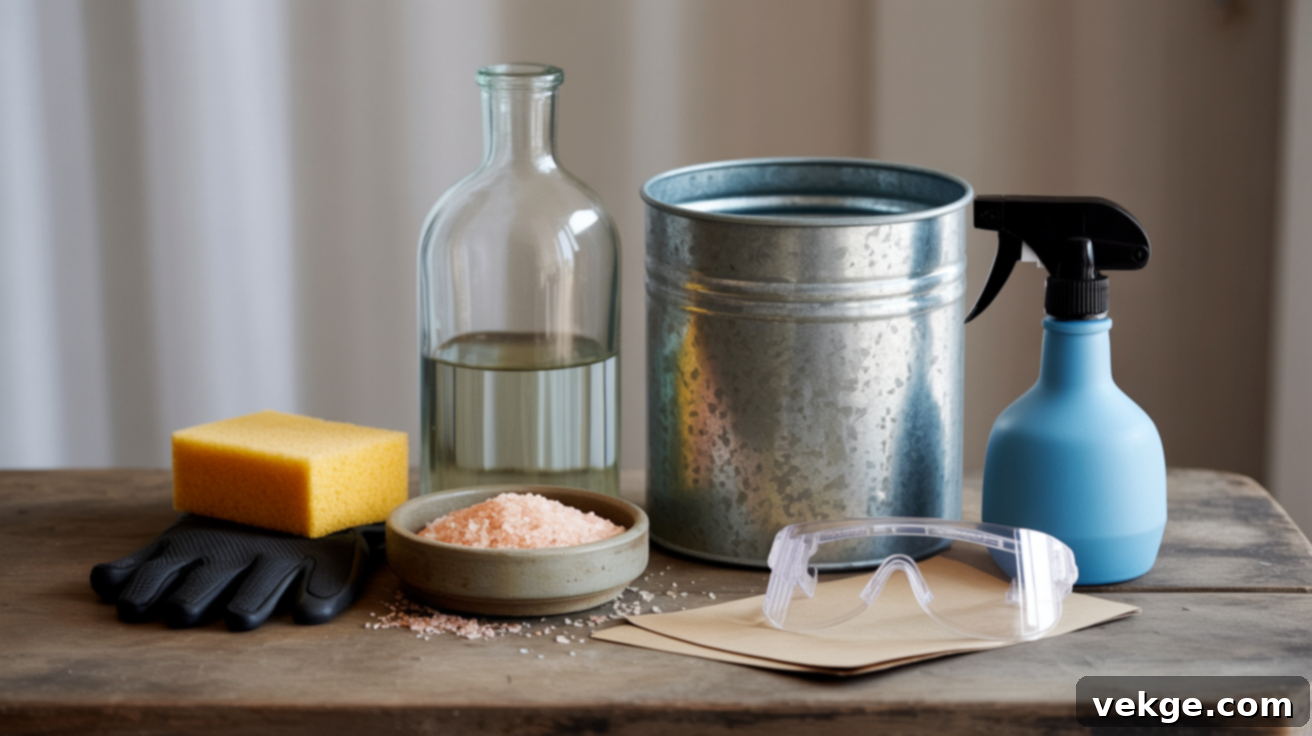
Before diving into the aging process, it’s crucial to gather the necessary tools and supplies. Having these items on hand will not only help you prepare the surface and apply solutions effectively but also ensure your safety throughout the project. Here’s a clear breakdown of what you’ll likely need:
- White Vinegar or Salt: These common household items are fantastic for dulling the metal’s shine and accelerating the aging effect. White vinegar acts as a mild acid to etch the zinc, while salt water encourages a natural-looking rust.
- Protective Gloves and Goggles: Essential safety gear to shield your hands and eyes from any chemicals, splashes, or potential rough edges of the metal. Always prioritize personal protection.
- Sandpaper, Steel Wool, or Wire Brush: Used to abrade the surface, removing the protective coating and creating a texture that allows aging agents or paint to adhere properly. Coarse grits (e.g., 80-120 grit) are often ideal.
- Spray Bottle or Sponge/Cloth: Tools for evenly applying vinegar or saltwater solutions across larger surfaces or soaking smaller items effectively.
- Paints and Brushes (for Faux Methods): If you opt for a faux aged look, you’ll need various acrylic or craft paints in muted tones (grays, browns, rust colors) and brushes or sponges for application.
- Optional: Hydrochloric Acid (Muriatic Acid): A much stronger and faster-acting option for aging, but it requires extreme caution and stringent safety measures. Only consider this if safer alternatives don’t yield the desired results and you are comfortable with its handling risks.
- Clean Water and Rags: For rinsing the metal after treatment and general cleanup.
- Respirator or Mask: Crucial if using hydrochloric acid or if working in a poorly ventilated area, to prevent inhaling fumes.
1. Use Vinegar to Break Down the Shine
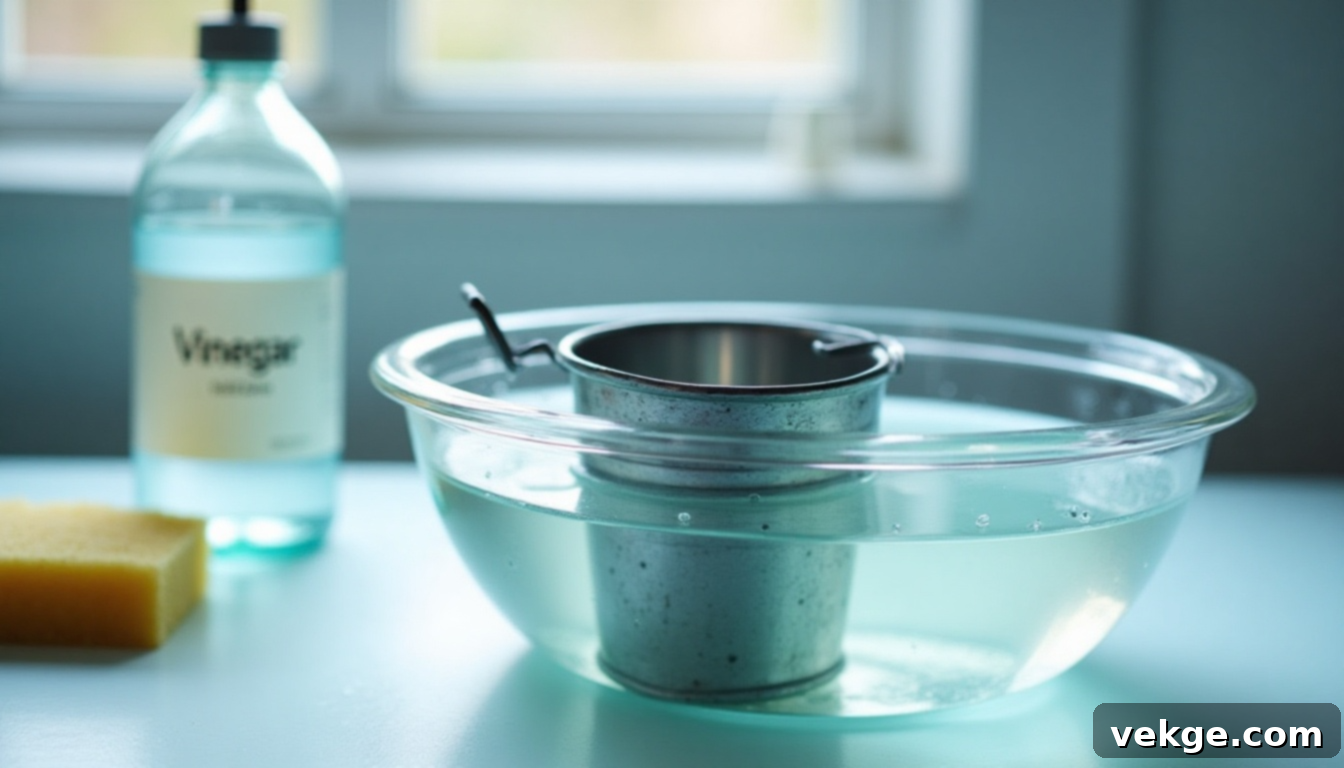
White vinegar is an incredibly accessible and relatively safe way to age galvanized metal without resorting to harsh, specialized chemicals. Its mild acidity gently etches the zinc coating, effectively dulling the bright, reflective surface. For smaller galvanized items, you can simply submerge them completely in a tub of white vinegar. For larger surfaces that can’t be soaked, thoroughly wipe them down using a sponge or cloth generously soaked in vinegar.
Allow the vinegar to sit on the metal for several hours. The longer it remains in contact, the more pronounced the dulling effect will be. You might even see a slight bubbling reaction as the acid works on the zinc layer. Periodically check the progress until you achieve your desired level of dullness. Once satisfied, rinse the item thoroughly with clean water to neutralize any remaining acid and prevent further etching. Let it air dry completely. This method typically results in a soft, matte finish that is both subtle and durable, providing a naturally aged appearance.
2. Spray Salt Water for a Rusted Effect
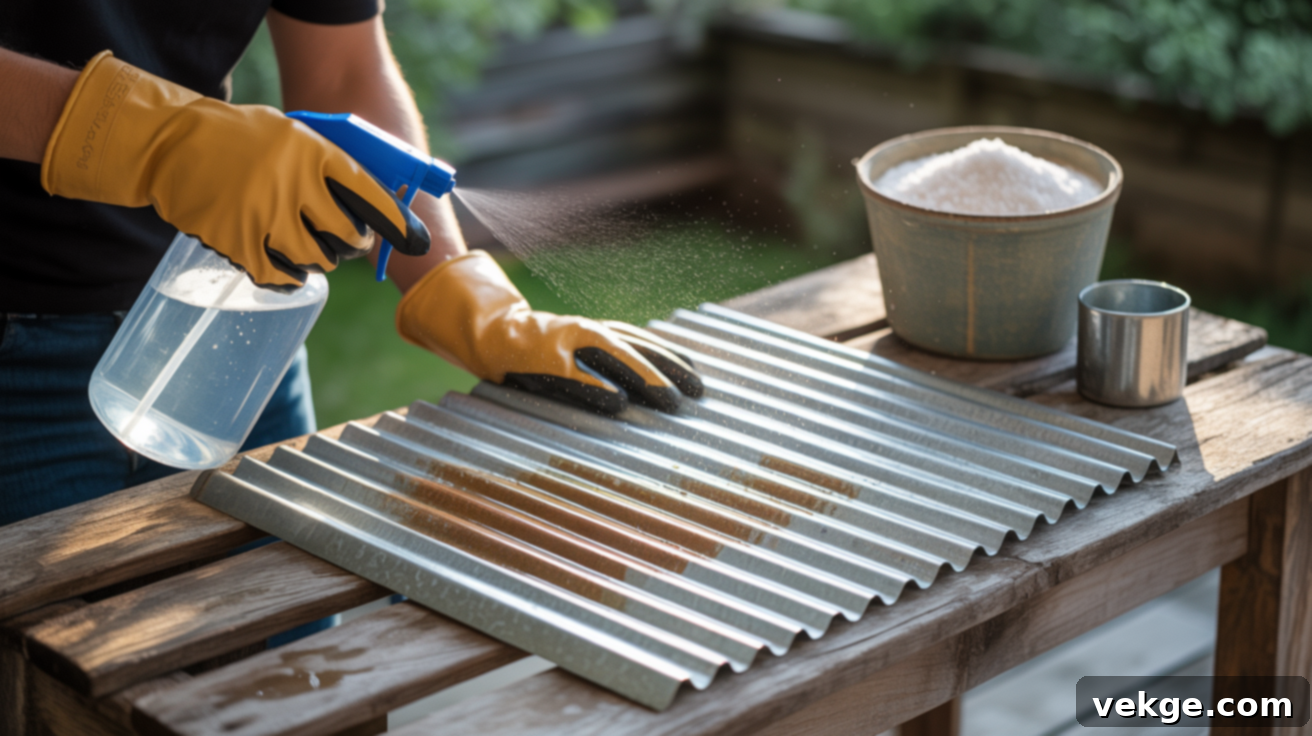
If you’re aiming for a more pronounced, naturally rusted look, a simple saltwater solution can work wonders. This method helps mimic the appearance of prolonged exposure to damp, humid environments, which naturally accelerates the rusting process on exposed iron or steel underneath the zinc coating (or where the zinc has been breached).
To prepare the solution, mix about half a cup of plain table salt into a quart of warm water, stirring thoroughly until the salt is completely dissolved. Pour the solution into a spray bottle and mist it evenly over the entire galvanized surface. After application, place the metal piece outdoors or in a consistently moist, humid area to encourage rust formation. Over the next few days, you should begin to see small specks or patches of rust appearing on the surface, particularly if the zinc coating has been scuffed beforehand.
For a deeper or more widespread rust effect, reapply the saltwater solution as needed, allowing time for the rust to develop between applications. The key is patience and consistent moisture. This technique creates an authentic, weathered appearance that adds significant character.
3. Sand or Scuff the Surface First
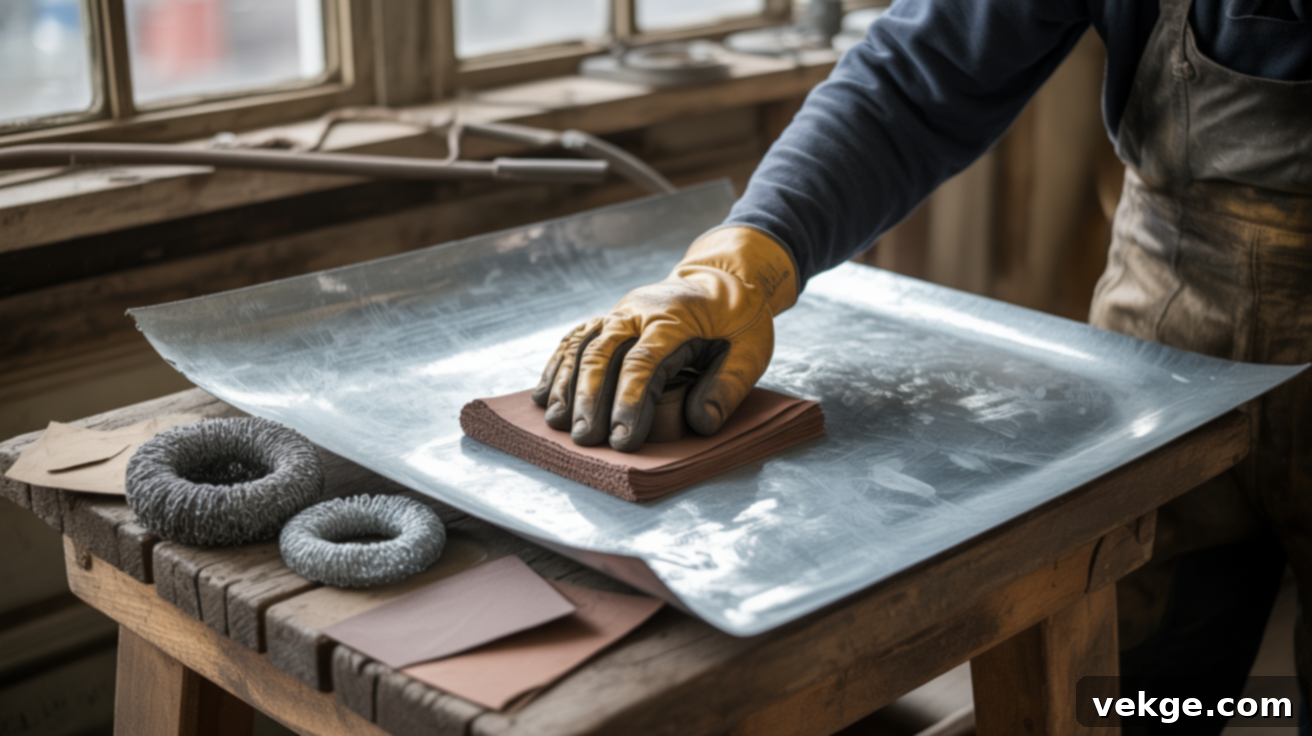
Regardless of whether you plan to use vinegar, saltwater, or even paint, preparing the metal surface by roughening it is a critical first step. Galvanized metal comes with a smooth, often slick zinc coating that acts as a protective barrier. This coating can prevent aging agents from reacting effectively and can make it difficult for paint to adhere properly, leading to poor and uneven results.
To ensure optimal adhesion and reaction, scuff the entire surface using coarse-grit sandpaper (e.g., 80 to 120 grit), steel wool, or a stiff wire brush. Focus particular attention on edges, corners, and any raised areas where natural wear and tear would typically occur. Creating a somewhat random pattern of scratches and abrasions will contribute to a more convincing aged effect.
This rough texture not only breaks through the outermost layer of the zinc coating but also provides a mechanical “grip” for subsequent treatments. It allows acidic solutions to etch more effectively, saltwater to initiate rust more readily, and paints to bond securely, ensuring a more durable and aesthetically pleasing aged finish.
4. Try Hydrochloric Acid (With Extreme Caution)
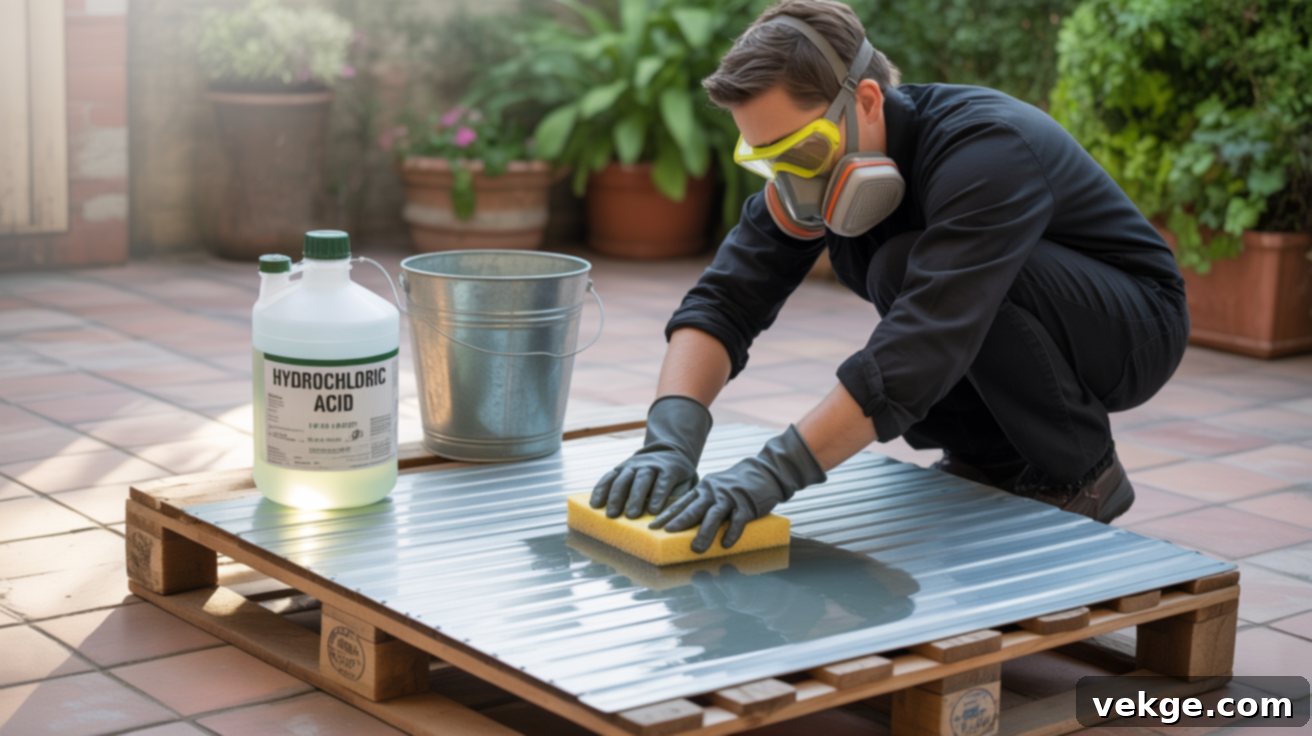
Hydrochloric acid, also known as muriatic acid, is an extremely potent chemical that can age galvanized metal very rapidly, often within minutes. However, due to its strength and inherent dangers, it must be handled with the utmost care and is generally recommended only if safer, milder alternatives have not produced the desired results. **This method is for experienced users who understand and accept the risks.**
If you choose to use hydrochloric acid, absolute adherence to safety protocols is non-negotiable. Always wear heavy-duty chemical-resistant gloves, full-face goggles or a face shield, and a respirator or mask specifically designed for acid fumes. Work exclusively in a very well-ventilated outdoor area, far away from people, pets, and anything that could be damaged by acid splashes or fumes. Apply the acid sparingly with an acid-resistant sponge or brush, observing the rapid dulling of the shine. As soon as the desired aged look is achieved, immediately and thoroughly rinse the entire surface with copious amounts of water to neutralize the acid. Ensure all runoff is contained and disposed of safely according to local environmental regulations.
Given the significant safety risks, including chemical burns, respiratory irritation, and potential environmental harm, most DIYers will find the vinegar or saltwater methods more appropriate and sufficiently effective for their aging projects.
5. Distress With Dents and Scratches
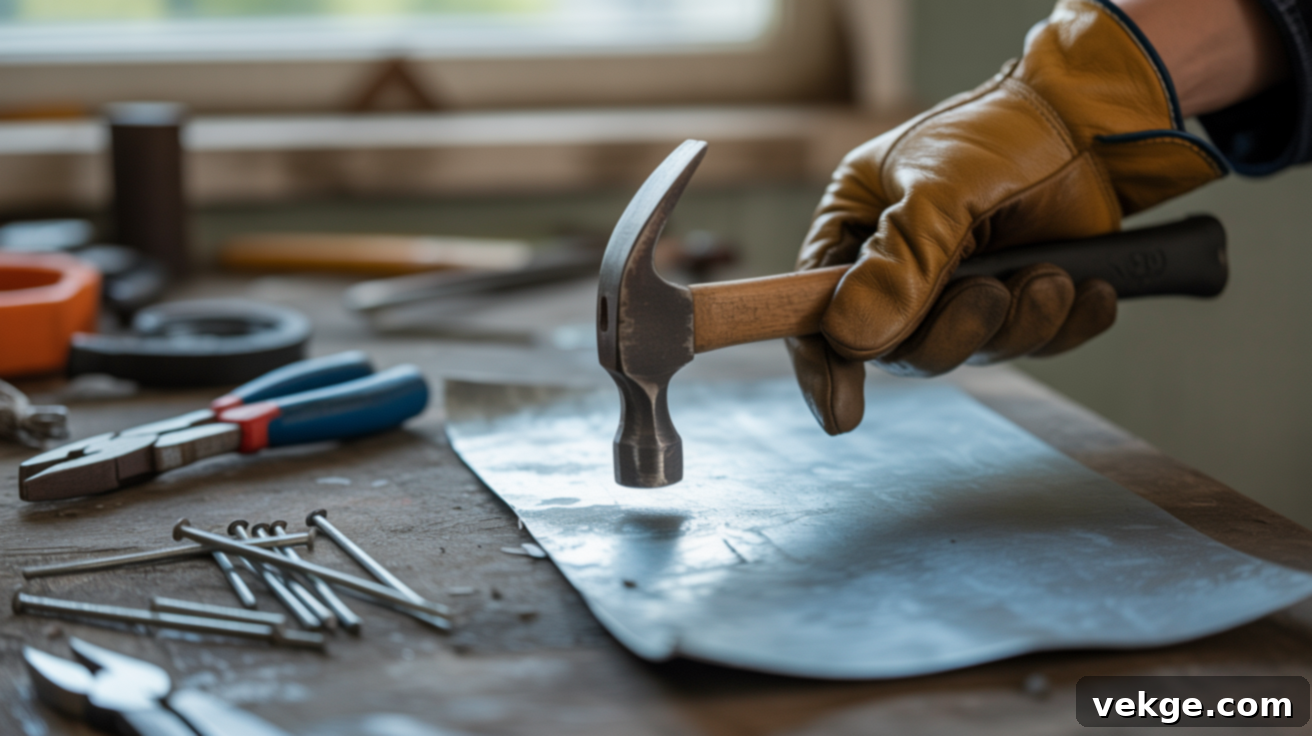
To elevate the aged look beyond simple color changes and surface dullness, consider adding physical distress to your galvanized metal. This technique creates a sense of history and realism, making the piece appear truly ancient and well-used. Physical imperfections like dents, scratches, and bends add tactile depth and character that cannot be achieved with chemical treatments alone.
Start by tapping the metal strategically with a hammer to create small, irregular dents and subtle bends. Avoid uniform patterns; instead, aim for a natural, haphazard distribution that mimics years of accidental bumps and impacts. You can also drag nails, screws, or even sharp-edged tools across the surface to produce random scratches and scuffs. Concentrate these marks on areas that would naturally experience wear, such as edges, corners, and areas of high contact.
For more aggressive distressing, consider drilling tiny, shallow holes, or using pliers to crimp and slightly warp edges. Remember, the goal is to make the piece look like it has genuinely endured years of use and exposure. These imperfections interact with light, casting shadows and highlighting the texture, which contributes significantly to a compelling, authentic aged appearance.
6. Apply Faux Paint for a Weathered Look
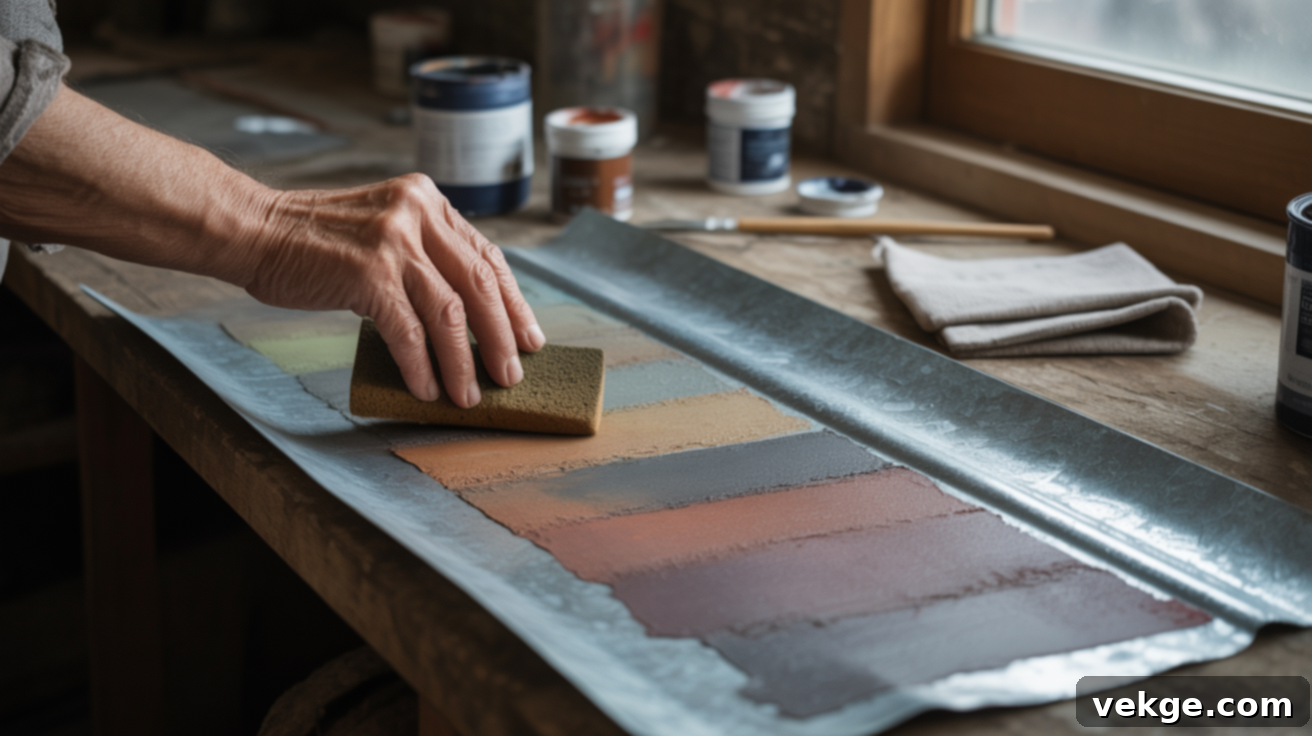
If you prefer to achieve an aged look without the use of chemical treatments, or if you want precise control over the final appearance, faux painting is an excellent alternative. This method allows you to simulate rust, patinas, and general weathering using various paint techniques. Begin by choosing a palette of muted tones that naturally occur on aged metal, such as various shades of gray, rust orange, earthy browns, off-whites, and even hints of subtle greens or blues for copper-like patinas.
The key to successful faux aging is layering thin, uneven coats. Use a dry brush technique or a sponge to dab, stipple, and lightly wipe paint onto the surface. Avoid full, opaque coverage; instead, focus on building up colors in random spots, allowing some of the underlying metal (or previous paint layers) to show through. For a rusted effect, apply a base of dark brown, then layer lighter rust tones, dabbing and blending to create texture.
For an authentic look, consider using metal-reactive paints that contain actual metallic particles. When activated with a special solution, these paints can produce real rust or verdigris effects, offering a highly convincing corroded appearance. Allow each thin layer of paint to dry completely before applying the next. Once you’ve achieved your desired weathered look, you can seal the finish with a clear, matte, or satin topcoat to protect it and ensure its longevity, especially for pieces that will be handled frequently or exposed to the elements.
Safety Tips for Aging Metal
Working with galvanized metal and various aging solutions, especially strong chemicals, requires careful handling to protect yourself, others, and your workspace. Prioritizing safety is paramount throughout the entire process. Always adhere to these guidelines:
- Work in a Well-Ventilated Area: Fumes from vinegar, salt water, and especially hydrochloric acid can be irritating or harmful. Always perform aging processes outdoors or in a very well-ventilated space with open windows and good airflow to prevent inhaling vapors.
- Wear Protective Gloves and Goggles: This is non-negotiable. Protect your hands with chemical-resistant gloves (e.g., nitrile or neoprene) and your eyes with safety goggles or a full-face shield to guard against splashes, spills, and accidental contact with chemicals or sharp metal edges.
- Avoid Inhaling Fumes: If using strong acids like hydrochloric acid, a high-quality respirator or mask with appropriate chemical cartridges is essential. Even with milder solutions, try to keep your face away from the surface during application and reaction to minimize exposure.
- Keep Others and Pets Away: Ensure that children, pets, and other bystanders are kept well away from your work area while you are handling chemicals or actively aging metal. Set up clear boundaries and communicate any potential hazards.
- Dispose of Chemicals Properly: Never pour used solutions down drains or onto the ground. Follow your local municipal guidelines for the safe disposal of chemical waste and any contaminated materials like rags or sponges.
- Never Mix Solutions: Combining different cleaning agents or aging solutions can lead to unpredictable and potentially dangerous chemical reactions, releasing toxic fumes or causing violent effervescence. Always use products individually as directed.
- Have Water Nearby: In case of accidental skin contact or spills, immediately rinse the affected area or surface with copious amounts of clean, running water for at least 15-20 minutes. Have a bucket of water or access to a hose readily available.
- Read Product Labels: Always read and follow the manufacturer’s instructions and safety warnings for any specific chemicals you are using.
Finishing and Sealing for Long-Lasting Results
Once you’ve successfully achieved your desired aged look on galvanized metal, the next crucial step is often to preserve that finish. After all, you’ve put in the effort to create that perfect patina, and you don’t want it to wear off prematurely or revert to its original shine. This is where sealing comes into play, offering a layer of protection without compromising the aesthetic you’ve just created.
My go-to choice for sealing aged galvanized metal is a high-quality matte or satin clear coat spray. These types of sealants offer excellent protection against wear, moisture, and UV rays without reintroducing the unwanted gloss that you worked so hard to eliminate. Applying a few light, even coats works best. It’s vital to allow each coat to dry completely, according to the manufacturer’s instructions, before applying the next. This ensures proper adhesion and a durable finish.
It’s generally wise to avoid using wax-based sealants on aged metal projects. While they might offer a temporary sheen, many waxes tend to yellow over time, which can significantly alter and detract from the authentic aged appearance you’ve painstakingly created. Additionally, waxes often offer less robust protection against the elements compared to dedicated clear coats.
However, there’s also an option for those who appreciate the ongoing evolution of their metal pieces: you can choose to skip sealing altogether. Unsealed metal, especially if exposed to outdoor conditions or damp air, will continue to age and change naturally over time. This approach results in an ever-evolving, dynamic patina, but it means the finish won’t be “locked in” and will be more susceptible to environmental factors. Consider this option if you value the organic progression of aging and don’t require a perfectly consistent, unchanging look.
Maintenance Tips for Aged Galvanized Metal
Once you’ve successfully aged your galvanized metal, maintaining that beautiful, worn aesthetic is key to its longevity. The right care will protect the finish and help it retain its character for years. Here are some simple yet effective steps you can use to protect your aged galvanized pieces:
- Seal Thoughtfully: As discussed, apply a matte or satin clear coat sealant to lock in the aged look and provide a protective barrier. This prevents further rapid change and guards against unwanted shine or corrosion, especially for indoor pieces or those handled often.
- Refresh Sealant Periodically: For items exposed to the elements (outdoor decor, garden planters), reapplying a clear coat sealant every 6 to 12 months can significantly extend the life of the finish. Harsh weather can break down sealants over time.
- Prepare Before Resealing: Always clean the surface thoroughly before reapplying sealant. Remove any dust, dirt, or loose particles to ensure the new sealant bonds properly and creates an even, streak-free finish.
- Protect from Harsh Elements: While aged metal looks great outdoors, covered storage or positioning pieces under overhangs can shield them from the most extreme rain, snow, and direct sunlight, further preserving the finish.
- Dust Gently: For general cleaning, use a soft brush or a slightly damp cloth to gently wipe away dust and light dirt. Avoid excessive scrubbing or using abrasive materials that could scratch or dull the aged patina.
- Avoid Harsh Cleaners: Steer clear of strong chemical cleaners, abrasive pads, or steel wool. These can strip away the aged finish, damage the sealant, or even revert the metal to a shinier state. Stick to mild soap and water if a deeper clean is needed, followed by thorough rinsing.
- Allow to Air-Dry Naturally: After cleaning, let the surface air-dry completely. Wiping with a cloth might leave streaks or lint, and vigorous drying could potentially affect the delicate aged finish.
What to Avoid When Aging Galvanized Metal
To ensure your project is successful, safe, and yields the desired aesthetic, it’s just as important to know what to avoid as it is to know what to do. Whether you’re using natural solutions or considering stronger agents, steering clear of these common missteps will help you achieve a great result and prevent potential hazards.
- Never Use Heat to Remove Galvanized Coating: This is perhaps the most critical safety warning. Heating galvanized metal, such as with a torch, welder, or even a high-powered heat gun, releases highly toxic zinc fumes. Inhaling these fumes can cause a serious condition known as “metal fume fever,” leading to flu-like symptoms, and in severe cases, can cause significant lung damage or other health issues. Always avoid burning, welding, or applying intense heat to galvanized metal unless you are absolutely certain the zinc coating has been safely and completely removed beforehand in a professionally controlled environment.
- Don’t Skip Surface Preparation: Attempting to apply vinegar, salt water, or paint to a dirty, oily, or overly slick galvanized surface is a recipe for poor results. The existing zinc coating, along with any grease, oil, fingerprints, or dust, will create a barrier that prevents aging agents from reacting evenly or paint from adhering properly. This can lead to patchy aging, uneven patinas, or paint that quickly chips and peels. Always take the time to thoroughly clean and, most importantly, scuff or sand the surface first. This crucial step ensures a clean, receptive surface for a consistent and durable aged effect.
- Avoid Sealing Too Early: Patience is key when it comes to the final steps of your project. Applying a sealant or clear coat to metal that hasn’t fully dried after aging or painting can trap moisture underneath. This trapped moisture can lead to a host of problems, including bubbling, peeling, cloudy patches, or even encouraging further corrosion beneath the sealant. Always allow aged or painted surfaces to dry completely—ideally overnight, or even longer in humid conditions—before applying any protective clear coat. This extra drying time ensures a strong bond and a flawless, long-lasting finish.
Summing Up
You now possess clear, actionable methods for aging galvanized metal, whether you prefer the gentle dulling power of vinegar, the rustic charm of saltwater-induced rust, or the controlled artistry of faux paint. The guesswork is eliminated, and you’re equipped to transform shiny new metal into pieces brimming with character and history.
Remember that the key to success lies in proper surface preparation, careful application, and the patience to let the processes unfold. Taking your time with each step, particularly the initial scuffing and adequate drying times, will yield the most satisfying and durable results. These techniques have consistently worked for me, creating beautiful, aged finishes that truly enhance my DIY and home decor projects.
With these guidelines, you’re ready to tackle your next galvanized metal project with confidence. If you’re inspired to explore more DIY or home improvement endeavors, feel free to check out other how-to guides and tips shared on this website for further creative ideas and practical solutions.
