Unlock Vintage Charm: Creative Ways to Repurpose Your Antique Wash Stand
Do you have an old antique wash stand gathering dust, sitting unused in an attic or garage? Don’t let these beautiful, classic pieces go to waste. With a touch of creativity and a few simple tools, you can transform these forgotten relics into functional and stylish elements that enhance any room in your home, or even your garden.
Antique wash stands, with their sturdy construction and timeless design, offer endless possibilities for repurposing. Whether you envision a charming nightstand for your bedroom, a unique vanity for your bathroom, or an unexpected mini bar for your living area, giving new life to an old wash stand is an accessible and rewarding DIY project.
This comprehensive guide will walk you through a variety of inspiring ways to reuse an antique wash stand, offering practical ideas and a detailed, step-by-step refinishing process. You don’t need specialized skills—just a willingness to roll up your sleeves and give your old furniture a fresh look and a renewed purpose. Get ready to add character, functionality, and a touch of history to your living space!
The Enduring Appeal of Repurposing Antique Furniture
Repurposing an old wash stand is more than just a craft project; it’s a thoughtful way to inject personality and sustainability into your home. Instead of discarding these well-made pieces or buying new, mass-produced items, you can create something truly unique and useful. This approach not only saves money but also helps reduce waste, contributing to a more eco-friendly lifestyle.
A Sustainable and Eco-Friendly Choice
In an age of disposable goods, choosing to repurpose antique furniture is a powerful statement for sustainability. By giving an old wash stand a new life, you’re preventing it from ending up in a landfill. This reduces demand for new materials and manufacturing processes, which often have a significant environmental impact. It’s an act of recycling that brings beauty and functionality back into your daily life.
Unmatched Character and Quality
One of the most compelling reasons to repurpose antique furniture is its inherent character. Old wash stands were crafted with strong, durable materials and often feature intricate details that are hard to find in modern pieces. This quality ensures they last for generations. The natural wear and tear—the subtle marks, faded areas, and unique patina—tell a story and add a distinctive charm that new furniture simply cannot replicate. These imperfections are not flaws; they are badges of authenticity, making each piece truly one-of-a-kind.
Cost-Effective Home Decor
Repurposing projects don’t have to be expensive or overly complicated. With a bit of effort and creativity, you can transform an old wash stand into a stylish, functional piece without breaking the bank. Often, the cost of materials for refinishing—like paint, stain, and new hardware—is far less than purchasing a brand-new item of comparable quality. This makes it an excellent option for budget-conscious decorators who still want high-quality, distinctive furnishings.
Personalize Your Space with a Unique Touch
By reusing what you already have, you create a home that feels more personal and authentic. An antique wash stand adds a touch of history and warmth to any room, standing out from generic modern furniture. It allows you to express your individual style, creating a conversation piece that reflects your personality and appreciation for timeless design.
Inspiring Ways to Repurpose Your Antique Wash Stand
An antique wash stand’s inherent structure—typically featuring a top surface, drawers, and often a cabinet or lower shelf—makes it incredibly versatile. Here are some of the most popular and practical ideas for giving yours a brand new role:
1. Elegant Bathroom Vanity
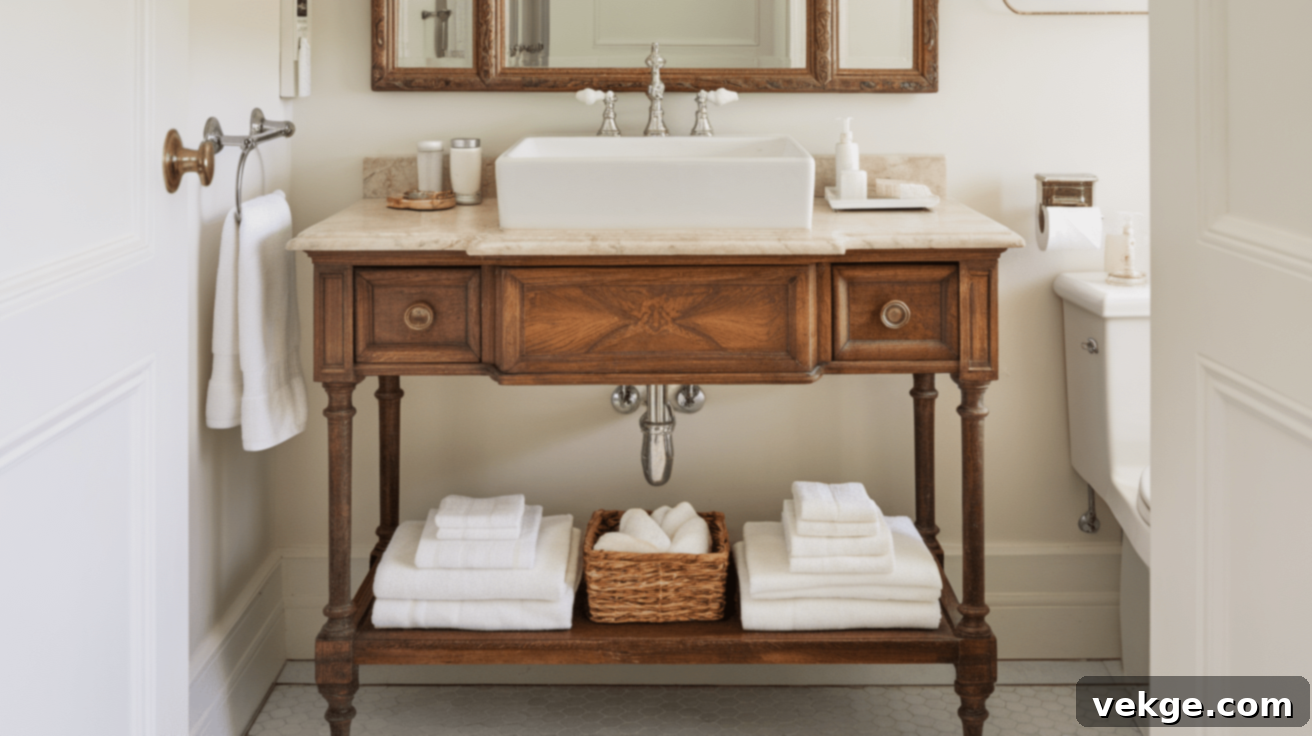
Transforming an old wash stand into a bathroom vanity is one of the most popular and rewarding repurposing projects. Its classic design and often compact size make it a perfect fit for small or medium-sized bathrooms, instantly adding vintage charm. To achieve this, you can typically place a stylish bowl-style sink directly on top of the stand and cut a precise hole for plumbing. The existing drawers or cabinet space are ideal for storing towels, soaps, toiletries, and other bathroom essentials, helping to keep your space organized and clutter-free.
For a cohesive look, consider painting or staining the wash stand to match your bathroom’s existing decor. If the original top is wood or marble, it’s crucial to apply a high-quality sealant to protect it from water damage and ensure its longevity in a humid environment. Swapping out old knobs or handles for new, elegant hardware can also significantly update its appearance, blending vintage appeal with modern functionality. This DIY vanity not only offers a unique aesthetic but also provides practical storage, making it a sustainable alternative to a new, mass-produced unit.
2. Charming Nightstand or End Table
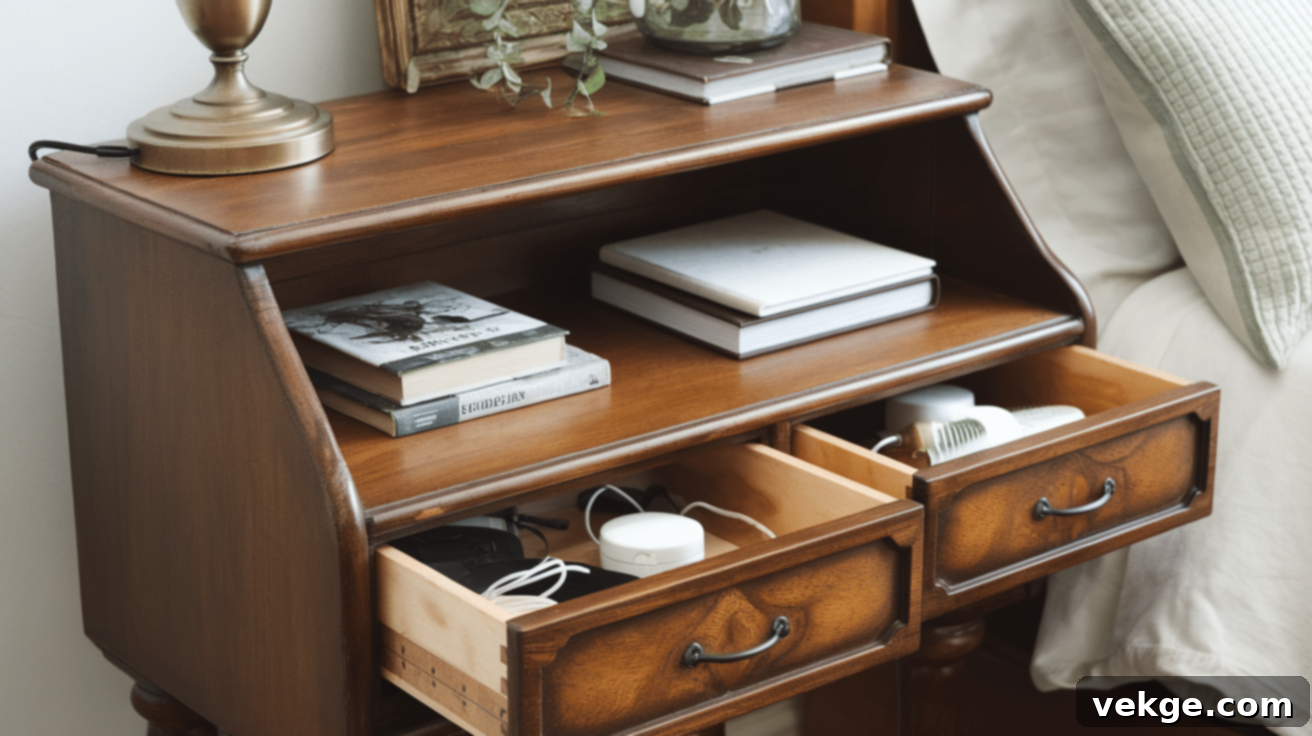
An antique wash stand’s compact dimensions and built-in storage make it an excellent candidate for a bedside nightstand or a stylish end table in a living room. The top surface provides ample space for a lamp, your favorite books, a clock, or a small decorative plant. The drawers and cabinet sections are perfectly suited for storing small personal items you want to keep close at hand, such as chargers, notebooks, reading glasses, or other bedtime essentials.
Personalize your repurposed nightstand by painting or staining it to complement your bedroom’s color scheme. A light, fresh color can brighten the room and give the piece a modern farmhouse feel, while a dark stain can preserve its antique elegance and add a touch of sophistication. Replacing the original hardware with new, decorative knobs or handles can further enhance its aesthetic and integrate it seamlessly with your existing furniture. This simple transformation offers not just extra storage but also a unique, functional piece that adds character to your private sanctuary.
3. Sophisticated Mini Bar Station
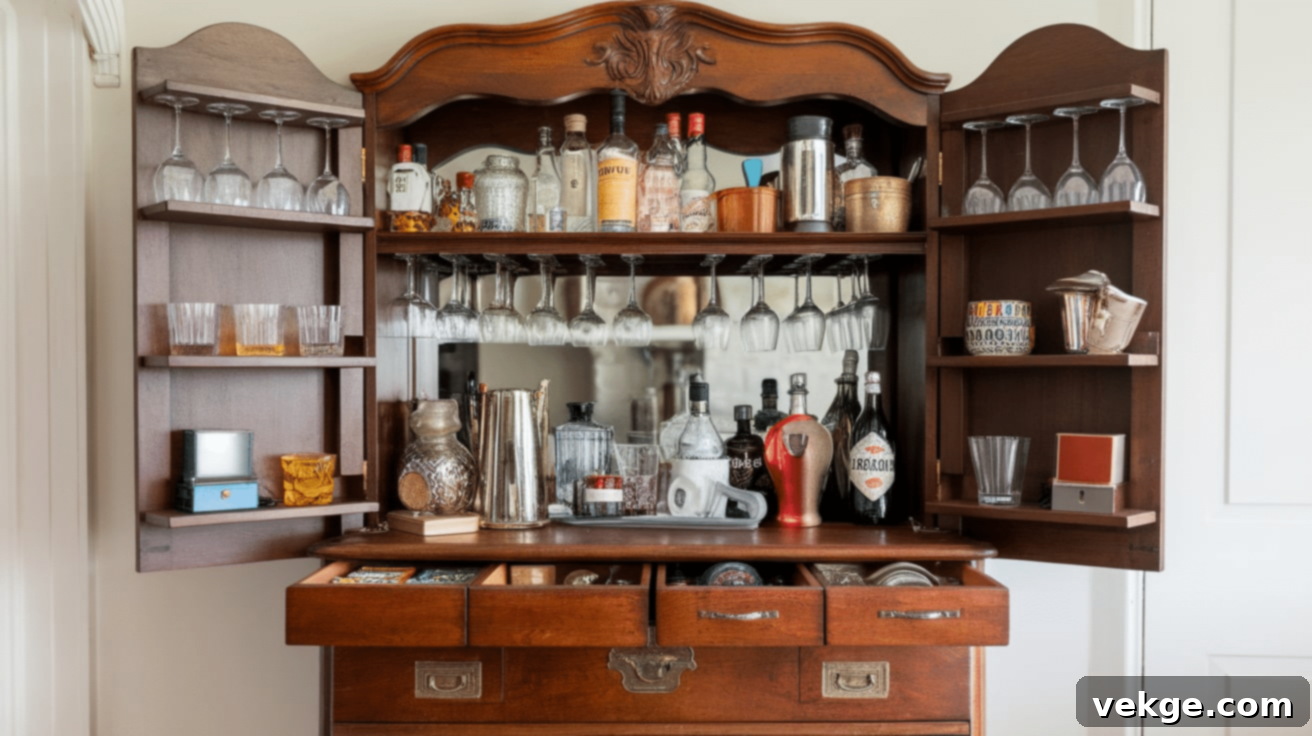
For the entertainer or cocktail enthusiast, an antique wash stand can be ingeniously repurposed into a sophisticated mini bar. The top surface becomes an ideal display area for your favorite bottles, elegant glassware, and a small tray for mixing drinks. The enclosed drawers or cabinet space can then be utilized to neatly store bar tools, cocktail napkins, coasters, and other essential supplies, keeping everything organized and ready for your next gathering.
Consider painting or staining the wash stand to match the ambiance of your entertaining space. A rich, dark wood stain can enhance its classic appeal, while a vibrant coat of paint can give it a more modern and playful character. Upgrading to new, stylish hardware, such as brass or chrome handles, can further elevate its design. This creative reuse of an antique piece provides a distinctive alternative to a standard bar cart, adding a unique focal point and a touch of vintage luxury to your home.
4. Functional Plant Stand or Garden Potting Bench
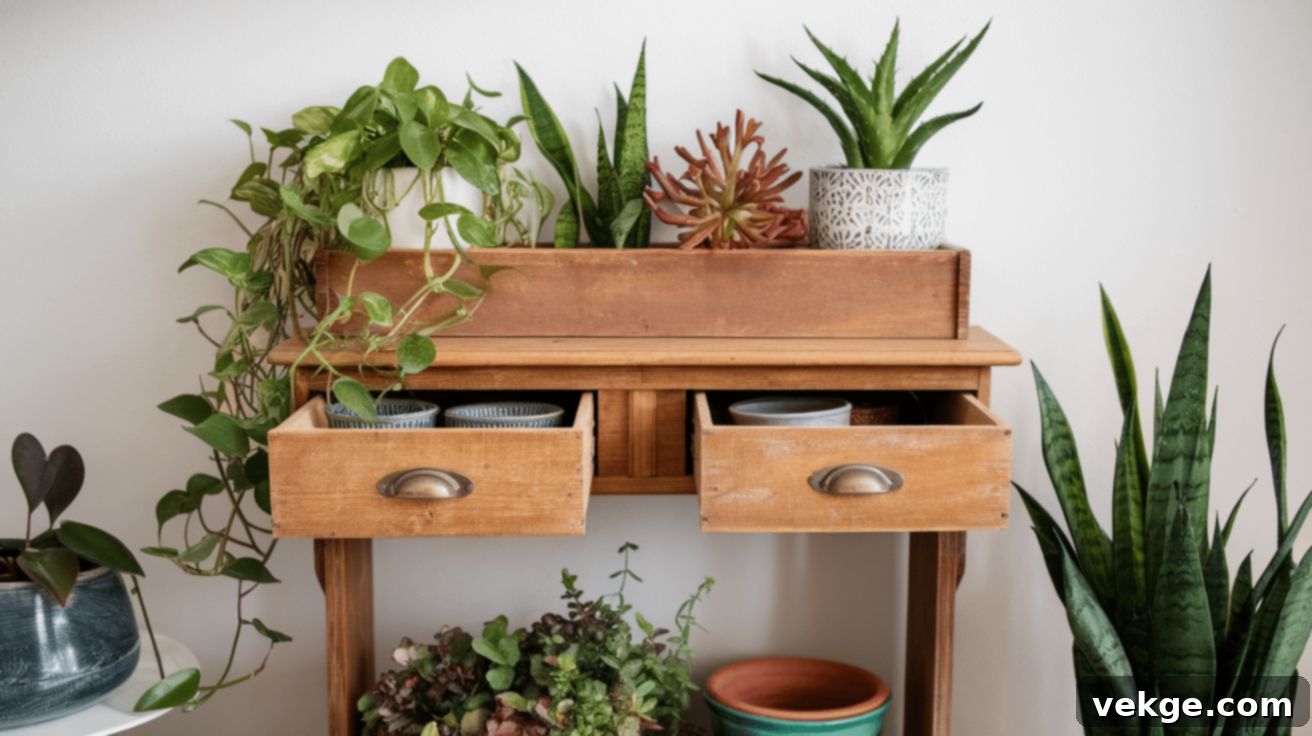
Bring the beauty of nature indoors or elevate your gardening game outdoors by transforming an antique wash stand into a charming plant stand or a practical potting bench. The sturdy top surface is perfect for displaying a collection of potted plants, herbs, or flowers, adding a natural touch to any room or patio. The drawers or shelves beneath can efficiently organize gardening tools, extra pots, plant food, and other supplies, keeping everything tidy and accessible.
If you prefer a rustic aesthetic, you can leave the wood in its natural state, allowing its aged beauty to shine through. For a more coordinated look, paint it to match your indoor decor or outdoor furniture. If the stand will be exposed to the elements, it’s essential to apply a weather-resistant protective seal to ensure its durability and longevity. This repurposing idea not only organizes your botanical treasures but also adds a unique, green accent to your living environment.
5. Stylish Console or Entryway Table
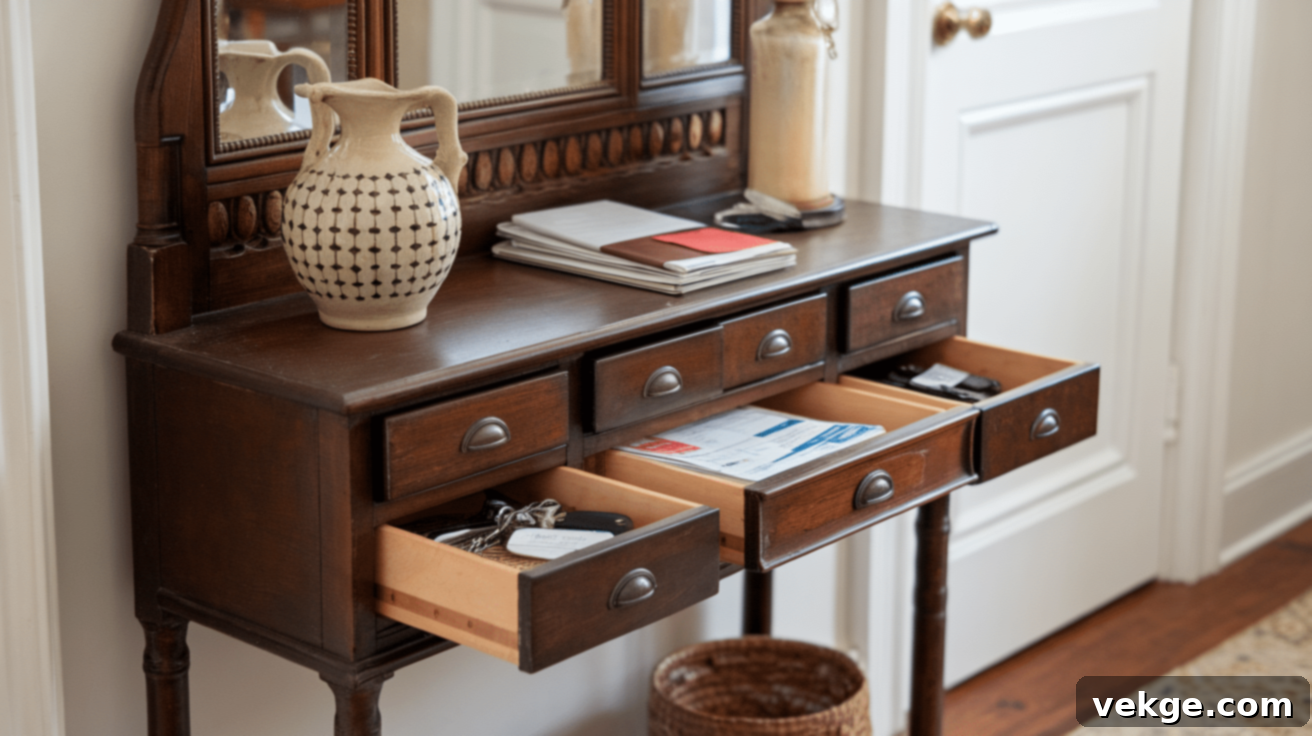
An antique wash stand can make a surprisingly chic and functional console table, ideal for hallways, entryways, or even behind a sofa in the living room. Its narrow profile often fits well in smaller spaces, providing a designated spot for everyday essentials. The top surface is perfect for placing keys, mail, decorative accents, or a small lamp to create a welcoming ambiance. The drawers or cabinet can discreetly store small items like gloves, stationery, or electronic devices, helping to maintain a clutter-free environment.
Customize the wash stand to seamlessly integrate with your home’s aesthetic. A fresh coat of paint in a neutral tone can create a minimalist look, while a bold color can turn it into an artistic statement piece. If you appreciate the natural beauty of aged wood, a light sanding and clear coat can preserve its original charm. Updating the hardware with new pulls or handles can significantly refresh its appearance, making it feel both vintage and contemporary. This repurposing idea offers a practical storage solution while enhancing the visual appeal of your entryway or living area.
6. Compact Home Desk or Craft Station
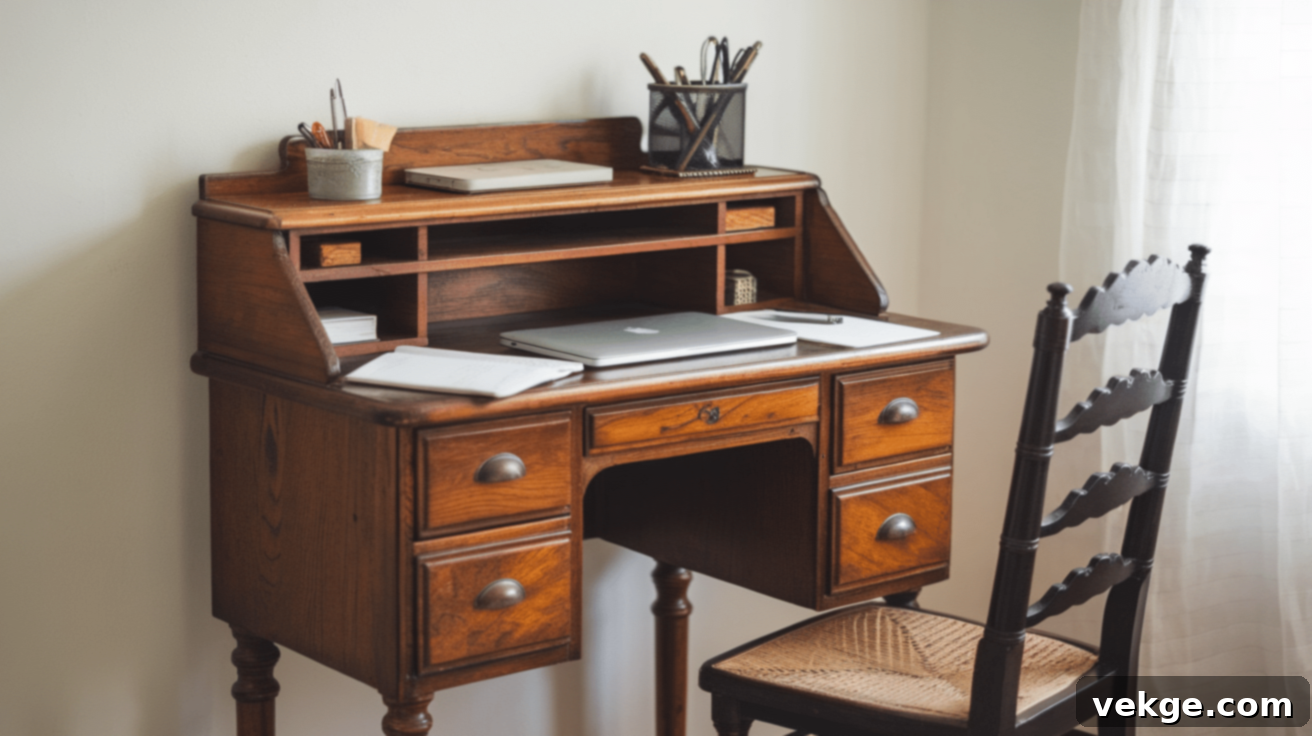
For those needing a compact workspace or a dedicated spot for creative hobbies, an antique wash stand can be cleverly transformed into a small desk or craft station. Its surface provides just enough space for a laptop, a few books, or your current writing project. The integrated drawers and cabinet are incredibly useful for organizing pens, notebooks, craft supplies like paints and brushes, or even sewing essentials, keeping your creative tools neatly tucked away.
To personalize your new desk, you can paint or stain the wash stand to match your study or craft room decor. Light colors can make the space feel more open and inspiring, while darker tones can add a sense of gravitas. Replacing the hardware with new, ergonomic handles can improve functionality and add a modern touch. If you prefer the authentic antique look, simply clean and seal the existing wood. This transformation provides a functional and stylish workspace without requiring a large footprint, perfect for small apartments or dedicated hobby nooks.
Your DIY Guide: How to Refinish an Antique Wash Stand
Refinishing an antique wash stand is a rewarding project that can make a substantial difference in its appearance and functionality. With a little time, effort, and the right steps, you can transform it into a beautiful, functional piece that perfectly complements your home.
Step 1: Thorough Cleaning
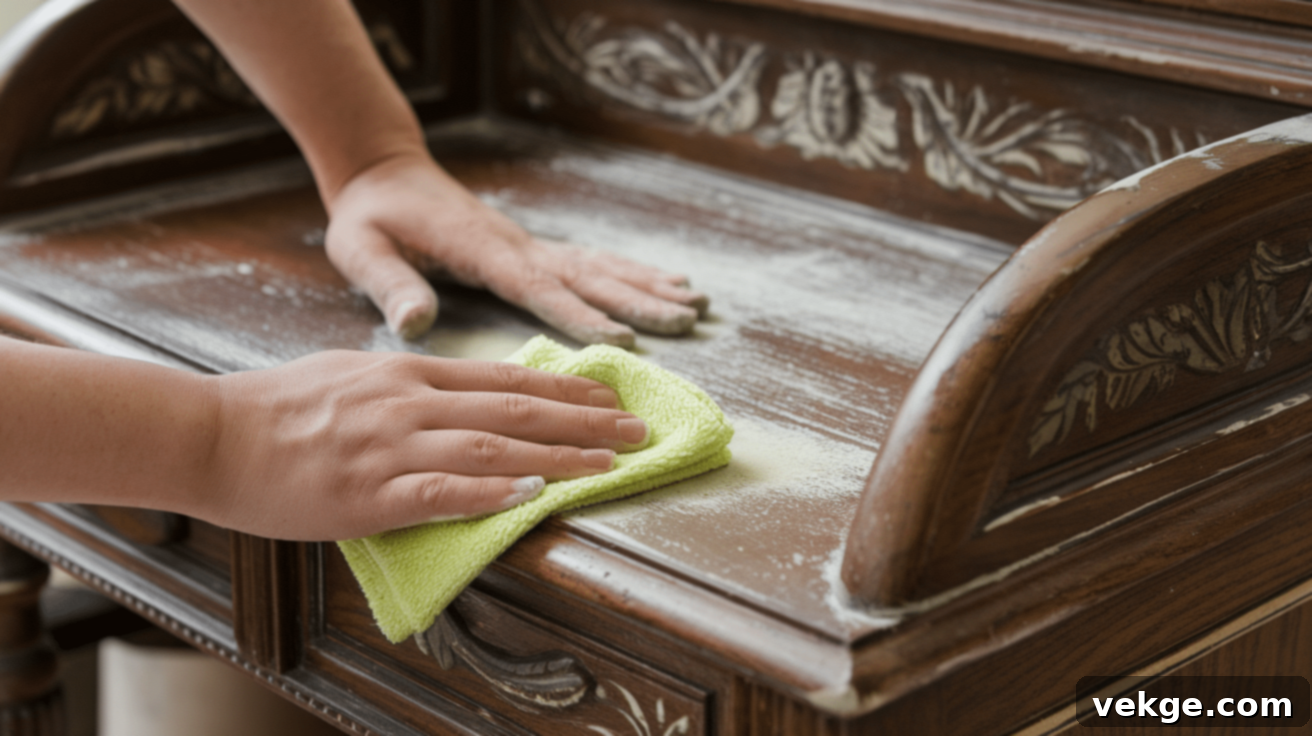
Before you begin any refinishing work, a thorough cleaning is absolutely essential. Over years, dust, dirt, grime, and old polish can accumulate, creating a barrier that prevents new paint or stain from adhering properly. Start by using a dry cloth or a soft brush to remove all loose dust and cobwebs from every surface, paying special attention to corners, carved details, and the insides of drawers.
Next, prepare a solution of mild soap (like dish soap) and warm water. Dampen a clean cloth with this mixture and gently wipe down all surfaces. Avoid saturating the wood, as excessive moisture can cause damage. For stubborn spots or sticky residue, a diluted vinegar-and-water solution or a specialized wood cleaner can be effective. If you notice old wax buildup, mineral spirits or a dedicated wax remover can help strip it away. After cleaning, wipe the entire piece again with a clean, damp cloth, then immediately follow with a dry cloth to absorb any remaining moisture. Allow the wash stand to dry completely—ideally for several hours or overnight—before proceeding. A perfectly dry and clean surface is key for a smooth, lasting finish.
Step 2: Define Its New Purpose
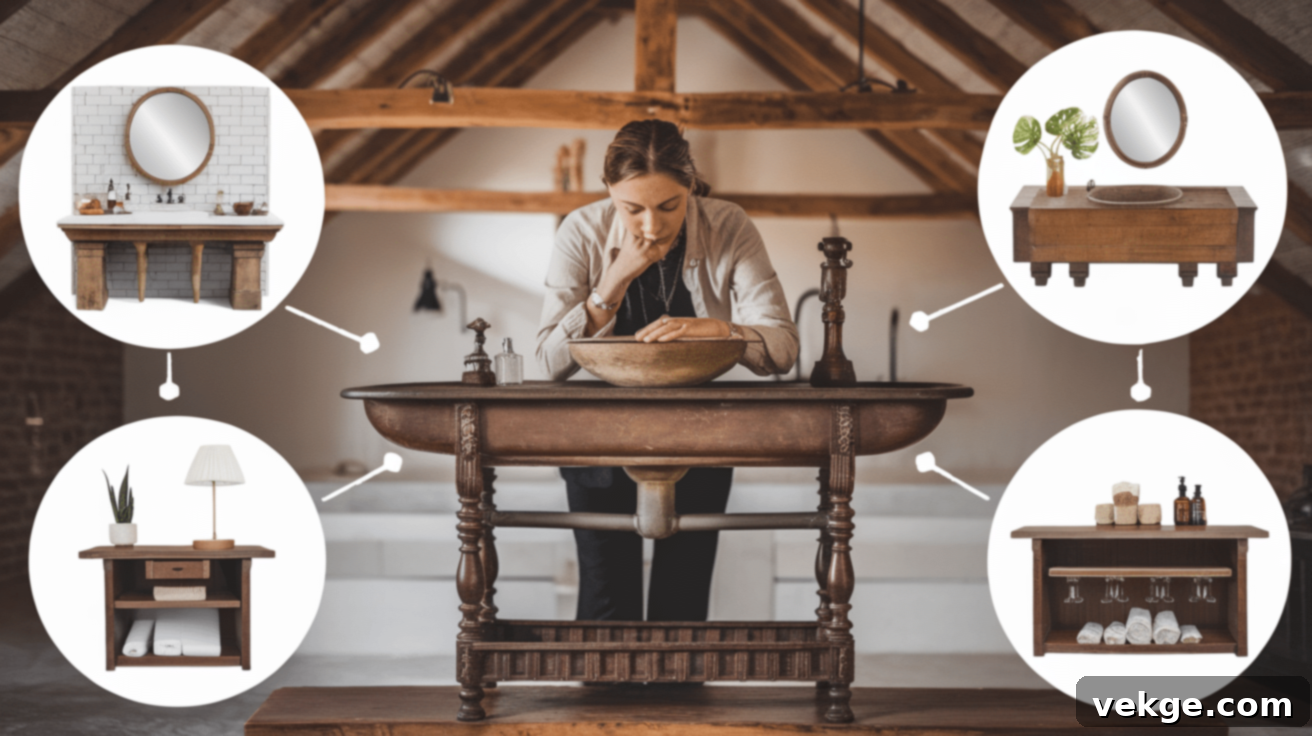
Before you commit to sanding and painting, take a moment to solidify your vision for the wash stand’s new life. Its inherent size and shape offer remarkable versatility, making this decision a crucial part of your planning. The purpose you choose will significantly influence the modifications, finishes, and hardware you select.
If you’re aiming for extra storage, perhaps as a nightstand or console table, consider whether you want to keep all drawers intact or remove cabinet doors for an open-shelf display. For a bathroom vanity, precise measurements for a sink cut-out and plumbing access will be necessary. If it’s to become a plant stand, think about waterproofing the top surface or adding a liner to protect the wood from moisture. Having a clear purpose helps streamline the entire refinishing process, ensuring that the final piece is not only beautiful but also perfectly suited to its new role and seamlessly integrated into your home decor.
Step 3: Sanding and Surface Preparation
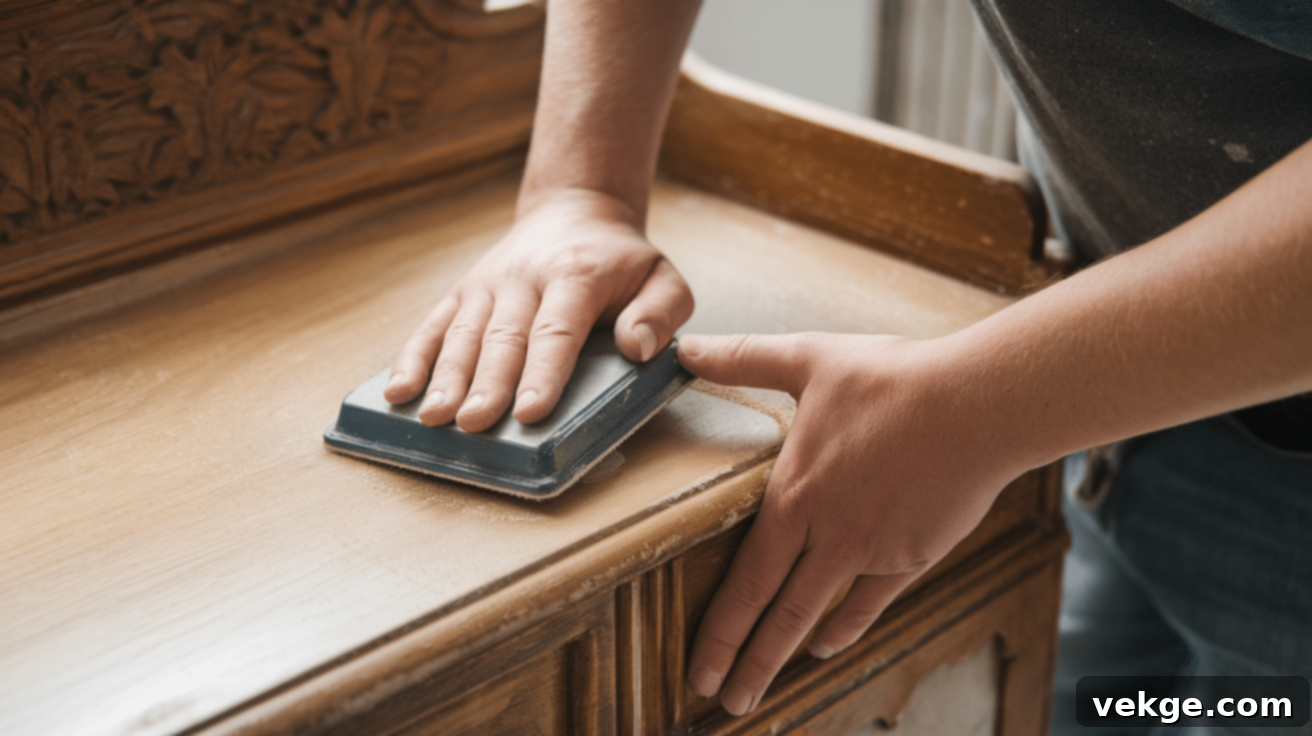
Sanding is a critical step that prepares the surface for a new finish. It removes old layers of paint, stain, or varnish, and smooths out imperfections, ensuring excellent adhesion and a professional-looking result. Start with medium-grit sandpaper (around 100-150 grit) to tackle the initial layer. Always sand in the direction of the wood grain to prevent unsightly scratches. For intricate details, curves, or hard-to-reach areas, a sanding block or folded sandpaper will be your best friend.
Once the old finish is largely removed and the surface feels somewhat smooth, switch to fine-grit sandpaper (220-320 grit) for a final, silky-smooth finish. After each sanding pass, thoroughly wipe away all dust with a dry cloth, a tack cloth, or a vacuum cleaner with a brush attachment. If you encounter any cracks, dents, or small holes, fill them with wood filler, allow it to dry completely, and then sand the patched areas flush with the surrounding surface. Proper sanding is the foundation for any successful paint or stain application, ensuring a clean, even, and durable finish.
Step 4: Choose Your Finish: Paint or Stain
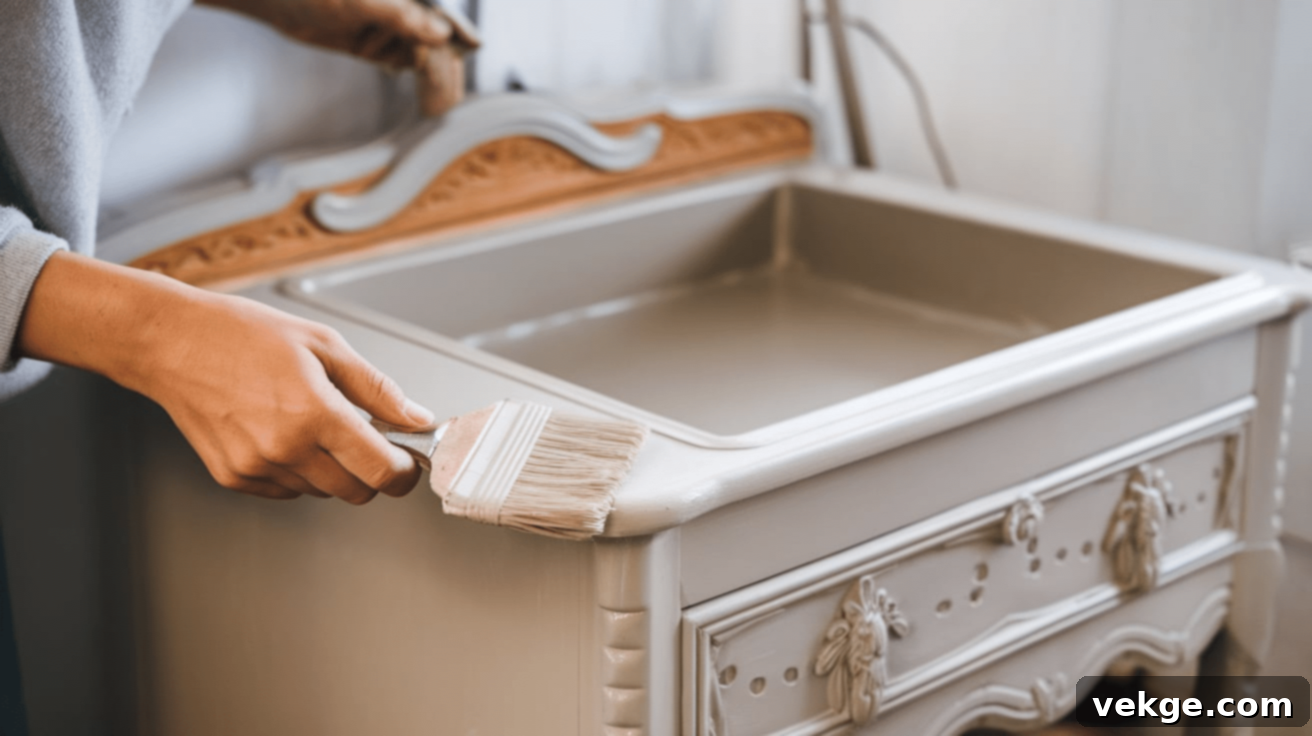
With the wash stand properly prepped, it’s time to decide on its new aesthetic: paint or stain. Both options offer distinct looks and protection. If you opt to paint, choose a high-quality primer first, especially if you’re making a dramatic color change or if the wood is prone to bleed-through. Select a paint color that complements your intended space and apply thin, even coats with a brush or roller. Allow each coat to dry completely, and lightly sand between coats for a super-smooth, professional finish.
If you prefer to stain, choose a shade that highlights the wood’s natural grain and character. Apply the stain with a cloth or brush, moving in the direction of the grain. After a few minutes, wipe off any excess stain with a clean cloth. You can apply multiple coats to achieve a darker, richer color, allowing adequate drying time between each application. Regardless of your choice, once the paint or stain is fully cured, apply a durable clear sealant (like polyurethane or lacquer) to protect the surface from scratches, moisture, and daily wear, ensuring your refreshed wash stand looks great for years to come.
Step 5: Update the Hardware
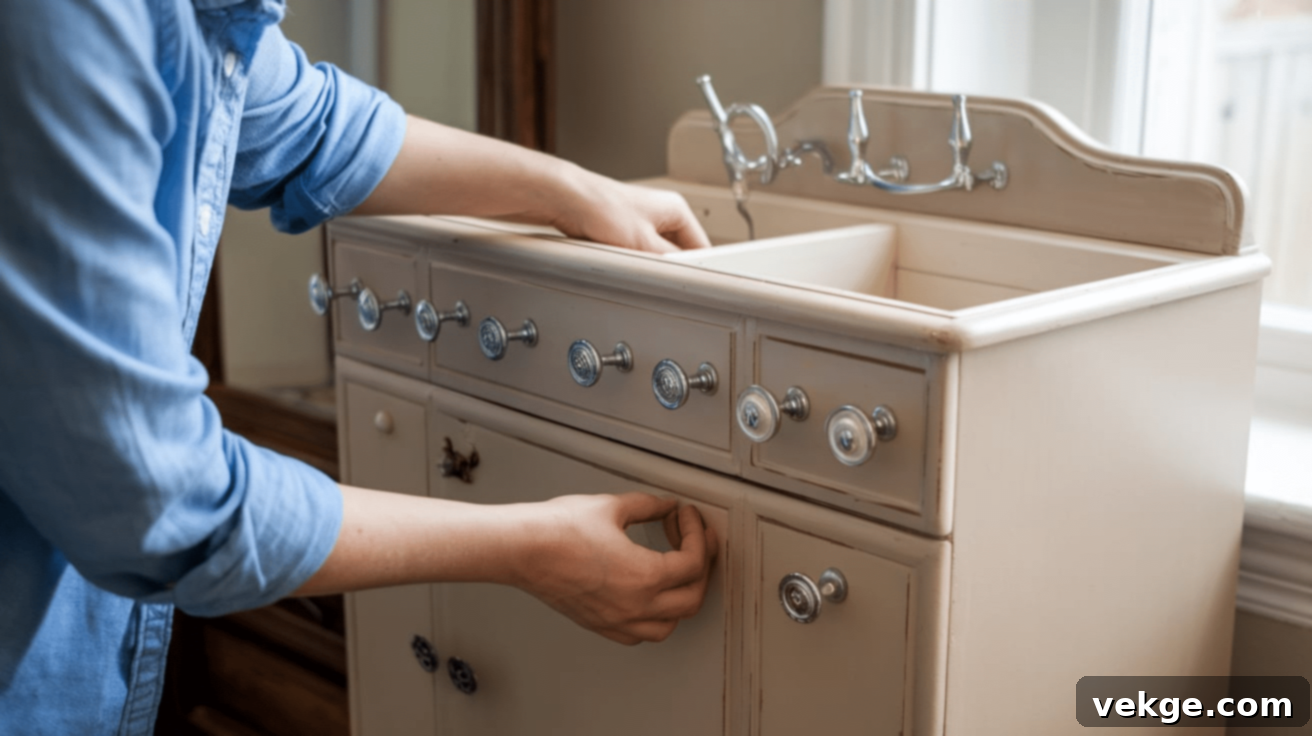
New hardware can dramatically transform the look of your repurposed wash stand, adding a fresh, updated touch that ties into your desired style. Start by carefully removing any existing knobs, pulls, or hinges. If your new hardware uses different hole spacing, you’ll need to fill the old holes with wood filler, sand them smooth once dry, and then drill new pilot holes for the chosen hardware.
Selecting the right knobs or handles is key. For a timeless, classic feel, consider traditional metal pulls in brass, bronze, or polished nickel. If your style leans more contemporary, opt for sleek, minimalist designs in matte black or brushed chrome. Unique materials like glass, ceramic, or leather can add a distinct personality. Carefully attach the new hardware using a screwdriver, ensuring everything is secure and perfectly aligned. This small but impactful detail can instantly elevate the wash stand, making it feel fully integrated with its new purpose and decor.
Step 6: Make Necessary Modifications
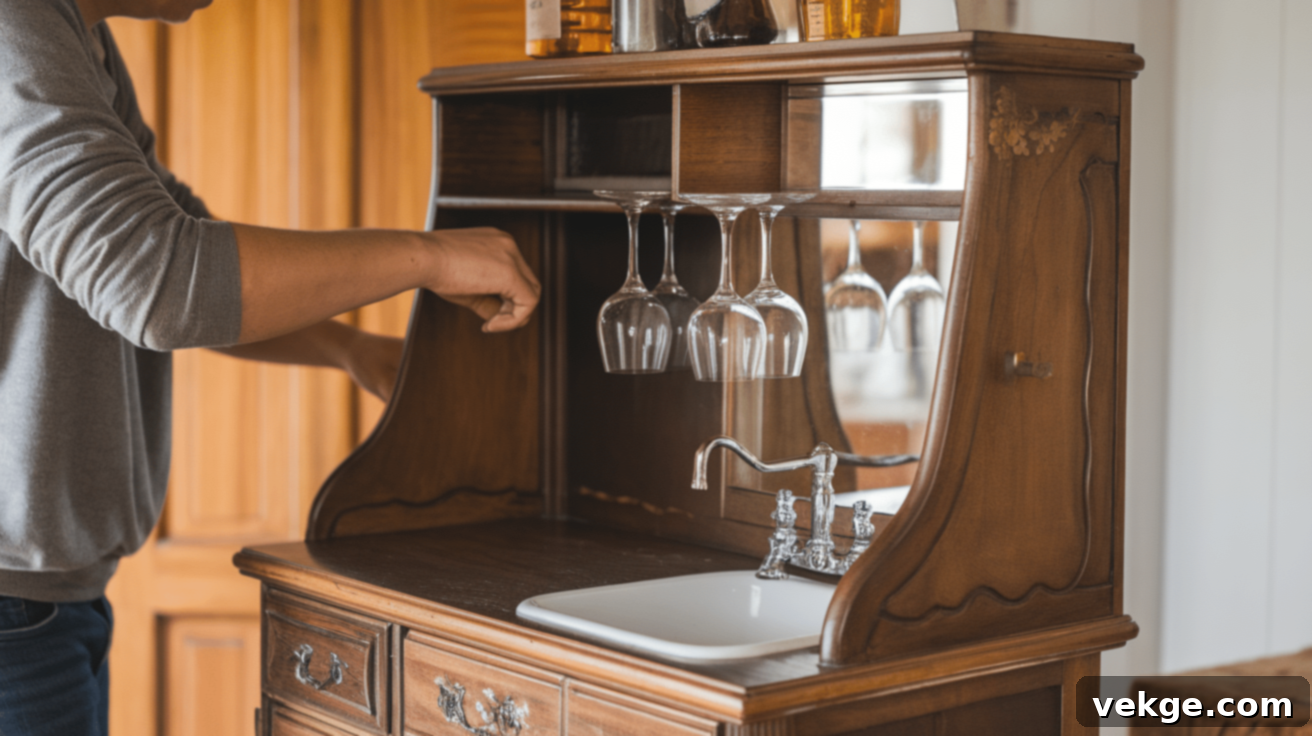
Once your wash stand is clean, sanded, and beautifully finished, it’s time to adapt its structure to perfectly suit its new function. These modifications are crucial for maximizing its utility and ensuring it performs its new role effectively.
If you’re converting it into a bathroom vanity, carefully measure and cut the necessary holes in the top for the sink basin and plumbing. Ensure the openings are precise to guarantee a secure and leak-free installation. For a nightstand or console table, you might consider removing cabinet doors to create open shelving, or adding extra internal shelves for more organized storage. When transforming it into a mini bar, think about installing small racks inside for wine glasses or adding hooks on the sides for hanging bar tools. These thoughtful adjustments are what truly make a repurposed wash stand functional and custom-fit for its new purpose in your home.
Step 7: Final Touches and Styling
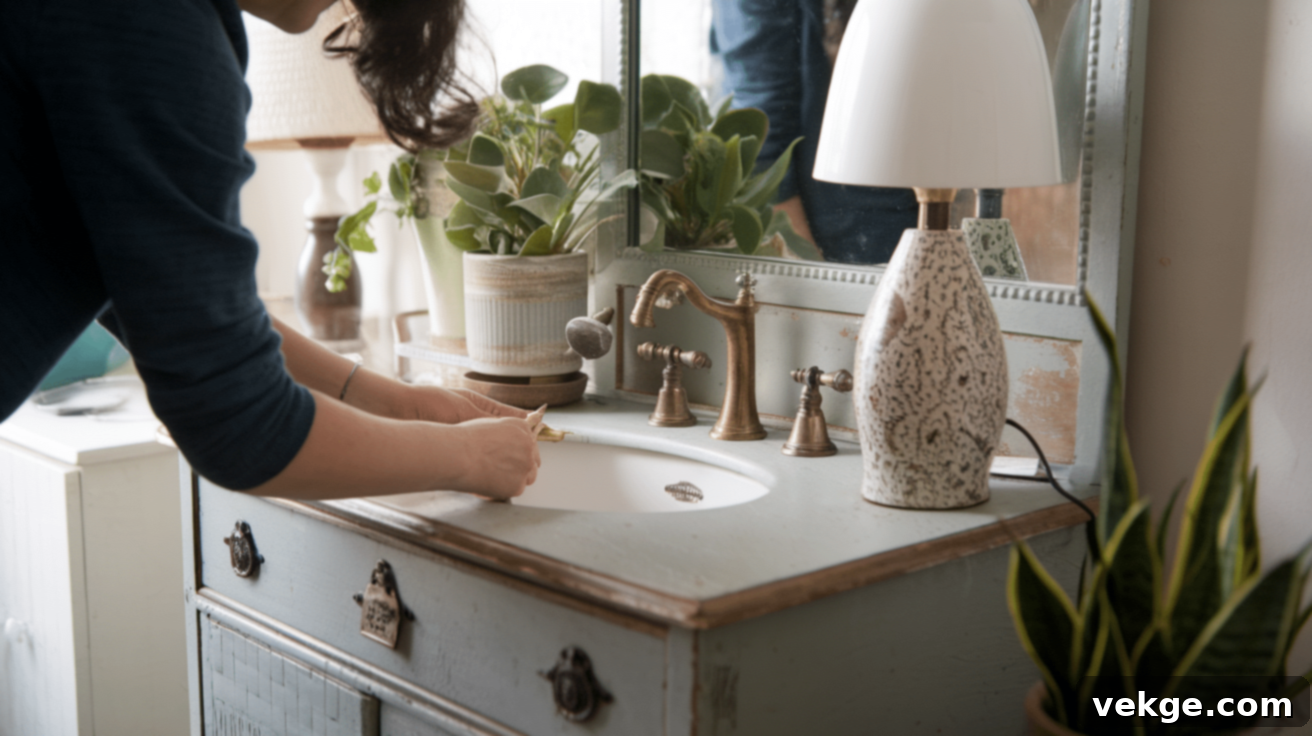
With all the hard work complete, it’s time for the exciting part: adding the final touches and styling your newly repurposed antique wash stand. Take a moment to inspect your paint or stain job for any missed spots or areas that need a little touch-up. Ensure all finishes are completely dry and cured before placing any items on the surface.
For a bathroom vanity, add a stylish mirror above it, and perhaps a small tray to hold soap and lotion. If it’s a nightstand, arrange a bedside lamp, a stack of your favorite books, or a small potted plant to create a cozy corner. For a mini bar, artfully arrange your bottles, elegant glassware, and bar tools. Consider adding decorative elements like candles, small sculptures, or framed photos to personalize the piece further. These thoughtful final details not only complete the look but also help your repurposed wash stand seamlessly integrate into your home, making it feel truly special and uniquely yours.
Conclusion: Give Your Antique Wash Stand a Second Life
Repurposing an antique wash stand is a truly rewarding project that offers a blend of sustainability, creativity, and unique style. Whether you transform it into a sophisticated bathroom vanity, a cozy nightstand, a charming mini bar, or a functional craft station, you’re not just creating a new piece of furniture; you’re preserving a piece of history and imbuing your home with unmatched character.
This process encourages you to think outside the box, allowing you to craft a home that feels deeply personal and reflects your individual taste. Instead of contributing to consumer waste by buying new, you’re embracing the beauty of what already exists, giving it a renewed purpose and extending its story. This approach not only saves money but also fosters a more mindful and sustainable lifestyle.
The timeless design and sturdy construction of an antique wash stand bring an inherent warmth and elegance to any room. So, if you have one of these treasures sitting unused, don’t let its potential fade away. With a few simple modifications and a fresh perspective, it can become a cherished and highly functional part of your home for many more years to come. Embrace the joy of DIY and enjoy the satisfaction of giving new life to a beautiful antique.
Frequently Asked Questions (FAQ)
What are the most popular ways to repurpose an antique wash stand?
Antique wash stands are incredibly versatile! Some of the most popular repurposing ideas include transforming them into a bathroom vanity, a charming nightstand, a sophisticated mini bar, a functional plant stand, a stylish console table for an entryway, or even a compact home desk. Their built-in drawers and cabinet space provide excellent storage for various items, making them adaptable to many rooms.
What tools do I need for a basic wash stand repurposing project?
For most basic repurposing projects, you’ll need relatively common tools. These typically include: cleaning supplies (mild soap, cloths), sandpaper (medium and fine grit), wood filler, paint brushes or rollers (if painting), a screwdriver for hardware, and possibly a drill for new hardware or modifications. For more involved projects like a bathroom vanity, you might also need a jigsaw for cutting sink holes and basic plumbing tools.
Is waterproofing necessary for a bathroom vanity conversion?
Absolutely yes! If you’re repurposing an antique wash stand into a bathroom vanity, waterproofing the top surface and surrounding areas is crucial. Wood is susceptible to water damage, warping, and mold in humid bathroom environments. You should apply multiple coats of a durable, water-resistant sealant (like a marine-grade polyurethane or epoxy resin) to all exposed wood surfaces, especially the top, to protect it from moisture and ensure its longevity.
How can I ensure my repurposed wash stand looks cohesive with my existing decor?
To ensure your repurposed wash stand blends seamlessly with your decor, consider its new finish and hardware. Choose paint colors or wood stains that complement your room’s palette. Select new knobs or handles that match the style of other fixtures or furniture in the space (e.g., modern, vintage, rustic). You can also style it with decorative items that tie into your existing aesthetic, such as lamps, plants, or artwork, helping it feel like a natural part of the room.
How do I maintain a repurposed antique wash stand?
To keep your repurposed wash stand in excellent condition, regular maintenance is key. For indoor pieces, simply dust it regularly with a soft cloth. Avoid harsh chemical cleaners, opting for mild soap and water for occasional deeper cleaning, and ensure surfaces are dried immediately. If it’s used outdoors or in a high-moisture area like a bathroom, inspect its protective finish annually and reapply a sealant as needed to guard against weather and water damage. Protecting it from direct, prolonged sunlight can also prevent fading and cracking.
