Maximize Your Kitchen: The Ultimate DIY Guide to Extending Cabinets to the Ceiling for Storage & Style
Are you dreaming of a kitchen with more storage and a polished, custom-built look, but don’t want to undertake a full remodel? The solution might be simpler than you think: extending your existing kitchen cabinets all the way to the ceiling. This clever upgrade instantly makes your kitchen appear larger, more cohesive, and significantly boosts your storage capacity.
I’ve personally transformed my kitchen by utilizing this often-overlooked vertical space, and I’m here to show you exactly how to do it. This comprehensive guide will walk you through everything, from precise measurements and building techniques to integrating these new extensions seamlessly with your current kitchen design. You’ll also discover practical tips to simplify the process and creative ideas for making the most of your newly acquired storage.
This single modification not only doubled my kitchen’s storage potential but also gave the entire space a taller, more refined, and put-together appearance. Let’s explore how you can turn that empty, dust-collecting gap above your cabinets into a valuable, functional, and stylish asset for your home.
Why Extend Kitchen Cabinets to the Ceiling? Unlocking Key Benefits
Upgrading your kitchen cabinets to reach the ceiling offers a multitude of advantages that go beyond mere aesthetics. This popular home improvement project provides practical, visual, and financial benefits for any homeowner. Let’s delve into the core reasons why this update is a smart choice for your home.
1. Significantly Increased Storage Capacity
- Maximize Vertical Space: Small kitchens, in particular, gain immense value from vertical expansion. Extending cabinets upward can add an impressive 20-30% more storage space, transforming previously unused areas into functional real estate.
- Declutter Your Counters: This extra room is ideal for stowing away seasonal decorations, rarely used special occasion dishes, bulky kitchen appliances, or large cookware that otherwise clutters your countertops and lower cabinets.
- Enhanced Organization: By providing dedicated homes for various items, the added space helps maintain clear countertops and keeps everyday essentials well-organized and easily accessible (with the help of a step stool!).
2. Modern and Sleek Aesthetic Appeal
- Seamless, Custom Look: Cabinet extensions create a clean, unified line that flows from the floor to the ceiling, giving your kitchen a sophisticated, custom-built quality. This smooth finish instantly elevates the entire room’s design.
- Visually Expansive Space: The continuous vertical lines draw the eye upwards, making the ceilings appear taller and the overall kitchen space feel larger and more open.
- Instant Update for Older Kitchens: This modification can dramatically modernize an outdated kitchen, providing a fresh, contemporary look without the need for a full, costly renovation.
3. Reduced Dust Accumulation and Easier Maintenance
- Eliminate Dust Traps: The gap between standard cabinets and the ceiling is notoriously difficult to clean and often becomes a collection point for dust, grease, and grime.
- Effortless Cleanliness: Extending cabinets to the ceiling completely eliminates this hard-to-reach void. With no exposed cabinet tops, your kitchen will stay cleaner with significantly less effort, requiring only routine wiping of the cabinet fronts.
- Hygienic Environment: This practical improvement means less time battling stubborn grease and dust, allowing you more time to enjoy cooking and spending time in a pristine kitchen.
4. Improved Home Resale Value
- High-Impact Upgrade: Kitchens are a focal point for potential buyers and often play a pivotal role in home sales. An updated kitchen with extended cabinets signals quality, thoughtful design, and maximized functionality.
- Attractive Investment: Real estate professionals frequently note that this type of kitchen upgrade can yield a good return on investment during home appraisals, making it a worthwhile enhancement for your home’s future value.
- Modern Appeal for Buyers: Buyers are often looking for move-in ready homes with modern amenities and smart storage solutions. Ceiling-height cabinets tick both these boxes, making your property more appealing in a competitive market.
Essential Considerations Before Starting Your Cabinet Extension Project
Thorough planning is the cornerstone of any successful home improvement project. Before you pick up a single tool, taking the time to assess your kitchen space and resources will help you avoid costly mistakes and ensure a smooth process. Here’s a detailed checklist to review before you begin your cabinet extension journey.
1. Assessing Your Kitchen Space
Accurate measurements and an understanding of your kitchen’s unique characteristics are vital.
Measuring Requirements:
- Ceiling Height: Measure the exact ceiling height at multiple points along the wall where cabinets will be extended. Ceilings are rarely perfectly level.
- Space Above Cabinets: Precisely measure the vertical distance from the top of your existing cabinets to the ceiling. This will determine the height of your extensions.
- Corner Measurements: Pay special attention to measurements near corners, as these areas can have unique challenges or require custom cuts.
- Obstruction Check: Carefully note the locations of any light fixtures, ceiling vents, electrical outlets, pipes, or other built-in features that might interfere with the cabinet extensions.
- Wall Irregularities: Look for any signs of wall bowing or irregularities that could affect the alignment of your new cabinets.
Potential Issues to Note:
- Ceiling Slopes: Be aware of any noticeable slopes or unevenness in your ceiling, as these will require creative solutions like scribe molding or soffits.
- Existing Molding: Determine if your current cabinets have crown molding or other trim that will need to be removed, reused, or replaced.
- Wiring and Plumbing: Identify any hidden wiring or plumbing in the walls above your cabinets that could be impacted by drilling or mounting.
2. Deciding Between DIY and Professional Help
Your skill level, available time, and budget will influence whether you tackle this project yourself or hire a professional.
Skills Assessment for DIY:
- Carpentry Knowledge: Do you have basic carpentry skills, including cutting, joining, and finishing wood?
- Power Tool Comfort: Are you comfortable and proficient with power tools such as saws (miter, circular, jigsaw), drills, and nail guns?
- Level and Plumb: Can you accurately use a level and plumb line to ensure your cabinets are perfectly straight and square?
- Cabinet Structure: Do you understand how cabinets are constructed and securely attached to walls?
- Physical Capability: Are you able to lift and maneuver heavy cabinet boxes safely, possibly with the help of a partner?
Project Requirements for DIY:
- Time Commitment: Extending cabinets for an average kitchen can take 2-4 full days of focused work, depending on complexity.
- Essential Tools: You’ll need a range of basic tools including a saw, level, drill, measuring tape, and safety gear.
- Material Handling: Can you transport and safely store cabinet materials and wood pieces?
- Assistance: A helper is almost essential for heavy lifting and ensuring accurate installation.
- Work Space: You’ll need a dedicated area for cutting, assembling, and painting.
Cost Comparison: DIY vs. Professional
| Cost Factors | DIY Costs (Estimated) | Professional Costs (Estimated) |
|---|---|---|
| Materials (Cabinets, Wood, Finish) | $300 – $600 | $400 – $800 |
| Tools (if purchased) | $100 – $200 (if needed) | N/A (included in labor) |
| Labor/Time Investment | 16 – 32 hours (personal time) | $500 – $1000 (1-2 days) |
| Total Estimated Costs | $400 – $800 | $900 – $1800+ |
Remember: While DIY can save on labor costs, sometimes hiring a professional can actually save you money in the long run by preventing costly mistakes, ensuring a flawless finish, and providing peace of mind.
Overcoming Common Challenges in Cabinet Extension Projects
Even the most straightforward kitchen projects can present unexpected hurdles. When extending cabinets to the ceiling, certain issues pop up more frequently than others. Knowing these common challenges and their practical solutions will help you prepare and execute a successful upgrade.
1. Dealing with the Gap Between Cabinets and Ceiling
The space between your new extensions and the ceiling is rarely uniform. Here’s how to create a polished finish:
- Crown Molding (Under 2 inches): For smaller gaps, crown molding is your best friend. It beautifully conceals the space, adding an elegant, finished architectural detail that makes the cabinets look truly built-in.
- Custom Panels (Larger Gaps): If the gap is more significant, custom-cut panels matched to your cabinet color or finish can bridge the distance seamlessly. These panels create a smooth, continuous surface.
- Soffits: Installing a small, decorative soffit can blend the extension with your ceiling, creating a deliberate built-in look while accommodating any unevenness.
Installation Tips for a Seamless Finish:
- Caulk for Tight Seals: Use painter’s caulk in corners and along seams for a smooth, professional, and tightly sealed finish.
- Pre-Paint/Stain: For best results, paint or stain all new materials (panels, molding) before installation, especially if they are difficult to reach once installed.
- Match Finishes Carefully: Take samples of your existing cabinet finish to ensure the new materials match perfectly, or opt for a contrasting accent for a deliberate design choice.
- Consider LED Lighting: Integrate LED strip lighting above or below the new crown molding for a stylish, ambient glow that highlights the extension.
2. Handling Uneven Ceilings
Perfectly level ceilings are a rarity. Here’s how to achieve a straight look despite variations:
- Multiple Measurements: Always measure the ceiling height at several points along the wall to identify the lowest and highest spots.
- Scribe Molding: For slight curves or gentle slopes, scribe molding can be custom-cut to follow the ceiling’s contour, creating a visually straight line.
- Flexible Trim Pieces: For more significant variations, flexible trim pieces can be used to adapt to the ceiling’s shape without visible gaps.
- Creating a Level Border: In cases of serious slopes, it’s often more aesthetically pleasing to install a level soffit or a straight border a few inches below the lowest point of the ceiling, rather than trying to follow the uneven line. This creates a clean, intentional separation.
3. Integrating with Older Cabinets
Before extending older cabinets, a thorough assessment is crucial to ensure they can support the additional weight and structural changes:
- Cabinet Box Strength: Check the overall strength and stability of the existing cabinet boxes. Are they solid wood or particle board? Are they still rigid?
- Wall Attachment Security: Verify that the existing cabinets are securely attached to the wall studs. Loose cabinets will need reinforcement before extensions are added.
- Material Condition: Inspect for any signs of water damage, warping, cracked panels, or other material degradation that could compromise structural integrity.
- Frame and Door Alignment: Ensure that existing cabinet frames are square and doors align properly. If they’re already misaligned, extending them will only amplify these issues.
Quick Assessment Tip: If the cabinet doors open and close smoothly, and the overall structure feels solid and stable when gently pushed or pulled, your existing cabinets are likely suitable for extension. However, if you find loose joints, significant damage, or weak materials, consider replacing those sections or consulting a professional.
Budget-Friendly Solutions for Extending Kitchen Cabinets
Achieving more storage and a high-end kitchen look doesn’t have to break the bank. With smart planning and creative choices, you can extend your cabinets to the ceiling while staying within a reasonable budget. Let’s explore cost-effective strategies to enhance your kitchen.
1. Reusing Existing Materials Strategically
Making smart use of your current kitchen elements can significantly cut down costs:
- Retain Cabinet Bases: Keep your existing lower and upper cabinet boxes as the foundation for your extensions. This is often the most expensive component.
- Repurpose Molding: Carefully remove any existing crown molding or decorative trim. If it’s in good condition, it can often be cleaned, repaired, and reused with your new extensions for a cohesive look.
- Save Original Doors: If you’re adding new extension boxes, save an original cabinet door or panel. This serves as a perfect reference for matching new doors or paint finishes.
- Utilize Spare Wood: Hold onto any spare wood pieces, even small ones. They can be invaluable for creating fillers, shims, or small trim pieces.
Time-saving tip: As you dismantle any existing components, take clear photos and label all pieces. This will make reassembly much easier and reduce guesswork.
2. Cost-Effective Cabinet Extension Options
Consider these alternatives for extending your cabinets, balancing cost with customization:
Ready-Made Options:
- Stock Upper Cabinets: Purchasing standard-sized, unfinished upper cabinets designed for extensions (often 12-18 inches tall) is usually the most economical choice, ranging from $100-$300 per unit.
- Standard Sizes: These units are available in common widths and depths, often fitting seamlessly with existing cabinetry.
- Quick Availability: Stock options are readily available from home improvement stores, allowing for quicker project initiation and installation.
- Easy Matching: With a fresh coat of paint, stock units can be easily matched to your current cabinet finish.
Custom Solutions:
- Built to Exact Specifications: Custom extensions are tailor-made for your kitchen, ensuring a perfect fit and seamless integration with existing cabinets, especially beneficial for unusual ceiling heights or cabinet styles.
- Material Flexibility: While generally more expensive, custom work allows you to choose materials that precisely match or complement your current cabinetry.
- Higher Cost, Perfect Fit: Expect higher costs due to specialized labor and materials, but you gain an impeccable, fully integrated look.
Money-saving tip: Keep an eye out for sales at kitchen and home improvement stores, especially around major holidays, to purchase materials at a reduced price.
3. Creative DIY Alternatives to Full Extensions
If full cabinet extensions aren’t feasible for your budget or skill level, these simpler DIY options still enhance storage and aesthetics:
Open Storage Ideas Above Cabinets:
- Floating Shelves: Install stylish floating shelves in the space above your existing cabinets. These are great for displaying decorative items, cookbooks, or often-used dishes.
- Wall-Mounted Racks: Consider wall-mounted dish racks, pot racks, or spice racks in the vertical space for functional and visual appeal.
- Pull-Down Storage Units: For hard-to-reach areas, install pull-down shelving systems (like those used in pantries) to bring items within easy reach.
- Glass-Front Display Cases: Add smaller, independent glass-front cases for displaying special items without fully enclosing the space.
Decorative and Functional Options:
- Simple Box Frames: Build simple, open box frames that sit atop your cabinets, offering a structured space for baskets or decorative objects.
- Basket Storage Systems: Use a series of attractive baskets or bins to organize items in the open space, providing both storage and a neat appearance.
- Plant Display Areas: Utilize the space for displaying a collection of indoor plants, adding life and freshness to your kitchen.
- Accent Lighting: Install uplighting or downlighting in the gap to create ambiance and highlight the area, even if no storage is added.
Installation tip: If you’re new to DIY cabinet projects, start by extending cabinets in a small section or on a single wall. This allows you to test your skills, refine your technique, and build confidence before tackling the entire kitchen.
Design Inspiration: 10 Creative Ideas for Extending Kitchen Cabinets
Extending your cabinets to the ceiling doesn’t mean sacrificing style. In fact, it opens up a world of design possibilities. Here are ten inspiring ideas to help you envision how this upgrade can transform your kitchen’s aesthetic and functionality.
1. Glass-Front Cabinets for Display
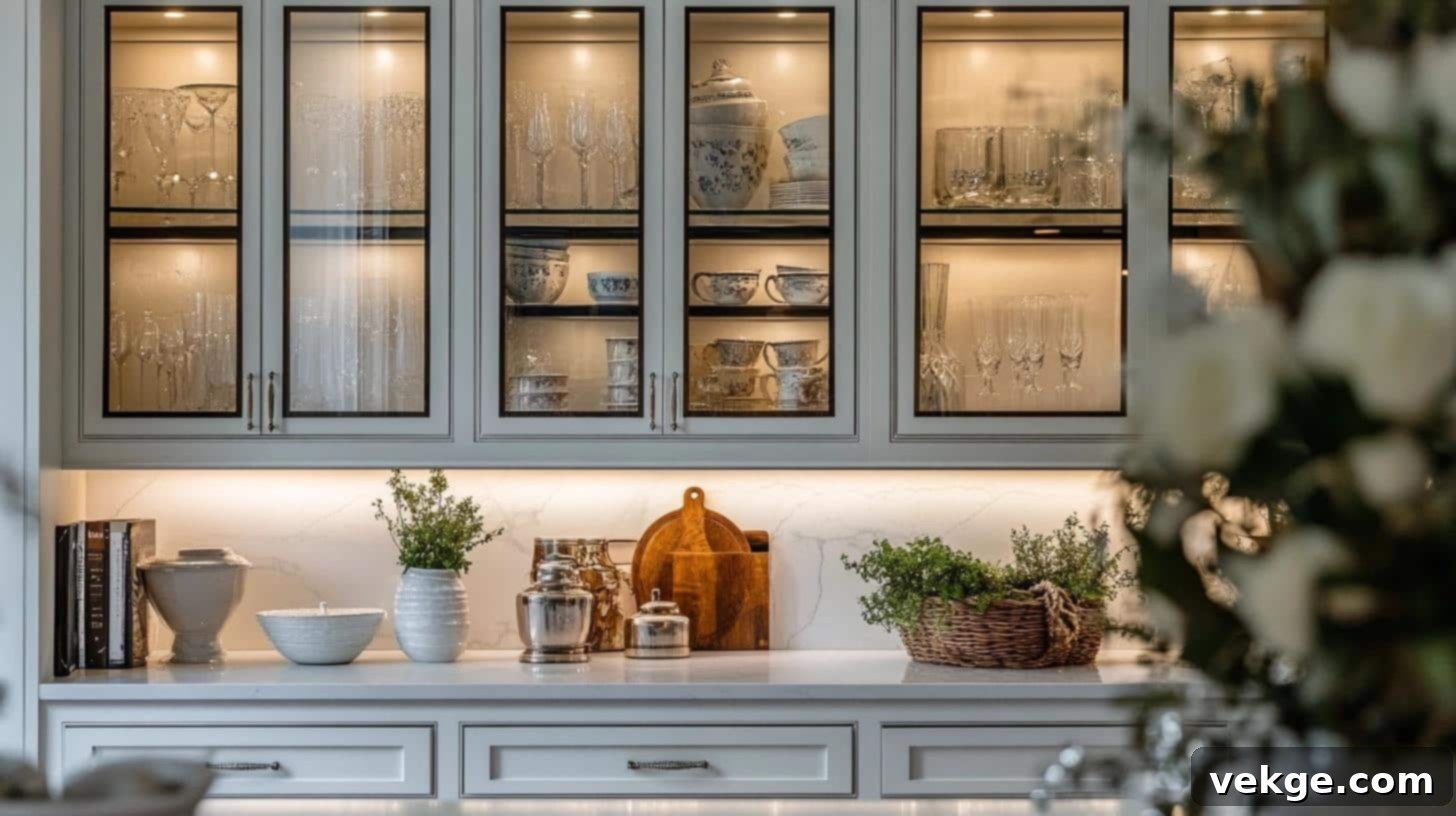
Glass-front cabinets extending to the ceiling create an open, airy atmosphere while offering a sophisticated way to display decorative items, fine glassware, or cherished dishes. These cabinets add significant vertical storage without making the space feel closed off, and the transparent glass allows light to flow through, enhancing brightness and the illusion of spaciousness.
- Style Impact: Adds a modern, elegant, and transparent element, showcasing your collections.
- Best For: Displaying beautiful glassware, decorative plates, or vibrant plants.
- Materials Needed: Cabinet boxes, glass cabinet doors, internal shelves, optional lighting.
- Cost Consideration: Varies based on glass type (clear, frosted, seeded) and whether internal lighting is added.
2. Open Shelves Above Cabinets
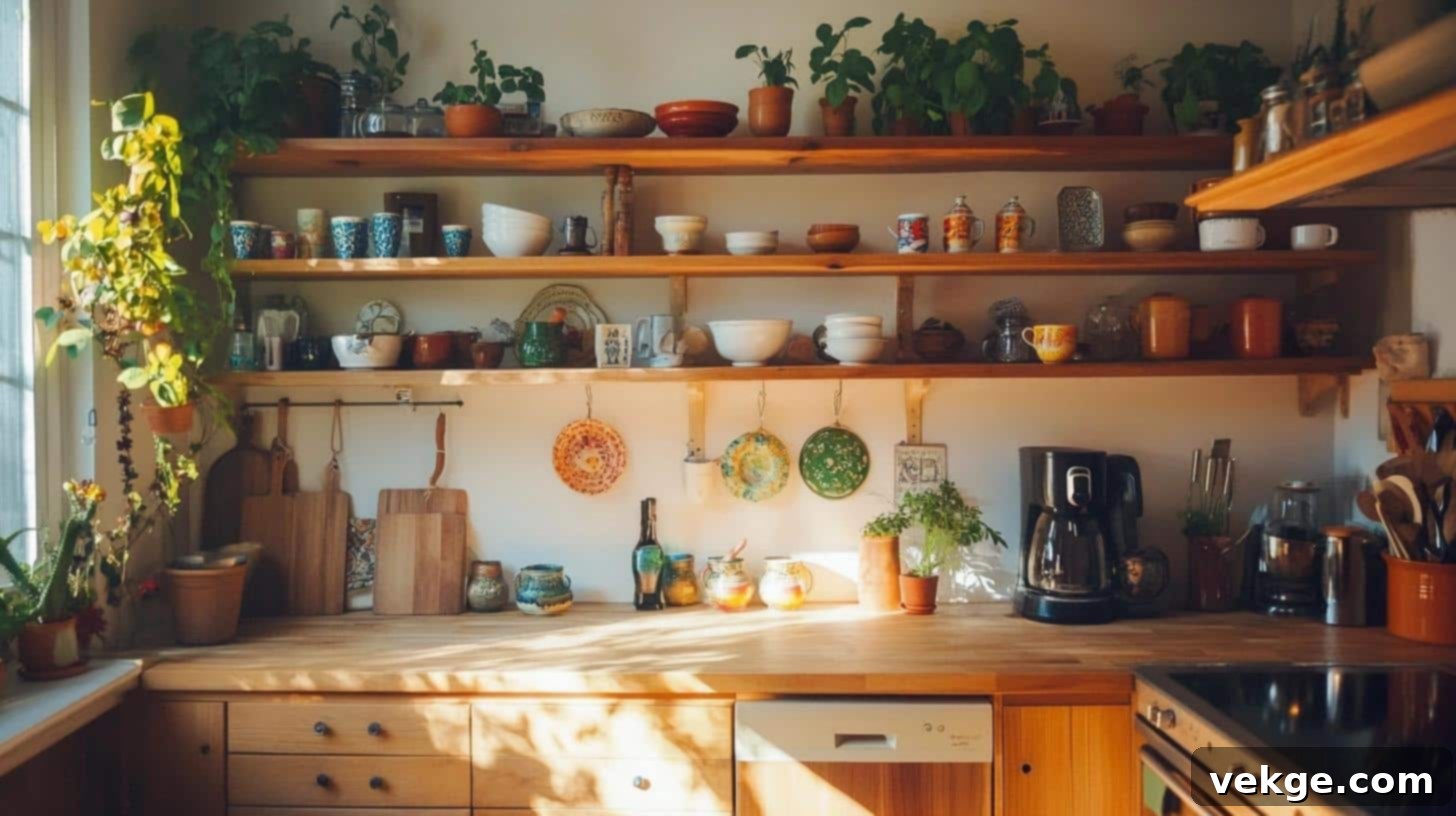
Adding open shelves above your existing cabinets is a straightforward and often more affordable way to extend storage to the ceiling. These shelves provide easily accessible extra space for decorative items, cookbooks, or frequently used kitchen essentials, allowing for flexible styling while maintaining an open and inviting feel.
- Style Impact: Creates a casual, approachable, and personalized look while maximizing vertical space.
- Best For: Showcasing cookbooks, unique kitchen accessories, or a collection of small potted plants.
- Materials Needed: Sturdy wooden or metal shelves, robust brackets for secure support.
- Cost Consideration: Generally budget-friendly, depending on the material and finish of the shelves.
3. Contrasting Cabinet Colors
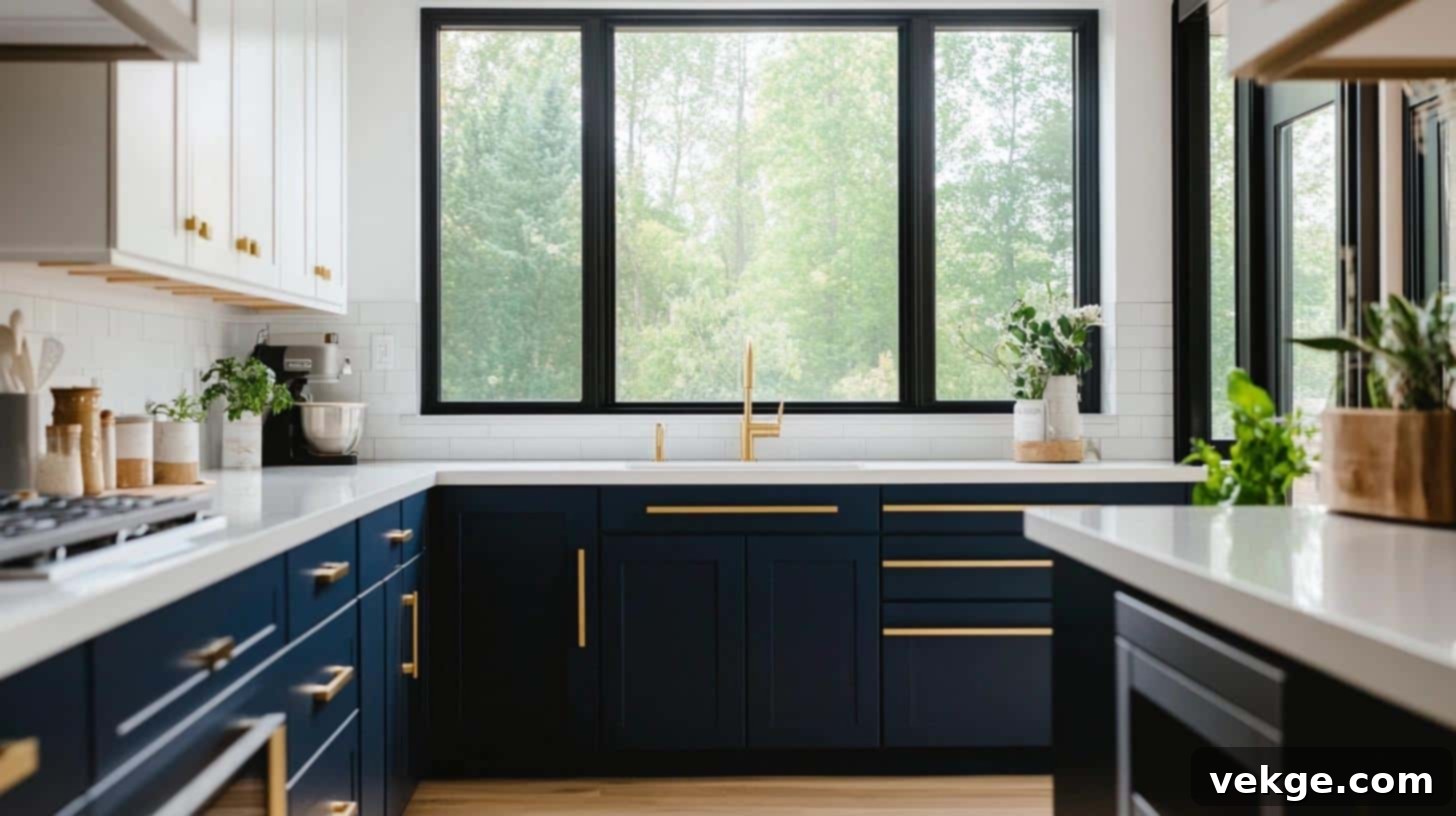
Employing a different color for your upper cabinet extensions creates a striking visual impact. Extending these contrasting units to the ceiling adds a sense of height, while the bold color choice with lower cabinets introduces depth and character. This technique is excellent for defining zones in open-plan kitchens or for homeowners who want to inject a distinctive, personal style.
- Style Impact: Bold, contemporary, and visually dynamic, enhancing overall interest and personality.
- Best For: Modern and contemporary kitchens that prioritize color and design statements.
- Materials Needed: High-quality paint, new cabinet doors, or panels in contrasting hues.
- Cost Consideration: Moderate, depending on whether you’re painting existing surfaces or purchasing new materials.
4. Custom Paneling and Molding
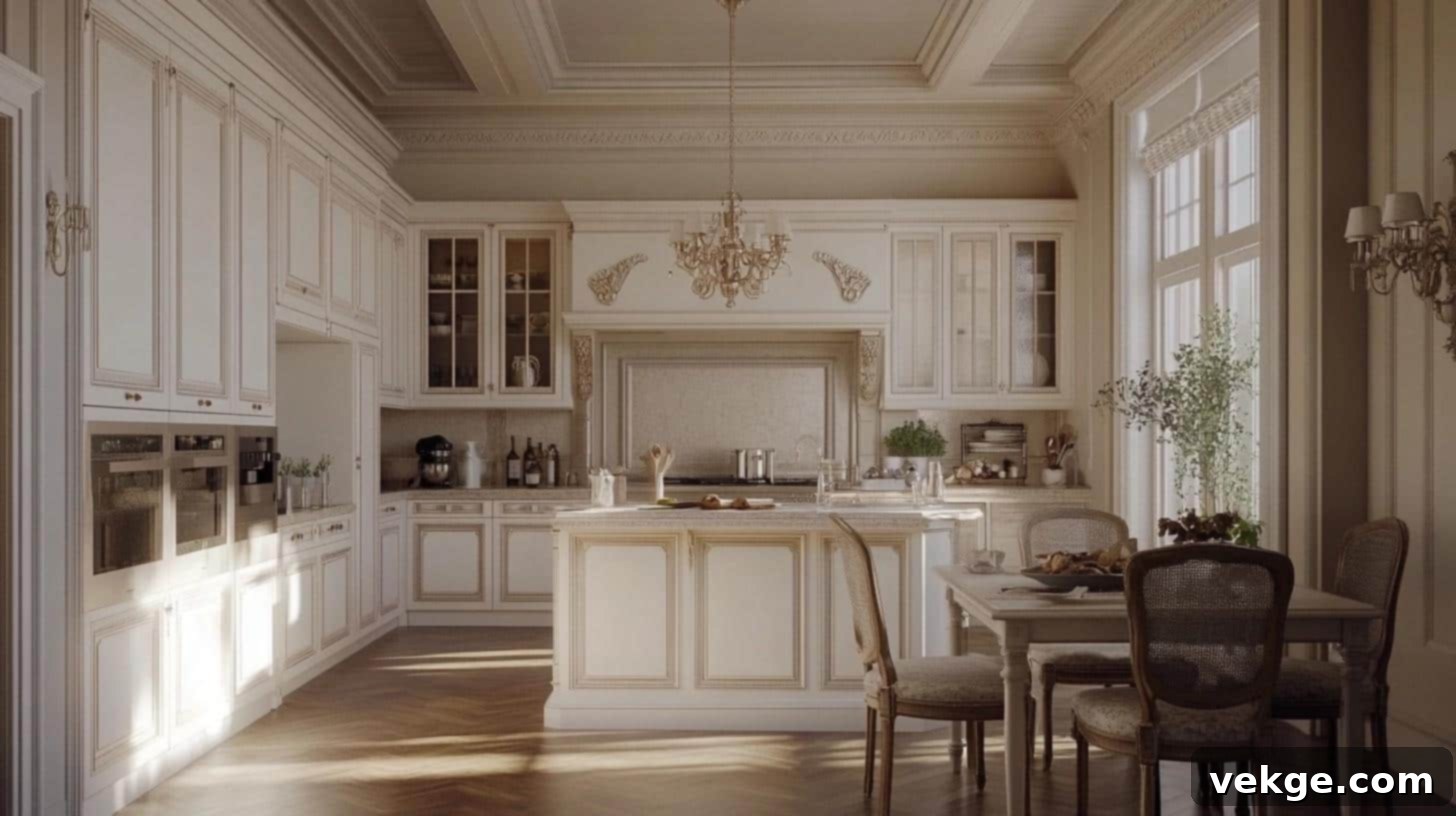
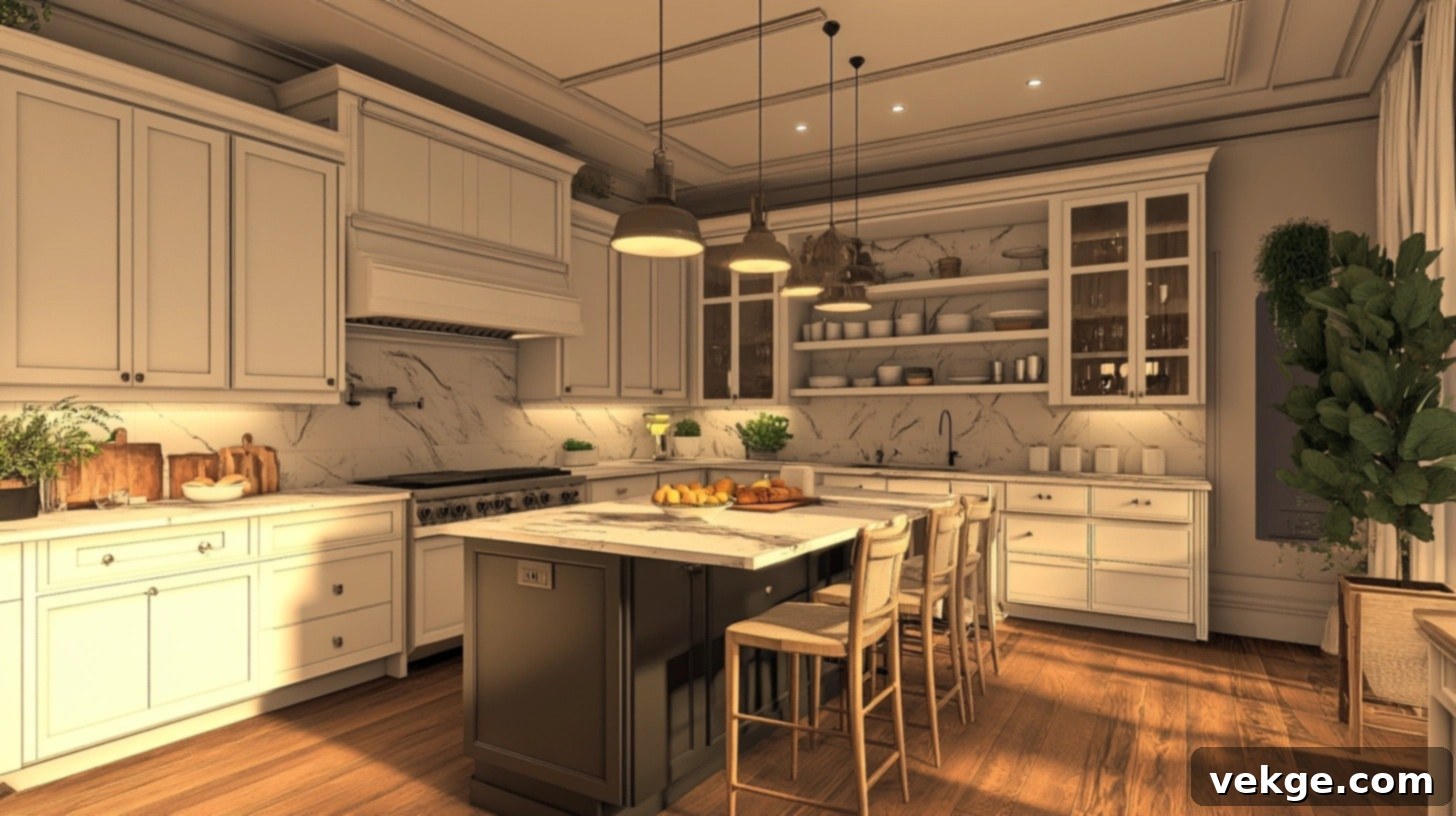
Opting for custom paneling and elaborate crown molding is a classic approach to extending cabinets to the ceiling with an elegant and seamless finish. This traditional technique gives the kitchen a unified, bespoke, and polished appearance. The crown molding specifically bridges the gap between the cabinet tops and the ceiling, adding a touch of timeless luxury and architectural detail to the space.
- Style Impact: Traditional, refined, and luxurious, adding significant architectural detail.
- Best For: Kitchens aiming for a cohesive, classic, or transitional design aesthetic.
- Materials Needed: Custom-cut panels, intricate crown molding, paint or stain to match.
- Cost Consideration: Higher cost due to the customization, material quality, and specialized labor required.
5. Floating Decorative Cabinets
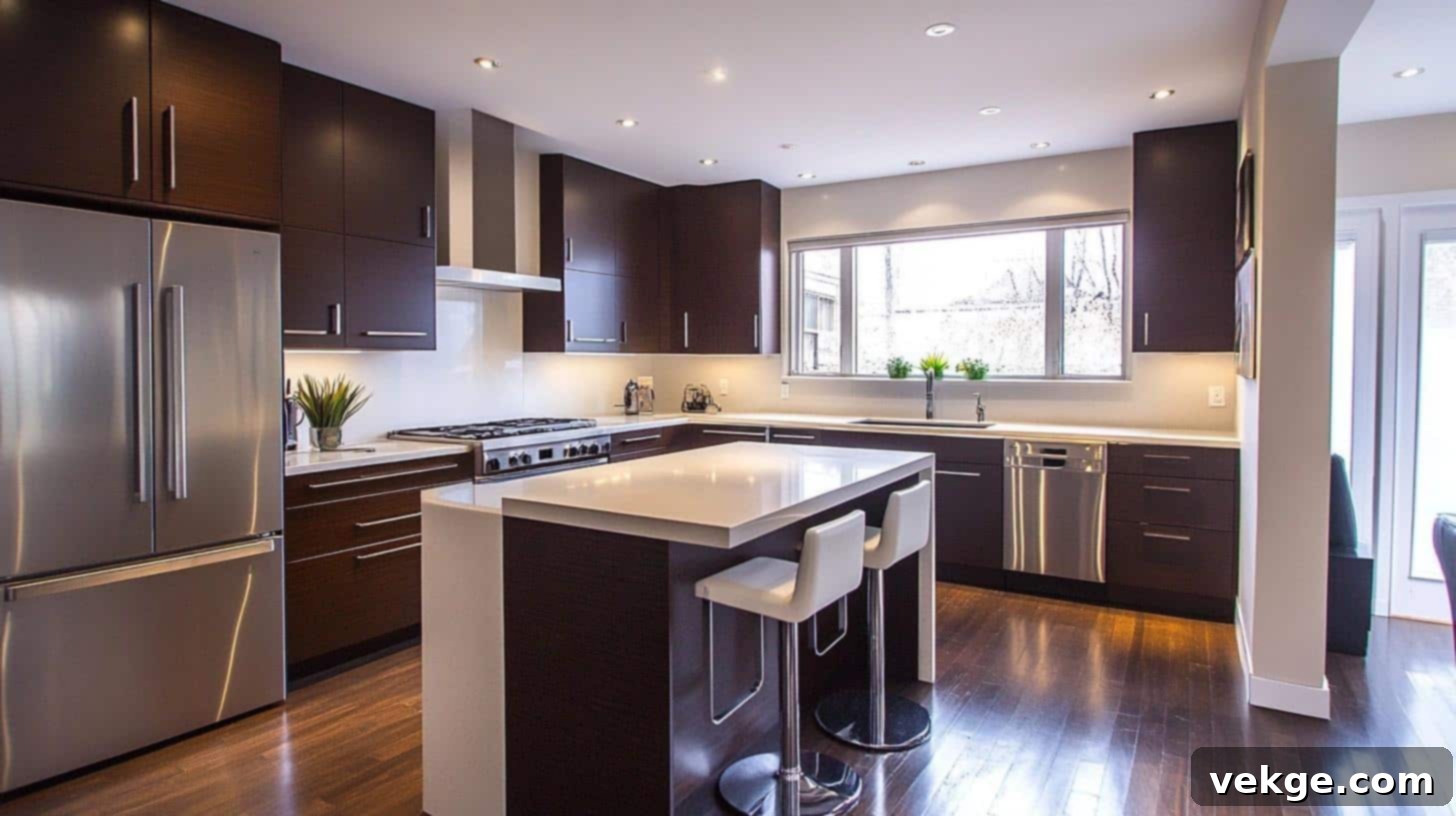
Installing floating decorative cabinets above your existing cabinetry creates a sleek, contemporary, and minimalist look. These unique units provide extra space for light storage or display, keeping the overall kitchen design streamlined and uncluttered. Floating cabinets contribute to an illusion of greater space and openness, making the kitchen feel expansive while still offering practical storage solutions.
- Style Impact: Minimalistic, modern, and creates a weightless, floating effect.
- Best For: Decorative storage and contemporary kitchen designs that value clean lines.
- Materials Needed: Lightweight cabinet materials, robust hidden wall mounts.
- Cost Consideration: Moderate to high, depending on the chosen materials and complexity of installation.
6. Textured Cabinet Extensions
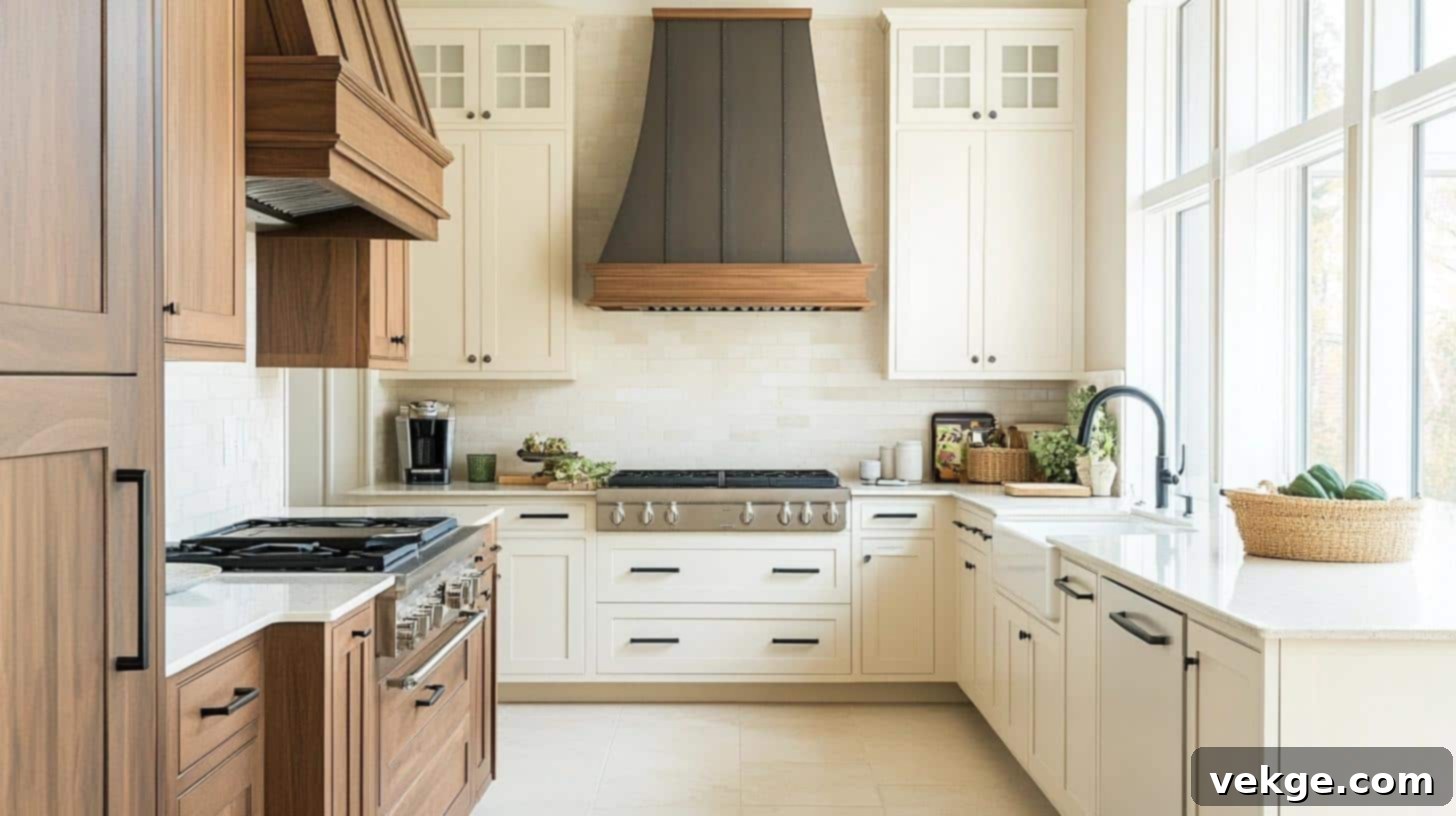
Extending cabinets to the ceiling using textured materials, such as reclaimed wood grain finishes, ribbed panels, or even woven elements, adds significant dimension, warmth, and character to the kitchen. This approach provides an organic and inviting feel, elevating the overall aesthetic while offering practical, enclosed storage. It’s a great way to introduce natural elements or unique patterns.
- Style Impact: Adds tactile interest, warmth, and a unique, organic feel to the kitchen.
- Best For: Creating a cozy, rustic, industrial, or truly personalized kitchen ambiance.
- Materials Needed: Textured wood panels, patterned laminates, or other tactile surface materials.
- Cost Consideration: Varies significantly depending on the specific texture and material chosen.
7. Incorporating Windows or Light Panels
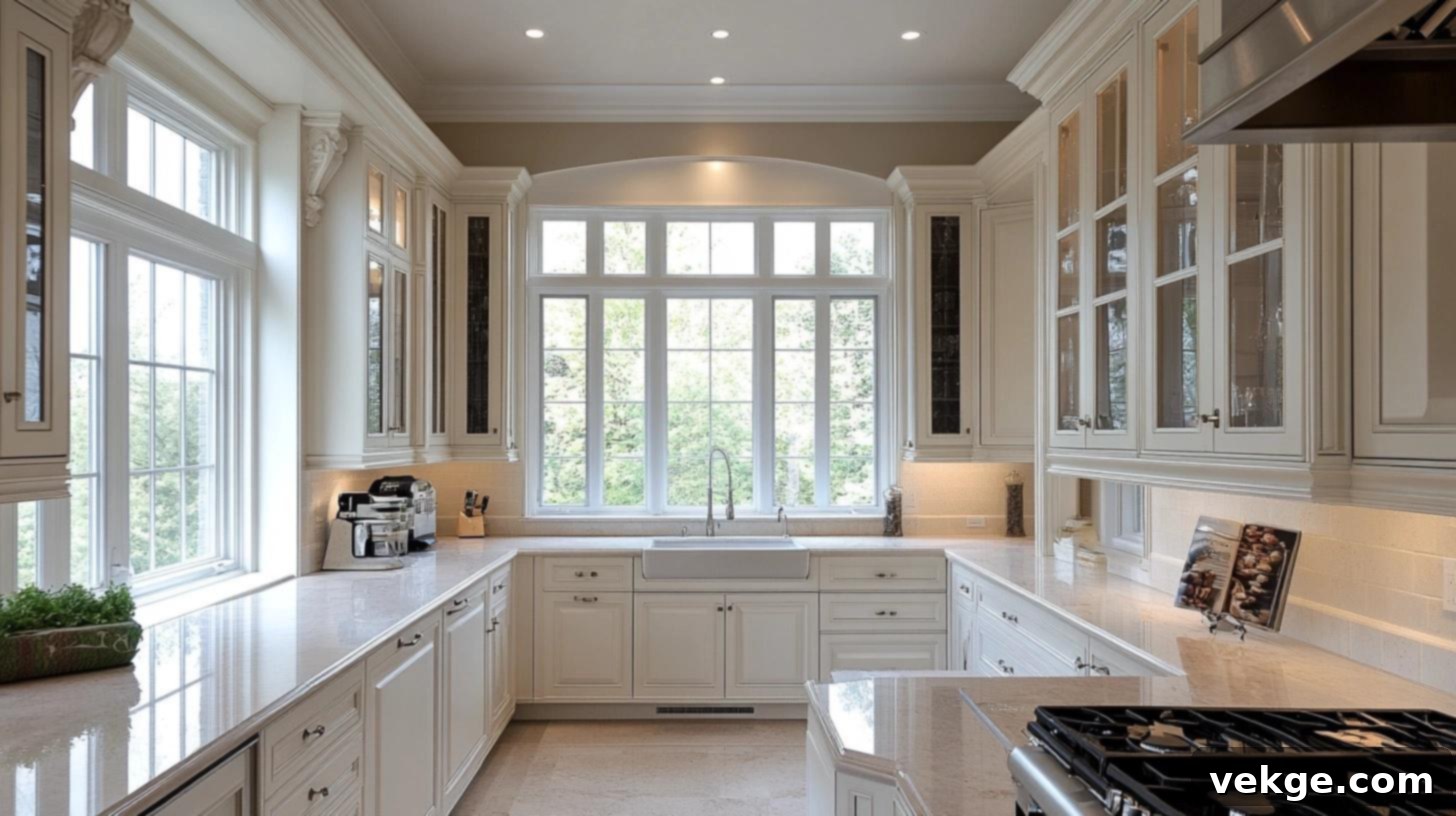
Integrating narrow vertical windows or specialized light panels between upper cabinets and the ceiling is an innovative way to maximize natural light and visually extend cabinetry. This method brightens up the kitchen considerably, making it feel more open, airy, and visually spacious, especially beneficial in kitchens with limited natural light sources, without adding excessive material bulk.
- Style Impact: Brightens the space, enhancing light and creating a feeling of openness.
- Best For: Small kitchens or those that receive limited natural light.
- Materials Needed: Custom-sized glass panels or specialized light fixtures.
- Cost Consideration: Moderate to high, due to the precision required for installation and the cost of glass or lighting components.
8. Modular Cube Storage
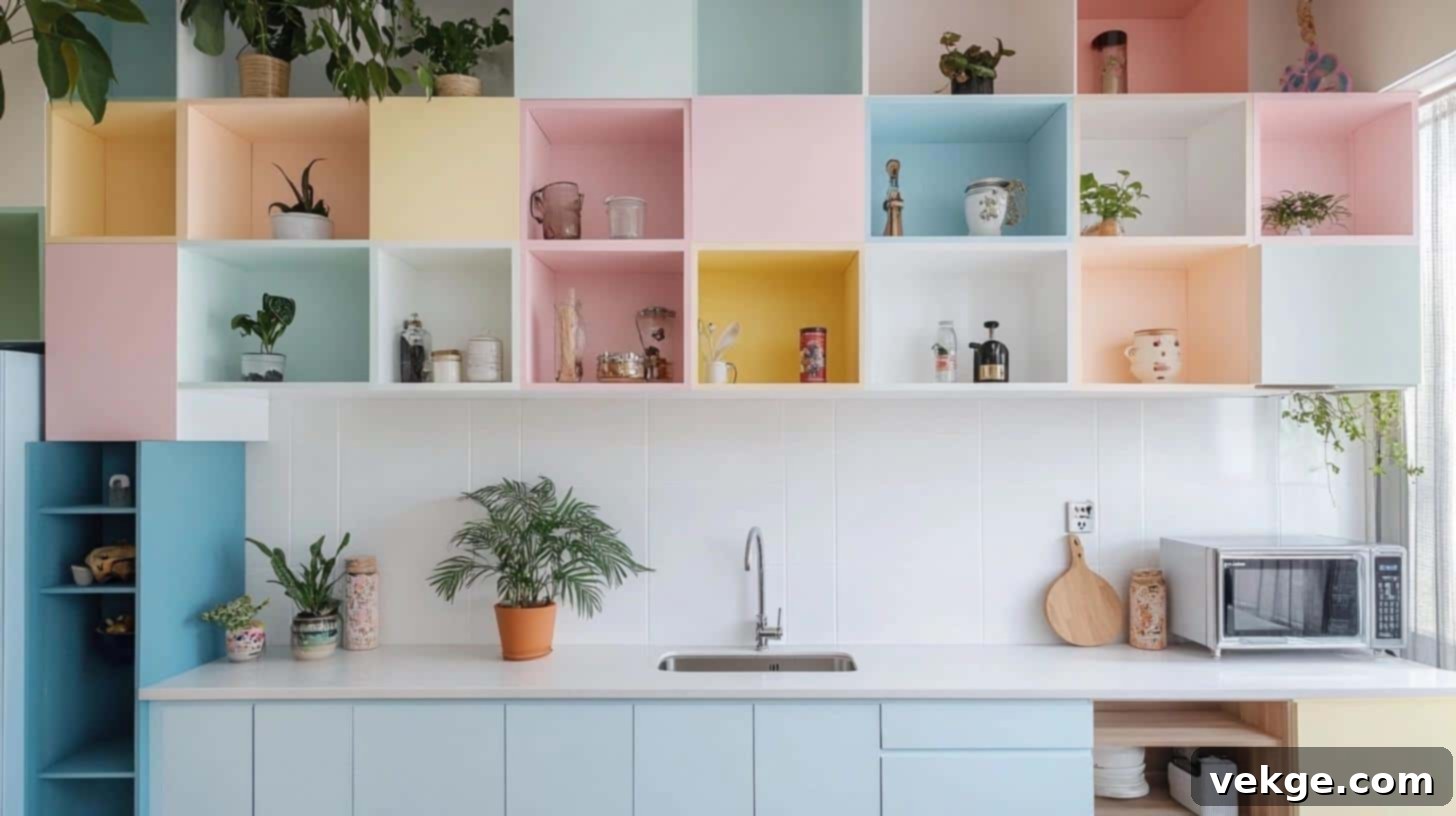
Modular cube storage units, strategically placed above existing cabinets, offer unparalleled flexibility and a distinct modern design aesthetic. These versatile cubes can be used for storing various kitchen items or displaying decorative accents. They allow for creative arrangements and easy reconfigurability, making the most of every inch of vertical space while maintaining a clean, organized look.
- Style Impact: Modular, flexible, and adds a modern, organized touch to the kitchen.
- Best For: Flexible storage and display in modern, contemporary, or eclectic kitchens.
- Materials Needed: Modular storage cubes (wood, metal, or laminate), appropriate brackets or mounts.
- Cost Consideration: Affordable to moderate, depending on the material quality and level of customization.
9. Perforated Metal Cabinet Extensions
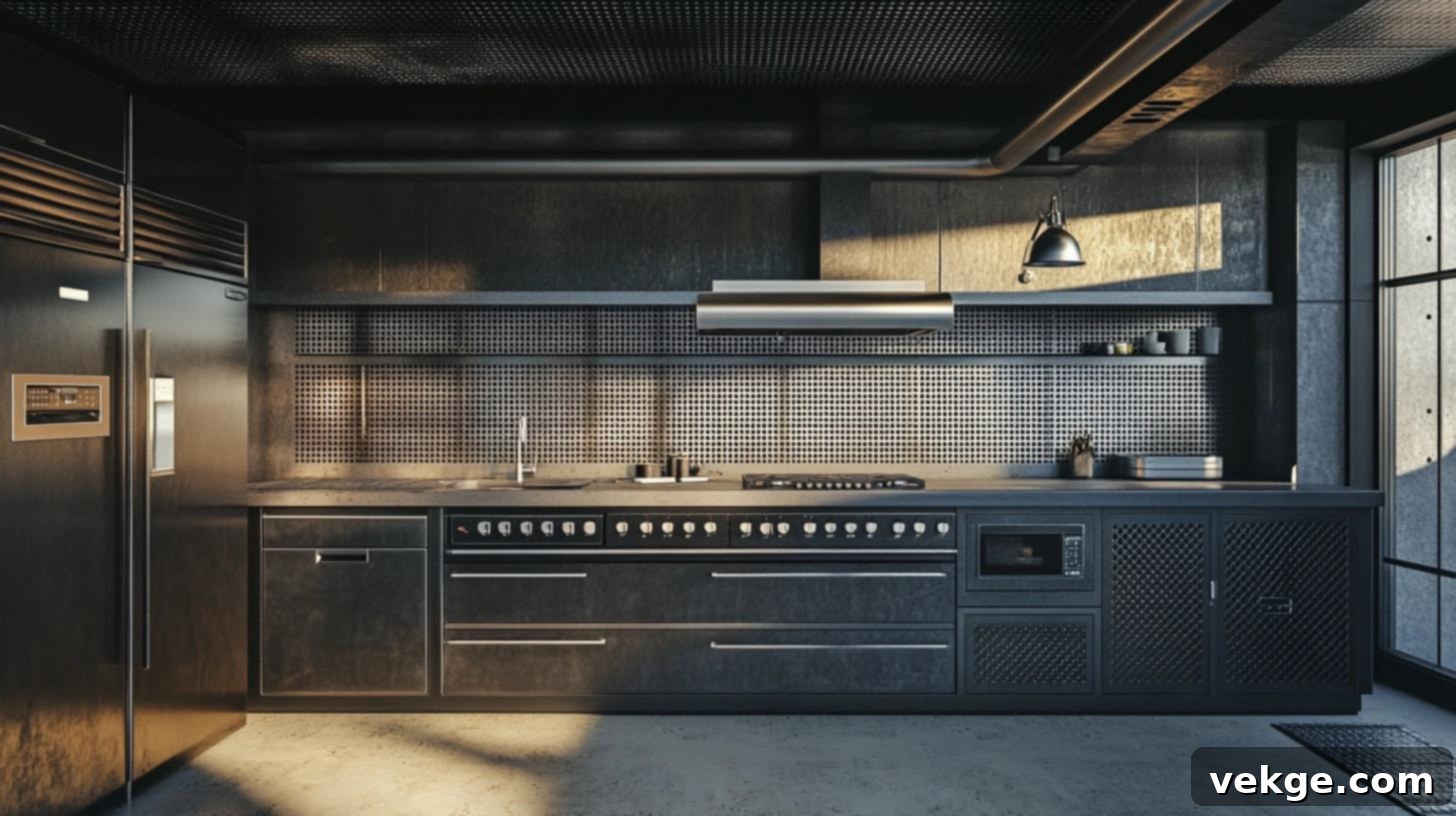
Utilizing perforated metal panels to extend cabinets creates a unique, sleek, and industrial aesthetic. This design choice adds a subtle texture and visual interest to the kitchen, making it both highly functional and exceptionally stylish. The perforated design also allows for some ventilation, perfect for lightweight yet durable storage, contributing to an edgy, contemporary vibe.
- Style Impact: Industrial, modern, and visually distinctive with added texture.
- Best For: Kitchens with an industrial, minimalist, or contemporary theme.
- Materials Needed: Perforated metal panels, sturdy mounting hardware, frame materials.
- Cost Consideration: Moderate, varying based on the type of metal (steel, aluminum) and the complexity of the installation.
10. Mirror-Backed Upper Cabinets
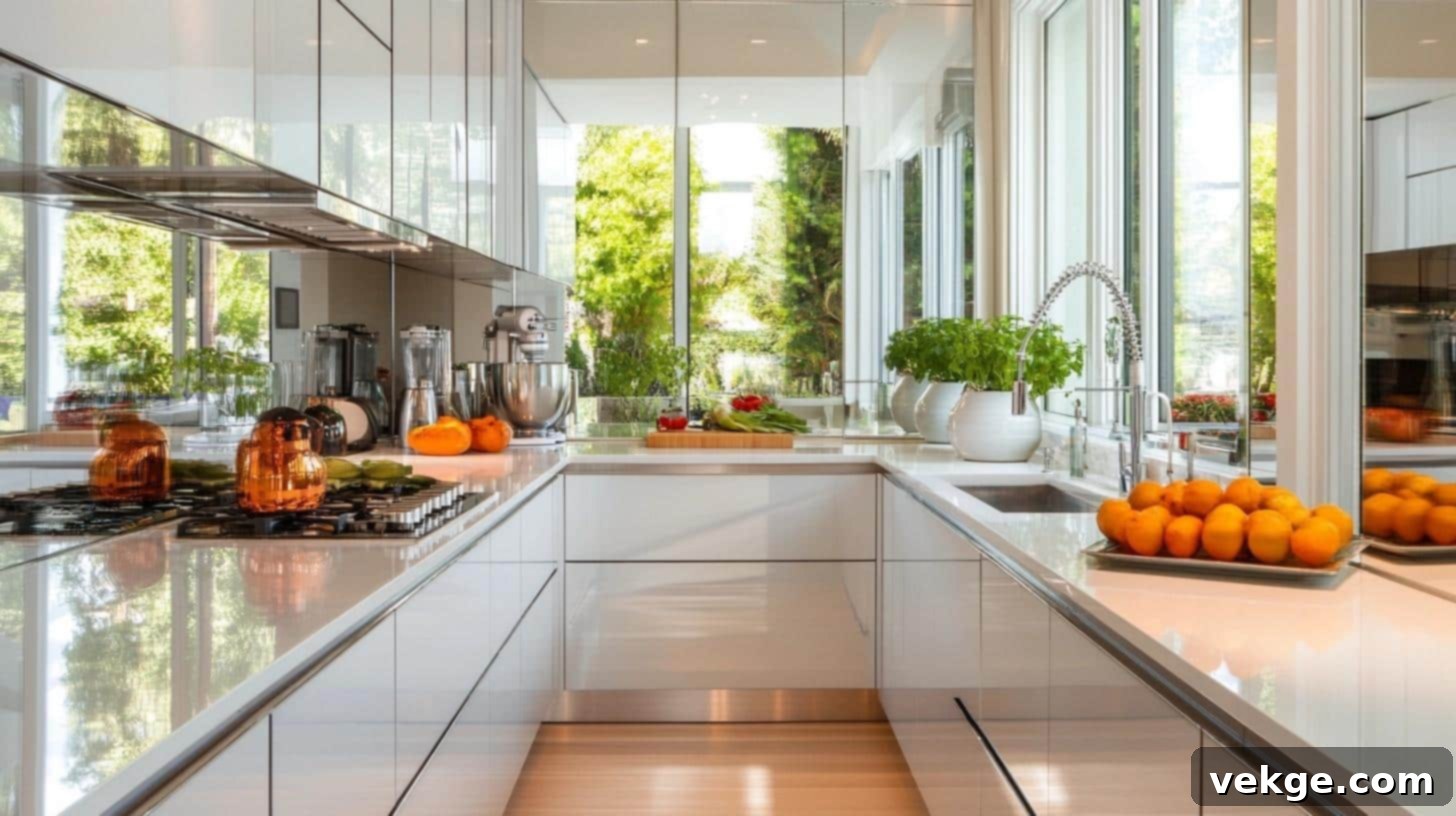
Extending cabinets with mirror-backed upper sections or entirely mirrored panels reflects light beautifully, instantly making the kitchen feel significantly larger and more expansive. Mirrors are a powerful tool for creating the illusion of more space and depth, which is particularly advantageous in smaller kitchens. This design choice cultivates a bright, airy, and glamorous atmosphere while still maintaining practical storage capabilities.
- Style Impact: Reflects light, amplifies space, and adds a touch of glamour.
- Best For: Smaller kitchens or those aiming for an opulent, spacious feel.
- Materials Needed: Mirrors or mirrored panels, cabinet frames, appropriate adhesives, and fasteners.
- Cost Consideration: Moderate to high, depending on the quality of the mirrors and the precision of the installation.
Pros and Cons of Extending Kitchen Cabinets to the Ceiling
Before you commit to this home improvement project, it’s wise to consider both the advantages and potential drawbacks. A balanced perspective will help you make an informed decision that aligns with your needs, budget, and lifestyle.
Pros: The Advantages of Ceiling-Height Cabinets
Embracing this trend brings significant benefits to your kitchen:
- Unmatched Storage Boost: Adds an estimated 20-30% more storage area, perfect for less frequently used items.
- Decluttered Living: Keeps seasonal items, holiday dishes, and bulky appliances neatly tucked away, freeing up prime lower cabinet and counter space for daily essentials.
- Sleek, Contemporary Look: Creates seamless lines from floor to ceiling, making the kitchen appear larger, more modern, and custom-designed. It significantly updates older kitchen aesthetics.
- Reduced Maintenance: Eliminates the dreaded dust and grease trap above standard cabinets, leading to less time spent on cleaning and better air quality.
- Enhanced Home Value: A well-executed kitchen upgrade like this signals quality and smart design, potentially increasing your home’s appeal and resale value.
Cons: Potential Drawbacks and Considerations
While beneficial, there are aspects to consider carefully:
- Increased Cost: While DIY can reduce labor, materials for stock cabinets still cost $100-$300 per unit, and custom work can be significantly higher. Additional materials for trim, paint, and hardware add to the overall expense.
- Access Challenges: The top shelves of extended cabinets will require a sturdy step stool or ladder for access, making them less ideal for daily-use items. This can be a safety concern for shorter individuals or those with mobility issues.
- Complex Installation: This project demands precise measurements, carpentry skills, and often a helper. DIY mistakes can be costly, and professional installation adds to the budget. Unexpected issues like uneven ceilings can further complicate the process.
- Matching Existing Finishes: Achieving a perfect match with your existing cabinet finish can be challenging, especially for older or custom-colored cabinets. Stock units might not perfectly align in style or color without extra effort.
Money-saving tip: If budget is a primary concern, start by exploring ready-made extension units. See if they can achieve the look and storage you desire before investing in more expensive custom options.
Safety note: Always store rarely used or lightweight items in top cabinets. Keep a high-quality, stable step stool readily available and teach all household members how to use it safely when accessing higher storage.
Step-by-Step DIY Guide: How to Extend Your Kitchen Cabinets
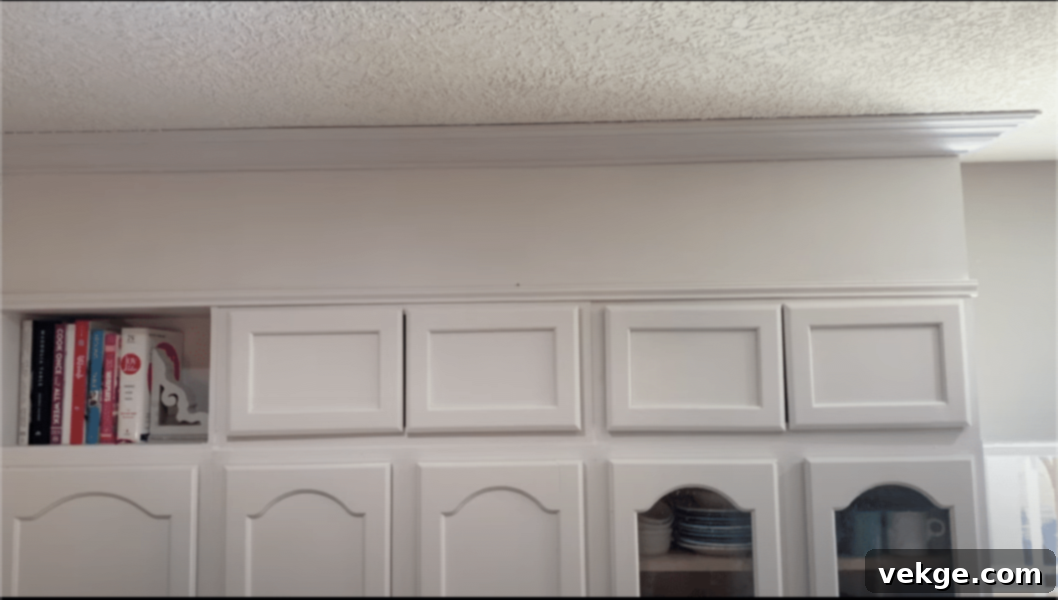
Transforming your kitchen with ceiling-height cabinets is a rewarding DIY project that significantly enhances both storage and style. A well-structured approach is key to ensuring a smooth and successful outcome. Follow these detailed steps to correctly extend your kitchen cabinets, achieving a professional and integrated finish.
Required Materials and Tools
Gathering all necessary items before you start will prevent delays and frustration.
| Required Materials | Tools Needed |
|---|---|
| Unfinished stock cabinets (upper units for extension) | Power drill and various bits |
| MDF or plywood panels (for sides and tops of extensions) | Long level (4 ft or longer recommended) |
| 1×4 lumber for supporting frames (pine or poplar) | Measuring tape (25 ft) |
| Wood shims (for leveling) | Nail gun (pneumatic or cordless) |
| Construction adhesive (e.g., Liquid Nails) | Circular saw, miter saw, or jigsaw |
| Crown molding (to match existing or desired style) | Putty knife or spackle tool |
| Wood putty or spackle | Paint brushes, rollers, and trays |
| Paint, primer, and painting supplies (drop cloths, painter’s tape) | Safety equipment (gloves, safety goggles, dust mask) |
| Wood screws (various lengths) and finishing nails | Stud finder |
Step 1. Acquire and Prepare Stock Cabinets
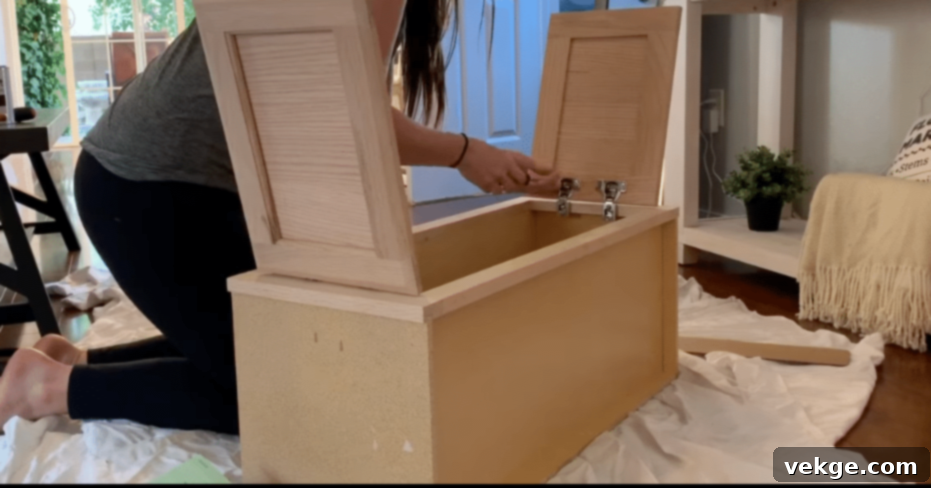
Choosing the right extension units is crucial for a cohesive look:
- Select Matching Units: Purchase unfinished upper cabinets that closely match the width and depth of your current cabinetry. These “extension” or “stacked” cabinets are typically shorter (12-18 inches tall).
- Custom Build for Unique Spaces: If standard sizes don’t fit, consider building simple custom boxes to fill non-standard gaps or create a perfect match.
- Prepare for Finishing: Remove all hardware (hinges, pulls) from the new units and existing cabinets if you plan to paint or re-stain them simultaneously.
Step 2. Paint and Finish Preparation
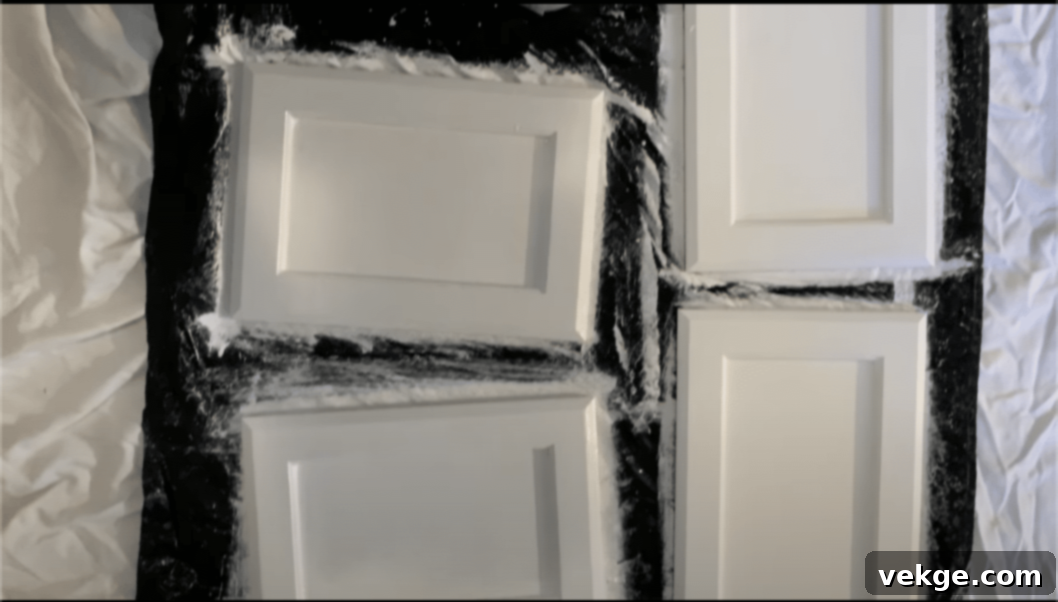
A flawless finish requires careful preparation and painting:
- Color Match: Obtain paint or stain that precisely matches your existing cabinets. Test a small, inconspicuous area if unsure.
- Thorough Cleaning: Clean all cabinet surfaces (existing and new) thoroughly to remove any grease, dust, or grime. Use a degreaser if necessary.
- Prime and Paint: Apply a high-quality primer to all unfinished surfaces, then apply multiple thin coats of your chosen paint, allowing proper drying time between each coat. Paint new cabinets and frame pieces separately for best coverage.
Step 3. Cabinet Installation Process
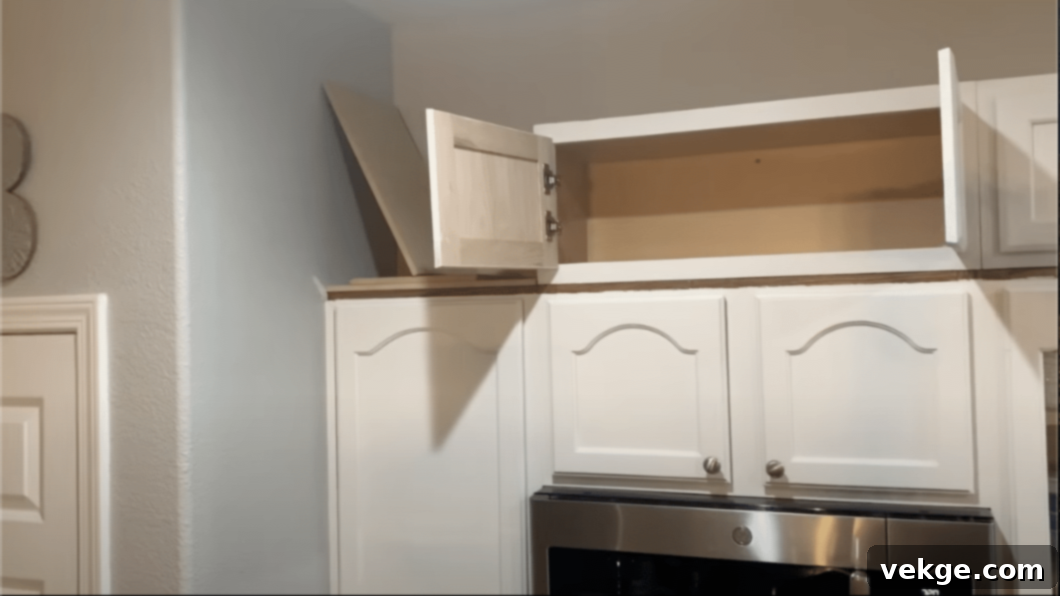
Securely mounting the extensions is paramount:
- Level Check: Use your long level to check the walls and the tops of your existing cabinets for level surfaces. Mark any high or low spots.
- Add Shims: Use wood shims as needed to ensure the top surface of your existing cabinets is perfectly level before placing the extensions.
- Locate Studs: Use a stud finder to locate and mark the wall studs above your existing cabinets. These are critical for secure attachment.
- Mount Extensions: Carefully lift and place the new extension cabinets on top of your existing units. Clamp them together and to the existing cabinets, then secure them to the wall studs using long screws. Ensure the fronts align perfectly with the cabinets below.
Step 4. Build Supporting Frame
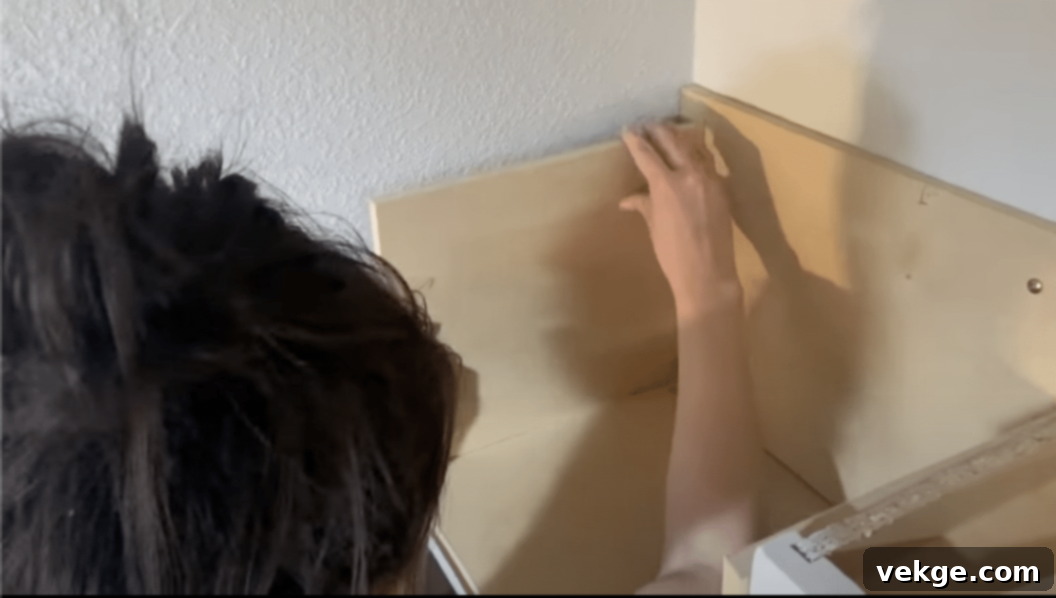
A solid frame provides stability and a base for finishing panels:
- Measure and Cut Lumber: Cut 1×4 lumber pieces to fit vertically from the top of your extension cabinets to the ceiling, forming a “frame” for the space above the new units.
- Construct Frames: Build simple rectangular frames for each section where panels will be applied. Ensure these frames are perfectly level and plumb.
- Secure the Frame: Attach these frames securely to the tops of the extension cabinets and to the ceiling joists or blocking, adding extra support where needed, especially at corners.
Step 5. Add Panels and Trim
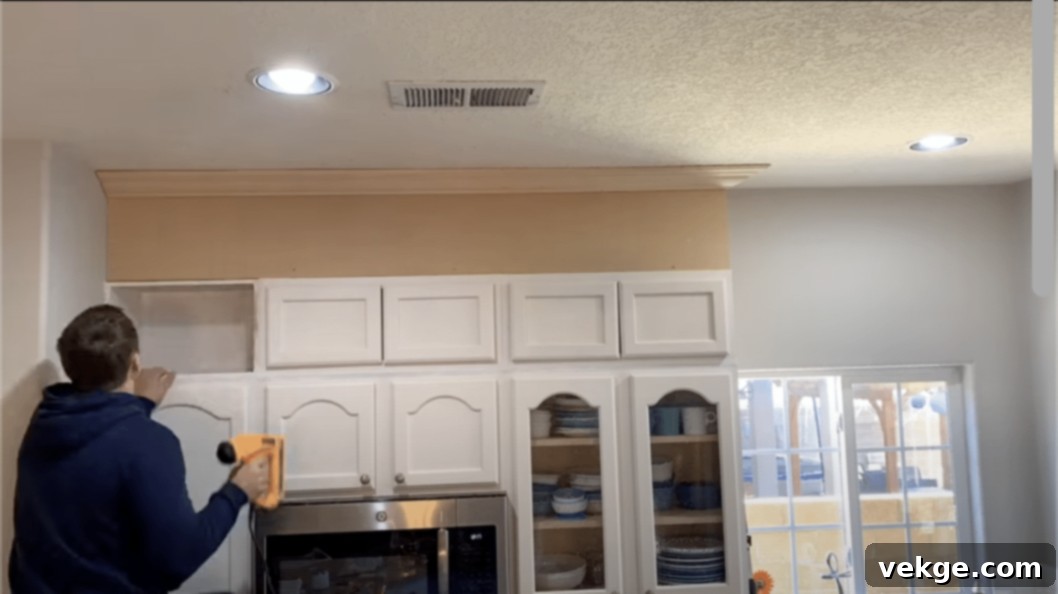
This step brings the integrated, built-in look to life:
- Cut Panels to Fit: Measure and cut MDF or plywood panels to perfectly fit the spaces created by your supporting frames. These will cover the exposed framework.
- Adhere and Fasten: Apply construction adhesive (e.g., Liquid Nails) to the back of the panels and press them firmly into place. Secure them further with finishing nails using your nail gun.
- Install Crown Molding: Carefully measure, cut (using a miter saw for angles), and install the crown molding along the top edge where the panels meet the ceiling. Nail it into the panels and ceiling joists where possible.
- Add Additional Trim: Install any additional trim pieces between the new extension cabinets and the vertical panels, or to match the style of your existing cabinets.
Step 6. Finishing Work and Touch-Ups
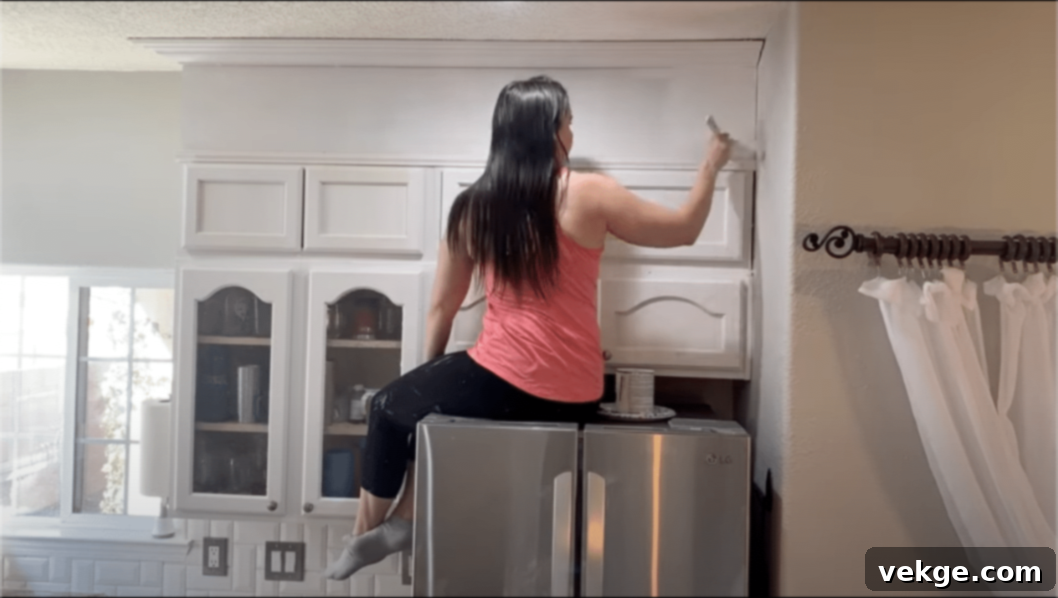
The final touches ensure a professional and seamless result:
- Fill Seams and Holes: Use wood putty or spackle to fill all nail holes, gaps, and seams between panels and molding. Allow it to dry completely.
- Sand Smooth: Lightly sand all filled areas smooth until they are flush with the surrounding surface.
- Final Paint Touch-Ups: Apply any necessary final coats of paint to blend the filled areas and ensure a uniform color and finish across all new and existing surfaces.
- Clean and Inspect: Clean all surfaces thoroughly, remove any painter’s tape, and step back to inspect all joints and seams for a polished, professional appearance.
For a more detailed visual guide to the process, you can find helpful videos online. For example, a thorough step-by-step video can be found by searching for “DIY extend kitchen cabinets to ceiling” on YouTube. One such example: click here for a visual guide.
Is Extending Kitchen Cabinets Right for Your Home? Making an Informed Decision
Contemplating that empty space above your kitchen cabinets is often the first step towards a more functional and aesthetically pleasing kitchen. Before you dive into this project, it’s essential to carefully evaluate if extending your cabinets to the ceiling is the right choice for your specific home, lifestyle, and budget.
What to Consider First: A Personal Assessment
Take stock of your kitchen’s unique characteristics and your daily routines:
- Your Kitchen’s Setup:
- What is the current height of your upper cabinets, and how much space is truly available above them?
- What is the condition and quality of your existing cabinet units? Are they sturdy enough for extensions?
- Does your ceiling have significant slopes, or is it relatively even?
- Are there any windows, vents, or other wall features that would interfere with full-height cabinets?
- Daily Kitchen Life & Storage Needs:
- What specific items would you store in the newly created high-level space (e.g., seasonal decor, rarely used appliances, extra pantry items)?
- Who uses the kitchen most often, and how comfortable are they with using a step stool for access?
- How do you currently move and operate in your kitchen? Will full-height cabinets enhance or hinder your flow?
- What current kitchen frustrations (lack of storage, dusty cabinet tops) would this project solve for you?
- Money Matters & Value:
- Are you leaning towards budget-friendly stock units with potential for slight variations, or are you prepared for the higher cost of custom work for a perfect match?
- Do you have the DIY skills and time, or would hiring professional help be a better investment, considering potential mistakes?
- What long-term value benefits (resale value, personal enjoyment) do you hope to gain from this upgrade?
Smart Planning Steps for Success
Once you’ve considered the above, these initial planning steps will set you on the right path:
- Grab that Measuring Tape: Take precise measurements of your ceiling height, cabinet dimensions, and the space above.
- List Your Storage Needs: Make a comprehensive list of all items you’d ideally move into the new upper cabinet space.
- Define Your Budget: Set a realistic budget, accounting for materials, tools (if needed), and potential professional help.
- Document Problem Spots: Take photos of any uneven ceilings, challenging corners, or existing flaws you’ll need to address.
- Research Options: Visit local kitchen showrooms and home improvement stores to explore different extension types, finishes, and price points.
Making it Happen: Start Small, Think Big
If you have a smaller kitchen or are hesitant about a large-scale project, consider starting with one section or wall. This allows you to:
- Test the Change: See how the extended cabinets impact the look and feel of your kitchen on a smaller scale.
- Learn What Works: Gain valuable experience and refine your techniques before committing to the entire kitchen.
- Stay Within Budget: Manage costs more effectively by completing the project in phases.
- Build Confidence: Successfully completing a smaller section will empower you to tackle the rest of the kitchen with greater assurance.
Remember: A well-designed and functional kitchen significantly enhances your home and daily life. Take the time to plan thoroughly, but don’t postpone too long from creating the ideal space you desire.
Conclusion: Elevate Your Kitchen with Ceiling-Height Cabinets
Extending your kitchen cabinets to the ceiling is far more than just adding extra storage space; it’s a transformative upgrade that creates a complete, well-designed kitchen, optimized to work better for you. From reclaiming valuable counter space and simplifying cleaning routines to adding significant value to your home, this popular update offers tangible benefits for kitchens of any size and style.
Before embarking on this rewarding project, remember the critical steps: meticulously assess your existing cabinet condition, take precise measurements of your space, and establish a clear, realistic budget. Whether your preference leans towards cost-effective stock units or a bespoke custom solution, the foundation of a successful outcome lies in thorough and thoughtful planning.
If you’re feeling hesitant about tackling a full kitchen-wide project, consider starting with just one section or a single wall. This phased approach allows you to test the results, gauge your comfort level with the DIY process, and build your confidence before committing to the entire space.
For those seeking expert assurance, local kitchen specialists and contractors are invaluable resources. They can provide professional evaluations of your space, offer tailored design advice, and suggest the most suitable options to meet your specific needs and aesthetic vision.
Don’t let that unused space above your cabinets continue to be a missed opportunity. Take that proactive first step today – grab your measuring tape, start visualizing the possibilities, and begin planning your kitchen’s sophisticated new look.
Frequently Asked Questions About Extending Kitchen Cabinets
Can I extend cabinets in a kitchen with high ceilings?
Absolutely, high ceilings offer even more creative options! You can use taller stacked cabinets, custom-built extensions, or a combination of both. For very high ceilings, reserve the topmost shelves for decorative items or rarely used possessions and consider integrated lighting to highlight the space.
What if my existing cabinets have soffits above them?
You generally have two main options: remove the soffits entirely or work around them. Removing soffits allows your new cabinets to reach the ceiling for a seamless look, but it can be a more involved process if they contain plumbing or electrical wiring. Working around them might involve building custom panels or a new, decorative soffit below the ceiling, which can be less costly and less disruptive.
Do I need special permits for this cabinet extension project?
In most cases, extending existing cabinets to the ceiling is considered a minor aesthetic and functional update, and typically does not require a permit. However, it’s always wise to check with your local building department, especially if your project involves altering electrical wiring, plumbing, or making structural changes to walls, as these often do require permits.
How much will extending my kitchen cabinets to the ceiling cost?
The cost varies significantly. For a DIY project using stock extension cabinets, expect to pay approximately $100-$300 per unit for materials, plus additional costs for wood, trim, paint, and tools (if needed). Custom work by a professional can range from $500-$1000 or more per cabinet section, including labor. The total cost will depend on your kitchen’s size, material choices, and whether you hire professionals.
Will the cabinet extension perfectly match my existing cabinets?
Achieving a perfect match can be challenging but is often attainable. If using stock units, they may not perfectly match the finish or exact style of your existing cabinets, but a fresh coat of matching paint or stain can create a cohesive look. Custom extensions offer a better chance of an exact match, but at a higher cost. Always keep samples of your current cabinet finish (a spare door or drawer front) to ensure the best possible color and texture match for new materials.
