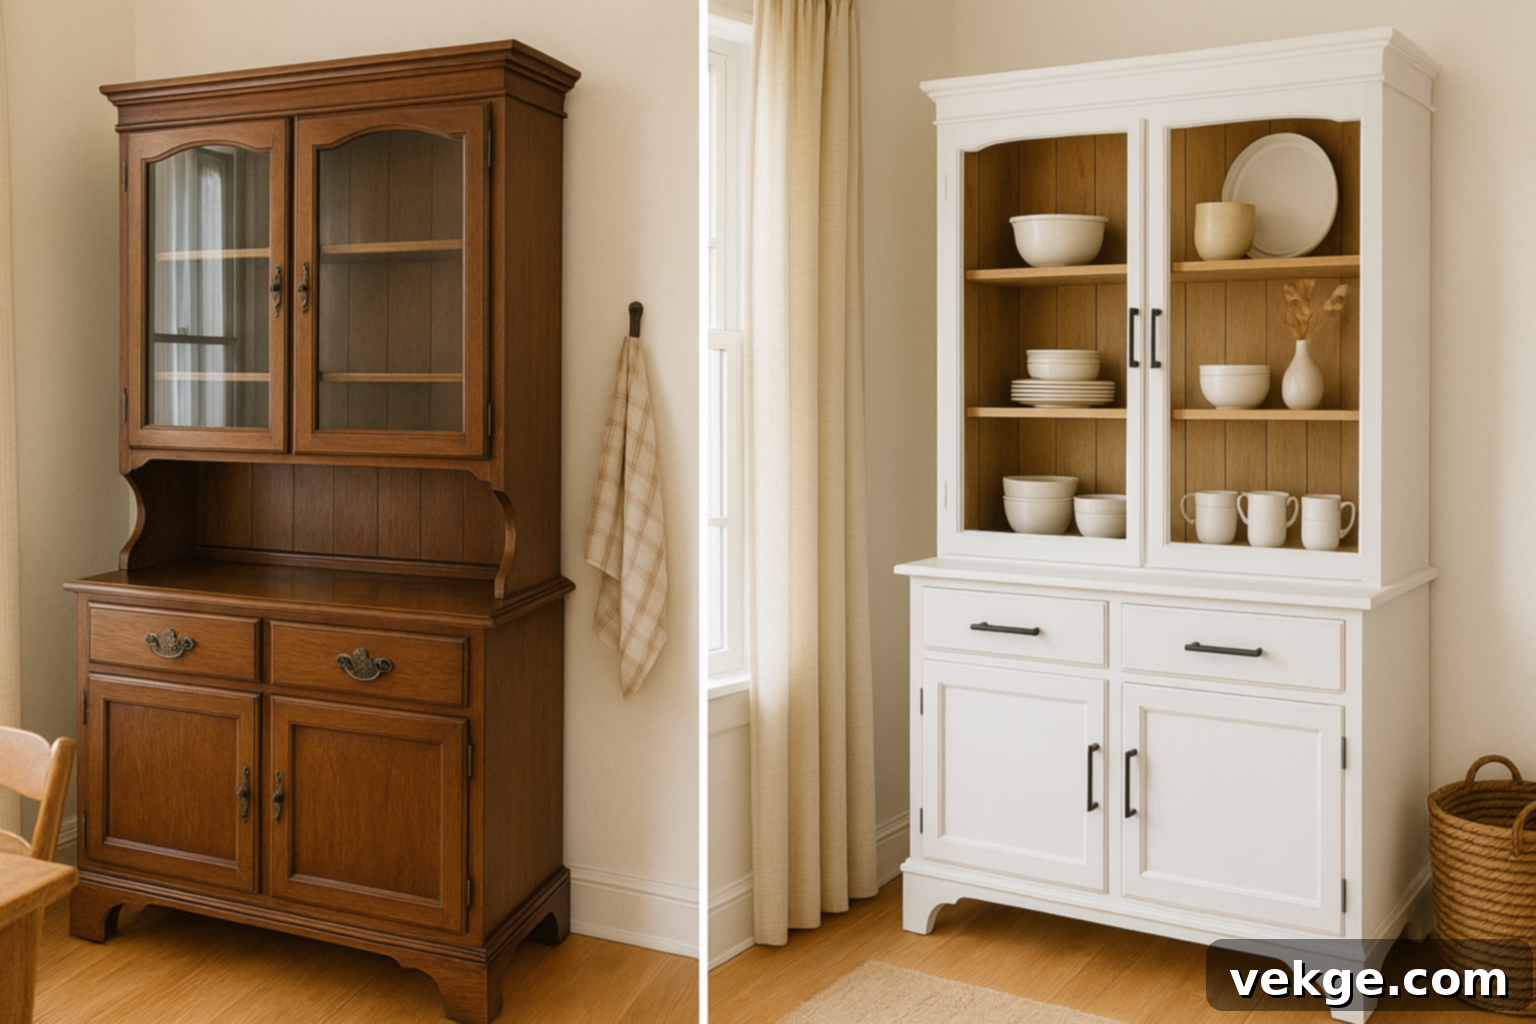
DIY Hutch Makeover: Transform Old Furniture into Stunning Home Decor
Is your old hutch looking tired, dated, or simply out of place in your updated living space? Perhaps its dark wood finish feels too heavy, or its traditional style clashes with your modern aesthetic. The good news is, a beloved piece of furniture doesn’t have to be discarded. With the right approach and a touch of creativity, an old hutch can be completely revitalized, becoming a fresh, functional, and eye-catching centerpiece in any room.
A successful hutch makeover doesn’t demand a huge budget or endless hours. What it requires is a clear plan, a few essential tools, and a willingness to put in a little effort. This comprehensive guide will walk you through the entire process, detailing the exact steps, offering practical tips, and providing an array of style ideas to inspire your own project. Whether you’re aiming for a sleek modern look, a cozy farmhouse vibe, or a whimsical cottagecore feel, you’ll find everything you need right here.
If you’ve been contemplating giving your hutch a new lease on life, this guide is the perfect starting point. Get ready to transform your furniture and refresh your home!
Why Hutch Makeovers Are Trending Again
The resurgence of hutch makeovers is no accident; it’s a reflection of several growing trends in home design and lifestyle. More homeowners are choosing to refresh their existing pieces rather than buying new, and there are compelling reasons why this movement is gaining momentum.
One major factor is the flourishing **DIY (Do-It-Yourself) culture**. People are increasingly empowered to tackle home projects, finding joy and satisfaction in creating something beautiful with their own hands. Coupled with this is a renewed appreciation for **vintage and antique furniture**. Hutches, often built with solid wood and robust craftsmanship, are inherently durable, making them ideal candidates for upcycling. Instead of being relegated to the past, these classic pieces are being given contemporary makeovers to fit today’s simpler, more open living styles.
Social media platforms have also played a significant role in popularizing hutch transformations. “Before and after” photos and videos spread rapidly, showcasing the dramatic impact a simple paint job or hardware change can have. These inspiring visuals encourage others to embark on their own DIY journeys, demonstrating that a little effort can yield impressive results that completely alter the feel of a room.
Furthermore, hutch makeovers align perfectly with a growing **sustainable mindset**. Upcycling furniture helps reduce waste, minimizing the environmental impact of discarding old items and purchasing new ones. It’s a smart, eco-friendly way to update a space, allowing you to reuse what you already own and contribute to a more sustainable lifestyle. Beyond environmental benefits, it’s also a highly **economical solution**. Giving an existing hutch a fresh look is often far more affordable than investing in a brand new piece of furniture, especially for large items.
Essential Tools & Materials for Your Hutch Makeover
Before you dive into painting, gathering the right tools and materials will make your makeover project smoother and more efficient. Here’s a checklist of what you’ll likely need:
- Cleaning Supplies: Mild soap, warm water, soft cloths, degreaser (if needed).
- Preparation Tools: Screwdrivers (for hardware removal), painter’s tape, drop cloths or old sheets, sandpaper (various grits: 100-220), sanding block or electric sander, wood filler (for repairs).
- Paint & Primer: Your chosen furniture paint (chalk, mineral, milk, acrylic latex), primer (if recommended for your paint/surface), paint stir sticks.
- Application Tools: High-quality paint brushes (angled for corners, flat for larger areas), foam rollers or small paint rollers (for smooth finishes), paint trays, spray painter (optional, for ultra-smooth finish).
- Sealer: Furniture wax, polyurethane (water or oil-based), or varnish.
- Finishing Touches: New hardware (knobs, pulls), decorative elements (peel-and-stick wallpaper, fabric), dust mask, safety glasses.
Step-by-Step DIY Hutch Makeover Guide
Transforming your hutch doesn’t have to be complicated. This simple, step-by-step guide is perfect for beginners and seasoned DIYers alike. Follow these instructions to turn an old, unloved hutch into a stunning, fresh piece that complements your home.
Step 1: Deep Clean & Prepare the Surface
Preparation is the cornerstone of any successful paint project. Skipping this step can lead to a less durable, uneven finish. Begin by carefully removing all doors, shelves, drawers, knobs, and any existing hardware. Place these items in a safe spot, perhaps labeled or organized in bags, to ensure no small parts are lost. Take photos if you need a reminder of how everything goes back together.
Next, give every surface of your hutch a thorough cleaning. Use a soft cloth dampened with mild soap and warm water, paying close attention to corners, crevices, and drawer edges where grime tends to accumulate. For stubborn grease or residue, a dedicated degreaser can be very effective. Allow the hutch to dry completely before proceeding. Any lingering moisture can compromise paint adhesion.
If the existing finish is glossy, chipped, or uneven, a light sanding is crucial. Sanding creates a ‘tooth’ for the new paint to adhere to, ensuring a smooth, long-lasting finish. Start with a medium-grit sandpaper (around 120-150 grit) to scuff the surface, then follow up with a finer grit (180-220 grit) for a smoother feel. Always sand in the direction of the wood grain. This step also helps smooth out any old bumps, scratches, or imperfections. If you plan to use chalk or mineral paint on an already smooth, non-glossy surface, you might be able to skip sanding, but a light scuffing is always recommended for better adhesion. After sanding, wipe away all dust with a tack cloth or damp rag and let it dry.
Step 2: Selecting the Perfect Paint Type
The type of paint you choose will significantly influence the final look and durability of your hutch. Consider how much wear and tear the piece will endure, and the aesthetic you’re aiming for.
- Chalk Paint: Known for its soft, matte, and often distressed finish. It’s incredibly forgiving and usually requires no priming or extensive sanding, making it popular for beginners. It adheres well to most surfaces and dries quickly.
- Milk Paint: Offers a slightly worn, authentic vintage look, often used for chippy or distressed finishes when mixed with a bonding agent. It can also create a smooth, opaque finish. It’s eco-friendly and comes in powder form that you mix with water.
- Mineral Paint: A durable, self-leveling paint that provides excellent coverage and a smooth, hard finish. It’s highly resistant to chips and scratches, making it ideal for high-traffic pieces. It typically doesn’t require a primer or topcoat.
- Acrylic Latex Paint: A versatile and widely available option. It comes in various sheens (matte, satin, semi-gloss, gloss) and is durable. For best results with acrylic latex, priming is often recommended, especially over slick or dark surfaces.
Think about the overall color scheme of your room and select a shade that either blends seamlessly or provides a striking contrast. Always look at sample swatches on the actual wood piece if possible, as colors can look different on various surfaces and in different lighting. If this is your first time painting furniture, opt for a paint that is easy to control and forgiving of minor mistakes.
Step 3: Mastering Paint Application Techniques
Applying paint correctly ensures a professional-looking finish. Begin by stirring your chosen paint thoroughly to ensure an even consistency and color. Choose the right tool for the job: a high-quality synthetic brush works best for intricate details, grooves, and edges, while a small foam or short-nap roller is excellent for covering large, flat surfaces quickly and smoothly, minimizing brush strokes.
For an ultra-smooth, factory-like finish, consider using a paint sprayer, but be aware that this requires careful masking of surrounding areas and proper ventilation. Regardless of your tool, apply the paint in thin, even layers. Thick coats are prone to drips, streaks, and uneven drying. It’s always better to apply two or three thin coats than one thick one.
Allow each coat to dry completely according to the manufacturer’s instructions before applying the next. Lightly sanding between coats with a very fine-grit sandpaper (220 grit or higher) can help achieve an even smoother result, removing any minor imperfections or dust particles. Remember to wipe off any sanding dust before the next coat. Patience is key in this step; rushing can lead to a less refined finish. Take your time, apply with care, and you’ll be rewarded with a clean, even, and beautiful surface.
Step 4: Protecting Your Work with a Quality Sealer
Once your paint is fully dry and cured (which can take 24-72 hours depending on the paint and humidity), the final crucial step is to seal and protect your hard work. This layer safeguards the paint from scratches, scuffs, and general wear and tear, making your hutch easier to clean and ensuring its longevity.
- Furniture Wax: Offers a soft, matte finish and is easy to apply with a lint-free cloth. It needs to be buffed to a sheen and may require reapplication every 6-12 months, especially on frequently used surfaces.
- Polyurethane: Available in water-based (dries clear, low odor) and oil-based (more durable, can amber over time). It provides a strong, durable, and water-resistant protective layer. Choose from matte, satin, or gloss finishes depending on your desired look. Apply in thin, even coats with a brush, allowing each coat to dry completely before applying the next.
- Varnish: Similar to polyurethane, varnish offers excellent protection and comes in various sheens. It’s highly durable and resistant to moisture and heat, often used for pieces that need robust protection.
Always follow the product label for specific application instructions and full curing times, which can sometimes take several days or even weeks for maximum hardness. A well-sealed hutch will not only look great but will also withstand the test of time, remaining a cherished piece in your home for years to come.
Inspiring Hutch Makeovers: Before & After Transformations
These real-life makeovers perfectly illustrate how simple updates can breathe new life into old hutches, transforming them into stylish and functional pieces. Each example showcases a distinct aesthetic, proving that you can refresh your space without replacing your furniture entirely.
Modern Farmhouse White Hutch
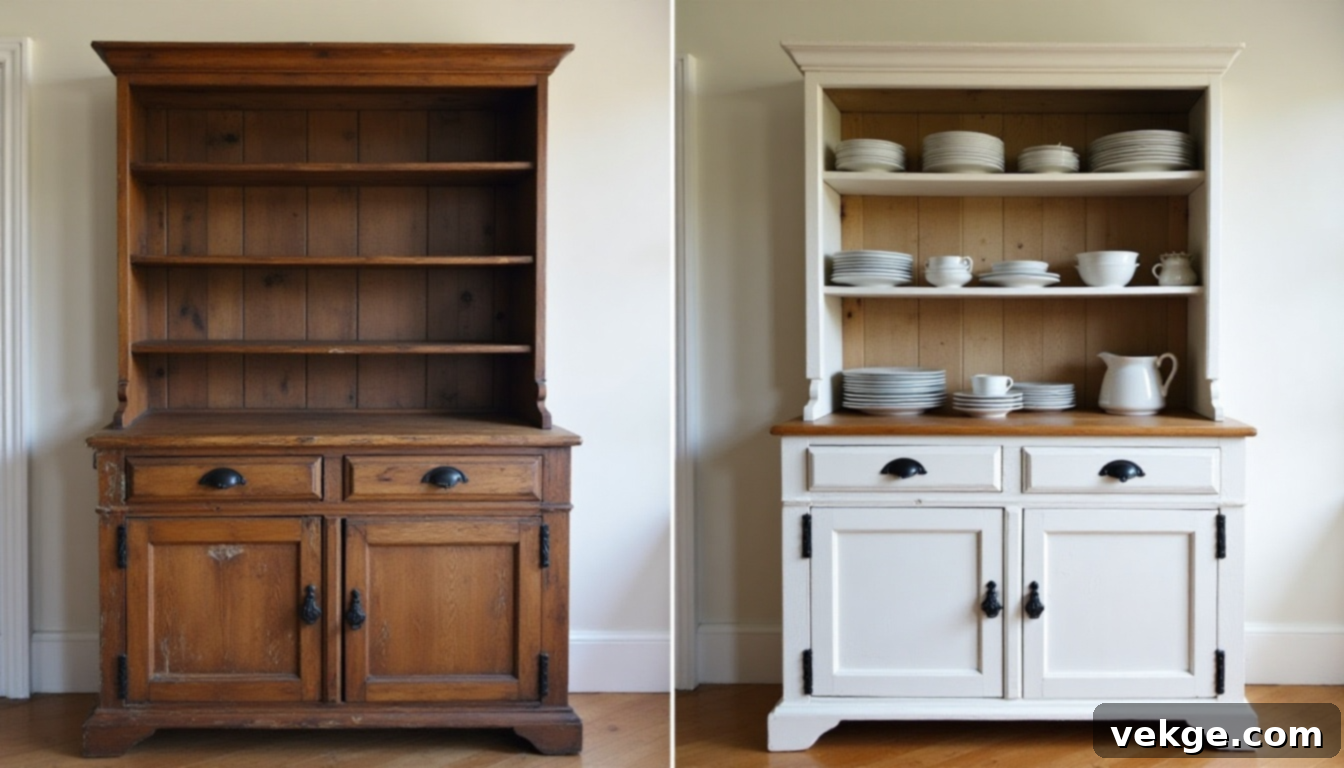
This hutch underwent a stunning transition to a modern farmhouse aesthetic. The base was given a fresh coat of crisp white chalk paint, instantly brightening its appearance and creating a clean, inviting foundation. To add warmth and character, the top surface was carefully sanded down and left unpainted, proudly showcasing the natural wood grain. The original glass doors were removed, opening up the top shelves for easy access and a lighter, airier feel. To complete the transformation, outdated hardware was replaced with sleek black metal handles, providing a subtle yet effective contrast. The result is a soft, clean, and effortlessly stylish piece that perfectly complements casual dining areas or cozy kitchen spaces. It’s now ideal for displaying everyday dishes, decorative items, or even a collection of plants, blending natural elements with a refined, simple design.
Minimalist Matte Black Hutch
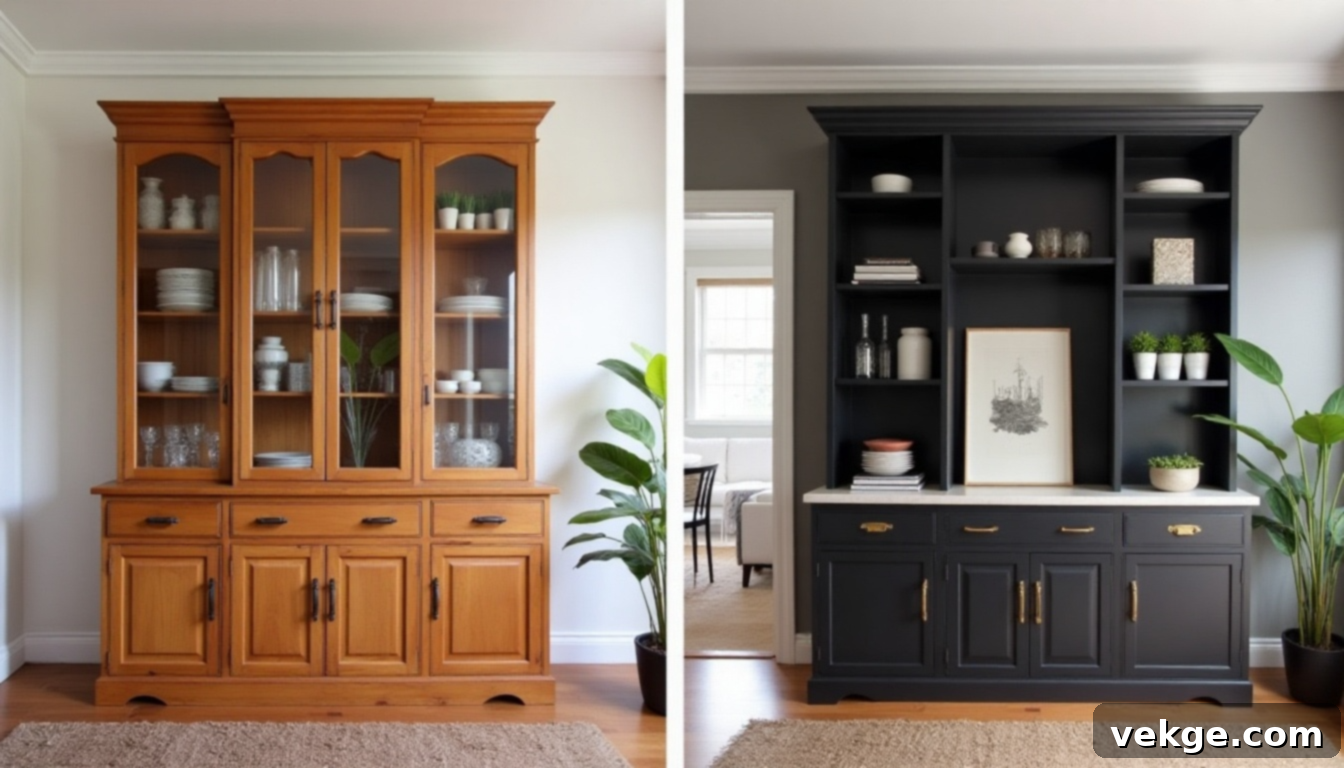
Embracing a bold, contemporary vision, this hutch was entirely reimagined with clean lines and a striking matte black finish. The deep, rich color instantly elevates the piece, giving it a sharp, modern look that seamlessly integrates into sophisticated living or dining rooms. To enhance its minimalist appeal and functionality, the traditional glass doors were removed and replaced with open shelving, transforming the hutch into a practical and display-friendly unit. The dark backdrop beautifully highlights whatever is placed on the shelves. For a touch of understated elegance, new brass pulls were added, providing a subtle contrast and just the right amount of polished shine. This makeover is ideal for those who favor sleek, functional furniture without excessive ornamentation or bright colors, creating a strong visual statement that remains refined and uncluttered.
Soft Pastel Hutch for a Nursery
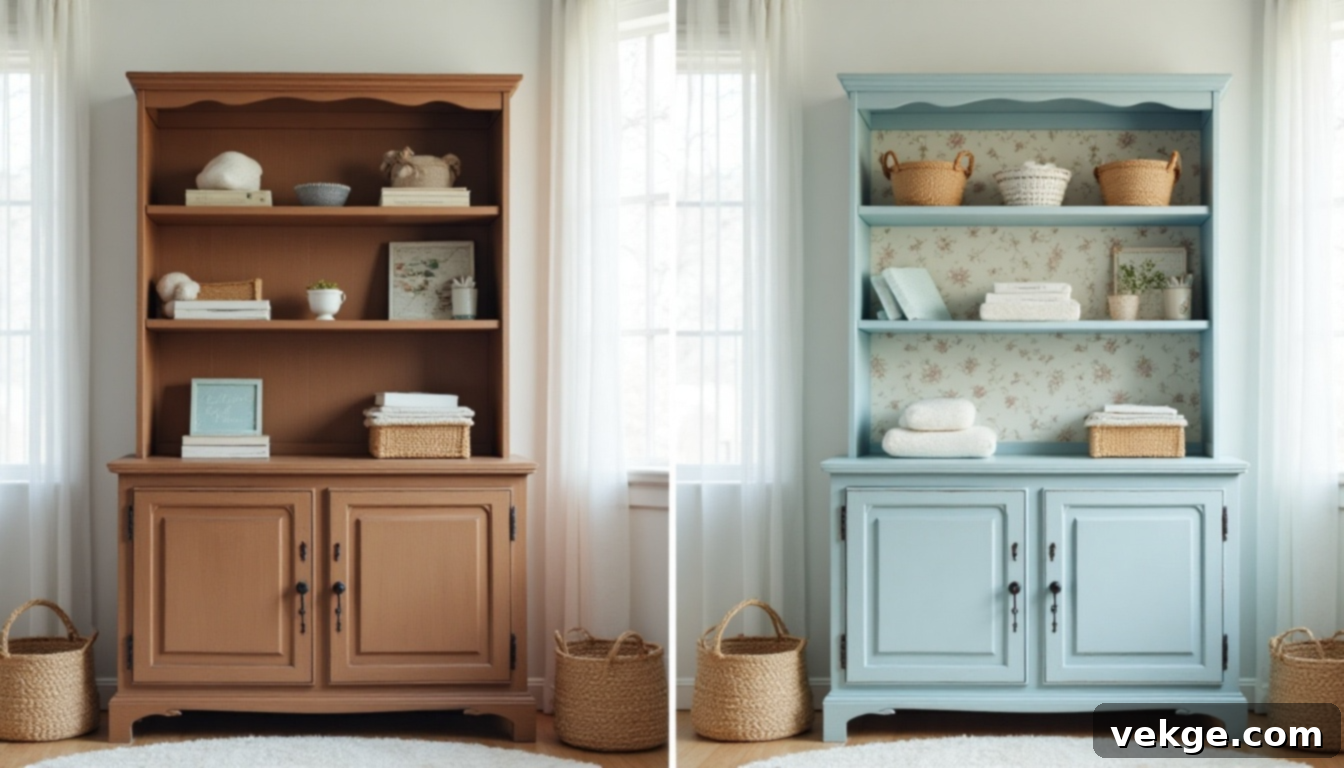
This creative makeover transformed a standard hutch into a charming and calming storage solution, perfectly suited for a nursery. The entire unit, including the inside shelving, was painted in a gentle pastel blue, creating a unified and serene aesthetic. To add a layer of whimsy and warmth, the back panel of the hutch was lined with a delicate peel-and-stick wallpaper featuring a light floral print. This small detail adds significant charm without overwhelming the soft color palette. The muted hues make the hutch a cozy and inviting addition to a baby’s room, complementing other soft furnishings and neutral tones. It now serves as an organized space for baby books, decorative baskets, and essential gear, blending seamlessly with the serene and tender atmosphere of a nursery.
Repurposed Hutch Top Turned Coffee Bar
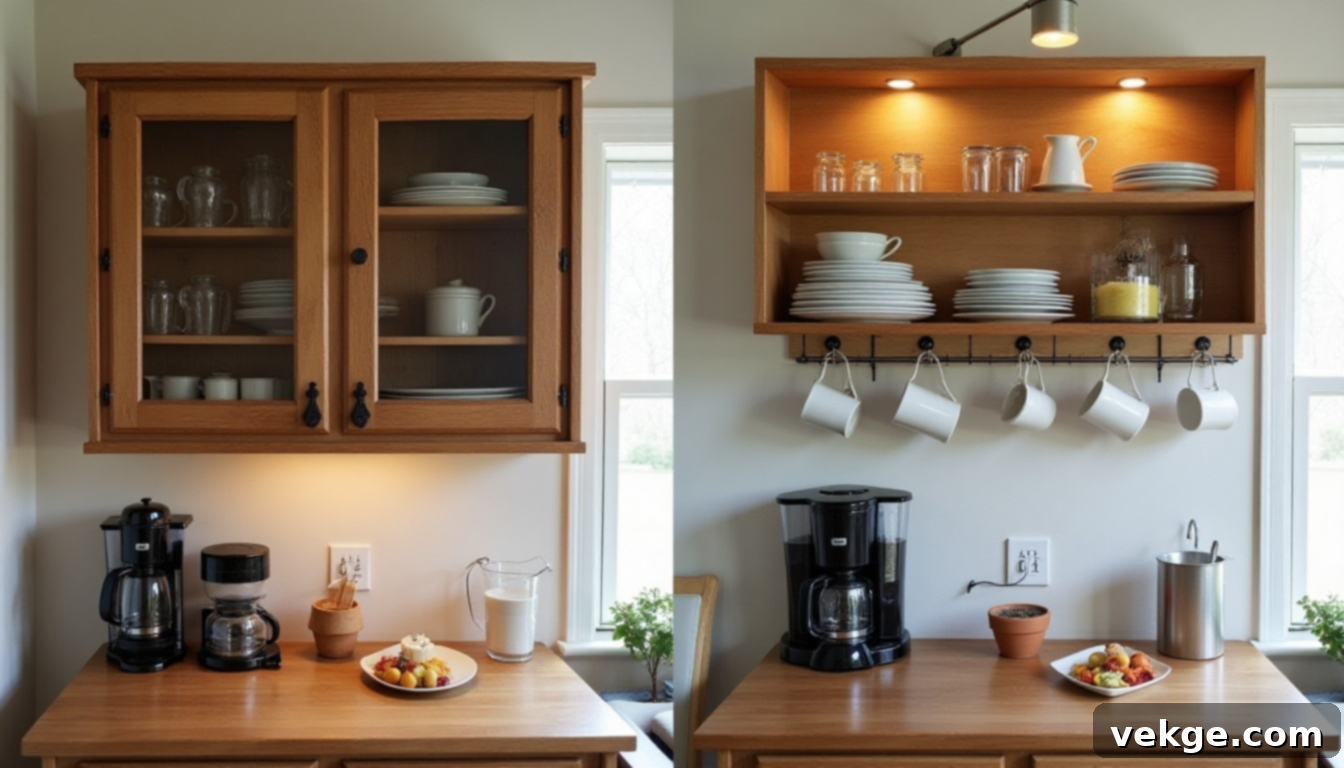
Demonstrating ingenuity and resourcefulness, this project took only the top section of a hutch and repurposed it into a compact, stylish, and highly functional coffee station. Mounted securely to a kitchen wall, it maximizes vertical space, featuring open shelves that neatly hold mugs, coffee jars, and various drink-making tools. To further enhance its practicality, hooks were installed underneath the bottom shelf, providing a convenient spot to hang additional cups and keeping the main counter clear. A clever strip of lighting tucked beneath the lowest shelf casts a warm, inviting glow, creating a cozy ambiance perfect for morning routines. This innovative makeover showcases how a discarded furniture piece can be transformed into a smart, space-saving solution that adds both function and aesthetic appeal to daily life, proving that even a part of a hutch can find a new, useful purpose.
Style Your Hutch: Ideas for Every Home Aesthetic
Matching your hutch to your home’s unique style can elevate your interior design. Small changes in paint, hardware, and backing can make a dramatic difference without a full overhaul. Explore these style-specific ideas to find the perfect look for your transformed hutch.
Farmhouse
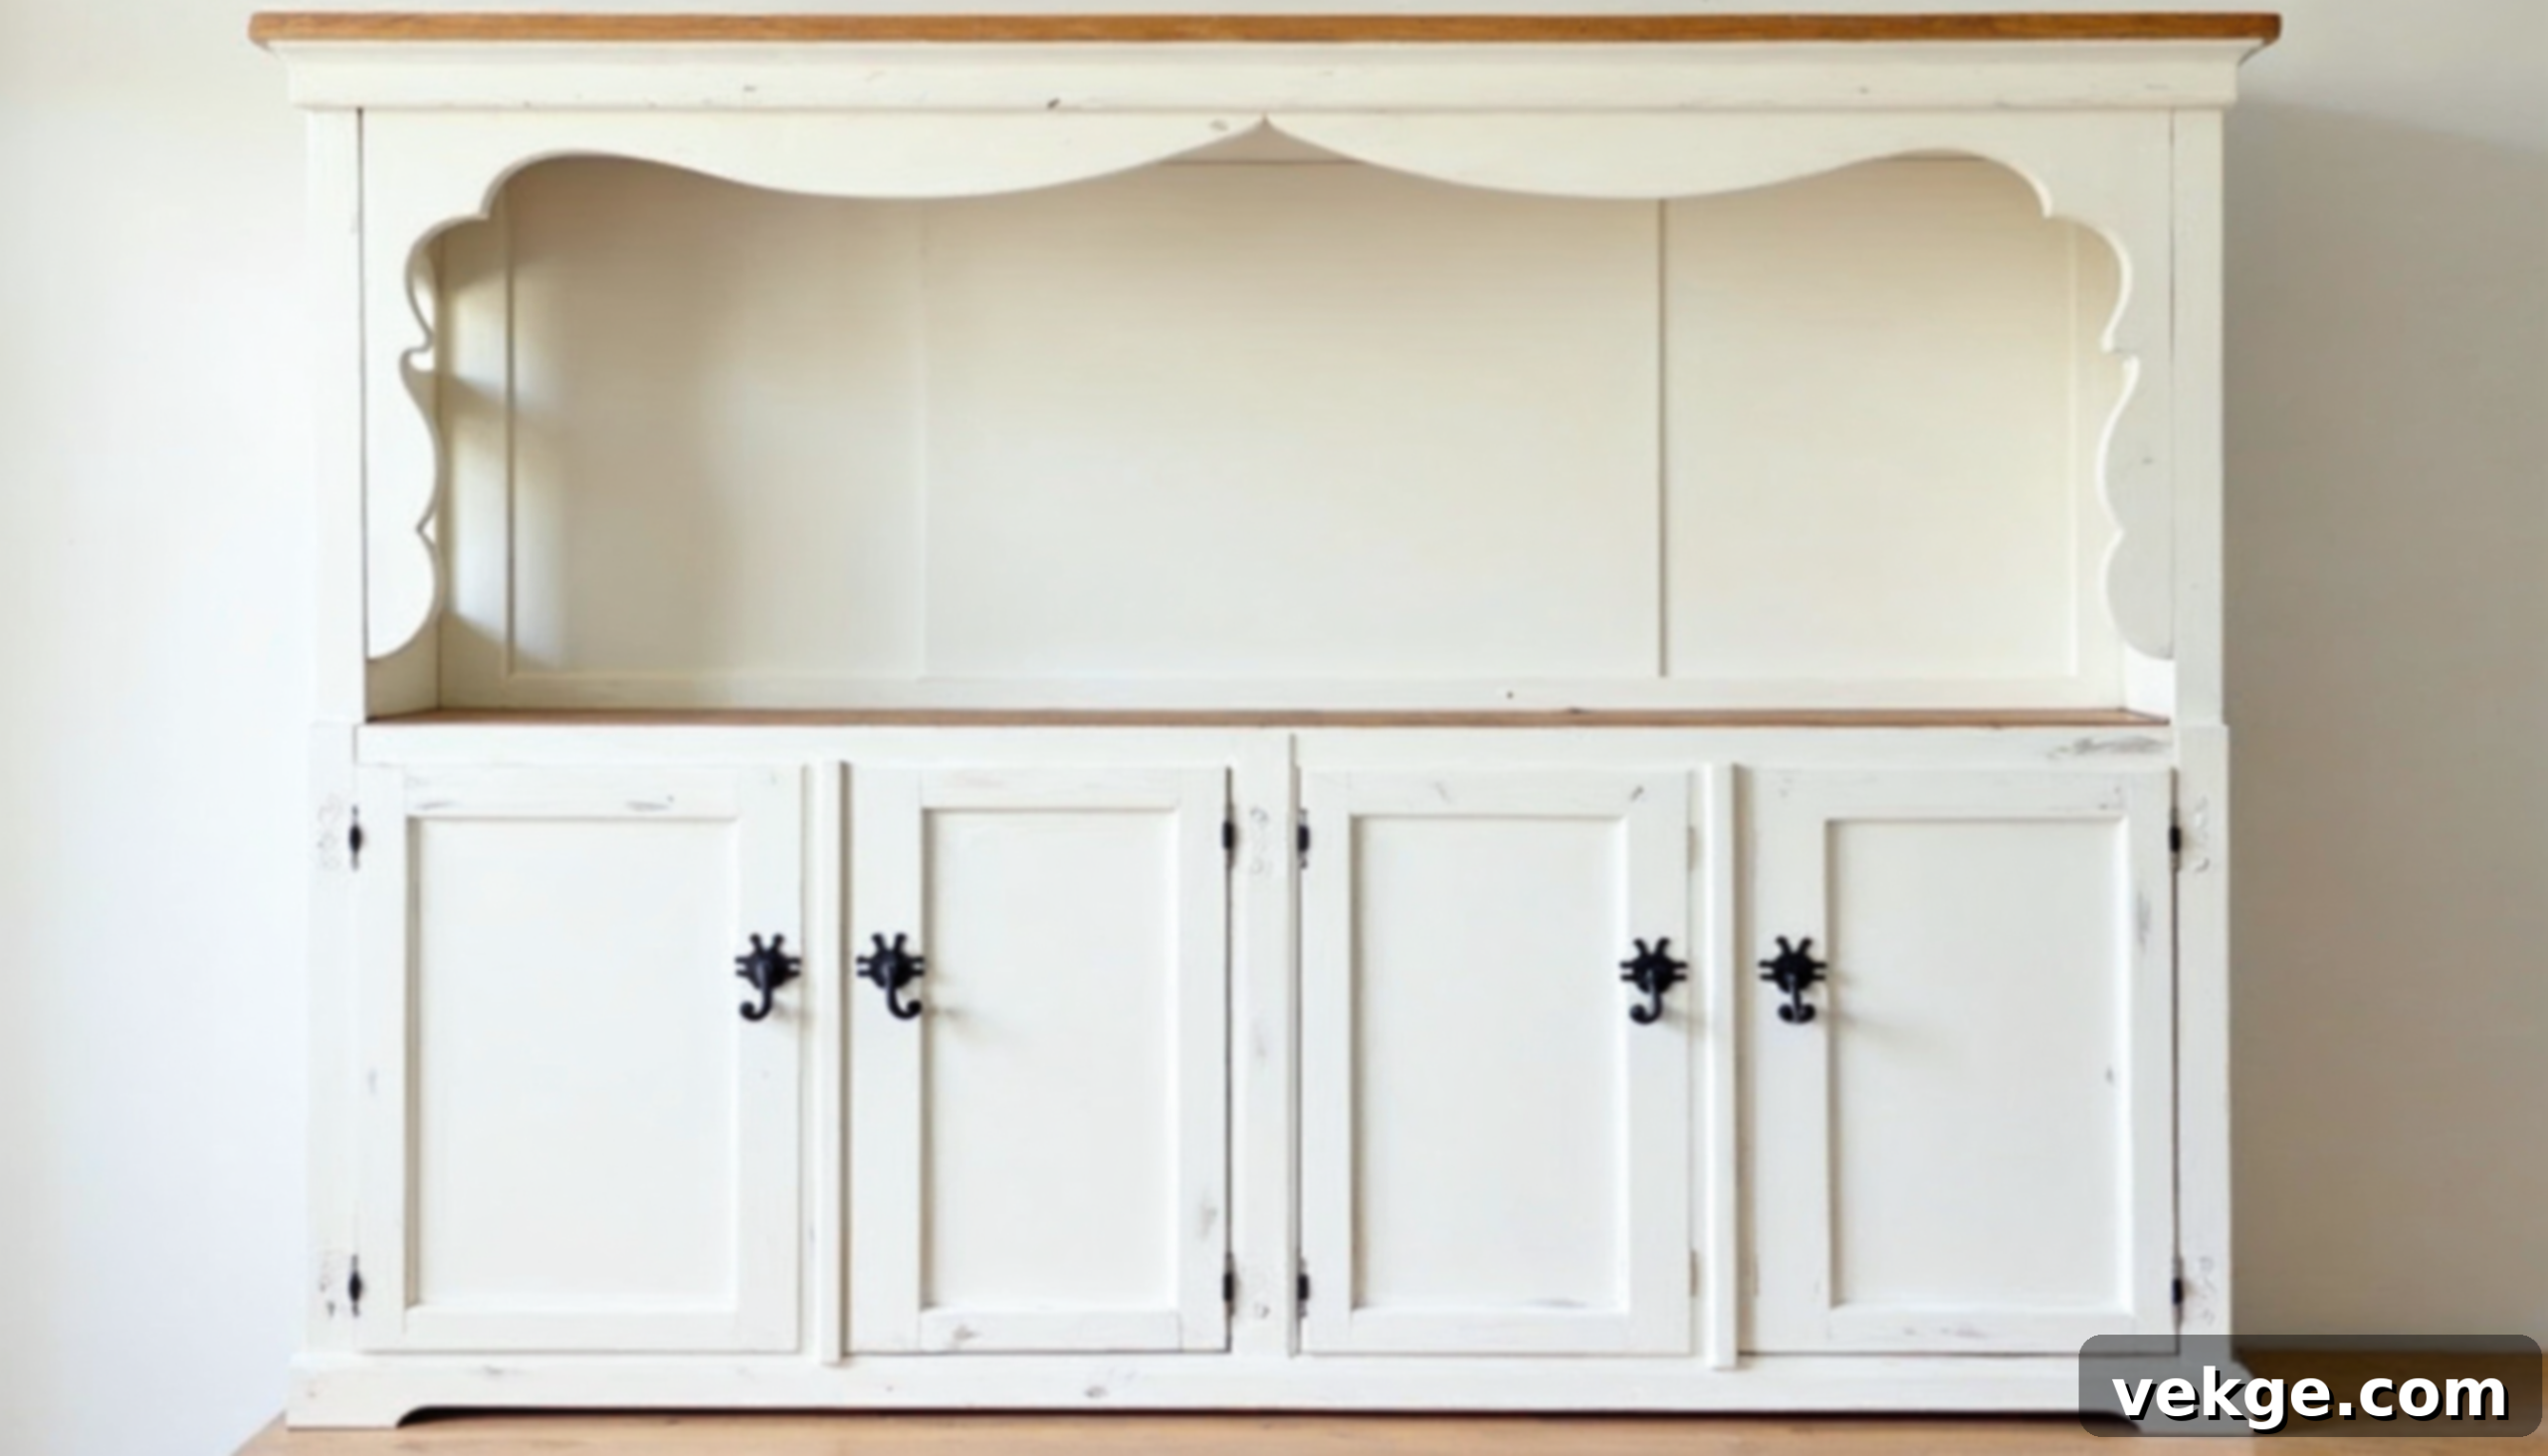
To achieve a classic farmhouse look, begin with a fresh coat of white or a soft, creamy off-white paint for the hutch’s base. This provides a clean, bright foundation. Introduce warmth by incorporating natural wood accents; consider leaving the top surface unpainted, or add wooden shelves. For an authentic barn-inspired touch, install a shiplap-style panel or beadboard as the hutch’s back. Replace existing hardware with rustic black or bronze pulls and hinges that feature simple, traditional lines. This style pairs beautifully with open shelving, allowing you to display woven baskets, classic white dishware, and other cozy decor elements. Opt for a slightly matte or subtly distressed finish to give the hutch a comfortable, lived-in feel. The final result should evoke a sense of calm, homeliness, and effortless charm, perfectly blending with rustic or neutral home decor.
Mid-Century Modern
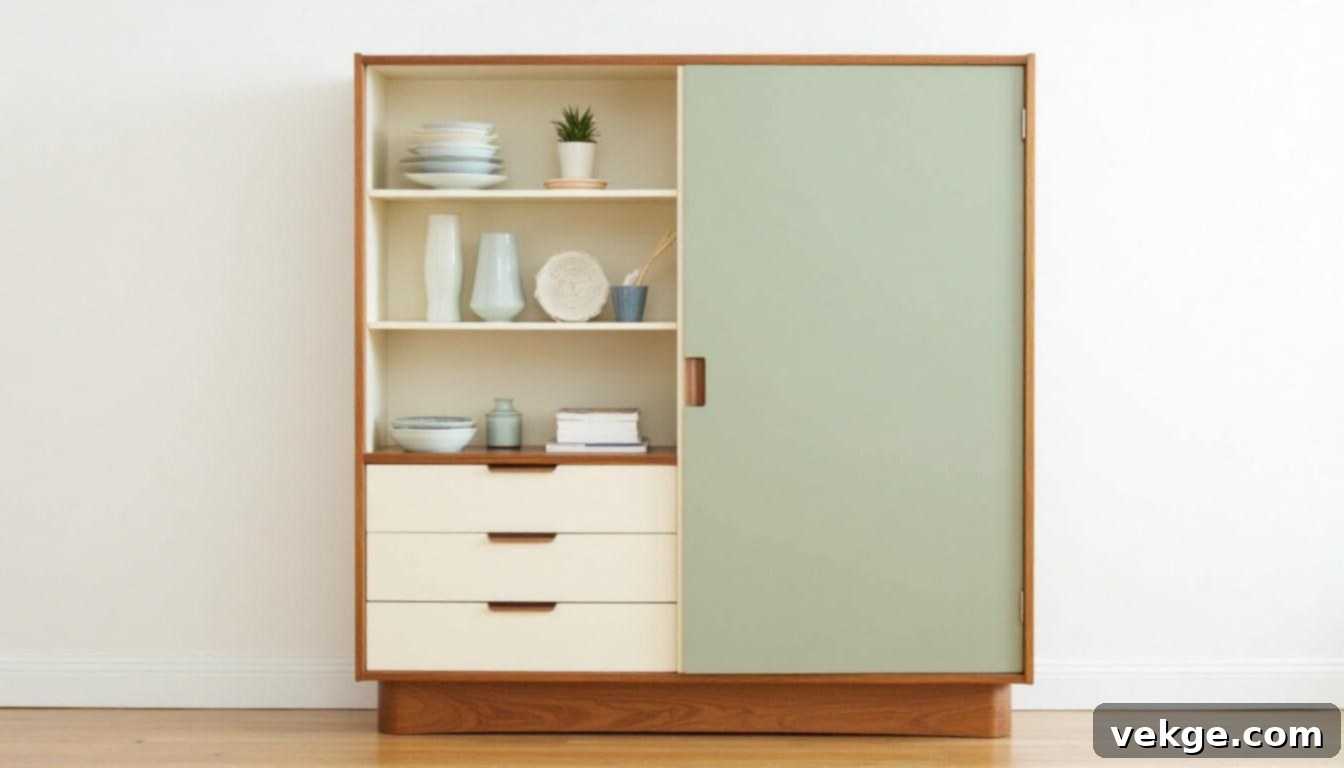
Give your hutch a sophisticated mid-century modern update by experimenting with two-tone paint schemes; a lighter, complementary color on the inside or shelves and a darker, richer shade on the exterior frame works wonderfully. One of the defining characteristics of mid-century design is its sleek, elevated profile, so consider replacing any chunky or traditional legs with slender, tapered ones, often angled slightly outwards, to give the piece a light and airy feel. Hardware should be minimalist and refined; opt for sleek round or rectangular knobs in brushed brass, chrome, or even warm wood. The essence of this style is balance: clean geometric shapes, smooth flat surfaces, and limited, intentional detailing. This makeover is perfect for those who appreciate a minimal layout, warm wood tones, and clear, structured lines that feel sophisticated without being heavy or overly ornate. Accessorize with vintage pottery, abstract art, or a simple plant.
Cottagecore
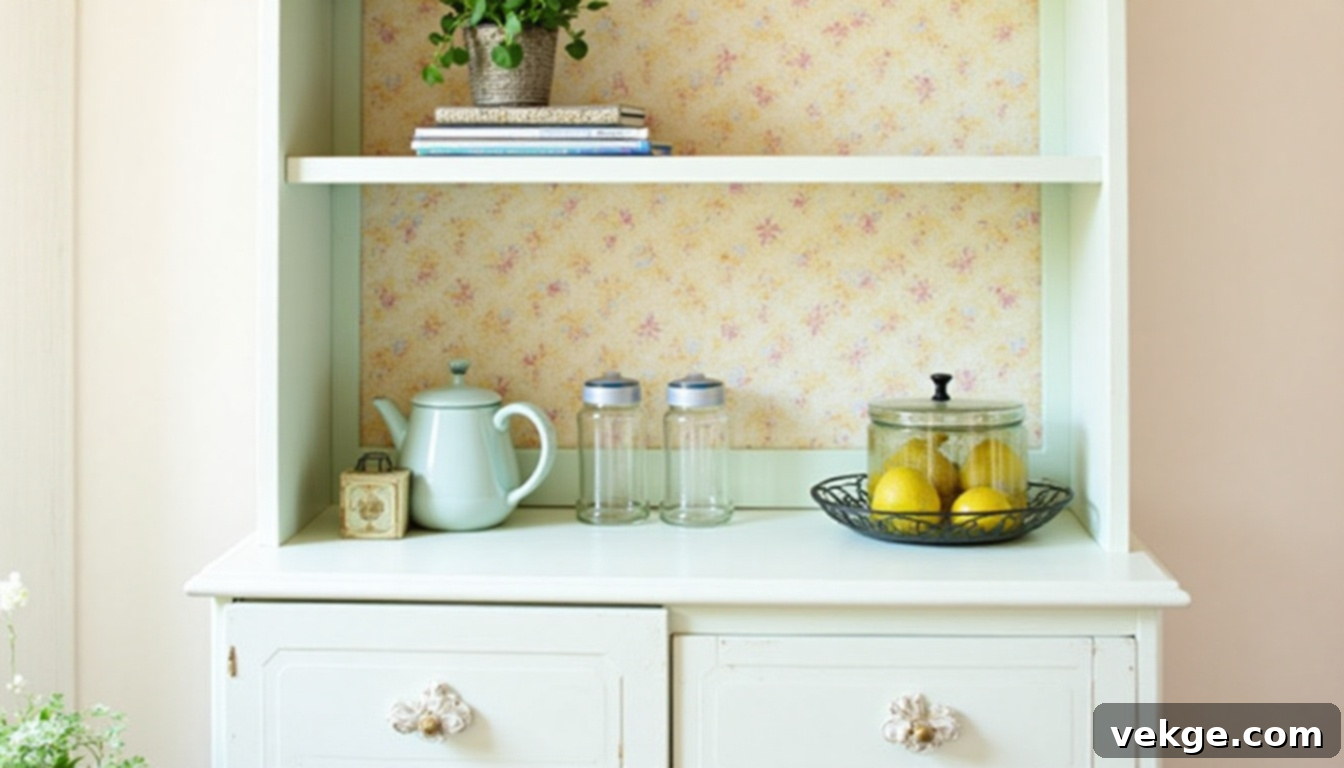
The cottagecore aesthetic celebrates soft whimsy, nostalgic charm, and a cozy, handmade look inspired by idyllic rural life. Paint your hutch in dreamy pastel colors such as mint green, blush pink, soft yellow, or lavender. To enhance the enchanting vibe, line the back panel with a beautiful floral peel-and-stick wallpaper or a charming fabric featuring botanical prints. For hardware, choose delicate glass, ceramic, or vintage-style wooden knobs that complement the sweet and gentle aesthetic. Open shelving is perfect for this style, allowing you to display an array of quaint items like vintage jars, well-loved books, small potted plants, and handcrafted ceramics. This style works best in spaces that feel warm, inviting, and relaxed, such as a cozy reading nook, a quaint kitchen corner, or a bohemian bedroom, inviting a sense of comfort and natural beauty.
Industrial
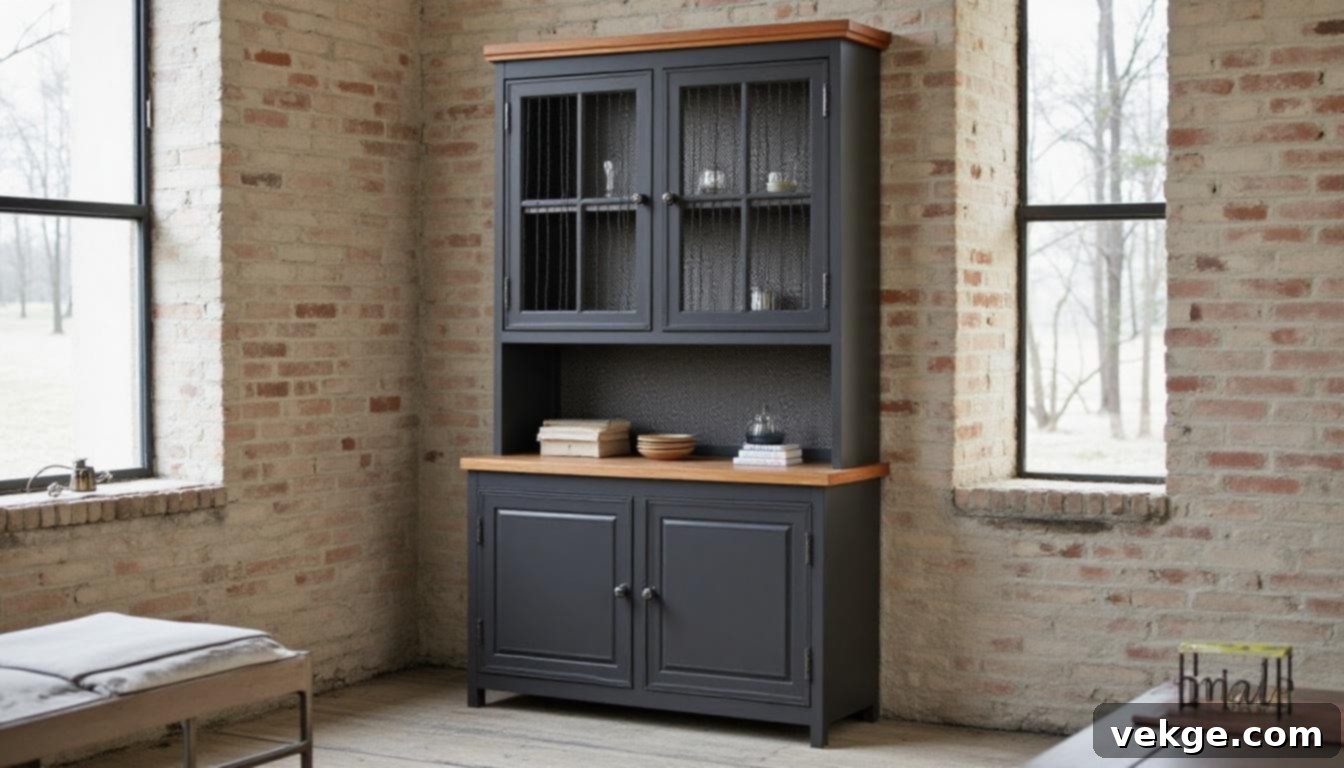
For a bold and rugged industrial aesthetic, embrace dark, moody paint colors like charcoal gray, deep brown, or even matte black. A matte or flat finish will maintain that raw, grounded feel that defines industrial design. Replace traditional glass doors with metal mesh or wire panels to expose the contents while adding textural interest and a utilitarian edge. If possible, the top of the hutch can be left in its natural wood state, or sanded down to highlight grain and any existing marks, giving it an authentic, worn appearance. Complete the look with simple, robust iron hardware, exposed black pipe handles, or chunky metal pulls. This style pairs exceptionally well with architectural elements like exposed brick walls, concrete floors, or rooms with an abundance of natural wood and minimal polish, creating a striking blend of function and urban edge.
Longevity & Care: Maintaining Your Beautifully Painted Hutch
Once you’ve invested time and effort into transforming your hutch, a little ongoing care will ensure it stays looking pristine for years. Regular maintenance is simple and crucial for preserving the beauty and durability of your painted furniture.
Regular Dusting: Dust your hutch regularly with a dry, soft cloth or a microfiber duster. This prevents dust buildup, which can become more difficult to remove over time and dull the finish.
Gentle Cleaning: Avoid harsh chemical cleaners, abrasive sponges, or strong detergents, as these can strip the sealer or damage the paint. For occasional deeper cleaning, use a soft cloth dampened with mild soap and warm water. Always wipe the surface dry immediately to prevent water spots or damage, especially if your sealer isn’t fully waterproof.
Wax Reapplication (if applicable): If your hutch was sealed with furniture wax, consider reapplying a thin, even coat once or twice a year, or as needed, particularly on high-traffic surfaces. This will refresh the protective layer and restore its soft sheen.
Protect from Scratches: For polyurethane or varnish finishes, wipe clean as needed and be mindful of placing sharp or heavy objects directly on the surface. Use felt pads under decor items to prevent scratches.
Avoid Direct Sunlight: Position your hutch away from direct, prolonged sunlight. UV rays can cause paint colors to fade over time, especially brighter or darker shades.
By following these simple steps, your beautifully made-over hutch will remain a fresh and admired piece in your home, continuing to bring you joy and style for many seasons to come.
Conclusion
Embarking on a hutch makeover is one of the most rewarding and impactful ways to update your space without the expense and waste of buying new furniture. By understanding a few basic principles—from thorough cleaning and preparation to careful paint application and protective sealing—you can breathe new life into an old piece, transforming it into something truly unique, fresh, and perfectly suited to your home’s aesthetic.
You now possess the knowledge and inspiration to tackle your own hutch transformation. Whether you choose a bold, modern statement, a soft, whimsical touch, or a classic farmhouse charm, the satisfaction of creating a custom piece will be immensely rewarding. Each brushstroke and thoughtful design choice will make the change feel truly worthwhile.
Ready for more home improvement adventures? Dive into our other DIY and furniture makeover blogs for a wealth of fresh ideas and practical guides to enhance your home, one beautifully transformed piece at a time. Your next project awaits!
