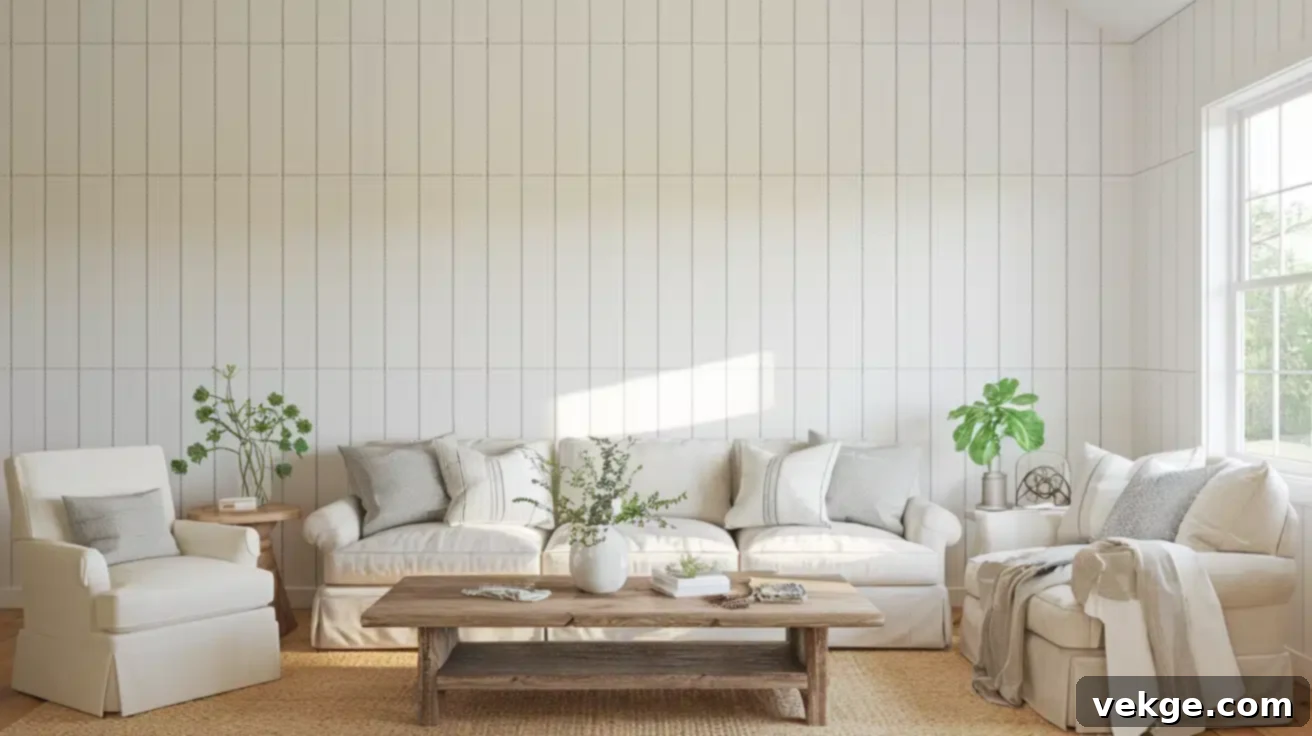
Transform Your Home: The Ultimate Guide to Farmhouse Vertical Shiplap Walls
Wooden wall paneling has long been a staple in interior design, but few styles have captured the modern homeowner’s imagination quite like shiplap. Once a purely functional material used in shipbuilding and barn construction, shiplap has undergone a remarkable transformation, becoming a beloved feature in contemporary homes. While traditionally associated with horizontal applications, a fresh and increasingly popular trend is taking center stage: vertical shiplap.
Vertical shiplap offers a distinct set of aesthetic and practical advantages that set it apart. By drawing the eye upwards, it creates an illusion of height, making rooms feel significantly taller and more spacious. This vertical orientation also proves beneficial for maintenance, as dust and debris are less likely to accumulate on its surfaces compared to horizontal boards, simplifying cleaning. Its versatile appeal means it seamlessly integrates into various spaces, from bustling kitchens and elegant living rooms to serene bedrooms and functional home offices.
The allure of farmhouse vertical shiplap lies in its unique ability to blend rustic charm with modern sophistication. It expertly preserves the warm, inviting essence of traditional farmhouse aesthetics while injecting a crisp, contemporary edge. This fresh interpretation of a classic look makes it an ideal choice for anyone looking to renovate, build new, or simply refresh their home’s interior with a design element that is both timeless and on-trend. Discover why vertical shiplap, particularly in the beloved farmhouse style, is a design consideration you won’t want to overlook.
The Rich History and Modern Revival of Shiplap
The story of shiplap is deeply rooted in practicality, far removed from the stylish interior design element it is today. Its origins trace back centuries, primarily finding application in shipbuilding and in homes situated in harsh, coastal environments. The ingenious design, featuring interlocking or overlapping rabbeted edges, was specifically engineered to create a tight seal. This prevented water, wind, and moisture from penetrating, offering superior protection against the elements, making it an indispensable material for structures exposed to the unforgiving forces of nature.
For generations, shiplap served a purely functional role. It was often relegated to utilitarian spaces like barns, sheds, and exterior siding, or hidden beneath layers of plaster, wallpaper, or paint in homes. Its rugged durability and weather-resistant properties were valued above any aesthetic appeal. However, as building materials evolved and modern construction techniques offered more efficient ways to seal structures, shiplap’s practical necessity waned, leading to a period where it largely faded from widespread use.
The turn of the 21st century brought a remarkable renaissance for shiplap. Spearheaded by popular home renovation shows and the burgeoning interest in farmhouse-style decor, this humble building material was rediscovered and celebrated for its inherent character and textured appeal. Designers and homeowners alike began to strip back layers of paint and plaster, revealing the beautiful, raw shiplap underneath, or intentionally installing new boards to achieve that coveted rustic yet refined look.
This revival didn’t just bring back traditional horizontal shiplap; it paved the way for innovative applications, most notably vertical shiplap. This fresh orientation breathed new life into the classic aesthetic, allowing it to transcend its farmhouse roots. Today, vertical shiplap is a versatile design feature that lends itself beautifully to a multitude of styles beyond traditional farmhouse, including crisp coastal, edgy industrial, minimalist Scandinavian, and sleek contemporary interiors. Its ability to add depth, texture, and a sense of history makes it a highly sought-after element in modern home design, elevating ordinary walls into captivating focal points.
Unmatched Durability: Why Vertical Shiplap Walls Last
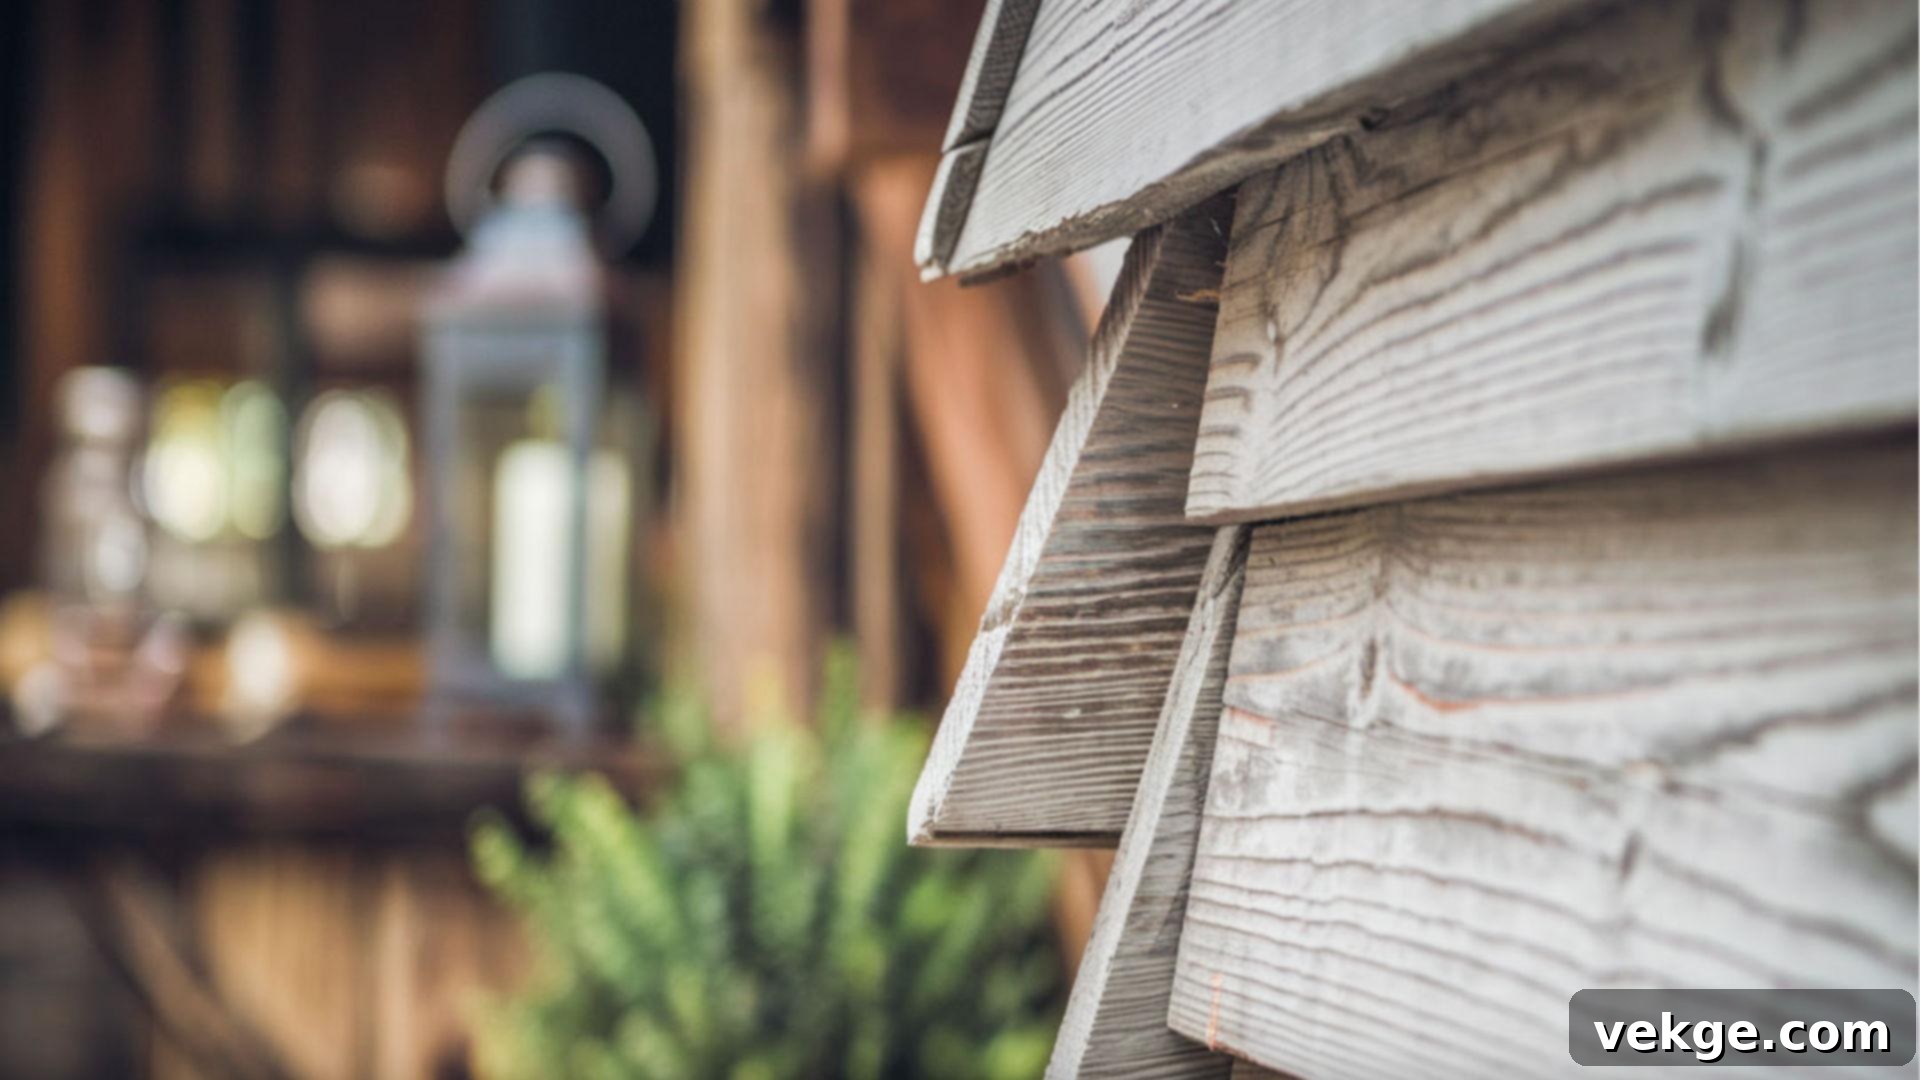
Beyond its striking aesthetic, one of the most compelling advantages of vertical shiplap walls, particularly in the popular farmhouse style, is their exceptional durability and longevity. Unlike more fragile wall coverings, shiplap is designed to endure the rigors of daily life, making it a wise investment for busy households and high-traffic areas.
The inherent strength of shiplap comes from its unique construction. Each board features a rabbeted edge that overlaps or interlocks with the next, creating a robust, unified surface. This interlocking design not only forms a strong physical barrier but also helps distribute stress across the entire wall, significantly increasing its resistance to impacts, scuffs, and general wear and tear that might easily damage drywall or wallpaper. This structural integrity contributes to a tough and stable wall covering that stands the test of time.
Specifically, farmhouse vertical shiplap offers enhanced practical benefits, especially in areas prone to moisture or spills. The vertical orientation allows water and liquids to shed downwards more efficiently, reducing the likelihood of moisture pooling between boards. This natural drainage can be a significant advantage in damp environments like bathrooms, laundry rooms, or even kitchen backsplashes, helping to prevent water damage, mold, and mildew formation.
The choice of material also plays a crucial role in shiplap’s lifespan. While various materials can mimic the look, genuine wood is the traditional and often most durable choice. High-quality wood, when properly sealed and maintained, can easily last for many decades, becoming a cherished part of your home’s character. Popular wood choices for vertical shiplap include:
- Pine: An affordable and readily available option, pine is widely chosen for its beautiful grain and ease of workability. When sealed and painted, it offers excellent durability for interior applications.
- Cedar: Known for its natural resistance to moisture, rot, and insects, cedar is an excellent choice for shiplap, particularly in humid climates or for exterior applications. Its distinctive aroma is an added bonus.
- MDF (Medium-Density Fiberboard): While not solid wood, MDF shiplap offers a very smooth, uniform finish and is less prone to warping. It’s an economical choice, especially when painted, but should be used in areas without high moisture exposure unless properly sealed.
- Plywood: As a cost-effective DIY option, plywood strips can be cut to create a shiplap effect. While less robust than solid shiplap boards, when prepped and finished correctly, it can offer a durable solution for budget-conscious projects.
Shiplap’s ability to resist natural environmental changes further enhances its longevity. It’s less susceptible to warping, cracking, or bowing compared to some other wall finishes, even with fluctuations in temperature and humidity. Applying a quality paint or stain adds an essential protective layer, shielding the wood from moisture, UV damage, and everyday abrasions, thereby extending its life considerably.
Should damage occur, repairing farmhouse vertical shiplap is often straightforward. Unlike large sections of drywall, individual shiplap boards can typically be replaced without needing to overhaul an entire wall, making maintenance simpler and more cost-effective in the long run.
Ultimately, the key to maximizing shiplap’s durability lies in correct installation and consistent, minimal care. When professionally installed or meticulously fitted by a DIY enthusiast, shiplap creates an incredibly sturdy, attractive, and long-lasting surface. A simple routine of dusting and occasional touch-ups is usually all that’s required to keep your vertical shiplap walls looking pristine for years to come, confirming its status as a smart, stylish, and enduring choice for any home.
Choosing Your Path: Ready-Made vs. DIY Vertical Shiplap for Your Home
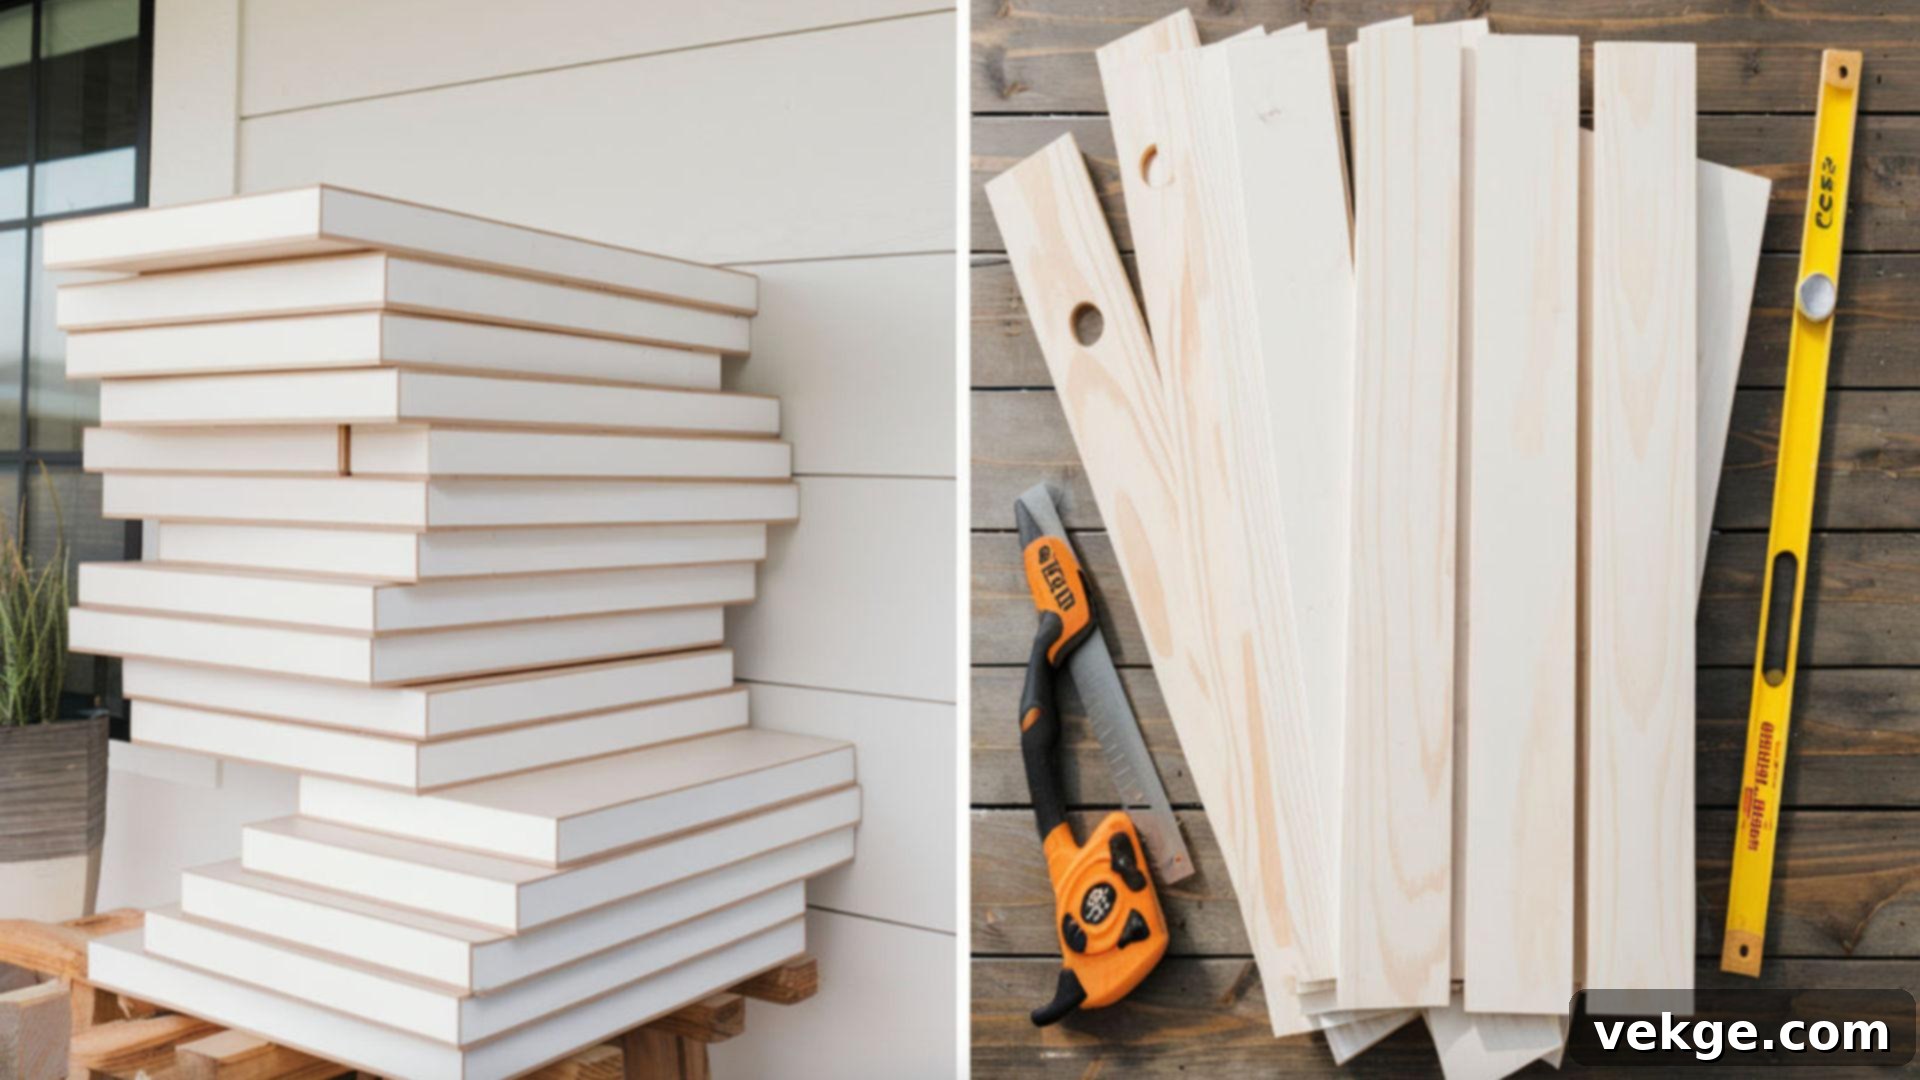
When embarking on a vertical shiplap project, a fundamental decision homeowners face is whether to purchase ready-made shiplap boards or to craft a DIY version. Both approaches offer distinct advantages and disadvantages, influencing factors like cost, installation time, and the final aesthetic. Understanding these differences is crucial for making the best choice for your specific farmhouse vertical shiplap vision.
1. Ready-Made Vertical Shiplap Boards: Convenience and Consistency
Opting for ready-made shiplap boards, particularly those designed for vertical application, offers significant convenience. These boards are typically manufactured with precise dimensions, pre-cut to consistent lengths, and often feature the characteristic rabbeted edges that interlock neatly. This precision translates into several benefits:
- Time-Saving Installation: With boards pre-cut and ready, installation becomes a more streamlined process, reducing the time and effort spent on measuring, cutting, and ensuring consistency.
- Uniform Aesthetic: Factory-made boards guarantee a uniform appearance. The gaps between boards are perfectly consistent, resulting in a cleaner, more professional, and polished finish that’s often difficult to replicate perfectly with DIY methods.
- Higher Durability: Pre-fabricated shiplap boards are typically engineered specifically for wall coverings, often made from higher-grade wood or MDF designed to be sturdy and long-lasting, minimizing issues like warping or cupping.
- Easier for Beginners: For those new to DIY projects, ready-made shiplap simplifies the process considerably, allowing for a more forgiving installation experience.
2. DIY Vertical Shiplap: Budget-Friendly and Customizable
The DIY approach to vertical shiplap often involves purchasing large sheets of plywood or MDF and cutting them into strips to mimic the shiplap effect. This method appeals strongly to budget-conscious homeowners and those who enjoy a hands-on project:
- Cost-Effectiveness: Generally, the material cost for DIY shiplap (using plywood or MDF) is significantly lower than purchasing pre-milled shiplap boards, making it an attractive option for larger projects.
- Customization Control: DIY allows for complete control over the final look. You can precisely adjust the width of the boards and the size of the gaps to achieve a unique aesthetic that perfectly matches your design vision. This level of customization is invaluable for truly personalized farmhouse vertical shiplap accents.
- Accessibility: Pre-made vertical shiplap can sometimes be harder to source locally compared to horizontal options. In such cases, the DIY route becomes the most accessible way to achieve the desired vertical board look.
- Sense of Accomplishment: Successfully completing a DIY shiplap project provides a great sense of satisfaction and pride in your home transformation.
3. Key Considerations for Your Decision
- Installation Difficulty: While pre-made boards offer easier installation due to their interlocking design, DIY shiplap requires more precision in cutting and spacing. You’ll need access to tools like a table saw or circular saw for accurate cuts and more patience for consistent spacing.
- Longevity and Material Quality: Ready-made boards are often more robust. DIY versions, especially those from thinner plywood, might be less durable and more susceptible to wear over time if not properly prepped, sealed, and installed.
- Time Investment: DIY shiplap projects demand a significant time investment, not just for installation but also for the cutting and preparation phase. If time is a constraint, ready-made is usually the faster option.
- Tools Required: DIY projects will necessitate a broader range of tools, including power saws for cutting, which might be an additional upfront cost if you don’t already own them.
Ultimately, your decision hinges on your budget, your DIY skill level, the tools at your disposal, and your desired outcome for your farmhouse vertical shiplap walls. Both methods are capable of creating stunning results, bringing charm and character to your home.
Versatile Charm: Creative Applications of Vertical Shiplap in Your Home
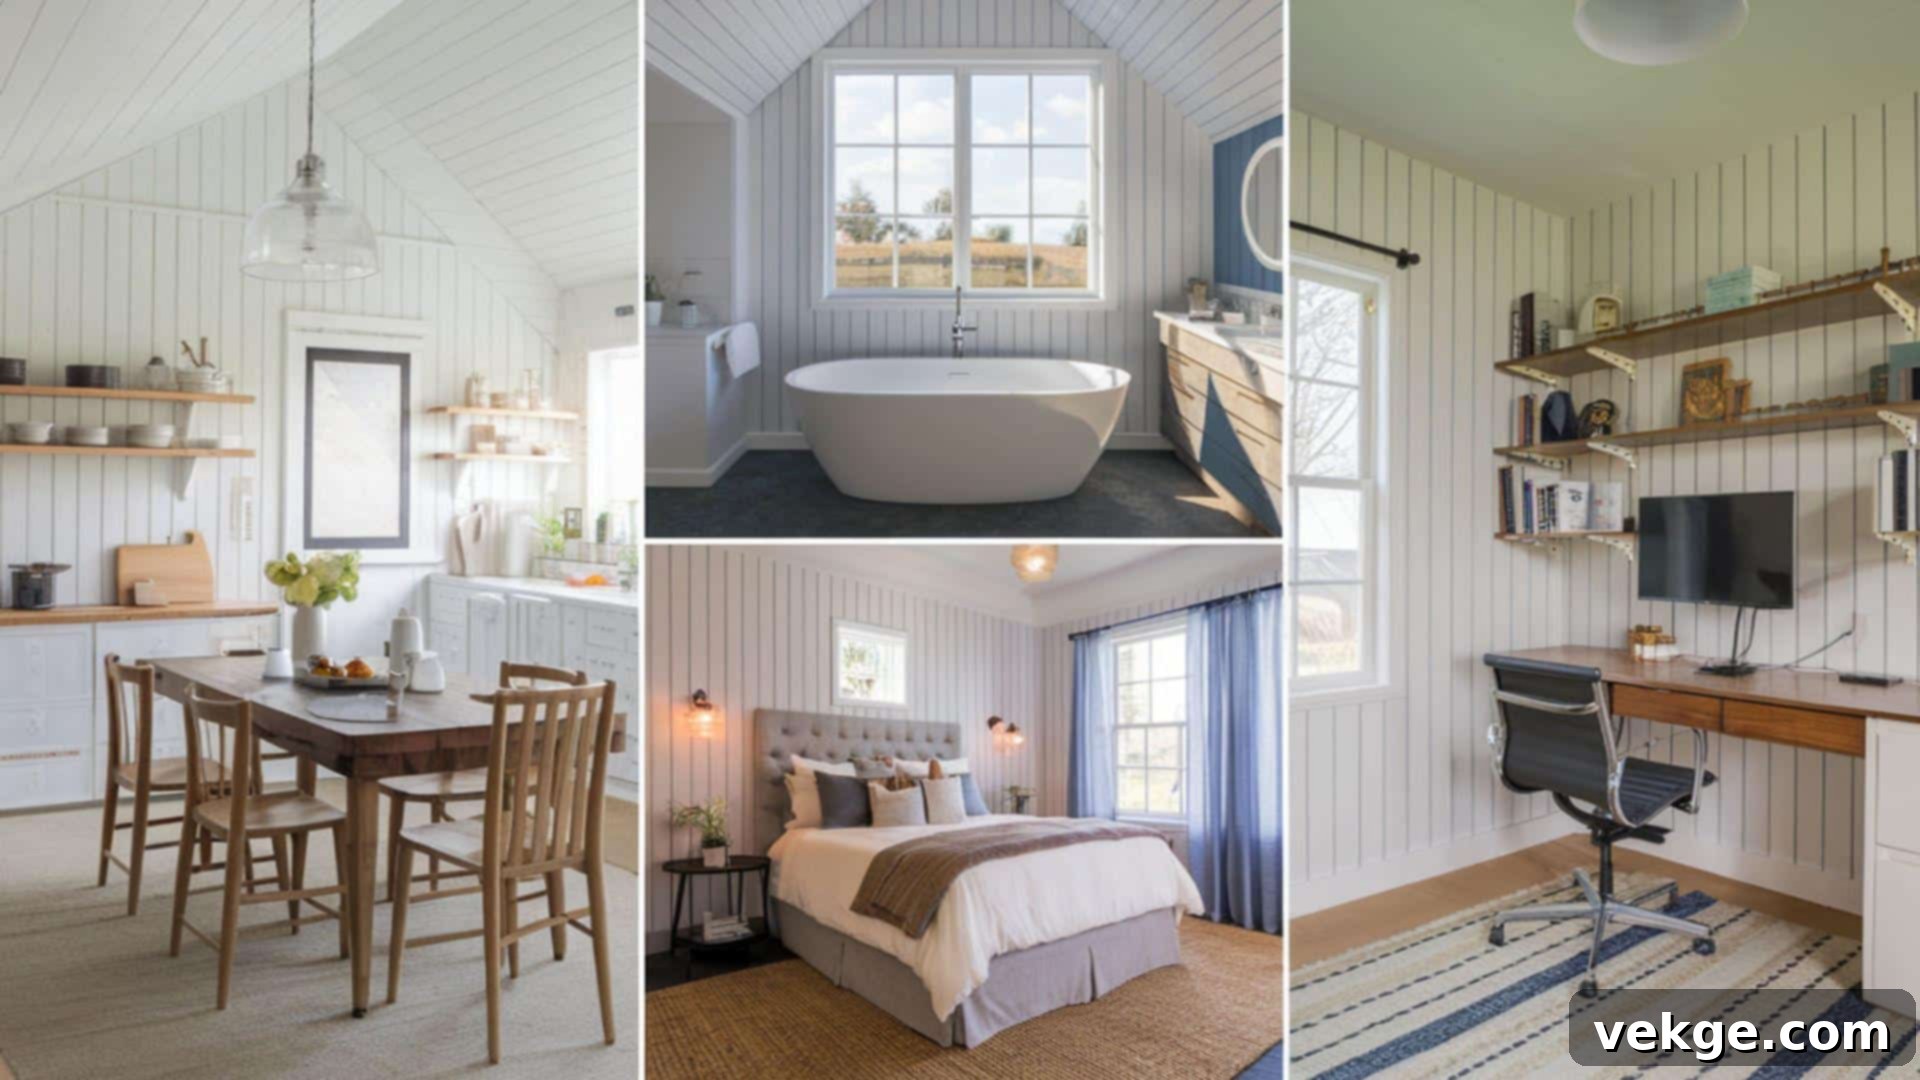
The beauty of farmhouse vertical shiplap lies in its remarkable versatility. Far from being confined to a single room or style, its clean lines and appealing texture can enhance virtually any area of your home, injecting character, warmth, and a touch of modern farmhouse elegance. Here are some of the most inspiring ways to integrate this dynamic design element into your living spaces.
1. Elevating Living & Sleeping Spaces
- Living Rooms: A vertical shiplap accent wall in a living room instantly becomes a striking focal point. Its upward lines draw the eye, creating an an impressive sense of height and making the room feel more expansive and grand. It provides a perfect backdrop for artwork, a fireplace, or a large television, grounding the space with sophisticated texture.
- Bedrooms: In bedrooms, vertical shiplap can evoke a serene, cozy retreat. Imagine a unique headboard feature or an entire wall covered in shiplap to create a cabin-like, tranquil atmosphere. Opting for lighter colors can make the space feel airy, while darker hues can add dramatic depth and warmth.
- Dining Rooms: Transform a dining area into a more inviting and sophisticated space by using vertical shiplap on one or more walls. It adds a subtle architectural detail that complements various dining furniture styles, from rustic farmhouse tables to sleek modern designs.
2. Functional Flair in High-Moisture Areas
- Bathrooms: Thanks to its enhanced moisture-shedding properties (especially when properly sealed and painted), farmhouse vertical shiplap is an excellent choice for bathrooms. It adds much-needed texture and visual interest to what can often be plain, functional spaces. It works beautifully around vanities, in shower surrounds (when appropriately treated), or on full walls.
- Kitchens: As a stylish and practical backsplash, vertical shiplap elevates the aesthetic of any kitchen. It’s not only easy to clean but also infuses the cooking area with that coveted farmhouse charm or a crisp, contemporary edge. It can also be used on a kitchen island for a custom, built-in look.
- Laundry Rooms: Bring style and durability to your laundry room with vertical shiplap. It can help protect walls from splashes and bumps while making this often-overlooked utility space feel more intentional and pleasant.
3. Defining Transition and Workspace Areas
- Entryways and Hallways: Make a powerful first impression with vertical shiplap in your entryway. It immediately adds character and a welcoming warmth, guiding guests into your home. In hallways, the vertical lines can make narrow spaces feel longer and more open.
- Home Offices: Create a focused and professionally inspiring atmosphere in a home office. Vertical shiplap provides an elegant and non-distracting backdrop for video calls and helps define the workspace within a larger room, fostering productivity.
- Mudrooms: Perfect for high-traffic areas where functionality meets style, vertical shiplap can line mudroom walls, offering a durable and easy-to-clean surface that complements hooks, cubbies, and benches.
4. Beyond Walls: Unique and Exterior Applications
- Ceilings: Don’t forget the “fifth wall”! Installing vertical shiplap on ceilings can create a dramatic architectural feature. When run parallel to the longest dimension of the room, it can make the space feel even longer and more visually engaging, adding depth and a custom touch.
- Exterior Facades: While often considered an interior element, vertical shiplap (when specifically rated for outdoor use and properly treated) can also be used on exterior walls, porches, or gables. It adds distinctive texture and curb appeal, giving your home’s facade a unique farmhouse, coastal, or even modern rustic character.
- Cabinetry and Furniture Accents: For a truly cohesive look, vertical shiplap can be incorporated into custom cabinetry, built-in shelving, or even upcycled furniture pieces, offering a unified design theme throughout your home.
From subtle accents to full room transformations, farmhouse vertical shiplap offers endless possibilities to enhance your home’s beauty and functionality. Its adaptability ensures that it can be tailored to fit your personal style and bring your design aspirations to life.
DIY Dream: Essential Supplies and Equipment for Your Vertical Shiplap Project
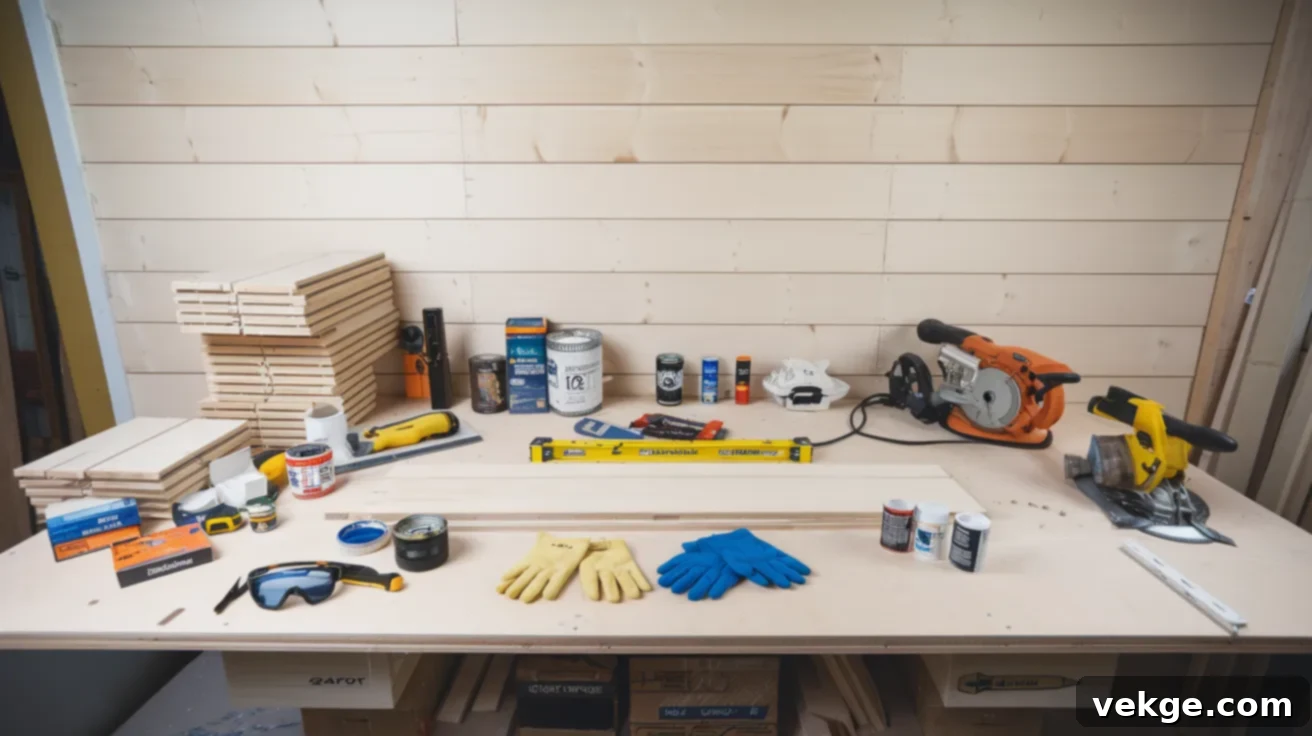
Embarking on a DIY farmhouse vertical shiplap project requires careful preparation. Having the right materials and tools on hand not only streamlines the installation process but also ensures a professional and long-lasting finish. Here’s a comprehensive list of what you’ll need to transform your walls with beautiful vertical shiplap.
Key Materials for Vertical Shiplap
- Shiplap Boards: These are the star of your project. Available in various materials like solid wood (pine, cedar), MDF, or plywood, chosen based on your budget, desired finish, and room’s moisture levels. Costs typically range from $1 to $7 per square foot for ready-made boards. Remember to calculate square footage carefully, accounting for cuts and potential waste.
- Furring Strips: Thin wood strips (commonly 1″x2″ or 1″x3″) are essential if your walls are uneven or you need to create a flat mounting surface, or for providing spacing if you’re not nailing directly into studs along the entire height of vertical boards. They also help ensure proper airflow behind the shiplap, which can be beneficial in some environments.
- Nails or Screws: For securing both the furring strips to the wall studs and the shiplap boards to the furring strips. A nail gun (brad nailer or finish nailer) is highly recommended for speed and a cleaner finish on the shiplap boards themselves. Use appropriate length fasteners to ensure secure attachment without piercing through the drywall or into electrical wires.
- Wood Filler: An indispensable item for filling any visible nail holes on your shiplap boards, ensuring a perfectly smooth and seamless surface before painting. Choose a paintable wood filler that matches your desired finish.
- Caulk: Used to seal small gaps where the shiplap meets the ceiling, corners, trim, or baseboards. This creates a clean, professional edge and prevents dust or moisture from accumulating in crevices. Acrylic latex caulk is generally suitable and paintable.
- Paint or Stain: The final touch to bring your farmhouse vertical shiplap vision to life. Choose a high-quality interior paint in your desired color (popular choices include whites, grays, and subtle pastels for a farmhouse look) or a wood stain to highlight the natural grain. A paint sprayer is highly recommended for achieving even coverage, especially in the grooves between shiplap boards, resulting in a factory-like finish.
- Primer (Optional but Recommended): Especially important for MDF or raw wood shiplap, a good quality primer creates a uniform base, seals the material, and improves paint adhesion, leading to a more durable and even paint finish.
Essential Tools for Installation
- Stud Finder: Critical for locating wall studs accurately, ensuring that your furring strips and shiplap boards are securely attached to the structural elements of your wall, preventing sagging or detachment.
- Measuring Tape: Precision is paramount. A reliable measuring tape is needed for all measurements, from board lengths to spacing and ensuring your layout is centered and even.
- Level: An indispensable tool for ensuring that your furring strips are perfectly horizontal and your vertical shiplap boards are plumb (perfectly straight up and down). A long level (4-6 feet) is ideal for this.
- Jigsaw or Circular Saw: A circular saw is excellent for making long, straight cuts on your boards. A jigsaw is invaluable for intricate cuts around electrical outlets, light switches, and other obstacles.
- Hammer or Nail Gun: While a hammer works, a nail gun (brad or finish nailer) powered by air compressor or battery makes the installation significantly faster, easier, and leaves smaller, neater nail holes.
- Miter Saw: For precise angled cuts, especially important for professional-looking corners, trim work, or if your ceiling is not perfectly level. A miter saw allows for consistent, clean cross-cuts.
- Paintbrush or Paint Sprayer: A paintbrush is sufficient for smaller areas or touch-ups, but for a whole wall of shiplap, a paint sprayer will provide the smoothest, most professional, and fastest finish, particularly when getting into the grooves of the boards.
- Caulking Gun: For applying caulk neatly and efficiently along seams and edges, ensuring a flawless, sealed finish.
- Safety Gear: Always prioritize safety. This includes safety glasses to protect your eyes from flying debris, **work gloves** to prevent splinters and provide better grip, and **ear protection** when using power tools.
Gathering these materials and tools before you begin will make your vertical shiplap installation much smoother and more enjoyable, leading to stunning results you’ll be proud of.
Step-by-Step DIY Vertical Shiplap Installation Guide
Ready to transform your space with the timeless elegance of farmhouse vertical shiplap? This detailed DIY guide will walk you through each step of the installation process, ensuring a smooth and successful project. Remember to always prioritize safety and take your time for precise results.
STEP 1: Prepare Your Walls and Locate Studs
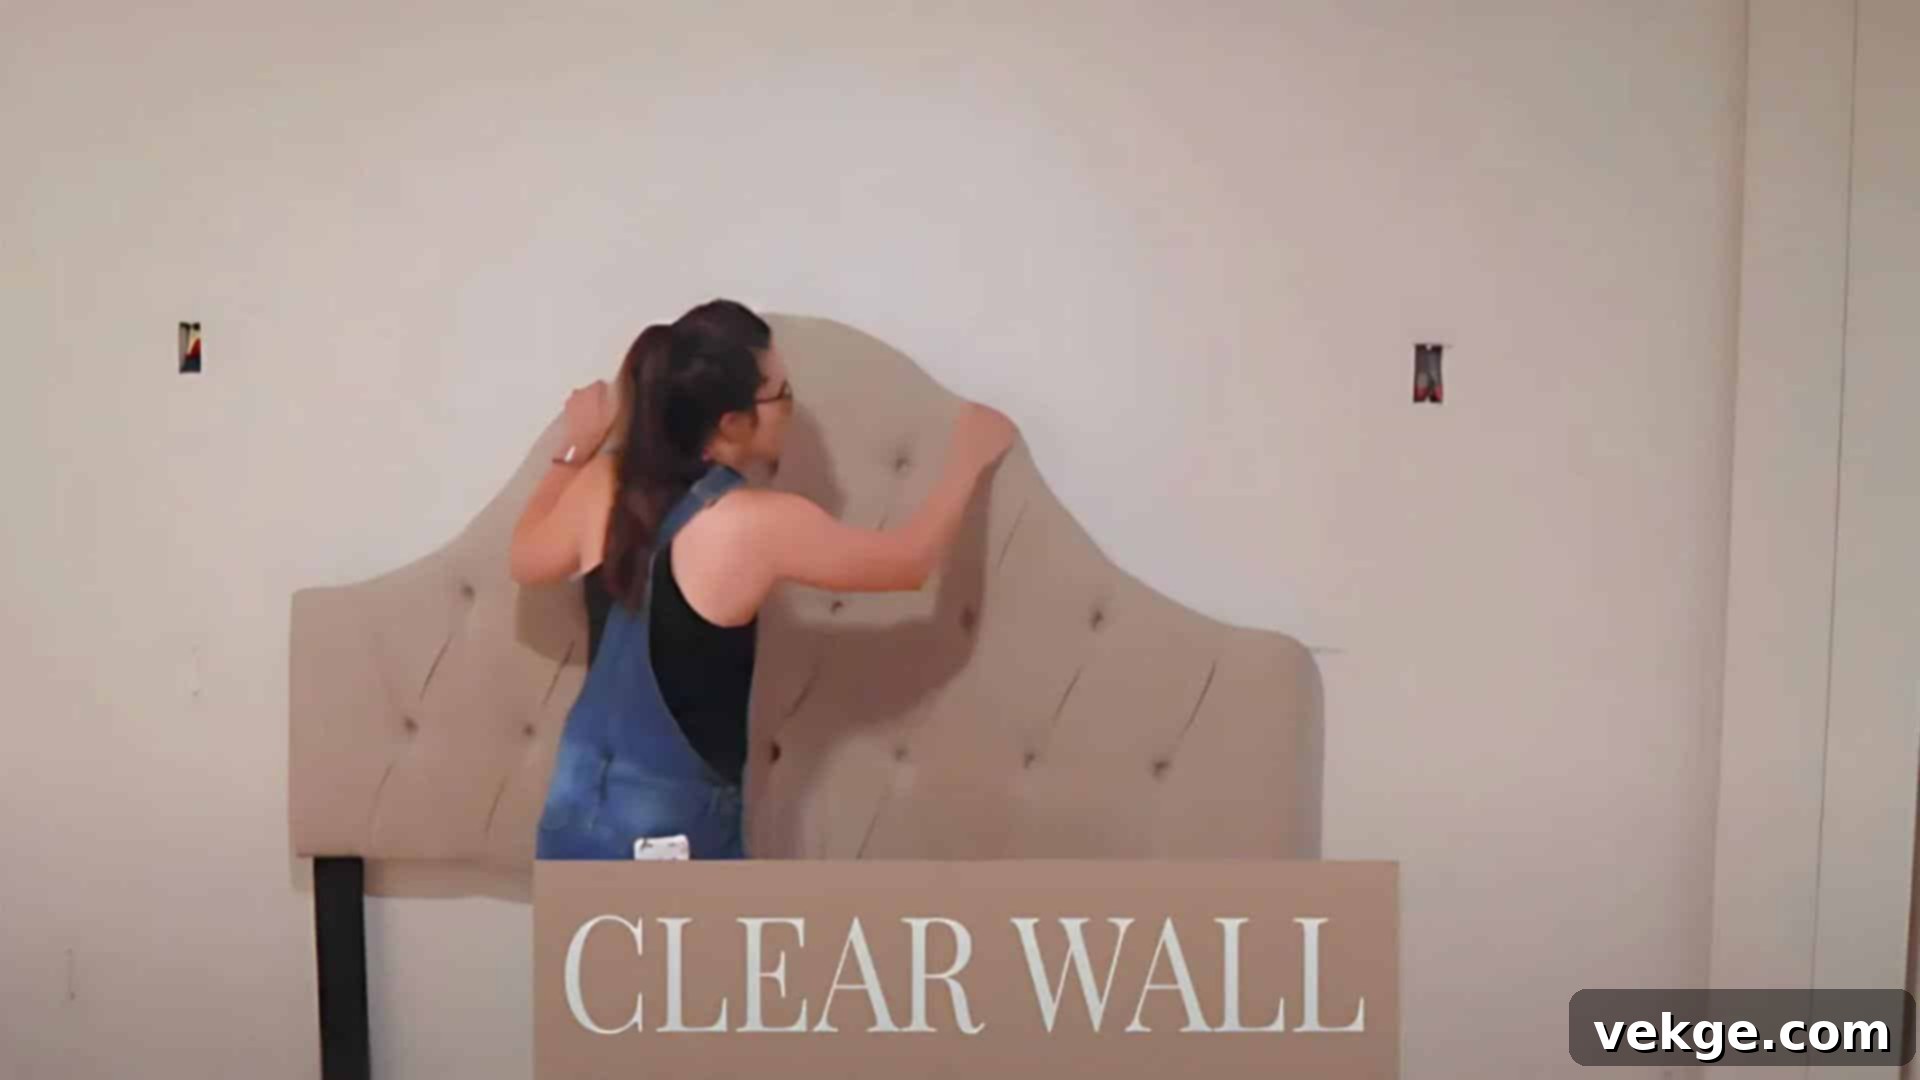
The first crucial step is proper wall preparation. Begin by removing all existing decor, fixtures, and outlet covers from the wall you intend to cover. Clean the entire surface thoroughly with a mild soap and water solution to ensure it’s free of dust, grease, or grime. Once dry, use a reliable stud finder to locate all vertical wall studs. Mark their positions clearly with a pencil from floor to ceiling. These studs are the structural anchors for your shiplap, ensuring secure and long-lasting installation.
STEP 2: Install Horizontal Furring Strips (If Necessary)
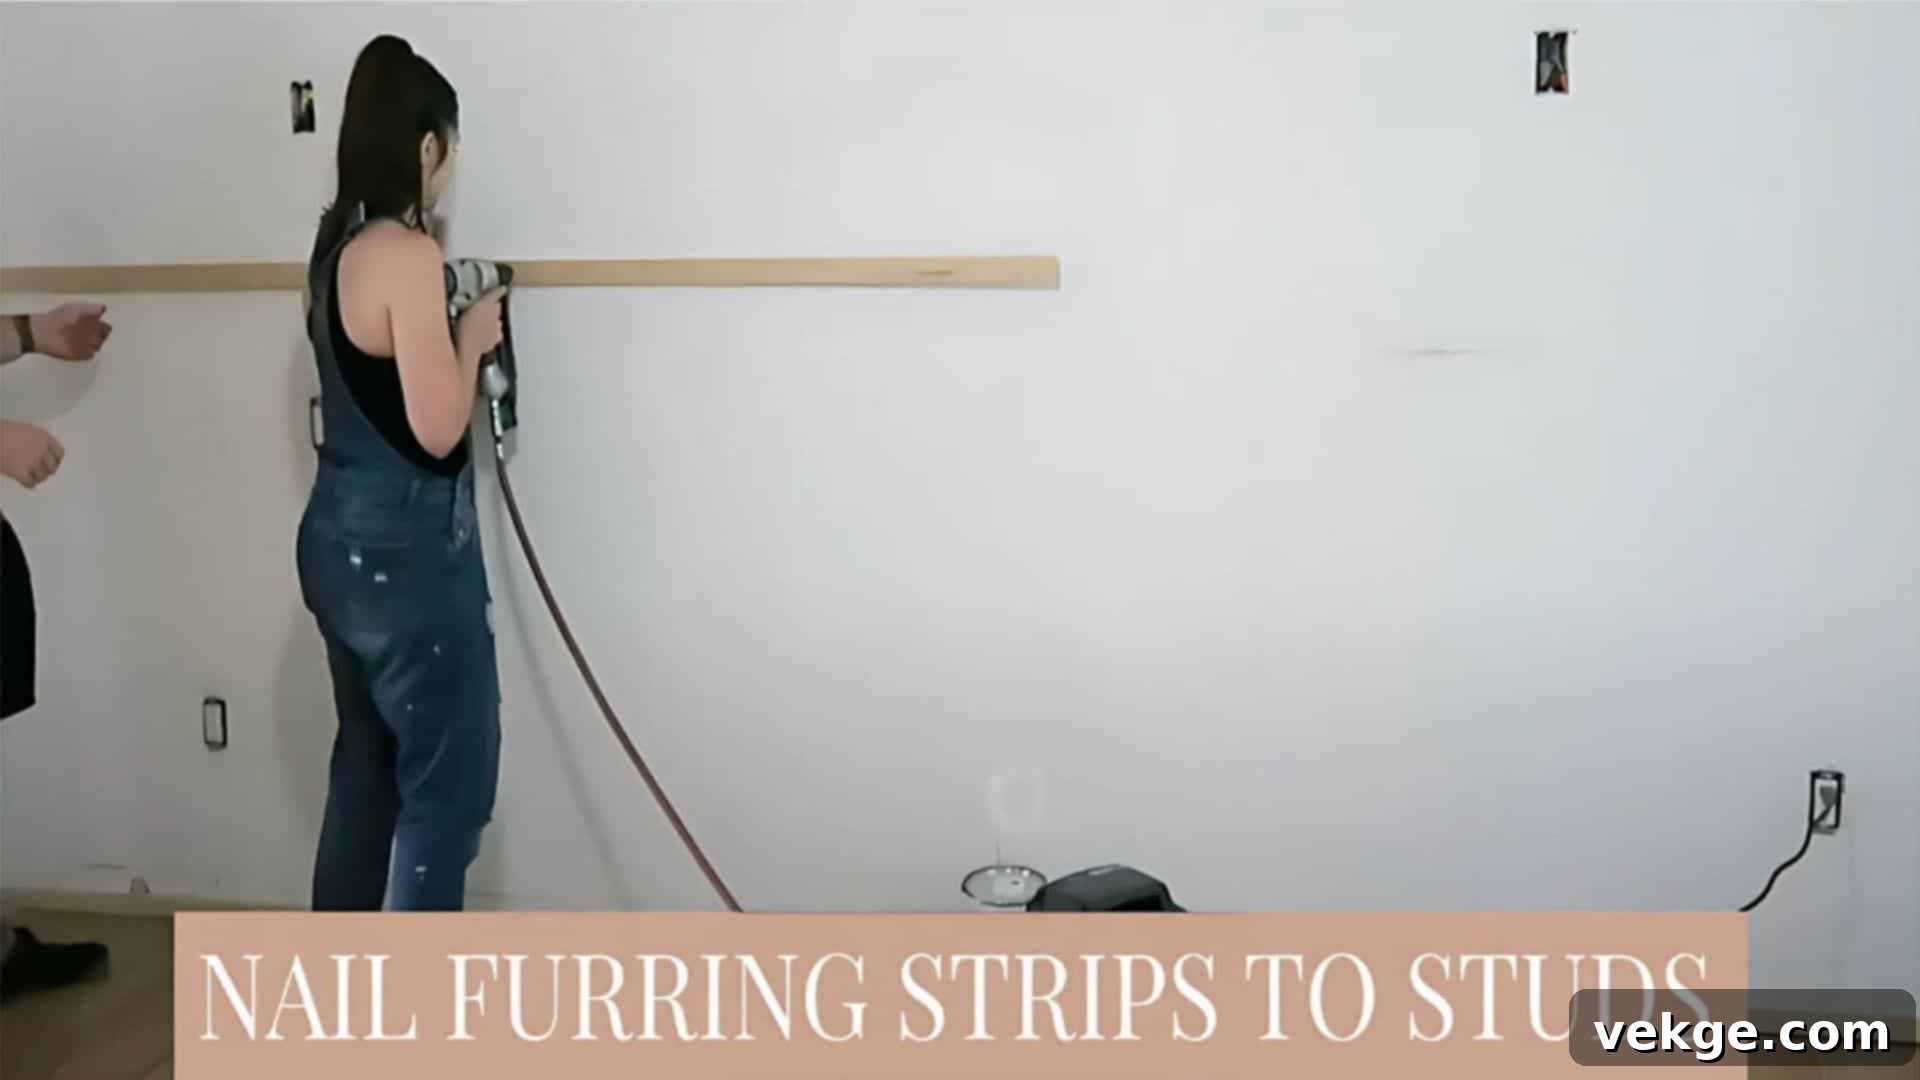
While some installations may allow you to nail directly into studs, installing furring strips horizontally is highly recommended, especially for vertical shiplap. Attach these thin wood strips to the marked studs, typically every 16 to 24 inches (or roughly every four feet for longer boards), ensuring they are perfectly level. Furring strips provide a consistent, flat surface to nail your vertical shiplap boards onto, which is particularly beneficial if your existing walls are uneven. They also create a slight air gap, which can be useful for wire management or insulation behind the shiplap.
STEP 3: Begin Shiplap Installation
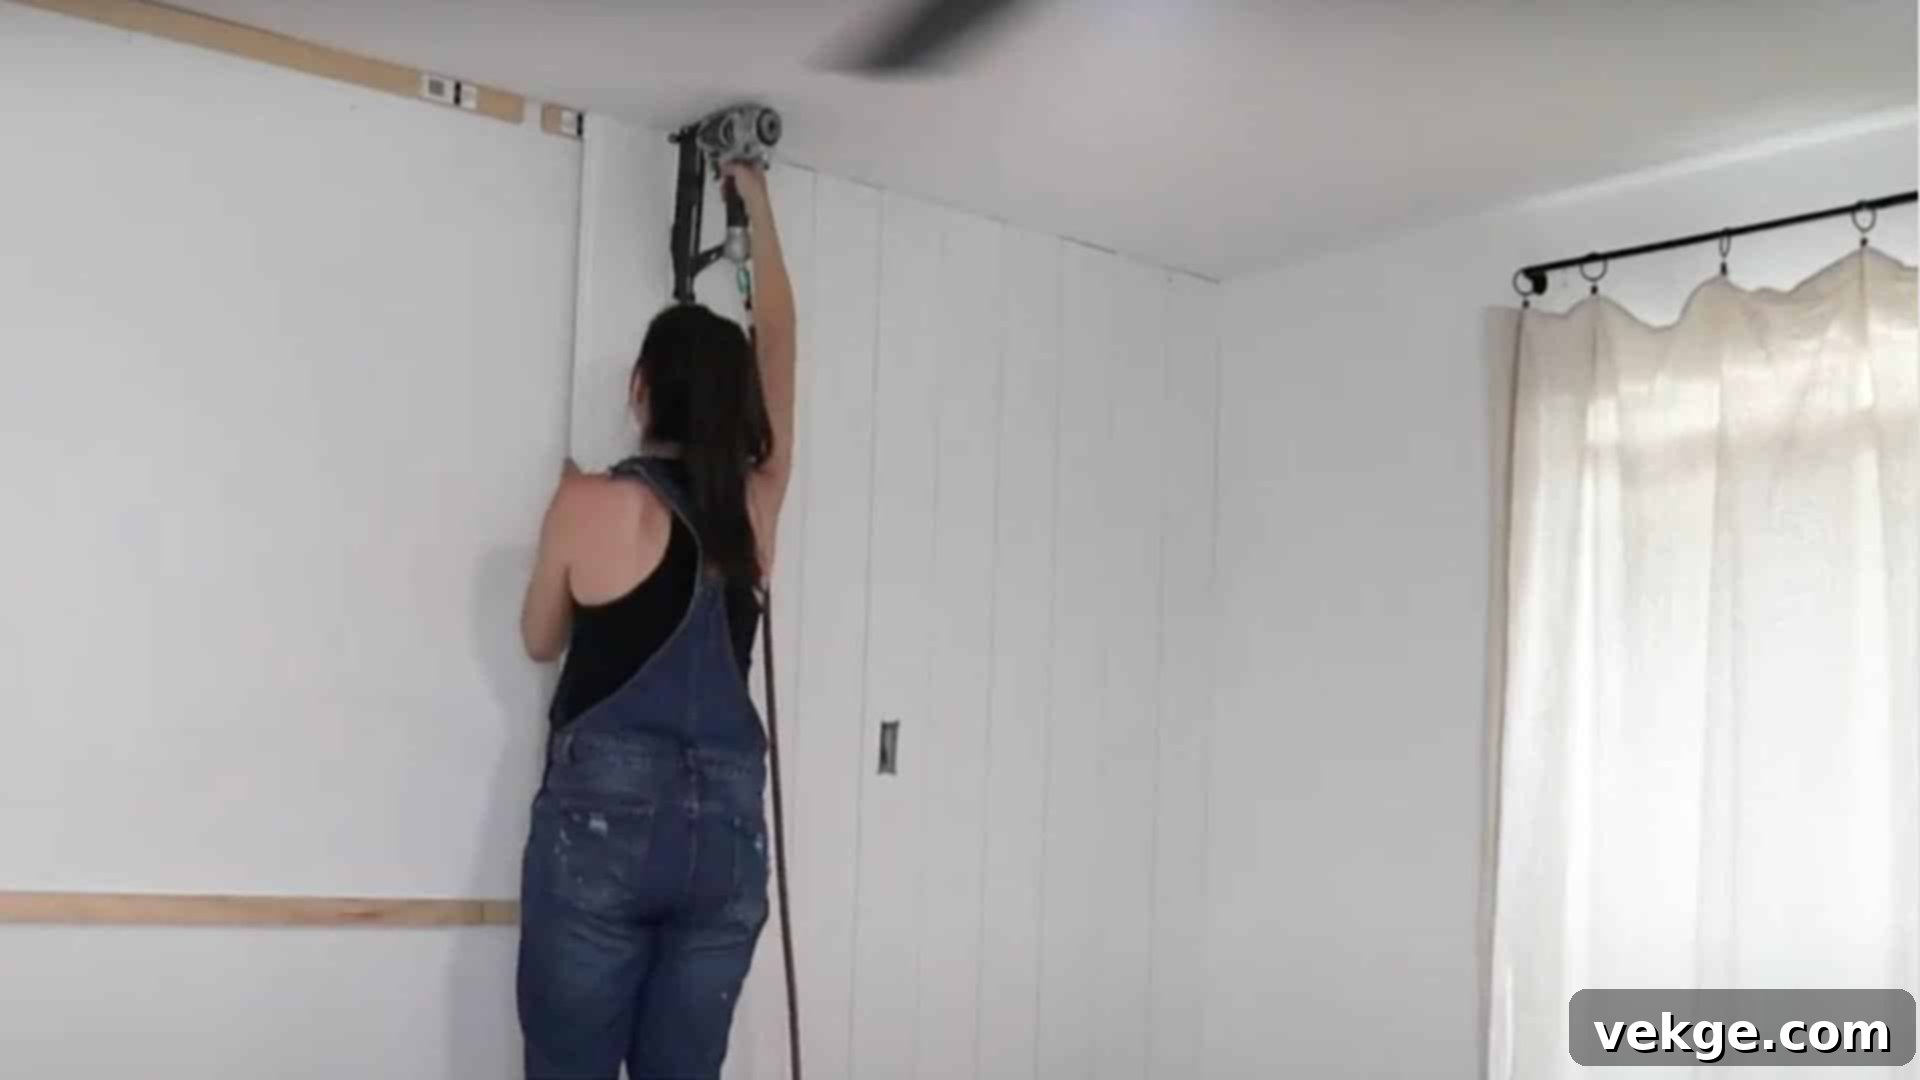
Now for the exciting part: installing your farmhouse vertical shiplap boards! Start from one corner of the room, using a level to ensure your first board is perfectly plumb (vertical). This initial board is critical, as all subsequent boards will align with it. Secure the shiplap boards to the horizontal furring strips (or directly into studs if not using furring strips) using your nail gun or hammer and nails. If your ceiling height conveniently matches your board length, installation will be simpler. For tongue-and-groove shiplap, the interlocking design makes alignment straightforward. For square-edge boards, use spacers to maintain consistent gaps.
STEP 4: Make Necessary Cuts Around Obstacles
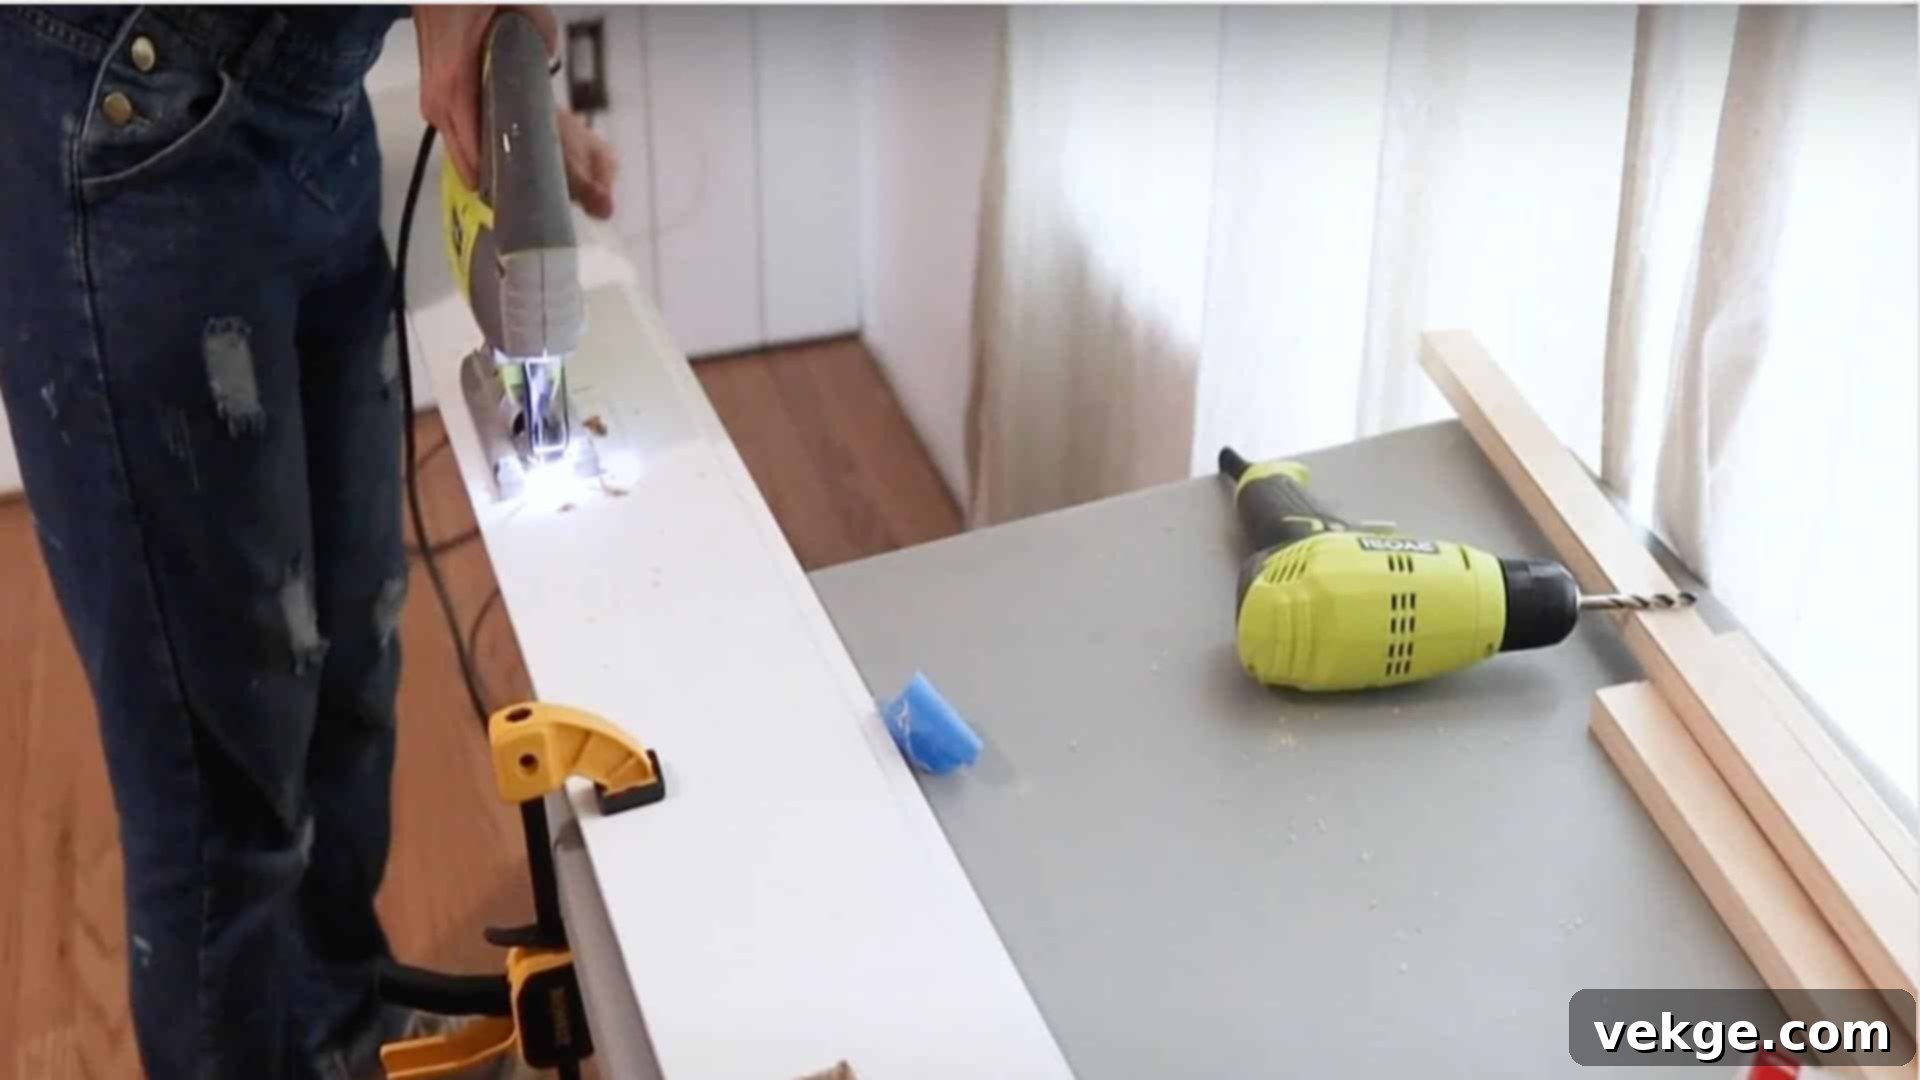
As you progress across the wall, you’ll encounter obstacles like electrical outlets, light switches, and windows. This is where your **jigsaw or circular saw** comes into play. Carefully measure and mark the precise dimensions of these openings on your shiplap boards. Cut out the sections using the jigsaw for intricate shapes. Remember to turn off the power at the circuit breaker before working around electrical boxes. For the final row of shiplap, you may need to measure and rip cut the boards lengthwise using a circular saw to fit the remaining space perfectly.
STEP 5: Finishing Touches: Baseboards, Filler, Caulk, and Paint
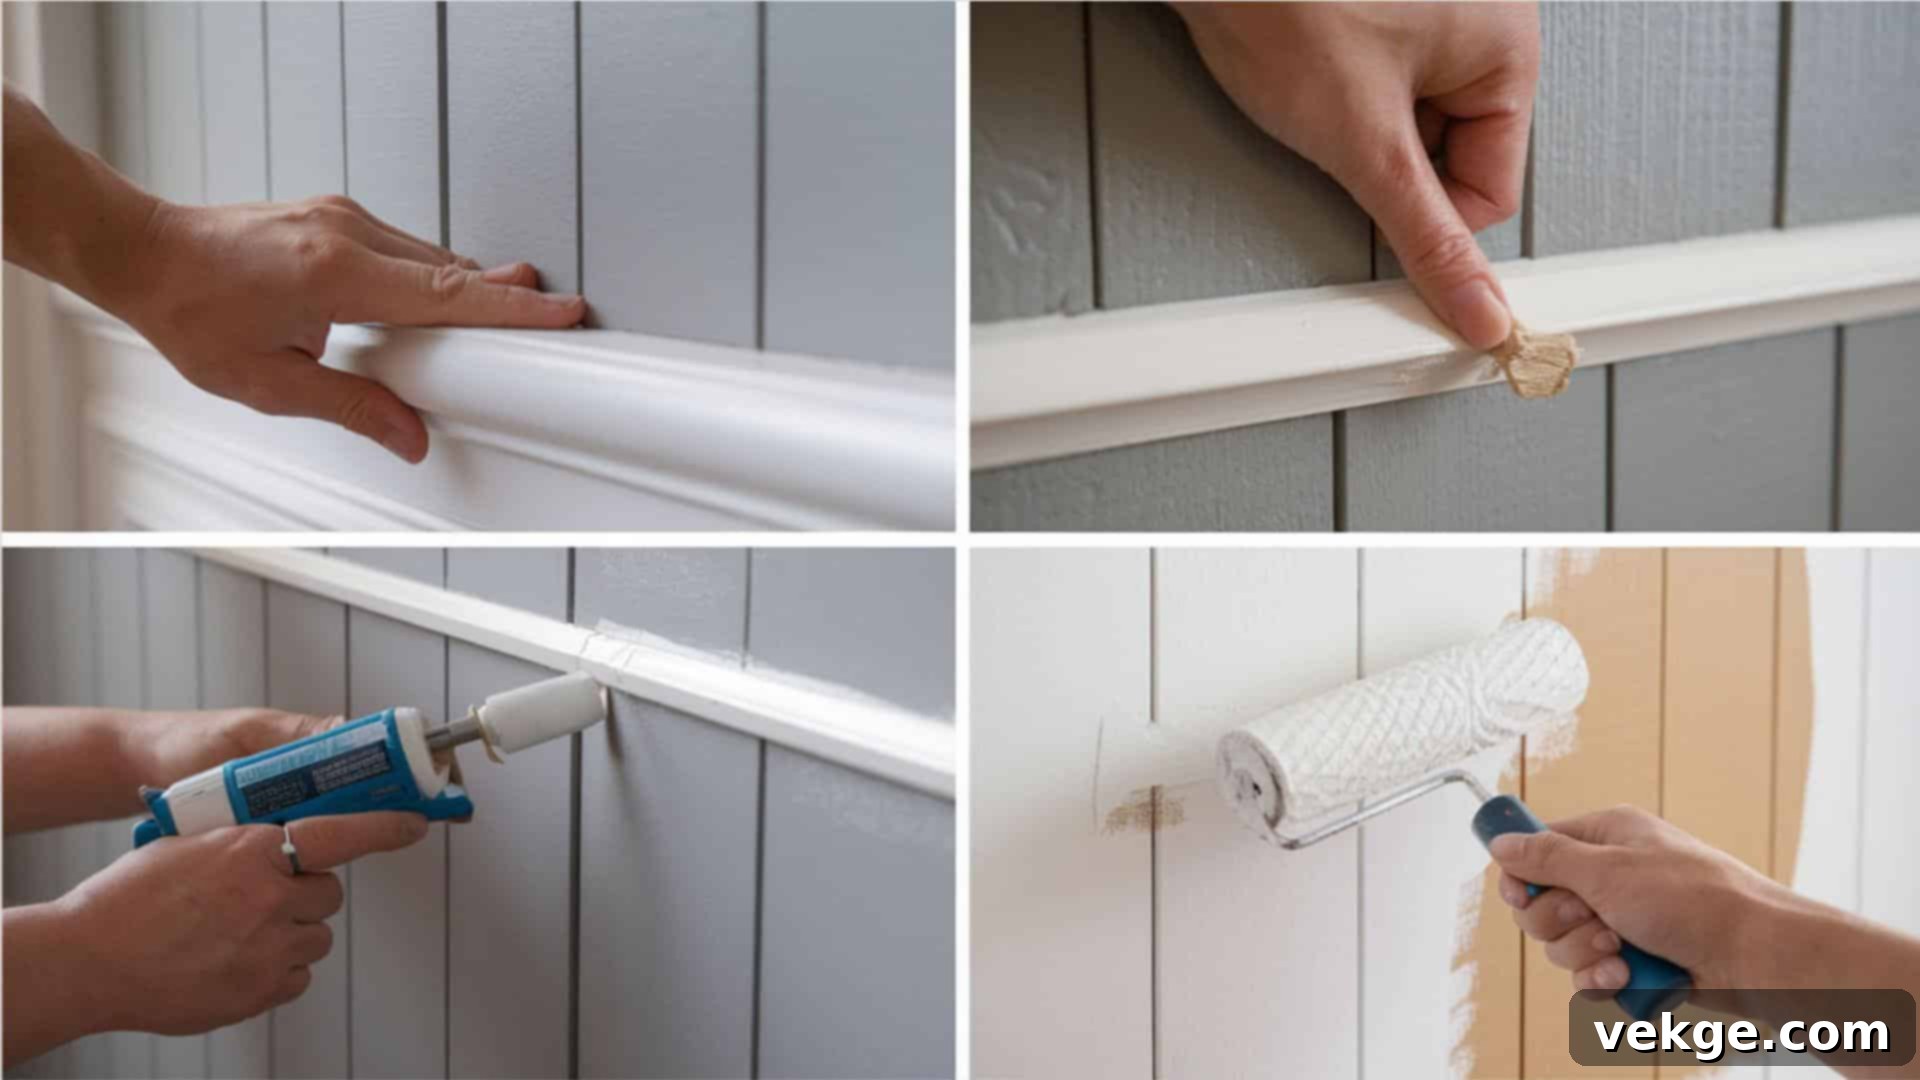
With all your vertical shiplap boards in place, it’s time for the finishing touches that elevate your project from DIY to professional. Install new baseboards (or reinstall existing ones) along the bottom of the wall for a polished transition to the floor. Next, use **wood filler** to meticulously fill all visible nail holes, then sand smooth once dry. Apply a bead of **paintable caulk** along the top edge where the shiplap meets the ceiling and in any corners or seams where necessary. Finally, apply your chosen paint or stain. For the best finish, a **paint sprayer** is highly recommended as it allows for smooth, even coverage, especially within the slight gaps of the shiplap, creating a flawless, professional look. Allow adequate drying time between coats.
STEP 6: Capture Your Transformation: Before & After Photos

Don’t forget to document your hard work! Before beginning any installation, take a clear “before” photo of the wall. Once your farmhouse vertical shiplap project is completely finished – painted, dried, and cleaned – capture an “after” photo. This visual comparison will not only allow you to fully appreciate the dramatic transformation you’ve achieved but also serve as a wonderful record of your DIY skills. Share your stunning results on social media to inspire others and celebrate your renewed space!
For more detailed visual guidance, check out the comprehensive video tutorial by Farmhouse Living on YouTube.
Ensuring Lasting Beauty: Maintenance and Longevity of Vertical Shiplap Walls
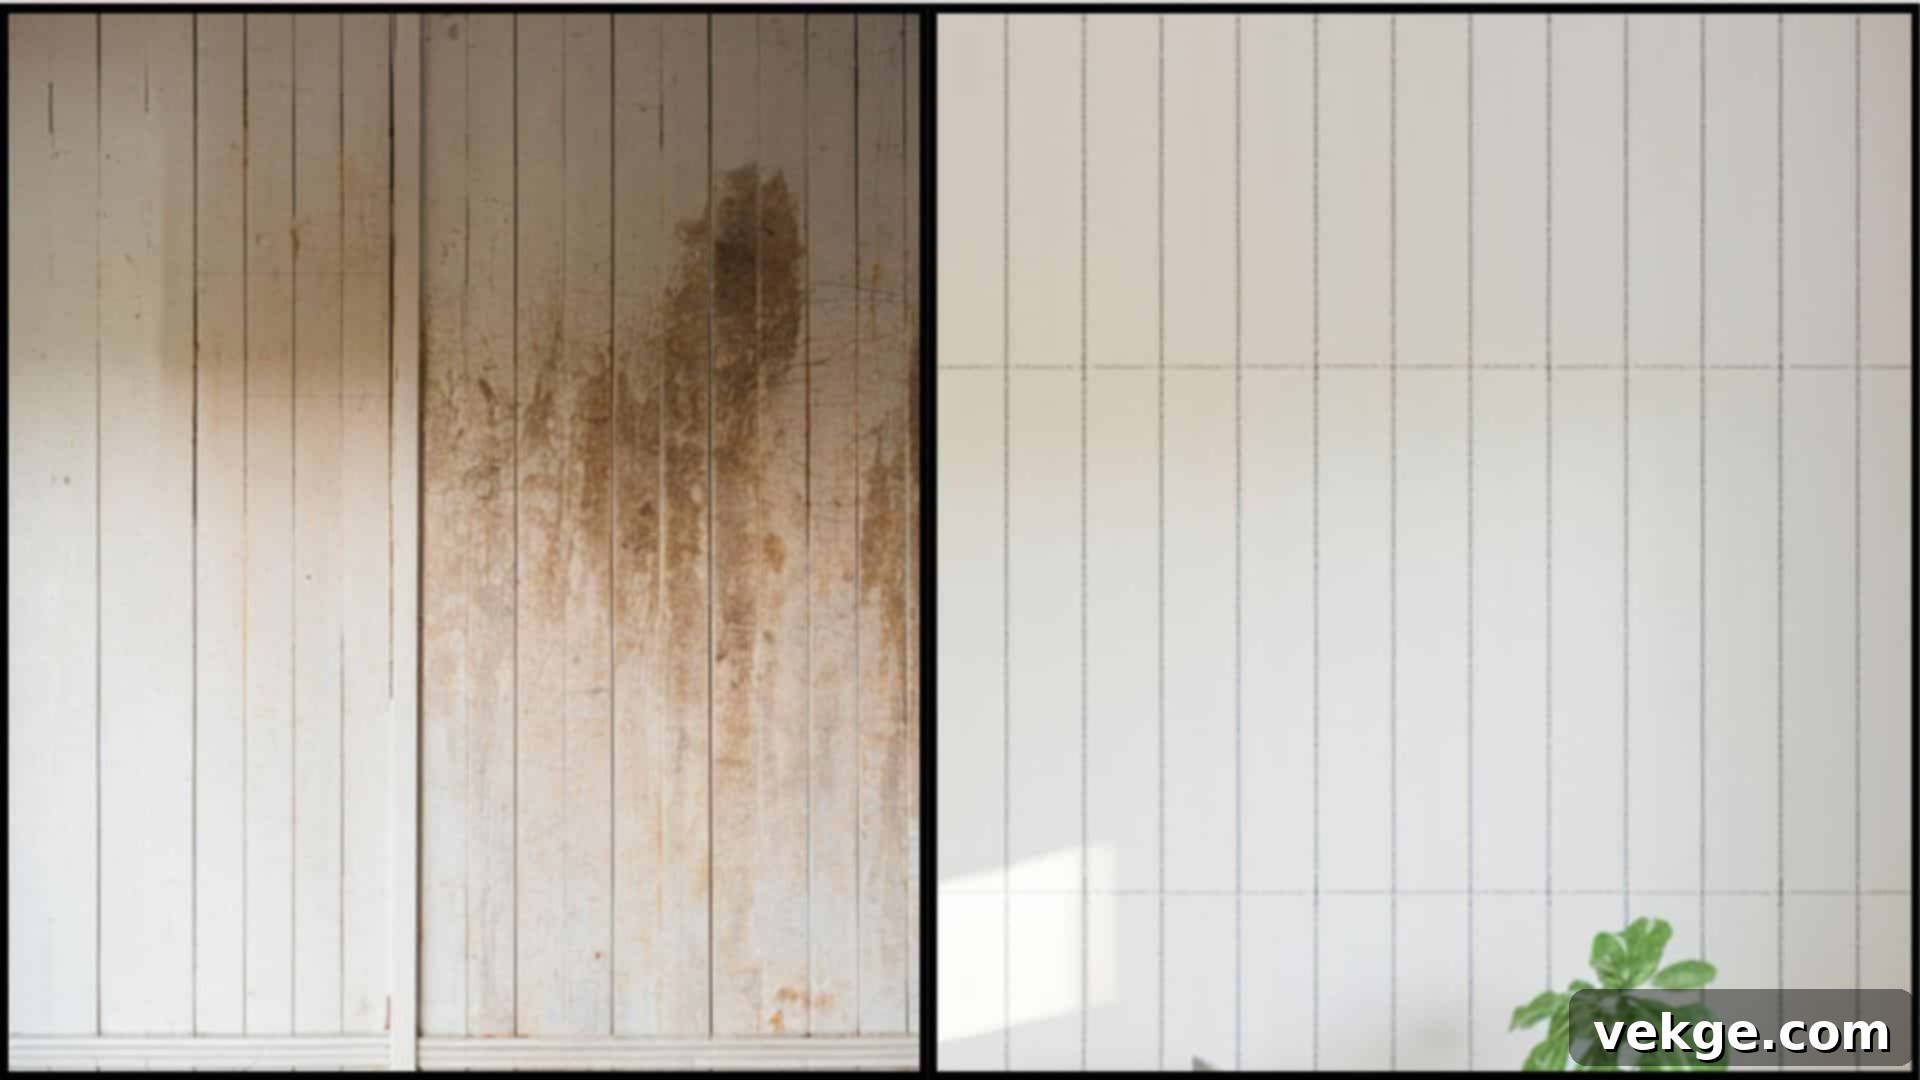
One of the many appealing aspects of farmhouse vertical shiplap is its low-maintenance nature and impressive longevity. With just a few simple care practices, your beautiful shiplap walls can retain their charm and structural integrity for decades, continuing to add significant value and style to your home.
Routine Cleaning for Pristine Walls
Keeping your vertical shiplap walls clean is remarkably easy. Regular dusting is usually sufficient to maintain their fresh appearance. Use a soft, dry cloth, a feather duster, or a vacuum cleaner attachment with a soft brush to gently remove dust and cobwebs from the surface and especially from the grooves between boards. This routine prevents dust buildup and keeps the lines crisp.
For areas that require a deeper clean, such as occasional smudges or light grime, a slightly damp cloth with a small amount of mild, non-abrasive soap (like dish soap diluted in water) works perfectly. Gently wipe the affected areas and then immediately follow with a clean, dry cloth to remove any moisture residue. Crucially, avoid harsh chemical cleaners, abrasive scrubbers, or excessive water, as these can damage the wood, strip away paint or sealant, or encourage moisture absorption.
Addressing Wear and Tear
Over time, particularly in high-traffic areas, your painted farmhouse vertical shiplap might show minor signs of wear. Small scuffs, chips, or faded spots are normal and easily remedied. Plan for occasional touch-ups every few years, depending on the exposure and use of the room. Keep a small amount of your original paint color on hand for these quick fixes. Annually, take a moment to inspect your shiplap walls for any signs of significant damage, loose boards, or areas where the paint or sealant might be compromised.
Preventing Moisture-Related Issues
While shiplap is durable, wood is still susceptible to prolonged moisture. In high-humidity environments like bathrooms or laundry rooms, proper ventilation is absolutely essential. Ensure exhaust fans are used effectively during and after showers or when operating appliances that produce steam. Good airflow helps prevent moisture from settling on the boards, which can lead to warping, swelling, or the growth of mold and mildew. If your shiplap is in a kitchen, promptly wipe away any splashes or spills.
Maintaining Structural Integrity
Should you notice any individual shiplap boards starting to loosen or pull away from the wall, address them promptly. Re-secure them with a small finish nail or adhesive. Early intervention prevents further damage to the board and maintains the overall integrity and stability of the wall covering. This ease of spot repair is another significant benefit of vertical shiplap over continuous wall surfaces.
Understanding Natural Wood Behavior
It’s important to remember that wood is a natural material that “breathes.” It will naturally expand and contract subtly with seasonal changes in temperature and humidity. This means you might observe tiny, hairline gaps appearing or disappearing between boards at different times of the year. This is a normal characteristic of wood paneling and is generally not a cause for concern or an indication of damage in your farmhouse vertical shiplap.
By following these straightforward maintenance tips, your vertical shiplap walls will continue to be a beautiful, long-lasting, and valuable feature of your home for many years to come. Its combination of enduring style and minimal upkeep truly makes it a homeowner’s favorite.
Smart Investment: Understanding the Cost of Farmhouse Vertical Shiplap
Adding farmhouse vertical shiplap to your home is an investment that pays dividends in both aesthetic appeal and increased property value. However, like any home renovation, understanding the associated costs is key to proper budgeting and decision-making. The total expense for installing vertical shiplap can vary widely based on factors such as the size of the project, chosen materials, whether you opt for DIY or professional installation, and regional labor rates.
Below is a detailed breakdown of potential expenses to help you plan your vertical shiplap project effectively:
| Cost Category | Details & Considerations | Estimated Costs |
|---|---|---|
| Materials Cost (Shiplap Boards) | The primary driver of material cost is the type of shiplap board you select. – Solid Wood (Pine, Poplar): Typically ranges from $1 to $4 per square foot. Pine is a popular, affordable choice. – Premium Woods (Cedar, Fir): Can range from $4 to $7+ per square foot, offering enhanced durability and natural resistance properties. – MDF (Medium-Density Fiberboard): Often the most budget-friendly pre-made option, typically $0.75 to $2 per square foot, ideal for painted finishes. – DIY Plywood Strips: Cutting your own shiplap from plywood sheets can bring the cost down to under $1 per square foot for the raw material, but requires more labor and cutting tools. |
– $1 to $7+ per sq ft (Ready-made boards) – Under $1 per sq ft (DIY plywood material) |
| Labor Expenses (Professional Installation) | If you choose to hire a professional, labor costs will be a significant factor. – Professional installation typically ranges between $4 and $7 per square foot, but this can vary based on your location, the complexity of the installation (e.g., numerous cuts for windows/doors), and the contractor’s rates. – DIY installation eliminates labor costs, representing substantial savings, but requires a significant investment of your own time, effort, and potentially upfront costs for tools. |
– $4 to $7 per sq ft (Professional labor) – Significant savings (DIY labor) |
| Additional Supplies & Finishing | Beyond the boards, don’t forget the necessary finishing supplies. – This includes items like nails/screws, wood filler, caulk, primer, paint (or stain), and brushes/rollers/sprayer rental. – These essential items can add an estimated $50 to $300 to your project, depending on the size of the area and the quality of products chosen. |
$50 to $300+ per project |
| Tool Rental/Purchase (DIY Specific) | If you’re going the DIY route and don’t own the necessary power tools (miter saw, nail gun, stud finder, paint sprayer), consider the cost of purchasing or renting them. This can range from $100 to $500+, depending on what you need and if you rent for a day or purchase for long-term use. | $100 to $500+ (DIY Tool investment) |
| Long-term Value & ROI | While there’s an upfront cost, installing vertical shiplap often results in a positive return on investment. – It’s a highly desirable feature that can increase your home’s resale value and appeal to potential buyers. – Its renowned durability means reduced future maintenance expenses compared to more delicate wall coverings. – The choice between DIY and professional installation should weigh your budget against your available time, personal skills, and the desired level of finish. |
Potential increase in home value & reduced maintenance costs |
By thoroughly calculating these potential expenses and considering your own capabilities, you can effectively budget for and successfully complete your farmhouse vertical shiplap project, enjoying both its immediate beauty and its lasting benefits.
Final Thoughts: Embrace the Enduring Charm of Vertical Shiplap
In conclusion, vertical shiplap, especially when embracing the beloved farmhouse aesthetic, stands out as a dynamic and enduring design choice for any home. It masterfully revitalizes a classic architectural element, offering a fresh, contemporary appeal while retaining a sense of timeless charm. Its ability to create an illusion of heightened ceilings and introduce captivating visual texture can dramatically enhance the perception and atmosphere of any room.
Beyond its undeniable beauty, farmhouse vertical shiplap provides significant practical benefits. Its robust construction ensures exceptional durability, standing up to the demands of everyday life for many years. Coupled with its remarkably easy maintenance – requiring little more than routine dusting and occasional light cleaning – it offers a smart, long-lasting solution for wall coverings.
From the heart of the kitchen to the tranquility of bedrooms, and from inviting entryways to productive home offices, vertical shiplap seamlessly integrates into a diverse range of spaces and complements various interior styles. Whether your home leans towards a cozy rustic farmhouse, a sleek modern minimalist, or an eclectic coastal vibe, shiplap can adapt, unify, and elevate your decor.
Embarking on a DIY vertical shiplap project is a deeply rewarding endeavor. With the right tools, a bit of patience, and the step-by-step guidance provided, you possess all you need to confidently transform your walls and breathe new life into your living environment. The satisfaction of creating such a significant and stylish upgrade with your own hands is truly unparalleled.
Are you feeling inspired and ready to begin your own farmhouse vertical shiplap transformation? We encourage you to take the plunge! Once your project is complete, we would be thrilled to see your stunning results. Share photos of your newly revitalized walls on social media and tag us, or join our community. For continuous inspiration, expert tips, and more innovative home improvement ideas, including advanced vertical shiplap techniques, don’t forget to sign up for our exclusive newsletter.
Transform your home, one beautiful board at a time!
Frequently Asked Questions (FAQs) About Vertical Shiplap
Is Vertical Shiplap Still in Style?
Absolutely! Vertical shiplap is not only still in style but is experiencing a surge in popularity as a refreshing alternative to traditional horizontal applications. Its clean lines and streamlined appearance align perfectly with current trends in modern farmhouse, Scandinavian, minimalist, and contemporary interior design. It offers a timeless yet fresh aesthetic that continues to be a favorite for homeowners and designers seeking to add character and visual interest to their spaces without being overly rustic.
Does Vertical Shiplap Make a Room Look Bigger?
Yes, significantly so! One of the most cherished benefits of vertical shiplap is its ability to create an illusion of greater height and space. By drawing the eye upward, the vertical lines effectively enhance the perception of a room’s height, making low ceilings feel taller and smaller rooms appear more expansive and open. This optical trick is a powerful design tool, particularly in compact or vertically challenged spaces.
What Are the Best Paint Colors for Vertical Shiplap Walls?
The beauty of vertical shiplap walls is their versatility with color. For a classic, airy, and bright farmhouse style, neutral tones such as crisp whites (e.g., Alabaster, Simply White), soft off-whites, warm beiges, and subtle grays (e.g., Agreeable Gray, Repose Gray) are consistently popular choices. These colors maximize light and enhance the texture of the boards. For those seeking a bolder, more contemporary statement, deep blues (like navy), sophisticated charcoal grays, or even rich forest greens can create a striking accent wall, adding dramatic depth and a touch of modern elegance to your vertical shiplap.
