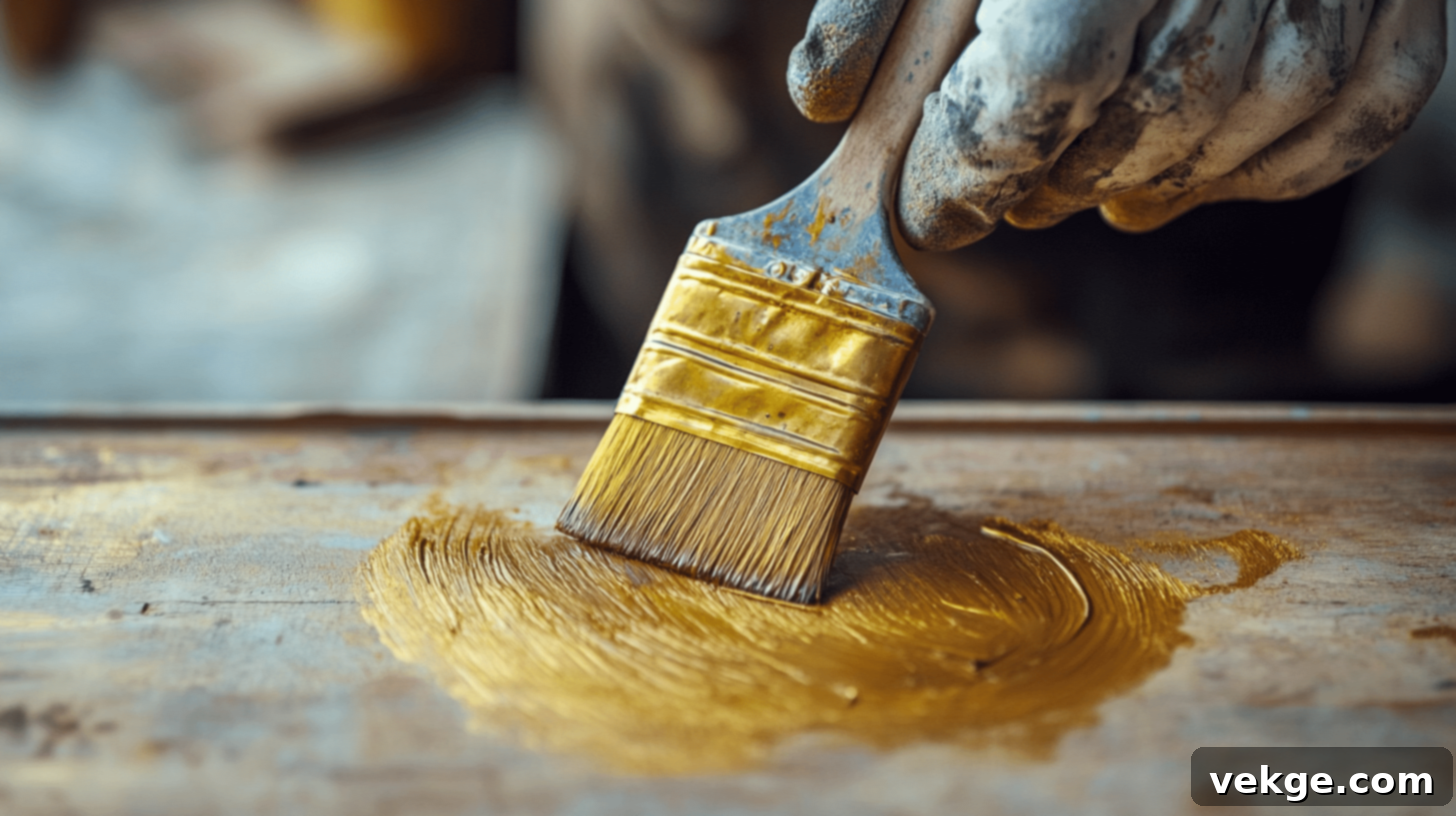
The Ultimate Guide to Choosing & Applying Gold Paint for Wood: Expert Tips & Top Picks
As a passionate DIY enthusiast, I understand the common frustrations that come with selecting the perfect gold paint for wood projects. The journey often involves countless hours testing various brands, only to be met with paints that chip prematurely, fade under light, or simply fail to deliver that desired, brilliant shine on wooden surfaces. Having personally navigated these challenges, I’ve spent years experimenting with numerous gold paints across a diverse range of wood types, meticulously documenting what works and what doesn’t.
Through extensive hands-on testing, I’ve identified the gold paints that truly excel, offering superior adhesion, stunning aesthetics, and long-lasting durability. This comprehensive guide is designed to share my top recommendations, ensuring your next wood painting project achieves a professional and dazzling gold finish.
In the following sections, I will delve into the unique characteristics that make each paint special, providing you with the knowledge needed to confidently choose the ideal product for your specific project. Whether you’re aiming for a subtle shimmer or a bold metallic statement, this guide is your go-to resource for transforming ordinary wood into extraordinary gold masterpieces.
Understanding Gold Paint & Its Diverse Types for Wood
Through my extensive experience painting various wooden furniture pieces and crafts, I’ve discovered that gold paint isn’t a one-size-fits-all solution. It comes in several distinct forms, each offering unique properties and best suited for different applications. Let me simplify these types so you can easily understand their benefits:
1. Metallic Acrylic Gold Paint
This type is often my first recommendation for most wood projects. Metallic acrylic paints are formulated with tiny, reflective metal particles that create a vibrant, shimmering effect. They are incredibly versatile, known for their fast-drying capabilities and excellent adhesion to various wood surfaces. A significant advantage is their water-based nature, which makes cleanup remarkably easy—a little soap and water are usually all you need for brushes and spills.
2. Oil-Based Gold Paint
While oil-based gold paints typically require a longer drying time, the wait is often well worth it. I turn to these paints when I need a finish that can withstand heavy use and provide superior durability. Their unique composition allows them to penetrate deeper into the wood grain, creating a more robust and lasting bond. The resulting shine and richness of color are also exceptionally enduring. However, keep in mind that cleaning up after oil-based paints requires a paint thinner or mineral spirits.
3. Spray Gold Paint
For projects involving intricate details, hard-to-reach areas, or when I desire a flawlessly even and smooth coat without brush marks, spray gold paint is my preferred choice. Its aerosol format ensures consistent coverage and a professional finish, especially on larger items or complex shapes. The key to success with spray paint is to apply it in several thin, even layers, keeping the can in continuous motion to prevent drips and unevenness. Always ensure good ventilation when using spray paints.
4. Gold Leaf Paint (Liquid Gilding)
Gold leaf paint is distinct from traditional paints, as it comprises ultra-fine metal flakes suspended in a liquid medium. I reserve this type for truly special projects where an exceptionally rich, authentic gold appearance is paramount. While it represents a higher investment in terms of cost, the unparalleled luster and depth it provides mimic the look of real gold leaf, offering an exquisite, high-end finish that can elevate any piece.
5. Water-Based Gold Paint
For quick turnarounds and projects where a strong odor is undesirable, water-based gold paints are my go-to. They typically dry within an hour and produce minimal fumes, making them ideal for indoor use without extensive ventilation. While the metallic sheen might not be as intense as some other types, they offer a beautiful, subtle gold touch, perfect for decorative accents or crafts.
Essential Gold Painting Tips from My Experience:
- Always Test First: Before committing, test your chosen gold paint on an inconspicuous area of your wood project or a scrap piece. This helps confirm the color, sheen, and adhesion.
- Layering is Key: Most gold paints require at least 2-3 coats to achieve the best, most opaque coverage and a truly vibrant gold effect.
- Patience Between Coats: Allow each coat to dry completely according to the manufacturer’s instructions before applying the next. Rushing this step can lead to a tacky finish or peeling.
- Prime Raw Wood: For raw, unfinished wood, applying a suitable primer will significantly enhance paint adhesion, improve coverage, and ensure a more uniform, long-lasting finish.
- Consistent Strokes: When using a brush, maintain consistent, even strokes, always moving in the direction of the wood grain for a smoother, more professional appearance.
Top Gold Paints for Wood Projects
1. Rust-Oleum Universal Metallic Spray Paint
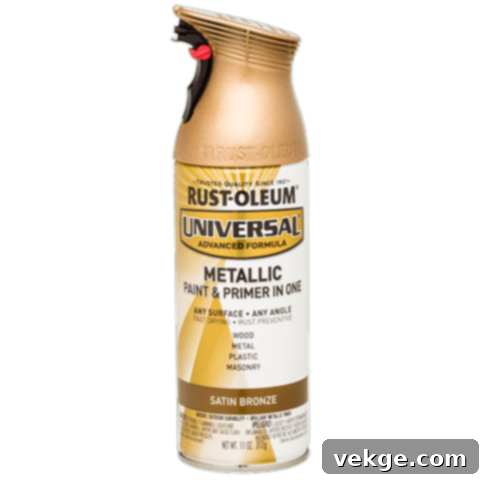
Rust-Oleum’s Metallic Spray Paint is a staple in my workshop for its exceptional versatility and brilliant finish. Its unique formula ensures robust adhesion to wood, making it a reliable choice for various projects.
Key Features
- Remarkably fast drying, typically within 10-15 minutes, allowing for quick recoating.
- One standard can offers impressive coverage of approximately 12 square feet.
- Features a built-in primer, streamlining the preparation process and enhancing adhesion.
- Suitable for both indoor and outdoor applications, providing flexibility for diverse projects.
- Exhibits excellent resistance to weather, maintaining its shine and integrity over time.
- Forms a strong, durable bond with wooden surfaces, preventing chipping and peeling.
Ideal Uses
- Transforming large wooden furniture pieces with a uniform, metallic sheen.
- Adding glamour to outdoor wood decor, such as planters or garden accents.
- Perfect for fast home makeover projects where time is of the essence.
- Revitalizing old picture frames with a fresh, golden look.
- Enhancing various woodcraft items, from decorative boxes to sculptural pieces.
- Protecting and beautifying garden furniture, ensuring it stands up to the elements.
2. Modern Masters Metallic Paint (Olympic Gold)
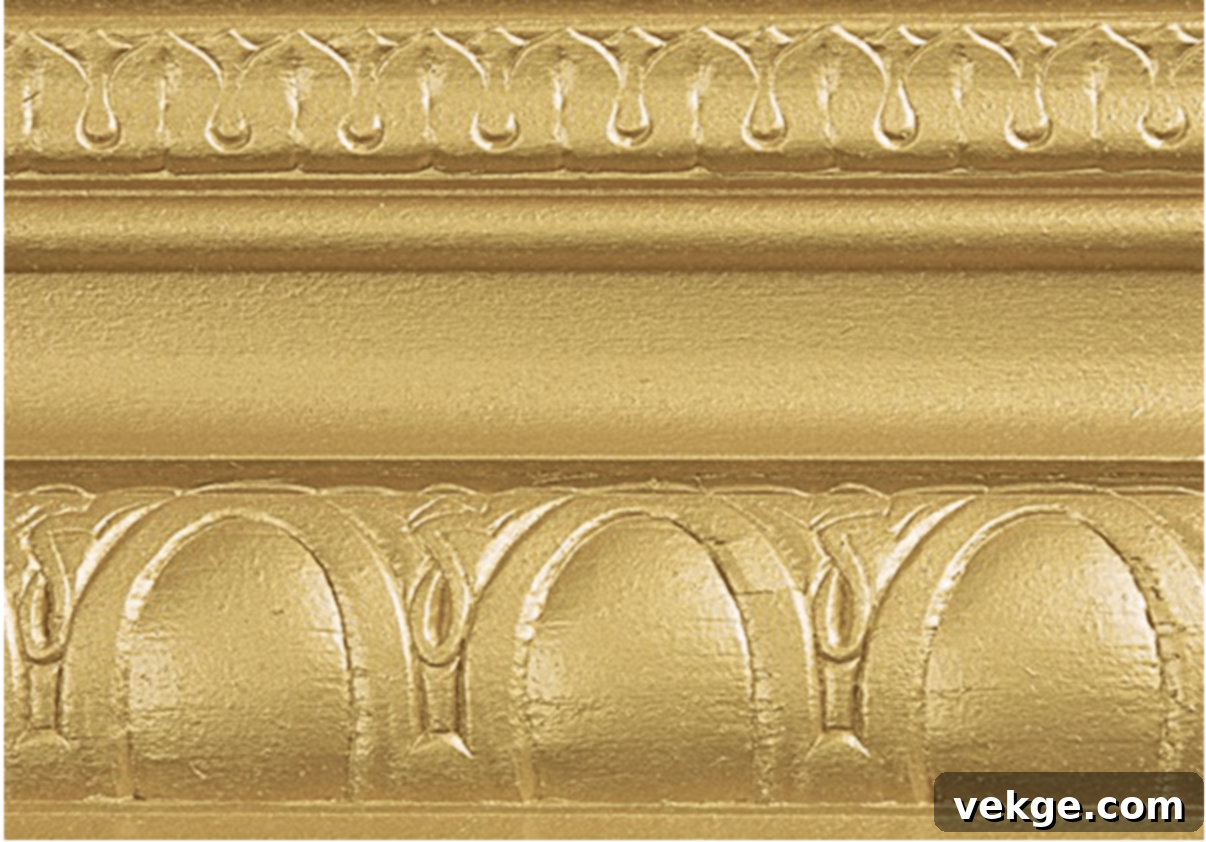
For a sophisticated, handcrafted look, Modern Masters Metallic Paint in Olympic Gold is an excellent choice. This premium brush-on formula delivers a rich, authentic metallic luster, perfect for projects demanding a touch of elegance.
Key Features
- A high-quality brush-on formula that allows for precise application and artistic control.
- Features a low odor, making it more comfortable for indoor use without strong fumes.
- Offers easy water cleanup, simplifying the post-project tidying process.
- Achieves a full dry in approximately 2 hours, enabling efficient project completion.
- Engineered not to fade in sunlight, preserving its brilliant gold hue over time.
- Boasts a self-leveling formula, which helps minimize brush strokes for a smoother finish.
Ideal Uses
- Adding exquisite detail to fine wooden crafts, enhancing their artistic appeal.
- Decorating indoor furniture pieces, such as tables, chairs, or dressers, with a luxurious touch.
- Perfect for intricate trim work, highlighting architectural details with a metallic accent.
- Ideal for small detail areas where precision and control are crucial.
- Creating striking wood accent pieces that serve as focal points in any room.
- Performing cabinet touch-ups, seamlessly blending repairs with existing finishes.
3. FolkArt Treasure Gold Majestic Gold
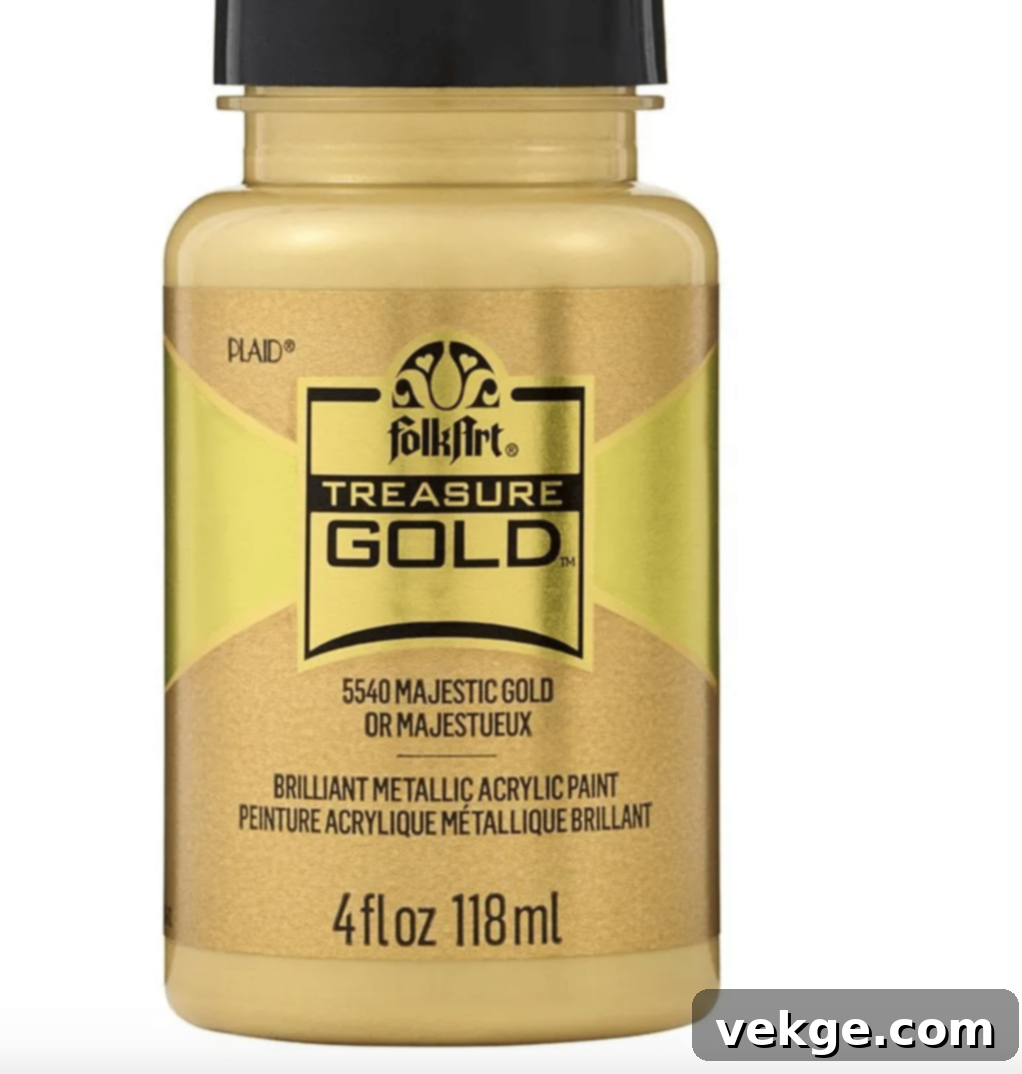
FolkArt Treasure Gold in Majestic Gold is a favorite for its user-friendly application and beautiful, rich metallic sheen. Its creamy consistency allows for excellent brush control, making it perfect for detailed work and smaller projects.
Key Features
- Possesses a creamy, smooth texture that glides on easily and provides excellent coverage.
- Offers a quick 1-hour dry time, facilitating faster project completion and recoating.
- Formulated to be non-toxic, making it safe for crafting with children or on items used by kids.
- Its consistency and size make it particularly good for reaching and painting tight spots.
- Ensures easy brush control, allowing for detailed and intricate paintwork.
- Requires no special tools for application, making it accessible for all skill levels.
Ideal Uses
- Embellishing small wood projects, from decorative boxes to mini frames.
- Perfect for detailed paintwork, such as stenciling or intricate designs on wood.
- Safe and fun for kids’ craft items, adding a metallic sparkle to their creations.
- Decorating wood jewelry boxes, giving them a luxurious and personalized look.
- Adding a touch of gold to picture frames, enhancing their visual appeal.
- Creating delicate decorative touches on various wooden items.
4. Amaco Rub ‘n Buff Antique Gold
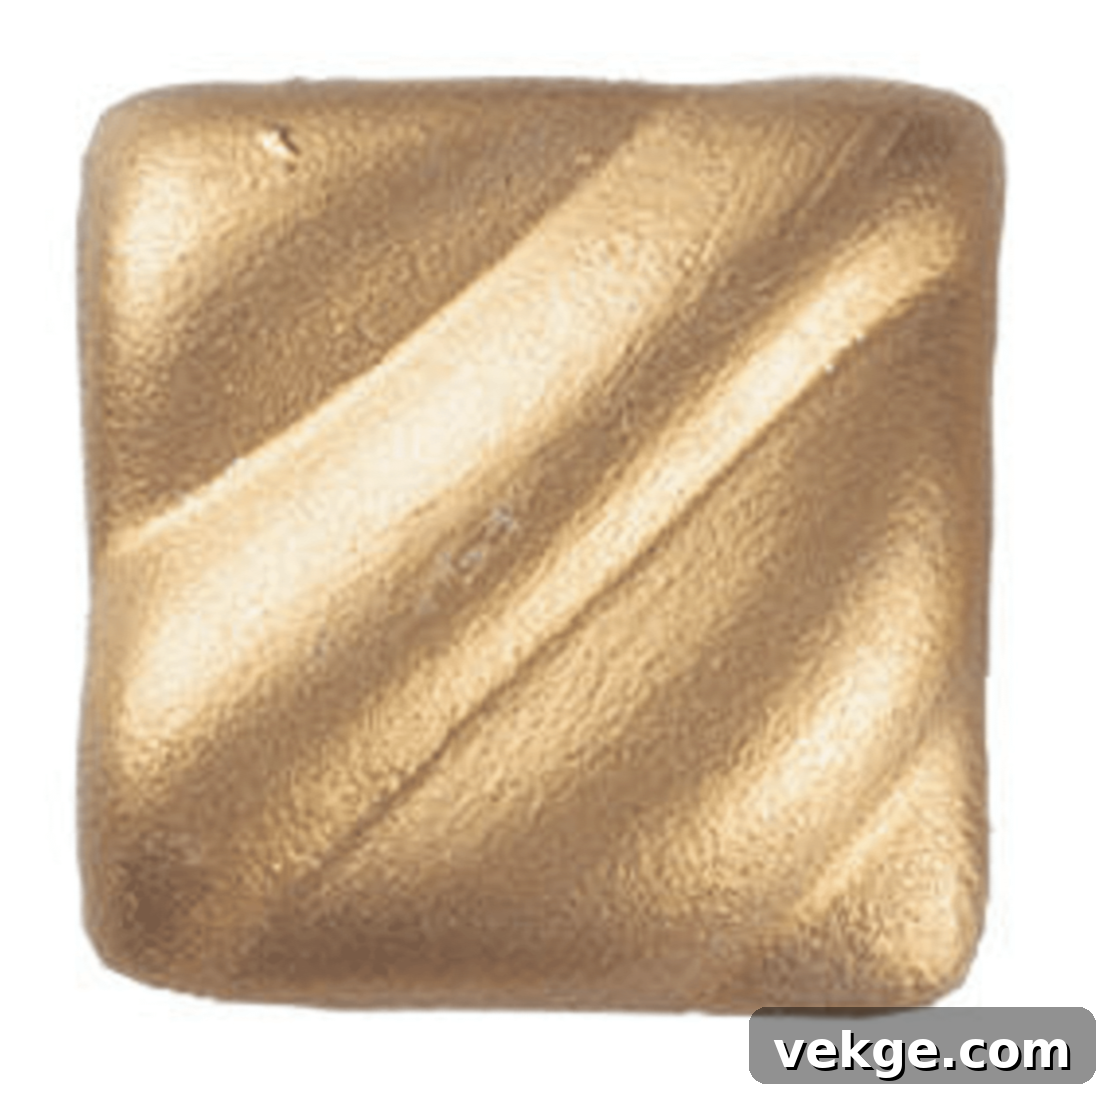
Amaco Rub ‘n Buff is less of a paint and more of a wax finish, offering a unique application method and a stunning, aged metallic look. It’s incredibly effective for adding an authentic antique gold patina or highlighting intricate details.
Key Features
- A unique wax-based formula that buffs to a beautiful metallic luster.
- Comes in a tiny 0.5 oz tube, yet a little product goes an incredibly long way.
- Features a remarkably quick 30-minute dry time, allowing for rapid project completion.
- Easily applied with just your fingers or a soft cloth for controlled application.
- Provides strong, opaque coverage with minimal product, ideal for fine details.
- Highly concentrated, meaning a small amount covers a surprisingly large area.
Ideal Uses
- Accentuaing wood edges and carved details for an aged, elegant look.
- Perfect for small touch-ups and repairs on existing gold finishes.
- Masterfully adding aged looks and patinas to new or refurbished wooden pieces.
- Skillfully highlighting intricate details and raised motifs on wood carvings.
- Excellent for quick fixes and minor cosmetic enhancements on wooden items.
- Enhancing the depth and character of wood carvings with a subtle metallic sheen.
5. Krylon Fusion All-In-One Gloss Gold Metallic Spray Paint
Krylon Fusion All-In-One is a powerhouse spray paint that simplifies projects by combining paint and primer. Its “Any-Angle Spray System” is a game-changer for uniform coverage on diverse surfaces, including wood.
Key Features
- Features an innovative any-angle spray system for consistent coverage from any direction.
- Dries efficiently in just 20 minutes, speeding up project timelines.
- Includes a built-in primer, eliminating the need for a separate priming step.
- Offers a generous coverage area, suitable for medium to large-scale projects.
- Provides a strong, durable grip on various surfaces, ensuring long-lasting adhesion.
- Highly versatile, performing well on a wide range of materials beyond just wood.
Ideal Uses
- Ideal for big wood projects such as entire furniture sets or large decorative panels.
- Perfect for quick makeovers where efficiency and a professional finish are desired.
- Excellent for outdoor items like garden benches, wooden planters, or patio decor.
- Transforming wood furniture with a durable, glossy gold metallic finish.
- Painting large frames or mirrors, ensuring a smooth and even application.
- Versatile for a variety of craft projects requiring a robust and quick-drying gold.
How to Choose the Right Gold Paint for Your Wood Project
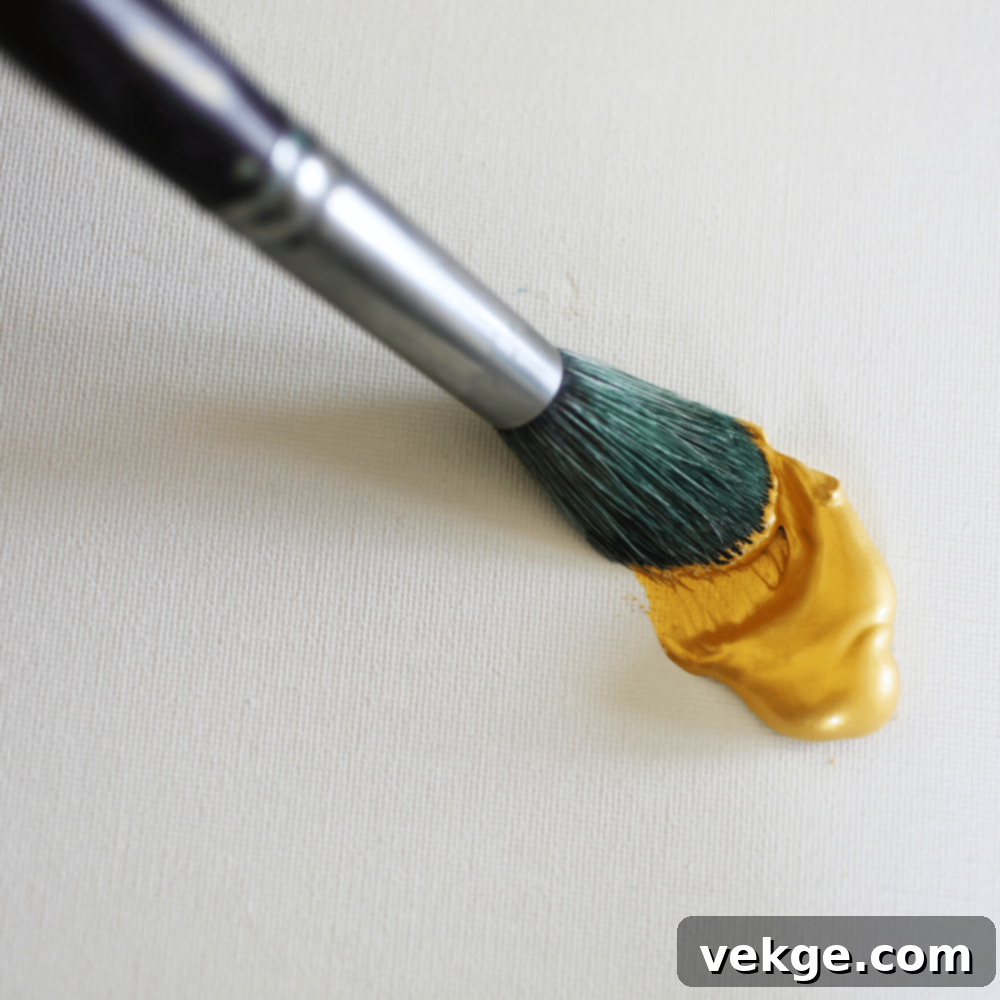
Selecting the ideal gold paint for your wooden project is crucial for achieving the desired aesthetic and durability. Drawing from my extensive experience, here are the key factors to consider:
1. Surface Size Matters
The dimensions of your wood project should heavily influence your paint choice for efficiency and best results:
- For small items (under 2 square feet): Brush-on paints, especially acrylics or waxes like Rub ‘n Buff, offer precision and control, making them ideal for intricate details.
- For medium items (2-10 square feet): Both brush-on and spray paints can work well. Brush-on provides more artistic control, while spray paints offer faster, more uniform coverage.
- For large surfaces (over 10 square feet): Spray paints are highly recommended as they save significant time and ensure incredibly even coverage without visible brush marks.
2. Indoor vs. Outdoor Use
Consider the environment where your finished project will reside:
- Indoor items: Most gold paint types are suitable for indoor use, as they are not exposed to harsh elements. Water-based options are great for low odor.
- Outdoor items: It’s essential to select paints specifically formulated with UV protection and weather resistance to prevent fading, cracking, and peeling. Oil-based or specialized outdoor spray paints are best.
- Semi-outdoor (like porches or covered patios): Opt for paints that offer some degree of moisture and UV resistance, such as oil-based or high-quality acrylics designed for exterior use.
3. Time and Budget Considerations
Your project timeline and financial constraints will also guide your selection:
- Quick projects: Fast-drying spray paints or water-based acrylics are ideal, allowing for faster recoating and project completion.
- Budget-conscious projects: Water-based acrylic paints often come at a lower price point while still offering good quality and versatility.
- Long-term items requiring durability: Oil-based paints, while more expensive and slower drying, offer superior longevity and resilience.
- Small touch-ups or detailing: Rub-on waxes are incredibly cost-effective as a small amount goes a very long way.
4. Desired Finish Type
Visualize the final look you want to achieve:
- Bright, high-gloss shine: Metallic spray paints typically deliver the most vibrant and reflective finish.
- Soft, subtle glow: Water-based gold paints often provide a more understated, gentle shimmer.
- Aged, old-world look: Rub-on waxes are perfect for creating an antique or distressed gold effect.
- Rich, deep color with high durability: Oil-based paints are excellent for achieving a luxurious, profound gold depth.
5. Your Skill Level
Be realistic about your painting experience:
- First-time painters: Start with easy-to-use water-based acrylic paints, as they are forgiving and easy to clean up.
- Painters with some experience: Spray paints can provide excellent results with a bit of practice, offering speed and uniformity.
- Experienced painters with good control: Brush-on metallic acrylics or oil-based paints allow for fine detail and artistic expression.
- Detail work and precision: Specialized gold paints or rub-on waxes are perfect for intricate designs and highlighting.
6. Application Method Preferences
Consider how you prefer to apply the paint:
- Brush application: Best for small areas, intricate details, or when you want textured brush strokes.
- Spray application: Ideal for large, flat surfaces, quick coverage, and achieving a smooth, even finish.
- Rub-on application: Perfect for edges, highlights, distressing, and adding an antique patina with fingers or a cloth.
- Roll-on application: Works well for very big, flat areas like tabletops or cabinet doors, using a foam roller for smooth results.
7. Clean-Up Needs
Think about the effort required after painting:
- Easy cleanup: Choose water-based paints, as they only require soap and water for brushes and spills.
- Less worry about mess: Spray paints, when applied carefully in a protected area, minimize direct contact and brush cleanup.
- Detailed brush work cleanup: Brush-on types will require cleaning brushes, either with water or appropriate solvents.
- Quick fixes and minimal mess: Rub-on waxes are incredibly clean to use, often requiring just a wiped cloth.
8. Safety Needs and Workspace
Prioritize your safety and environment:
- Indoor use: Always pick low-odor and low-VOC (Volatile Organic Compound) options, especially if working in confined spaces.
- Kids’ items: Ensure you use non-toxic, child-safe paints for anything children will interact with.
- Workspace ventilation: Regardless of paint type, ensure adequate airflow to disperse fumes, especially with spray or oil-based paints.
- Consider dry times: Longer dry times mean your project will occupy your workspace for longer, so plan accordingly.
A Comparison Between Gold Paint & Gold Leaf
When aiming for a gold finish on wood, two primary options come to mind: gold paint and traditional gold leaf. While both can create beautiful results, they differ significantly in application, cost, durability, and overall aesthetic. Understanding these differences is key to making the right choice for your project.
| Aspect | Gold Paint | Gold Leaf |
|---|---|---|
| Price Point | • Typically costs $10-30 per container, offering a more affordable entry point. | • Costs $25-50 for a small pack of sheets, which might cover less area. |
| • Generally covers a larger surface area for a lower material cost. | • Requires more material and often specialized sizing/adhesive, increasing overall cost. | |
| • Needs fewer, common tools for application (brushes, rollers, spray cans). | • Requires specific tools like sizing (adhesive), gilder’s tip, burnishers, and soft brushes. | |
| Skill Level Required | • Simple to use, functioning much like regular paint with basic techniques. | • Demands careful handling and a delicate touch due to the fragility of the leaf. |
| • Application is straightforward, similar to any other painting task. | • Involves a multi-step process: applying sizing, laying leaf, and sealing. | |
| • Mistakes are relatively easy to fix by repainting or wiping away. | • Errors are harder to correct without potentially redoing sections. | |
| • Takes less practice to master effective application techniques. | • Requires patience and dedicated practice to achieve a flawless finish. | |
| Durability | • Most gold paints, especially with a good topcoat, stand up well to daily use. | • Can be delicate and prone to scratching if not properly sealed or handled. |
| • Offers good resistance to scratches, especially oil-based or multi-surface formulas. | • Shows wear marks and can tear easily in high-traffic areas. | |
| • Touch-ups are simple, blending seamlessly with existing layers. | • Repairs require meticulous reapplication of leaf and sizing. | |
| • A practical choice for busy areas or functional items. | • Best suited for decorative pieces that will not experience frequent contact. | |
| Look and Shine | • Provides a good metallic look, ranging from subtle shimmer to high gloss. | • Offers the most authentic and vibrant appearance, truly resembling real gold. |
| • The shine tends to be consistent, without much variation in depth. | • Its luminosity changes dynamically with ambient light, offering incredible depth. | |
| • Generally has less depth and dimension compared to real metal leaf. | • Exhibits a rich color depth and a unique, natural metallic texture. | |
| • Often results in a more modern or contemporary metallic finish. | • Delivers a classic, high-end, and often opulent finish. | |
| Time Investment | • Typically requires 1-3 coats, with drying time between each. | • Involves multiple steps: surface prep, base coating, sizing application, and leafing. |
| • Dries within hours for most acrylic and spray paints. | • The entire process, including sizing cure and sealing, can take days to complete. | |
| • Application is relatively quick and straightforward. | • Slow, meticulous application is needed to achieve professional results. | |
| • A comparatively simple and direct painting process. | • A more complex and artistic process, demanding precision. | |
| Care Needs | • Can be cleaned with normal, mild household cleaners after proper curing. | • Requires gentle cleaning; harsh chemicals can damage or tarnish the leaf. |
| • Most sealed gold paints hold up well to light washing. | • Pure gold leaf won’t tarnish, but imitation leaf can, and protective topcoats are essential. | |
| • Relatively easy maintenance and general care. | • Requires careful handling and often a protective topcoat to maintain its integrity. | |
| • Less special care or environmental considerations needed. | • More upkeep and protection from abrasives or harsh environments. | |
| Best Project Types | • Ideal for daily use items, furniture, and practical pieces. | • Perfect for special, decorative, or artistic pieces where opulence is key. |
| • Suitable for children’s furniture or toys (with non-toxic options). | • Enhances wall art, decorative panels, and intricate carvings. | |
| • Great for outdoor items that need weather resistance. | • Elevates fine furniture, frames, and heirlooms with a luxurious touch. | |
| • Excellent for quick makeovers and budget-friendly renovations. | • Best for show items, museum reproductions, or pieces meant to be admired. |
Ultimately, your choice between gold paint and gold leaf will depend on your budget, the desired level of authenticity, the item’s intended use, and your willingness to invest time and develop specialized skills. Both offer unique ways to bring the timeless elegance of gold to your wooden creations.
How to Prepare Wood Surfaces for Gold Paint: A Step-by-Step Guide
Proper surface preparation is, without a doubt, the most critical step in achieving a flawless and durable gold finish on wood. Skipping or rushing these initial stages can lead to poor adhesion, uneven color, and a less-than-professional result. From my years of experience, I can’t stress enough how much a well-prepped surface contributes to the final look and longevity of your gold paint job. Here’s my detailed approach:
1. Thoroughly Clean the Surface
I always begin every project with meticulous cleaning because it truly lays the foundation for success:
- Dust Removal: Start by wiping off all loose dust, cobwebs, and debris using a dry, lint-free cloth or a vacuum cleaner with a brush attachment.
- Deep Cleaning: For dirt, grime, or light grease, use a solution of mild soap (like dish soap) and warm water. Dampen a cloth, wipe the entire surface, and then follow with a clean, water-dampened cloth to remove any soap residue.
- Complete Drying: Allow the wood to dry fully. For optimal results, I recommend at least 24 hours of drying time, especially in humid conditions, to ensure no moisture is trapped in the wood.
- Stubborn Stains: For sticky spots, sap, or significant grease, a small amount of mineral spirits or white spirit on a clean rag can be very effective. Ensure to ventilate the area well.
- Inspect for Residue: Carefully check for any lingering remnants of old paint flakes, wax, or oil that could hinder new paint adhesion.
2. Fix Surface Imperfections
Before applying any paint, I always address any structural or surface issues to ensure a smooth base:
- Fill Holes: Use a high-quality wood filler or spackle to fill any nail holes, cracks, or minor divots.
- Allow to Cure: Let the wood filler dry completely according to the manufacturer’s instructions. This is crucial to prevent shrinkage or cracking later.
- Secure Loose Parts: Inspect the item for any loose joints, wobbly legs, or detached pieces and re-secure them using wood glue or appropriate fasteners.
- Tighten Fasteners: Ensure all screws, bolts, or other hardware are securely tightened.
- Remove Old Flakes: Use a paint scraper or sandpaper to remove any peeling or flaking old paint, aiming for a consistent surface.
3. Sand the Wood Properly
Sanding creates a smooth surface and provides “tooth” for the primer and paint to adhere to. Here’s my proven sanding method:
- Initial Rough Sanding: If the wood is very rough or has stubborn old finishes, start with 80-grit sandpaper to remove material quickly and level imperfections.
- Medium Sanding: Progress to 120-grit sandpaper across the entire surface. This removes the scratches from the coarser grit and begins to smooth the wood.
- Fine Finishing Sand: Finish with 220-grit sandpaper for ultimate smoothness. This step is especially important for achieving a high-quality, professional finish, as gold paint can highlight imperfections.
- Dust Between Steps: Crucially, wipe off all sanding dust thoroughly with a tack cloth or a damp cloth after each grit change.
- Tactile Check: Run your hand over the entire surface to feel for any rough spots or inconsistencies that might have been missed.
4. Apply a Quality Wood Primer
A primer is a non-negotiable step, especially for raw wood or when changing colors dramatically. Here are my essential primer tips:
- Wood-Specific Primer: Always use a primer specifically designed for wood. This ensures maximum adhesion and seals the wood grain, preventing absorption of your gold paint.
- Thin, Even Coats: Apply primer in thin, even coats. Thick coats can lead to drips, uneven texture, and longer drying times.
- Adequate Drying: Allow each primer coat to dry completely as per the product’s instructions. This might take several hours.
- Light Sanding After Primer: After the primer is fully dry, I recommend a very light sanding with 220-grit sandpaper (or finer) to create an even smoother base. Wipe off all dust thoroughly.
- Check for Full Coverage: Ensure the primer has completely covered the wood and created a uniform base. Two thin coats are often better than one thick one.
5. Optimize Your Room Setup
The environment you paint in significantly impacts the outcome:
- Dust-Free Zone: Choose a clean, dust-free space. Dust can settle on wet paint, ruining the finish.
- Temperature Control: Maintain room temperature between 65-75°F (18-24°C). Extreme temperatures or humidity can affect paint drying and adhesion.
- Ample Lighting: Set up good, bright lighting to easily spot drips, missed spots, or imperfections as you paint.
- Protect Surroundings: Cover nearby items, floors, and walls with drop cloths or plastic sheeting to protect them from paint splatter.
- Ensure Airflow: Create good airflow with open windows or a fan (directed away from your project to avoid blowing dust onto it) to help with drying and fume dissipation.
6. Prepare Your Tools
Having the right tools ready and in good condition is vital:
- Clean Brushes/Sprayers: Ensure all brushes are clean and free of old paint, and sprayers are unclogged and ready.
- Fresh Sandpaper: Have a supply of fresh sandpaper in the required grits.
- Clean Rags/Tack Cloths: Keep plenty of clean rags and tack cloths handy for wiping dust and spills.
- Drop Cloths: Additional drop cloths or newspaper can be useful for minor spills or placing tools.
- Safety Gear: Always have a face mask (especially for sanding and spraying), gloves, and safety glasses readily available.
7. Final Pre-Painting Checks
Just before dipping the brush or pressing the nozzle, run through these final checks:
- Hidden Spot Test: If you haven’t already, perform a small test application in a hidden area to confirm the color and finish.
- Weather Check (if outside): If painting outdoors, ensure weather conditions are dry and within recommended temperature ranges.
- Read Paint Instructions: Double-check the specific instructions on your chosen gold paint can for unique recommendations or drying times.
- Mix Paint Well: Stir or shake your paint thoroughly to ensure the metallic particles are evenly distributed, preventing a dull finish.
- Don Safety Gear: Put on all necessary safety gear before starting.
By diligently following these preparation steps, you’ll set yourself up for a successful and stunning gold paint project on wood, ensuring your hard work truly shines.
Best Application Techniques for Gold Paint on Wood
Applying gold paint effectively requires a specific approach to ensure a smooth, even, and brilliantly metallic finish. Different methods are suited for different project types and desired effects. Below, I’ve outlined the best application techniques, drawing from countless hours spent perfecting the art of painting wood gold.
| Category | Details |
|---|---|
| Brush Application Method | First Coat: Laying the Foundation |
| • Choose a high-quality flat brush, typically 2-3 inches wide, for even coverage. | |
| • Always paint with the natural grain of the wood to minimize visible brush strokes. | |
| • Use long, steady, and consistent strokes, avoiding stopping in the middle of a pass. | |
| • Apply paint in thin, even layers. Overloading the brush can lead to drips and an uneven finish. | |
| • Work in manageable small sections, overlapping slightly to ensure continuous coverage. | |
| • Allow the first coat to dry for 2-3 hours, or as per paint manufacturer’s instructions. | |
| Second Coat: Building Depth and Shine | |
| • After the first coat is fully dry, lightly sand the surface with 220-grit sandpaper for adhesion. | |
| • Meticulously clean off all sanding dust with a tack cloth before applying the next coat. | |
| • Apply the second coat slightly thicker than the first, but still ensuring evenness. | |
| • Continue to follow the same wood grain path with your brush strokes for consistency. | |
| • Regularly check coverage as you paint, ensuring no translucent spots remain. | |
| • Wait a full 24 hours for the second coat to thoroughly cure before handling. | |
| Spray Paint Method | Setup for Success: |
| • Maintain a consistent distance of 10-12 inches between the can and the surface. | |
| • Shake the can vigorously for at least 2 minutes before and periodically during use. | |
| • Always test spray on a piece of scrap paper or cardboard to check the spray pattern. | |
| • Move your entire arm, not just your wrist, to ensure a fluid and even pass. | |
| • Work in a well-lit area to easily see your coverage and avoid missed spots. | |
| Effective Spraying Technique: | |
| • Begin spraying off the piece, move across in smooth, horizontal passes. | |
| • Use a steady, continuous movement to prevent paint buildup. | |
| • Maintain an even speed throughout each pass for uniform coverage. | |
| • Overlap each pass by about one-third to ensure complete coverage without lines. | |
| • Apply 2-3 thin coats for optimal color and durability, rather than one thick coat. | |
| • Allow 15 minutes (or as specified) for drying between coats to prevent drips. | |
| Foam Roller Method | Best For: Achieving Seamless Flat Surfaces |
| • This method excels on large, flat areas, producing a remarkably smooth finish. | |
| • Ideal for surfaces like table tops that require an impeccable, even coat. | |
| • Perfectly suited for cabinet doors and other broad, flat wooden panels. | |
| • Delivers the smoothest results on previously smooth or finely sanded surfaces. | |
| • Guarantees consistent, uniform coverage, minimizing roller marks. | |
| Application Steps: | |
| • Use a high-density, small foam roller to prevent texture and air bubbles. | |
| • Load the roller lightly with paint, removing excess on a roller tray. | |
| • Roll in one consistent direction across the surface, maintaining linearity. | |
| • Apply light, even pressure. Pressing too hard can squeeze paint out the sides of the roller. | |
| • Frequently check for any drips or pooling of paint, especially at edges. | |
| • Complete edges and corners with a brush after rolling the main flat surface. | |
| Detail Work | Mastering Intricate Sections: |
| • For small, delicate areas, choose small artist brushes or fine-tipped detail brushes. | |
| • Always work from the inside of the detail outwards to contain potential errors. | |
| • Clean your detail brushes often during the process to maintain precision. | |
| • Take frequent short breaks to allow your eyes to rest and to critically check your work. | |
| • Immediately fix any small runs or smudges with a damp cloth or fine brush before they dry. | |
| Pro Tips I’ve Learned | • Patience is a Virtue: Never rush the job. Take your time, especially with drying between coats. |
| • Maintain Cleanliness: Keep your entire workspace as dust-free as possible to prevent particles from adhering to wet paint. | |
| • Consistent Lighting: Check your lighting frequently and from different angles to ensure even coverage. | |
| • Tool Hygiene: Clean your tools thoroughly between coats to prevent dried paint from affecting future applications. | |
| • Full Dry is Key: Always, always let each layer dry fully before applying the next or handling the piece. | |
| Temperature and Humidity Matters | • Ideal Temperature: Work in rooms maintained between 65-75°F (18-24°C). |
| • Avoid High Moisture: High humidity can significantly extend drying times and affect paint adhesion. | |
| • Promote Air Movement: Ensure good air circulation (without creating direct drafts onto wet paint). | |
| • Check Weather: Skip painting on excessively humid or rainy days if working outdoors or in a poorly controlled environment. | |
| • Adjust Dry Times: If the environment is cooler than ideal, allow extra dry time, even beyond manufacturer recommendations. |
By implementing these techniques and paying attention to detail, you will achieve a stunning and professional gold finish on all your wooden projects, making them truly stand out.
How to Achieve Different Gold Finishes on Wood
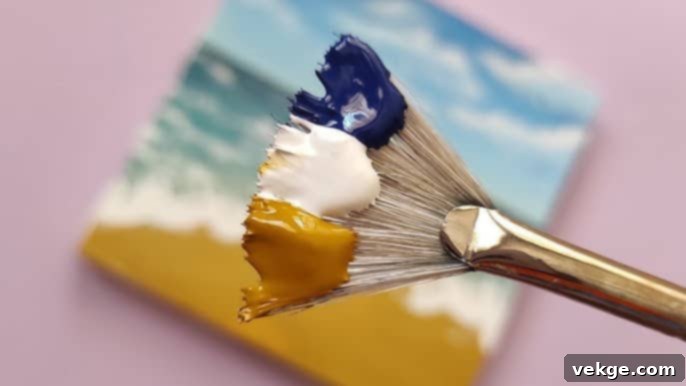
Gold is not just one color; it encompasses a spectrum of finishes, each conveying a distinct mood and style. From dazzling bright to elegantly aged, the way you apply and treat your gold paint can dramatically alter its final appearance. Here’s how to achieve various popular gold finishes on your wood projects:
Bright Gold Finish (High Shine)
This finish is perfect for a glamorous, contemporary look that truly pops. It maximizes the reflectivity of the gold paint.
Base Steps:
- Start with a smooth, perfectly even white primer. The white base enhances the brightness of the gold.
- Sand the primed surface meticulously until it is exceptionally smooth to the touch, removing any imperfections.
- Clean the surface thoroughly with a tack cloth to ensure it’s free of dust or debris.
- Apply gold paint in very thin, consistent coats to build color without obscuring the shine.
- Use a high-quality metallic spray paint for the most uniform and brilliant reflective finish.
Method:
- Apply 2-3 very light, even coats of metallic gold spray paint.
- Allow at least 30 minutes of drying time between each coat to prevent bubbling or unevenness.
- Ensure all coats are perfectly even and cover the surface uniformly.
- Once fully dry, buff the painted surface gently with a soft, lint-free cloth to enhance the shine.
- For added durability and an even deeper gloss, finish with 2-3 coats of a clear, high-gloss top coat.
Antique Gold Look (Distressed & Muted)
An antique gold finish evokes a sense of history and timeless elegance, perfect for vintage or rustic pieces.
Base Steps:
- Begin with a cream or off-white primer to provide a soft undertone.
- Purposefully leave a slight texture on the primer or wood surface to mimic age.
- Avoid over-sanding; a perfectly smooth surface isn’t desired for an aged look.
- Mix your chosen gold paint well, ensuring metallic flecks are evenly distributed.
- Apply the base gold coat somewhat unevenly, allowing for subtle variations in coverage.
Method:
- Apply a base coat of your chosen gold paint (a slightly darker or warmer gold works well).
- Let the base coat dry completely, typically for at least 6 hours or overnight.
- Using a soft cloth or brush, dab a dark antiquing wax or a very thin, diluted brown/black glaze into recessed areas and corners.
- Immediately wipe off excess wax/glaze with a clean cloth, leaving the darker pigment only in crevices.
- Build up layers of distressing slowly, adding more wax/glaze until the desired aged effect is achieved.
Matte Gold Effect (Subtle & Modern)
For a contemporary, understated, and sophisticated look, a matte gold finish offers elegance without overwhelming shine.
Base Steps:
- Prime your wood with a gray or neutral-toned primer to subdue the gold’s brightness.
- Sand very lightly, primarily to ensure adhesion rather than a high polish.
- Clean the surface meticulously with a tack cloth before painting to remove all dust.
- Select a flat (matte) gold paint or a gold metallic paint that can be dulled with a matte medium.
- Ensure your workspace is cool and dry, as humidity can affect the matte finish.
Method:
- Apply gold paint in thin, even coats using a natural bristle brush for a smooth, non-streaky application.
- Do not over-brush; apply paint and move on to avoid creating shiny spots or uneven texture.
- Allow ample drying time between coats to prevent the finish from becoming splotchy.
- Skip the top coat if you desire a truly matte effect, as most clear sealers will add some sheen. If sealing, choose a specifically matte-finish sealant.
Textured Gold (Tactile & Rustic)
This finish adds dimension and character, perfect for accent pieces or creating a sense of rugged luxury.
Base Steps:
- Apply a thick layer of primer, possibly a tinted one, to provide a substantial base.
- While the primer is wet, use a brush or sponge to create desired textures (e.g., stippling, swirling).
- Allow the textured primer to dry fully and harden before proceeding.
- Lightly sand only the high spots of the texture to add subtle highlights.
- Clean the textured surface well, ensuring no dust is caught in the crevices.
Method:
- Apply a thick gold paint or a gold paint mixed with a textural medium.
- Dab the paint onto the textured surface using a sponge, stippling brush, or even a crumpled rag.
- Build up layers slowly, ensuring the paint catches on the raised areas and deepens the gold color.
- Focus on hitting high spots with more paint to emphasize the texture.
- Once completely dry, seal the piece with a durable topcoat to protect the texture and paint.
Brushed Gold Look (Elegant & Directional)
A brushed gold finish highlights the craftsmanship and adds a sophisticated, linear shimmer.
Base Steps:
- Use a light-colored primer to enhance the gold’s visibility.
- Sand the surface very smoothly with fine-grit paper (e.g., 320-grit) to eliminate imperfections.
- Clean the surface meticulously to ensure no dust interferes with the brush strokes.
- Select the right brush size for your project, opting for a high-quality synthetic brush that holds its shape.
- Work in a well-lit area to clearly see your brush strokes and maintain consistency.
Method:
- Apply the gold paint entirely in one direction, using long, continuous strokes.
- Employ a “dry brush” method: load your brush sparingly with paint, wiping off excess.
- Keep your strokes perfectly straight and parallel, maintaining a uniform pattern.
- Avoid adding too much paint at once, as this will obscure the individual brush marks.
- Build the color slowly over several thin coats, allowing each layer to define the brushed texture.
Two-Tone Gold (Depth & Contrast)
This technique creates visual interest and depth by combining two different shades of gold.
Base Steps:
- Apply a base coat of a darker or more subdued gold paint.
- Allow this base coat to dry for a full 24 hours to ensure it’s completely cured.
- Carefully mask off the areas where you want the darker gold to show through using painter’s tape to create your pattern.
- Press down firmly on the tape edges to ensure a crisp, clean line and prevent bleed-through.
- Test the lighter gold topcoat in a hidden spot to ensure it adheres well and the colors complement each other.
Method:
- Apply a lighter, brighter gold topcoat over the entire masked surface.
- Once the topcoat is applied but still slightly wet (or as per tape instructions), carefully remove the painter’s tape at a 45-degree angle.
- Immediately fix any small bleeds or imperfections with a fine brush and the appropriate color.
- Allow the entire piece to dry fully, ideally for 24-48 hours.
- Seal the whole piece with a clear protective topcoat to unify and protect both gold tones.
Experimentation is key! Don’t be afraid to try different combinations and techniques on scrap wood until you find the perfect gold finish for your vision.
How to Seal & Protect Gold Painted Wood for Lasting Beauty
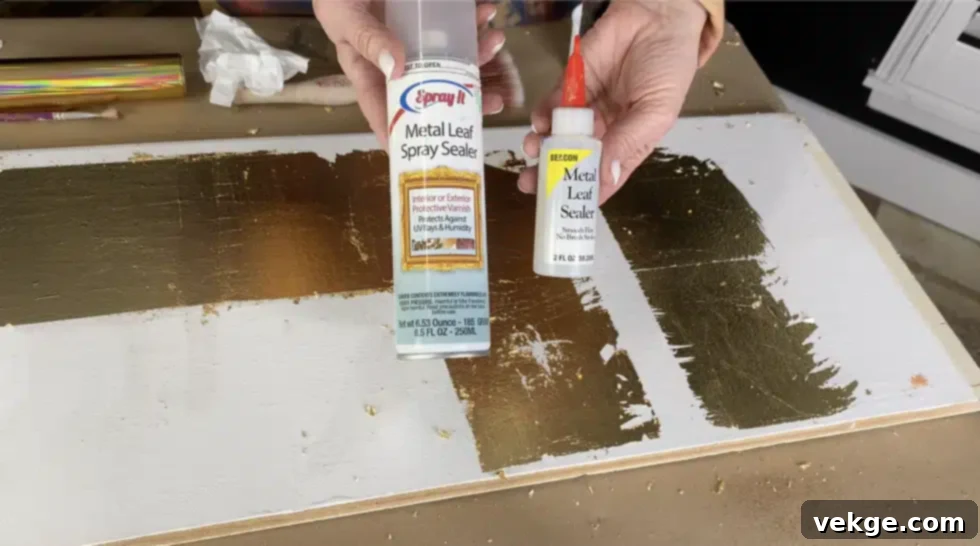
The secret to a gold paint job that not only looks stunning but also stands the test of time lies in proper sealing and protection. From my extensive experience, the right sealer makes all the difference in how long your golden masterpiece retains its luster and integrity. I’ve experimented with many types of sealers over the years, and each has its unique advantages.
- Clear Polyurethane: This is a fantastic choice for most projects, especially those requiring high durability. It dries crystal clear, forms a very hard protective layer, and lasts for years, safeguarding against scratches and wear.
- Water-Based Sealers: For quicker projects or when working indoors with less ventilation, I often opt for water-based sealers. They typically dry in about two hours, emit minimal odor, and are easy to clean up. They offer good protection for general use.
- Wax Sealers: When working on small, decorative items or aiming for a soft, tactile finish, a wax sealer is an excellent pick. It provides a natural, subtle sheen and a pleasant feel to the touch, offering a traditional protective layer.
- Spray Sealers: For intricate details or when you want to avoid brush marks on your gold finish, a clear spray sealant is highly effective. It creates a smooth, even layer of protection without disturbing the metallic particles.
Before applying any sealer, patience is paramount. I always let the gold paint dry for a full two days—48 hours—before sealing. This wait can feel long, but it’s absolutely crucial to ensure the paint has completely cured and off-gassed, preventing issues like bubbling or cloudiness in your topcoat. Once cured, I meticulously clean the painted surface, ensuring it’s entirely free of dust, lint, or any other contaminants. The room needs to be warm and well-ventilated; consistent temperature and humidity help the sealer cure correctly. As a best practice, I always test the sealer in a hidden spot first to ensure compatibility with my specific gold paint and to confirm the desired finish.
For the first coat of sealer, I typically use a high-density foam brush to minimize streaks and put on a very thin, even layer. I work in one continuous direction, carefully watching for any drips or pooling, especially on edges and in recessed areas. After allowing this initial coat to dry for about four hours, it’s ready for the next step. I then lightly sand the entire surface with 320-grit (or finer) sandpaper to create a smooth base for subsequent coats and enhance adhesion. Following another thorough dust-off, I apply a medium-thick second coat of sealer. Six hours later, I perform one more light sanding and apply the final, thin coat. The hardest part then begins: waiting a full 24 hours (or more, depending on the product) before using or placing the item back into service. This final curing period is vital for the sealer to achieve maximum hardness and protection.
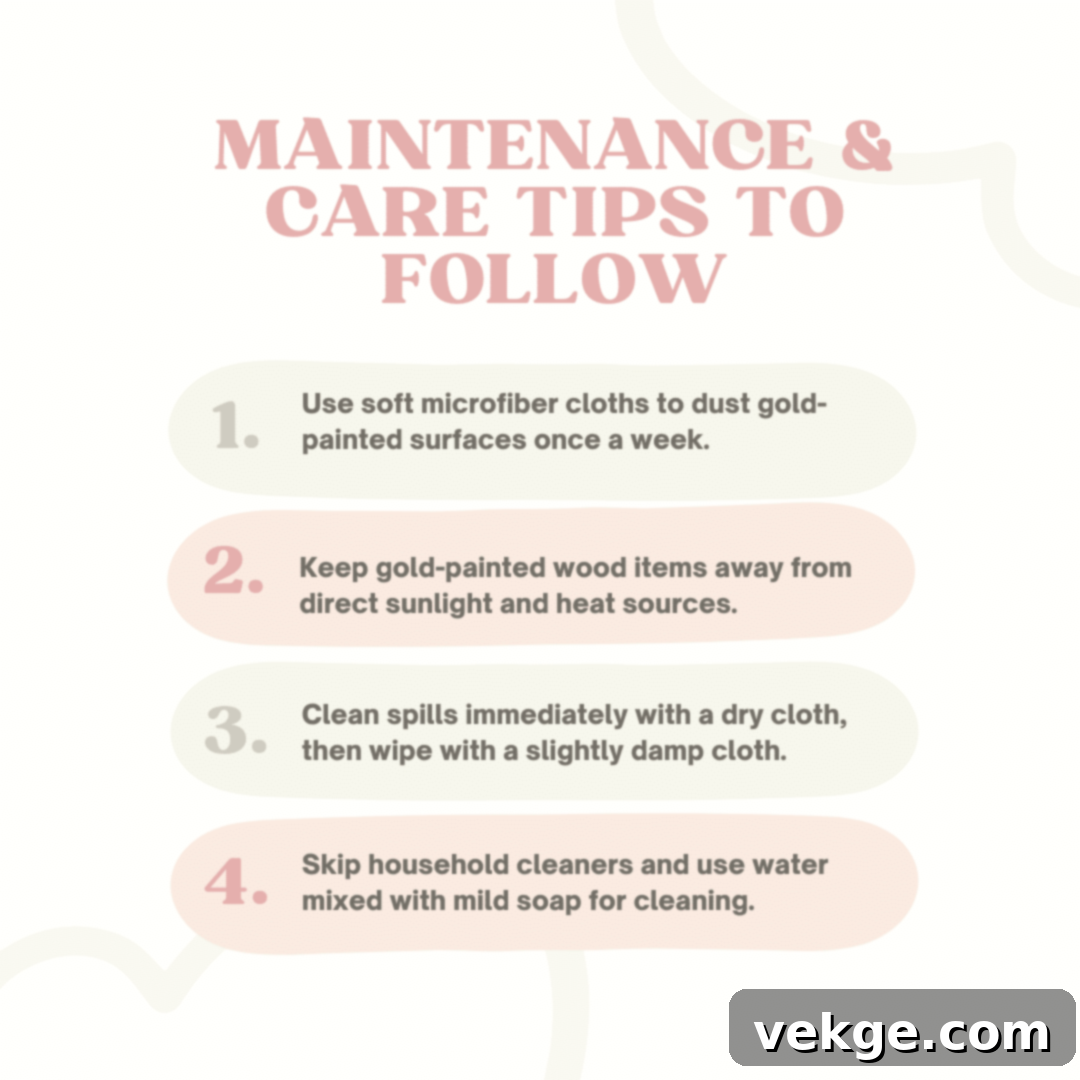
Taking care of your sealed gold-painted wood is not overly complicated, but it does require some attention to maintain its beauty. I dust regularly with a soft, lint-free cloth to prevent abrasive particles from accumulating. Promptly cleaning up spills is essential, as standing water or liquids can degrade the finish over time. If the item is a table or surface that will hold drinks, I always recommend using coasters to prevent water rings and heat damage. For general cleaning, mild, non-abrasive cleaners or simply a damp cloth are best; harsh chemicals can dull the gold and break down the sealer.
Annually, I inspect sealed items for any signs of wear, such as chips, scratches, or dullness, and promptly address them. Minor chips can often be touched up with a small amount of paint and then re-sealed. To prolong the life of the finish, I recommend keeping gold-painted items out of direct, intense sunlight when possible, as prolonged UV exposure can still cause subtle fading over many years, even with UV-resistant sealers.
I’ve learned these common mistakes the hard way:
- Rushing Dry Time: Applying sealer too soon leads to trapped moisture, bubbling, or a cloudy finish.
- Thick Coats: Overly thick sealer coats can result in an uneven, gummy, or textured appearance, as well as prolonged drying.
- Harsh Cleaners: Using aggressive cleaning products will inevitably dull the metallic sheen and degrade the protective layer.
- Excessive Sanding: Sanding too aggressively between sealer coats can remove the underlying gold paint, ruining your hard work.
- High Heat Exposure: Placing hot items directly on sealed surfaces can soften the sealer, leaving permanent marks.
By taking your time and treating the finish gently, your gold paint will remain radiant and protected for a much longer period, allowing you to enjoy your beautifully transformed wooden pieces for years to come.
Conclusion
Embarking on a gold-painted wood project can be incredibly rewarding, transforming ordinary items into dazzling showpieces. I sincerely hope this comprehensive guide has equipped you with the confidence and knowledge needed to select and apply the perfect gold paint for your wooden creations. My years of hands-on experience have consistently reinforced one fundamental truth: the success and longevity of any paint job, especially with metallic finishes, hinge significantly on diligent preparation and the precise application of the chosen method.
I strongly encourage you to begin with a small, less critical project to test your chosen gold paint and refine your technique. Pay meticulous attention to preparing the wood surface, following each step outlined in this guide – from cleaning and sanding to priming. The care and effort invested in these initial stages will undoubtedly be reflected in the final, brilliant appearance and enduring quality of your gold finish. Remember, practice makes perfect, and every project is an opportunity to learn and grow your DIY skills.
Should you find yourself seeking further insights or facing specific challenges with your project, please don’t hesitate to leave a comment below. I am always eager to hear about your creative endeavors and offer personalized advice to help you achieve your desired gold finish. Your success is my inspiration!
To further enhance your wood painting expertise, I invite you to explore my in-depth guide on prepping various wood surfaces for painting. It’s packed with additional helpful tips and tricks that will serve as an invaluable resource for all your future DIY projects, ensuring every piece you touch turns into a true masterpiece.
