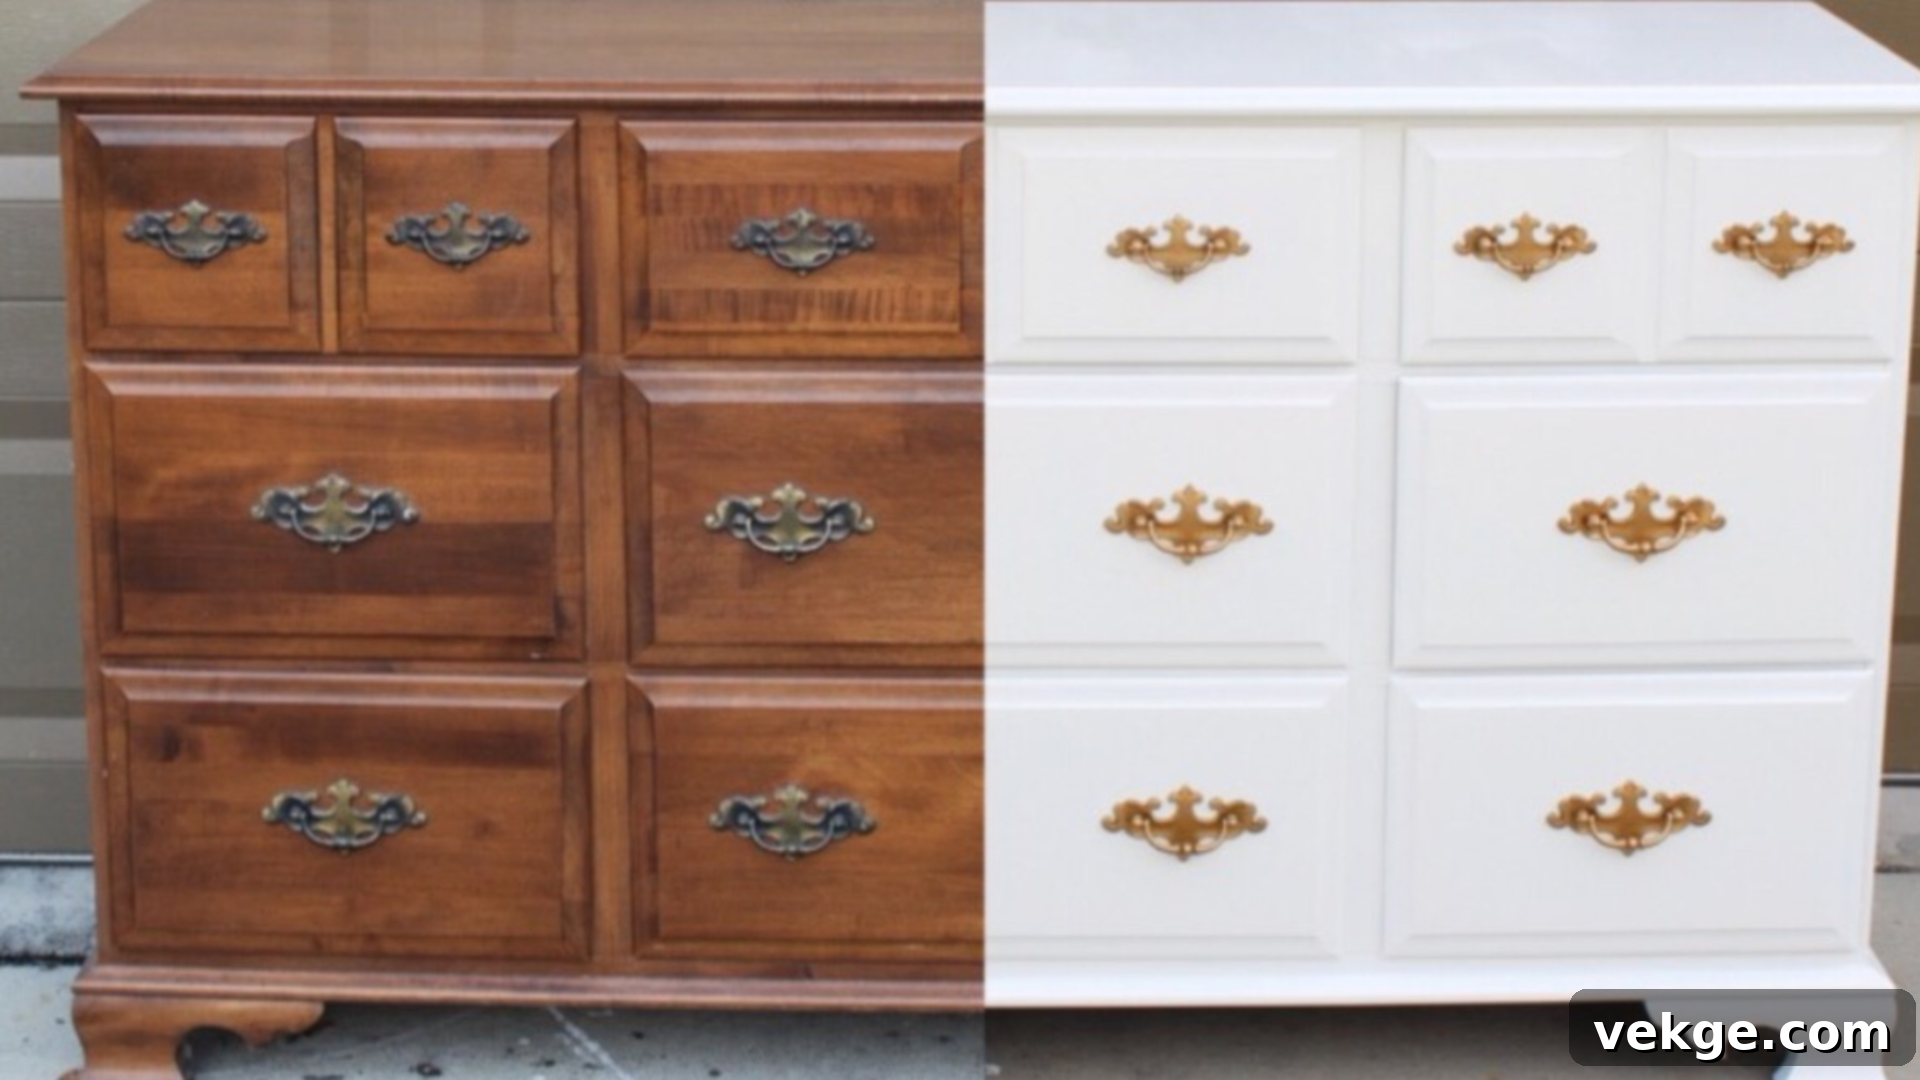
Transform Your Furniture: The Ultimate Guide to Painting Without Sanding (No-Sanding DIY)
Are you dreaming of giving your old furniture a fresh, new look but dread the thought of endless sanding? If you’ve ever wondered how to paint a dresser without sanding or how to paint furniture without sanding, you’re in the right place! This guide is your key to achieving a beautiful, professional finish with minimal effort and absolutely no sanding.
We understand the temptation to skip the messy and time-consuming sanding process and jump straight into the fun part: making your furniture shine. That’s precisely why we’re sharing this simple, no-sanding technique that has been personally tried and loved by many DIY enthusiasts. It’s an incredibly easy way to convert your old furniture – be it a dresser, table, chair, or cupboard – without the hassle of hours of laborious preparation.
Trust us, with just a few straightforward steps and the right products, you can achieve a smooth, durable, and professional-looking finish that will amaze your friends and family. So, if you’re ready to revamp your furniture, save time, and minimize mess, keep reading. Let’s dive into the world of no-sanding furniture painting and transform your living space!
Understanding the Magic of Painting Furniture Without Sanding
Traditionally, preparing furniture for painting has always involved a crucial step: sanding. This process helps to rough up the old finish, creating a surface that the new paint can properly adhere to. However, this traditional method comes with its downsides – it’s messy, labor-intensive, and often requires specific tools and protective gear to manage the dust and debris.
The concept of painting a dresser or any piece of furniture without sanding has revolutionized the DIY world. It’s a creative and practical technique that allows you to refresh the look of cherished old items without the need for time-consuming stripping or heavy sanding. The popularity of this method has surged thanks to remarkable advancements in paint technology.
Modern specialized paints, often referred to as “all-in-one” paints, mineral paints, or chalk paints, are formulated with superior adhesion properties. These innovative products are designed to bond directly to various surfaces like wood, laminate, and even metal, often without the need for a separate primer or extensive surface preparation. This means you can now achieve a smooth, durable, and long-lasting finish without ever picking up a piece of sandpaper. It’s a game-changer for anyone looking for an easier, quicker, and cleaner alternative to traditional furniture painting.
Why DIY Enthusiasts Love No-Sanding Painting
Painting furniture without sanding isn’t just a trend; it’s a practical and efficient method that has won the hearts of countless DIYers. Its benefits extend beyond just convenience:
- Significant Time and Effort Savings: The most obvious advantage is skipping the lengthy and often tedious sanding process. This means your project moves from start to finish much faster, allowing you to enjoy your refreshed furniture sooner. No more hours spent with a sander, just clean, swift progress.
- Minimal Mess and Cleaner Workspace: Traditional sanding generates a significant amount of fine dust that gets everywhere. With no-sanding techniques, you eliminate this dust, keeping your workspace, home, and lungs much cleaner. This makes cleanup incredibly easy, often just requiring a quick wipe-down.
- Highly Cost-Effective: Eliminating sanding means you don’t need to invest in electric sanders, various grits of sandpaper, or respirators specifically for dust. This makes the entire project more budget-friendly, especially for those just starting their DIY journey.
- Perfect for Beginners: If you’re new to furniture painting, the idea of sanding can be intimidating. The no-sanding approach significantly lowers the barrier to entry, making it accessible and enjoyable for DIYers with limited tools or experience. It builds confidence quickly!
- More Eco-Friendly Approach: By reducing the need for sandpaper and potentially harsh chemical strippers, this method can be more environmentally conscious. It also encourages upcycling and repurposing existing furniture, keeping items out of landfills and reducing the demand for new pieces.
- Versatility Across Surfaces: Modern no-sanding paints are incredibly versatile, adhering to a wide range of surfaces including varnished wood, laminate, metal, and even previously painted furniture, expanding your makeover possibilities.
In essence, painting a dresser without sanding is a transformative method for anyone who wants to update their furniture with minimal effort, mess, and expense, while still achieving outstanding, professional results.
Your Step-by-Step Guide to Painting a Dresser Without Sanding
Ready to get started? Follow these easy steps to achieve a smooth, professional-looking finish on your dresser without the hassle of sanding. This method is designed to be straightforward and rewarding.
Tools and Materials Required for Your No-Sanding Project
Painting a dresser without sanding is a quick and easy DIY project that truly doesn’t require complicated prep work. With the right tools and materials, you can achieve a smooth, professional-looking finish in just a few simple steps. Here’s what you’ll need:
- Heirloom Traditions All-in-One Paint (or similar no-sanding paint): These paints are formulated with built-in primers and topcoats, eliminating multiple steps. Brands like Dixie Belle, Fusion Mineral Paint, or Annie Sloan Chalk Paint (with wax/topcoat) are also excellent options.
- High-Quality Paintbrush: Essential for cutting in edges, reaching detailed areas, and ensuring smooth application in crevices. A good quality synthetic brush will minimize brush strokes.
- Dense Foam Roller (for smooth, even coverage): Ideal for large, flat surfaces, providing a factory-smooth finish with no roller marks. Look for high-density foam rollers.
- Paint Tray: For easy paint loading onto your roller and brush. Consider using tin foil to line it for effortless cleanup.
- Cleaning Solution: A degreaser like Crud Cutter, Simple Green, or even a simple mixture of warm water and mild dish soap (like Dawn) is crucial for removing grime and oils.
- Lint-Free Rags or Microfiber Cloths: For cleaning the dresser thoroughly and wiping away any residue.
- Screwdriver: To carefully remove existing drawer pulls, knobs, or other hardware.
- Moving Blanket or Drop Cloth: To protect your floors and surrounding workspace from any potential drips or spills.
- Polyurethane or Clear Coat (for sealing, optional but recommended): While many all-in-one paints have a built-in topcoat, an additional clear coat can offer enhanced durability, especially for high-traffic pieces or tabletops.
- 220-Grit Sandpaper (optional, for minor imperfections): Not for full sanding, but a small piece can be useful for lightly scuffing extremely glossy spots or smoothing out any accidental drips or texture issues *between coats* if they occur.
- Tack Cloth (optional): If you do a light scuffing, a tack cloth helps remove any fine dust particles before painting.
By gathering these materials, you’re setting yourself up for an efficient and successful furniture transformation. The key is in the preparation and the quality of your no-sanding paint!
Step 1: Remove Hardware
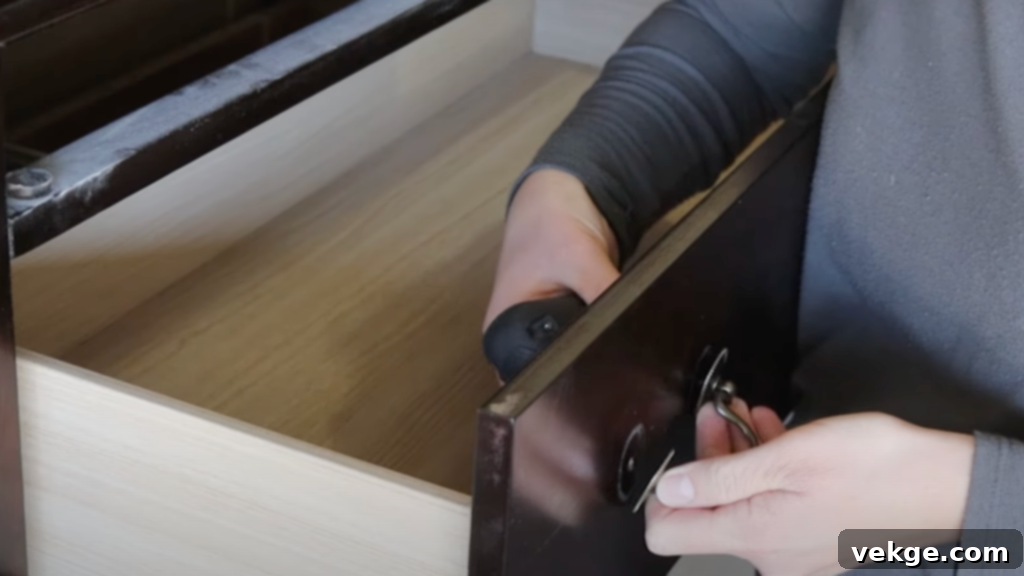
Before any painting begins, use a screwdriver to carefully remove all drawer pulls, knobs, and any other hardware from the dresser. This step is crucial because it makes painting significantly easier, ensuring full coverage without having to meticulously paint around obstacles. It also prevents any accidental paint from covering the hardware, keeping them clean. Set the pulls and screws aside in a safe, labeled container so they can be easily reattached later. Removing hardware ensures that the paint covers the entire surface of the dresser uniformly, leaving you with a clean, unblemished canvas for your new finish.
Step 2: Clean the Dresser Thoroughly
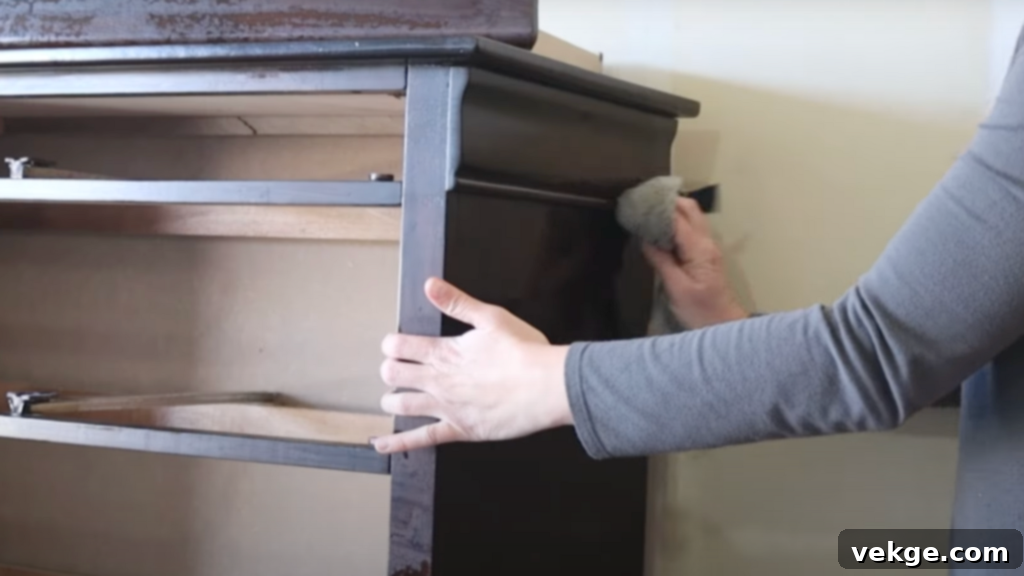
This is arguably the most critical step in no-sanding painting. Before applying any paint, you must thoroughly clean the dresser. Use a good degreaser like Crud Cutter, Simple Green, or a strong solution of dish soap and warm water. Cleaning removes all traces of dirt, dust, grime, and especially oils (from hands, furniture polishes) that can prevent the paint from adhering properly, leading to peeling or an uneven finish. Use a damp, lint-free rag to wipe down all surfaces of the dresser, paying special attention to areas that collect grease or dust. Rinse with clean water and wipe again to remove any cleaning solution residue. Allow the dresser to dry completely before proceeding; any lingering moisture can also affect paint adhesion.
Step 3: Prepare Your Workspace for Success
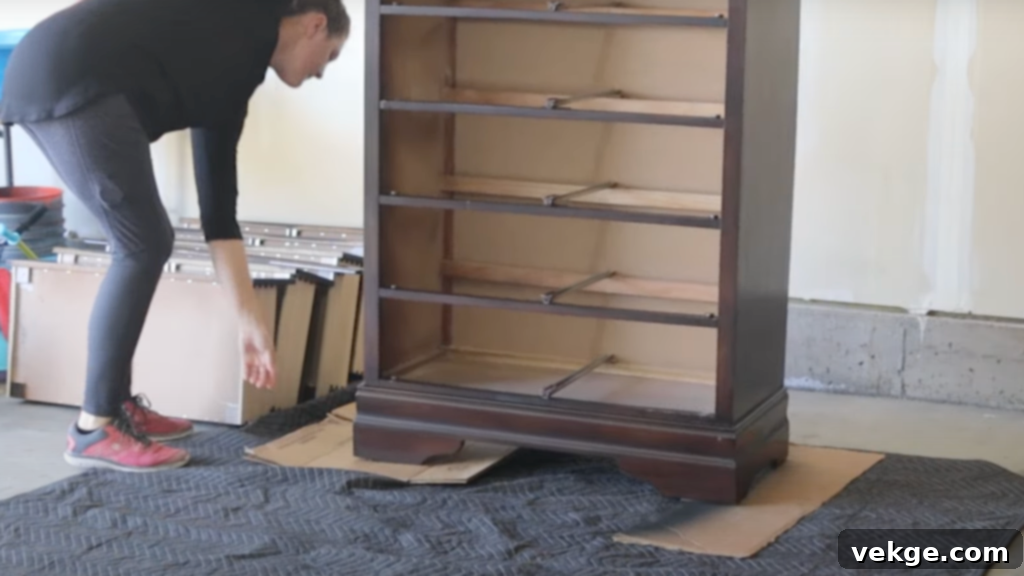
A well-prepared workspace prevents messes and ensures a smooth project. Lay down a moving blanket, drop cloth, or old sheets to protect your floors and surrounding areas from paint drips and spills. Ensure you have ample space around the dresser to move freely and paint all sides comfortably. If possible, remove the drawers from the dresser and paint them separately; this often makes it easier to reach all surfaces and prevents paint from accidentally getting on the drawer slides. Good ventilation is also important, so open windows or work in a well-ventilated area. Setting up your workspace ahead of time helps prevent interruptions and keeps your focus on the painting process.
Step 4: Apply the First Coat of Paint Evenly
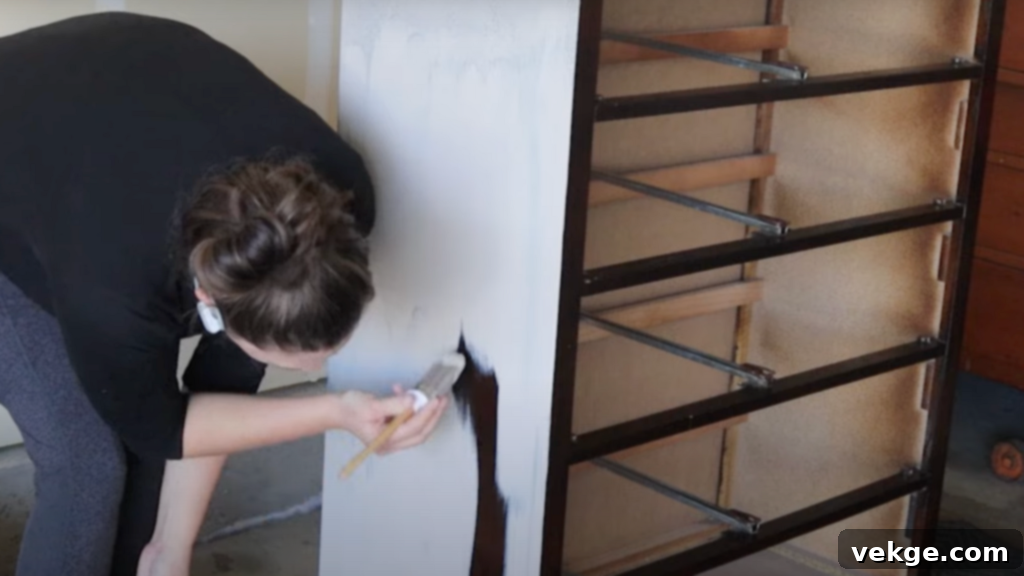
Now for the fun part! Use your chosen no-sanding paint (like Heirloom Traditions All-in-One Paint in a color such as Oyster) for a smooth, durable finish. These paints are ideal because they typically don’t require a separate primer. Begin by using your paintbrush to apply paint to detailed areas, corners, and edges. Then, immediately follow with a dense foam roller over the larger, flat surfaces. The roller helps to smooth out any brush strokes or imperfections created by the brush, ensuring a remarkably even and professional-looking coat. Apply thin, even coats – resist the urge to apply one thick coat, as this can lead to drips and a longer drying time. Work methodically to ensure consistent coverage across all visible surfaces.
Step 5: Work in Small, Manageable Sections
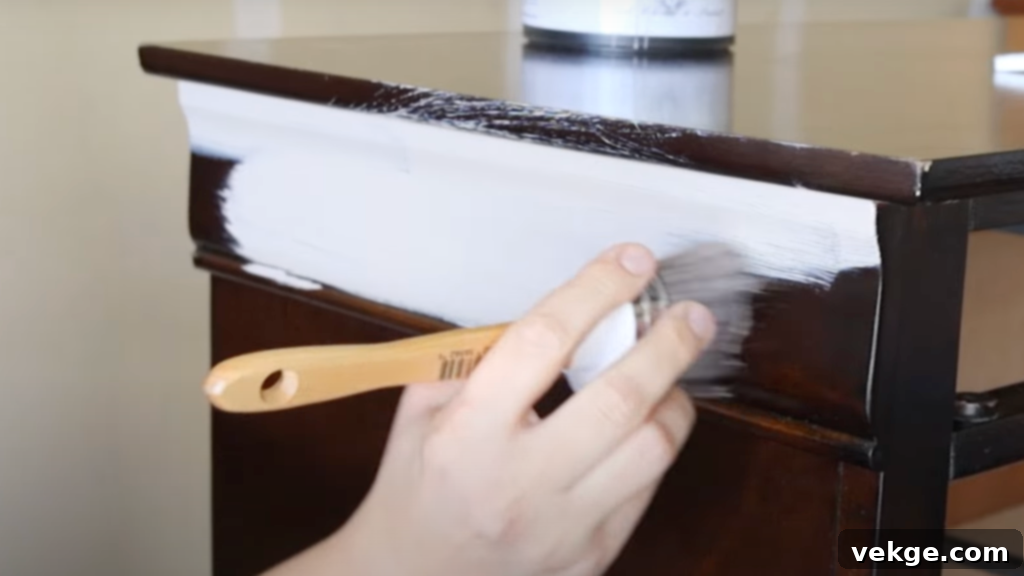
To prevent the paint from drying too quickly and leaving visible lap lines or marks, it’s best to work in small, manageable sections. Apply a thin coat of paint to one area (e.g., one drawer front, or a section of the dresser side), then immediately use your foam roller to smooth it out. The roller should have minimal paint on it for the final pass, acting more as a smoothing tool to prevent excess buildup and ensure an even texture. Work quickly and efficiently so you can roll over the painted surface while it’s still wet. This “wet edge” technique helps achieve a seamless finish, minimizes texture, and reduces the chances of bubbles or unevenness.
Step 6: Allow the First Coat to Dry Completely
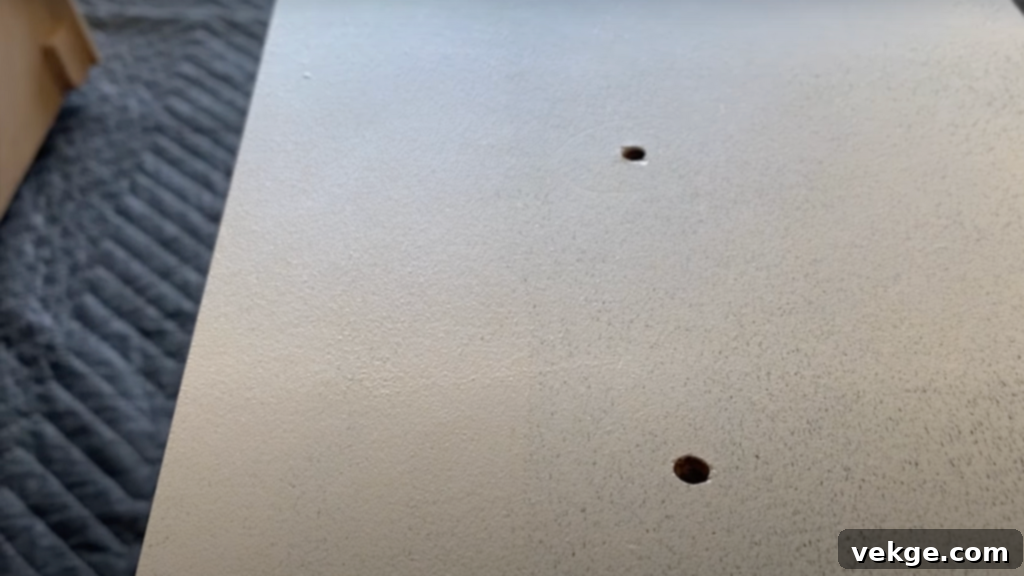
Patience is key after applying the first coat. Allow it to dry thoroughly before moving on to any subsequent coats. Drying time can vary depending on the specific paint, humidity levels, and temperature, but typically expect at least 2-3 hours for the first coat to dry completely to the touch. It’s often recommended to wait even longer, sometimes 4-6 hours or overnight, for a full cure. Once the paint is dry, gently inspect the surface for any uneven spots, drips, or areas that might need a light touch-up. If you find minor imperfections, you can lightly scuff them with 220-grit sandpaper (optional) and wipe with a tack cloth before the next coat. Letting the paint dry properly ensures optimal adhesion between coats and contributes significantly to a smooth, durable, and long-lasting finish.
Step 7: Apply Additional Coats for Full Coverage
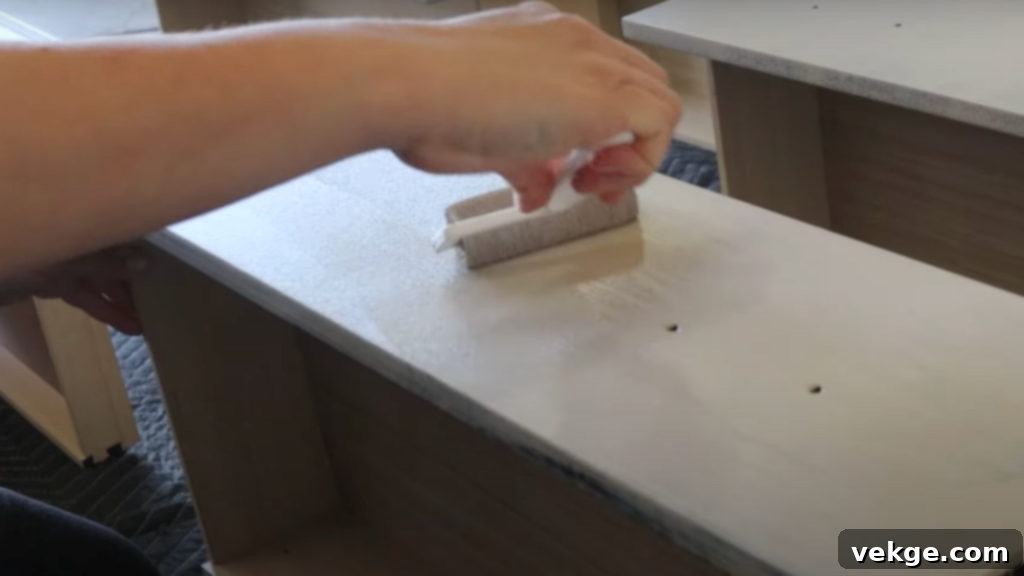
Once the first coat is completely dry, apply a second coat of paint using the same brush-and-roll technique. Aim for thin, even layers. Depending on the color you’re painting over, the original finish, and the desired opacity, you may need a third coat for full, rich color and even coverage. Always allow 2-3 hours of drying time between each coat, or as recommended by your paint manufacturer. Applying multiple thin coats is far superior to one or two thick coats, as it minimizes drips, speeds drying, and most importantly, results in a much smoother, more professional-looking, and durable finish. Continue until you achieve your desired depth of color and flawless coverage.
Step 8: Reattach Hardware and Admire Your Work!
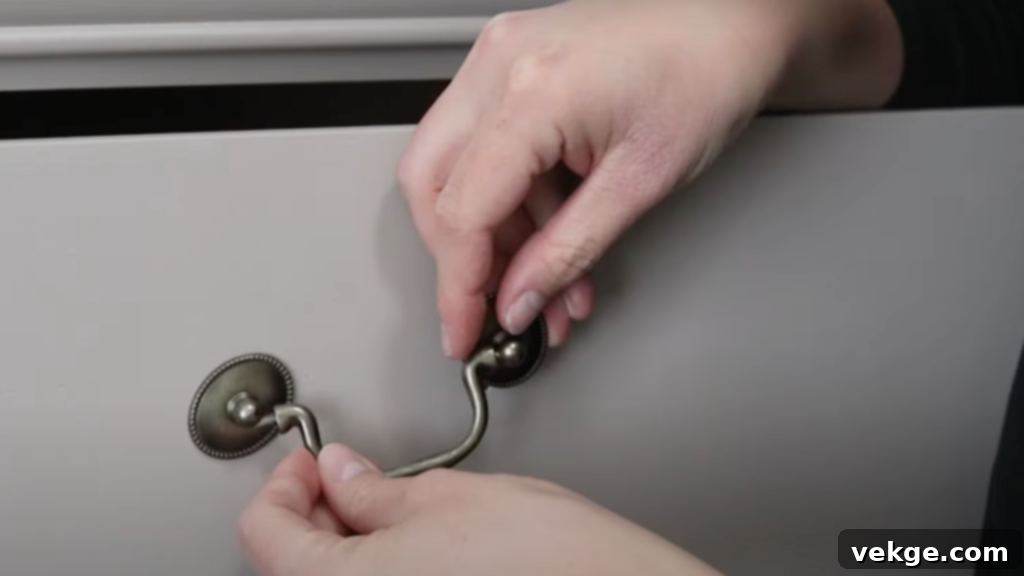
Once the final coat of paint has dried completely and is no longer tacky (this can take 24-48 hours depending on paint type and conditions), it’s time for the exciting final step: reattaching the drawer pulls or knobs. Carefully screw them back into place, ensuring they are secure but not overtightened. While some DIYers opt to replace hardware for an entirely fresh look, reusing the original hardware is a quick, cost-effective, and often charming way to complete the makeover. If desired, you can even paint your existing hardware to match or complement the dresser’s new color for a cohesive design. Attaching the hardware back onto the dresser gives it a finished, polished appearance and brings your transformed piece to life. Stand back and admire your beautiful, newly painted dresser – no sanding required!
To watch the full tutorial and see how this step-by-step guide works, watch the complete video here:
Adapting the No-Sanding Method for Various Furniture Types
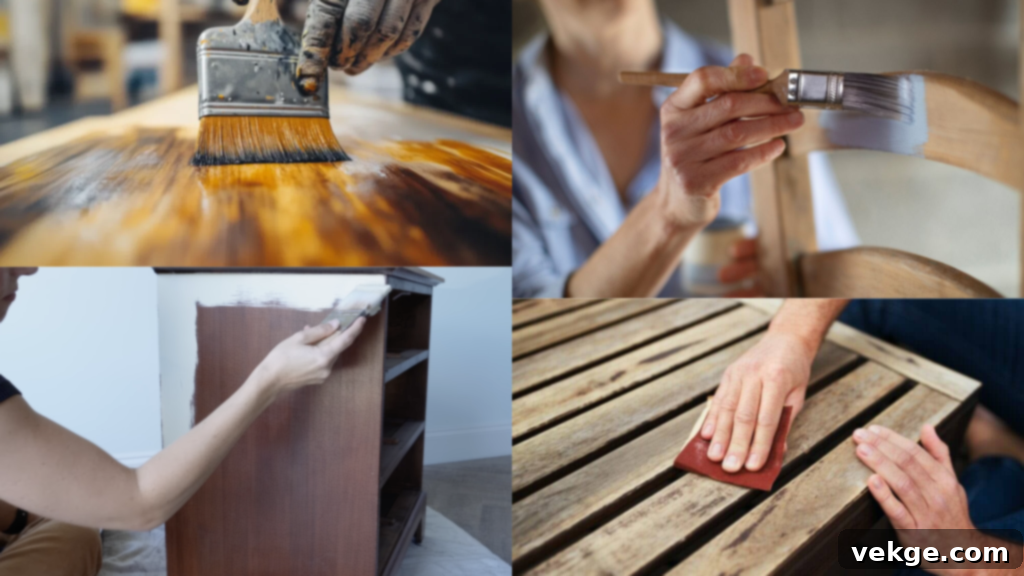
While the detailed steps above focused on a dresser, the no-sanding painting method is highly adaptable for almost any piece of furniture. Whether you’re refreshing chairs, tables, or cupboards, the core principles of thorough cleaning, thin coats, and patience remain the same. However, here are some additional considerations and tips to ensure success with different furniture types:
- For Chairs: Chairs often have intricate details, spindles, and curved surfaces. Use a high-quality, angled paintbrush for these areas. You might find it helpful to slightly thin your first coat of paint with a tiny bit of water (check paint manufacturer’s recommendations) for better flow into tight spots, reducing brush marks.
- For Tables (especially tabletops): Tabletops experience more wear and tear. While the no-sanding paint provides a durable finish, consider an extra layer of a high-quality, clear topcoat (like Polycrylic) for enhanced protection against scratches, spills, and heat. This is where durability is paramount.
- For Cupboards/Cabinets: When painting kitchen cabinets or large cupboards, always remove the doors and hardware. Paint the frames and doors separately for the best results. A foam roller is excellent for the flat surfaces of cabinet doors, while a brush handles the recessed panels and edges. Pay attention to the inside edges of the doors and frames for a professional look.
- General Tips for All Furniture:
- Always Test Adhesion: Before committing to the entire piece, apply a small amount of paint to an inconspicuous area. Let it dry and try to scratch it with your fingernail. If it adheres well, you’re good to go.
- Thin Coats are Key: This cannot be stressed enough. Multiple thin coats will always give a smoother, more durable finish than one thick, heavy coat, especially on complex surfaces.
- Watch for Drips: Especially on vertical surfaces or intricate designs. Keep an eye out for drips during application and brush or roll them out immediately while the paint is still wet.
- Light Scuffing (Optional): If you encounter any stubborn drips, imperfections, or a very slick surface where the paint seems hesitant to grip (rare with good no-sanding paints), a very light scuff with 220-grit sandpaper can provide a little extra “tooth.” Remember, this is a light scuff, not full sanding! Always clean dust thoroughly afterward with a tack cloth.
The beauty of no-sanding painting lies in its versatility and ease. With these simple adaptations, you can confidently tackle any furniture piece in your home and achieve stunning results.
To watch another tutorial on how to paint furniture without sanding, watch the complete video here:
Essential Cleaning Tips to Preserve Your Painted Furniture
Once your furniture makeover is complete, proper cleaning and maintenance are essential to maintaining the beauty and longevity of your newly painted piece. By following a few simple tips, you can keep the paint intact, vibrant, and looking fresh for many years to come:
- Use a Soft, Lint-Free Cloth: Always use a soft microfiber cloth or a lint-free rag for cleaning. Abrasive sponges or cloths can scratch the paint surface, especially on matte or satin finishes.
- Avoid Harsh Chemicals: Steer clear of strong chemical cleaners, ammonia-based products, or abrasive scrubbers. These can strip the paint, dull the finish, or cause discoloration.
- Damp Cloth, Not Soaking Wet: When wiping, use a cloth that is barely damp, not soaking wet. Excess water can penetrate the paint layers, especially if the piece isn’t fully cured or sealed, potentially causing swelling or peeling.
- Test Cleaners on an Inconspicuous Area: Before applying any new cleaning solution to the entire piece, always test it on a small, hidden area first (e.g., the back of a drawer or an inside panel) to ensure it doesn’t damage the paint.
- Dust Regularly: Regular dusting prevents the buildup of dirt and grime, which can become harder to remove over time. A soft, dry cloth or a feather duster is perfect for this.
- Avoid Aggressive Scrubbing: If you encounter a stubborn mark, gently wipe it rather than aggressively scrubbing. Repeated scrubbing in one spot can wear down the paint finish.
- Use Mild Dish Soap and Warm Water: For general cleaning, a very mild solution of warm water and a small amount of gentle dish soap (like Dawn) is usually sufficient and safe. Always wipe away soap residue with a clean, damp cloth.
- Keep Out of Direct Sunlight: Prolonged exposure to direct sunlight can cause certain paint colors to fade or yellow over time, especially lighter shades. Position your furniture to minimize direct sun exposure.
- Apply a Clear Sealant (if not built-in): If your no-sanding paint doesn’t have a built-in topcoat, or if you desire extra protection for high-traffic pieces, applying a clear sealant (wax or polyurethane) is highly recommended. This adds a protective barrier.
- Clean Spills Immediately: Wipes spills promptly with a soft, dry cloth. Allowing liquids, especially colored ones, to sit on the painted surface can lead to staining or damage.
By implementing these gentle and consistent cleaning techniques, you can easily preserve the smooth, vibrant finish of your painted furniture. With regular care and attention, your DIY masterpiece will remain beautiful and well-maintained for an extended period, looking as good as new for years to come.
Recommended Products for Sealing Your Furniture
While many “all-in-one” paints include a built-in topcoat for durability, adding an extra layer of sealant can provide enhanced protection, especially for high-traffic pieces like tabletops or items exposed to moisture. When sealing your painted dresser or furniture, two common and effective options are Polycrylic and Wax, each offering distinct finishes and levels of protection.
Polycrylic is a clear, water-based finish that provides strong, durable protection against scratches, stains, and moisture. It dries quickly, doesn’t yellow over time (unlike some oil-based polys), and offers a smooth, professional finish ranging from matte to gloss. It’s generally preferred for surfaces that need maximum protection.
Wax, on the other hand, gives a softer, more natural, and often matte or subtle satin look. It adds a beautiful sheen and provides a good level of protection, particularly popular with chalk-painted furniture for creating a vintage or rustic appearance. It requires reapplication every so often, depending on use.
Polycrylic Recommended Products:
- Minwax Polycrylic Protective Finish: A widely popular and accessible choice for wood surfaces. It offers a durable, clear finish that’s easy to apply, dries quickly, and comes in various sheens.
- Varathane Water-Based Polyurethane: Known for its excellent scratch-resistant finish and fast drying time, this product is ideal for furniture and floors. It’s available in different sheens and provides robust protection.
- Rust-Oleum Varathane Ultimate Polyurethane (Water-Based): This water-based option provides excellent protection while maintaining a clear, non-yellowing finish. It’s user-friendly and offers strong durability.
- General Finishes High-Performance Water-Based Topcoat: A favorite among professional refinishers for its superior durability and resistance to water, heat, and chemicals. It’s a premium product offering exceptional results.
- Behr Premium Water-Based Polyurethane: Provides a tough, protective finish that enhances the beauty of your wood projects without the yellowing over time, a reliable choice for long-lasting protection.
Wax Recommended Products:
- Annie Sloan Chalk Paint Wax: A highly regarded product specifically formulated for adding a smooth, protective finish to chalk-painted furniture. Available in clear and dark options for different aesthetic effects.
- Minwax Paste Finishing Wax: A durable paste wax that provides a rich, satin finish while effectively protecting your painted furniture from everyday wear and tear. Easy to apply and buff to a beautiful sheen.
- Rust-Oleum Chalked Ultra Matte Clear Sealer: Provides a wax-like finish with added durability, specifically designed to complement chalked paint projects. It’s a great choice for those seeking the look of wax with slightly more resilience.
- SC Johnson Paste Wax: A classic, easy-to-apply wax that delivers a beautiful shine and added protection for both painted and bare wood surfaces. A timeless option for furniture care.
- Fiddes & Sons Supreme Wax Polish: A high-quality, versatile wax that works exceptionally well with chalk paints and provides a durable, natural-looking finish with a lovely depth of shine.
Choosing the right sealant depends on your desired look and the level of protection your furniture piece requires. Both options, when applied correctly, will significantly extend the life and beauty of your no-sanding painted furniture.
Common Mistakes to Avoid When Painting Furniture Without Sanding
While painting a dresser or any furniture piece without sanding is incredibly straightforward, there are a few common pitfalls that can affect the final result. By being aware of and actively avoiding these mistakes, you can ensure a smooth, long-lasting, and professional-looking finish with minimal effort.
- Skipping Crucial Surface Preparation: This is the number one mistake. Even though you’re not sanding, a thorough cleaning and degreasing (Step 2) is non-negotiable. Skipping this step means paint won’t adhere properly to dirt, oil, or grime, leading to peeling, chipping, or an uneven finish over time. Always ensure the surface is meticulously clean and dry.
- Using the Wrong Type of Paint: Not all paints are created equal, especially for no-sanding projects. Using standard latex house paint without a primer designed for adhesion will likely result in poor bonding and flaking. Always opt for specialized “all-in-one” paints, mineral paints, or chalk paints that are explicitly formulated for no-sanding application on furniture.
- Applying Thick, Heavy Coats of Paint: It might seem faster to apply one thick coat, but this often leads to drips, streaks, uneven coverage, and significantly longer drying times. Thick coats are also more prone to cracking and peeling. Always apply multiple thin, even coats (Steps 4, 5, 7) for a smoother, more durable result.
- Not Allowing Proper Drying Time Between Coats: Impatience can ruin a good paint job. Applying subsequent coats of paint before the previous one has fully dried (to the manufacturer’s recommendations, not just touch-dry) can lead to the undercoat lifting, bubbling, or creating an uneven texture. Always respect the drying times (Step 6).
- Ignoring Roller Texture or Brush Marks: While no-sanding paints often self-level, sloppy application can still leave visible textures. Using too much paint on your roller or not smoothing out brush strokes immediately can result in a less-than-professional finish. Use a dense foam roller for large flat areas and a good quality brush for details, ensuring you smooth as you go.
- Skipping the Sealing Step (if necessary): For pieces that will see regular use or potential moisture exposure, skipping a protective topcoat can leave your paint vulnerable to scratches, chips, and stains. Even if your paint has a built-in topcoat, an additional layer of polycrylic or wax can provide enhanced durability and peace of mind (refer to “Recommended Products for Sealing”).
By being mindful of these common mistakes and adhering to the recommended techniques, you can ensure your no-sanding furniture makeover is not only successful but also results in a beautifully durable and professional-looking piece that will bring joy for years to come.
Conclusion: Embrace the Ease of No-Sanding Furniture Transformation
If you’re ready to give your furniture a fresh, vibrant look without the dreaded hassle and mess of sanding, then painting furniture without sanding is the perfect solution for you. As we’ve seen, whether it’s an old dresser, a wobbly chair, or a worn-out table, you can transform it into a stunning focal point in no time, with just a few easy steps and the right selection of tools and materials.
There’s no need for hours of laborious prep work, expensive sanding equipment, or professional painting experience. Modern paint technology has made it incredibly simple for anyone to achieve a high-quality finish. Just follow our straightforward process: meticulous cleaning, thin and even paint application, sufficient drying time between coats, and a protective sealant. You’ll be amazed at the beautiful, newly painted furniture that feels utterly brand new and perfectly customized to your taste.
So, skip the sanding, embrace the convenience, and get started on your furniture transformation today. Create a space you truly love, one beautifully refreshed piece at a time. Dive into the world of no-sanding options, and discover how easy it is to convert your furniture, creating the perfect retreat right in your own home. Don’t forget to check out our other blogs and tutorials for more tips on making your workspace and home better for you!
**Self-Correction/Review:**
1. **`
