DIY Box Trim Walls: Achieve a High-End Look on a Budget (Step-by-Step Guide)
Transforming your walls with elegant architectural details doesn’t have to break the bank. Many homeowners dream of adding sophisticated wall trim but often hesitate due to perceived high costs. However, achieving a luxurious, custom look with box trim walls is more accessible and affordable than you might imagine. Through personal experience, I’ve discovered a straightforward method to create stunning picture frame molding on a budget, proving that this DIY project is simpler and more rewarding than expected.
This comprehensive guide will walk you through the exact steps I used to install beautiful box trim, allowing you to enhance your home’s aesthetic without overspending. You’ll learn how to select the most cost-effective materials, master precise measuring techniques, and discover clever tricks that significantly reduce expenses. Additionally, I’ll highlight common pitfalls to avoid, drawing from my own hands-on experience, ensuring your project goes smoothly from start to finish.
Ready to elevate your home’s style? Let’s embark on this journey to make your walls truly stand out!
Understanding Box Trim Basics: A DIY Perspective

From a do-it-yourself perspective, box trim, often referred to as picture frame molding, is a decorative wall treatment that creates geometric patterns, typically squares or rectangles, using thin pieces of molding. This elegant addition instantly imparts a sophisticated, layered look, making any room feel more polished and intentionally designed. It’s a fantastic way to add architectural interest without the complexity or cost of full wall paneling.
When I first explored box trim, I discovered various styles, but the most straightforward approach, which I successfully implemented, involves simple geometric shapes. This method uses slim trim pieces to mimic the appearance of empty picture frames arranged artfully on your walls, hence the popular alternative name.
Choosing the Right Materials: Budget vs. Luxury
The selection of materials plays a crucial role in both the final aesthetic and the overall cost of your box trim project. For budget-conscious DIYers, MDF (Medium Density Fiberboard) trim is an excellent choice. It’s significantly more affordable than solid wood, yet it provides a smooth finish that paints beautifully, making it virtually indistinguishable from higher-end options once installed and painted. MDF is also stable and less prone to warping, which is a big plus for beginners.
Alternatively, if your budget allows, you might consider pine or hardwood trim. These materials offer natural grain patterns and superior durability. However, they typically come at a much higher price point, which can quickly add up for larger projects. For my initial projects, sticking with MDF allowed me to achieve a high-end look without stretching my finances.
Beyond Aesthetics: Practical Benefits of Box Trim
While primarily admired for its visual appeal, box trim offers practical advantages too. In high-traffic areas like hallways or dining rooms, it can act as a protective barrier, shielding your walls from scuffs, dents, and everyday wear and tear. A lesser-known benefit, which I happily discovered, is its ability to cleverly conceal minor wall imperfections, such as small cracks or uneven patches, providing a clean, flawless finish that wouldn’t be possible with paint alone.
Important Considerations for Wall Texture
Before you begin, it’s important to assess your wall surface. Box trim adheres best and looks most seamless on walls that are relatively smooth. Attempting to install trim on heavily textured walls (like popcorn or orange peel finishes) can be more challenging. The trim may not sit perfectly flat, potentially leaving noticeable gaps. If your walls have significant texture, some preliminary preparation, such as light sanding or skim-coating the areas where the trim will be placed, might be necessary to ensure optimal adhesion and a professional finish. We’ll delve deeper into handling textured walls later in this guide.
Planning and Preparation: Your DIY Box Trim Project
Effective planning and thorough preparation are the cornerstones of a successful box trim installation. From my experience, meticulous planning not only saves time and money by minimizing material waste but also ensures you achieve the precise aesthetic you envision.
Designing Your Layout and Taking Measurements
My first step always involves sketching the wall layout on graph paper. This allows me to visualize the design and experiment with different box sizes and arrangements. I begin by measuring the wall’s total height and width. Then, I draw squares and rectangles, aiming for a balanced and visually appealing pattern. Maintaining similar box sizes across a wall usually yields the most harmonious results. For instance, in my living room, I found that boxes approximately 24 inches wide and 36 inches tall perfectly suited the scale of the space, creating an elegant yet understated feature.
When measuring, remember these crucial tips: subtract the height of your existing baseboards and any crown molding from the total wall height. This gives you the true working area for your box trim. Additionally, I recommend leaving a consistent gap of about 4 to 6 inches between the boxes and the ceiling or floor, as well as between individual boxes. This consistent spacing is key to a polished, professional appearance. Don’t forget to account for any outlets, switches, or wall fixtures that might interfere with your design.
Essential Tools and Materials Checklist
To ensure a smooth installation, gather all your tools and materials before you start. Here’s a comprehensive list based on my projects:
- MDF Trim Pieces: Calculate the total linear feet needed from your sketch, adding about 10-15% for waste and mistakes.
- Miter Saw: Essential for precise angle cuts. Consider borrowing one from a friend or renting for a day to save money.
- Level: A long level (4-6 feet) is invaluable for ensuring your lines are perfectly straight. A smaller torpedo level is also handy.
- Measuring Tape: A reliable 25-foot tape measure is standard.
- Pencil: For marking measurements and layout lines.
- Stud Finder: Crucial for locating wall studs, especially if you plan to use a nail gun for extra security.
- Wood Glue / Construction Adhesive: High-quality construction adhesive (like Liquid Nails) is often preferred for a strong bond, especially on less-than-perfect walls.
- Brad Nailer (and 2-inch nails): While adhesive is primary, a brad nailer provides immediate hold and added security. You can rent one if you don’t own one.
- Sandpaper: Fine-grit sandpaper (180-220) for smoothing cut edges and minor imperfections.
- Caulk Gun & Paintable Caulk: Essential for filling gaps and creating seamless transitions.
- Paint and Primer: Choose a primer suitable for MDF and paint in your desired finish (semi-gloss is popular for trim).
- Painter’s Tape: For marking layouts and creating crisp paint lines.
- Chalk Line: Useful for creating long, straight horizontal lines for your layout quickly.
- Graph Paper: For initial design planning.
- Utility Knife: For various small tasks.
- Safety Glasses: Always protect your eyes, especially when cutting or nailing.
Money-Saving Tips for Materials and Tools
One of the biggest budget savers I discovered was buying longer pieces of trim rather than pre-cut shorter ones. By purchasing standard 8-foot or 12-foot lengths and cutting them myself, I saved approximately 20% on material costs. Additionally, leveraging tools from friends or renting specialized equipment like a miter saw or brad nailer for a weekend can significantly reduce your initial investment, often cutting tool costs to zero or a fraction of purchasing new.
Wall Preparation: The Often-Overlooked Step
Before any trim touches the wall, mark all stud locations using your stud finder and a light pencil. This ensures that when you do use a nailer, your nails have something solid to grip onto, enhancing the longevity and stability of your trim. Next, thoroughly clean your walls. A simple wipe-down with a damp cloth and mild soap (or a TSP solution for greasy walls) removes dust, grime, and any residue, allowing adhesives and paint to bond optimally. A clean surface is paramount for a professional finish.
Step-by-Step Box Trim Installation Guide
1. Planning & Pre-Installation Phase
- Design Your Layout: Carefully draw your box trim design on graph paper, taking into account wall dimensions, window/door frames, and any existing fixtures. Visualize where artwork might hang or furniture will be placed.
- Prepare Your Walls: Before applying any trim, address wall blemishes like holes or cracks. Fill them with spackle and sand smooth. It’s often beneficial to paint the wall in your chosen base color first, as this makes finishing touches easier later.
2. Accurate Wall Layout and Marking
- Transfer Measurements: Using your measuring tape and pencil, transfer your design measurements from your graph paper to the wall. Mark the corners and edges of where each box will go.
- Create Straight Lines: For horizontal lines, use a chalk line to snap perfectly straight guides. For vertical lines, use a long level and pencil to draw precise guides.
- Test with Painter’s Tape: A crucial step for visual confirmation is to place painter’s tape along your marked lines. This allows you to step back and assess the balance and symmetry of your design. Make any necessary adjustments now, as it’s easier to move tape than installed trim.
- Check for Level: Use your level frequently to ensure all horizontal and vertical lines are perfectly straight and plumb.
- Adjust for Obstacles: Carefully plan around electrical outlets, light switches, and other wall fixtures, ensuring your boxes don’t awkwardly cut across them.
3. Corner Installation and Frame Assembly
- Work One Box at a Time: To maintain accuracy and manage the project effectively, focus on completing one box frame before moving to the next.
- Apply Adhesive: Apply a continuous bead of construction adhesive to the back of your trim pieces. Don’t skimp, especially if your walls aren’t perfectly smooth.
- Position and Secure Corners: Start with the corner pieces (if using pre-fabricated ones) or the mitered corners of your first frame. Align them precisely with your painter’s tape marks. Press firmly.
- Initial Hold: Use painter’s tape to temporarily hold the trim pieces in place while the adhesive begins to set. For extra security, especially on less-than-perfect walls, a brad nailer can be used. Shoot nails at opposing angles for a stronger hold, aiming for wall studs whenever possible.
- Ensure Level and Plumb: Continuously check with your level as you attach each piece to guarantee everything remains perfectly aligned.
- Measure and Cut Infill Pieces: Once corners are secured, accurately measure the distance between them. Cut your molding pieces to fit these precise measurements, ensuring your mitered corners (45-degree angles) are clean and tight.
4. Finishing Touches: The Art of Seamless Integration
- Caulk All Gaps: Once all trim is securely in place and adhesive has dried, run a thin, even bead of paintable caulk along all seams where the trim meets the wall. This step is vital for a professional finish, as it fills any tiny gaps and creates a seamless, built-in appearance. Smooth the caulk with a wet finger or damp cloth.
- Allow Caulk to Dry: Let the caulk dry completely according to the manufacturer’s instructions. Rushing this step can lead to cracked caulk or uneven paint.
- Prime and Paint: Apply a good quality primer to the MDF trim, especially the cut edges, which tend to absorb more paint. Once primed, paint the molding to match your wall color or choose a complementary shade for added contrast. Two thin coats are always better than one thick coat.
- Touch Up: After the paint dries, carefully inspect your work for any missed spots or imperfections and touch up as needed.
When I tackled this project myself, I found that breaking it down into these manageable steps made the process straightforward and less intimidating. Taking your time with each stage, especially planning and preparation, truly pays off in the final, polished result.
DOWNLOAD THE ENTIRE BOX TRIM ON WALLS INSTALLATION GUIDE FROM THIS PDF
CLICK HERE
The Grand Finale: Perfecting Your Box Trim Project

The finishing touches are where your box trim truly transforms from mere pieces of wood into a seamless, architectural feature. This stage requires patience and attention to detail, but the payoff is a professional, high-end result that looks like it was always part of your home.
Mastering the Art of Caulking
Caulking is your secret weapon for hiding imperfections and creating perfectly smooth lines. Apply a thin, consistent bead of paintable caulk where every trim piece meets the wall. I’ve found that using a caulk gun with a fine tip and then smoothing the bead with a gloved, wet finger works wonders. Work in small sections to prevent the caulk from drying before you can smooth it properly. White paintable caulk is generally the best choice, as it blends effortlessly with most trim and wall colors once painted over.
Pro Tip: Don’t apply too much caulk at once. Excess caulk is harder to smooth and can create a messy look. A little goes a long way in achieving those crisp, clean lines that define quality trim work.
The Painting Process for a Flawless Finish
Before painting, ensure your trim is clean and free of dust or fingerprints. Lightly sand any rough spots or filled nail holes, then wipe clean. For truly crisp lines, meticulously apply painter’s tape along the wall next to the trim. This step, though time-consuming, prevents paint bleed and ensures a sharp contrast or seamless blend between your trim and wall color.
When it comes to paint application, two thin, even coats of paint consistently yield a better and more durable finish than one thick coat. A semi-gloss or satin finish is often preferred for trim because it’s easy to clean, durable, and provides a subtle sheen that helps the trim stand out elegantly against a flatter wall paint.
Critical Lesson Learned: Always allow each coat of paint to dry completely according to the manufacturer’s instructions before applying the next. Rushing this step can lead to a gummy texture, uneven coverage, and a less-than-smooth finish. I’ve found a small foam roller is excellent for covering the flat surfaces of the trim, while a high-quality angled brush is perfect for getting into corners and along edges for precision.
The Final Inspection
Once all paint is dry, remove the painter’s tape carefully. Take a step back and examine your work from various angles and under different lighting conditions. Keep a small brush and touch-up paint handy to address any tiny spots you might have missed or any paint that might have bled. This final, meticulous check ensures your box trim project looks impeccable and professional, a true testament to your DIY efforts.
Cost Analysis and Savings: DIY Box Trim vs. Professional
One of the most compelling reasons to undertake a box trim project yourself is the significant cost savings. Here’s a breakdown of my investment for a 12′ x 12′ room, illustrating just how budget-friendly this DIY endeavor can be:
| Category | Item | Cost |
|---|---|---|
| Materials Cost | MDF trim (8 pieces at 8 feet each) | $80 |
| Construction adhesive (2 tubes) | $12 | |
| Painter’s tape (1 roll) | $6 | |
| Caulk (2 tubes) | $10 | |
| Paint (1 quart, if not using leftover) | $20 | |
| Sandpaper pack | $5 | |
| Nails for Brad Nailer | $8 | |
| Tool Rentals/Borrowing | Brad nailer rental (weekend) | $30 |
| Borrowed miter saw from neighbor | $0 | |
| Basic tools I already had (level, tape, pencil) | $0 | |
| Money-Saving Strategies Applied | Opted for MDF over more expensive hardwood trim | Saved approx. $100 |
| Borrowed or rented tools instead of purchasing | Significant savings | |
| Purchased materials during home improvement store sales | Additional savings | |
| Utilized leftover wall paint for trim (if matching) | Paint cost saved | |
| Total Investment | Approximate DIY Total | $171 |
To put these numbers into perspective, professional quotes for the same box trim installation on a 12’x12′ room typically range from $600 to $900. By choosing the DIY route, I realized substantial savings, roughly between $430 and $730. This makes box trim an exceptionally cost-effective way to add significant value and style to your home.
Time Investment: The entire project, from planning to the final coat of paint, was completed over one weekend, totaling approximately 12-15 hours. This includes drying times for adhesives and paint.
Installing Box Trim on Textured Walls: Practical Solutions
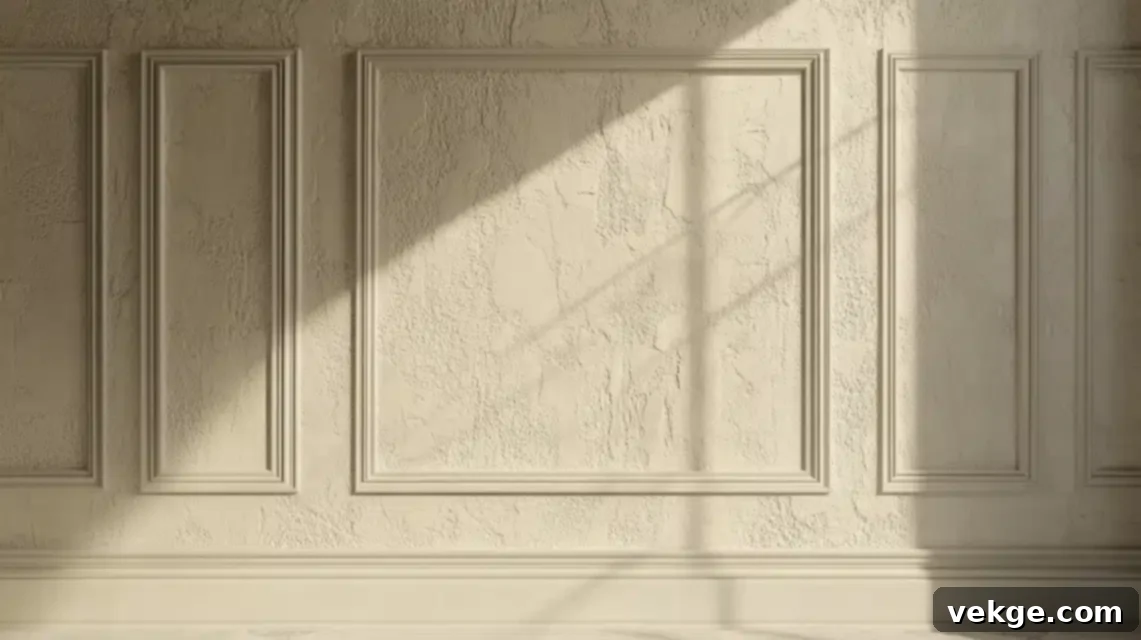
Installing box trim on textured walls presents unique challenges, but it’s certainly not impossible. With a few extra steps and materials, you can achieve a fantastic result that looks just as good as on smooth surfaces. Here’s what I learned from tackling this specific scenario.
Pre-Installation Preparations for Textured Surfaces
The key to success on textured walls lies in adequate preparation. Instead of skim-coating the entire wall, which can be time-consuming and messy, I adopted a more targeted approach. I used a drywall sander (or even just sanding blocks) to carefully smooth out only the specific areas where the trim pieces would be installed. This creates flat, even surfaces that allow the trim to sit flush and ensure optimal adhesion. While this adds a bit more effort, it significantly improves the final appearance and prevents gaps.
Additional Materials for Textured Walls
To effectively manage textured walls, you’ll need a few extra supplies:
- Drywall Sanding Blocks/Sponges: Essential for localized smoothing. (Approx. $15)
- Joint Compound/Spackle: For patching and minor skim-coating in trim areas. (Approx. $12)
- Extra Construction Adhesive: A thicker bead is often needed to bridge texture gaps. (Approx. $12)
- Wider Trim Pieces: Opting for slightly wider trim can sometimes help to visually minimize the appearance of texture around the edges. (Approx. +$40, depending on quantity)
- Additional Paintable Caulk: You’ll likely use more caulk to fill larger gaps caused by texture. (Approx. $10)
My Proven Method for Textured Walls
When installing the trim, I applied a noticeably thicker bead of construction adhesive on the back of each piece. This extra adhesive helps to fill any minor depressions or unevenness caused by the wall texture, ensuring a stronger, more consistent bond. After positioning each trim piece, I pressed it firmly against the wall, holding it in place for a longer duration—typically around 30 seconds per section—to allow the adhesive to grip properly.
Special Tricks I Employed:
- Support Brackets: For longer or heavier trim pieces, I sometimes used temporary support brackets or even propped up pieces with spare wood until the adhesive set.
- “Liquid Nails” for Extra Hold: Products like Liquid Nails (a type of heavy-duty construction adhesive) provide exceptional bonding strength, which is particularly beneficial on challenging surfaces.
- Wider Caulk Lines: Don’t be afraid to apply a slightly wider caulk bead than usual. This helps blend the trim seamlessly into the textured wall, disguising any residual unevenness. Smooth it carefully for a clean look.
- Additional Brad Nails: I often added extra brad nails, especially into studs, to provide maximum security. The textured surface might reduce the initial grip of adhesive, so mechanical fasteners become even more important.
Total Extra Cost: The additional materials and tools specifically for textured walls added approximately $89 to my total project cost. Even with this increase, the DIY savings compared to hiring a professional remained substantial, highlighting the value of tackling this project yourself.
Important Follow-Up Note: After a few days, I made it a point to re-inspect the trim on heavily textured walls. I found that some areas might need an extra brad nail or a small caulk touch-up after the wall and trim had fully settled. This quick check ensures long-term stability and a flawless finish.
Advanced Design Ideas to Elevate Your Box Trim
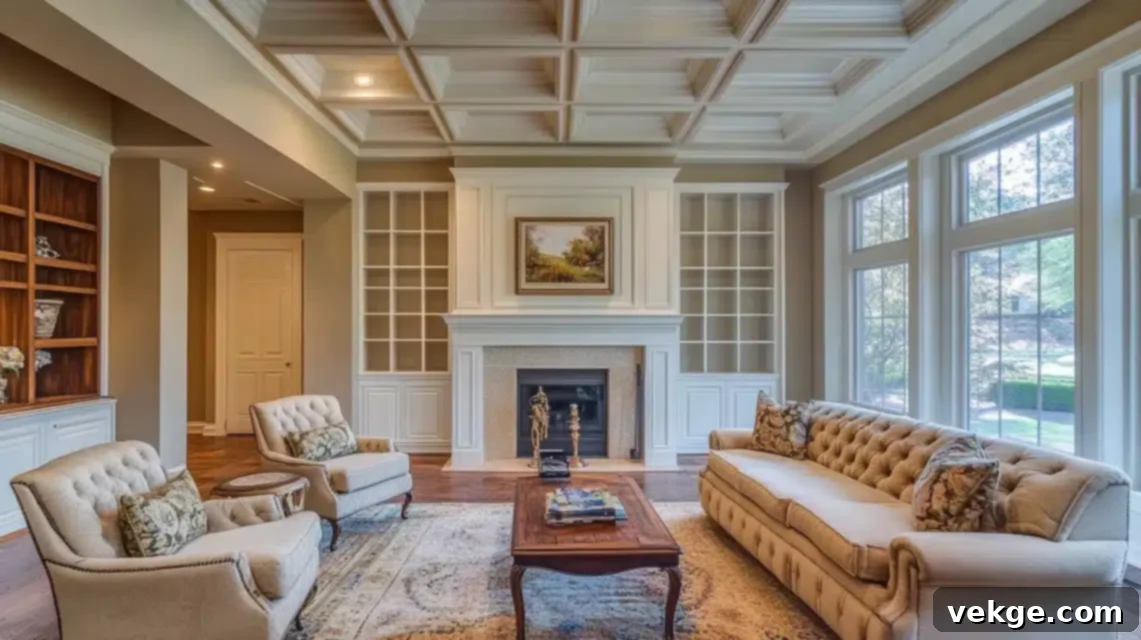
Once you’ve mastered the basic box trim installation, you might want to explore more intricate designs to add even greater character and sophistication to your home. Here are some advanced ideas I’ve experimented with, along with their considerations:
1. Double-Layer Design for Added Depth
This design creates a truly bespoke look. I implemented it in my dining room, and it instantly elevated the space. It involves installing a thinner trim piece just inside the main box, essentially creating a “frame within a frame.” This adds wonderful depth and a custom, detailed appearance. This design typically adds about $40-$60 to material costs due to the extra trim. The key to its success is maintaining perfectly even spacing between the inner and outer frames for a symmetrical and polished look.
2. Mixed Sizes Pattern for Visual Interest
In my hallway, I opted for a more dynamic approach by using boxes of varying sizes. I placed larger boxes centrally on the wall, flanked by smaller, more compact ones. This creates engaging visual interest and can make a long hallway feel more expansive. While this design doesn’t necessarily increase material costs, it does demand more meticulous planning and precise measurements to ensure consistent spacing and a balanced composition across the entire wall.
3. Wainscoting Blend with a Chair Rail
One of my favorite traditional looks combines box trim with a chair rail. I installed a chair rail at a standard height of 36 inches from the floor, then added box trim both above and below it. The boxes below the chair rail are typically smaller, mimicking traditional wainscoting, while the boxes above can be larger or arranged in a different pattern. This style requires additional materials:
- Chair Rail Molding: (Approx. $45-$75 depending on length and style)
- Additional Trim Pieces: For the extra boxes and chair rail itself. (Approx. $60-$100)
- More Paint and Caulk: To cover the additional trim. (Approx. $30)
This design creates a classic, elegant feel and offers excellent protection for walls in dining areas or entryways.
4. Color Blocking for a Modern Twist
For a bold and contemporary statement, consider color blocking within your box trim. In my office, I painted the inside of each box a different shade than the main wall color. This creates a striking contrast and a unique, artistic effect. I used three complementary paint colors in total. The additional paint cost me approximately $40, but the result was a highly personalized and visually dynamic space.
5. Integrated Lighting Enhancement
To add a touch of ambiance and sophistication, I experimented with integrating subtle LED strip lighting behind some of my box trim. This creates indirect, soft lighting that highlights the trim and adds a warm glow to the room. This effect works particularly well in living rooms, bedrooms, or media rooms. The supplies for this enhancement include:
- LED Light Strips: Dimmable, warm white or color-changing options. (Approx. $35-$60)
- Power Supply/Driver: Essential for powering the LEDs. (Approx. $15-$25)
- Wire Covers/Concealers: To hide cables discreetly. (Approx. $10-$20)
These advanced ideas demonstrate the versatility of box trim, allowing you to customize your walls far beyond a basic installation and truly reflect your personal style.
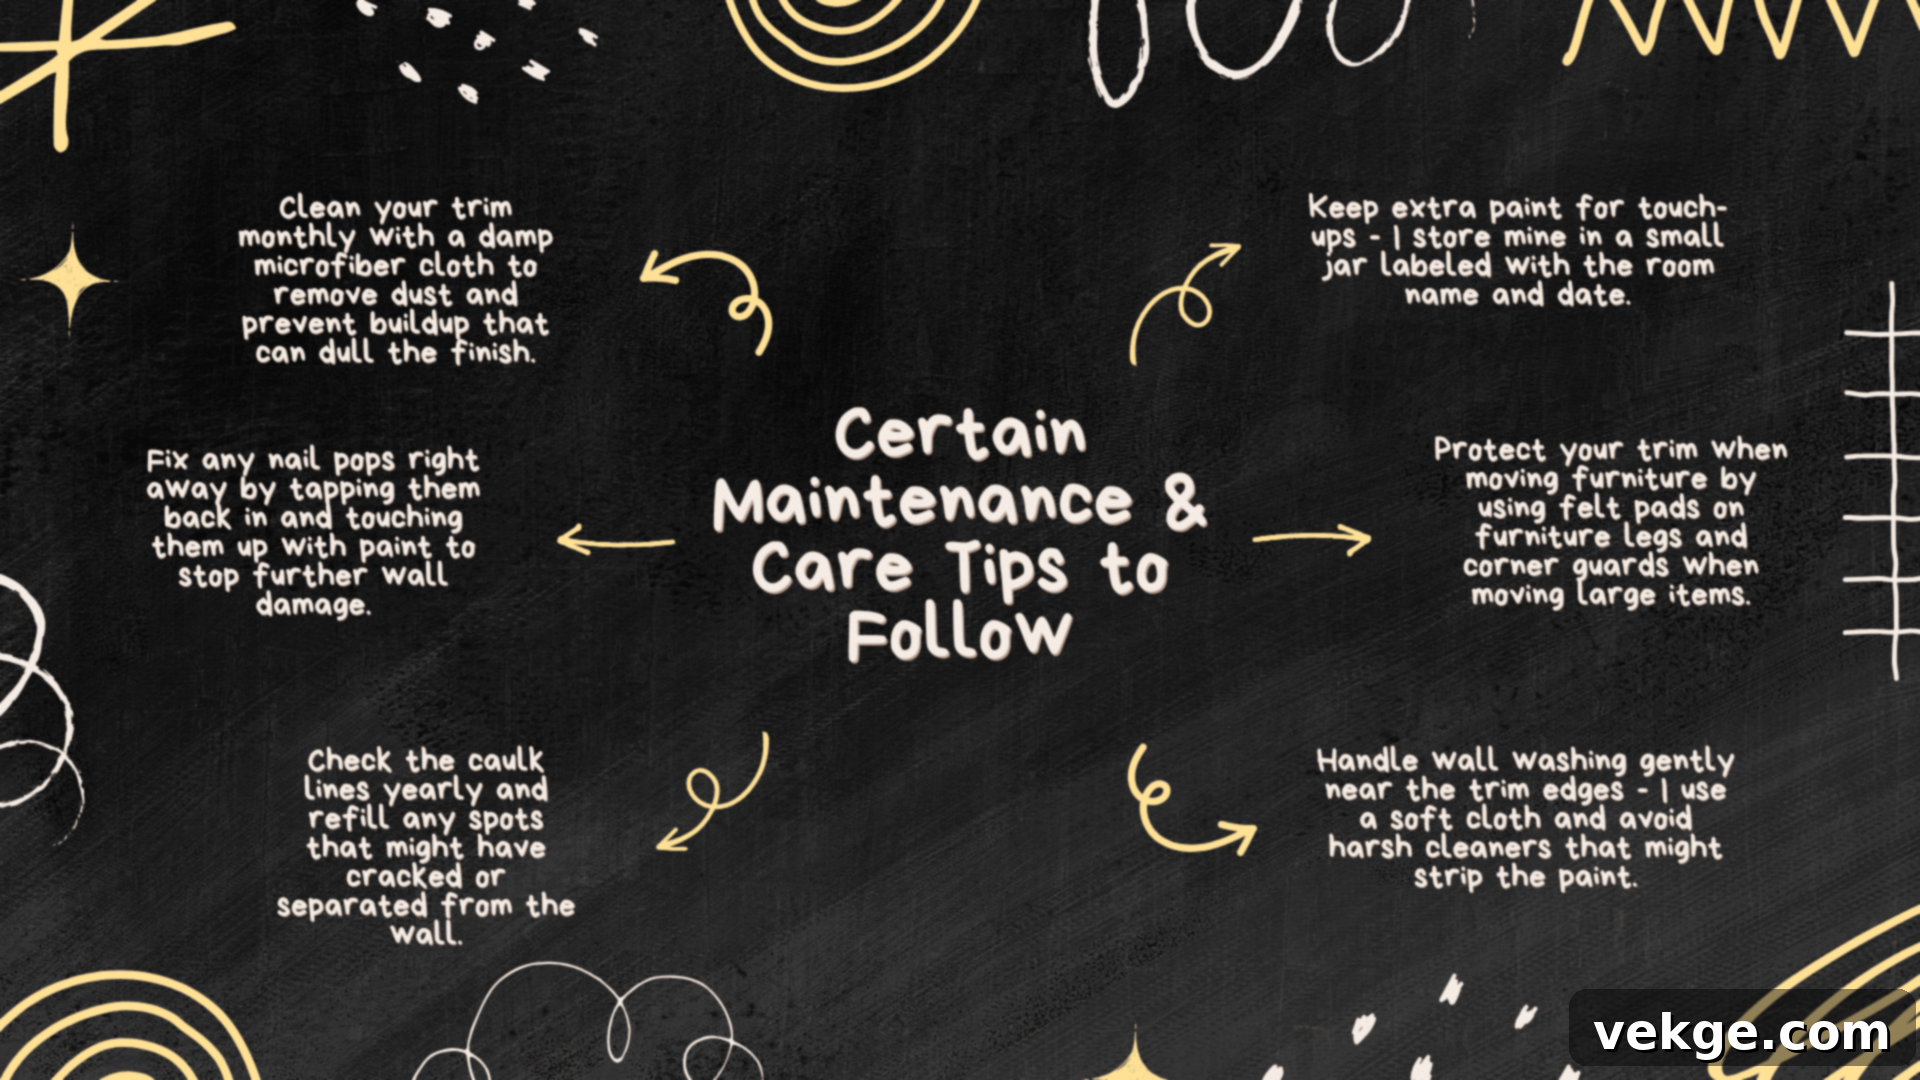
Conclusion: Your Path to Budget-Friendly Wall Transformation
There you have it—a comprehensive, step-by-step guide to installing beautiful box trim walls on a budget. Sharing my personal journey and practical insights, from initial planning to the final coat of paint, aims to equip you with the knowledge and confidence to tackle this rewarding DIY project yourself. Remember, the true magic of box trim lies not just in its elegant appearance but also in the satisfaction of creating something beautiful with your own hands, while saving a considerable amount of money.
Always prioritize careful planning and meticulous preparation; these are the foundational steps that will make the biggest difference in the quality and longevity of your finished look. Don’t rush the process, and embrace the learning curve—every DIY project is an opportunity to expand your skills.
If this guide has inspired you to enhance your home, I encourage you to explore my other helpful home improvement resources, such as “Budget-Friendly Crown Molding Installation” and “DIY Wall Paneling Ideas.” These projects often complement box trim beautifully, allowing you to create a cohesive and sophisticated architectural theme throughout your living spaces.
I would absolutely love to see your box trim creations! Please share your experience, photos, and any questions you might have in the comments section below. Let’s build a community of DIY enthusiasts, making our homes more beautiful, one carefully crafted box at a time.
Ready to pick up that measuring tape and transform your walls? The journey to a more elegant home starts now!
Frequently Asked Questions About DIY Box Trim
What are Some Common Mistakes to Avoid in Box Trim Installation?
From my observations and personal missteps, several common mistakes can derail a box trim project. The most significant is rushing the measurement and planning phase; always measure twice, cut once. Skipping crucial wall preparation, such as cleaning or sanding textured spots, can lead to poor adhesion and an uneven finish. Additionally, using low-quality materials or cutting corners on caulk and paint can compromise the overall aesthetic and durability. My biggest early mistake was neglecting to use a stud finder, leading to nails that didn’t hold securely.
Can I Install Box Trim Around Obstacles Like Doors and Windows?
Absolutely, box trim can be installed around existing architectural features like doors and windows, and often enhances them. The key is meticulous planning and precise cutting. I always recommend measuring at least three times when working near frames. It’s often visually appealing to leave a consistent reveal or gap, typically about 3 to 4 inches, between the window/door frame and the nearest box trim. For corners or intricate transitions, custom-cut mitered joints or decorative corner blocks can create clean, professional-looking finishes that seamlessly integrate the trim with your existing elements.
Are There Design Ideas or Inspiration for Different Room Types?
Yes, box trim is incredibly versatile and can be adapted to suit various room types and styles. In living rooms with higher ceilings, I’ve found that larger, grander boxes create an impressive, expansive feel. For bedrooms, especially above a headboard, medium-sized boxes can frame the bed beautifully, adding a focal point without overwhelming the space. In more compact areas like bathrooms or entryways, smaller, perhaps more numerous boxes, or even just single panels, can add character and detail without feeling cluttered. Experiment with different ratios and arrangements to find what best complements your room’s scale and existing decor. Consider using advanced techniques like wainscoting blends or color blocking for a truly unique effect tailored to specific room functions.
