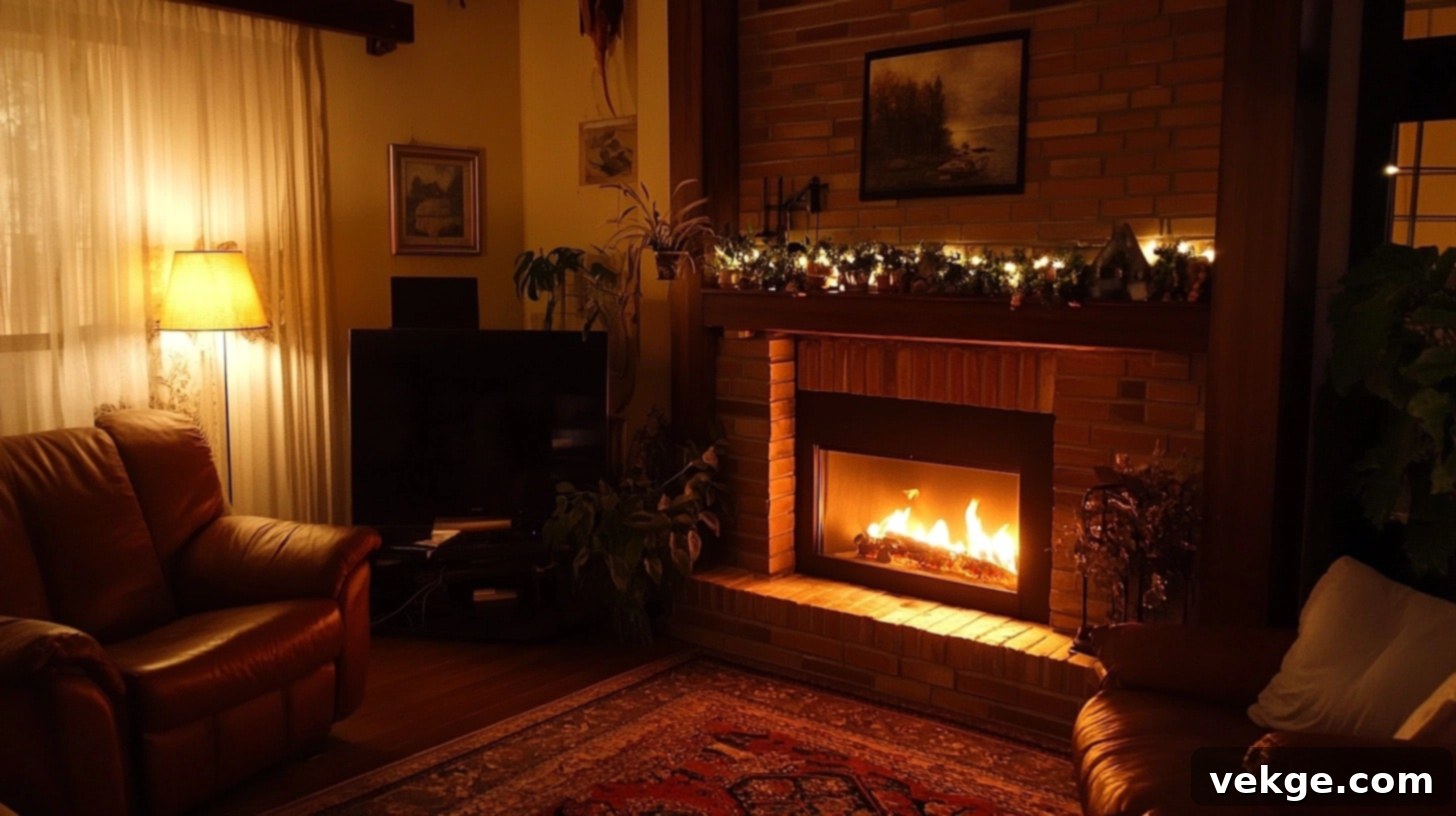
Build Your Dream DIY Electric Fireplace Surround: A Complete Step-by-Step Guide
There’s a unique charm and warmth that a fireplace brings to any home, creating a natural focal point and a cozy atmosphere. However, the traditional fireplace often comes with the demands of maintenance, chimney upkeep, and the mess of wood or ash. That’s where the modern appeal of an electric fireplace truly shines. Clean, efficient, and incredibly easy to use, electric fireplaces offer all the aesthetic benefits without the traditional hassle. But why settle for a standard unit when you can create a personalized masterpiece?
This comprehensive guide will take you through my personal journey of constructing a custom DIY electric fireplace surround. From initial concept and meticulous planning to the final decorative touches, I’ll share every detail of this rewarding home improvement project. You’ll gain practical knowledge on how to accurately measure, precisely cut, and expertly assemble your own fireplace surround, tailored perfectly to your home’s aesthetic. Additionally, I’ll provide valuable tips on finishing techniques, including painting and decorating, to ensure your new fireplace not only provides warmth but also elevates your interior design. By the end of this guide, you’ll possess all the necessary skills and confidence to craft a unique electric fireplace surround that perfectly complements your personal style and adds significant charm and value to your living space.
Let’s embark on this exciting and transformative DIY journey together!
How to Choose the Right Electric Fireplace for Your Custom Surround
Embarking on a DIY fireplace project begins with a crucial decision: selecting the perfect electric fireplace unit. This choice will significantly influence the design and structure of your custom surround, so it’s important to understand the various types available and what they offer. Here’s a detailed breakdown of common electric fireplace options to help you make an informed decision:
- Wall-Mounted Fireplaces: Ideal for smaller spaces or minimalist designs, these units are designed to hang directly on the wall, much like a flat-screen television. They save valuable floor space and often feature sleek, contemporary designs. Installation is generally straightforward, requiring only secure mounting and access to a power outlet.
- Recessed Fireplace Inserts: For those seeking a seamless, built-in look, recessed models are an excellent choice. These units are designed to be flush-mounted into a wall or a custom-built frame, offering an incredibly sleek and integrated appearance. They create a sophisticated, modern aesthetic, making them perfect for contemporary homes.
- Electric Fireplace Inserts: If you desire a more traditional aesthetic or wish to convert an existing masonry fireplace, an insert is the way to go. These units are specifically designed to fit into an existing fireplace opening or can be incorporated into a newly constructed surround. They come in a wide range of sizes and styles, from classic to modern, ensuring compatibility with diverse design preferences.
- Freestanding Electric Stoves: Offering rustic charm and ultimate flexibility, freestanding electric stoves are portable and require no permanent installation. They evoke the look of a traditional wood-burning stove and can be moved from room to room, providing warmth and ambiance wherever needed. These are perfect for those who appreciate versatility or are not ready for a fixed installation.
Beyond the type, consider the practical aspects. Think about the dimensions of your room and the intended location for your fireplace. What is your preferred style—modern, traditional, rustic? Also, assess the heating capability you require. Some units primarily offer aesthetic flames, while others can efficiently warm a significant area. BTU output is a key specification to look for if heating is a priority. Don’t forget to check the electrical requirements; while many plug into standard outlets, larger or more powerful units might necessitate a dedicated circuit, which could impact your installation plans.
The electric fireplace you select is the heart of your project, so take your time, research different models, and ensure it aligns perfectly with your vision for your custom surround.
Step-by-Step Guide for Building a DIY Electric Fireplace Surround
Building your own electric fireplace surround is a rewarding project that allows for complete customization. This guide breaks down the process into manageable steps, ensuring you can create a sturdy, attractive, and functional fireplace feature for your home.
Materials Required for Your Custom Fireplace Build
Before you begin, gather all your materials. High-quality materials ensure durability and a professional finish.
| Material | Quantity | Estimated Cost |
|---|---|---|
| Electric Fireplace Insert | 1 | $300.00 |
| 2×4 Kiln Dried Wood (10 ft long) | 13 | $78.00 |
| 1/2 inch Drywall Sheets | 3 | $48.00 |
| 2.5 inch Wood Screws | As needed | $12.00 |
| Drywall Screws | As needed | $10.00 |
| Metal Corner Beads | 2 | $8.00 |
| Joint Compound | As needed | $20.00 |
| Joint Tape | As needed | $5.00 |
| Paint (Primer & Finish Coat) | As needed | $50.00 |
| Drywall Primer | As needed | $20.00 |
| Sponge | 1 | $3.00 |
| Shims | As needed | $2.00 |
Tools Required for Your DIY Fireplace Project
Having the right tools on hand will make the construction process smoother, safer, and more efficient.
| Tool | Quantity | Estimated Cost |
|---|---|---|
| Metal Snips | 1 pair | $10.00 |
| Putty Knife | 1 | $5.00 |
| Trowel | 1 | $10.00 |
| Mud Bucket | 1 | $8.00 |
| Drywall Sanding Screen | 1 | $5.00 |
| Hand Sanding Grip | 1 | $7.00 |
| Speed Square | 1 | $8.00 |
| Chop Saw (or Miter Saw) | 1 | $150.00 |
| Cordless Jig Saw | 1 | $100.00 |
| Chalk Reel | 1 | $5.00 |
| Dremel Multi-Max (or Oscillating Tool) | 1 | $99.00 |
| Husky Soft Cap Gel Knee Pads | 1 pair | $25.00 |
| General Purpose Work Gloves | 1 pair | $7.00 |
| Safety Glasses | 1 pair | $5.00 |
| Dust Mask | 1 | $3.00 |
| Hearing Protection | 1 | $10.00 |
Total Estimated Cost for Materials and Tools
Total Cost for Materials and Tools: $706.30
Please note that these costs are estimates and can vary based on location, brand, and sales. It’s always wise to shop around and compare prices.
Step 1: Plan and Mark the Fireplace Frame Layout
- Begin by meticulously planning your fireplace’s location and dimensions. Use a tape measure and a level to mark the lines on the wall where your fireplace framing will be built. Chalk or painter’s tape can be excellent for visualizing the final structure.
- Crucially, ensure the marked area precisely accommodates the dimensions of your chosen electric insert, leaving appropriate clearances as recommended by the manufacturer, and allows for the overall desired size of the finished fireplace surround. This initial planning step is vital for accuracy.
Step 2: Prepare the Wall and Baseboards for Construction
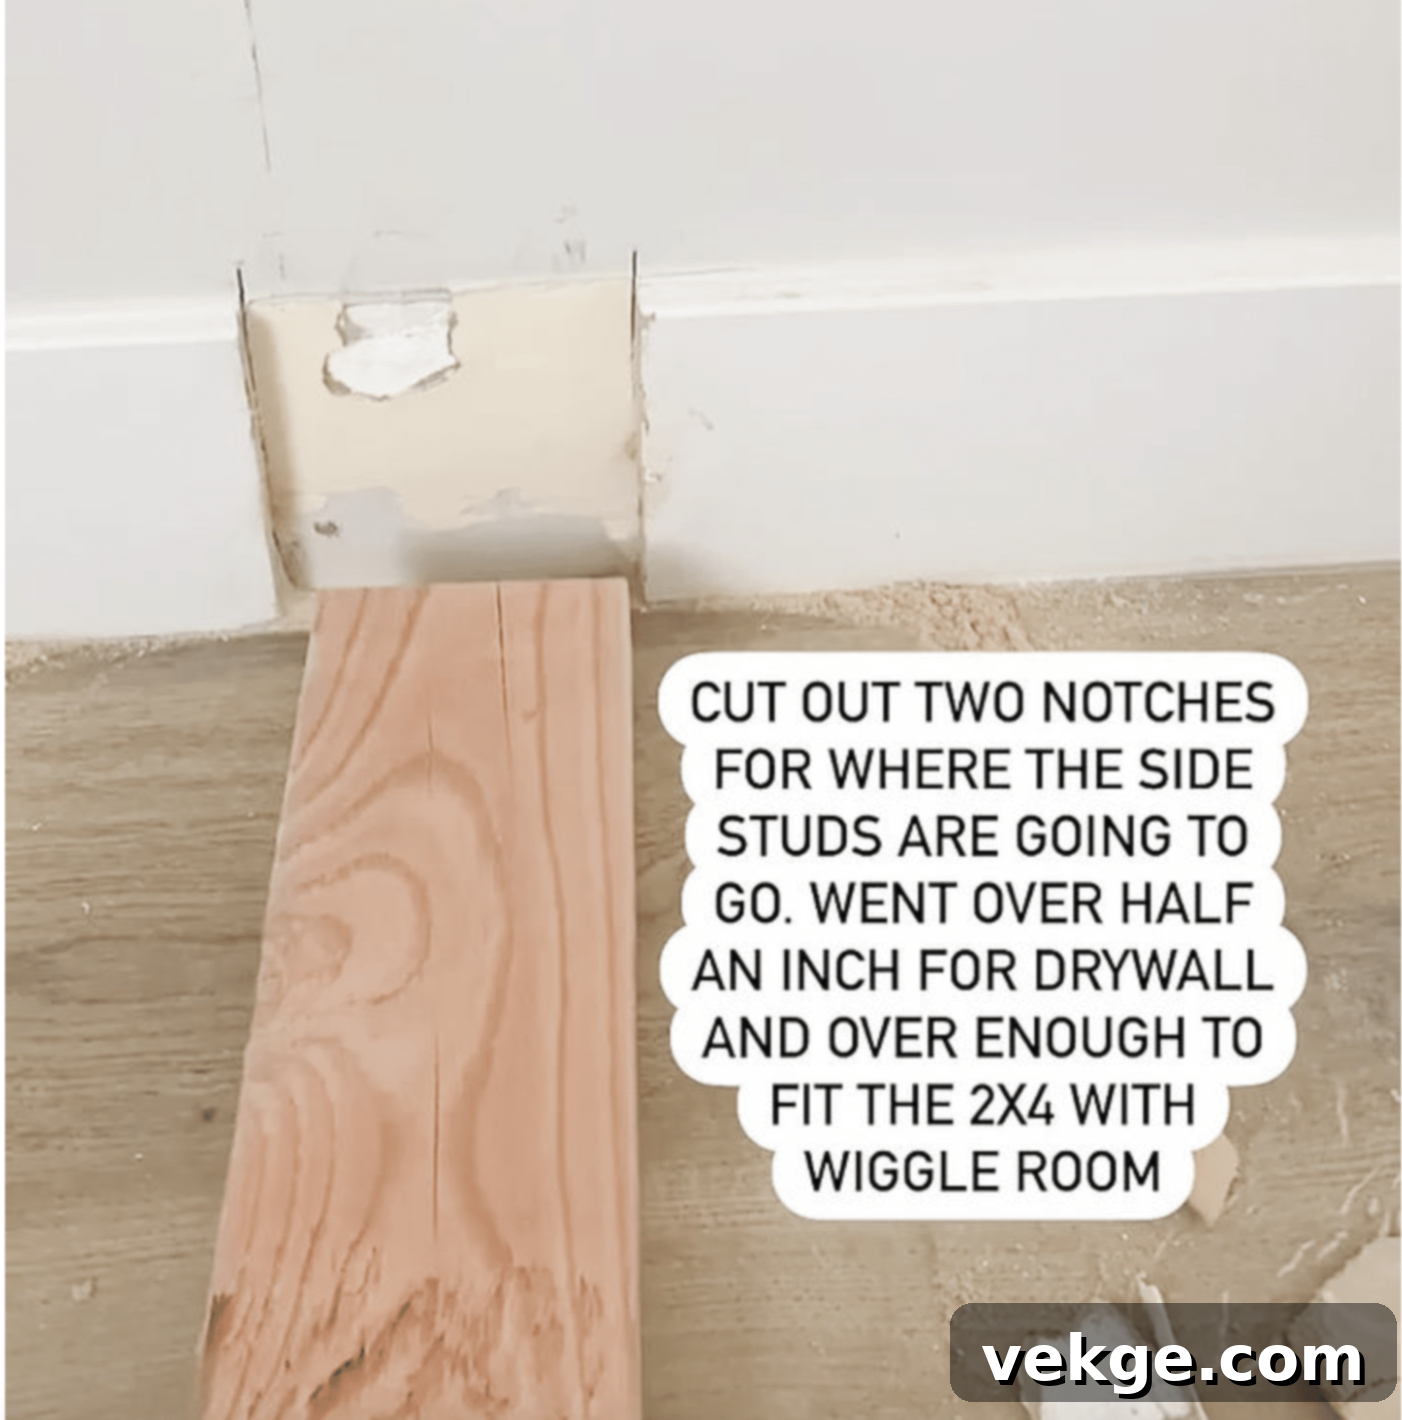
- If your fireplace will be built against a wall with existing baseboards, you’ll need to create notches for the 2×4 frame. Carefully use a multitool or an oscillating tool to cut out the sections of baseboard where the side studs of your frame will sit.
- Once cut, gently pry away the removed baseboard sections. Ensure enough space is cleared to comfortably accommodate both the thickness of the 2×4 studs and the drywall that will cover them, allowing for a flush finish.
Step 3: Build and Install the Primary Frame Structure
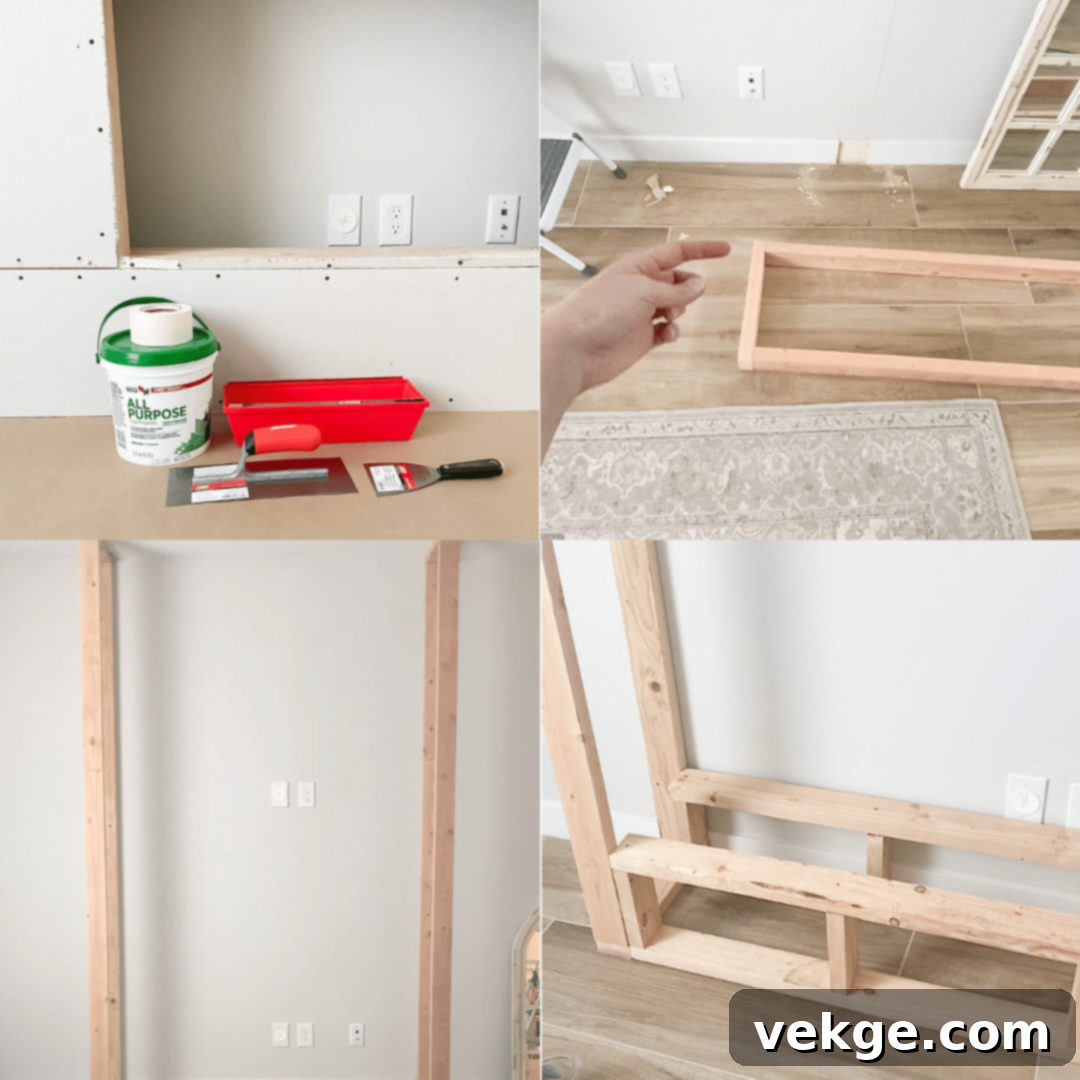
- Using your chop saw or miter saw, cut the 2x4s to the appropriate lengths for the vertical side studs of your fireplace frame. Assemble these studs to form the basic side structures.
- Stand the assembled side studs vertically against the wall, aligning them with the marked lines. Securely attach them to the wall, ideally screwing into existing wall studs for maximum support.
- Measure and cut horizontal 2x4s to act as front plates. Install these plates between the side studs at both the top and bottom of the main frame, ensuring the structure is square and rigid.
Step 4: Construct the Platform for the Electric Insert
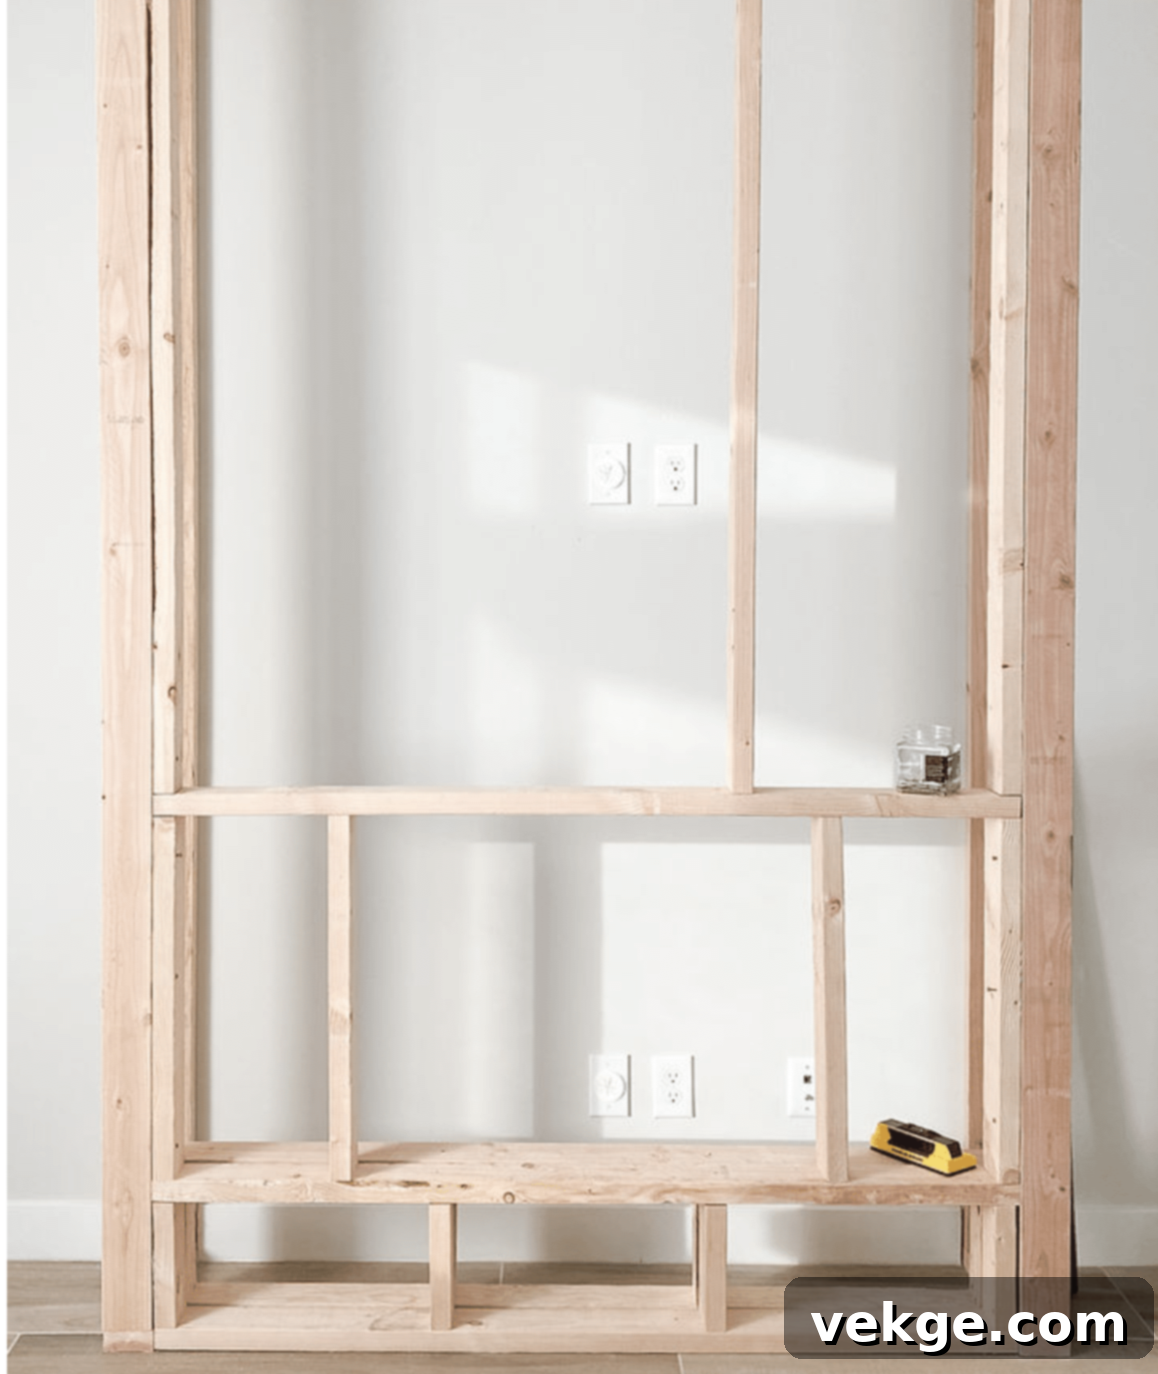
- Now, focus on building a robust and level platform where your electric fireplace insert will rest. Cut and attach additional 2x4s to create a sturdy box-like structure within your main frame.
- It is critical to ensure this platform is perfectly level and positioned at the desired height. For this project, the insert was placed 10 inches above the floor, providing an optimal viewing height and aesthetic balance. Use a level and shims if necessary to achieve perfect flatness.
Step 5: Frame the Insert Opening and Add Support for Mantel and TV
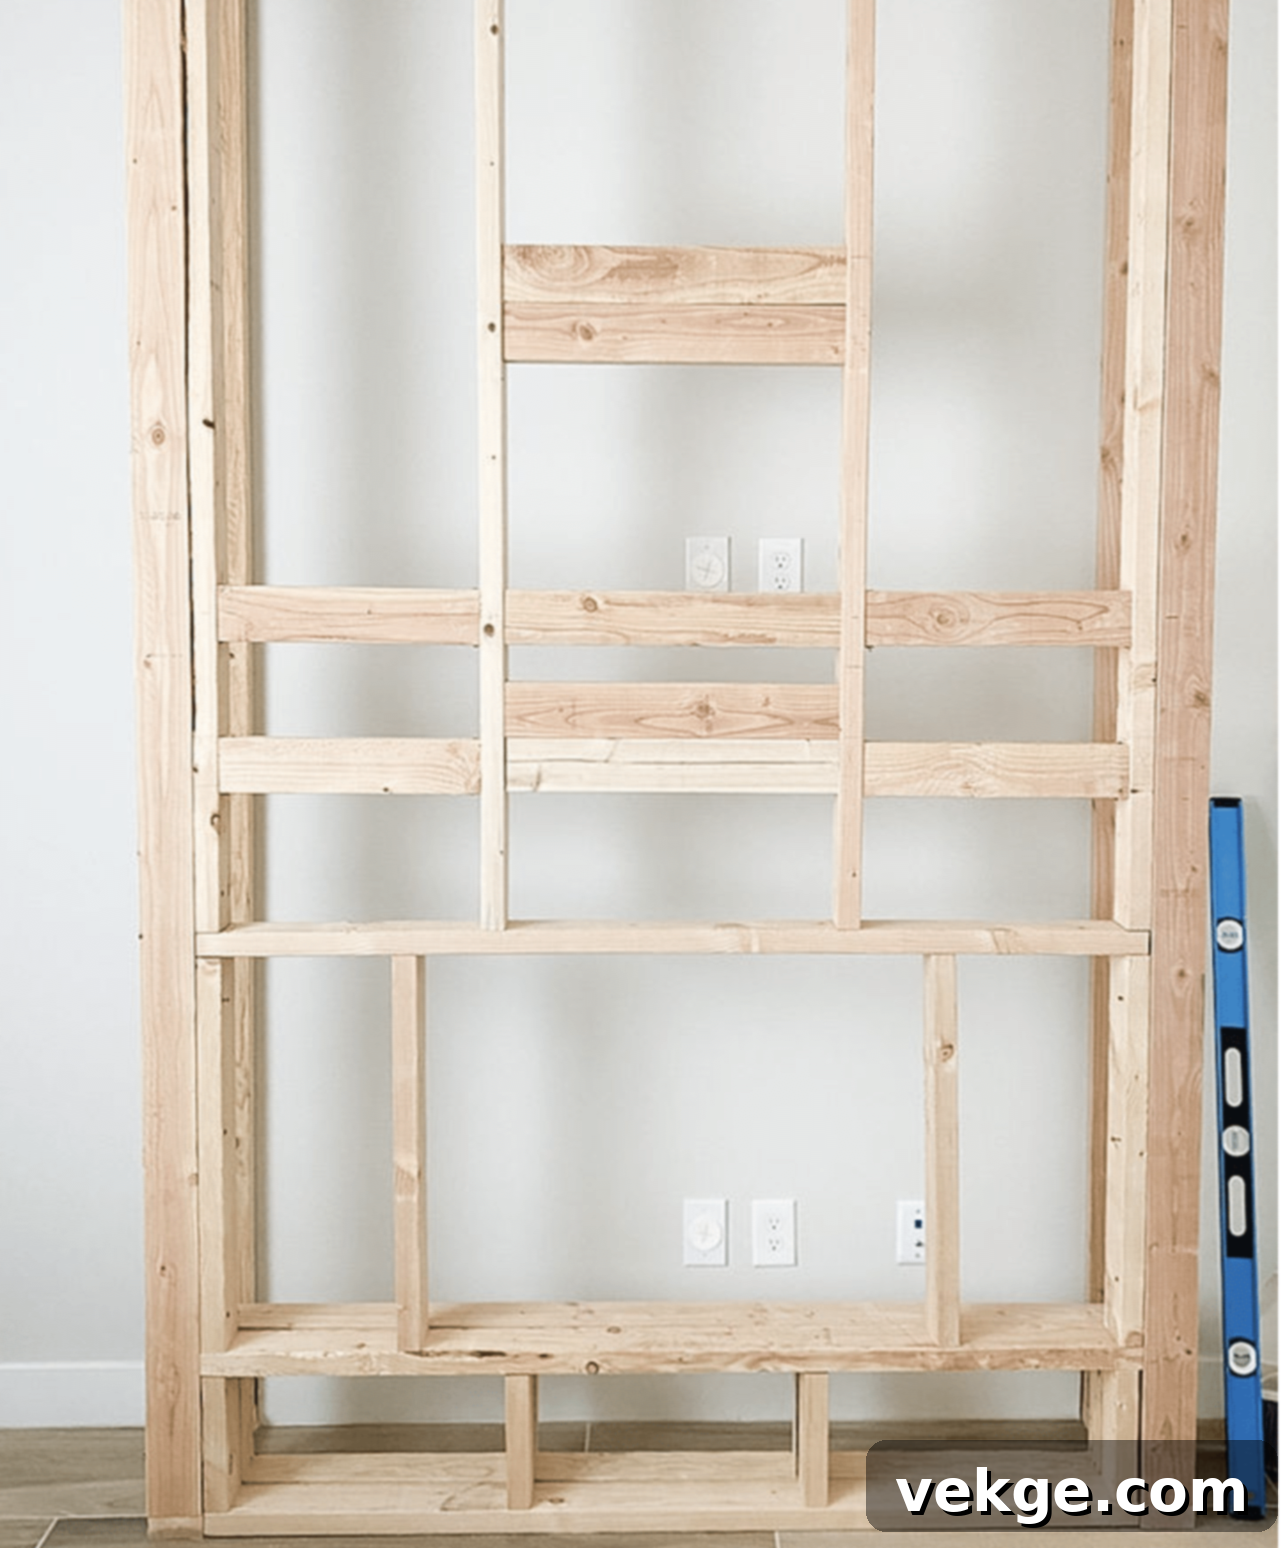
- Carefully frame the specific opening for your electric insert. Attach 2x4s above and around the insert area, ensuring the opening is slightly larger than the insert itself to allow for easy installation and proper ventilation.
- This is also the stage to add any necessary structural support for future additions. If you plan to mount a mantel or a television above the fireplace, cut and install horizontal studs at the precise desired heights. These studs will provide solid anchoring points for your mantel and TV bracket, ensuring stability and safety.
Step 6: Attach Drywall and Prepare Edges for Finishing
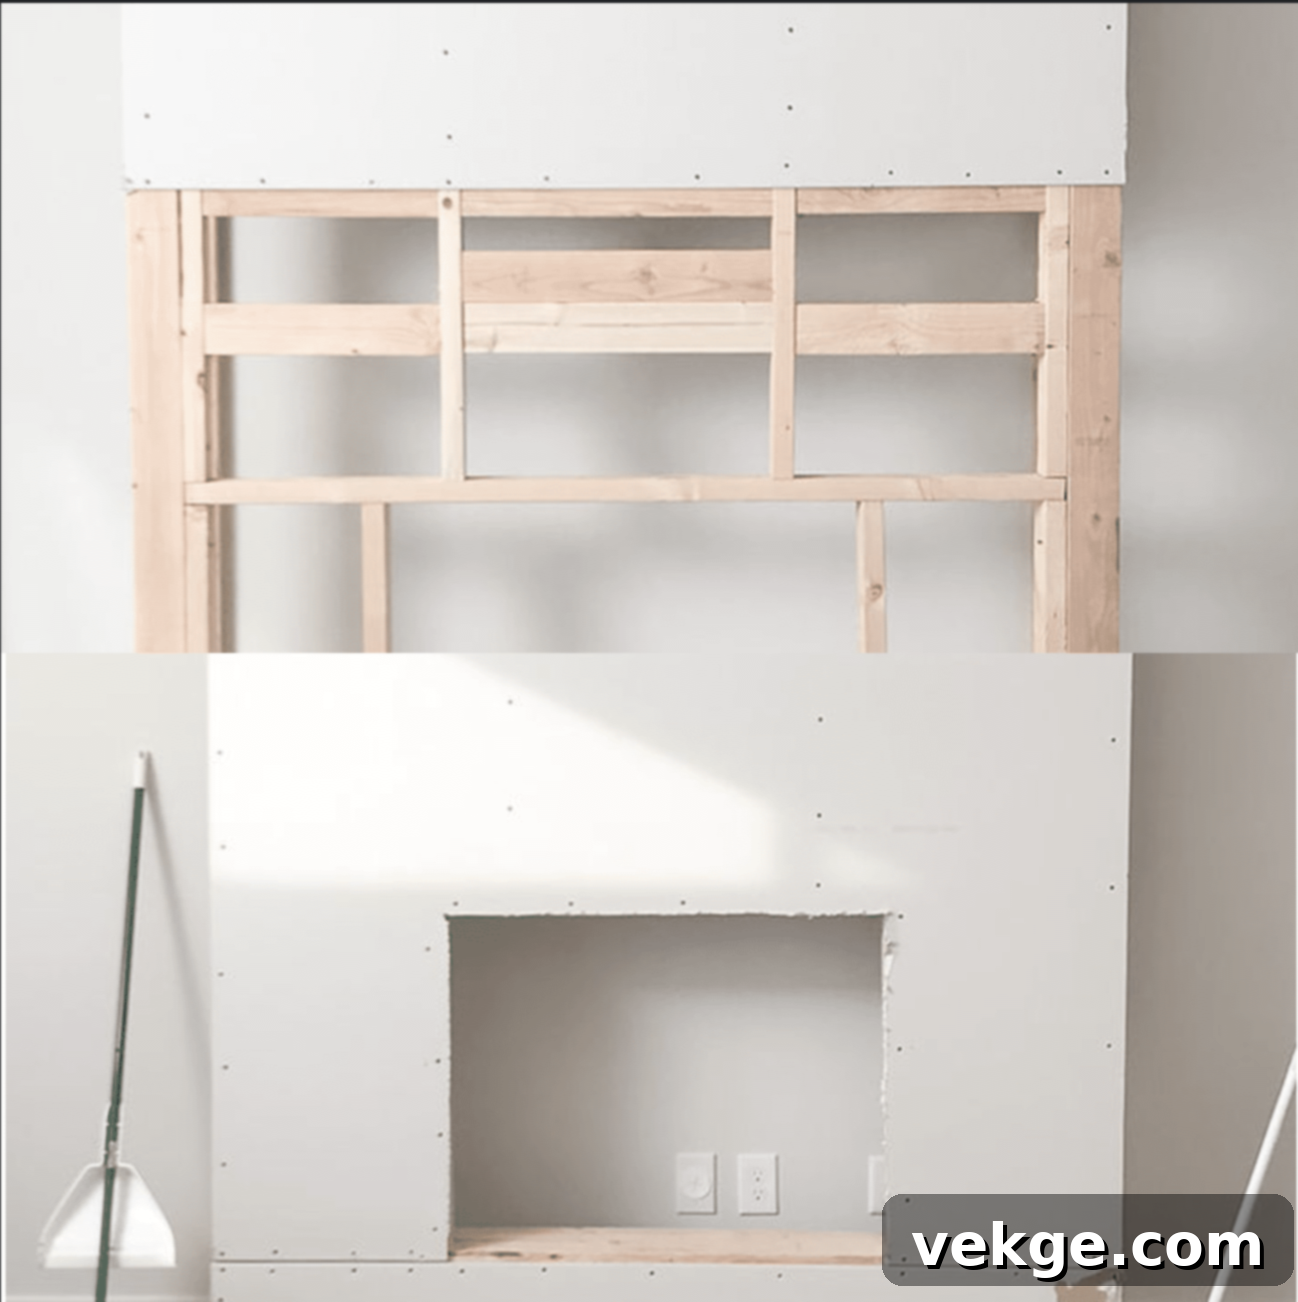
- With the framing complete, it’s time to add the drywall. Measure and cut drywall sheets to accurately fit the front and sides of your newly built frame. Use drywall screws to firmly attach the sheets to the 2×4 studs. Ensure the screw heads are slightly countersunk but do not break the paper surface.
- For crisp, durable corners, install metal corner beads on all exterior edges of the drywall. Secure these with drywall screws, creating a solid base for smooth, professional-looking finishes.
Step 7: Taping, Mudding, and Achieving a Smooth Finish
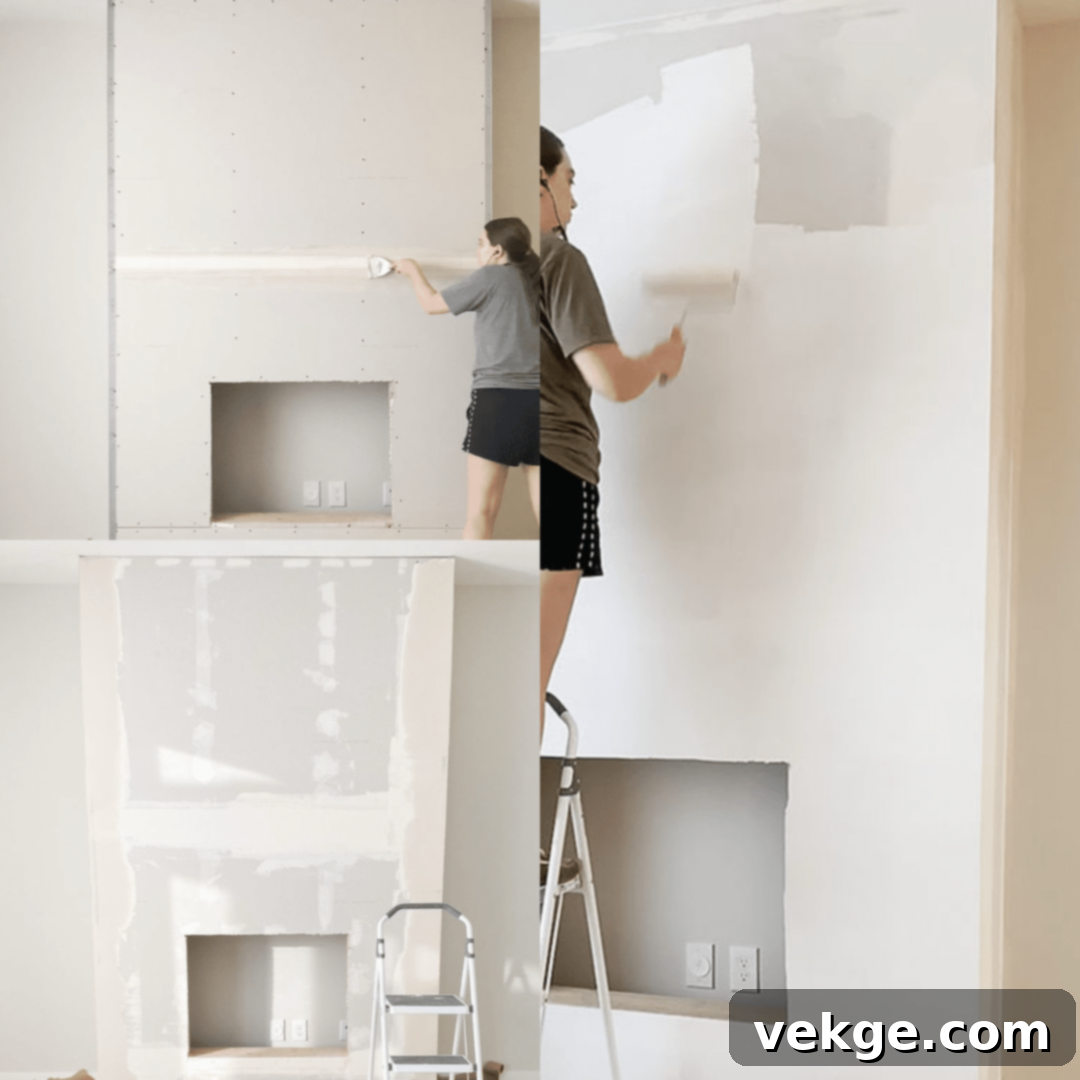
- This step is crucial for a polished look. Apply a thin, even layer of joint compound over all drywall seams and screw holes. Immediately embed joint tape into the wet compound, ensuring it’s centered over the seam. Apply another thin coat of compound over the tape. Repeat this process for the corner beads.
- Once the joint compound is completely dry (usually 24 hours), sand it smooth using a drywall sanding screen and a hand sanding grip. Apply additional thin coats of compound as needed, sanding between each coat, until the surface is perfectly smooth and seamless.
- After achieving your desired smoothness, clean off any dust, then apply a high-quality drywall primer. Once the primer is dry, you can proceed with painting the entire fireplace surround in your chosen color.
Step 8: Final Installation of Insert, Mantel, and TV
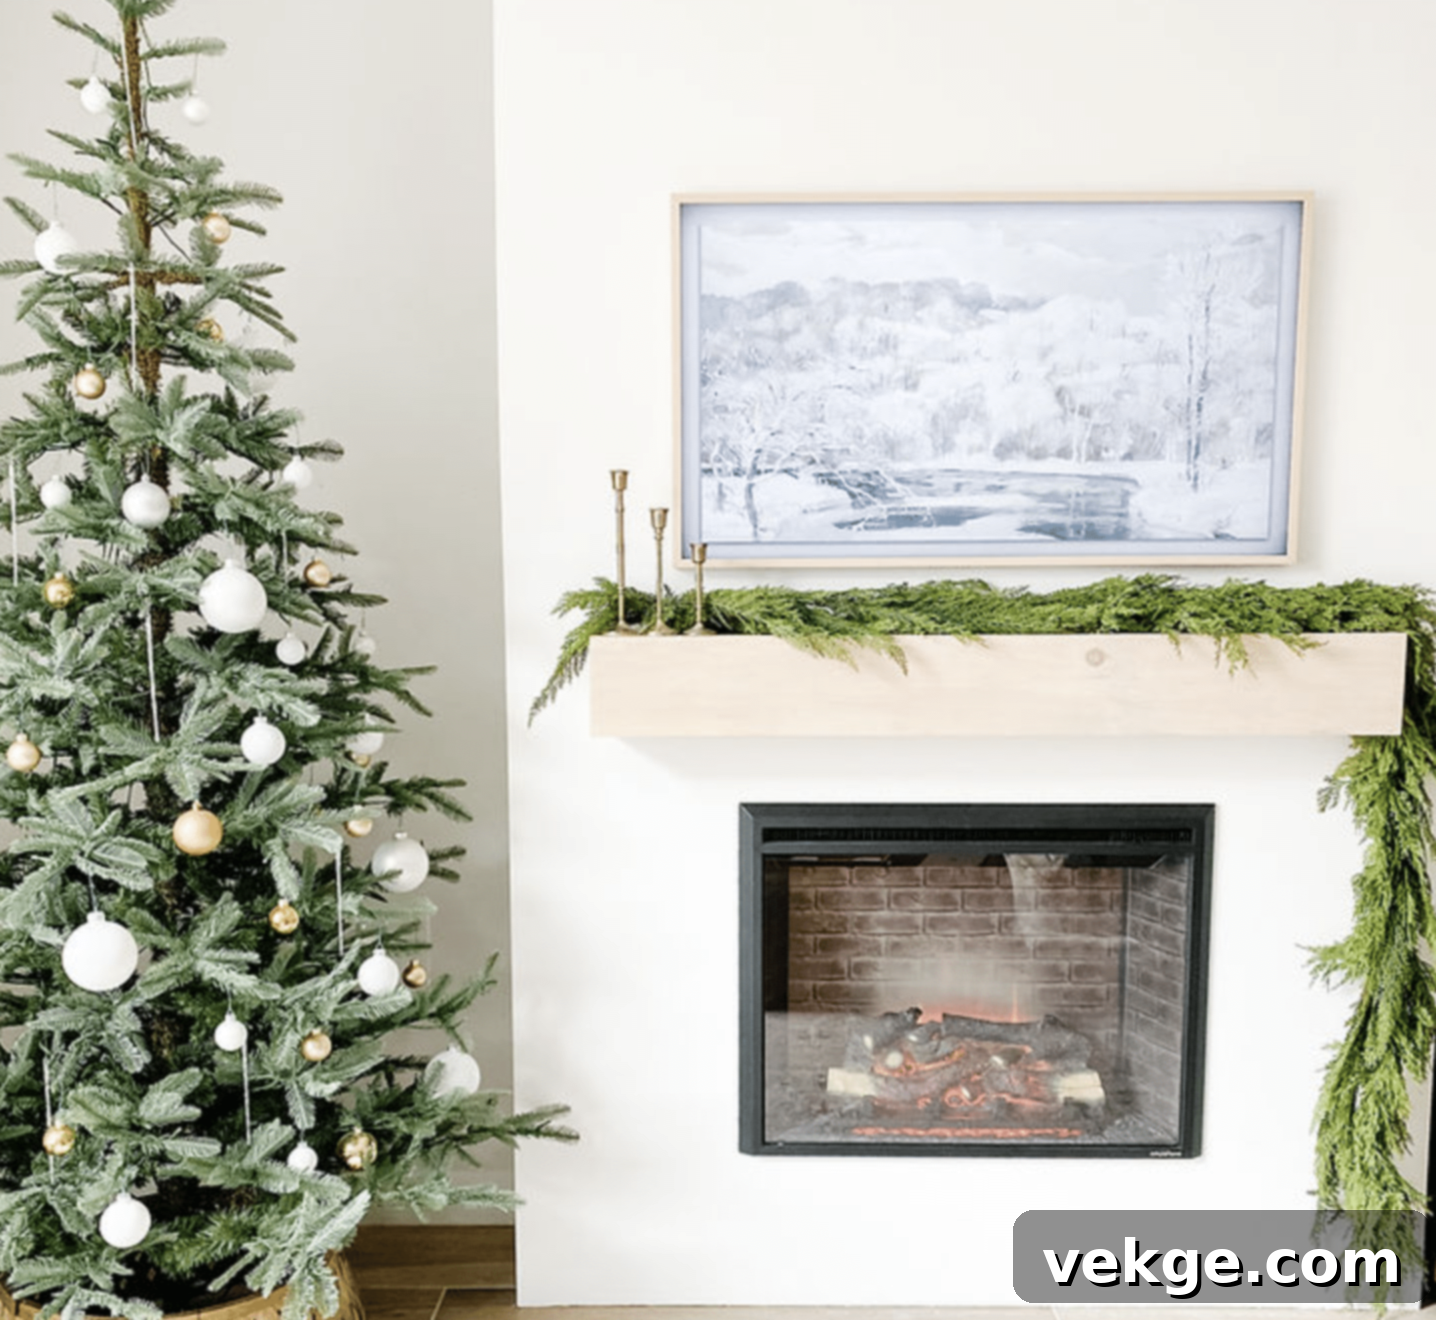
- With the surround finished and painted, it’s time for the final installations. Carefully slide your electric fireplace insert into its designated opening, ensuring it’s centered and level. Plug it into a suitable electrical outlet.
- Next, securely mount your chosen mantel onto the pre-installed studs. If you opted for a television above, attach its mount to the reinforced studs and hang the TV. Double-check all connections and ensure everything is stable and safely installed.
Congratulations! Take a moment to step back and admire your newly built, custom electric fireplace surround. You’ve just added a stunning and functional feature to your home!
Personalizing Your Electric Fireplace Surround: Design Elements to Elevate Your Space
A custom fireplace surround is more than just a frame for your electric insert; it’s an opportunity to inject personal style and enhance the functionality of your living area. By integrating thoughtful design elements, your fireplace can become a truly unique and multifunctional centerpiece. Here are several ways to personalize and elevate your DIY electric fireplace surround:
1. Built-in Shelving for Display and Storage
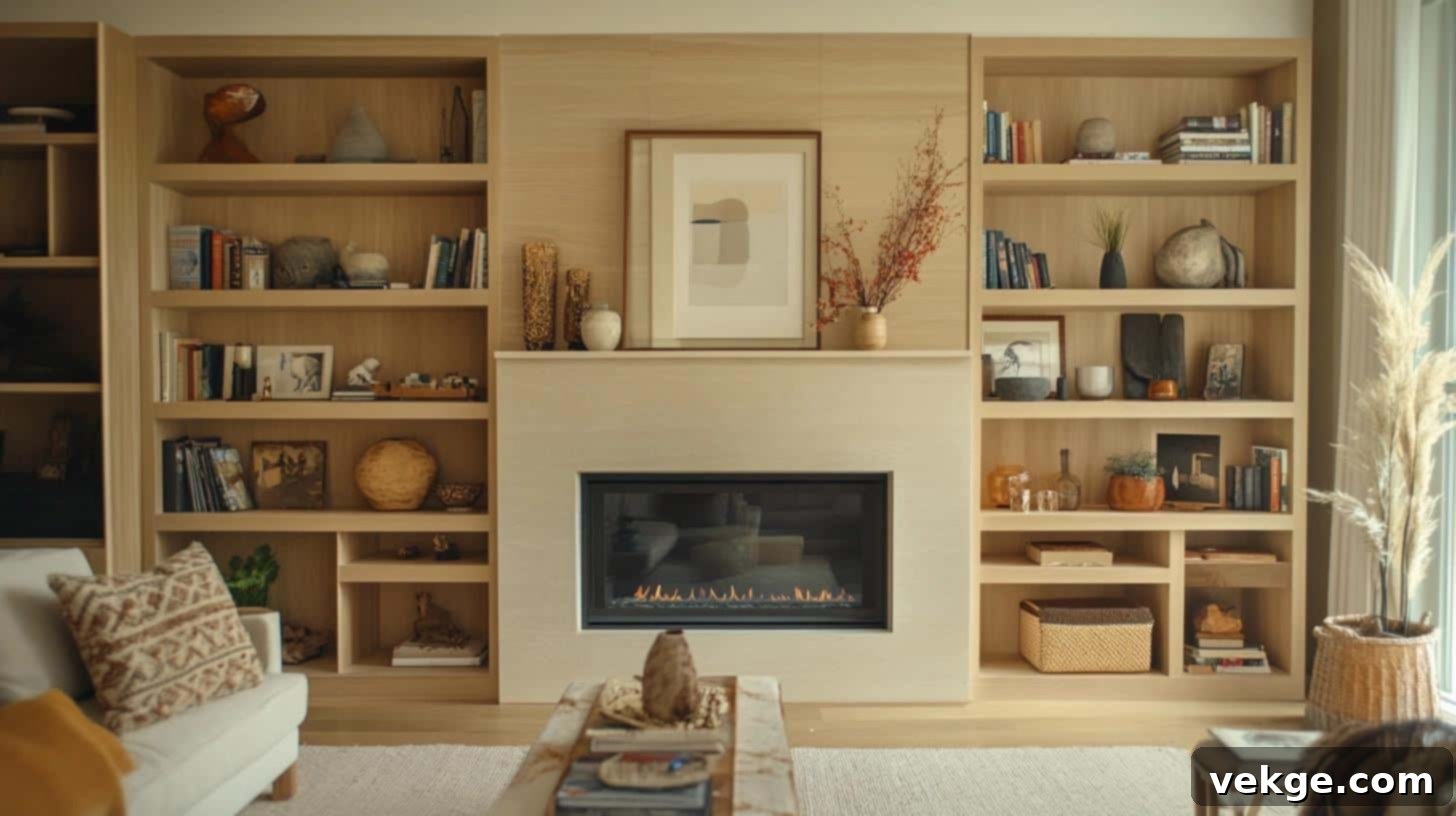
Adding open shelving on one or both sides of the fireplace opening creates valuable display space. These shelves can be used to showcase your favorite books, cherished family photos, unique decorative items, or even small indoor plants. To add visual interest and break up monotony, consider varying the heights and depths of the shelves to accommodate different-sized objects and create a dynamic look. Material choices for shelves, such as reclaimed wood, glass, or painted MDF, can further define your style.
2. Seamless Cabinet Integration for Hidden Storage
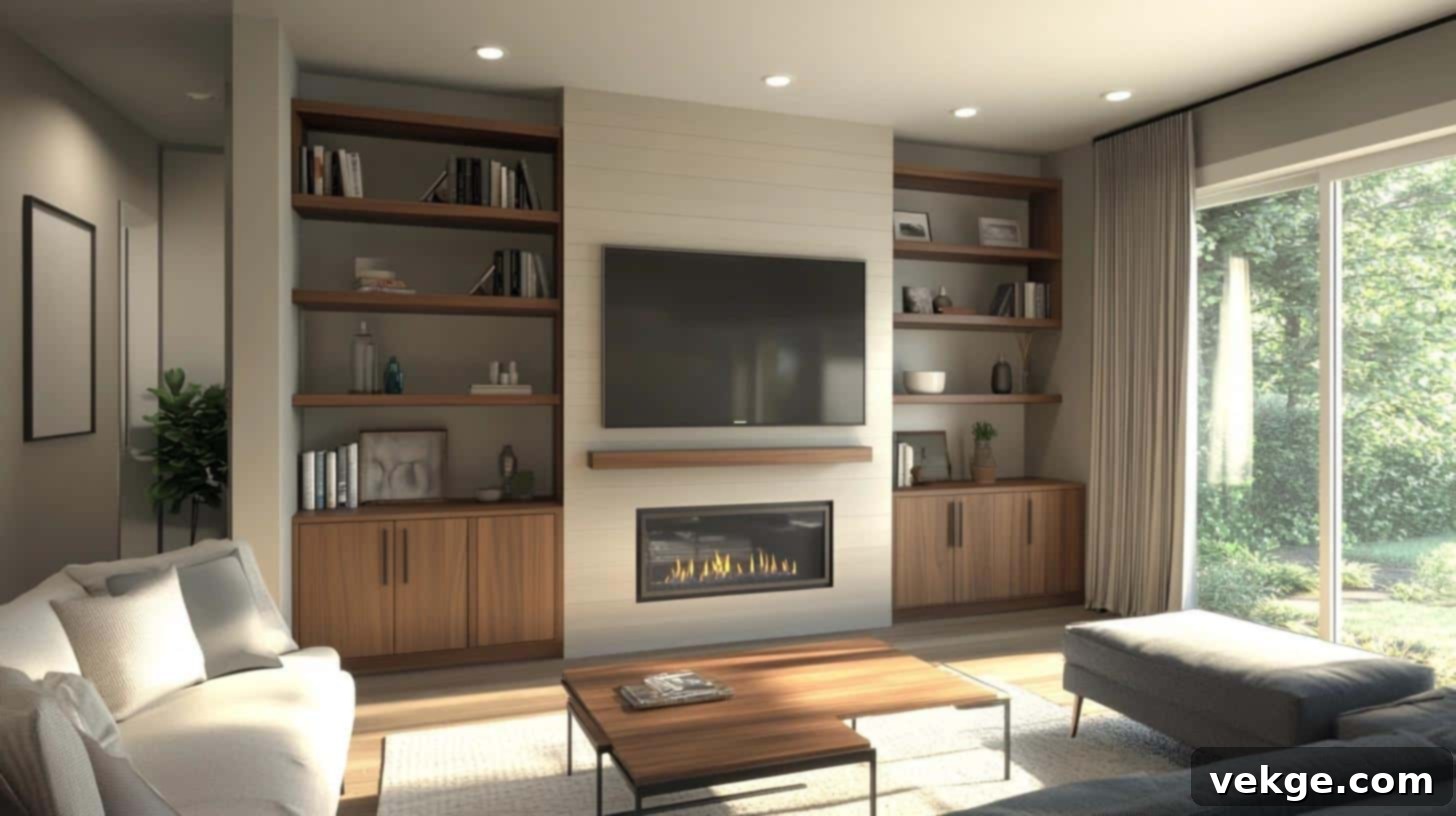
For a clean and uncluttered aesthetic, integrate cabinets below any open shelving or directly flanking the fireplace base. These hidden compartments are perfect for storing media equipment, game consoles, board games, or seasonal decorations, keeping them out of sight yet easily accessible. When selecting cabinet doors, choose a style that complements the overall design of your surround and your room, whether that’s sleek handle-less doors for a modern look or panel doors for a more traditional feel.
3. Thoughtful Mantel Design for Impact and Functionality
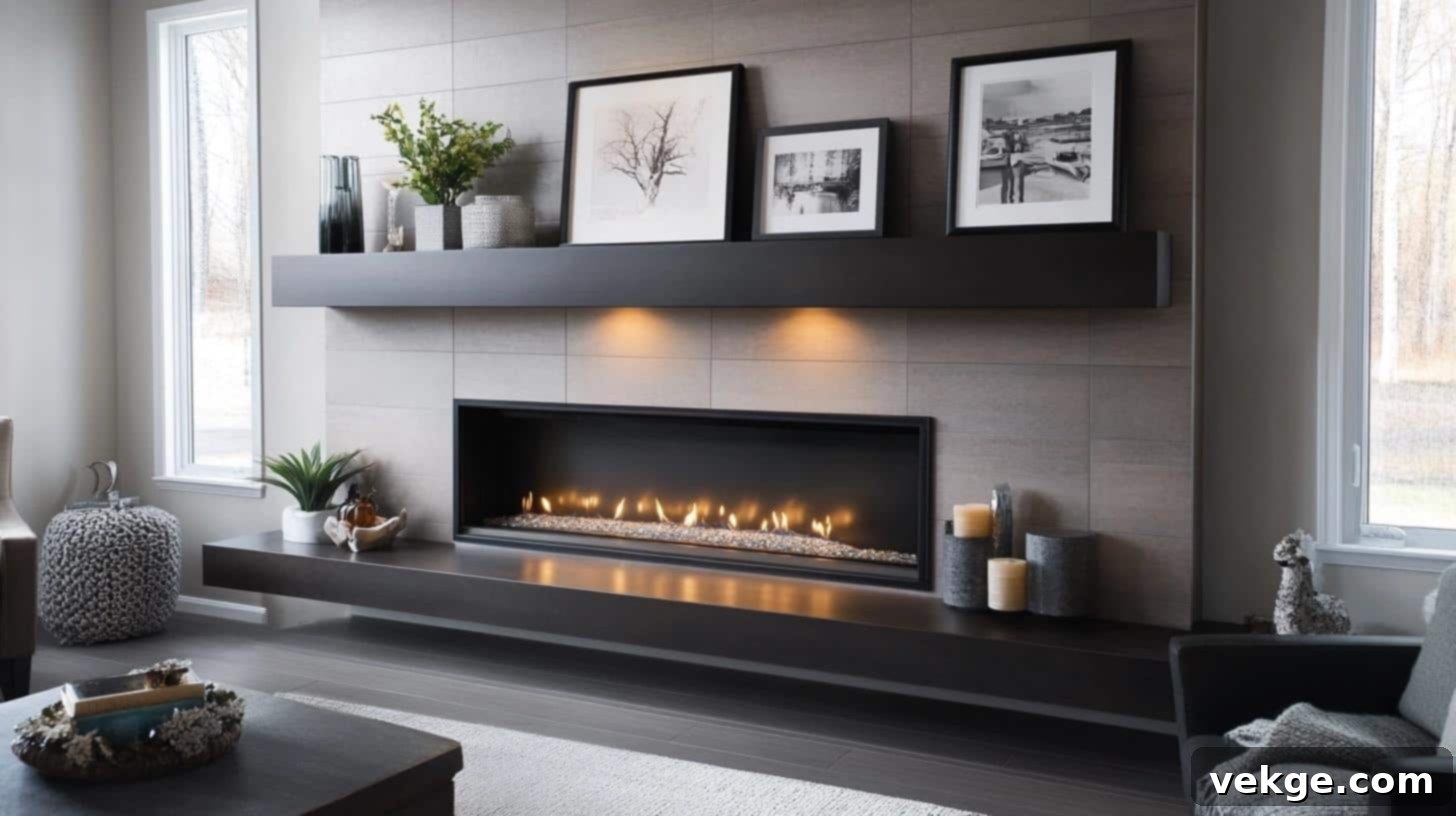
The mantel is a prominent feature of any fireplace. Design a wide mantel shelf to provide ample additional display space for artwork, holiday decorations, or a collection of decorative objects. For an ingenious storage solution, consider a hollow mantel design, which can conceal electrical cords, small remotes, or other items you want close at hand but out of view. The material and style of your mantel, from rustic wood beams to sleek stone slabs, will significantly impact the overall character of your fireplace.
4. Strategic Lighting Features to Enhance Ambiance
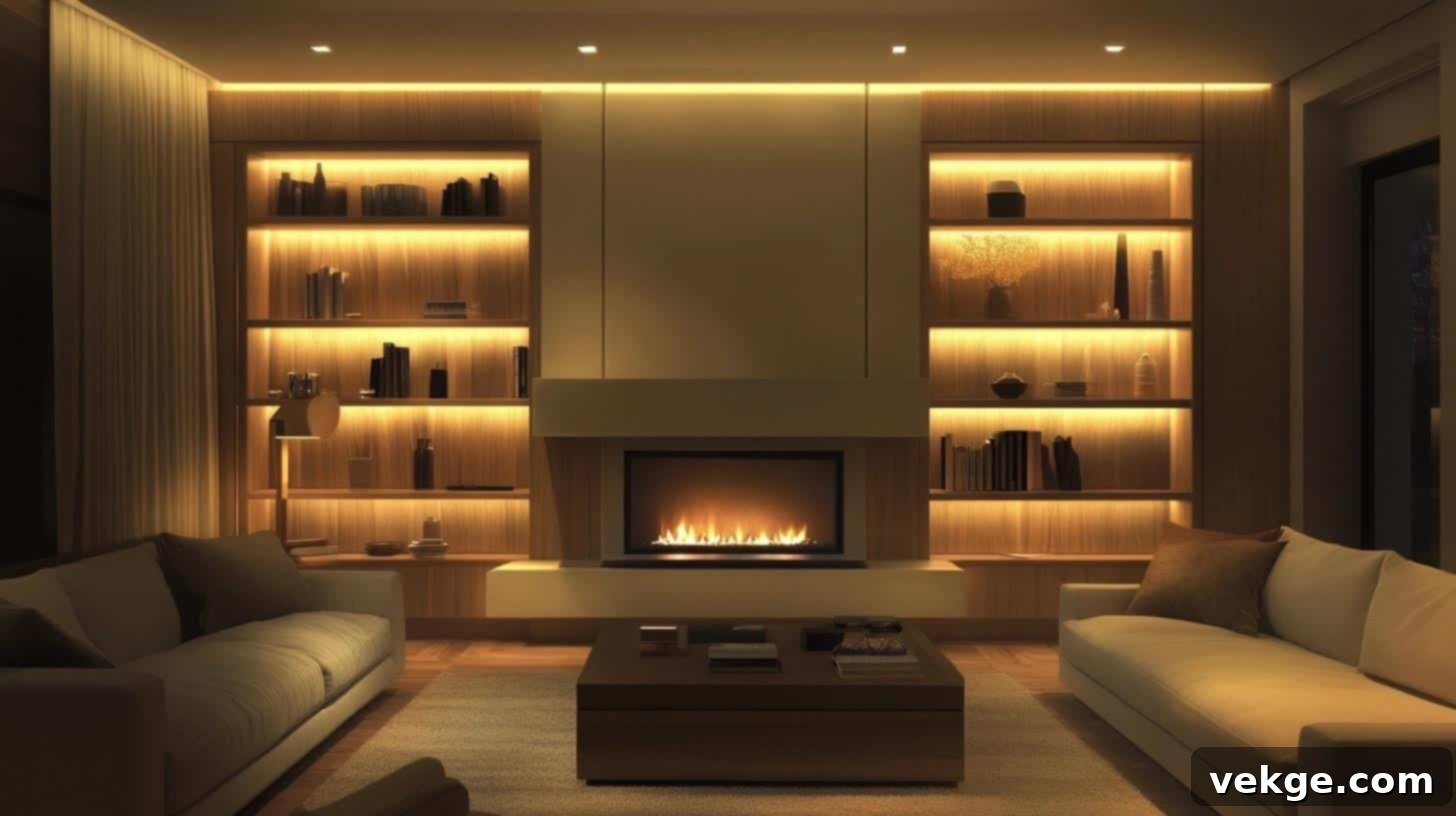
Lighting can dramatically enhance the ambiance of your fireplace area. Install subtle LED strip lighting behind shelves or underneath the mantel to create a soft, inviting glow. Adding sconces on either side of the fireplace provides more focused ambient lighting, perfect for reading or setting a mood. For a truly dramatic effect, consider incorporating a backlit panel behind the fireplace insert itself, which can make the flames appear even more vibrant and captivating.
5. Artistic Touches: Textures, Materials, and Wall Features
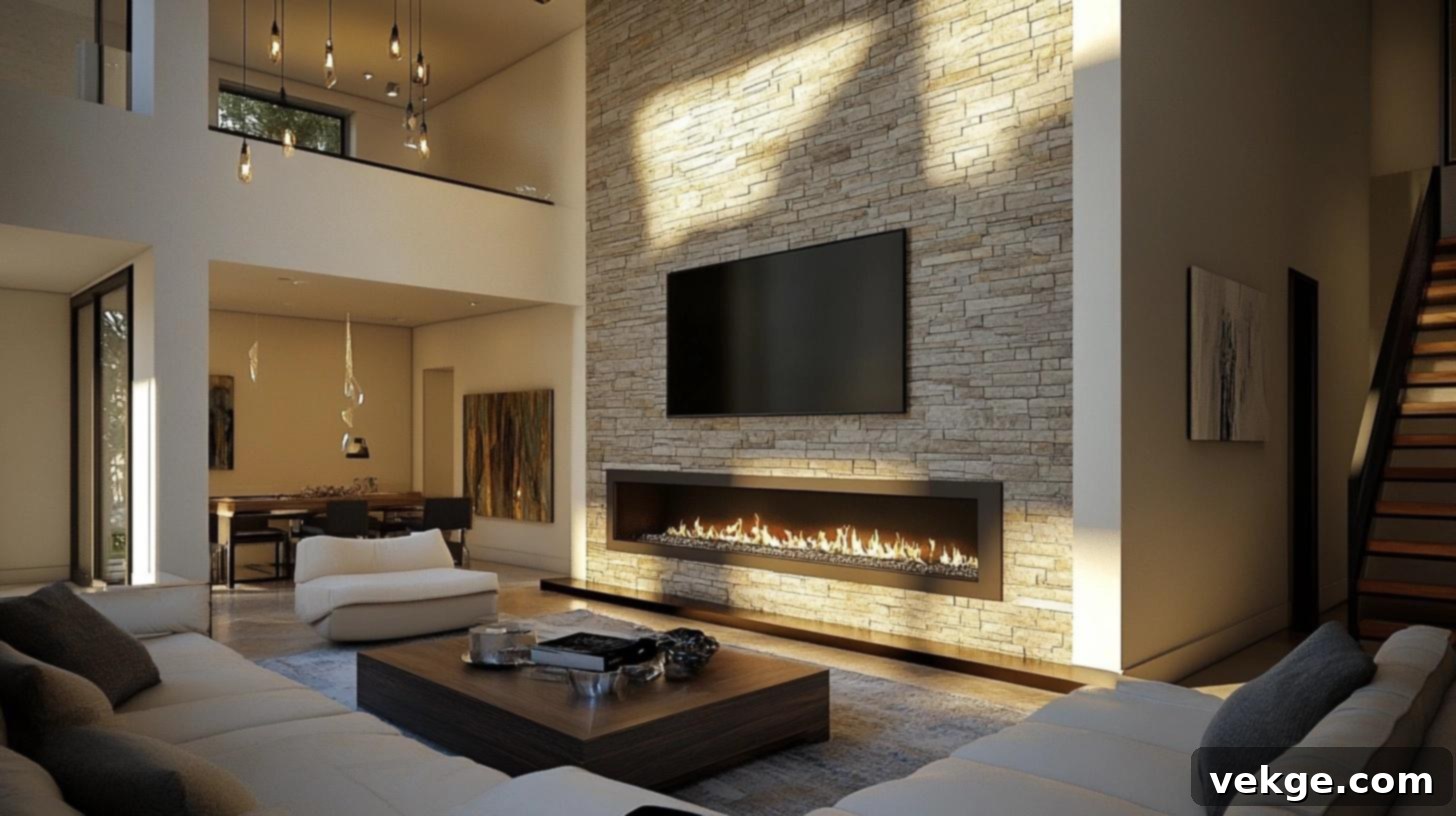
Don’t underestimate the power of materials and artwork. Design the space above the fireplace to perfectly accommodate a large piece of art, a mirror, or a television. Alternatively, create a captivating feature wall around the fireplace using materials like a tile mosaic, natural stone, or exposed brick for an authentic touch. Utilizing textured materials such as reclaimed wood panels or stacked stone can add significant visual interest and depth, transforming a simple wall into a luxurious architectural element.
6. Seamless Tech Integration for Modern Living
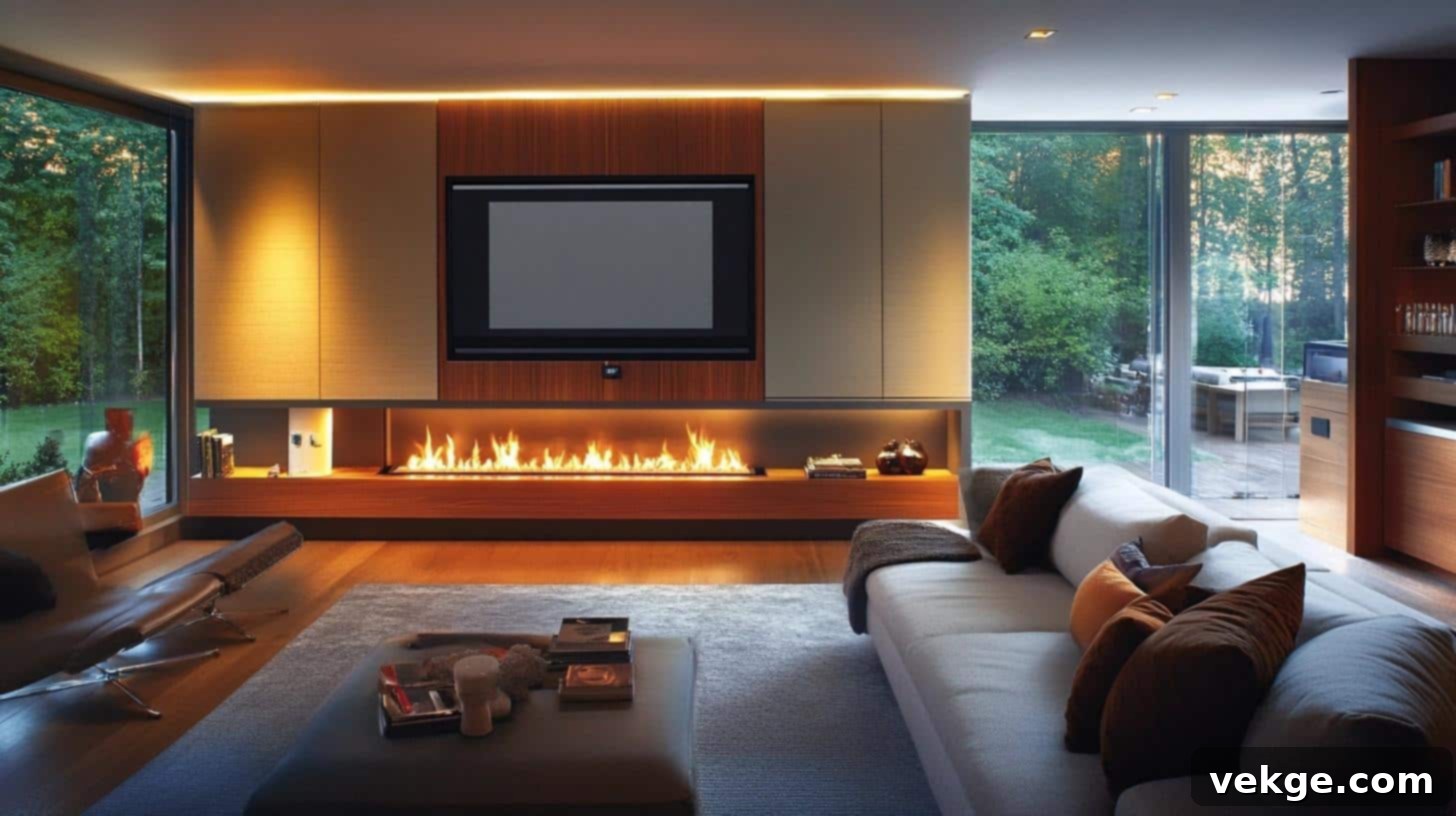
In today’s smart homes, integrating technology discreetly is key. Design hidden compartments within your surround for media equipment, ensuring a tidy and organized entertainment area. For movie enthusiasts, installing a pull-down projection screen above the fireplace can transform your living room into a home theater. Furthermore, consider incorporating smart home controls directly into the surround for effortless operation of your fireplace, lighting, and other connected devices.
By thoughtfully combining these elements, your DIY electric fireplace surround transcends its basic function, becoming a highly personalized and multifunctional centerpiece that perfectly reflects your individual style while meeting all your practical needs.
Keeping Your Electric Fireplace Surround in Top Shape: Care and Maintenance Tips
Once you’ve invested time and effort into creating a beautiful DIY electric fireplace surround, it’s essential to implement a routine for its care and maintenance. Proper upkeep will not only preserve its aesthetic appeal but also ensure the safe and efficient operation of your electric fireplace unit for many years to come.
- Regular Cleaning: Dust and debris can quickly accumulate on your surround. Make it a habit to dust the entire surrounding area, including the mantel and shelves, weekly with a soft, dry cloth. For the electric fireplace unit itself, always refer to the manufacturer’s specific instructions. Generally, this involves unplugging the unit from its power source and gently cleaning the glass front with a lint-free cloth, possibly with a mild glass cleaner if recommended. Avoid abrasive cleaners that could scratch surfaces.
- Thorough Maintenance Checks: Periodically, conduct a visual inspection of all electrical connections and cords. Look for any signs of wear, fraying, or damage. If you notice any components showing signs of deterioration, such as cracked wires or loose plugs, replace them immediately to prevent potential hazards. Ensuring secure connections is crucial for safe operation.
- Prioritizing Safety: Even though electric fireplaces don’t produce real flames, it’s vital to maintain safety precautions. Always keep flammable items, such as curtains, blankets, or paper, at a safe distance from the fireplace’s heating element. Never leave the electric fireplace unattended while it is operating, especially if you have pets or young children. Additionally, ensure there is adequate space around the unit for proper air circulation, preventing overheating and allowing the heat to dissipate effectively.
- Seasonal Care and Protection: During periods of non-use, such as the warmer summer months, consider covering your electric fireplace surround. A decorative fabric cover or a custom-made cover can protect it from dust accumulation, sunlight exposure that might fade paint, and accidental bumps. This simple seasonal care helps maintain its pristine appearance and ensures it looks just as inviting when it’s time to fire it up again in the cooler months.
By consistently following these simple yet effective steps, homeowners can effortlessly keep their custom-built DIY electric fireplace surround looking immaculate and functioning safely. This diligent care ensures that your personalized addition remains a beautiful, lasting, and attractive feature within your cherished home environment.
Wrapping It Up: Your Journey to a Cozy Home
As we conclude this comprehensive guide, I sincerely hope you feel truly inspired and equipped with the knowledge to embark on building your very own electric fireplace surround. For me, this project was an incredibly rewarding experience, transforming my living space into a haven of warmth and style, and creating a beautiful, inviting focal point that I cherish.
Remember, the foundation of any successful DIY endeavor lies in meticulous planning, unwavering attention to safety during every step, and most importantly, allowing your unique creativity to shine through. This project is a fantastic opportunity to personalize your home in a significant way.
Now, it’s your turn to unleash your inner builder! I am incredibly excited to see the stunning results of your hard work. Why not share photos of your completed DIY electric fireplace surround on social media? Use the hashtag #DIYFireplaceSurround so our community can admire your craftsmanship and get inspired by your unique design.
Should you encounter any questions or need further guidance along the way, please do not hesitate to reach out in the comments section below. I’m here to help and support your journey.
Ready to transform your home? Grab your tools, put on your safety gear, and let’s bring that much-desired warmth, style, and cozy ambiance to your living space. Happy building!
Frequently Asked Questions About DIY Electric Fireplace Surrounds
1. What Materials are Safe to Use Around an Electric Fireplace?
Most non-flammable materials are perfectly safe. For the construction of the surround, excellent choices include fire-resistant drywall, natural stone (like marble or granite), brick, or ceramic/porcelain tile. Wood can be used for framing and decorative elements, but it’s crucial to ensure it’s kiln-dried, treated, and maintained at a safe distance from the electric fireplace’s heating element as specified by the manufacturer’s guidelines for clearances.
2. How Can I Make My Electric Fireplace Look More Realistic?
To enhance the realism of your electric fireplace, consider several upgrades. Start by adding a high-quality, realistic log set or clear crystal rocks for a modern touch. Opt for units that feature advanced 3D flame effects or those with adjustable flame colors and brightness to mimic real fire. Surrounding the insert with authentic materials like natural stone or brick can also significantly contribute to a more traditional and believable appearance.
3. How Much Space Do I Need for the Fireplace Surround?
The space required for your fireplace surround is largely dependent on the size of your chosen electric fireplace insert and your desired design aesthetic. Generally, it’s advisable to allow at least 6 inches of clearance on each side of the fireplace opening and 12 inches above it for safety and proper ventilation. Always measure your room carefully and sketch out your design to ensure the surround fits proportionally and functions safely within your space.
4. What is the Average Cost of Building a DIY Electric Fireplace Surround?
The cost of building a DIY electric fireplace surround can vary significantly based on the materials you choose and the complexity of your design. A basic surround using drywall and common lumber might range from $200-$500 for materials (excluding the insert). More elaborate designs, incorporating high-end finishes like natural stone, custom cabinetry, or intricate trim work, could range from $500-$1500 or even more. The electric insert itself is often the largest single expense.
5. Do I Need Professional Help for Electrical Connections?
While many standard electric fireplaces are designed to simply plug into a regular 120V wall outlet, it is always recommended to consult a licensed electrician for any permanent electrical work. If your chosen electric fireplace unit requires a dedicated circuit, or if you plan to hardwire it, professional assistance is essential to ensure compliance with local electrical codes and, most importantly, for your safety and the safety of your home. Never take chances with electrical wiring.
