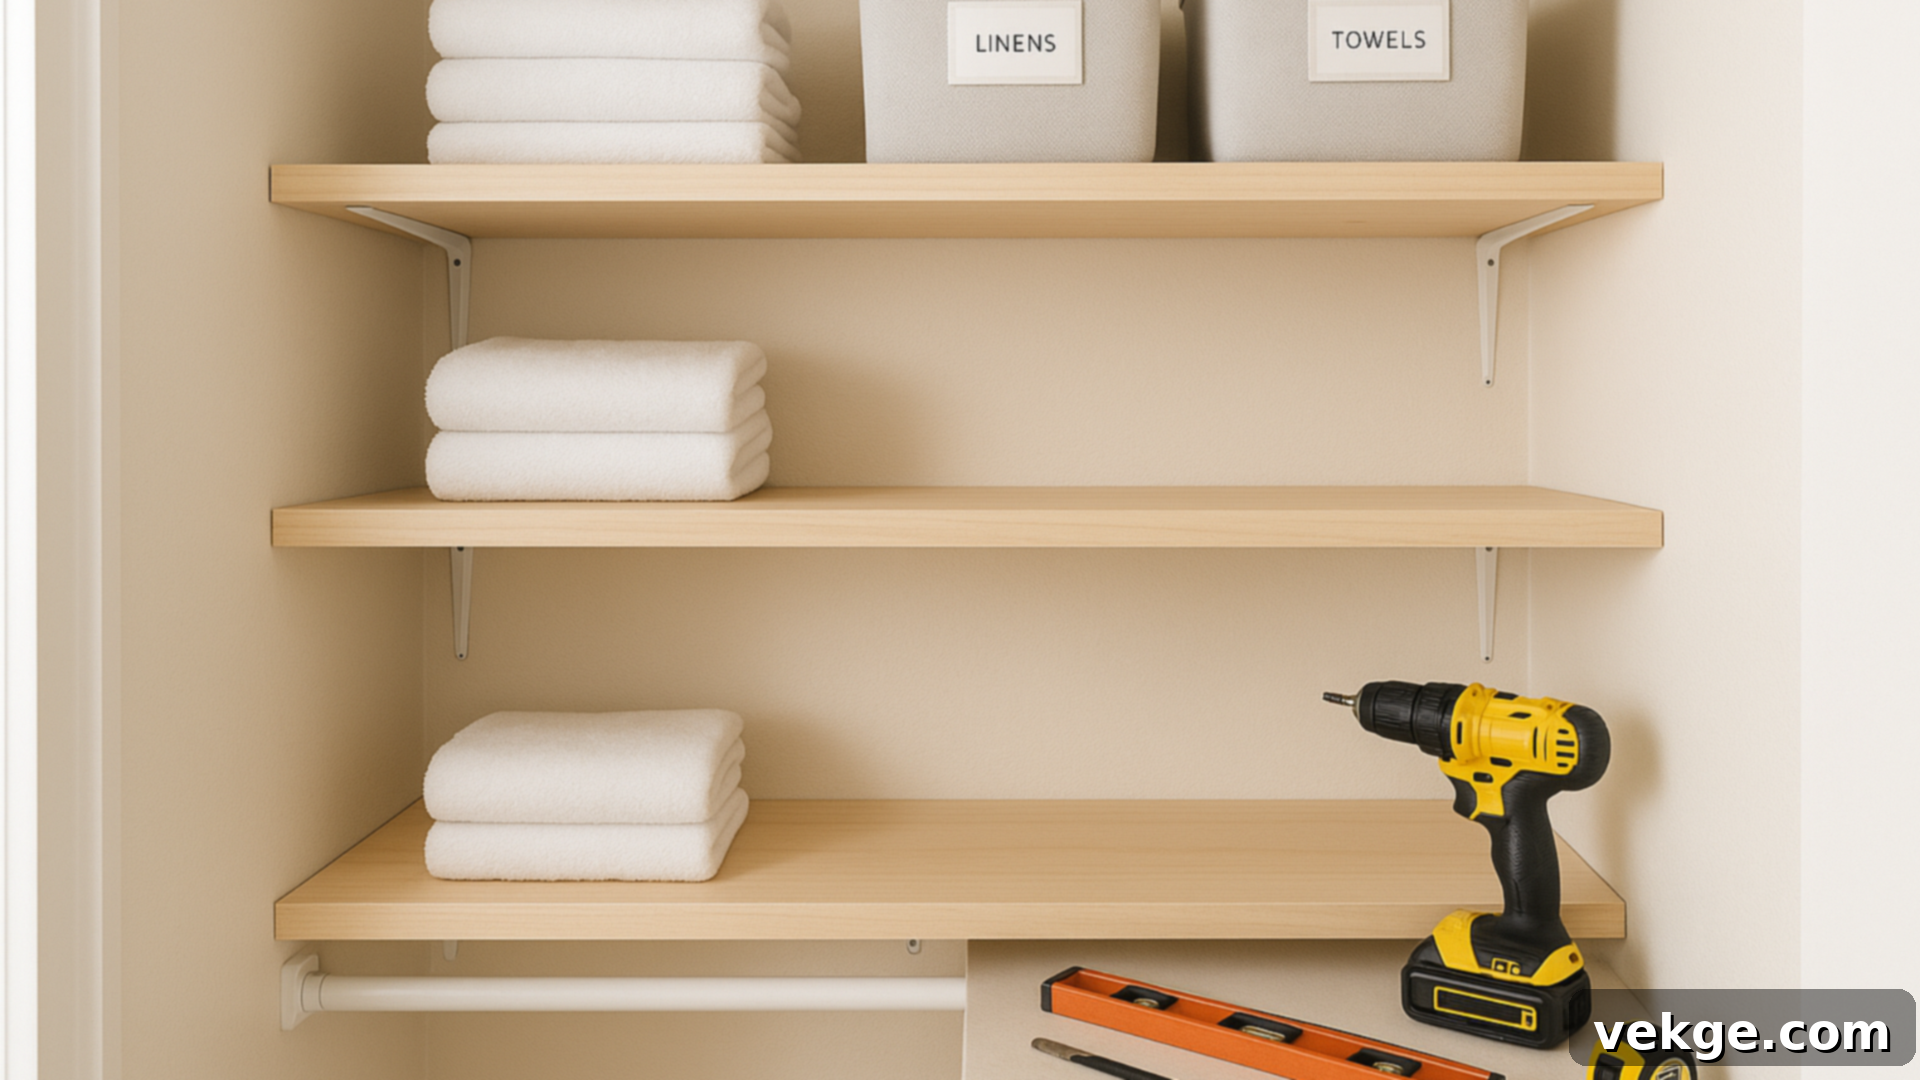
The Ultimate DIY Guide to Building Custom Closet Shelves: Organize Your Space & Save Money
Is your closet a chaotic jumble where nothing quite fits and finding what you need feels like a treasure hunt? You are certainly not alone. I’ve navigated that same frustrating space myself. Ready-made shelving units often fall short in terms of fit or durability, while professional custom installations can be surprisingly expensive. That’s precisely why taking on a DIY shelf-building project is such a smart, empowering, and cost-effective solution.
This comprehensive guide will equip you with all the knowledge and steps required to meticulously plan, confidently construct, and securely install shelving that not only perfectly integrates with your unique space but also stands the test of time, holding up to all your storage needs.
You’ll discover the essential tools to use, learn what pitfalls to steer clear of, and gain the confidence to execute the project without any guesswork. From precise measurements to the final touches, we’ll cover it all. Are you ready to reclaim your closet and make it truly work for you, transforming it into an organized and efficient storage haven?
Know Your Purpose Before You Start: Defining Your Closet Organization Goals
Before you even pick up a saw, it’s incredibly helpful to get crystal clear on your motivation for building a closet shelf. From my experience, some people seek absolute control over every design detail, others want to explore all available options before committing, and many simply need a solid foundation of ideas to kickstart their project.
When your ultimate goal is clearly defined, it streamlines the entire decision-making process, making it much easier to select the right tools, materials, and overall layout that will genuinely serve your needs and bring your vision to life.
DIY Shelving: A Smart, Budget-Friendly Choice for Personalized Storage
Building your own shelving is an outstanding choice, especially if your primary goals are to save money and create a storage system that’s custom-tailored to your exact space and aesthetic preferences. This approach allows you to dictate every aspect, from the precise dimensions and layout to the type of wood and the final finish.
This level of customization is particularly advantageous for awkward or small spaces, or for closets with non-standard dimensions where off-the-shelf kits simply won’t fit without extensive modifications. Beyond just fit, you also gain complete control over the structural integrity and longevity of your shelves, ensuring they’re built to last and handle the specific weight requirements of your items.
It’s an ideal project for anyone who enjoys hands-on work and desires a robust, durable storage solution that precisely matches their needs, all without the premium cost associated with professional custom installations. The satisfaction of building something functional and beautiful with your own hands is an added bonus.
While the allure of convenience is strong, not everyone has the tools, time, or inclination to build shelves entirely from scratch. Store-bought options, such as popular modular kits from retailers like IKEA, might appear to be easier at first glance. However, these often come with hidden costs, significant limitations in size and configuration, and may not be engineered for long-term durability or heavy loads.
DIY builds almost invariably offer greater cost savings and unparalleled flexibility. While ready-made units are suitable if immediate convenience is your top priority, if strength, personalized style, and significant savings are more important, then a DIY approach consistently delivers superior results. This guide is designed to empower those who may already have some basic tools and materials but are unsure how to transform them into functional closet storage.
You’ll discover effective strategies to set up shelves in various challenging scenarios, whether you’re dealing with tight reach-in closets, expansive walk-ins, or shared storage areas. This guidance is especially valuable if you’re uncertain about the best design for your space or how much storage capacity you truly need to accommodate your belongings.
What You’ll Need to Get Started: Essential Tools and Material Choices
Before you dive into the construction phase, I highly recommend dedicating time to gather all your necessary tools and carefully consider your material options. This preparatory step is crucial for saving valuable time later on and effectively avoiding common, easily preventable mistakes. A little forethought goes a long way in ensuring a smooth and successful build.
With just a handful of fundamental items and a well-thought-out plan, you can construct robust and attractive shelves that are perfectly sized for your space and engineered to endure for many years.
Tools & Equipment for Your Closet Shelf Project
Building sturdy closet shelves doesn’t necessitate a professional-grade workshop filled with expensive machinery. The fundamental tools required are typically found in most homes or are easily accessible at any hardware store or online retailer. These basics include:
- Cordless Drill/Driver: Essential for pre-drilling holes and driving screws.
- Measuring Tape: For accurate dimensions. A laser measure can also be very helpful for large spaces.
- Level: Crucial for ensuring your shelves are perfectly horizontal. A longer level (2-4 ft) is ideal.
- Hand Saw or Circular Saw: For cutting wood to size. A circular saw offers faster, straighter cuts.
- Stud Finder: Absolutely vital for locating wall studs to ensure maximum support and safety.
- Pencil: For marking measurements and stud locations.
- Safety Glasses: Always protect your eyes when cutting and drilling.
- Wood Screws: Ensure they are appropriate length and type for your wood and supports (e.g., construction screws).
- Wood Glue: For added strength in joints, if applicable, especially when joining support cleats.
- Sandpaper or Power Sander: For smoothing cut edges and preparing surfaces for finishing.
- Paint Brushes/Rollers or Stain Applicators: For applying your chosen finish.
- Caulk Gun & Paintable Caulk (optional): For filling gaps between shelves and walls for a seamless look.
Having all these items readily available before you begin will ensure a continuous and efficient building process, preventing frustrating interruptions.
Wood Types Compared: Selecting the Right Material for Durability and Aesthetics
The type of wood you choose will significantly impact both the strength and overall cost of your shelves. Each material has distinct properties that make it suitable for different applications:
- Plywood: Known for its exceptional strength and stability, plywood is an excellent choice for long spans and shelves intended to hold heavy items. It resists warping and sagging better than solid wood in many cases. Opt for furniture-grade plywood for a smoother finish.
- MDF (Medium-Density Fiberboard): MDF offers a very smooth surface, making it ideal for painting. It’s generally less expensive than plywood but is also heavier and prone to swelling and damage if exposed to moisture. It’s best suited for areas with consistent humidity levels.
- Pine: A lightweight and relatively inexpensive softwood, pine is easy to cut and work with. It’s perfect for smaller shelves, less heavy loads, or where a rustic, natural wood look is desired (especially when stained). However, it’s softer and more prone to dents than plywood.
- Solid Hardwoods (Oak, Maple, Birch): While more expensive and harder to work with, hardwoods offer superior durability, strength, and a luxurious appearance. They are an investment but can create truly exquisite, long-lasting shelves.
Make your selection based on your budget, the anticipated weight the shelf will bear, and whether you plan to paint or stain the finished product. For heavy items like stacked bins, boxes, or books, always opt for thicker boards (¾” minimum) to prevent future sagging and ensure longevity.
Shelf Depth Guide: Optimizing Accessibility and Storage Capacity
The depth of your shelves is a critical factor often underestimated. Shelves that are too shallow can lead to items easily falling off, while those that are too deep make it difficult to reach items stored at the back, turning your closet into a black hole. Here’s a practical guide to common shelf depths:
- Linen Closets: 12-14 inches deep – This depth is ideal for neatly stacking towels, sheets, and blankets without excessive overhang or wasted space.
- Clothing Storage: 14-16 inches deep – Perfect for folded shirts, sweaters, and jeans. It provides enough surface area for clothes to be stacked in manageable piles without being too deep to access.
- Storage Bins/Boxes: 18 inches or more deep – If you plan to use large storage bins, baskets, or store bulkier items, these deeper shelves will accommodate them comfortably.
- Shoe Shelves: 10-12 inches deep – Often sufficient for most shoe sizes without consuming too much space.
Always measure the available depth of your closet first. Crucially, remember to account for any door swings, trim, or existing fixtures that might impede access or installation. Planning the depth carefully ensures both functionality and aesthetic appeal.
Building Your Own Closet Shelf: A Step-by-Step Guide to Success
Now that you’re prepared, I’ll guide you through the entire process, from accurately measuring your space and meticulously prepping your materials to securely getting those shelves mounted. Each step is designed to be straightforward and easy to follow, even if this is your very first time using tools or undertaking a carpentry project. Rest assured, you have the ability to achieve this transformation!
Step 1 – Measure Your Space with Precision
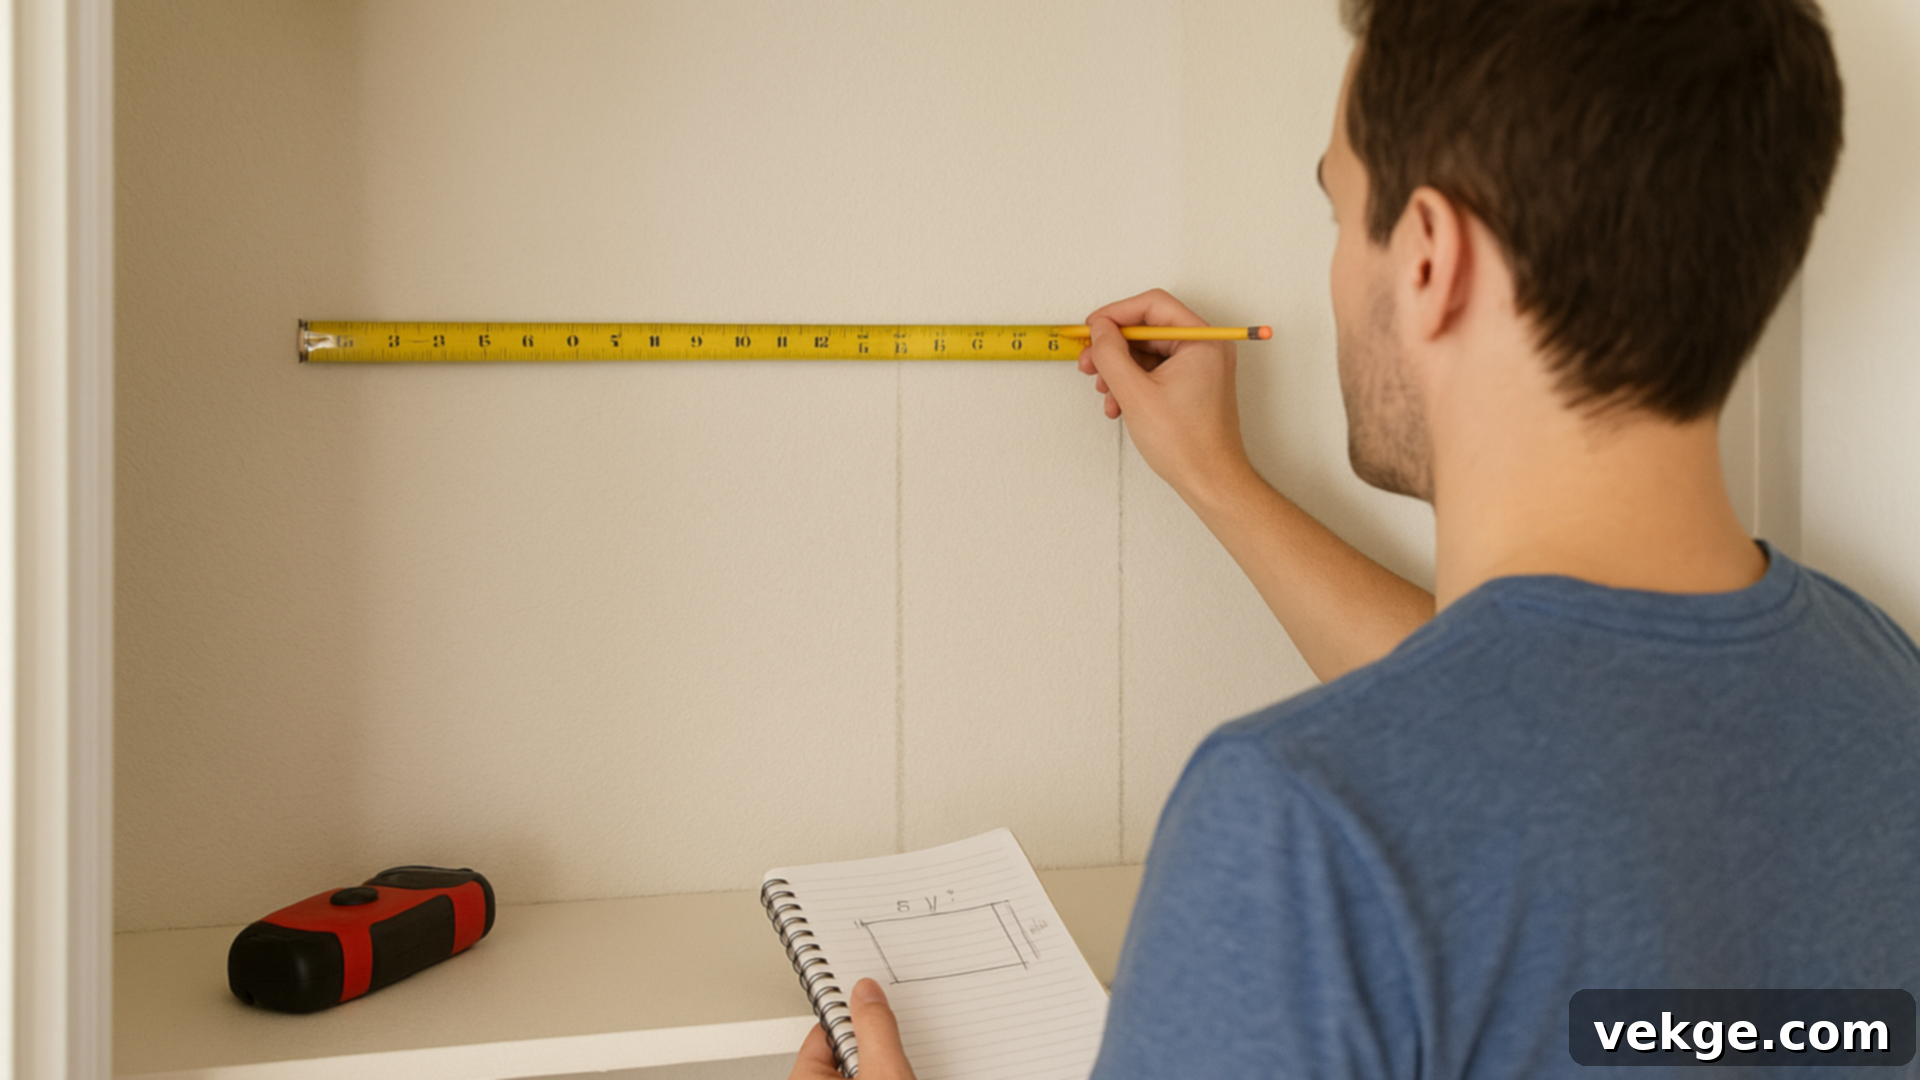
Begin by taking precise measurements of the height, total width, and depth of your closet space. Use a reliable measuring tape and, if possible, a laser measure for larger dimensions. Next, use a stud finder to meticulously locate all available wall studs. Mark these support points clearly with a pencil. Attaching your shelves to studs whenever possible is paramount for ensuring maximum strength and stability.
It’s crucial to double-check all your measurements, especially if your walls appear to be uneven or not perfectly straight – a common occurrence in older homes. Record every dimension in a dedicated notebook or on your phone for easy reference. Consider sketching a simple diagram of your closet, marking stud locations and potential shelf placements. Taking your time during this initial measurement phase is key to avoiding costly errors and rework when you start cutting and installing your materials.
Step 2 – Cut & Prep Materials for a Flawless Finish
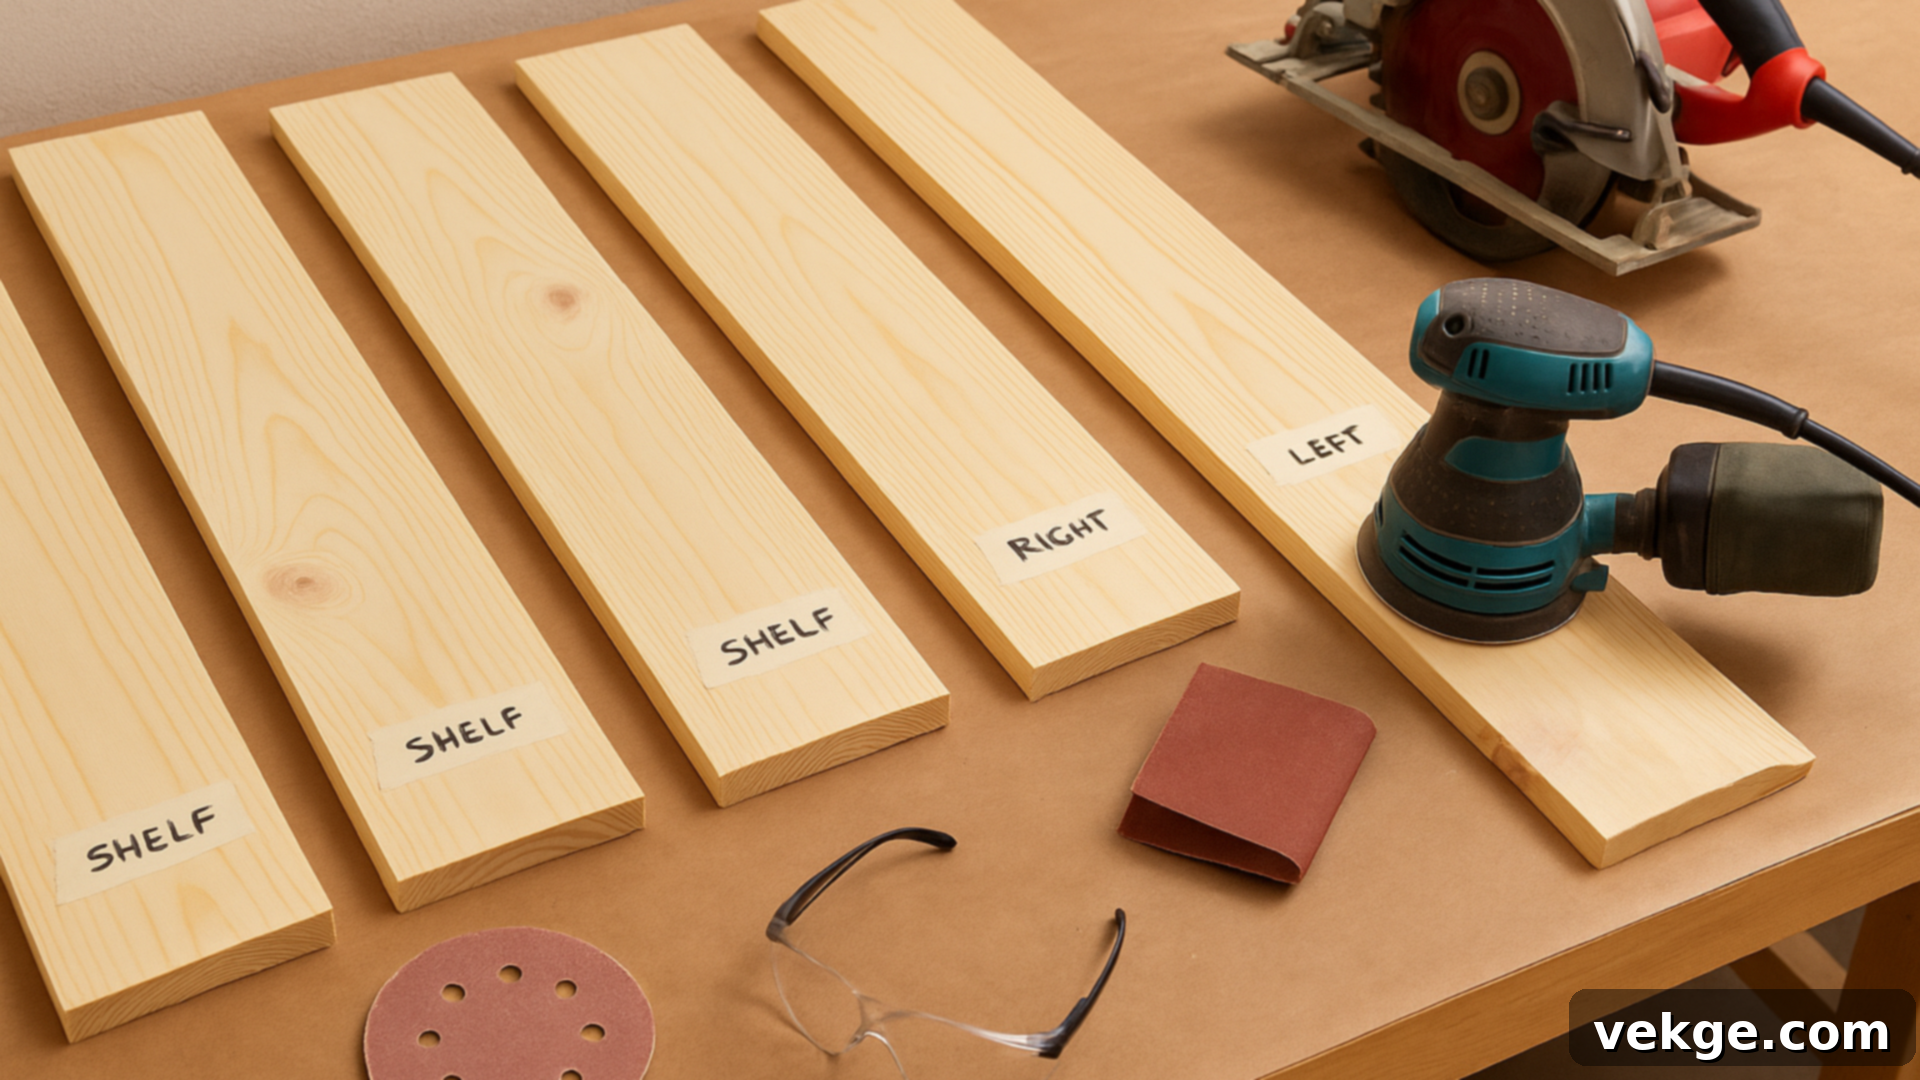
Once you have all your precise dimensions, proceed to cut your chosen boards to the exact lengths required. Use a circular saw for long, straight cuts or a hand saw for smaller, more intricate adjustments. To maintain order and prevent mix-ups, immediately label each cut board with sticky notes or a pencil, indicating its specific location or purpose (e.g., “Top Shelf – Left Side”). It’s generally smart practice to cut all your pieces at once before moving on to assembly.
After cutting, dedicate time to sand all edges smooth using sandpaper (starting with 80-100 grit, then finishing with 150-220 grit) or a power sander. This crucial step not only makes your shelves safer to handle by eliminating splinters but also contributes significantly to a clean, professional aesthetic. Always work on a flat, stable surface and double-check each cut for accuracy before sanding. Being organized and precise at this stage will save you from frustration and extra work down the line.
Step 3 – Paint or Stain the Boards for Durability and Style
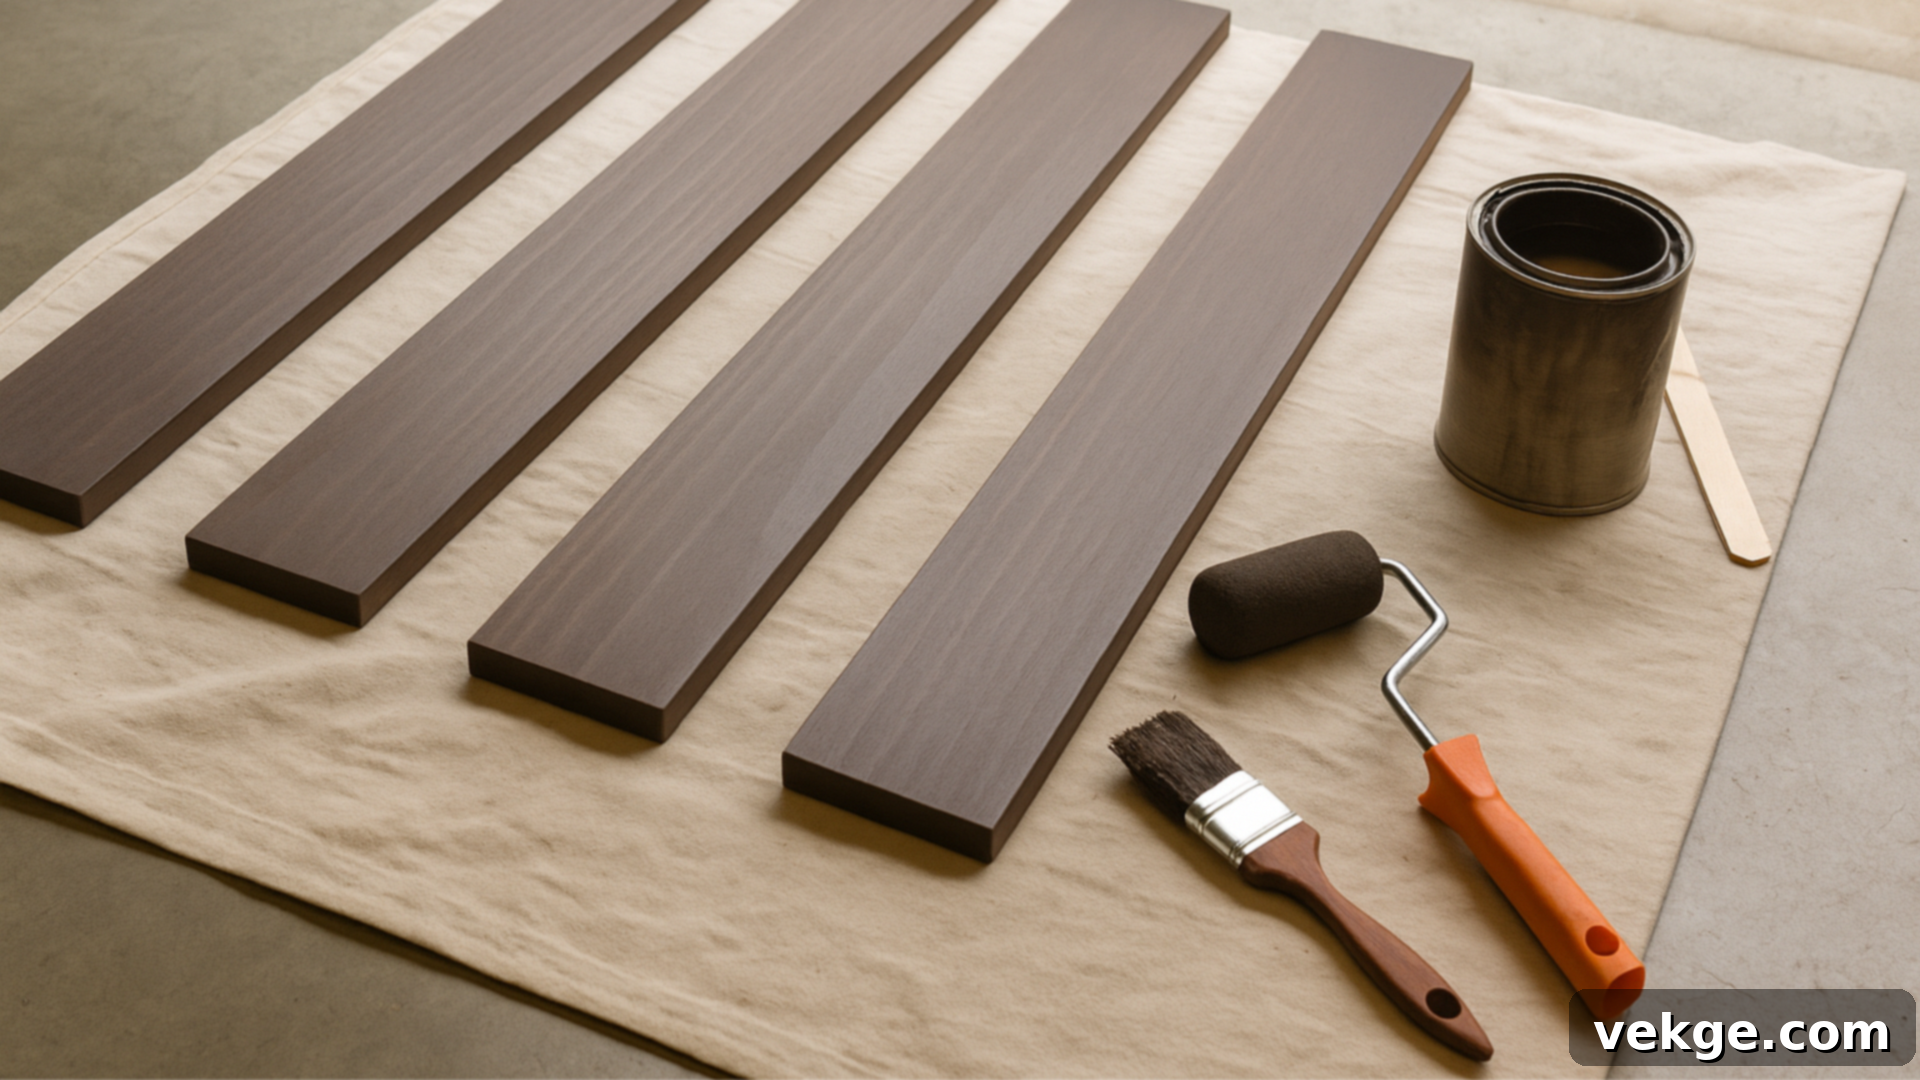
Before proceeding with installation, it’s the ideal time to apply your chosen finish to your boards. You might opt to paint them to seamlessly match your closet’s existing decor, or use a wood stain to beautifully highlight the natural grain of the wood. For a professional finish, consider applying a primer coat before painting, especially on MDF or pine, to ensure even color and better adhesion.
Apply your paint or stain with a brush or roller, following the manufacturer’s instructions, and allow each coat to dry completely – typically around 24 hours between coats, or as specified. It’s absolutely essential to perform this step in a well-ventilated area, preferably outdoors or in a garage with open windows. Skipping this finishing step can lead to raw wood absorbing moisture, becoming susceptible to warping, and wearing out much faster. A properly finished surface not only enhances the aesthetic appeal but also makes your shelves much easier to clean and maintain over their lifespan.
Step 4 – Install Wall Supports for a Strong Foundation
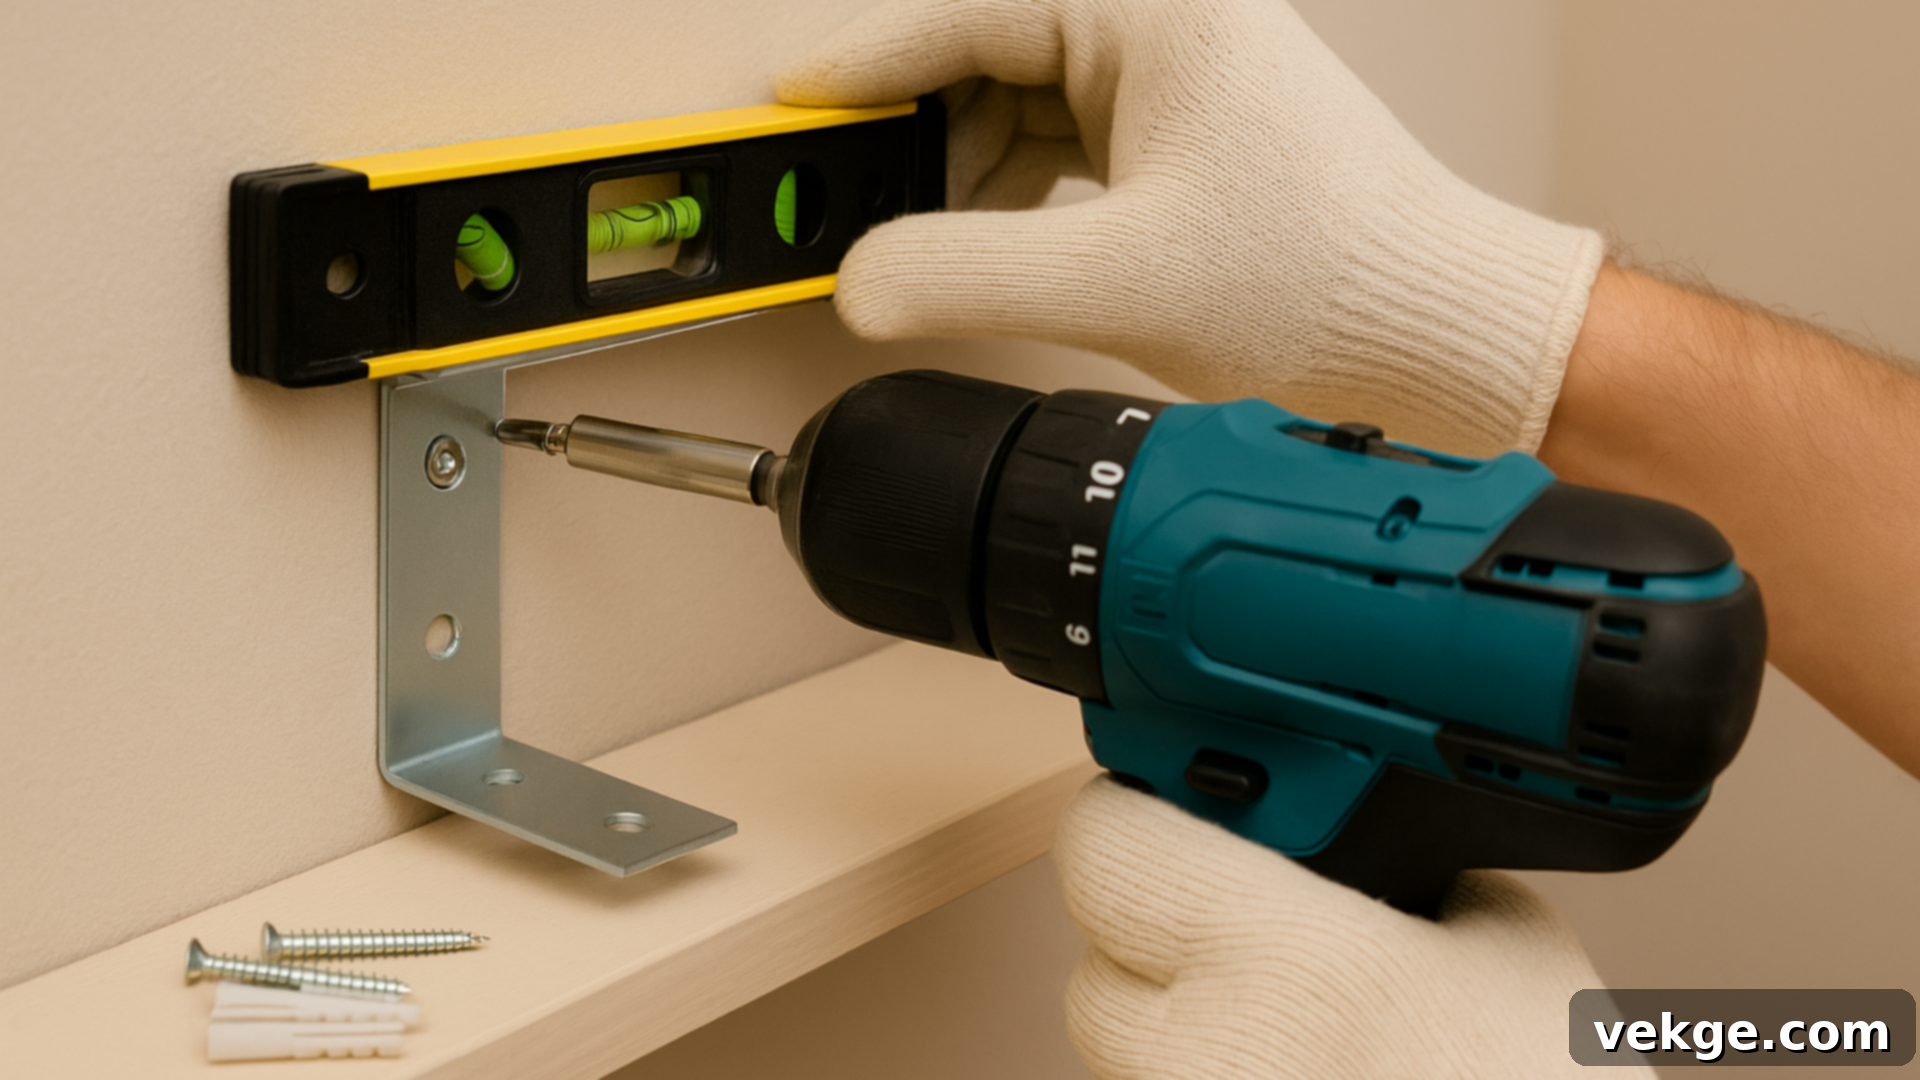
The wall supports form the indispensable base of your entire shelf setup, bearing the weight of your stored items. You can choose from various types, including wood cleats (long strips of wood screwed into the wall), metal L-brackets, or adjustable shelf track systems. Whenever humanly possible, always attach these supports directly into wall studs for superior weight distribution and structural integrity. This is where your stud finder from Step 1 becomes invaluable.
If hitting a stud isn’t an option for a particular section, use robust wall anchors specifically rated for heavy loads. Toggle bolts or self-drilling drywall anchors are good choices for plaster or drywall. Use a bubble level or laser level to ensure all supports are perfectly horizontal and evenly spaced from each end of the closet. Mark your desired shelf height first, then align your supports. Pre-drill pilot holes for your screws to prevent wood splitting. Confirm that every support is tightly and securely fastened; the safety and stability of your entire shelving system depend critically on this step.
Step 5 – Mount the Shelves and Secure Them in Place
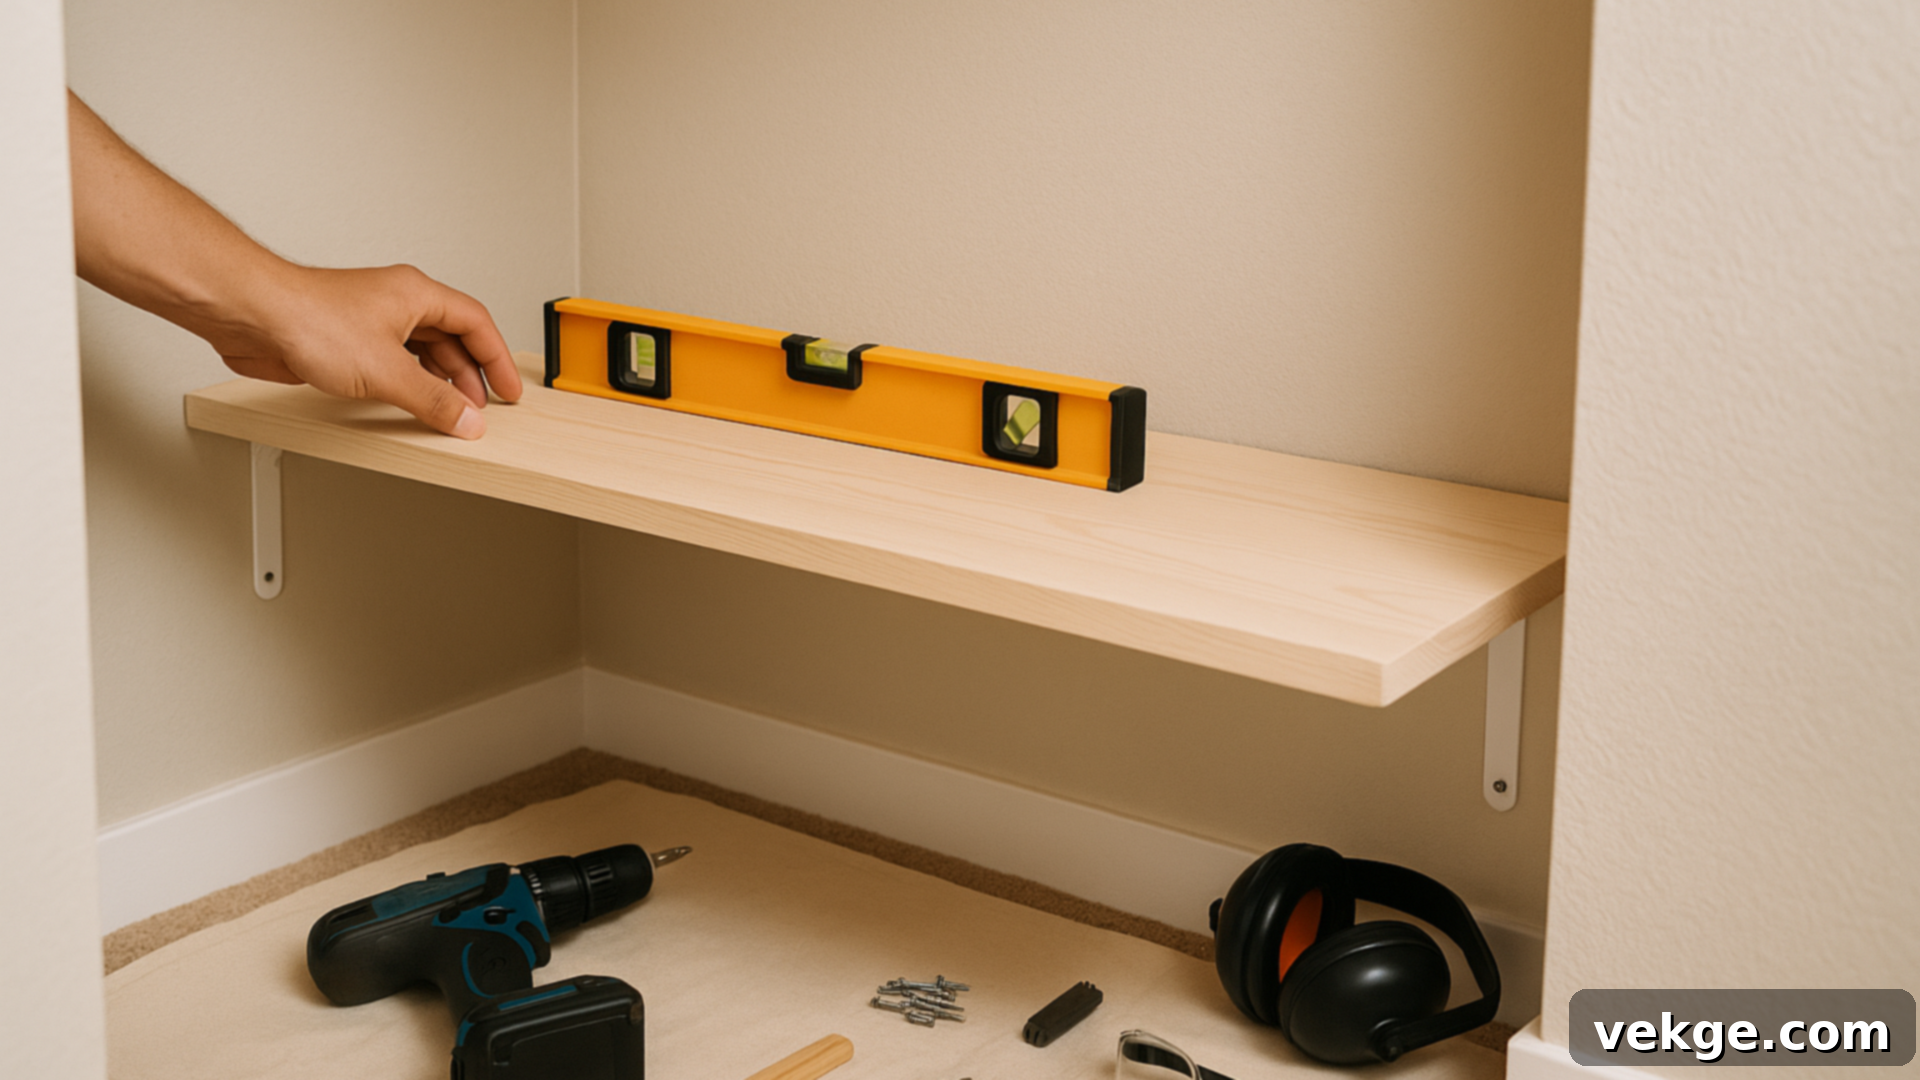
With your supports firmly in place, it’s time to carefully position your finished shelf boards on top of them. Use your level once again to meticulously check that each shelf sits perfectly flat and level. If you notice any slight discrepancies, you can make minor adjustments to your support brackets or insert small wood shims underneath the shelf to achieve perfect alignment.
Once you are completely satisfied with the placement and levelness, securely screw the shelves into the supports. For wood cleats, drive screws down through the shelf into the cleat. For metal brackets, use appropriate screws through the bracket’s holes into the underside of the shelf. For particularly long shelves (over 36-48 inches), consider adding an additional middle support underneath to proactively prevent any potential sagging over time, especially if they will hold heavy items.
If you’re installing multiple shelves, double-check the vertical spacing between them to ensure it meets your storage needs (e.g., enough height for folded sweaters or tall books). This final installation step brings your vision to fruition, transforming your closet into a functional and beautifully organized space, ready for immediate use.
Fixing Common DIY Shelving Problems: Troubleshooting for Success
Even with the most meticulous planning, minor issues can occasionally arise during a DIY build. This section offers practical and quick fixes to ensure your closet shelves remain robust, safe, and effortlessly functional for years to come.
Dealing with Uneven Walls for a Level Finish
Older homes or certain construction types often feature walls and corners that are far from perfectly straight or plumb, which can significantly affect the alignment and appearance of your shelves. To remedy this common issue, strategically place thin wood shims behind your cleats or brackets to fill any gaps between the support and the wall. You can also carefully scribe the back edge of your shelf board to match the contour of a wavy wall for a truly custom, gap-free fit, though this requires a bit more skill and specialized tools.
These small adjustments help ensure your shelves sit perfectly level and flush against the wall, creating a polished, built-in look. Always re-check with a level after any adjustments before final fastening. Investing a few extra minutes in these precise adjustments will yield cleaner, more professional results that stand the test of time.
Maximizing Storage in Tight Spaces and Narrow Closets
Working within the constraints of small, narrow, or awkwardly shaped closets can feel limiting, but you still have an abundance of clever options to maximize storage. Floating shelves, where the supports are hidden within the shelf itself, are an excellent solution when floor space is at a premium or a minimalist aesthetic is desired. Installing corner shelves effectively utilizes every available inch, transforming otherwise wasted space into valuable storage.
Consider cutting boards to fit snugly wall-to-wall for a built-in look, or opt for adjustable track systems that don’t require side supports, offering flexible shelf placement. Always account for the swing of closet doors, light switches, or any other permanent fixtures when planning your layout. By creatively designing around a tight layout, you can craft highly functional storage without creating a cluttered or impassable space.
Preventing Shelf Sag for Long-Term Durability
Over time, shelves can begin to visibly dip or sag in the middle, especially if they are long or consistently loaded with heavy items. This common problem can be prevented with a few proactive measures. Firstly, always choose thicker boards—at least ¾ inch—for shelves intended to bear significant weight. The thicker the material, the greater its inherent resistance to bending.
For any shelves exceeding 36-48 inches in length, it is highly advisable to add an intermediate support. This could be a center bracket, an additional cleat attached to the back wall, or even a vertical divider in the middle to help distribute the load. You can also reduce the spacing between your main wall supports to minimize the unsupported span of the shelf. Ensure all screws are tight and brackets are robustly secured. A few added supports and careful material selection now will keep your shelves firm, reliable, and perfectly level for many years to come.
Closet Layout Ideas: Tailoring Your Shelves to Every Space
The optimal closet layout is highly dependent on the specific type of closet you’re working with. Every space serves a different purpose, so your shelving configuration should precisely match how you intend to use it. I’ve compiled a variety of layout ideas to help you make the absolute most of your closet, whether it’s a spacious walk-in, a compact reach-in, a wide open area, or a tight, narrow nook.
Linen Closet: Organized Freshness
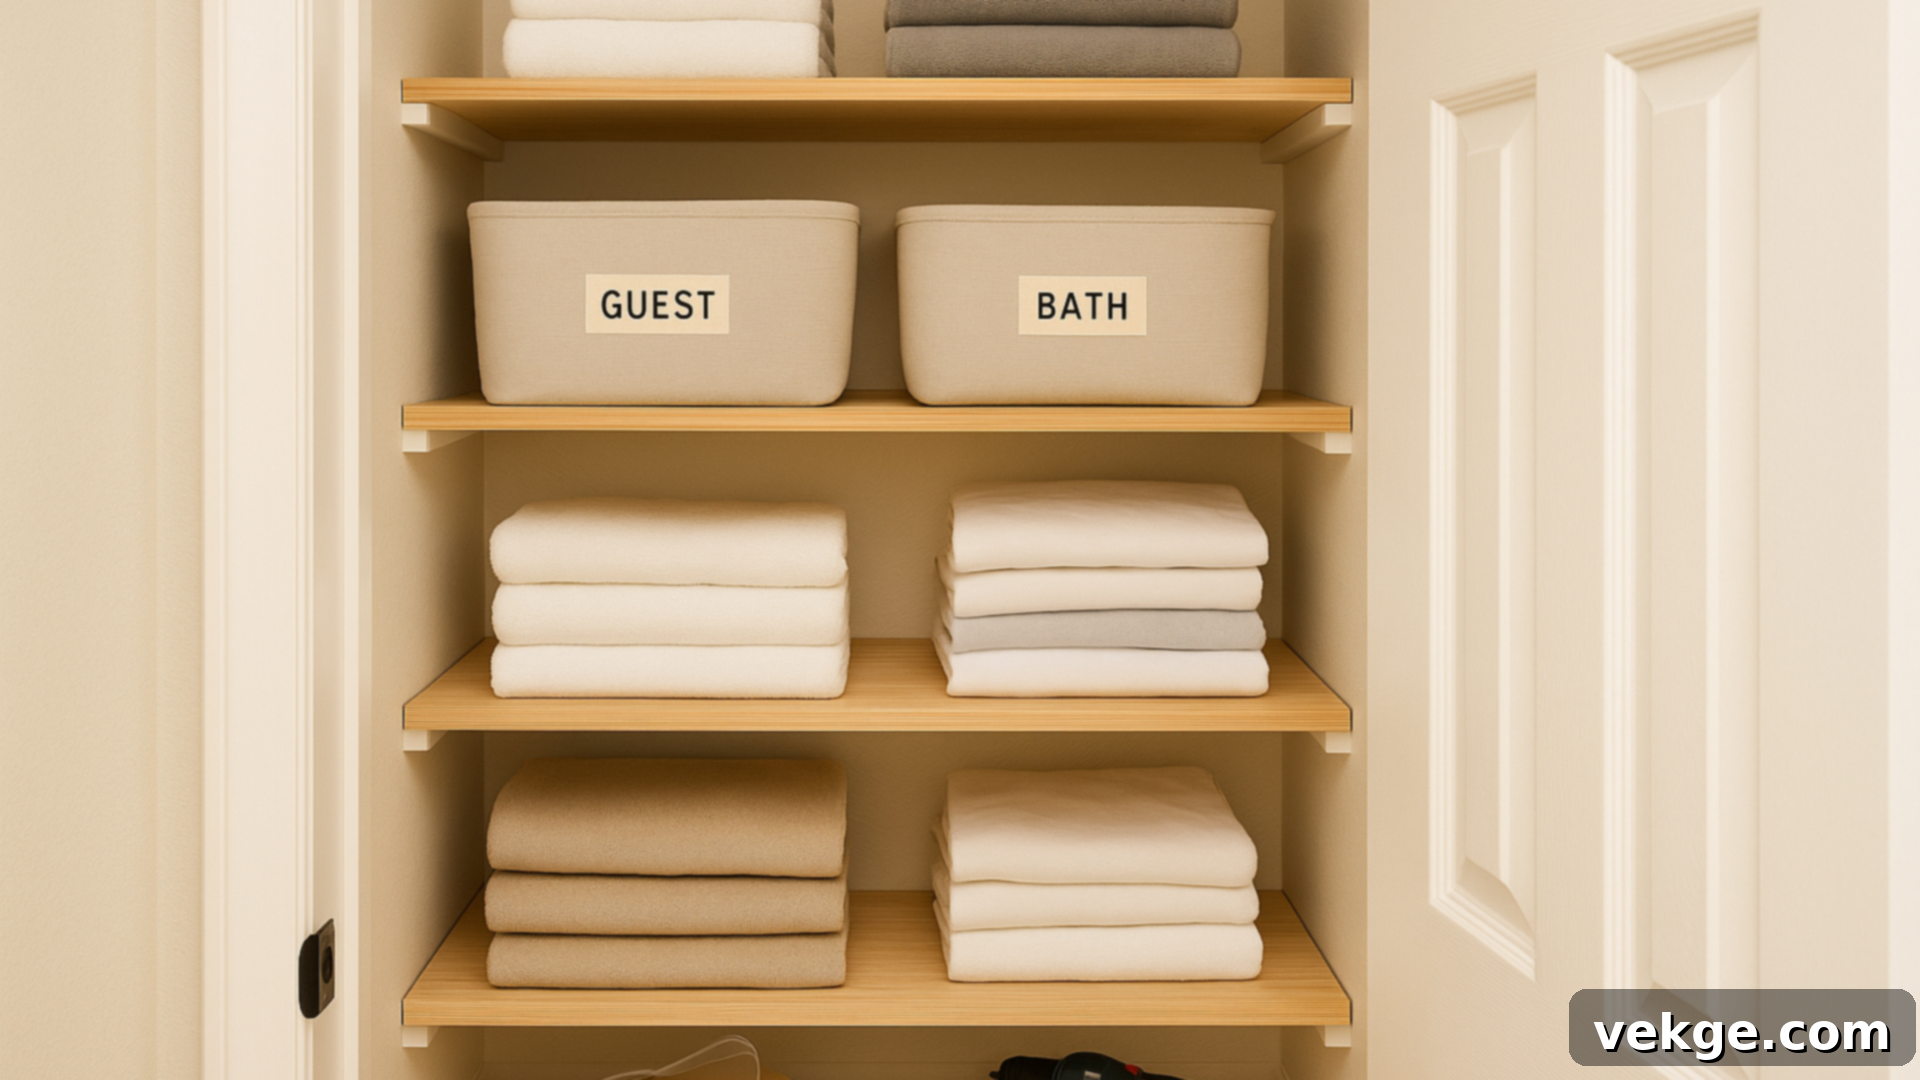
Linen closets are most effective with simple, deep shelves designed to efficiently stack towels, sheets, blankets, and other household textiles. Fixed shelves, spaced evenly from top to bottom, typically offer the best functionality and visual order. Aim for a shelf depth of 12–14 inches and at least 12 inches of vertical clearance between each shelf. This spacing keeps items neat, prevents excessive compression of textiles, and makes them easy to grab without rummaging through unruly piles.
For enhanced organization, consider labeling sections for different categories like “Bedding,” “Bath Towels,” or “Guest Supplies.” Integrating pull-out baskets on lower shelves can also be useful for smaller items like washcloths or cleaning supplies, ensuring everything has its designated place.
Coat Closet: Ready for Any Season
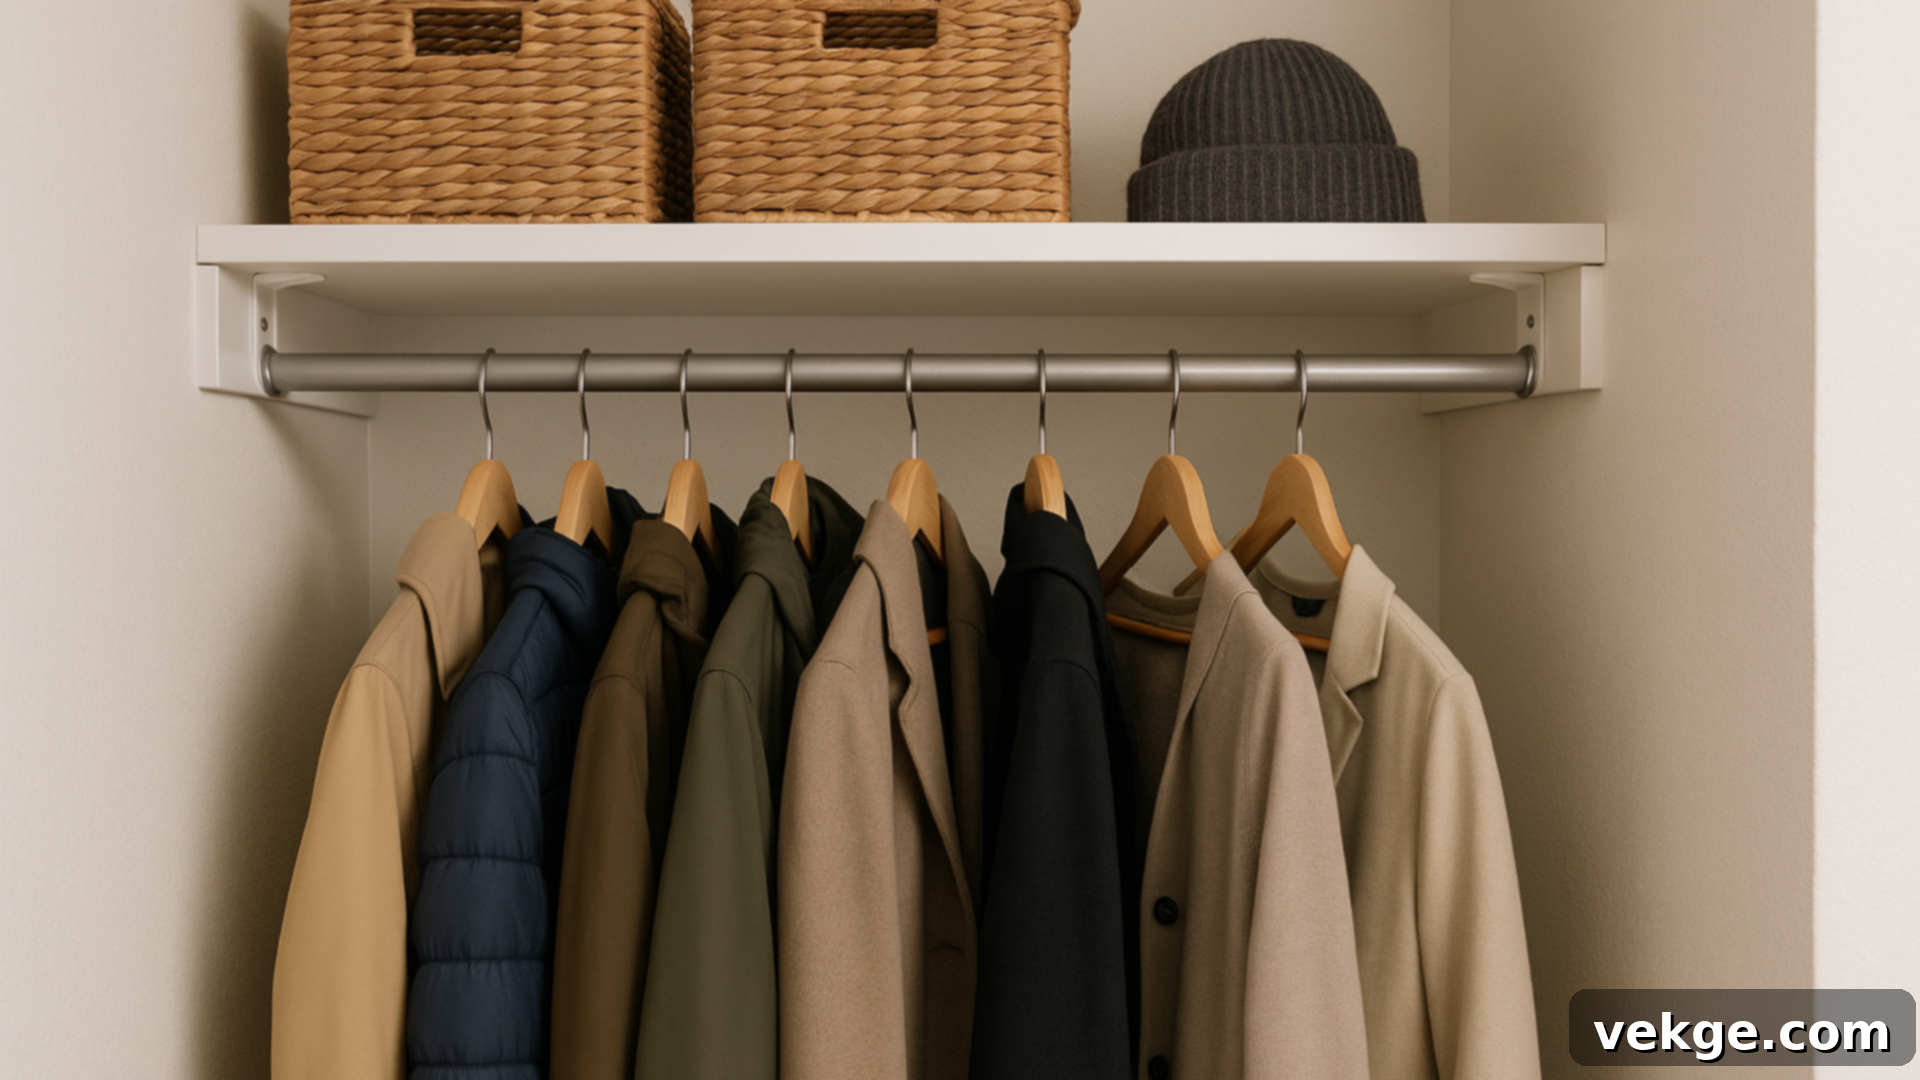
A coat closet benefits most from a thoughtful combination of hanging space and shelf storage. Install a sturdy hanging rod approximately 60-70 inches from the floor, positioned directly beneath a fixed top shelf. The rod will efficiently accommodate jackets, coats, and other outerwear, while the robust top shelf can store bulkier seasonal items like hats, gloves, scarves, and even small duffel bags. Keep the top shelf about 16–18 inches deep to prevent items from easily falling off.
It’s crucial to secure the hanging rod directly to wall studs or very solid side panels to reliably support the considerable weight of multiple heavy winter coats. You might also consider a shallow shelf or a shoe rack on the floor for boots and everyday footwear, keeping the entry clear and tidy.
Walk-In Closet: The Ultimate Dressing Room
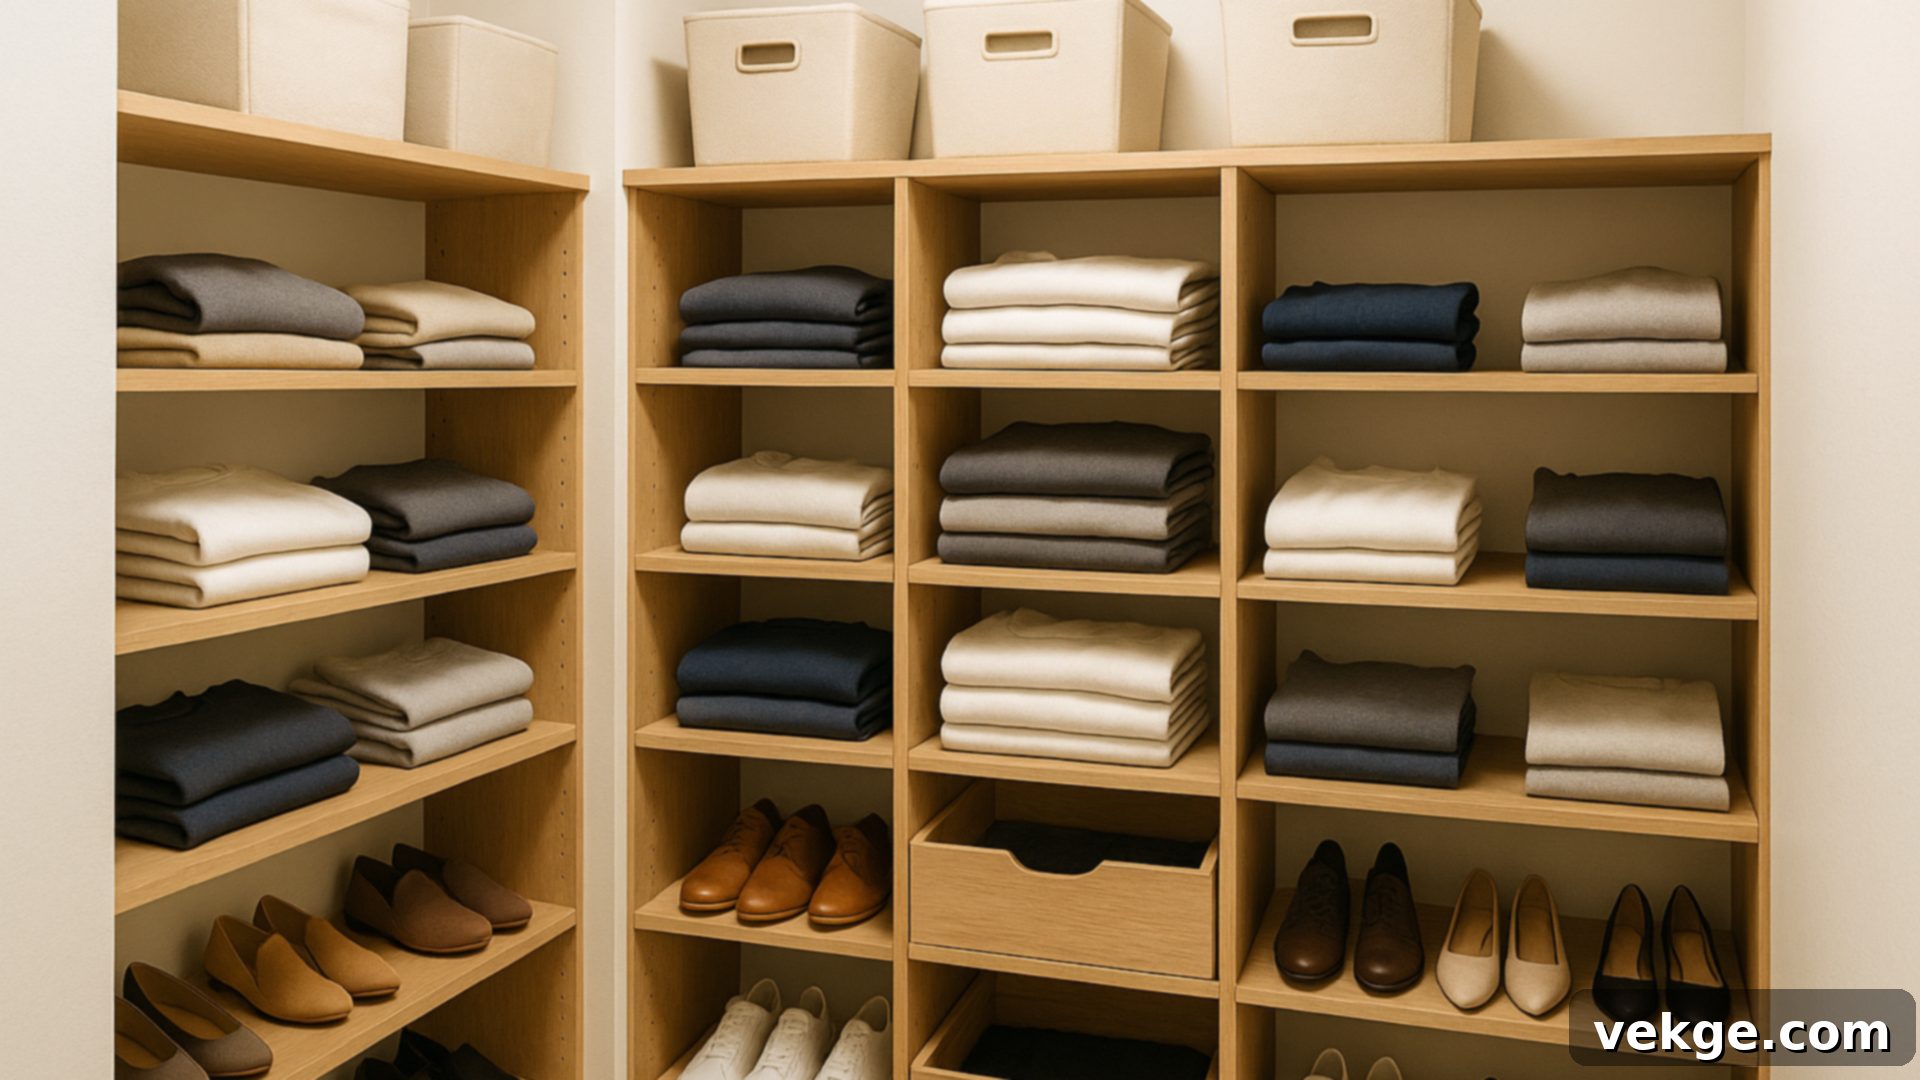
Walk-in closets offer the most flexibility for creating extensive and highly personalized storage solutions. A U-shape or L-shape layout typically provides the maximum amount of usable space. Design your system with distinct zones: install lower shelves for shoes and boots, mid-level shelves for neatly folded clothes (sweaters, t-shirts, jeans), and higher shelves for items used less frequently, such as seasonal attire or luggage.
Integrate dedicated spaces for bins or drawer inserts to sort smaller accessories like socks, belts, ties, and jewelry. Crucially, ensure you leave ample walking space in the center of the closet so you can move around comfortably and access all your belongings without bumping into shelves or feeling cramped. Consider adding a full-length mirror or task lighting to enhance functionality.
Reach-In Closet: Smart Solutions for Compact Spaces
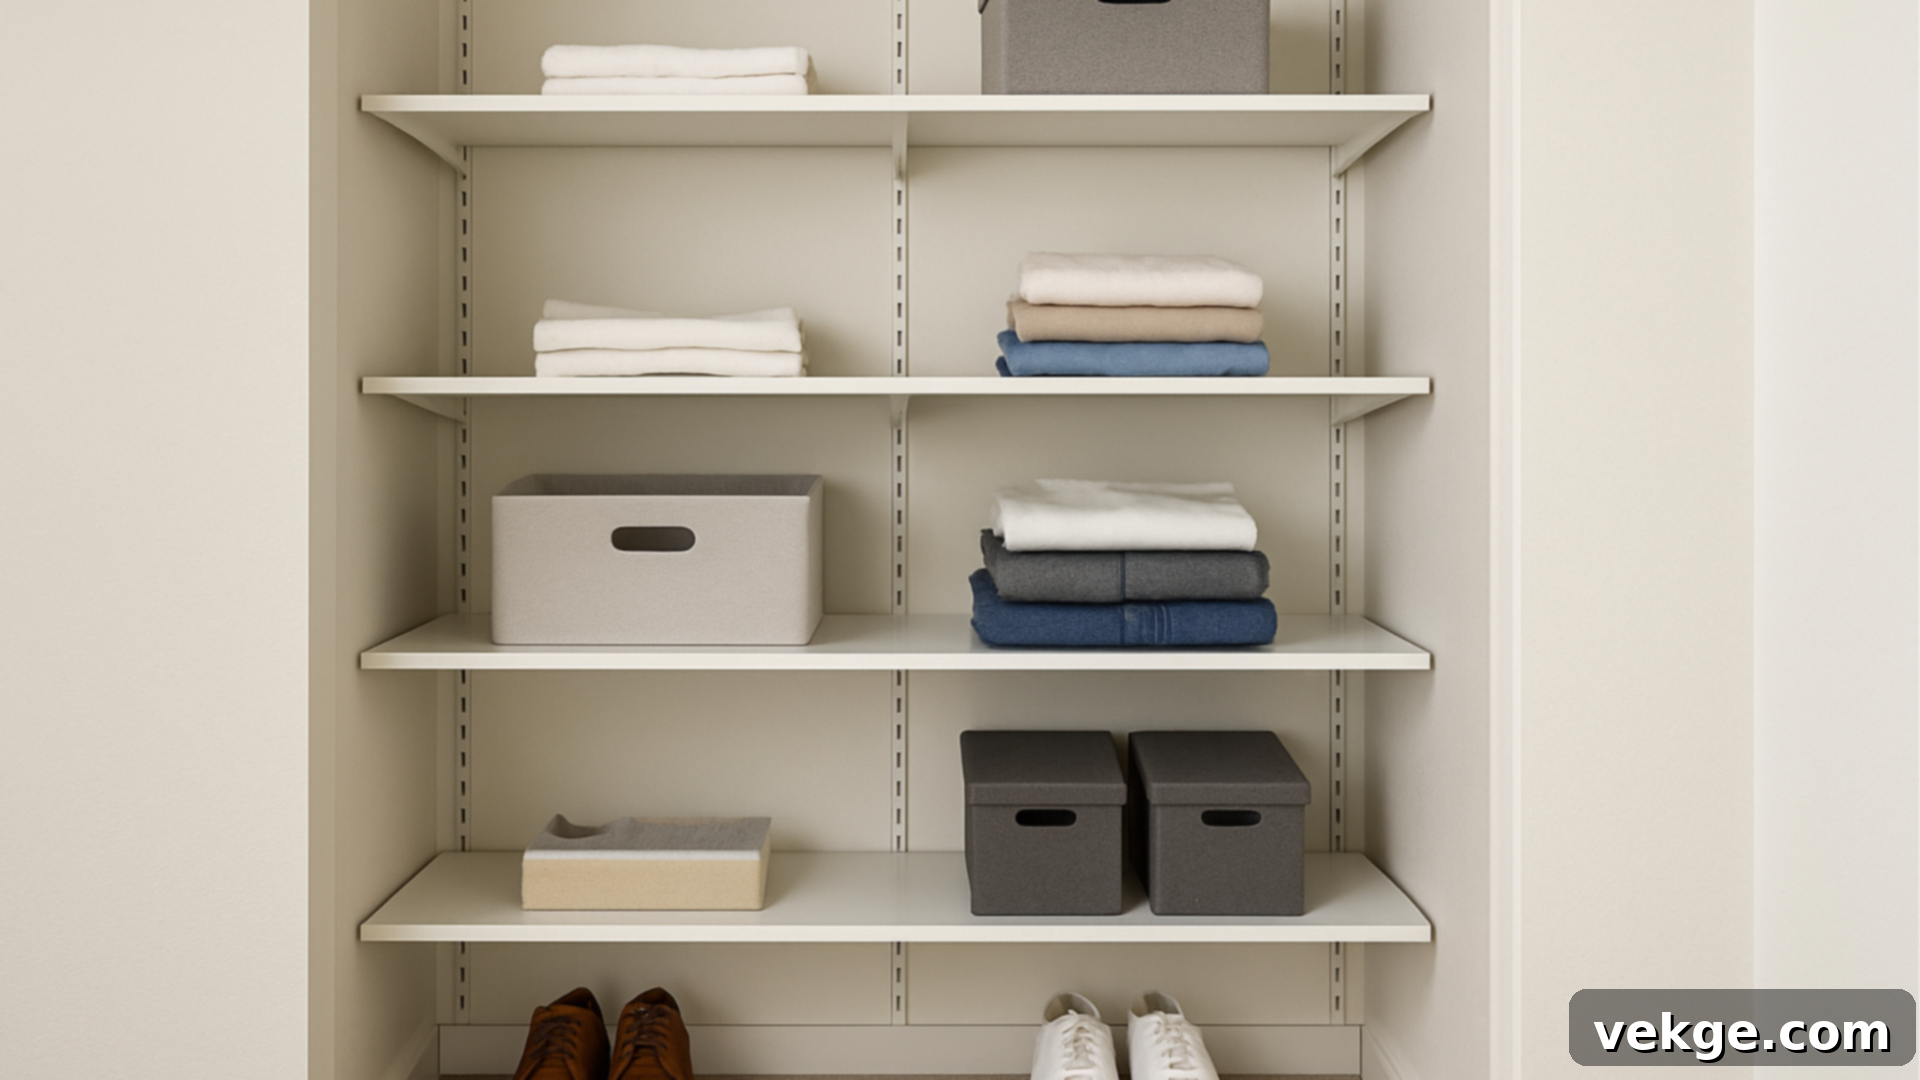
Reach-in closets, by their nature, require smart, space-efficient solutions. They benefit greatly from floating shelves or versatile modular setups that don’t impede access or the door swing. Shelves can extend wall-to-wall, typically at a depth of 12–16 inches, depending on the items you intend to store. To maximize adaptability, consider using adjustable shelf tracks, which allow you to effortlessly change shelf heights as your storage needs evolve over time.
For even greater organization, integrate vertical dividers to keep stacks of clothes tidy, or utilize stackable bins for smaller items. The key is to avoid over-cluttering the center of the closet, ensuring it remains easy to grab what you need without extensive digging or rearranging everything. Installing shelves above the hanging rod can also significantly increase storage capacity for items like duvets or off-season clothing.
Why DIY Closet Shelves Work: Unmatched Flexibility and Value
When you choose to build your own closet shelves, you unlock a level of flexibility and enjoy significant cost savings that pre-fabricated solutions simply cannot match. You’re not constrained by standardized sizes or limited material options, making it far easier to create a storage system that perfectly integrates with your specific space and genuinely meets your unique organizational needs.
More Affordable Than Store-Bought Kits
The costs of store-bought closet kits, particularly those with custom features or modular components, can quickly accumulate. With a DIY approach, you gain the power to select your materials directly, often purchasing raw wood or plywood at a fraction of the cost of pre-cut, pre-finished kit pieces. You also avoid paying for unnecessary elements or fancy add-ons that come bundled in many kits but don’t align with your specific requirements.
With just a few basic tools and a thoughtful plan, you can construct incredibly strong, durable, and long-lasting shelves for significantly less than half the price of most comparable kits. It truly is the intelligent choice for upgrading your storage on a budget without compromising on quality, structural integrity, or personalized design.
Fits Any Closet Type, No Matter the Shape or Size
Closets are notoriously varied, ranging from compact reach-ins to sprawling walk-ins, and from narrow hallway linen spaces to oddly shaped nooks with sloped ceilings. DIY shelving empowers you to custom-fit your design to the actual dimensions and unique architectural features of your space, rather than forcing a standard kit to adapt.
You can effortlessly work around existing baseboards, electrical outlets, unusual angles, or even slanted ceilings. Whether your goal is to store towels, heavy winter coats, or your everyday clothing, your DIY shelves will be purpose-built to perfectly accommodate those items. This eliminates the frustration of trimming, forcing adjustments, or dealing with unsightly gaps that are often unavoidable with off-the-shelf kits, resulting in shelves that function precisely as you envisioned.
Custom to Your Exact Storage Needs and Style
One of the greatest advantages of DIY shelving is the unparalleled freedom it offers. You get to decide the exact number of shelves, their precise depth, and their specific function. You can easily incorporate hanging rods, custom-sized bins, or baskets to perfectly match your storage requirements. Do you need robust shelves for bulky storage boxes or just a few shallow tiers for shoes? The power to decide is entirely yours.
Beyond functionality, you also have complete control over the aesthetic. You can choose to stain the wood to highlight its natural beauty, paint it to blend seamlessly with your home’s decor, or leave it unfinished for a rustic look. This level of aesthetic and functional freedom ensures that your DIY shelves truly feel like they were made just for you, reflecting your personal style and meeting your exact organizational demands.
Smart Storage Add-Ons: Enhancing Functionality and Aesthetics
Once your primary shelves are expertly built and installed, incorporating a few thoughtful add-ons can significantly elevate your closet’s usability and organizational efficiency. These simple upgrades enhance functionality without consuming precious extra room, making them especially valuable in smaller spaces or shared closets where every inch of storage counts.
Hidden Brackets: For a Clean, Floating Aesthetic
Hidden brackets offer a sleek, modern, and clean “floating” look for your shelves by eliminating visible supports. These specialized brackets are either installed directly into the wall studs and then the shelf slides over them, or they are recessed into the back of the shelf itself, creating a smooth, unobstructed surface. This option is particularly favored for contemporary or minimalist design schemes where visual clutter is to be avoided.
It’s crucial to select hidden brackets that are robustly rated for the maximum weight you anticipate storing on your shelves. Even without visible hardware, these shelves can be incredibly strong and secure if installed correctly and into solid blocking or studs. Hidden brackets typically work best with thicker shelf wood (1.5″ or more) to allow for sufficient material to house the mounting hardware securely, ensuring long-lasting stability.
LED Strip Lights: Illuminating Your Closet Contents
LED strip lights offer a quick, energy-efficient, and highly effective way to brighten up your closet shelves and improve visibility. You can easily affix them to the underside of each shelf, along the closet’s top frame, or even vertically along the side walls to cast an even glow. Both battery-powered and plug-in versions are widely available, with some advanced options including motion sensors that activate the lights automatically when the closet door opens.
This is an invaluable upgrade for closets lacking built-in lighting or for dark corners that need extra illumination. Installation is typically straightforward: simply peel the adhesive backing, stick the strip in place, and plug it in (or insert batteries). Choose warm white LEDs for a cozy, inviting atmosphere, or cool white for a brighter, more functional workspace effect that enhances color perception of your clothing.
Fabric Bins & Baskets: Containing Clutter with Style
Fabric bins and decorative baskets are indispensable tools for organizing smaller, often loose items such as socks, belts, scarves, craft supplies, or small accessories. They slide effortlessly onto shelves and come in a vast array of sizes, colors, and materials to match any decor. Opt for sturdy bins with reinforced sides and convenient handles, making them easy to pull out, access contents, and slide back into place.
Group similar items within each bin to prevent clutter and streamline the process of finding what you need. Adding simple labels to the front of each bin can save significant time and maintain long-term organization. These versatile containers are not only excellent for hiding everyday mess but also contribute to a consistently neat and visually appealing shelf system.
Adjustable Shelf Tracks: Future-Proofing Your Storage
Adjustable shelf tracks provide an incredible degree of flexibility, allowing you to easily change the height of your shelves over time. This feature is particularly beneficial if your storage needs evolve, if you plan to re-purpose the closet for different items, or if the closet is in a child’s room where needs will change as they grow. The system typically consists of metal strips that are securely mounted vertically to the wall studs, into which metal brackets can be effortlessly inserted and repositioned at various heights.
Once the tracks are installed, you can raise or lower individual shelves without the need for drilling new holes or undertaking major reconstruction. This option is a superb choice for dynamic spaces like kids’ bedrooms, guest closets, or shared storage areas that demand adaptable and reconfigurable storage solutions.
Mistakes to Avoid: Ensuring a Strong and Stable Build
Even a seemingly straightforward project like building closet shelves can encounter problems if critical details are overlooked. I’ve personally learned from many of these pitfalls, so here are some common mistakes to actively watch out for. Addressing these will help ensure your shelves remain strong, perfectly straight, and fully functional for the long haul.
- Skipping Stud Anchors: This is perhaps the most critical error. Shelves that are not firmly anchored into wall studs are prone to pulling away from the wall, collapsing under weight, and creating a significant safety hazard. Always use a reliable stud finder to locate and mark studs before drilling any holes. If studs are unavailable, use heavy-duty toggle bolts or other appropriate wall anchors rated for substantial weight.
- Using Weak or Insufficiently Thick Wood: Opting for thin, low-quality, or inappropriate wood (e.g., cheap particle board for long spans) is a recipe for disaster. Such materials can quickly bend, sag, or even crack under pressure, especially when storing heavy items. Always choose solid, thick wood (¾” minimum, thicker for long spans) that is clearly rated to handle your anticipated storage needs.
- Inaccurate Cuts Leading to Gaps and Wobbles: Rushing the cutting phase without meticulously checking measurements can result in unsightly gaps, wobbly shelves, or boards that simply don’t fit the space correctly. This not only compromises the aesthetic but also the structural integrity. Always adhere to the “measure twice, cut once” mantra. Use a square to ensure perfectly straight and accurate cuts to avoid wasting materials and extra work.
- Neglecting to Level: Failing to use a level at every installation step – when marking support lines, attaching cleats, and finally placing the shelves – will result in visually uneven and functionally unstable shelves. Take your time to ensure everything is perfectly plumb and level.
- Rushing the Finishing Process: Applying paint or stain without proper sanding, preparation, or allowing sufficient drying time between coats can lead to a poor, uneven finish that chips, peels, or looks unprofessional prematurely. Patience is key for a durable and attractive finish.
Conclusion: Empowering Your Closet Transformation
You are now equipped with the comprehensive knowledge and practical steps needed to confidently build DIY closet shelves that perfectly fit your space, efficiently hold everything you need, and offer significant cost savings. By thoughtfully considering each stage and applying these principles, you can transform any cluttered closet into an organized sanctuary.
Throughout this guide, we’ve meticulously covered everything from the initial planning and material selection to the precise building and secure installation processes, using basic tools and addressing various closet types—from compact linen closets to spacious walk-ins and tight reach-ins. Remember the core principles: measure with absolute care, anchor supports firmly into wall studs whenever possible, and always opt for solid, appropriate materials that ensure longevity and stability.
Are you ready to embark on more home improvement projects? Explore our other detailed DIY guides for simple, step-by-step assistance on a variety of transformations around your home. There’s always something new and rewarding to build, and I am here to guide you every step of the way, helping you enhance your living spaces with confidence and skill.
