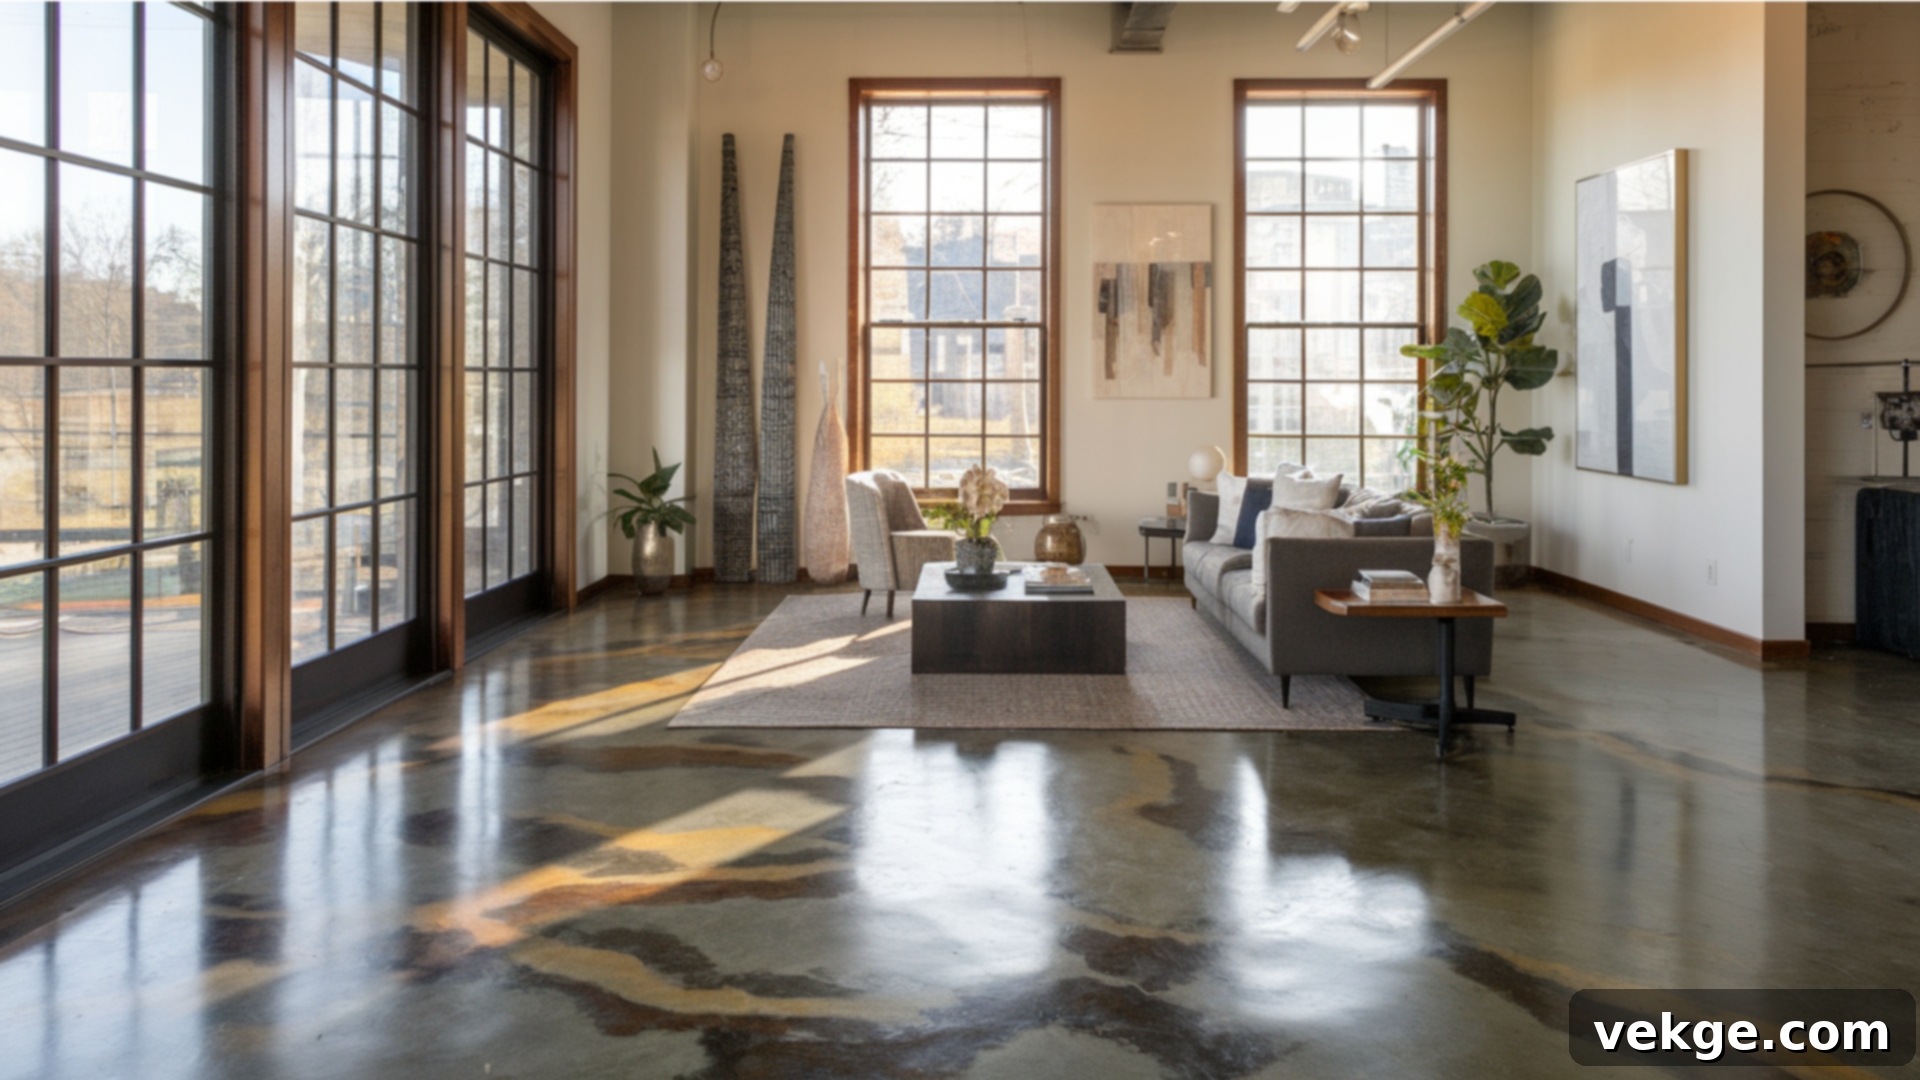
Transform Your Home: The Ultimate Guide to Beautiful Stained Concrete Floors
Stained concrete floors are rapidly becoming a premier choice for homeowners seeking an affordable, stylish, and incredibly durable flooring solution. Whether you’re embarking on a major home renovation or building a new property from the ground up, these floors offer a sleek, modern aesthetic that seamlessly integrates into almost any design scheme, from industrial chic to rustic charm.
You might be asking: Are stained concrete floors a good idea for my home? The answer largely depends on your specific needs, aesthetic preferences, and lifestyle. This comprehensive guide will walk you through everything you need to know: the profound benefits, potential drawbacks, and essential maintenance tips for integrating stained concrete floors into your house. By the end, you’ll have a clear understanding of whether this versatile and long-lasting option is the perfect fit for your living space.
Understanding Stained Concrete Floors: More Than Just a Slab
Stained concrete floors are much more than just a bare concrete slab. They are meticulously treated with specialized stains that chemically react with the minerals in the concrete itself, creating rich, translucent, and often variegated color effects. This unique process ensures that each floor is one-of-a-kind, boasting deep, luminous tones that can’t be replicated by paint or topical coatings. The result is a sophisticated, durable flooring option designed to enhance your home’s design and provide lasting value.
Key Benefits of Stained Concrete Flooring
Choosing stained concrete offers a multitude of advantages that make it an increasingly popular option for modern homes:
- Unbeatable Cost-Effectiveness: Compared to many traditional flooring materials like hardwood, high-end tile, or natural stone, stained concrete offers a significantly more affordable entry point, especially if you’re working with an existing concrete slab. The long-term savings are also substantial due to its longevity and minimal maintenance requirements. It provides a luxurious, high-end look without the exorbitant price tag.
- Exceptional Durability and Longevity: Concrete is inherently one of the most robust building materials available. When stained and properly sealed, your concrete floors become incredibly resilient against daily wear and tear. They are ideal for high-traffic areas, standing up to pets, children, and heavy furniture without showing significant signs of damage. With proper care, a stained concrete floor can easily last for decades, often outliving other flooring types.
- Remarkable Design Flexibility and Customization: The aesthetic possibilities with stained concrete are virtually limitless. Stains come in a wide spectrum of colors, from earthy browns and grays to vibrant blues and greens. Moreover, the application techniques allow for mimicking the appearance of other premium materials like polished marble, natural stone, or even exotic hardwoods. You can achieve various patterns, incorporate decorative scores, or combine multiple colors to create a truly bespoke look that perfectly complements your home’s interior design.
- Low Maintenance and Easy Cleaning: Unlike carpet which traps allergens and dirt, or grout lines that can be notoriously difficult to clean, stained concrete floors are seamless and non-porous when sealed. This makes them incredibly easy to clean – a simple sweep and damp mop are usually all that’s needed to keep them looking pristine.
- Eco-Friendly Choice: For homes already built on a concrete slab, choosing stained concrete means utilizing an existing material, reducing the need for new materials and their associated manufacturing and transportation impacts. This makes it a sustainable option, minimizing waste and your carbon footprint.
- Improved Indoor Air Quality: Stained concrete floors do not harbor dust mites, pet dander, or other allergens, unlike fibrous materials. This contributes to better indoor air quality, making them an excellent choice for individuals with allergies or asthma.
Exploring the Diverse Types of Concrete Stains
The magic of stained concrete lies in the variety of stains available, each offering distinct characteristics in terms of appearance, application, and durability. The most common types you’ll encounter are acid-based, water-based, and dye-based stains. Understanding their differences is key to selecting the perfect finish for your project:
| Stain Type | Benefits/Pros | Process/Cons | Ideal Use Cases |
|---|---|---|---|
| Acid-Based Stains | Produces vibrant, variegated, and translucent colors; reacts with concrete’s minerals for a permanent, non-fading finish; creates a unique, mottled appearance reminiscent of natural stone. | More complex and less predictable application process due to chemical reaction; limited color palette (earth tones like browns, greens, blues); requires thorough surface preparation and neutralization. | Basements, living rooms, outdoor patios, commercial spaces. Excellent for achieving natural, earthy, or antique looks. |
| Water-Based Stains | Offers a significantly broader color palette than acid stains, including bright and pastel shades; easier and safer to apply; allows for more control over color intensity and uniformity; environmentally friendly with low VOCs. | Less depth and natural variation compared to acid stains; may require more coats for desired intensity; can appear more opaque; might require more frequent resealing if not properly maintained. | Interior spaces like kitchens, bedrooms, bathrooms, and areas where a controlled, customizable, or contemporary finish is desired. |
| Dye-Based Stains (Concrete Dyes) | Delivers intense, vibrant, and bold colors; available in a vast array of bright and rich hues; penetrates deep into the concrete; dries quickly; ideal for modern, artistic looks. | Less durable than acid or water-based stains against UV exposure (can fade quickly if exposed to direct sunlight); typically requires more maintenance and a robust sealer for longevity; less natural “mottling” effect. | Large, open interior spaces, retail environments, galleries, or anywhere a modern, bold, and highly saturated color statement is desired. Not recommended for outdoor use. |
Each type of concrete stain offers unique advantages depending on your project needs and desired aesthetic. Acid-based stains are perfect for natural, earthy aesthetics with their unique mottled appearance, while water-based stains provide a broader range of colors with easier, more predictable application. If you’re after a vibrant and bold look, dye-based stains are ideal, though they demand a bit more attention to sealing and protection, especially from sunlight. Carefully select the option that best aligns with your design goals, desired maintenance level, and the specific conditions of your space.
DIY Guide: Achieving Stunning Stained Concrete Floors in Your House
Staining your concrete floors can be an incredibly rewarding DIY project, allowing you to personalize your home and save on labor costs. With careful planning and execution, you can achieve professional-looking results. Here’s a detailed, step-by-step guide to help you get started on your journey to beautiful stained concrete.
Essential Tools and Materials Required
Before you begin the exciting stained concrete floor project, ensure you have all the necessary tools and materials readily available. Proper preparation and the right equipment are half the battle:
- Concrete Stain: (Choose Acetone-based, Water-based, or Acid-based based on your desired look and the advice above). Always buy a bit extra.
- Floor Grinder: (20-inch machine with diamond polishing pads) – often rentable from equipment rental stores. Essential for surface preparation.
- HEPA Vacuum: For thorough dust removal after grinding and cleaning.
- Water-based Sealer: Or a sealer compatible with your chosen stain. Consider acrylic, epoxy, or urethane based on traffic and desired finish.
- Pump-up Sprayer: Crucial for even application of stain and sealer.
- Polyethylene Sheeting: Heavy-duty plastic sheeting for protecting walls, doorways, and adjacent areas.
- Painter’s Tape: High-quality tape for securing sheeting and masking baseboards and edges precisely.
- Brushes and Rollers: For detailed work around edges or applying certain types of sealers/finishes.
- Sandpaper: Fine-grit sandpaper (e.g., 220-grit) for light sanding between sealer coats if needed.
- Floor Finish or Wax: (Optional) For an added layer of protection and a higher sheen.
- Ventilation Equipment: Industrial fans and open windows for excellent air circulation, especially when working with chemicals.
- Personal Protective Equipment (PPE): Gloves, safety glasses, respirator mask, knee pads, and long-sleeved clothing are absolutely essential for safety.
- Degreaser/Concrete Cleaner: For deep cleaning the slab.
- Concrete Etcher: (Optional, but often recommended) To open up the concrete pores for better stain penetration, especially for acid stains.
Step 1: Meticulous Preparation of the Area
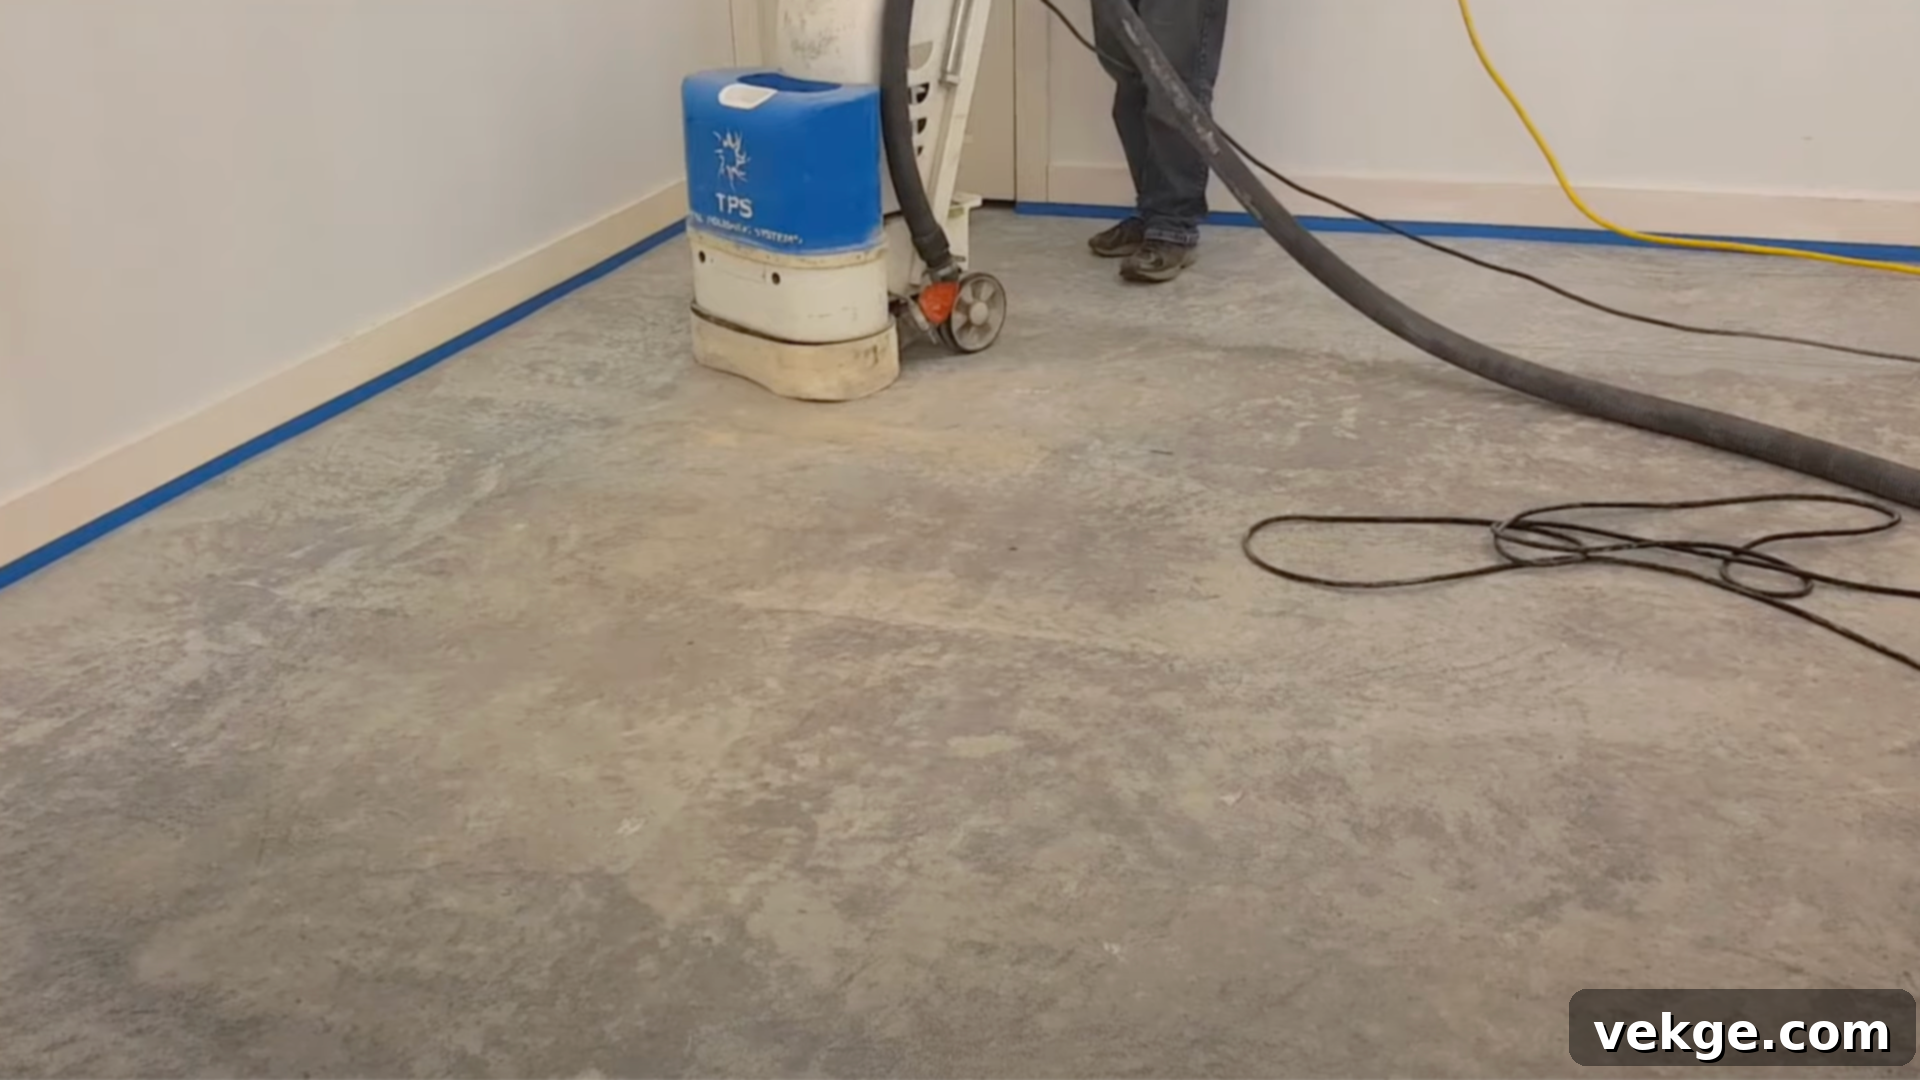
Before any staining begins, thoroughly clear the entire area of all furniture, rugs, and any other obstacles to ensure you have a completely open and ample workspace. This step is critical for even application and preventing accidental stains on belongings.
Next, meticulously cover the walls, baseboards, and any adjacent permanent fixtures with heavy-duty polyethylene sheeting, securing it firmly with high-quality painter’s tape. This protective barrier is crucial to shield surfaces from accidental drips, overspray, and splashes of stain or sealer.
Now, prepare the concrete surface itself. Begin by thoroughly cleaning the concrete using a commercial-grade degreaser and a stiff scrubbing brush or a floor scrubber. This process aims to remove all dirt, grease, oil, wax, paint, or any other contaminants that could inhibit the stain from penetrating evenly. If the floor has been previously sealed or coated, you absolutely must use a chemical stripper to remove all old finishes. Any remaining residue will prevent the stain from reacting correctly. After cleaning, rinse the floor thoroughly with clean water until all cleaning agents are gone.
Once the surface is clean and dry, carefully inspect it for any cracks, divots, or damage. Repair these imperfections using a suitable concrete repair compound and allow it to cure completely according to manufacturer instructions. For optimal stain penetration, especially with acid-based stains, consider lightly etching the concrete surface following product guidelines, then neutralize and rinse thoroughly.
Lastly, ensure the room is exceptionally well-ventilated by opening all windows and doors and setting up powerful fans. Good ventilation is vital to minimize the inhalation of fumes from stains and sealers throughout the entire process.
Step 2: Final Clean and Inspect for Flaws
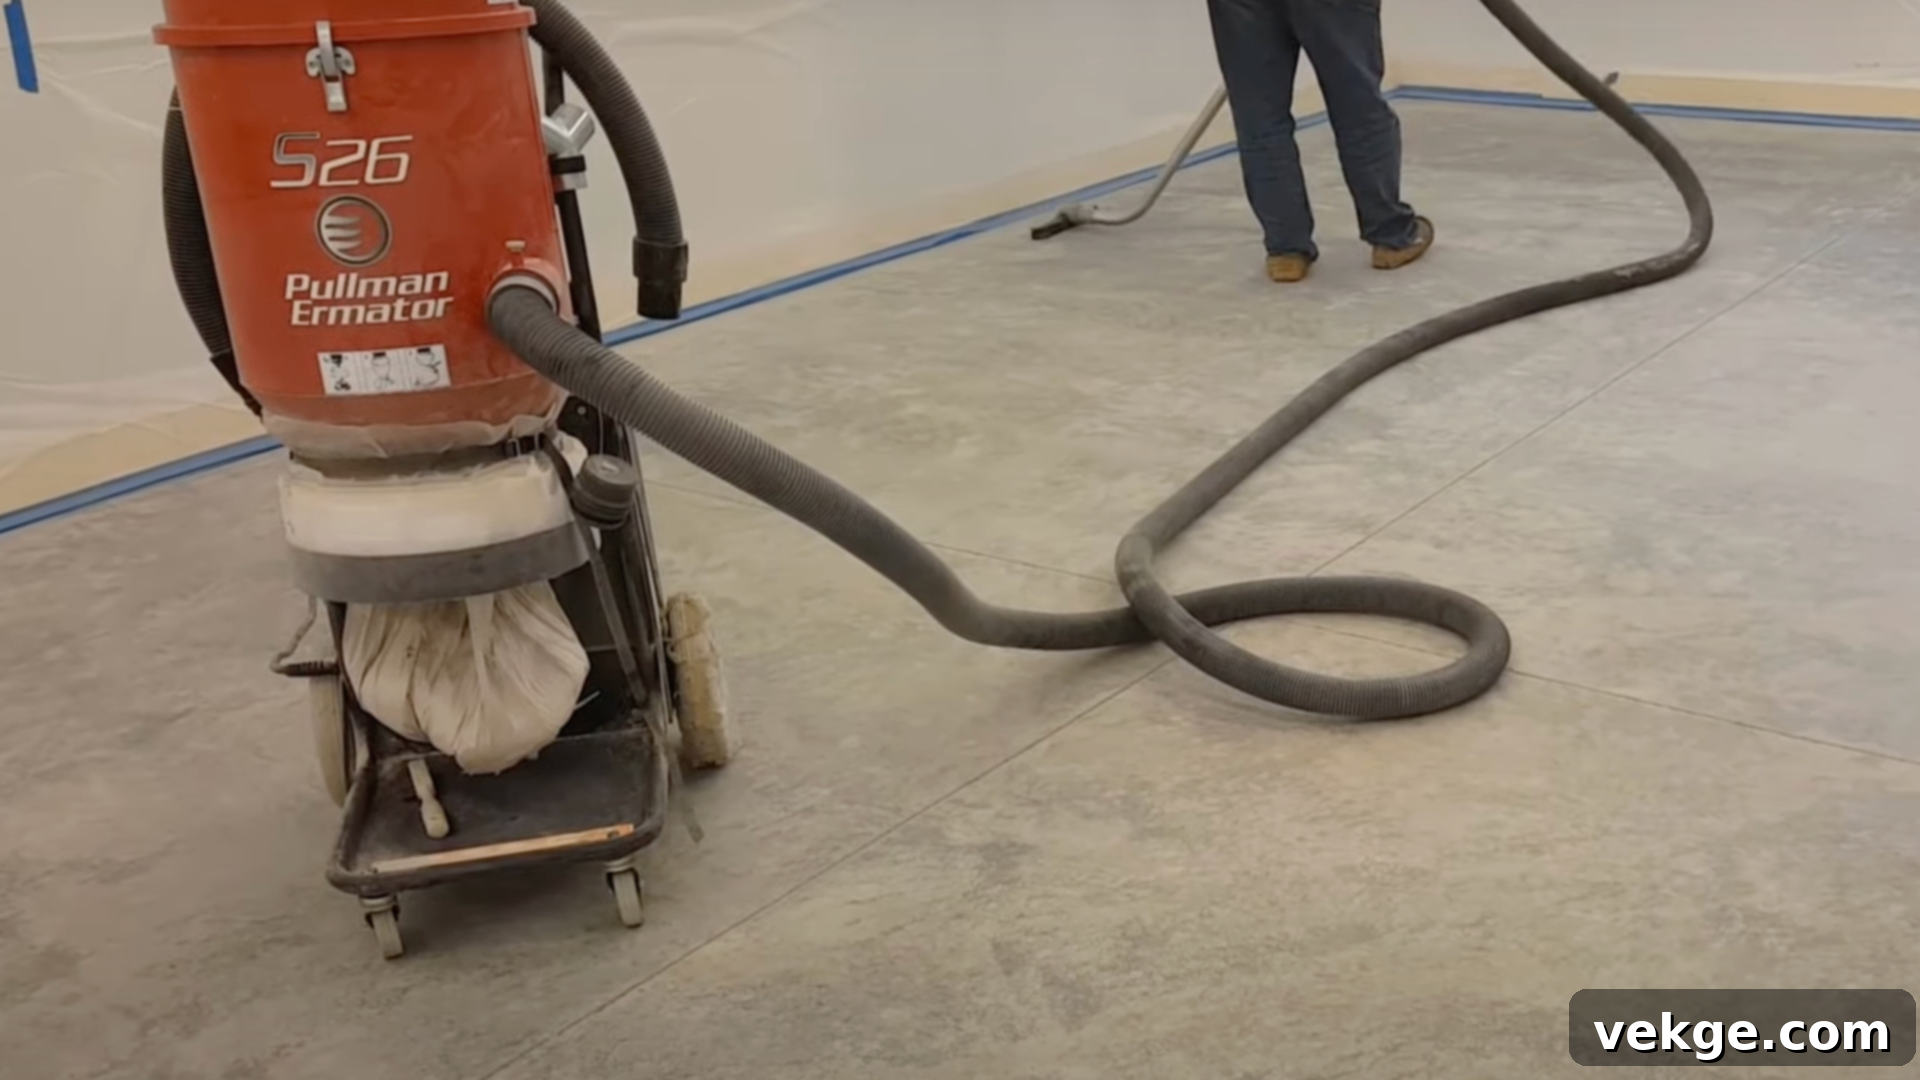
After all preparation and grinding (if applicable), thoroughly vacuum the entire floor surface with a HEPA vacuum to remove every speck of dust, grit, or tiny particles. Even small debris can affect the final stain application. Conduct a meticulous final inspection of the concrete for any remaining damage, unaddressed cracks, or lingering stains that might have been missed. If necessary, lightly clean the floor again with a mild, pH-neutral cleaner to remove any last traces of grease or oils, then rinse well. It is absolutely crucial that the floor is completely dry before moving on to the staining process, as moisture can interfere with stain penetration and color development. Consider performing a moisture test if humidity is high.
Step 3: Artfully Apply the Stain
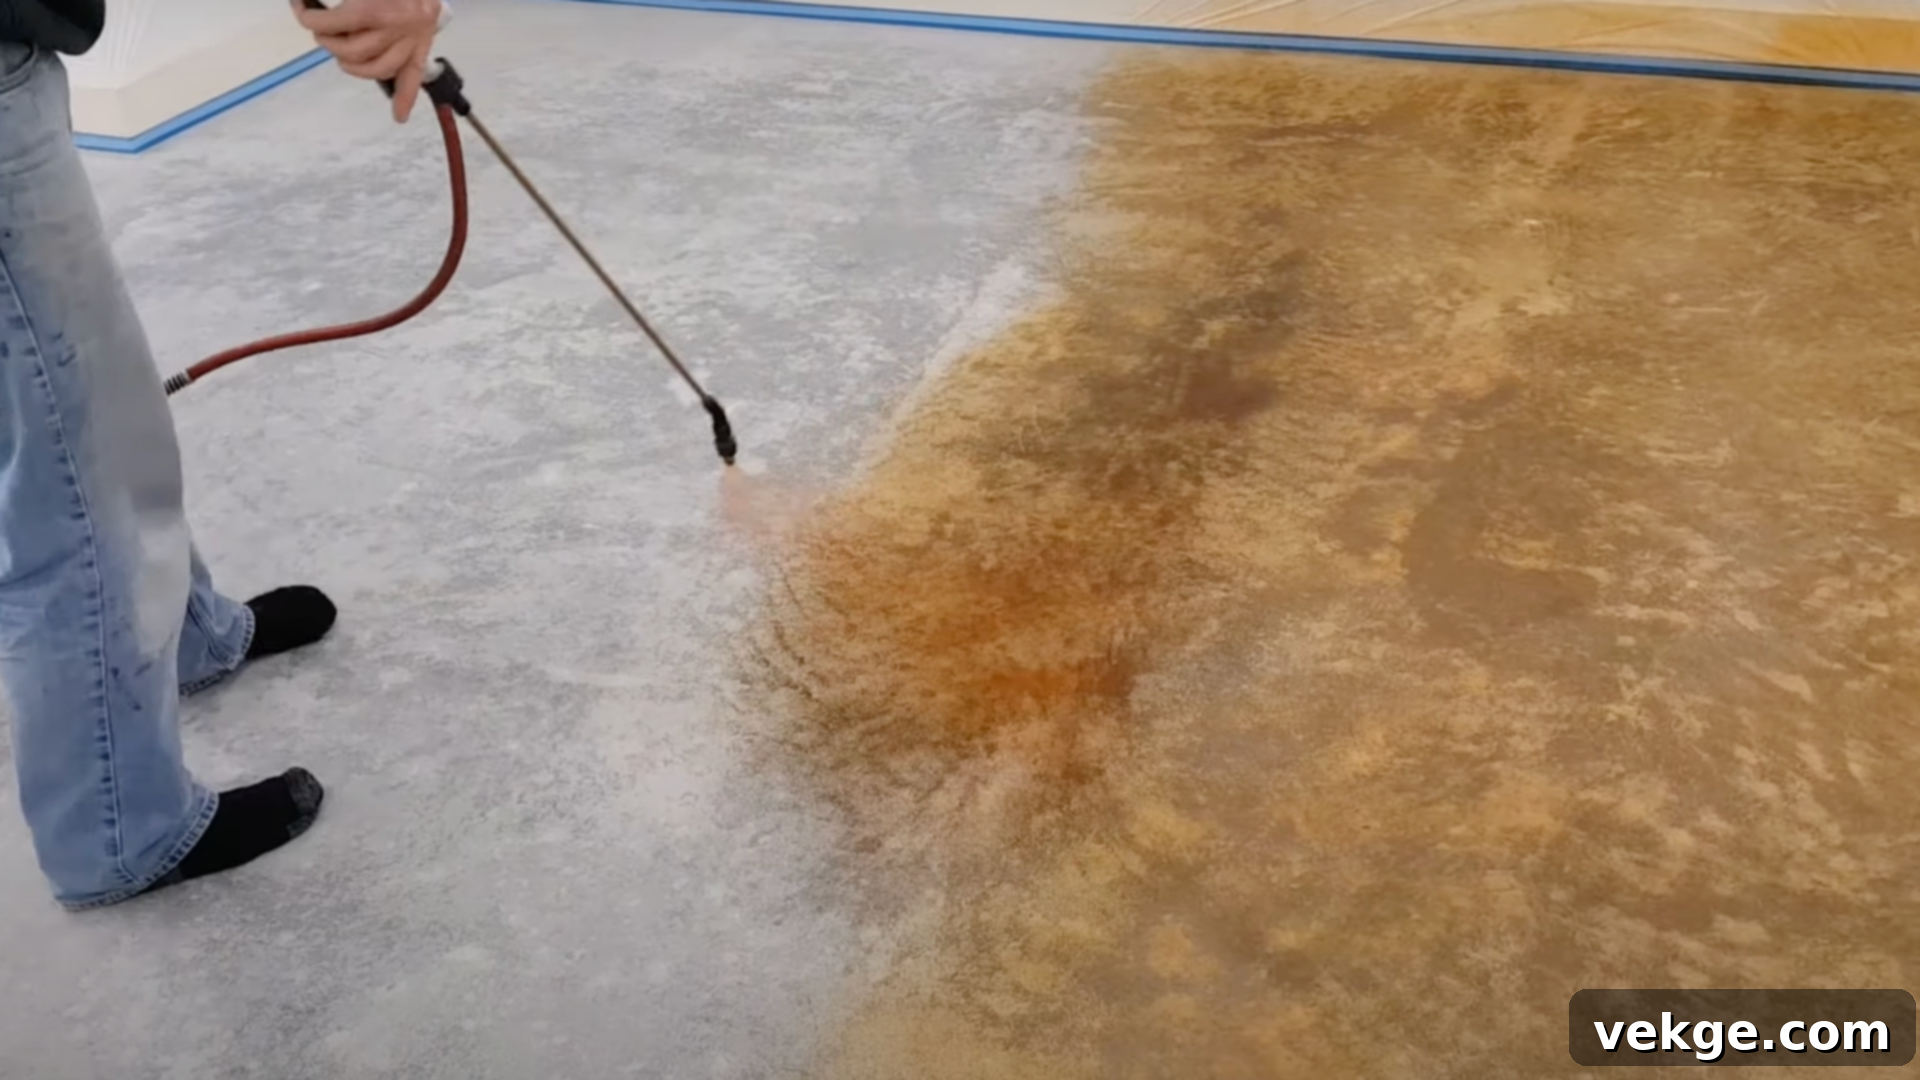
Equipped with your chosen concrete stain and a clean pump-up sprayer, begin applying the first coat evenly across the floor. Work in small, manageable sections, using a consistent sweeping motion to ensure uniform coverage. Overlap each pass slightly to avoid harsh lines. The stain will penetrate into the concrete, initiating the chemical reaction (for acid stains) or absorption (for water/dye-based stains) that creates those beautiful, rich color variations. Allow this first coat to dry thoroughly according to the manufacturer’s instructions, which can take several hours depending on the stain type, humidity, and ventilation.
Once completely dry, assess the color. If you desire a deeper, more intense hue, apply a second coat using the same careful technique. For acid stains, a neutralization step might be required after the desired color is achieved before rinsing. Always avoid walking on the floor until the stain is fully dry to prevent smudging, footprints, or uneven coverage. Patience here will significantly impact your final result.
Step 4: Secure and Protect with a Sealer
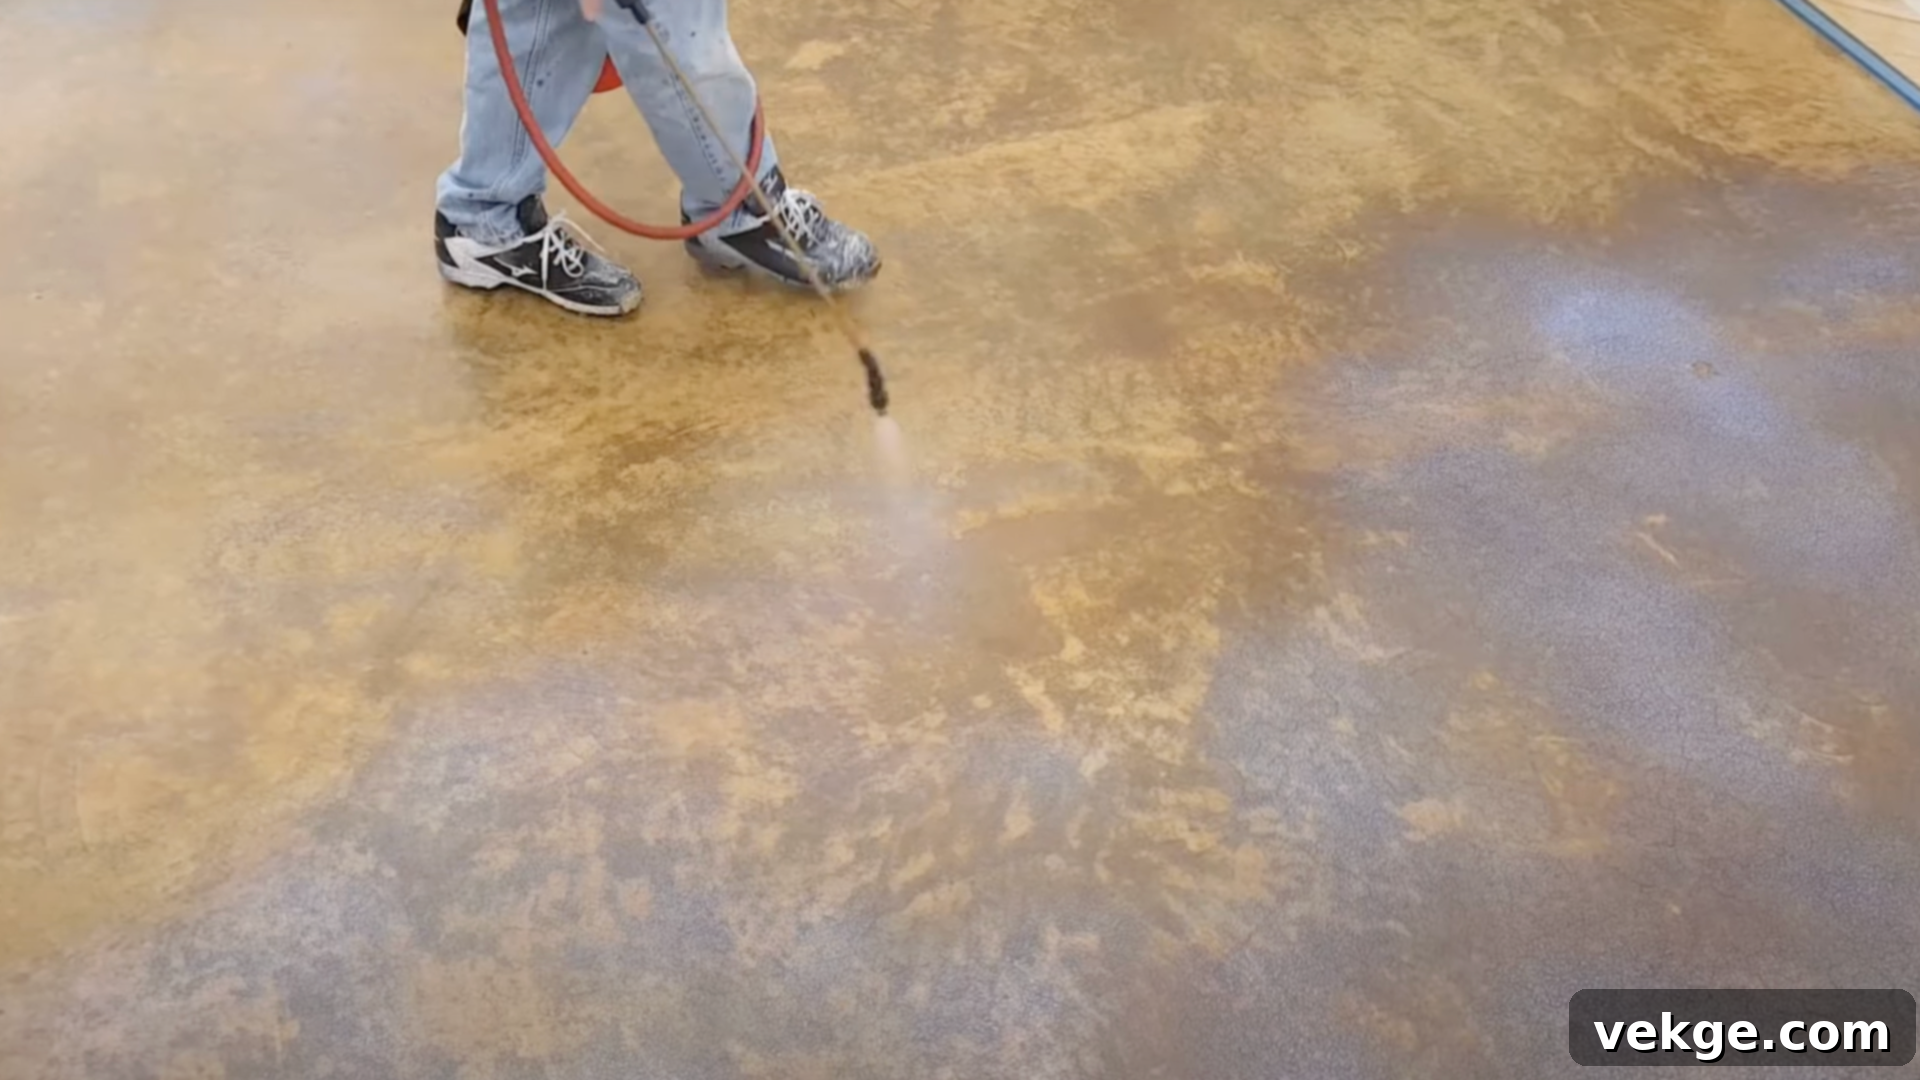
After the stain has completely dried and cured (refer to product instructions), it’s time to apply the protective sealer. Using a clean pump-up sprayer, apply a thin, even coat of your chosen water-based (or compatible) sealer. The sealer is paramount; it protects the concrete and the stain from wear, moisture, chemicals, and UV damage, while also enhancing the color and providing your desired finish (matte, satin, or high-gloss).
Apply two to three thin coats of sealer, allowing each coat to dry completely before applying the next. This layered approach ensures maximum protection and an even, durable finish. Ensure the entire floor is uniformly coated and sealed, paying extra attention to edges and corners. A good sealer will significantly extend the life and beauty of your stained concrete floors.
Step 5: The Final Touches and Curing
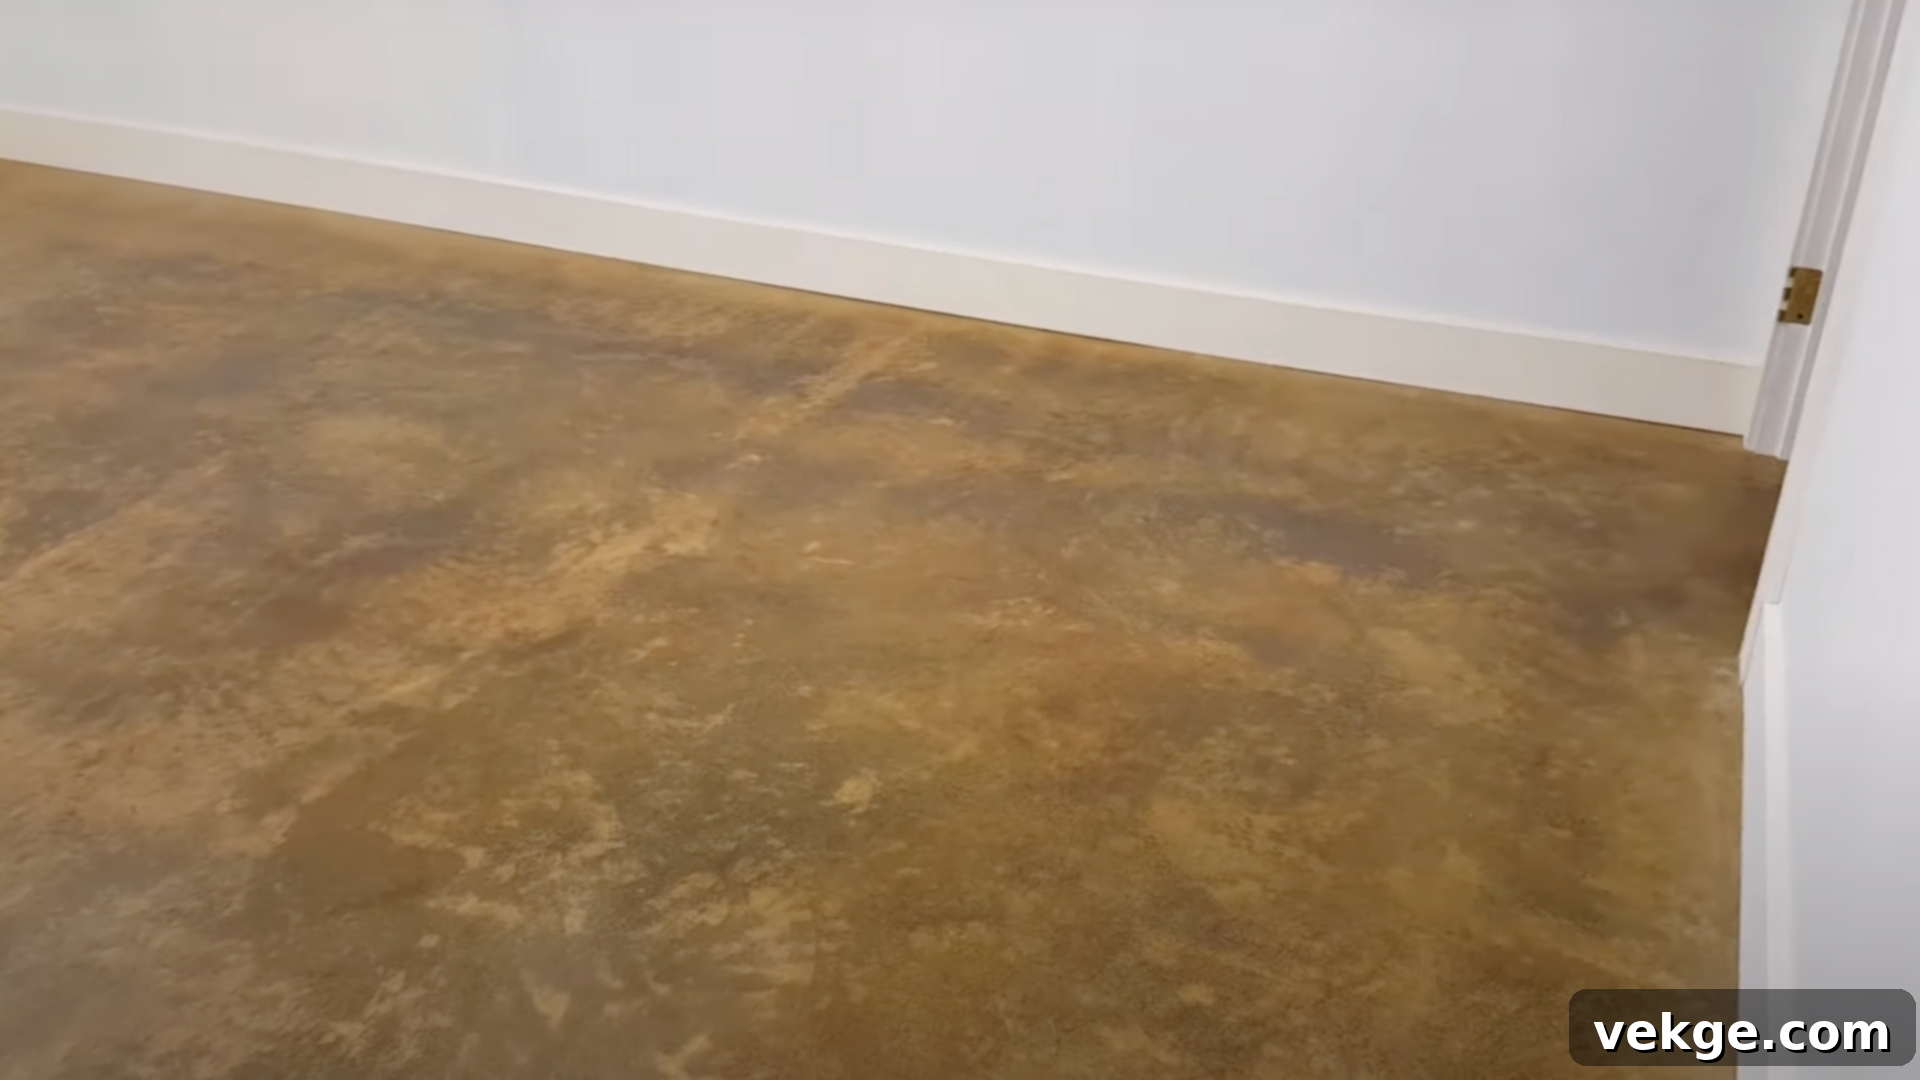
After the final coat of sealer (and optional wax or floor finish) has completely dried and fully cured (this can take several days for heavy furniture placement), perform a last inspection of the floor. Carefully clean up any accidental splashes, tape residue, or mess around the edges. Ensure the floor feels completely dry, smooth, and evenly coated before allowing any foot traffic or moving furniture back into the room.
Congratulate yourself on a job well done! You can now enjoy the long-lasting, stylish, and unique look of your freshly stained concrete floor, a testament to your hard work and design vision. Remember to consult specific product labels for exact drying and curing times, as these can vary.
For an in-depth visual tutorial and additional tips, watch the video here:
Common Mistakes to Avoid for Flawless Results
While staining concrete can be a rewarding DIY project, certain pitfalls can compromise the final outcome. Being aware of these common mistakes will help you achieve a professional-quality finish:
- Uneven Application: This is one of the most frequent issues. Applying too much stain in one area or unevenly spraying can lead to noticeable streaks, blotches, or inconsistent color. Always maintain a consistent spray pattern and work methodically in small sections.
- Skipping the Prep Work: Proper surface cleaning, degreasing, and potentially etching are absolutely crucial. Any dirt, oil, previous coatings, or sealers will prevent the stain from penetrating properly, resulting in splotchy, dull, or non-reactive areas. There are no shortcuts in preparation.
- Using the Wrong Sealer or Incompatible Products: Not all sealers are created equal, and not all are compatible with every stain type. Always use a sealer specifically recommended for your chosen concrete stain. An incompatible sealer can delaminate, yellow, or fail to protect the stain effectively.
- Not Doing a Test Patch: Concrete reacts differently based on its age, porosity, and composition. Always apply your chosen stain and sealer to a small, inconspicuous area first. This allows you to test the color, absorption rate, and overall appearance before committing to the entire floor.
- Ignoring Weather and Environmental Conditions: Extreme temperatures, high humidity, or direct sunlight during application can significantly impact drying times and the stain’s reaction. Always check product specifications for ideal temperature and humidity ranges.
- Inadequate Ventilation: Stains and sealers often contain volatile organic compounds (VOCs). Poor ventilation can lead to strong, lingering odors and pose health risks. Always ensure ample airflow with fans and open windows.
To ensure the best and most beautiful results for your stained concrete floors, take your time with every stage – from thorough preparation and careful application to proper sealing and curing – to confidently avoid these common staining mistakes.
DIY vs. Professional Hire: A Detailed Cost Breakdown
Stained concrete is generally considered a budget-friendly flooring option, but the overall cost can fluctuate significantly based on whether you opt for a DIY approach or decide to hire experienced professionals. Making the right decision involves weighing your budget, skill level, and desired outcome.
The DIY Route: Pros and Cons
Tackling stained concrete floors yourself offers the significant advantage of cost savings on labor and provides you with complete control over the design process. You can choose specific colors, techniques, and really immerse yourself in customizing the look. However, it demands a substantial investment of your time, effort, and a certain level of skill. Without prior experience, there’s a higher risk of common mistakes like uneven application, poor sealing, or inadequate preparation, which can lead to less-than-polished results and potentially costly fixes. You’ll also need to factor in the rental or purchase of specialized tools, which can add up.
Hiring a Professional: Pros and Cons
Engaging a professional concrete staining company guarantees expert results with minimal effort on your part. They possess the specialized knowledge, tools, and experience to handle all aspects – from meticulous preparation and precise application to perfect sealing. Professionals can achieve complex designs, ensure consistent quality, and often provide warranties for their work. The primary downside, of course, is the higher upfront cost. This cost can increase further for intricate designs, custom color blends, or larger square footage, but it often pays off in terms of quality, durability, and peace of mind.
Cost Comparison: DIY vs. Professional Stained Concrete Floors
Here’s a quick look at the estimated cost comparison per square foot, providing a clearer picture to help you make an informed decision:
| Option | Estimated Cost (per sq. ft.) | Notes |
|---|---|---|
| DIY (Materials & Tool Rental) | $2 – $7 | Includes the cost of stains, sealers, cleaners, and potential rental fees for floor grinders or specialized sprayers. This option requires your significant time, effort, and skill for preparation and application. Expect potential learning curve. |
| Professional Hire (Basic Application) | $5 – $10 | Covers basic single-color stain application and sealing by an experienced professional. Ideal for straightforward projects where consistency and durability are key. |
| Professional Hire (Mid-Range) | $10 – $15 | Includes more detailed staining techniques, such as multiple colors, simple scoring patterns, or higher-quality, more complex materials and sealers. Offers a more customized finish. |
| Professional Hire (High-End & Decorative) | $15 – $25+ | Encompasses premium finishes, intricate decorative designs, artistic patterns, faux effects (like marble or wood grain), and specialized sealants for maximum durability and aesthetic appeal. This is where a professional touch truly shines. |
When deciding, carefully consider your budget, your personal skill level and comfort with DIY projects, and the specific aesthetic outcome you envision for your home. Both options can yield beautiful results, but understanding the trade-offs is crucial for the best investment.
Maintenance and Longevity: Keeping Your Stained Concrete Floors Beautiful
One of the most appealing aspects of stained concrete floors is their relatively low maintenance. However, to truly preserve their beauty, vibrancy, and durability for many years to come, a consistent and proper maintenance routine is essential. Think of it as protecting your investment.
Essential Maintenance Tips:
- Regular Cleaning is Key: Implement a routine of sweeping or vacuuming your stained concrete floors regularly, ideally daily in high-traffic areas. This removes abrasive dust, dirt, and grit that can act like sandpaper underfoot, preventing microscopic scratches that dull the finish over time.
- Gentle Damp Mopping: For deeper cleaning, use a damp mop with a pH-neutral cleaner. Products specifically designed for concrete or natural stone are ideal. Avoid harsh chemical cleaners, as they can break down the protective sealer or even cause discoloration of the stain. Damp mopping effectively removes spills, footprints, and general grime without damaging the surface.
- Avoid Harsh Chemicals and Abrasives: This cannot be stressed enough. Steer clear of cleaning products containing ammonia, bleach, vinegar, citrus-based cleaners, or any highly acidic or alkaline solutions. These can chemically react with or degrade the sealer, leading to dullness, streaks, or permanent damage. Similarly, avoid abrasive scrub brushes, scouring powders, or steel wool, which can scratch the sealed surface.
- The Paramount Importance of Sealing: The sealer is the protective shield of your stained concrete floor. It not only guards against dirt, moisture penetration, and general wear but also locks in the vibrant color of the stain, preventing fading and enhancing its depth. A good quality sealer makes the floor non-porous, easier to clean, and resistant to stains and spills.
- Knowing When to Reseal: The frequency of resealing depends on the type of sealer used, the amount of foot traffic, and environmental factors. As a general guideline, reseal your stained concrete every 1 to 3 years. You’ll know it’s time when the floor begins to appear dull, shows signs of wear, or no longer effectively repels water (a simple water droplet test will reveal if the water soaks in rather than beading up). Regularly inspecting your floor will help you catch these signs early.
- Protect Against Scratches and Dents: While incredibly durable, stained concrete can still be scratched or dented by heavy or sharp objects. Place felt pads or rubber stoppers under furniture legs to prevent scratching when items are moved. Use entry mats at all exterior doorways to trap dirt and grit before it reaches your stained floors.
- Clean Spills Immediately: Although sealed, promptly wiping up spills, especially those from acidic liquids like juice or wine, will prevent potential etching or staining, especially if your sealer is nearing the end of its lifespan.
By diligently following these simple yet effective cleaning and maintenance steps, you will ensure the long-lasting beauty, vibrant color, and structural integrity of your stained concrete floors for many decades to come.
Conclusion: Is Stained Concrete the Right Choice for Your Home?
Stained concrete floors represent a compelling and increasingly popular option for modern homeowners. They stand out as a highly durable, remarkably affordable, and incredibly stylish flooring solution capable of transforming and enhancing virtually any space within your home. From their unique aesthetic versatility to their robust resistance against daily wear and tear, stained concrete offers a distinct blend of form and function.
As we’ve explored, with the right initial application and consistent, mindful care and maintenance, these floors are designed to last for decades, making them a profoundly smart and sustainable choice, particularly for high-traffic areas where longevity is paramount. They offer a hypoallergenic, easy-to-clean surface that contributes to better indoor air quality, a benefit often overlooked in traditional flooring choices.
By now, after navigating through the benefits, understanding the different stain types, reviewing the DIY process, considering the cost implications, and learning essential maintenance tips, you should have a much clearer and more informed perspective on whether stained concrete floors align perfectly with the vision and practical needs of your home. Remember to weigh factors such as your initial budget, your desired design aesthetic, the specific environment of your space, and your willingness to commit to the minimal yet crucial upkeep.
If you’re seeking a flooring option that combines artistic flair with exceptional resilience and value, stained concrete floors are undoubtedly worth serious consideration. For more inspiring home improvement ideas, expert tips, and creative solutions to elevate your living spaces, be sure to explore other valuable resources and blogs on our website!
