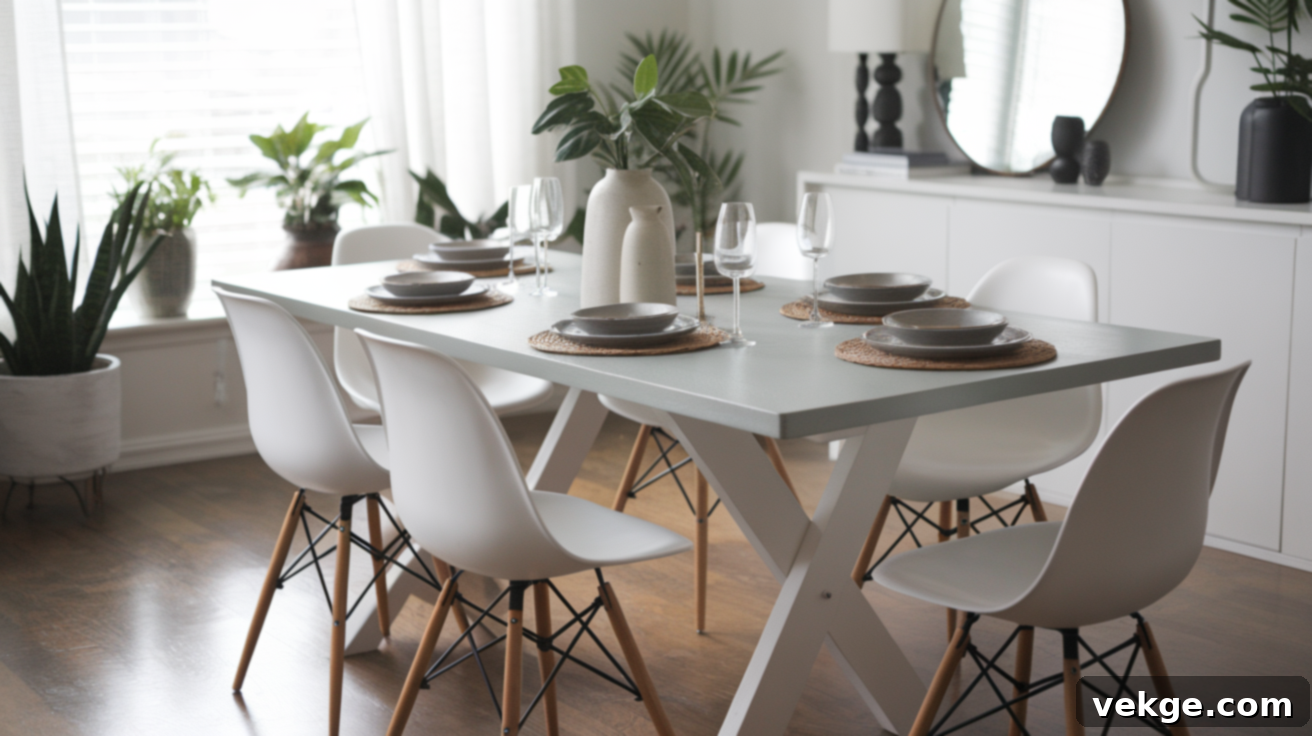
DIY Chalk Paint Dining Table Makeover: A Comprehensive Guide to Vintage Charm
Are you looking to breathe new life into an old dining table without breaking the bank? A chalk paint dining table makeover is one of the most accessible, affordable, and rewarding DIY projects you can undertake. This versatile paint allows you to transform outdated furniture into a stylish focal point for your home, offering a soft, matte, and often vintage-inspired aesthetic that feels both charming and incredibly current.
Unlike traditional paints, chalk paint often eliminates the need for extensive sanding or priming, making the transformation process quicker and less labor-intensive. Its unique properties allow for beautiful finishes, from smooth contemporary looks to beautifully distressed, shabby chic styles. This guide will walk you through everything you need to know, from understanding why chalk paint is an excellent choice for your dining table, to a detailed step-by-step painting process, troubleshooting common issues, and maintaining your refreshed piece for years to come.
Get ready to unleash your creativity and turn that overlooked dining table into a conversation-starting masterpiece that perfectly reflects your personal style!
Why Choose Chalk Paint for Your Dining Table?
Chalk paint has become a favorite among DIY enthusiasts for many compelling reasons, especially when it comes to furniture makeovers like a dining table. Its unique formulation offers several distinct advantages that make it an attractive option for both beginners and experienced painters.
Firstly, one of the biggest draws of chalk paint is its incredible ease of use. It typically adheres well to most surfaces – including wood, laminate, metal, and even fabric – without the need for extensive prep work. This means you can often skip the tedious and time-consuming steps of sanding and priming that are usually required with other types of paint. This alone can save hours, making your project much more enjoyable and less daunting.
Secondly, chalk paint delivers a beautiful, velvety matte finish that instantly lends a vintage, rustic, or shabby chic appeal. This unique texture adds depth and character to your dining table, creating a look that’s both sophisticated and inviting. It’s also remarkably easy to distress, allowing you to achieve an aged, weathered appearance with minimal effort, which is perfect for adding a touch of antique charm.
However, it’s also important to consider a few aspects. Chalk paint traditionally comes in a more curated, often earthy, color palette compared to the vast selection of synthetic hues found in other paint types. While this contributes to its signature vintage appeal, it might be a limitation if you’re seeking very specific or vibrant modern colors. Additionally, while the finish is beautiful, chalk paint alone can be porous. On high-traffic surfaces like a dining table, which endures daily use, spills, and cleaning, it’s crucial to apply a proper sealant. Without adequate protection, the finish can be susceptible to marks, scratches, and moisture damage, compromising its durability and longevity. Proper sealing, whether with wax or a clear topcoat, is non-negotiable for a chalk-painted dining table.
Despite these considerations, the convenience, aesthetic versatility, and transformative power of chalk paint make it an excellent choice for a dining table makeover, offering a fresh, stylish update with relative ease.
Chalk Painting a Dining Table: Step-by-Step Guide
Ready to get started? This step-by-step guide will walk you through the entire process of transforming your dining table with chalk paint. Follow these instructions carefully to achieve a beautiful, custom piece that enhances your home’s decor.
Tools and Materials Required
Before you begin, gather all your tools and materials. Having everything on hand will ensure a smooth and efficient painting process:
- Palm sander or sandpaper (various grits): For light sanding, distressing, or tackling any rough spots.
- Deglosser and scouring pad: To remove any grease, grime, and glossy finish if your table has a particularly slick surface.
- Chalk paint: Choose your desired color and brand. Ensure you have enough for at least two coats.
- Natural bristle paintbrush: Ideal for chalk paint application, as it helps achieve the characteristic soft, textured finish.
- Foam brush or lint-free cloth for sealing: For smooth, even application of wax or polyurethane.
- Polyurethane (water-based) or wax (clear or dark): Your choice of sealant, depending on the desired finish and durability.
- Vinegar and water solution (50/50 mix): For a final clean and to remove any residue before painting.
- Damp cloths or sponges: For cleaning.
- Painter’s tape (optional): To protect areas you don’t want to paint, like the underside or hardware.
- Drop cloths or old sheets: To protect your floor and surrounding areas.
- Primer (optional, but recommended for certain tables): Such as a shellac-based primer for preventing bleed-through on dark or stained wood.
Step 1: Preparing Your Dining Table
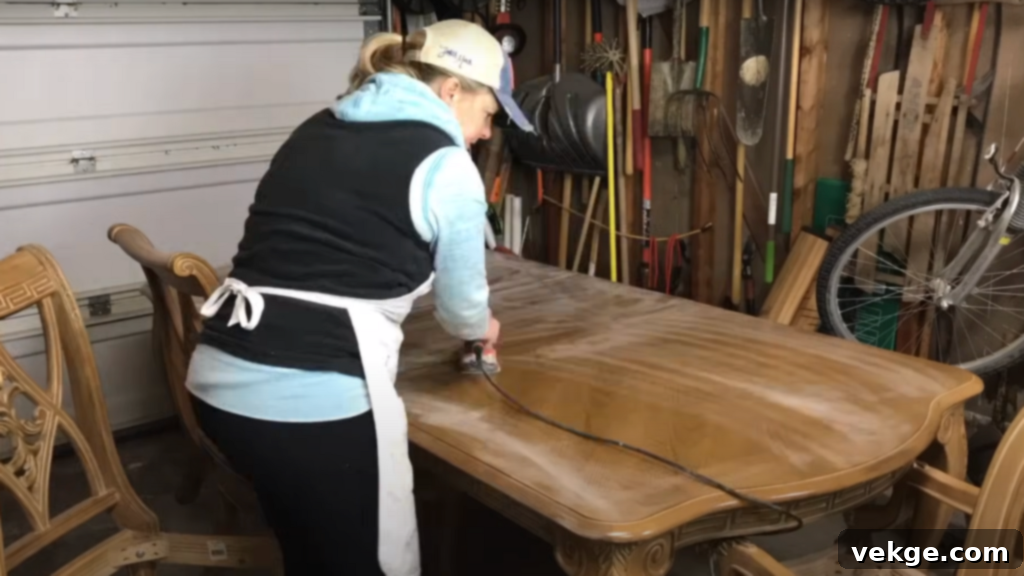
While chalk paint often boasts a “no sanding, no priming” benefit, a little preparation goes a long way, especially for a high-use item like a dining table. Start by thoroughly cleaning the table with a damp cloth and mild detergent to remove any dust, grime, food residue, or oily spots. Ensure the table is completely dry before proceeding.
Next, inspect your table. If it has deep stains, a very glossy finish, or is made from a dark wood that might bleed tannins (causing yellowing through lighter paint colors), a primer can be a lifesaver. A shellac-based primer, such as Zinsser BIN, is highly effective at blocking stains and preventing bleed-through. Test a small, inconspicuous patch first to see if a primer is truly necessary. While optional, this step significantly improves paint adhesion and ensures a smooth, uniform finish, saving you potential headaches later on.
Step 2: Cleaning the Table
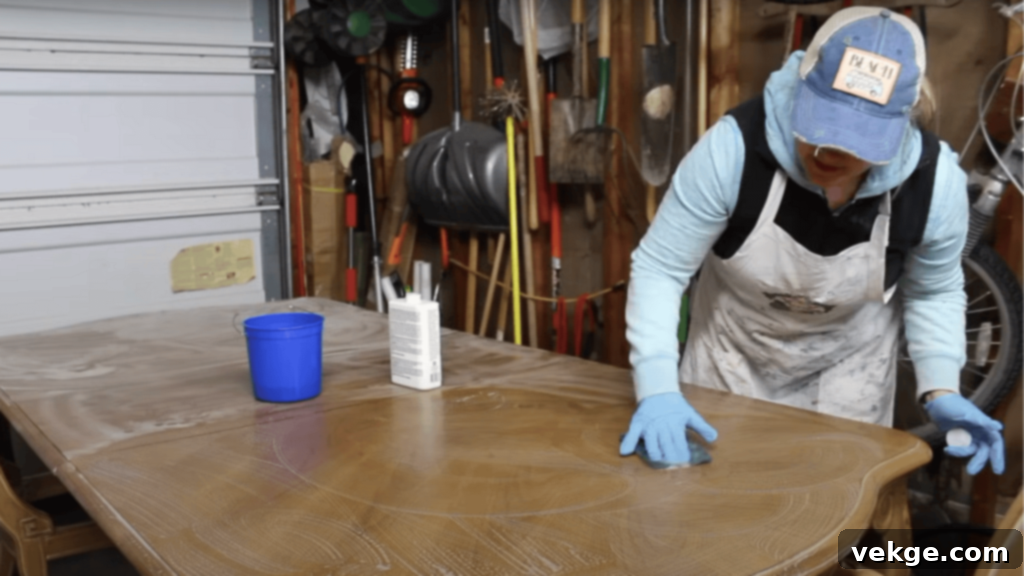
Even if you’re not fully sanding, a thorough cleaning is paramount for proper paint adhesion. After the initial cleaning, if your table had a glossy finish or any stubborn residue, consider using a deglosser with a scouring pad. Deglossers chemically dull the surface, allowing the paint to grip better without harsh sanding. Follow the product instructions for application. Rinse the table thoroughly with a clean sponge and water to remove all traces of the deglosser.
As a final cleaning step, spray the entire table with a 50/50 solution of white vinegar and water. This acts as a natural degreaser and helps remove any lingering dust, oils, or cleaning product residues. Wipe it down with a clean, lint-free cloth and allow it to dry completely. A perfectly clean and dry surface is critical for a flawless chalk paint application.
Step 3: Applying Chalk Paint
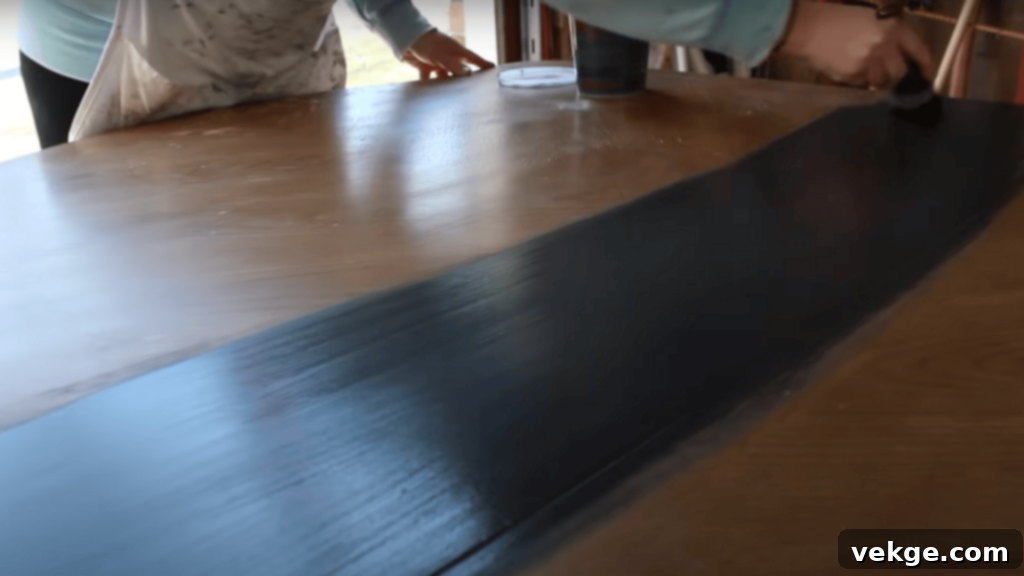
Now for the fun part! Stir your chalk paint thoroughly. Using a good quality natural bristle brush, begin applying the paint in thin, even coats. Work in manageable sections, applying long, smooth strokes in the direction of the wood grain (if visible) to minimize brush marks. Chalk paint dries relatively quickly, so avoid overworking the paint once it starts to set.
Since chalk paint is highly opaque, you might be tempted to apply a thick first coat, but thin coats are always better for a smooth, professional finish and better adhesion. Allow the first coat to dry completely – typically 20-60 minutes, depending on humidity and paint thickness – before applying a second coat. Most projects will require two coats for full coverage, and sometimes a third for very dark-to-light transformations. Remember to allow ample drying time between each coat to prevent peeling or an uneven finish.
Step 4: Distressing the Table (Optional)
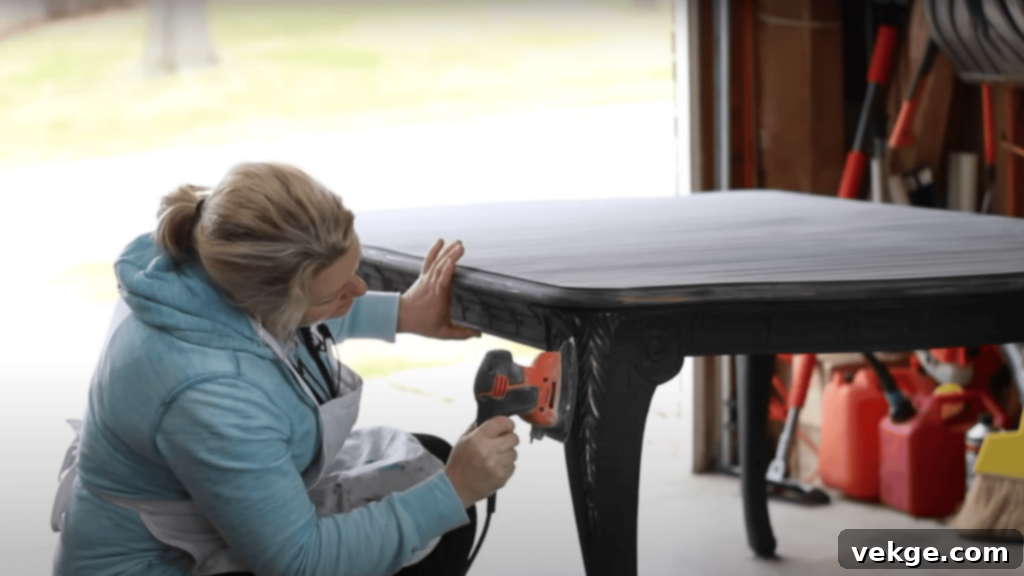
If you love the charming, weathered look, distressing your table is an exciting step. Once your final coat of paint is completely dry (it’s best to wait a few hours or even overnight), grab some fine-grit sandpaper (around 220 grit). Focus on areas that would naturally show wear and tear over time: the edges, corners, raised details, and areas around the legs. Lightly sand these spots, allowing the original finish or underlying wood to peek through. The key is to distress gradually and naturally, stepping back frequently to assess your progress.
For a smoother, less textured chalk paint finish, you can also lightly sand the entire tabletop with a very fine-grit sanding sponge after the paint has dried. This removes any slight chalkiness or minor brush strokes, leaving a buttery smooth surface ready for sealing. Remember, distressing is entirely optional; if you prefer a solid, clean painted look, you can skip this step and move directly to sealing.
Step 5: Sealing the Table
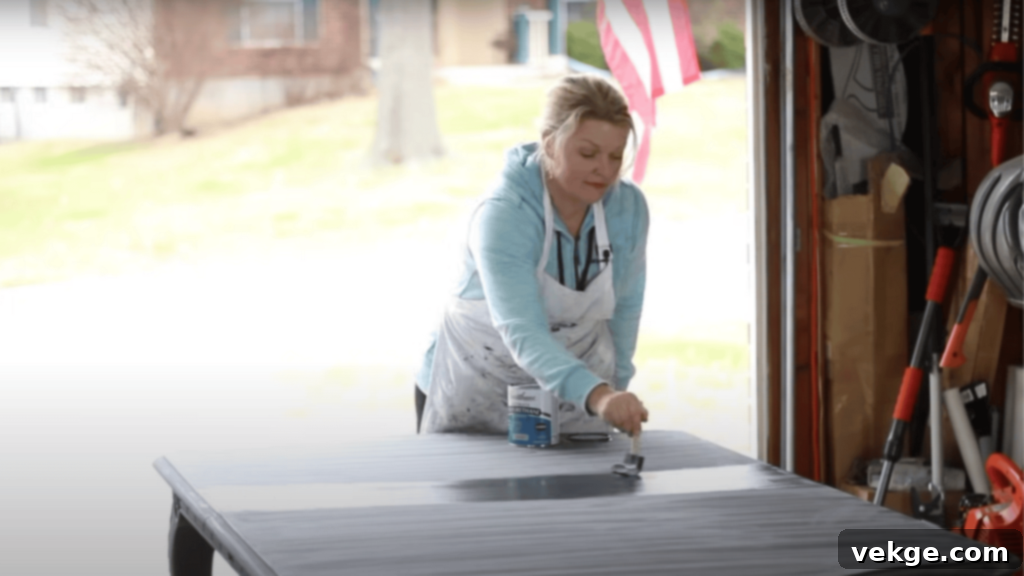
This is arguably the most critical step for a chalk-painted dining table. Sealing protects the porous chalk paint from moisture, stains, and daily wear and tear, ensuring its longevity and durability. You have two primary options: wax or polyurethane.
- Wax: For a traditional, soft, matte finish that enhances the vintage look, clear furniture wax is an excellent choice. Apply a thin, even layer of wax with a foam brush or a lint-free cloth, working it into the paint in small sections. Wipe off any excess immediately. For a dining table, you’ll typically need at least 2-3 thin coats of wax, allowing each coat to dry (usually 20-30 minutes) before buffing gently with a clean cloth. The more coats, the more durable the finish. Dark wax can also be used over clear wax to add an antique patina and emphasize distressed areas.
- Polyurethane: For superior durability and a more resilient finish, especially on a high-traffic dining surface, a water-based polyurethane is highly recommended. It offers excellent protection against scratches and spills. Apply thin, even coats with a foam brush to avoid brush marks. Allow each coat to dry completely according to the manufacturer’s instructions (often 2-4 hours) before applying subsequent coats. For maximum protection, aim for 2-3 coats, lightly sanding with very fine grit sandpaper (e.g., 400 grit) between coats for optimal adhesion, then wiping away dust before the next layer. Water-based polyurethanes typically dry clear and won’t yellow over time, providing a range of finishes from matte to high gloss.
Allow your sealed table to cure fully before heavy use – this can take anywhere from a few days for wax to several weeks for polyurethane to reach its maximum hardness. By following these simple steps, you’ll have a beautifully painted and protected dining table that’s ready for years of enjoyment.
For a more detailed walkthrough of the process, check out the video tutorial below:
Troubleshooting Common Chalk Paint Issues
Even with careful planning, sometimes DIY projects encounter minor hiccups. Don’t worry, most common chalk paint issues are easily fixable! Here’s how to handle them to ensure your dining table makeover turns out beautifully:
- Fixing Brush Marks and Streaks: If you notice noticeable brush marks or streaks after the paint has dried, it’s often due to applying too much paint, overworking the paint, or using the wrong type of brush. Once the paint is fully dry, lightly sand the affected area with fine-grit sandpaper (around 220-320 grit) until smooth. Clean off the dust, then reapply a very thin, even coat of chalk paint using long, smooth strokes. Ensure your brush isn’t overloaded with paint, and try to avoid going over areas that are already starting to dry.
- Dealing with Peeling Paint: Paint peeling or chipping can occur if the surface wasn’t properly cleaned, if there was moisture trapped, or if the paint wasn’t allowed to dry completely between coats. If paint peels off, gently scrape away any loose paint. Sand the peeling spots and surrounding edges to feather them smoothly into the existing paint. Clean the area thoroughly, and then reapply fresh coats of chalk paint, ensuring adequate drying time between each layer and prior to sealing.
- Solving Curing Problems or Uneven Finishes: If your finish feels tacky or looks uneven, it might be a curing issue (especially with sealants) or inconsistent application. Ensure the paint and sealant are completely dry between coats, following manufacturer recommendations closely. Humidity and temperature can significantly affect drying and curing times. For rough or uneven spots, lightly sand them down with fine-grit sandpaper, clean the dust, and then apply another thin layer of paint or sealant for a smoother, more uniform finish. Patience during drying and curing is key to a durable result.
By keeping these simple troubleshooting tips in mind, you can confidently tackle any minor setbacks and ensure your chalk-painted dining table project achieves a professional and lasting finish.
Additional Tips for Long-Lasting Results
A chalk-painted dining table is a beautiful addition to any home, but as a high-traffic surface, it requires ongoing care to maintain its pristine look. Here are essential tips for protecting and maintaining your newly painted masterpiece for years to come.
Protecting Your Painted Table
To ensure that your chalk-painted dining table stays looking beautiful for years, it’s important to take proactive steps to protect it from daily wear and tear. One of the simplest yet most effective ways to protect your table is by consistently using placemats and coasters. These items create a physical barrier, shielding the surface from heat, moisture rings, and potential scratches caused by hot plates, glasses, or serving dishes. Make it a habit for every meal and drink to extend the life of your finish.
For even greater protection, particularly during busy family meals or when entertaining, consider using a tablecloth or runner. These not only add an extra layer of defense against spills and impacts but also offer an opportunity to introduce more style and color to your dining space. Furthermore, be mindful of your table’s placement. Try to avoid exposing the table to direct, prolonged sunlight. UV rays can cause paint to fade over time, and intense heat can sometimes affect the sealant, leading to a worn or discolored appearance. Position your table strategically or use window coverings to mitigate direct sun exposure.
Cleaning and Maintaining the Painted Surface
Keeping your painted table clean and well-maintained is essential for preserving its finish and beauty. Start with regular dusting using a soft, dry, lint-free cloth to gently remove any dust, crumbs, or debris that may accumulate on the surface. This prevents fine particles from scratching the finish over time.
For more stubborn spots, spills, or general cleaning, you can clean the table with a lightly damp cloth. If necessary, a small amount of mild, diluted soap can be used. However, it is crucial to avoid harsh chemical cleaners, abrasive scrubbers, or strong solvents, as these can strip the wax, damage the polyurethane finish, or even dissolve the paint itself. Always wipe up spills immediately to prevent staining, especially if your table is waxed, as wax offers less stain resistance than polyurethane.
To maintain the painted surface, especially if you’ve used wax as a sealant, consider reapplying the wax every 6-12 months, or more frequently depending on how often the table is used and how much traffic it receives. Signs that your wax needs refreshing include a dulling finish, increased susceptibility to water marks, or a less smooth feel. Simply clean the table, apply a thin layer of wax, and buff to a soft sheen. If you’ve applied a polyurethane finish, which is generally more durable, it won’t require regular reapplication like wax. However, if the finish shows significant wear or scratches after several years, a light sanding with fine-grit sandpaper (e.g., 400-600 grit) followed by a new coat of water-based polyurethane can restore it to looking as good as new.
By consistently following these tips for protection and maintenance, you can ensure that your beautifully chalk-painted dining table remains a stunning and durable centerpiece for your home for many years to come.
Product Recommendations
To help you achieve the best possible results on your chalk paint project, here are some top product recommendations that are highly regarded in the DIY community for their quality and performance:
-
Annie Sloan Chalk Paint: Often considered the original and a gold standard, Annie Sloan Chalk Paint is a top choice for its smooth application, rich pigmentation, and wide range of classic colors. It’s renowned for its excellent adhesion and ease of use, making it perfect for indoor furniture projects due to its low odor and water-based formula. This paint offers exceptional coverage and a beautiful, characteristic matte finish.
-
Zinsser BIN Shellac-Based Primer: If your dining table has existing stains, a particularly glossy finish, or is made from dark wood that could bleed tannins through lighter chalk paint colors, this primer is invaluable. It’s a shellac-based primer that effectively blocks stains, seals odors, and provides excellent adhesion for subsequent paint layers, ensuring your chalk paint goes on smoothly and stays true to its color.
-
Annie Sloan Clear Chalk Paint Wax: For those who prefer the traditional, soft, and breathable finish that complements chalk paint’s matte look, Annie Sloan’s Clear Wax is an essential sealing option. It’s easy to apply and buffs to a lovely sheen, providing a protective layer that deepens the paint’s color while maintaining its characteristic feel. It’s ideal for creating that authentic vintage aesthetic.
-
Minwax Polycrylic Protective Finish (Water-Based Polyurethane): If you need a more durable and water-resistant finish, especially for a high-traffic dining table, a water-based polyurethane like Minwax Polycrylic is an excellent choice. It dries crystal clear, offering superior protection against scratches, scuffs, and spills without yellowing over time. It’s available in various sheens, allowing you to choose between a matte, satin, or glossy look, providing robust protection for your chalk paint.
-
Natural Bristle Paintbrush (e.g., Wooster, Purdy): While not a single product, investing in a high-quality natural bristle paintbrush is crucial for applying chalk paint. Brushes like those from Wooster or Purdy are designed to hold and distribute chalk paint effectively, minimizing brush marks and helping achieve that desirable textured or smooth finish with ease.
These carefully selected products will significantly enhance your chalk paint dining table makeover, helping you achieve professional, long-lasting results that you’ll be proud of for years to come.
Conclusion
Embarking on a chalk paint dining table makeover is an incredibly rewarding DIY journey. It’s a project that combines affordability with remarkable creative freedom, allowing you to transform an ordinary piece of furniture into a personalized statement. Now that you’ve explored the benefits of chalk paint, mastered the step-by-step application process, learned how to troubleshoot common issues, and gathered valuable tips for protection and maintenance, you have all the knowledge needed to create a stunning and durable piece.
Whether you’re aiming for a perfectly smooth, contemporary finish or a beautifully distressed, classic vintage look, the key to success lies in careful preparation, using the right tools, and diligent sealing. Remember that patience is your best friend throughout the drying and curing stages, ensuring your hard work truly lasts.
Don’t stop here! If you’re eager for more painting tips, furniture makeover ideas, or general home improvement projects, explore the other blogs and guides on our website. We’re dedicated to helping you keep your home looking its absolute best with simple, step-by-step instructions and inspiring ideas. Happy painting!
