Ultimate Guide to Proper Paint Can Storage: Keep Your Paint Fresh for Years
Every DIY enthusiast or homeowner knows the feeling: you finish a painting project, and now you have a half-full can of paint left over. If you’re like most people, these leftover paint cans often end up tucked away in a garage corner or basement shelf, sometimes forgotten. However, improper paint can storage is a common mistake that can lead to wasted paint, costly trips to the store for new supplies, and unnecessary environmental impact. The good news is, with a few simple steps, you can keep your paint fresh, vibrant, and ready for future touch-ups or new projects, saving both time and money.
But how do you store paint cans to keep the paint fresh and accessible for future use? In this comprehensive guide, we’ll delve into simple yet highly effective ways to store paint cans properly, ensuring they remain in excellent condition. We’ll also explore practical methods to organize them for easy access, transforming your storage space from cluttered to efficient. From selecting the best storage containers and implementing clever DIY solutions to mastering the art of sealing cans tightly, we’ve got you covered. Let’s explore how you can maximize your paint storage efficiency and ensure your paints are always project-ready.
The Basics of Effective Paint Can Storage
Properly storing your paint cans is more than just tidiness; it’s a smart investment in your home and projects. When you store paint the right way, you extend its lifespan significantly, allowing you to use it for future touch-ups, small repairs, or even entirely new creative endeavors. This not only saves you the expense of buying new paint but also reduces waste, contributing to a more sustainable lifestyle.
Optimal Conditions for Storing Paint Cans
Paint needs specific environmental conditions to maintain its quality and usability over time. The primary enemies of stored paint are extreme temperatures, moisture, and air exposure. To keep your paint in prime condition, always store cans in a cool, dry place, safely away from direct sunlight and any heat sources like furnaces or radiators. The ideal storage temperature range for most paints is between 50-80°F (10 and 27°C). It’s crucial to prevent paint from freezing, as this can permanently alter its chemical composition, causing separation and rendering it unusable. Similarly, excessively hot temperatures can cause paint to thicken, dry out, or separate, making it difficult or impossible to remix.
Excellent spots for paint storage often include a temperature-controlled basement shelf, a dedicated cabinet in your garage (away from exterior walls if you live in an area with extreme temperatures), or a utility closet. Ensure that these areas are not prone to dampness or significant temperature fluctuations. After each use, it’s vital to close lids tightly and, for an extra measure of protection, consider storing cans upside down for a few minutes immediately after sealing. This creates a vacuum seal, further preventing air from entering and drying out the paint. Finally, make it a habit to label each can clearly with the paint color, the room it was used in, and the date of purchase or opening. This simple step will save you immense frustration when searching for a specific shade years later.
How Long Can You Expect Paint to Last?
The longevity of stored paint largely depends on its type and how meticulously it has been stored. Generally, oil-based paints boast a longer shelf life, often lasting up to 15 years when kept under optimal conditions. Water-based (latex) paints, while incredibly popular, typically have a slightly shorter lifespan, usually remaining viable for about 10 years. However, these are general guidelines; always check your paint before use.
To assess your stored paint, open the can and stir it thoroughly with a paint stick. Good quality paint should mix smoothly, with any separated components readily reincorporating into a uniform consistency. It should also have a normal, mild paint odor. If the paint smells sour, rancid, or like rotten eggs, it’s a clear sign of bacterial contamination, and the paint should be safely disposed of. To further extend paint life, always clean the rim of the can thoroughly before closing, ensuring no dried paint prevents a tight seal. Placing a layer of plastic wrap or foil over the can opening before replacing the lid can also create an improved airtight barrier. Always test old paint on a scrap piece of material or an inconspicuous area before committing it to your main project.
Diverse Storage Options for Paint Cans
Once you understand the fundamentals of paint preservation and longevity, the next step is implementing an effective organizational system. A well-thought-out paint storage system doesn’t just keep your space tidy; it makes finding the right color effortless, ensuring your projects proceed smoothly without frustrating searches. Let’s explore some practical and helpful options to keep your paint cans neatly organized.
1. Specialized Storage Containers and Racks

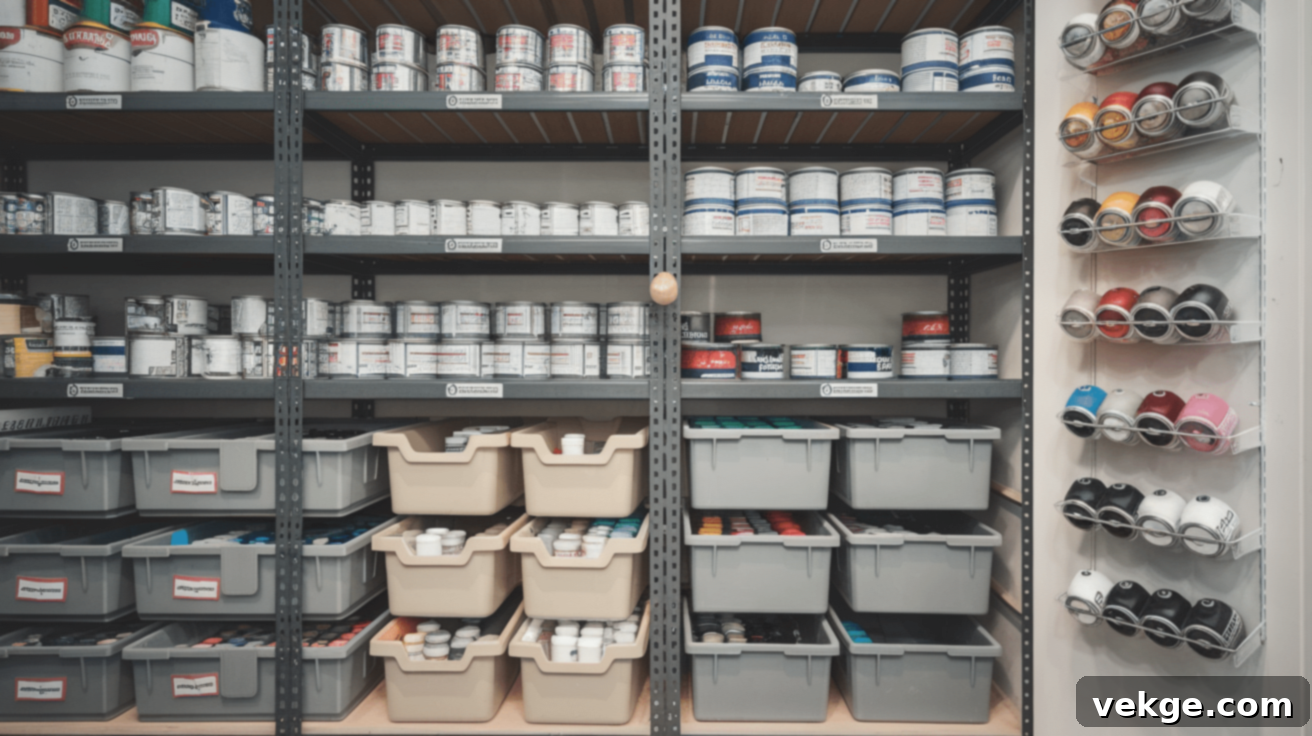
The market offers a wide array of storage solutions specifically designed for paint cans, making organization easier than ever. Metal paint racks are an excellent choice, as they elevate cans off the floor (preventing rust from moisture) and allow you to view all labels at a glance, improving inventory management. These racks often come in various sizes, accommodating quart, gallon, and even five-gallon buckets. For smaller cans and tubes, clear plastic bins with secure lids are invaluable. They keep dust and debris away, offer visibility, and stack efficiently, maximizing vertical space.
For spray paint cans, which require a different storage approach due to their shape and propulsion, consider specialized door-hanging racks or small drawer units. These keep cans upright and organized, preventing nozzles from clogging or misfiring. If you’re on a budget or prefer a more rustic look, DIY ideas abound. Repurpose old wooden crates by stacking them, use sturdy milk crates, or construct simple wooden slots within an existing shelving unit. The optimal choice depends largely on the volume and variety of paint you possess, as well as the specific space limitations and aesthetic preferences of your storage area.
2. Customizable Storage Solutions for Your Unique Needs

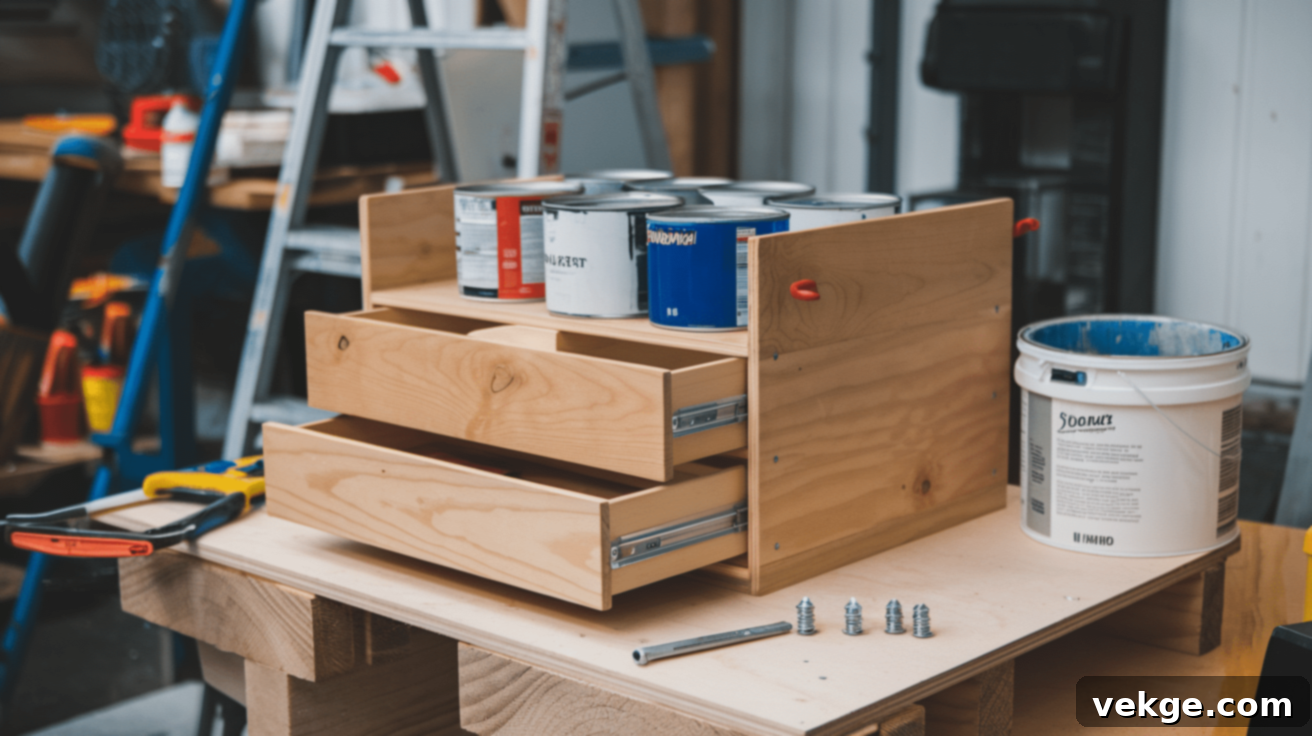
For those with specific requirements or an inclination for woodworking, building your paint can holder offers unparalleled flexibility. A basic DIY rack can be constructed with minimal materials—some sturdy wood planks, screws, and a saw. This allows you to tailor the dimensions precisely to your available space and the size of your paint can collection. For a more advanced setup, consider adding features like sliding drawers, which keep dust out and offer a cleaner look, or cabinet doors to conceal your paint collection entirely. You might also integrate pull-out shelves for easier access to cans at the back.
The primary advantages of creating your own DIY storage solution are cost-effectiveness and perfect customization. You can design it to fit oddly shaped spaces, utilize specific wall dimensions, and even match your existing workshop aesthetic. This bespoke approach ensures every can has a designated spot, optimizing your storage. However, the downsides include the time investment required for planning and construction, and the final product might not have the polished finish of a commercially manufactured item. When embarking on a DIY project, select plans that align with your current skill level and the tools you already own to ensure a successful and satisfying build.
3. Space-Saving Storage Ideas for Confined Areas

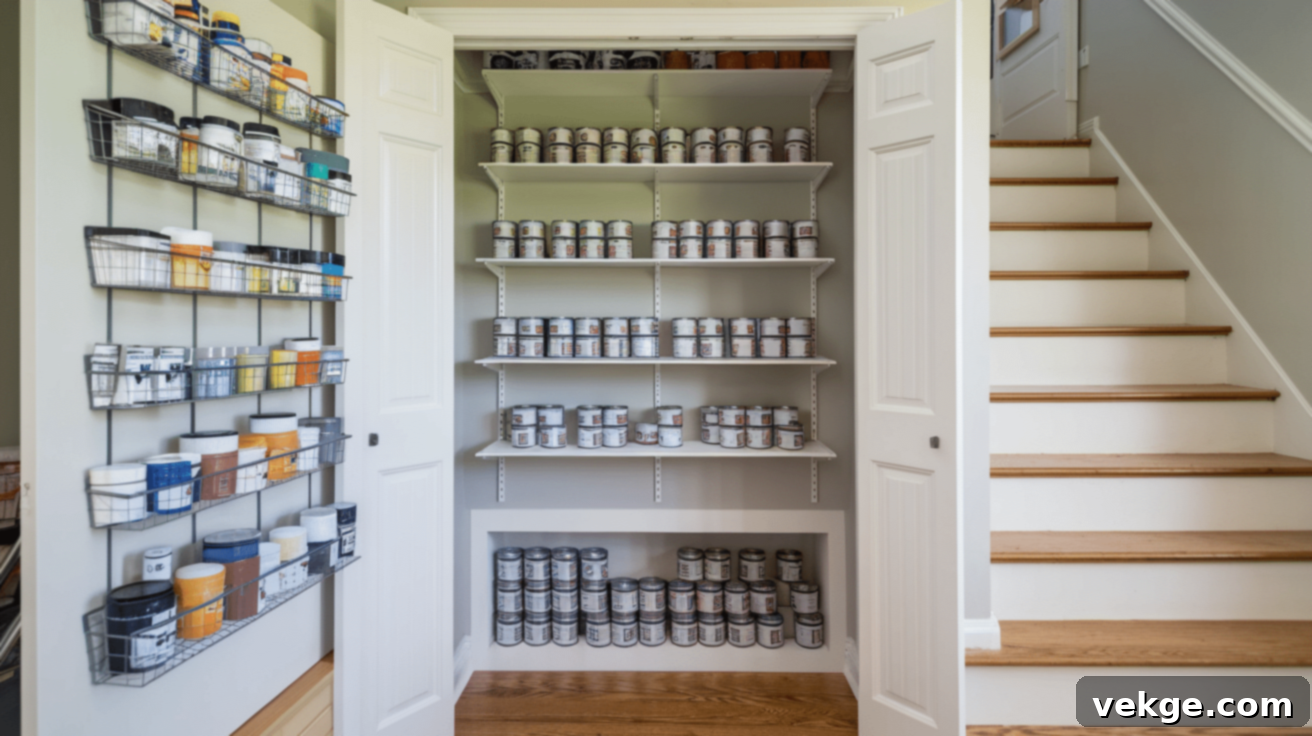
When storage space is at a premium, thinking vertically rather than horizontally is key. Thin, wall-mounted shelves are remarkably effective in narrow closets, laundry rooms next to washer/dryer units, or even in a small entryway. These shelves can hold quart or even gallon cans without protruding too far into the room. Under-stair storage spaces, often overlooked, can be transformed with custom-built short shelves, perfect for stowing smaller quart-size cans or paint samples.
In compact sheds or workshops, door-mounted racks or hanging systems that utilize pegboards or slat walls can free up valuable floor and shelf space. These allow for quick visual inspection and easy retrieval. For small paint jars, tubes of acrylics, or craft paints, consider repurposing over-the-door shoe holders; their clear pockets offer excellent visibility and organization. When stacking cans, always group same-size containers in neat rows with labels facing outwards. This intelligent arrangement allows for quick identification without necessitating the removal of multiple cans, making the most of every inch of available space.
4. Portable Storage Solutions for On-the-Go Projects

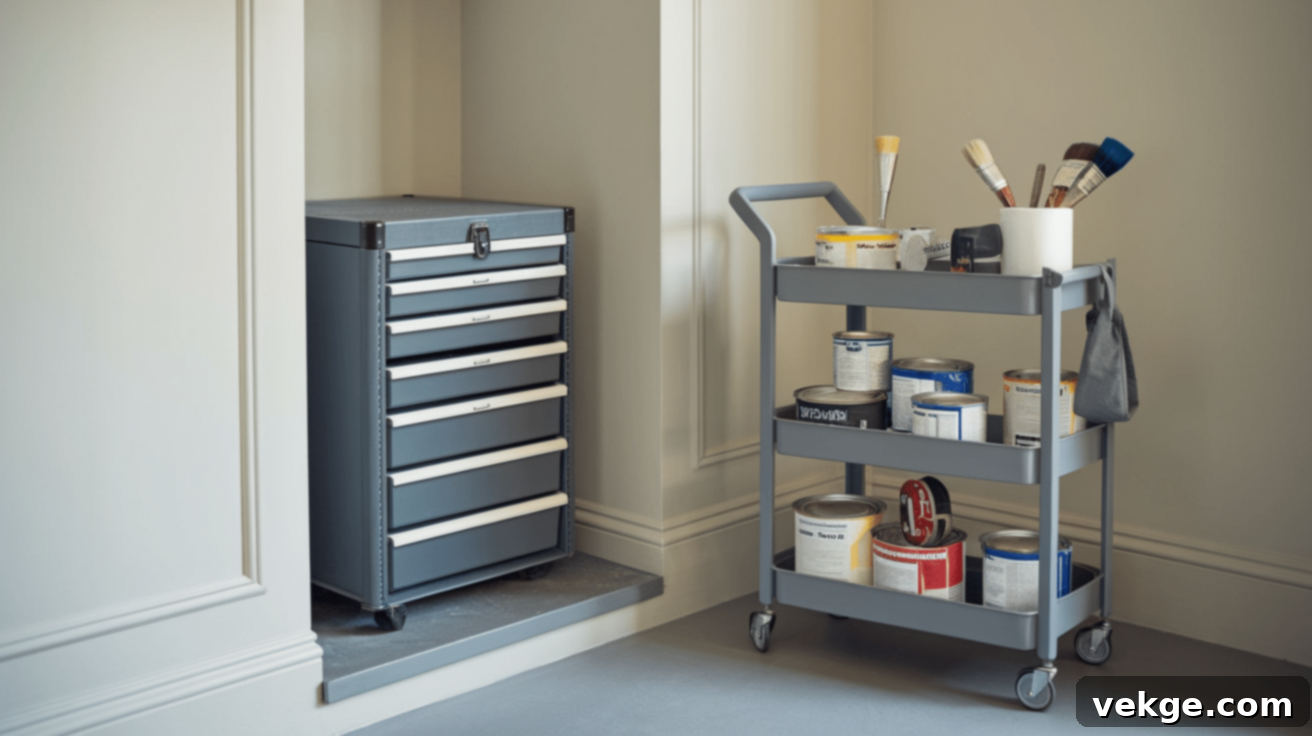
For individuals who frequently work on projects in various rooms or even different locations, portable paint storage solutions are a game-changer. Rolling utility carts are an excellent choice, making it easy to transport paint, brushes, and other supplies from one room to another without straining your back. Look for carts with adjustable shelves specifically sized to accommodate different paint can dimensions, and consider models with side hooks or compartments for brushes, rollers, and stirring sticks. These carts can be easily moved to the project site and then tucked away into a corner or closet when not in use, preserving precious floor space.
Heavy-duty toolboxes with deep drawers also serve as effective portable storage for smaller cans, spray paints, and essential painting accessories. Their robust construction protects contents during transit, and multiple compartments help keep items organized. These mobile units are particularly beneficial for contractors, artists, or anyone who needs to store paint in one central location but frequently uses it elsewhere. Their ability to be easily maneuvered and then compactly stored makes them an indispensable asset for dynamic work environments, ensuring your painting supplies are always where you need them, when you need them.
Safety and Care for Stored Paint
Beyond simply organizing your paint cans, ensuring their safety and maintaining their quality is paramount. Proper care not only extends the life of your paint but also contributes to a safer home environment. Understanding how to protect your stored paint from deterioration and potential hazards is a critical aspect of responsible paint ownership. Let’s delve into the essential practices for preserving your paint and safeguarding your space.
1. The Art of Sealing Paint Cans Effectively
A truly airtight seal is the single most important factor in keeping paint fresh for years. After each use, take a moment to thoroughly clean the rim of the can with a damp cloth or paper towel, removing any excess paint. Dried paint on the rim can prevent the lid from seating properly, creating small gaps that allow air to seep in and dry out the paint. When replacing the lid, use a rubber mallet (not a metal hammer) to gently tap it closed, working your way around the entire circumference. This ensures an even, tight seal without denting the can, which could compromise future sealing efforts.
For an extra layer of protection, particularly with paints you intend to store for extended periods, place a piece of plastic wrap, cling film, or aluminum foil over the can opening before pressing the lid down. This creates an additional barrier against air infiltration. Some experienced painters also advocate for briefly inverting the sealed can (for just a few minutes) to allow the paint to form an internal seal around the lid, further enhancing its airtightness. Always double-check that the lid is fully and uniformly closed to effectively keep air out and preserve your paint’s quality.
2. Critical Temperature and Humidity Considerations
As previously mentioned, paint thrives in a stable temperature range of 50-80°F (10-27°C). Extreme heat, such as that found in unventilated attics or sheds during summer, can cause paint to thicken, skin over, or even separate into unusable components. The pigments can also be affected, leading to color changes. Conversely, freezing temperatures, often encountered in unheated garages or outdoor sheds during winter, are particularly detrimental. Freezing can cause water-based paints to expand, rupture the can, and permanently alter the paint’s consistency, making it lumpy, grainy, and impossible to remix. Once frozen and thawed, most water-based paints are ruined.
High humidity is another enemy, especially for metal paint cans. Persistent moisture in the air can lead to rust formation on the cans, which not only looks unsightly but can also compromise the can’s integrity, potentially contaminating the paint inside or allowing air in. To mitigate rust, always store cans off damp floors by using shelves, wooden pallets, or even simple wooden boards. If your storage area is particularly humid, consider using a dehumidifier or moisture-absorbing products like desiccant packets to maintain a drier environment. Regularly check your storage area during periods of extreme heat or cold to ensure temperatures remain within the acceptable range for paint preservation.
3. Safe Handling and Storage of Hazardous Paint Types
Not all paints are created equal, especially concerning their hazard levels. Oil-based paints, varnishes, stains, lacquers, and many aerosol spray paints contain volatile organic compounds (VOCs) and flammable solvents. These materials pose significant fire risks and should be stored with extreme caution. Always store them in a well-ventilated area, preferably in a dedicated metal storage cabinet designed for flammable liquids, and strictly away from any heat sources, open flames, sparks, or pilot lights. If you have children or pets in your home, it is absolutely essential to store all paints, especially hazardous types, in a locked cabinet or on a high shelf inaccessible to them.
Never store paint near food items or in kitchen areas, as fumes from certain paints can contaminate food. Always read the safety data sheet (SDS) and the labels on the paint cans for specific handling, ventilation, and storage instructions. Some paints, particularly those with high VOC content, require greater air circulation in their storage spots to prevent fume buildup. Be aware that local municipal regulations often dictate specific storage and disposal requirements for highly toxic or flammable materials. It’s prudent to check with your local waste management facility or fire department for guidance on storing these specific types of hazardous household chemicals.
4. Inspecting Stored Paint for Quality Assurance
Even with meticulous storage, it’s wise to periodically inspect your stored paint, perhaps once a year, to ensure its quality. Open each can and stir the paint thoroughly with a clean stir stick. Good quality paint should be free of lumps and mix back to a uniform consistency. The consistency should be smooth, and it should pour evenly. As mentioned earlier, pay close attention to the smell; a fresh, normal paint odor is a good sign. If the paint emits a sour, moldy, or rotten egg-like smell, it indicates bacterial growth, and the paint is no longer usable and should be properly disposed of.
If you find that the paint has become thick but still smells normal and has no unmixable chunks, it might be salvageable. For oil-based paints, you can try mixing in a small amount of the appropriate paint thinner (mineral spirits or turpentine, as recommended by the manufacturer) to restore its consistency. For water-based paints, a very small amount of distilled water can sometimes help. However, if you observe solid chunks that won’t blend, a jelly-like texture, or a thick skin that doesn’t fully dissolve back into the paint, it’s generally an indication that the paint is spoiled and cannot be effectively revived. Before committing any old paint to a significant project, always perform a small test patch on an inconspicuous area or a piece of scrap material to ensure it applies smoothly, dries correctly, and the color matches your expectations.
How to Safely Dispose of Leftover Paint
Disposing of leftover or spoiled paint requires careful consideration and adherence to environmental guidelines. Simply throwing paint in the regular trash or pouring it down drains is highly irresponsible and can cause significant harm to our environment, polluting soil and water systems. Most municipalities have strict rules and regulations regarding paint disposal to protect public health and the ecosystem.
It is crucial to check with your local waste management center or municipal government for the correct and legal way to dispose of paint in your area. Many communities offer specific “Household Hazardous Waste” (HHW) drop-off days or facilities where you can safely dispose of chemicals like paint, motor oil, and cleaning products. Some paint retailers and manufacturers also participate in take-back programs, collecting old paint for proper recycling or hazardous waste handling. Recycling old paint, where available, is the most environmentally friendly option, as it prevents usable paint from ending up in landfills and conserves resources by reprocessing it into new products.
Here are some helpful and environmentally responsible ways to handle leftover paint:
- Dry Out Small Amounts of Latex Paint: For small quantities of water-based (latex) paint, you can often dry it out at home. Leave the lid off the can in a well-ventilated, safe spot, away from children, pets, and direct heat sources. You can speed up the drying process by adding absorbent materials like cat litter, shredded paper, or sawdust to the paint. Once the paint is completely solid and no longer liquid, it is generally safe to dispose of it in your regular household trash.
- Locate Paint Recycling Centers: Actively seek out paint recycling centers in your town or region. These specialized facilities are designed to collect and reprocess old paint. They clean, filter, and often blend old paints to create new, recycled paint products, significantly reducing landfill waste and conserving raw materials.
- Consider Donating or Repurposing Usable Paint: If you have good quality, usable leftover paint that you won’t be using, consider donating it. Local schools, community theater groups, non-profit organizations, Habitat for Humanity ReStores, or even neighbors might be grateful for paint for small jobs, art projects, or community initiatives. This not only reduces waste but also benefits others in your community.
Wrapping Up
Mastering the art of paint can storage is an essential skill for any homeowner or DIY enthusiast. By implementing the strategies discussed in this guide, you’re not just organizing; you’re making a smart investment in the longevity of your supplies, saving money, and reducing waste. From understanding the ideal storage conditions and selecting the right containers to ensuring a tight seal and safely disposing of unwanted paint, each step plays a crucial role in maintaining your paint’s quality.
Whether you’re embarking on a major garage overhaul, designing a bespoke DIY storage solution, or simply learning how to keep that perfect shade from going bad, these professional paint storage techniques will empower you. Start applying these actionable storage ideas today to avoid the frustration of wasted paint and ensure your projects always stay on track with fresh, ready-to-use colors. Are you prepared to revolutionize your paint storage? Dive in, try out some of the solutions we’ve outlined, and keep your paint cans in pristine condition, ready for every future creative endeavor!
