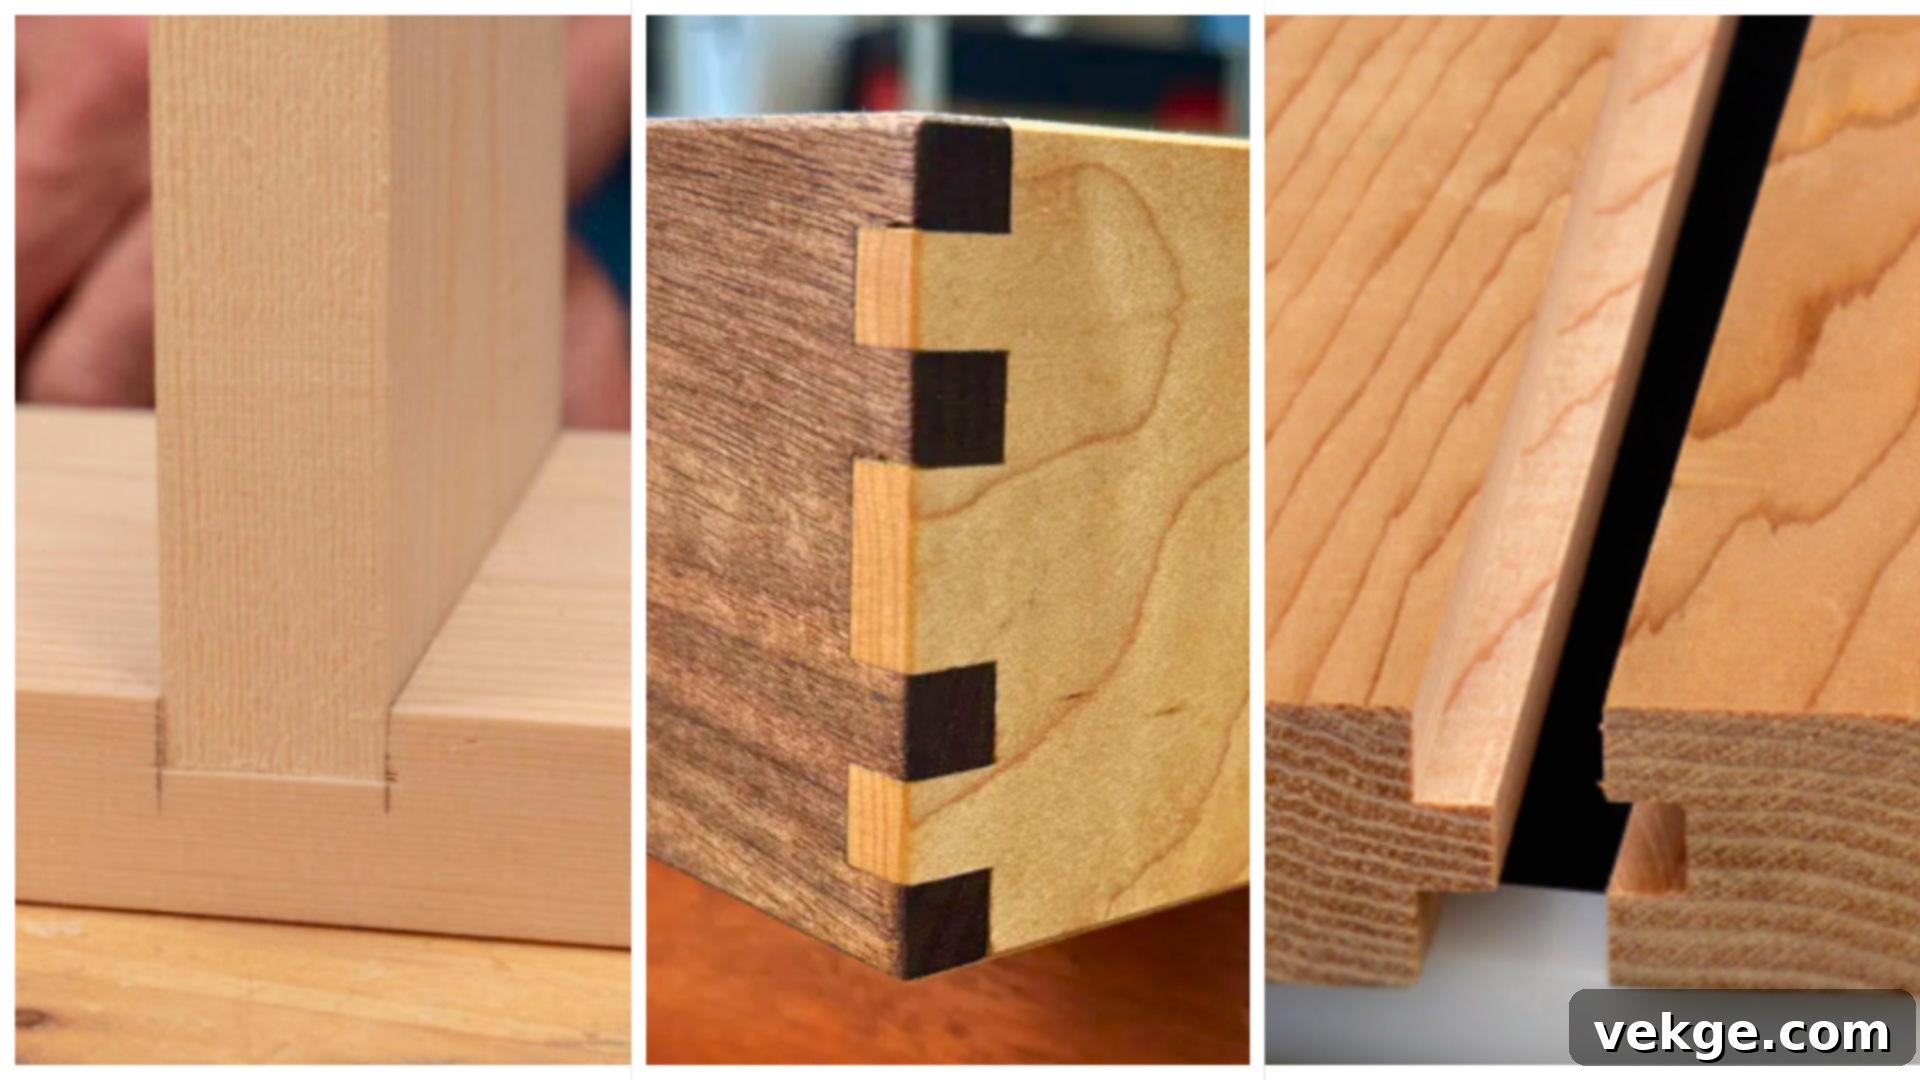
Mastering Wood Joinery: Your Essential Guide to Strong & Beautiful Wood Connections
Every lasting woodworking project, from a simple picture frame to a sturdy dining table, begins with a thoughtful design and ends with expertly crafted joints. It’s not just about assembling pieces of wood; it’s about creating enduring connections that withstand the test of time, resisting daily wear, shifting temperatures, and the stresses of gravity. This is the art and science of **wood joinery** – the cornerstone of durable and aesthetically pleasing woodworking.
For many aspiring woodworkers, the sheer variety of **woodworking joints** can feel overwhelming. I remember those early days of trial-and-error, often resulting in frustratingly weak or unsightly connections. But understanding the fundamental principles of each joint type unlocks a world of possibilities, transforming your projects from fragile assemblies into robust heirlooms.
In this comprehensive guide, we’ll demystify the world of **wood joinery techniques**. I’ll walk you through all the primary types of **wood joints**, explaining their mechanics, ideal applications, and providing practical tips for successful execution. Whether you’re building furniture, cabinets, or decorative items, you’ll learn how to select the perfect joint for strength, appearance, and ease of construction. We’ll also cover essential tool basics, common pitfalls to avoid, and a handy comparison chart to help you make informed decisions for every build.
Exploring the Fundamental Types of Wood Joinery
Once you grasp the purpose and application of various **wood joints**, you’ll significantly elevate your woodworking skills. Each joint offers a unique balance of strength, aesthetic appeal, and complexity, making certain types better suited for specific projects than others. Let’s delve into the most common and effective **types of wood joinery** that form the backbone of countless woodworking creations.
1. Butt Joint
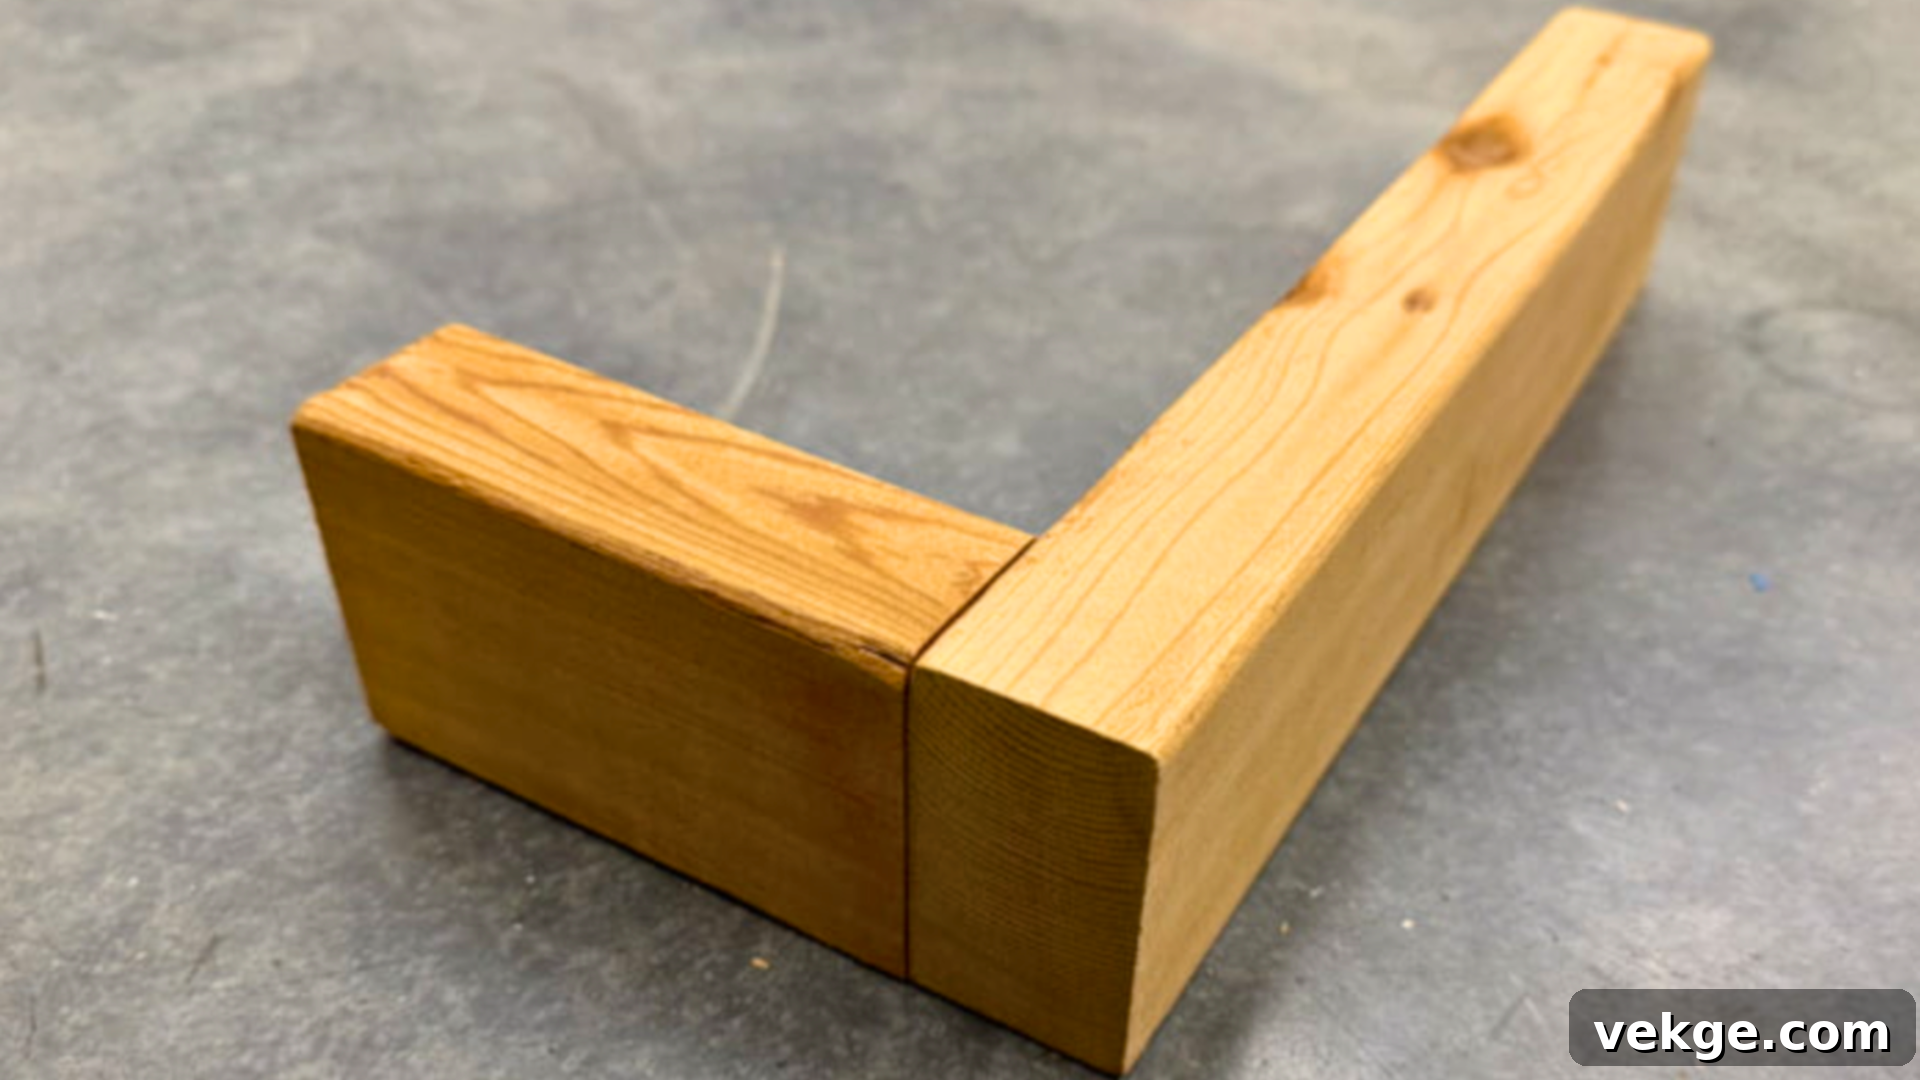
The butt joint is arguably the simplest of all **woodworking joints**, forming the foundation for many beginner projects. It involves placing the end grain of one board directly against the face or edge of another, then securing them with mechanical fasteners like screws or nails. Because it doesn’t require complex cuts or specialized tools, it’s an excellent starting point for those new to woodworking.
While straightforward, the butt joint offers minimal inherent strength due to the poor long-grain to end-grain glue bond. Its primary strength comes from the fasteners. Therefore, it’s typically used in applications where high structural integrity isn’t crucial, or where it will be reinforced, and where its visible end grain isn’t a significant aesthetic concern.
- Best use cases: Quick utility shelves, internal framing (like inside a cabinet where it won’t be seen), temporary jigs, basic boxes, or wall frames where the joint is under compression.
- Strength rating: Low. Relies heavily on mechanical fasteners and glue, which is less effective on end grain.
- Tools needed: A saw for straight cuts, a drill for pilot holes and screws, and clamps to hold pieces in alignment while fastening.
- Mistakes to avoid: Never rely on nails or screws alone for any significant load; always use wood glue for added stability, even if minimal. Ensure precise 90-degree cuts for a tight fit, and always check for square alignment before securing to prevent crooked assemblies.
2. Mitered Butt Joint
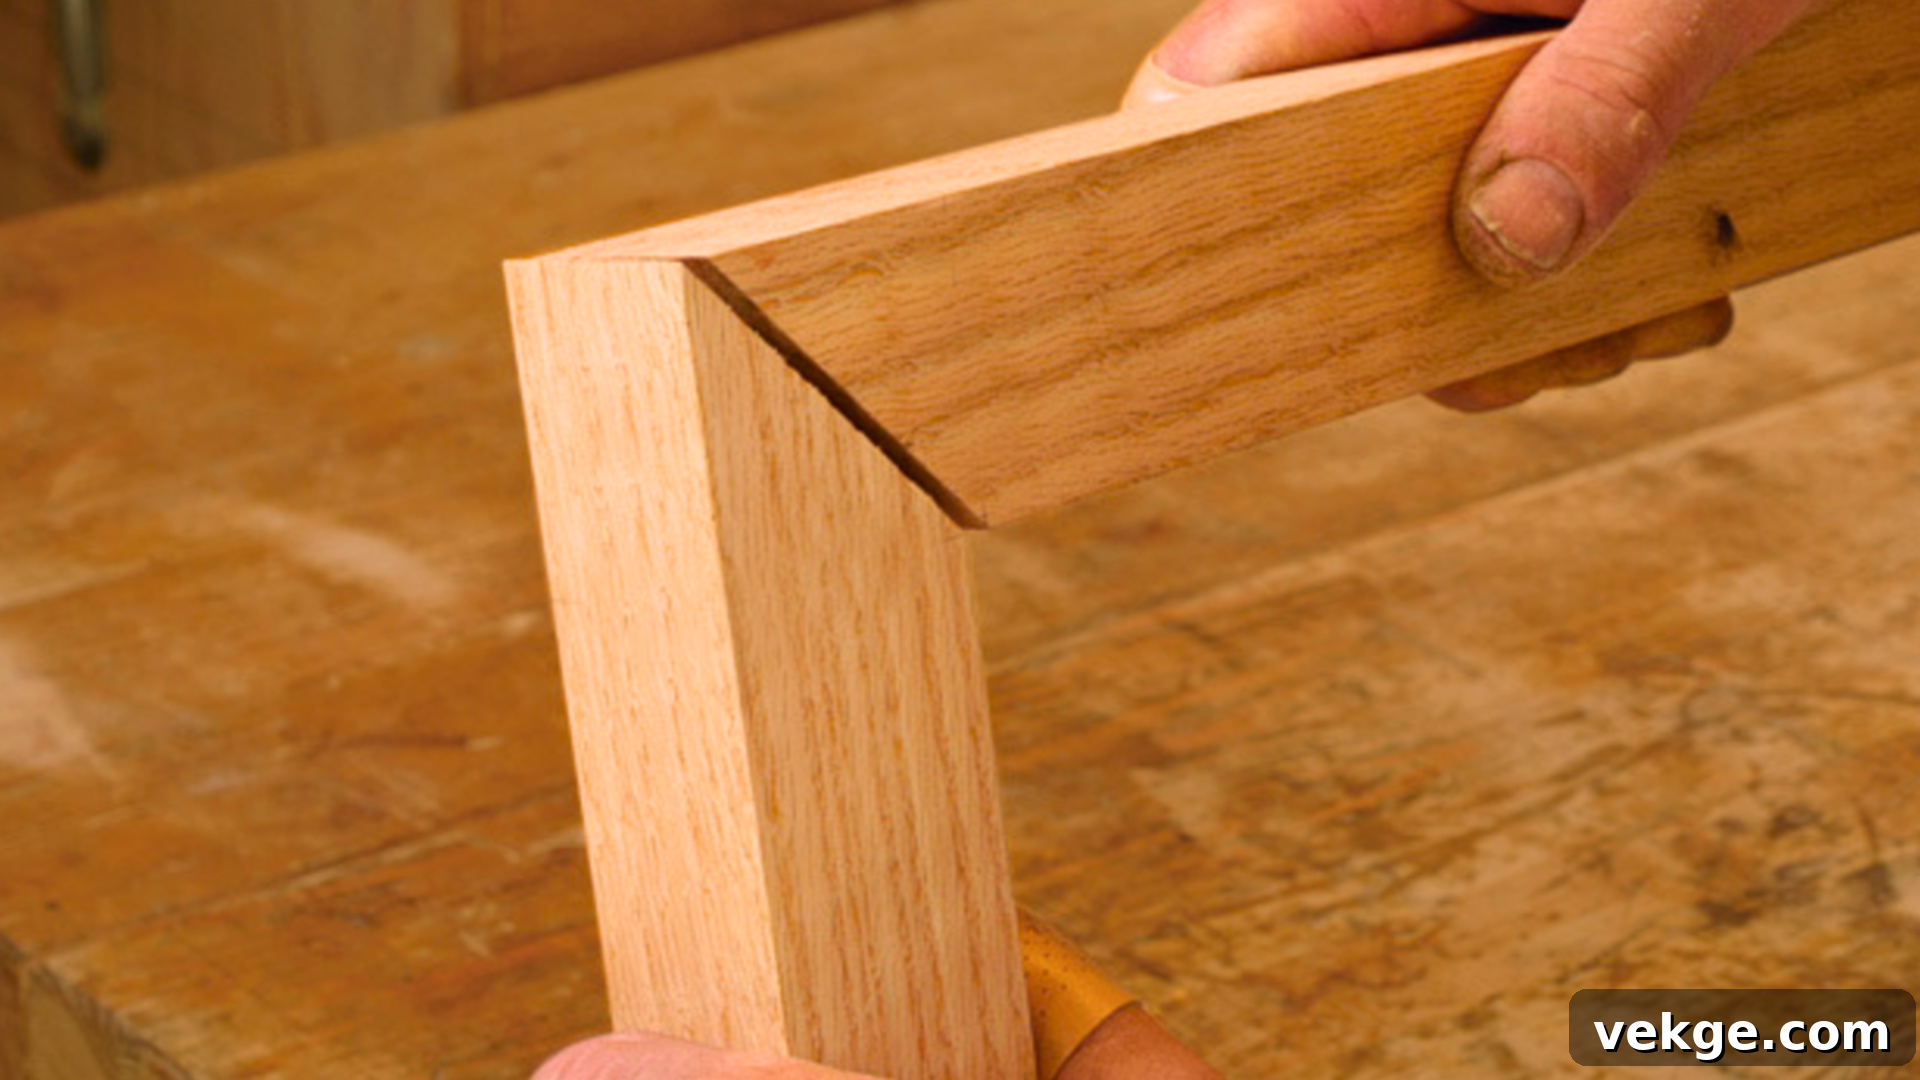
The mitered butt joint is an elegant variation of the basic butt joint, primarily chosen for its clean aesthetic. Instead of a straight 90-degree cut, two boards are precisely cut at an angle – most commonly 45 degrees – so that when joined, they form a perfect corner, often 90 degrees. This technique effectively conceals the unsightly end grain, offering a much cleaner and more professional appearance than a standard butt joint.
However, despite its visual appeal, the mitered joint, like its simpler counterpart, doesn’t inherently offer significant strength. It still relies on end-grain glue bonds, which are weak. For projects requiring durability, it’s essential to reinforce mitered joints with splines, biscuits, dowels, or specialized fasteners, especially for items that will endure stress.
- Best use cases: Picture frames, door and window trims, decorative boxes, molding, and furniture elements where visual continuity is paramount.
- Strength rating: Low to medium, greatly improved with reinforcement.
- Tools needed: A miter saw (manual or power) for accurate angle cuts, wood glue, and clamps (corner clamps are especially useful) for holding the joint securely while the glue dries.
- Mistakes to avoid: Precision is key. Inaccurate angles (even by half a degree) will result in visible gaps and a weak bond. Always ensure your saw is calibrated, and test-fit cuts before applying glue. Insufficient clamping pressure can also lead to open joints.
3. Half-Lap Joint

The half-lap joint marks a significant step up in strength and stability compared to butt joints. In this method, half the thickness of each board is removed at the joint area, allowing the two pieces to overlap and sit flush with each other. This clever design creates a much larger long-grain to long-grain gluing surface, which is inherently much stronger than an end-grain bond.
Beyond increased gluing area, the half-lap also offers good mechanical strength. The interlocking nature of the joint prevents components from twisting or shifting, making it an excellent choice for frames and structural elements that need to remain flat and rigid. It’s a versatile joint that balances relative simplicity with solid performance.
- Best use cases: Framing structures for cabinets, tables, or screens; furniture supports, grid-style designs like lattice work, and simple door frames.
- Strength rating: Medium. Offers good resistance to racking (distortion under sideways pressure) due to the large gluing surface and interlocking wood fibers.
- Tools needed: A hand saw and chisel for precise manual work, or a table saw equipped with a dado blade, router, or band saw for faster, more consistent cuts.
- Mistakes to avoid: Removing too much material from either piece will significantly weaken the overall structure. Always measure carefully and perform test cuts on scrap wood first. Test-fitting each joint without glue is crucial to ensure a tight, flush fit before final assembly.
4. Tongue and Groove Joint
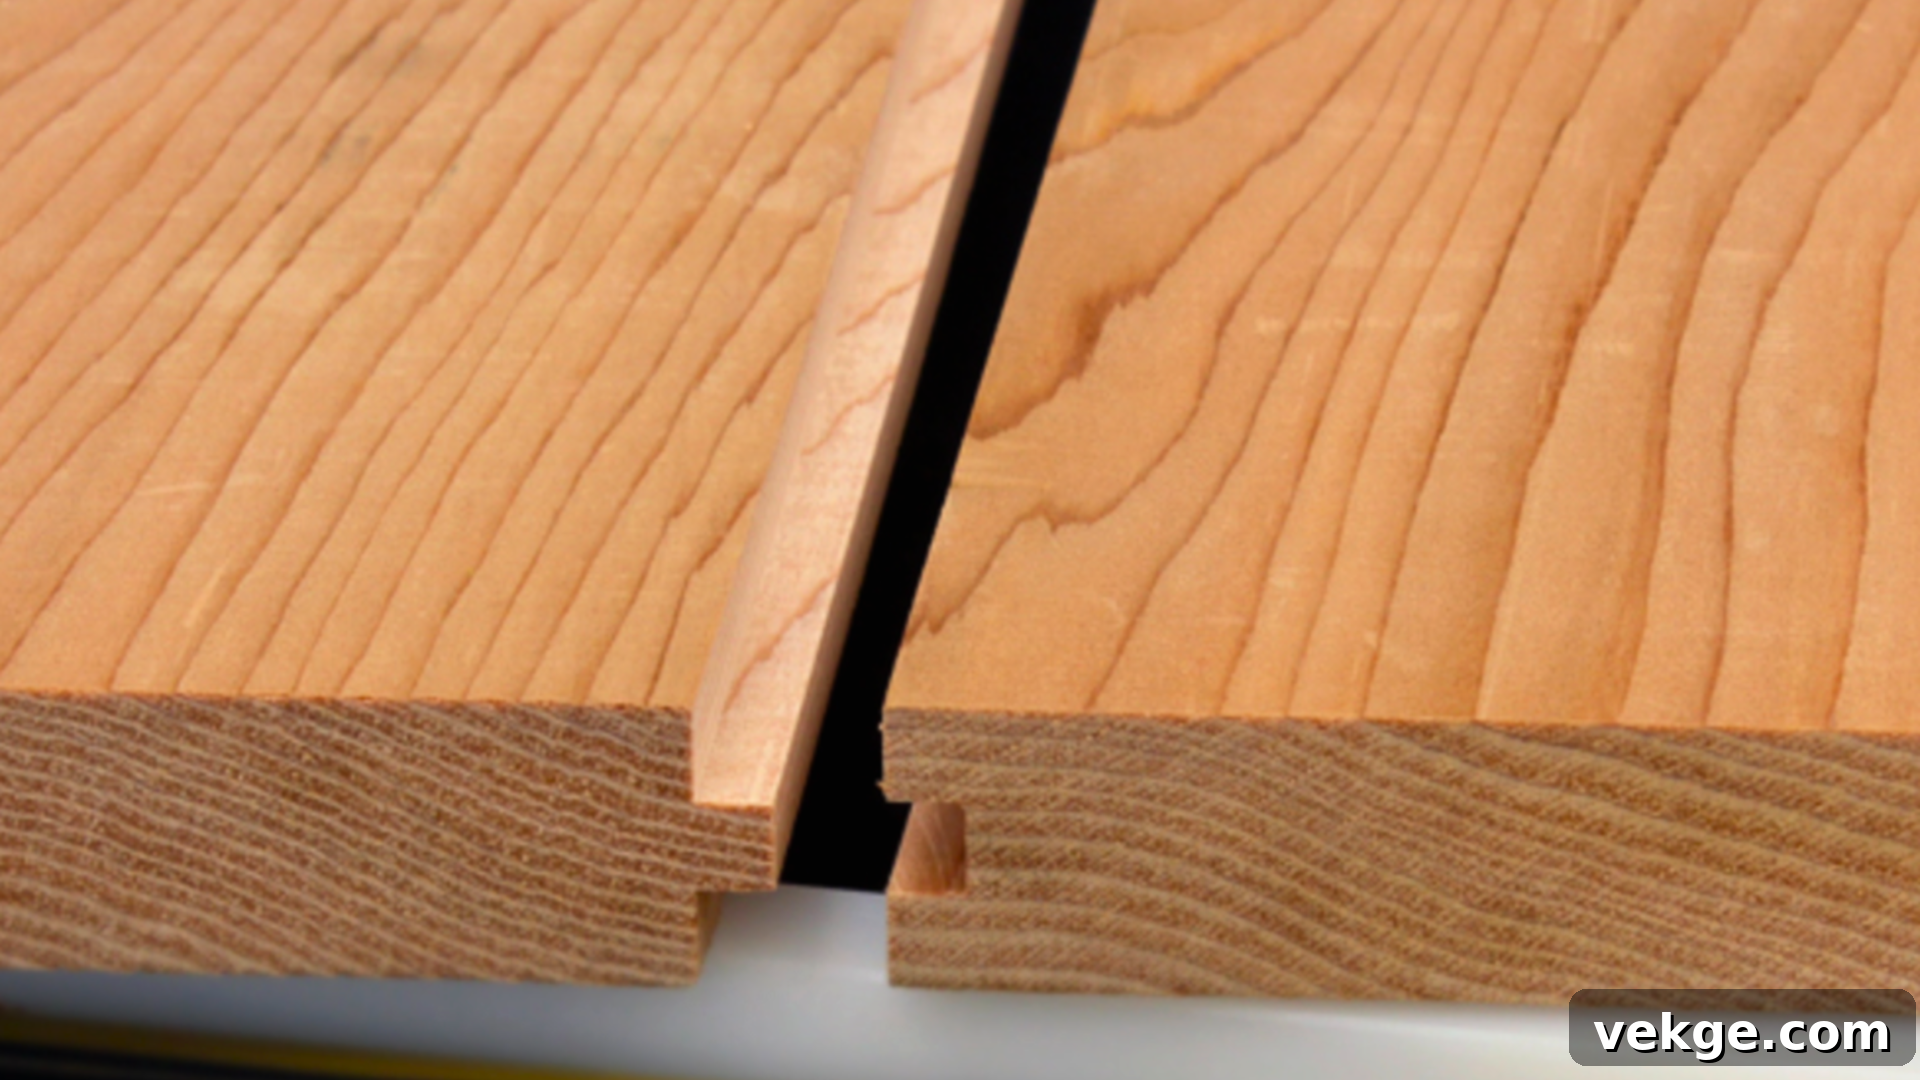
The tongue and groove joint is a highly effective method for joining long boards side-by-side, creating broad, flat surfaces without visible gaps. It consists of a raised “tongue” milled along one edge of a board that precisely fits into a corresponding “groove” cut into the edge of an adjacent board. This interlocking design not only provides excellent alignment but also creates a substantial long-grain gluing surface for a strong bond.
This joint is particularly valued in applications where surface flatness and resistance to movement are critical. The interlocking mechanism helps prevent boards from bowing or cupping, making it a reliable choice for large panel assemblies. It’s a hallmark of quality craftsmanship in many traditional and modern woodworking applications.
- Best use cases: Hardwood flooring, wall paneling, large tabletops, cabinet backs, and any project requiring the seamless joining of multiple boards into a wide panel.
- Strength rating: Medium to high. Provides excellent shear strength and resistance to bowing.
- Tools needed: A router fitted with specialized tongue and groove bits is the most common and efficient tool. Alternatively, a table saw with a dado blade can be used, or a shaper for large-scale production. Clamps are essential for tight assembly.
- Mistakes to avoid: Achieving the right fit is paramount. If the tongue is too thick or the groove too narrow, forcing the joint can cause splitting. Conversely, a fit that is too loose will result in a weak joint and potential gaps. Test-fitting on scrap wood and making fine adjustments to bit height or fence position is crucial.
5. Mortise and Tenon Joint
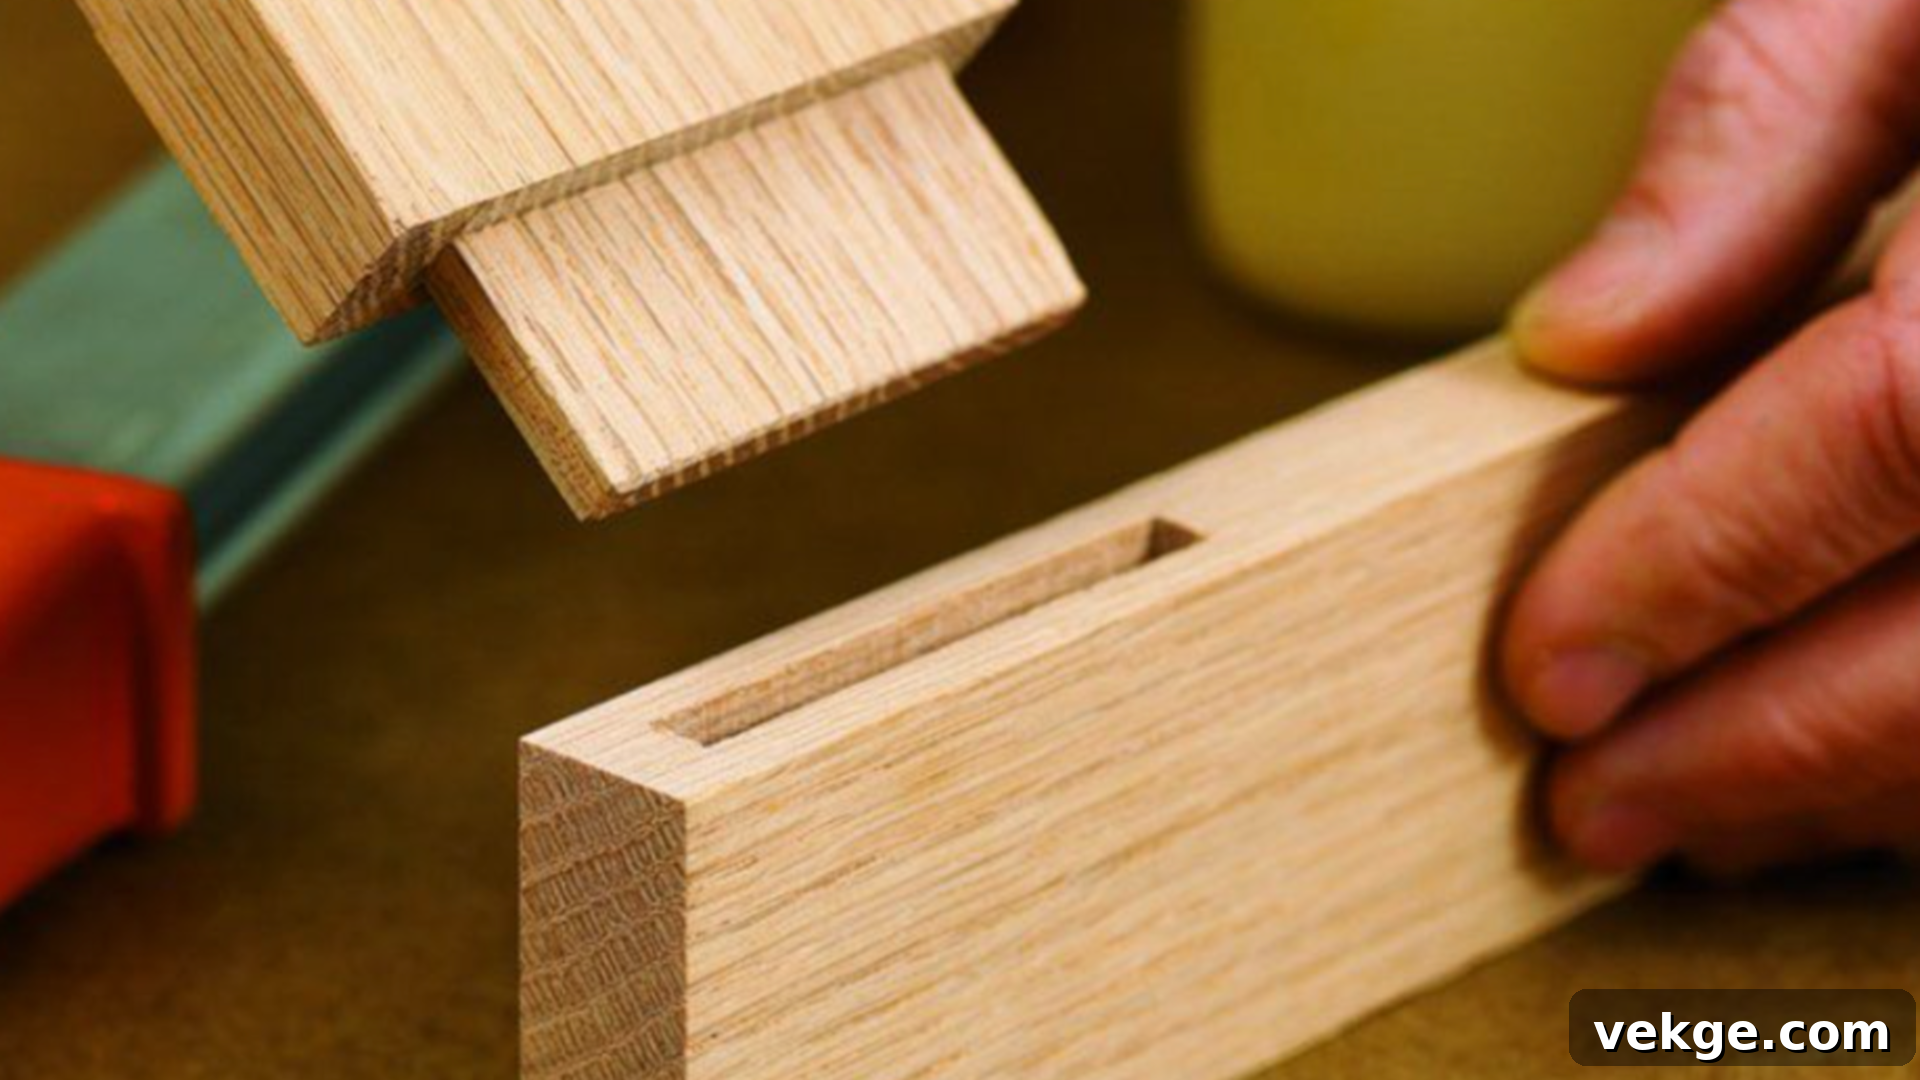
The mortise and tenon joint is a cornerstone of traditional woodworking and remains one of the strongest and most revered **woodworking joints**. Dating back thousands of years, its enduring popularity is a testament to its incredible strength and stability. It involves creating a rectangular hole (the mortise) in one piece of wood and a precisely fitted projection (the tenon) on the end of another. When glued together, the long-grain to long-grain contact within the mortise provides an incredibly strong mechanical and adhesive bond.
This joint is celebrated for its ability to withstand significant stress from all directions, making it ideal for structural applications where durability is paramount. While it requires precision and can be more challenging to master than simpler joints, the effort invested pays off in the longevity and integrity of the finished piece.
- Best use cases: Chair legs and rails, table frames, bed rails, door construction, and any heavy-duty furniture where structural integrity is critical.
- Strength rating: High. Offers exceptional resistance to racking, twisting, and pulling forces.
- Tools needed: Chisels (for squaring mortises), a saw (for tenon shoulders), a drill (for initial mortise waste removal), a mallet, and high-quality wood glue. Specialized tools like mortising machines or router jigs can increase efficiency and accuracy.
- Mistakes to avoid: Tenons that are too thin will create a wobbly, weak joint. If a tenon is too thick or the mortise too tight, forcing it can split the wood, especially the piece containing the mortise. Precise measuring and cutting, along with careful test-fitting, are non-negotiable for a successful mortise and tenon joint.
6. Biscuit Joint (Plate Joiner Joint)
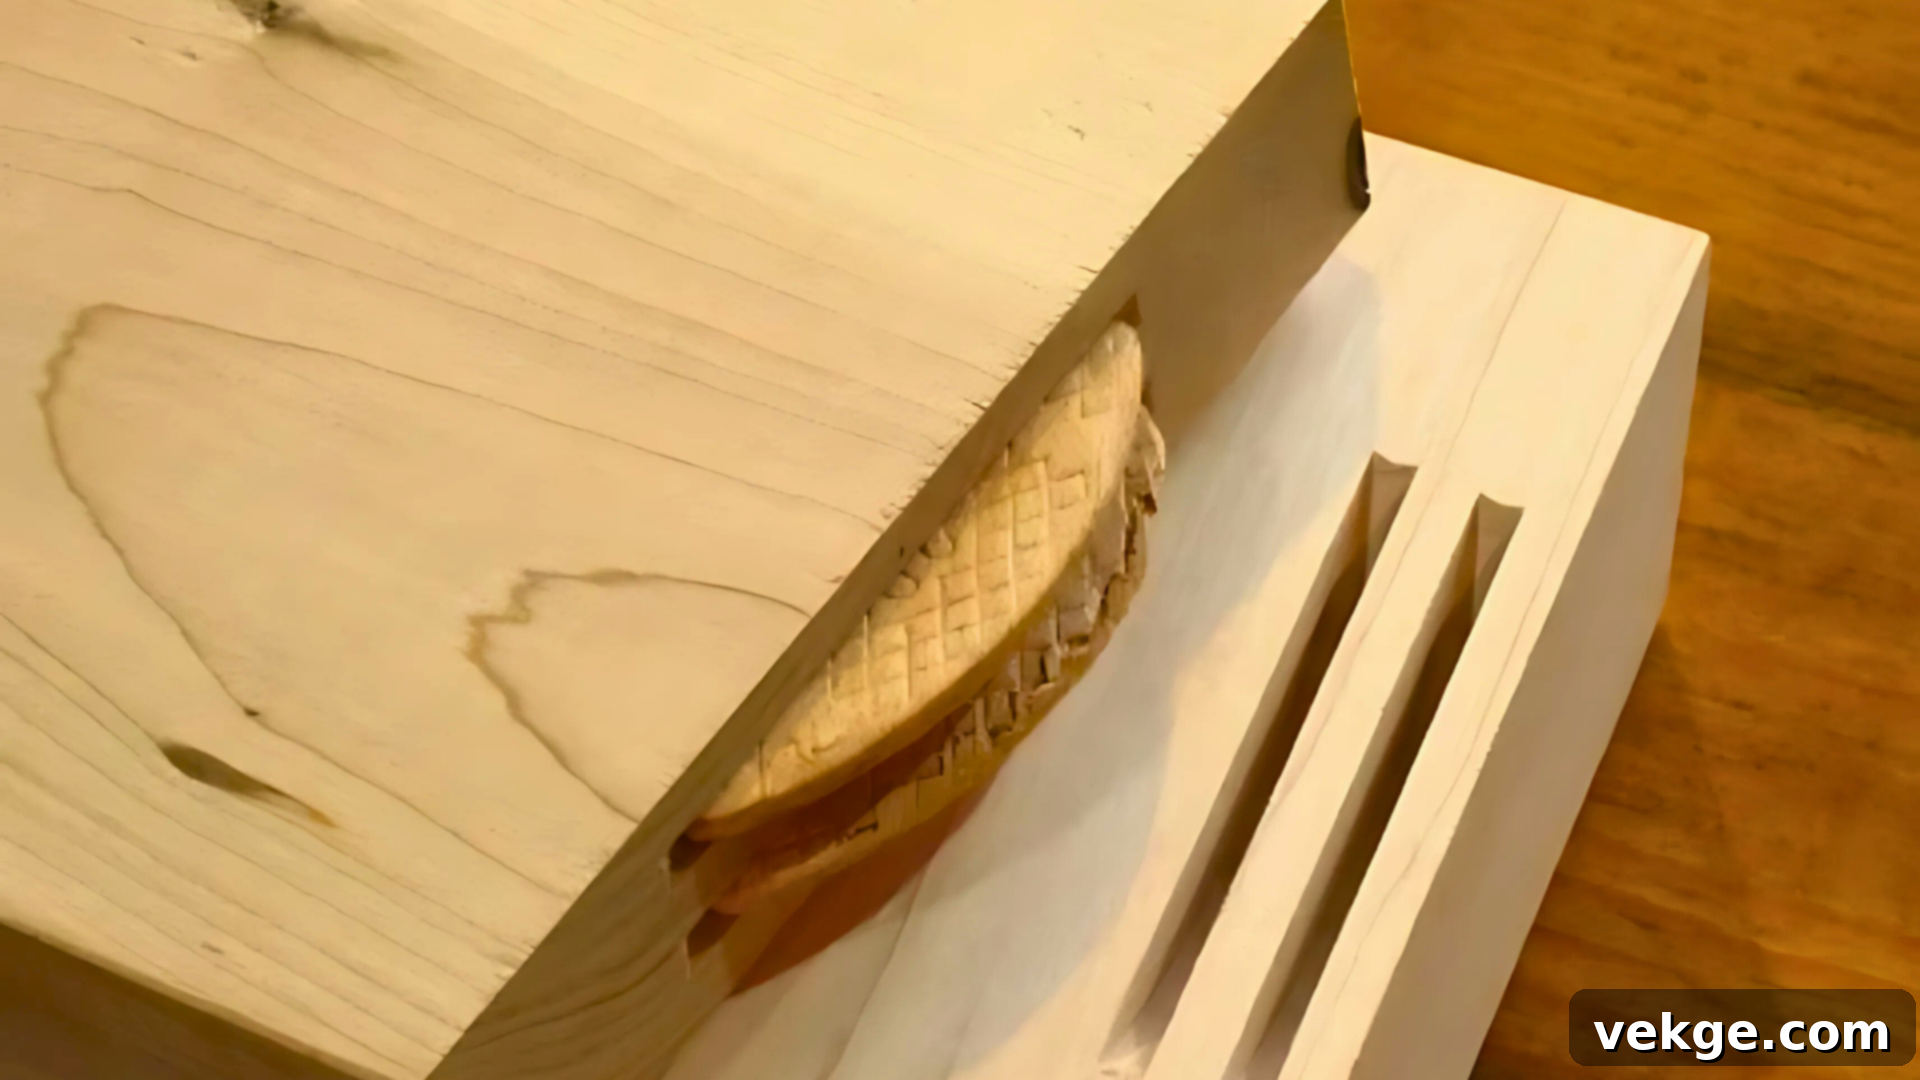
The biscuit joint, also known as a plate joiner joint, is a modern and popular method for quickly and accurately joining boards, especially for panel glue-ups. It utilizes a specialized power tool called a biscuit joiner, which cuts crescent-shaped slots into the mating edges of two boards. Small, oval-shaped compressed wood “biscuits” are then inserted into these slots, typically with wood glue.
When the glue is applied, the biscuits swell slightly within the slots, creating a very tight mechanical lock that aids alignment during clamping and adds considerable shear strength. While not as strong as a mortise and tenon for racking resistance, it excels at keeping panels flat and aligned and is relatively quick to execute.
- Best use cases: Gluing panels for tabletops, cabinet doors, shelves, and carcases; aligning edge-to-edge joints, and attaching face frames to cabinet boxes.
- Strength rating: Medium. Primarily provides alignment and increased surface area for glue; offers decent shear strength.
- Tools needed: A biscuit joiner, wood glue (PVA glue is common), and plenty of clamps.
- Mistakes to avoid: Inaccurate or inconsistent slot placement will lead to misaligned boards and an uneven surface. Always mark your joint lines carefully across both mating pieces. Not enough glue or not allowing sufficient drying time can also compromise the joint’s integrity.
7. Pocket Hole Joint (Kreg Joint)
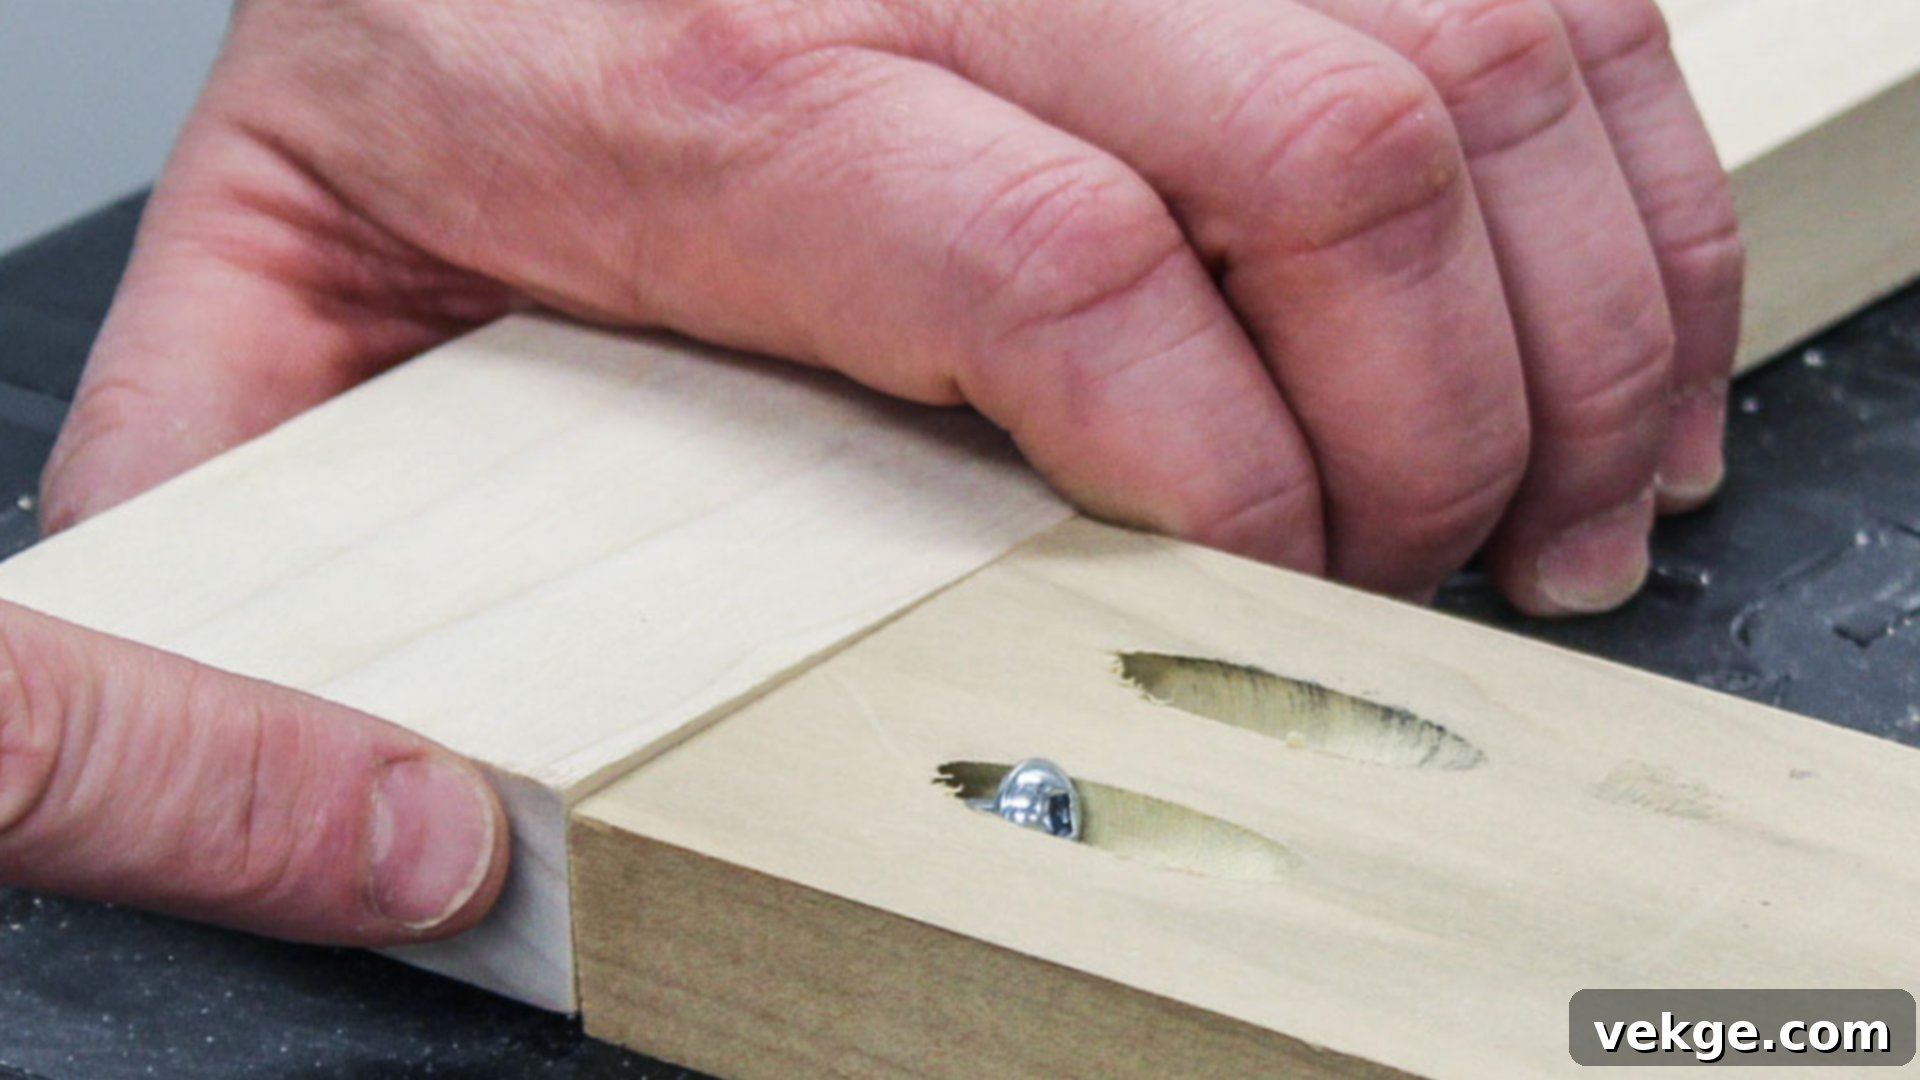
The pocket hole joint, widely popularized by the Kreg jig system, offers a fast, strong, and relatively simple way to join wood. It involves drilling an angled pilot hole into one piece of wood, typically using a specialized jig, and then driving a self-tapping screw through this “pocket” into the adjoining piece. The screw pulls the two components tightly together, creating a robust mechanical connection.
One of the key advantages of pocket hole joinery is its ability to create strong joints without extensive clamping or drying time for glue (though glue is often used for extra strength). It’s also quite forgiving, making it a favorite among hobbyists and professionals for quick and efficient assembly.
- Best use cases: Cabinet face frames, simple furniture construction (like bookcases or small tables), attaching table aprons to legs, and building baseboards or trim.
- Strength rating: Medium. Offers good resistance to racking and pulling forces, especially with glue.
- Tools needed: A pocket hole jig (e.g., Kreg jig), a drill, and specialized self-tapping pocket hole screws.
- Mistakes to avoid: Using the wrong screw length for your material thickness can lead to the screw point breaking through the surface of the adjoining board or not providing sufficient grip. Always consult the jig’s guidelines for screw selection. Overtightening can strip the pocket hole or split the wood.
8. Dado Joint
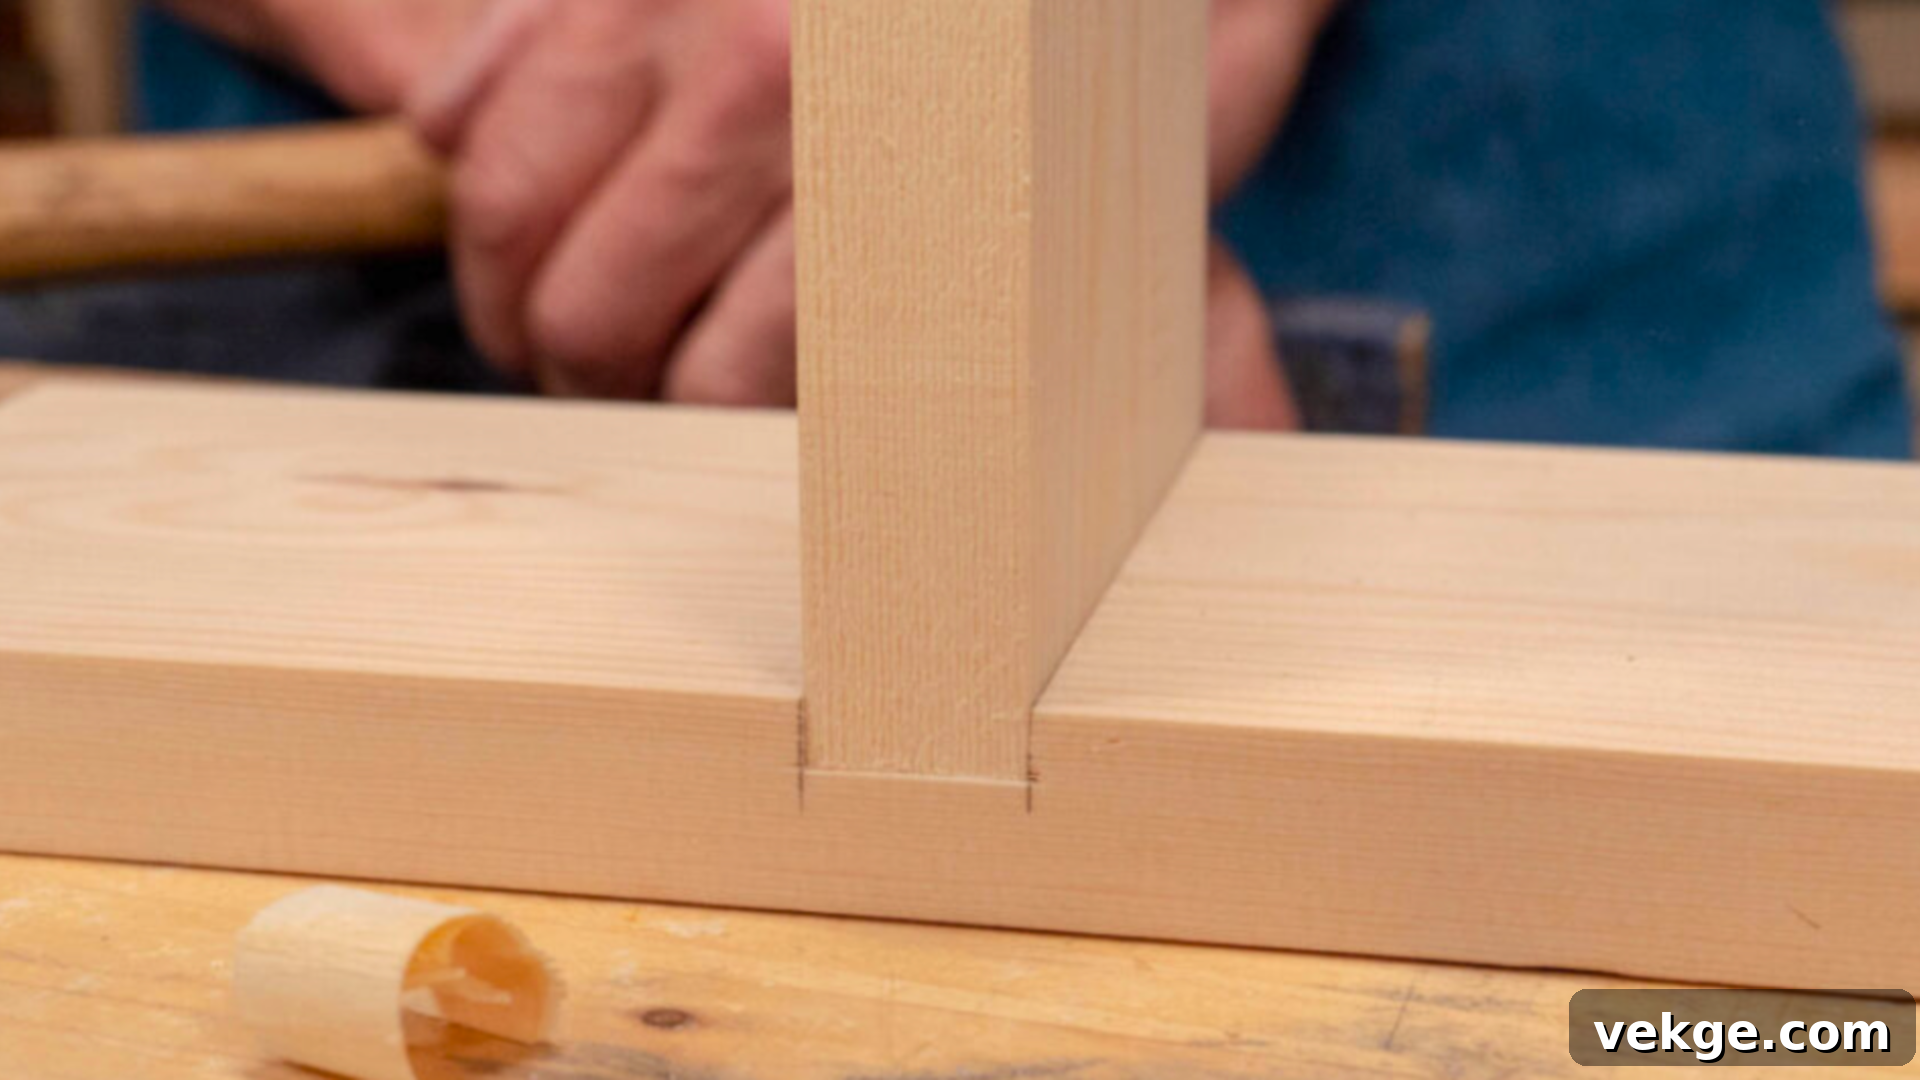
A dado joint is a strong and widely used method in cabinetmaking and shelving units. It consists of a flat-bottomed groove cut across the grain on the face of one board, designed to precisely accept the end or edge of another board. This creates a secure, interlocking connection that prevents the inserted board from shifting sideways, while also providing substantial long-grain gluing surface for added strength.
Dados are excellent for supporting shelves, holding drawer bottoms, and constructing cabinet carcases, as they distribute weight effectively across a wide area. Their strength and ease of creation (with the right tools) make them a go-to choice for functional and durable joinery.
- Best use cases: Bookshelves, cabinet sides, drawer bottoms (especially for heavier duty drawers), and any application where one board needs to be securely held perpendicular to another.
- Strength rating: High. Provides excellent support against downward pressure and good resistance to racking.
- Tools needed: A table saw with a dado blade set is ideal for consistent, square dados. Alternatively, a router with a straight bit and an edge guide, or a handheld saw and chisel, can also be used.
- Mistakes to avoid: Cutting the dado too shallow will result in insufficient support and a weaker joint. Conversely, cutting it too deep can compromise the structural integrity of the receiving board, making it prone to splitting. Ensure the dado’s width precisely matches the thickness of the mating board for a snug fit.
9. Rabbet Joint
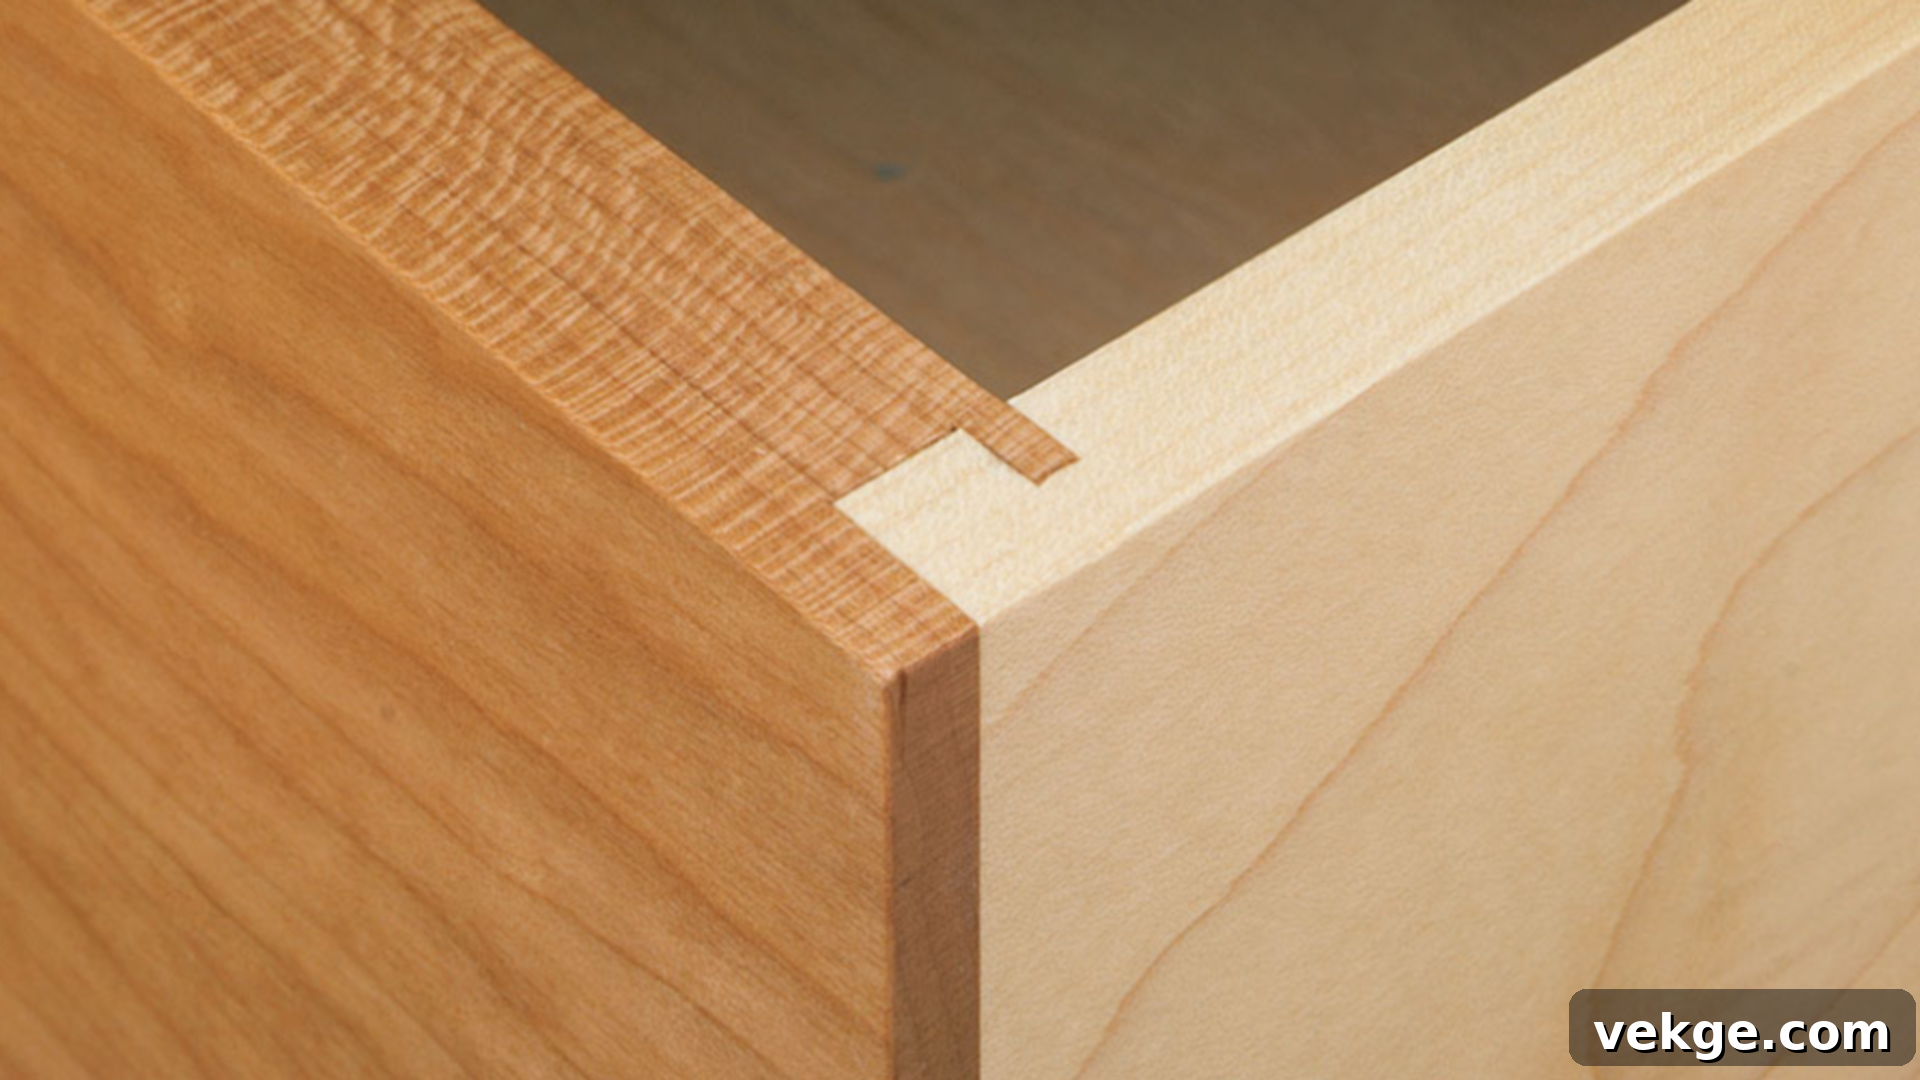
The rabbet joint is another fundamental cut, often found in conjunction with other joinery techniques, particularly in box and cabinet construction. It involves cutting a step or L-shaped recess along the edge or end of a board. This recess creates a shoulder against which another board can sit flush, or slightly overlap, providing a clean surface and an increased gluing area compared to a simple butt joint.
Rabbets are commonly used for creating the backs of cabinets, fitting drawer bottoms, or forming the corners of simple boxes. While not the strongest joint on its own, it offers good alignment and a discreet way to secure components, often reinforced with fasteners or other joints.
- Best use cases: Recessing cabinet backs, constructing basic boxes and drawers, fitting glass panels into window frames, and creating edges for panels.
- Strength rating: Medium. Stronger than a butt joint due to the increased gluing surface and shoulder, especially when glued and fastened.
- Tools needed: A router with a rabbeting bit, a table saw with a standard blade (making two passes), or a dedicated rabbet plane.
- Mistakes to avoid: Inconsistent depth or width of the rabbet will lead to gaps or misaligned parts. Careless cutting can also cause tear-out along the corner edge, which is difficult to hide. Always use a sharp bit/blade and support the workpiece properly.
10. Dovetail Joint
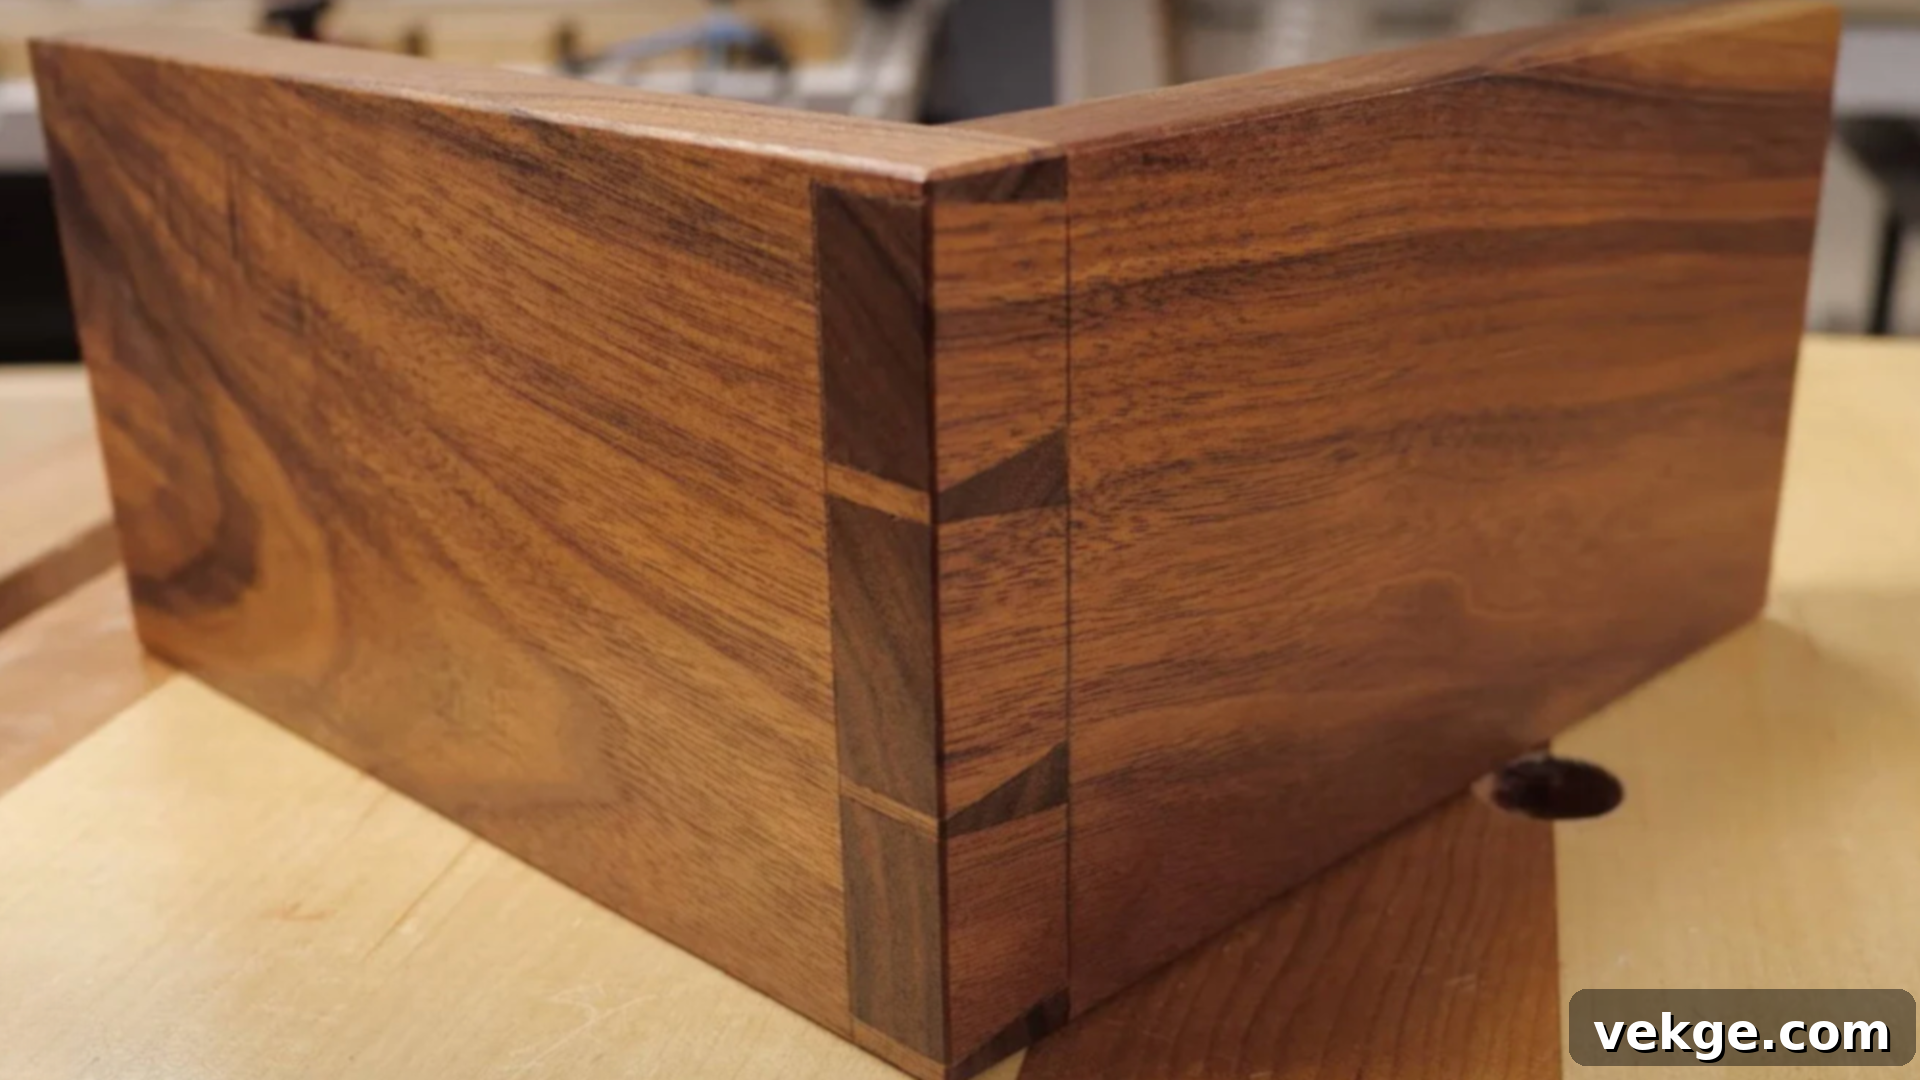
The dovetail joint is widely regarded as the pinnacle of **fine woodworking joints**, celebrated for its extraordinary strength and exquisite beauty. Characterized by interlocking “pins” and “tails” that resemble a dove’s tail, this joint creates an incredibly strong mechanical lock that resists being pulled apart. The flared shape of the tails ensures that the joint only tightens under tension, making it virtually indestructible when properly glued.
A hand-cut dovetail is a hallmark of skilled craftsmanship, showcasing precision and patience. While challenging to master, the resulting joint is not only supremely durable but also adds a distinctive decorative element to any project, particularly for high-end furniture and boxes.
- Best use cases: High-end drawer boxes (especially for fine furniture), jewelry boxes, blanket chests, and any project where both ultimate strength and aesthetic appeal are paramount.
- Strength rating: Very high. Unparalleled resistance to pulling forces, making it one of the strongest joints available.
- Tools needed: A dovetail saw, chisels, marking gauge, dovetail markers, and a coping saw. Dovetail jigs (for routers) offer a faster but less traditional approach.
- Mistakes to avoid: Precise fit is crucial. Tails and pins cut too tightly can lead to splitting the wood during assembly. Too loose, and the joint will be weak and unsightly. Practice on scrap material is essential for developing the necessary accuracy and feel. Misalignment of pins and tails will ruin the fit and appearance.
11. Half-Blind Dovetail Joint
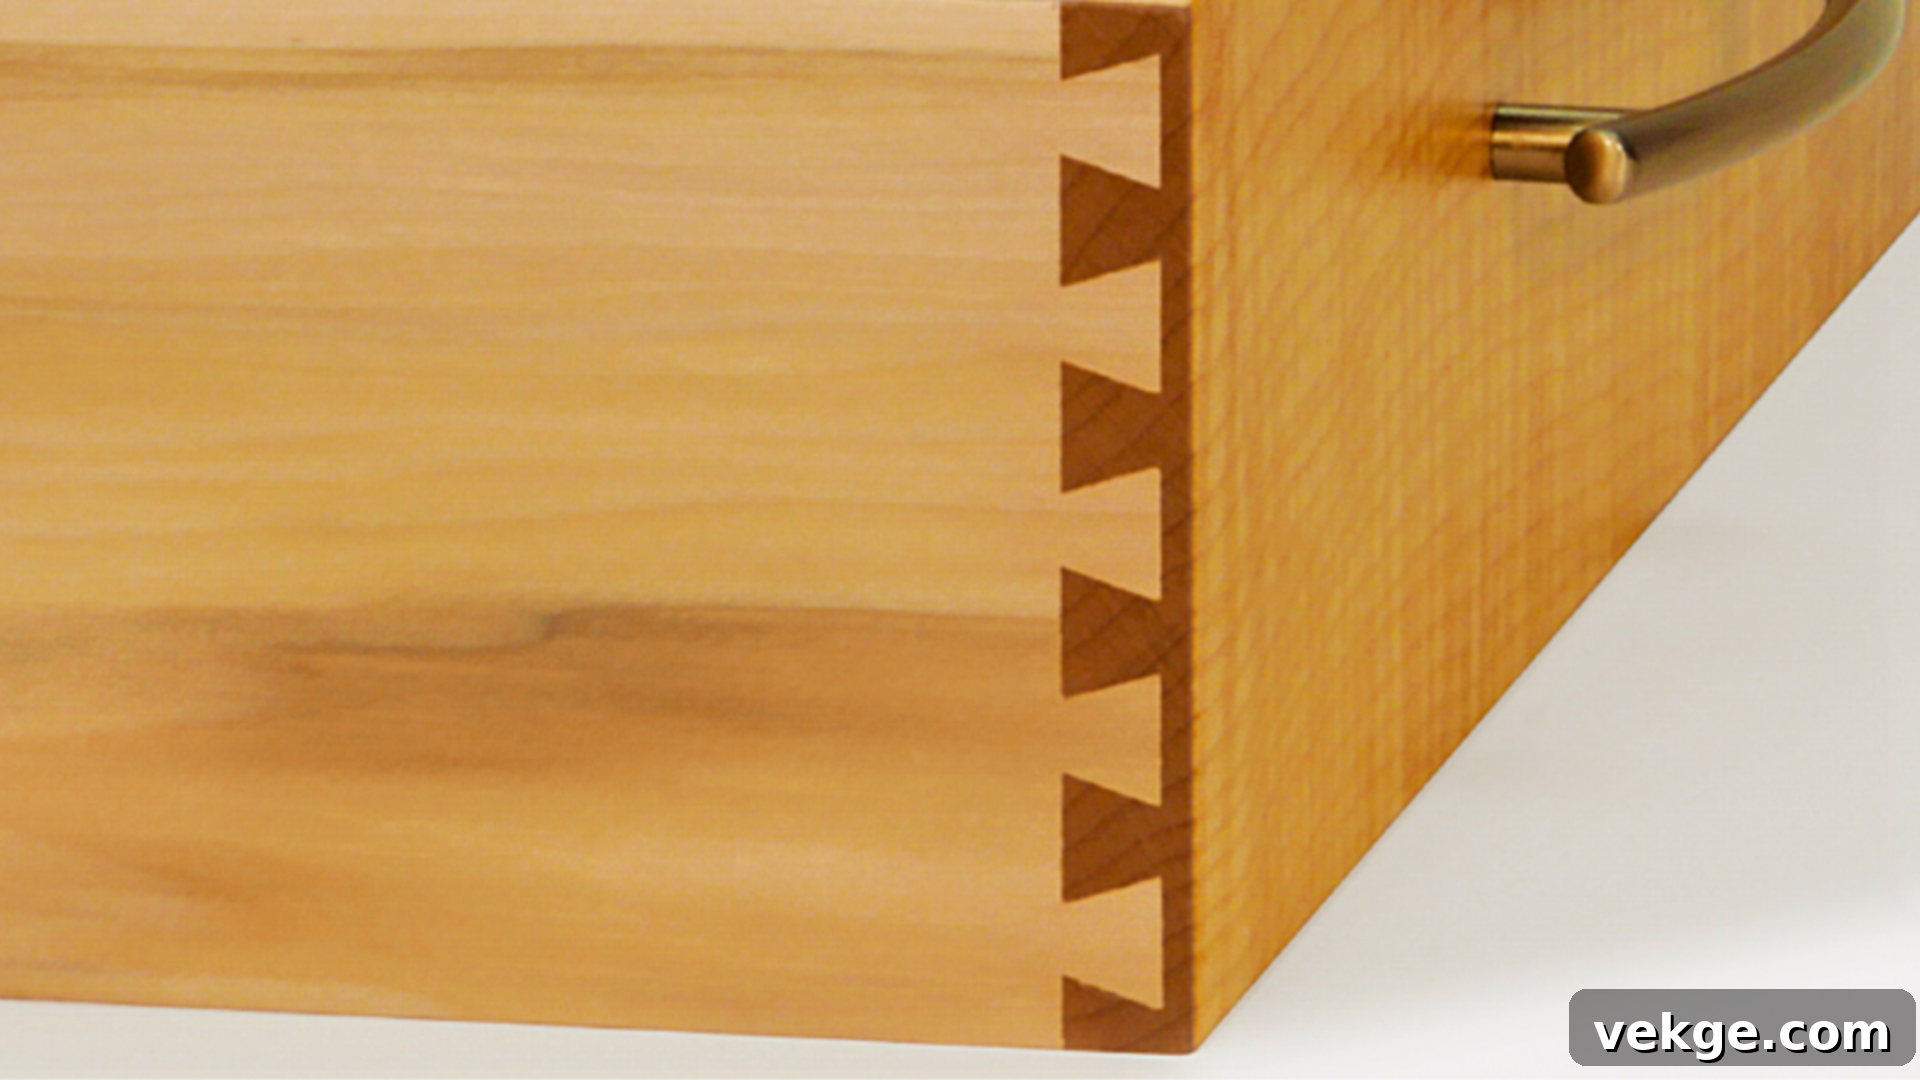
The half-blind dovetail joint offers the remarkable strength of a traditional dovetail while providing a cleaner aesthetic on one side. Unlike the through dovetail, where the interlocking pins and tails are visible from both mating surfaces, the half-blind version conceals the pins on one face. This means that while the tails are visible on one board, the other board (often a drawer front) remains smooth and uninterrupted, preserving the external appearance of the piece.
This joint is a popular choice for situations where you need the incredible strength of a dovetail but wish to hide its complexity from a particular viewpoint. It strikes a perfect balance between robust construction and refined design, commonly found in high-quality furniture.
- Best use cases: Drawer fronts, where the dovetails are hidden from the outside, but visible and strong inside the drawer box. Also used for cabinet frames or other applications requiring a clean exterior.
- Strength rating: Very high. Provides nearly the same strength as a through dovetail, excellent resistance to pulling.
- Tools needed: Similar to through dovetails: chisels, saw, marking tools. However, specialized half-blind dovetail jigs for routers are often used to achieve consistent results more quickly.
- Mistakes to avoid: Achieving a perfect fit is even more critical with half-blind dovetails, as a poor fit can lead to gaps or a weak joint that is difficult to fix without affecting the visible face. Incorrect depth of the pins can also compromise the “blind” aspect, making the joint visible.
12. Sliding Dovetail Joint
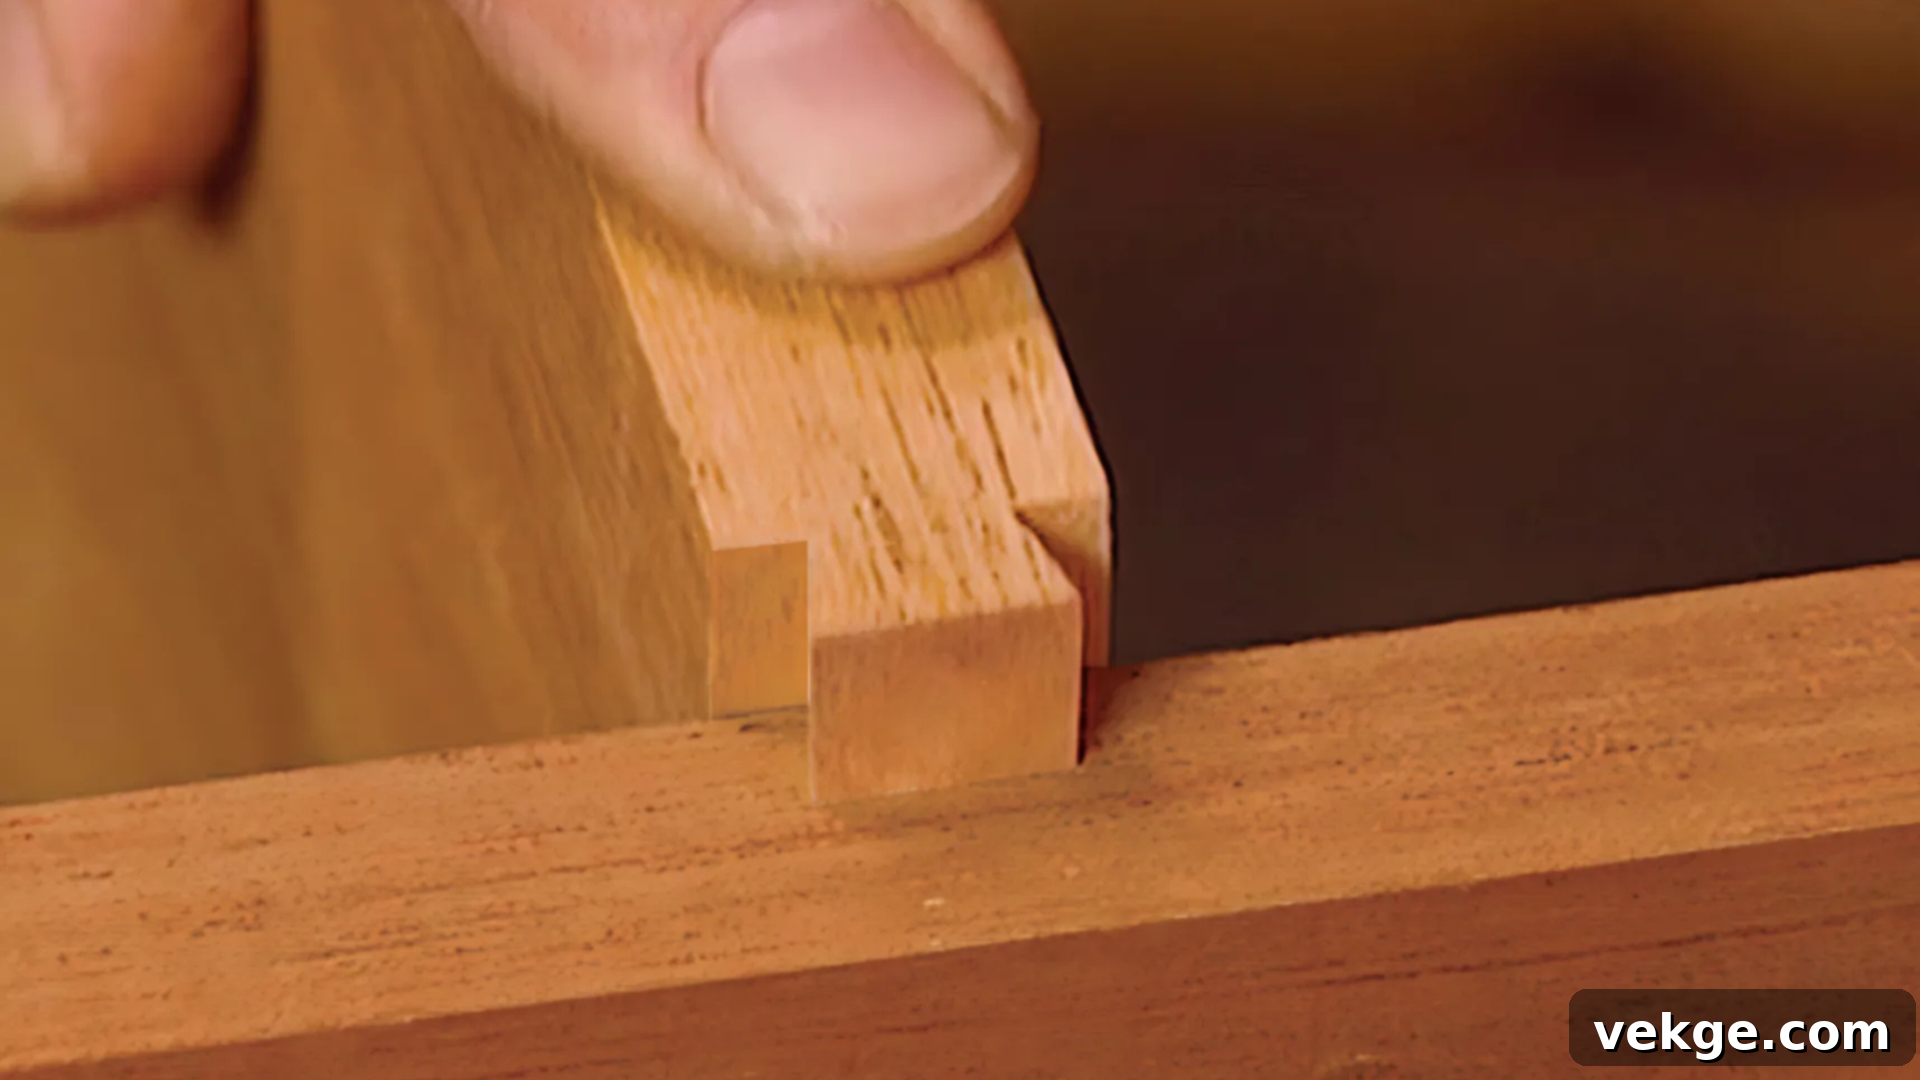
The sliding dovetail joint is a distinctive and highly functional joint that combines the mechanical strength of a dovetail with the convenience of a sliding assembly. It features a long, tapered groove (dovetail dado) cut into one board, into which a matching dovetail-shaped tongue from another board slides. Once fully engaged and glued, this joint creates a powerful mechanical lock that resists pulling apart and prevents lateral movement.
This type of dovetail is particularly effective for attaching shelves securely without visible fasteners, or for creating strong, hidden connections between components that need to be locked into place. The sliding action also aids in precise alignment during assembly, a significant advantage for long joints.
- Best use cases: Attaching fixed shelves to cabinet sides, securing drawer dividers, connecting table aprons to legs, and creating strong internal framework components.
- Strength rating: High. Offers excellent resistance to both withdrawal and shear forces.
- Tools needed: A router fitted with a dovetail bit (usually a dedicated one for the male or female part, sometimes both). A router table can provide greater control for cutting the long grooves and tongues.
- Mistakes to avoid: The fit of a sliding dovetail must be just right. If it’s too tight, it will be impossible to slide together without damaging the wood. If it’s too loose, the joint will be weak and wobbly. Test cuts and fine adjustments to the router bit height or fence setting are crucial for a perfect, friction-fit slide.
13. Box Joint (Finger Joint)
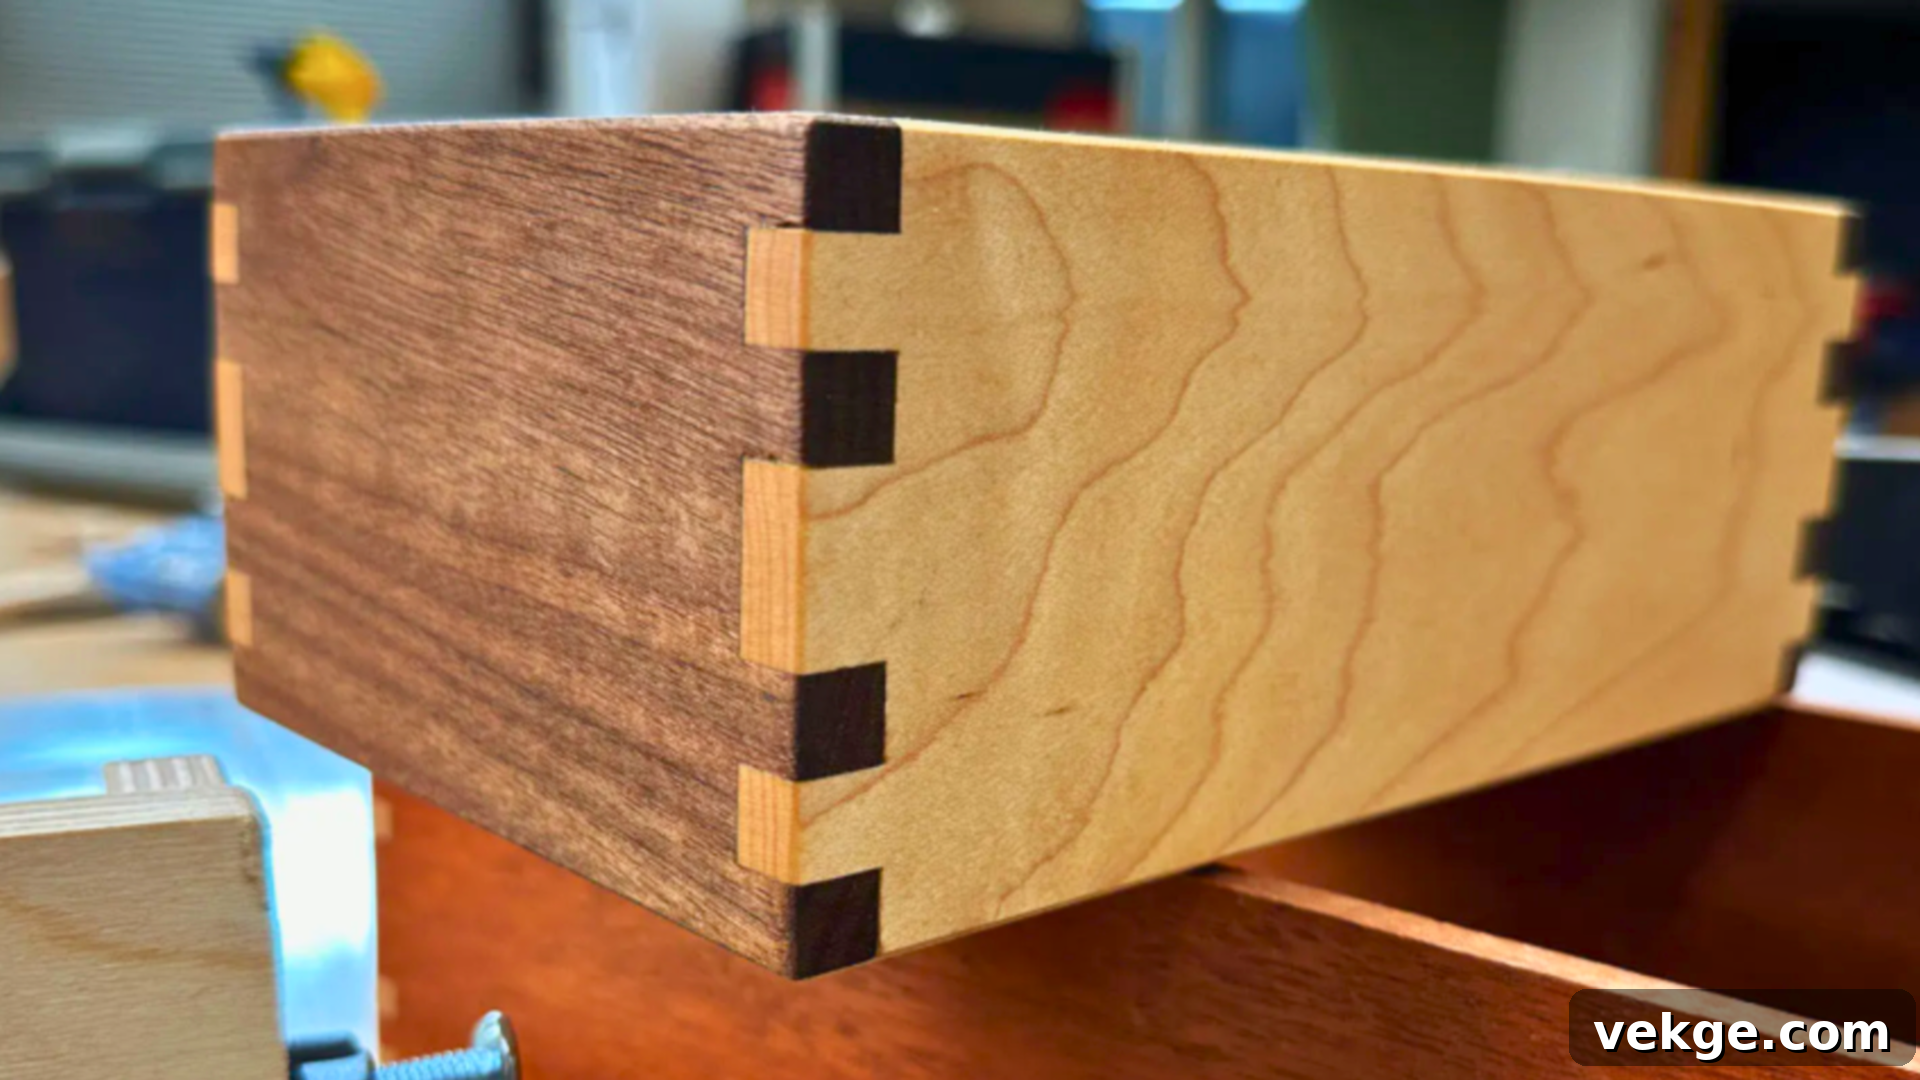
The box joint, also known as a finger joint, is a highly effective and decorative method for constructing strong, square corners. It consists of a series of interlocking square “fingers” or pins cut into the ends of two mating boards. When fitted together and glued, these fingers create a large, robust long-grain gluing surface, resulting in a joint almost as strong as a dovetail, especially in shear strength.
Unlike dovetails, box joints are relatively straightforward to cut with a jig on a table saw or router table, making them a popular choice for projects where both strength and a distinctive aesthetic are desired without the complexity of hand-cutting dovetails.
- Best use cases: Toolboxes, utility drawers, storage boxes, keepsake boxes, and any project requiring strong corner construction with a visible, interlocking pattern.
- Strength rating: High. Offers excellent resistance to pulling and racking forces due to the extensive long-grain to long-grain gluing surface.
- Tools needed: A table saw with a dado blade set (or standard blade for multiple passes) and a specialized box joint jig is the most common setup. A router table with a straight bit and a jig can also be used. Wood glue is essential.
- Mistakes to avoid: Inconsistent spacing or poorly cut fingers will create weak spots, unsightly gaps, or prevent the joint from closing properly. Ensure your jig is accurately calibrated and that your cuts are clean and square.
14. Bridle Joint
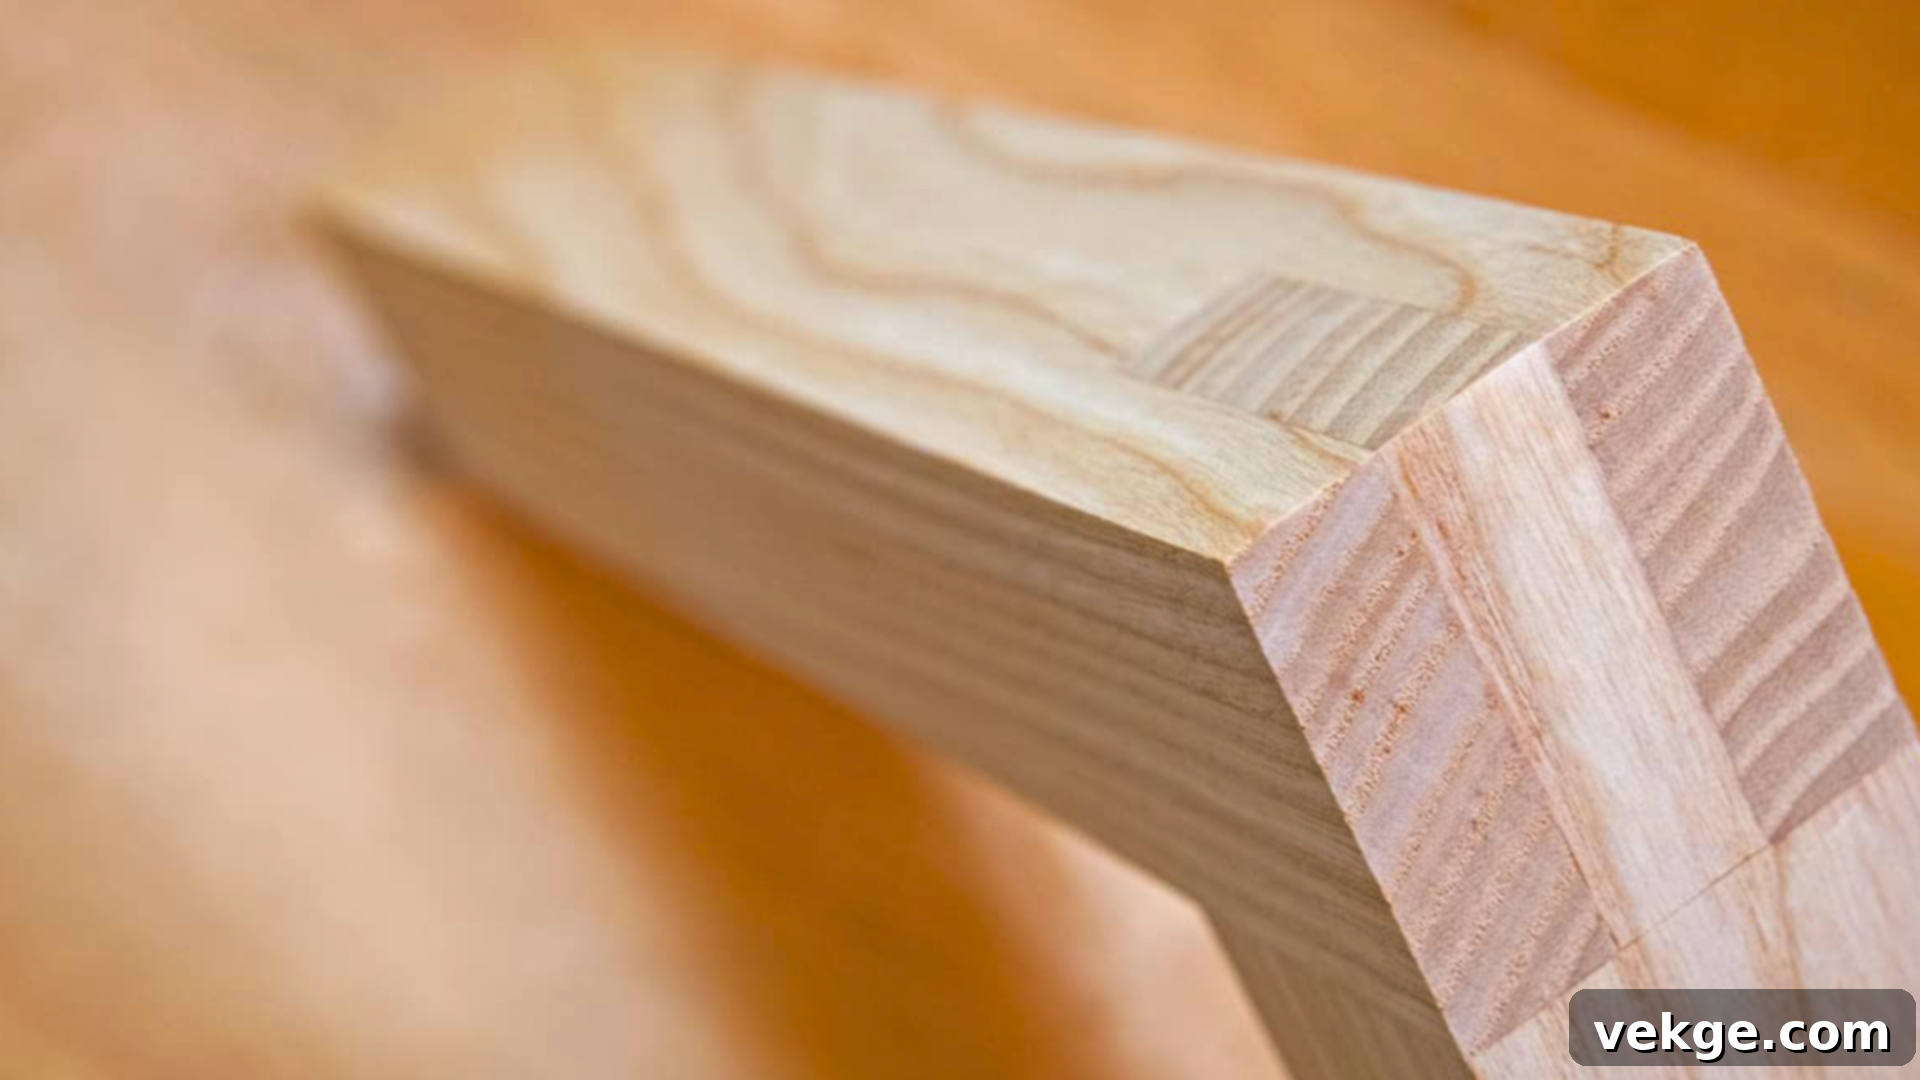
The bridle joint is a strong and aesthetically pleasing joint that shares some characteristics with an open mortise and tenon. It involves cutting a slot or open mortise into the end of one board, which then receives a matching tenon (or tongue) from the end of the other board. The key difference from a mortise and tenon is that the bridle joint’s mortise is open on one side, making it easier to cut and providing additional gluing surface at the end grain of the mortised piece.
This joint offers good mechanical strength and a clean appearance, making it suitable for visible framing applications. Its open design also allows for easier visual inspection and alignment during assembly compared to a blind mortise and tenon.
- Best use cases: Table or bench legs connecting to aprons, door frames, window frames, and structural components where a strong and visible corner joint is desired.
- Strength rating: Medium to high. Good resistance to racking and shear forces, similar to a stout half-lap or open mortise and tenon.
- Tools needed: A table saw (for precise cheek cuts), hand saw, chisels for refining corners, clamps, and wood glue.
- Mistakes to avoid: Loose-fitting cuts will significantly weaken the joint, reducing its mechanical strength and gluing surface. Always measure carefully and test-fit the joint before applying glue and clamping. Too much force during assembly can split the “cheeks” of the open mortise.
15. Scarf Joint
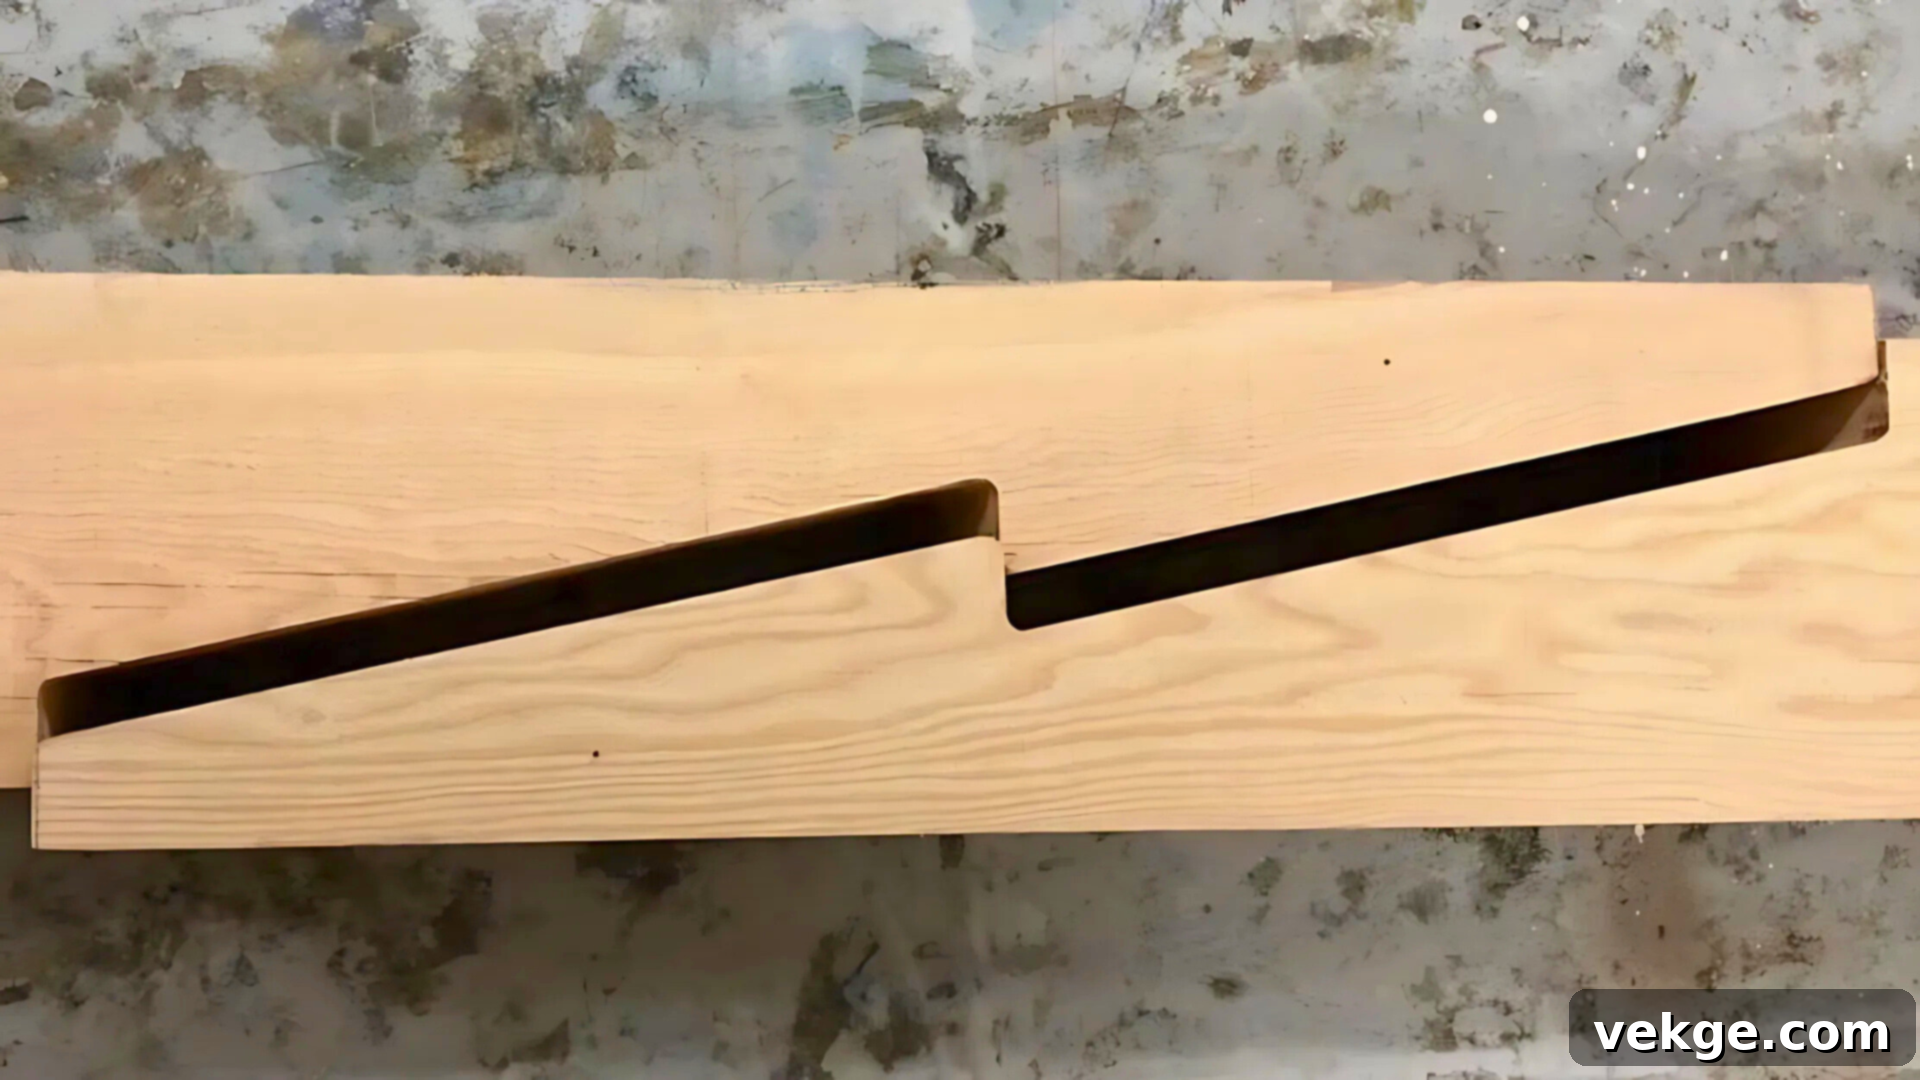
The scarf joint is a unique and specialized joint primarily used to extend the length of two boards by joining them end-to-end. Unlike a simple butt joint, which offers very little strength when joining end grain, the scarf joint achieves substantial strength by creating a long, sloping, overlapping surface. This significantly increases the long-grain to long-grain gluing area, allowing for a much more robust and stable connection.
Scarf joints are indispensable when working with shorter stock and needing longer continuous pieces for architectural elements, boat building, or long panels. Various forms exist, from plain slopes to stepped or hooked scarfs, each designed to maximize strength and alignment for specific applications.
- Best use cases: Extending the length of long beams, trim, molding, handrails, boat planking, and large panels where stock length is limited.
- Strength rating: Low to medium, but significantly higher than a butt joint. Its strength depends heavily on the length of the slope and quality of the glue bond.
- Tools needed: A hand saw, circular saw, or band saw for cutting the long, precise angles. A router can be used for stepped variations. Wood glue is critical, and clamps or fasteners may be used for reinforcement during curing.
- Mistakes to avoid: A scarf joint that is too short or too shallow will easily pull apart under tension. Aim for a long slope (e.g., 1:8 or 1:10 ratio of thickness to length) for optimal strength. Inconsistent angles or gaps in the joint will also compromise its integrity. Ensure even glue spread and sufficient clamping pressure.
Wood Joinery Comparison Table: At a Glance
By now, you’ve gained insight into how each **woodworking joint** functions and its ideal applications. To help you quickly compare their characteristics and make swift decisions during your project planning, here’s a condensed table summarizing the key attributes of the most common types of **wood joinery**.
| Joint Type | Strength | Complexity | Best For |
|---|---|---|---|
| Butt Joint | Low | Very Easy | Framing, quick builds, temporary structures |
| Mitered Butt | Low (Medium with reinforcement) | Easy (Moderate with reinforcement) | Picture frames, decorative trim, molding |
| Half-Lap | Medium | Moderate | Frame construction, furniture supports, grid designs |
| Tongue & Groove | Medium to High | Moderate | Floorboards, wall panels, large tabletops |
| Mortise & Tenon | High | Hard | Chairs, table frames, beds, heavy-duty furniture |
| Biscuit | Medium | Easy | Panel glue-ups, tabletop assembly, cabinet carcases |
| Pocket Hole | Medium | Easy | Cabinet face frames, simple furniture, general assembly |
| Dado | High | Moderate | Shelving, drawer bottoms, cabinet construction |
| Rabbet | Medium | Easy | Cabinet backs, box construction, drawer bottoms |
| Through Dovetail | Very High | Hard | High-end drawers, jewelry boxes, fine custom boxes |
| Half-Blind Dovetail | Very High | Hard | Drawer fronts, cabinet doors with hidden joinery |
| Sliding Dovetail | High | Hard | Fixed shelving, drawer guides, strong hidden connections |
| Box Joint | High | Moderate | Toolboxes, utility drawers, robust storage boxes |
| Bridle Joint | Medium to High | Moderate | Frames, bench legs, exposed structural connections |
| Scarf Joint | Low to Medium | Moderate | Extending long boards, beams, trim, boat building |
Keep this table as a handy reference to quickly match the ideal **wood joint** to the specific demands of your next woodworking project, helping you build with confidence and precision.
Common Mistakes in Joinery and How to Avoid Them
Even seasoned woodworkers occasionally encounter challenges with **wood joinery**. While the techniques themselves can be straightforward, the smallest oversight in execution can significantly impact the strength, appearance, and longevity of your finished piece. Understanding these common pitfalls and knowing how to prevent them will save you time, materials, and frustration.
- Loose joints: This is one of the most frequent issues and often stems from inaccurate cuts or insufficient material removal. A loose fit means less long-grain contact for glue, leading to a weak bond that will eventually fail under stress.
- Fix: Always dry-fit your components *before* applying any glue. If the joint is loose, you may need to recut the pieces or, in some cases, use shims or a thicker glue line (though this is a compromise). Double-check your measurements and tool settings for accuracy before cutting your final pieces.
- Gaps in the fit: Visible gaps are not only unsightly but also indicate a weaker joint. They typically arise from uneven cuts, improper clamping pressure, or minor misalignments during assembly.
- Fix: Ensure all cuts are perfectly square and clean. Use appropriate clamps (e.g., bar clamps, pipe clamps, corner clamps) to apply even pressure across the entire joint. If small gaps appear, a mix of sawdust and glue can sometimes fill them, but ideally, you want a gap-free fit from the start.
- Weak glue bonds: Even the strongest **wood joints** rely heavily on a proper glue bond. A weak bond can result from dirty surfaces, inadequate glue application, or not allowing sufficient drying time.
- Fix: Always ensure mating surfaces are clean, dry, and free of dust, oil, or previous finishes. Apply an even layer of high-quality wood glue (like PVA or Titebond) to both surfaces of the joint. Follow the glue manufacturer’s recommendations for open time, clamping time, and full cure time. Avoid disturbing the joint while the glue is curing.
- Cracks or splits in the wood: This often occurs when driving screws or nails without proper preparation, especially in dense or brittle wood.
- Fix: Always drill pilot holes for screws and nails. The pilot hole diameter should match the screw’s shank diameter, and the clearance hole should match the head. For hardwoods, consider slightly larger pilot holes or wax the screw threads. Avoid overtightening screws, which can crush wood fibers.
- Misaligned cuts: Rushing through the marking and cutting process is a recipe for disaster. Small errors in layout can compound, throwing off an entire assembly.
- Fix: Take your time with layout. Use sharp pencils or marking knives, and double-check all measurements. Utilize straightedges, squares, and cutting guides (like sleds or fences) to ensure cuts are straight, square, and consistent. “Measure twice, cut once” is a golden rule in woodworking.
- Overtightened fasteners: Whether it’s a screw in a pocket hole or a bolt in a frame, overtightening can lead to stripped holes, crushed wood fibers, or even structural damage.
- Fix: Tighten fasteners until the joint is snug and secure, but avoid excessive force. For screws, stop once the head is flush or slightly recessed. For bolts, use washers and tighten until there’s no movement, but don’t compress the wood unnecessarily.
Conclusion: Building with Confidence Through Expert Wood Joinery
You’ve journeyed through the intricate world of **wood joinery**, from the simplicity of a butt joint to the sophisticated beauty of a hand-cut dovetail. We’ve explored the diverse **types of wood joints**, understood their unique strengths and applications, and equipped you with the knowledge to select the optimal connection for any project. You’ve also learned about essential tools, crucial mistakes to avoid, and gained a practical reference to compare these vital **woodworking techniques**.
Mastering **wood joinery** is not just about learning cuts; it’s about understanding the fundamental principles that ensure durability, stability, and elegance in every piece you create. It transforms raw lumber into lasting heirlooms, imbuing your work with strength and character that will be appreciated for generations.
If some of these concepts felt challenging at first, remember that practice is the ultimate teacher. The more you build, experiment, and refine your approach, the more intuitive these choices will become. Embrace the learning process, experiment with new **joinery techniques**, and you’ll undoubtedly feel your confidence grow with every perfectly fitted joint.
Ready to put your new knowledge into practice or delve deeper into other aspects of woodworking? Explore our other articles for more tips on essential tools, easy project builds, or advanced **woodworking joinery tricks**. Your journey to becoming a master craftsman has just begun!
