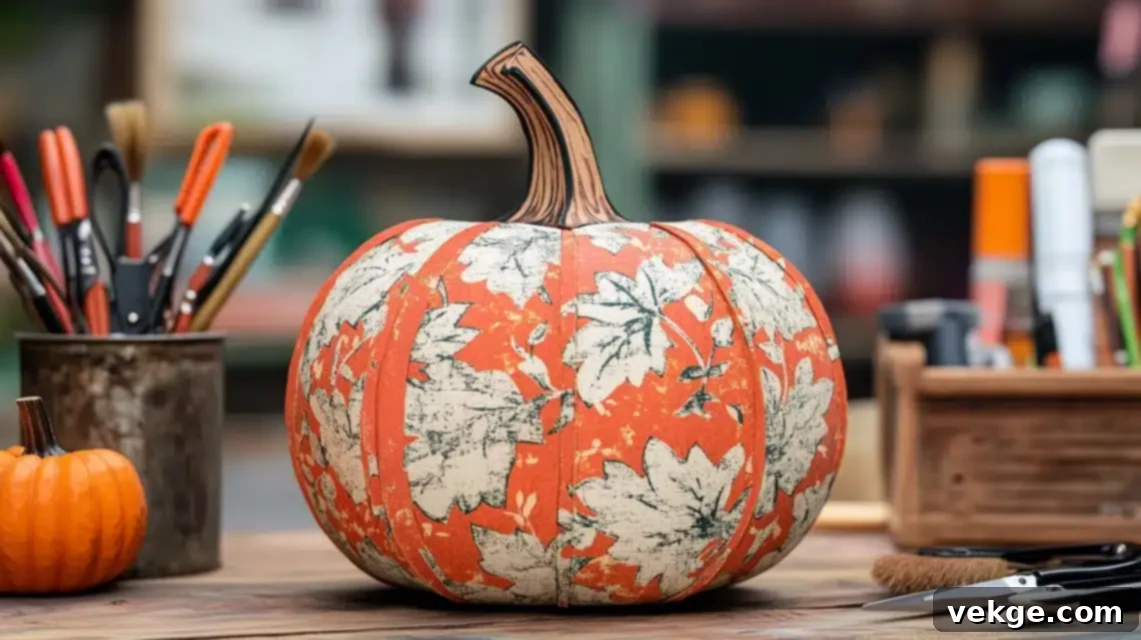
The Ultimate Guide to Wooden Pumpkin Painting: DIY Decor for Fall & Halloween
For half a decade, I’ve had the immense pleasure of guiding countless enthusiasts through the delightful art of wooden pumpkin painting in local craft workshops. It’s a craft that combines simplicity with endless creative possibilities, transforming plain wooden cutouts into charming, personalized pieces of seasonal decor. From my own journey, starting with rudimentary designs to crafting bespoke pieces for home decor boutiques, I’ve witnessed firsthand the pure joy and satisfaction that comes from bringing these adorable decorations to life.
What truly captivates me about painting wooden pumpkins is their incredible versatility. Whether your aesthetic leans towards rustic farmhouse charm, modern minimalist elegance, or vibrant playful designs, there’s a technique and a style perfectly suited for you. This comprehensive guide is a culmination of years of hands-on experience, packed with tried-and-true methods and innovative ideas to spark your creativity. I’m thrilled to share everything I’ve learned, from selecting the ideal materials to adding those crucial final touches that make your creations truly sparkle. Get ready to unleash your inner artist and craft wooden pumpkins that will enchant your home throughout the autumn season, from cozy fall evenings to spooky Halloween nights!
Embark on Your Creative Journey: A Step-by-Step Guide to Wooden Pumpkin Painting
Step 1: Gather Your Creative Arsenal – Essential and Optional Materials
Before dipping your brush into paint, setting up your workspace and gathering all necessary materials is key to a successful project. Having everything at hand ensures a smooth, enjoyable, and uninterrupted crafting experience. Let’s dive into what you’ll need to create your stunning wooden pumpkins.
Basic Supplies for Every Project
- Wooden Pumpkin Cutouts: These are the foundational canvases for your artwork. You can find a wide variety of shapes, sizes, and thicknesses at major craft stores like Hobby Lobby, Michaels, and Joann. For budget-friendly options, check seasonal aisles at Dollar Tree or your local discount retailers. Online platforms like Amazon and Etsy also offer extensive selections, including bulk packs perfect for group crafting or decorating multiple areas.
- Chalk Paint in Various Colors: Chalk paint is my preferred medium for wooden pumpkins due to its excellent adhesion to unfinished wood, beautiful matte finish, and minimal surface preparation requirements. Essential fall shades often include earthy tones like sage green, warm ivory, classic pumpkin orange, versatile black, a soft plaster white, and white wax for highlighting and sealing. Don’t hesitate to experiment with different color palettes to perfectly match your existing home decor or seasonal theme.
- Paintbrushes and Sponges: A good assortment of brushes will allow for versatility in your designs. Include flat brushes for broad, even coverage, round brushes for detailed work, and smaller liner brushes for fine lines. Sponge brushes are excellent for smooth base coats, and dense sponges can be used for stenciling.
- Sandpaper (Optional but Recommended): While chalk paint adheres well, a light sanding (using 120-220 grit sandpaper) can significantly improve the final finish. This step helps to smooth out any rough edges, splinters, or imperfections in the wooden cutouts, creating a perfectly prepared surface for superior paint adhesion and a professional look.
- Clean Cloth or Paper Towels: Keep these handy for wiping excess paint from brushes, cleaning up any spills, and gently dabbing off moisture.
- Water Container: For rinsing brushes between color changes.
Optional Supplies for Advanced Techniques & Embellishments
Once you’ve mastered the basics, these optional items will empower you to explore intricate patterns, add rich textures, and truly personalize your wooden pumpkins, taking your creations to the next level.
- Stencils and Pixie Spray (Temporary Adhesive): Stencils are fantastic for adding elaborate patterns or precise lettering without needing advanced freehand skills. Pixie spray, a repositionable adhesive, applied lightly to the back of your stencil helps to secure it in place and prevent paint from bleeding underneath, ensuring crisp, clean lines every time.
- Textured Scrapbook Paper: For a mixed-media approach, incorporating scrapbook paper with autumn-themed patterns, subtle textures, or even glitter accents can add significant visual interest and depth to your pumpkins.
- Mod Podge: An indispensable crafting staple, Mod Podge serves as an all-in-one glue, sealer, and finish. It’s perfect for securely attaching scrapbook paper, layering mesh ribbons, and providing a protective, often slightly glossy, topcoat.
- Mesh Ribbons, Raffia, and Twine: These versatile materials add natural and rustic charm. Use them to create bows for the pumpkin stems, fashion sturdy hangers, or wrap around sections for added texture.
- Antique Wax or Dark Glaze: Used for creating a beautifully distressed, aged, or weathered look. Applying it sparingly to edges and crevices enhances carved details and adds a lovely vintage patina, especially popular in farmhouse-style decor.
- Decorative Elements: Small faux leaves, berries, miniature sunflowers, tiny pinecones, cinnamon sticks, dried flowers, or even small wooden buttons can be glued onto your finished pumpkins to enhance their seasonal appeal and create charming focal points.
- Clear Sealant (Matte or Gloss): If your finished pumpkins will be displayed outdoors, in high-traffic areas, or simply to ensure their longevity, a clear, weatherproof sealant or spray varnish is essential. It protects your artwork from moisture, dust, and UV fading.
Step 2: Unleash Your Creativity – Exploring Diverse Painting Techniques
This is where your wooden pumpkins truly come to life! These seven techniques offer a spectrum of styles, from bold and modern to charmingly vintage, ensuring there’s a design for every taste. Don’t hesitate to mix and match elements or experiment to develop your own unique artistic approach!
1. Two-Tone Painting: A Bold & Modern Statement
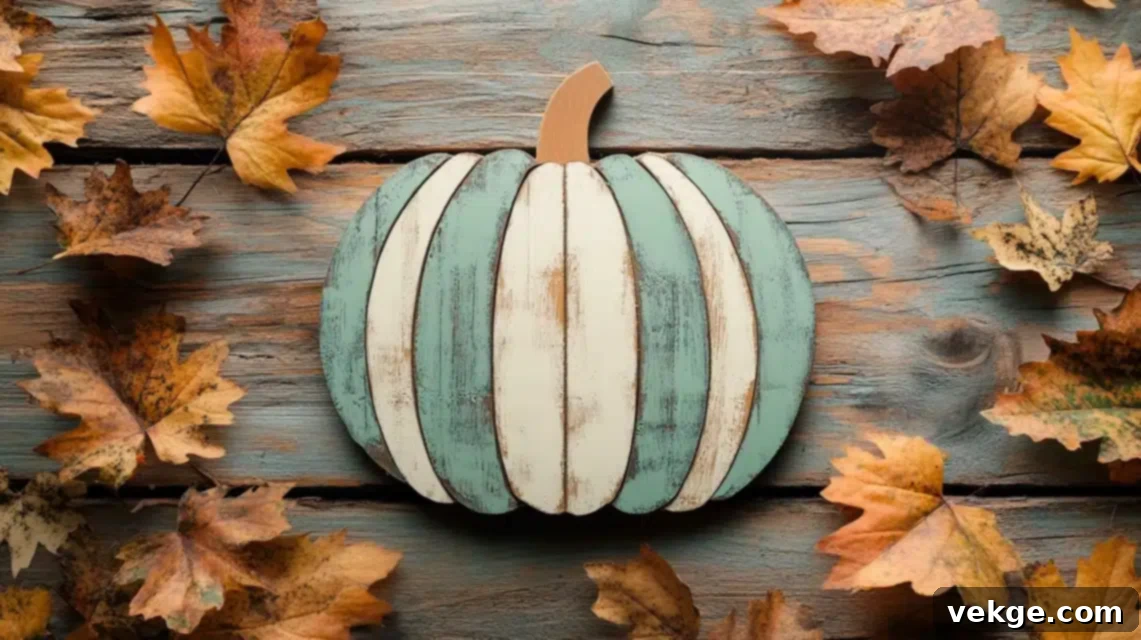
This technique creates a striking visual impact by dividing your pumpkin into distinct color blocks. It’s an excellent choice for a contemporary, minimalist, or graphic aesthetic.
- Color Selection: Choose two distinct and complementary colors that provide a pleasing contrast, such as a soft sage green paired with a warm ivory, or a vibrant pumpkin orange offset by a deep charcoal black. Consider the overall color scheme you want to achieve for your fall or Halloween decor.
- Application Process: Paint alternating sections of your wooden pumpkin. Many wooden pumpkin cutouts have natural ridges that lend themselves perfectly to this segmented style. Ensure your first color coat is completely dry before carefully applying the second.
- Achieving Clean Lines: The secret to a professional-looking two-tone design is the strategic use of painter’s tape. Apply it firmly along the edges of the sections you wish to keep crisp. Paint over the exposed areas, and then, crucially, remove the painter’s tape gently while the paint is still slightly wet. This prevents the paint from peeling or tearing, resulting in beautifully sharp and defined color divisions.
- Design Variations: Beyond alternating sections, you could also paint the top and bottom halves in different colors, create bold diagonal stripes, or even incorporate a thin accent line between the two main colors for added detail.
2. Stenciled Patterns: Adding Intricate Details with Ease
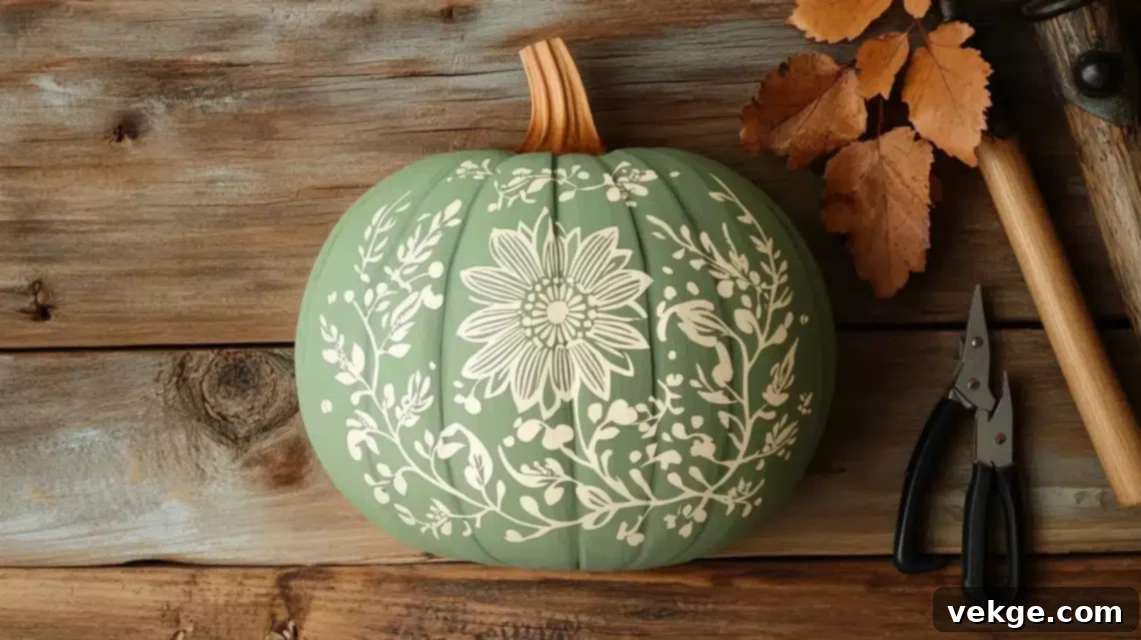
Stenciling allows you to incorporate complex and beautiful designs onto your pumpkins without requiring advanced freehand painting skills. It’s a fantastic way to personalize your creations with intricate detail.
- Preparation: Begin with a pumpkin that has a fully painted and dry base coat. For the best contrast and visibility of your stencil design, choose a lighter base color, such as ivory, plaster white, or a pale sage.
- Stencil Application: To ensure your stencil stays put and to minimize paint bleed, lightly spray the back of your chosen stencil with a temporary adhesive like Pixie spray. This creates a gentle tackiness that secures the stencil to the wooden surface.
- Painting the Pattern: Carefully position the stencil onto your pumpkin. Using a small sponge brush or a dedicated stencil brush, dab a contrasting paint color over the stencil openings. It’s crucial to use minimal paint and apply it in thin, light layers. This prevents paint from seeping under the stencil and ensures a crisp pattern.
- Design Ideas: The possibilities with stencils are virtually limitless! Explore elegant floral motifs, intricate geometric patterns, playful polka dots, classic stripes, or seasonal images such as autumn leaves, acorns, charming fall sayings, or even spooky spiderwebs and bat silhouettes for Halloween.
- Removal: For the cleanest edges, gently peel off the stencil immediately after you’ve finished painting, while the paint is still slightly wet. This helps prevent dried paint from adhering to the stencil and lifting the fresh design.
3. Distressed Vintage Look: Timeless Farmhouse Charm
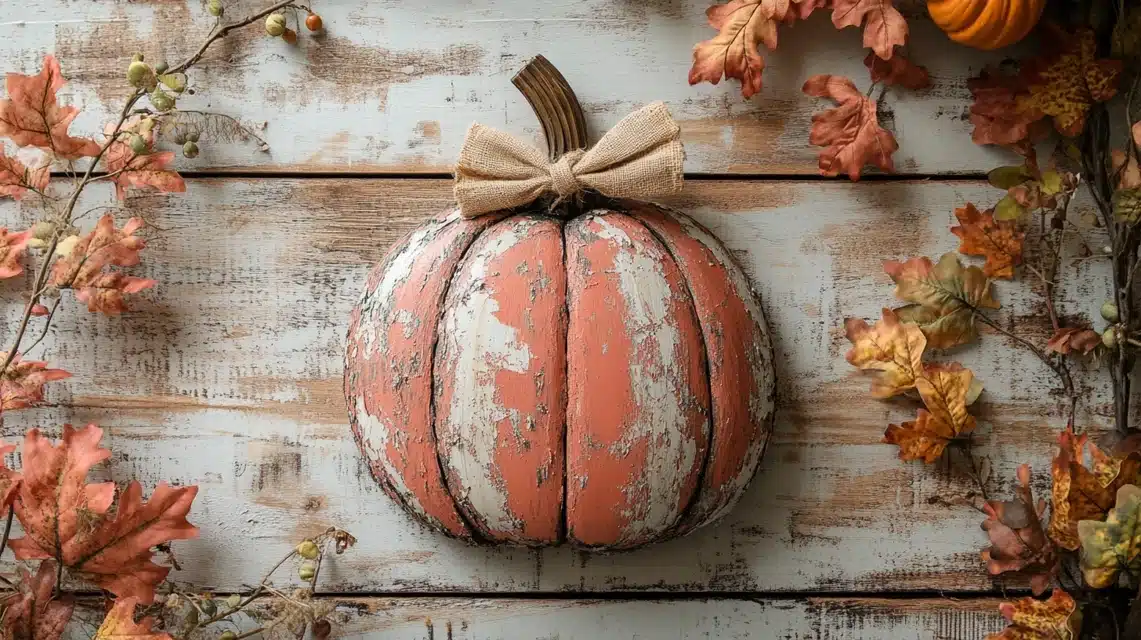
Achieve an aged, beautifully weathered, and well-loved aesthetic that evokes the warmth and character of a rustic farmhouse. This look is perfect for those who appreciate understated elegance and a touch of history.
- Base Coat: Begin by painting your wooden pumpkin in a soft, neutral base color. Plaster white, antique white, a very light sage green, or even a muted gray are excellent choices, providing a perfect foundation for the distressed effect to shine through.
- Creating the Distress: Once your base coat is completely dry, use fine-grit sandpaper (around 180-220 grit) to gently sand the edges, raised areas, and any spots where natural wear and tear would typically occur. The goal is to allow the raw wood beneath, or a darker undercoat if you chose to layer colors, to subtly peek through. This technique creates an authentic aged appearance.
- Applying Antique Wax: For an even deeper vintage feel and to add dimension, apply a thin layer of antique wax or a dark glaze with a dry brush. Concentrate the wax in crevices, along the edges, and anywhere you want to create shadows and visual depth. Immediately wipe away any excess wax with a clean, lint-free cloth, leaving just enough to create that coveted antique patina.
- Styling: This timeless technique pairs exquisitely with rustic embellishments like raffia bows, natural twine, burlap accents, or subtle metallic elements for a sophisticated, cozy farmhouse-style finish.
4. Layered Mesh Designs: Textural Elegance
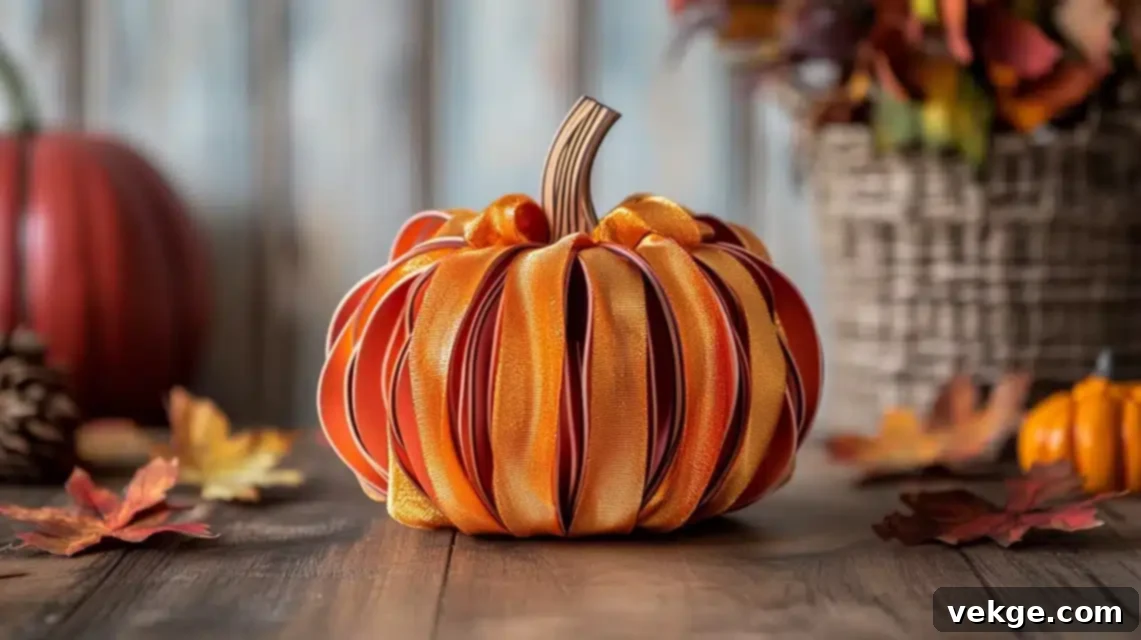
Introduce an unexpected and delightful tactile dimension to your wooden pumpkins by incorporating mesh ribbons or fabric. This technique adds sophisticated texture, visual interest, and a unique charm.
- Base Coat: Start with a smoothly painted and completely dry base coat on your pumpkin. An ivory chalk paint provides a neutral yet warm canvas that allows the texture and color of the mesh to truly pop and stand out.
- Preparing the Mesh: Carefully measure and cut mesh ribbons, burlap, or other textured fabrics to fit a specific section (like the middle band) or across the entire face of your pumpkin. You can use a single strip for a minimalist look or layer multiple thinner strips for a richer, more complex effect. Experiment with different colors, patterns, or weaves of mesh.
- Adhesion: Apply a thin, even layer of Mod Podge to the area of the pumpkin where the mesh will be placed. Carefully position the mesh ribbon, gently smoothing out any air bubbles or wrinkles with your fingers or a soft brayer. Once the mesh is in place, apply another thin layer of Mod Podge over the top of the mesh to seal it, provide durability, and give it a subtle, unified sheen.
- Enhancement: For an extra touch of elegance, consider accentuating the edges of the mesh with fine gold-leaf ribbons, a thin line of metallic paint, or even a delicate glitter glue. This adds a luxurious detail that beautifully catches the light and elevates the overall design.
5. Textured Scrapbook Paper: A Mixed-Media Marvel
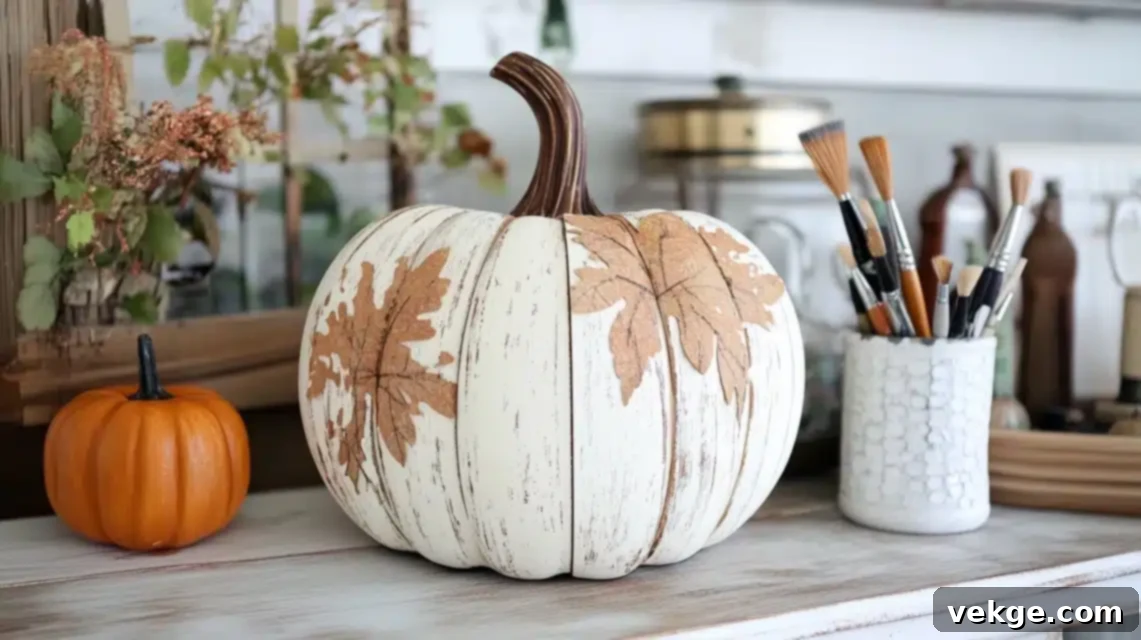
Combine the artistic beauty of paint with the intricate designs and varied textures of scrapbook paper for a truly unique and engaging mixed-media effect. This technique allows for immense creativity and customization.
- Selecting Paper: Choose scrapbook paper with patterns, delightful textures, or even subtle glitter accents that perfectly complement your desired color scheme and theme. Autumn-themed prints, subtle damask patterns, buffalo plaid, or even paper with a burlap or linen texture work wonderfully to add depth and visual interest.
- Tracing and Cutting: Place your wooden pumpkin cutout directly onto the scrapbook paper. Carefully trace the exact shape of the pumpkin, or a specific section if you only want a partial overlay. Precision in cutting is key for a seamless finish.
- Customizing the Paper (Optional): If you wish to slightly mute the paper’s original colors or integrate it more seamlessly with the pumpkin’s painted areas, you can apply a very thin wash of chalk paint over the scrapbook paper. Ensure it dries completely before proceeding.
- Adhering the Paper: Apply a generous but even layer of Mod Podge to the back of the cut-out scrapbook paper. Carefully position it onto your wooden pumpkin, aligning it perfectly. Use your fingers or a brayer to gently smooth out any trapped air bubbles or wrinkles. Once the paper is securely in place, apply another thin layer of Mod Podge over the top of the paper to seal it, protect it, and give it a uniform, often slightly glossy, finish.
- Integration: Paint any remaining exposed wooden areas of the pumpkin in a coordinating or contrasting color to further integrate the paper design into the overall piece. This technique truly adds significant depth and tactile interest to your decor.
6. Classic Jack-o’-Lantern: A Timeless Halloween Favorite
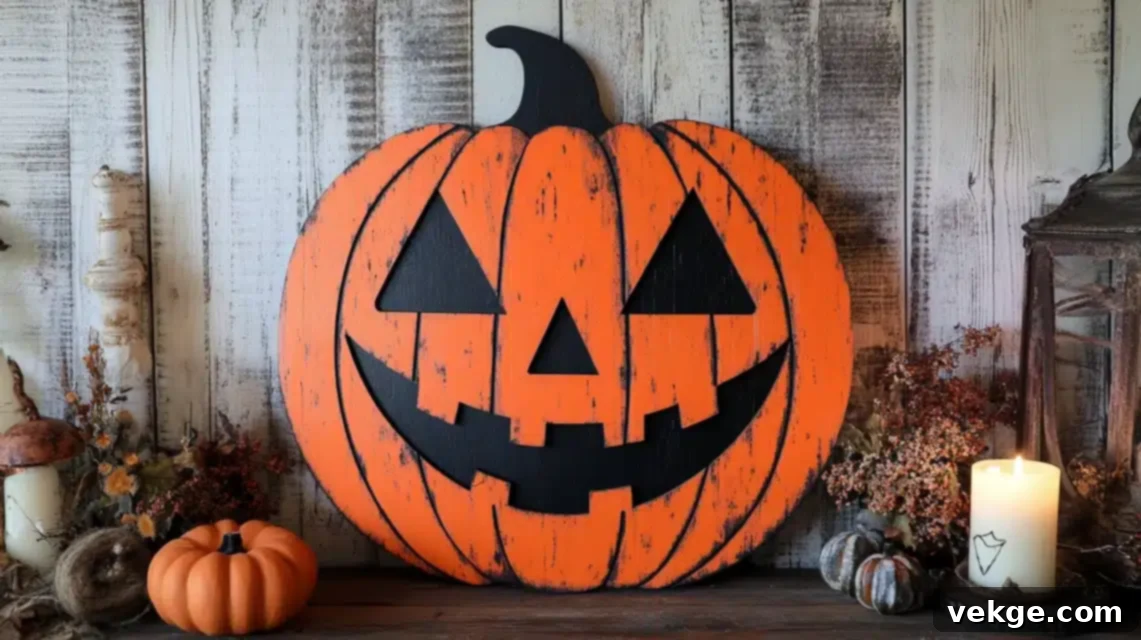
Embrace the spirited fun of Halloween with a traditional, friendly, or wonderfully spooky Jack-o’-Lantern design. This beloved classic never goes out of style and is a joy to create.
- Base Color: Begin by painting your entire wooden pumpkin in a vibrant, classic orange chalk paint. Apply two even coats for full, opaque coverage and a rich, inviting hue. Allow each coat to dry thoroughly.
- Adding Iconic Features: Once the orange base is completely dry, use black chalk paint and a small detail brush to meticulously add the iconic Jack-o’-Lantern features: two triangular eyes, a small, often triangular nose, and a wide, either toothy grin or a spooky, jagged scowl. If you’re hesitant about freehand drawing, you can lightly sketch the features with a pencil first, then trace over them with paint.
- Depth and Texture Enhancement: For an extra dimension that makes your Jack-o’-Lantern pop, lightly apply antique wax with a dry brush. Focus this application around the edges of the black features and along the natural ridges of the pumpkin. This creates subtle shadows and highlights, adding a sense of depth and a slightly aged, or even eerily charming, character.
- Variations: Don’t feel limited to a single expression! Experiment with different facial expressions, from whimsical and cheerful to delightfully frightful. For an added festive touch, consider incorporating glitter accents around the eyes or mouth for a sparkling Halloween display.
7. Minimalist Monochrome: Understated Elegance
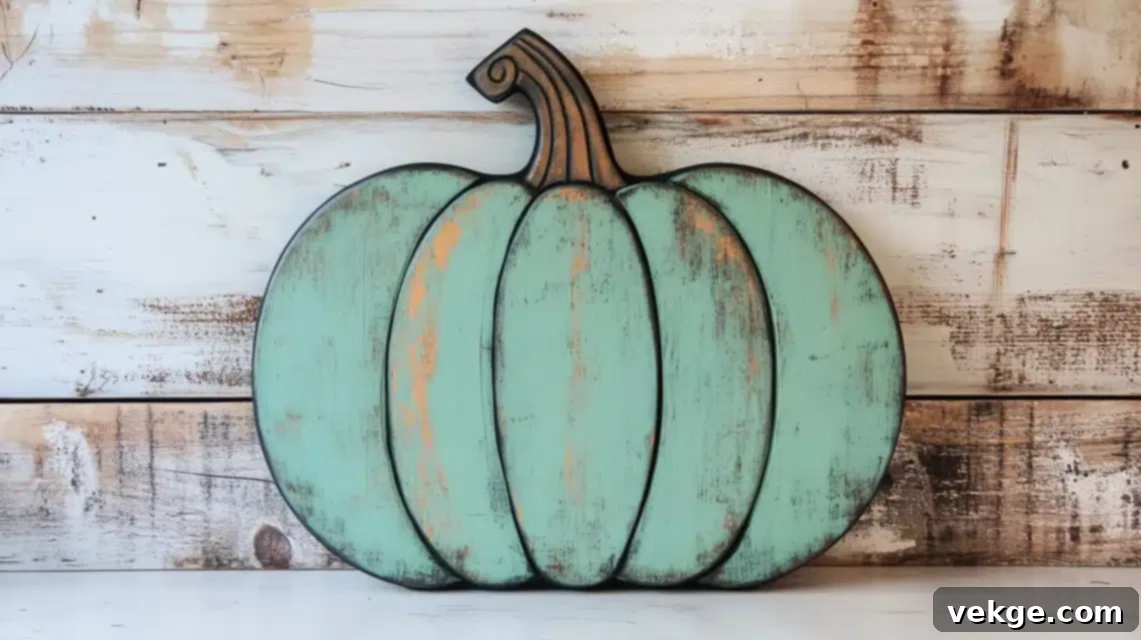
Sometimes, less is truly more. A monochromatic approach offers a sophisticated, timeless, and effortlessly elegant look that blends seamlessly with modern, contemporary, or understated decor styles.
- Single Color Focus: Paint your entire pumpkin in a single, refined color. Soft sage green, crisp white wax, classic plaster white, a muted terra cotta, or a sophisticated charcoal gray can create a stunning impact through simplicity and thoughtful color choice. Ensure even coverage with two smooth coats.
- Subtle Accents for Interest: To add visual interest without breaking the monochrome aesthetic, focus on subtle details. You could paint the pumpkin’s stem in a slightly darker or lighter shade of the same color, or a contrasting neutral like a rich brown or a soft tan.
- Gentle Distressing (Optional): A very light distressing on the edges or along the pumpkin ridges can add a touch of character and depth without overwhelming the minimalist aesthetic. Alternatively, a clear wax finish can provide a subtle sheen and protection while maintaining the clean look.
- Styling Suggestions: These elegant, minimalist pumpkins are perfect for creating serene and sophisticated displays. Pair them with other natural elements such as unpainted wood, clear glass vases, metallic accents, or neutral-toned textiles for a chic, contemporary fall setting. They also look stunning in groupings of various sizes.
Step 3: The Grand Finale – Adding Finishing Touches & Displaying Your Art
Once your paint is completely dry, these final details truly bring your wooden pumpkins to life, giving them personality, charm, and a polished finish. This step allows for immense personalization and can elevate your simple pumpkin into a treasured decorative piece.
Thoughtful Embellishments to Personalize Your Pumpkins
- Enhancing Stems & Creating Bows: Give the pumpkin’s stem extra character by painting it a contrasting color (such as a deep brown, black, or even metallic gold) or by wrapping it intricately with natural twine, raffia, or thin jute rope. Create charming bows from mesh ribbons, burlap, plaid fabric, or even strips of lace, and securely attach them neatly to the base of the stem using hot glue.
- Incorporating Natural Elements: For a wonderfully rustic or truly autumnal feel, carefully glue small faux leaves, clusters of vibrant berries, miniature sunflowers, tiny pinecones, fragrant cinnamon sticks, dried orange slices, or even small acorns around the base of the stem or along the pumpkin’s edges. These elements instantly infuse seasonal charm and visual richness.
- Using Wax for Depth and Dimension: If you’re aiming for a vintage or aged look, use antique wax or a darker shade of chalk paint (applied very sparingly with a dry brush) to darken the pumpkin’s stem. This adds definition, creates a pleasing contrast with the pumpkin’s body, and highlights textural details.
- Adding Glitter or Metallic Accents: For a touch of sparkle and festivity, add subtle glitter to the stem, a stenciled element, or along the edges of the pumpkin. Metallic paints (like gold, copper, or silver) can be used to highlight carved details, stencil patterns, or create delicate outlines for an opulent and eye-catching feel.
Creative Display Options to Showcase Your Masterpieces
Your beautifully painted wooden pumpkins deserve to be shown off! Here are a few inspiring ideas to integrate them seamlessly into your seasonal decor, both indoors and out:
- Elegant Wall Decor: For lighter wooden cutouts, attach a sturdy rope hanger, picture wire, or D-ring hangers to the back to transform them into charming wall art. Group several painted pumpkins of different sizes and styles together to create a captivating gallery-style display on an accent wall or above a mantelpiece.
- Welcoming Porch or Shelf Leaners: Larger wooden pumpkins make excellent, inviting leaners for front porches, entryways, or open shelves. Combine them with real pumpkins, lanterns, cozy blankets, or other autumnal foliage to create a rich, layered display.
- Stunning Stacked Centerpieces: Arrange multiple painted pumpkins of varying sizes (from small to large) into a visually appealing stacked centerpiece. Secure them gently with a small dab of hot glue between each pumpkin for added stability, especially if they will be frequently moved or displayed in high-traffic areas. This creates a dramatic focal point for dining tables or coffee tables.
- Charming Tiered Tray Adornments: Smaller painted pumpkins are perfectly sized for adorning tiered trays, nestled amongst other autumn-themed trinkets, flickering LED candles, seasonal greenery, and small ceramic dishes.
- Wreath Enhancements: Attach a small, beautifully painted wooden pumpkin to a fall wreath for a personalized and welcoming touch on your front door.
- Window Sills and Mantels: Line up several pumpkins of different designs on a sunny window sill or a cozy fireplace mantel to add warmth and seasonal cheer to any room.
Summing Up Your Wooden Pumpkin Painting Journey
The most rewarding aspect of teaching and practicing wooden pumpkin painting is witnessing the unique character and charm each finished piece develops, even when following the same fundamental steps. Every artist brings their individual flair, making each pumpkin a true original and a reflection of their personal style. The techniques, tips, and inspiration I’ve shared in this comprehensive guide are designed to empower you to create your own distinctive and beloved fall and Halloween decorations, filling your home with handmade warmth, character, and seasonal charm.
Here’s a quick recap of the valuable insights we covered, ensuring you have all the tools for success:
- An in-depth look at essential and optional materials, guiding you from selecting the perfect wooden cutouts to choosing specialized paints and delightful embellishments.
- Seven diverse and engaging painting methods to spark your creativity, including modern two-tone designs, intricate stenciled patterns, charming distressed vintage looks, unique layered mesh techniques, mixed-media scrapbook paper applications, classic Jack-o’-Lantern expressions, and sophisticated minimalist monochrome styles.
- Expert tips and tricks for adding thoughtful decorative elements like ribbons, natural accents (leaves, berries), and waxes to enhance and personalize your finished pieces.
- A plethora of creative ideas for artfully displaying your beautifully painted pumpkins, whether as eye-catching wall art, welcoming porch leaners, impressive stacked centerpieces, or delightful tiered tray adornments.
- Practical solutions and detailed answers to frequently asked questions regarding crucial steps like priming the wood, sealing your pumpkins for outdoor use, efficiently sourcing materials, and implementing budget-friendly crafting options.
Remember, there’s no single “right” or “wrong” way to paint your wooden pumpkin. The true magic lies in enjoying the creative process, experimenting with colors, textures, and designs, and ultimately crafting something that brings a smile to your face and adds a personal, heartfelt touch to your seasonal decor. So grab your brushes, unleash your imagination, and happy painting!
Frequently Asked Questions About Wooden Pumpkin Painting
Do I Need to Prime the Wood Before Painting?
Priming wooden pumpkin cutouts is generally optional, especially when you choose to use chalk paint. Chalk paint is renowned for its excellent adhesion to various surfaces, often eliminating the need for a separate primer. However, a light sanding of the wood surface with fine-grit sandpaper (120-220 grit) before applying any paint is highly recommended. This crucial step smooths out any rough edges, loose fibers, or minor imperfections in the wood, creating a perfectly prepared surface that ensures superior paint adhesion and a much smoother, more professional-looking finish. If you’re opting for a different type of paint (such as standard acrylics that are not specifically formulated for raw wood) or if the wood is particularly porous, stained, or has knots that might bleed through, applying a thin, even coat of wood primer can prevent discoloration and ensure your chosen colors appear true and vibrant.
How Can I Seal My Painted Wooden Pumpkin for Outdoor Use?
To adequately protect your beautifully painted wooden pumpkins and ensure their longevity, especially if you intend to display them outdoors where they’ll be exposed to the elements, sealing is an absolutely crucial final step. You should apply a clear, weatherproof sealant or an outdoor-rated spray varnish. Look specifically for products that offer UV protection to prevent your vibrant colors from fading in direct sunlight, and ensure they provide strong water resistance to guard against moisture, humidity, and rain. Apply several thin, even coats, making sure to allow each coat to dry completely according to the manufacturer’s instructions before applying the next. A matte or satin finish sealant will help preserve the natural, velvety look of chalk paint, while a gloss finish will add a protective shine and enhance color vibrancy. Always ensure your paint is thoroughly dry (typically 24-48 hours after the final coat, depending on paint thickness and environmental humidity) before applying any sealant to prevent smudging or trapping moisture.
Where Can I Buy Unfinished Wooden Pumpkin Cutouts?
Unfinished wooden pumpkin cutouts are widely accessible and easy to find, particularly during the autumn and Halloween seasons. You can purchase them at most major craft supply stores across the country, such as Hobby Lobby, Michaels, and Joann Fabric and Craft Stores, which often stock a variety of sizes and shapes. For more budget-friendly options, check the seasonal sections at discount retailers like Dollar Tree or your local general merchandise stores. Additionally, online marketplaces like Amazon and Etsy offer an extensive selection, often including unique designs, different wood types, and bulk options from independent crafters and suppliers, perfect for large projects or multiple decorating schemes. Sometimes, local lumber yards or small woodworking shops might also carry plain wood cutouts or even custom-cut pieces.
Are There Budget-Friendly Options for Making Wooden Pumpkins?
Absolutely! Crafting beautiful and charming wooden pumpkins doesn’t have to be an expensive endeavor. Here are several effective budget-friendly tips to help you create stunning decor without breaking the bank:
- Source Affordable Cutouts: Keep an eye out for wooden cutouts at dollar stores, discount retailers, or the clearance sections of craft stores, especially after seasonal holidays when items are marked down significantly.
- Repurpose Scrap Wood: If you or someone you know has access to scrap wood (such as old fence pickets, pallet wood, or even discarded shelving), you can easily cut your own pumpkin shapes using a jigsaw. This is an incredibly cost-effective and sustainable option.
- Utilize Sample Paints: Instead of buying large cans of paint, look for small sample pots of chalk paint or acrylics. Many hardware stores offer paint samples at a fraction of the cost, providing enough paint for several small pumpkins.
- DIY Embellishments: Embrace nature’s bounty! Collect natural elements like fallen leaves, small twigs, pinecones, dried berries, or acorns from your yard or local park for free, charming decorations. Repurpose old ribbons, fabric scraps, or even yarn from previous projects to create bows and textures.
- Shop Sales and Use Coupons: Always keep an eye out for craft store sales, weekly coupons, and clearance sections, especially for paint, brushes, and embellishments. Buying larger bottles of paint during a good sale can also save money in the long run if you plan on doing multiple projects.
How Long Does Chalk Paint Take to Dry?
Chalk paint is widely appreciated for its quick-drying properties, which makes it ideal for projects with multiple layers or tight timelines. Typically, a single thin coat of chalk paint will be dry to the touch within a mere 20-30 minutes, especially in a well-ventilated area. However, it’s always recommended to wait at least 1-2 hours between coats to ensure the paint is sufficiently cured and to prevent any lifting or smudging of the previous layer. If you’re applying multiple, thicker coats, or if you’re working in a high-humidity environment, allowing extra drying time (up to 3-4 hours per coat) is a good practice. For sealing your finished pumpkin with wax or a topcoat, it’s best to wait a full 24-48 hours after the final paint coat to ensure all layers are thoroughly dry and hardened, preventing any potential reactions or imperfections.
Can I Use Acrylic Paint Instead of Chalk Paint?
Yes, you can certainly use acrylic paint for your wooden pumpkin projects! Acrylic paint offers a vast array of colors, finishes (from matte to satin to gloss), and is generally quite durable. If you choose to use acrylics, it’s highly advisable to lightly sand the wooden cutout first, as this creates a slightly rougher surface for better paint adhesion. Acrylics can also benefit significantly from a thin coat of wood primer, especially if you want your vibrant colors to truly pop without being absorbed by the wood or if the wood has any knots or stains that might bleed through the paint layers. Acrylic paints generally take a bit longer to dry than chalk paint, so allow sufficient time between coats. A clear sealant is definitely recommended for durability and protection, particularly if the pumpkin will be handled frequently or displayed outdoors.
What are Some Essential Tips for Beginners in Wooden Pumpkin Painting?
For those just starting their journey into the delightful world of wooden pumpkin painting, here are some friendly and encouraging tips to ensure a smooth and enjoyable experience:
- Start Simple: Don’t feel pressured to create an elaborate masterpiece on your first try. Begin with a single base color and perhaps a simple distressed look or a classic, easy Jack-o’-Lantern face. Mastering the basics will build your confidence for more complex techniques later.
- Practice on Scrap Wood: If you’re unsure about a new technique, a color combination, or how a specific brush works, try it out on a piece of scrap wood or a spare cutout first. This allows you to experiment without worrying about “ruining” your main project.
- Thin Coats are Key: It’s always better to apply two or three thin, even coats of paint rather than one thick coat. Thin coats dry faster, provide smoother coverage, and are far less likely to streak, drip, or clump.
- Don’t Be Afraid to Experiment: The beauty of crafting lies in creative freedom! Don’t fear making a “mistake” – chalk paint is incredibly forgiving and can often be easily painted over or gently sanded away. Embrace the process of discovery and let your intuition guide you.
- Have Fun and Enjoy the Process: Most importantly, remember to relax and enjoy the creative journey! Wooden pumpkin painting is meant to be a relaxing and rewarding activity. Focus on the joy of creating something beautiful with your own hands, rather than striving for perfection.
