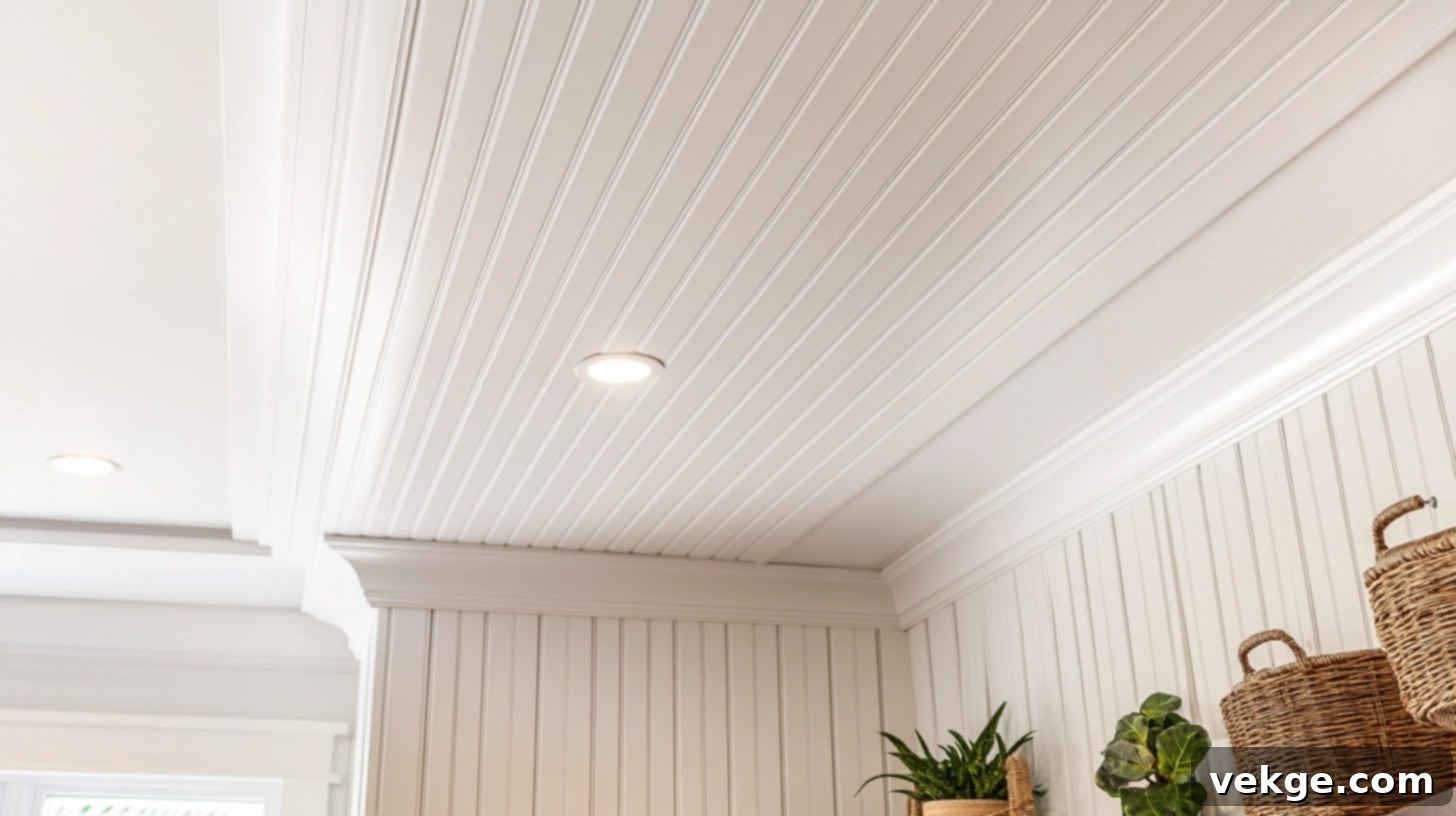
Transform Your Space: The Ultimate Guide to Installing a Beadboard Ceiling
Are you tired of staring up at a plain, damaged, or outdated ceiling? Many homeowners grapple with ceilings marred by unsightly cracks, stubborn stains, or unappealing textures like popcorn. It’s a common issue that can significantly detract from the overall beauty and comfort of your home.
The good news is, there’s a remarkably effective and stylish solution that can breathe new life into your living spaces: a beadboard ceiling. This classic design element is not only aesthetically pleasing but also surprisingly easy to install, budget-friendly, and versatile enough to enhance almost any room in your house. It offers a unique blend of timeless charm and practical benefits, making it an excellent choice for anyone looking to upgrade their home’s aesthetic without breaking the bank.
This comprehensive guide will equip you with everything you need to know about beadboard ceilings. We’ll delve into what beadboard is, explore its versatile applications, provide a step-by-step DIY installation guide, share inspiring design tips, and highlight common mistakes to avoid. Whether you’re planning a full renovation or a simple cosmetic update, this guide offers the practical steps and smart ideas you need to achieve a stunning result.
Join us as we explore the world of beadboard ceilings and discover if this charming and practical solution is the perfect fit for your home.
What is a Beadboard Ceiling and Why Is It a Smart Choice?
At its core, a beadboard ceiling is constructed from wood or engineered panels characterized by evenly spaced, decorative grooves, often referred to as “beads.” These distinctive grooves create a visually appealing texture that adds depth and character to any overhead surface.
Beadboard’s heritage dates back to the Victorian era, where it gained popularity in traditional homes. It was frequently used in wainscoting and ceilings, particularly in cozy cottages, rustic farmhouses, and charming bungalows, lending a touch of simple elegance and craftsmanship. Its enduring appeal lies in its ability to evoke a sense of warmth, history, and tailored style.
Today, beadboard is more accessible and versatile than ever, available in several convenient formats to suit various installation needs and preferences:
- Panels: These are large, pre-cut sheets, typically 4×8 feet, designed for quick and easy installation over existing ceilings. They are an excellent option for covering a significant area efficiently, often made from MDF or plywood for stability.
- Planks: Offering a more authentic and traditional look, these are narrower boards, often featuring a tongue-and-groove system. This design allows them to interlock seamlessly, creating a tight fit and a truly custom appearance. Planks are generally made of solid wood or high-quality MDF.
- Tiles: Lightweight and often made from materials like foam or fiberboard, beadboard tiles are ideal for quick coverage projects. They can be particularly useful for small areas or when a less permanent solution is desired, offering flexibility in design and application.
The Unrivaled Benefits of Choosing a Beadboard Ceiling
Beyond its aesthetic appeal, a beadboard ceiling offers a wealth of practical advantages that make it a compelling option for home improvement projects:
- Enhanced Aesthetics and Character: Installing a beadboard ceiling instantly elevates the visual interest of any room. It introduces a classic or coastal feel, subtly drawing the eye upward and adding an undeniable layer of architectural character without requiring extensive structural changes. The rhythmic pattern of the beads provides a sense of order and sophistication.
- Effective Flaw Concealment: One of beadboard’s most significant practical benefits is its ability to expertly mask imperfections. Whether you’re dealing with an old, dated popcorn ceiling, unsightly cracks, water stains, or uneven drywall, beadboard provides a clean, smooth, and refreshed surface, saving you the hassle and expense of extensive ceiling repairs.
- Cost-Effective Renovation: Compared to a complete ceiling overhaul, which might involve drywall replacement or professional texturing, installing beadboard is a far more budget-friendly solution. It offers a high-impact aesthetic upgrade at a fraction of the cost, making it an accessible option for many homeowners.
- Unmatched Customization and Versatility: Beadboard is incredibly adaptable. You can paint it virtually any color imaginable to perfectly match your existing walls, trim, or decor. This ease of customization means you can effortlessly change your room’s style later on without a major undertaking, keeping your home feeling fresh and contemporary.
- Improved Acoustic Properties: The textured surface of beadboard can subtly help to absorb sound, potentially reducing echoes and making a room feel more acoustically comfortable, especially in larger, open-plan spaces.
- Increased Home Value: A well-executed beadboard ceiling can add perceived value to your home. It’s a detail that speaks to quality and thoughtful design, appealing to potential buyers if you ever decide to sell.
DIY Beadboard Ceiling: A Detailed Step-by-Step Guide
Installing a beadboard ceiling is a rewarding DIY project that requires careful planning and a methodical approach. With a bit of patience and the right tools, you can achieve a professional-looking finish. Here’s a detailed guide to help you get started:
Essential Tools and Supplies You’ll Need
Before you begin, gather all necessary tools and materials to ensure a smooth and efficient installation:
- Measuring and Marking: Tape measure, level (a long builder’s level is helpful), pencil, chalk line, straightedge or T-square.
- Cutting: Miter saw or circular saw (for panels/planks), utility knife (for thinner tiles), jigsaw (for cutting around fixtures).
- Fastening: Hammer or nail gun (pneumatic or battery-powered brad nailer is highly recommended for speed and ease), appropriate nails or screws (e.g., 1.5-inch finish nails or screws for drywall, longer for joists), construction adhesive (e.g., Liquid Nails for paneling).
- Safety Gear: Safety glasses or goggles, work gloves, dust mask (especially when cutting or sanding).
- Access: Stable ladder or scaffold for comfortable and safe ceiling access.
- Finishing: Caulk gun, caulk (paintable acrylic latex), wood filler, sandpaper, paintbrush or roller (if painting), trim molding.
Step 1: Meticulous Planning and Layout
The success of your beadboard ceiling hinges on thorough planning. Begin by accurately measuring your entire ceiling area to determine how many panels or planks you’ll need, accounting for a 10-15% overage for cuts and mistakes. Then, carefully plan the layout:
- Find Joists/Studs: Use a stud finder to locate ceiling joists. Mark their positions lightly with a pencil or chalk line. Nailing into joists provides the most secure hold. If installing over existing drywall without direct joist access, consider using more adhesive and appropriate anchors or liquid nails for panels.
- Center the Design: It’s generally best to start your installation from the center of the room and work outward. This helps ensure that any partial cuts at the edges are symmetrical and less noticeable, creating a balanced, professional appearance. Snap a chalk line across the longest dimension of the ceiling, then another perpendicular to it, creating a precise starting point.
- Account for Obstacles: Identify and mark the locations of all light fixtures, vents, smoke detectors, and other ceiling penetrations. Plan how you will cut the beadboard to neatly fit around these elements before you begin cutting any material. Precision here is key for a polished finish.
Step 2: Securing Beadboard Over Joists or Drywall
The method of attachment will depend on your existing ceiling structure:
- Open Joist Installation: If you’re applying beadboard directly to exposed ceiling joists (e.g., in a basement or unfinished attic), you can directly nail or screw the beadboard planks or panels into the wood joists. Ensure your fasteners are long enough to penetrate well into the joists.
- Over Existing Drywall: For most applications, you’ll be installing beadboard over an existing drywall ceiling. In this scenario, it’s crucial to locate and mark your ceiling joists. While adhesive will provide initial hold, fastening into joists with nails or screws provides long-term structural support. For areas between joists, liberal use of high-quality construction adhesive is essential. Ensure the existing drywall is clean, dry, and free of loose paint or debris for optimal adhesion.
- Maintain Flatness and Level: As you install each piece, use your level to ensure the beadboard remains flat and even. Gaps or unevenness will be much harder to correct later. Apply constant pressure to adhesive-backed panels until they securely bond.
Step 3: Gluing, Nailing, or Screwing for Maximum Hold
A combination of fastening methods often yields the best results:
- Construction Adhesive: Apply a generous amount of high-quality construction adhesive (in a serpentine pattern for panels, or a bead along the back of planks) to the back of each beadboard piece. This provides strong initial tack and helps to prevent sagging or movement over time.
- Nailing: A nail gun (brad nailer) is ideal for this task. Position nails strategically along the tongue edge of tongue-and-groove planks, or in the grooves of panels, to conceal them as much as possible. Aim for joists whenever possible. For panels, you can also place nails discreetly along the edges that will be covered by trim.
- Screwing: Screws offer superior holding power, especially for heavier beadboard panels. Use appropriate screws (e.g., coarse-thread drywall screws for drywall applications, or wood screws for joists) and countersink them slightly below the surface. You’ll fill these holes later.
- Tight Seams: Regardless of your fastening method, always press each board or panel tightly against the previous one to eliminate any visible gaps between seams. This creates a clean, continuous surface. A rubber mallet can be gently used to tap planks into place if they are tongue-and-groove.
Step 4: The Finishing Touches: Trim, Paint, and Molding
Once all the beadboard is securely in place, turn your attention to the details that will elevate your work:
- Install Trim and Molding: Add decorative trim or crown molding around the perimeter of the room where the ceiling meets the walls. This not only adds a finished look but also effectively conceals any slight imperfections or gaps along the edges of your beadboard installation. Miter corners for a seamless joint.
- Fill and Smooth: Use paintable caulk to fill any small gaps between beadboard pieces, along the seams of trim, and in nail/screw holes. For larger holes or imperfections, use wood filler, sand it smooth once dry.
- Painting or Staining: Now comes the transformative step! Paint or stain your beadboard ceiling in a color that complements your room’s decor. A high-quality primer is recommended before painting, especially on raw wood or MDF. Consider a semi-gloss or satin finish for easy cleaning and a subtle sheen that enhances the beadboard’s texture. For bathrooms or kitchens, opt for moisture-resistant paint.
- Clean Up: Remove any protective coverings, clean up dust and debris, and step back to admire your beautiful new beadboard ceiling!
For a visual guide, check out this helpful YouTube video:
Versatile Applications: Where to Use Beadboard on Ceilings
Beadboard ceilings are remarkably adaptable and can enhance the aesthetic and functionality of almost any room. They are particularly effective at adding a cozy, inviting look and are excellent for disguising older or uneven ceilings. Let’s explore some of the best places to incorporate this charming ceiling treatment:
Kitchens and Dining Rooms
Beadboard brings a fresh, clean, and wonderfully homey atmosphere to kitchens and dining areas. Its classic appeal complements a wide range of design styles, from rustic farmhouse to modern coastal or even minimalist contemporary kitchens looking for a touch of texture. Beyond aesthetics, it can make these spaces feel more expansive by drawing the eye upward. However, due to the inherent moisture and potential for grease and food splatters in these rooms, it’s crucial to select beadboard made from moisture-resistant materials (like vinyl or sealed MDF) or to ensure that solid wood beadboard is properly sealed and painted with a durable, washable, moisture-resistant finish. This protection will prevent swelling, warping, or peeling and make cleaning much easier.
Bathrooms
Bathrooms pose a significant challenge for any ceiling material due to high humidity and temperature fluctuations. However, beadboard can still be a fantastic option here, provided you take the necessary precautions. Opt for materials specifically designed for high-moisture environments, such as vinyl beadboard or pressure-treated wood. If using traditional wood, seal it thoroughly on all sides before installation and paint it with a premium water-resistant or mildew-resistant paint. This proactive approach is essential to prevent long-term issues like warping, swelling, or peeling. When correctly installed and finished, beadboard can transform your bathroom into a serene, spa-like sanctuary without the need for a costly renovation. It’s also incredibly effective at concealing common bathroom ceiling flaws, which is especially beneficial for older or smaller bathrooms.
Bedrooms and Living Areas
In the private retreats of bedrooms and the communal gathering spaces of living rooms, beadboard ceilings excel at introducing warmth, texture, and a sense of inviting comfort. For rooms with unusually high ceilings, beadboard can make the space feel less cavernous and more intimate. Conversely, it can add much-needed interest and depth to otherwise plain, flat ceilings. You can choose to apply beadboard across the entire ceiling for a cohesive look, or for a more subtle design touch, install it in the center with a perimeter border of traditional molding or trim. Beadboard pairs beautifully with both painted finishes (for a clean, crisp look) and natural wood stains (for a rustic or traditional feel), allowing it to harmonize with diverse interior design styles.
Porches and Covered Outdoor Spaces
Beadboard is an outstanding choice for covered outdoor areas such as porches, sunrooms, lanais, or entryways. It provides a refined, finished look that elevates these transitional spaces, making them feel like a natural extension of your indoor living environment. For outdoor applications, material selection is paramount. Always choose beadboard made from weather-resistant materials like vinyl, composite, or pressure-treated wood. These materials are engineered to withstand exposure to humidity, rain, temperature fluctuations, and insects without deteriorating. When installed correctly, an outdoor beadboard ceiling significantly enhances curb appeal and contributes to a cohesive, well-designed home exterior.
Inspiring Beadboard Ceiling Design Ideas for Every Style
Beadboard is remarkably versatile and can complement a wide array of home styles. Whether your personal aesthetic leans towards cozy, airy, or minimalist, there’s a design approach that will integrate beadboard perfectly into your space.
1. The Cozy Cottage/Farmhouse Look
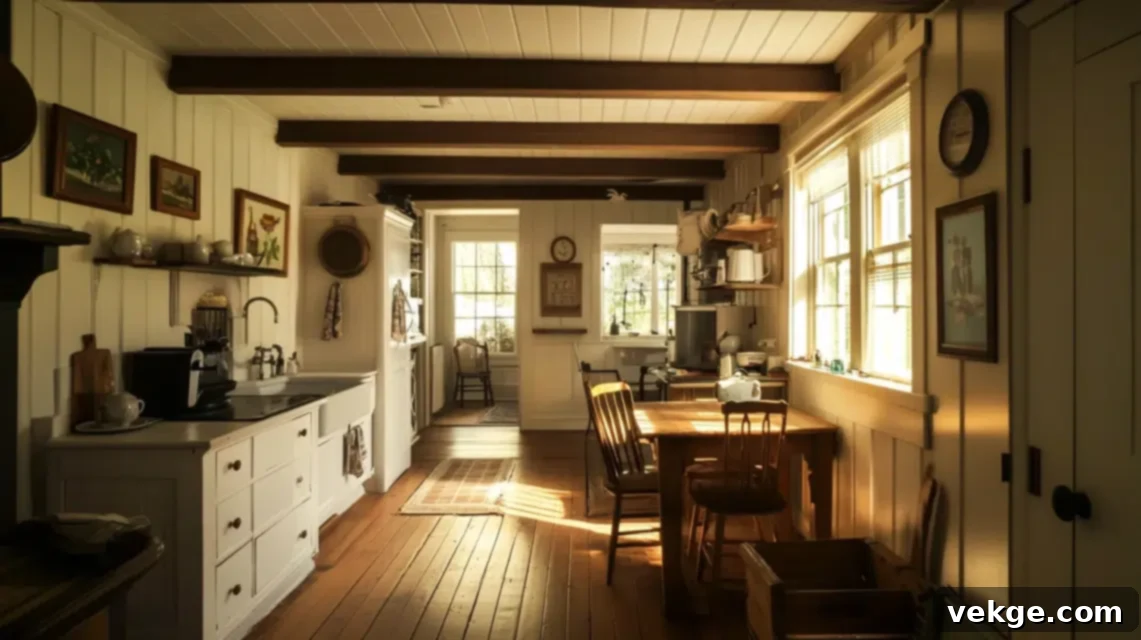
To achieve that quintessential cozy farmhouse or charming cottage vibe, opt for traditional wood beadboard planks. Paint them in soft, inviting shades of white, off-white, cream, or a very light pastel. For an extra layer of rustic charm and architectural interest, consider adding exposed faux or real wood beams to the ceiling. This combination creates a profoundly warm, welcoming, and lived-in feel, making any space feel instantly more comfortable and inviting. This style is particularly effective in kitchens, bedrooms, dining rooms, or even hallways where you want to infuse a touch of classic country charm without overwhelming the decor.
2. The Serene Beach-Inspired Style
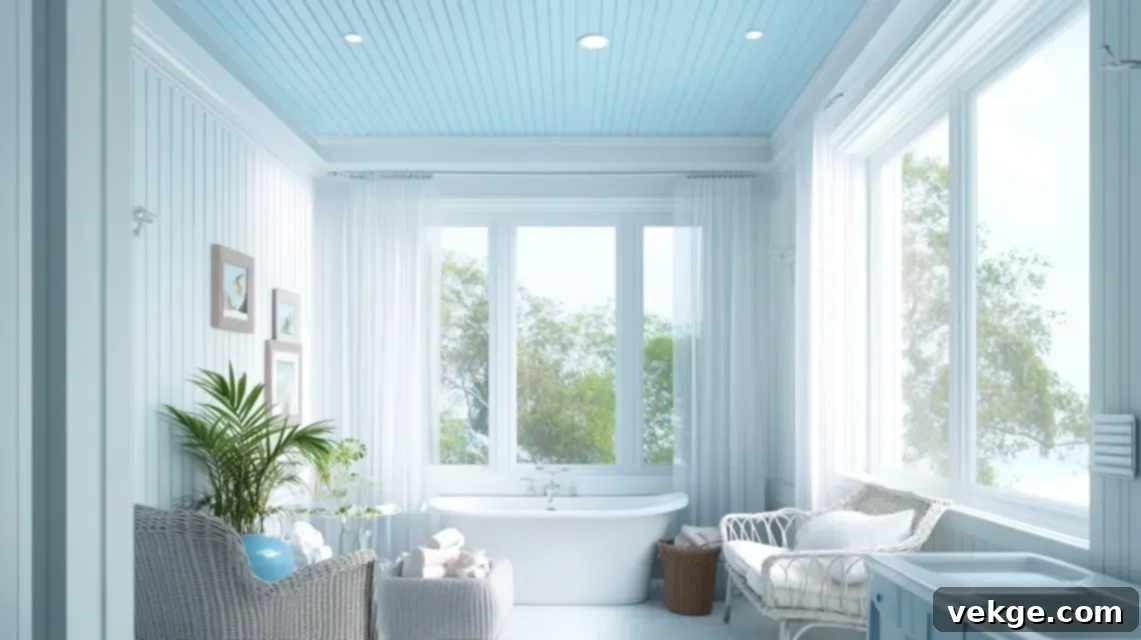
Infuse your home with the tranquil, breezy essence of the coast by painting your beadboard ceiling in soothing hues of light blue, soft gray, seafoam green, or crisp white. This palette instantly evokes a calm, beachy atmosphere, making it a perfect choice for bathrooms, sunrooms, enclosed porches, or even living areas where you desire a relaxed, airy feel. Pair a light-colored beadboard ceiling with white walls, natural linen textiles, light-toned wood furniture, and subtle nautical accents for a truly cohesive and refreshing look. This design makes the room feel open, fresh, and perpetually sun-kissed, as if you’re always just a stone’s throw from the ocean.
3. Contemporary and Modern Uses
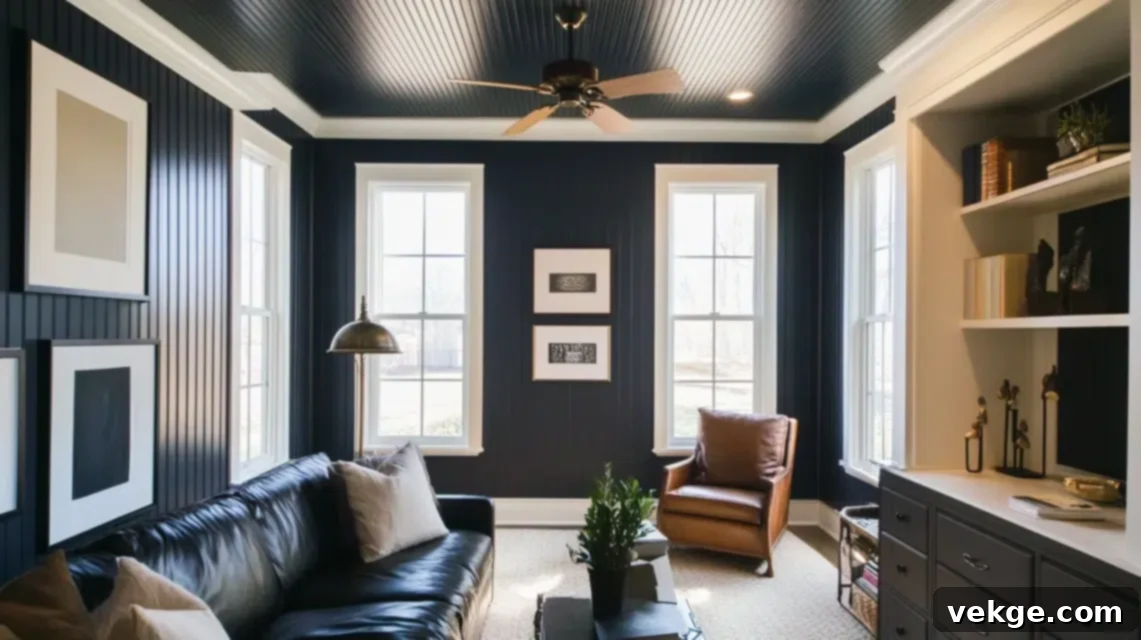
While beadboard has a traditional past, it can be styled to look strikingly modern and sophisticated. For a contemporary aesthetic, focus on clean lines and a minimalist approach. Use beadboard with thinner, more subtle beads and paint it the exact same color as your ceiling or trim for a seamless, architectural effect. Alternatively, embrace drama by painting the beadboard in dark, rich colors like deep navy, charcoal gray, or even black. This bold choice can add unexpected depth and a luxurious, enveloping feel to a room. Conversely, a crisp white beadboard ceiling with sharp, clean lines can enhance a minimalist decor, offering quiet texture without overpowering the space. This approach works beautifully in living rooms, home offices, or bedrooms where you desire an updated, neat look with a touch of understated textural interest.
4. Painted vs. Natural Finish Designs
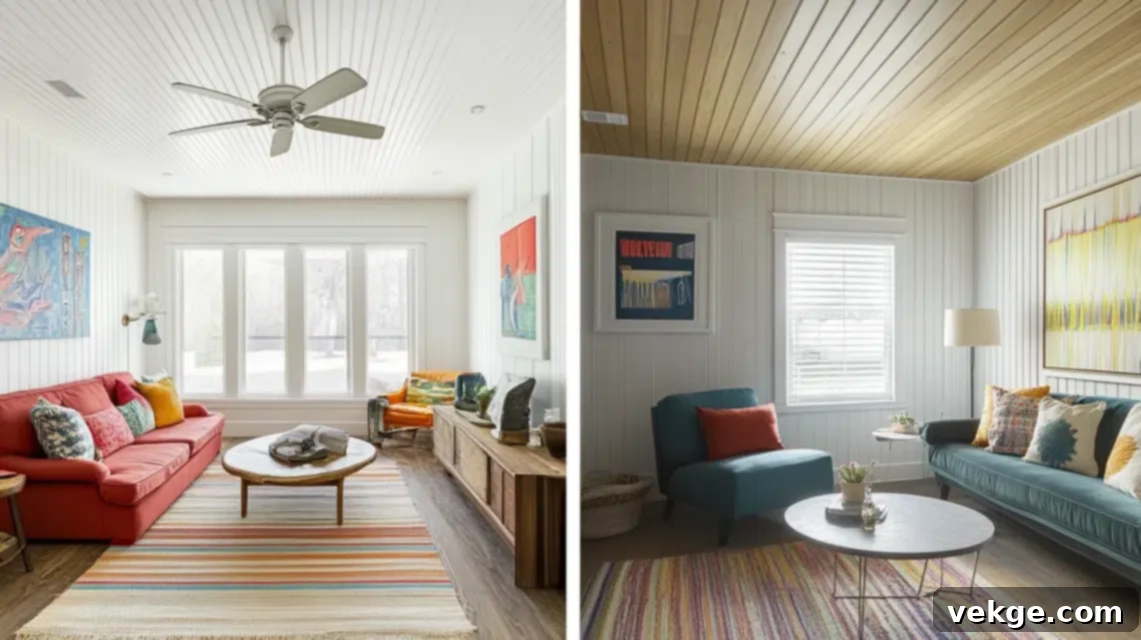
The choice between a painted or natural finish offers two distinct aesthetic paths for your beadboard ceiling. A painted beadboard allows for complete color customization, enabling you to match your ceiling perfectly with any room color scheme. While white remains a popular and timeless choice, light pastels can add subtle charm, and even bold, unexpected colors can create a striking focal point. This option provides a clean, unified, and often more contemporary look. On the other hand, a natural finish, typically achieved with a clear coat or light stain, celebrates the inherent beauty of the wood grain. This approach imparts a warm, organic, and rustic feel, perfect for cabins, farmhouses, or spaces where you want to highlight natural materials. Choose paint for a crisp, customizable, and polished appearance, or opt for a natural finish to infuse warmth, authentic texture, and a touch of effortless, classic charm into your space.
Common Mistakes to Avoid for a Flawless Beadboard Ceiling
Undertaking a DIY project like installing a beadboard ceiling can be incredibly rewarding, but it’s also prone to certain pitfalls. Being aware of common mistakes beforehand can save you significant time, money, and frustration, ensuring a smooth process and a beautiful result. Here’s what to keep in mind:
- Installing Over an Unstable or Sagging Ceiling: This is a critical error. Beadboard requires a perfectly flat, stable surface to adhere properly and maintain its integrity over time. Attempting to install it over a sagging, uneven, or damaged existing ceiling will only exacerbate the problem, leading to an unprofessional finish, potential detachment, and wasted effort. Always fix any structural issues, drooping drywall, or significant unevenness first, reinforcing where necessary, to create a solid foundation.
- Failing to Locate and Mark Joists Accurately: Guessing the location of ceiling joists is a recipe for weak support and potential future sagging. Fasteners (nails or screws) need to penetrate into solid wood for proper weight bearing. Invest in a reliable stud finder and meticulously mark the center of each joist with a chalk line across the entire ceiling before you start installing. This ensures secure attachment and prevents the beadboard from coming loose.
- Using the Wrong Type of Adhesive: Not all adhesives are created equal, especially for overhead applications. Standard wall glue or general-purpose construction adhesive may not possess the strong initial tack or long-term holding power required for ceiling panels or planks. Always select a high-quality construction adhesive specifically formulated for heavy-duty paneling or ceiling applications. This ensures that the beadboard stays firmly in place, complementing your mechanical fasteners.
- Nailing/Screwing Only Into Drywall: While adhesive provides initial hold, relying solely on drywall for fastening is insufficient for the long-term support of beadboard. Drywall alone cannot adequately bear the weight. Ensure that the majority of your nails or screws penetrate directly into the ceiling joists. For areas between joists, use construction adhesive and, if necessary, toggle or expansion anchors designed for drywall, but always prioritize joist attachment where possible.
- Neglecting Moisture Considerations in High-Humidity Areas: For bathrooms, kitchens, and outdoor spaces, ignoring moisture protection is a major oversight. Standard wood beadboard will warp, swell, or peel if exposed to persistent humidity. Always use moisture-resistant materials like vinyl beadboard or exterior-grade treated wood in these environments. If using interior wood beadboard, it must be thoroughly sealed on all sides with a waterproof primer and finished with a moisture-resistant or mold-inhibiting paint. Adequate ventilation is also crucial.
- Skipping the Layout Planning Stage: Diving straight into cutting and installing without a clear plan is a common beginner’s mistake. Without a well-thought-out layout, you risk ending up with uneven rows, awkwardly small cuts at the edges, or misaligned patterns. Take the time to measure, center your starting point, and plan how each panel or plank will fit, including cuts around light fixtures and vents. A precise layout ensures a symmetrical, professional, and visually pleasing finish.
- Improper Handling and Storage of Materials: Wood or MDF beadboard needs to acclimate to the room’s temperature and humidity for at least 48-72 hours before installation. Storing it flat will prevent warping. If the material is installed before it has acclimated, it can expand or contract after installation, leading to unsightly gaps or buckling.
Conclusion: Elevate Your Home with a Beadboard Ceiling
You are now equipped with a wealth of knowledge to confidently embark on your beadboard ceiling project. We’ve thoroughly explored the myriad ways this timeless design element can rejuvenate old ceilings, establish a clean and appealing aesthetic, and seamlessly integrate into various rooms throughout your home.
From understanding the different types of beadboard materials and finishes to mastering the step-by-step installation process and selecting the perfect design for your space, you have the insights needed to make informed and smart choices. I understand that initiating a new home improvement project can sometimes feel overwhelming, but the transformative impact of even a seemingly small change, like updating your ceiling, can dramatically shift the entire ambiance and feel of a room.
Remember, achieving perfection isn isn’t the primary goal; consistent, careful progress is. Take it one step at a time, celebrating each milestone along the way. Your efforts will culminate in a beautiful, personalized ceiling that enhances your home’s character and comfort.
Should you find yourself seeking further inspiration, detailed instructions, or simply more creative ideas for your next home project, I encourage you to delve into our other blogs. You’ll discover a treasure trove of tips and guidance designed to make every future endeavor a little easier and a lot more enjoyable.
