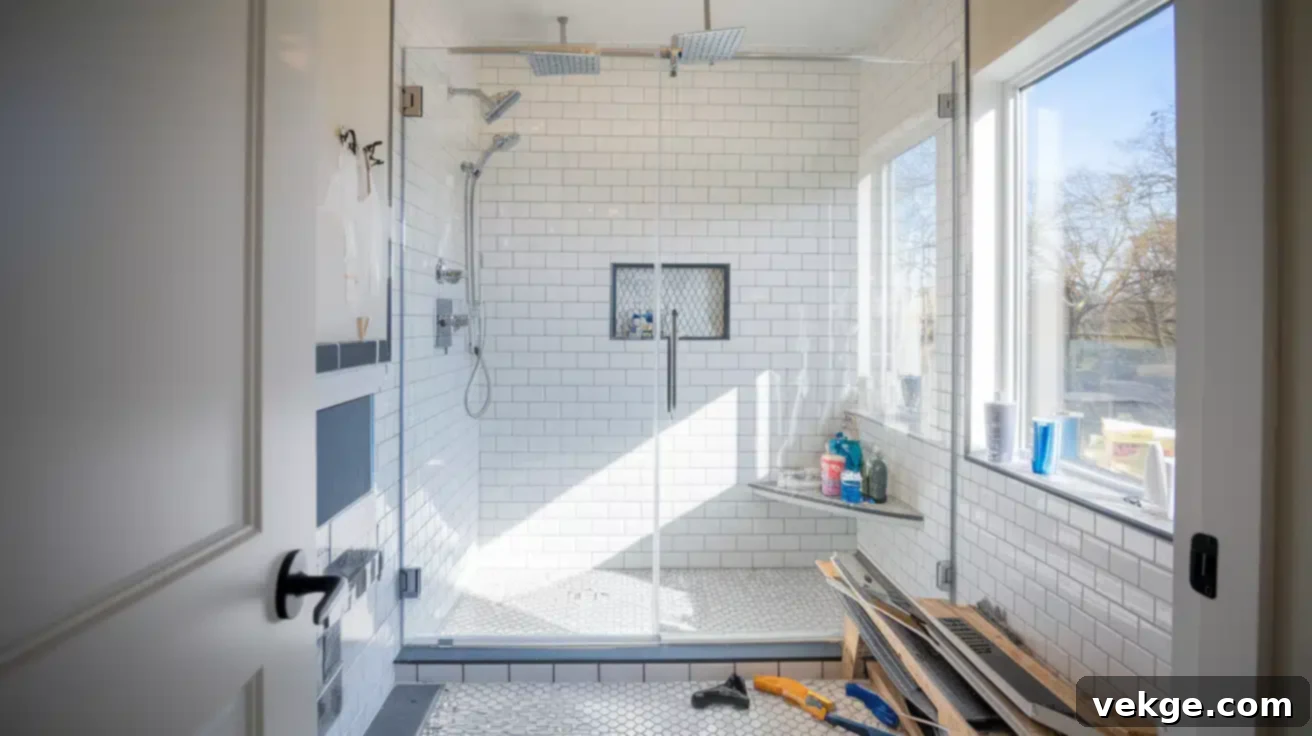
DIY Shower Remodel: A Comprehensive Guide to Transforming Your Bathroom on a Budget
Embarking on a DIY shower remodel is an excellent and practical way to breathe new life into your bathroom without breaking the bank. Many homeowners choose to renovate their showers for a variety of reasons, ranging from addressing pressing functional issues like persistent leaks, unsightly mold growth, or frustratingly poor drainage, to simply wanting to refresh the space with a modern aesthetic featuring updated fixtures and contemporary designs.
A well-planned and executed DIY shower renovation can significantly enhance both the appearance and the functionality of your bathroom, all while keeping costs considerably lower than hiring a professional contractor. This in-depth guide is designed to be your go-to resource, covering everything you need to know: from essential materials and detailed step-by-step instructions, to inspiring design ideas, crucial maintenance tips, and a transparent breakdown of potential costs. By meticulously following these guidelines, you can efficiently and affordably transform your shower space, creating a haven of comfort and style.
Whether your goal is to upgrade for enhanced personal comfort, increase your home’s resale value, or simply tackle those nagging repair issues, a DIY shower remodel stands out as a smart, rewarding, and often surprisingly achievable investment for any homeowner.
Essential Materials and Tools for Your DIY Shower Remodel
Before you dive into the transformation, gathering the right materials and tools is paramount. Proper preparation ensures a smooth process and a professional finish. Here’s a detailed list to get you started:
Demolition Tools:
- Hammer and Prybar: Indispensable for efficiently removing old tile, grout, and backer board.
- Utility Knife: Useful for cutting caulk, membranes, and other materials.
- Gloves: Heavy-duty work gloves are essential to protect your hands from sharp edges and debris.
- Safety Glasses: Non-negotiable eye protection against flying shards and dust.
- Dust Mask/Respirator: Protects your lungs from construction dust, especially important during demolition.
- Drop Cloths/Plastic Sheeting: To protect surrounding areas of your bathroom from dust and debris.
Waterproofing Materials:
- Cement Board or Tile Backer Board: Products like USG Fiberock, HardieBacker, or Durock provide a stable, water-resistant substrate for your tiles. Choose the correct thickness for your application (typically 1/2 inch for walls).
- Waterproofing Membrane: Critical for preventing water penetration. Options include liquid-applied membranes (such as Mapei AquaDefense or Custom Building Products RedGard) or sheet membranes (Schluter Kerdi).
- Waterproof Sealant/Caulk: For sealing corners, seams, and penetrations in the waterproofing layer.
- Waterproof Tape/Bands: Specifically designed for reinforcing seams and corners with sheet membranes.
Tile Options:
- Wall Tiles: Consider durable, moisture-resistant options. Subway tiles are a popular, budget-friendly, and versatile choice. Ceramic and porcelain are also excellent for showers.
- Accent Tiles: For creating focal points, decorative bands, or niche interiors.
- Bullnose Trim Pieces: Or other edge finishing tiles for clean, professional-looking edges, especially where tile meets painted walls or other surfaces.
- Tile Spacers: Essential for ensuring uniform grout lines and an even installation.
Installation Materials:
- Mortar/Thin-set: Specifically formulated for setting tiles in wet environments. Ensure it’s appropriate for your chosen tile type and backer board. Polymer-modified thin-set is often recommended.
- Grout: Available in sanded (for wider gaps) and unsanded (for narrower gaps) varieties, and a vast array of colors to complement your tiles. Epoxy grout offers superior stain resistance and durability.
- Caulk: 100% silicone caulk for inside corners and where tile meets the shower pan or tub, providing a flexible, waterproof seal. Color-matched caulk is available for a seamless look.
- Grout Sealer: A penetrating sealer to protect your grout from moisture and stains, extending its life and making cleaning easier.
Shower Components:
- Shower Pan or Materials for a Tiled Base: A pre-fabricated acrylic or fiberglass pan offers easier installation. For a custom tiled base, you’ll need a pre-sloped mortar bed, waterproofing membrane, and drain assembly.
- Shower Fixtures: This includes the shower head, control handle(s), and a new drain assembly. Consider pressure-balancing valves for safety.
- Optional: Materials for a Bench Seat or Built-in Shelf: This would include treated lumber for framing, cement board, and additional tile.
Tools:
- Tile Saw or Snap Cutter: A wet tile saw is ideal for precise, clean cuts, especially for porcelain or larger tiles. A snap cutter works well for ceramic tiles.
- Notched Trowels: Various notch sizes are needed for applying mortar – choose based on your tile size.
- Grout Float and Sponge: For applying grout and cleaning excess.
- Level: Crucial for ensuring straight tile lines and a properly sloped shower pan/floor.
- Measuring Tape and Pencil/Marker: For accurate measurements and markings.
- Rubber Mallet: For gently tapping tiles into place to ensure full contact with mortar.
- Bucket and Mixing Drill/Paddle: For mixing thin-set and grout consistently.
Stepwise Guide to a Budget-Friendly DIY Shower Remodel
1. Planning and Measuring Your Space Meticulously
The success of your shower remodel begins long before any demolition. Start by taking exact and thorough measurements of your entire shower area, including height, width, and depth. Create a detailed drawing or blueprint. This meticulous planning stage is critical for accurately calculating material quantities, thereby minimizing waste and unnecessary expenses. Carefully consider the precise placement of your shower fixtures, any desired shelves, niches, or built-in bench seats. Also, account for existing plumbing lines and ensure that any new features won’t interfere. This blueprint will guide your material purchases, help you establish a realistic budget, and form the basis of your comprehensive shopping list, preventing costly mid-project trips to the hardware store.
2. Demolition of the Existing Shower Structure
Safety first! Don your safety gear, including gloves, safety glasses, and a dust mask. Begin the demolition process by carefully removing all existing tile and the underlying backer board, working your way down to the wall studs. Exercise extreme caution to avoid damaging any plumbing pipes or electrical wiring that may be hidden behind the walls. Remove old fixtures, the shower pan or base, and clear the space completely. This step can be quite messy, so cover nearby areas, including your bathroom floor, toilet, and vanity, with plastic sheeting or drop cloths to protect them from dust and debris. Properly dispose of all construction waste according to local regulations.
3. Framing for New Features and Structural Enhancements
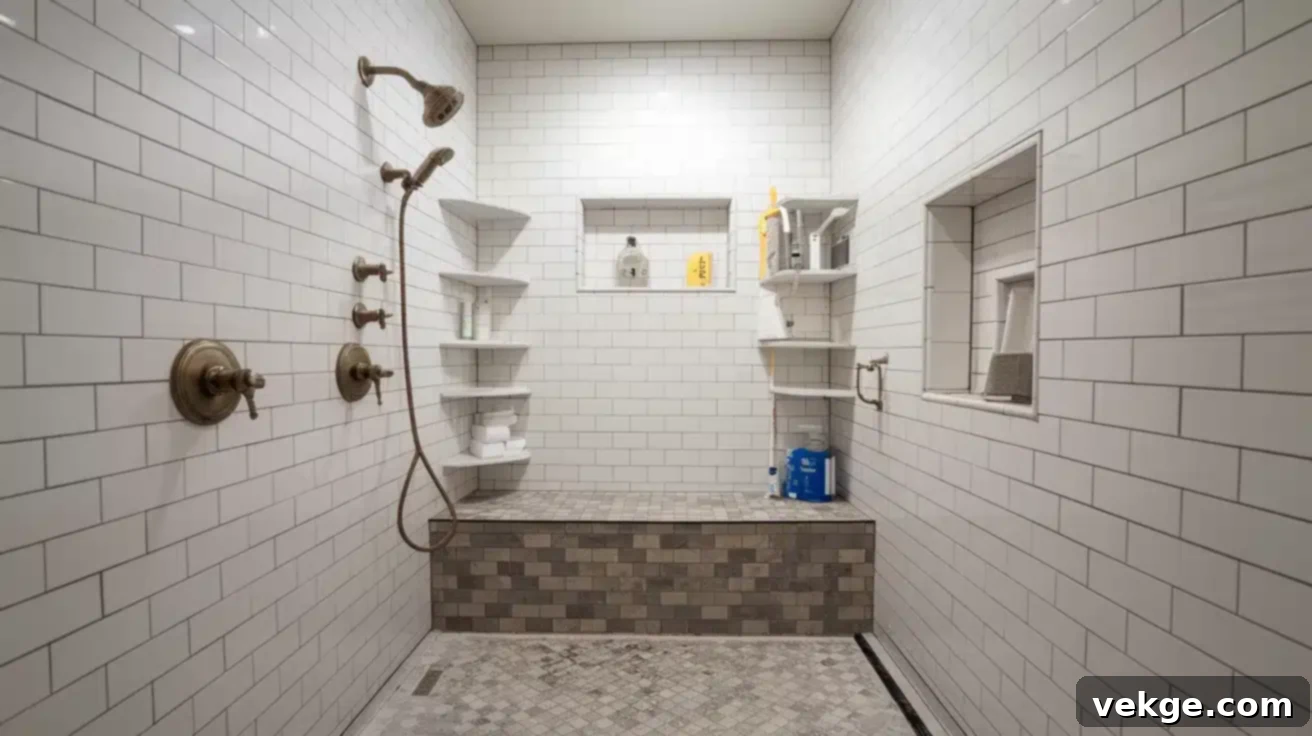
If your design includes new elements such as a bench seat, a recessed niche, or even a pony wall, now is the opportune moment to construct the framing. Utilize pressure-treated 2x4s or galvanized metal studs to create the robust structure for these additions, especially if they will be in direct contact with the shower pan or concrete, to resist moisture. For instance, one resourceful DIYer ingeniously framed a bench seat to perfectly fill extra space between the new shower pan and the back wall. Additionally, they built false walls to create a recessed shelf, ideal for storing shampoo bottles and soaps, ensuring both functionality and a sleek, integrated look.
4. Installing the Shower Pan or Building a Custom Base
The shower base is the foundation of your new shower and must be installed flawlessly to prevent future leaks. If you’re using a pre-fabricated shower pan, set it up precisely according to the manufacturer’s instructions. Use a level extensively to ensure it is perfectly pitched towards the drain, allowing water to flow away efficiently. If your existing drain requires adjustment to align with the new pan, make those modifications now. For a custom tiled base, you’ll need to create a “mud bed” (a sloped mortar bed) that ensures proper drainage before applying your waterproofing membrane and tiles. This step requires precision to avoid water pooling.
5. Meticulous Waterproofing of the Walls and Floor
This is arguably the most critical step in your entire shower remodel. First, install cement board or tile backer board firmly onto the wall studs, securing it with appropriate screws. Then, apply a high-quality waterproofing membrane, such as Mapei AquaDefense (a liquid-applied membrane) or Schluter Kerdi (a sheet membrane). Ensure complete and continuous coverage on all surfaces that will be tiled, including the floor of a tiled shower, the curb, and any built-in features. Pay special attention to overlapping seams, corners, and around any pipe penetrations, using waterproof sealant or specialized tape to create an impenetrable barrier against water. This step is non-negotiable for the long-term success and integrity of your shower, protecting the underlying structure from water damage, mold, and mildew.
6. The Art of the Tiling Process
With a perfectly waterproofed foundation, you’re ready for tiling. Begin by establishing a perfectly level first row of tiles as your baseline – this sets the tone for the entire project. Work in manageable sections, applying an even layer of mortar or thin-set to the backer board using a notched trowel appropriate for your tile size. For optimal adhesion, many professionals recommend “back buttering” each tile by applying a thin layer of mortar to its back before setting it. Use tile spacers consistently to ensure uniform grout lines throughout. As you progress, cut tiles as needed using either a tile saw (for precision and harder tiles) or a score-and-snap cutter (for softer ceramic tiles). Regularly check for level and plumb, making small adjustments as you go to achieve a professional finish.
7. Grouting and Sealing for Longevity and Aesthetics
After your tiles are perfectly set and the mortar has fully cured (typically 24-48 hours, depending on the product and conditions), it’s time for grouting. Apply grout evenly between the tiles using a rubber grout float, working it deeply into the joints. Work in small sections, and crucially, clean off excess grout from the tile faces with a damp sponge before it dries and hardens. For all inside corners where two tiled surfaces meet (e.g., wall-to-wall, wall-to-floor/pan), use a 100% silicone waterproof sealant instead of grout. This flexible sealant accommodates movement and prevents cracking, maintaining a waterproof seal. Once the grout is fully cured (check manufacturer’s instructions, typically 24-72 hours), apply a high-quality penetrating sealer to both the tiles and grout lines. This protective layer will guard against moisture penetration, staining, and make future cleaning significantly easier.
By following these steps carefully and patiently, you can achieve a stunning shower remodel that boasts a professional look and durability, all without the hefty professional price tag.
DIY Shower Base Options: Acrylic Pan vs. Tile Floor
Choosing the right shower base is a fundamental decision in your remodel, impacting both the installation process and the long-term maintenance of your shower. Here’s a detailed comparison to help you decide:
| Feature | Acrylic Shower Pan | Tile Shower Floor |
|---|---|---|
| Installation | Generally easier and faster to install, making it an excellent choice for DIYers with less experience. It’s a single unit. | Requires more time, skill, and precision for proper sloping, waterproofing, and tile installation. |
| Customization | Limited in terms of colors, shapes, and sizes. You choose from pre-manufactured options. | Highly customizable with an extensive range of tile options, patterns, and colors to match any design aesthetic. |
| Waterproofing | Features built-in, factory-sealed waterproofing, significantly reducing the risk of leaks if installed correctly. | Requires meticulous, multi-layer waterproofing techniques (e.g., sloped mortar bed, membrane, proper sealing) to prevent water damage. |
| Maintenance | Easy to clean due to a smooth, non-porous surface with minimal grout lines. Requires basic upkeep. | Grout lines require regular sealing and cleaning to prevent mold, mildew, and staining, adding to maintenance effort. |
| Durability | Resistant to cracks and chips but can be susceptible to scratches or discoloration over time with harsh cleaners. | Generally more durable and resilient to impact. However, grout can wear, stain, or crack over time if not maintained. |
| Aesthetic Appeal | Offers a simple, clean, and functional look, often suitable for contemporary or minimalist designs. | Can achieve a luxurious, high-end, and personalized stylish appearance that significantly elevates bathroom design. |
For DIYers prioritizing ease of installation and minimal maintenance, an acrylic shower pan is often the preferred choice. However, if you’re seeking a unique, custom aesthetic and are comfortable with a more involved installation, a tiled shower floor offers unparalleled design flexibility.
Innovative Shower Design Ideas for Every Bathroom
Beyond functionality, your shower remodel is an opportunity to express your personal style. Here are some innovative design ideas to inspire your project:
1. Mixed Tile Patterns and Colors
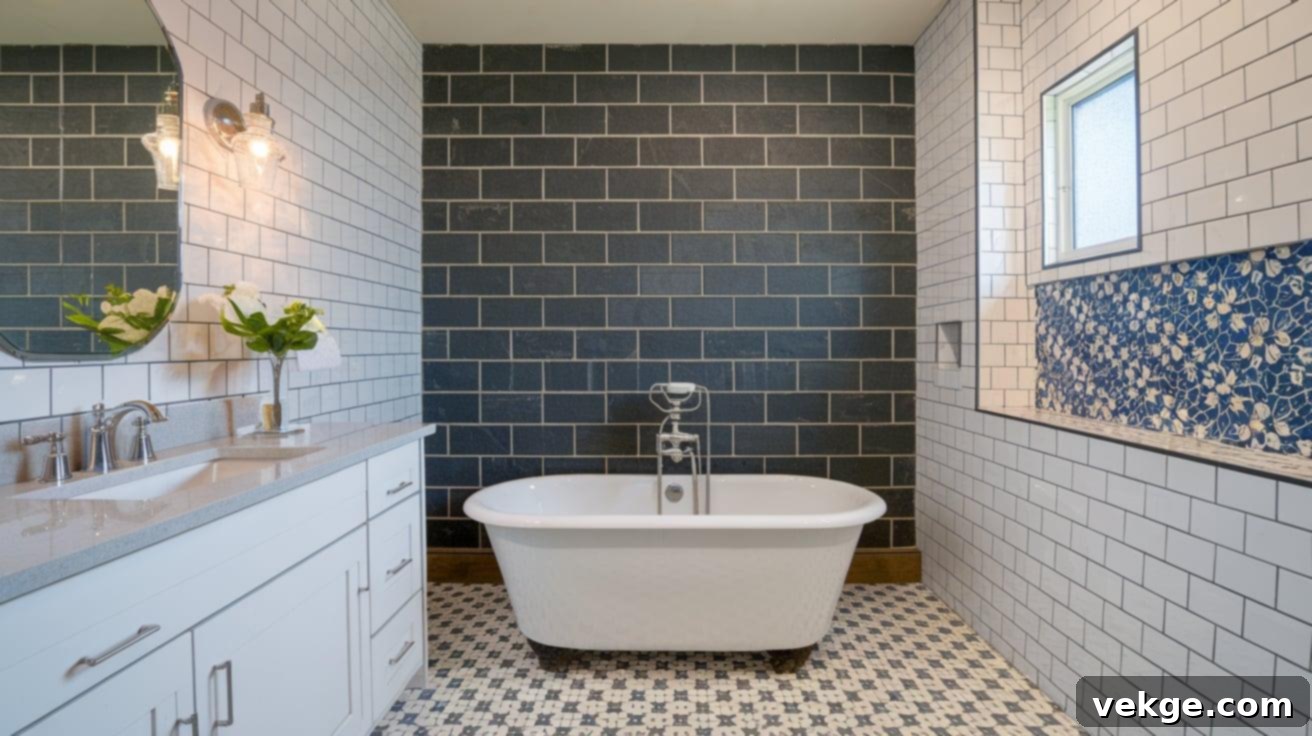
Create captivating visual interest and depth by artfully combining different tile styles, sizes, and colors. For instance, in one inspiring example, a homeowner achieved a striking contrast by using dark slate 4×12 tiles installed vertically on the back wall, complemented by classic white subway tiles laid horizontally on the side walls. Another creative DIYer combined timeless white subway tile with vibrant blue flower mosaic accent tiles, strategically placed to create a stunning focal point and a pop of color. Don’t shy away from mixing tile sizes either; using larger tiles for the main wall areas and smaller, intricate ones for accents can not only add sophisticated detail but also save time and money on installation.
2. Built-in Niches and Shelves for Streamlined Storage
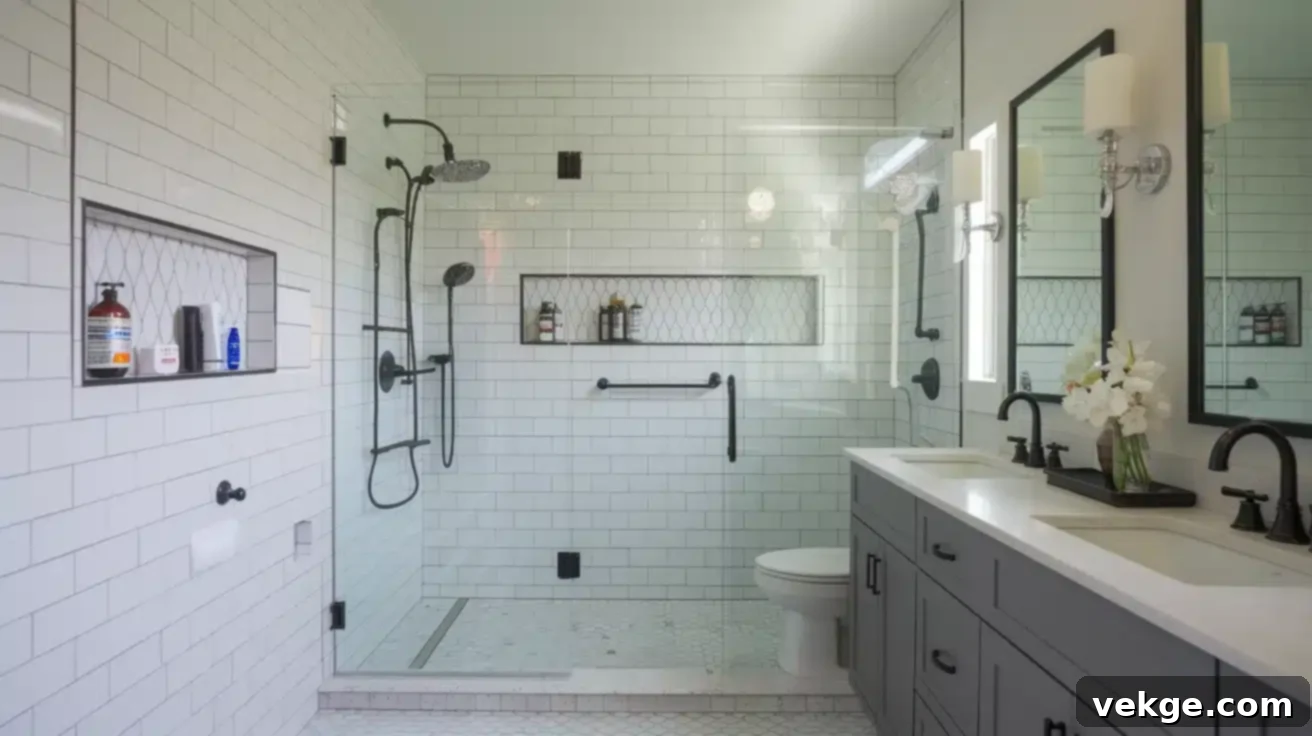
Maximize your shower’s functionality and maintain a clutter-free space by incorporating practical storage solutions that don’t intrude on your floor area. A brilliant creative solution observed in one remodel was building a full-length, recessed shelf directly into the shower wall, providing ample space to neatly organize shampoo, soap, and other bathing essentials. Custom shower niches, built snugly between wall studs, can be expertly tiled to seamlessly match your shower’s aesthetic. These built-in features are not only visually appealing but also incredibly practical, keeping all your bathroom products within easy, comfortable reach while maintaining a sleek and uncluttered look.
3. Comfortable and Stylish Bench Seating Options
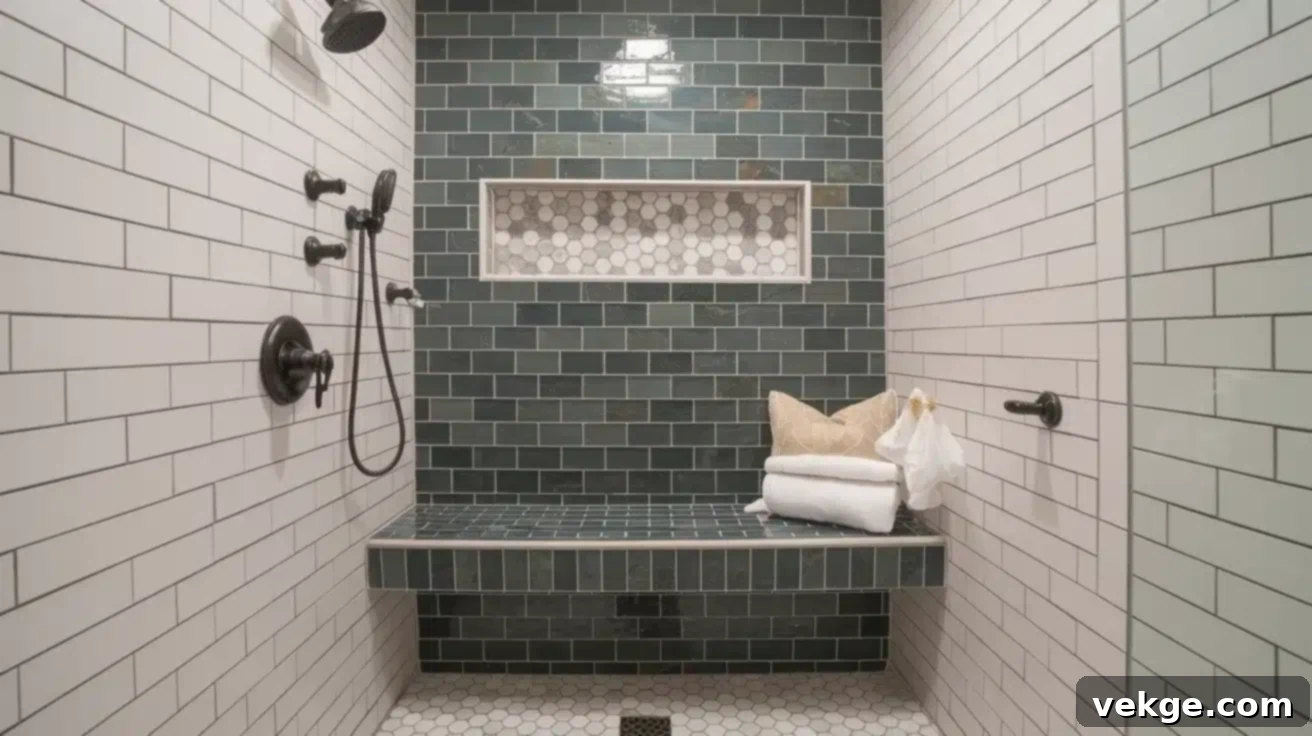
A well-integrated bench seat can elevate your shower experience by adding both comfort and an element of spa-like luxury. You can easily construct one by framing a section of your shower with pressure-treated 2x4s, ensuring it’s structurally sound and sloped slightly for drainage, then covering it with cement board before tiling. To achieve a clean, expansive look, consider using larger format tiles on the bench surface to minimize grout lines. One skilled remodeler successfully used matching 16×16 slate tiles, precisely cut to fit their bench seat, resulting in a cohesive and incredibly sleek appearance. Bench seats are also excellent for accessibility and for simply relaxing during your shower.
4. Shower Curtain vs. Glass Door Considerations
The choice between a shower curtain and a glass door significantly impacts both your budget and your bathroom’s overall style and functionality. Shower curtains are a significantly more budget-friendly option compared to glass doors and offer unparalleled flexibility for easily changing your bathroom’s aesthetic whenever you desire a fresh look. For instance, one DIYer expertly chose a charcoal-colored shower curtain that beautifully complemented their grey and white tile combination, adding a touch of sophisticated contrast. For bathrooms with limited space, curtains can also visually enlarge the area, as they don’t have the fixed structure or swinging arc of a door. Conversely, glass doors offer a more permanent, upscale feel, enhancing natural light and making a small bathroom appear larger and more open. Consider your long-term vision, maintenance preferences, and budget before making this important decision.
By thoughtfully incorporating these diverse design ideas, you can craft a shower that not only meets your functional needs but also perfectly reflects your unique style, all while staying comfortably within your allocated budget.
How to Maintain and Clean Your New Shower for Lasting Beauty
A beautiful new shower deserves proper care to maintain its pristine condition and extend its lifespan. Regular and correct maintenance will prevent issues and keep your bathroom looking fresh.
1. Cleaning Recommendations for Different Surfaces
The key to effective cleaning is using the right products for the right surfaces. Always opt for mild, pH-neutral cleaners for your tiles, especially if you have natural stone, as acidic cleaners can damage sealers and etch the stone. For acrylic pans, use non-abrasive products to prevent scratching. Interestingly, white subway tiles are excellent at subtly hiding water spots and mineral deposits compared to darker tiles, which tend to show every droplet. Establish a regular cleaning routine with appropriate products to prevent soap scum buildup, hard water stains, and discoloration, which become much harder to remove if left unattended.
2. Preventing Mold and Mildew Growth
Prevention is the best defense against mold and mildew. Always run your bathroom exhaust fan during and for at least 15-20 minutes after every shower to remove excess moisture from the air. A simple habit like wiping down shower walls with a squeegee after each use can dramatically reduce standing water. Utilize mold-resistant sealants specifically in corner joints and around the base of your shower. If you have a shower curtain, ensure it’s fully spread open to allow it to dry completely after use, preventing mildew growth on the fabric. Good airflow and consistent moisture reduction are your most potent weapons.
3. When to Reseal Grout and Joints
Grout and sealant are your shower’s first line of defense against water penetration, so their integrity is paramount. Inspect all sealed areas, particularly grout lines and silicone joints, every 6-12 months. A quick test is to sprinkle a few drops of water on the grout; if the water is absorbed rather than beading up on the surface, it’s time to reapply sealer. Always use a high-quality penetrating sealer on both your tiles (if porous) and all grout lines for maximum, long-lasting protection. Proactive resealing prevents water from seeping into the walls behind your tile, which can lead to costly structural damage and mold issues.
4. Long-term Maintenance Tips for Durability
Beyond routine cleaning, regular inspections are crucial for long-term durability. Periodically check for any cracked tiles, crumbling grout, or areas where caulk might be missing or compromised. Address these minor issues promptly before they escalate. Don’t forget to clean your shower head regularly to prevent mineral buildup, which can reduce water pressure and spray patterns. Pay special attention to inside corners, as these areas experience the most movement and are common points for sealant failure. It’s worth noting that pre-fabricated shower pans generally require less maintenance than tiled floors, offering a bit more peace of mind regarding potential leaks due to their monolithic construction.
Common Mistakes to Avoid When Remodeling a Shower
While a DIY shower remodel is rewarding, certain pitfalls can turn your dream project into a nightmare. Being aware of these common mistakes can save you significant time, money, and frustration.
1. Improper Waterproofing: The Most Critical Error
This is by far the most significant and costly mistake many DIYers make. Rushing or cutting corners on proper waterproofing can lead to devastating consequences, including water damage to your subfloor, wall studs, and even adjacent rooms, ultimately resulting in mold growth and structural issues. Always invest in quality waterproofing products like Mapei AquaDefense or Schluter Kerdi and apply them meticulously to all shower walls, the curb, and the floor. Ensure the waterproofing membrane is applied completely, overlapping seams correctly, and allowed to dry fully according to manufacturer instructions before laying any tile. Remember, water damage from poor waterproofing can ruin your entire bathroom and beyond.
2. Poor Drainage Planning and Execution
A shower that doesn’t drain properly is not only annoying but can also contribute to mold growth and water damage. One homeowner regrettably recounted how their old shower consistently pooled water in the corner instead of efficiently flowing towards the drain. It is absolutely essential to ensure your shower floor, whether a pre-fabricated pan or a custom tiled base, has the correct slope (typically 1/4 inch per foot) towards the drain. When installing a pre-fab pan, use a level extensively before permanently securing it to verify the proper pitch. For tiled floors, meticulous planning and execution of the sloped mortar bed are paramount. Proper drainage is non-negotiable for hygiene and preventing water-related issues.
3. Tile Layout Mistakes and Lack of Planning
A beautiful tile job starts with careful planning. Avoid haphazard tiling that results in awkward, tiny slivers of cut tile in highly visible areas or around fixtures. Instead, begin with a perfectly level first row as your foundational guide. Dry-fit your tiles on the floor first to plan your layout, ensuring balanced, visually pleasing patterns and minimizing distracting cuts. One experienced DIYer strongly recommended this dry-fitting technique to visualize the final outcome and make adjustments beforehand. Thoughtful planning prevents unsightly results and costly re-dos.
4. Skipping Important Steps or Rushing the Process
Patience is a virtue in a shower remodel. Never rush through crucial steps, such as allowing mortar or thin-set to fully cure (set and dry) before applying grout – typically 24-48 hours. Attempting to grout too early can compromise the bond of the tiles and lead to cracking. Similarly, always seal natural stone tiles before grouting to prevent grout pigments from staining the porous stone. As mentioned, always use proper 100% silicone sealant in inside corners where flexibility is needed, instead of rigid grout. Taking shortcuts might seem to save time in the short term, but it almost invariably leads to bigger problems, costly repairs, and significant expenses down the line. Each step serves a vital purpose in ensuring the longevity and integrity of your new shower.
Conclusion: Your Dream Shower Awaits
Embarking on a DIY shower remodel is a significant undertaking that demands time, patience, and attention to detail, but the rewarding results are undoubtedly worth every effort. Your newly renovated shower can effectively resolve frustrating drainage issues, become remarkably easier to clean, and perfectly align with your personal style and aesthetic preferences. The sense of accomplishment from transforming your bathroom with your own hands is truly unparalleled.
To ensure success, remember these key takeaways: Plan thoroughly, creating a detailed blueprint for every aspect of your project. Invest wisely in proper waterproofing materials and apply them meticulously, as this is the single most critical step for the longevity of your shower. Take your time with the first row of tiles, as it sets the foundation for the entire installation. Never, under any circumstances, skip the crucial sealing step for grout and porous tiles. Work in small, manageable sections, and resist the temptation to rush through any part of the process.
Ready to finally transform your bathroom into a more functional, beautiful, and comfortable space? With these comprehensive tips, a solid plan, and perhaps a dedicated weekend or two of focused work, you possess all the knowledge needed to create a stunning new shower that not only looks professionally installed but also comes without the hefty professional price tag. Get ready to enjoy your beautifully remodeled oasis!
Frequently Asked Questions About DIY Shower Remodels
How Long Does a DIY Shower Remodel Typically Take?
The duration of a DIY shower remodel can vary significantly based on the project’s complexity, your skill level, and how many hours you can dedicate each day. However, most DIY shower projects, from demolition to final sealing, typically take anywhere from one to two weeks of consistent work. More intricate designs or unforeseen issues can extend this timeframe.
Can I Remodel My Shower Without Professional Help?
Absolutely, a shower remodel is a very achievable DIY project for many homeowners. However, it’s crucial to ensure you have access to the right tools, possess a solid understanding of fundamental waterproofing techniques, and are confident in your tiling skills. If you’re unsure about any critical step, particularly plumbing or complex waterproofing, it’s always wise to consult with or hire a professional for that specific part of the job to prevent costly mistakes.
What are the Biggest Cost-Saving Areas in a DIY Shower Remodel?
The most significant cost savings come from eliminating labor fees, which can account for 50% or more of a professional remodel. Additionally, choosing affordable yet durable materials like ceramic subway tiles, opting for a pre-fabricated shower pan instead of a custom tiled base, and sourcing fixtures during sales or clearance events can substantially reduce your overall expenses.
How Much Should I Budget for a DIY Shower Remodel?
A budget for a DIY shower remodel can range widely, typically from $1,000 to $5,000, depending on the scope and material choices. This estimate covers materials like tile, cement board, waterproofing, grout, caulk, and new fixtures. High-end tiles, custom glass doors, or intricate plumbing changes will increase the cost. Always factor in an additional 10-15% for unexpected expenses or tool rentals.
Do I Need a Permit for a Shower Remodel?
In many municipalities, a permit is required for certain types of bathroom remodels, especially if you are altering the plumbing layout, changing structural elements, or making significant electrical changes. Replacing existing tiles and fixtures in their current locations might not always require a permit, but it’s always best to check with your local building department beforehand to ensure compliance and avoid potential fines or issues during resale.
