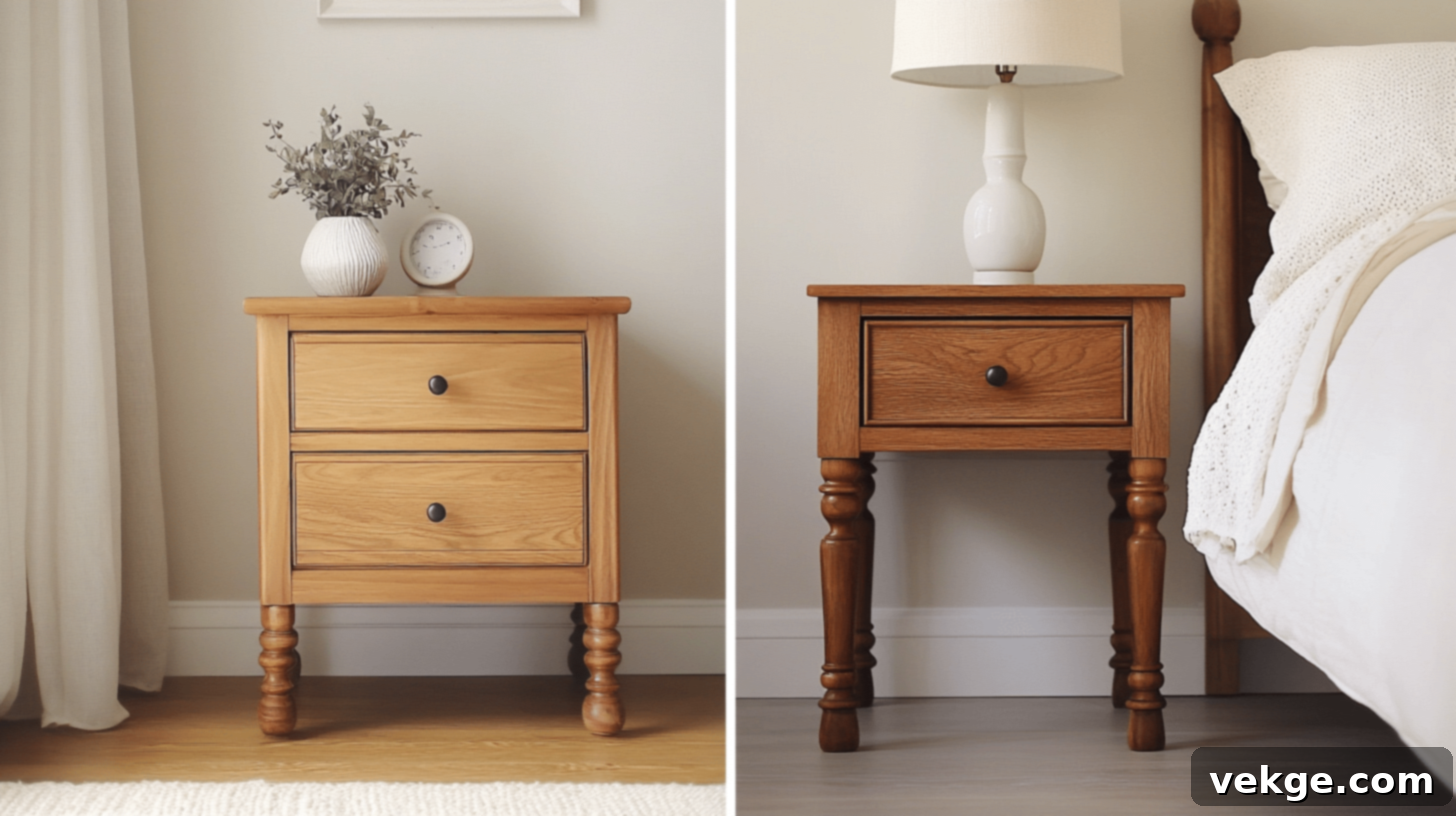
Transform Your Furniture: The Ultimate DIY Guide to Adding Legs for Style, Function & Durability
Are you looking to refresh your living space without investing in entirely new furniture? The answer might be simpler and more affordable than you think: just lift it! Adding a set of stylish legs to an existing piece of furniture can profoundly change its appearance, transforming a basic cabinet into a captivating focal point or giving an old sofa a modern edge. This seemingly small alteration not only upgrades the aesthetics but also brings significant practical benefits, such as making cleaning effortless and enhancing air circulation beneath your cherished pieces.
This comprehensive DIY guide will walk you through every step of adding legs to virtually any piece of furniture in your home. We’ll demystify the process, from selecting the perfect legs that match your style and needs to executing a flawless installation. You’ll only need a few basic tools, a budget of approximately $35-$50 for materials, and a commitment of just a few hours. Even if you’re a complete novice in DIY projects, don’t fret! We’ll cover everything from understanding your furniture’s material to drilling safely and troubleshooting common issues. Get ready to elevate your furniture, literally, and witness its incredible transformation!
Understanding Your Furniture’s Foundation: Materials Matter
Before you begin drilling, it’s crucial to understand the material making up your furniture’s base. This knowledge will guide your choice of attachment methods and ensure a stable, long-lasting installation for your new legs. Different materials offer varying levels of strength and require specific care.
1. Solid Wood Base
If your furniture features a solid wood base, consider yourself lucky! This material provides the strongest and most forgiving foundation for adding legs. Solid wood allows you to drill directly into its fibers, which then grip the hardware firmly. This natural strength ensures a highly stable and durable attachment point for your new legs, making installation relatively straightforward. When working with solid wood, you’ll benefit from its robustness and ability to withstand significant load, giving you confidence in your upgraded piece.
2. Particleboard and MDF (Medium-Density Fiberboard)
These engineered wood products are common in many affordable furniture pieces. While versatile, they are less dense and more prone to crumbling or stripping out screws compared to solid wood. When adding legs to furniture made from particleboard or MDF, extra precautions are essential. You’ll almost certainly need to add support blocks, often made from solid wood, to the underside of your furniture. These blocks create a reinforced, stronger layer for the leg hardware to attach to, preventing damage and ensuring stability. Think of it as providing a more robust “footing” for your legs on a softer surface.
3. Upholstered Pieces
Adding legs to upholstered furniture, such as sofas, armchairs, or ottomans, presents a unique challenge: the frame is hidden beneath fabric. Your primary task here is to locate the solid wooden frame that provides the structural integrity. Typically, the strongest points are at the corners where the frame members meet. You might need to gently probe the underside of the fabric or refer to any available schematics of the furniture to pinpoint these crucial spots. Once located, these solid frame sections will offer the necessary support for securely attaching your new legs, ensuring your upholstered piece remains stable and comfortable.
Weight, Stability, and Strategic Leg Placement
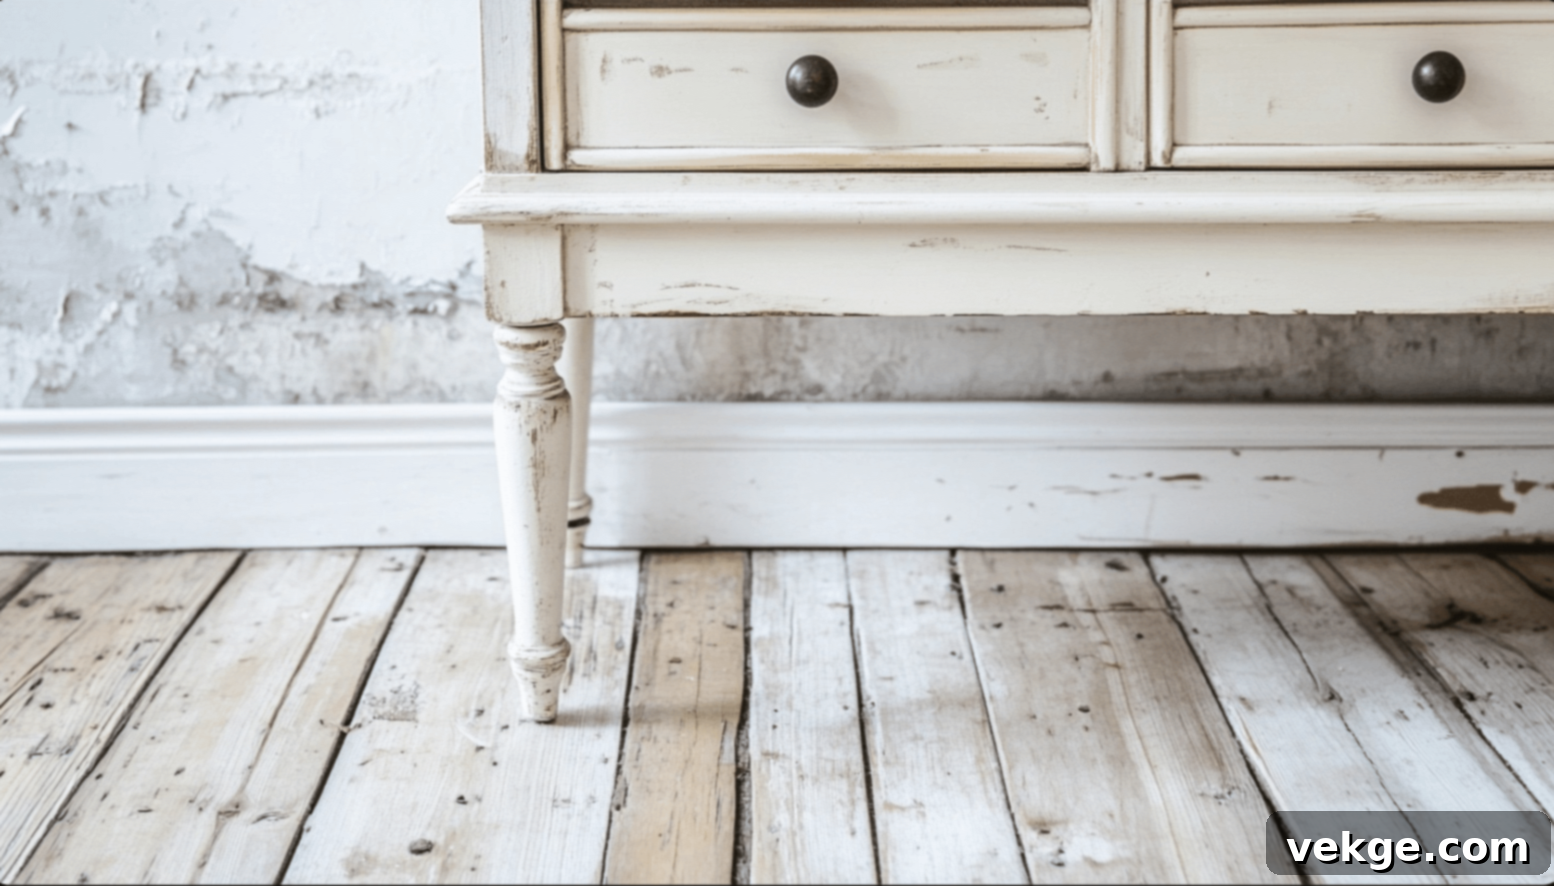
The success of your furniture leg upgrade hinges on careful consideration of weight distribution and overall stability. Ignoring these factors can lead to wobbly furniture, damage, or even safety hazards. Proper planning ensures your transformed piece is both beautiful and functional.
Load-Bearing Needs: Calculating the Weight Your Legs Must Hold
Before selecting your legs, think critically about what your furniture will hold. A lightweight nightstand holding a lamp and a book requires different support than a heavy dresser packed with clothing, a bookshelf laden with volumes, or a large media console. Each leg must be capable of supporting its share of the total weight of the furniture piece, plus anything placed on or within it. Opt for legs that are rated to handle the maximum expected load, ensuring they won’t buckle or fail over time. For very heavy items, consider adding more than four legs or using larger, more robust leg types.
Balance Points: Engineering Stability from the Ground Up
Carefully assess how the weight of your furniture piece is currently distributed. A good practice is to gently tip your furniture onto its side or back to observe its existing structure. Mark the spots where the new legs will provide optimal support and balance. While most furniture pieces benefit from legs placed at each corner, some longer or heavier items, like large dressers or lengthy TV stands, may require additional central support. Strategic placement ensures even weight distribution, preventing sagging in the middle and ensuring the entire piece remains level and stable on the floor.
Beyond Aesthetics: The Multifaceted Benefits of Adding Furniture Legs
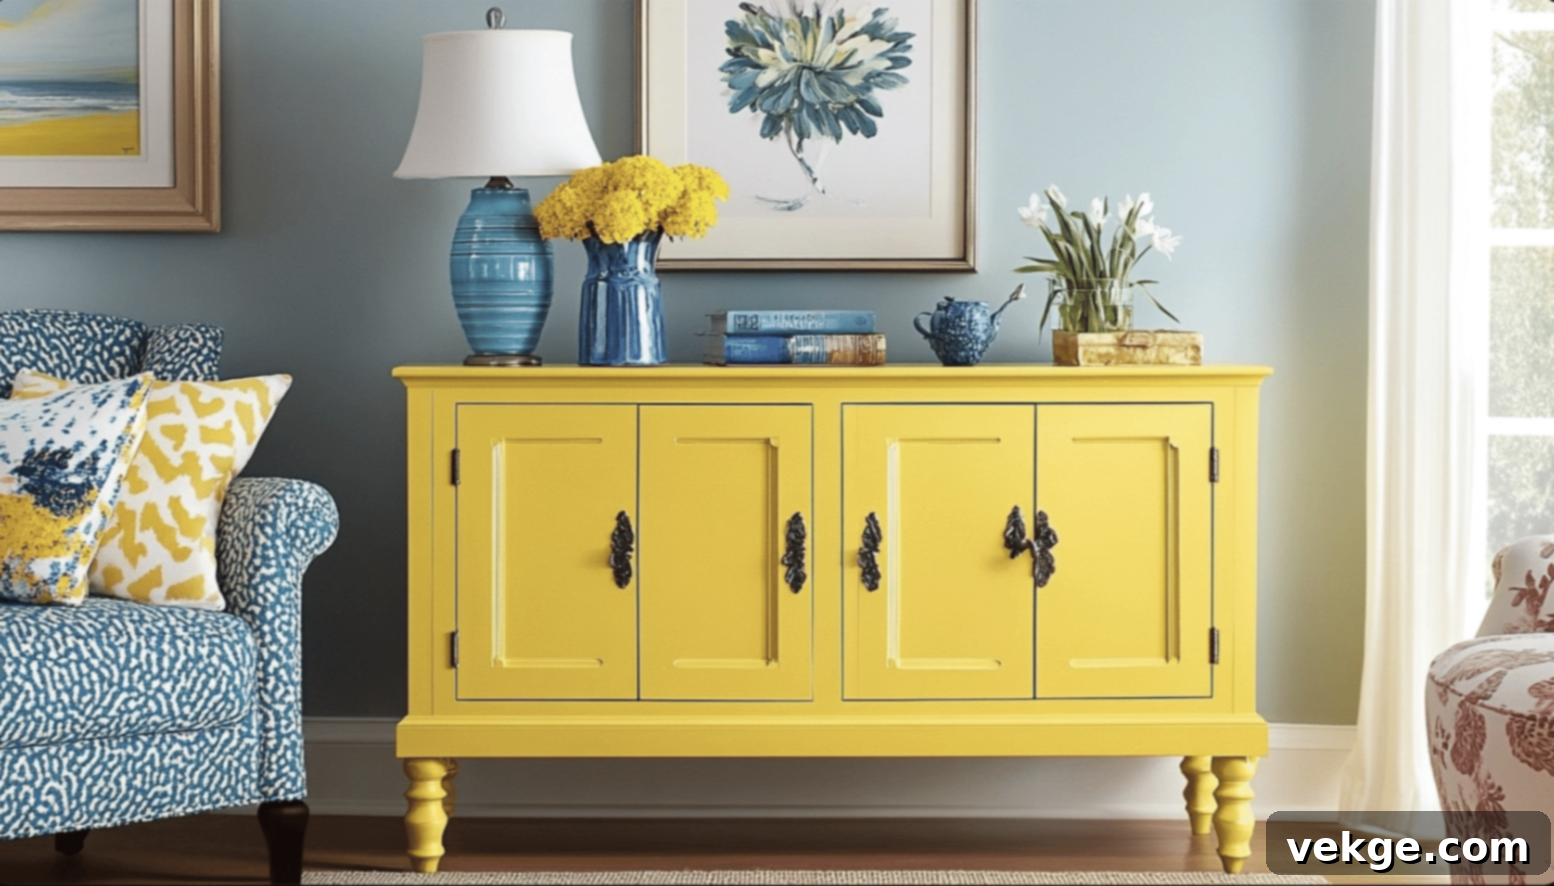
Adding legs to your furniture isn’t just about a fresh look; it’s a smart upgrade that enhances functionality, prolongs lifespan, and improves your living environment. Let’s explore the numerous advantages this simple DIY project offers.
1. Style Updates and Instant Transformation
Fresh Look for Old Pieces: Furniture legs are like the shoes of your decor – they can dramatically alter the entire outfit. A simple, flat-bottomed cabinet instantly gains character and elegance when lifted onto new legs. Whether you opt for sleek mid-century modern hairpins, classic bun feet, or sturdy industrial metal legs, this change is a powerful way to inject new life into tired or outdated pieces, making them feel bespoke and current.
Style Matching and Cohesion: Legs are powerful style indicators. They allow you to seamlessly integrate a piece into your existing decor or define a new aesthetic. Short, chunky legs might complement a rustic or farmhouse vibe, while tall, slender tapered legs scream modern sophistication. By carefully selecting leg styles, materials (wood, metal, acrylic) and finishes, you can ensure your upgraded furniture perfectly matches other elements in your room, creating a cohesive and harmonious design.
2. Enhanced Functionality and Practicality
Cleaning Made Simple: One of the most underrated benefits of raised furniture is the ease of cleaning. No more struggling to reach dust bunnies in tight, inaccessible spaces! With furniture lifted on legs, you can effortlessly sweep, vacuum, or mop underneath, maintaining a cleaner home and reducing allergens. This is especially beneficial for homes with pets or for those using robotic vacuums, as the increased clearance allows for unhindered cleaning.
Optimized Space and Storage: Adding legs creates valuable under-furniture space. This previously unused area can be perfect for sliding in low-profile storage bins, baskets, or even additional hidden compartments. For smaller rooms, this extra storage can be a game-changer, helping to declutter and maximize every inch without adding bulk to your floor plan.
Improved Ergonomics: Depending on the piece, adjusting its height with legs can also improve ergonomics. A coffee table that’s too low can be raised to a more comfortable height, or a bedside table can be adjusted to match the height of a new mattress, making it more practical and user-friendly.
3. Protection Benefits for Furniture and Floors
Floor Care and Protection: Lifting furniture off the floor protects both the furniture and your flooring. In damp areas like basements or bathrooms, it keeps the furniture’s base away from potential moisture, preventing water damage and mold. Quality legs, especially when paired with felt pads, also prevent scratches, scuffs, and indentations on hardwood, laminate, or tile floors, preserving their condition.
Enhanced Air Flow: The space created beneath raised furniture allows for better air circulation. This improved airflow can significantly reduce moisture buildup under heavy, solid pieces, which can otherwise lead to mold, mildew, or warping of the furniture itself. Better ventilation contributes to the longevity of your furniture and a healthier indoor environment.
Base Protection from Damage: Legs act as a buffer, elevating the main body of your furniture from direct contact with the floor. This protects the original base from everyday wear and tear, accidental spills, scuffs from cleaning tools, and accumulation of dirt and dust, effectively extending the lifespan and preserving the appearance of your furniture.
4. Room Enhancement and Visual Impact
Creating Visual Space: Furniture that floats on legs allows light and air to flow underneath, creating a sense of openness and lightness in a room. This visual trick makes spaces feel larger, less cluttered, and more inviting, especially beneficial in smaller apartments or compact living areas. The elevated perspective can also make furniture appear more elegant and sophisticated.
Easy Moving and Rearrangement: While a heavy piece of furniture might be a challenge to lift and move, the addition of sturdy legs (especially with felt pads) often makes it easier to slide and reposition. This simplifies cleaning, allows for quick room rearrangements, and reduces the risk of injury or floor damage during a move.
Essential Tools and Materials for Adding Furniture Legs
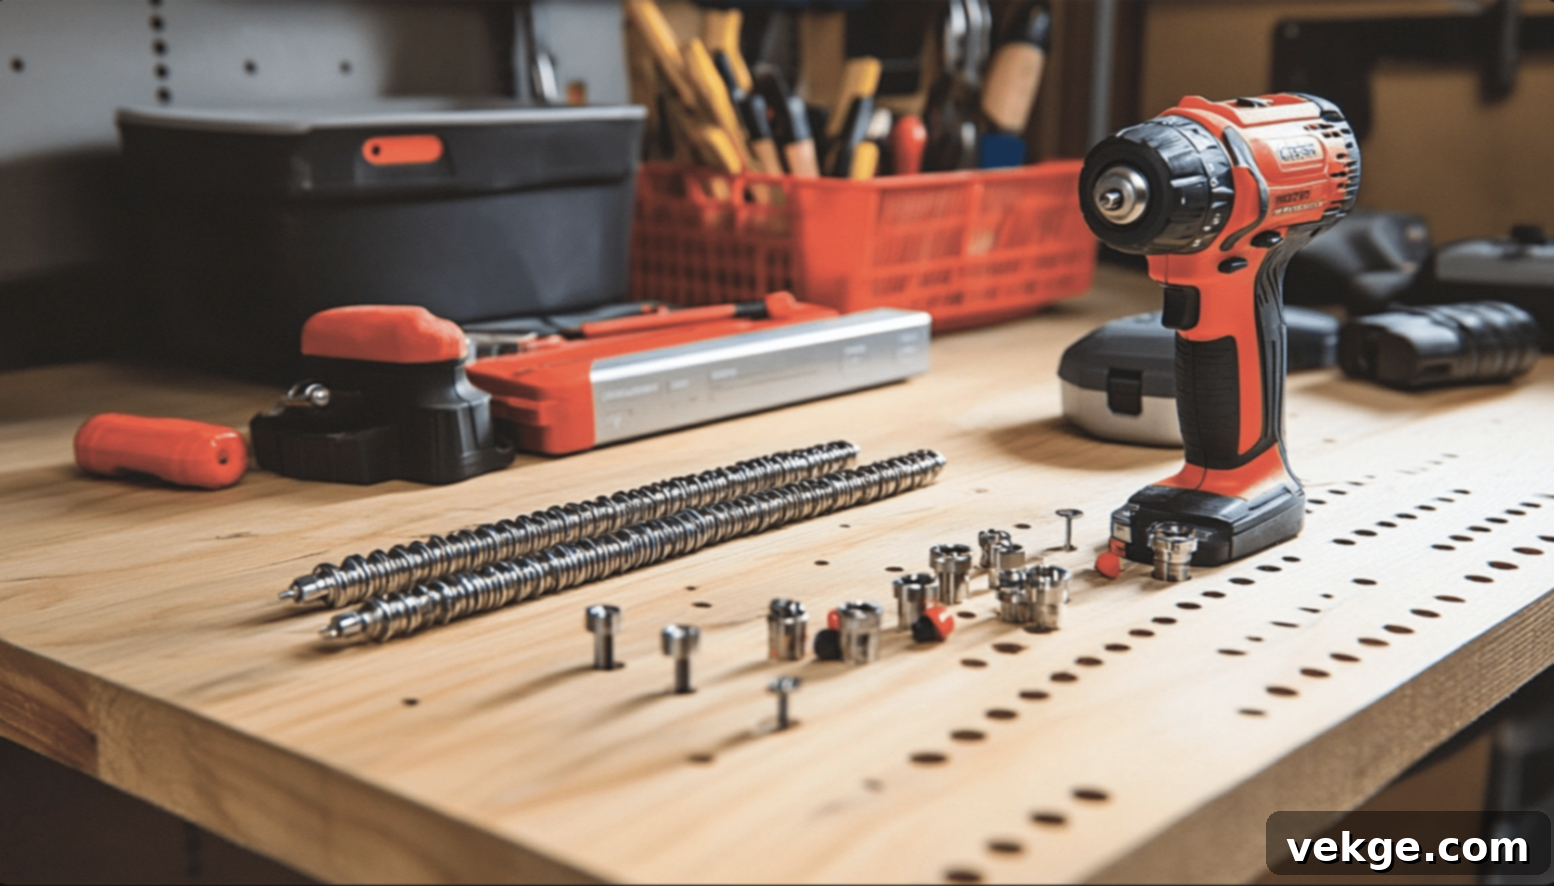
Successful furniture leg installation relies on having the right tools and materials. Most of these are common household items, but precise selection will make your project smoother and more secure. Here’s what you’ll need to gather:
Tools You’ll Need for a Smooth Installation
- Electric Drill: Your primary tool for creating pilot holes and securing screws. A cordless drill offers greater flexibility, while a corded drill provides consistent power. Ensure it has variable speed control.
- Drill Bit Set: You’ll need various sizes. Crucially, match your drill bits to the size of your T-nuts, bolt hangers, and wood screws. Pilot holes should always be slightly smaller than the screw diameter to ensure a tight grip without splitting the wood.
- Measuring Tape or Ruler: For accurate marking and consistent leg placement. Precision is key for stable furniture.
- Level: Essential for ensuring your leg marks are even and your finished piece sits perfectly flat. A small torpedo level is often sufficient.
- Hammer: Used for gently tapping T-nuts flush into pre-drilled holes. Choose one with a comfortable grip.
- Pencil or Marker: For clearly marking drilling spots. Use a light pencil for marks that can be easily erased or hidden.
- Safety Glasses: Always protect your eyes from wood splinters or debris when drilling.
- Work Gloves: To protect your hands from splinters and provide a better grip on tools and furniture.
- Optional: Clamps: Can be invaluable for holding support blocks or other pieces steady while gluing or screwing, ensuring a secure bond.
- Optional: Stud Finder: For upholstered pieces, this can help locate hidden wooden frame elements beneath the fabric.
Basic Materials for a Secure Attachment
The specific hardware you need will depend on your chosen legs and attachment method, but these are common components:
- T-nuts (approx. $0.50 – $1.00 each): These threaded inserts are essential for creating strong, permanent attachment points for legs that use bolts or bolt hangers. They have prongs that bite into the wood, preventing rotation.
- Mounting Plates (approx. $3-$5 each): Often used for legs with pre-installed bolts or for pieces where direct T-nut installation isn’t ideal. They provide a flat surface for legs to screw into and attach to the furniture’s base with screws. Angled mounting plates are available for splayed leg designs.
- Wood Screws: For attaching mounting plates or support blocks. Choose appropriate length and gauge for your materials.
- Bolt Hangers: If your legs don’t come with pre-installed bolts, bolt hangers are screws with a machine thread on one end (to go into the leg) and wood threads on the other (to go into the furniture/T-nut).
- Support Wood Strips or Blocks: Crucial for reinforcing particleboard, MDF, or thinner bases. These are usually small pieces of solid wood that provide a sturdy surface for hardware attachment.
- Strong Wood Glue: Essential for permanently attaching support blocks or strips, creating a durable bond that enhances the structural integrity.
- Drop Cloths: To protect your floors and workspace from sawdust and accidental spills during the project.
- Felt Pads or Furniture Glides: Highly recommended to apply to the bottom of your new legs. These prevent scratches on your floors and make moving the furniture much easier.
Choosing the Right Furniture Legs: Style, Height, and Material
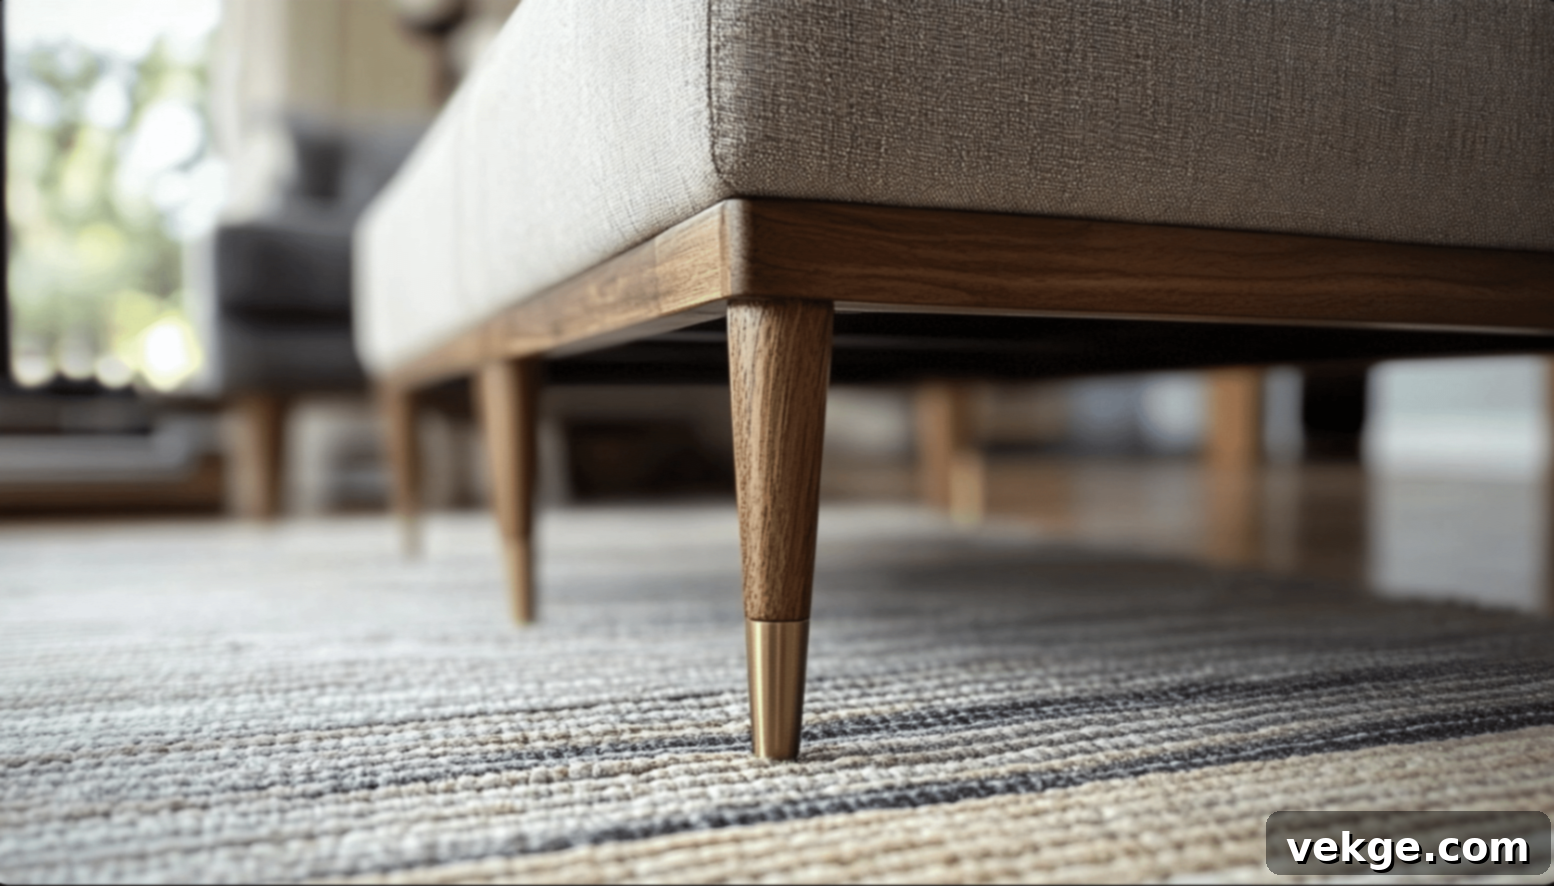
The legs you choose will largely define the new character of your furniture. Consider both aesthetics and practicalities to make the best selection.
Leg Basics: Material, Style, and Weight Capacity
Furniture legs come in a vast array of materials and styles, each offering a distinct look and level of durability. The most common and versatile options are wood and metal.
- Wood Legs: Ideal for classic, traditional, farmhouse, or even some modern styles. They are excellent at holding weight and can be stained or painted to match your furniture perfectly. A set of four quality wooden legs can range from $20-$40, depending on the wood type and craftsmanship. Types include:
- Bun Feet: Short, rounded, and often used on low pieces or for a classic, plush look.
- Tapered Legs: Slimmer at the bottom, offering a sleek, mid-century modern aesthetic.
- Straight Legs: Simple, clean, and versatile for a variety of designs.
- Queen Anne/Cabriole Legs: Elegant, curved legs for traditional or antique-inspired pieces.
- Metal Legs: Often more suited for modern, industrial, or minimalist designs. They can be very strong and come in various finishes like matte black, chrome, or brass. Metal legs, such as hairpin legs or industrial pipe legs, can often be more budget-friendly than elaborate wooden ones, starting from $15-$30 for a set of four.
- Hairpin Legs: Iconic, slender, and minimalist, perfect for mid-century or contemporary pieces.
- Industrial Pipe Legs: Rugged, utilitarian, and ideal for a loft or urban aesthetic.
- Sleek Tapered Metal: Similar to wooden tapered legs but with a more modern, metallic finish.
- Other Materials: Acrylic legs offer a contemporary, almost invisible look, while salvaged items like antique table legs or custom-fabricated pieces can add unique charm.
Consider your furniture’s style and weight: Wooden legs generally handle more weight due to their solid structure, while metal legs offer a sleek, often lighter visual profile. Always check the weight capacity specified by the leg manufacturer.
Getting the Height Right: Functionality and Visual Impact
The height of your new legs is critical for both the functionality and the visual balance of your furniture. Consider the intended use of the piece:
- Nightstands & End Tables: Typically, 4-6 inches high is comfortable, allowing for easy access to items.
- Sofas & Armchairs: Legs usually range from 6-8 inches high, providing comfortable seating and clearance for cleaning.
- Storage Pieces (Dressers, Cabinets): 3-5 inches can be ideal, offering enough lift for cleaning without making the piece feel too tall or unstable.
- Coffee Tables: Legs typically fall in the 10-18 inch range, depending on your sofa height and preference.
PRO TIP: Always set your legs back at least half an inch from the edges of your furniture’s base. This slight recess prevents accidental stubbing of toes, protects the legs from bumps, and creates a more aesthetically pleasing, finished look. Shorter, wider legs generally offer greater stability for heavier pieces. Before making a final purchase, consider mock-ups: use blocks of wood or books to simulate the leg height and test how it looks and feels with your furniture.
Preparing Your Furniture for New Legs: Precision is Key

Proper preparation is paramount for a successful and stable installation. Take your time with these steps to ensure your new legs are perfectly aligned and securely attached.
1. Inspect, Clean, and Clear the Base
Begin by giving your furniture a thorough inspection and cleaning:
- Turn it Upside Down: Carefully flip your furniture over or place it on its side, ensuring it’s stable and won’t tip. Use blankets or towels to protect its finished surfaces.
- Clean the Bottom Surface: Wipe down the entire underside to remove dust, dirt, and grime. A clean surface allows for accurate marking and ensures any glue or mounting plates adhere properly.
- Look for Damaged Spots: Inspect for any existing cracks, splits, or weak points in the base material. Address these with wood filler or reinforcement before proceeding.
- Remove Old Hardware: If the furniture had existing legs or mounting hardware, carefully remove them. Ensure the surface is as flat and clear as possible.
With the base clean and clear, use your pencil to lightly mark your intended work spots. Keep these marks faint initially, as you’ll refine them, and you don’t want visible traces later.
2. Making Strong Points: Reinforcement for Stability
The strength of your leg attachment depends entirely on the integrity of the material you’re drilling into.
- Identify Solid Attachment Areas: For solid wood, you’re usually good to go. For particleboard, MDF, or hollow bases, you’ll need to create solid attachment points.
- Add Wood Support Blocks/Strips: If your furniture’s base is not solid, cut pieces of solid wood (e.g., 3/4″ thick plywood or common pine boards) to fit the corners or wherever legs will attach. These blocks should be slightly larger than the footprint of your mounting plates or T-nuts to provide ample surface area.
- Attach Reinforcement: Secure these wood strips or blocks using a combination of strong wood glue and wood screws. Apply glue generously, position the block, and then pre-drill pilot holes before driving screws through the support block into the furniture base. Ensure the screws are long enough to bite firmly into the furniture but not so long that they protrude through the top surface. Let the glue dry completely (check manufacturer’s instructions, often 24 hours) for maximum strength.
- Check for Evenness: Ensure any added support pieces are level and flush with the surrounding surface to avoid creating new wobbles.
TIP: For very thin particleboard bases, consider using longer wood screws that go entirely through the furniture’s base and into the support strip, or even consider through-bolting for maximum strength if the design allows.
3. Finding the Right Spots: Precise Marking
Accurate placement is crucial for both stability and aesthetics.
- Measure from Each Corner: Using your measuring tape, carefully measure in from two perpendicular edges (e.g., 1.5 inches from the side and 1.5 inches from the front) to determine the exact center point for each leg.
- Maintain Setback: As mentioned, aim to place legs 1/2 inch to 1 inch inward from the furniture’s edges. This creates a more refined look and protects the legs. Mark these precise points with your pencil.
- Ensure Symmetry: Double-check that all corresponding marks are equidistant from their respective edges. Use a ruler or a square to ensure your marks form a perfect square or rectangle.
- Test with a Level: After marking, place your legs (or just the mounting plates) over the marked spots and visually check for alignment. Use a level to ensure the theoretical plane formed by the leg bases is perfectly flat.
Crucial Reminder: Measure twice, drill once! Incorrectly marked spots will result in wobbly furniture and unnecessary repair work. Take your time to get this step absolutely right.
Attachment Methods for Different Furniture Types
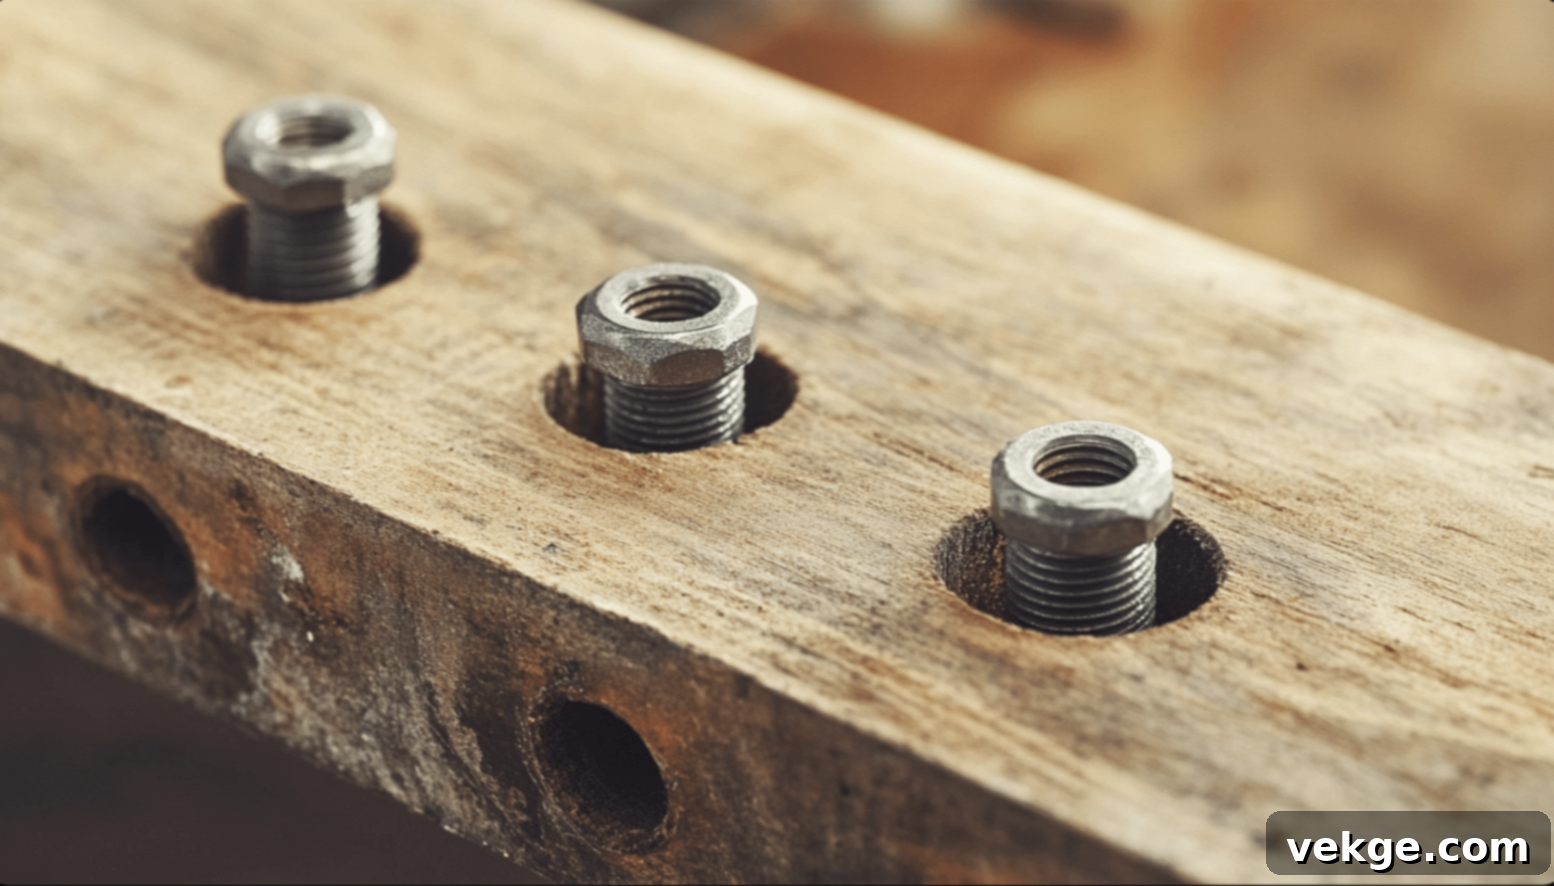
The method you use to attach your new legs is critical for security and stability. The most common and robust approach is the T-nut method, but different furniture materials may require variations or alternative techniques.
T-Nut Method: The Strongest and Most Common Way
The T-nut method provides a highly secure, threaded connection for furniture legs that have a pre-installed bolt or that use bolt hangers. It’s suitable for solid wood and reinforced particleboard/MDF.
Steps to Install Using T-Nuts:
- Drill Pilot Holes: At each marked leg placement, use your drill to create a pilot hole. The drill bit size for this hole must perfectly match the diameter of the T-nut’s barrel (the part that goes into the wood), ensuring a snug fit. Drill to the exact depth of the T-nut’s barrel.
- Insert and Tap T-Nuts: Place a T-nut over each pilot hole, ensuring its prongs are facing the wood. Using a hammer, gently but firmly tap the T-nut into the hole until its flange (the flat part) is completely flush with the surface of the wood. The prongs will embed themselves, preventing the T-nut from spinning.
- Prepare Legs (if needed): If your chosen legs don’t have a pre-installed bolt, you’ll need to insert a bolt hanger into each leg. Pre-drill a pilot hole into the center of the top of the leg, then screw the bolt hanger into the leg until the wood-threaded end is fully seated.
- Attach Legs: Align the bolt on the leg (or the bolt hanger in the leg) with the threaded opening of the T-nut. Carefully turn the leg clockwise until it is fully tightened against the furniture’s base. Do not overtighten, as this can strip the threads or damage the wood.
When correctly installed, the T-nut method creates a very strong, stable, and easily removable connection, allowing you to change legs in the future if desired.
Special Cases: Adapting to Different Furniture Materials
Not all furniture bases are created equal. Adjust your approach based on the material for optimal results.
- Solid Wood: Direct T-Nut Install or Mounting Plates: For solid wood, you can directly install T-nuts as described above. Alternatively, if your legs come with surface-mount plates (e.g., L-brackets or flat plates), simply position them over your marked spots, pre-drill pilot holes, and secure them with wood screws.
- Particleboard/MDF: Essential Wood Base Reinforcement: As discussed in the preparation section, always add a solid wood support block or strip to the underside of particleboard or MDF furniture first. Once these blocks are securely glued and screwed in place, you can then proceed with the T-nut method or attach mounting plates to these reinforced areas. Without this reinforcement, screws will likely strip, and legs will become wobbly.
- Upholstered Furniture (Hidden Frame): Mounting Plates are Key: After locating the solid internal frame of your upholstered piece, you’ll typically use mounting plates. You might need to make small incisions in the fabric to expose the frame for attachment. Screw the mounting plates directly into the solid wood frame, then attach your legs to the plates. Ensure any fabric cut is minimal and won’t unravel.
- Metal Frame Furniture: Specialized Mounting: For furniture with a metal frame, you’ll need metal-specific mounting plates and self-tapping metal screws. If the frame has pre-drilled holes, use those. If not, you may need a drill bit designed for metal to create pilot holes before screwing in the plates. Welding is an option for permanent, industrial-strength attachment, but this requires specialized tools and expertise.
- Softwood or Fragile Bases: Extra Support Blocks Needed: For furniture made of very soft woods (like pine or cedar) or older, potentially brittle wood, larger support blocks or even through-bolting (where a bolt passes entirely through the furniture and is secured with a nut on the inside) might be necessary to distribute the load and prevent the wood from splitting or crushing.
Remember these critical tips for any attachment method:
- Pre-Drill All Holes: This prevents wood splitting and ensures screws go in straight.
- Keep Screws Straight: Drive screws in perpendicular to the surface for maximum holding power.
- Don’t Over-Tighten: Especially with power tools, over-tightening can strip threads or damage the wood. Tighten until snug, then give a quarter turn.
- Test Weight Before Finishing: Once all legs are attached, gently set the furniture upright and test its stability. Push and pull gently from different directions.
If the piece feels wobbly at any point, stop and re-check your work. Loose connections or misaligned legs will only worsen over time and could lead to furniture damage or instability.
Safety Tips and Best Practices for Your DIY Furniture Project

Safety should always be your top priority when undertaking any DIY project. Following best practices ensures not only your personal well-being but also the longevity and stability of your furniture. Here are essential tips to keep in mind:
Essential Safety Points During Installation and Use:
- Wear Personal Protective Equipment (PPE): Always wear safety glasses to protect your eyes from flying debris or wood splinters. Gloves can prevent cuts and splinters, and ear protection is advisable if using loud power tools for extended periods.
- Secure Your Workspace: Ensure your work area is clear of clutter. When flipping furniture, do so carefully, and place it on a stable surface or use sawhorses to keep it from wobbling while you work.
- Test Each Leg’s Strength: Before placing any weight on the furniture, gently push and pull each leg to ensure it feels firmly attached. Listen for any creaking or signs of weakness.
- Distribute Weight Evenly: Once in use, encourage even weight distribution across all legs. Avoid placing excessively heavy items on one side of the furniture, which can strain specific legs.
- Stop Work If Wood Shows Cracks: If you notice the wood splitting during drilling or attachment, stop immediately. Address the crack with wood glue and clamps before proceeding, or reinforce the area.
- Check Measurements Twice: This cannot be stressed enough. Incorrect measurements are the leading cause of wobbly furniture. Double-check all marks before drilling any holes.
- Never Force Parts: If hardware doesn’t fit easily (e.g., a screw feels too tight, or a T-nut won’t tap in), re-evaluate. Forcing components can strip threads, damage wood, or break tools.
- Add Felt Pads Under Each Leg: These are crucial for protecting your floors from scratches and allowing easier movement of the furniture. They also help to slightly absorb minor unevenness in the floor.
Daily Care and Long-Term Maintenance Tips:
- Clean Dust from Leg Joints Often: Dust and grime can accumulate around the leg joints. Regular cleaning helps you spot any loosening or damage early.
- Watch for Floor Wear Marks: Periodically check the floor underneath your furniture for any new scratches or indentations. This can indicate that felt pads need replacing or that the furniture is being moved improperly.
- Keep Legs Dry in Wet Areas: If your furniture is in a bathroom or basement, ensure the legs don’t sit in standing water or excessive dampness, which can cause wood to swell or metal to rust.
- Pull Gently When Moving Furniture: When repositioning, lift if possible. If sliding, do so gently and avoid dragging, which can damage legs or floors.
- Listen for Squeaks or Creaks: These sounds are often early indicators of loose connections. Investigate them promptly.
- Replace Worn Felt Pads: Felt pads wear down over time. Replace them proactively to maintain floor protection.
- Tighten Legs If They Turn Loose: Regularly check the tightness of leg bolts. If any feel loose, gently tighten them by hand.
- Call Experts for Big Problems: If you encounter significant structural issues, persistent wobbles you can’t fix, or damage beyond your repair capabilities, consult a professional furniture repair specialist.
Finishing Touches for Your Furniture: Polish and Perfection
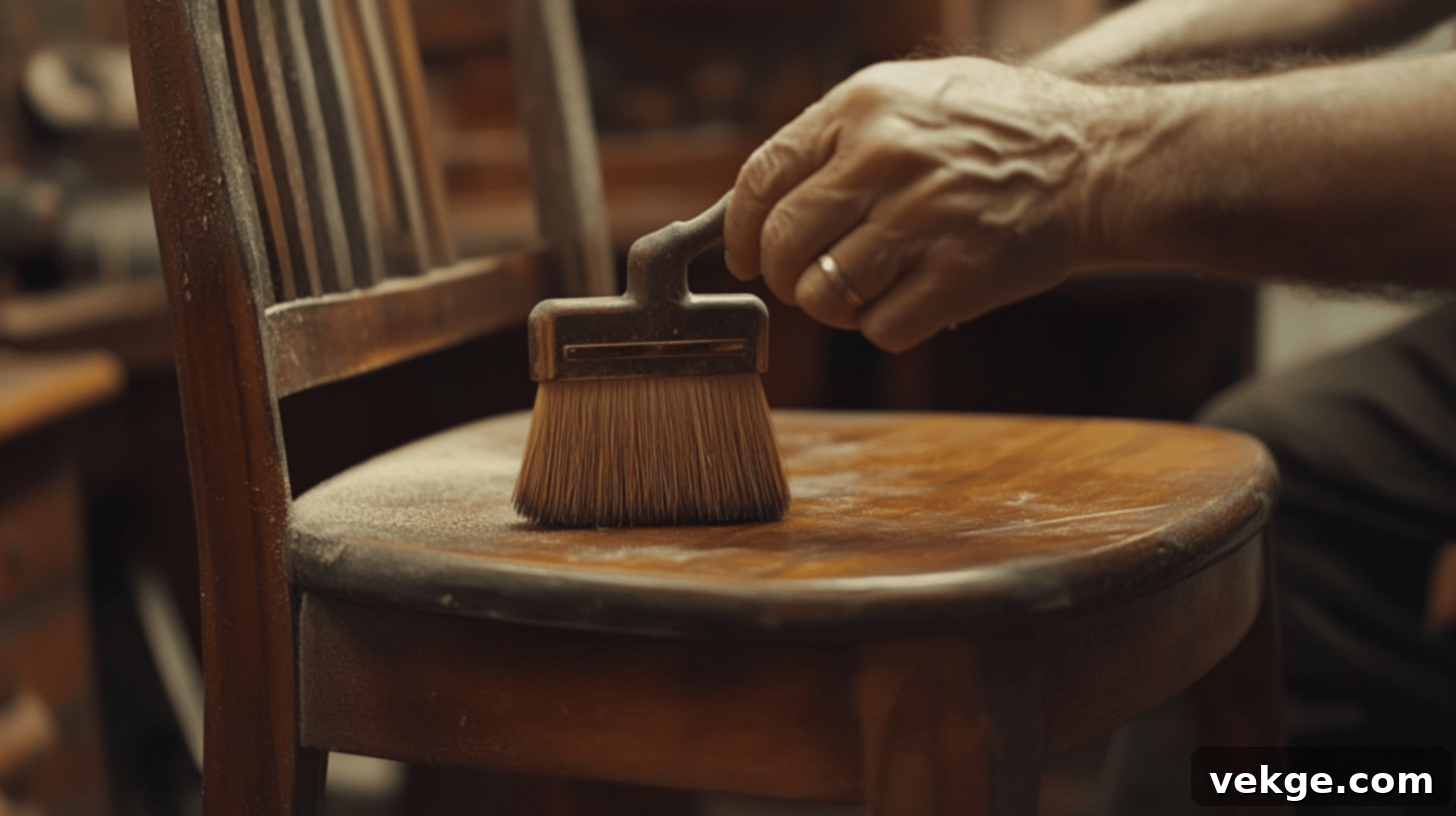
Once your new legs are securely attached, the final steps involve making everything look seamless and protecting your hard work. These finishing touches elevate your DIY project from functional to fabulous.
Making It Perfect: Achieving a Professional Finish
- Add Paint or Stain to Match Your Piece: If your new legs are unfinished, paint or stain them to either perfectly match your furniture’s existing finish or create a striking contrast. Apply thin, even coats for the best results.
- Wait 24 Hours for Paint/Stain to Dry Fully: Always allow ample drying time between coats and before handling the finished product. Rushing this step can lead to smudges or an uneven finish.
- Use a Clear Protective Topcoat: For added durability and protection against wear, scuffs, and moisture, apply a clear polyurethane, varnish, or lacquer topcoat. This also enhances the aesthetic appeal.
- Keep Colors Simple and Classic: When in doubt, opt for neutral colors (white, black, natural wood tones) or classic finishes that complement your room’s decor and won’t quickly go out of style.
- Fill Any Gaps with Wood Filler: If there are small gaps between the leg’s mounting surface and the furniture base, or minor imperfections from drilling, use a wood filler that can be stained or painted to match.
- Sand Rough Spots Until Smooth: Before applying any finish, lightly sand any rough edges or surfaces on the legs or the furniture’s underside. Start with a medium-grit sandpaper (e.g., 120-grit), then follow with a fine-grit (e.g., 220-grit) for a silky-smooth feel.
- Wipe Clean with a Soft Cloth: After sanding and between coats of finish, use a tack cloth or a slightly damp, lint-free cloth to remove all dust particles.
- Let Each Coat Dry Completely: Patience is key. Follow the manufacturer’s instructions for drying times for each coat of paint, stain, or topcoat to achieve a durable and beautiful finish.
Final Checks: Ensuring Long-Term Stability and Satisfaction
- Test All Legs on Flat Ground: Once the finish is dry, gently set the furniture upright on a known flat surface. Observe if all legs make firm contact with the ground.
- Push Gently from Each Side: Lightly push the furniture from various angles (front, back, sides, corners) to test for any wobbling or instability.
- Look for Even Gaps Under the Legs: If there’s an uneven gap under one or more legs, it indicates either an uneven floor or a problem with leg installation. Minor discrepancies can often be fixed with furniture shims or thicker felt pads.
- Check All Screws One Last Time: Give each screw or bolt a final snug turn with a screwdriver or wrench. Do not overtighten, but ensure they are secure.
- Add Floor Guards If Needed: If you haven’t already, apply felt pads or rubber glides to the bottom of each leg to protect your floors from scratches.
- Take Photos to Track Any Changes: Document your finished project! Not only is it satisfying, but it also provides a baseline if you ever need to troubleshoot issues down the line.
- Keep Spare Parts in a Marked Box: Store any leftover hardware, an extra felt pad, or a small amount of matching paint/stain for future touch-ups or repairs.
- Set Reminders for Monthly Checks: For heavy or frequently used pieces, a quick monthly check for loose legs or worn pads can prevent bigger problems.
Common Problems and Quick Fixes for Your DIY Leg Project
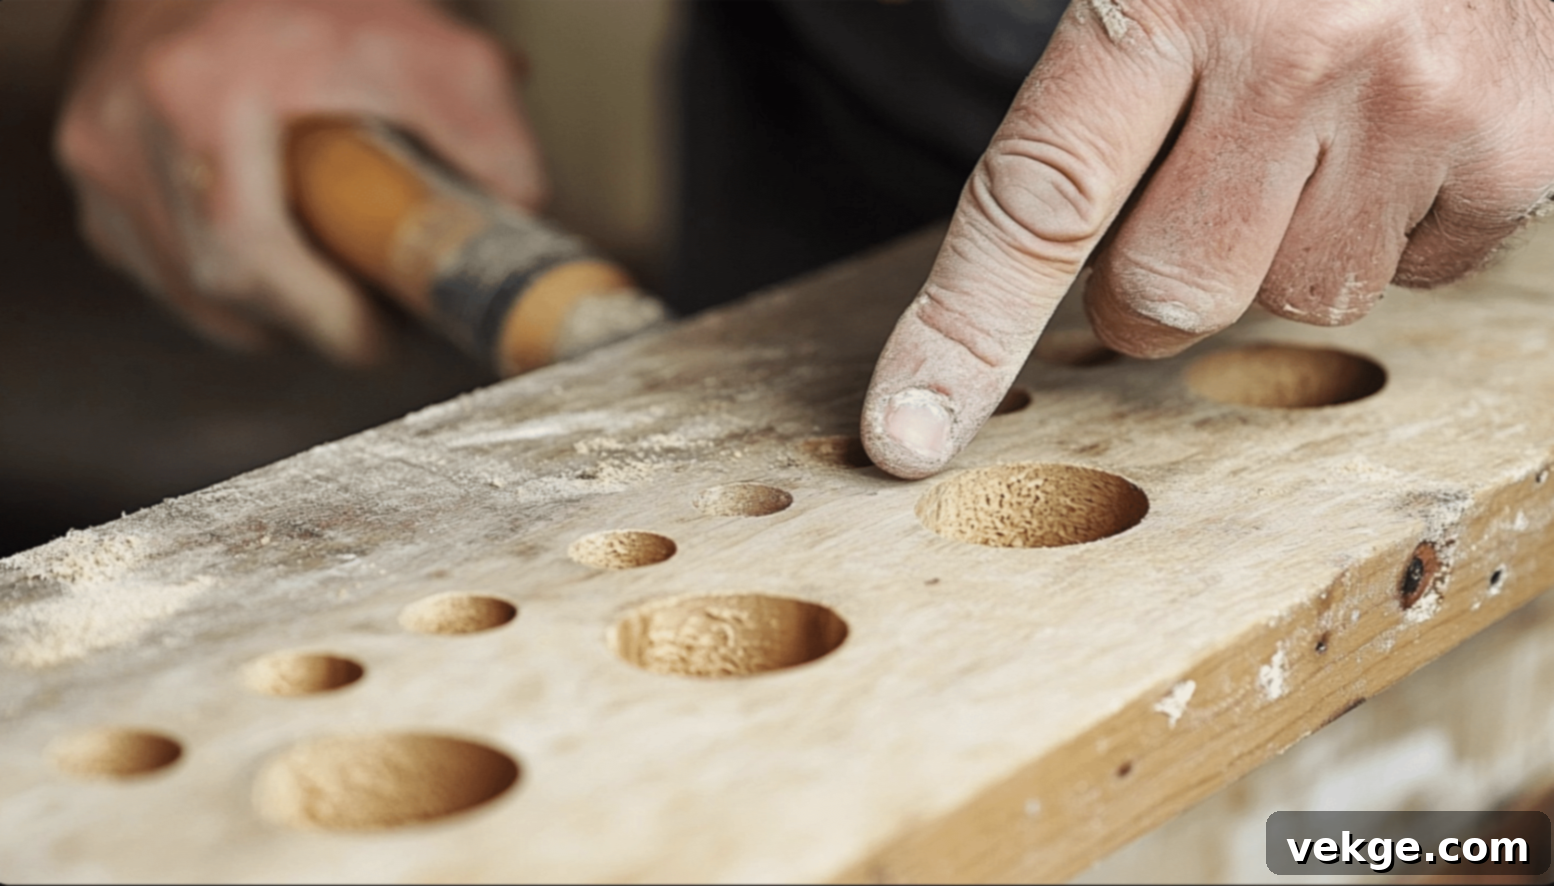
Even the most meticulously planned DIY project can encounter a snag or two. Don’t get discouraged if something doesn’t go perfectly; most common problems have simple, effective solutions. Here’s how to troubleshoot and get your project back on track.
1. When Things Go Wrong: Diagnosing Wobbles
The most common and frustrating issue is a wobbly piece of furniture. Before blaming your legs, first ensure your floor is perfectly level. Then, carefully examine your furniture:
- Check All Legs Touch the Ground Simultaneously: Gently try to slide a piece of paper under each leg. If the paper slides easily under one leg while the others are firm, that leg is too short, or the attachment point is uneven.
- Inspect T-Nut/Mounting Plate Seating: Often, a wobbly leg means the T-nut wasn’t tapped completely flush with the surface, or a mounting plate isn’t sitting flat.
- Loose Fasteners: Sometimes, the leg just needs a simple tightening. This is the easiest fix!
2. Fixing Basic Issues: Splits, Weakness, and Misalignment
- Wood Splits When Drilling: If you encounter a small crack or split while drilling pilot holes, immediately stop. Fill the crack with strong wood glue and clamp the area firmly until dry (at least 24 hours). For larger splits, you may need to add a thin piece of wood veneer or a small wood block behind the crack, gluing both parts together and securing with small screws if possible, before redrilling. Always pre-drill pilot holes to prevent splitting.
- Legs Feel Weak or Loose:
- Incorrect T-Nut/Bolt Size: Ensure the T-nut and the bolt on your leg are compatible sizes. Mismatched threads won’t hold securely.
- Stripped Threads: If a T-nut’s threads are stripped, carefully remove it and install a new, slightly larger T-nut in the same spot (after slightly enlarging the hole if necessary), or shift the attachment point slightly and install a new T-nut. For stripped bolt hangers in wooden legs, you might need to use a larger bolt hanger or apply wood glue to the threads before re-inserting.
- Loose Connections: Often, legs just need a quarter-turn with a wrench to tighten up. If using mounting plates, ensure the screws securing the plate to the furniture are tight.
3. Getting Back on Track: Addressing Measurement Errors and Crooked Legs
- Bad Measurements/Misaligned Holes: If your drilled holes don’t line up, or legs are crooked due to mis-marking, don’t despair. Fill the incorrect holes with wood putty, let it dry, sand it smooth, and then carefully re-mark and re-drill new holes. Take extra time on the marking step this time!
- Legs Don’t Turn Straight/Sit Crooked:
- T-Nut Not Straight: If a T-nut was tapped in crookedly, it will cause the leg to screw in at an angle. You might need to gently pry out the T-nut (being careful not to damage the wood) and re-install it straight, ensuring it’s flush.
- Obstructed Threads: Sometimes, wood debris or paint can get into the T-nut threads. Use a wire brush or a tap (threading tool) to clean out the threads.
- Apply Threadlocker: For persistently loose legs, a drop of removable threadlocker (like blue Loctite) on the bolt threads before screwing them into the T-nut can help secure them against vibrations.
Remember that even seasoned DIYers encounter problems. The key is to approach them methodically, diagnose the root cause, and apply the appropriate fix. Patience and persistence will lead you to a successful and sturdy furniture transformation.
Understanding Costs and Value: A Budget Breakdown
Adding legs to your furniture is a highly cost-effective way to achieve a significant home upgrade. The investment is minimal compared to buying new pieces, and the value added in terms of aesthetics and functionality is substantial. Here’s a breakdown of typical costs and smart money-saving tips.
| CATEGORY | ITEM | COST (Approximate) |
|---|---|---|
| Basic Supply Costs | Set of 4 wooden legs | $20-30 |
| T-nuts (4-8 pieces) | $2-4 (50¢-$1 each) | |
| Mounting plates (4 pieces, if needed) | $12-20 ($3-5 each) | |
| Wood glue (small bottle) | $5-8 | |
| Support wood strips (if needed) | $5-10 | |
| Basic screws and bolts | $3-5 | |
| Tool Investment (If starting from scratch) | Basic electric drill | $30-45 |
| Drill bit set | $15-20 | |
| Measuring tape | $5-10 | |
| Level | $8-12 | |
| Hammer | $10-15 | |
| Total Tool Cost | (Sum of above tools) | $68-102 |
| Money-Saving Tips | Buying legs in sets (often cheaper per leg) | e.g., $24 for 4 |
| Using scrap wood for support blocks | Free (if using existing scrap) | |
| Borrowing tools from friends or family | Free (if borrowed) | |
| Getting T-nuts in bulk (often cheaper) | e.g., $5 for 20 (25¢ each) | |
| Checking thrift stores or salvage yards for hardware | Variable (potential for great deals) | |
| Total Project Cost Estimate | With Owned Tools | $35-50 |
| With New Tools (first-time DIYer) | $100-150 |
As you can see, the direct material cost for upgrading a piece of furniture with new legs is remarkably low, typically falling within the $35-$50 range if you already own basic tools. Even if you need to purchase essential tools, the total investment is still very reasonable for the significant impact it has on your home. This DIY project offers exceptional value, extending the life of your furniture, enhancing its appeal, and personalizing your space without the hefty price tag of buying entirely new pieces.
Lesser Known Facts About Furniture Legs

Beyond their practical function, furniture legs carry a rich history and surprising significance in design and culture:
-
Ancient Origins and Symbolism: The earliest examples of decorative furniture legs date back to ancient Egypt, as far as 3000 BCE. They were often meticulously carved to resemble the legs of animals such as lions, bulls, or gazelles. These animalistic forms weren’t merely aesthetic; they symbolized strength, stability, and sometimes even the divine protection of the animal spirit, reflecting the importance of the furniture’s owner.
-
A True Style Indicator: The specific style of a furniture leg can reveal a great deal about a piece’s age, geographic origin, and the prevailing fashion trends of its era. For instance, the elegant, S-shaped cabriole leg, inspired by animal hind legs, is a defining characteristic of 18th-century French Rococo and English Queen Anne furniture, while turned and fluted legs are hallmarks of neoclassical designs.
-
Versatility in Modern Design: Contemporary furniture design has pushed the boundaries of leg materials far beyond traditional wood. Today, you’ll find legs crafted from robust metals like steel, sleek and transparent acrylic, delicate yet strong glass, and even innovative composite materials or recycled plastics, showcasing a blend of advanced technology and evolving aesthetics.
-
Innovations for Ergonomics: Adjustable legs represent a significant recent innovation in furniture design. These clever mechanisms allow the height of a piece to be easily altered, adapting to different users, tasks, or ergonomic needs. This feature is particularly valuable for desks, crafting tables, or even kitchen islands, offering personalized comfort and versatility.
-
A Powerful Preservation Tool: Beyond their transformative visual impact, adding legs serves a crucial practical purpose: preservation. By elevating the furniture’s base off the floor, especially in environments prone to dampness or fluctuating humidity, legs significantly enhance airflow and protect against moisture damage, ultimately prolonging the piece’s structural integrity and overall lifespan.
Video Tutorial: See It in Action!
Sometimes, seeing is believing. For those who prefer a visual guide, this video tutorial provides a clear demonstration of the process. It’s a fantastic resource to complement the written instructions and help you visualize each step.
For more detailed visual guidance, check out this excellent video by Glenda Chavez.
Conclusion: Elevate Your Home with Confidence
Congratulations! You’ve learned that adding legs to your furniture, while it might initially seem daunting, is an incredibly rewarding and accessible DIY project. With a modest investment of around $35-$50 for materials and just a few hours of your time, you possess the knowledge and confidence to profoundly alter the look, feel, and functionality of your cherished pieces. This is more than just a home improvement project; it’s an act of creative transformation that personalizes your space and breathes new life into the familiar.
Remember to approach each step with patience and precision. Take your time selecting the right legs, meticulously preparing your furniture, and carefully executing the attachment method. Watch as your furniture quite literally rises to new heights, gaining enhanced style, improved usability, and increased durability. Start with a smaller, simpler piece, like a side table or a nightstand, to build your confidence before tackling larger items.
We encourage you to share your triumphs! Post a photo of your finished furniture transformation in the comments below. If you encounter any challenges along the way, don’t hesitate to reach out – our community is here to offer support and advice. Have lingering questions before you even pick up a drill? Drop them in the comments, and we’ll do our best to guide you. Your next exciting furniture project is waiting for you to begin!
Frequently Asked Questions (FAQs)
What materials can I use for new furniture legs?
You have a wide variety of choices, including classic wood (oak, pine, maple), sleek metals (steel, aluminum, brass, iron), modern acrylic, or even more unique options like custom-fabricated designs or salvaged items such as vintage architectural pieces or sturdy tree branches, provided they are properly treated and secured.
Are specific brackets required for angled legs?
Yes, if you want your legs to splay outwards at an angle (a common mid-century modern aesthetic), you will need specific angled mounting plates. These plates are designed with a built-in angle that ensures the legs attach securely and consistently at the desired tilt, providing both stability and the correct aesthetic.
What’s the best way to attach legs to heavy furniture with drawers, like a dresser?
For heavy furniture, especially those with drawers full of items, prioritize strength and even weight distribution. Use heavy-duty mounting plates or the T-nut method with robust T-nuts and bolts. It’s crucial to reinforce the base with solid wood support blocks, even if the existing material is solid wood, to ensure maximum integrity. Ensure legs are strategically placed to bear the weight evenly, often directly under vertical supports within the furniture’s frame, and consider adding a fifth central leg for very long or exceptionally heavy pieces.
Can I add legs to an IKEA Kallax or similar particleboard unit?
Yes, you can, but it requires careful reinforcement. Since IKEA Kallax units are typically made of particleboard with hollow core sections, you cannot drill directly into them. You must first attach solid wood support blocks or strips (glued and screwed securely) to the underside where the legs will go. Once these reinforcements are in place, you can then attach T-nuts or mounting plates to these solid blocks for a stable leg installation.
How do I ensure my furniture legs are perfectly level?
After attaching the legs, place the furniture on a known level surface. If it wobbles, identify the shortest leg (or the leg not making full contact) using shims or a level. For minor discrepancies, you can use felt pads of varying thicknesses under the shortest leg(s). For more significant issues, you might need to slightly sand down the bottom of the longer legs or loosen and re-tighten the attachment of the problematic leg to ensure it sits perfectly flush.
