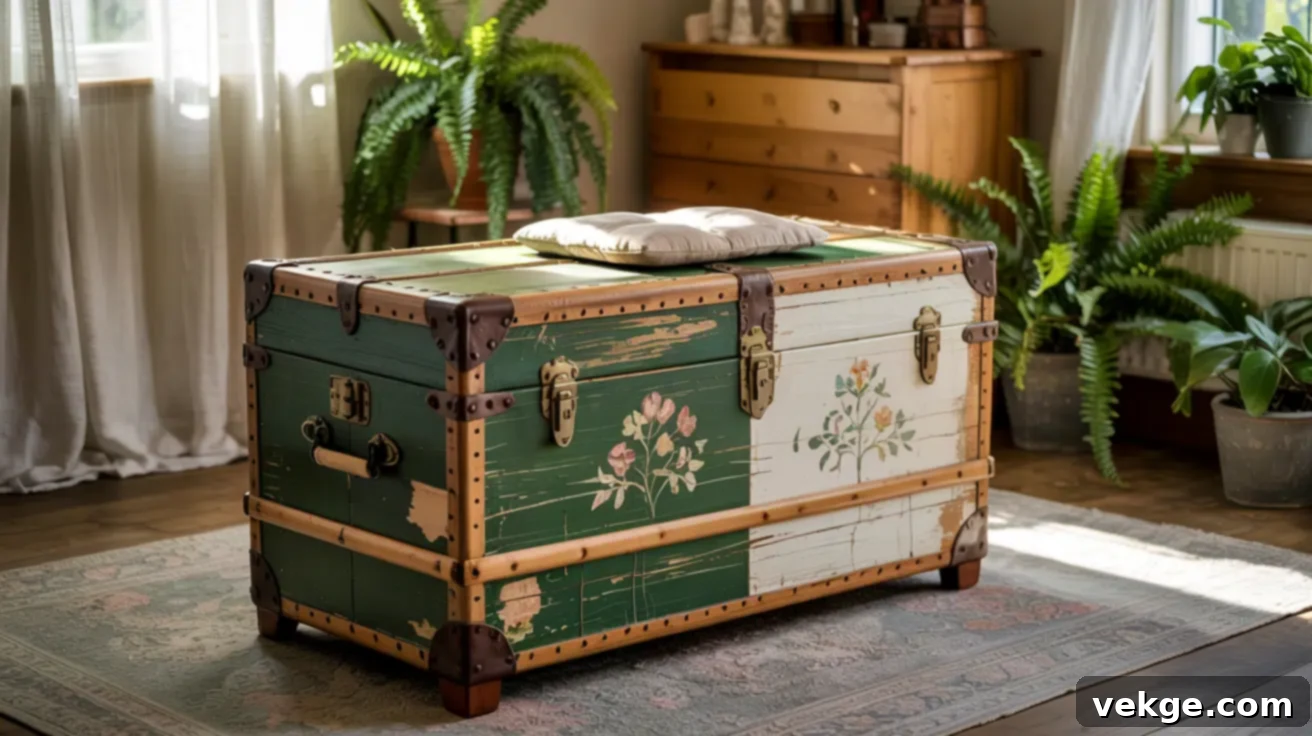
Transform Your Old Trunk: Ultimate DIY Makeover Ideas & Restoration Guide
Do you have an old trunk or chest tucked away in your attic, garage, or even a dusty corner of a spare room, just collecting forgotten items and dust? Many of us do! It’s a common scenario to hold onto these pieces, knowing they have potential but feeling unsure where to begin transforming them. This comprehensive guide is designed to empower you with simple, practical, and truly inspiring old trunk makeover ideas perfect for beginners and seasoned DIY enthusiasts alike.
You’ll embark on a journey to give your treasured trunk a new lease on life, imbuing it with fresh purpose and style. We’ll cover everything from easy paint upgrades and versatile interior lining options to essential minor repairs and exciting furniture transformations. Whether you’re seeking clever storage solutions, a unique decorative accent, or a functional piece of furniture to enhance your living space, these old trunk makeover ideas will guide you through the process step by step, ensuring a rewarding and beautiful outcome. Ready to unearth the hidden charm of your vintage piece and get started on a rewarding DIY project?
Why You Should Embrace Old Trunk Makeover Ideas
Beyond the simple act of redecorating, giving an old trunk a makeover offers a multitude of benefits that extend from personal satisfaction to environmental responsibility. Unlike mass-produced items, old trunks often boast solid craftsmanship and a unique visual character that sets them apart. They were built to endure, typically featuring robust construction and intricate details that speak volumes about their history and origin. These inherent qualities make them prime candidates for upcycling, allowing them to add unparalleled beauty and a sense of history to any modern space.
Choosing to give one of these forgotten treasures a second life is not only practical but also incredibly resourceful. It’s a wonderful way to reduce waste, contributing positively to sustainable living by diverting items from landfills. Furthermore, it offers a significant cost saving compared to purchasing new furniture, especially when you consider the quality and unique appeal of a restored vintage piece. This type of DIY project is remarkably approachable for beginners, requiring only a few basic tools and materials, yet it provides immense satisfaction and a sense of accomplishment for anyone who enjoys hands-on work. With a little creativity and effort, an old trunk can be transformed into a useful, personalized, and environmentally friendly addition to your home.
Inspiring Old Trunk Makeover Ideas for Every Style
The beauty of repurposing an old trunk lies in its versatility. Each makeover idea presented here brings a distinct function, aesthetic appeal, and varying level of effort, ensuring there’s something for every taste and skill set. Below, we’ve outlined eight popular approaches with clear guidance on estimated cost, project complexity, and where each transformed trunk might best fit into your home’s décor. Explore these ideas and envision which one resonates most with your personal style!
1. Rustic Farmhouse Chalk Paint Trunk
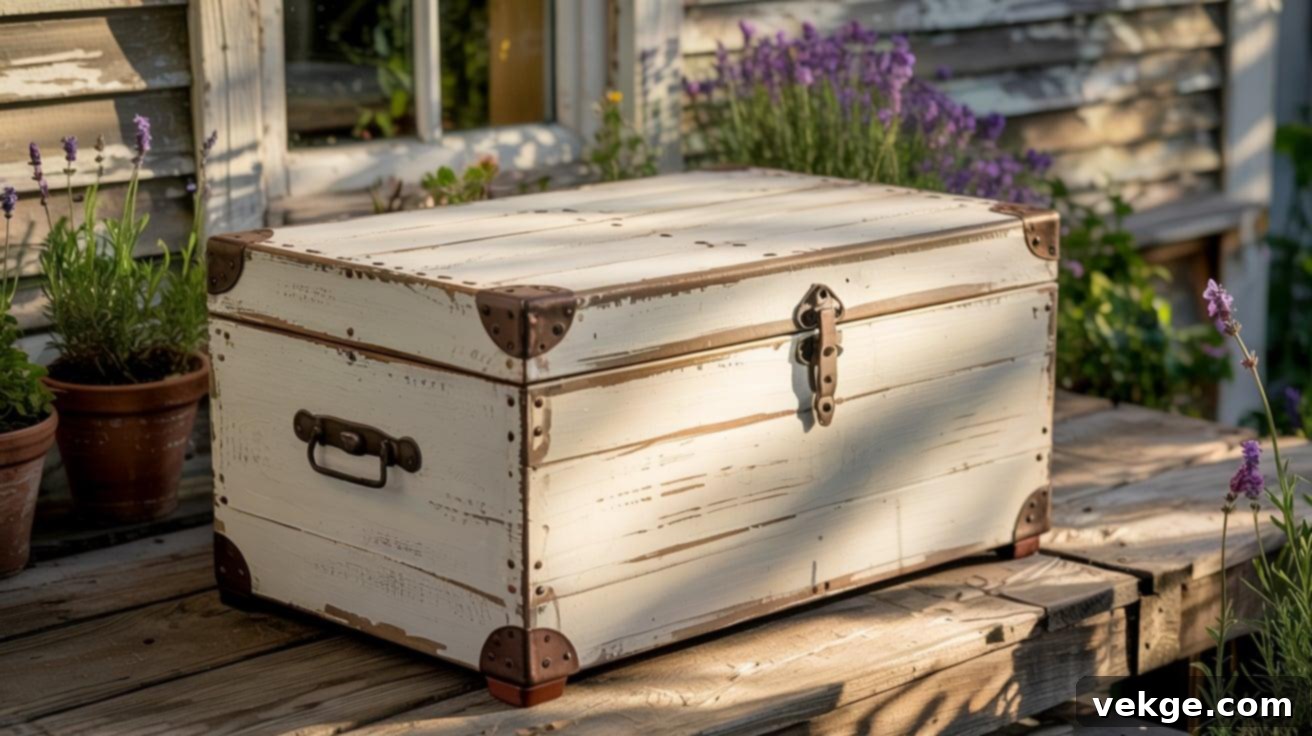
Embrace the cozy, inviting charm of the farmhouse aesthetic by using soft, muted shades like classic white, creamy ivory, or soothing sage green. These colors instantly lend a relaxed, rural look to your trunk. After painting, lightly sand the corners and edges to create a gently worn, distressed effect, mimicking years of natural aging. This style works exceptionally well as a welcoming focal point in entryways, a charming addition to bedrooms, or a functional yet beautiful piece in cozy living spaces.
This is one of the more affordable options and serves as a fantastic starting point for beginners. All it truly takes is a good quality brush, a sanding sponge for distressing, and one or two coats of a durable, furniture-friendly chalk paint for a clean but authentically down-to-earth result. You can further enhance the look with a clear wax finish for protection and a soft sheen.
2. Industrial Trunk with Black Metal Finish

Achieve a sleek, hard-edged, and contemporary look by applying matte or glossy black paint. This bold choice immediately gives the trunk a robust, utilitarian feel. To elevate the industrial aesthetic, pair it with striking gold or bronze accents on the existing handles and bolts, or consider adding rugged leather straps for a captivating contrast. This option fits seamlessly into home offices, creative studios, or modern loft apartments, adding a touch of urban sophistication.
This project falls into the moderate difficulty category primarily because meticulous surface preparation is essential, especially if your trunk has metal components that might be prone to rust. Using a rust-protective primer is crucial for longevity, and if you’re adding new metal details or hardware, strong, industrial-grade adhesives or secure fastenings are a must. This style makes the trunk feel heavier, more substantial, and purposeful in its design, often becoming a strong statement piece.
3. Boho Color Pop with Floral Stencils
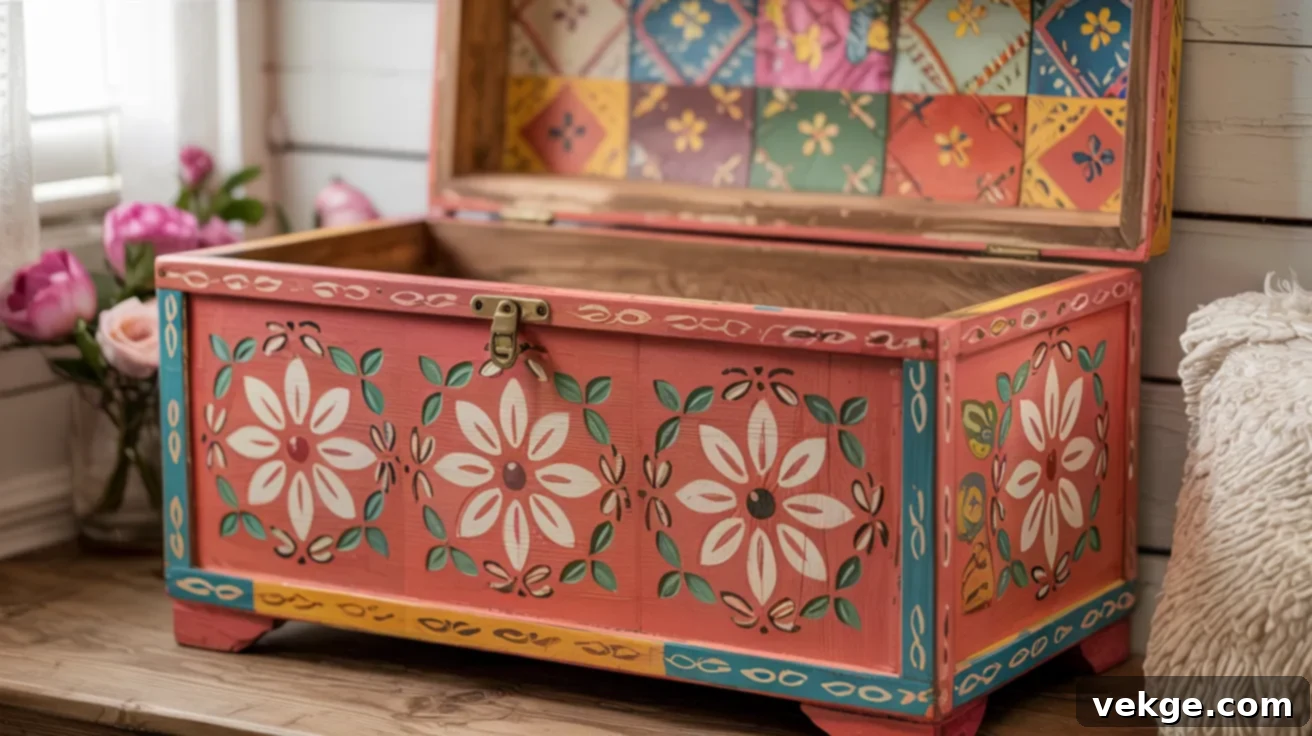
Infuse your space with vibrant energy by applying a bright, unexpected base color like lively coral, sunny mustard, or deep teal. Once dry, use intricate floral or tribal stencils to decorate the surface, applying the stencil patterns with either soft-toned contrasting paint or dazzling gold accents. For a truly immersive effect, line the inside of the trunk with colorful, patterned paper or fabric that complements your exterior design.
This design is perfect for adding warmth and a playful spirit to craft areas, children’s rooms, or any creative corner in your home. While the materials are affordable, it’s an intermediate project due to the precision required for stenciling and layering colors. It demands more care and patience during application, making it best suited for someone with a little prior DIY experience or a willingness to learn detailed techniques.
4. Nautical Rope-Handled Trunk
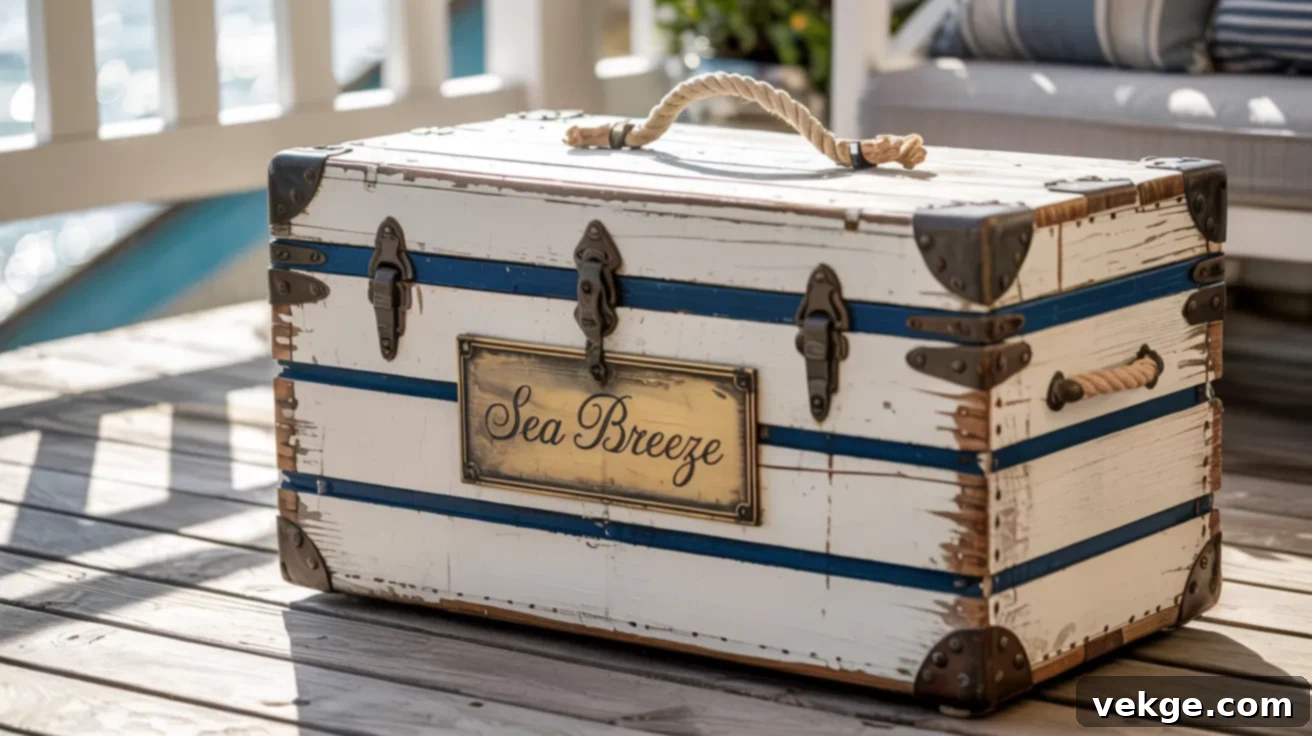
Evoke the breezy charm of the seaside with a nautical-themed trunk. Begin by choosing a classic base color, such as deep navy blue or crisp white. The defining feature of this makeover is the addition of sturdy rope handles to the sides, replacing any existing ones. If you have a bit more time and artistic flair, consider adding decorative striping in contrasting colors or a stylized compass pattern to the lid or front panel for an authentic touch.
This idea perfectly suits beach houses, bathrooms (if well-sealed against moisture), or covered patios. The materials are typically budget-friendly, though securely screwing in the new rope handles requires some effort and the right hardware. Keep in mind that rope handles can show wear over time, especially with heavy use, so moderate handling is advisable. This is a great weekend project that promises minimal mess and a refreshing aesthetic.
5. Vintage Decoupage with Book Pages
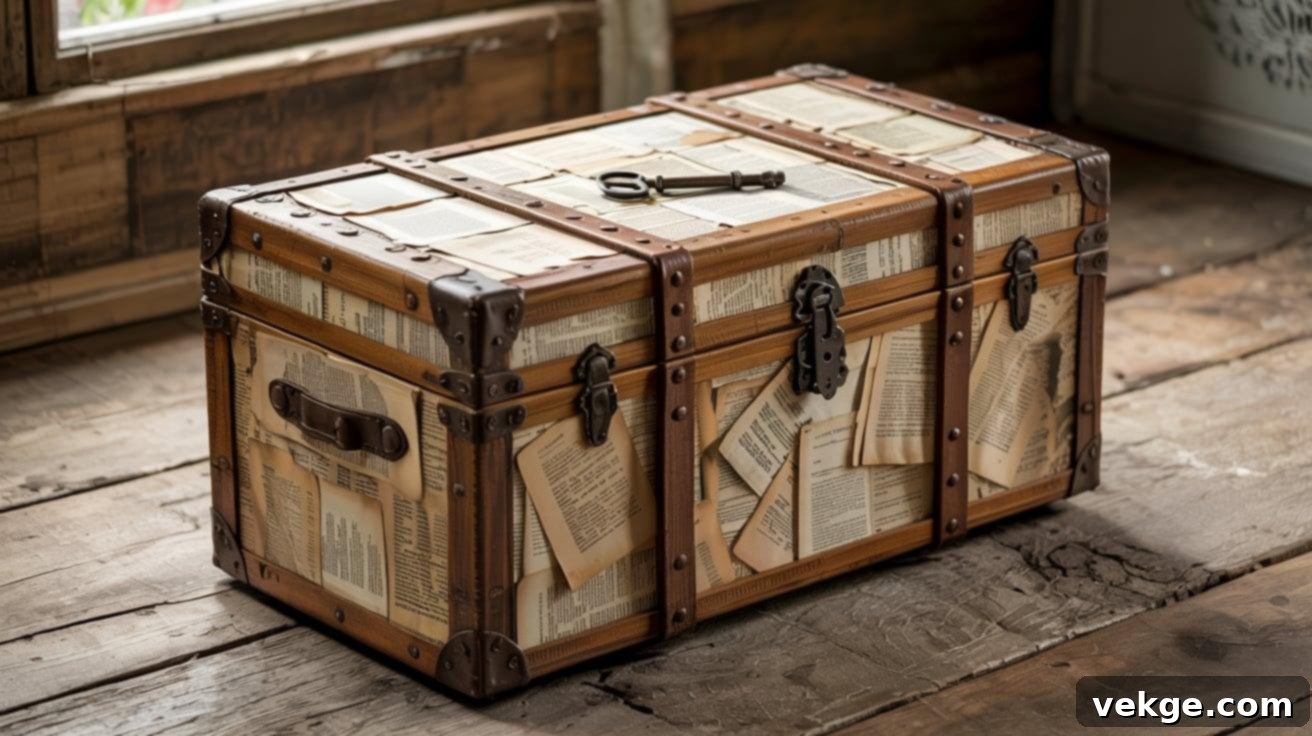
Create a truly unique and intellectual piece by decoupaging the surface with pages from old books, vintage maps, or even sheet music. Carefully glue down each page, overlapping them slightly to achieve a layered, aged finish. It’s crucial to let each section dry completely before moving to the next to prevent tearing or wrinkling. Once the paper collage is fully set and dry, apply several coats of a clear protective sealant to ensure durability and a smooth, wipeable surface.
This project is wonderfully suited for studies, home libraries, or cozy reading nooks, adding a profound sense of history and literary charm. It requires patience for the meticulous cutting and gluing of pages, but it’s a low-cost endeavor that doesn’t demand sanding or painting. This technique works best on trunks with relatively flat surfaces and minimal curves to ensure a smooth, unwrinkled application of the paper.
6. Coffee Table Conversion with Casters
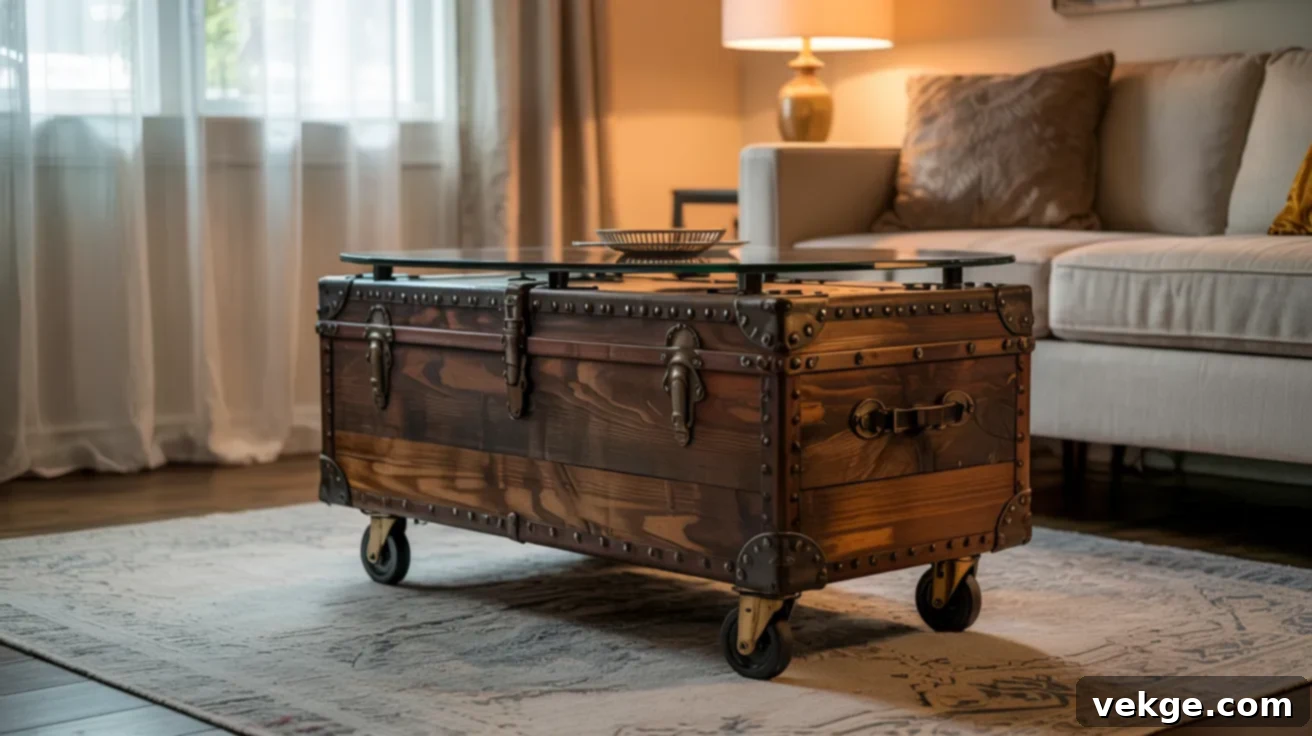
Transform your trunk into a stylish and functional centerpiece for your living room. Start by painting or staining the trunk to match your existing decor. The key step here is to install sturdy caster wheels on the bottom. This clever addition not only makes the trunk incredibly easy to move around your living space for flexibility but also elevates it, giving it a solid and defined role as a coffee table. For a smoother top surface, you can also add a custom-cut glass panel or a flat piece of reclaimed wood.
This design is highly practical and adaptable, fitting well into a wide variety of home layouts. The main challenge lies in securely attaching the caster wheels, which requires careful measurement, using appropriate washers, and strong bolts to ensure stability and prevent wobbling. The cost is moderate, depending on the quality of the hardware you choose, but the result is a lasting, functional piece with significant aesthetic appeal and utility.
7. Blanket Box with Upholstered Lid
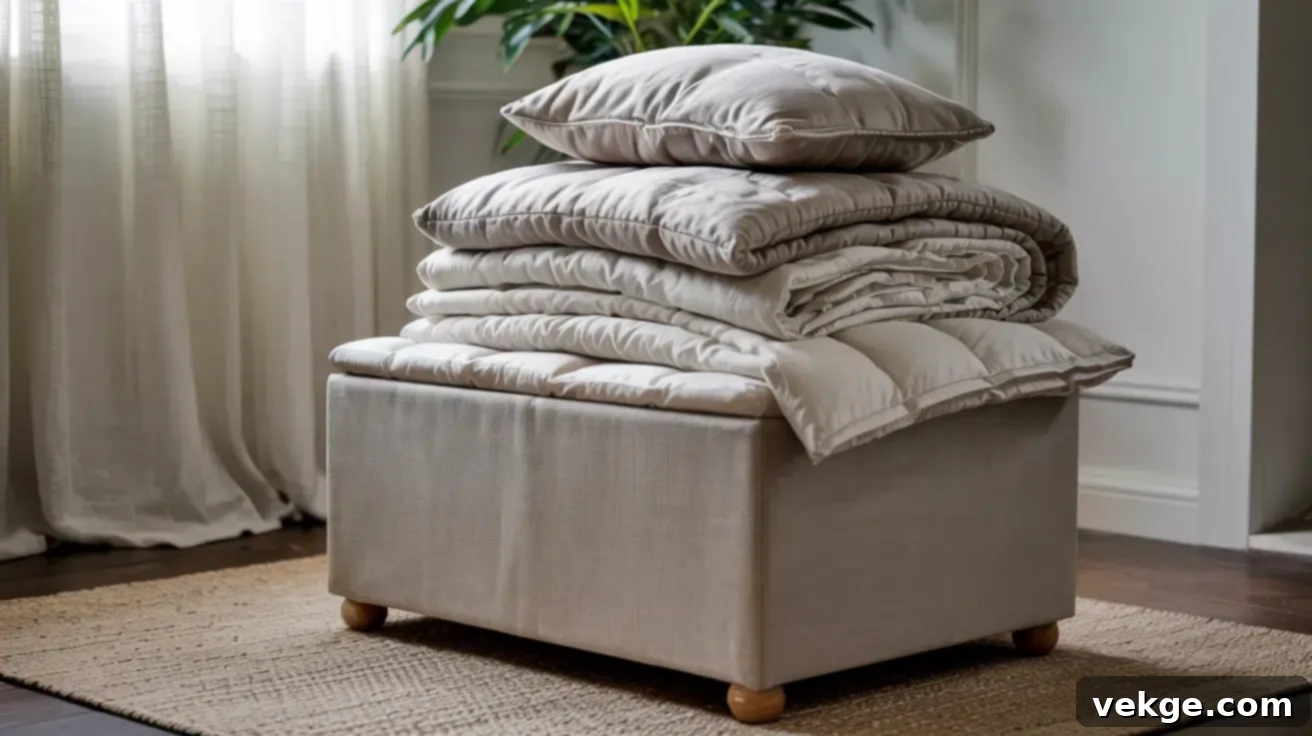
Combine comfort with clever storage by converting your old trunk into a beautiful blanket box with an upholstered lid. This involves covering the top of the trunk with a layer of foam and durable, attractive fabric, creating a cushioned surface. This design not only adds a touch of softness and luxury but also makes the piece highly functional as extra seating, especially in bedrooms at the foot of a bed or neatly tucked under a window. Inside, it provides ample space to store blankets, pillows, seasonal clothing, or other linens, keeping your space tidy and organized.
Essential tools for this project include a staple gun, sharp scissors, and possibly a utility knife for cutting foam. Materials will include upholstery foam (or pre-cut foam padding), batting for a smooth finish, and your chosen upholstery fabric. It’s slightly more advanced than a simple paint job, requiring some precision in cutting and stapling fabric, but the added comfort and visual appeal are well worth the effort. Choose a fabric that complements your room’s color scheme and is robust enough to resist wear and tear.
8. Kid’s Toy Chest with Chalkboard Paint

Ignite your child’s creativity and keep toys neatly stored with this fun and interactive makeover. Apply black or green chalkboard paint to the front panel, the entire lid, or even the sides of the trunk, creating a canvas where kids can draw directly with chalk. The remaining parts of the trunk can be painted in a vibrant, fun color or a playful pattern that complements your child’s room. This project is absolutely fantastic for playrooms, children’s bedrooms, or even preschool environments.
This project is exceptionally beginner-friendly and offers the wonderful advantage of allowing for regular design changes, keeping things fresh and exciting for children. For safety, ensure that any sharp corners are smoothed down, and consider installing soft-close hinges to prevent little fingers from getting pinched. It’s a very affordable, highly functional, and wonderfully interactive piece that encourages imaginative play while providing essential storage.
Interior Lining Ideas for Function & Beauty
While the exterior of your trunk gets all the attention, the interior lining plays a crucial role in both its aesthetic appeal and practical functionality. Lining the inside of a trunk significantly improves its appearance, concealing any rough surfaces, historical imperfections, or raw wood. More importantly, it adds character, provides a protective layer for stored items, and can even infuse a pleasant scent. The material you choose for the lining will depend on your desired style, durability requirements, and the specific purpose the trunk will serve.
When selecting your lining material, consider how frequently the trunk will be opened, what will be stored inside, and the overall look you’re aiming for. Each material offers unique pros and cons:
|
Material |
Pros |
Cons |
Best For |
|
Fabric |
Soft texture, wide range of patterns/colors, easy to match decor, adds warmth. |
Can stain or sag over time, requires spray adhesive or fabric glue, might fray at edges. |
Blanket boxes, upholstered seating trunks, toy storage, delicate items. |
|
Decorative Paper (Wallpaper, Gift Wrap) |
Affordable, incredibly easy to install, vast array of designs, simple to replace. |
Less durable than fabric or wood, prone to tearing, susceptible to moisture damage. |
Keepsake chests, purely decorative use, lightweight storage, temporary updates. |
|
Cedar Panels |
Natural pleasant scent, effectively repels insects (moths), highly durable, classic look. |
Higher initial cost, requires more woodworking tools and skill for installation, permanent. |
Long-term clothing storage, heirloom items, humid environments, pest prevention. |
For fabric or paper, measure precisely and cut templates. Use a strong spray adhesive or Mod Podge for paper, ensuring smooth application to avoid bubbles. For cedar, cut panels to fit snugly, using a strong wood glue and small brad nails to secure them, ensuring proper ventilation during and after installation for the scent to develop.
Step-by-Step: How to Make Over an Old Trunk
Transforming an old, dusty trunk into a beautiful and functional home accent doesn’t require complex tools or specialized skills. This step-by-step process is designed to be easy to follow, practical for all experience levels, and promises a highly rewarding outcome. Before you begin, ensure your trunk is thoroughly cleaned and free of any loose dirt or debris. A light sanding might be needed if the surface is particularly rough or has peeling paint.
Step 1: Apply Primer
Begin your makeover by thoroughly covering the entire surface of the trunk with a high-quality base primer. Primer is crucial because it creates an even, adhesive layer, helping your chosen paint stick uniformly and last significantly longer. Use a brush or roller to coat all sides thoroughly, paying attention to corners and crevices. Allow the primer to dry completely according to the manufacturer’s instructions before proceeding; rushing this step can lead to poor paint adhesion and an uneven final finish. Primer also does an excellent job of covering existing stains, odors, or imperfections in the original finish, providing a clean slate. A single coat is usually sufficient unless the trunk’s original color is very dark or the surface is unusually porous. Always ensure your workspace is well-ventilated during this stage.
Step 2: Paint the Trunk
Once the primer is fully dry, it’s time for the fun part: painting! Choose a paint shade that perfectly complements your space and desired style. For a smoother application, you might slightly thin acrylic or latex paint with a small amount of water, though many chalk paints are ready to use as is. Use a wide brush for larger areas and a smaller one for details, or a foam roller for a very smooth finish, to coat the entire surface evenly. Your goal is full, consistent coverage without streaks or clumps. Depending on the paint color, its opacity, and the desired texture, you will likely need a second coat after the first has dried. Be patient during drying times; typically, six hours is a good benchmark between coats. Avoid touching the freshly painted surface while it dries to prevent fingerprints, smudges, or dust from adhering.
Step 3: Add Raised Stencil Work
To introduce a decorative pattern and tactile interest, this step involves adding raised stencil work. First, ensure your painted trunk is completely dry. Position your chosen stencil securely on the trunk’s surface; painter’s tape can help hold it in place. Using a sculpting knife or a flat spreading blade, carefully spread texture paste (or joint compound) evenly across the stencil. Apply firm but consistent pressure to ensure the paste fills the stencil cut-outs cleanly and forms a distinct pattern. Carefully lift the stencil straight up immediately after application to avoid smearing the design. Let this textured layer dry thoroughly – this can take several hours depending on the paste thickness and humidity. Repeat the stencil application across other desired parts of the trunk, such as the front, sides, or lid, to create a consistent and visually engaging pattern that adds depth and sophistication.
Step 4: Highlight the Design
Once your textured patterns are completely dry and hardened, it’s time to bring them to life with highlights. Gently apply metallic wax, such as gold, silver, or bronze, over each raised design. You can use your fingertip for a soft, controlled application or a small, soft sponge for broader coverage. The goal is to enhance the surface detail and texture without overwhelming the base color of the trunk. Focus primarily on the raised parts of the stencil work to create a beautiful contrast and visual depth with the wax. Blend gently to avoid harsh edges, and you can vary the pressure for a softer, more subtle shimmer or a bolder, more pronounced metallic effect. This step is best performed under good lighting to fully appreciate how the highlights catch and reflect light, adding an extra dimension to your design.
Step 5: Add Detail with Paint
Further enhance the stenciled areas and other decorative elements by adding a thin layer of complementary paint. For example, if you used gold metallic wax, a fine brush with a touch of gold paint can go over the raised patterns, adding an extra layer of shine and precision. This step is entirely optional but can significantly boost the final, polished look. You can also use this opportunity to refresh or repaint existing trunk hardware, such as hinges, latches, handles, and decorative bolts, in the same metallic shade or a contrasting color for consistency and cohesion. Allow everything to dry completely before any further handling. The carefully applied metallic paint will catch light beautifully, highlighting the texture of the pattern while allowing the rest of the trunk’s surface to maintain a subtle elegance.
Step 6: Attach Legs or Feet
To elevate your trunk and enhance its functionality, consider attaching short legs or decorative feet to the bottom. This modification is particularly useful if you’re converting the trunk into a coffee table, a functional bench, or simply want to raise it off the floor for better access or aesthetic reasons. Carefully position each leg to ensure perfect balance and stability. Mark the attachment spots precisely and screw them in from the inside of the trunk where possible for a clean, professional finish, or use sturdy mounting plates. Choose legs that complement the overall color, style, and shape of your newly transformed trunk – options range from modern tapered legs to classic bun feet. This step helps solidify the piece’s new role in your home, so make sure everything is tightly fastened before use to prevent any wobbling or tipping.
Step 7: Seal with Varnish or Topcoat
Once all painting and detailing are complete and thoroughly dry, the final crucial step is to apply a clear sealant to protect your hard work. A water-based polyurethane varnish or a durable clear topcoat is highly recommended. Use a clean brush or sponge applicator to apply the sealant in even, smooth strokes across all painted and decorated surfaces. This protective finish is essential as it helps guard against moisture, scratches, scuffs, and general wear and tear, significantly extending the trunk’s lifespan and maintaining its beauty. Choose a matte, satin, or glossy finish based on the style you prefer for your trunk. Allow the coat to dry fully according to the product instructions – often requiring multiple thin coats with drying time in between – before placing items on or inside the trunk. This step is absolutely vital, especially if the trunk will hold heavier items, be used frequently, or moved around.
Step 8: Add Cushion (Optional)
For an added layer of comfort and versatility, consider placing a soft, custom-fitted cushion on top of your trunk. This optional step can transform your storage trunk into a comfortable bench or an inviting extra seat. You can either have a cushion professionally made to fit the exact dimensions of your trunk’s lid or repurpose a similar-sized cushion you might already have at home. When selecting a cushion, choose a fabric that not only matches your room’s color palette and aesthetic but is also durable and easy to clean, especially if it will see frequent use. You can secure the cushion with fabric ties, Velcro strips, or simply let it rest loosely on top if you prefer the flexibility to use the trunk for multiple purposes, alternating between seating and an occasional table.
Pro Tips & Restoration Advice
To ensure your old trunk makeover project is as smooth, clean, and long-lasting as possible, it’s wise to plan ahead and avoid common pitfalls. These trusted restoration practices will help you achieve professional-looking results and enjoy your upcycled piece for years to come.
Don’t Skip These DIY Mistakes
Even seasoned DIYers can overlook simple steps that lead to messy finishes or reduced durability. Keep these critical points in mind before and throughout your project:
- Inadequate Surface Preparation: Skipping cleaning and light sanding is a common error. Sanding matters immensely; it creates a “tooth” for paint to grip, improving adhesion and smoothing out minor flaws. Always clean off sanding dust thoroughly before priming.
- Ignoring Primer: While some paints claim “no primer needed,” for old, potentially stained, or very smooth surfaces, primer is your best friend. It blocks stains, evens out porosity, and ensures better, longer-lasting paint adhesion.
- Paint Bleed Prevention: When working with multiple colors, stencils, or around hardware, use painter’s tape around edges and hardware. Press it down firmly to create a crisp line and remove it while the paint is still slightly wet to prevent tearing.
- Insufficient Drying Time: Patience is key! Not allowing adequate drying time between coats of primer, paint, texture paste, or sealant is a primary cause of smudging, peeling, and poor finish. Sealant smudging is a real risk if not fully dry.
- Over-Application of Product: Applying paint or sealant too thickly leads to drips, uneven finishes, and longer drying times. Multiple thin coats are always better than one thick coat.
- Poor Ventilation: Working in a poorly ventilated area can lead to fumes accumulating, which is not only unpleasant but also unhealthy. Ensure your workspace has fresh air circulation, especially when using paints, primers, and sealants.
Best Paints and Sealers for Trunks
Choosing the right paint and sealer is pivotal to your trunk’s longevity and appearance, depending on its intended use, the original surface material, and the final look you envision. Here’s a comparative guide:
|
Paint Type |
Advantages |
Notes |
Popular Brands (Examples) |
|
Chalk Paint |
Very easy to apply, minimal surface prep required, creates a matte, velvety finish, great for distressing. |
Porous finish means it will need a top coat (wax or clear sealant) for durability and long-term protection, especially for high-traffic pieces. |
Annie Sloan, Rust-Oleum Chalked, Kilz Chalk Style, Asian Paints |
|
Mineral Paint |
Exceptional adhesion to many surfaces, highly durable, often built-in top coat properties, low VOC. |
Generally requires less extensive sealing (sometimes none at all), making it suitable for pieces used frequently like coffee tables or benches. |
Fusion Mineral Paint, Jolie Paint, Asian Paints |
|
Latex Paint (Acrylic Latex) |
Widely available, broad color palette, water-based for easy cleanup, good durability, washable. |
Primer is strongly recommended for proper adhesion, especially on non-porous surfaces. A top coat adds extra protection and sheen. |
Sherwin-Williams, Benjamin Moore, Dulux, Berger Paints, Behr |
|
Oil-Based Paint (Alkyd) |
Extremely durable, hard finish, excellent for high-wear areas, good leveling for smooth finish. |
Strong odor, longer drying times, requires mineral spirits for cleanup. Best for very heavy-duty use but less common for general DIY furniture. |
Sherwin-Williams, Benjamin Moore, Rust-Oleum (some lines) |
Regarding Sealers:
- Clear Polyurethane (Water-based): Excellent all-around protection against scratches and moisture, comes in various sheens (matte to gloss). Easy to apply and clean up.
- Finishing Wax: Often used with chalk paint to provide a durable, hand-rubbed finish with a soft sheen. Needs reapplication periodically.
- Clear Acrylic Sealant Spray: Convenient for intricate details or small areas. Offers good protection but might require multiple thin coats.
- Epoxy Resin: For a super high-gloss, extremely durable, and thick protective layer, especially if the trunk will be a high-use surface like a bar cart or coffee table. More complex application.
Fixing Tough Issues
Old trunks often come with their own set of challenges. Don’t be discouraged by these common issues; most are easily fixable:
- Rusty Hinges and Hardware: For surface rust, scrub thoroughly with a wire brush and fine-grit sandpaper. Apply a rust-preventive primer before painting or use a rust-inhibiting spray. For deeper rust, consider a rust-removing chemical product. If the hardware is severely damaged, replacement is the best option.
- Broken Latches or Locks: Minor issues can often be fixed with a bit of lubricating oil and gentle manipulation. For broken latches or missing locks, search for similar replacements at hardware stores, antique shops, or online specialty hardware retailers. You might need to fill old screw holes with wood filler before installing new hardware.
- Water Damage or Stains: If water damage is superficial, thoroughly dry the area, sand gently to remove any raised grain, and clean with a mild vinegar-and-water solution (1:1 ratio) to kill mildew and neutralize odors. For deeper damage or warping, you might need to use wood filler, sand extensively, and ensure the wood is completely dry before priming. For persistent musty odors, place an open box of baking soda, activated charcoal, or cedar chips inside for several days.
- Loose or Missing Wood Pieces: Use wood glue and clamps to reattach loose pieces. For missing sections, use wood filler, wood epoxy, or cut and fit a small piece of matching wood, then sand smooth.
- General Dirt and Grime: Before any work, clean the entire trunk thoroughly with a degreaser or a mild soap and water solution. A stiff brush can help with textured surfaces. Ensure it’s completely dry before proceeding to sanding or priming.
These repairs help preserve both the appearance and the function of your trunk with minimal expense, ensuring your makeover is built on a solid foundation.
Conclusion
Congratulations! You’ve now explored a wealth of inspiring ways to transform that old trunk into a functional, beautiful, and deeply personal piece for your home. Whether you’ve chosen to refresh it with a vibrant coat of paint, added a practical and stylish interior lining, elevated it with elegant feet, or created a cozy seating solution with a cushioned top, your trunk is no longer just a dust collector. It’s a testament to your creativity and a piece you can truly be proud of.
We hope this guide has not only provided you with concrete ideas but also instilled in you a renewed sense of confidence to tackle a rewarding DIY makeover project like this. Upcycling vintage trunks is more than just decorating; it’s about preserving history, embracing sustainability, and injecting unique character into your living spaces.
If you’re still buzzing with inspiration and already thinking about your next project, remember there are always more tips, tricks, and weekend-ready guides waiting for you. Don’t let another great piece of furniture sit unused – go forth and create!
