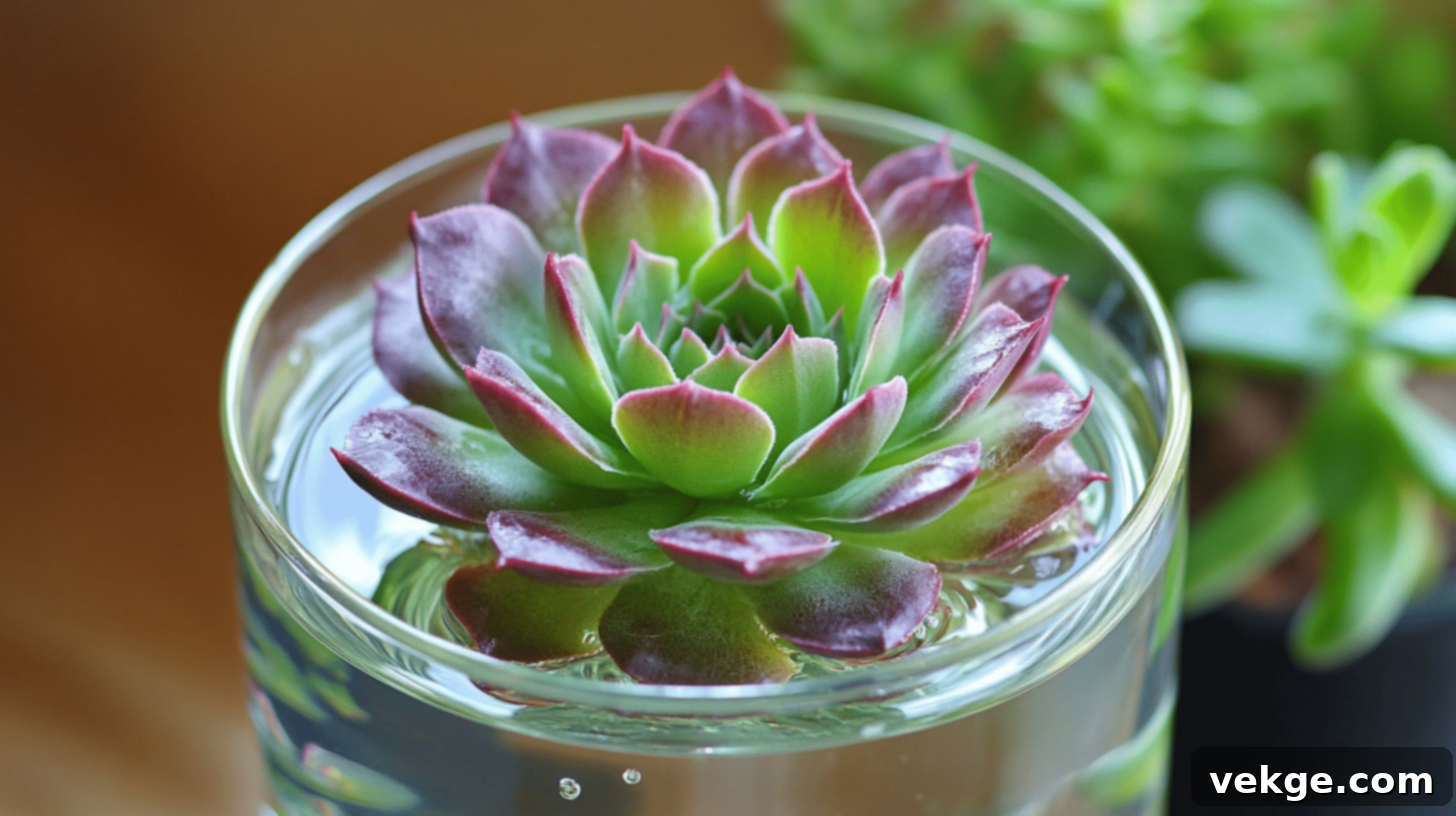
Ultimate Guide to Water Propagating Succulents: Grow New Plants from Leaves & Cuttings
Welcome to the captivating world of succulent propagation, where a single leaf can transform into an entirely new plant! This comprehensive guide will take you through the wonderfully simple and incredibly rewarding method of growing new succulents using water. Water propagation for succulents is a favorite among plant enthusiasts, offering a fantastic way to expand your collection without spending a dime. It’s not just cost-effective; it’s also a deeply satisfying process that allows you to witness the miracle of life unfolding right before your eyes.
Many green-thumbed individuals, from beginners to seasoned gardeners, prefer water-based propagation due to its straightforward nature and high success rate. Imagine observing the entire journey: from the first delicate roots emerging, to the formation of a tiny rosette, and eventually, a robust new succulent. This engaging method provides a unique window into plant growth that soil propagation often conceals.
Beyond expanding your green family, water propagation is an ingenious way to salvage fallen leaves that would otherwise go to waste. It turns potential discards into beautiful, thriving plant displays, adding a touch of natural elegance to any space. Whether you’re just starting your plant journey or you’re a long-time gardener looking for a new technique, this guide will equip you with all the knowledge to successfully propagate succulent leaves and cuttings in water. Get ready to master this enjoyable technique and watch your succulent family flourish!
What Does It Mean to Grow Succulents in Water? Understanding Water Propagation
Growing succulents in water, often referred to as water propagation for succulents, is an innovative and highly effective method for creating new plants from existing ones. Unlike traditional soil-based methods, this technique involves placing succulent leaves or stem cuttings directly in or just above water to stimulate root development. It completely bypasses the need for potting mix in the initial stages, making it a clean and often more predictable process.
The core principle is remarkably simple: you select a healthy leaf or a stem cutting from a mature succulent, prepare it, and then position it so its base is in close proximity to, or gently touching, water. Over a period of days to weeks, the cutting will begin to develop a robust root system. These roots will then support the growth of a new, miniature succulent plant. This method offers several distinct advantages compared to propagating in soil:
- Easy to Monitor Progress: The transparency of water allows for an unobstructed view of root development. You can easily track the progress, observe the roots as they emerge and grow, and quickly identify any potential issues. This visual feedback is incredibly rewarding and educational.
- Clean and Mess-Free Process: Without soil, there’s no dirt or debris to worry about, making it an ideal method for indoor gardening, especially on desks, windowsills, or in spaces where cleanliness is paramount. It’s a neat and tidy way to cultivate new life.
- Reduced Risk of Overwatering (Initially): While succulents are prone to overwatering in soil, water propagation carefully manages moisture. By ensuring only the very tip of the cutting is near or in water, and not the entire leaf or stem, you can minimize the risk of rot, which is a common problem in overly wet soil conditions.
- Higher Success Rate: Many gardeners report a higher success rate with water propagation, particularly for certain succulent varieties. The consistent moisture level around the base of the cutting can encourage faster and more vigorous root growth, giving new plants a stronger start.
- Educational and Therapeutic: Watching roots form and a new plant grow from scratch is not only educational, demonstrating basic plant biology, but also incredibly therapeutic and calming. It’s a wonderful way to connect with nature and observe the resilience of plants.
Water propagation for succulents has seen a surge in popularity among plant enthusiasts for all these reasons. It’s an engaging and accessible way to observe succulent growth in water and can be a profoundly fun, rewarding experience for gardeners of all skill levels, turning a simple leaf into a blossoming new addition to your home.
Best Types of Succulents to Propagate in Water for Optimal Results
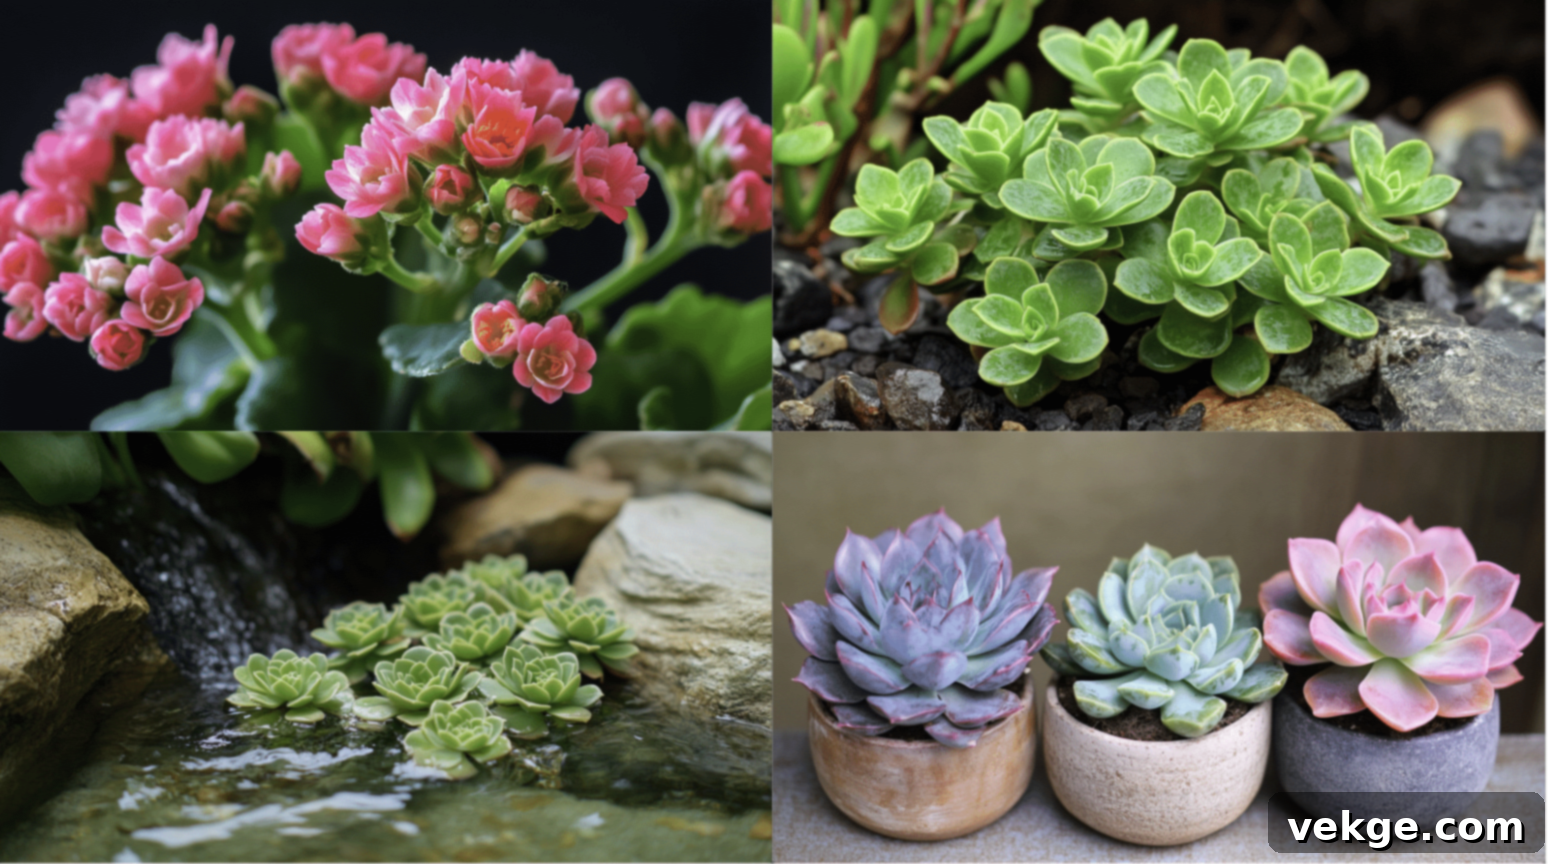
While the allure of water propagation extends to many succulents, some species are particularly well-suited for this method and tend to yield more consistent and faster results. Selecting the right type of succulent can significantly boost your success rate. Here’s a list of succulent varieties that commonly thrive when propagated in water:
- Echeveria: These are arguably one of the most popular choices for water propagation. Echeverias are known for their stunning, rose-shaped rosettes and thick, fleshy leaves. They often root with remarkable ease and speed in water, making them an excellent starting point for beginners.
- Sedum: Commonly known as stonecrop, many types of Sedum, such as Sedum morganianum (Donkey’s Tail) or Sedum rubrotinctum (Jelly Beans), are incredibly resilient and quick to root in water. Their robust nature makes them a reliable choice for propagation experiments.
- Crassula: This diverse genus includes the ever-popular Jade Plant (Crassula ovata). Crassulas generally root very well in water, especially from stem cuttings. Their thick, woody stems store ample energy, aiding in the rooting process.
- Kalanchoe: While often celebrated for their vibrant, long-lasting flowers, Kalanchoes are also fantastic candidates for water propagation. Many species, like Kalanchoe tomentosa (Panda Plant), readily develop new roots and offsets when placed in water.
- Graptopetalum: Often referred to as “Ghost Plants,” Graptopetalum varieties are known for their beautiful, dusty-grey foliage and their exceptional ability to root in water. They are quite forgiving, making them another great option for new propagators.
- Graptoveria: As a hybrid of Graptopetalum and Echeveria, Graptoverias inherit the best traits of both, often rooting vigorously and forming beautiful new plants from single leaves or cuttings in water.
These specific succulents excel in water propagation primarily because of their biological characteristics. They typically possess thick, fleshy leaves or stems that are adept at storing water and essential nutrients. This stored energy provides the cutting with the resources it needs to survive and initiate root growth before it can absorb water independently. Their robust cellular structure also often includes a higher concentration of natural rooting hormones, which further accelerates the process.
When you’re choosing succulents for water propagation, it’s a good rule of thumb to look for plants with these traits: thick, succulent leaves or sturdy stems. Avoid varieties with very thin, delicate, or excessively fuzzy leaves, as these might be more prone to rot or have less stored energy to draw upon during the rooting phase.
It’s important to remember that while these types generally perform well, every plant is an individual. Some might surprise you with rapid root development, while others might take a bit longer. Patience and observation are key components of the fun involved in growing succulents in water! Experiment with different varieties to discover what works best in your specific environment.
Step-by-Step Guide to Growing Succulents in Water: Your DIY Propagation Journey
Embarking on the journey of succulent water propagation is an exciting and highly rewarding DIY project. This detailed, step-by-step guide will walk you through the entire process, empowering you to watch a simple leaf or stem transform into a thriving new succulent. Get ready to create new life and expand your collection with ease!
What You’ll Need: Essential Materials and Tools for Success
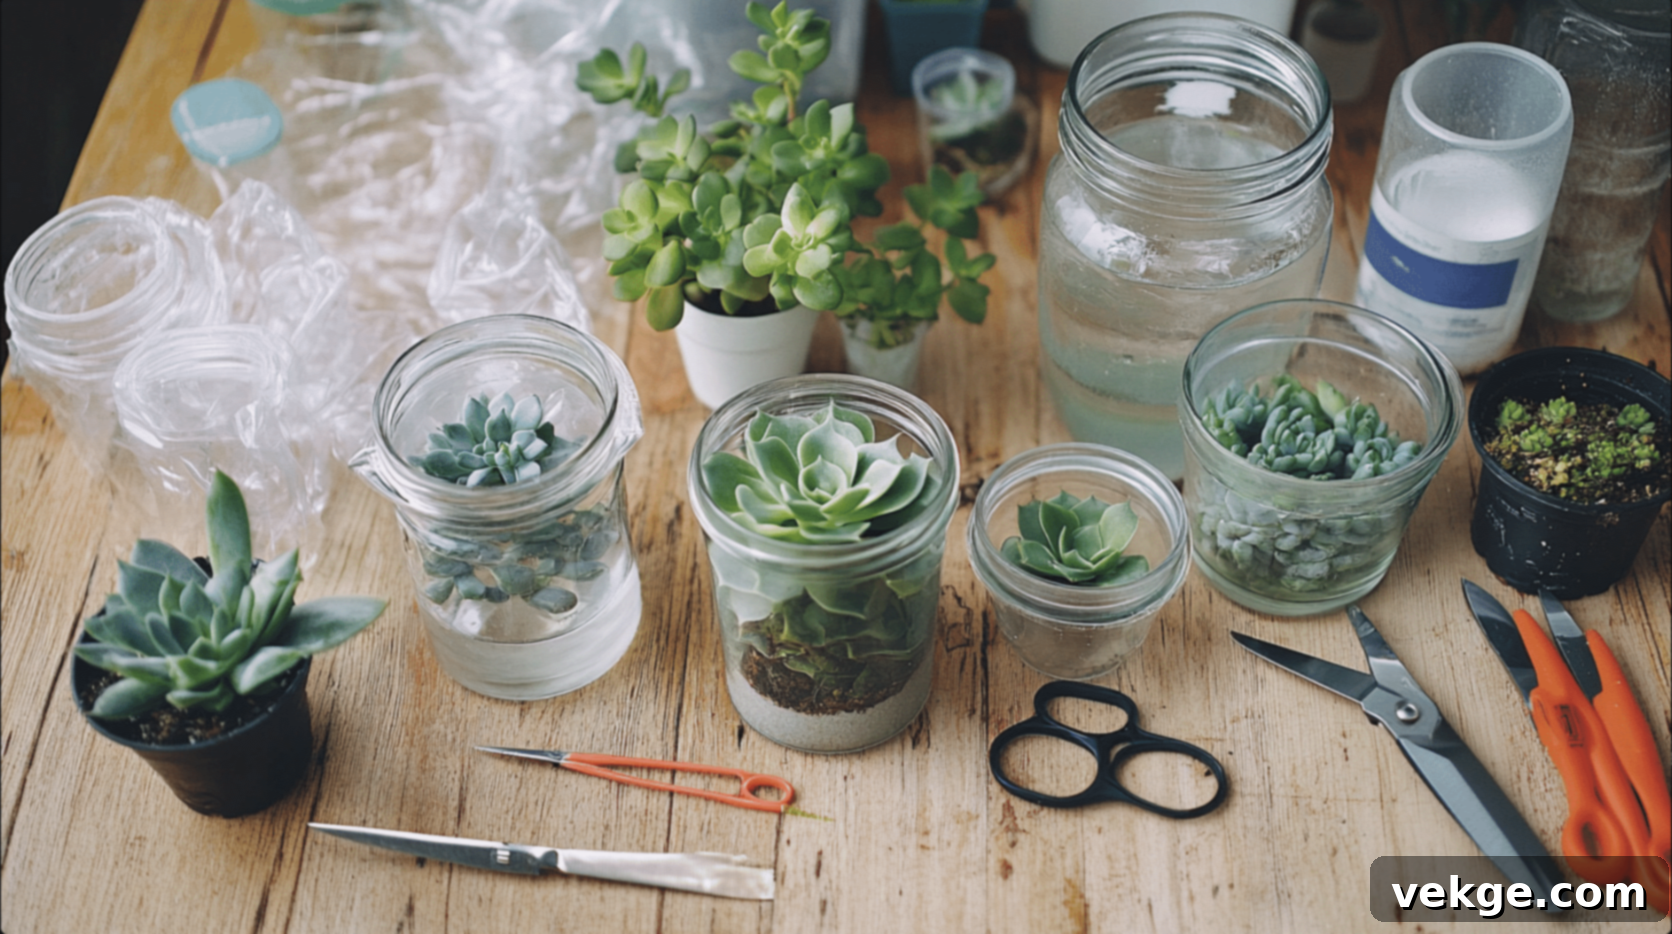
Before you begin, gathering the necessary items will ensure a smooth and successful propagation experience. Most of these materials are readily available, making this a simple and accessible project for any plant lover.
- Clean Glass Containers or Jars: Opt for clear glass so you can easily observe root development. Small jars, vases, shot glasses, or even repurposed food containers work wonderfully. Ensure they are sparkling clean to prevent bacterial growth.
- Sharp, Clean Scissors or a Knife: Sterilized tools are crucial for making clean cuts, which minimizes the risk of infection to the parent plant and the cutting. You can sterilize them with rubbing alcohol or a flame.
- Clean Water: The quality of your water matters. Rainwater or distilled water are ideal as they are free of harsh chemicals. If using tap water, let it sit uncovered for at least 24-48 hours to allow chlorine and other volatile chemicals to evaporate.
- Plastic Wrap or Cling Film: This is a simple but effective tool to create a stable platform for your cuttings, ensuring they remain suspended just above the water without falling in completely.
- Healthy Succulent Plants: The source of your cuttings! Choose mature, vibrant plants that show no signs of disease or pests. Healthy parent plants yield healthy cuttings.
Some additional tools that can enhance your propagation experience:
- Small Paintbrush: Useful for gently dusting off any soil or debris from leaves you intend to propagate.
- Tweezers: Excellent for handling delicate or small succulent leaves and positioning them precisely without causing damage.
- Clear Plastic Cups: Can be used for smaller, individual cuttings or for creating mini propagation stations.
- Rooting Hormone (Optional): While not strictly necessary for many succulents, a rooting hormone powder or liquid can sometimes accelerate root development, especially for more challenging varieties.
These simple materials for succulent propagation are easy to find and set up, making it an enjoyable and simple project for anyone who loves plants and wishes to expand their green collection.
Easy Steps to Follow for Successful DIY Succulent Propagation
Step 1: Selecting and Preparing Your Succulent Leaf or Stem Cutting
The first and most critical step is choosing the right material for propagation. The success of your new plant depends heavily on the health and proper preparation of the cutting.
- Selection: Look for a plump, healthy, mature leaf or a sturdy stem from your chosen succulent plant. Avoid any leaves that are withered, discolored, or show signs of damage. For leaves, choose those from the middle or lower part of the plant. For stems, select a piece that is 2-4 inches long, ideally with a few leaves attached.
- Harvesting Leaves: Gently twist the chosen leaf from the stem. The goal is to get a clean break, ensuring the entire base (the “callus point”) remains intact. If a piece of the leaf breaks off and leaves part of the base on the stem, it’s less likely to root.
- Harvesting Stem Cuttings: Use your clean, sharp scissors or knife to make a clean cut just below a node (where a leaf attaches) on the stem. Remove the bottom few leaves to expose an inch or two of bare stem.
- Callousing: This is a crucial step! Lay your harvested leaves or stem cuttings in a dry, well-ventilated area, away from direct sunlight, for 1-7 days (depending on your climate and the succulent type). This allows the cut end to form a protective scab or callus. This callus prevents rot when the cutting is introduced to water. Larger, thicker cuttings might need more time to callous than smaller leaves.
Step 2: Setting Up the Container with Water
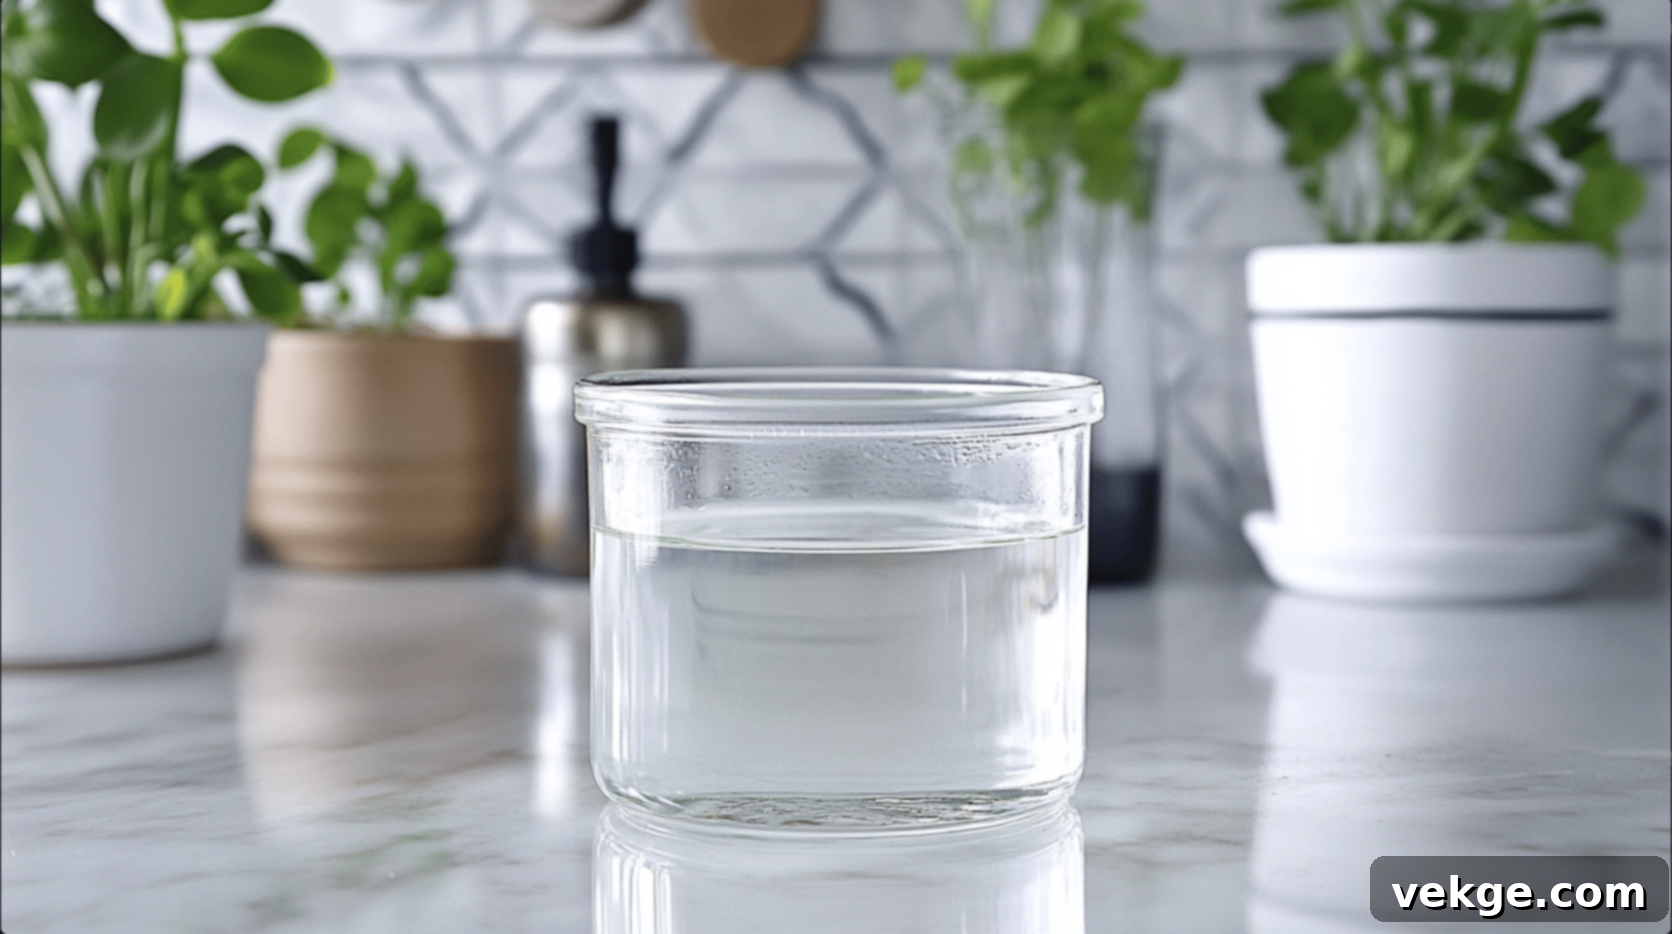
Once your cuttings are calloused, it’s time to prepare their new temporary home.
- Fill the Container: Fill your chosen clean glass container with your prepared water (distilled, rainwater, or dechlorinated tap water). Leave about an inch of space from the top of the container. The exact water level is important – you want it to be just below or barely touching the base of your cutting.
- Container Choice: Clear glass allows you to see the roots, but if algae becomes an issue, consider switching to an opaque container or placing your clear container in a slightly shaded spot.
Step 3: Placing the Succulent in Water and Ensuring Proper Conditions
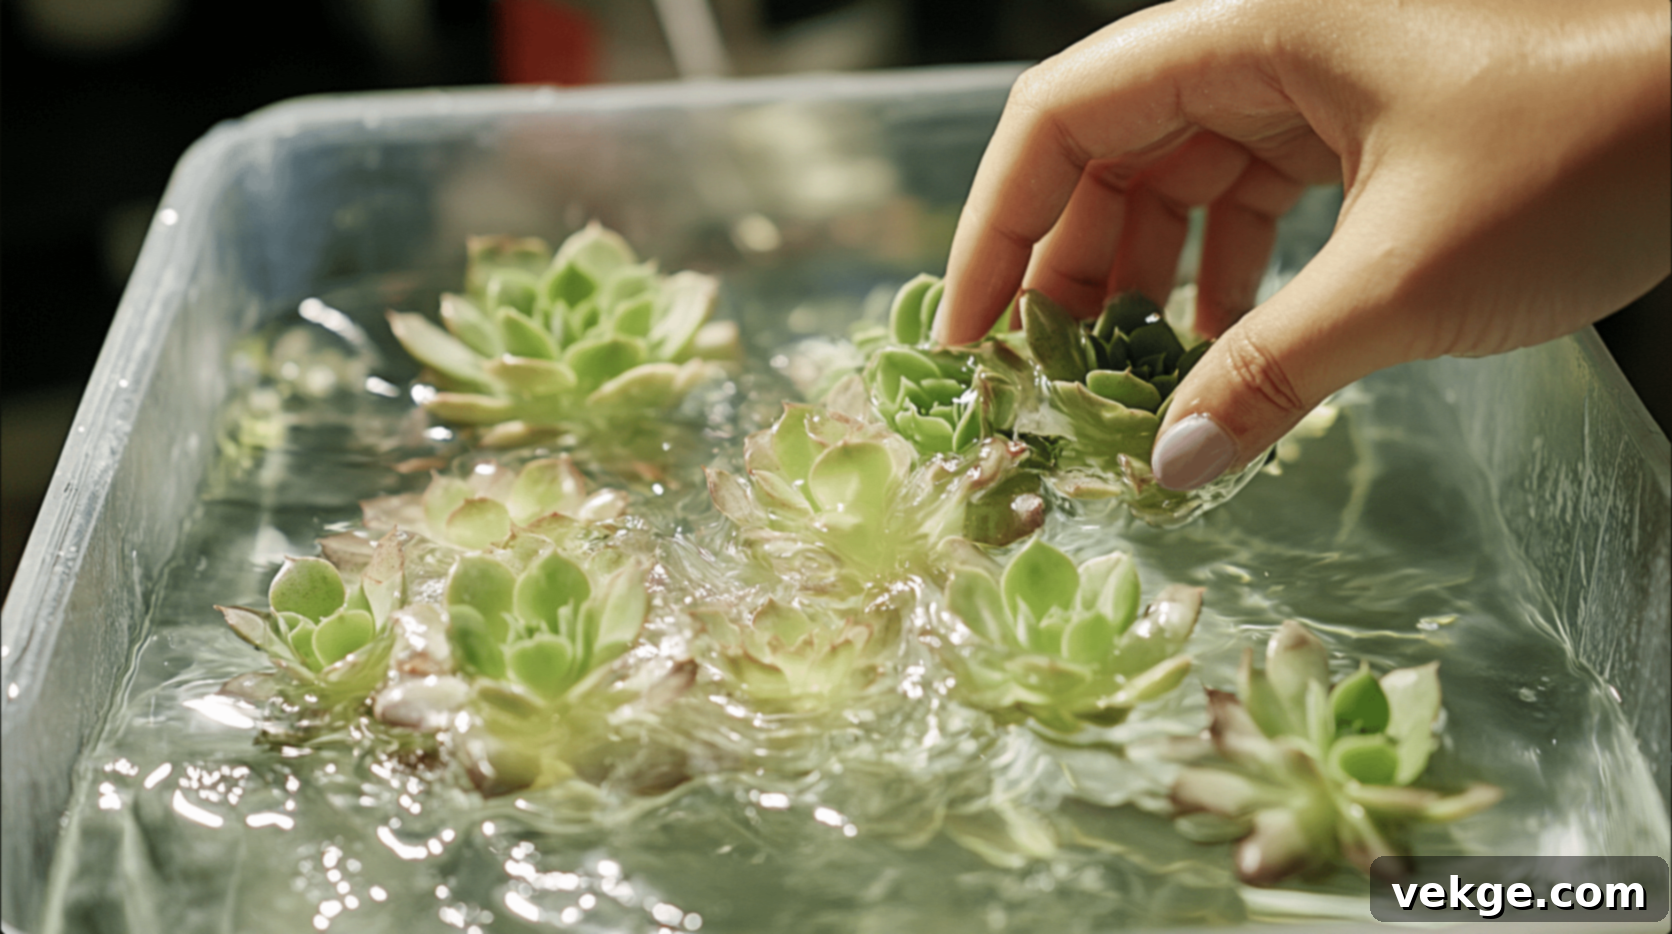
This step is where your calloused cuttings meet their new environment.
- Positioning Leaves: For individual leaves, you can lay them on top of the container opening, allowing the calloused end to hover just above the water. Many people use plastic wrap stretched over the opening, with small holes poked through it to hold the leaves in place. Another method is to use a small piece of wire mesh or even toothpicks inserted into the leaf to suspend it. The key is to ensure the bottom of the leaf is very close to the water, but ideally not submerged, to prevent rotting.
- Positioning Stem Cuttings: For stem cuttings, suspend them so that the calloused cut end is just above or barely touching the water. Again, plastic wrap with holes, a specialized propagation station, or even a small ring of wire can help hold the cutting in place. It is absolutely crucial that the actual succulent leaves do not touch the water, as this will almost certainly lead to rot.
- Light and Temperature: Place your setup in a location that receives bright, indirect light. A north-facing window or a spot a few feet away from a south-facing window is often ideal. Avoid direct, intense sunlight, which can scorch the delicate cuttings or encourage excessive algae growth. Maintain a stable room temperature, ideally between 65-75°F (18-24°C), as extreme temperatures can hinder root development.
Step 4: Monitoring Growth and Transitioning to Soil (or Continued Water Culture)
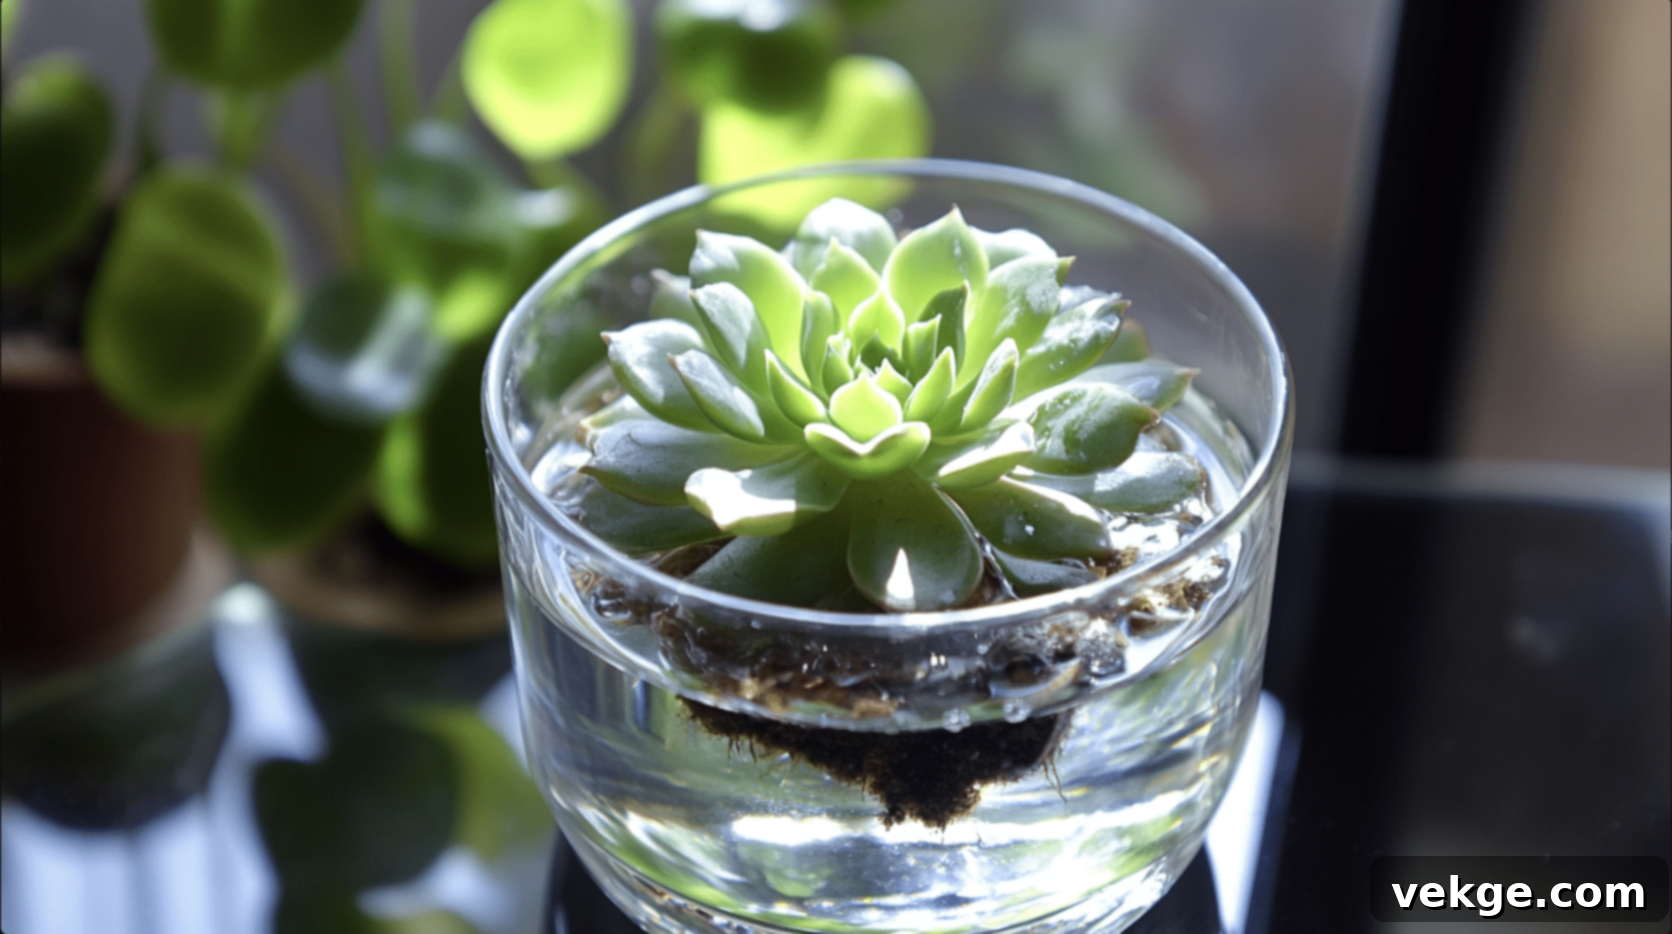
Patience is a virtue in this stage, but the rewards are well worth the wait!
- Water Changes: Change the water every 3-5 days, or whenever it starts to look cloudy, to keep it fresh and oxygenated and to prevent bacterial or algal buildup. This is vital for healthy root development.
- Observing Root Growth: After approximately 2-3 weeks, you should begin to see tiny, white roots emerging from the calloused end of your cutting. Some varieties might root faster, others might take a bit longer. Don’t be discouraged if it takes a month or more for some.
- When to Transfer: Once the roots are about 1-2 inches long and well-established, and you might even see a tiny “baby” plant forming at the base of the leaf or along the stem, your succulent is ready for its next stage. At this point, you have two main options:
- Transfer to Soil: This is the most common approach. Prepare a small pot with well-draining succulent or cactus soil. Gently plant the rooted cutting, ensuring the roots are covered but the new plant (or the base of the stem) is above the soil line. Water lightly after a few days.
- Continue in Water: Some gardeners choose to keep their succulents in water permanently, especially for aesthetic display. If you opt for this, ensure you continue to change the water regularly and consider adding a very diluted liquid fertilizer formulated for hydroponics to provide nutrients, as water alone doesn’t contain all the necessary minerals for long-term growth. Be aware that permanent water culture requires more careful management of nutrient levels and can be prone to algae.
For more visual guidance and detailed tips, make sure to check out the excellent video tutorial by Succulents Box on YouTube.
Common Problems in Succulent Water Propagation and Effective Solutions
While water propagation for succulents is generally straightforward, you might encounter a few challenges along the way. Understanding these common problems and knowing how to address them will significantly increase your success rate and reduce frustration. Here are the most frequent issues and their practical solutions:
1. Root Rot or Stem Rot
This is perhaps the most common and disheartening problem. It occurs when the succulent’s tissues, particularly the base of the leaf or stem, remain too wet for too long, leading to bacterial or fungal decay.
FIX: The primary cause is direct contact between the succulent’s fleshy parts (leaves/stems) and the water. Ensure that only the very tip of the calloused cut end is near or barely touching the water’s surface. The majority of the leaf or stem should remain dry. If rot has already started, immediately remove the affected parts with a sterile knife, allow the fresh cut to re-callous for several days, and then try propagating again with an adjusted setup.
2. Algae Growth in the Water
Green, slimy growth in your propagation container is algae, and it can compete with your cutting for nutrients and light, as well as make the water unhealthy.
FIX: Change the water frequently, ideally every 3-5 days, or as soon as you notice any cloudiness or green tint. Rinse the container thoroughly when changing water. If algae persists, try using opaque containers or covering clear containers with a piece of paper or cloth to block light from reaching the water, as algae needs light to grow.
3. No Roots Growing (or Very Slow Growth)
It can be frustrating when your cuttings seem to do nothing.
FIX: Patience is paramount! Root development can take anywhere from two weeks to several months, depending on the succulent species, ambient temperature, and light conditions. Ensure you are using healthy cuttings that were properly calloused. Provide bright, indirect light and a consistent, warm temperature (around 70°F or 21°C). Some cuttings simply might not be viable, so trying multiple cuttings increases your chances.
4. Leaves Turning Yellow or Brown and Shriveling
This often indicates that the cutting is using up its stored energy without successfully developing roots, or it’s simply a natural part of the process.
FIX: If roots have already formed and a new baby plant is emerging, the parent leaf will naturally shrivel and dry up as the new plant draws energy from it. This is normal. If no roots have formed and the leaf is rapidly deteriorating, it might not have had enough stored energy or a viable callus point. Ensure the cutting was healthy and plump initially. If roots have formed, it’s often a good sign it’s time to plant the cutting in soil to provide it with external nutrients.
5. Mold or Fungal Growth on Leaves/Stems (Not Rot)
White fuzzy growth, distinct from general rot, can sometimes appear, especially in humid conditions with poor air circulation.
FIX: Improve airflow around the cuttings. Ensure they are not crowded and are placed in an area with gentle air movement. You can use a small fan nearby on a low setting for short periods. If mold appears, gently wipe it off with a cotton swab dipped in a very diluted fungicide or rubbing alcohol, then address the airflow.
6. Water Developing a Foul Smell
A foul odor usually signifies bacterial growth in the water, which is detrimental to root development.
FIX: This is a clear indicator that the water needs to be changed more frequently. Ensure your containers are thoroughly cleaned between water changes, and that no decaying plant material (like a rotting leaf part) has fallen into the water. Using filtered or distilled water can also help reduce the initial bacterial load.
To proactively prevent many of these problems, always adhere to these best practices:
- Use clean and sterilized tools and containers.
- Provide consistent bright, indirect light, avoiding harsh direct sun.
- Keep the water clean and fresh by changing it regularly.
- Crucially, ensure leaves and stems do NOT sit directly in the water; only the calloused cut end should be near it.
- Practice patience and observe your plants closely for any early signs of trouble.
- Experiment with multiple cuttings from different parts of the plant to increase your chances of success.
Knowing these common issues in succulent water propagation and, more importantly, how to fix them, will give you a significantly better chance of growing healthy and vibrant new plants. Remember, every plant is different, and gardening is a continuous learning process. Keep trying, adapting, and enjoying the journey of growth!
How to Take Care of Your Succulents After They Grow Roots in Water
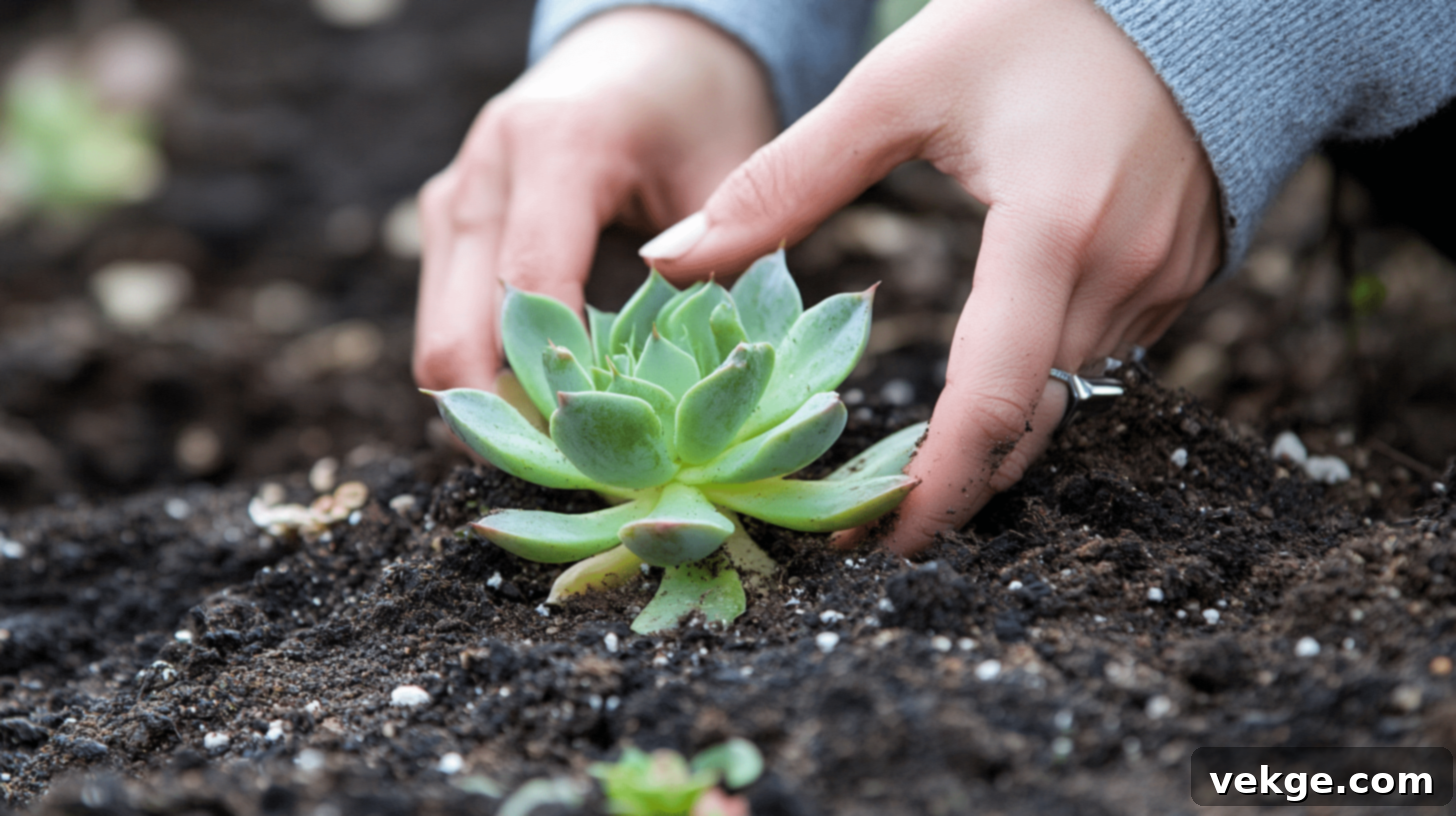
Congratulations! Seeing those healthy roots emerge is a major milestone in your succulent propagation journey. Once your succulents have developed a strong root system in water, it’s time to consider their long-term care to ensure they continue to thrive. This phase involves transitioning them from water to a more permanent environment, usually soil, and establishing a regular care routine.
Post-Propagation Care: Nurturing Your Rooted Cuttings
Even after roots appear, the care continues before you make the big move.
- Continued Root Monitoring: Don’t rush to plant them in soil immediately. Allow the roots to grow a bit longer, aiming for a length of about 1-2 inches. This gives them a better chance to establish themselves quickly once transferred. You might also see tiny new leaves (the “baby” plant) starting to form, indicating good progress.
- Gradual Light Exposure: If your propagation setup was in a shadier spot, and you plan to move the new plant to a sunnier location (e.g., a brighter windowsill), do so gradually over the course of a week. Sudden changes in light intensity can shock the plant and cause sunburn, especially on tender new growth.
- Maintain Clean Water: Continue changing the water every few days to keep it fresh and prevent any build-up of bacteria or algae. Clean water is crucial for the health of developing roots.
- Optional: Introduce Very Diluted Fertilizer: If you plan to keep the succulent in water for an extended period, or if growth seems slow, you can introduce a highly diluted, water-soluble fertilizer specifically designed for hydroponics or succulents. Use it at 1/4 or 1/8 strength to avoid nutrient burn.
Transition to Soil: Giving Your Succulents a Permanent Home
Moving your rooted cuttings to soil is a delicate but crucial step for their long-term health.
- Choosing the Right Soil: Succulents require extremely well-draining soil to prevent root rot. The best option is a commercial cactus or succulent potting mix. You can also create your own by mixing regular potting soil with gritty amendments like perlite, pumice, or coarse sand in a 1:1:1 ratio. Avoid heavy garden soil or standard potting mixes that retain too much moisture.
- Selecting the Pot: Choose a pot that is slightly larger than the root ball, but not excessively big, as too much soil can retain excess moisture. Crucially, the pot must have drainage holes at the bottom. Terracotta pots are often preferred as they are porous and allow for better airflow and evaporation.
- The Planting Process: Gently remove the rooted cutting from the water. Create a small hole in the prepared soil. Carefully place the rooted cutting into the hole, ensuring all the roots are covered with soil, but the base of the new plant (or the old parent leaf if still attached) is just at or above the soil surface. Lightly firm the soil around the base, but avoid compacting it too much.
- Initial Watering After Planting: This is a critical period. Wait at least 3-5 days, or even a week, after planting before you give your first watering. This allows any tiny roots that might have been damaged during the transplanting process to heal and form calluses, significantly reducing the risk of rot when they are introduced to moisture. After this waiting period, water thoroughly until water drains from the bottom of the pot.
Long-Term Care Tips: Ensuring Your New Succulents Thrive
Once established in soil, your propagated succulents will need consistent care to grow into beautiful, healthy plants.
- Watering Deeply but Infrequently: The golden rule for succulents. Water thoroughly until water runs out of the drainage holes. Then, allow the soil to dry out completely, usually for several days to a week or more, before watering again. Stick your finger into the soil; if it’s dry an inch or two down, it’s time to water. Overwatering is the most common killer of succulents.
- Providing Adequate Lighting: Most succulents thrive in bright, indirect light for at least 6 hours a day. Some varieties can tolerate direct morning sun, but intense afternoon sun can cause sunburn, especially for newly established plants. South-facing windows are often ideal, or you might consider supplemental grow lights if natural light is insufficient.
- Pot Choice is Key: Always use pots with drainage holes. Avoid cachepots (pots without holes) or pots that funnel water into a reservoir, as these lead to soggy soil and root rot. Terracotta, ceramic, or unglazed pots are excellent choices.
- Fertilizing Sparingly: Succulents are not heavy feeders. During their active growing season (typically spring and summer), you can feed them once a month with a balanced, water-soluble fertilizer diluted to half or even quarter strength. Do not fertilize in fall or winter when they are dormant.
- Temperature and Airflow: Keep succulents in environments where temperatures stay between 60-80°F (15-27°C). Protect them from freezing temperatures. Good air circulation is also beneficial, helping to dry out the soil and prevent fungal issues.
- Pruning and Maintenance: Regularly remove any dead, yellowing, or dying leaves. This not only keeps the plant looking tidy but also helps prevent pests and diseases. If your succulent becomes leggy, you can behead it and propagate the top part again!
Remember, caring for propagated succulents is essentially the same as caring for any mature succulent. The key to their success lies in understanding their specific needs, primarily avoiding overwatering and providing ample light. With the right care and a little patience, your newly propagated succulents will thrive and grow into stunning, resilient additions to your plant collection.
Fun Facts About Propagating Succulents in Water You Might Not Know!
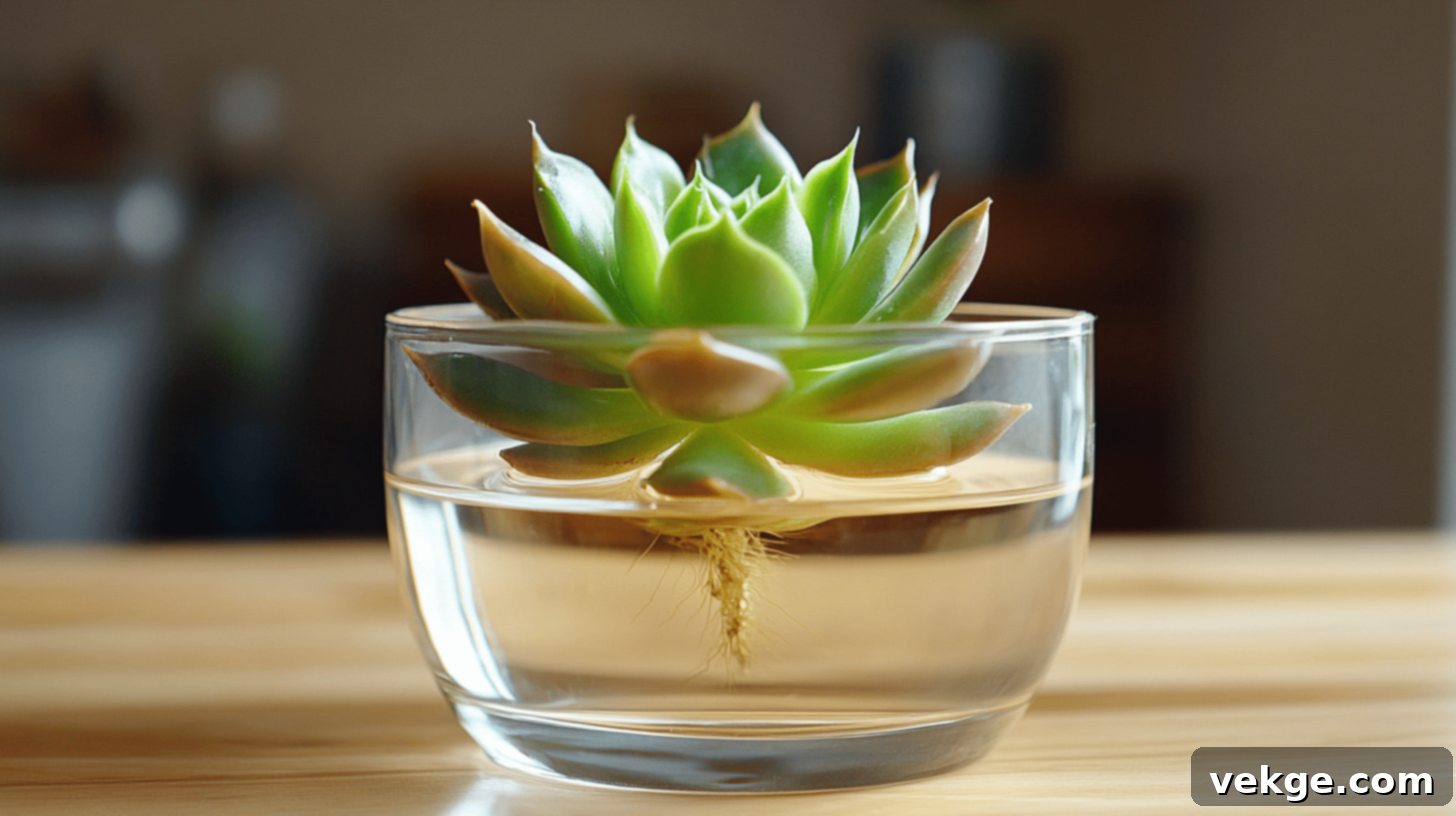
Beyond being a practical method to expand your plant collection, growing succulents in water is filled with fascinating aspects that make the process even more enjoyable. Here are some fun and intriguing facts about this unique propagation technique:
- Desert Survivors in Water: It’s quite counter-intuitive that plants adapted to arid desert environments, known for their ability to store water and survive droughts, can thrive and root in water. This highlights the incredible adaptability and resilience of succulents, demonstrating their ancient survival mechanisms at play in a surprisingly modern context.
- Faster Than Seeds: While growing succulents from seeds is possible, it’s an incredibly slow process that can take months or even years for tiny seedlings to develop. Water propagation, on the other hand, often yields visible roots within a few weeks, making it a much quicker and more gratifying method for rapid plant multiplication.
- The “Clear View” Advantage: One of the most captivating aspects of water propagation is the ability to visually observe the entire root development process. Unlike soil propagation, where the magic happens hidden beneath the surface, water allows you to literally have a window into the plant’s growth, making it an engaging and educational experience.
- An Endless Cycle of Life: With successful water propagation, a single healthy succulent leaf can potentially grow into a full, mature plant. This new plant can then, in turn, provide more leaves or cuttings, perpetuating a beautiful, never-ending cycle of plant creation. It’s truly a gift that keeps on giving!
- Water Memory (A Fun Hypothesis): While largely speculative and debated in the scientific community, some theories suggest that water might be able to hold a ‘memory’ of substances it has contacted, potentially influencing biological processes. While not scientifically proven in plant propagation, it’s a fun thought to imagine how the water itself might contribute to the unique growth patterns you observe.
- Minimalist Decor: Propagating succulents in elegant glass vessels filled with water creates stunning, minimalist decor. The transparent setup beautifully showcases the developing roots, turning the propagation process into a living art piece that adds natural beauty and tranquility to any room.
These fun facts add another layer of appreciation to the already wonderful world of water propagating succulents. It’s a testament to the marvels of nature and the simple joys of gardening.
Conclusion: Embrace the Art of Succulent Water Propagation
Growing succulents in water is not just a method; it’s a simple, rewarding, and highly engaging art form that allows you to effortlessly expand your plant collection. Throughout this comprehensive guide, we’ve explored the foundational principles of succulent water propagation, covering everything from selecting the most suitable succulent types to following precise, step-by-step instructions for optimal success. We’ve also armed you with practical solutions for common propagation problems and provided essential long-term care tips to ensure your new plants thrive.
This innovative method offers a unique, transparent view into the miracle of root development, transforming a seemingly ordinary leaf or stem into a vibrant new life form. For many varieties, water propagation can yield a higher success rate and faster results compared to traditional soil-based methods, making it an excellent choice for both novice and experienced gardeners.
Now, it’s your turn to put this knowledge into practice! Don’t hesitate to try propagating succulents in water. Start with easy-to-grow varieties like Echeveria or Sedum, and allow yourself the freedom to experiment with different types. Remember, patience is a key ingredient in all forms of succulent propagation; nature works on its own timeline.
We’d love to hear about your experiences and see your propagation successes! Feel free to share your stories, challenges, or any questions you might have in the comments below. Happy growing, and may your ever-expanding succulent family flourish beautifully!
Frequently Asked Questions (FAQs) About Succulent Water Propagation
Can All Succulent Species Be Propagated in Water?
No, while many succulents propagate successfully in water, not all species are ideal candidates. Some succulents, especially those with very delicate, fuzzy, or thin leaves, may be more prone to rot or simply prefer soil for optimal rooting. Species like Echeveria, Sedum, Crassula, and Kalanchoe generally perform very well in water, but it’s always best to research specific plant types or experiment with a few leaves to see what works best.
What Type of Water Should I Use for Succulent Propagation?
For the best results, use filtered, distilled, or rainwater. These types of water are free from harsh chemicals like chlorine and chloramine, which can be detrimental to the delicate developing roots of your succulents. If you must use tap water, allow it to sit out in an open container for at least 24-48 hours. This process allows the chlorine to evaporate, making the water safer for your cuttings. However, chloramine does not evaporate, so filtered water is still superior if chloramine is present in your tap water.
Can I Leave Succulents in Water Permanently After They Root?
While succulents can survive in water for an extended period after rooting, it is generally not recommended for their long-term health. Succulents are designed to grow in well-draining soil, which provides essential nutrients and allows their roots to breathe. Water alone often lacks the full spectrum of nutrients needed for sustained, healthy growth, and can lead to nutrient deficiencies over time. Furthermore, permanent water culture requires very careful management of water changes and potential algae growth. For optimal and robust growth, it’s best to transition your rooted succulents to a suitable succulent or cactus potting mix once their roots are well-established (around 1-2 inches long).
How Long Does It Take for Succulents to Root in Water?
The time it takes for roots to appear varies significantly depending on the succulent species, environmental conditions (like temperature and light), and the health of the cutting. Generally, you can expect to see tiny roots emerging within 2-4 weeks. Some fast-growing varieties might show roots in as little as 10-14 days, while more stubborn types could take over a month or even longer. Patience is crucial during this stage.
Do I Need to Use Rooting Hormone for Water Propagation?
Rooting hormone is generally not essential for most succulents when propagating in water, especially for common and easy-to-root varieties like Echeveria or Sedum. Many succulents contain natural rooting hormones that will activate with the right conditions. However, if you are working with a particularly stubborn variety, or if you want to potentially speed up the process, a very small amount of rooting hormone (either powder applied to the calloused end or a highly diluted liquid form) can sometimes be beneficial. Always ensure the cutting is properly calloused before applying any hormone.
