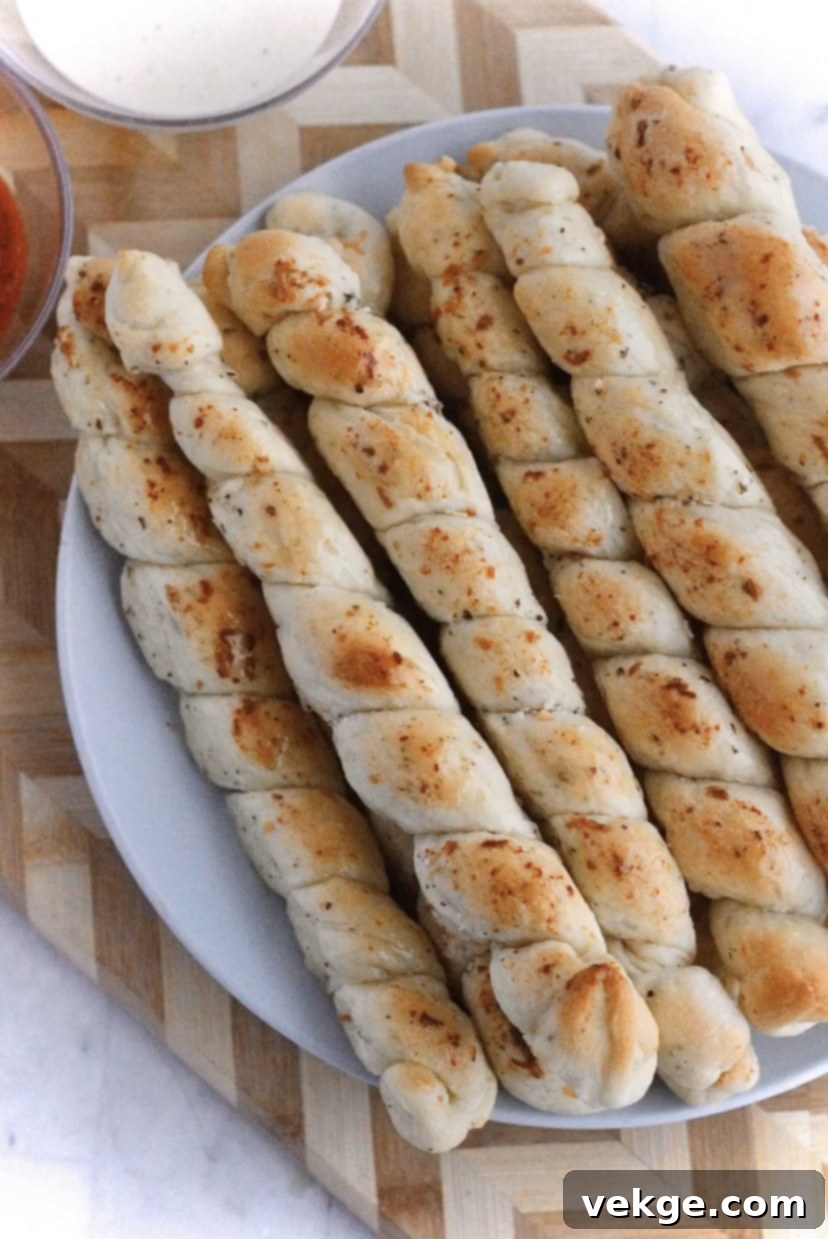
Prepare to transport your taste buds straight to the heart of Italy with these incredible homemade Cheesy Bread Twists. Forget plain, boring breadsticks; these are an absolute game-changer. Imagine soft, tender bread, perfectly golden, infused with aromatic herbs, and generously blanketed in a savory layer of melted Parmesan cheese and garlic. Each twist offers an irresistible combination of textures and flavors that will make them the star of any meal. Whether you’re hosting a lavish Italian dinner, enjoying a casual pizza night, or simply craving a comforting snack, these bread twists are guaranteed to earn rave reviews. They’re delightfully simple to make, yet yield results that taste like they came from your favorite trattoria. Get ready to experience the magic of homemade bread, elevated with a cheesy, herby twist!

Why These Cheesy Bread Twists Will Become Your New Favorite
These Cheesy Bread Twists aren’t just another side dish; they’re an experience. What makes them so utterly irresistible and a must-have in your recipe repertoire? Let’s break down the magic:
- Unmatched Flavor: The combination of fragrant dried rosemary, pungent garlic salt, and robust Italian seasoning creates a deeply savory profile that beautifully complements the rich, nutty Parmesan cheese. Every bite is a symphony of classic Italian-inspired tastes.
- Perfect Texture: We all love a good breadstick, but these twists take it a step further. They boast a wonderfully soft, fluffy interior with a slightly crisp, buttery exterior, providing that ideal bite you crave. The kneading process ensures a fantastic chewiness without being tough.
- Versatility at Its Best: These bread twists are incredibly adaptable. They’re fantastic alongside a hearty bowl of soup, perfect for dipping in marinara sauce during pizza night, or as a flavorful accompaniment to meatloaf, pasta dishes, or even a fresh salad. They seamlessly fit into any meal plan.
- Crowd-Pleasing Power: Seriously, these disappear fast! They are a guaranteed hit with both adults and children alike. Their appealing twisted shape and cheesy goodness make them fun to eat and impossible to resist.
- Rewarding Homemade Experience: There’s immense satisfaction in baking your own bread from scratch. The aroma filling your kitchen as these twists bake is heavenly, and the pride of serving something so delicious and homemade is truly special.
Once you’ve made these Cheesy Bread Twists, you’ll understand why they’ve earned their place as a staple in so many kitchens. They elevate everyday meals and bring a touch of restaurant-quality comfort right to your dining table.
View this post on Instagram
A post shared by Amber (@amberskitchen

Cheesy Bread Twists Recipe
Ingredients for Cheesy Bread Twists
Breadsticks
- 3 cups warm water
- 1/3 cup sugar (optional, for flavor and yeast activation)
- 1 1/2 T active dry yeast (or instant yeast, adjust proofing time if needed)
- 1/3 cup olive oil, melted (can substitute for avocado or coconut oil)
- 1 large egg
- 1 T salt
- 1 T dried rosemary
- 8 1/2 cups bread flour (use all-purpose flour if bread flour is unavailable; amount may vary by 1/2 cup)
- 24 wooden kebab sticks, lightly oiled
Topping
- 12 T melted butter
- 3/4 cup freshly grated Parmesan cheese
- 1/2 to 1 tsp garlic salt
- 1/2 to 1 tsp Italian seasoning
Instructions for Cheesy Bread Twists
- In a large mixing bowl (or the bowl of a stand mixer like a Bosch, which is ideal for this dough), combine the warm water, sugar (if using), and active dry yeast. Stir gently.
- Cover the bowl and let the mixture stand for 10 minutes. This allows the yeast to proof and dissolve, forming a foamy layer on top, indicating it’s active and ready.
- Once the yeast is activated, add the melted olive oil, large egg, salt, and dried rosemary to the yeast mixture. Mix thoroughly until all ingredients are well combined.
- Begin adding the bread flour, one cup at a time, mixing well after each addition. Continue to mix and knead the dough. The exact amount of flour needed can vary based on humidity and how packed your flour is. Aim for a dough that is elastic and slightly tacky to the touch, but not so wet that it sticks excessively to the sides of the bowl or your hands.
- Knead the dough vigorously for 15 minutes if you’re using a Bosch mixer or other stand mixer with a dough hook. If kneading by hand, continue for at least 15-20 minutes, or as long as your arms can manage, until the dough is smooth and resilient. 💪🏼
- Cover the dough with a lid or a clean, damp dish towel and allow it to rise in a warm place until it has doubled in size. This typically takes about 60 minutes. Once doubled, gently punch down the dough to release the air.
- Grease two large cookie sheets or line them with parchment paper. On a lightly floured surface, turn out the dough and divide it into 24 equal portions. Roll each portion into a long, thin “snake” shape, approximately 12 inches in length. Take a lightly oiled wooden skewer and carefully wrap each dough snake around it, pinching the ends to secure the twist. You should be able to fit 12 skewers on each baking sheet, allowing space for expansion.
- In a small bowl, melt the butter. Using a pastry brush, generously brush the melted butter over each dough twist. Then, evenly sprinkle with freshly grated Parmesan cheese, garlic salt (adjust to your preference), and Italian seasoning.
- Allow the shaped and topped bread twists to rise again in a warm place until they have doubled in size. This second rise will take approximately 45-60 minutes.
- Preheat your oven to 380°F (195°C). Bake the bread twists for about 16 minutes, or until they are golden brown and cooked through. Keep an eye on them to prevent over-browning.
- Carefully remove the wooden skewers immediately after baking and serve your delicious Cheesy Bread Twists while warm. Enjoy!
Tips for Perfectly Soft and Cheesy Bread Twists
Achieving bakery-quality bread twists at home is easier than you think with a few expert tips:
- Yeast Activation is Key: Ensure your warm water is between 105-115°F (40-46°C). Water that’s too hot will kill the yeast, while water that’s too cold won’t activate it. The sugar provides food for the yeast, helping it to foam up beautifully, indicating it’s alive and ready to make your dough rise.
- Don’t Skimp on Kneading: Kneading develops the gluten in the flour, which is essential for that wonderfully chewy, elastic texture. Whether by hand or with a mixer, aim for at least 15 minutes of solid kneading. The dough should feel smooth, stretchy, and resilient. If you stretch a small piece, it should form a thin membrane without tearing easily (the “windowpane test”).
- The Flour Factor: Bread flour has a higher protein content, leading to a chewier crumb. However, all-purpose flour works well too. Remember that flour absorption varies, so always add flour gradually until your dough reaches the “elastic and slightly tacky” consistency. It shouldn’t be dry and crumbly, nor overly wet and sticky.
- Rising Environment: Yeast loves warmth! Find a cozy spot in your kitchen for the dough to rise. A slightly warm oven (turned off, with just the pilot light on or a bowl of hot water inside), or simply a warm room, works wonders. Don’t rush the rise; allowing the dough to double naturally ensures a light and airy final product.
- Oiling the Skewers: Lightly oiling your wooden kebab sticks prevents the dough from sticking as it bakes and makes removal much easier, preserving the beautiful twisted shape.
- Freshly Grated Parmesan: While pre-grated Parmesan can be convenient, freshly grated Parmesan melts better and offers a superior, more robust flavor. It makes a noticeable difference in the final taste of your Cheesy Bread Twists.
- Don’t Overbake: Keep a close eye on your bread twists during the last few minutes of baking. They should be golden brown. Overbaking can lead to a dry texture.
Creative Variations & Serving Suggestions
These Cheesy Bread Twists are fantastic as is, but don’t hesitate to get creative! Here are some ideas to customize them and make them truly your own:
Delicious Variations:
- Spicy Kick: Add a pinch of red pepper flakes to the topping mixture for a subtle heat, or for a bolder flavor, incorporate some cayenne pepper into the dough.
- Herbaceous Delight: Experiment with other dried herbs. Thyme, oregano, or a blend of Italian herbs can replace or supplement the rosemary for different aromatic profiles. Fresh herbs, finely chopped, can also be added to the topping.
- Garlic Lover’s Dream: For an extra garlic punch, mix finely minced fresh garlic into the melted butter before brushing, or use garlic powder in addition to garlic salt.
- Cheese Please! While Parmesan is classic, consider a blend of cheeses for the topping. A mix of Parmesan with a little mozzarella or provolone will add extra meltiness and a different flavor dimension. A sprinkle of sharp cheddar could also be delicious.
- Sweet Breadsticks: Skip the savory toppings and instead brush with melted butter, then sprinkle with cinnamon sugar for a delightful sweet treat perfect for breakfast or dessert.
Perfect Serving Pairings:
These Cheesy Bread Twists are incredibly versatile and pair well with a wide array of dishes:
- Italian Classics: The obvious choice! Serve them with spaghetti and meatballs, lasagna, chicken alfredo, or any pasta dish. They’re perfect for soaking up rich sauces.
- Soup & Salad Companions: They elevate any soup, from a creamy tomato bisque to a hearty minestrone. They’re also a delicious crunchy contrast to a crisp green salad or a Caesar salad.
- Pizza Night Essential: What’s pizza night without some stellar breadsticks? These are the ultimate dipping tool for marinara or garlic butter.
- BBQ & Grilled Meals: Surprisingly, these twists can be a great side for grilled chicken, steaks, or even burgers, offering a comforting carbohydrate component.
- Appetizer Spread: Arrange them beautifully on a platter with various dips like marinara, olive tapenade, or a creamy pesto dip for a party or casual gathering.
- Breakfast/Brunch: Enjoy a savory twist with scrambled eggs, a frittata, or as part of a larger brunch spread.
Storing and Reheating Your Cheesy Bread Twists
Leftover bread twists (if there are any!) can be stored to maintain their freshness:
- Storage: Once completely cooled, store the Cheesy Bread Twists in an airtight container or a large zip-top bag at room temperature for up to 2-3 days. For longer storage, you can freeze them for up to 2 months. Wrap them individually in plastic wrap, then place them in a freezer-safe bag.
- Reheating from Room Temperature: To reheat, simply place them on a baking sheet and warm them in a preheated oven at 350°F (175°C) for 5-7 minutes, or until heated through and lightly re-crisped. You can also briefly microwave them, but the oven method yields a better texture.
- Reheating from Frozen: If reheating from frozen, you can either thaw them at room temperature first and then follow the room temperature reheating instructions, or place them directly on a baking sheet in a preheated 350°F (175°C) oven for 10-15 minutes, or until thoroughly warm and golden.
Frequently Asked Questions About Cheesy Bread Twists
Q: Can I use instant yeast instead of active dry yeast?
A: Yes, you can! If using instant yeast, you can typically skip the proofing step (combining it with warm water and sugar). You can add it directly to your flour mixture with the other dry ingredients. However, to be safe, we still recommend proofing it to ensure it’s active. If you do proof it, the rise times might be slightly faster.
Q: My dough isn’t rising. What went wrong?
A: The most common reasons for dough not rising are inactive yeast (check the expiration date!) or incorrect water temperature. Ensure your warm water is between 105-115°F (40-46°C). Also, a cold environment can significantly slow down or halt the rising process. Make sure your dough is in a warm, draft-free place.
Q: Can I make the dough ahead of time?
A: Absolutely! After the first rise and punching down, you can place the dough in an oiled bowl, cover it tightly with plastic wrap, and refrigerate it for up to 24 hours. When you’re ready to bake, take the dough out, let it come to room temperature for about 30-60 minutes, and then proceed with shaping, the second rise, and baking instructions.
Q: What if I don’t have bread flour?
A: All-purpose flour can be used as a substitute. While bread flour provides a slightly chewier texture, all-purpose flour will still yield delicious bread twists. You might need to adjust the amount of flour slightly, adding less or more until you achieve the desired dough consistency.
Q: Can I make these without cheese?
A: Yes, you can. If you prefer plain herbed breadsticks, simply omit the Parmesan cheese from the topping. You’ll still have incredibly flavorful and soft breadsticks, perfect for dipping.
Q: How can I adjust the recipe for fewer servings?
A: This recipe makes a generous batch of 24 breadsticks, perfect for gatherings or freezing. If you want fewer, you can easily halve the recipe to make 12 breadsticks. The cooking times should remain similar, but keep an eye on them. Many online recipe cards, like the one embedded above, also offer a serving adjustment feature that can automatically update ingredient quantities for you.
These Cheesy Bread Twists are more than just a recipe; they are an invitation to create comforting, memorable moments in your kitchen. The incredible aroma that fills your home, the satisfaction of baking from scratch, and the sheer delight on everyone’s faces as they savor these warm, garlicky, cheesy delights make every minute of preparation worthwhile. Whether it’s a quick weeknight dinner or a festive family gathering, these bread twists are sure to impress and satisfy. So roll up your sleeves, gather your ingredients, and get ready to bake a batch of homemade happiness. Happy baking!
