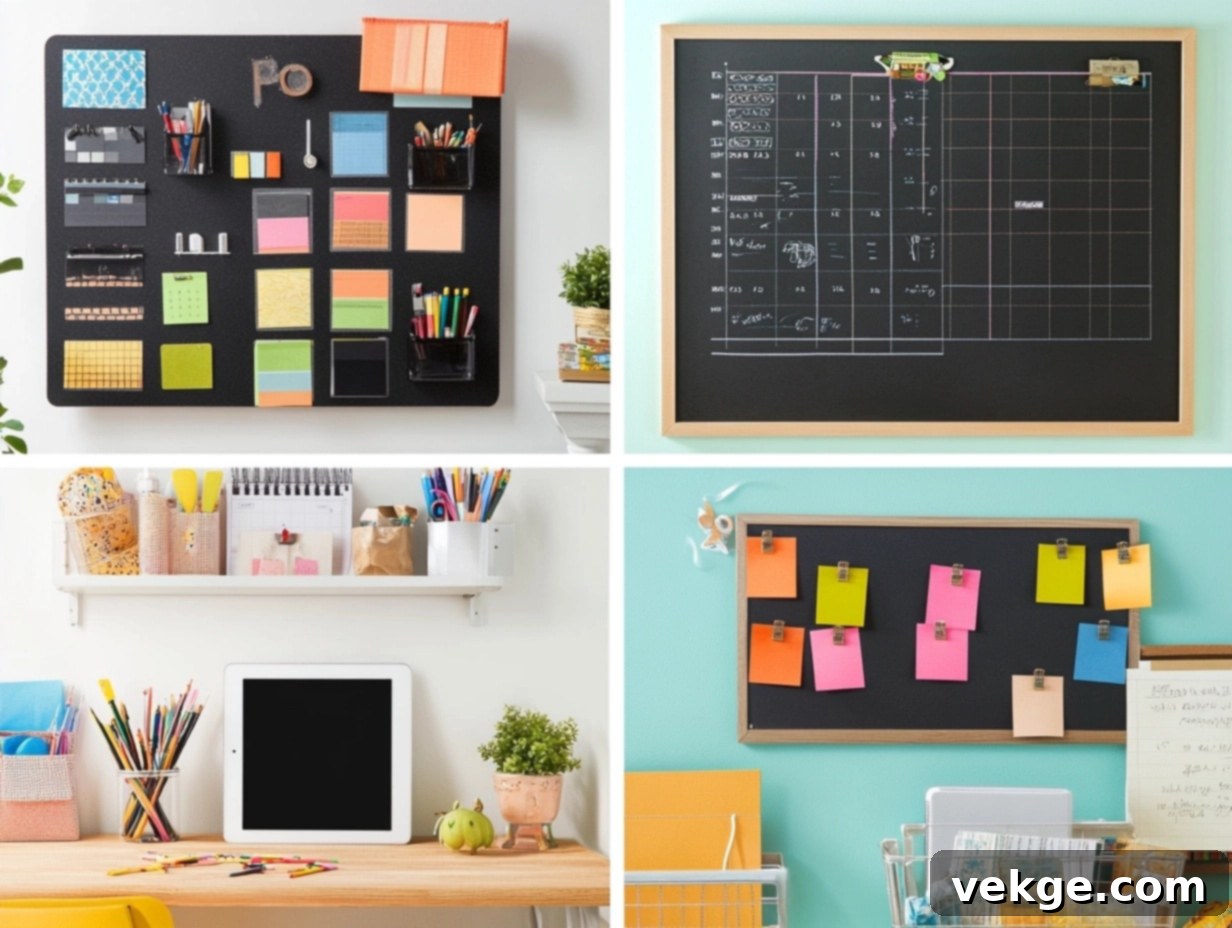
22 Creative Command Center Ideas to Transform Your Home Organization
Stepping into my kitchen that morning, a familiar wave of overwhelm washed over me. Scattered permission slips, forgotten appointments, and a general air of disarray made it clear: something had to fundamentally change. That pivotal moment sparked the creation of my very first command center wall – a true game-changer that brought much-needed order to our family’s busy life.
In today’s fast-paced world, whether you’re navigating the complexities of a bustling household, managing remote work, or simply striving to keep track of life’s endless details, a strategically designed command center can be your ultimate ally. It transforms daily chaos into a calm, efficient system, acting as the central nervous system for your home. Over the years, I’ve experimented with countless setups, learning what truly works and what falls short. Now, I’m thrilled to share a curated list of the most effective and innovative command center ideas I’ve discovered, designed to boost your productivity and bring peace of mind.
List of Command Center Wall Ideas
Each of these ideas is tailored to different needs and styles, proving that there’s a perfect organization solution for every family. Dive in and find the inspiration to create your own hub of calm!
1. Magnetic Calendar Wall
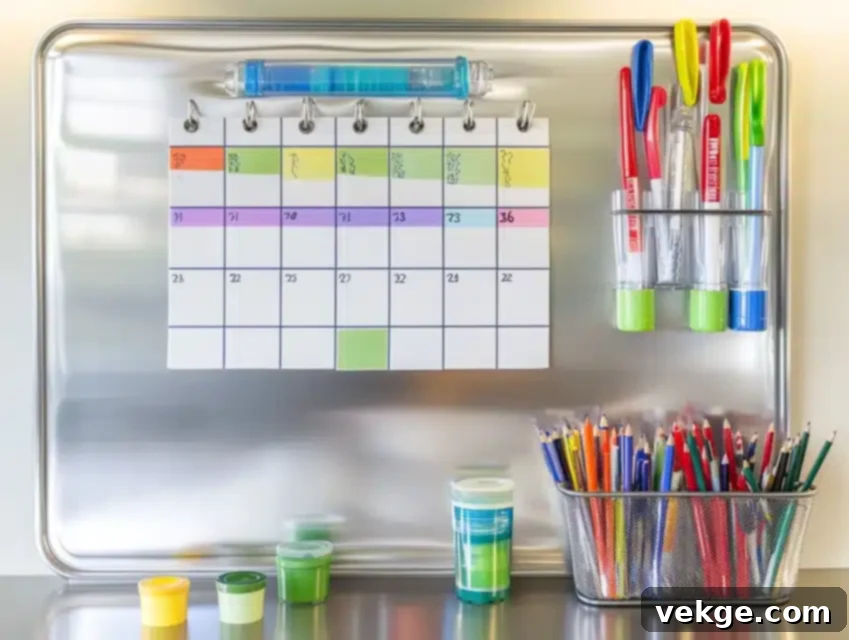
My journey into home organization truly began with a magnetic calendar wall, and it continues to be one of the most practical and adaptable solutions I’ve encountered. This dynamic system offers unparalleled flexibility, making it ideal for busy households seeking to manage ever-changing schedules with ease and clarity.
The foundation of this highly effective command center is a generously sized magnetic board, ideally at least 24″ x 36″. I’ve found that sleek metallic silver or classic white magnetic surfaces effortlessly complement diverse interior design styles, ensuring your organizational hub enhances, rather than detracts from, your home’s aesthetic. The inherent beauty of a magnetic surface lies in its non-damaging nature; you can reposition notes, photos, and reminders countless times without a single pinhole or sticky residue, keeping your walls pristine.
A true game-changer for family coordination is assigning a unique color-coded magnet to each family member. Imagine: vibrant green for Mom’s appointments, cool blue for Dad’s meetings, and cheerful red for the kids’ activities and school events. This visual shorthand allows anyone to grasp individual schedules at a glance, significantly reducing confusion and missed appointments. To keep essentials tidy and accessible, I highly recommend incorporating small magnetic containers along the bottom edge of the board. These are perfect for storing dry-erase markers, pens, and even small office supplies – and in my experience, they stay put, no matter how busy things get!
For an extra layer of versatility, invest in magnetic backing tape. This simple tool allows you to instantly transform any paper document – permission slips, invitations, important school notices – into a magnetic note that can be easily displayed and updated. One of the most significant advantages of this system is its inherent adaptability. The entire calendar layout can be effortlessly reconfigured each month, or even each week, to perfectly align with your family’s evolving schedule, making it an enduring solution for effective home management and a cornerstone of family productivity.
Quick DIY Steps:
- Begin by securely mounting a robust magnetic board to your chosen wall, utilizing heavy-duty anchors for stability. Consider adding a simple, custom-built frame around it for a polished, integrated look that matches your decor.
- Define your calendar grid using colorful washi tape or thin magnetic strips. This allows for easy adjustments and adds a touch of visual appeal, making the calendar both functional and decorative.
- Install a slim, unobtrusive floating shelf directly below the magnetic board. This provides a convenient spot for additional markers, erasers, and small seasonal decorations to keep your command center looking fresh and inviting.
2. Chalkboard Command Center
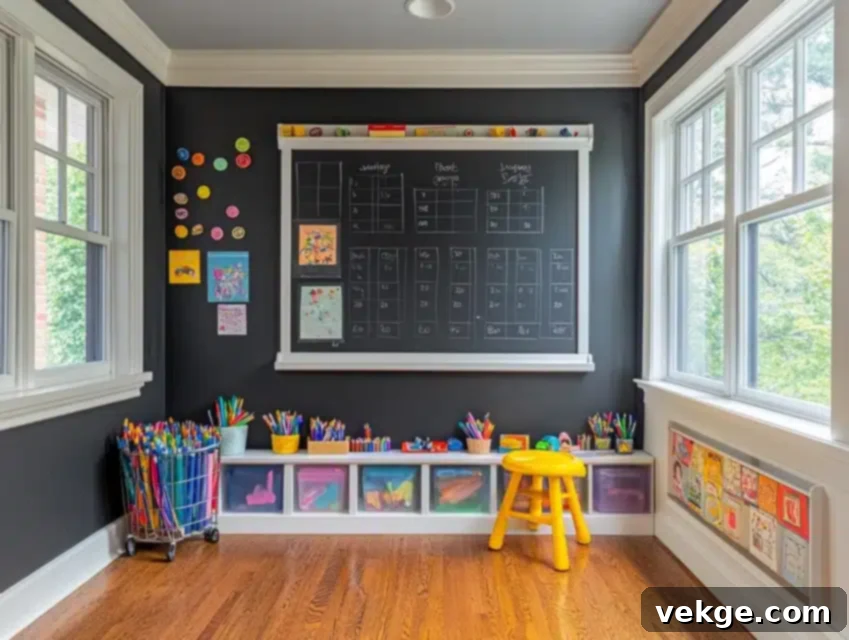
In our bustling mudroom, the chalkboard command center has become an indispensable communication hub, centralizing everything from daily reminders to creative family expressions. The beauty of using chalkboard paint is the absolute freedom it gives you to customize the size and placement to perfectly fit your space – I opted for a generous 4′ x 6′ section, which makes a strong visual statement while remaining incredibly practical for our active family.
The matte black surface, when thoughtfully framed with simple white molding, surprisingly lends a sophisticated and classic touch to the room. What truly sets this setup apart is its incredible flexibility. We’ve established permanent sections for key organizational elements, drawn with vibrant chalk markers: a weekly calendar, a running shopping list, and a rotating chore chart. Beyond these fixed components, there’s ample blank space for impromptu daily notes, quick reminders, and even spontaneous artistic doodles from the kids. My children particularly love having their own space to contribute, making it feel like a truly collaborative family space.
The chalkboard wall’s greatest asset is its ability to evolve alongside your family’s changing needs. As our schedule shifts or new activities emerge, we can effortlessly wipe clean and redesign the layout countless times. It’s the perfect canvas for quick reminders, inspiring quotes, or simply a fun way to engage everyone in daily planning. This tactile, visual system not only keeps us organized but also adds a charming, rustic touch to our home decor, proving that functionality can indeed be beautiful.
Quick DIY Steps:
- Thoroughly prime and then meticulously paint your chosen wall section with high-quality chalkboard paint. Apply multiple thin coats for a durable, smooth finish.
- Elevate the look by adding a decorative frame using simple molding. This defines the space and provides a polished, integrated aesthetic, making it look like a custom-built feature.
- Install a sleek picture ledge or a small floating shelf directly below the chalkboard. This provides a convenient and stylish spot to store chalk, erasers, and chalk markers, keeping them readily available.
3. Pegboard Organizer
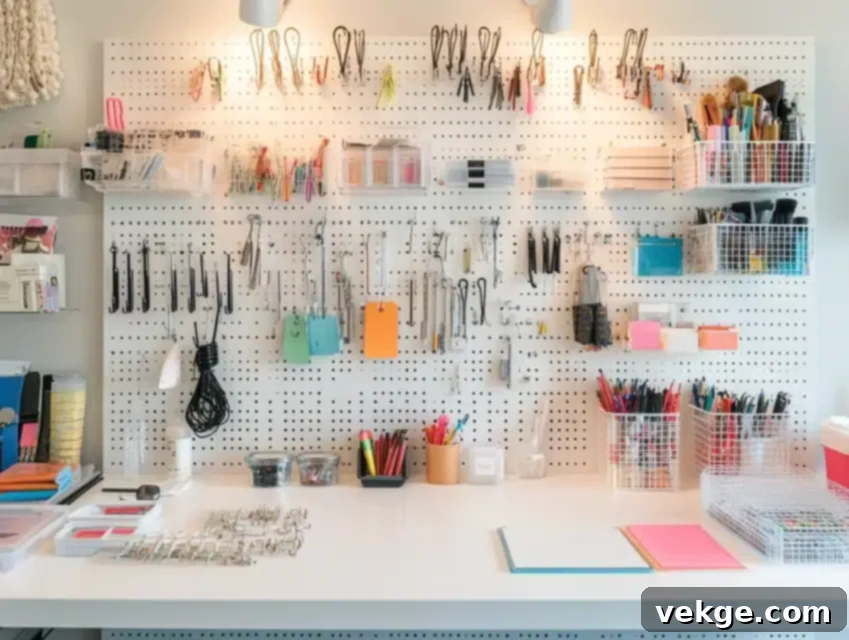
After experimenting with various fixed organizing systems that quickly became rigid, I discovered that pegboards offer an unmatched level of versatility and adaptability. Installing a generous 4′ x 4′ white pegboard in our main living area has been nothing short of a revelation, transforming how we approach family organization and decluttering.
Unlike conventional, static systems, a pegboard allows me to completely rearrange the entire layout effortlessly, whether it’s for seasonal changes or as our family’s needs evolve. For instance, during the busy school months, we allocate more space for homework organizers and essential supplies. When summer arrives, the board transforms, making room for activity schedules, adventure checklists, and creative project supplies. This dynamic adaptability ensures our command center always remains perfectly aligned with our current lifestyle.
The key to maximizing a pegboard system’s potential lies in selecting the right mix of accessories. I’ve found success with a combination of sturdy wire baskets for incoming papers and mail, various hooks for keys, masks, and often-used items, and clear containers for stationery and craft supplies. A brilliant design element of pegboards is that everything sits about 2 inches off the wall, creating a clean, “floating” look that adds desirable dimension and visual interest to the space, elevating it beyond mere functionality.
To integrate the pegboard seamlessly into our home decor, I painted it to precisely match our wall color, giving it the appearance of a sophisticated, custom-built feature rather than a utilitarian organizer. The ability to reconfigure the layout monthly not only keeps the space fresh and engaging but also ensures our home organization system remains highly effective and responsive to our family’s continuous growth and changing demands.
Quick DIY Steps:
- Mount the pegboard using spacers. These are crucial as they create the necessary gap between the board and the wall, allowing hooks and accessories to be inserted properly.
- Paint the pegboard and any surrounding frame to flawlessly match your room’s existing aesthetic. This step transforms a simple pegboard into a stylish, integrated organizational element.
- Thoughtfully arrange accessories in logical zones. Place daily necessities, such as keys and frequently used pens, at eye level for easy access, while less-used items can be stored higher or lower to optimize space and maintain a tidy appearance.
4. Family Message Hub with Clipboards
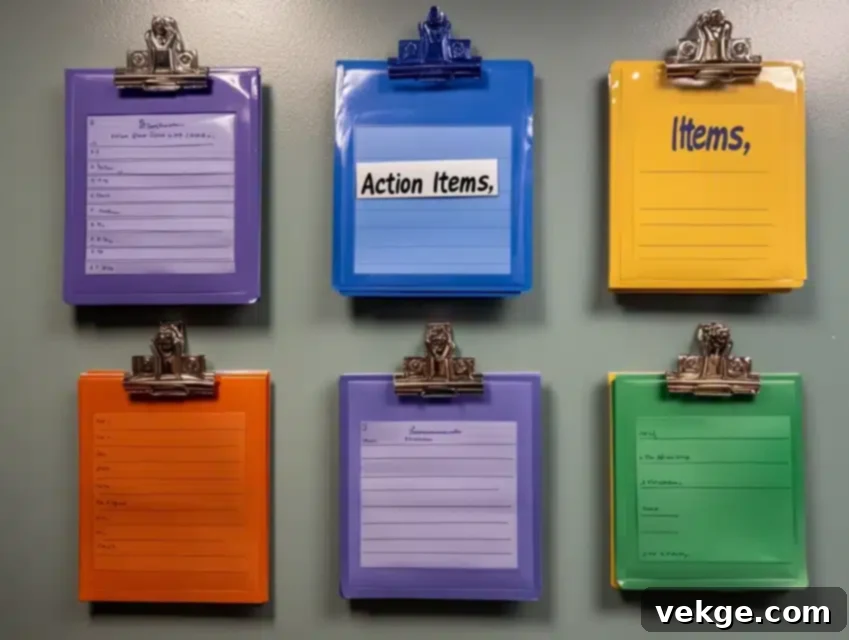
After enduring one too many instances of critical papers vanishing into the ether of countertop clutter, I engineered what we affectionately call our “Family Message Hub” – a strikingly simple yet profoundly effective system built around individual clipboards. The inherent brilliance of this setup lies in its elegant simplicity and immediate visual organization, making it a cornerstone for family communication.
The core concept is straightforward: each family member is assigned their own clipboard, easily identifiable by a distinct color. This instant personalization ensures that school forms, sports schedules, cherished artwork, and important announcements all have a designated, highly visible home. What I particularly cherish about this arrangement is its ability to keep everyone’s documents separate and accounted for, yet entirely visible at a glance. The clipboards themselves transcend mere functionality, doubling as chic decorative elements. I intentionally selected ones with metallic finishes, which beautifully catch and reflect the light, adding a touch of contemporary flair to our hallway.
The true genius that makes this system indispensable is the “action items” clipboard, strategically placed at the center. Any document requiring immediate attention, a signature, or a response is clipped here, effectively eliminating the exasperating “I never saw that!” excuse that used to plague our household. During our weekly family meetings, we conduct a quick, collaborative clean-up, removing outdated papers and updating each board, ensuring everything remains current, relevant, and actionable. This systematic approach ensures no critical information is overlooked, fostering a more organized and harmonious family environment.
Quick DIY Steps:
- Personalize your clipboards by painting them in coordinating colors. This creates a cohesive, visually appealing aesthetic that enhances your home decor while clearly designating each family member’s space.
- Mount the clipboards to the wall in an attractive pattern, such as a diamond or a neat grid. Use a level and sturdy anchors to ensure they are securely and symmetrically placed.
- Enhance personalization by adding clear, stylish name tags or labels for each family member. This not only aids in immediate recognition but also adds a thoughtful, custom touch to your family message hub.
5. Hidden Door Command Center
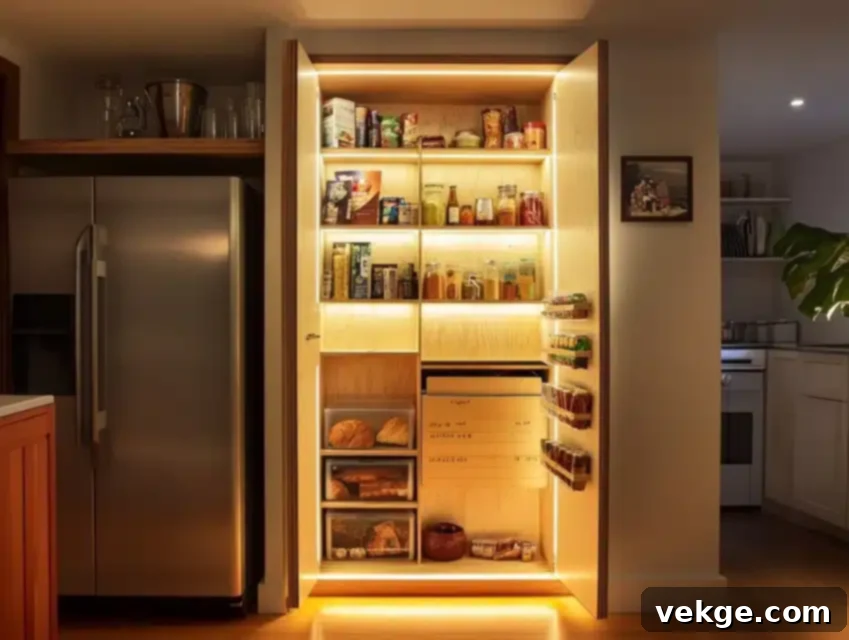
A truly transformative moment in my quest for ultimate home organization occurred when I recognized the untapped potential of our pantry door. This seemingly ordinary surface, often overlooked, became prime real estate for what I now consider our “secret weapon” for seamless household operations: a hidden door command center. It elegantly tucks away all our organizational needs, keeping our home running smoothly without any visual clutter.
I utilized the full vertical height of the door, intelligently creating distinct zones for various types of essential information. The family calendar sits at a comfortable eye level for easy viewing, meal planning charts occupy the middle section, and cleaning schedules, along with other routine checklists, are conveniently placed towards the bottom. This multi-zone approach ensures every piece of information has its dedicated place and is easily accessible when needed.
The sheer genius of this system lies in its dual nature: everything is readily available and highly functional when you need it, yet it completely vanishes from sight when you don’t. To enhance its usability, I installed discreet, thin LED strip lighting that automatically illuminates when the pantry door opens. This clever addition makes it effortless to check schedules or add items to the grocery list, even during those late-night kitchen runs. When guests arrive or when we simply desire a pristine, uncluttered look, the entire system disappears behind the closed door, maintaining a perfectly organized facade while keeping our lives perfectly organized behind the scenes.
Quick DIY Steps:
- Begin by covering the entire door surface with a thin sheet of plywood or corkboard. This provides a smooth, stable base for mounting various organizational items without damaging the door itself.
- Install your chosen organizational tools – such as a whiteboard, bulletin board, or file holders – using strong command strips or small screws. Command strips are ideal for minimizing door damage and allowing for easy repositioning.
- Integrate battery-operated LED strip lighting along the doorframe or inside the command center. This ensures optimal visibility, making it easy to read schedules and notes even in dimly lit areas.
6. Tech-Integrated Wall Station
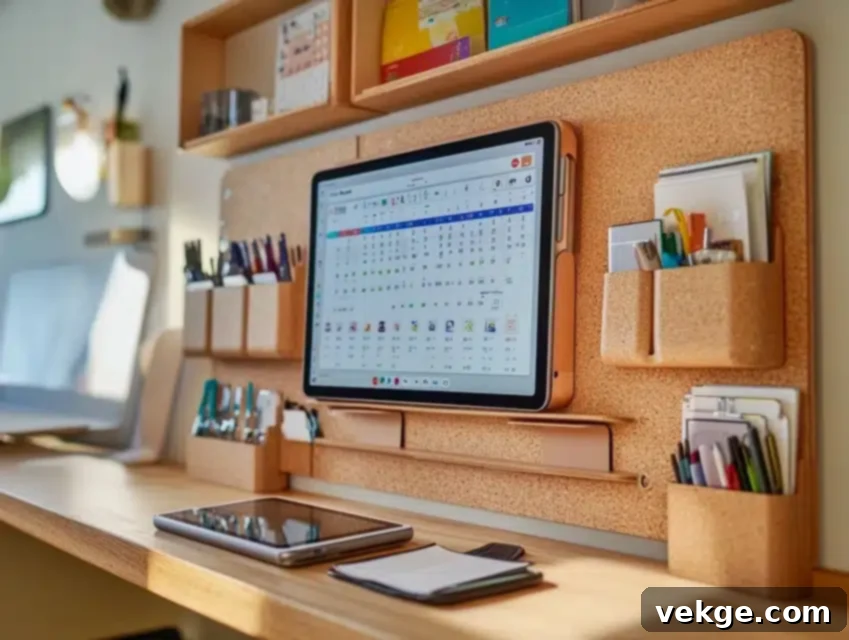
In a world where modern families seamlessly blend digital and analog routines, I recognized the crucial need for a “Digital-Analog Bridge” – a command center that harmoniously combines the best of both organizational worlds. This innovative setup is designed to serve as a central hub, integrating traditional paper-based organization with the convenience and connectivity of smart home technology, ensuring no detail is overlooked.
At the heart of this tech-integrated station is a securely wall-mounted tablet, acting as the dynamic display for our shared digital calendar, chore lists, and important reminders that sync in real-time across all family devices. Flanking this digital centerpiece are more traditional organizational elements: a vibrant cork board for pinning physical invitations and children’s artwork, and sleek file holders for managing tangible documents that still populate our lives. Below this integrated display, a small, strategically placed shelf discreetly houses a multi-device charging station, keeping all our family’s essential gadgets powered and ready for action.
What truly elevates this station is its ability to seamlessly bridge the gap between the virtual and the tangible. While the tablet provides instant, real-time updates from everyone’s digital calendars and shared apps, the surrounding cork boards and file holders beautifully display the physical items that technology simply can’t replace – like heartfelt wedding invitations, cherished kids’ drawings, or those critical paper forms that still require signatures. This synergistic approach ensures every piece of information, regardless of its format, is prominently displayed and easily accessible, creating a comprehensive and highly efficient family command center.
Quick DIY Steps:
- Install a secure and aesthetically pleasing tablet mount at adult eye level, ensuring it has discreet access to a power source for continuous charging.
- Design and build a dedicated charging station on a small shelf below the tablet. Utilize a decorative box or cable management solutions to neatly conceal power strips and wires, maintaining a clean and organized look.
- Thoughtfully mount surrounding organizational elements, such as cork boards, file holders, or small shelves, in a balanced layout that complements the central digital hub and maximizes functional space.
7. Multi-Level Family Organization Zone
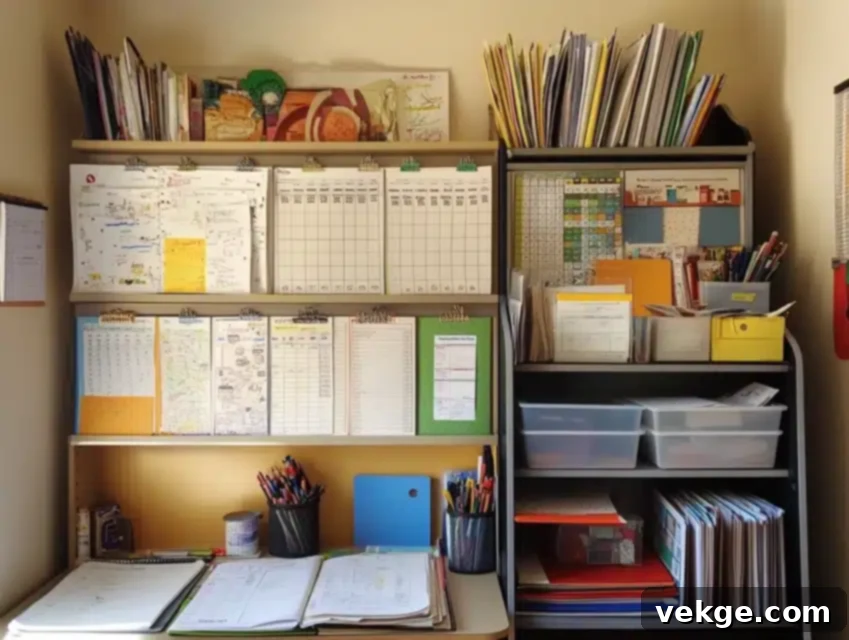
The inspiration for this multi-level organization zone struck when I observed a common frustration: my younger children simply couldn’t reach or effectively utilize half of our previous, single-height command center. Recognizing that true family organization requires accessibility for everyone, I redesigned our space with height-appropriate zones, a change that profoundly transformed how our entire family interacts with and maintains our organizational systems.
The bottom level of this innovative command center is specifically designed to sit at my children’s height, empowering them to take ownership of their responsibilities. This section features easily accessible chore charts with visual cues, engaging reward systems, and designated folders for their current homework and school projects. The middle section serves as the primary hub for our collective family information, housing the main family calendar, shared message boards, and general announcements that apply to everyone. Finally, the top level is thoughtfully reserved for managing more sensitive household paperwork, incoming bills, and adult-specific reminders – perfectly situated out of the reach of inquisitive little hands.
What I appreciate most about this dynamic system is its remarkable ability to grow and adapt with the family. As each child matures, their individual section can be expanded or reconfigured to reflect their increasing responsibilities and evolving needs. The consistent color-coding system we employ makes it incredibly intuitive for every family member, regardless of age, to quickly locate and engage with their designated zone. Furthermore, having clearly defined, dedicated spaces for all types of paperwork has dramatically reduced the dreaded “I didn’t know where to put it” paper piles, fostering a more orderly and collaborative home environment where everyone contributes to maintaining organization.
Quick DIY Steps:
- Visually mark three distinct zones on your chosen wall, ensuring each is at an appropriate height for its intended user group (children, adults, and adult-only items).
- Install adjustable shelving systems within each zone. This flexibility allows you to easily modify shelf heights and configurations as your children grow or as organizational needs change over time.
- Create clear, visual boundaries between each zone using simple yet effective methods like contrasting paint colors, decorative washi tape, or even thin wooden strips, to enhance visual organization and structure.
8. Seasonal Rotation Command Center
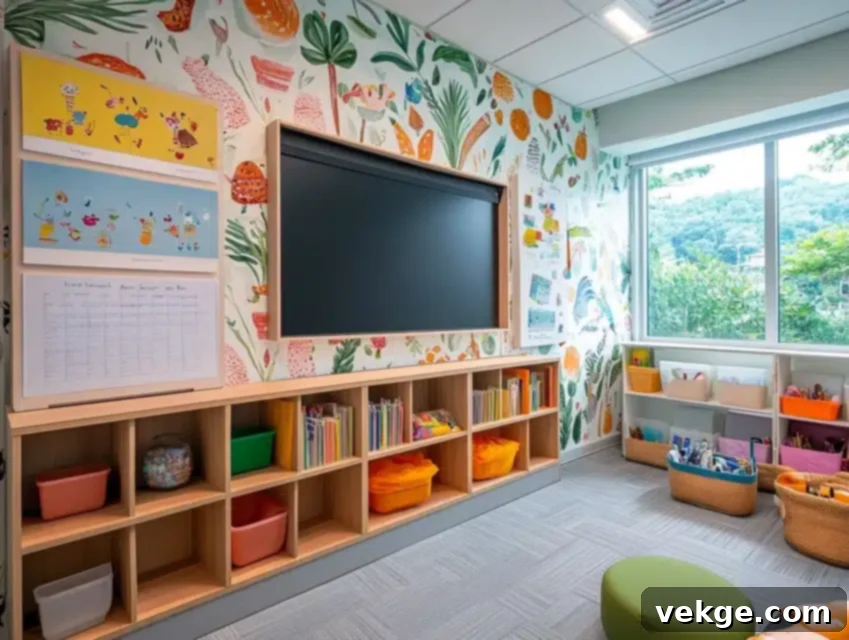
After years of static, unchanging organization systems that struggled to keep pace with our family’s dynamic lifestyle, I designed what I proudly call our “Living Command Center.” This innovative setup is uniquely crafted to gracefully adapt with the changing seasons, not just in its functional components but also in its visual appearance, ensuring it always feels fresh, relevant, and engaging.
The core structural elements of this command center remain consistent throughout the year, providing a stable foundation. However, the individual organizational components and decorative accents are meticulously designed to adapt to our current needs and the prevailing season. For example, during the vibrant summer months, it prominently displays camp schedules, outdoor activity planners, and travel itineraries. Come autumn, it seamlessly transitions to accommodate new school routines, important holiday planning checklists, and seasonal event reminders. This fluid adaptability is what makes it truly revolutionary for family organization.
The undeniable magic of this system lies in its modular design. Every single element, from message boards to storage pockets, can be effortlessly swapped out or rearranged, allowing for swift and easy seasonal transformations. I’ve taken this a step further by using magnetic paint beneath removable wallpaper, which provides the ultimate flexibility to change both the aesthetic and the functional layout without any permanent alterations. These thoughtful seasonal changes not only keep the space visually appealing and relevant to our immediate needs but, crucially, they also help my family stay more engaged and invested in our home organization system, ensuring its long-term success and effectiveness.
Quick DIY Steps:
- Establish a versatile neutral base for your command center, either by painting a wall section with magnetic paint or by mounting large, interconnected magnetic boards. This foundational layer provides the essential flexibility for future changes.
- Design and prepare interchangeable modules tailored for different seasonal needs. These could include specific calendars, activity checklists, or themed storage pockets that can be easily attached and removed.
- Set up an easily accessible and clearly labeled storage system for off-season elements. This ensures that when a new season rolls around, the relevant modules are quickly retrieved and ready for rotation, minimizing downtime and maintaining order.
9. Library-Style File Wall

Inspired by the enduring efficiency of old-school library catalog systems, I embarked on a mission to transform our often-cluttered hallway wall into what my children affectionately call the “Family Filing System.” This sophisticated yet highly practical command center has eliminated the perennial problem of papers piling up on countertops, ensuring that every document finds its rightful place within beautifully designed, wall-mounted file holders.
Each file holder is clearly labeled with intuitively categorized sections, such as “Action Items” for immediate tasks, “School” for academic documents, “Memories” for cherished artwork and photos, and “Upcoming Events” for invitations and notices. This visual categorization makes it effortless for anyone to quickly sort and retrieve documents, fostering a proactive approach to paper management. The real breakthrough in efficiency came with the addition of a dedicated “Weekly Review” slot. Every Sunday, our family gathers for a quick ritual, going through each category together, discussing items, and moving documents to their next logical destination – whether it’s to be filed away, actioned, or discarded.
Beyond its exceptional functionality, this system boasts an elegant aesthetic. I carefully selected copper-finished file holders, which not only add a touch of warmth and sophistication to our hallway but also complement our home decor beautifully. The result is a command center that is impeccably organized, visually appealing, and, most importantly, keeps every critical paper from ever getting lost again. This systematic approach has significantly reduced household stress and enhanced our overall family productivity.
Quick DIY Steps:
- Install a series of matching wall-mounted file holders in a neat grid pattern. Ensure they are spaced evenly and securely anchored to the wall for a professional and durable setup.
- Develop a clear, consistent labeling system for each file holder. Use a uniform font and coordinating colors to enhance readability and visual appeal, making categorization intuitive for everyone.
- Designate an easily accessible “inbox” area or a specific file holder for all new, incoming items. This acts as a temporary holding spot, preventing papers from being left on countertops and ensuring they are processed during your weekly review.
10. Kitchen Command Hub
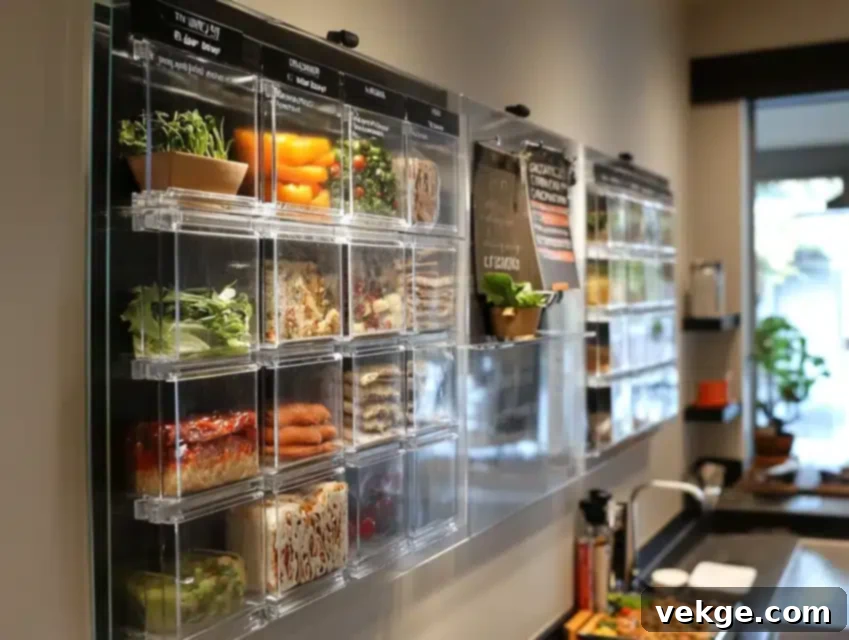
As the undeniable heart of our home, where most of our day-to-day family life unfolds, I realized the kitchen demanded its own specialized and highly efficient command center. This insight led to the creation of what we now lovingly call our “Kitchen Control Station” – a dedicated, multi-functional area that seamlessly combines meal planning, grocery list management, and essential everyday family organization within the very space it’s most needed.
The centerpiece of this culinary command hub is a sleek, glass-covered menu board, which acts as our central planning surface for weekly meals. Its dry-erase functionality allows for easy updates and ensures everyone is aware of the upcoming menu. Adjacent to this, clear acrylic pockets are strategically installed, providing organized homes for frequently referenced takeout menus, cherished recipes torn from magazines, and our ever-evolving running grocery list. This ensures that all kitchen-related paperwork is neatly contained and instantly accessible.
What truly distinguishes this kitchen-specific hub are its tailor-made features. I thoughtfully integrated a dedicated section for appliance manuals, ensuring they are always at hand when a quick reference is needed. There’s also a special spot for our family’s favorite, go-to recipes, making meal prep a breeze. A rotating dinner duty chart keeps everyone accountable and involved in kitchen chores, fostering a sense of shared responsibility. My personal favorite element is the “Quick Meals” list – a lifesaver for those notoriously hectic weeknight dinners. This entire system not only helps us stay incredibly organized but also significantly reduces food waste and alleviates the daily stress associated with meal planning, making kitchen operations smoother and more enjoyable for the entire family.
Quick DIY Steps:
- Mount a large, sturdy glass panel to the wall to serve as your menu board. Ensure it’s securely installed and can be easily written on and wiped clean with dry-erase markers.
- Install clear acrylic pockets in a visually appealing cascading or grid layout. These are perfect for holding various kitchen-related papers, keeping them tidy, visible, and protected from kitchen splashes.
- Create designated zones for different kitchen activities. For example, a “Recipes” zone, a “Manuals” zone, and a “Chores” zone, each clearly labeled to maximize efficiency and minimize clutter in this high-traffic area.
11. Modern Minimalist Command Wall
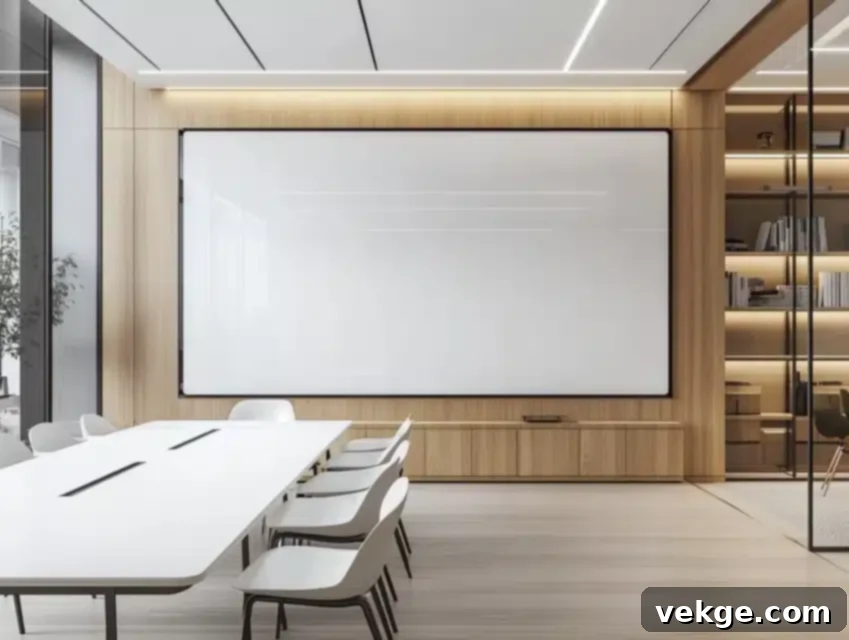
After finding myself overwhelmed by the visual noise and clutter that often accompanies traditional command centers, I made a conscious decision to strip everything back, creating what I affectionately call our “Zen Zone.” This minimalist approach to organization prioritizes calm and clarity, utilizing a clean, monochromatic color scheme, simple lines, and only the most essential elements to manage our family’s daily needs without creating any unnecessary visual distraction.
The main feature of this tranquil command wall is a generously sized white board, elegantly divided into distinct sections using thin, crisp black lines. Following a “less is more” philosophy, we intentionally keep only the most crucial, immediate information visible. This discipline ensures that our eyes are not assaulted by an abundance of notes, making it easier to focus on what truly matters for the day or week ahead.
The profound beauty of this system lies in its inherent simplicity and thoughtful design. Each family member is allocated just one designated spot for their most urgent items or reminders, fostering a clear sense of individual responsibility. Everything else – the less immediate papers, reference documents, and supplies – is neatly tucked away into sleek, hidden storage compartments, cleverly concealed behind sliding panels. The overall result is a profoundly calming space that effectively manages our household chaos without contributing to any visual noise. It’s truly amazing to observe how much more consistently and effectively we utilize this system precisely because it isn’t overwhelming or cluttered to look at, promoting a sense of peace and productivity in our home.
Quick DIY Steps:
- Select a large, prominent section of your wall and paint it in a single, neutral color like white, light grey, or a soft beige. This creates a clean, serene backdrop for your minimalist command center.
- Install sleek sliding panels over a portion of the wall. These panels can conceal shelves, cork boards, or additional storage, allowing you to hide clutter and maintain a streamlined aesthetic when not in use.
- Create minimalist dividing lines on your main display board using thin black or grey tape, or by carefully painting fine lines. These demarcations define clear sections for different tasks or family members without adding visual bulk.
12. Entryway Drop Zone
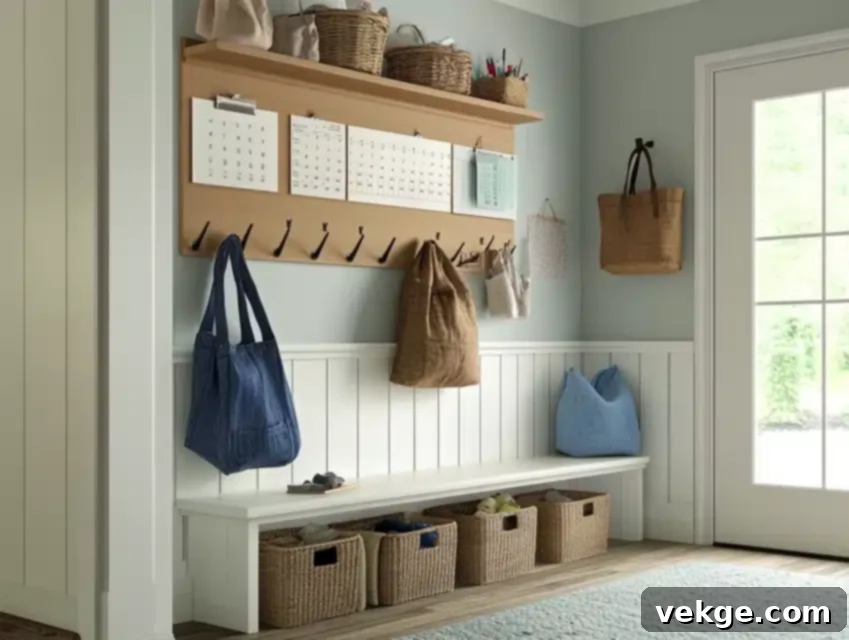
The moment I transformed our often-chaotic entryway into what we now fondly call the “Family Landing Pad,” our morning rush and evening arrivals underwent a complete and stress-free metamorphosis. This strategically designed command center acts as an essential interceptor, efficiently catching and organizing everything as we enter and exit the house, ensuring nothing is forgotten or misplaced in the daily shuffle. Its core design principle centers on quick access and effortless drop-offs, streamlining our transitions.
The genius of this system lies in its personalized, traffic-flow design. Each family member has their own dedicated hook section, complete with a small, individual bulletin board positioned directly above for personal reminders and notes. Below this, a spacious basket provides an easy drop-off point for shoes, backpacks, or sports gear. This thoughtful arrangement ensures that everything you need when heading out the door – keys, wallets, school bags, and upcoming event reminders – is conveniently located at grab-level, preventing frantic searches.
A prominent weekly calendar sits unmissable at eye level, making it virtually impossible to overlook important dates or appointments as you make your exit. To further enhance functionality and comfort, I integrated a small, sturdy bench beneath the entire setup. This serves a dual purpose: providing discreet storage for shoes and offering a comfortable spot to sit and sort through mail, put on shoes, or simply collect thoughts before stepping out. This entryway command center has not only brought order but also a sense of calm to our daily routines, making arrivals and departures far more organized and efficient.
Quick DIY Steps:
- Create individual stations for each family member, comprising a sturdy hook (or multiple hooks), a small personalized bulletin board above it, and a designated basket or cubby below for their belongings.
- Install a prominent, easy-to-read weekly or monthly calendar at adult eye level in a central position within the drop zone. This ensures that important dates and events are visible to everyone upon entry and exit.
- Integrate practical seating and shoe storage beneath the individual stations. A bench with cubbies or a long, narrow shelf with baskets can provide both comfort and essential organizational space for footwear and bags.
13. Study Station Command Center
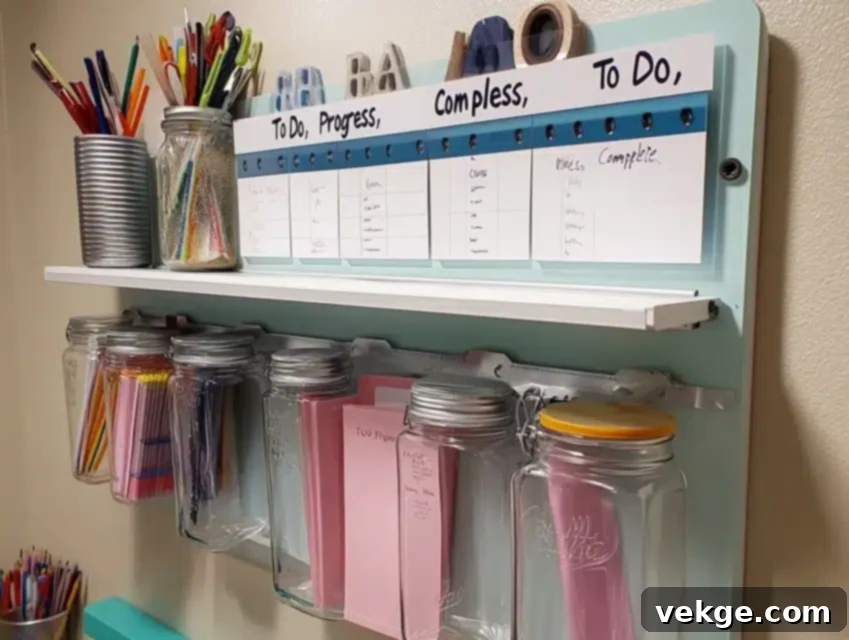
When remote learning suddenly became an integral part of our family’s routine, I quickly recognized the need for a dedicated, highly organized space to support academic success. This led to the transformation of an unused wall into what we now refer to as our “Academic Action Station.” Unlike typical command centers that focus on general household management, this specialized hub is entirely devoted to school, learning, and fostering effective study habits.
The focal point of this academic command center is a large, easy-to-read weekly assignment tracker, meticulously divided by subject. This visual breakdown allows children to see their entire academic workload at a glance, promoting better time management. Directly below the tracker, clear, vertical folders are installed, providing organized homes for current projects, pending assignments, and important handouts. A neatly arranged row of mason jars keeps essential study supplies – pens, pencils, rulers, and craft items – perfectly organized and readily accessible, ensuring that everything needed for homework is always within reach.
The true success of this system stems from its interactive homework-tracking method. Each child has been given a magnetic slider that they physically move across their assignments on the board, progressing from “To Do” to “In Progress” and finally to “Complete.” This empowering visual system has virtually eliminated the constant “Did you finish your homework?” questions that used to plague our evenings, fostering greater independence and accountability. Even after the return to in-person learning, this dedicated study station continues to be an invaluable asset, keeping our academic life remarkably in order and supporting a calm, focused learning environment at home.
Quick DIY Steps:
- Install a magnetic tracking board specifically designed for assignments or projects. Create clear, movable sections (e.g., “To Do,” “In Progress,” “Done”) using magnetic strips or chalk lines, along with individual magnetic sliders for each child.
- Design and set up a supply organization system at a child-accessible height. Utilize clear containers, mason jars, or small wall-mounted bins to store pens, crayons, paper, and other essential study materials neatly.
- If space allows, set up individual homework stations adjacent to the command center, ensuring each child has a dedicated desk or surface with proper lighting to support focused and comfortable study sessions.
14. Built-In Cabinet Command Center

For families who prefer a pristine, clutter-free aesthetic, the idea of having an organization system perpetually on display can be daunting. Tired of our command center always being visible, I ingeniously repurposed an old built-in cabinet into what we affectionately refer to as our “Stealth Command Station.” The true brilliance of this system lies in its doors – when closed, it seamlessly blends into the room, appearing as a normal, unassuming cabinet. But open them, and you reveal a fully functional, comprehensive family command center, ready to tackle any organizational challenge.
The interior of each cabinet door is maximized for efficiency, fitted with magnetic boards that serve as dynamic surfaces for calendars, notes, and photos. The main cabinet interior is thoughtfully designed with adjustable shelves, providing ample space for binders, books, and larger supplies, alongside a robust filing system for important documents. This multi-layered approach ensures every item, from small reminders to bulky files, has a dedicated and hidden home.
What makes this setup particularly special is its unparalleled ability to instantly conceal clutter. When guests arrive, or simply when we desire a cleaner, more minimalist living space, everything vanishes behind the closed doors, creating an environment of effortless serenity. To enhance its practicality, I integrated discreet LED strips that automatically illuminate when the cabinet doors open, making it exceptionally easy to check schedules, jot down notes, or retrieve documents, even in dimly lit conditions. This built-in command center truly offers the best of both worlds: impeccable organization and an uncluttered, sophisticated aesthetic.
Quick DIY Steps:
- Maximize storage and display by adding various organizational elements to the interior surfaces of the cabinet doors. This could include thin magnetic boards, cork panels, or even small, shallow shelves for pens and markers.
- Install proper lighting within the cabinet. Battery-operated LED strip lights with motion sensors are ideal, ensuring immediate visibility when the doors are opened and conserving energy.
- Create distinct zones within the cabinet for different types of information and supplies. For example, a “Calendar & Communications” zone on one door, a “Paperwork & Filing” section on a shelf, and a “Supplies” area in a drawer or bin.
15. Vintage-Inspired Message Center
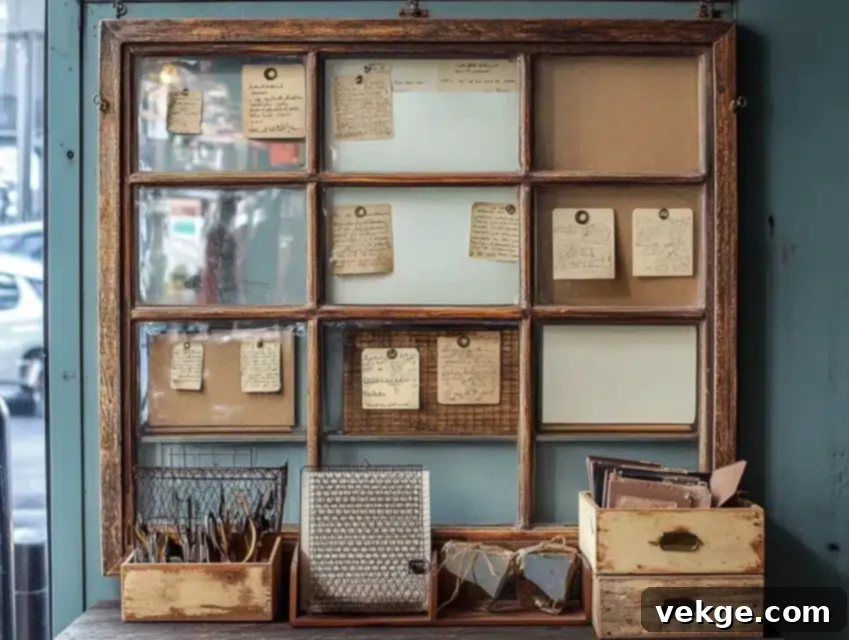
Drawing deep inspiration from the timeless charm and methodical efficiency of old-school post offices, I embarked on a creative project to craft our “Heritage Hub.” This unique command center masterfully blends a nostalgic vintage aesthetic with the essential functionality of modern family organization, resulting in a system that is both highly effective and visually captivating.
The foundation of this charming message center is an antique window frame, meticulously sourced and lovingly restored. The original glass panes were thoughtfully replaced with a diverse array of organizational surfaces: some sections now feature classic cork for pinning notes and photos, others boast smooth whiteboard material for daily messages and erasable calendars, and one particularly special pane is fitted with delicate chicken wire, perfect for elegantly hanging cards, invitations, or cherished mementos. This eclectic mix of textures and functions adds to its unique character.
The undeniable allure of this system lies in its distinctive personality and meticulous attention to detail. Each organizational section is adorned with a polished brass label holder, and I utilize vintage-style tags to clearly categorize information, adding an authentic historical touch. Below the main frame, several old wooden boxes were cleverly repurposed into functional mail slots, providing a dedicated and stylish sorting system for incoming and outgoing papers. This Heritage Hub isn’t merely a functional tool for home organization; it has truly blossomed into a captivating conversation piece, infusing our home with character, history, and a touch of whimsical elegance.
Quick DIY Steps:
- Begin by sourcing a vintage window frame from an antique shop, flea market, or salvage yard. Thoroughly clean, sand, and restore it, applying a fresh coat of paint or stain to enhance its character.
- Carefully remove the original glass panes and replace them with a variety of organizational materials. Cut corkboard, thin whiteboard panels, and chicken wire to fit precisely into the individual sections of the frame.
- Create a coordinated and aesthetically pleasing labeling system. Use vintage-style labels, clear brass holders, or elegant script to categorize each section, ensuring consistency and enhancing the overall vintage charm of the message center.
16. Kids’ Interactive Command Center
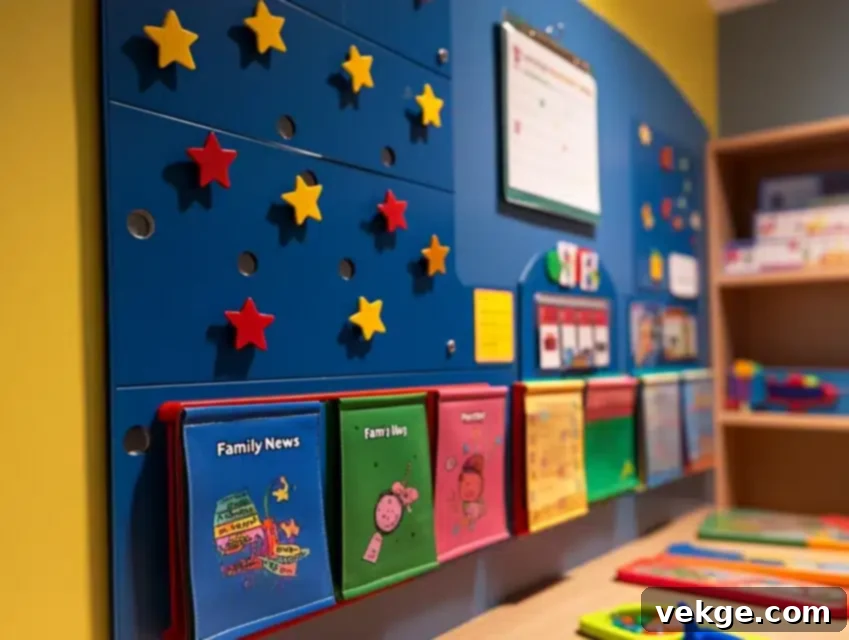
After observing my children’s dwindling interest and engagement with our more traditional family command center, I realized that an effective organizational system for kids needed to be, above all, fun and interactive. This insight led to the creation of what they now enthusiastically call their “Mission Control” – a vibrant, hands-on space designed specifically to engage young minds in the process of daily organization and responsibility.
Set purposefully at their eye level, this interactive command center bursts with bright colors and features numerous movable elements that invite participation. The centerpiece is a dynamic reward chart, where children can proudly track their achievements by personally moving magnetic stars or tokens. Adjacent to this, clear, child-friendly pockets display their weekly schedules, utilizing engaging pictures instead of just words. This visual approach makes it incredibly easy for even our youngest family members to understand and anticipate their daily routines, fostering independence and reducing anxiety.
What truly makes this space a success is its hands-on, empowering nature. Each child has their own “mission board” within the larger center, where they can track their personal goals, monitor chores, and celebrate their accomplishments. We’ve also integrated a dedicated “Family News” section, a space where kids are encouraged to proudly post their latest artwork, school achievements, or special family announcements. This entire system is not just about keeping things tidy; it cleverly teaches essential organization skills, promotes self-management, and makes the often-dreaded task of staying organized an engaging and enjoyable “mission” for the whole family.
Quick DIY Steps:
- Install a large, colorful magnetic board at a height easily accessible to your children. This serves as the primary canvas for all interactive elements and encourages their active participation.
- Design picture-based organizational systems for daily routines, chores, and schedules. Use simple icons or photographs to represent tasks, making it intuitive and easy for young children to understand without needing to read.
- Incorporate interactive elements that kids can physically manage themselves. This could include magnetic sliders for tracking progress, Velcro patches for moving chore assignments, or a jar for adding stars as rewards, empowering them with a sense of control and accomplishment.
17. Small Space Command Center
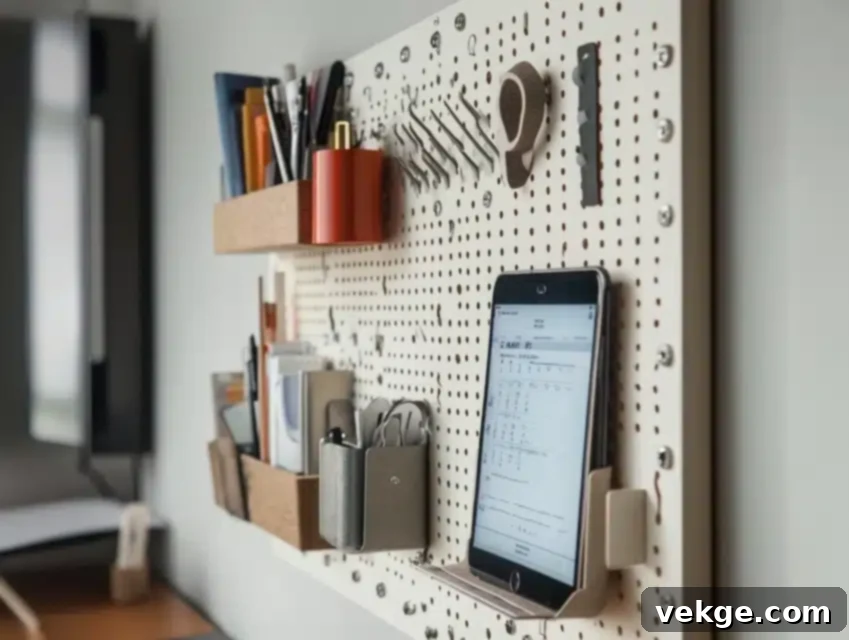
Living in a compact apartment for several years instilled in me a profound appreciation for maximizing every single inch of available space. This experience was the catalyst for developing what I call our “Micro Manager” – a highly ingenious and compact command center that effortlessly fits into even the tiniest corner, yet astonishingly packs all the functionality and organizational power of much larger systems. It’s proof that you don’t need extensive square footage to achieve superior home organization.
The brilliance of this system lies in its clever utilization of vertical space. I installed a narrow pegboard column, stretching from floor to ceiling (or as high as practical), equipped with a diverse array of adjustable components. This vertical approach allows for unparalleled flexibility, as elements can be rearranged, added, or removed as needed, adapting to our evolving daily requirements without consuming precious horizontal surface area. Each component is thoughtfully chosen for its efficiency and aesthetic appeal, ensuring the system remains both functional and visually pleasing.
The true genius of the Micro Manager is its emphasis on multi-functional storage solutions. For instance, our elegant wall-mounted mail holder cleverly doubles as a convenient tablet stand, perfect for displaying digital recipes or shared calendars. The main calendar board can ingeniously flip up or slide open to reveal additional, hidden storage compartments behind it, maximizing every millimeter of space. Despite its remarkably small footprint, we’ve successfully integrated all our essential organizational tools: a comprehensive family calendar, an efficient mail sorting system, and even a small, dedicated bulletin board for urgent notes. This compact powerhouse demonstrates that thoughtful design can deliver immense organizational benefits, even in the most constrained living environments.
Quick DIY Steps:
- Identify a narrow, underutilized vertical space in your home, such as a sliver of wall next to a doorway or between cabinets. Install a vertical organization system like a narrow pegboard, a series of wall-mounted pockets, or slim floating shelves.
- Prioritize multi-functional storage solutions. Look for items that serve dual purposes, like a mail sorter that can also hold a tablet, or a hook rack that includes a small shelf for quick drop-offs.
- Maximize vertical space with adjustable components. Choose shelves, hooks, and containers that can be easily moved up or down to adapt to different items and evolving needs, ensuring optimal use of every inch.
18. Eco-Friendly Organization Hub
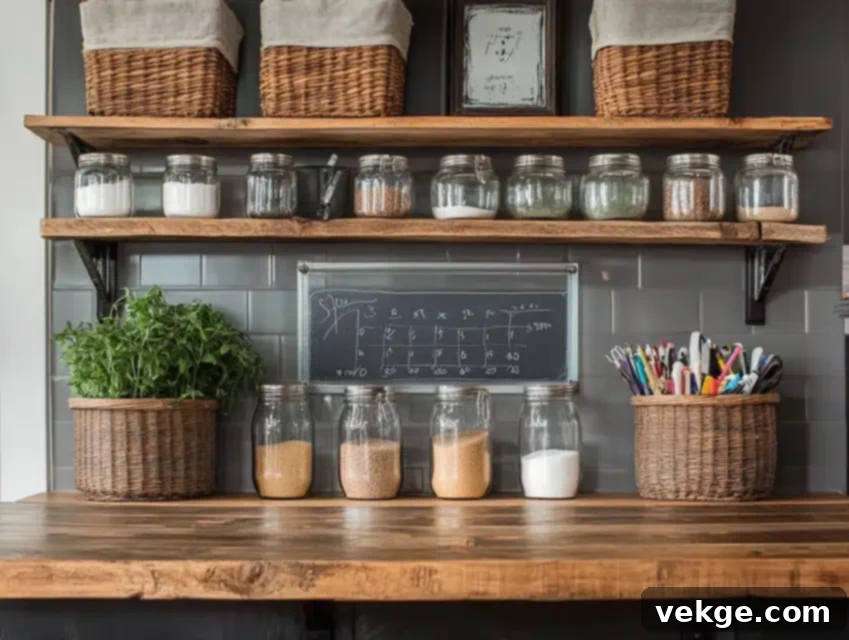
Driven by my deep passion for both efficient home organization and environmental consciousness, I meticulously crafted our “Green Command Center.” This unique hub is a testament to sustainable living, built almost entirely from repurposed and eco-friendly materials, proving that you can achieve impeccable organization without compromising your values or contributing to waste.
The robust base of this command center is beautifully constructed from reclaimed wood, giving it a rustic charm and a story. Old mason jars, which might otherwise have been discarded, have been cleverly repurposed into stylish and functional supply holders for pens, markers, and small office essentials. Instead of relying on conventional plastic organizers, I opted for elegantly woven baskets crafted from recycled materials, adding texture and warmth to the space. Furthermore, all our paper products and documents are neatly contained within repurposed wooden crates, continuing the theme of sustainable reuse and creating a cohesive aesthetic.
What truly defines this system is its unwavering commitment to a zero-waste approach. We’ve moved away from single-use paper notes, instead utilizing washable chalk markers on sleek glass surfaces for daily reminders and messages, ensuring everything is erasable and reusable. Every organizing container is carefully selected for its potential to be repurposed or recycled at the end of its life cycle. Even our central family calendar is an innovative reusable glass panel where we write, track, and then simply wipe clean each month. This Green Command Center has evolved beyond a mere organizational tool; it has become a powerful teaching tool for our children, instilling valuable lessons about sustainable living while flawlessly keeping our family organized and productive.
Quick DIY Steps:
- Actively source sustainable or reclaimed materials for the main structure of your command center. Think reclaimed wood planks for shelves, repurposed pallets for a base, or salvaged metal for accents.
- Create reusable writing surfaces from materials like old glass panes (for dry-erase), sanded and sealed wood (for chalk), or even polished slate. This reduces paper waste and encourages mindful usage.
- Integrate a dedicated paper recycling system directly within the command center. This could be a clearly labeled, attractive bin or a partitioned section, making it effortless to sort and dispose of paper waste responsibly as it accumulates.
19. Smart Home Integration Center
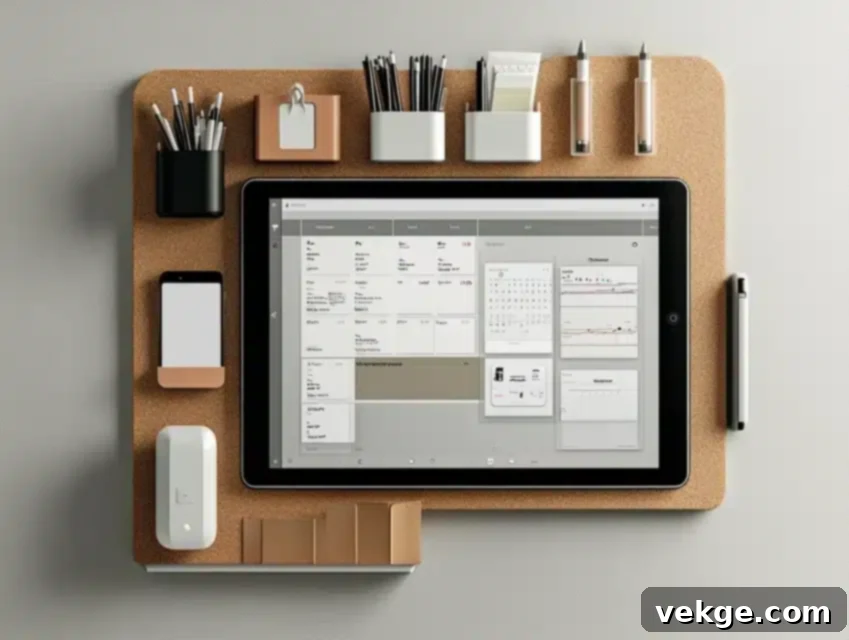
For families that thrive on the intersection of traditional organization and cutting-edge technology, I designed our “Smart Command HQ.” This innovative system stands as a testament to modern living, where digital efficiency and tactile organization coexist seamlessly. It’s the ultimate hub for families navigating both the analog and digital worlds, ensuring every detail is captured and communicated effectively.
At the very heart of this sophisticated command center is a sleek, wall-mounted tablet. This central display instantly syncs with all our family’s digital calendars, shared shopping lists, and crucial reminders, providing real-time updates that are accessible to everyone. Around this digital core, I strategically arranged traditional elements such as a cork bulletin board for physical invitations and artwork, and a robust paper filing system for documents that still require a tangible presence. This harmonious blend ensures no information falls through the cracks, regardless of its format.
What truly makes this setup unique and incredibly effective is its seamless ability to bridge the digital-analog divide. When a family member adds an event to their smartphone calendar, it automatically appears on our central display, keeping everyone informed without redundant entries. A key feature is the integrated charging station, cleverly built into the bottom shelf. This dedicated zone keeps all our family’s essential devices – phones, tablets, smartwatches – neatly organized, fully powered, and ready for use. Furthermore, voice commands can be utilized to instantly add items to our shopping list or set reminders, which then appear both digitally and on our physical message board. This Smart Command HQ is an indispensable tool for families seeking to master the art of organization in a hyper-connected world.
Quick DIY Steps:
- Securely mount a tablet holder to the wall at a comfortable viewing height. Ensure there’s hidden cable management to conceal wires, maintaining a clean and integrated look.
- Create a dedicated charging station on a bottom shelf or within a recessed area. Designate labeled spots for each family device, ensuring they are always charged and organized.
- Thoughtfully install traditional organizing elements, such as bulletin boards, magnetic whiteboards, or stylish file holders, around the digital hub. Balance the layout to create a cohesive and functional multi-faceted command center.
20. Working Parent Command Center
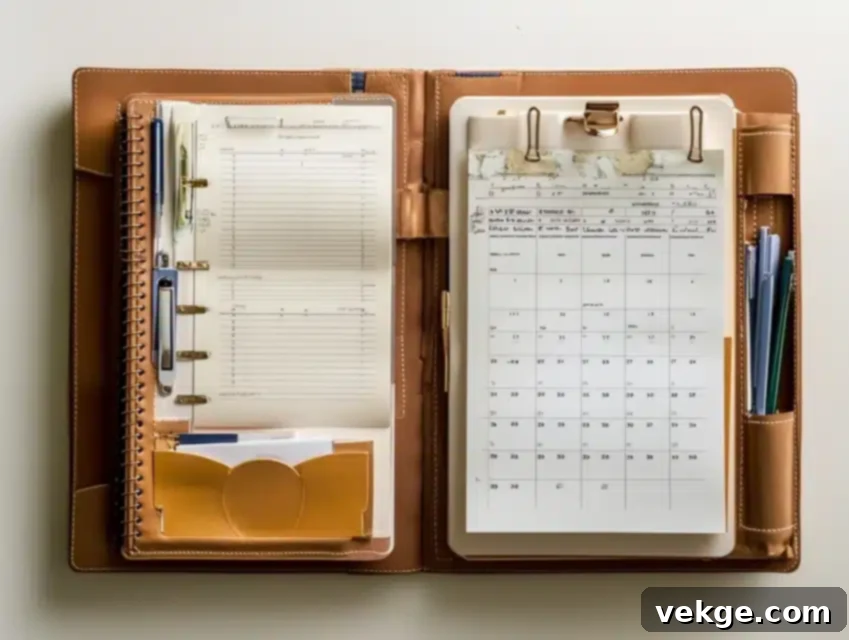
Navigating the intricate balance between remote work demands and the vibrant chaos of family life can be a constant challenge for working parents. Recognizing this, I meticulously designed what I aptly call the “Work-Life Balance Board.” This truly unique command center is thoughtfully partitioned into two distinct, yet interconnected, sections: one specifically dedicated to professional commitments and deadlines, and the other to family responsibilities and events. The clever design aims to help maintain crucial boundaries while keeping all aspects of our busy lives visible and manageable in one central location.
What makes this system exceptionally effective is its clear physical separation of duties, which helps to mentally compartmentalize tasks, while still ensuring seamless overall family coordination. Work projects, professional deadlines, and client communications reside in their designated work zone, preventing their encroachment into personal time. Simultaneously, family events, school activities, and household chores have their own distinct and equally prominent space, ensuring they receive the attention they deserve. This intentional division helps prevent the feeling of being constantly “on” for both work and family.
A central calendar strategically bridges both sections, acting as the ultimate harmonizer. This unified calendar is critical for preventing double-booking, allowing us to visualize the confluence of work and family obligations, and, most importantly, ensuring that precious family time is intentionally protected and doesn’t get inadvertently overshadowed by professional commitments. This Work-Life Balance Board empowers working parents to manage their demanding schedules with greater clarity, reducing stress and fostering a healthier, more organized integration of their professional and personal lives.
Quick DIY Steps:
- Create two distinct, visually separated zones on your command center wall – one clearly designated for “Work” and the other for “Family Life.” Use different colored backgrounds, borders, or even separate boards to distinguish them.
- Install a unified calendar system in the center of your command center. This central calendar should be capable of displaying both work-related appointments and family events, providing a holistic overview of your entire schedule.
- Add separate storage solutions specific to each zone. For the “Work” section, include file holders for professional documents and perhaps a small shelf for work-related notebooks. For “Family,” consider pockets for school forms, a chore chart, or a meal planner.
21. All-Season Activity Center
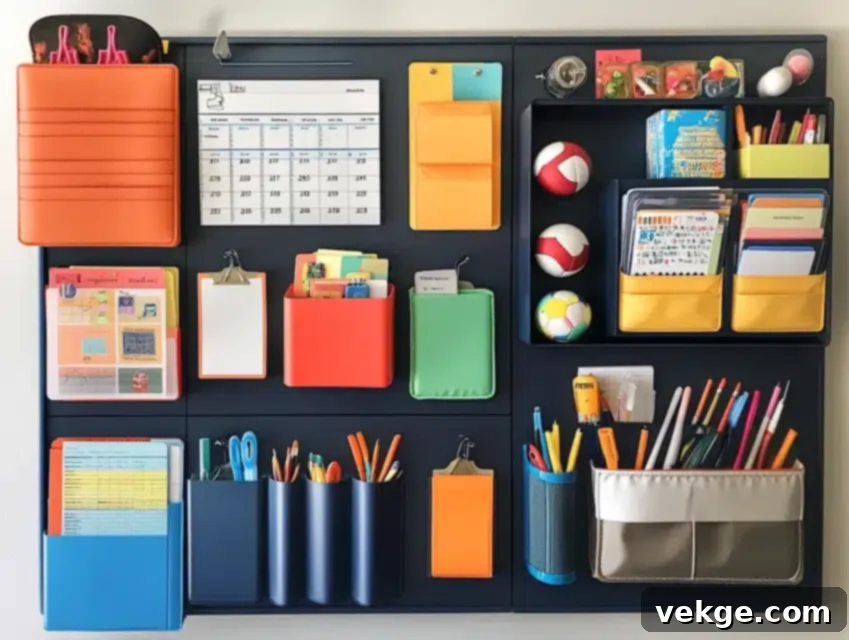
The constant, often overwhelming, rotation of sports gear, seasonal hobbies, and ever-changing family schedules profoundly inspired the creation of my “Season Switcher” command center. This intelligently adaptable system is characterized by its dynamic, moveable components that can be effortlessly rearranged and reconfigured to perfectly align with our family’s current activities throughout the entire year, eliminating the usual seasonal chaos.
During the intense soccer season, for instance, a dedicated spot prominently displays practice schedules, game day essentials checklists, and team communication. As winter approaches and sports transition, the command center transforms, adapting to track indoor activities, snow day procedures, holiday planning, and winter break schedules. This fluid transformation ensures that our organizational hub is always relevant and maximally useful for the specific demands of each season.
The undeniable genius of the Season Switcher lies in its inherently modular design. The foundational structure utilizes strong magnetic strips, which serve as the anchor for a variety of interchangeable pockets, bulletin boards, and organizers. These components can be easily swapped out and reorganized in mere minutes, allowing for rapid seasonal transitions without any fuss. To maintain perfect order, we store off-season components neatly in clearly labeled boxes, ensuring they are protected and ready to rotate back into action when their time comes. This comprehensive system has completely eliminated the disarray of seasonal transitions, keeping our family incredibly prepared and organized for whatever activities are current, fostering a sense of calm readiness year-round.
Quick DIY Steps:
- Install a large magnetic backing board as the foundation for your command center. This provides the ultimate flexibility, allowing you to easily attach, remove, and reposition magnetic organizational components.
- Design and create distinct “seasonal modules” that can be easily swapped. These might include specific calendars, checklists, or themed storage pockets tailored to summer camps, school year, or holiday planning.
- Establish a systematic and easily accessible storage solution for off-season components. Clearly label bins or boxes, so when it’s time to switch seasons, the relevant modules are quickly located and integrated into your living command center.
22. Emergency Ready Command Center
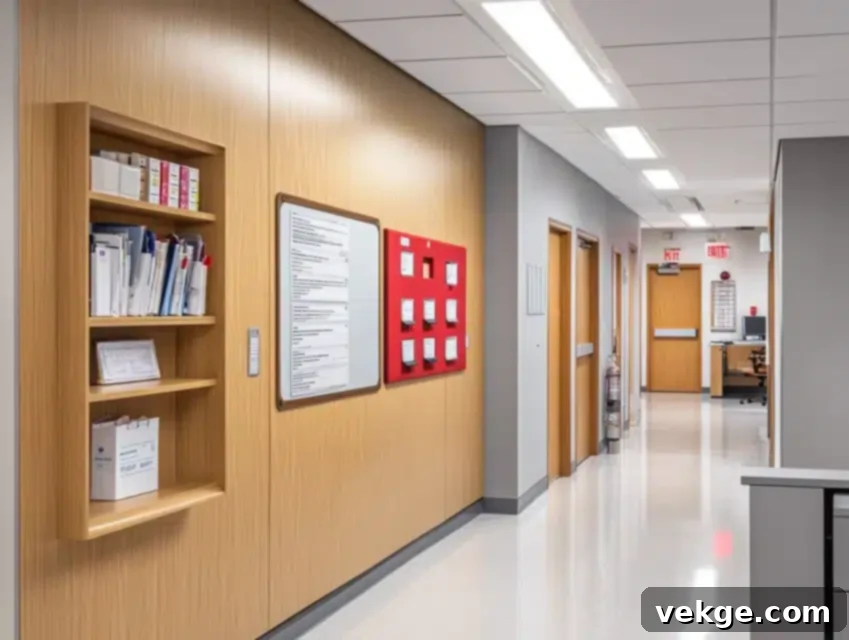
The unsettling experience of a power outage catching our family entirely unprepared was a profound wake-up call. This pivotal moment spurred the creation of our “Family Ready Station” – a command center designed not only to maintain our daily organization but also to seamlessly integrate essential emergency information and vital supplies. It’s a dual-purpose hub that provides peace of mind while keeping our daily lives on track.
While the front-facing elements of this command center handle our regular calendar, message board, and daily reminders, its true distinction lies in a cleverly hidden panel. Concealed discreetly behind the visible organizational tools, this panel securely holds critical emergency contact numbers, detailed evacuation plans, and readily accessible copies of important documents such as birth certificates, insurance policies, and medical information. This ensures that in any crisis, vital data is centralized and protected.
The sheer brilliance of this system is how it thoughtfully incorporates comprehensive emergency preparedness into our daily organization without generating unnecessary anxiety or fear. Rather than being an intimidating “emergency kit” hidden away, it’s an integrated part of our daily routine. Monthly maintenance, which includes checking battery dates and updating contact information, is now a standard part of our regular family schedule, ensuring that our emergency supplies and information are always current and ready. This proactive approach gives our entire family a profound sense of security and peace of mind, while simultaneously keeping daily household operations running smoothly and efficiently. It’s a testament to preparedness without panic.
Quick DIY Steps:
- Create a hidden panel within your command center structure (e.g., behind a hinged whiteboard or a false back). This panel should securely store laminated emergency contact lists, a family communication plan, and critical maps.
- Install a secure, fire-resistant, and waterproof document storage system within or adjacent to the hidden panel. This area should contain copies of important family documents, such as birth certificates, passports, and insurance policies, ensuring their safety and accessibility.
- Designate easily accessible emergency supply storage. This could include a small, clearly labeled bin within the command center holding essential items like flashlights, a battery-powered radio, first-aid basics, and a list of local emergency resources.
Conclusion
Creating a truly effective command center extends far beyond merely hanging a calendar on a wall; it’s about meticulously designing and implementing a dynamic system that intuitively works in harmony with your family’s unique rhythm and evolving needs. Having explored these diverse ideas and personally implemented several innovative solutions in my own home, I’ve come to a profound realization: the most successful command centers are those that possess the flexibility to adapt and grow alongside your family’s journey, continually serving as a pillar of support and organization.
Whether you’re drawn to a sleek, tech-integrated setup that leverages smart home capabilities, or you prefer the enduring charm and simplicity of a traditional bulletin board system, the core principles for success remain consistent: consistency in usage and accessibility for every family member. Remember, you don’t need to overhaul your entire home overnight. You can start small, perhaps by implementing one or two of these ideas, and gradually expand your command center as you progressively discover what truly resonates and works best for your unique household dynamics.
The ultimate goal is not to achieve unattainable perfection, but rather to cultivate a highly functional, intuitive, and welcoming space that actively helps your family stay connected, organized, and effortlessly navigate the complexities of daily life. Embrace the journey of organization, and watch as your home transforms into a hub of calm and efficiency.
Frequently Asked Questions About Command Centers
What’s the Ideal Height to Mount a Family Command Center?
For optimal adult usability, mount the main display elements of your command center at a comfortable eye level, typically around 60 inches (152 cm) from the floor. If children will be actively using the system, create distinct, lower zones specifically designed for their height, generally between 36-48 inches (91-122 cm). Alternatively, a multi-level design can accommodate everyone’s reach, ensuring accessibility for all family members.
How Do I Maintain My Command Center so It Doesn’t Become Cluttered?
Regular, brief maintenance is key. Dedicate a consistent 10-15 minutes each Sunday for a quick reset: remove all outdated papers and notes, update the calendar for the upcoming week, and wipe down surfaces. Implement a “one in, one out” rule for posted items to prevent visual overcrowding and ensure only essential information remains visible.
What’s the Minimum Wall Space Needed for An Effective Command Center?
You can create a surprisingly functional and effective command center in as little as 24 x 36 inches (60 x 90 cm) of wall space. The trick is to focus intensely on incorporating only the most essential elements, such as a compact calendar, a small message board, and a streamlined paper management system. Utilize vertical space cleverly, and expand components only if additional space allows and needs arise.
How Can I Make My Command Center Blend with My Home’s Decor?
Achieve aesthetic harmony by selecting organizers, boards, and accessories in colors and materials that seamlessly complement your home’s existing color scheme and style. Consider framing bulletin boards with decorative molding, using stylish washi tape for grid lines, or incorporating natural wood and metal accents. For an even cleaner look, explore options to hide components behind elegant cabinet doors or sliding panels when not in use.
What Are the Must-Have Elements for a Basic Command Center?
For a foundational command center, prioritize these three core elements: a clear calendar for scheduling appointments and events, a versatile message board (whiteboard or cork) for quick notes and reminders, and a robust paper management system (file folders or wall pockets) for handling incoming mail, permission slips, and important documents. From this basic structure, you can strategically add other components based on your family’s specific organizational needs and lifestyle.
