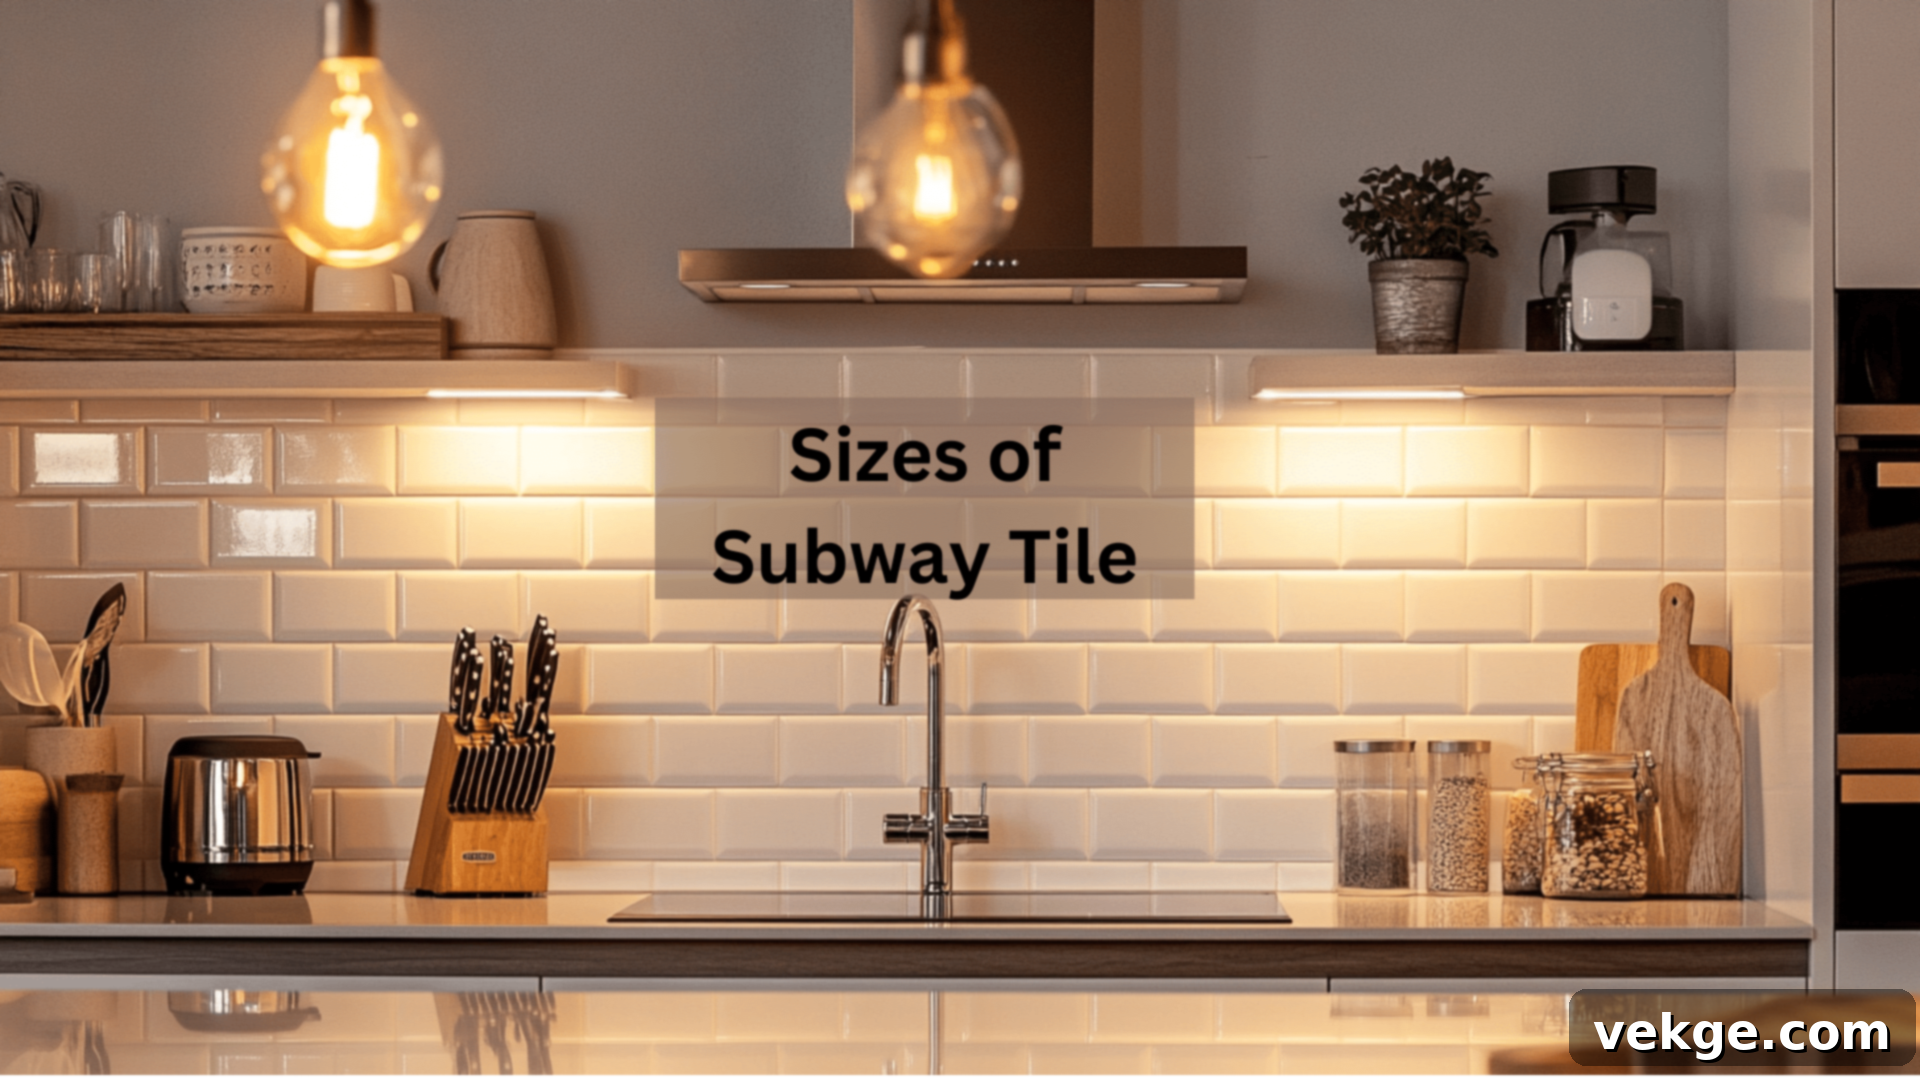
The Ultimate Guide to Choosing the Perfect Subway Tile Size for Your Kitchen Backsplash
Embarking on a kitchen renovation project often brings exciting design decisions, but few are as impactful and potentially overwhelming as selecting the right backsplash. You’ve likely been envisioning a fresh, modern aesthetic, perhaps even picturing the timeless appeal of subway tiles. Yet, a common dilemma arises: what size subway tile should you use for your kitchen backsplash?
With an array of options available, from the ever-popular classic 3×6-inch tiles to the contemporary elegance of 3×9-inch designs, the possibilities can feel endless. Making the right choice is crucial, as tile size significantly influences the overall look, feel, and perceived spaciousness of your kitchen.
In this comprehensive guide, we’ll delve into the most common subway tile sizes, helping you understand their unique characteristics and determine which one best suits your specific space and design vision. We’ll also share invaluable design tips, detailed installation steps, and illustrate how the perfect tile size can truly transform your kitchen into a stylish and inviting haven. By the time you finish reading, you’ll feel confident and inspired to select the ideal subway tile size that perfectly aligns with your personal style and functional needs. Let’s get started on creating your dream kitchen!
Common Subway Tile Sizes and Their Impact on Kitchen Design
Subway tiles come in a diverse range of sizes, each capable of creating a distinct look and atmosphere in your kitchen. Understanding these variations is the first step toward making an informed decision for your backsplash. Here’s an in-depth look at the most common subway tile sizes and their design implications.
3×6 Inches: Classic and Timeless Elegance
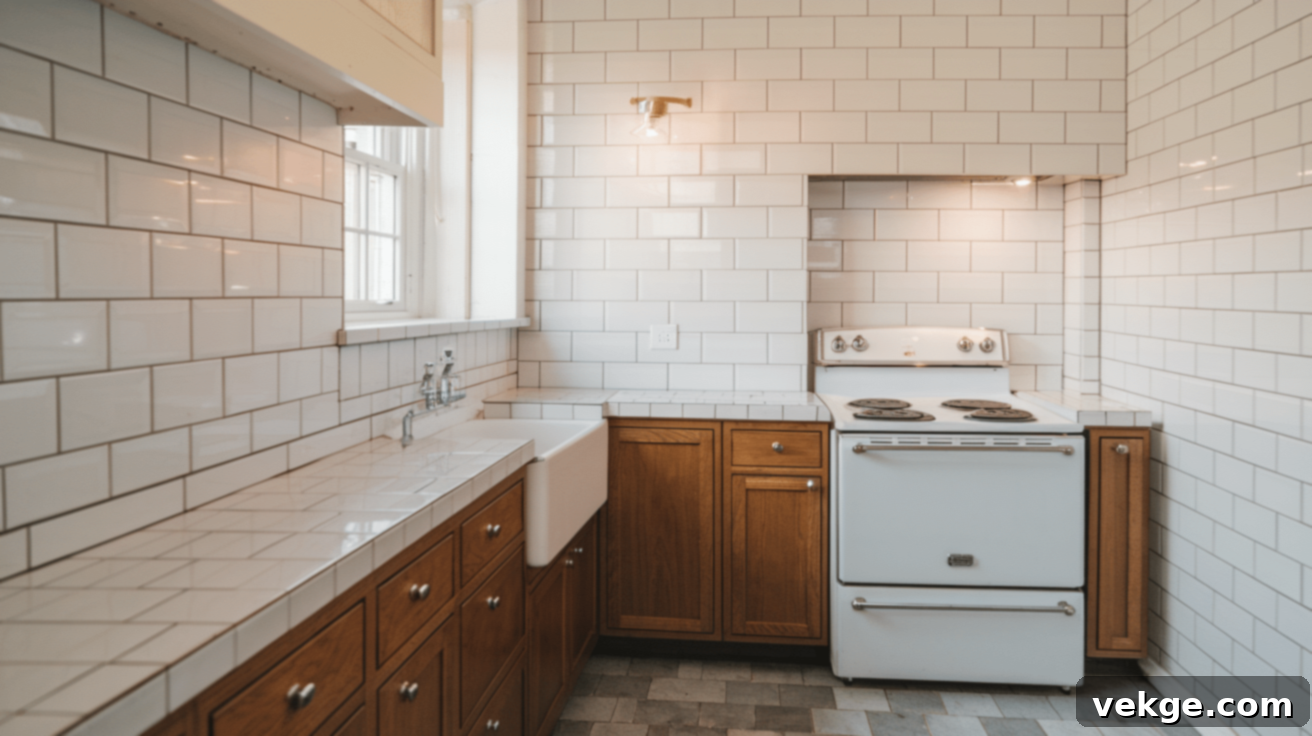
The 3×6-inch subway tile is arguably the most recognizable and standard choice, a design staple that has graced kitchens for over a century. Its enduring popularity stems from its incredible versatility, seamlessly fitting into both historic and contemporary kitchen aesthetics. This size is often praised for its balanced proportions, which make it forgiving and adaptable to various kitchen layouts and cabinet styles.
- Pros: This size is generally easy to install due to its manageable dimensions and widely available in a vast array of colors, finishes, and materials. It offers a classic, understated look that never goes out of style, making it a safe and reliable choice for most homes. Its timeless appeal also contributes to excellent resale value.
- Cons: While timeless, some might perceive the 3×6-inch tile as “basic” or less distinctive compared to more modern, elongated options. The relatively smaller size also means more grout lines, which can sometimes create a busier look if not carefully managed.
4×8 Inches: Larger Scale for a Less Busy Aesthetic
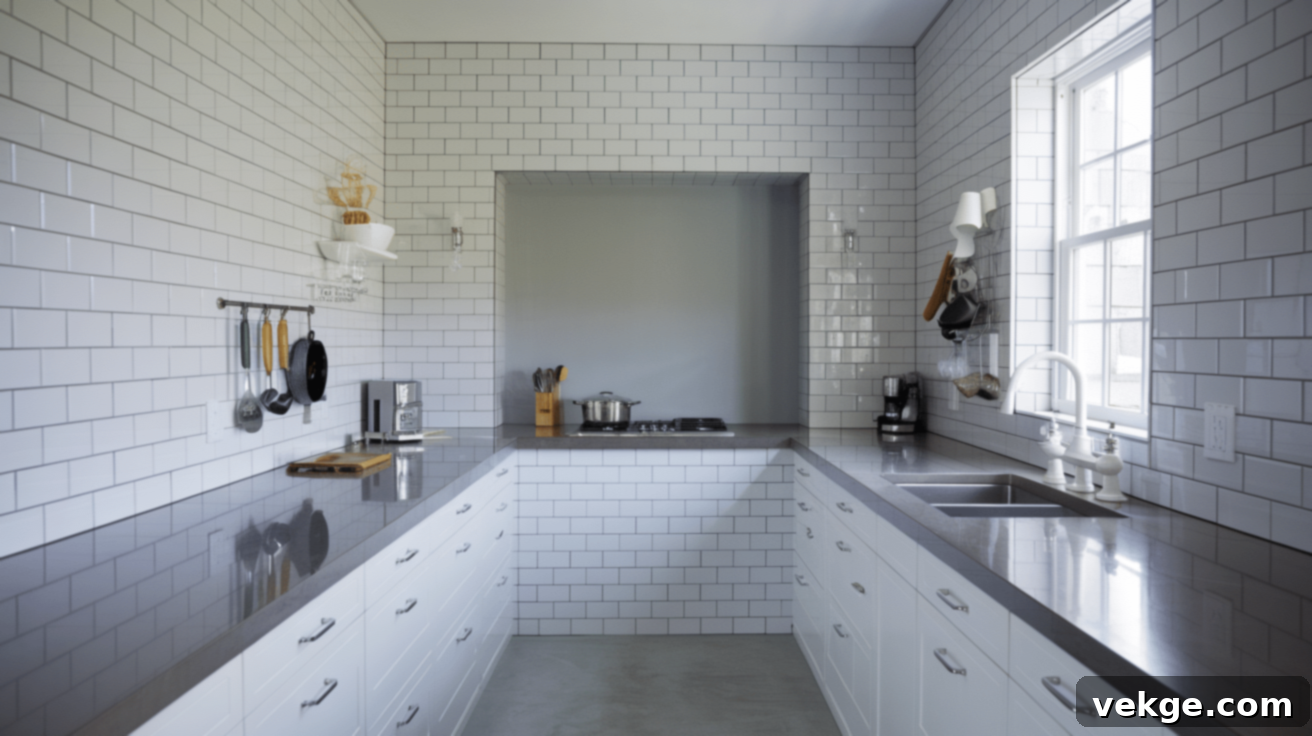
Stepping up in size, the 4×8-inch subway tile provides a more expansive feel for your kitchen backsplash. These larger tiles naturally lead to fewer grout lines across the surface, creating a cleaner, less visually cluttered appearance. This makes them an excellent choice for modern homes or for those looking to create an illusion of greater space.
- Pros: Ideal for enhancing the sense of openness, particularly in smaller kitchens, these tiles contribute to a sleek and updated aesthetic. The reduced number of grout lines also means less cleaning and maintenance over time.
- Cons: While beneficial for larger areas, 4×8-inch tiles might not be as suitable for very tight or intricate backsplash sections, as more cuts may be required. The slightly larger size can also make grout lines more prominent if a contrasting color is chosen, so careful consideration of grout color is important.
3×9 Inches: On-Trend and Contemporary Elegance
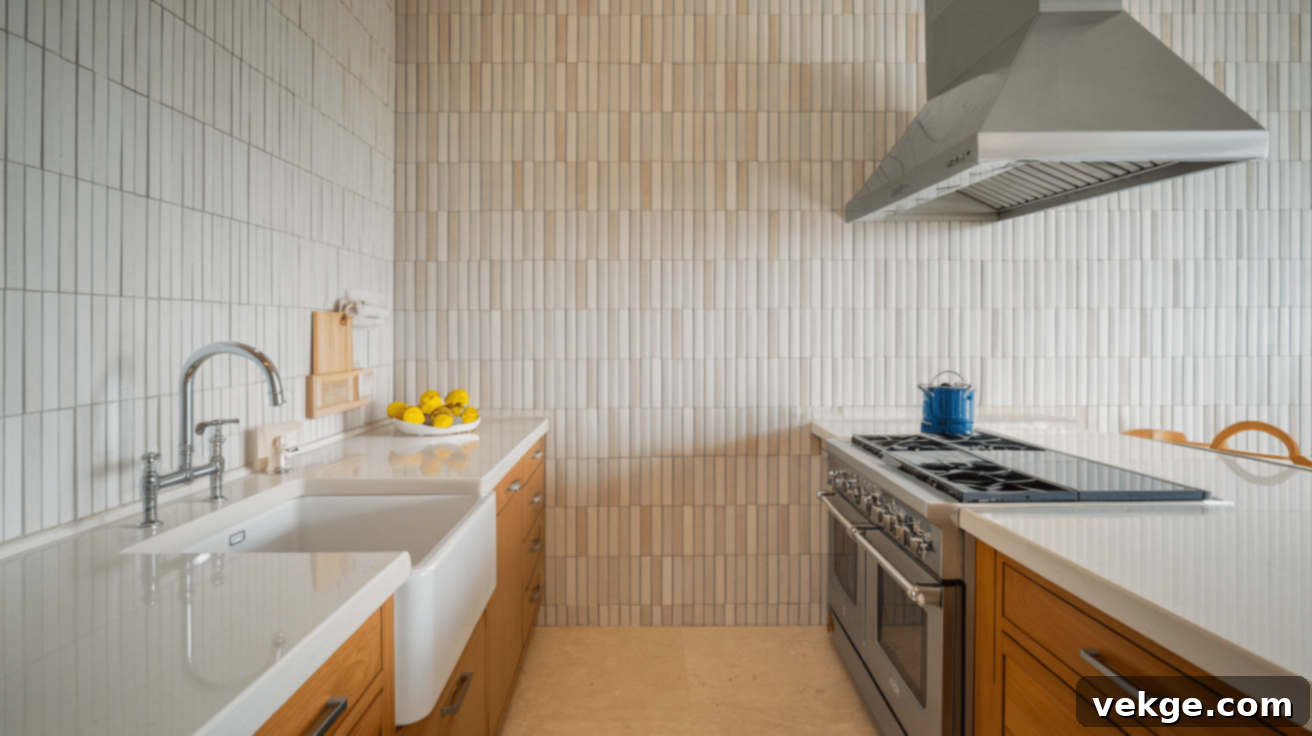
The 3×9-inch subway tile represents a growing trend in kitchen design, offering a fresh, elongated look that feels distinctly modern. These long, slender tiles create a smooth, clean visual line across your walls, adding a sophisticated and contemporary touch to any kitchen. Their unique proportions offer a subtle departure from the traditional 3×6, providing an updated feel without straying too far from the classic subway tile aesthetic.
- Pros: This size imparts an immediate sense of freshness and modernity. It works wonderfully for creating a streamlined, linear effect, which can make a kitchen feel wider or taller depending on the installation orientation. They are perfect for achieving a minimalist or transitional design.
- Cons: As a newer trend, 3×9-inch tiles might not be as readily available in every color, material, or finish compared to the more established sizes. Their elongated shape can also be slightly more challenging to install perfectly straight, requiring precise measurements and careful alignment.
1×2, 2×4 Inches: Smaller Sizes for Intricate Detail and Texture
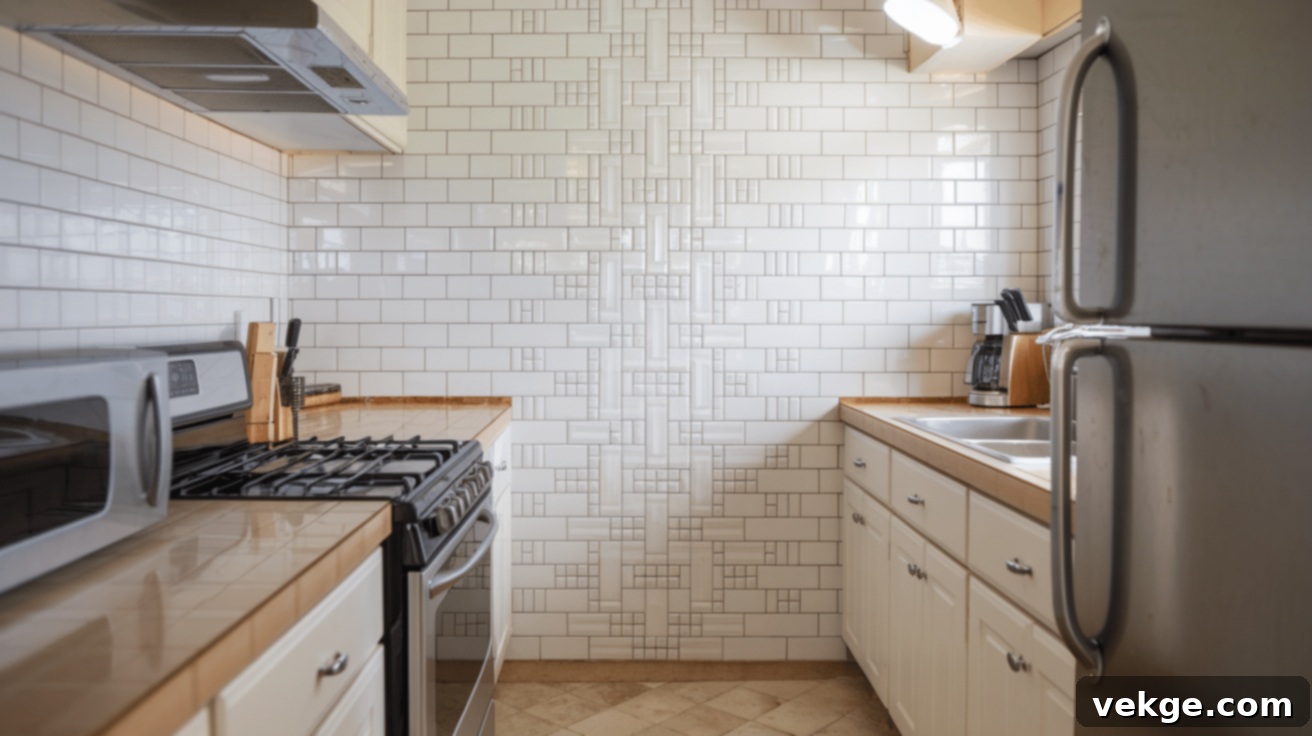
For those seeking to add rich texture, intricate patterns, or a more artisanal feel, smaller subway tiles like 1×2 or 2×4 inches are an excellent choice. These diminutive tiles are particularly effective in compact kitchens where larger tiles might overpower the space. They provide an opportunity for highly detailed designs and a cozy, handcrafted aesthetic.
- Pros: Smaller tiles excel at creating elaborate patterns, such as basket weave or mini herringbone, adding significant visual interest and depth. They can make a kitchen feel cozier and more bespoke, and are perfect for highlighting specific areas or creating a focal point.
- Cons: The primary drawback of smaller tiles is the increased number of grout lines. This can sometimes create a “busy” appearance, especially if a contrasting grout color is used. More grout also means more surface area for dirt and grime accumulation, potentially making them harder to clean and maintain over time. Installation is also more labor-intensive and requires greater precision.
How to Choose the Right Subway Tile Size for Your Kitchen
Selecting the perfect subway tile size is a critical decision that profoundly impacts the aesthetic and functional appeal of your kitchen. The chosen tile size influences everything from the perceived spaciousness of the room to its overall style. Here are key considerations to guide you in making the best choice for your culinary space.
Consider the Kitchen Size and Layout
The dimensions and configuration of your kitchen are perhaps the most influential factors in determining the appropriate tile size. Larger kitchens, especially those with open-plan layouts, can comfortably accommodate larger tiles such as 4×8 or even larger formats without making the space feel fragmented or overwhelmed. These larger tiles contribute to a grander, more cohesive look.
Conversely, in smaller or galley-style kitchens, smaller tiles like 2×4 or the classic 3×6 can be more proportionate. They prevent the backsplash from feeling too imposing and help maintain a sense of scale. Additionally, consider your kitchen’s unique shape: long, narrow kitchens might benefit from elongated rectangular tiles laid horizontally to enhance the sense of width, while kitchens with high ceilings might look good with vertically stacked tiles to draw the eye upwards. Even the flow of foot traffic and the placement of appliances can subtly inform where certain tile sizes or patterns might be most effective.
Aesthetic Goals: Modern vs. Classic and Beyond
The size and style of your subway tiles are powerful tools for setting the desired tone for your entire kitchen. If your goal is a sleek, modern, or minimalist aesthetic, larger tiles with fewer, thinner grout lines often achieve this effect best. They create a clean, uninterrupted surface that aligns with contemporary design principles. Consider finishes like glossy or matte white for a truly modern edge.
For a more traditional, classic, or farmhouse-inspired kitchen, the standard 3×6-inch subway tile is an ideal choice. It evokes a sense of history and warmth, perfectly complementing features like shaker cabinets and vintage-inspired hardware. Before making a selection, clearly define the overarching style you envision for your kitchen. Your choice of tile size, color, finish, and even grout color should harmonize with other design elements such as cabinetry, countertops, and flooring to create a cohesive and deliberate look.
Visual Perception: Creating Illusions with Tile
Tile size and its orientation can cleverly manipulate how we perceive space. Large tiles, by minimizing the number of grout lines, can make a small kitchen appear significantly larger and more open, creating an illusion of expansive walls. This effect is further amplified when paired with light-colored tiles and matching grout, which allows the backsplash to blend seamlessly and reflect more light.
Conversely, small tiles introduce more detail and texture, making a plain kitchen more dynamic and vibrant. They can add a cozy, intimate feel to a larger space or prevent a small kitchen from feeling too sterile. The way you lay out the tiles—be it a classic brick pattern, a straight grid, a vertical stack, or an intricate herringbone—also profoundly alters the visual flow and character of the space, influencing whether it feels taller, wider, or more active.
Budget and Cost Considerations: Beyond the Tile Price
Your budget is a practical factor that plays a significant role in your tile size selection. While larger tiles might have a higher unit cost per piece, you generally need fewer of them to cover the same area, which can sometimes balance out the overall material expense. Furthermore, fewer large tiles translate to less grout required, potentially offering savings on materials and application time.
On the other hand, smaller tiles often appear cheaper per piece, but the sheer quantity needed and the increased labor involved in their installation (due to more pieces and more grout work) can quickly escalate costs. It’s crucial to consider not just the price of the tiles themselves, but also the total cost of installation, which includes professional labor (if applicable), thin-set mortar, grout, sealers, cutting tools, spacers, and any unexpected expenses. Always obtain detailed quotes and factor in these ancillary items to get a true picture of your project’s total cost.
Layout and Installation Tips for a Flawless Subway Tile Backsplash
Beyond choosing the right tile size, the way your subway tiles are arranged and installed is paramount to achieving a professional and beautiful finish. The pattern, grout selection, and meticulous installation methods all play key roles in defining the final look of your kitchen backsplash. Let’s explore some helpful tips for planning and executing your subway tile project.
Tile Layout Patterns: Unleashing Creative Potential
The arrangement of your subway tiles can dramatically alter the entire feel of your kitchen, transforming a simple surface into a work of art. There are numerous patterns to choose from, each imparting a distinct look and style to your space. Experimenting with different layouts can provide unexpected visual interest.
Stacked vs. Herringbone Patterns
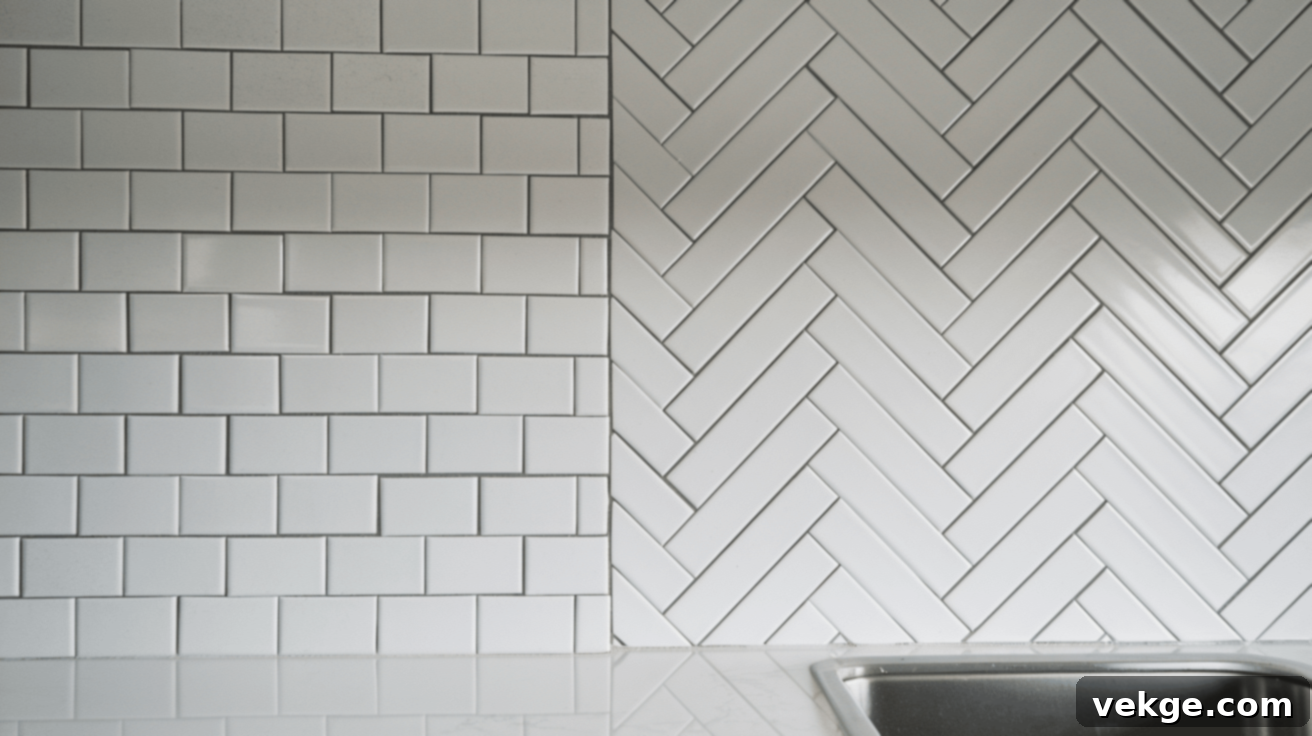
- Stacked Pattern: In a stacked pattern, tiles are aligned precisely, both horizontally and vertically, creating a clean, grid-like appearance. This minimalist approach is ideal for modern, contemporary, or industrial kitchen designs, offering a very simple and sleek backdrop. It emphasizes the tile’s rectangular shape and creates a sense of order and serenity.
- Herringbone Pattern: The herringbone pattern is achieved by setting rectangular tiles at 45-degree angles, with the end of one tile meeting the side of another to form a distinctive “V” or zigzag effect. This dynamic pattern adds movement, texture, and a touch of sophistication or traditional charm, depending on the tile and grout choices. It works well in both classic and transitional kitchens and can make a small space feel more expansive due to the diagonal lines drawing the eye.
Grid Pattern vs. Diagonal (and the Classic Offset/Brick Pattern)
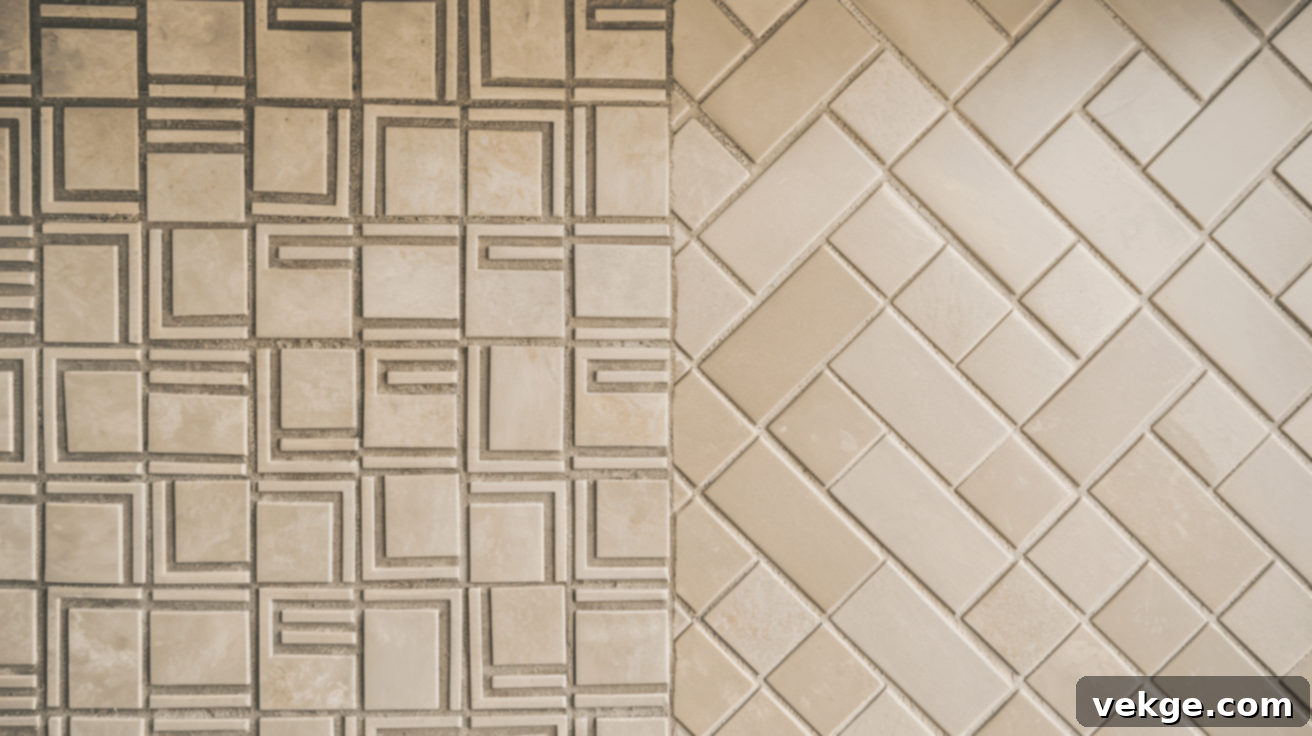
- Grid Pattern (Stacked): As mentioned above, the grid pattern involves aligning tiles perfectly in straight horizontal and vertical lines. It’s straightforward to install, provides a neat, uncluttered appearance, and is often chosen for its minimalist appeal.
- Diagonal Pattern: A diagonal pattern, often applied to square tiles but adaptable to rectangles, involves turning the tiles to a 45-degree angle relative to the walls. This pattern can make a small kitchen seem larger by drawing the eye across the space. While visually striking, diagonal layouts typically require more tile cuts and thus more material and labor, increasing both cost and installation time.
- Offset/Brick Pattern (Running Bond): This is the most traditional and enduring subway tile pattern. Each tile in a row is offset by half its length from the tiles in the row above and below, mimicking the classic brickwork found on buildings. It’s incredibly versatile, works with almost any kitchen style, and effectively disguises minor wall imperfections. It offers a balanced blend of visual interest and classic appeal.
Grout Choices: The Unsung Hero of Tile Design
Grout is much more than just a functional element that holds tiles together; it is a powerful design component that significantly contributes to the overall aesthetic of your kitchen. The color, width, and type of grout can drastically alter the perception of your backsplash.
- Color Contrast: Using light-colored grout with light tiles (e.g., white on white) creates a smooth, monolithic surface where the tiles appear to blend seamlessly, making the space feel expansive and clean. Conversely, dark grout with light tiles (or vice versa) creates a high-contrast look that makes each individual tile pop, emphasizing the pattern and adding definition. This can be a bold statement or add a traditional, handcrafted feel.
- Grout Line Width: Thin grout lines (typically 1/16 to 1/8 inch) lend a modern, sleek, and minimalist look, minimizing visual interruptions. Thicker lines (1/4 inch or more) create a more rustic, industrial, or detailed aesthetic, often used with handmade or irregular tiles to embrace their unique character.
- Grout Type: Consider the type of grout for durability and maintenance. Sanded grout is used for wider joints (1/8 inch or more), offering strength and preventing cracking. Unsanded grout is for narrower joints (up to 1/8 inch). Epoxy grout, while more expensive and challenging to install, offers superior stain resistance and water impermeability, making it ideal for high-traffic, splash-prone areas like kitchen backsplashes. Always ensure your chosen grout is sealed properly to protect against moisture and stains.
How to Install White Subway Tiles in Your Kitchen: A Step-by-Step Guide
Installing a subway tile backsplash can be a rewarding DIY project that significantly enhances your kitchen’s appeal. With the right tools and a careful approach, you can achieve a professional-looking result. Here’s a detailed list of essential materials and step-by-step instructions for a successful installation:
Essential Materials for Subway Tile Installation
Before you begin, gather all your materials to ensure a smooth, uninterrupted installation process:
- Subway Tiles (calculate 10-15% extra for cuts and breakage)
- Thin-Set Mortar (polymer-modified is often recommended for better adhesion)
- Grout (choose your desired color and type – sanded or unsanded, epoxy)
- Tile Spacers (consistent size for even grout lines)
- Level (a long one is best for backsplashes)
- Measuring Tape
- Pencil or Marker
- Notched Trowel (appropriate notch size for your tile and mortar, often 1/4″ or 3/16″)
- Grout Float (rubber base for pressing grout)
- Rubber Mallet (optional, for gentle tapping tiles into place)
- Tile Cutter or Wet Saw (essential for precise cuts)
- Sponges and Buckets (for cleaning up excess mortar and grout)
- Clean Cloths
- Grout Sealer (if not using epoxy grout)
- Safety Glasses and Gloves
Steps for Subway Tile Installation
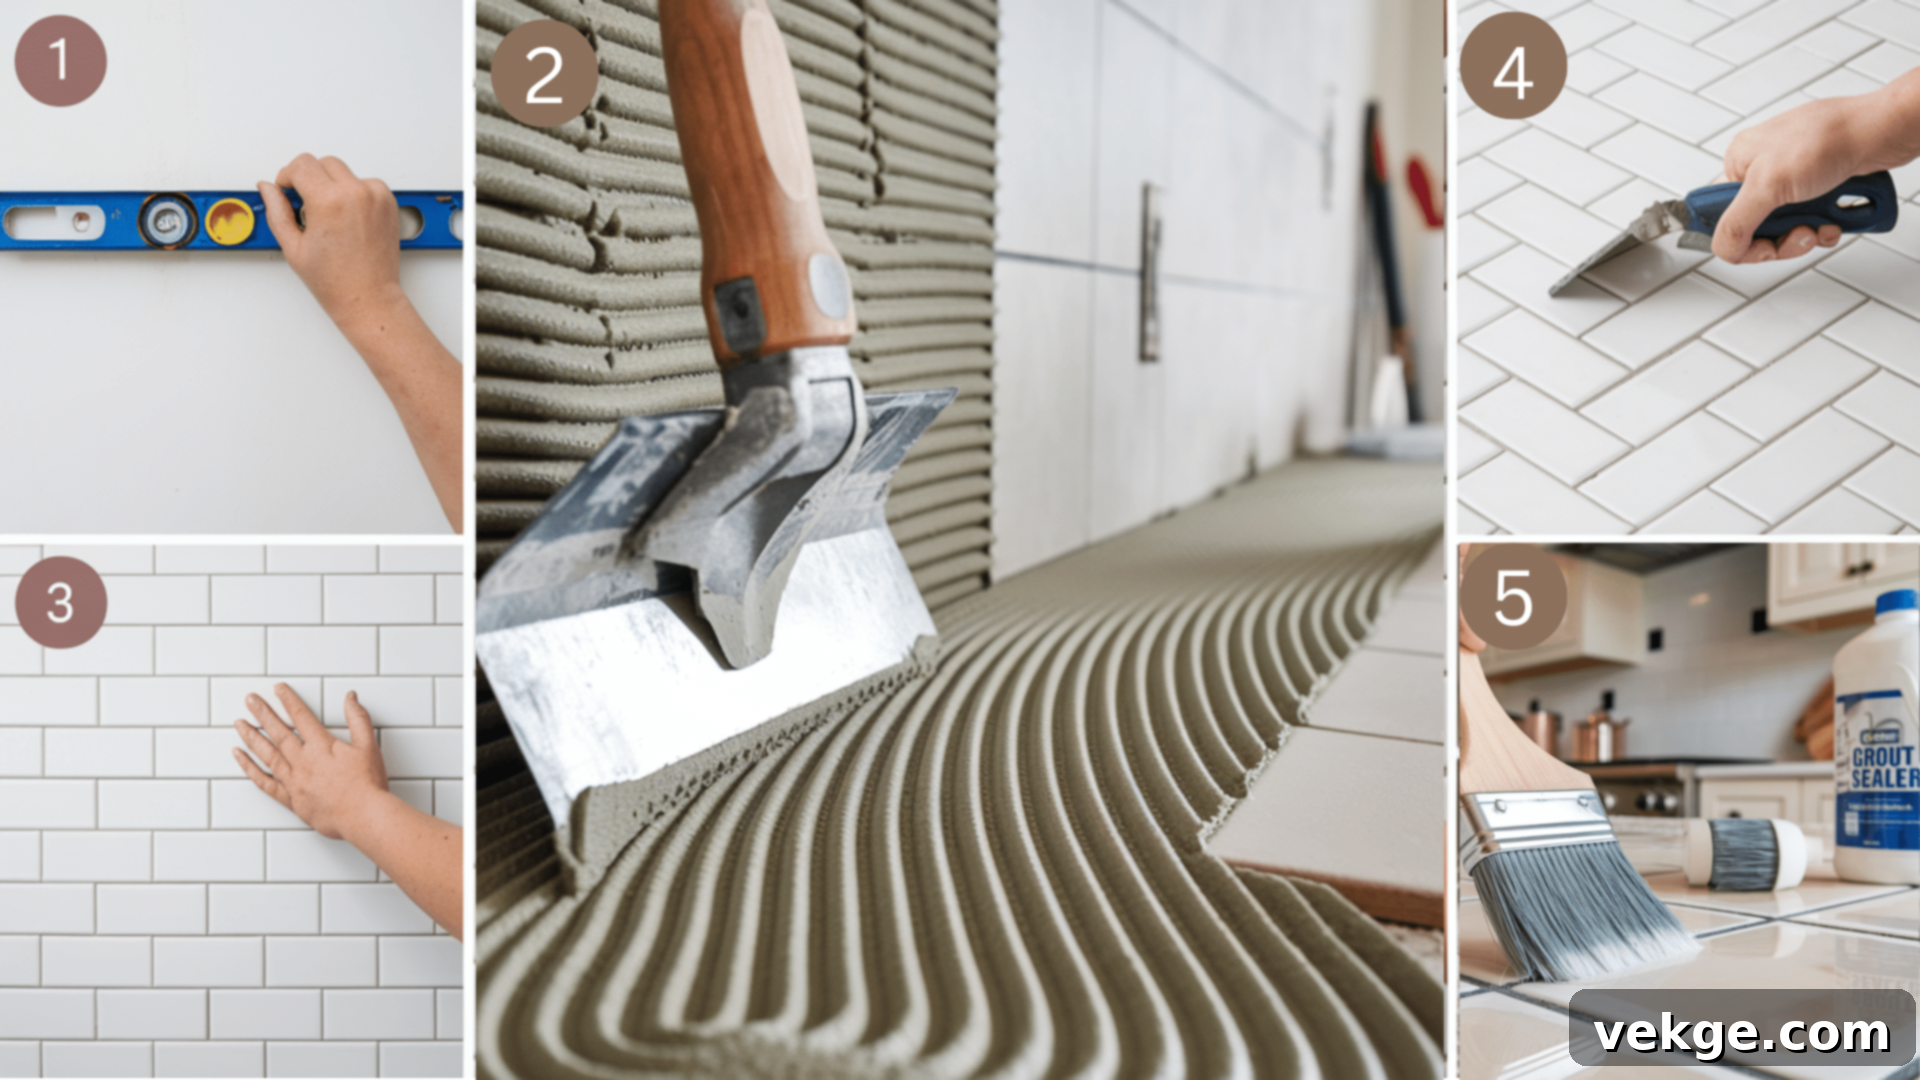
- Prepare the Surface and Mark Your Starting Point: Begin by ensuring your wall surface is clean, dry, and free of grease or debris. Repair any holes or imperfections. Using a level and a pencil, draw a straight, horizontal reference line on your wall where the bottom edge of your first row of tiles will rest. This is crucial for ensuring that your entire backsplash is level and perfectly aligned, even if your countertop isn’t perfectly straight. You might also want to dry-lay a row of tiles on your countertop to visualize spacing and plan cuts.
- Apply Thin-Set Mortar: In small, manageable sections (about 2×2 feet), use a notched trowel to spread a uniform layer of thin-set mortar onto the wall. Hold the trowel at a 45-degree angle, creating consistent ridges in the mortar. Avoid applying too much at once, as it can dry before you have a chance to set the tiles. The ridges help the tile adhere properly and prevent air pockets.
- Press Tiles into Place: Starting from your reference line and working your way up, firmly press each tile into the wet mortar with a slight twisting motion to ensure good contact. Insert tile spacers between each tile to maintain consistent grout lines. Continuously check your work with a level, both horizontally and vertically, to ensure everything remains perfectly aligned. If a tile is slightly off, gently tap it with a rubber mallet. Wipe away any excess mortar that squeezes through the joints immediately with a damp sponge. Allow the tiles to set and cure for at least 24 hours (or as per mortar manufacturer’s instructions) before proceeding.
- Mix and Apply Grout: After the tiles have fully set (typically 24 hours), remove all tile spacers. Mix your chosen grout according to the manufacturer’s instructions to achieve a smooth, consistent paste. Using a rubber grout float, apply the grout diagonally across the tile surface, pressing it firmly into all the spaces between the tiles. Work in small sections, ensuring every joint is completely filled.
- Clean Excess Grout and Polish: Once a section is grouted, wait about 15-30 minutes for the grout to begin to set (it will look hazy). Then, using a damp (not soaking wet) sponge, carefully wipe off the excess grout from the tile faces. Rinse your sponge frequently in clean water. Be gentle to avoid pulling grout out of the joints. After the initial clean, let the grout dry for a few hours. A faint haze (grout haze) might appear; you can remove this with a dry, clean cloth or a specialized grout haze remover, following product instructions.
- Seal the Grout: Wait for the grout to fully cure, which can take anywhere from 48 to 72 hours, or even longer depending on the product and humidity. Once cured, apply a high-quality grout sealer to protect the grout from moisture, stains, and mildew. Follow the manufacturer’s instructions for application and reapplication frequency (typically every 1-3 years, especially for non-epoxy grouts).
By diligently following these steps and utilizing the correct materials, you’ll be able to create a beautifully tiled and durable backsplash that will enhance your kitchen for years to come!
Tips for Creating a Good Look in Your Kitchen with Subway Tiles
Subway tiles are incredibly versatile and can complement virtually any kitchen style, from the most traditional to the ultra-modern. The key to achieving your desired aesthetic lies in the thoughtful combination of tile size, layout pattern, and color choices. Here are some curated ideas to help you design a kitchen that feels either timeless or perfectly on-trend.
Classic Styles: Timeless Appeal That Endures
For a kitchen design that will remain elegant and relevant for decades, the 3×6-inch subway tile is an unrivaled choice. These tiles have been a fixture in kitchens for well over a century and continue to exude an understated charm. To achieve the most timeless effect:
- Color Palette: Opt for classic white, off-white, or soft cream tiles. These neutral hues provide a clean backdrop that allows other kitchen elements to shine without competing for attention.
- Layout Pattern: The traditional offset (brick) pattern is the quintessential choice for a classic look. It’s familiar, comforting, and visually balanced.
- Grout Choice: Pair your classic tiles with a light gray or warm white grout. This creates a soft contrast that subtly defines each tile without being stark, contributing to a clean and enduring aesthetic that resists fleeting trends.
- Pairing: This classic approach works beautifully in both vintage and newly constructed homes. It pairs seamlessly with a wide range of cabinet styles, from traditional shaker to raised panel, and complements natural stone or solid surface countertops.
Modern Touches: Fresh and Contemporary Kitchen Designs
If your vision is a kitchen that feels undeniably fresh, current, and sophisticated, it’s time to think beyond the conventional subway tile setup. Modern kitchens often embrace larger tile formats, innovative patterns, and bold material choices to create a clean, updated, and often minimalist look.
- Tile Size: The larger 3×9 or 4×8 subway tiles are excellent for modern aesthetics. They provide a smoother, more expansive wall surface with fewer grout lines, which contributes to a streamlined and uncluttered feel. These bigger tiles can also make smaller modern kitchens feel more open and less busy.
- Innovative Patterns: Instead of the traditional brick layout, try a vertical stack pattern. This simple yet striking change draws the eye upwards, enhancing ceiling height and creating a contemporary linear effect. A horizontal stack also offers a very clean, minimalist look.
- Bold Grout: For a more dramatic modern statement, choose a grout color that strongly contrasts with your tiles (e.g., charcoal grout with white tiles, or white grout with dark gray tiles). This highlights the tile’s geometry and adds an architectural edge.
- Material Finishes: Consider glass subway tiles for a highly reflective, light-catching surface that adds sparkle and a luxurious modern touch. Matte finish tiles can also provide a sophisticated, understated modern vibe.
- Color Palette: Embrace cool grays, deep blues, or even black subway tiles for a daring, contemporary statement.
Small Tiles for a Textured and Artisanal Look
Smaller subway tiles, such as the 1×2 or 2×4 inch varieties, offer a unique opportunity to inject warmth, intricate detail, and a handcrafted character into your kitchen that larger tiles sometimes cannot. These petite tiles create a more detailed and dynamic pattern on your walls, contributing to a cozy, inviting, and often artisanal feel.
- Design Philosophy: Small tiles are perfectly suited for kitchens aiming for a lived-in, homey, or bohemian look rather than a stark, ultra-modern one. They are also an excellent choice for older homes or those with a rustic aesthetic where very contemporary designs might feel out of place.
- Pattern Exploration: Utilize these small tiles to create complex and visually rich patterns like a basket weave, crosshatch, or a tight herringbone. These patterns add a significant amount of visual texture and interest.
- Focal Points: Consider using small tiles to create a feature wall or to define specific zones within your kitchen, such as above the range or inside a recessed niche. This allows their intricate detail to be appreciated without overwhelming the entire space.
- Mixing and Matching: Don’t be afraid to mix small tiles with larger ones. You can use smaller tiles to create decorative borders, accent strips, or unique design features that break up larger expanses of tile.
- Grout Emphasis: With smaller tiles, the grout lines become a more prominent design element. Use a slightly contrasting grout color to highlight the intricate patterns and add depth to the textured surface.
Wrapping Up: Your Perfect Subway Tile Choice
You now possess a wealth of knowledge regarding subway tiles for kitchen backsplashes! From understanding the enduring appeal of the classic 3×6-inch size to exploring the modern elegance of 3×9-inch tiles and the textural richness of smaller options, you’re well-equipped to navigate the many choices for your kitchen walls.
Remember to thoughtfully consider the size and layout of your kitchen, the specific aesthetic you wish to achieve (be it classic, modern, or intricately textured), and your practical budget constraints when making your final selection. Don’t be afraid to experiment; you might start by trying subway tiles on just one wall as a test run, or even mix different tile sizes and patterns to craft a truly unique and personalized design that reflects your individual style.
No matter which size or style you ultimately choose, subway tiles consistently offer a clean, fresh, and versatile look that has the power to make your kitchen feel brand new again, injecting it with character and charm. Embrace the possibilities and create a kitchen backsplash that you’ll love for years to come!
For more insightful blogs on home design and renovation, be sure to visit our website now.
