This post contains affiliate links and I may receive a commission on your purchase. Thank you for shopping through my links.
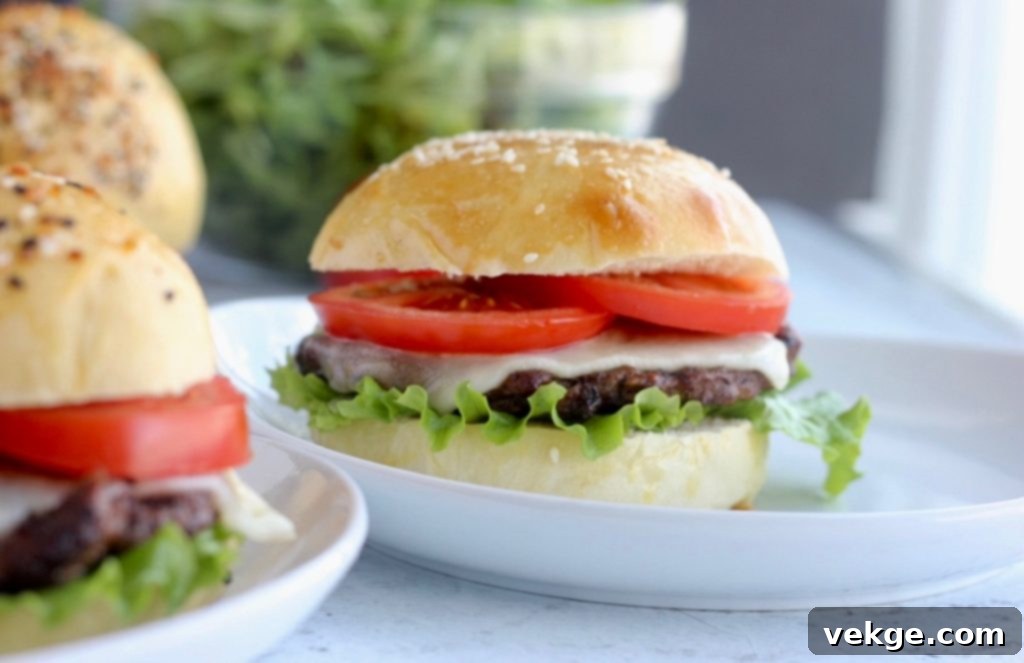
Prepare to revolutionize your burger experience! While homemade buns undeniably elevate any hamburger, imagine the incredible difference when those buns are made with sourdough. We’re talking about an unparalleled upgrade that will make your taste buds sing and forever change your perception of a perfect burger. These sourdough hamburger buns aren’t just good; they’re truly exceptional – incredibly soft and fluffy, yet robust enough to cradle even the juiciest patties. Get ready to discover your new favorite way to enjoy a burger, crafted right in your own kitchen with the magic of natural fermentation.

Elevate Your Burger Game: Why Homemade Sourdough Buns Are a Must-Try
Once you experience the sublime quality of homemade hamburger buns, especially this particular sourdough recipe, it becomes almost impossible to truly enjoy a burger served on a flimsy, store-bought alternative. These buns represent a monumental leap in quality, offering a delightful combination of softness and resilience. They are tender to the bite, yet possess the structural integrity required to hold all your favorite burger toppings without crumbling or becoming soggy. The flavor profile is profoundly superior; rich, nuanced, and with that subtle sourdough tang that adds an irresistible complexity. After savoring the depth and texture of these artisanal buns, you’ll likely find commercial buns taste remarkably bland and feel unpleasantly like cardboard in comparison. It’s not just a bun; it’s a foundation that transforms an ordinary meal into an extraordinary culinary event, promising a more satisfying and flavorful bite every single time.
Discover the Magic of Sourdough: Flavor, Health, and Timeless Tradition
Embarking on the sourdough journey might seem daunting at first, a perception often fueled by misconceptions about its complexity. However, I assure you, the rewards are immense and incredibly fulfilling. Many are pleasantly surprised by how quickly they grasp the fundamentals, often leading to a lifelong passion for this ancient craft. Sourdough, often referred to as “Natural Yeast,” represents the original method of leavening bread. From the very inception of bread-making until the early 20th century, when active dry yeast became commercially available, all leavened loaves relied on the magic of a wild yeast starter. The advent of quick dry yeast, while convenient, gradually pushed sourdough into obscurity, turning it into a somewhat lost art. But I am fiercely dedicated to rekindling this beautiful tradition and sharing its innumerable benefits with a new generation of home bakers.
Breads crafted with sourdough don’t just boast a richer, deeper flavor profile – that distinctive, subtle tang is instantly recognizable and adds layers of complexity that quick-yeast breads simply cannot achieve. Beyond the exquisite taste, sourdough offers a remarkable array of digestive advantages that are entirely absent from conventionally made breads. In a fascinating reversal, many of the reasons quick-yeast breads are often labeled “unhealthy” are precisely why sourdough breads are considered incredibly beneficial:
- Blood Sugar Stabilization: Sourdough has the unique ability to lower the glycemic index of not only the meal you’re currently enjoying but also subsequent meals. This helps stabilize blood sugar levels, preventing the sharp spikes and crashes associated with high-glycemic foods, promoting sustained energy.
- Enhanced Nutrient Absorption: The prolonged fermentation process inherent to sourdough baking plays a crucial role in making the nutrients from grains more bioavailable. This “pre-digestion” breaks down complex carbohydrates and neutralizes phytic acid, an anti-nutrient that typically binds to minerals and inhibits their absorption. By neutralizing phytic acid, sourdough unlocks essential minerals like iron, zinc, and magnesium, along with vital B vitamins, making them readily accessible to your body for optimal health.
- Improved Digestibility: For many, sourdough bread is significantly easier to digest compared to commercial breads made with quick yeast. A common testament to its gentleness is that numerous individuals with gluten sensitivities find they can tolerate sourdough products without experiencing discomfort, thanks to the breakdown of gluten proteins during the long fermentation process.
- Gut Health Booster: Sourdough is teeming with beneficial probiotics. While these living cultures don’t survive the baking process, they transform into potent prebiotic fuel. This prebiotic fiber then nourishes and supports the healthy bacteria residing in your gut, contributing to a thriving digestive ecosystem, improved immunity, and overall well-being.
These are just a handful of the compelling reasons why I enthusiastically incorporate sourdough into every baked good possible. The fact that it tastes absolutely incredible is truly the cherry on top, making healthy eating a delicious endeavor!
It’s important to set expectations: the sourdough process demands patience and a significantly longer timeline than conventional baking. Instead of relying on short, one-hour rise times, expect each fermentation stage to span anywhere from 4 to 8 hours. This extended waiting period is where the magic happens, developing those complex flavors and vital health benefits that make sourdough so unique and rewarding.

Essential Ingredients for Perfect Sourdough Buns
Let’s delve into the core ingredients that make these sourdough hamburger buns so exceptional. Understanding each component’s role is key to achieving consistent and delicious results every time you bake.
Sourdough Starter: The Heart of Your Buns
Your sourdough starter is more than just an ingredient; it’s a living culture, the very soul of your leavened bread. Its health and activity are paramount for successful dough rising. Before you even think about mixing this recipe, ensure your starter is robust and ready for the challenge. A strong, vibrant starter is the foundation for light, airy, and flavorful buns with that signature sourdough tang.
Signs of an Active and Strong Sourdough Starter:
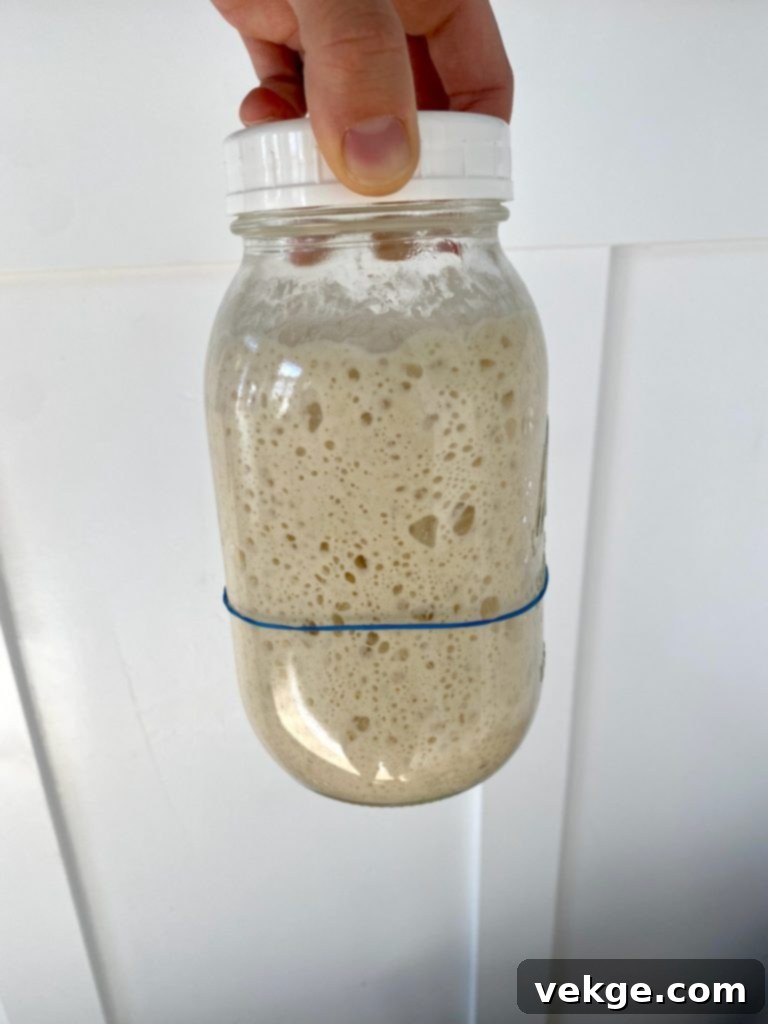
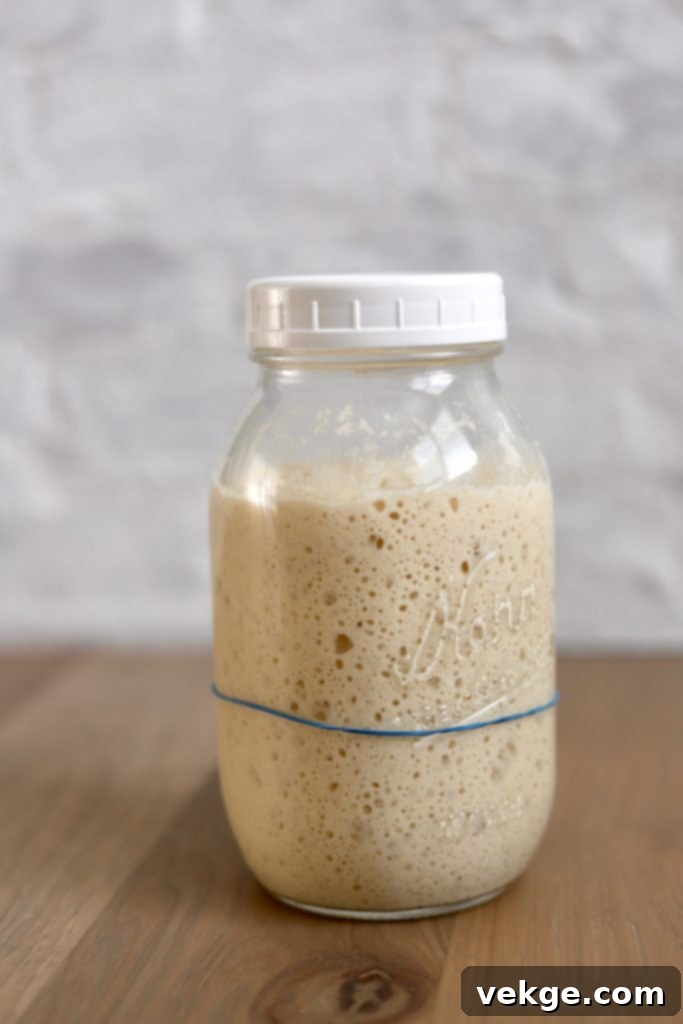
- Vigorous Expansion and Bubbles: After a feeding, a healthy starter will typically double or even triple in size, becoming visibly filled with numerous bubbles throughout its structure. This indicates active yeast and bacteria producing carbon dioxide, which gives bread its rise.
- Consistent Feeding Schedule: A starter thrives on regularity. One that is fed frequently and maintained on a consistent schedule, rather than being left neglected for extended periods without revival, is more likely to be strong and active when you need it.
- The Float Test: This simple yet effective test is a reliable indicator of readiness. Fill a glass bowl or cup with room-temperature water. Gently drop a small spoonful (less than a teaspoon) of your fed starter into the water. If it floats on the surface, congratulations! Your starter is buoyant with carbon dioxide bubbles and ready to use. If it sinks, it likely needs more time to develop sufficient air bubbles and activity, or perhaps another feeding.
Signs Your Starter Needs More Attention Before Use:
- Flat and Runny Consistency: If your starter appears flat, lacks discernible bubbles, and has a very liquid consistency, it indicates low activity and insufficient gas production.
- No Volume Increase: A starter that fails to rise significantly in volume or develop bubbles in the hours following a feeding is not yet active enough for baking and will struggle to leaven your dough.
- Pungent Odors: A strong smell reminiscent of vinegar or nail polish remover is a clear sign of an over-fermented and extremely hungry starter. It has consumed all its food and is producing acetic acid, which can indicate it’s past its peak.
- Liquid Layer (Hooch): The presence of a dark liquid layer (often called “hooch”) on top of your starter signifies that it’s starving and requires a fresh feeding. While a small amount of clear hooch can be normal, dark hooch suggests prolonged neglect.
Troubleshooting: What to Do If Your Starter Isn’t Activating:
- Quality Ingredients: Always feed your starter with unbleached flour and filtered water. Chlorine in tap water can inhibit or even kill the delicate yeast and bacteria cultures in your starter, so it’s crucial to avoid it.
- Optimal Temperature: Ensure your starter is left in a warm environment to ferment and activate. An ideal temperature range is typically between 72°F and 75°F (22°C-24°C). Cooler temperatures will significantly slow down activity, while excessively hot temperatures can harm the cultures.
- Nutritional Boost: For a temporarily sluggish starter, try incorporating a small amount of whole wheat flour or ground rye flour into its regular feeding. These flours are richer in nutrients and can provide a much-needed boost to yeast activity, helping to kickstart a stalled starter.
- “Power Feeds”: Implement a series of “power feeds” to invigorate a weak starter. Combine 1 tablespoon of starter with 1/4 cup of flour and 1/4 cup of water. Mix thoroughly, cover, and let it sit at room temperature for 12 hours. Repeat this process several times over the course of a few days until vigor returns, showing consistent doubling.
- Avoid Contamination: Be extremely vigilant about preventing any contact between your starter and cleaning products or antibacterial agents. These substances are designed to kill bacteria and will unfortunately decimate your starter culture, requiring you to start anew.
The Sourdough Circle of Life: A Continuous Cycle of Feeding and Activity
Understanding this cycle is fundamental to maintaining a healthy starter and ensuring its readiness for baking:
Runny Discard → Feed with Flour & Water → Mix Thoroughly → Allow Sufficient Time to Ferment (Rise & Bubble) → Transforms into Bubbly, Active Starter (Peak Activity) → Digests All Available Food → Reverts to Runny Discard (Hungry & Sluggish) → Feed with Flour & Water → Mix → Becomes Bubbly, Active Starter → Digests All Food → Turns into Runny Discard → REPEAT, REPEAT, REPEAT. This ongoing cycle ensures a fresh, potent starter ready for all your sourdough adventures.
Preparing Your Starter for This Recipe: Feeding for Success
This recipe calls for one cup of bubbly, active starter. Learning how to properly feed and prepare your starter for baking might feel a bit perplexing initially, but after a few repetitions, it will become second nature. My preferred method involves using a smaller amount of existing starter relative to the flour and water. This “teaches” the starter to work harder, effectively digesting a larger meal, and cultivating a strong, robust appetite for future bakes. This also helps in developing a more complex flavor profile.
For a typical pre-recipe feeding, I combine 3 Tablespoons of runny discard starter + 1 cup of flour + 1 cup of water. This creates a 1:5:5 ratio (1 part runny discard to 5 parts flour to 5 parts water). Precision weighing isn’t strictly necessary here; simply mix until well combined. The desired consistency is that of a thick pancake batter. If it seems too thin, incorporate a little more flour; if too thick, add a touch more water until you reach the right consistency.
This feeding strategy typically yields enough active starter for this recipe, plus approximately 1/4 cup of extra starter. This “reserve” portion can then be refrigerated until your next sourdough baking adventure, ensuring you always have a starter ready to refresh and use. Remember to feed this reserve starter once a week, even when stored in the fridge, to keep it alive and vibrant.
While a 1:5:5 ratio is my go-to, you can also experiment with other ratios, such as 1:1:1 (equal parts starter, flour, water) or 1:8:8. Generally, a larger feeding ratio means the starter will take longer to become fully active, as it has more “food” to work through. Conversely, a smaller feeding ratio will lead to quicker activation. For my lifestyle, I find that feeding my starter with a larger ratio (somewhere between 1:4:4 and 1:8:8) right before bedtime works perfectly. It allows the starter to activate overnight, so by morning, I can immediately begin preparing the dough. This allows the dough to ferment and rise throughout the day, ready for baking in the afternoon or evening, fitting perfectly into a busy schedule.
Consult my sample schedule below for a practical example of how to integrate this into your day.
Flour: The Building Block of Your Buns
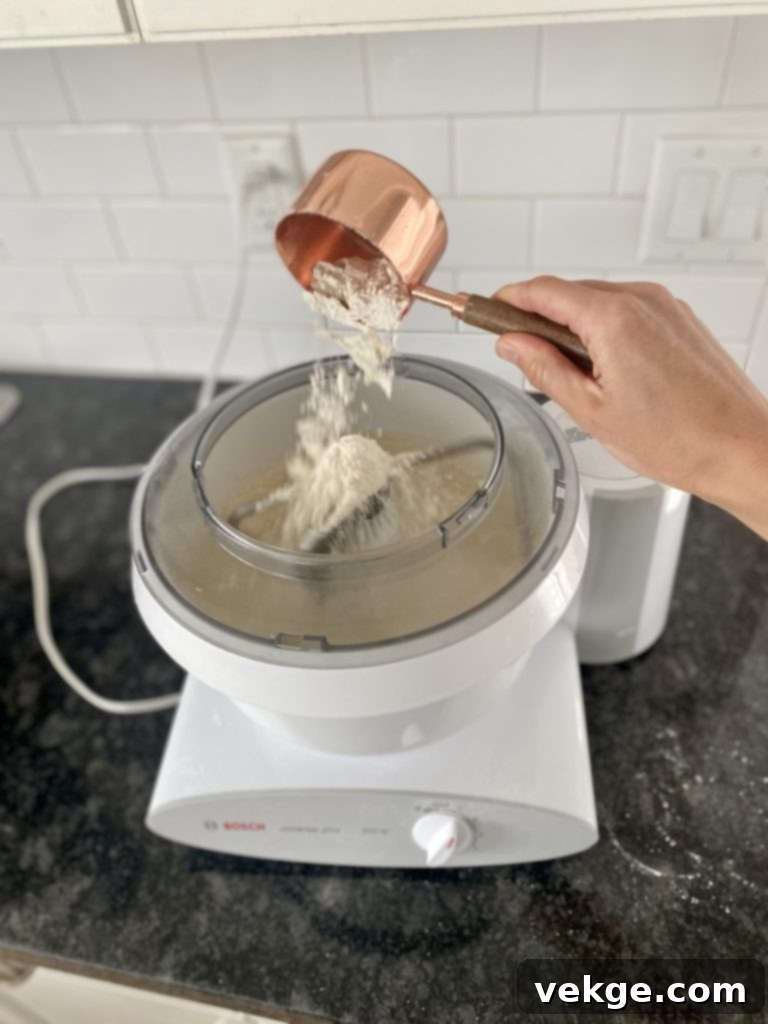
The type of flour you choose significantly impacts the texture, rise, and overall character of your sourdough hamburger buns. This versatile recipe accommodates several flour options, each offering a distinct result: bread flour, all-purpose flour, whole wheat flour, or Kamut flour. Understanding the properties of each will help you select the best one for your desired outcome.
Bread Flour: For Optimal Structure and Rise
Bread flour consistently remains my top choice for sourdough baking, and for good reason: the results are truly unbeatable. This type of flour boasts a higher protein content (typically 12-14%) than all-purpose flour. This higher gluten content translates directly into a more robust gluten network within the dough, enabling a taller, more buoyant rise and a finished bun that is exceptionally soft with a beautiful, satisfying stretch. Most well-stocked grocery stores carry bread flour. I frequently use organic bread flour sourced from a local mill, LEHI MILLS. (Use affiliate coupon code AMBERSKITCHEN for 10% off your purchase.) I particularly appreciate their commitment to sourcing wheat from farmers who meticulously avoid the use of glyphosate on their crops, ensuring a purer product for healthier baking.
All-Purpose Flour: A Reliable Alternative
If bread flour isn’t readily available, all-purpose flour serves as a perfectly acceptable substitute. It can be used in a straight-across, 1:1 ratio. While the protein content (typically 10-12%) is lower, meaning the gluten development might not be quite as strong as with bread flour, you will still achieve delicious and soft buns. The texture might be slightly less chewy but still wonderfully tender.
Whole Wheat Flour: Embracing Health and Heartiness
Incorporating whole wheat flour adds a wonderful depth of flavor and increased nutritional benefits due to the presence of bran and germ. However, be mindful of its unique properties: whole wheat flour is notoriously “thirsty” and heavier than white flours. It also contains bran particles that can cut gluten strands, affecting rise. Consequently, you will generally need slightly less whole wheat flour than bread or all-purpose flour to achieve the correct dough consistency. For instance, if a recipe calls for 8.5 cups of white flour, you might only need 7.5 or 7.75 cups of whole wheat. Always assess the dough’s texture as you add flour, aiming for a tacky but not overly sticky feel.
When working with sourdough and 100% whole wheat flour, expect longer rise times and a slightly less dramatic rise in height. The denser bran and germ in whole wheat flour can impede gluten development and yeast activity. For a fantastic compromise that balances health benefits with a good rise, consider using a blend of half whole wheat flour and half bread flour. This hybrid approach will still extend the rise time compared to all-white flour, but not as significantly as 100% whole wheat, while still providing the valuable nutrients of whole grains and a delightful texture.
Kamut (Khorasan) Flour: An Ancient Grain with Distinctive Character
Kamut, also known as Khorasan wheat, is an ancient grain that has undergone far less genetic modification than many common wheat varieties cultivated today. It imparts a delightful, subtly nutty and buttery flavor to baked goods. While it can be substituted for all-purpose flour, it’s not a direct 1:1 replacement. Kamut is more absorbent than all-purpose flour, so when using it, reduce the total amount of flour by approximately 10-15%. In my experience, Kamut tends to yield buns that don’t rise quite as high and might exhibit a slightly more crumbly texture compared to modern wheat flours, but its unique flavor makes it a worthwhile choice. I source my regeneratively grown Khorasan flour locally from KHORASANMILLS.COM, and I believe they offer shipping across the United States!
*This is an affiliate link, and I may receive a commission on your purchase at no extra cost to you. Your support through this link is greatly appreciated.
Salt: More Than Just Seasoning
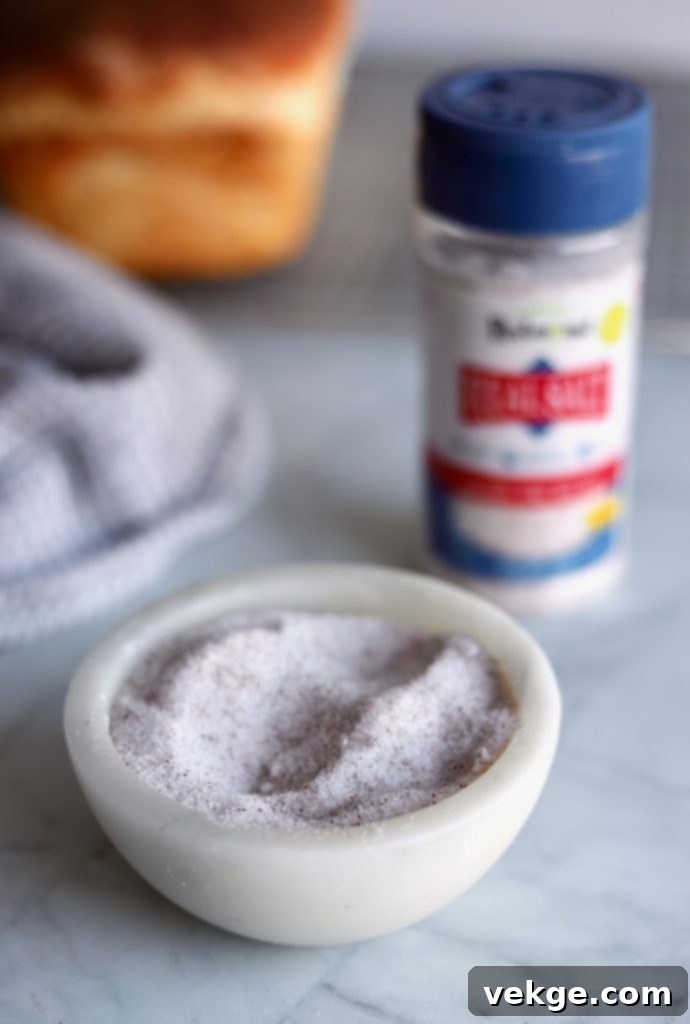
My choice of salt is quite particular, and for good reason! I exclusively use fine sea salt from Redmond Real Salt, convinced that it’s the only salt truly worth having in my kitchen. What makes it so special? It’s brimming with naturally occurring trace minerals, utterly pure, completely unprocessed, and free from any fillers, anti-caking agents, additives, or unhealthy pollutants. Regrettably, many commercial table salts are heavily processed, stripped of their beneficial trace minerals, and often contain undesirable additives that can affect both health and flavor. Redmond Real Salt, on the other hand, is meticulously mined from an ancient sea bed located in central Utah, making it a truly authentic sea salt with a rich mineral profile. I purchase my salt HERE. To ensure cost-effectiveness and always have it on hand, I opt to buy in bulk, typically ordering a 25-pound bag every few years. I store it conveniently in mason jars, which keeps it fresh and ready for all my culinary needs for an extended period.
My exclusive affiliate coupon code “AMBERSKITCHEN” grants you a generous 15% discount on any Redmond products.
*This is an affiliate link, and I may receive a commission on your purchase. Your support through this link is genuinely appreciated.
Water: The Unsung Hero of Sourdough
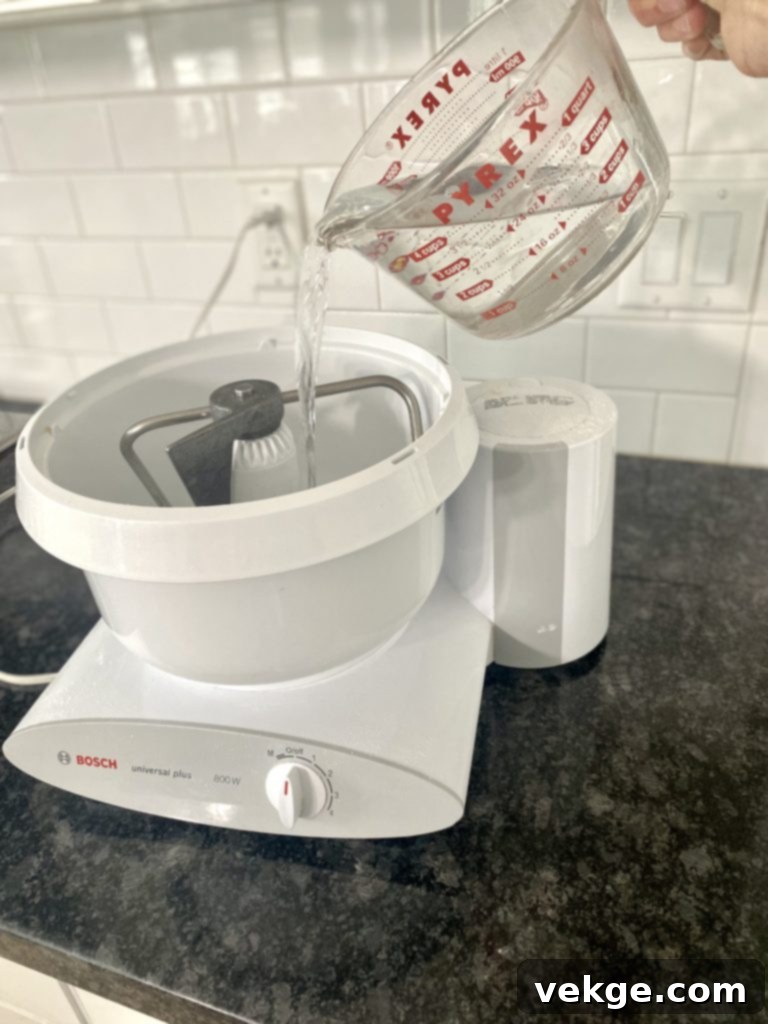
The quality and temperature of your water are far more critical in sourdough baking than many realize. Aim for room temperature to slightly warm water, ideally between 70°F and 80°F (21°C-27°C). Why does temperature matter so much? Water that is too cold will drastically slow down the fermentation process, leading to incredibly long rise times and potentially a less active dough. Conversely, water that is too hot can be detrimental, as it risks aggravating or even killing the delicate wild yeast and bacteria in your sourdough starter. The gentle warmth of the water provides an optimal environment, encouraging the yeast to become active more quickly without causing harm, promoting consistent and predictable rises.
Filtered water is always the superior choice. Chlorinated tap water acts as an antibiotic, and it can significantly weaken the vitality of your sourdough starter and, consequently, the strength and rise of your dough. This is because chlorine inhibits the microbial activity essential for sourdough fermentation. If you don’t have access to a water filter, a simple trick is to fill a cup or jug with tap water and leave it uncovered at room temperature for a few hours (at least 4-6 hours, or overnight). This allows the chlorine to naturally evaporate from the water. If you choose this method, there’s no need to intentionally warm the water afterward; it will naturally come to an acceptable room temperature.
Full disclosure: out of sheer convenience, I occasionally use tap water for my starter and in my dough, and it has generally been fine. However, my experience isn’t universal. I’ve heard from other passionate sourdough bakers that their tap water either has no discernible negative effect on their starter or, conversely, causes a strong negative reaction. So, while my general recommendation is to start with filtered water for the best and most consistent results, you might find that your tap water is forgiving enough for occasional use, but always be prepared for potential variations.
Butter or Coconut Oil: Enhancing Texture and Flavor
For many years, I exclusively used butter in this recipe, appreciating its savory depth that beautifully complements a juicy hamburger. Butter tends to yield a slightly firmer bun, perfect for a classic burger experience that holds up well. However, an exciting discovery came with using coconut oil: the softness factor is utterly unparalleled, creating buns that are incredibly tender and melt-in-your-mouth. Coconut oil imparts a subtle sweetness and a wonderfully plush texture, making for a truly luxurious bun. The choice truly comes down to your preference: do you lean towards a buttery, savory flavor with a bun that has a bit more structure, or do you prioritize an exceptionally soft bun achieved with coconut oil? Both options are fantastic, offering slightly different but equally delicious results.
If your butter or coconut oil is cold and solid, a quick warm-up in the microwave for 10-20 seconds will bring it to the perfect melted consistency, ensuring it incorporates smoothly into the dough. Should neither butter nor coconut oil be suitable for your dietary needs, my next recommendations would be extra virgin olive oil or avocado oil. Both offer healthy fat alternatives that can contribute to a moist and flavorful bun, though they may introduce subtle flavor differences and might affect the final texture slightly.
Egg: The Secret to Softness and Structure
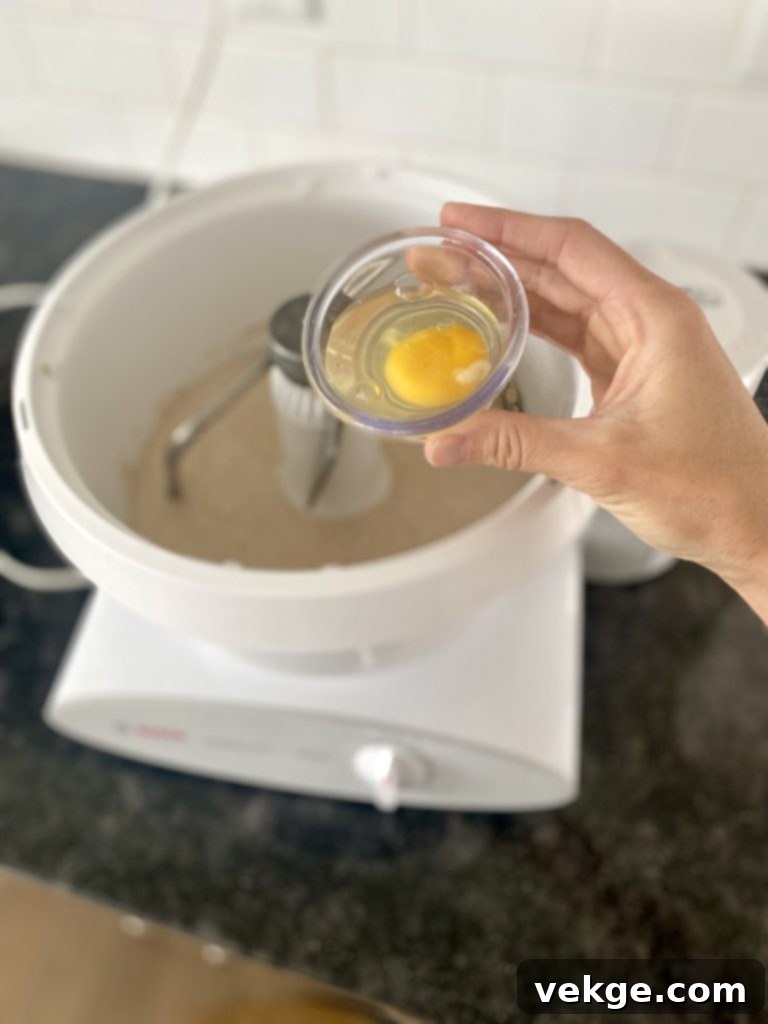
The addition of an egg in this recipe plays a vital role in achieving the desired texture: it contributes significantly to the bread’s softness and acts as a binder, preventing the buns from becoming crumbly. Eggs also add richness, enhance the dough’s elasticity, and contribute to a beautiful golden hue on the crust, making for a more appealing finished product.
However, if eggs are not an option for you due to dietary restrictions or allergies, don’t despair! You have several excellent alternatives that will still yield wonderful results:
- Omit the Egg Entirely: Believe it or not, the recipe will still perform well without the egg. The other ingredients and the robust sourdough starter will still ensure a delightful bun, perhaps slightly denser but still delicious.
- Aquafaba Substitution: For a surprisingly effective vegan and egg-allergy friendly substitute, use 1/4 cup of aquafaba (the liquid from cooked chickpeas) in place of one egg. This remarkable liquid closely mimics egg properties in baked goods, aiding in binding and providing some leavening. Simply open a can of chickpeas, drain 1/4 cup of the liquid, and use it directly in your recipe.
- Flax Egg Replacement: Another popular vegan alternative is a “flax egg.” To prepare one, combine 1 tablespoon of ground flaxseed meal (ensure it’s freshly ground raw flaxseed for best results, as it contains beneficial Omega-3s) with 2 1/2 tablespoons of water. Mix them thoroughly and let the mixture sit for about 5 minutes until it thickens to a gel-like consistency. This flax egg can then be used as a direct substitute for one large egg, providing binding and some moisture.
A common question I receive is whether to use half an egg or a whole egg when halving the recipe. My advice is that the egg in this particular recipe is very forgiving. Even if you cut the recipe in half, adding an entire egg will be perfectly fine, or you could skip the egg altogether, and your buns will still turn out wonderfully. This flexibility makes adapting the recipe even easier and less stressful for home bakers.
Sugar: Fueling Flavor and Fermentation
Granulated sugar works beautifully in this recipe, contributing not only a subtle sweetness but also acting as a readily available food source for your sourdough starter. This encourages robust fermentation, a faster rise, and contributes to a beautiful golden-brown crust during baking. However, you have the flexibility to use alternative sweeteners like honey or coconut sugar, substituting them in a 1:1 ratio. Each will impart a slightly different nuance to the final flavor profile; honey will add a floral note, while coconut sugar offers a caramel-like hint. If you prefer a less sweet bun or are managing sugar intake, you can also opt to skip the sugar entirely. While it might slightly affect the starter’s initial vigor and the crust’s browning, the buns will still be delicious and rise effectively, albeit perhaps a touch slower.
Momma’s Sloppy Joes: The Perfect Pairing
Beyond traditional burgers, these versatile sourdough buns serve as an absolutely phenomenal vessel for other delicious fillings. Their sturdy yet soft texture and tangy flavor provide the perfect counterpoint to rich, savory ingredients. If you’re looking for another incredible meal idea that truly shines with these buns, my Momma’s Sloppy Joes recipe makes an AMAZING and hearty filling. The robust flavor of the sourdough beautifully complements the savory, slightly sweet sloppy joe mix, creating a truly satisfying and memorable meal that will have everyone asking for seconds!
Hear What Others Are Saying About These Sourdough Buns!
Don’t just take my word for it. Here’s a glimpse into the overwhelmingly positive feedback from other home bakers who have fallen in love with these sourdough hamburger buns. Their experiences truly highlight the exceptional quality, deliciousness, and satisfying results you can expect from this recipe. Read on to see why these buns have become a staple in so many kitchens!



Frequently Asked Questions About Sourdough Hamburger Buns
- Q: Can I refrigerate the dough before baking?
- A: Absolutely! This is a fantastic technique for controlling your baking schedule and even enhancing flavor. After the initial bulk rise (first rise), place the dough into an airtight bowl or bag. It can be safely refrigerated for 12 to 48 hours. This cold fermentation process, known as retarding, slows yeast activity and allows for more complex flavors to develop. When you’re ready to proceed, remove the cold dough from the fridge and gently form it into individual buns. Cover them loosely with plastic wrap or a clean dish towel and allow the dough to slowly come to room temperature, then continue with the second rise until doubled in size. The egg wash can be applied right before baking. Enjoy the added flexibility and enhanced taste!
- Q: Can I freeze the dough?
- A: Unfortunately, freezing unbaked sourdough dough tends to yield inconsistent and often disappointing results. The delicate yeast and bacterial cultures are sensitive to drastic temperature changes and can be severely impacted by freezing and thawing. This often leads to poor rise, an undesirable texture, and a loss of the unique sourdough characteristics. For this reason, I do not recommend freezing the dough before it’s baked.
- Q: Can I freeze the buns after they are baked and cooled?
- A: Yes, absolutely! This is an excellent way to prepare ahead and always have fresh-tasting buns on hand. Baked and completely cooled sourdough buns freeze exceptionally well when stored properly. Place them in an airtight freezer bag or container, ensuring they are not crushed or compromised in shape. When you wish to use them, simply remove them from the freezer and allow them to defrost at room temperature for a few hours. For an extra touch that truly makes them shine and brings back that fresh-baked warmth and texture, I highly recommend slicing them open, generously buttering the insides, and toasting them on a griddle just before serving. This step creates a delightful crispness on the cut surface.
- Q: What is the best way to store leftover buns?
- A: These homemade sourdough buns are at their absolute peak freshness on the first day. Since they contain no artificial preservatives, they won’t maintain their “fresh-from-the-bakery” quality for as long as store-bought alternatives. However, they remain quite delicious on the second and third days when stored in an airtight container at room temperature. To revitalize them and bring back their appealing texture, I always suggest this simple trick: just before serving, slice the bun open, generously butter the insides, and then toast the buttered side face-down on a pancake griddle or frying pan for about a minute, or until they achieve a lightly golden and delightfully toasty finish. This quick step makes a world of difference!
- Q: Can I use this recipe for hot dog buns?
- A: Yes, this recipe is perfectly adaptable for making delicious sourdough hot dog buns! The rich flavor and soft texture will elevate your hot dogs to a gourmet level. However, forming consistent sizes and shapes by hand can be a bit challenging to get that classic hot dog bun look. For the best and most uniform results, I highly recommend using a hot dog bun mold. This will help you achieve perfectly shaped buns every time. Keep in mind that the baking time will likely need to be slightly reduced by a minute or two compared to hamburger buns due to their different shape and thickness, so keep a close eye on them towards the end of the baking process to prevent over-browning.
A Sample Schedule for Baking Your Sourdough Hamburger Buns
Mastering the timing of sourdough baking can initially feel like a puzzle, but with a few attempts, it quickly becomes intuitive. Below is a sample schedule outlining how I typically approach making these delectable buns. Remember, this is a flexible guide, and I encourage you to adapt it to seamlessly fit your own lifestyle and routine. An important note: you always have the option to refrigerate the dough to effectively pause or significantly slow down the fermentation process! If you choose to utilize the fridge to slow the process (by approximately 90%), I strongly recommend doing so after the first bulk rise. Ensure the dough is stored in an airtight bag or bowl and limit refrigeration to between 12 and 48 hours. Exceeding this timeframe can lead to over-fermentation, making the dough difficult to work with and potentially resulting in an undesirable slimy texture.
Thursday at 10 PM: Activate Your Starter (Make the Levain)
Combine 3 tablespoons of your runny discard starter with 3/4 to 1 cup of flour and 3/4 to 1 cup of water. Mix these ingredients thoroughly until well combined. Cover your starter and place it in a warm spot (ideally between 70°F and 80°F / 21°C-27°C) to activate. This overnight period allows the starter to become super bubbly and active, forming your levain.
Friday at 7:00 AM: Assess and Mix the Dough
*IF* your starter has successfully doubled in size and is visibly full of active bubbles, indicating it’s at its peak, it’s time to proceed with making the dough. If it hasn’t doubled, it indicates your starter needs strengthening. Refer to the troubleshooting notes above for guidance on power feeds or other tips to get it ready.
Friday at 7:15 AM: First Rise (Bulk Fermentation)
After mixing, cover your dough with a clean dish towel or plastic wrap. Allow it to rise until it has doubled in size. This crucial bulk fermentation step typically takes between 4 and 8 hours, depending on the ambient temperature of your kitchen and the overall strength of your starter. Be patient, as this is where much of the flavor develops.
Friday at 12:15 PM: Divide, Shape, and Second Rise
*IF/WHEN* the dough has successfully doubled in size, carefully transfer it to a lightly floured surface. Gently divide the dough into 10 to 12 equal portions. Roll each portion into a smooth, round ball, ensuring any seams are tucked neatly underneath. Arrange these balls on a cookie sheet lined with parchment paper. Using the palm of your hand, gently flatten each ball into a disc, about 1/2 inch tall. They might appear small at this stage, leading you to wonder if they’ll ever be large enough – but trust the process! As long as your starter is strong, they will soon transform into beautiful, substantial buns. Cover them again with a clean dish towel or loosely with plastic wrap and let them undergo their second rise until doubled in volume. This secondary proofing can take anywhere from 2 to 5 hours. If the dough hasn’t doubled, allow it more time or revisit the troubleshooting tips for strengthening your starter.
Friday at 4:00 PM: Egg Wash and Bake
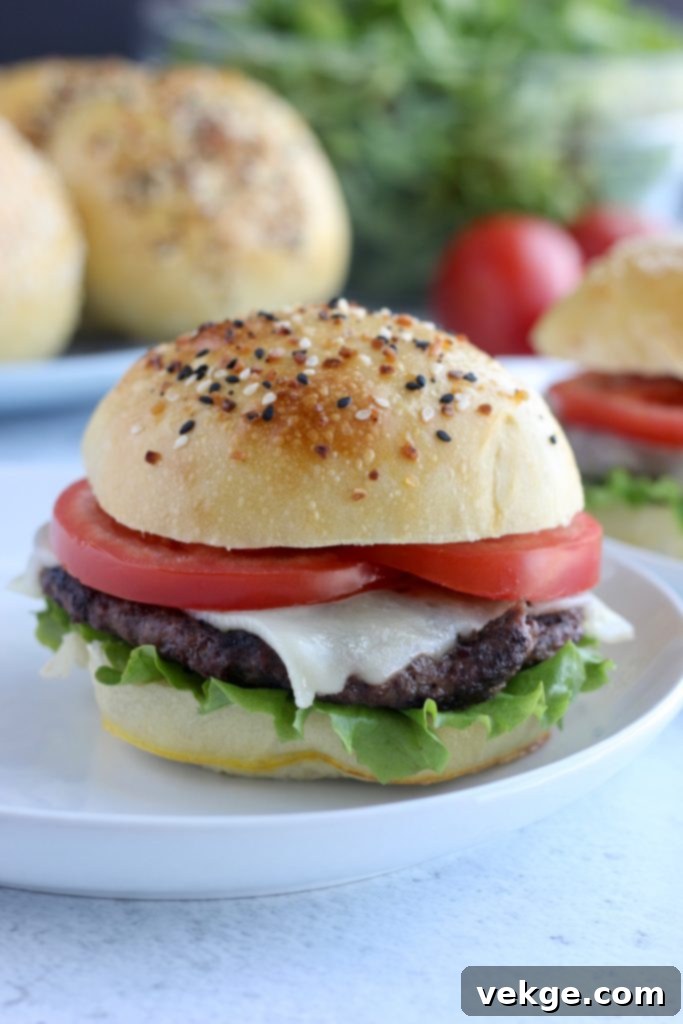
*IF/WHEN* your shaped dough buns have fully doubled in size and look puffy, preheat your oven to 350°F (175°C). Whisk one raw egg (the second egg from the ingredients list) and gently brush it over the tops of each bun. While I usually prefer mine plain, this is the perfect opportunity to sprinkle with sesame seeds or “Everything but The Bagel” seasoning for added flavor and visual appeal. Another excellent idea for an attractive finish is to score a couple of shallow lines on top of the dough after applying the egg wash. Bake for 15-17 minutes, or until they achieve a beautiful golden-brown color and sound hollow when tapped on the bottom.
Friday at 5:00 PM: Cool and Serve
Carefully remove the baked buns from the oven and transfer them to a wire rack to cool completely. Allowing them to cool fully is important for texture. Once cooled, slice them open, and for an ultimate upgrade, butter and toast the insides on a griddle until lightly golden. Then, serve and enjoy your incredible homemade sourdough hamburger buns, ready to complete any meal!
Expand Your Sourdough Repertoire
Once you’ve mastered the art of sourdough and experienced its delightful results, it’s destined to become your trusted companion in the kitchen! The versatility of sourdough extends far beyond just buns; it can transform countless baked goods with its unique flavor and health benefits.
HERE you’ll find a collection of my other cherished sourdough recipes, from artisanal breads and pizzas to sweet treats and pancakes, all designed to inspire your baking journey and make the most of your active starter.


Sourdough Hamburger Buns
Soft yet sturdy and incredibly delicious! Once you try these, you’ll never want store-bought buns again. Made with the natural goodness of sourdough, these buns are a game-changer for any burger or sandwich.
Course: Sourdough
Keywords: baking with sourdough, hamburger buns recipe, homemade hamburger buns, natural yeast recipe, sourdough, sourdough hamburger buns recipe
Prep Time: 35 minutes
Cook Time: 15 minutes
Additional Time: 8 hours (for rising/fermentation)
Total Time: 8 hours 50 minutes
Servings: 10-12 buns
Author: Amber
Ingredients
- 3 to 3 1/2 cups flour (bread, all-purpose, whole wheat, or Kamut)
- 1 cup bubbly active sourdough starter (approx. 210 grams)
- 1 cup slightly warm water (filtered is best)
- 3 Tablespoons melted butter OR 3 Tablespoons melted coconut oil
- 3 Tablespoons sugar (granulated, honey, or coconut sugar)
- 1 large egg, beaten (optional, see notes for substitutes)
- 1 1/4 teaspoon fine sea salt
- Plus one more egg for brushing onto the tops of the rolls before baking (optional, for egg wash)
Instructions
- Activate Your Starter: Begin by creating your active starter (levain). Combine 3 Tablespoons of your runny discard starter with 1 cup of flour and 1 cup of water. The total volume should be around 1 1/3 cups. Use 1 cup for this recipe and refrigerate the remaining 1/3 cup as your reserve. Mix well, mark its volume in the container, cover, and let it rest in a warm spot for 8-10 hours, ideally overnight. It’s ready when active, bubbly, and doubled in size.
- Combine Wet Ingredients: In a large bowl or stand mixer, gently combine the slightly warm water, sugar, and 1 cup of your bubbly active starter (210 grams). Stir just enough to mix.
- Add Remaining Wet & Salt: Incorporate the salt, melted butter (or coconut oil), and the beaten egg into the starter mixture. Stir until everything is well combined.
- Gradually Add Flour: Slowly add the flour, about 1 cup at a time, mixing and kneading thoroughly after each addition. Be cautious not to overdo the flour. Continue adding until the dough is tacky but no longer excessively sticking to your fingers or the sides of the bowl.
- Knead the Dough: Knead the dough for 4-5 minutes by hand, or 2-3 minutes if using a stand mixer with a dough hook, until it’s smooth and elastic.
- First Rise (Bulk Fermentation): Place the dough into a lightly oiled bowl (or leave it in the mixer bowl), cover it, and let it rise until it has doubled in size. This bulk fermentation typically takes between 4 and 8 hours, depending on your starter’s strength and room temperature.
- Divide and Shape: Turn the risen dough out onto a lightly floured surface. Gently divide it into 10 or 12 equal portions. Roll each portion into a smooth ball, tucking any seams underneath. Place them onto a parchment paper-lined cookie sheet. Using the palm of your hand, gently flatten each ball into a disc, about 1/2 inch tall. Don’t worry if they seem small; they will rise significantly!
- Second Rise (Proofing): Cover the shaped buns with a clean dish towel or plastic wrap, and allow them to rise again until they have doubled in volume. This secondary proofing can take anywhere from 2 to 5 hours.
- Preheat Oven: Once the buns have sufficiently risen, preheat your oven to 350°F (175°C).
- Egg Wash & Toppings: Whisk one raw egg and gently brush it onto the tops of each dough bun. For extra flavor and texture, sprinkle with sesame seeds or “Everything but The Bagel” seasoning, or score a couple of lines on top.
- Bake: Bake the buns for 15-17 minutes, or until they are beautifully golden brown. Remove from the oven and let them cool completely on a wire rack.
- Slice Before Serving: Right before serving, carefully slice the cooled buns in half horizontally.
- Optional Toasted Buttered Buns: (Highly Recommended!) For an incredible flavor and texture upgrade, butter the insides of the sliced buns and toast them face-down on a pancake griddle or frying pan for about a minute, or until they are lightly golden and slightly crispy.
- Enjoy! Serve these magnificent homemade sourdough hamburger buns with your favorite burgers, sandwiches, or sloppy joes!
