Restore & Repurpose: The Ultimate Guide to Vintage Wooden Toolbox Transformations
Stepping into my grandfather’s dusty old garage, I stumbled upon a true treasure: his vintage wooden toolbox. It wasn’t just a container; it was a testament to decades of hard work, each scratch and dent a silent storyteller of countless projects, hammers wielded, and nails secured. In that moment, I saw beyond its practical utility – I envisioned a new life for this seasoned piece, a unique addition to my own home.
The timeless charm of vintage items continues to captivate us in modern interior design. There’s an undeniable allure in objects that carry history, character, and a sense of enduring quality. Old wooden toolboxes perfectly embody this appeal, offering a fantastic opportunity for creative restoration and repurposing. Their robust construction, the inherent warmth of natural wood, and their distinctive appearance can inject unparalleled character and a cozy, rustic elegance into any living space.
This comprehensive guide is designed to empower you with the knowledge and inspiration to transform these often-forgotten relics into stunning, functional showpieces for your home. We’ll delve into everything from the exciting hunt for your ideal vintage toolbox to the meticulous steps of cleaning, repairing, and beautifully styling these historical treasures. Whether you dream of a unique wall-mounted shelf, an eye-catching coffee table centerpiece, or clever kitchen storage, I’ll share my proven methods and creative ideas.
Join me as we embark on this rewarding journey of upcycling. Let’s give these hardworking, wooden boxes the well-deserved second chance they deserve, turning them into cherished focal points that tell a story in your modern home.
Hunting for Treasures: Where to Find Your Vintage Wooden Toolbox
Embarking on the quest for an old wooden toolbox is an exciting adventure, often leading to truly rewarding discoveries. These robust containers, once essential in every craftsman’s arsenal, are now sought-after pieces for restoration and repurposing. Knowing where to look significantly increases your chances of finding a gem with character and potential.
Local Haunts for Hidden Gems: Estate Sales and Thrift Stores
Your search should ideally begin in local estate sales, especially those hosted in established, older neighborhoods. These sales frequently clear out garages, workshops, and basements where generations of tools and storage items, including sturdy wooden toolboxes, have been carefully kept. Attending these sales early in the morning, right when they open, often gives you the first pick of the best quality and most interesting pieces before they’re snatched up by other enthusiasts.
Small-town thrift stores are another fantastic resource, often receiving new inventory on a regular basis. While you might encounter toolboxes that appear quite dirty, dusty, or show signs of minor damage, don’t be deterred. Many of these imperfections are superficial and can be easily addressed with a thorough cleaning and straightforward repairs, transforming them into beautiful functional pieces. Always keep an eye on online listings for similar items to ensure you’re getting a fair price and understanding the market value.
Seasonal Finds: Yard Sales, Flea Markets, and Antique Shows
The spring and fall seasons are prime times for yard sales and garage sales. Homeowners often use these opportunities to declutter, unearthing forgotten treasures from their sheds, attics, and storage units. Neighborhood-wide sales can be particularly fruitful, offering a concentrated hunting ground for these vintage items, often at very budget-friendly prices.
Flea markets and antique shows provide an excellent opportunity to physically inspect various toolboxes, feel their weight, examine their construction, and compare prices from multiple vendors. The tactile experience of handling these pieces can help you assess their condition and potential for restoration more accurately than online photos alone. Don’t be afraid to haggle a bit for a better deal!
Expanding Your Search: Online Marketplaces and Auctions
For those willing to broaden their search, online platforms like Facebook Marketplace, Craigslist, and Etsy offer a vast selection. These sites allow you to connect with sellers across a wider geographical area, often yielding unique finds. However, it’s crucial to factor in potential shipping costs, which can sometimes be substantial for larger, heavier items. Local online auction sites are also worth exploring, as they frequently list vintage tools and industrial storage items, often at surprisingly reasonable prices. Remember to check seller ratings and ask for detailed photos if buying online to avoid disappointment and ensure transparency.
Step-by-Step Guide to Restoring an Old Wooden Toolbox
Restoring a vintage wooden toolbox is a deeply satisfying project. It brings new life to an old item while preserving its history and character. Follow these steps carefully to achieve a beautiful and durable result.
Materials Required for Your Toolbox Restoration Project
| Category | Tools/Materials |
|---|---|
| Cleaning Supplies | – Sugar soap – Steel wool – WD40 (for rust removal on hardware) |
| Sanding Tools | – Power sander (orbital or belt) – Sandpaper (a range from 60 grit for heavy removal to 240 grit for fine finishing) |
| Rust Removal Tools | – Rotary tool (e.g., Dremel) – Wire brush attachments – Rust remover solution (for soaking hardware) |
| Wood Treatment | – Indian Rosewood wood dye – Ebony wood dye (spirit-based, for specific effects or touch-ups) |
| Finishing Supplies | – Wax polish (a blend of beeswax and carnauba wax is ideal) |
| Hardware Tools | – Screwdriver set (Phillips and flathead) – Drill (for rusted screws or new pilot holes) |
| Replacement Materials | – New wood (matching species/grain for rotten parts) – Wood glue – Wood filler |
| Painting Supplies | – Black spray paint (for metal hardware, matte or satin finish) |
| Safety Gear | – Gloves (work and chemical-resistant) – Goggles/Safety glasses – Dust mask/Respirator |
| Special Tools (Optional) | – Map gas torch (for controlled wood burning or bending metal) |
Step 1: Initial Assessment, Tool Gathering, and Disassembly
- Assess Your Toolbox: Before diving in, take a moment to carefully inspect your vintage toolbox. Note any deep damage, missing parts, or heavily rusted areas. This initial assessment helps you plan your restoration more effectively and gather the right supplies. Look for the type of wood and construction methods (like dovetail joints).
- Gather Your Arsenal: Ensure you have all the necessary restoration tools and materials readily available. This includes items like WD40 for stubborn rust, a power sander for efficient surface preparation, a rotary tool with various attachments for detailed work, steel wool, your chosen wood dye, and a high-quality wax polish. Having everything at hand will streamline the process and prevent interruptions.
- Careful Disassembly: Begin by systematically removing all hardware – hinges, latches, handles, and any internal trays or dividers. Use WD40 liberally on rusted screws or bolts, allowing it to penetrate for a few minutes before attempting to unscrew them. For exceptionally stubborn or corroded fasteners, drilling them out carefully might be necessary. Keep all removed hardware organized in a container to prevent loss, as even small parts contribute to the toolbox’s authenticity.
Step 2: Deep Cleaning and Thorough Inspection
- Eliminate Grime: With the hardware removed, it’s time for a thorough cleaning. Mix sugar soap (or a good quality all-purpose degreaser) with water according to package directions. Use steel wool or a stiff bristle brush to vigorously scrub away decades of dirt, grease, grime, and any loose paint. Pay close attention to corners, crevices, and the bottom of the toolbox where dirt tends to accumulate. Rinse with clean water and allow the wood to dry completely in a well-ventilated area, avoiding direct sunlight.
- Detailed Damage Check: Once clean and dry, perform a more detailed inspection. Look for any signs of water damage, wood rot, or insect infestation, especially along the bottom and corners. Gentle probing with an awl or screwdriver can reveal soft, compromised wood that needs attention. Identify any cracks, loose joints, or areas where wood might need patching or replacement, making notes for the next repair phase.
Step 3: Rust Removal and Wood Repair
- Hardware Rejuvenation: Take your disassembled metal hardware. Using a rotary tool fitted with a wire brush attachment, carefully remove all traces of rust. For deeper rust, consider a rust remover solution soak beforehand, following product instructions. Once clean, spray paint the metal components with a durable black or metallic spray paint to give them a fresh, uniform look and added protection against future corrosion. Ensure complete coverage and allow adequate drying time.
- Addressing Rotten Wood: For areas with significant wood rot, it’s best to replace the compromised sections. Carefully cut out the rotten wood using a chisel or saw, ensuring you remove all damaged material. Use the original piece as a template to cut new wood that matches the dimensions and grain direction as closely as possible. Secure the new wood using strong wood glue and small brad nails or clamps, ensuring a strong, seamless fit. For minor cracks or chips, wood filler can be used effectively, sanded smooth once dry.
Step 4: Precision Sanding to Reveal Natural Beauty
- Progressive Sanding: This step is crucial for achieving a smooth, professional finish that highlights the wood’s inherent beauty. Start with a coarse 60-grit sandpaper on your power sander to remove any remaining paint layers, deep scratches, and old finishes. Gradually work your way up through finer grits – 120-grit, then 180-grit, and finally 240-grit – ensuring you create an even, silky-smooth surface. Always sand with the grain of the wood to avoid unsightly cross-grain scratches.
- Highlighting Character: As you sand, pay special attention to highlighting unique details like dovetail joints or finger joints, which often hide beneath layers of grime or paint. The goal is to expose the natural grain and character of the wood, allowing its inherent beauty to shine through. Hand-sand intricate areas where a power sander cannot reach, such as inside corners and decorative edges, to ensure a consistent finish throughout.
Step 5: Applying Wood Dye and Addressing Stubborn Stains
- Restoring Wood’s Richness: Once the wood is perfectly smooth and dust-free, it’s time to apply your chosen wood dye. A rich shade like Indian Rosewood can deeply enhance the natural grain and bring out the wood’s original warmth. Apply three thin, even coats using a clean cloth or foam brush, allowing each coat to dry completely according to the product instructions. This layering technique builds depth, ensures an even color, and allows you to control the final hue. Always test the dye on an inconspicuous area first.
- Tackling Persistent Stains: If you encounter any stubborn stains that resist sanding or dye, a controlled wood-burning technique (like a localized Shou Sugi Ban application with a map gas torch) can be used to char the area slightly, blending the stain into a darker, textured feature. Practice this on scrap wood first to master the technique, ensuring safety and precision. Alternatively, a darker ebony spirit-based dye can be carefully applied to camouflage difficult spots.
Step 6: Protecting and Polishing the Wood, Final Hardware Clean-Up
- Luxurious Finish: After the wood dye has fully cured (this can take 24-48 hours depending on the product and climate), apply a high-quality wax polish, such as a blend of beeswax and carnauba wax. This not only provides a protective barrier against moisture and daily wear but also imparts a beautiful, lustrous sheen that enhances the wood’s depth. Apply a thin, even coat with a soft, lint-free cloth, let it haze slightly for 10-15 minutes, then buff vigorously with a clean, dry cloth to achieve a deep, rich glow.
- Hardware’s Last Shine: While the wood is setting, give any remaining smaller hardware pieces (like small latches or corner protectors) a final clean-up. Use a rust remover solution and a small wire brush or steel wool to ensure they are spotless and ready for reassembly. A quick polish with metal polish can also enhance their appearance.
Step 7: Reassembly and Embracing Imperfections
- Careful Reconstruction: Begin reattaching all the cleaned and restored hardware components. Align hinges, latches, and handles precisely, using either the original screws (if salvagable and cleaned) or new, matching hardware. If using new screws, ensure they are of similar size and type. Ensure all screws are tightened securely but avoid overtightening, which can split old wood. Work slowly and methodically to ensure everything fits perfectly back into place.
- Celebrating History: As you reassemble, remember that the beauty of a vintage piece lies in its history. Embrace the minor dents, subtle color variations, and unique marks that tell the story of its past life. These “imperfections” add character, authenticity, and a unique narrative, making your restored toolbox truly one-of-a-kind. Step back and admire your beautifully transformed, functional work of art – a testament to craftsmanship and your dedication!
11 Creative Ways to Repurpose Your Vintage Wooden Toolbox
Once restored, your old wooden toolbox is a blank canvas for creativity. Its inherent structure, compartments, and rustic appeal make it perfect for a myriad of uses around the home. Here are some of my favorite ideas to inspire your next upcycling project.
1. Elevated Kitchen Organization and Rustic Charm
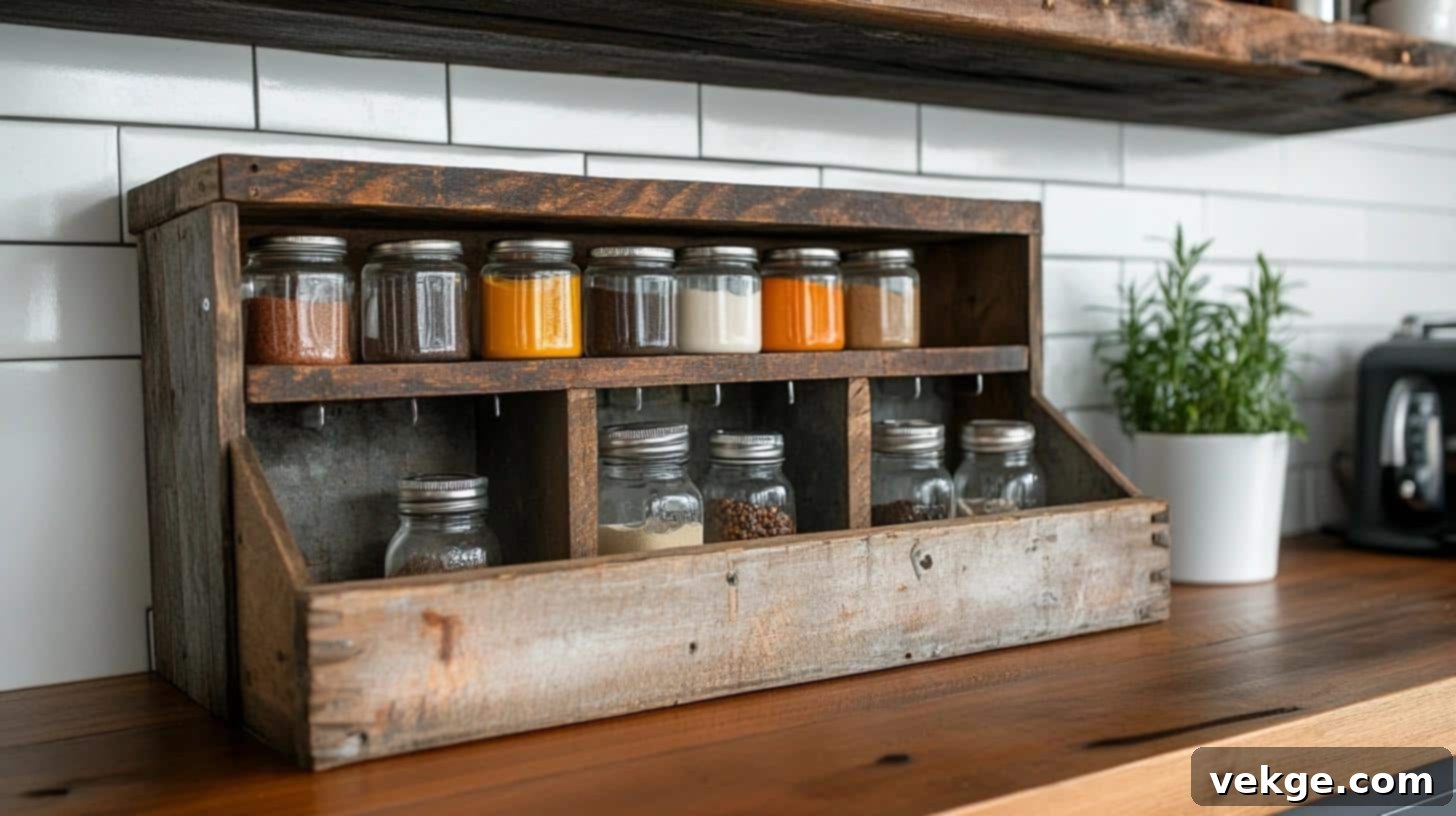
Transforming your vintage wooden toolbox into a kitchen organizer introduces both practical storage and a charming, rustic aesthetic. Kitchens often crave smart, visually appealing solutions for everyday items, and the inherent compartments and character of an old toolbox make it an ideal candidate. Its seasoned wood can warm up a modern kitchen, providing a focal point that’s both functional and decorative.
- Artisan Spice Rack: Mount the toolbox securely on a kitchen wall to create an utterly unique and accessible spice rack. The individual sections are perfect for holding small glass jars filled with your favorite herbs and spices, making them easy to see and grab while cooking.
- Beverage & Bottle Organizer: Utilize the deeper sections to neatly store taller items like cooking oils, vinegar bottles, or even a selection of craft beers or wine, keeping your countertops clutter-free yet stylishly arranged.
- Utensil Caddy: Place it on your counter or island to hold frequently used cooking utensils, ensuring spatulas, whisks, and ladles are always within arm’s reach while adding a touch of vintage flair.
2. Stylish Bathroom Organization and Vanity Storage
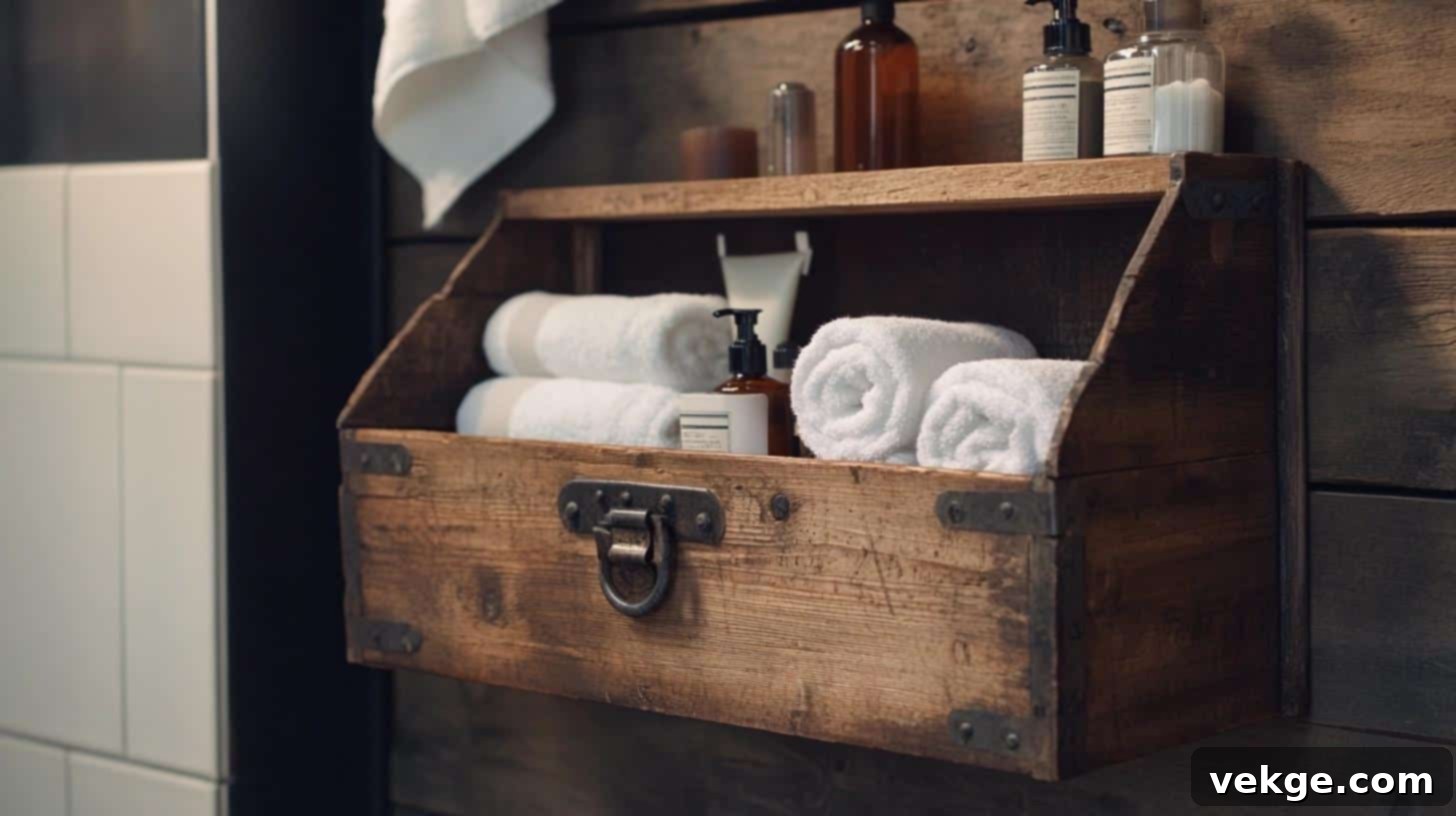
Small bathrooms notoriously lack adequate storage space, making every available inch incredibly valuable. A repurposed wooden toolbox can add both much-needed storage and a touch of unique style without encroaching on precious floor space. Its segmented design is perfect for sorting various bathroom essentials.
- Water-Resistant Seal: Before use, apply three coats of a clear, water-resistant sealant or marine varnish to both the inside and outside of the toolbox to protect the wood from humidity and splashes common in a bathroom environment.
- Vanity Essentials Sorter: Use its sections to neatly sort items such as rolled hand towels, decorative soaps, cotton balls, Q-tips, or small lotions. It can sit on your counter or be mounted on a wall for a floating shelf effect.
- Makeup and Skincare Caddy: Organize your daily makeup, brushes, and skincare products into the compartments, keeping your vanity tidy and your routine streamlined.
3. Inviting Living Room Display and Conversation Starter
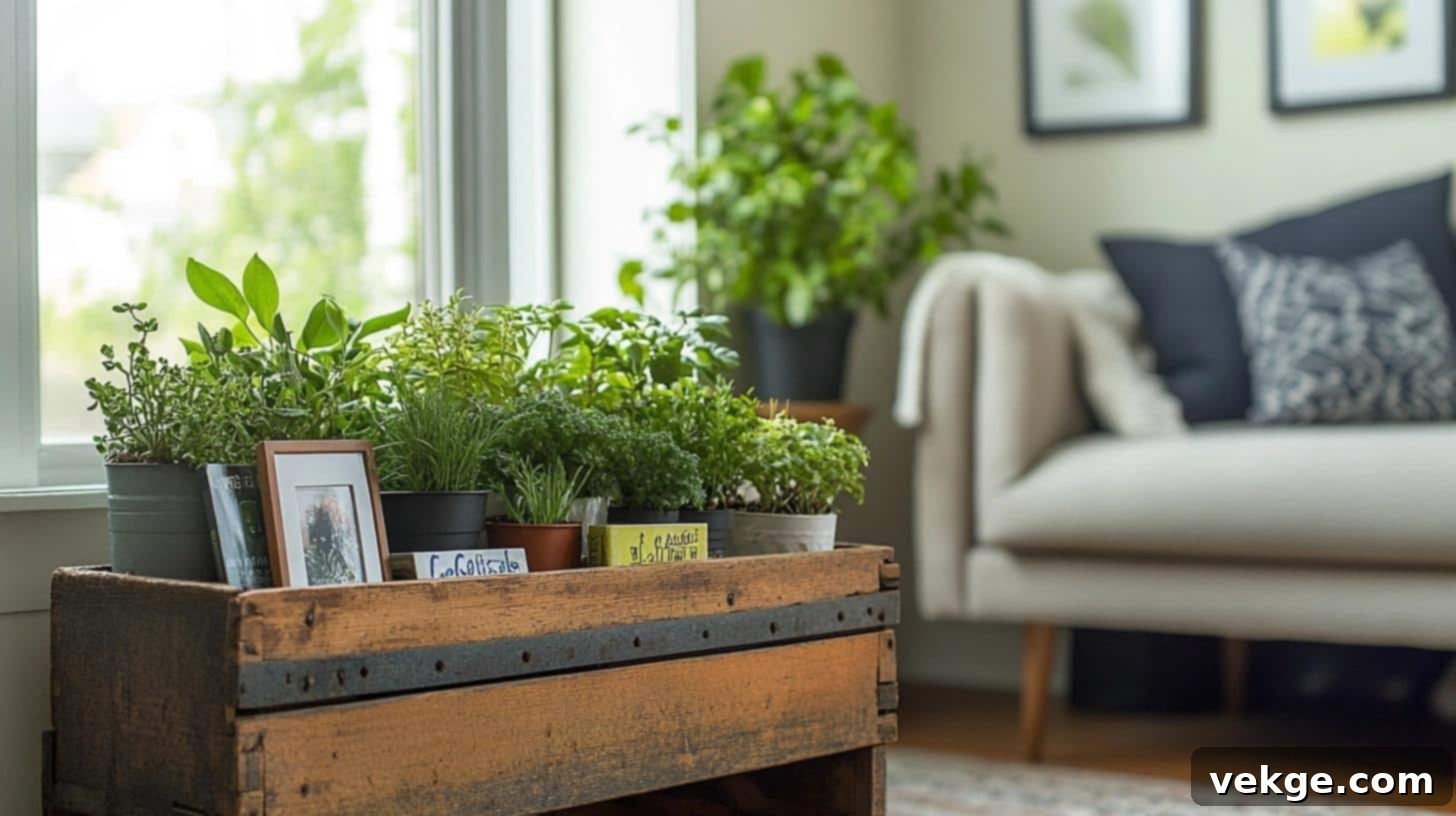
Living rooms are meant to be reflections of your personality and style, filled with pieces that spark conversation and serve a purpose. A vintage toolbox, with its inherent character and history, can become an instant focal point, offering charming spots for your favorite decorative items or small collections.
- Mini Indoor Garden: Set up a charming mini indoor garden by placing small potted succulents, air plants, or herbs within the different sections, bringing a touch of nature and freshness indoors.
- Curated Display Shelf: Utilize the various levels and compartments to create a dynamic display for cherished books, framed photographs, small art pieces, or collected curios, showcasing your personal narrative.
- Remote Control & Coaster Caddy: On a coffee table, it can neatly house remote controls, coasters, and other small items that tend to clutter living spaces.
4. Charming Bedside Table Stand and Organizer
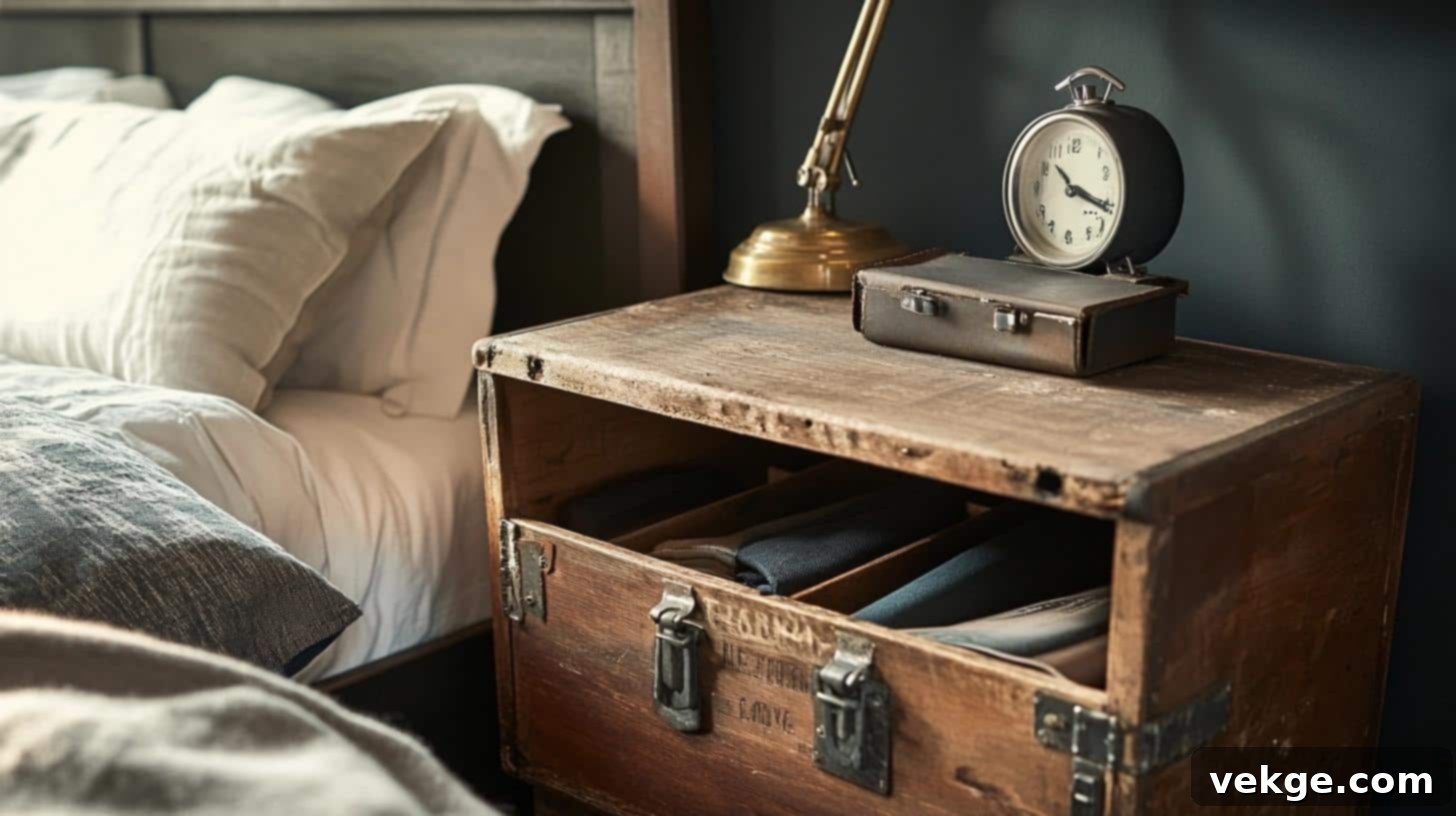
In bedrooms where space is at a premium, turning your wooden toolbox into a bedside stand offers a compact yet incredibly functional solution. Its modest footprint works exceptionally well in tight bedroom layouts, providing convenient access to your nightly essentials.
- Lamp and Clock Perch: The flat top surface is ideal for holding a small bedside lamp, an alarm clock, or a glass of water, keeping them within easy reach.
- Reading Nook Organizer: Tuck your current read, e-reader, reading glasses, or a journal into the deeper sections, creating a dedicated spot for your nighttime routine items.
- Tech Hub: Use one compartment to neatly coil charging cables for your phone and tablet, keeping them organized and accessible.
5. Welcoming Entryway Helper and Catch-All
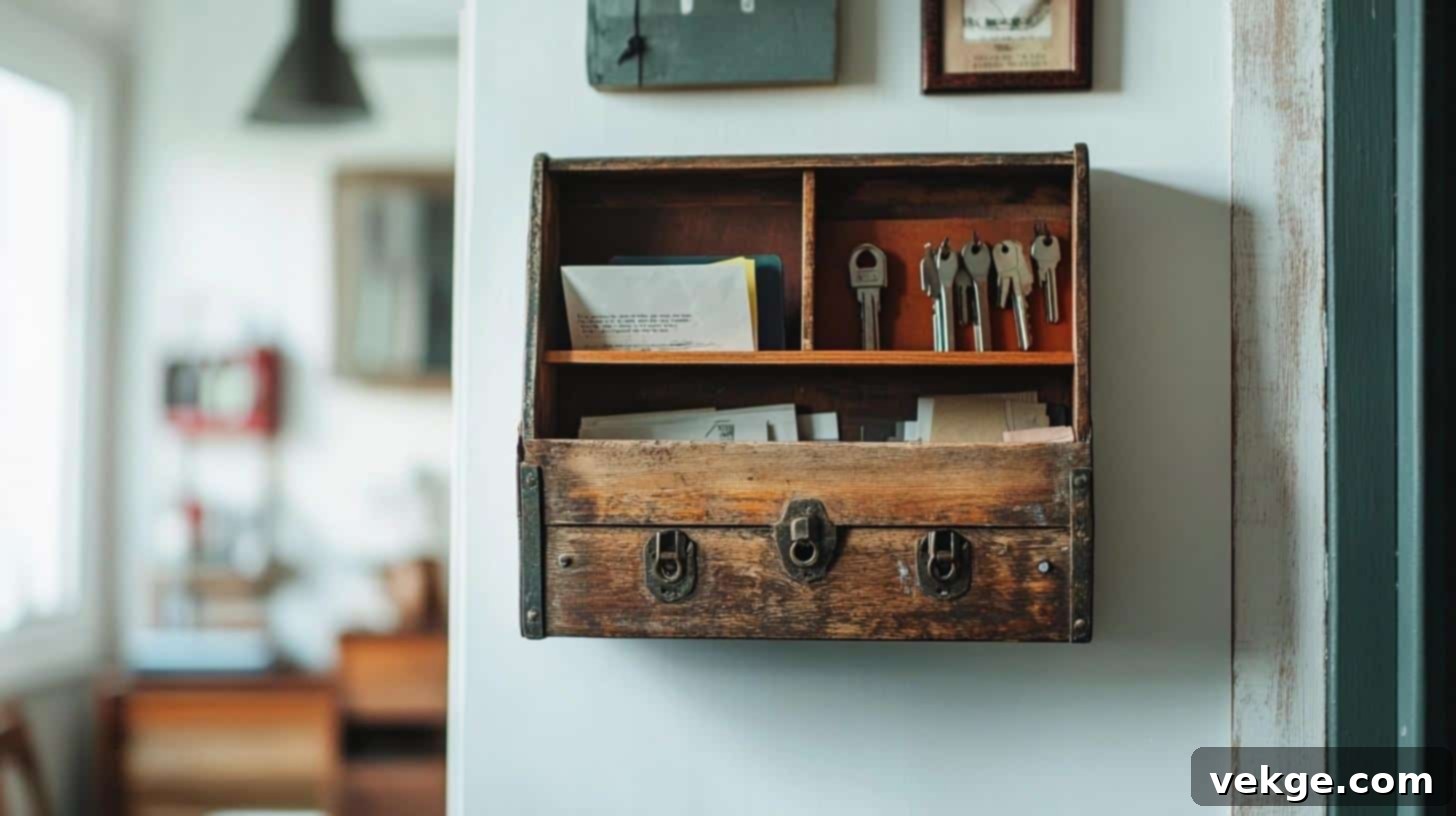
Entryways are often magnets for daily clutter – keys, mail, wallets, and loose change. A wall-mounted wooden toolbox serves as an elegant and efficient solution, keeping everything sorted and easily accessible without overwhelming the space. It sets an organized and inviting tone for your home.
- Mail and Key Sorter: Dedicate separate sections for incoming mail, outgoing mail, and a designated spot for keys, ensuring you never misplace them as you walk in or out the door.
- Change & Accessory Tray: Place a small decorative tray or bowl in one compartment for loose change, car fobs, or small accessories like sunglasses or a hair tie.
- Phone Charging Station: Create a small, discreet charging station by drilling a small hole for a cable, keeping your phone off the counter and out of sight when not in use.
6. Rustic Planters for Greenery
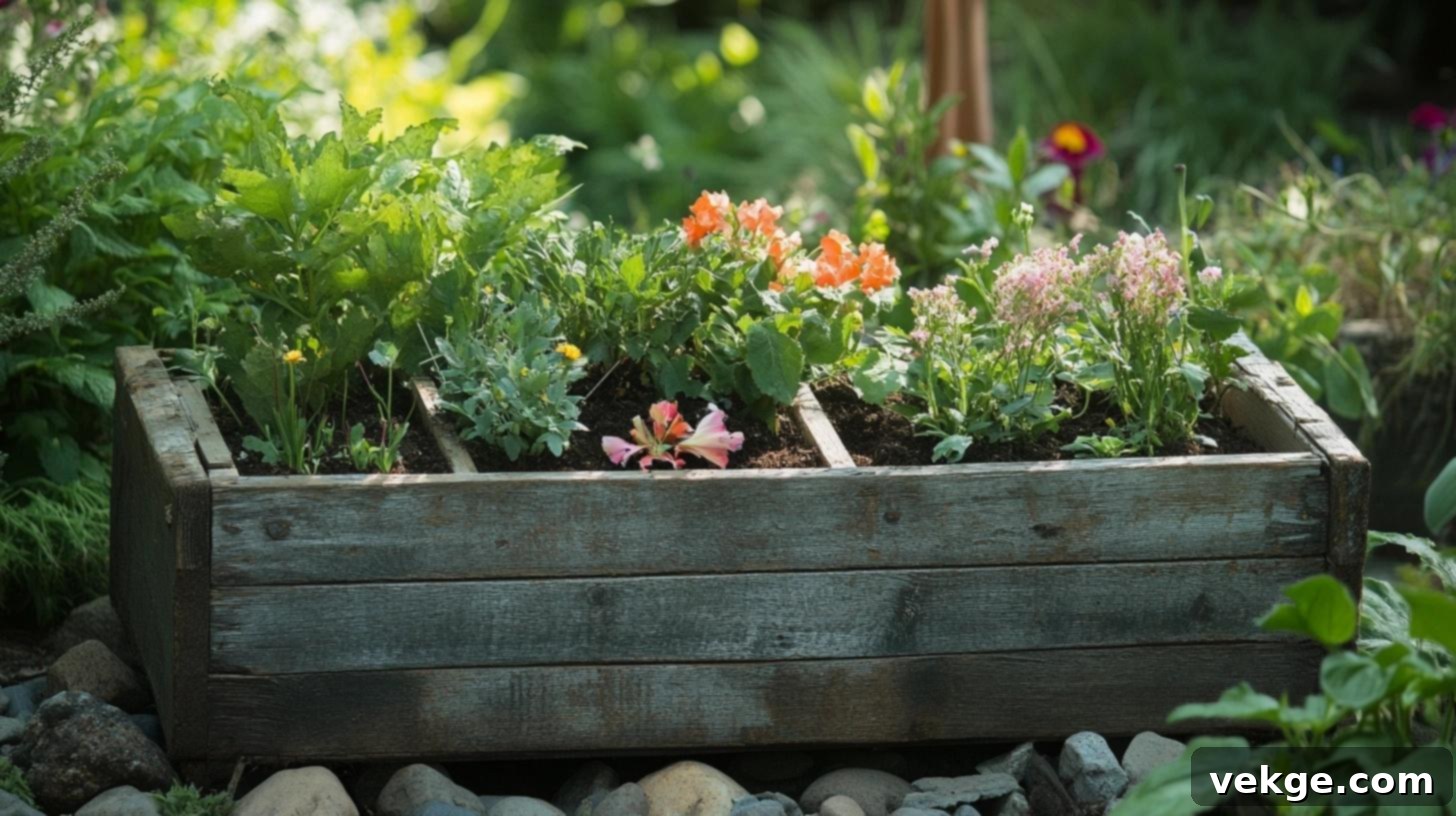
Old wooden toolboxes make beautifully natural and charming homes for plants and flowers, adding a touch of rustic gardening flair to any space, indoors or out. Their solid wood construction is surprisingly robust and can handle soil and occasional water spills well, especially with proper preparation.
- Protective Lining: To shield the wood from moisture and soil, line the interior of the toolbox with heavy-duty plastic sheeting or a pre-made planter liner. Staple it securely around the edges.
- Proper Drainage: Add a layer of gravel or small rocks at the bottom of the lined toolbox before adding potting soil. This essential step ensures proper drainage, preventing root rot and keeping your plants healthy.
- Herb Garden or Succulent Display: Plant a selection of your favorite herbs for a kitchen windowsill or create a stunning succulent or cactus display, taking advantage of the toolbox’s segmented structure.
7. Unique Centerpieces for Tablescapes
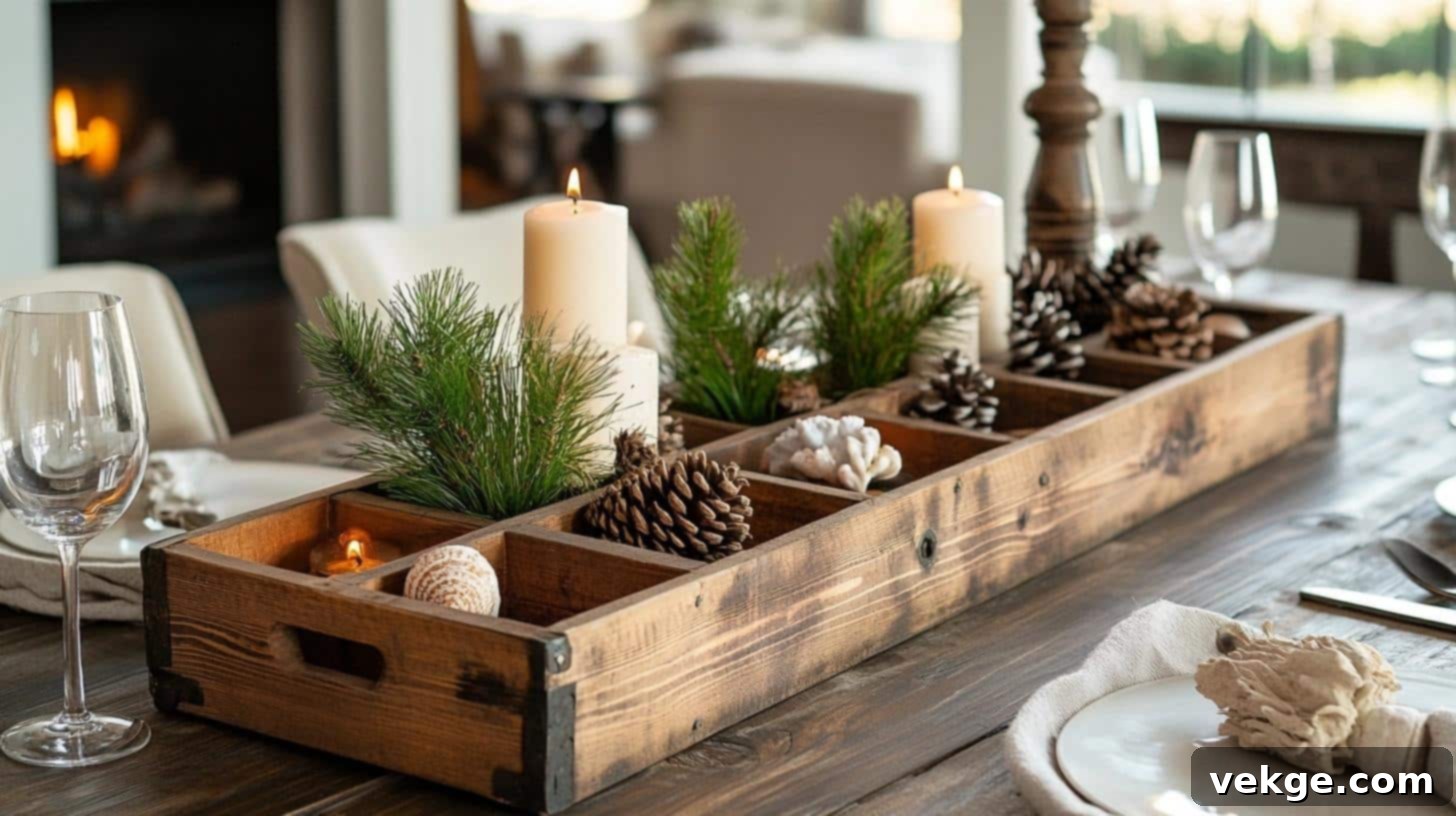
A vintage wooden toolbox placed in the middle of your dining table, coffee table, or kitchen island instantly creates interest and adds a unique, artisanal touch. Its elongated shape and multiple sections suit most table sizes perfectly, offering a versatile base for seasonal or permanent displays that tell a story.
- Seasonal Vignettes: Fill sections with seasonal decorative items like pinecones, autumn leaves, or small gourds in the fall; seashells and sand in the summer; or fairy lights and ornaments during the holidays.
- Candle and Vase Arrangement: Combine pillar candles of varying heights with small vases holding fresh flowers or greenery, creating a dynamic and elegant display. Ensure candles are placed in secure holders.
- Fruit and Bread Display: For a functional kitchen centerpiece, use it to artfully arrange fresh fruits, artisanal bread, or cloth napkins, bringing warmth and utility to your dining area.
8. Versatile Wall-Mounted Shelves
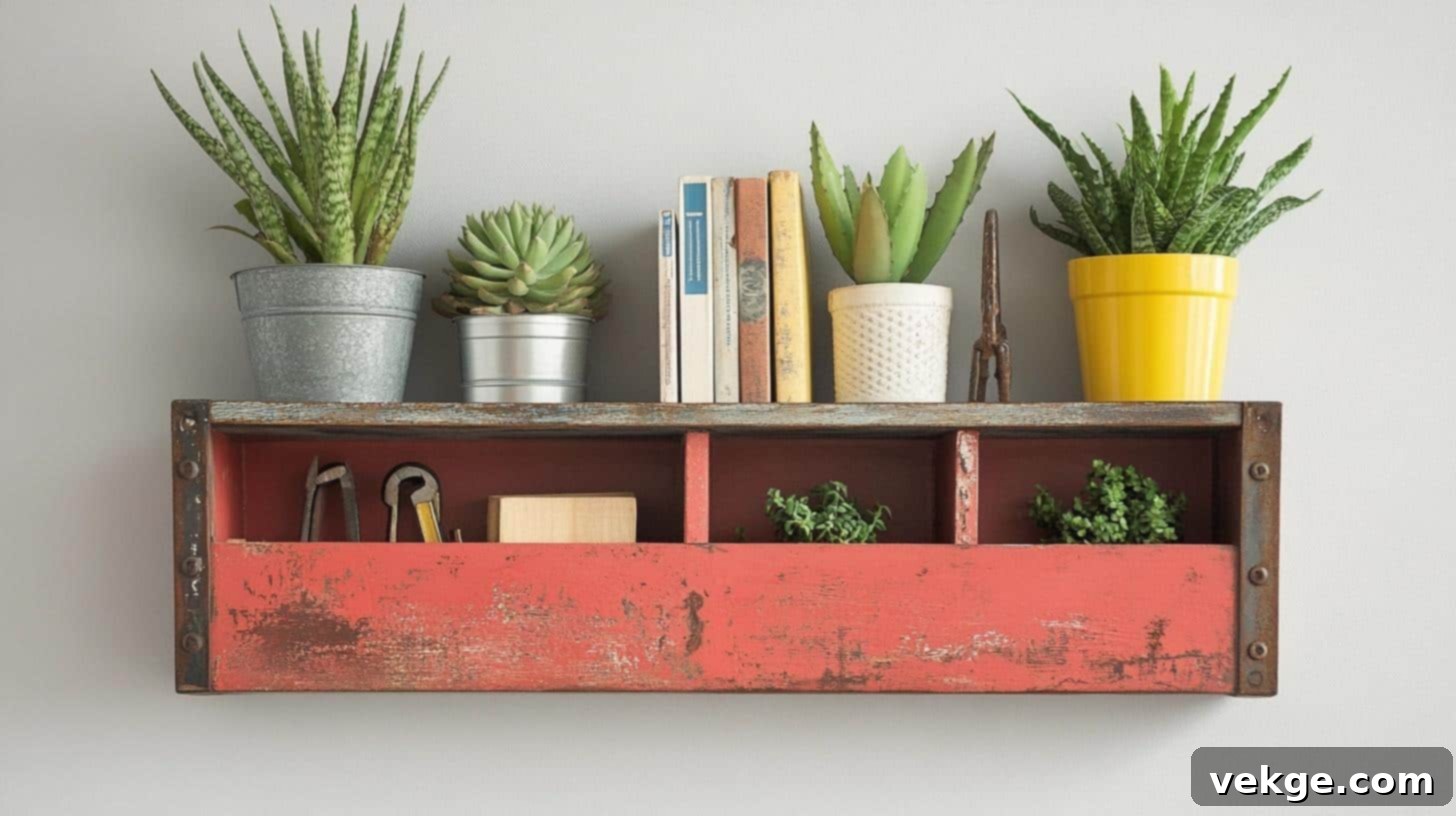
Mounting a toolbox on the wall transforms often-unused vertical space into valuable storage and display areas. Its built-in sections naturally create intriguing display nooks, perfect for adding character and functionality to any room, from a home office to a child’s bedroom.
- Secure Installation: Always secure the toolbox firmly to wall studs using appropriate heavy-duty screws and anchors to ensure stability and safety, especially if you plan to store heavier items.
- Customizable Finish: Paint or stain the toolbox to match your room’s existing color scheme, or choose a contrasting color to make it pop as a focal point. A distressed finish can enhance its vintage appeal.
- Display for Small Collections: Use the compartments to showcase small collectible figurines, thimbles, vintage keys, or mini spirit bottles, creating a personalized gallery wall.
9. Bookshelf Accent and Integrated Storage

Break up monotonous rows of books on a bookshelf by incorporating a vintage toolbox, perhaps turned on its side or placed upright. This clever trick adds significant visual interest, texture, and creates unexpected extra storage spots for smaller items that often get lost among books.
- Creative Bookends: Utilize the smaller, sturdier sections of an upright toolbox as unique and functional bookends, giving your bookshelf a distinctive, personalized touch.
- Curio Display: Show off small decorative items, mementos, or paperweights in the tool’s original compartments, adding depth and personality to your literary collection.
- Hidden Storage: Turn the toolbox with its opening facing the wall (if applicable) to create a discreet hidden compartment for important documents or small valuables.
10. Durable Outdoor Organizer for Patio or Garden
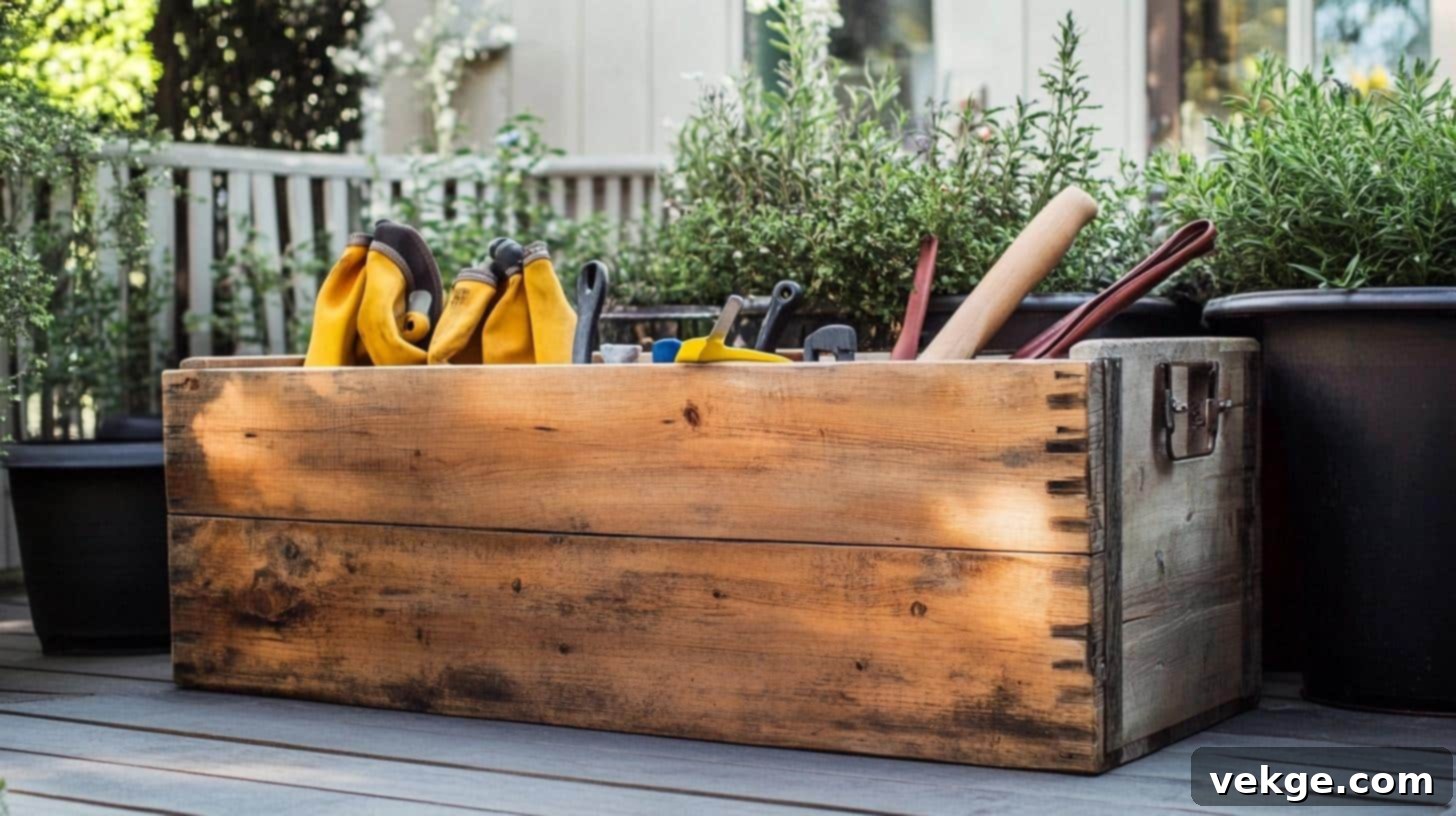
Extend the utility of your restored wooden toolbox to your outdoor living spaces. A properly protected toolbox can provide charming extra storage for your patio, deck, or garden area, keeping outdoor essentials tidy, organized, and conveniently close at hand. It adds a touch of rustic charm to your exterior decor.
- Weatherproofing is Key: Thoroughly seal the wood with multiple coats of an exterior-grade wood sealant, varnish, or marine spar urethane to protect it against moisture, UV rays, and temperature fluctuations. Pay extra attention to corners and edges.
- Garden Tool & Supply Hub: Store small hand tools like trowels, pruners, seed packets, garden gloves, or plant markers within reach, making gardening tasks more efficient and enjoyable.
- Patio Entertainment Caddy: Use it to organize outdoor dining essentials like napkins, cutlery, small condiment bottles, or citronella candles for al fresco gatherings.
11. Functional Coffee Table Storage and Decor
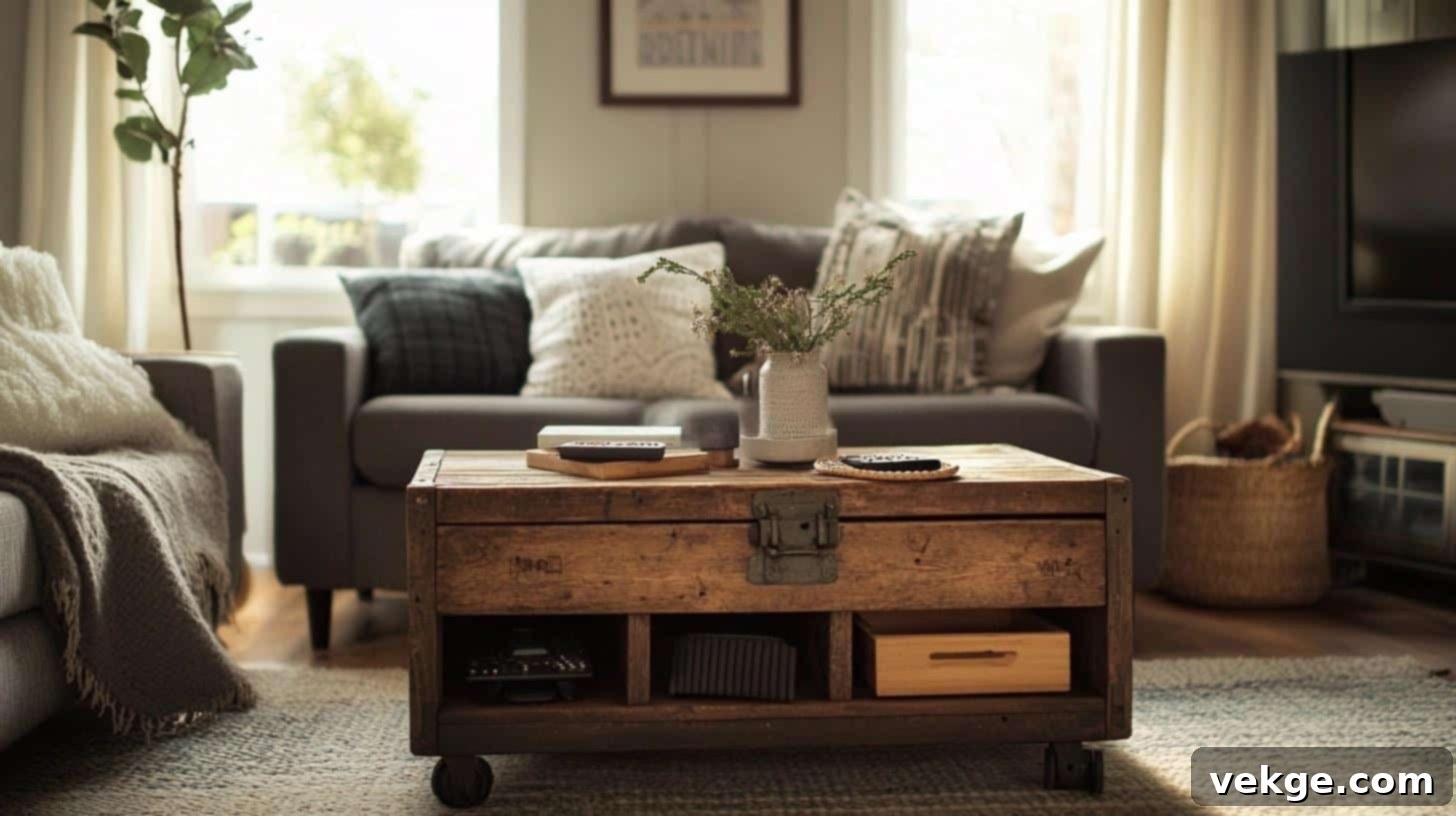
Positioning a vintage wooden toolbox at the center of your living room coffee table creates a dynamic focal point that’s both beautiful and exceptionally practical. Its robust shape and ideal size make it perfect for daily use and for discreetly managing common living room items that tend to accumulate.
- Enhanced Height & Mobility: Consider adding short, decorative legs or small castor wheels to the bottom of the toolbox. This can improve its height for easier access and allow for effortless repositioning around the living room.
- Remote Control & Coaster Sanctuary: Utilize the original sections to neatly store all your remote controls, keeping them organized and easily accessible. Designate another section for coasters, ensuring they are always on hand when needed.
- Magazine & Book Holder: The longer compartments are ideal for holding magazines, small books, or even a tablet, keeping your coffee table clutter-free while maintaining a stylish display.
DIY Enhancements: Personalizing Your Restored Wooden Toolbox
Beyond basic restoration, you can further customize your vintage wooden toolbox with simple DIY projects to enhance its functionality and aesthetic appeal. These thoughtful additions transform a beautiful piece into one that perfectly suits your specific needs and personal style, truly making it your own.
1. Illuminating Your Display: Simple Light Addition

Adding subtle lighting to your wooden toolbox can dramatically elevate its presence, making it a captivating display piece. This is particularly effective when the toolbox is used to showcase small collectibles, plants, or as a bedside organizer. Battery-operated LED strip lights are a safe and easy choice, avoiding the need for complex wiring.
- Selecting the Right Lights: Opt for warm white, battery-operated LED strip lights. Consider their length, brightness level, and whether they offer adjustable settings to match the mood and function of your space. Some even come with remote controls for convenience and dimming capabilities.
- Strategic Placement: Before adhering, plan where the lights will sit. Common areas include along the inside top edge, beneath internal shelves, or within specific compartments to highlight items and eliminate unwanted shadows. Use painter’s tape to temporarily hold them in place and test the effect before final installation.
- Secure Installation: Once satisfied with the placement, securely attach the light strips using their adhesive backing. For extra durability, you might add small clips or dabs of hot glue, especially in high-traffic areas or if the toolbox will be moved frequently.
- Concealed Power: Design a discreet spot for the battery pack. This could be tucked into a less visible compartment, attached to the back of the toolbox, or even secured within a false bottom if you’re adding one. Ensure easy access for when batteries need to be changed without having to dismantle your display.
2. Maximizing Organization: Adding Dividers
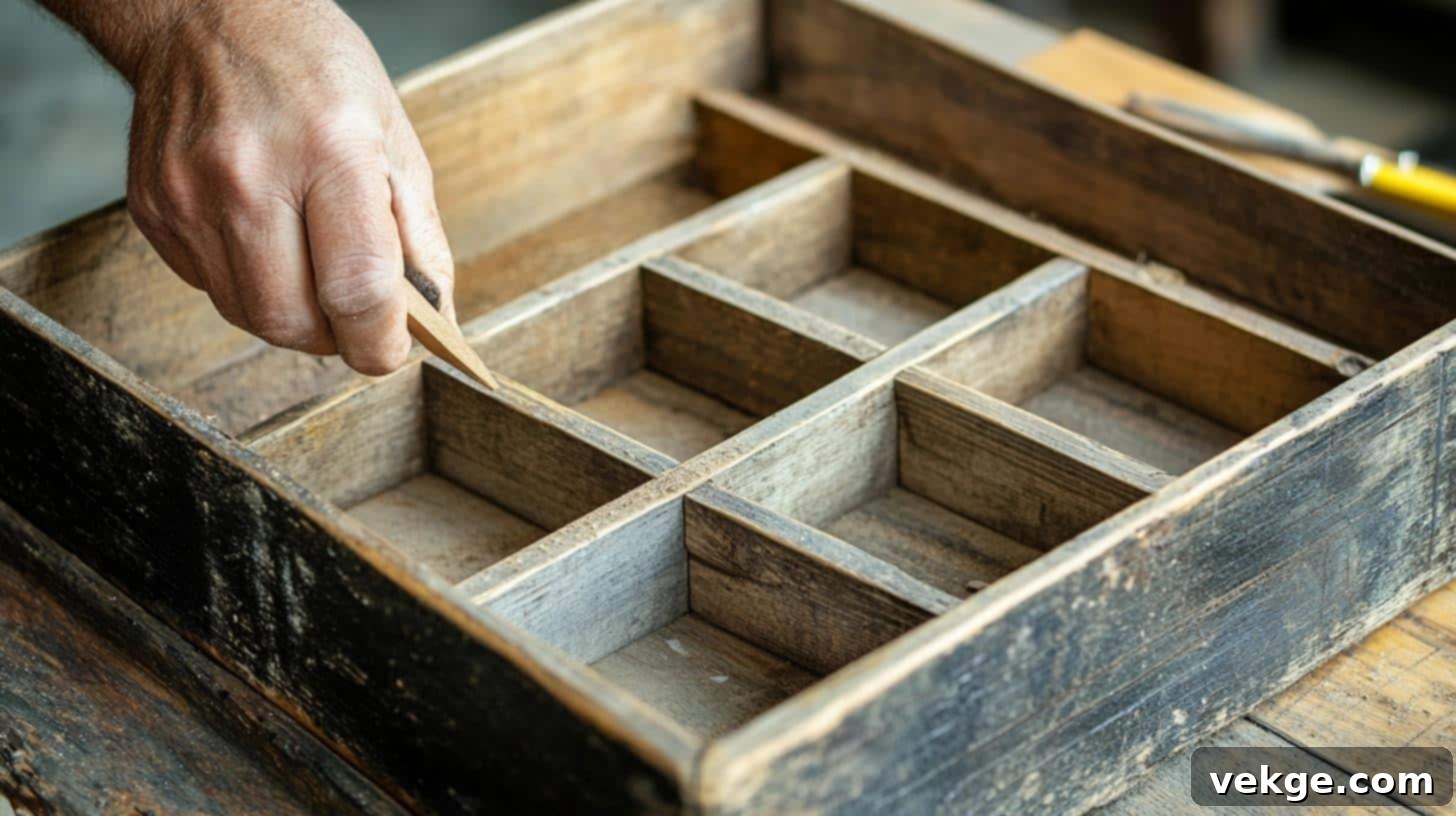
Many vintage toolboxes have large, open compartments. Adding new dividers can dramatically increase their organizational capability, allowing you to sort smaller items more effectively. This enhancement is perfect for craft supplies, office stationery, or bathroom toiletries.
- Precise Measurement: Carefully measure the inside dimensions of the toolbox where you want to add dividers. Remember that old wood might have slight variations in width, so measure at several points and cut accordingly.
- Material Selection: Choose thin wood pieces (like craft plywood or balsa wood) that complement your toolbox’s original material and finish. You can stain or paint them to match or create a subtle contrast.
- Test Fit and Smooth Edges: Cut your chosen material to size. Test-fit each divider piece, sanding the edges for a smooth, snug placement into existing grooves or against the interior walls.
- Secure Installation: Once satisfied with the fit, secure the pieces with small beads of wood glue along the edges. For added stability, use tiny finishing nails or brad nails to reinforce the dividers, ensuring they hold up to regular use.
3. Enhanced Mobility: Adding Wheels for Movement
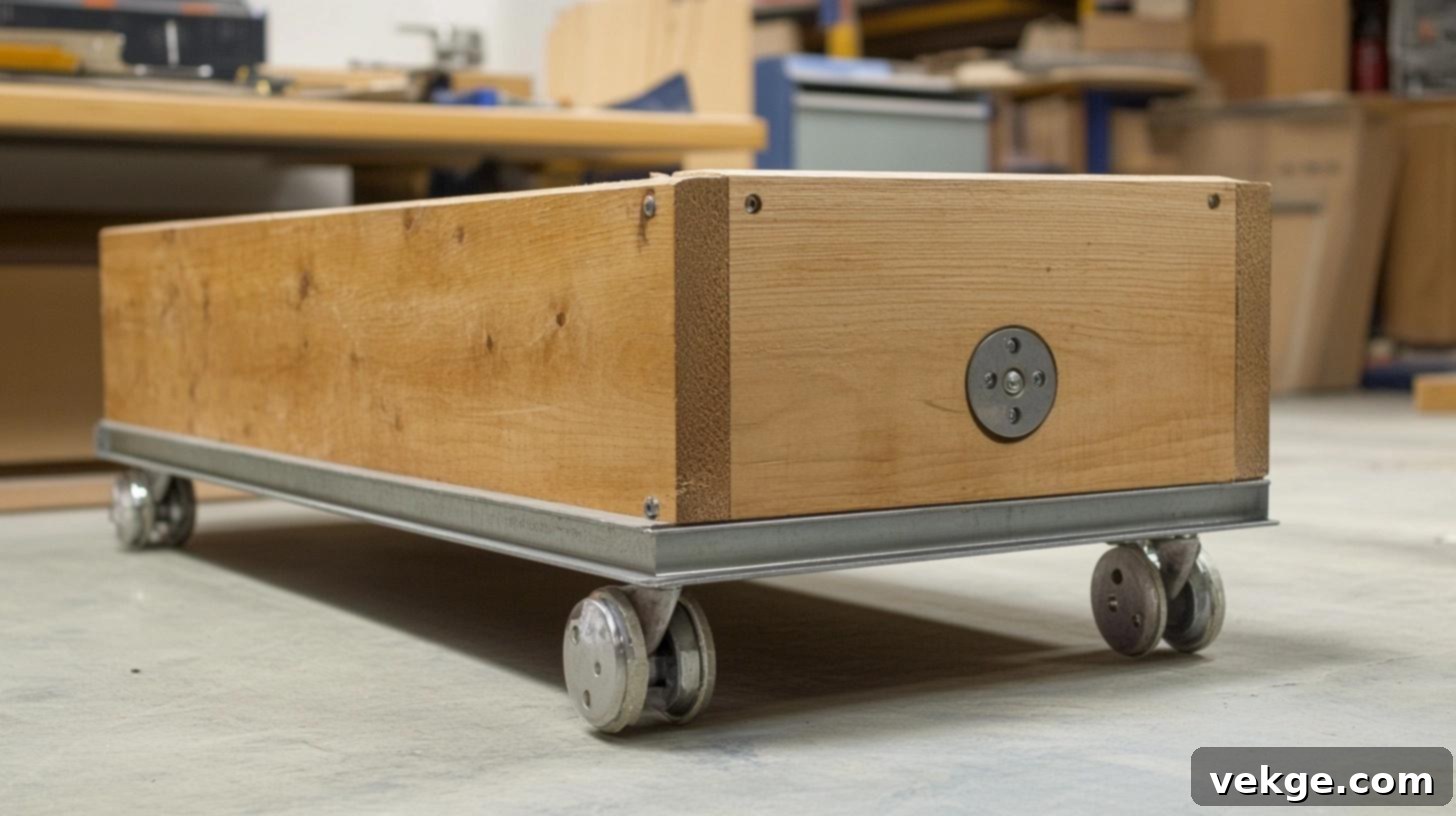
If your restored toolbox is larger or intended for uses that require frequent repositioning – such as a rolling craft station, a mobile planter, or a versatile coffee table – adding wheels can be an incredibly practical upgrade. This makes heavy items easy to move and can also slightly raise the toolbox’s height.
- Caster Selection: Select sturdy casters (swivel or fixed) that are appropriate for the anticipated weight of your toolbox and its contents. Consider the type of flooring they will roll on (e.g., rubber wheels for hardwood floors, harder wheels for carpets).
- Mounting Plan: Before drilling, create a mounting plan that ensures the box’s balance and stability. Place casters at each corner, slightly inset from the edges. If the toolbox is very long, a fifth caster in the center can prevent sagging.
- Secure Attachment: Install metal mounting plates on the bottom of the toolbox, ensuring equal spacing for optimal stability. Pre-drill pilot holes to prevent wood splitting, then attach the wheels using proper hardware like wood screws or bolts, ensuring they are tightly secured.
- Test and Adjust: Once all wheels are installed, gently test the weight distribution by placing items in the toolbox. Ensure it rolls smoothly and stably before final use.
4. Renewed Aesthetics and Grip: Handle Updates
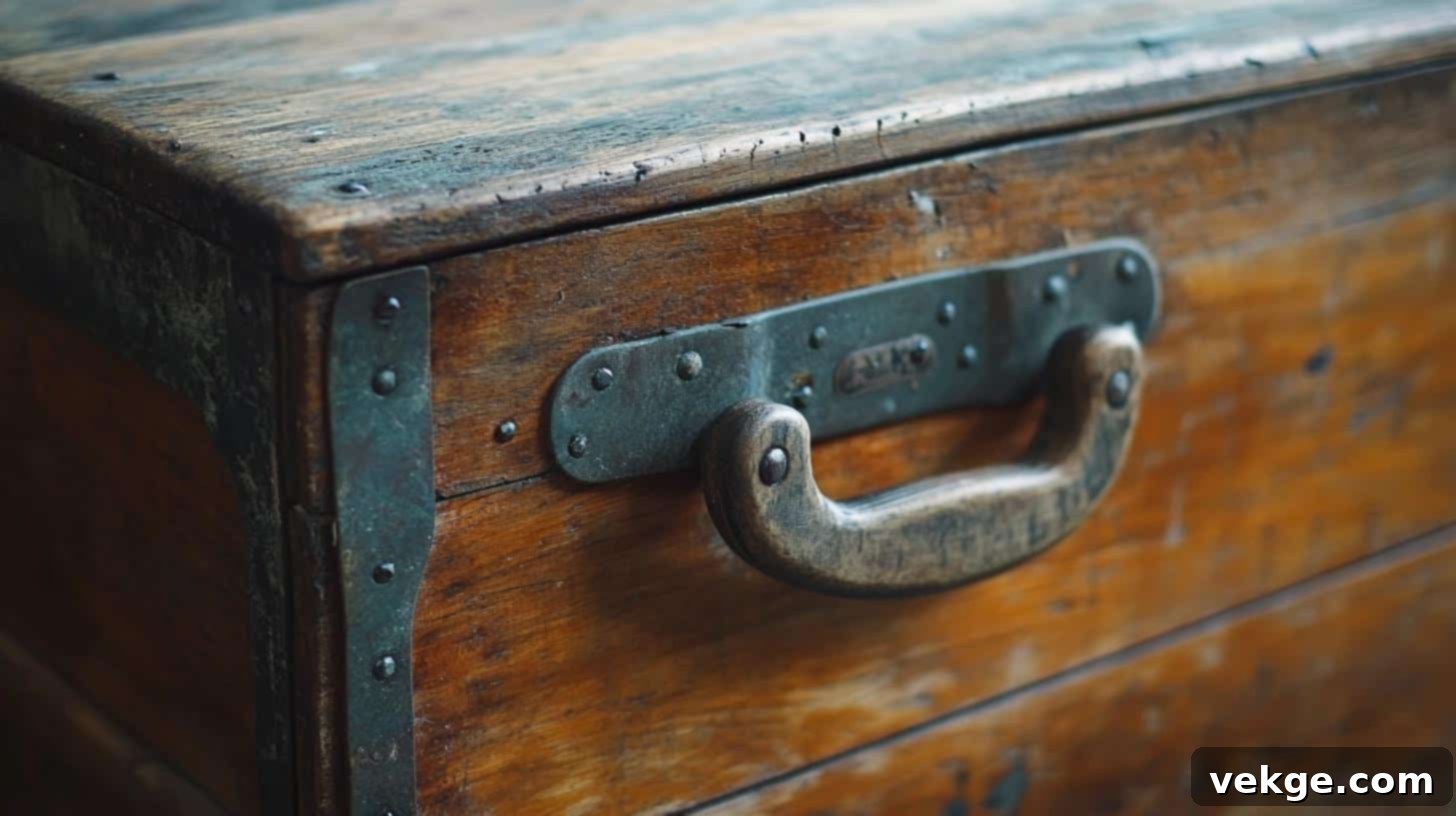
The handles of an old toolbox often show the most wear and tear. Updating them can dramatically improve both the aesthetics and functionality, making it easier and more comfortable to carry, or simply enhancing its visual appeal as a stationary piece. You can restore existing handles or replace them entirely.
- Rust & Dirt Removal: For original metal handles, thoroughly remove all rust and dirt using steel wool, a wire brush, or rust remover solution. Clean wooden handles with fine sandpaper and a wood cleaner.
- Reinforce Mounting Points: Check the wood around the existing handle mounting points for weakness or cracks. Reinforce them as needed with wood glue, small dowels, or even metal plates on the inside for added strength, especially if the toolbox will be carried frequently.
- Replacement Options: Select replacement handles that either perfectly match the toolbox’s vintage style or introduce a complementary modern touch, depending on your desired aesthetic. Options include leather straps, new metal pulls, or sturdy rope handles.
- Proper Installation: Install new hardware with appropriate backing supports (washers or small wooden blocks) on the inside to distribute pressure and prevent the wood from splitting when the toolbox is lifted. Ensure all screws are tight and the handle feels secure.
5. Fresh Look or Preserved Patina: Paint or Stain

While the initial restoration focuses on revealing the natural wood, you might choose to apply a fresh coat of paint or stain to give your toolbox a completely new look or to deepen its existing character. This step offers immense creative freedom, allowing you to tailor the toolbox to any decor style, from shabby chic to minimalist modern.
- Thorough Surface Preparation: Completely remove any existing old finish, paint, or varnish down to the bare wood using appropriate sandpaper grits (as described in the restoration steps) or a chemical stripper. This ensures proper adhesion of the new finish.
- Spotless Cleaning: After sanding, thoroughly clean all surfaces, paying special attention to removing all dust from corners, grooves, and inside compartments. A tack cloth or vacuum cleaner works well for this.
- Even Application: Apply your chosen paint or stain in thin, consistent layers, always following the wood grain. Use a high-quality brush for paint or a foam applicator for stain to achieve an even, streak-free finish. Multiple thin coats are better than one thick coat.
- Optimal Drying Time: Allow proper drying time between coats, strictly adhering to the product instructions. Insufficient drying time can lead to a sticky finish, uneven color, or flaking. Finish with a clear protective topcoat (polyurethane, lacquer, or wax) for durability.
Ensuring Longevity: Maintenance Tips for Your Restored Wooden Toolbox
Your beautifully restored wooden toolbox is now a cherished part of your home, and with proper care, it can remain a stunning and functional piece for many more years. Regular maintenance is key to preserving its beauty and durability, allowing its rich history to continue to shine.
- Consistent Wood Care for Lasting Beauty: The simplest routine is often the most effective. Dust your wooden toolbox weekly with a soft, dry microfiber cloth to prevent buildup in its unique corners and grooves. This not only keeps it looking fresh but also prevents abrasive particles from scratching the finish. On a monthly basis, apply a good quality furniture polish or wood conditioner. This nourishes the wood, helps maintain its natural luster, and provides a protective barrier against minor wear and tear. During these cleanings, take a moment to gently check for any loose hardware or joints – addressing minor issues promptly prevents them from escalating into larger, more complex repairs.
- Proactive Damage Prevention and Smart Placement: Where you place your wooden toolbox significantly impacts its longevity. Avoid positioning it in direct sunlight, which can fade the wood and dry it out, leading to cracks. Similarly, keep it away from direct heat sources like radiators or heating vents, as extreme temperature fluctuations are detrimental to wood, causing warping or splitting. When using it to display items, especially heavier ones or those with rough bases, always place protective pads or felt bumpers underneath to prevent scratches and dents to the wood surface. Most importantly, wood and water are not friends: clean up any spills immediately to prevent water rings, warping, or permanent staining.
- Timely Quick Fixes for Minor Issues: Small problems, when addressed swiftly, keep your toolbox looking its best and prevent further damage. For minor scratches or scuffs, use a wood touch-up marker or crayon that precisely matches the wood’s dye or stain. Loose screws or hardware should be tightened immediately with the appropriate screwdriver to prevent further damage or loss of components. Water rings, if caught early, can often be removed or lessened with specialized wood care products designed for stain removal. For any areas that develop slight rough spots from consistent use, a very gentle sanding with fine-grit sandpaper (like 400-grit) followed by re-polishing can smooth them out without affecting the overall finish.
- Season-Based Care for Optimal Health: Adapting your care routine to the seasons can further protect your wooden toolbox, addressing environmental changes that affect wood.
- Spring: This is an excellent time for a deeper clean and inspection after the indoor heating season. Check for any winter dryness and reapply polish if needed.
- Summer: If the toolbox is near windows, ensure curtains or blinds protect it from intense sun. Monitor humidity levels; in very humid areas, excessive moisture can cause wood to swell.
- Fall: Consider applying a fresh coat of wax or a wood sealant to prepare it for the drier indoor heating conditions of winter.
- Winter: Indoor heating can significantly dry out wood. Maintain moderate humidity levels in your home (ideally around 40-50%) using a humidifier if necessary, and continue regular polishing to keep the wood moisturized and prevent cracking.
Regular, seasonal checks allow you to catch potential issues early and ensure your wooden treasure remains healthy, stable, and beautiful year-round.
Conclusion: Breathing New Life into Vintage Charm
My journey began with a simple discovery in my grandfather’s garage – an old wooden toolbox, worn and weathered, yet brimming with untapped potential. Little did I know then just how many inspiring ways these remarkable pieces could enhance and brighten a home, transforming from forgotten relics into cherished, functional art.
Through countless restoration projects and creative repurposing endeavors over the years, I’ve continuously discovered new possibilities for these vintage treasures. Each project reinforced a fundamental truth: with a bit of dedication, the right techniques, and a touch of imagination, these sturdy boxes can transcend their original purpose, serving both aesthetic beauty and practical utility in a modern setting, truly telling a story.
Now, the exciting part begins for you. It’s your turn to embark on this rewarding journey of giving an old wooden toolbox a vibrant new life. Don’t feel overwhelmed; start small, choose a project that excites you, and meticulously follow the step-by-step guidance and creative ideas I’ve shared throughout this comprehensive guide. As you work, you’ll witness your vision take shape, crafting a unique piece that reflects your personal style and ingenuity.
The time and care you invest in restoring and repurposing these vintage toolboxes today will not only create a stunning focal point but will also ensure your handcrafted piece continues to look magnificent and tell its rich story for many years to come. I am genuinely eager to see the incredible transformations you achieve!
We encourage you to share your restoration stories, showcase photos of your completed projects, and ask any lingering questions in the comments section below. Your experiences inspire others in our growing community of DIY enthusiasts. For even more upcycling tips, creative home decor ideas, and exclusive content, be sure to join our community by subscribing to my weekly newsletter. Let’s keep the spirit of craft and repurposing alive!
Frequently Asked Questions About Vintage Wooden Toolbox Restoration
Here are some common questions and practical answers to help you with your vintage wooden toolbox restoration and repurposing projects, ensuring you tackle each step with confidence.
Q1: What is the safest and most effective way to remove old paint or varnish from my wooden toolbox?
A: For safe and effective removal of old paint or varnish, we recommend using a chemical paint stripper specifically formulated for wood. Always apply it according to the manufacturer’s instructions, typically with a brush, and allow it to sit for the recommended duration to soften the old finish. Then, gently scrape off the loosened paint or varnish using a plastic scraper or putty knife to avoid damaging the underlying wood. Any remaining stubborn spots can be removed with a fine-grit sandpaper. Crucially, always work in a well-ventilated area, and wear appropriate personal protective equipment, including chemical-resistant gloves and a respiratory mask, to ensure your safety and protect your health.
Q2: Which type of paint or stain is most suitable for enhancing vintage wood?
A: For vintage wood, oil-based paints and stains are generally highly recommended. Their formulation allows them to penetrate deeper into the wood grain, providing richer color, enhanced durability, and a longer-lasting finish compared to water-based alternatives, which tend to sit more on the surface. When selecting your product, ensure you choose one specifically designed for either indoor or outdoor use, depending on your toolbox’s intended new purpose, to provide optimal protection against elements like moisture, UV rays, or daily wear and tear. Always test a small, inconspicuous area first to confirm the desired color and finish.
Q3: Is it possible to use a restored old wooden toolbox in an outdoor setting?
A: Absolutely, a restored wooden toolbox can be a charming addition to an outdoor space, but it requires thorough preparation. Before placing it outside, you must seal all wood surfaces (inside and out) with a high-quality, exterior-grade wood sealer or marine varnish. Apply multiple coats, allowing adequate drying time between each, and plan to reapply a fresh coat annually to maintain its protective barrier against the elements. To further prolong its life, avoid direct contact with wet ground by placing it on risers or pavers, and consider covering it or moving it indoors during periods of heavy rain, snow, or harsh weather conditions.
Q4: How can I prevent the wood of my toolbox from deteriorating over time?
A: Preventing wood deterioration largely comes down to consistent care and smart placement. Keep your wooden toolbox clean by regular dusting, and ensure it remains dry, as moisture is wood’s biggest enemy, leading to rot and warping. Apply a nourishing wood polish or wax every three to six months to moisturize the wood and protect its finish. Address any scratches, dings, or loose hardware promptly to prevent minor issues from worsening. Shield the toolbox from prolonged direct sunlight exposure to prevent fading, drying, and cracking. If using it as a surface, always use coasters under drinks and protective mats under display items. Regularly inspect joints and corners for any signs of weakness or separation, reinforcing them as needed.
Q5: Are there any specific precautions I should take when drilling into or modifying old wood?
A: Yes, working with old wood requires a gentle and cautious approach, as it can be more brittle or prone to splitting than new lumber. Before drilling or making any cuts, thoroughly inspect the wood for existing cracks, splinters, or areas of weakness. Always start by drilling small pilot holes, which will guide your drill bit accurately and significantly reduce the risk of splitting the wood. Use sharp drill bits and saw blades, and operate your drill or saw at a slower speed to maintain control and prevent overheating the wood. Whenever possible, support the wood firmly on both sides of your working area to minimize vibration and prevent splintering. Lastly, always prioritize your safety by wearing appropriate protective gear, including safety glasses to protect your eyes and a dust mask to avoid inhaling fine wood particles.
