Transform Your Kitchen: The Ultimate Guide to Painting Cabinets for a Stunning Refresh
Are you dreaming of a refreshed kitchen but hesitant about the significant cost and disruption of a full renovation? Painting your cabinets offers an incredibly effective and budget-friendly solution to revitalize your space. It’s a simple, yet powerful, way to update your kitchen’s aesthetic without the need for extensive demolition or starting from scratch. But is it the ideal choice for your home and your unique vision?
This comprehensive guide will walk you through everything you need to know about painted kitchen cabinets. We’ll delve into the many benefits and potential drawbacks, explore the most popular and inspiring paint ideas, and help you identify the signs that might suggest replacement is a better option than repainting. You’ll also discover practical, easy-to-follow tips to ensure your paint job not only looks fantastic but also stands the test of time.
If you’re contemplating a significant style boost for your kitchen, join us as we explore whether painting your cabinets is the perfect path to achieving the fresh, updated look you desire.
Painted Kitchen Cabinets in a Kitchen Remodel: A Smart Investment or a Risky Move?
When considering an update for your kitchen, painting your existing cabinets often emerges as the most accessible and impactful way to achieve a fresh, contemporary look without embarking on a costly, full-scale renovation. However, like any home improvement project, it’s wise to carefully weigh the advantages and disadvantages before you commit to picking up a brush. Understanding both sides will help you make an informed decision that aligns with your budget, time, and aesthetic goals.
Benefits of Opting for Painted Kitchen Cabinets
Painting kitchen cabinets is undeniably one of the most cost-effective strategies to infuse your entire cooking space with a vibrant, updated feel. This approach allows homeowners to achieve a dramatic transformation at a fraction of the cost of replacing all existing cabinetry. It’s an ideal solution for those looking to refresh their kitchen’s appearance while working within a modest budget, making it a highly attractive upgrade for many.
Beyond the financial savings, painting offers unparalleled flexibility in color choice. This freedom allows you to truly personalize your kitchen, reflecting a specific style, mood, or current trend that resonates with you. Whether you envision a bright, airy space, a dramatic, moody atmosphere, or a cozy, rustic charm, the right paint color can bring that vision to life. This customizable approach is particularly effective for creating a bespoke look without the premium price tag typically associated with custom cabinetry.
Furthermore, painted cabinets can effectively unify disparate elements within your kitchen. If your walls, countertops, and hardware feel disjointed, a cohesive paint finish on your cabinets can act as a unifying force, tying everything together into a harmonious and visually pleasing design. This can be especially useful in older kitchens where elements may have been added or updated piecemeal over the years, giving the entire space a fresh, integrated appearance.
Downsides and Considerations Before You Paint
While the benefits are compelling, painting cabinets is not without its challenges. The process demands meticulous and thorough preparation, which can be surprisingly time-consuming. Surfaces require extensive cleaning to remove years of grease and grime, followed by careful sanding to create a proper adhesion for the new paint. Each door and drawer also needs to be systematically removed, labeled, and prepared, ensuring an even application and truly long-lasting results. Rushing this crucial phase almost invariably leads to a subpar finish that won’t hold up over time.
The painting process itself also involves multiple coats of primer and paint, each requiring ample drying periods. This means the project can stretch out over several days, or even a week, during which your kitchen may be partially or completely out of commission. This extended timeline can be inconvenient for busy households.
Moreover, if the paint isn’t properly sealed, applied with professional-level technique, or adequately maintained, it may be prone to chipping, scratching, or premature wear, especially in high-traffic areas. Achieving a perfectly smooth, factory-like finish without visible brush marks requires significant skill and patience, making this method potentially less suitable for those seeking a fast, low-effort upgrade or an immaculate, machine-applied appearance.
Stylish Ways to Paint Your Kitchen Cabinets: Inspiring Ideas for Every Home
Feeling overwhelmed by the sheer number of color and style choices for your kitchen cabinets? Don’t worry, you’re not alone! To help you narrow down the options and find the perfect look for your home, I’ve curated some of the most popular and aesthetically pleasing painted cabinet trends. These ideas are designed to inspire and guide you in selecting a style that truly complements your space and personal taste.
1. Classic White Kitchen Cabinets
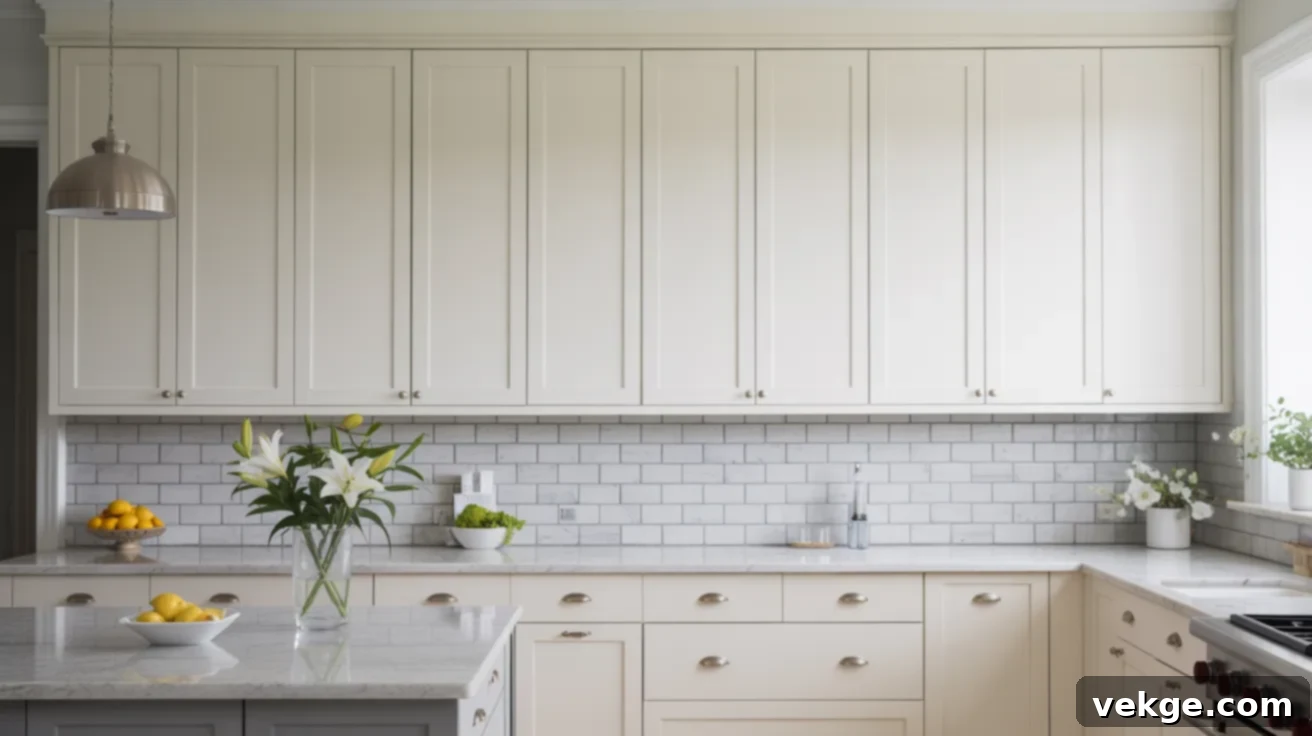
White cabinets are a timeless choice that instantly grants your kitchen a clean, bright, and expansive feel. Their reflective nature helps bounce light around the room, making even small spaces appear larger and more open. This versatility makes them perfect for virtually any design aesthetic, from ultra-modern and sleek to cozy traditional or rustic farmhouse styles. White cabinets effortlessly pair with almost any wall color, countertop material, or hardware finish, offering endless design possibilities. If you’re looking for a safe, stylish, and incredibly versatile option that will never go out of fashion, classic white is an excellent choice.
2. Dynamic Two-Tone Color Schemes
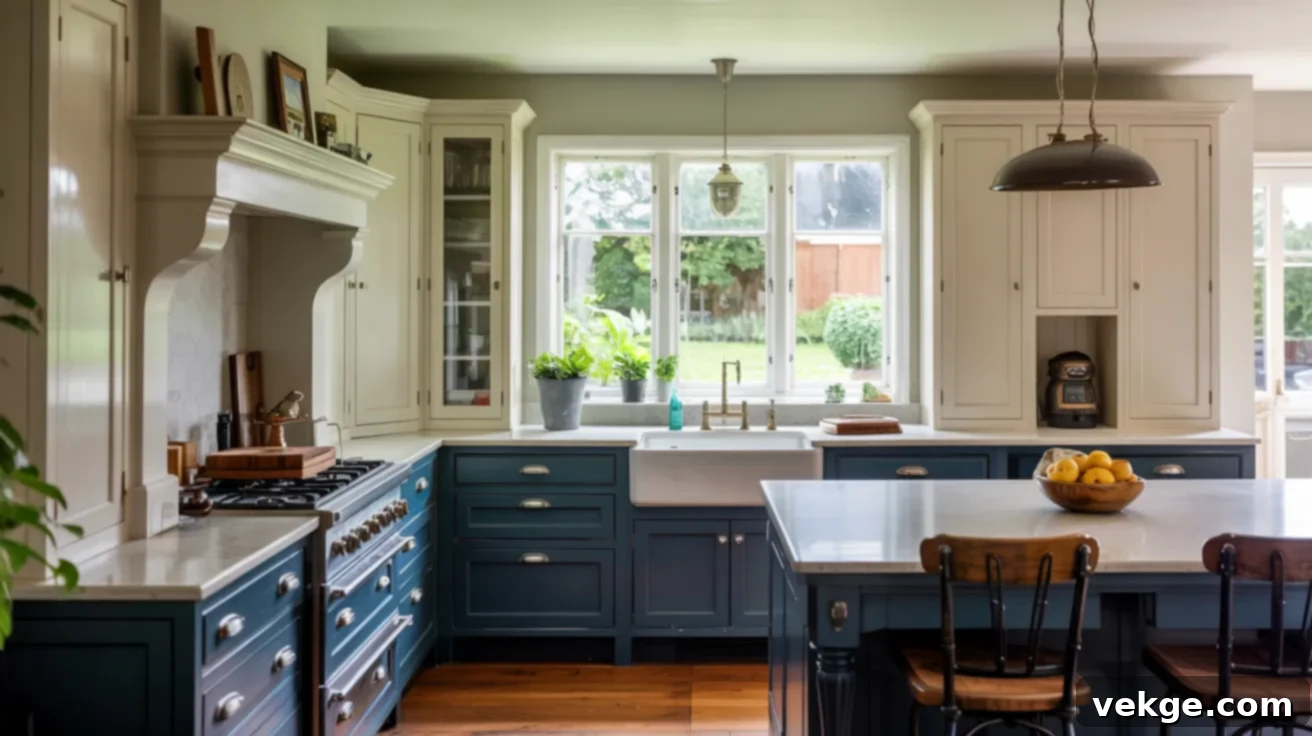
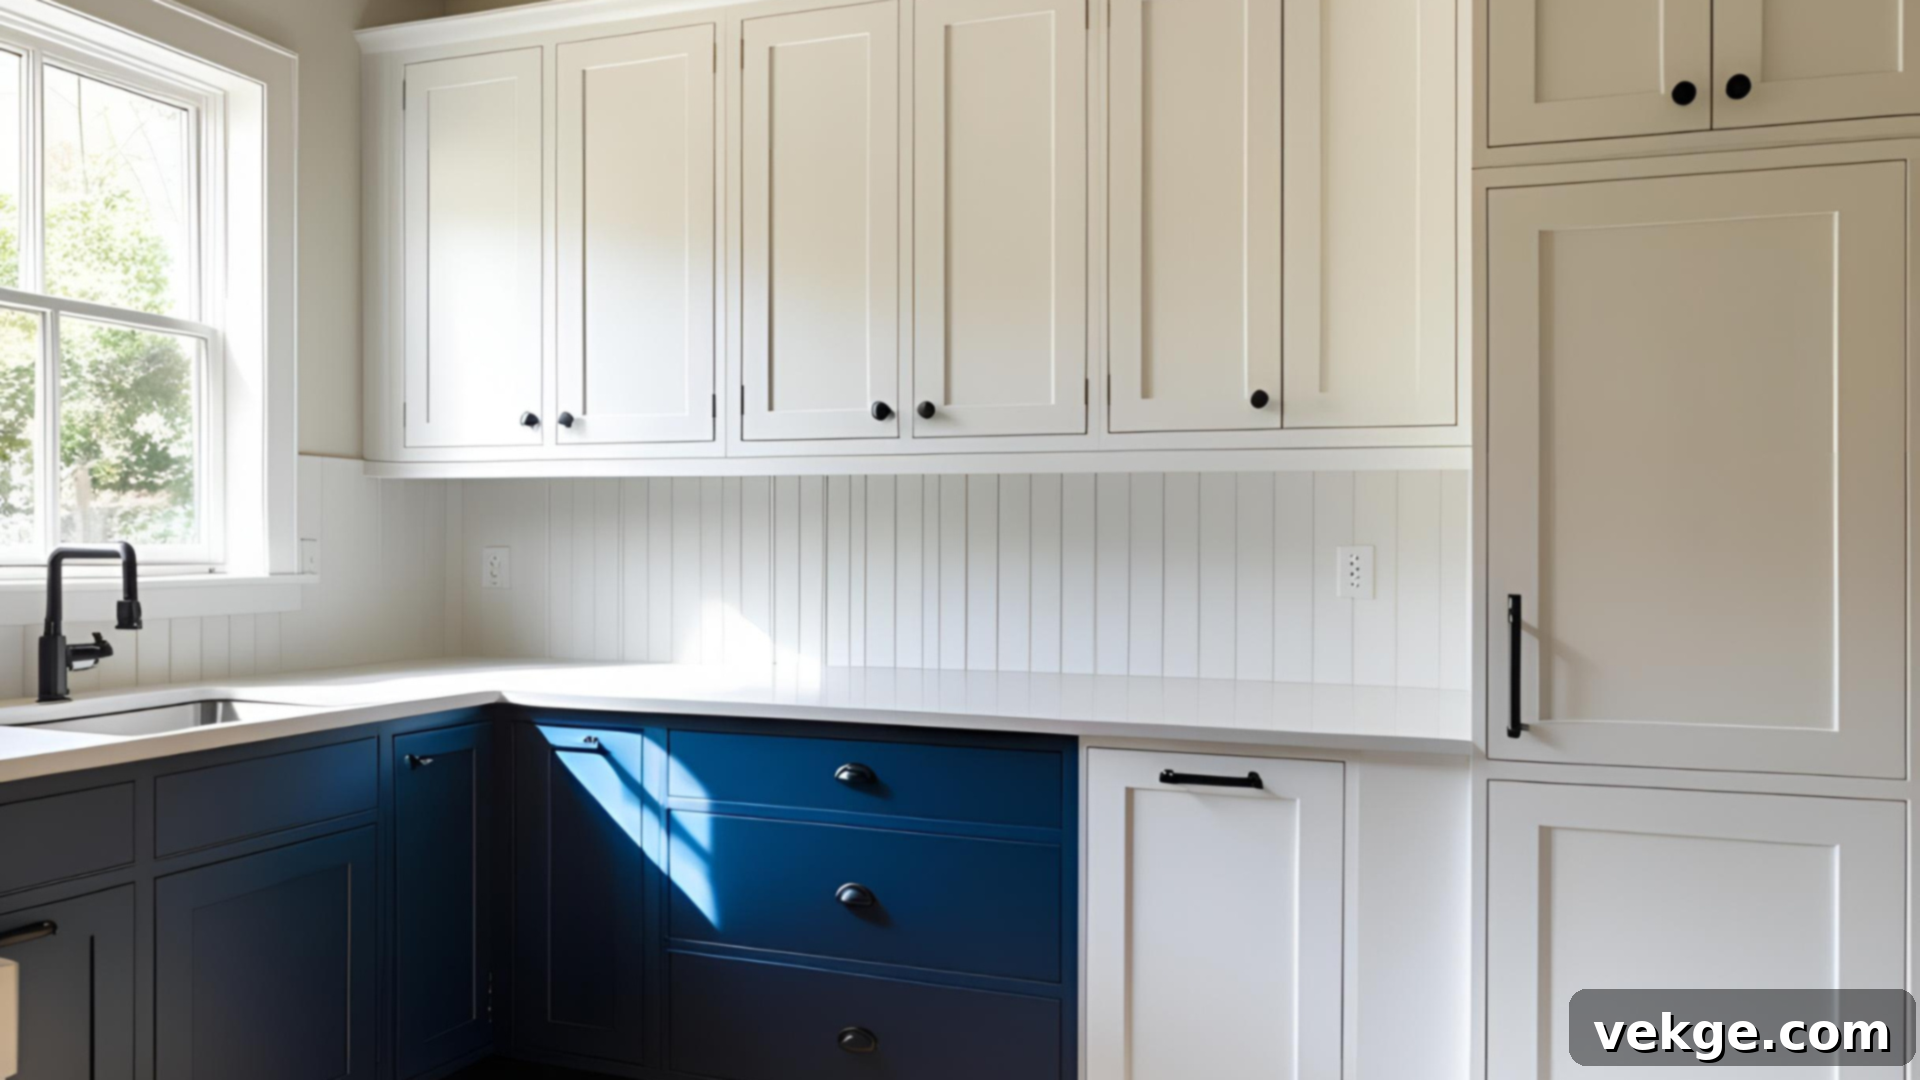
For a kitchen with added depth and visual intrigue, consider a two-tone color scheme. This involves using one distinct color for your upper cabinets and a different, often contrasting, color for your lower cabinets or kitchen island. A popular example is pairing sophisticated navy bottoms with crisp white uppers, creating a balanced and visually engaging look. This approach brilliantly defines distinct zones within the kitchen, allowing you to cleverly mix bold, statement-making tones with softer neutrals. It’s a fantastic way to introduce contrast and personality without overwhelming the space, particularly effective in open-concept layouts where the kitchen flows into other living areas.
3. Bold & Moody Tones for Drama
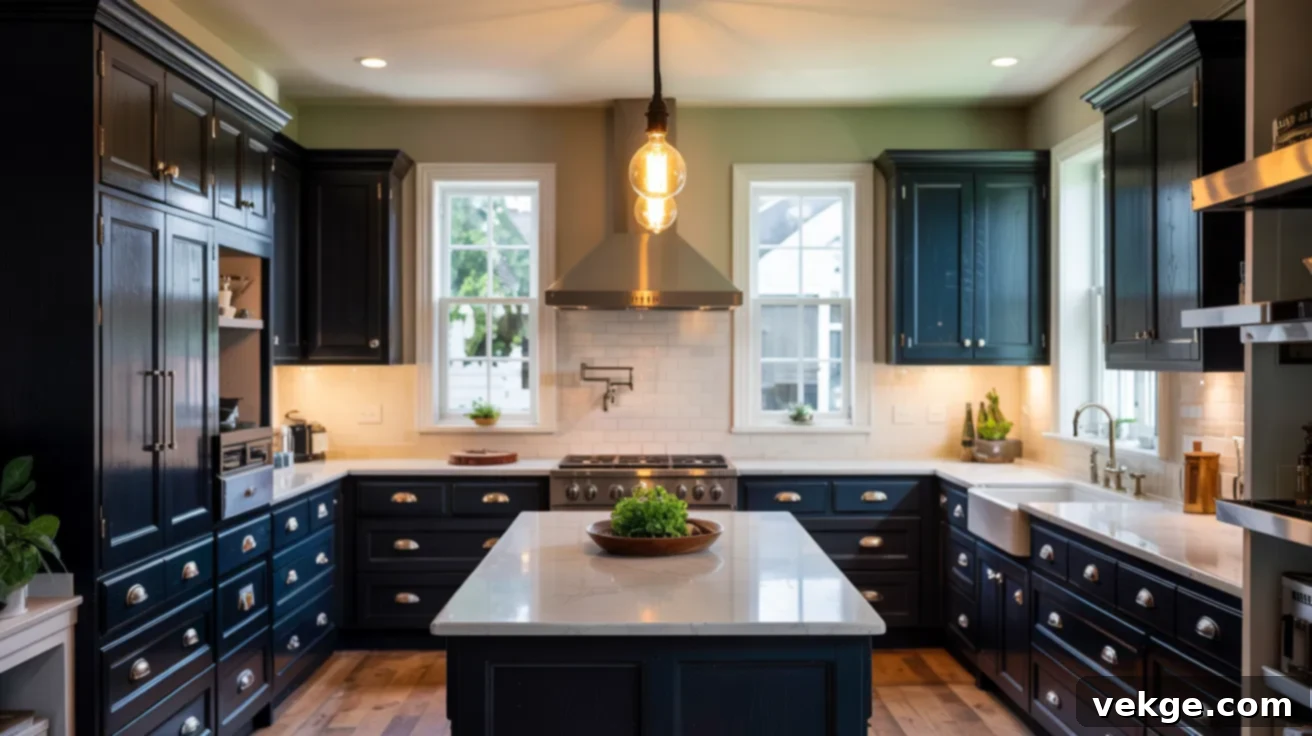
Embrace drama and sophistication with dark, moody shades such as deep black, rich navy blue, or lush forest green. These powerful colors create a luxurious and dramatic kitchen vibe, allowing your cabinets to become a striking focal point and adding a grounded, sophisticated feel to the entire space. To prevent the room from feeling too dark or enclosed, it’s advisable to balance these intense hues with lighter elements like bright white walls, light-colored countertops, or a shimmering backsplash. This style is an excellent choice if you aim for your kitchen to make a bold, unforgettable statement.
4. Natural and Neutral Finishes
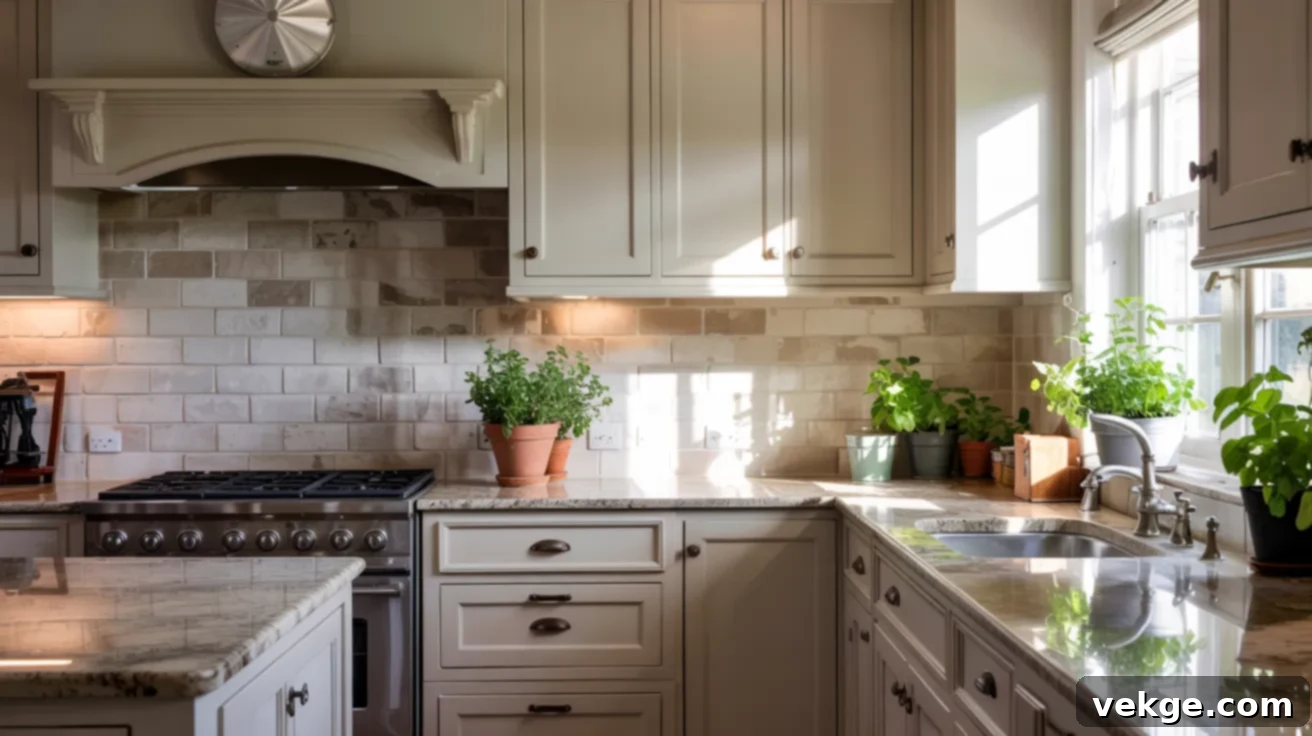
For those who prefer a more subdued and serene aesthetic, natural and neutral finishes are ideal. Colors like warm beige, inviting taupe, and versatile greige offer an immediate sense of warmth, calm, and understated elegance. These soft, muted tones blend effortlessly with natural materials such as wood and stone, cultivating a relaxed, balanced, and timeless kitchen environment. They are incredibly easy to live with over time and seamlessly adapt to both traditional and modern home designs. If your preference leans towards texture and subtle harmony over stark contrast, neutral paints help create a smooth, flowing visual experience throughout your kitchen.
5. Chic Matte or Satin Paint Finishes
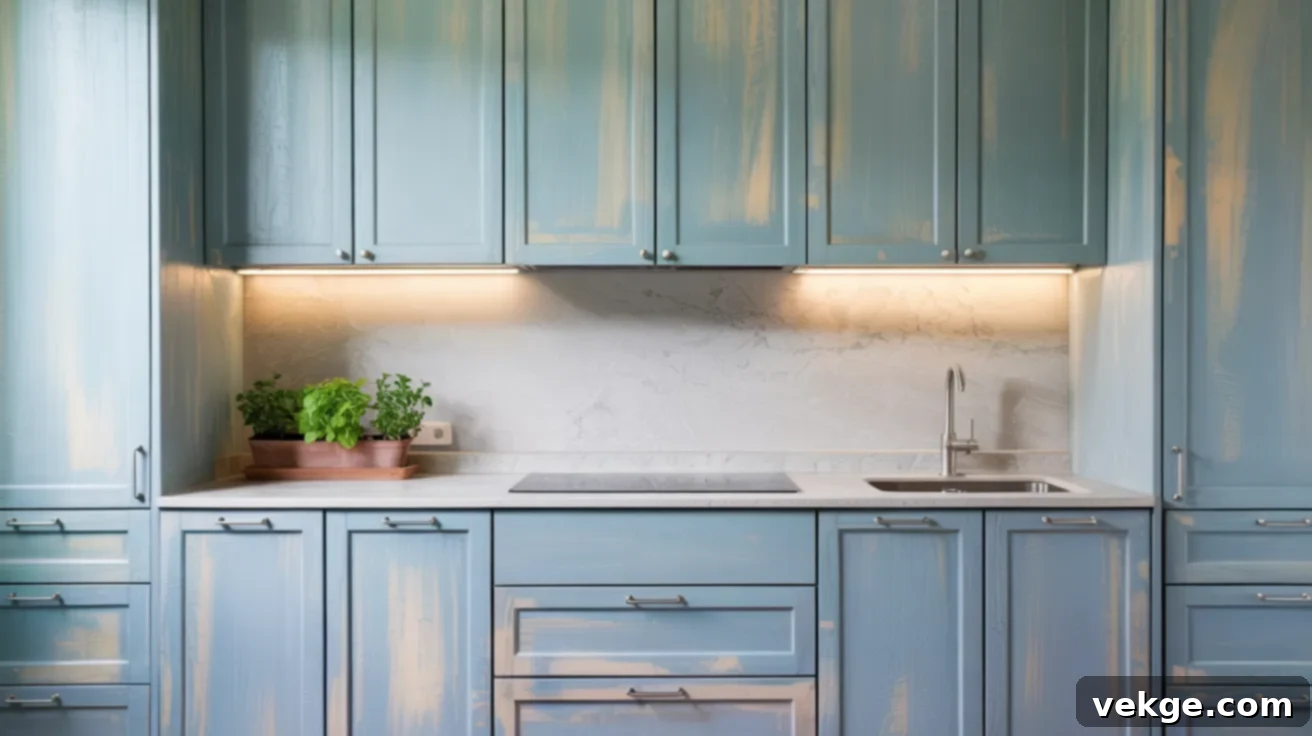
Matte and satin finishes are increasingly popular and on-trend for kitchen cabinets, and for good reason. These contemporary finishes excel at reducing glare, effectively hiding minor smudges and imperfections, and offering a wonderfully smooth, tactile texture. Matte paint provides a soft, sophisticated, and modern look, while satin offers a slightly more reflective quality that makes it easier to clean – a significant advantage in active, busy kitchens. Both are superb alternatives to traditional glossy paints, pairing beautifully with understated color palettes, natural textures like wood and stone, and a desire for modern elegance.
6. Versatile Shaker-Style Painted Cabinets
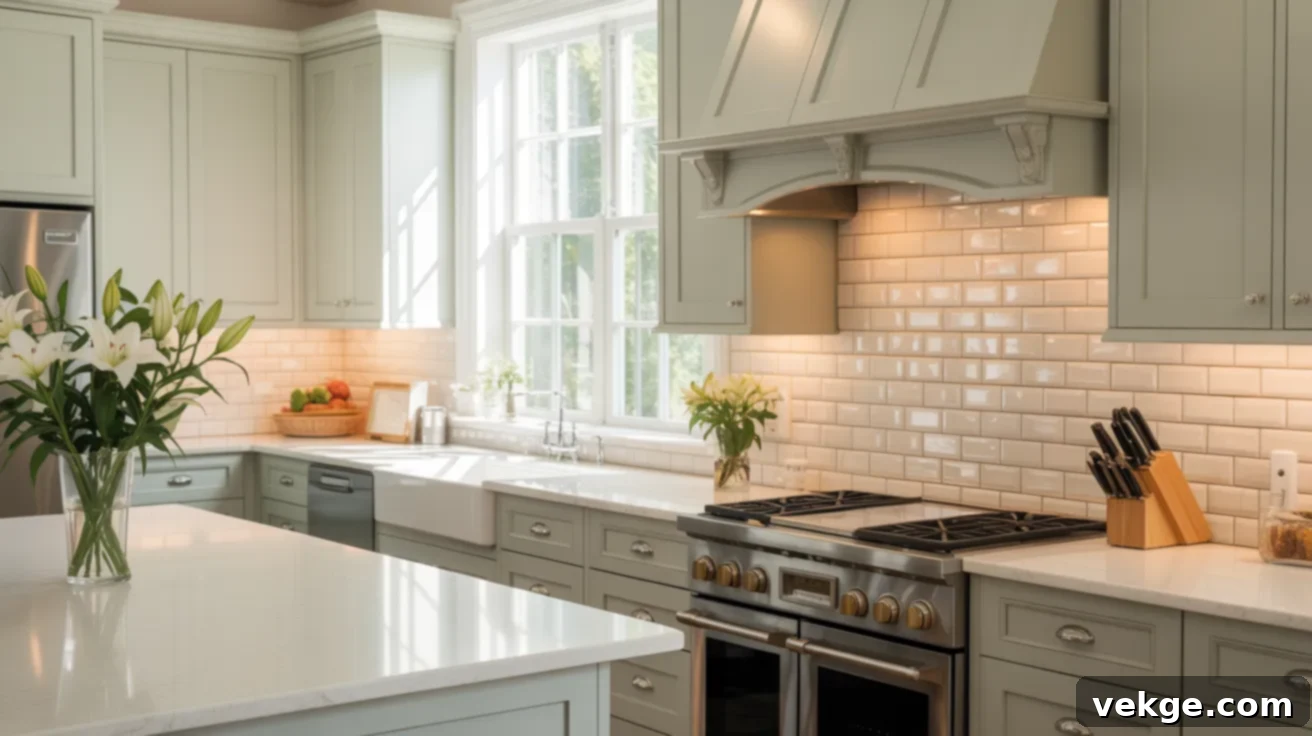
Shaker-style cabinet doors are renowned for their timeless simplicity and incredible versatility, making them a perfect canvas for virtually any paint color or design theme. Characterized by their flat center panel and clean, square edges, they offer a crisp, understated look that integrates seamlessly into modern, traditional, or transitional kitchens. Painted shaker cabinets in classic white, calming blues, or sophisticated grays are especially popular choices, as they effortlessly complement a wide array of backsplashes and countertops, ensuring a cohesive and elegant kitchen design.
7. Pastel Hues for a Soft Touch
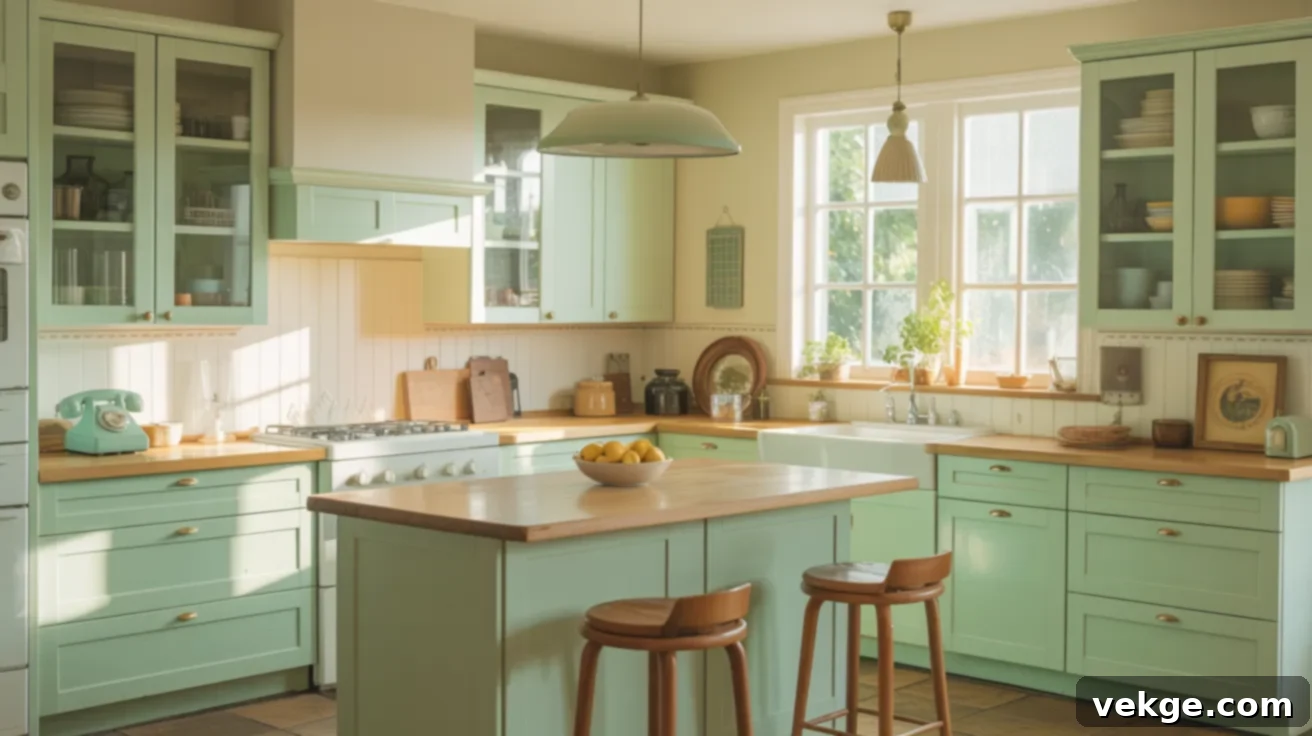
Inject a sense of whimsical charm and gentle elegance into your kitchen with pastel-hued cabinets. Soft shades like light pink, delicate mint green, or serene pale blue can add a unique touch of class and brightness. These colors are particularly well-suited for vintage, cottage, or inherently whimsical kitchen designs, creating a light and inviting atmosphere. When paired with light wood accents or elegant brass hardware, these soft shades maintain an airy and friendly feel, allowing you to infuse personality into your space without overwhelming it with bold intensity.
8. Distressed or Weathered Finishes
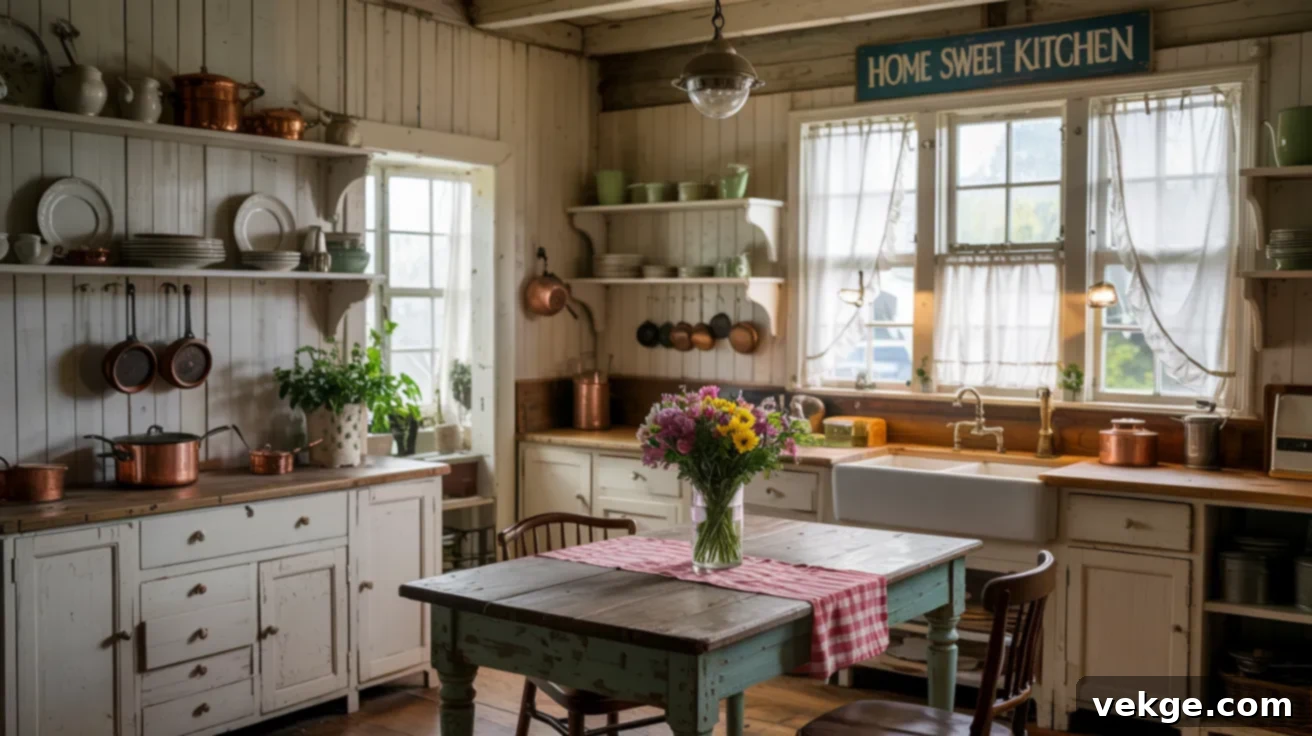
For kitchens seeking character, warmth, and a sense of history, distressed or weathered paint finishes are an exceptional choice. This technique creates a beautifully worn, aged effect that adds charm and a classic feel to your cabinets. These finishes are perfectly suited for farmhouse, rustic, or even French country-inspired kitchens. Achieving this look often involves subtly sanded edges, strategically layered colors, or a careful antiquing process to create a lived-in aesthetic that feels wonderfully cozy and familiar. This finish can often be achieved as a DIY project using chalk paint and a light sanding technique.
9. Color-Drenched Cabinets and Walls
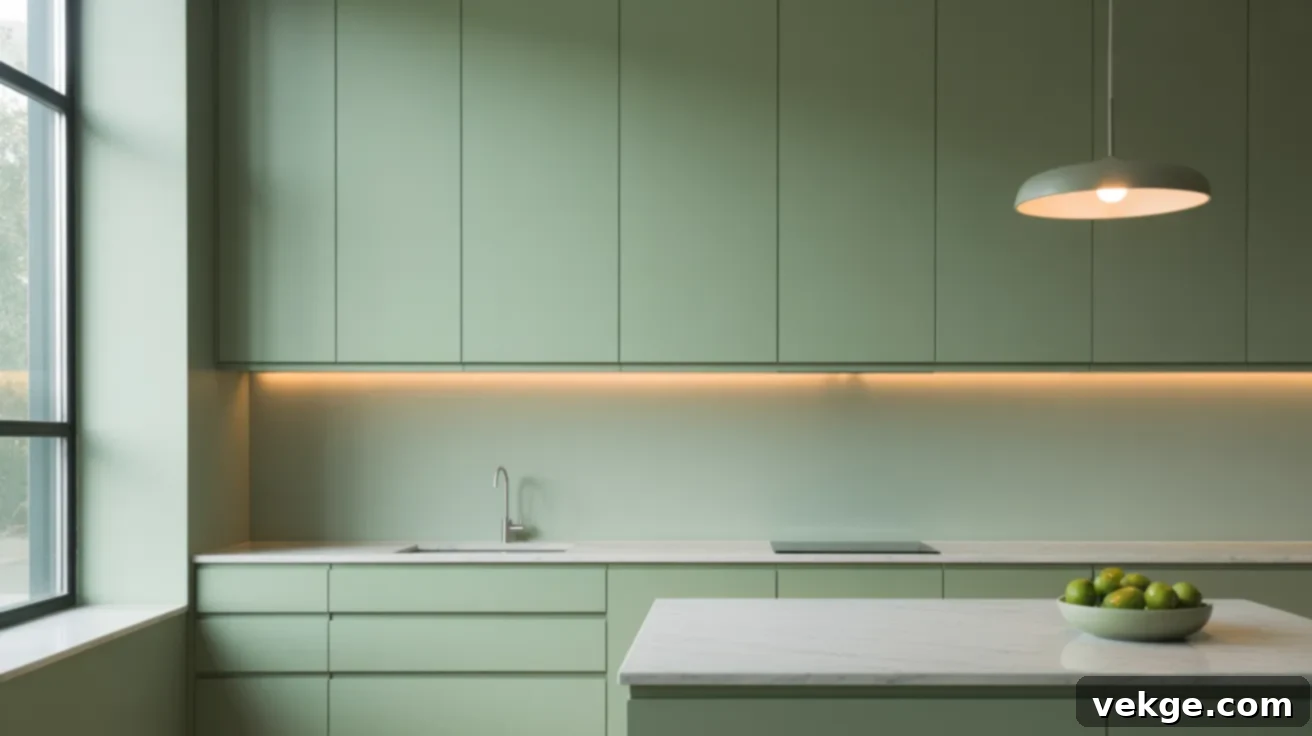
For a truly immersive and cohesive design statement, consider a “color-drenched” approach by painting both your cabinets and surrounding walls in the exact same shade. This creates a seamless, unified look that blurs the lines between cabinetry and architecture, fostering a sense of expansive flow. It’s particularly effective in smaller kitchens where too much contrast can visually chop up the space and make it feel even smaller. Employing soft, calming tones like sage green or slate gray in this manner can envelop the room in a harmonious color palette, creating an unexpected depth and adding a distinctly modern, sophisticated touch.
10. Paint + Natural Wood Combo Cabinets
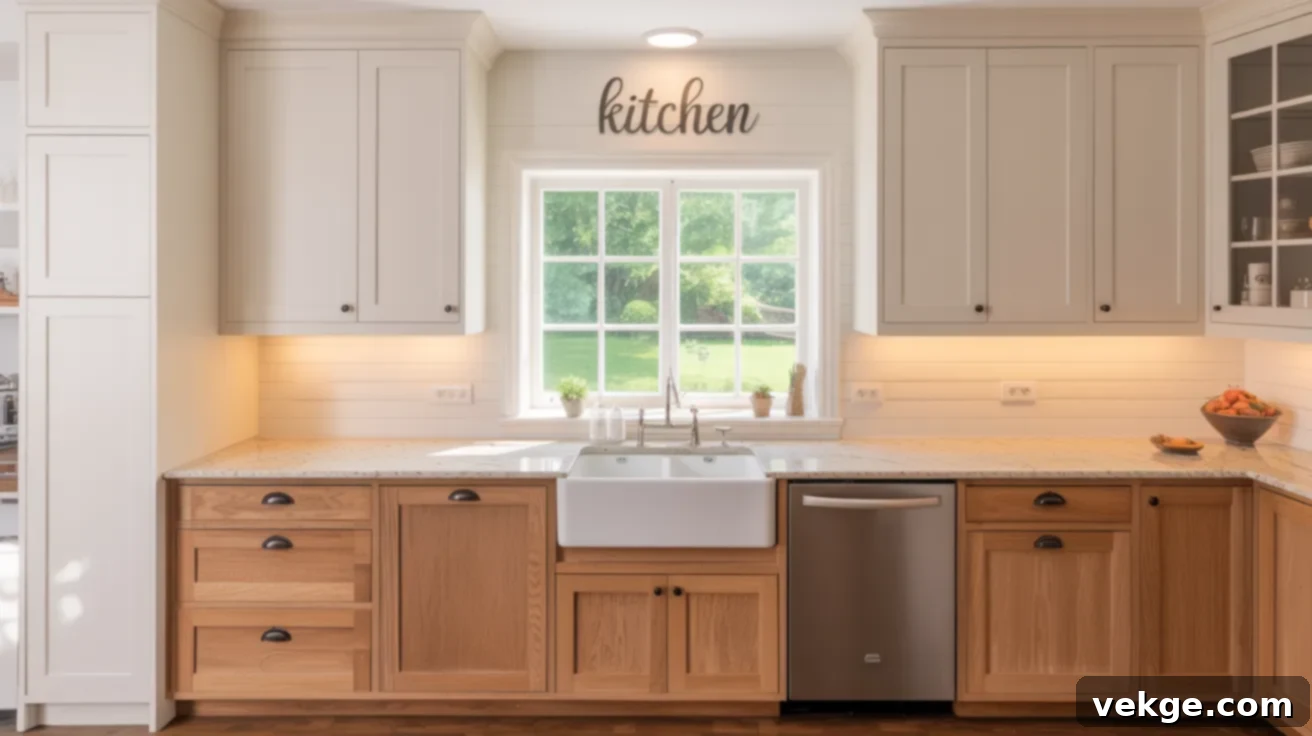
Achieve a balanced and richly textural kitchen design by thoughtfully blending painted cabinets with natural wood elements. A popular and effective strategy is to paint your upper cabinets a soft, airy white or light neutral, while leaving your base cabinets in their beautiful natural oak, walnut, or maple finish. This smart contrast creates a visually grounded lower half for the kitchen while maintaining a light and expansive feel above. It’s an intelligent and stylish way to combine the inherent warmth and organic beauty of natural wood with the customizable charm of painted surfaces, resulting in a sophisticated and inviting space.
11. Metallic-Accented Kitchen Cabinets
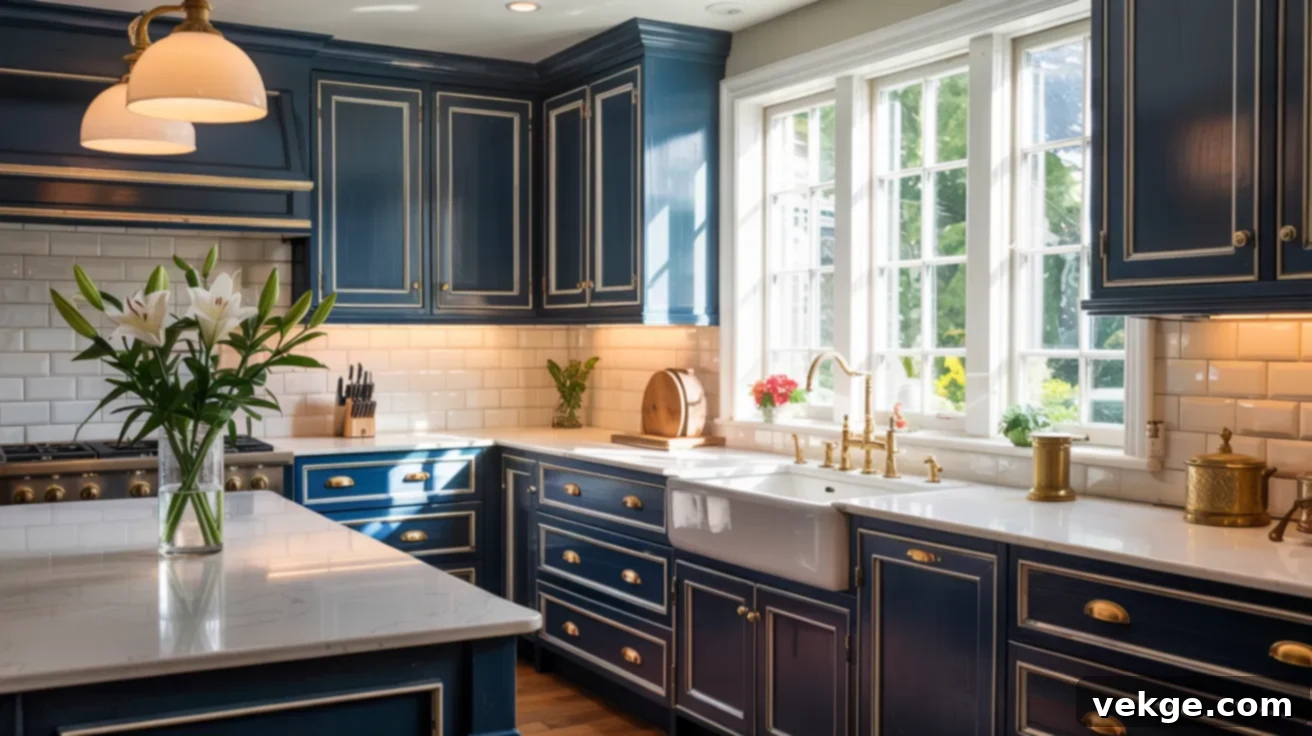
Elevate your kitchen’s luxury factor with subtle, well-placed metallic accents. Incorporating touches of gold, bronze, or chrome on cabinet edges, handles, pulls, or as small decorative trim pieces can add an immediate hint of opulence. These metallic finishes create a beautiful contrast against both dark, dramatic paint colors and lighter, more ethereal shades, making them incredibly versatile. They are perfect for those who desire a touch of refined shine and sophisticated sparkle without committing to an overwhelming, all-metal aesthetic, adding a bespoke and high-end feel.
12. High-Gloss Lacquer Finishes
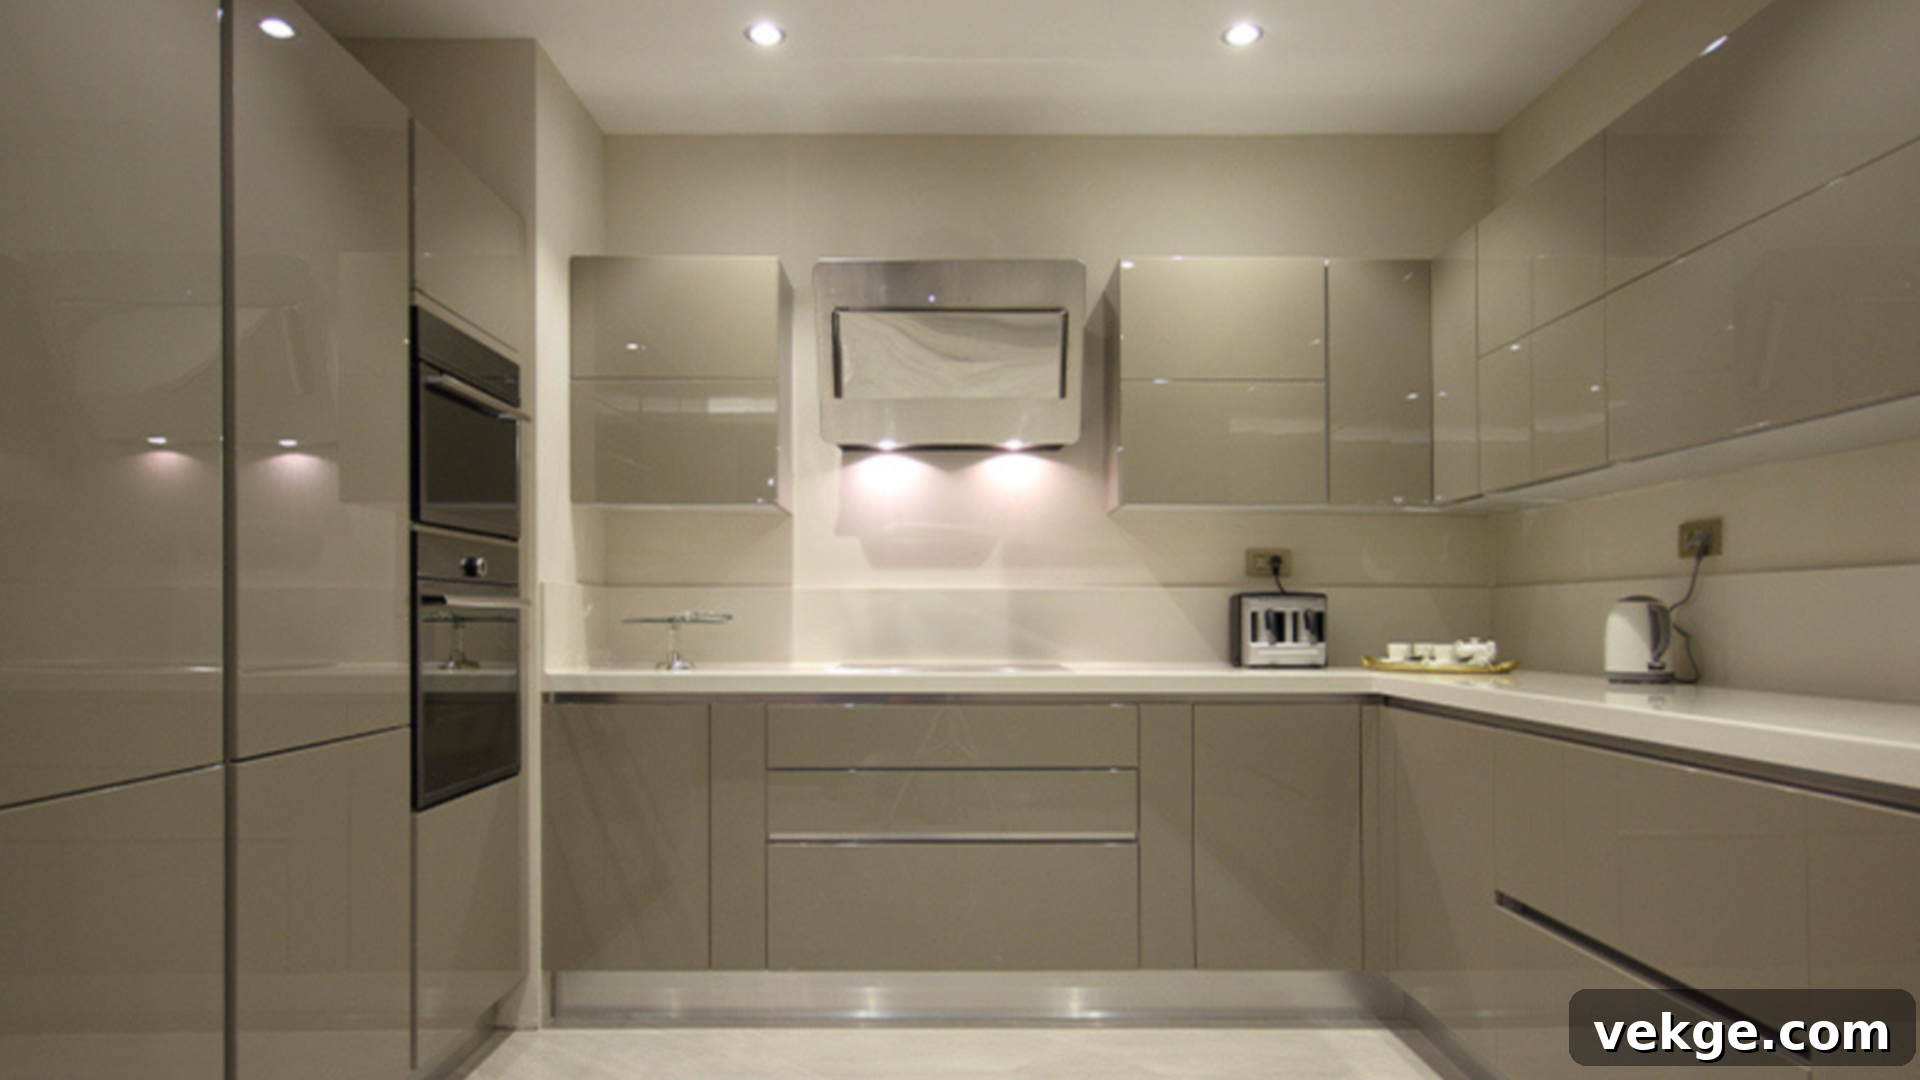
For a sleek, undeniably modern, and highly reflective kitchen, high-gloss lacquer finishes are an excellent choice. Their superior ability to reflect light creates a sense of spaciousness and brilliance, working exceptionally well in smaller kitchens by visually expanding the room. Often seen in crisp white, bold black, or vibrant, saturated colors, lacquered cabinets boast a perfectly smooth, mirror-like surface that exudes contemporary elegance. They are a staple for minimalist or ultra-modern kitchen designs and offer the practical advantage of being remarkably easy to wipe clean, maintaining their pristine appearance with minimal effort.
13. Earth-Inspired Tones
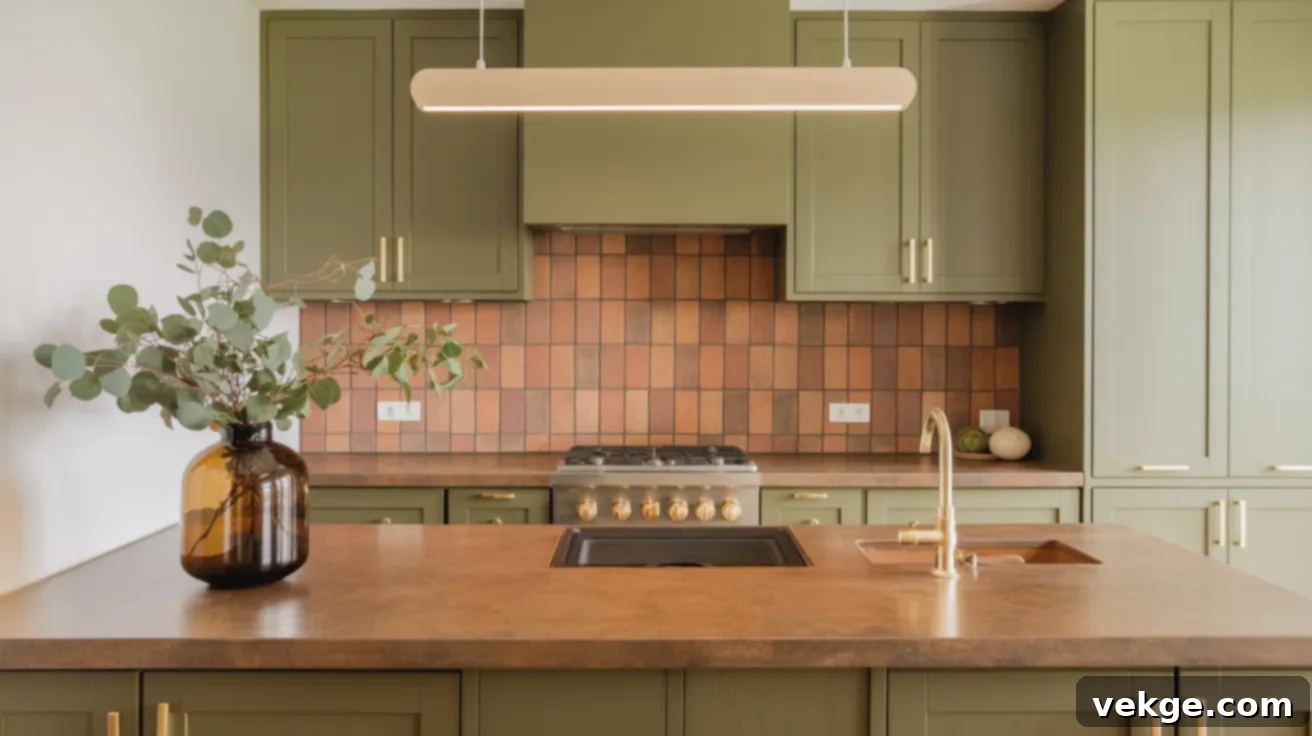
Bring the calming, grounding essence of the outdoors into your kitchen with earth-inspired tones. Colors such as rich olive green, warm terracotta, and sandy browns create an immediate connection to nature. These inherently grounded and organic colors pair beautifully with natural wood accents, rugged stone countertops, and the timeless appeal of brass hardware. Earth tones offer a sense of comfort, warmth, and timelessness, making them perfect for naturally themed kitchens or for those looking to shift away from the starkness of pure whites and cool grays, embracing a more serene and organic palette.
14. Graphic Black-and-White Contrast
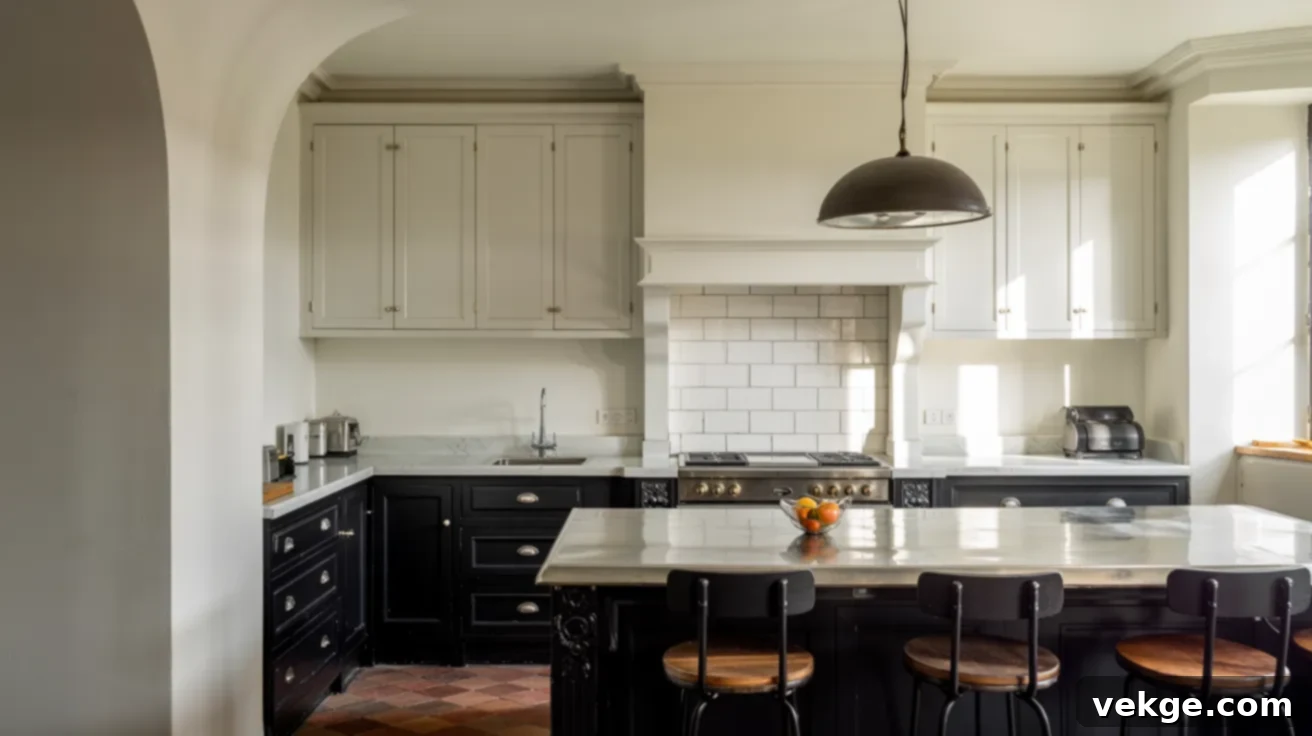
Embrace a bold and undeniably striking aesthetic with a graphic black-and-white contrast scheme. This can be achieved by pairing dramatic black cabinets with crisp white walls, or by reversing the combination for a different effect. This powerful contrast delivers a sharp, modern, and incredibly sophisticated look, especially when complemented by simple, minimalist hardware and clean lines. For a balanced yet impactful approach, consider black lower cabinets to ground the space and white upper cabinets to maintain an airy feel. It’s an excellent method for creating a high-impact, chic appearance without relying on bright, vibrant colors.
15. Painted Island with Neutral Cabinets
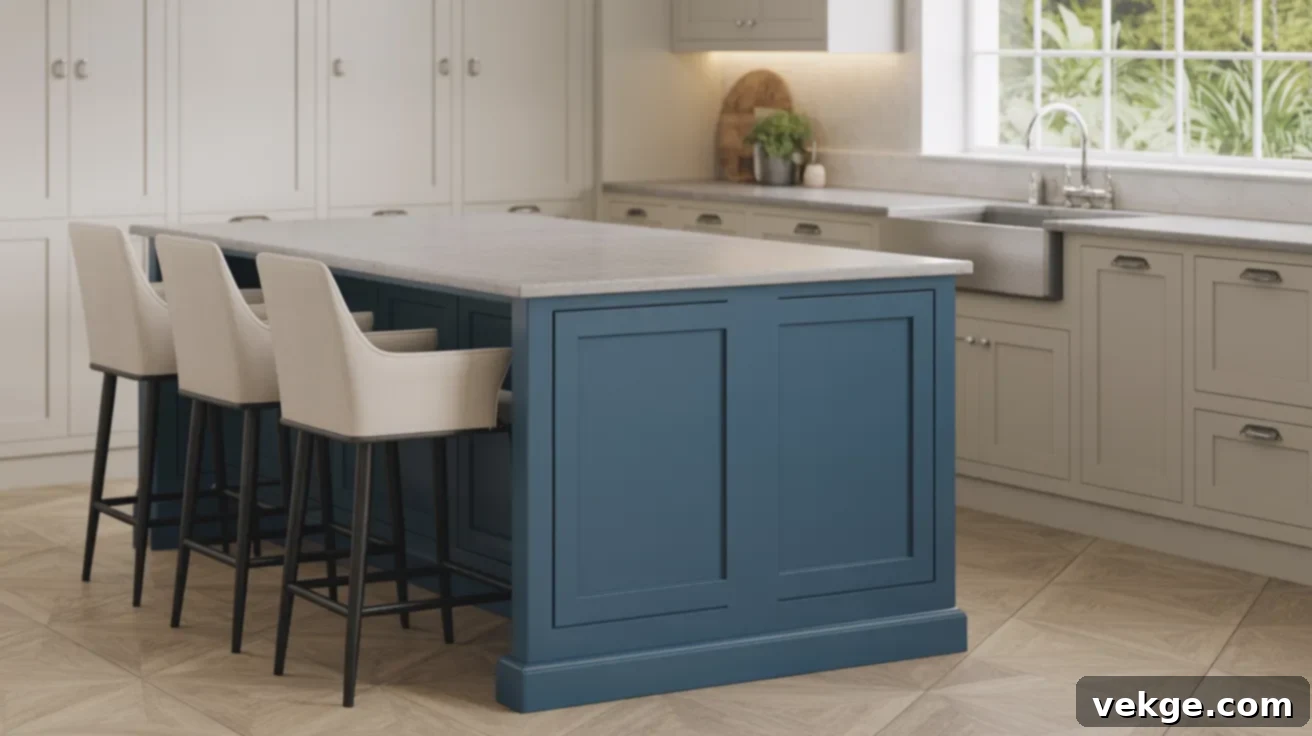
If you love the idea of adding a pop of color but prefer to keep your main cabinetry understated, a painted kitchen island is the perfect compromise. Make your kitchen island the star of the show by painting it a bright, bold, or unexpected color. Popular choices include deep navy, serene sage green, or even a rich maroon, offering a distinct focal point. By keeping the surrounding wall cabinets in a neutral shade like white, gray, or wood tone, you effectively highlight the island as the room’s central design element. This clever combination adds significant personality and visual interest without overwhelming the entire kitchen space.
How to Paint Kitchen Cabinets the Right Way: A Step-by-Step DIY Guide
If you’re planning to tackle this rewarding project yourself, having a solid, well-structured plan is crucial for success. I’ve broken down the entire process into easy, clear, and actionable steps to help you achieve professional-looking results that last. Proper technique at each stage will significantly impact the final finish and durability of your painted cabinets.
What You’ll Need for a Successful Cabinet Painting Project
Before you even think about starting, it’s incredibly smart to gather all your necessary supplies. This prevents frustrating interruptions mid-project and ensures you have everything on hand for each stage. Here’s a comprehensive list of what I suggest having ready before you begin:
- Degreaser or heavy-duty dish soap: Essential for removing stubborn kitchen grease.
- Sandpaper: Medium-grit (120-150) for initial sanding, fine-grit (220-320) for smooth finishes.
- Painter’s tape: High-quality, for precise masking of adjacent surfaces.
- Drop cloths or old sheets: To protect floors and countertops from paint drips.
- Screwdriver (manual or electric): For efficient removal of hardware and doors.
- Labeling tape or sticky notes and a pen: Crucial for accurate reassembly.
- High-quality bonding primer: Specifically designed for cabinets, to ensure paint adhesion.
- Cabinet-specific paint: Latex, acrylic-alkyd hybrid, or alkyd/oil-based, chosen for durability.
- Angled brushes: High-quality synthetic brushes for cutting in corners and detailed areas.
- Foam rollers: Small, high-density foam rollers for smooth, even application on flat surfaces.
- Small paint trays or containers: For easy pouring and use of paint.
- Clean cloths or tack cloths: For wiping dust and debris.
- Stir sticks: To thoroughly mix paint and primer.
- Drill (optional): Can speed up door removal and reattachment.
- Respirator mask: For protection from paint fumes and sanding dust.
- Safety glasses: To protect your eyes.
Crucial Cabinet Preparation: Don’t Skip This Step!
This preparation phase is the most time-consuming part of the entire process, but it is absolutely essential for achieving long-lasting, professional-looking results. Skipping or rushing proper prep work is the leading cause of peeling, chipping, and uneven finishes down the line. Start by meticulously removing all cabinet doors, drawer fronts, and hardware. Crucially, label each door and drawer (e.g., “Upper Left 1”, “Drawer 3”) and mark its corresponding location on the cabinet frame to ensure accurate and hassle-free reassembly later.
Next, clean every surface thoroughly using a strong degreaser or a robust dish soap solution. Kitchen cabinets accumulate years of cooking grease and residue, which must be completely eliminated for paint to adhere properly. After cleaning, rinse well and allow everything to dry completely. Once dry, sand all surfaces – doors, drawer fronts, and cabinet frames – with medium-grit sandpaper (120-150 grit) to scuff the existing finish. This creates a slightly rough surface that the primer can grip onto, significantly improving adhesion. After the initial sanding, follow up with a fine-grit sandpaper (220-320 grit) for a smoother finish, especially if your goal is a factory-like feel.
Once sanding is complete, meticulously wipe everything down with a tack cloth or a clean, damp rag to remove every trace of sanding dust. Dust is the enemy of a smooth paint finish. Finally, use high-quality painter’s tape to carefully protect adjacent walls, countertops, floors, and appliance edges from accidental paint marks, ensuring crisp, clean lines.
Step-by-Step Cabinet Painting Process
With thorough preparation complete, you’re ready to bring your vision to life! Follow these steps carefully for the best results:
Step 1: Apply a High-Quality Bonding Primer. Using an angled brush for corners and detailed areas, and a foam roller for flat surfaces, apply a thin, even coat of high-quality bonding primer to all prepared cabinet surfaces (doors, drawer fronts, and frames). Primer is vital as it blocks stains, ensures uniform color, and significantly helps the paint stick better and last longer. Avoid applying it too thick. Allow the primer to dry fully according to the manufacturer’s instructions, typically several hours.
Step 2: Lightly Sand and Apply the First Coat of Paint. Once the primer is completely dry, lightly sand all primed surfaces with fine-grit sandpaper (220-320 grit) to remove any minor imperfections or dust, then wipe clean with a tack cloth. Now, apply a thin, even coat of your chosen cabinet paint using a foam roller for large flat areas and an angled brush for edges and details. The key here is thin layers to prevent drips and ensure a smooth finish. Avoid overloading your brush or roller.
Step 3: Allow Adequate Drying Time. This is perhaps the most crucial step often rushed by DIYers. Wait at least 24 hours, or even longer (as directed by your paint manufacturer), before applying the next coat. Do not rush this part; insufficient drying time will compromise the paint’s hardness and durability, leading to premature chipping and peeling. Patience here will pay off immensely in the longevity of your cabinets.
Step 4: Apply Second and Subsequent Coats. Once the previous coat is completely dry and cured, lightly sand again with fine-grit sandpaper, wipe clean, and then apply a second thin, even coat of paint. Most cabinet painting projects require two to three coats of paint to achieve full coverage and a durable finish. After each coat, meticulously check for drips or imperfections, lightly sanding them away before the next application. Use a smaller artist’s brush for touching up any small corners or hard-to-reach edges if needed.
Step 5: Final Cure and Reassembly. After applying the final coat, allow everything to dry and cure for a minimum of 2–3 days, or even up to a week for optimal hardness, before carefully reattaching the doors, drawer fronts, and hardware. Rushing reassembly can lead to scratches and damage to your fresh paint job. Handle each piece with care during installation. Enjoy your beautiful, transformed kitchen!
For a clear, visual walkthrough of the entire cabinet painting process, showing each step in action and offering valuable tips, watch this helpful video:
Avoid These Common Cabinet Painting Mistakes for Best Results
While painting cabinets is a rewarding project, there are a few easy-to-make mistakes that can significantly compromise your results if you’re not careful. Keeping these pitfalls in mind will help ensure a smoother process and a more durable finish:
- Don’t skip the primer: Primer is the foundation of a lasting paint job. Without a proper bonding primer, your paint won’t adhere well, leading to early peeling and chipping, especially in a high-traffic area like a kitchen.
- Avoid thick coats of paint: While tempting to get it done faster, thick layers of paint are prone to dripping, take much longer to dry, and are more likely to peel or chip. Thin, even coats dry harder and create a smoother, more durable finish.
- Use the right paint for cabinets: Standard wall paint is not designed for the heavy wear and tear of kitchen cabinets. Always choose high-quality paint specifically formulated for cabinetry or trim, which offers superior durability and a harder finish.
- Label doors and drawers carefully: This seemingly minor step is crucial for accurate reassembly. Mismatched doors can lead to uneven gaps and a frustrating installation process.
- Don’t forget to clean off all grease or grime: Kitchen cabinets are notorious for accumulating grease. Any residual grime will prevent paint from adhering properly, causing bubbling and peeling. Clean thoroughly with a degreaser.
- Let each layer dry fully before adding the next: Patience is key. Rushing drying times leads to soft, easily damaged paint and can trap moisture, affecting the cure and adhesion of subsequent coats.
- Keep your workspace clean and dust-free: Dust particles settling on wet paint can ruin an otherwise perfect finish. Work in a well-ventilated, clean area, and wipe down surfaces with a tack cloth before each coat.
- Never paint in a rush: Haste leads to sloppiness – drips, uneven coverage, missed spots, and brush marks will be evident in the final result. Take your time and enjoy the process.
- Don’t use cheap brushes or rollers: Inexpensive tools can shed bristles, leave streaks, and apply paint unevenly. Invest in high-quality angled brushes and high-density foam rollers for the best finish.
- Avoid dark colors if your kitchen has poor lighting: Dark colors can absorb light, making an already dimly lit kitchen feel smaller and more enclosed. Consider your kitchen’s natural light before committing to deep shades.
Painted Cabinets vs. New Cabinets: What’s the Most Cost-Effective Choice?
When you’re looking to refresh your kitchen, deciding between painting your existing cabinets and investing in brand-new ones can be a tough call. Both options have their merits and drawbacks, largely dependent on your budget, the amount of time you have, and the current condition of your kitchen cabinets. A side-by-side comparison of costs, effort, and outcomes can help you make the right decision for your home and lifestyle.
|
Option |
Cost Level |
Time Investment |
Effort Needed |
Look & Finish |
Best If You Want |
|
DIY Painting |
Low ($200 – $600 for materials) |
High (5-10 days, spread out) |
Very High (intensive prep, application) |
Basic to Good (depends on skill) |
A budget-friendly upgrade and enjoy hands-on projects |
|
Professional Painting |
Medium ($3,000 – $8,000) |
Medium (3-7 days of work) |
Low (minimal homeowner effort) |
Smooth, polished, factory-like |
Less hassle with a clean, professional result |
|
Stock Cabinet Replacement |
Medium ($5,000 – $15,000) |
Medium (Installation 1-3 days) |
Medium (Measuring, selection, some demo) |
Clean, standard, new look |
Quick style refresh with new layout options or modern features |
|
Semi-Custom Cabinets |
High ($15,000 – $30,000) |
Medium (Installation 3-5 days) |
Medium (Design, selection, professional installation) |
Personalized, improved aesthetics and functionality |
A new look with layout changes and specific size needs |
|
Custom Cabinets |
Very High ($30,000+) |
Long (Weeks to months for design, build, install) |
Professional-only work (extensive design & build) |
Fully tailored, high-end, unique |
A full kitchen redesign, luxury upgrade, or unique space requirements |
As the table illustrates, DIY painting is by far the most budget-friendly option, making it accessible for nearly everyone. However, it demands a significant investment of your personal time and effort. Professional painting bridges the gap, offering a high-quality finish with less personal strain but at a higher cost. Replacing cabinets entirely can range from moderately expensive to a very significant investment, depending on the level of customization. Your choice will ultimately hinge on balancing your desired outcome, your financial capabilities, and how much time and effort you’re willing to dedicate to the project.
How to Make Your Painted Kitchen Cabinets Last Longer: Essential Care Tips
Once your kitchen cabinets are freshly painted and looking absolutely stunning, the goal is to keep them that way for many years to come. Maintaining their beautiful appearance requires just a little ongoing care and attention. I’ll walk you through the essential basics and practical tips to ensure your hard work actually lasts for years, not just a few months, protecting your investment and enjoyment.
Daily Cleaning and Routine Care Tips
Keeping your painted cabinets clean and pristine doesn’t require aggressive daily scrubbing or harsh chemicals. For routine maintenance, a soft microfiber cloth dampened with a mild soap-and-water mixture is usually more than sufficient. You can use a small amount of gentle dish soap diluted in warm water. Avoid using harsh chemical cleaners, abrasive scrubbers, scouring pads, or any cleaning products that contain ammonia, bleach, or strong solvents, as these can gradually degrade the paint finish over time, causing discoloration, dullness, or even chipping.
The most important tip for longevity is to promptly wipe away any food splatters, spills, or grease as soon as they occur. Allowing acidic foods, oils, or strong dyes to sit on the surface can lead to staining or etching of the paint. Gentle, consistent, and immediate cleaning is truly crucial to maintaining the original appearance and durability of your painted cabinet surfaces. Always dry the cabinets thoroughly after cleaning to prevent water spots or moisture damage.
What to Do When Paint Chips: Touch-Up Strategies
Despite your best efforts and careful maintenance, even the most well-painted cabinets may occasionally develop minor chips, dings, or scuffs over time, especially in high-traffic areas. The good news is that small imperfections are usually easy to manage with a small touch-up kit. It’s always a good idea to save a small amount of your original cabinet paint for this purpose, along with a fine-tipped artist’s brush.
To repair a chipped area, begin by lightly sanding the immediate spot with very fine-grit sandpaper (400-grit or higher) to smooth out any rough edges and create a blendable surface. Clean the area thoroughly with a damp cloth and allow it to dry completely. For deeper chips or areas of significant wear, applying a tiny dab of high-quality primer specifically designed for adhesion before repainting can be beneficial. Then, using your fine brush, apply the matching paint in thin, even layers, building up the color gradually until it blends seamlessly with the surrounding finish. Patience and a steady hand during touch-ups are key to ensuring the repaired area is virtually undetectable.
How Long Do Painted Cabinets Typically Hold Up?
With diligent preparation, the use of high-quality paint, and consistent, gentle care, painted kitchen cabinets can remain in excellent condition for an impressive five to ten years or even longer. The longevity of your paint job is heavily dependent on several factors: the quality of the materials (primer, paint, topcoat) used, the meticulousness of the preparation work (cleaning, sanding, priming), and the ongoing attention given to daily cleaning and maintenance.
Neglecting critical prep work, opting for subpar products, or using harsh cleaning methods can unfortunately lead to premature wear, such as peeling, fading, chipping, or excessive scratching. Conversely, a well-executed paint job coupled with regular, appropriate upkeep plays a major role in preserving their fresh appearance and performance, ensuring they continue to enhance your kitchen’s aesthetic and functionality for many years.
Choosing the Right Paint and Finish for Your Kitchen Cabinets
Selecting the correct type of paint and finish is arguably one of the most critical decisions you’ll make for your cabinet painting project. The right choice can significantly impact the durability, ease of use during application, and the ultimate aesthetic appeal of your kitchen. I’ll help you navigate the options to choose the best type for a long-lasting, beautiful result that works perfectly in your kitchen environment.
Best Paint Types for Kitchen Cabinets
When it comes to painting kitchen cabinets, it’s essential to understand that not all paints are created equal. The heavy use and potential for moisture and grease in a kitchen demand a more robust paint than what you might use on walls.
- Latex Paint: Often water-based, latex paint is easy to work with, dries quickly, and has low odor. While convenient, standard latex paint may not offer the extreme durability needed for high-traffic cabinet surfaces and can be prone to chipping if not specifically formulated for cabinets.
- Acrylic Paint: Also water-based, acrylic paints (especially those labeled for cabinets or trim) offer a smoother, harder finish and superior durability compared to standard latex. They combine the ease of water clean-up with enhanced resistance to chipping and scratching, making them a popular and excellent choice for cabinets.
- Alkyd Paint (Oil-Based): Traditionally known for providing the hardest, most durable, and smoothest factory-like finish. Alkyd paints are exceptionally resistant to dings and moisture. However, they take much longer to dry, have a strong odor, and require mineral spirits for cleanup, which can be a deterrent for DIYers.
For a perfect balance of strength, durability, and ease of application, I highly recommend opting for acrylic-alkyd hybrid blends or specifically formulated “cabinet enamel” paints. These modern formulations offer the best of both worlds: the easy cleanup and quick drying time of water-based paints with the superior hardness and longevity traditionally found in oil-based paints.
Understanding Paint Finish Types
The paint’s finish, or sheen, not only affects its appearance but also how well it withstands daily wear and tear and how easy it is to clean. Choosing the right sheen is crucial for both aesthetics and practicality:
- Matte/Flat Finishes: Offer a soft, non-reflective look that effectively hides surface flaws and imperfections. However, they are generally the least durable and most difficult to clean, making them less ideal for busy kitchen cabinets where spills and grease are common.
- Satin Finish: This is my personal go-to recommendation for kitchen cabinets. Satin offers a subtle, soft sheen that is elegant without being overly shiny. It excels at hiding fingerprints, minor imperfections, and is remarkably easy to clean, making it highly practical for active kitchens.
- Semi-Gloss Finish: Provides a noticeable sheen and is very durable and easy to wipe clean. It reflects more light than satin, making colors appear brighter and adding a crisp, clean look. It’s an excellent choice for cabinets, though it can show minor surface imperfections more readily than satin.
- Gloss/High-Gloss Finishes: Deliver a super shiny, dramatic, and highly reflective look. While exceptionally durable and easy to clean, they show every single scratch, smudge, and imperfection, requiring pristine application and upkeep. They are best suited for very modern, minimalist kitchens seeking a high-impact, mirror-like effect.
For most kitchens, a satin or semi-gloss finish strikes the optimal balance between beautiful aesthetics and practical durability. These finishes are forgiving, easy to maintain, and withstand the rigors of daily kitchen life, especially if you have kids, pets, or cook frequently.
Recommended Products for Your Cabinet Painting Project
When you’re ready to purchase your cabinet paint, some options consistently stand out in terms of quality and performance. Look specifically for “cabinet-specific kits” or premium enamel paints labeled for “trim and doors,” as these are engineered to be tougher, smoother, and more resistant to wear than standard wall paints. Many successful DIYers and professionals have achieved excellent results with brands that offer all-in-one kits, which thoughtfully include both primer and topcoat, simplifying the selection process and ensuring compatibility.
Popular and highly-rated choices among both DIY enthusiasts and professional painters include cabinet-specific paints from renowned brands such as Benjamin Moore (e.g., Advance line), Sherwin-Williams (e.g., Emerald Urethane Trim Enamel), and specialty lines like Rust-Oleum’s Cabinet Transformations. Always be sure to read the product label carefully; if it explicitly states “cabinet-grade” or “urethane enamel,” you’re likely in the right aisle for a durable, beautiful finish.
Conclusion: Ready to Transform Your Kitchen with Painted Cabinets?
If you’ve been contemplating a kitchen revamp, painting your cabinets stands out as a remarkably smart, cost-effective, and impactful way to update your space without the monumental undertaking of a full renovation. Now that you’ve explored the diverse range of stylish options, understood the necessary tools, and walked through the detailed steps, you are much better prepared to confidently embark on a project that perfectly fits your home’s aesthetic, your budget, and your personal pace.
From what I’ve observed and experienced, the keys to a successful and long-lasting cabinet paint job are consistent: thorough preparation, selecting the right kind of high-quality paint, and a healthy dose of patience throughout the process. Whether you decide to tackle this project yourself as a rewarding DIY endeavor or bring in a professional for a flawless finish, a clear and dramatic change is absolutely achievable without the need to tear everything out.
Embrace the power of paint to breathe new life into your kitchen. If this comprehensive guide has proven useful and inspiring, I encourage you to explore more of my kitchen-focused posts. I consistently share clear, actionable steps and practical tips honed from years of experience to help you effectively fix up and refresh various aspects of your home, making your living spaces more beautiful and functional.
