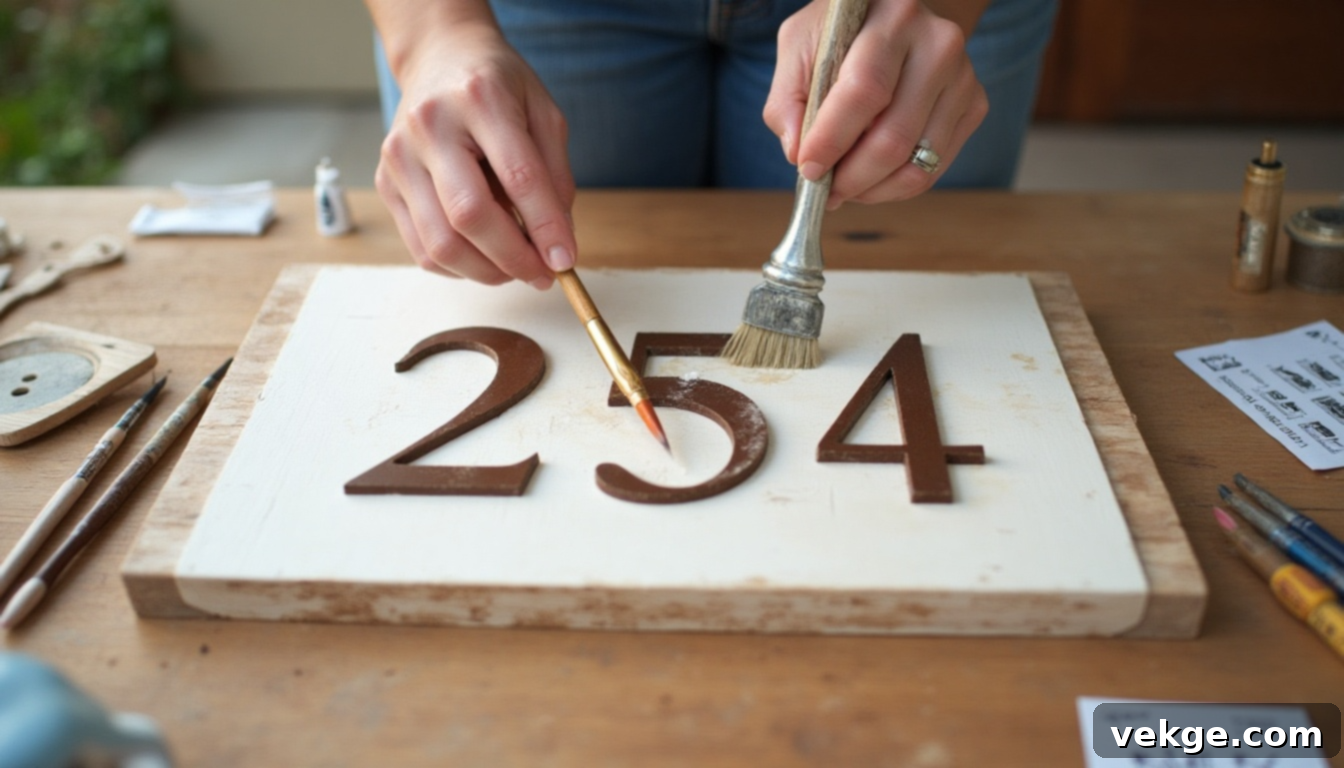
Elevate Your Home’s Entrance: The Ultimate Guide to DIY House Number Signs
If you’ve ever found yourself wishing your house numbers didn’t fade, fall off, or simply felt more reflective of your personal style, you’re not alone. The challenge of finding a house number sign that perfectly blends with your home’s aesthetic and fits within your budget can be surprisingly difficult. But what if you could create your own? It’s not just easier than you think; it’s an incredibly rewarding project.
This comprehensive guide will meticulously walk you through every stage of crafting your very own house number sign. From selecting the ideal materials that stand up to the elements to the hands-on process of building and securely hanging your custom creation, we’ll cover it all. Beyond the practical steps, I’ll also share a diverse array of design inspirations and practical lighting techniques to ensure your sign doesn’t just display your address, but truly stands out and enhances your home’s curb appeal.
You don’t need a massive renovation or a hefty budget to make a significant impact. With a dedicated effort and a bit of creativity, this small DIY endeavor can transform into a prominent, durable, and personalized upgrade to your home’s exterior. Let’s embark on this creative journey together and give your home the distinctive touch it deserves.
Why DIY House Number Signs Are a Smart and Stylish Choice
Creating a personalized house number sign offers a unique blend of practicality and aesthetic enhancement for your home’s exterior. Unlike generic, mass-produced options, a DIY sign allows for unparalleled customization, giving you complete control over its size, style, and overall layout to perfectly complement your unique space and taste. It’s an opportunity to inject your personality directly into your home’s first impression.
Beyond personal expression, the financial benefits of a DIY approach are significant. Custom-made house signs from retailers often come with premium price tags, especially when you factor in unique designs or durable materials. In stark contrast, a DIY version can be incredibly cost-effective, often requiring just a few dollars for basic supplies like reclaimed wood, a can of exterior paint, or affordable vinyl numbers. This means you get a high-quality, custom look without the hefty expense.
Furthermore, this isn’t a project that demands weeks of your time or advanced carpentry skills. It’s a quick and gratifying weekend endeavor, accessible even to beginners. You won’t need specialized tools or extensive experience to construct a sign that is both visually appealing and robust enough to withstand the elements year after year. It’s a straightforward, satisfying way to significantly boost your home’s curb appeal and make a lasting personal statement in just a few simple steps.
Essential Considerations Before You Begin Your Custom Address Plaque Project
Before you dive into building your custom house number sign, thoughtful planning is crucial. Consider these key elements: your home’s architectural style, the materials you’ll utilize, and how prominently your sign will be displayed. Each choice contributes to the final look and longevity of your address plaque.
Finding the Perfect Style to Complement Your Home’s Exterior
The design of your house number sign should ideally harmonize with your home’s existing architecture and landscape. A modern home, for instance, pairs beautifully with signs featuring clean lines, minimalistic aesthetics, and bold, sans-serif numbers, often crafted from sleek materials like metal or acrylic. Conversely, a rustic or farmhouse-style home might call for distressed wood, hand-painted numbers, and vintage-inspired fonts that evoke warmth and charm.
Minimalist options prioritize simplicity and neatness, eschewing excessive decoration for a refined, understated elegance. A vintage sign, on the other hand, can incorporate classic typography, intricate metalwork, or distressed finishes to create a sense of history and character. For properties with limited wall space, a vertical layout offers a slim, elegant solution that fits perfectly on columns, fence posts, or narrow sections of your home’s facade.
Ultimately, the goal is to create a cohesive and unified look. Take a moment to observe your home’s exterior—its colors, textures, and overall vibe—and choose a sign style that feels inherently right for your unique space. This thoughtful selection will ensure your house number sign not only functions well but also serves as a beautiful extension of your home’s personality.
Choosing the Right Materials for Durability and Design
The material you select for your DIY house number sign is paramount, influencing not only its aesthetic appeal but also its durability, maintenance requirements, and overall cost. It’s essential to pick a material that aligns with your chosen style, fits within your budget, and, critically, can withstand the specific weather conditions prevalent in your area.
| Material | Pros | Cons |
|---|---|---|
| Wood | Highly versatile, easy to paint or stain, affordable, perfect for rustic, traditional, or even modern designs. Offers a natural, warm aesthetic. | Requires proper sealing and regular maintenance to prevent warping, rotting, or fading, especially in humid or wet climates. |
| Metal | Exceptionally durable, weather-resistant, and can offer a very sleek, modern, or industrial look. Options include aluminum, steel, or copper. | Can be heavier, potentially more expensive, and may require specialized tools or services for cutting and finishing. Some metals can rust if not treated. |
| Ceramic | Offers a wide range of stylish, vibrant colors and textures; excellent resistance to sun fading. Ideal for mosaic designs or hand-painted tiles. | Fragile; susceptible to cracking or breaking if dropped, hit, or exposed to extreme temperature fluctuations (freeze-thaw cycles). |
| Acrylic | Provides a contemporary, sleek, and often translucent finish. Naturally water-resistant and excellent for backlit or floating number designs. | Can scratch easily, may become cloudy or fade over prolonged exposure to harsh UV rays, and might not suit traditional home styles. |
| Vinyl | Very affordable, incredibly easy to apply as decals or stickers, and available in a vast array of colors and fonts. Great for quick, non-permanent solutions. | Less durable than other materials; can peel, crack, or fade over time, especially when exposed to direct sunlight and extreme weather. Limited in texture. |
When making your selection, carefully consider the specific location where your sign will be mounted (e.g., direct sun, rain exposure, sheltered porch), how much time you’re willing to dedicate to upkeep, and the overarching aesthetic you wish to achieve. The right material ensures your sign remains both functional and beautiful for years to come.
Optimal Size and Visibility Guidelines for Your Address Sign
Beyond aesthetics, the primary function of a house number sign is clear visibility. For homes that are relatively close to the street, your numbers should be at least 4 inches tall to be easily readable. If your house is set further back from the road or has a long driveway, it’s highly advisable to opt for larger numbers, ranging from 6 to 10 inches or even more, to ensure they are legible from a distance.
Contrast is key for visibility. Always aim for high-contrast color combinations, such as bold black numbers on a pristine white or light-colored background, or crisp white numbers against a dark wood or metal backdrop. Avoid subtle differences like light gray on white, as these can make numbers blend in and become unreadable from the street.
For nighttime visibility, consider integrating lighting solutions or using reflective numbers. Solar-powered lights are an excellent, energy-efficient option, while reflective vinyl or paint can make your numbers pop when illuminated by headlights. Crucially, ensure that no plants, trees, decorative elements, or other outdoor decor obstruct the view of your sign. Trim back any foliage that might grow to obscure it.
Remember, clear visibility isn’t just about convenience for guests and delivery services; it’s a vital safety feature for emergency services during critical situations. Keep your design simple, uncluttered, and, most importantly, easy to read day or night.
Step-by-Step Guide: How to Craft a Stunning Cedar DIY House Number Sign
Ready to infuse some handcrafted personality into your home’s exterior? This detailed tutorial will guide you through building a beautiful cedar house number sign, blending rustic charm with a clean, modern finish. This project results in a durable, waterproofed, and framed sign that is fully customizable. You’ll primarily work with cedar wood, floating numbers, and a selection of essential tools, proving that a professional-looking result is well within your DIY reach.
Supplies & Tools You’ll Need
- Cedar wood planks (choose boards that are straight and free of major defects)
- Trim boards (for the frame, ideally a contrasting material or color if desired)
- Scrap wood (essential for creating consistent cutting templates)
- Saw (a miter saw offers precision, but a hand saw with a miter box works)
- Drill + various drill bits (including a pilot bit for screws)
- Brad nailer or hammer + finishing nails (for secure frame assembly)
- Tung oil (or a high-quality exterior wood sealer/stain for cedar protection)
- Exterior-grade white paint (or your chosen color for the frame accent)
- Exterior-grade silicone sealant (for waterproofing and filling gaps)
- Construction adhesive or strong exterior wood glue (for slats)
- Floating house numbers + accompanying screws/mounting hardware
- Pencil, measuring tape, clamps (optional, but highly recommended for stability)
- Sandpaper (various grits from medium to fine for smooth finishes)
Step 1: Precisely Cut the Cedar Boards for the Main Panel
Begin by cutting your cedar planks to the precise length that will define the overall height of your house number sign. Carefully consider the aesthetic you envision – whether it’s a compact plaque or a more elongated display. To guarantee uniformity across all your cedar pieces, a smart trick is to create a cutting template: securely clamp a scrap board to your saw as a dependable guide. Once your first cedar piece is cut to the perfect size, use this template to make all subsequent cuts, ensuring every board is identical. After cutting, arrange all your cedar pieces vertically, side-by-side. This aligned panel will form the robust and attractive main surface upon which your house numbers will be mounted.
Step 2: Prepare the Cedar Backing for Structural Integrity
With your front cedar panel boards aligned and ready, measure their combined total height accurately. Using this exact measurement, cut one additional cedar board. This particular piece will serve as the crucial backing board, providing a solid foundation and support for the vertical cedar slats you’ve prepared. It is imperative that this backing board matches the height of the front panel precisely. This ensures that when the entire sign is framed, the components sit flush, creating a balanced and structurally sound final product.
Step 3: Craft the Frame by Cutting Trim Boards at 45° Angles
Now, it’s time to construct the elegant frame that will encase your cedar panel. Adjust your miter saw (or use a miter box with a hand saw) to a precise 45-degree angle. This angle is essential for creating clean, professional-looking mitered corners that fit together seamlessly. First, cut one trim piece for the top section of your frame. Then, use this piece as an exact template to cut the bottom trim piece to the identical length, ensuring symmetry. Repeat this careful process for the two side pieces, meticulously measuring to match the vertical length of your cedar panel. Once all four angled pieces are cut, dry-fit them around your cedar panel to confirm a snug, precise fit and a perfectly uniform border before proceeding to assembly.
Step 4: Sand and Seal All Wood Components for Longevity and Beauty
Before any assembly takes place, thoroughly sand all your wood components. This includes the individual cedar slats for the front, the cedar backing board, and all the trim pieces for the frame. Start with a medium-grit sandpaper to remove any rough edges, splinters, or imperfections, then move to a finer grit to achieve a wonderfully smooth, ready-to-finish surface. Once sanded, apply tung oil (or your chosen exterior wood sealer) generously to the cedar slats. This step is vital as it will enhance the natural beauty of the wood grain, deepening its color, and most importantly, providing robust protection against moisture, UV damage, and general weather wear. For a striking contrast, carefully paint two of the trim pieces (typically the vertical sides of the frame) with a durable, exterior-grade white paint. Ensure all pieces are completely dry and cured according to product instructions before moving on to the next stage.
Step 5: Assemble and Weatherproof the Frame
To meticulously assemble your trim frame, begin by using clamps to firmly hold the mitered 45-degree corners together, ensuring they are perfectly aligned. With the corners secured, use a brad nailer or finishing nails to permanently fasten each joint, driving the nails discreetly. For a truly seamless and weatherproof finish, apply a bead of exterior-grade silicone sealant along the inside corners of the frame and over any visible nail holes. This critical step not only significantly enhances the frame’s durability and structural integrity but also acts as a powerful barrier, effectively preventing any moisture intrusion. Once the sealant has fully dried and cured, carefully touch up any sealed areas with your chosen exterior paint to maintain a clean, polished, and professional-looking finish.
Step 6: Securely Attach the Cedar Backing to the Frame
With your precisely assembled frame now complete and dry, carefully position the cedar backing board centrally within the frame opening. It should fit snugly and be perfectly flush with the inner edges of the frame. To ensure a stable and lasting attachment, secure the backing board by nailing it through its edges directly into the top and bottom trim pieces of the frame. This crucial step creates a strong, stable, and rigid surface, which is essential for securely mounting the front cedar slats and ensuring that your entire house number sign remains sturdy and well-constructed once fully assembled and displayed.
Step 7: Install the Front Cedar Slats with Adhesive
Now it’s time to bring the front panel to life by installing the cedar slats. Apply a generous, even layer of strong construction adhesive or exterior-grade wood glue directly onto the cedar backing board. Carefully place each cedar slat into its designated position, paying close attention to ensure they are evenly spaced, tightly fitted together, and perfectly aligned. Press each slat down firmly and hold for a few moments to ensure a robust, lasting bond with the adhesive. It’s vital to allow ample time for the adhesive to fully cure and set according to the product’s instructions before proceeding to the next steps. This ensures the integrity and durability of your sign’s front face.
Step 8: Final Sealing and Paint Touch-Ups for a Polished Look
Once the entire cedar panel and frame are fully assembled and the adhesives have cured, conduct a thorough inspection of your sign for any minor imperfections. Look for small nail holes, tiny gaps where wood pieces meet, or any areas where the wood might be exposed. Use exterior-grade silicone sealant or a suitable wood filler to meticulously seal these spots. This proactive measure is crucial for protecting the wood from future moisture exposure and preventing water damage. After the filler or sealant has completely dried and cured, apply a final, careful coat of paint or sealer to any areas that require touch-ups. This last step ensures your sign boasts a flawless, polished, and truly professional finish, ready for display.
Step 9: Thoughtfully Attach Your Floating House Numbers
Carefully lay out your floating house numbers on the front cedar panel. Take your time to adjust their spacing and alignment until you are completely satisfied with the visual balance and readability. Once the placement is perfect, use an awl, a sharp pin, or even a small nail to create slight indentations, marking the exact screw locations for each number. Before fastening, it is absolutely essential to pre-drill pilot holes at each of these marked spots. Pre-drilling prevents the wood from splitting when the screws are inserted, ensuring a clean installation. Finally, using the hardware provided with your floating numbers, securely screw them into place. Ensure they are straight and firmly attached to complete your personalized address plaque.
Step 10: Mount Your Custom House Number Sign with Confidence
Congratulations! Your stunning, custom-crafted cedar house number sign is now complete and ready to proudly display. Choose the ideal location on your home’s exterior, whether it’s near the front door, on a prominent wall, or by your mailbox. Depending on the surface material – be it brick, siding, a wooden fence post, or a porch column – select the appropriate mounting hardware. This could include heavy-duty wall anchors, robust screws, or specialized outdoor mounting brackets to ensure a secure and long-lasting installation. Once meticulously installed, your beautiful, handcrafted sign will not only significantly enhance your home’s curb appeal and help visitors find your address with ease but also serve as a striking testament to your impressive DIY skills and personal style.
For those who prefer a visual learning experience, watch the full video tutorial below to see each step in action and follow along visually, ensuring you don’t miss any crucial details.
Creative DIY House Number Sign Ideas to Inspire Your Next Project
These imaginative DIY house number sign ideas offer fantastic ways to infuse character into your home’s exterior without breaking the bank or requiring advanced skills. Each concept utilizes readily available materials and is adaptable to various spaces, whether it’s a cozy garden nook, a bustling porch, or a prominent front door, allowing you to personalize your address display with ease and style.
1. Hand-Painted Rock for a Natural Garden Accent
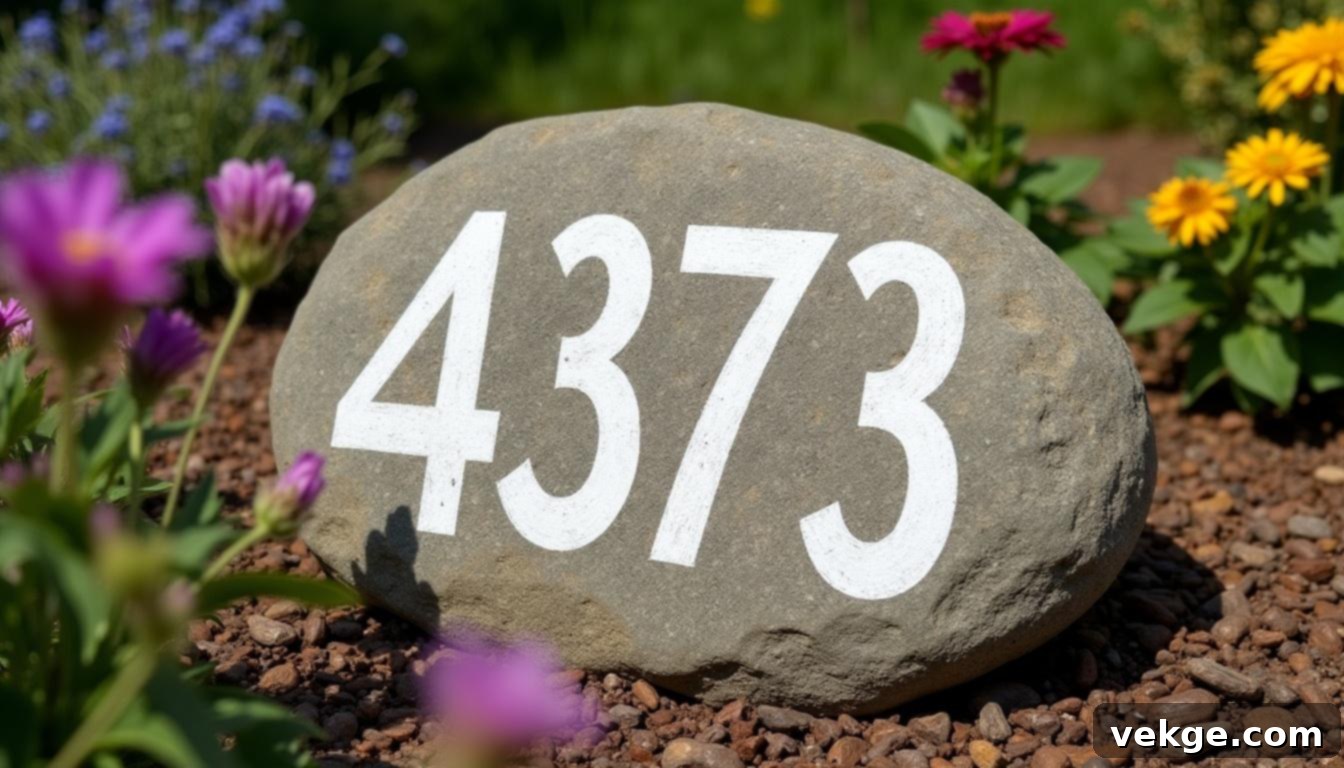
Begin by sourcing a smooth, substantial rock that will sit harmoniously within your garden bed or near your walkway. Thoroughly clean and dry the rock before applying bold, highly visible numbers using durable outdoor acrylic paint. Opt for high-contrast colors (e.g., white on dark gray, black on a light-colored rock) to ensure your numbers truly pop and are easily readable from the street. Once the paint is completely dry, apply several coats of a clear, weatherproof sealant. This critical step will protect your design from the damaging effects of rain, sun, and frost. This charming idea is ideal for garden enthusiasts or anyone seeking a unique, tool-free project. Strategically place it near your driveway entrance, mailbox, or front steps to enhance visibility and add a delightful, natural touch to your home’s curb appeal.
2. Framed Wooden Panel with Sleek Vinyl Numbers
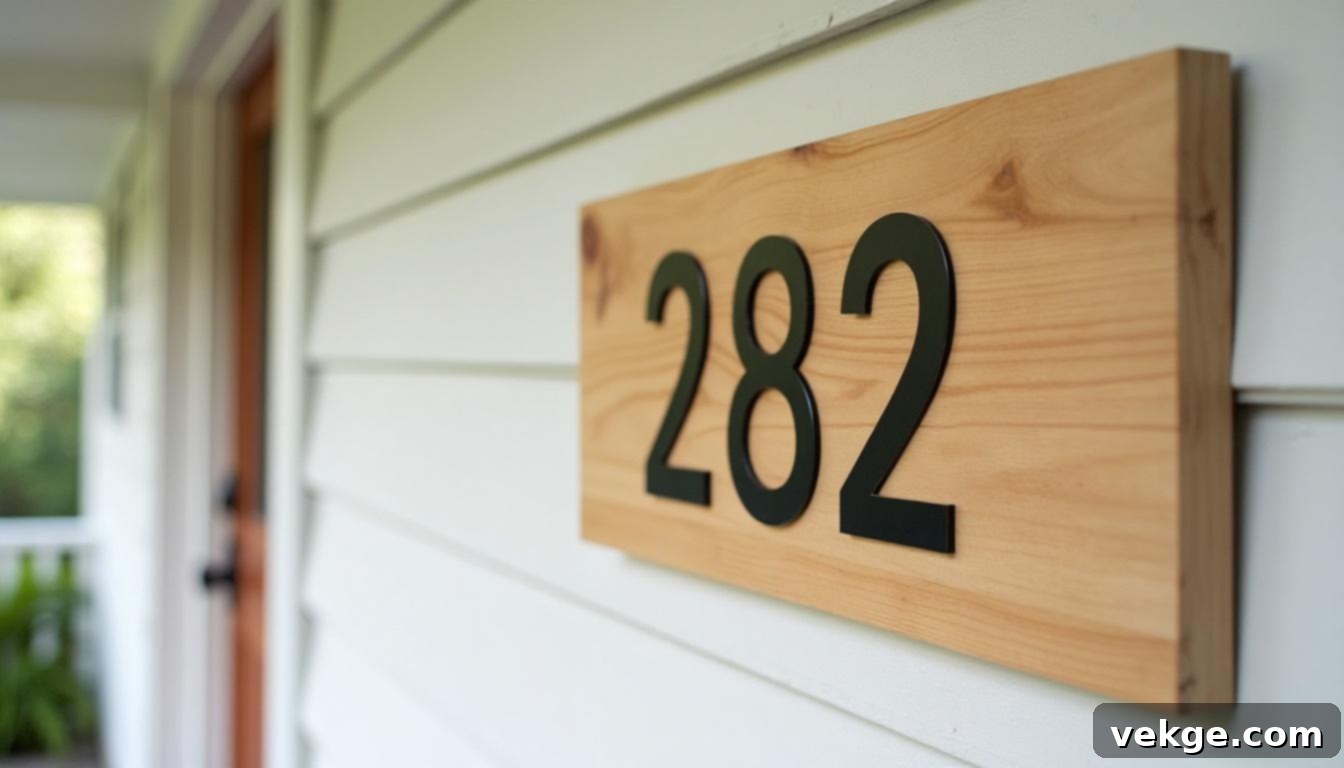
Start with a flat, sturdy wooden board as your base, then elevate its appearance by framing it with narrow trim pieces for a polished and complete look. You have the flexibility to either paint the background of the board in a color that complements your home’s exterior or embrace the natural beauty of the wood grain. The simplicity of this design truly shines with the application of high-quality vinyl numbers directly onto the center. Stick-on vinyl numbers make this project exceptionally quick and straightforward. This versatile sign can be securely mounted on your exterior wall, porch column, or fence. For enhanced durability and to extend its life outdoors, consider applying a clear, UV-resistant sealant. The result is a clean, contemporary, and easily adaptable sign that seamlessly integrates with a wide range of home styles, from traditional to ultra-modern.
3. Artistic Ceramic Tile Mosaic Address Sign
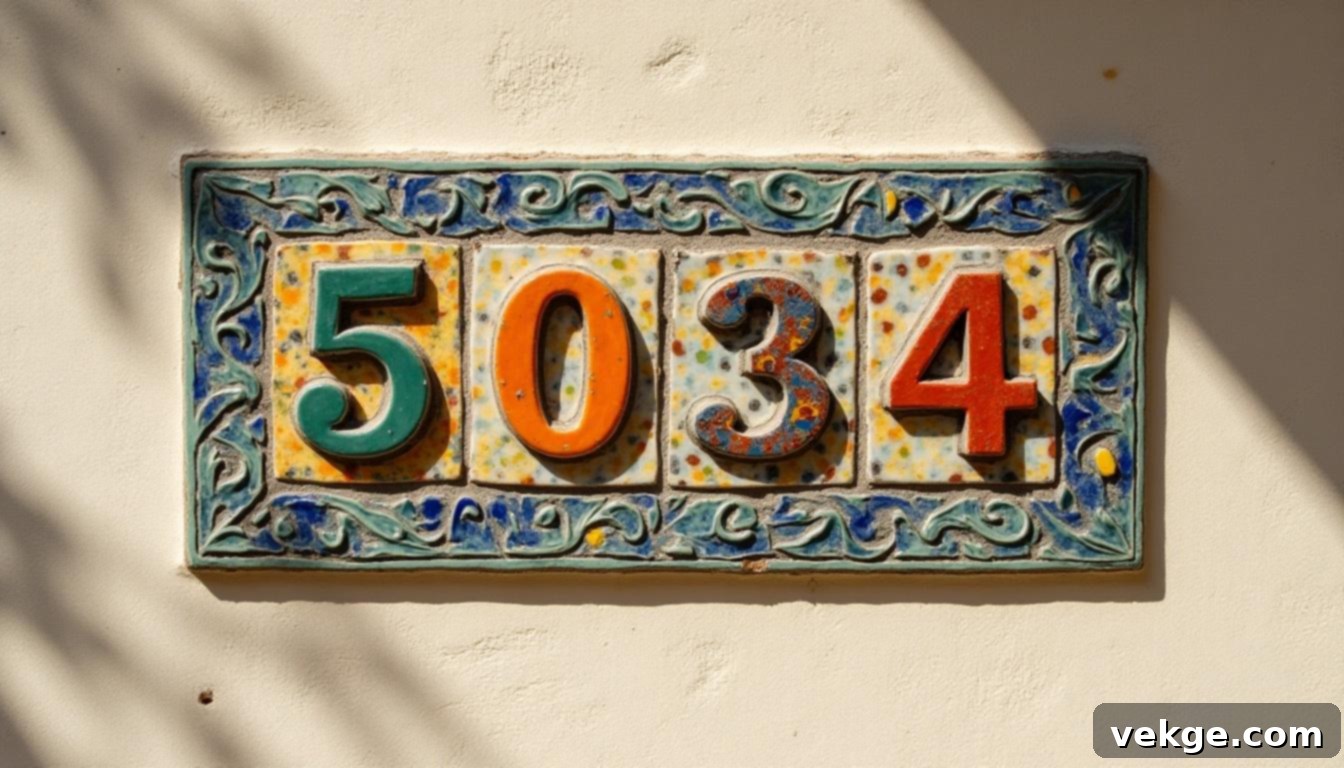
Unleash your creativity by arranging small, colorful ceramic tiles on a rigid base such as a flat wood board or cement backer board to artfully form your house number. Use a strong tile adhesive to firmly secure each tile in place. Once the adhesive has set, meticulously fill the gaps between the tiles with grout, then wipe the surface clean for a smooth finish. Allow everything to dry and cure completely, then apply a waterproof sealer to protect your mosaic from the elements. This method offers a fantastic opportunity to add rich texture and vibrant color to your sign, transforming it into a true focal point. It’s an excellent way to repurpose leftover tiles or to customize your sign with a palette of your favorite shades. Mount this unique mosaic creation on a wall, garden gate, or mailbox for a standout look that will endure through any weather condition.
4. Convenient Magnetic Sign for Metal Doors and Surfaces
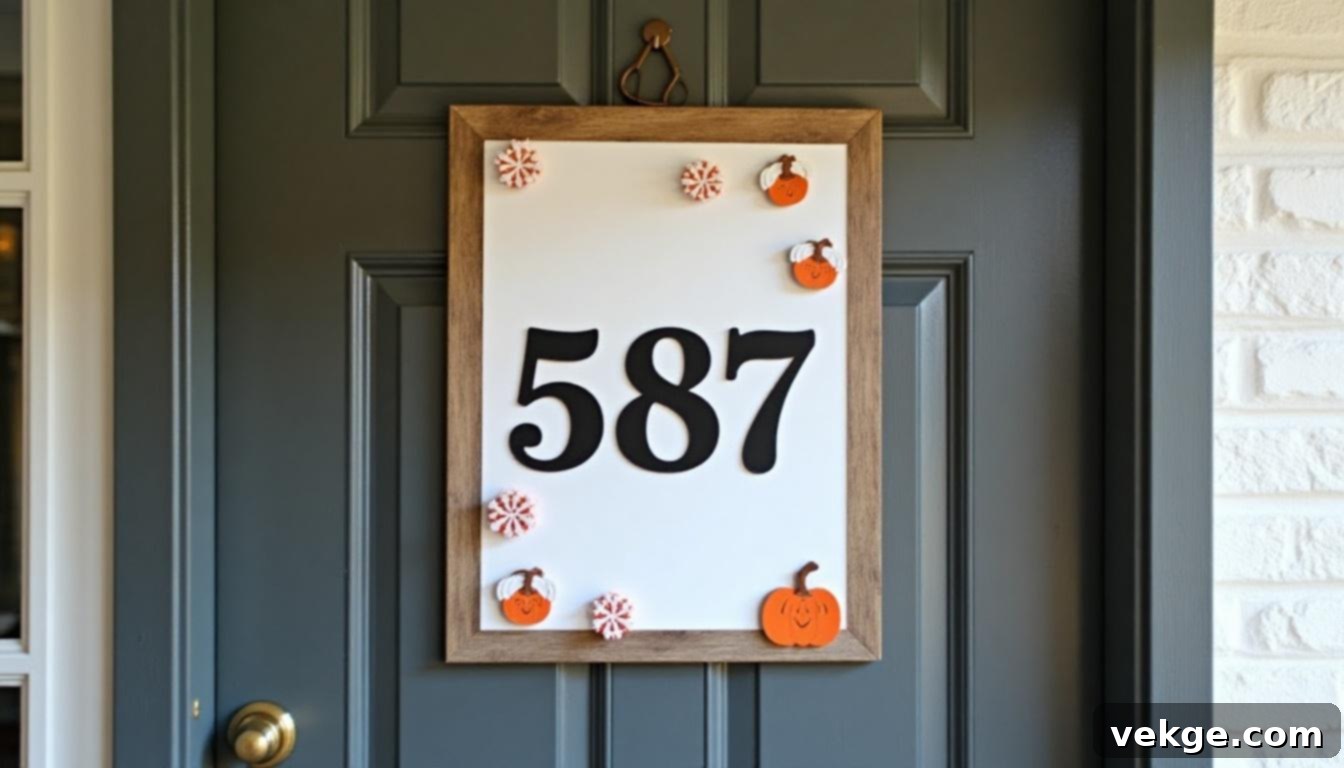
For a non-permanent and highly versatile solution, utilize a thin magnetic sheet or flexible magnetic board as your base. Decorate this base with numbers cut from vinyl, thin plastic, or even individual magnetic numbers. You can paint the magnetic sheet with exterior paint for a custom background or add seasonal designs for a rotating display. This type of sign is absolutely perfect for renters, apartment dwellers, or any home with a metal front door, as it causes no damage and leaves no residue. It offers incredible ease of movement and updates as needed, allowing for effortless seasonal changes or relocation. Ideal for metal garage doors, mailboxes, or apartment entry doors, this simple project can be completed in under an hour and provides endless creative freedom without any permanent alterations.
5. Elegant Planter with Vertically Painted Numbers
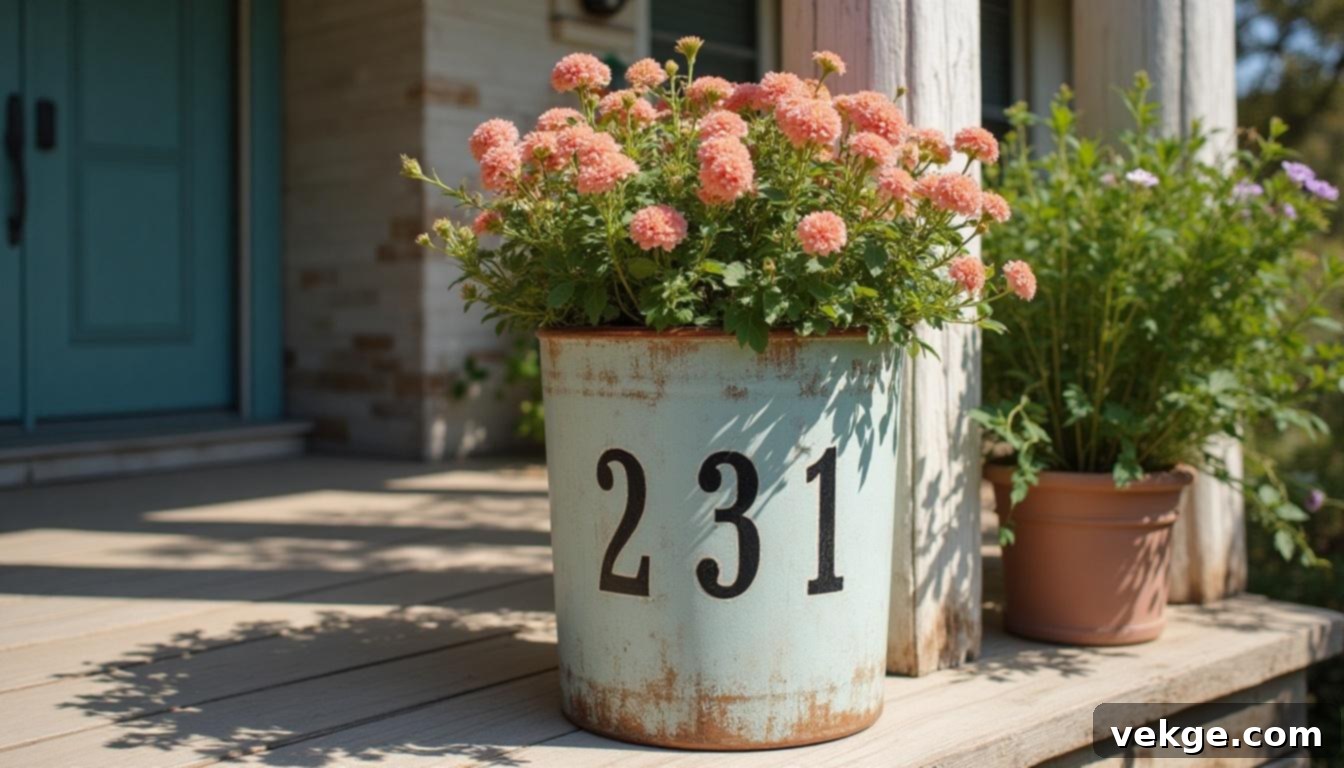
Select a tall, eye-catching planter crafted from durable metal, ceramic, or sturdy plastic. Ensure the surface is thoroughly cleaned and dried. Using outdoor-grade paint, stencil or freehand your house number vertically along a prominent side of the planter. Allow the paint to dry completely, then apply a clear spray sealant for enhanced durability and weather resistance. Once finished, fill the planter with a beautiful assortment of vibrant flowers, lush shrubs, or seasonal greenery to create a welcoming and dynamic entryway display. Position this dual-purpose planter near your porch steps or along your walkway where it will be clearly visible from the street. This option beautifully combines practical address marking with decorative flair, making it an excellent choice for smaller patios or narrow walkways.
6. Contemporary Acrylic Panel with Striking LED Strip Lighting
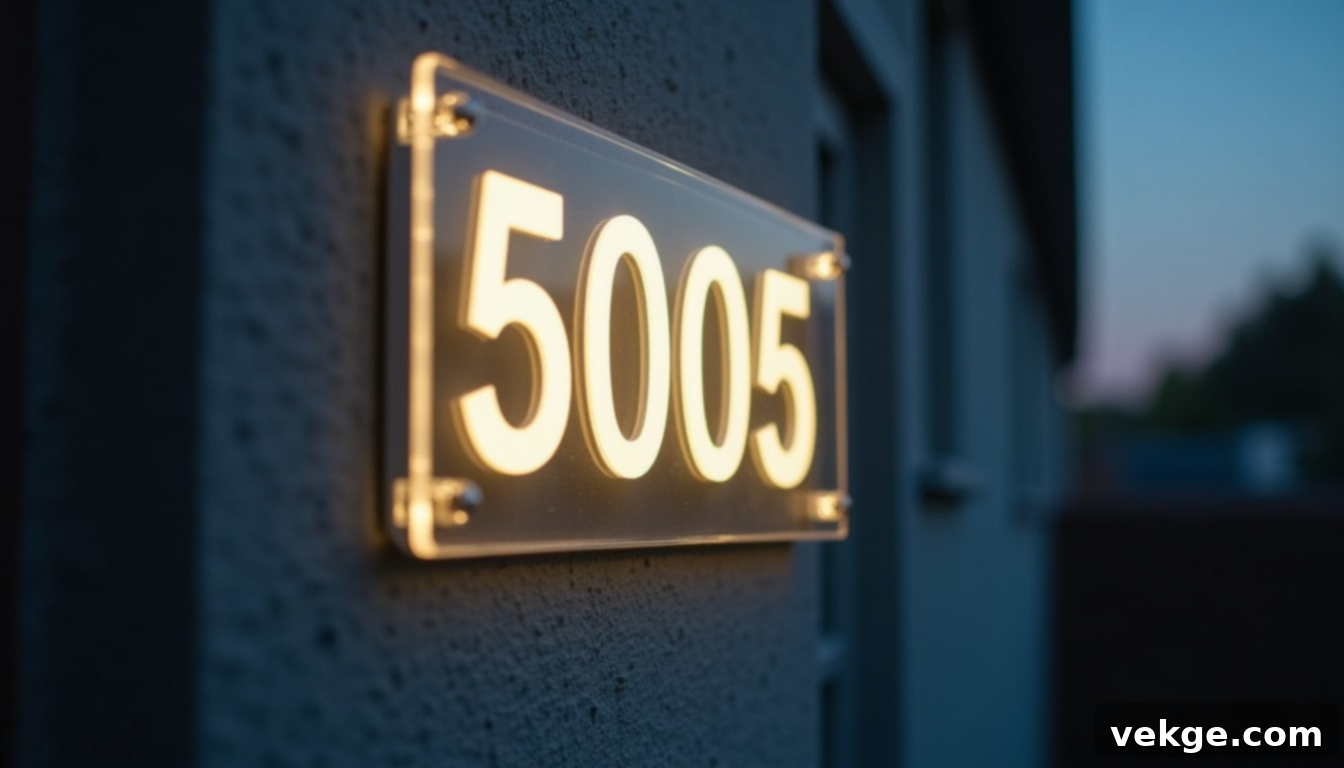
For a sleek, modern, and highly visible address display, cut a clear acrylic sheet to your desired dimensions. Securely mount your house numbers onto the acrylic using a strong outdoor-grade glue or discreet screws. The key feature of this design is the integration of light: attach a waterproof LED strip along the back or base of the acrylic panel, positioned to cast an inviting glow around or through the numbers at night. Power this illumination with a reliable solar pack for an eco-friendly, wire-free solution, or use a plug-in adapter if a power source is conveniently located. This project brilliantly merges contemporary design with practical nighttime visibility, making it especially effective for homes in low-light areas or those with long, dark driveways. Mount it securely to a wall, post, or within a minimalist wooden frame for a clean, luminous look that shines brightly after dusk.
7. Classic Vertical Plank with Stenciled Numbers
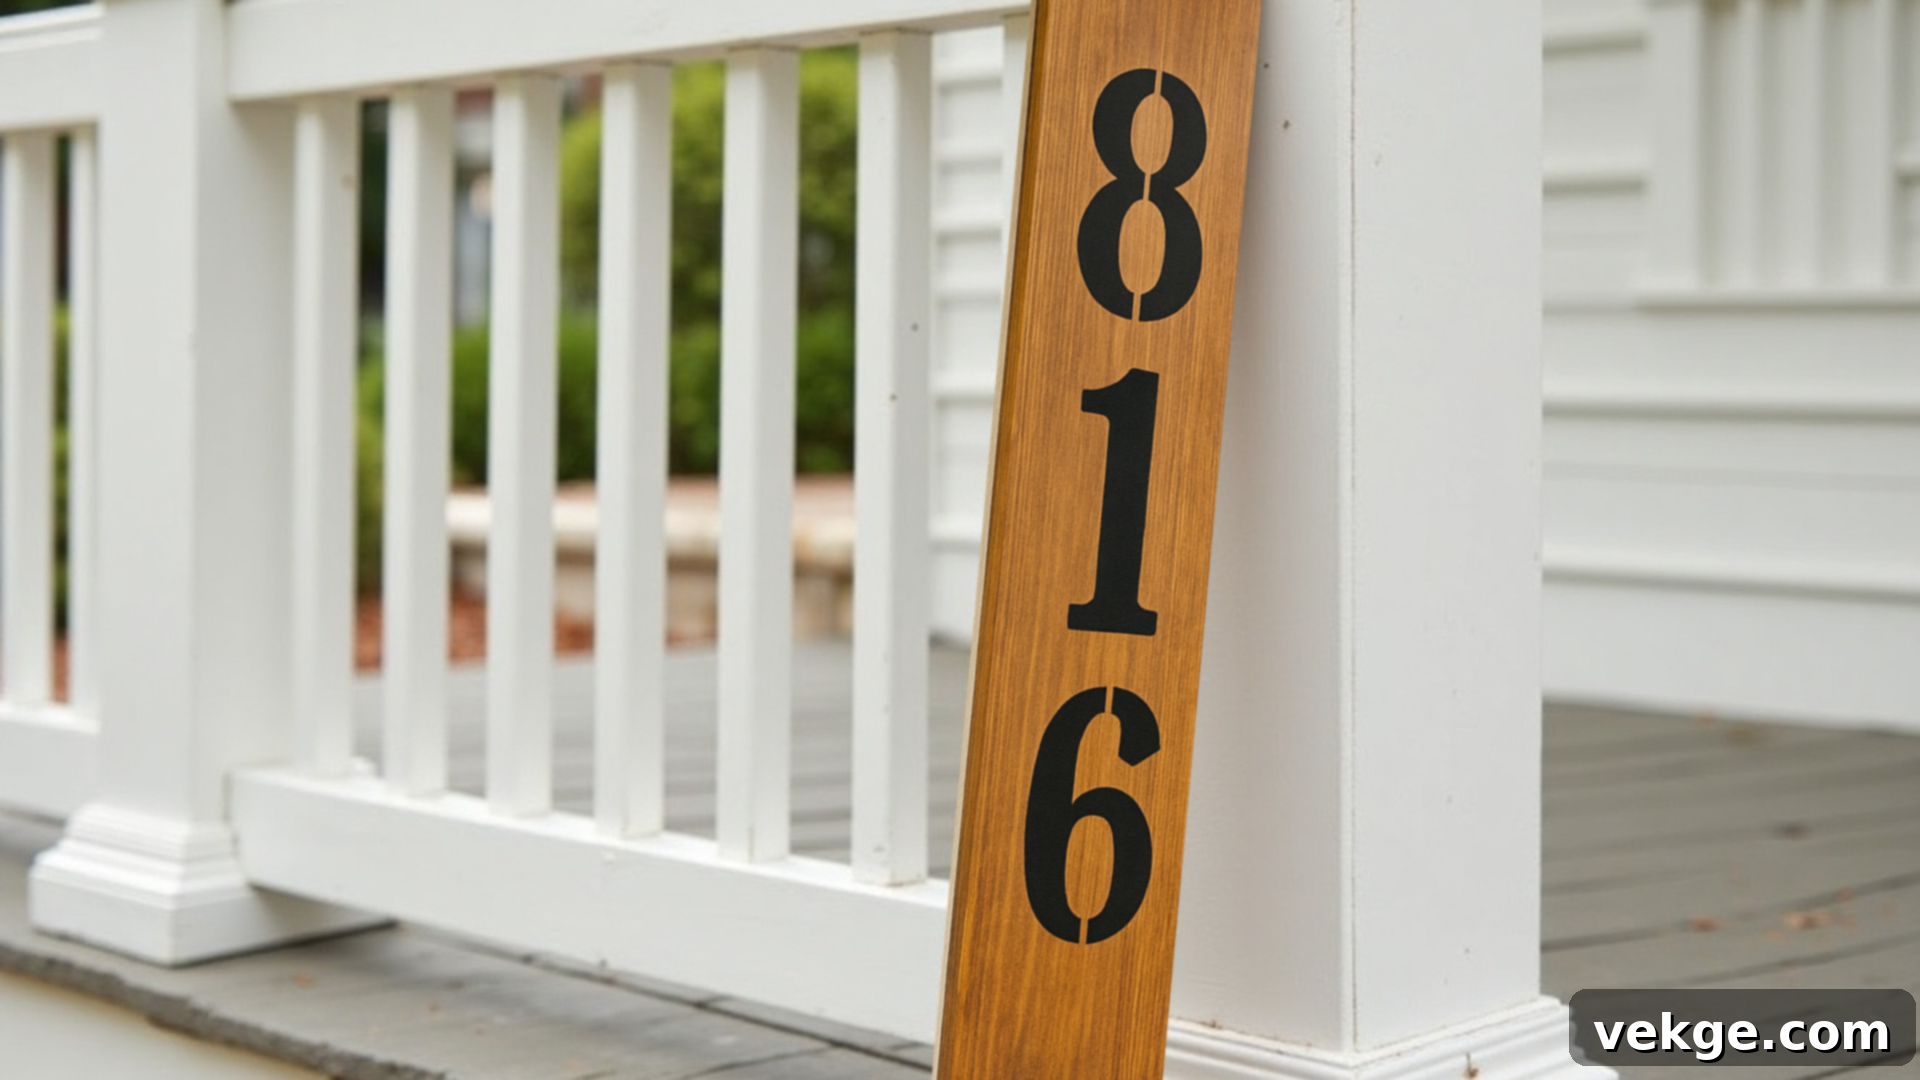
Opt for a narrow, sturdy wood board and prepare its surface by smoothing it thoroughly with sandpaper. You can paint or stain the plank to perfectly complement your home’s exterior colors or natural wood tones. Once the base is prepared, use a high-quality stencil to precisely apply your house numbers vertically down the length of the board. This elegant vertical design is perfectly suited for mounting on porch posts, slender columns, or walls where horizontal space is at a premium. Ensure you choose high-contrast colors for the numbers to guarantee easy readability from the street, even from a distance. To protect your work and ensure its longevity, apply a durable weatherproof sealant to keep the finish pristine and resistant to the elements. It’s an effective and stylish way to add height and clear visibility without requiring extensive space or complex tools.
8. Rustic Hanging Wood Slice with Charming Rope Accent
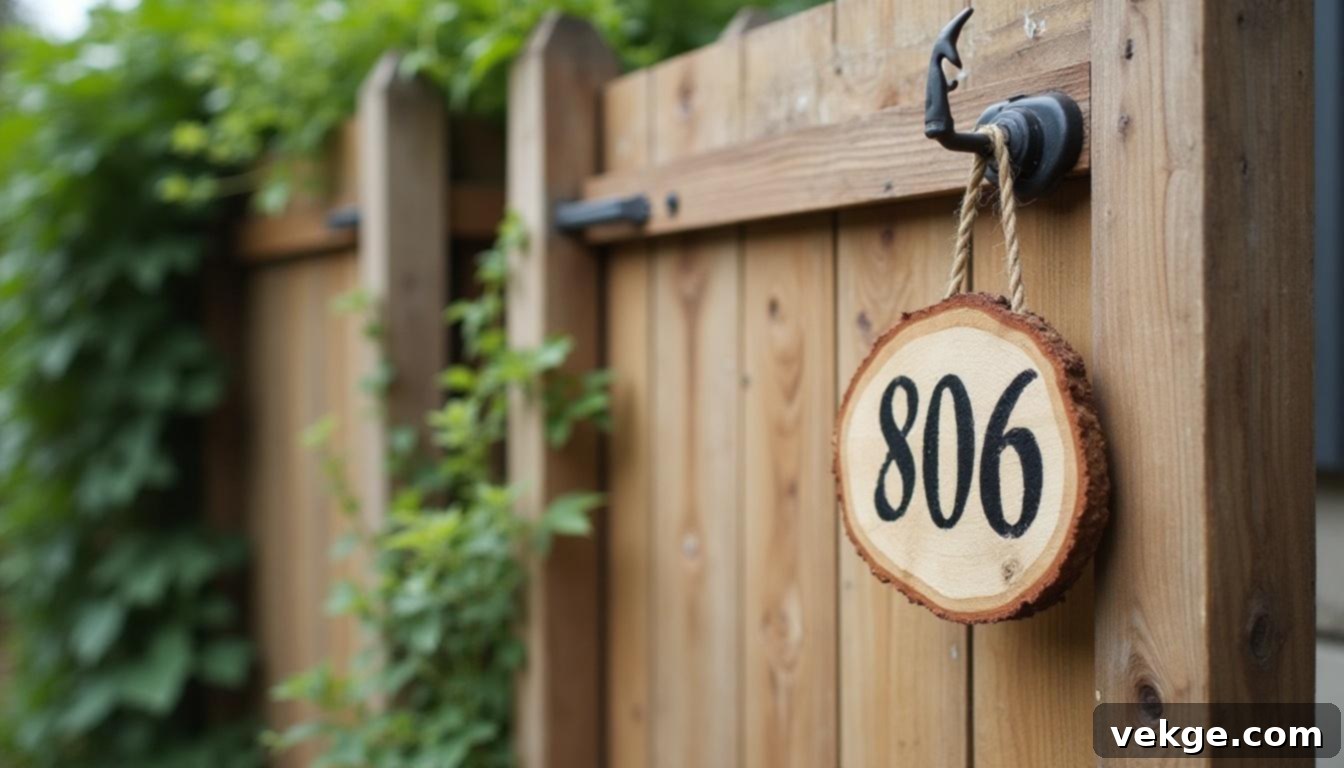
Discover or purchase a thick, naturally cut wood slice and sand its surface to achieve a beautifully smooth finish, highlighting its natural grain. Using weather-resistant paint, carefully paint or stencil your house numbers onto the prepared wood slice. To create a rustic hanger, drill two evenly spaced holes near the top edge of the slice and thread a sturdy piece of rope or thick twine through them, knotting securely. This charming sign is ideal for hanging on porches, garden fences, or gates, instantly adding a warm, organic, and inviting touch to your outdoor space. Crucially, seal the wood thoroughly with an outdoor-grade sealant to prevent moisture damage, cracking from the sun, or weathering. It’s a simple, budget-friendly option that delivers striking rustic charm and undeniable handmade appeal.
9. Ingenious Solar Light-Integrated Address Sign
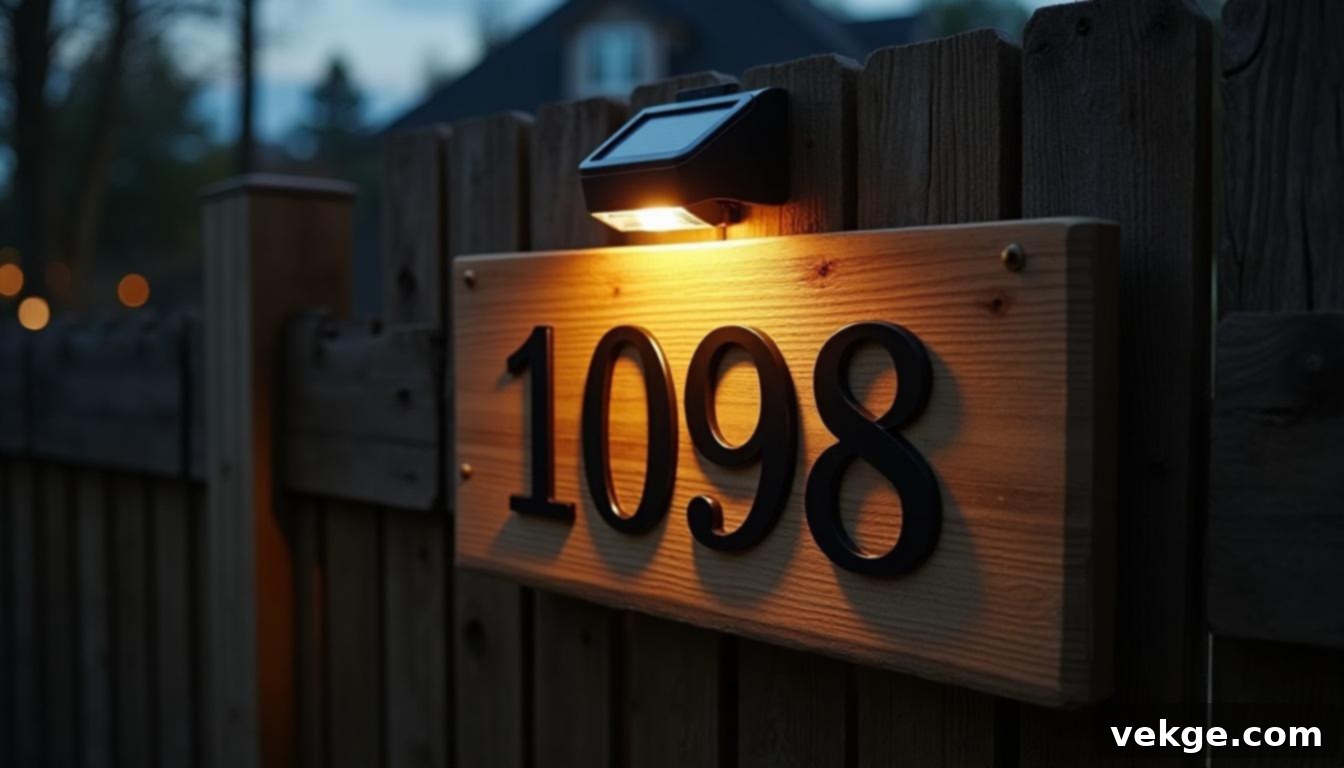
Combine functionality with sustainability by creating a solar light-integrated sign. Select a robust backing material, such as treated wood or weather-resistant metal, and clearly attach your house numbers across its surface. The innovative element here is mounting a small, self-contained solar light directly above or beside the numbers, carefully angled to shine downward and illuminate the address. Look for solar light models that feature built-in sensors, ensuring the light automatically activates at dusk and turns off at dawn, maximizing energy efficiency. This smart solution is particularly beneficial for homes with long driveways, limited existing porch lighting, or off-grid locations. It dramatically improves nighttime visibility for everyone – guests, delivery drivers, and especially emergency services. Best of all, there’s no complex wiring involved, just straightforward setup for a reliable and eco-friendly nighttime glow.
10. Repurposed Windowpane with Charming Painted Numbers
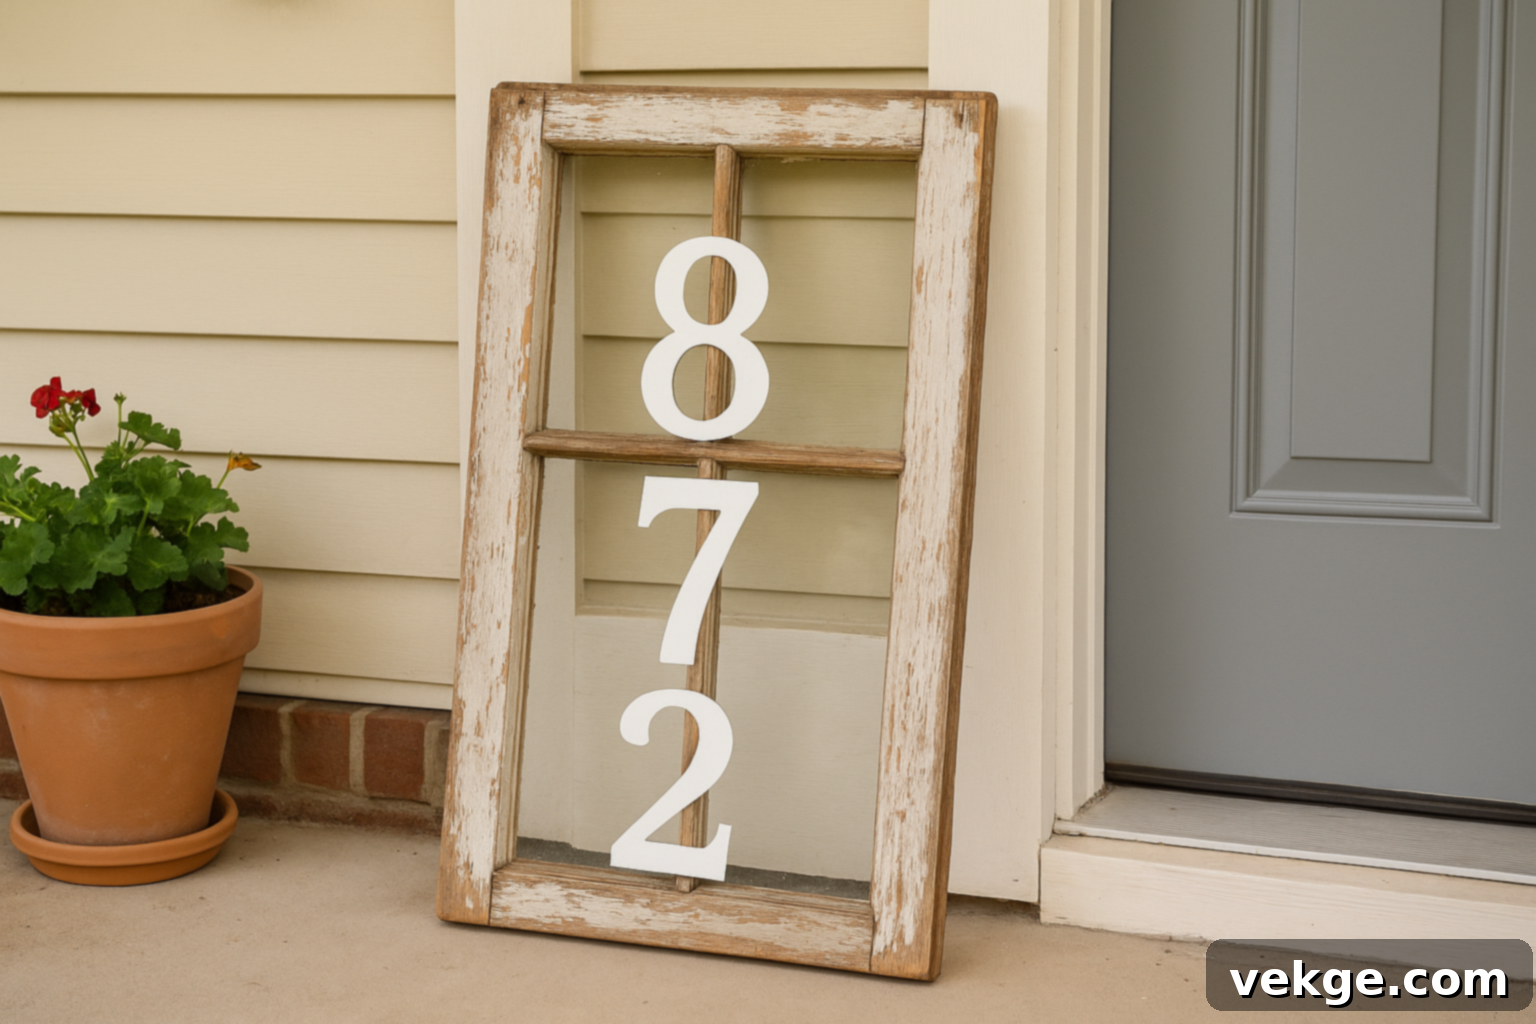
Give an old wooden window frame a new lease on life by transforming it into a unique address sign. Start by thoroughly cleaning the frame. Depending on your desired aesthetic, you can either remove the glass panes or frost them for a softer look. Then, meticulously paint your house number onto one or more of the glass panes using durable exterior-grade paint. You have the creative freedom to either preserve the frame’s charming weathered look for a rustic vibe or repaint it entirely to perfectly match your home’s exterior palette. This resourceful project beautifully utilizes salvaged materials and is particularly well-suited for farmhouse, cottage, or eclectic rustic themes. Hang it securely on a prominent porch wall, lean it artfully beside your front door, or even display it on a garden shed. With proper sealant applied to the frame, it can confidently withstand outdoor exposure, imbuing your entryway with distinctive character and historical charm.
Seasonal and Themed House Number Ideas to Personalize Your Space
Beyond permanent installations, updating your house number display with seasonal or themed elements is a delightful way to inject continuous personality and charm into your home’s facade. These easy-to-implement swaps and compact setups ensure your address remains festive, welcoming, and highly functional, regardless of the season or the size of your living space.
Holiday Swaps: Versatile Magnetic or Removable Plates
Embrace the festive spirit with ease by utilizing magnetic numbers or plates backed with hook-and-loop fasteners, allowing you to effortlessly swap out your house number design for various holidays and seasons. Imagine adorning your display with a whimsical snowflake border for winter, cheerful pumpkins for Halloween, or vibrant, lush florals to welcome summer. For these decorative accents, you can use painted wood cutouts, lightweight metal shapes, or durable plastic embellishments. Crucially, always ensure your core house numbers remain bold, clear, and easily readable amidst the festive additions. These clever, interchangeable swaps make it incredibly simple to keep your home festive without the commitment of completely redoing your entire address setup. Just adhere the themed plate or layer it over your existing base sign, then remove or change it when the season transitions, offering endless creative possibilities.
Apartment or Small-Space Displays: Maximizing Charm in Compact Areas
Even in more compact living situations, such as apartments or condos, you can still create stylish and highly visible house number displays that reflect your personal taste. Consider using durable number decals or high-quality vinyl stickers directly on your mailbox or apartment front door for a sleek, integrated look. For a reusable and adaptable option, explore mini plaques with robust adhesive backing or small hooks. These can be easily painted, stenciled, or decorated to perfectly match your aesthetic and are designed to occupy minimal space. When selecting your design, prioritize high-contrast color schemes to ensure the numbers remain prominently visible from a hallway or shared common area, which is vital for visitors and deliveries. These thoughtfully designed, compact options not only keep your display neat and organized but also offer excellent flexibility for updating your look and are perfectly renter-friendly.
Protecting and Illuminating Your House Number Sign for Lasting Appeal
To ensure your custom house number sign remains both visually appealing and easily readable for years to come, proactive protection from the elements and effective nighttime illumination are essential. Here’s a detailed guide on how to properly seal and light your sign to maximize its durability and visibility.
Comprehensive Waterproofing Tips for All Materials
Safeguarding your sign from the relentless wear of rain, snow, harsh sunlight, and humidity is paramount. For wooden signs, use a high-quality, clear outdoor sealant or marine-grade varnish specifically formulated for wood. Apply it in thin, even coats, allowing each layer to dry completely before applying the next, typically two to three coats. For painted or stained signs, this sealing process is crucial as it creates a protective barrier, preventing colors from fading, chipping, or peeling. If your sign incorporates ceramic tiles or mosaics, ensure all grout lines are properly sealed with a waterproof grout sealer. For metal signs, apply a clear coat lacquer or an anti-rust sealant. For acrylic or vinyl, a UV-resistant clear spray can help prevent yellowing or peeling. As a best practice, reapply your chosen sealant annually or bi-annually, depending on your local climate and product recommendations, to maintain optimal protection. A properly sealed sign, whether mounted on a fence, porch, or post, will retain its clean, sharp appearance through every season, extending its life and aesthetic value.
Effective Lighting Options for Enhanced Nighttime Visibility
Ensuring your house numbers are visible after dark is not just a convenience; it’s a safety necessity. Several lighting options can dramatically improve your sign’s nighttime visibility:
- Solar Lights: These are an incredibly popular, wire-free, and energy-efficient solution. Solar lights charge during the day and automatically illuminate at dusk. Choose models with a broad light spread and position them directly above or slightly to the side of your sign, angled downwards, to evenly highlight the numbers.
- Plug-in LED Strips: If a power source is readily accessible, waterproof LED strips offer consistent, bright illumination. They can be discreetly mounted behind the sign for a backlit “halo” effect or along its edges to create a contemporary glow. Ensure all connections are weather-sealed.
- Hardwired Fixtures: For a more permanent and integrated solution, consider installing a low-voltage landscape light or a dedicated address light fixture. These often require professional installation but provide reliable, powerful illumination.
- Motion-Sensor Lights: These offer both energy savings and an added layer of security. Motion-sensor lights turn on only when someone approaches, making your numbers highly visible precisely when needed, then turning off to conserve energy.
Regardless of the type of lighting you choose, always select outdoor-rated, waterproof lights to ensure durability. Mount them securely, ensuring they are positioned to cast an even, unobstructed light over the numbers, making your address unmistakable in the dark.
Discover Top DIY House Number Sign Kits from Popular Retailers
For those who love the idea of a custom address sign but prefer a more guided approach, various DIY kits offer an excellent middle ground. These kits provide pre-selected materials and instructions, making the process smoother and often faster than sourcing everything from scratch. Compare kits based on their contents, ease of assembly, price point, and overall durability to find the perfect fit for your needs. Each platform brings something unique to the table, from charming handmade aesthetics to practical, ready-to-install options.
- Amazon: The Rustic Address Sign Kit by ForestAcre Primitives often includes beautifully pre-stained wood, durable metal numbers, and all necessary mounting hardware. It’s an ideal choice for homeowners aiming for a distinct farmhouse, rustic, or vintage aesthetic with minimal fuss.
- Etsy: Etsy’s marketplace, exemplified by options like the Welcome Home House Number DIY Kit, typically offers a painted wooden board and easy-to-apply stick-on numbers. These kits are celebrated for their charming, handmade appeal and are perfect for a fast, straightforward setup, often with unique personalization options from small artisans.
- Lowe’s: Retailers like Lowe’s provide accessible and often budget-friendly solutions, such as the PRO-DF Economical Address Plaque Kit. This type of kit usually features a basic, sturdy plastic plaque with customizable number slots. It’s an excellent choice for modern homes and those working with tighter budgets, offering a clean look with simple installation.
What to Look for in a Quality DIY House Number Kit
When evaluating house number kits, prioritize components that promise longevity and a good return on your investment. A high-quality kit should reliably include weather-resistant numbers (e.g., made from durable metal, acrylic, or treated vinyl), a sturdy and appropriately sized backing board (look for pressure-treated wood, rust-proof metal, or UV-stabilized plastic), and all the necessary mounting hardware for secure installation. Carefully check for materials like rust-proof aluminum, powder-coated steel, or cedar and pine treated for outdoor use.
Furthermore, ensure the kit provides clear, easy-to-follow instructions and does not require specialized tools that you don’t already own or are unwilling to acquire. While adhesive-backed numbers offer convenient application, be aware that screw-mounted numbers generally provide superior long-term durability and resistance to peeling. Ultimately, select a kit that aligns with your DIY skill level, budget, and, most importantly, the architectural style and existing exterior of your home. Reputable options like Amazon’s Modern House Numbers Set or Lowe’s Whitehall Easy Street Address Sign are often reliable choices for robust outdoor use, offering a blend of quality and ease for your DIY address project.
Conclusion: Your Unique Home, Your Custom Address
As we’ve explored, creating a stunning and highly functional house number sign doesn’t demand a hefty budget, an arsenal of fancy tools, or years of crafting experience. I’ve personally experienced the satisfaction of transforming a simple plan into a durable, eye-catching home upgrade with just a bit of dedicated time, and I assure you, you possess all the capability to do the same.
Now equipped with a detailed roadmap—from the initial planning and material selection to the hands-on building and crucial protection steps—this is the perfect moment to roll up your sleeves and bring your vision to life. Whether you decide to go bold with a vibrant mosaic, embrace the rustic charm of cedar, or opt for a minimalist, illuminated acrylic panel, the most important thing is that your finished sign truly reflects your home’s unique character and your personal style.
If this project has ignited your passion for hands-on improvements that are both impactful and budget-friendly, I encourage you to explore my other DIY guides. I’m always sharing practical, easy-to-implement fixes and creative upgrades that you can start today to keep your living space looking sharp, feeling personal, and making a lasting impression, all without straining your wallet.
