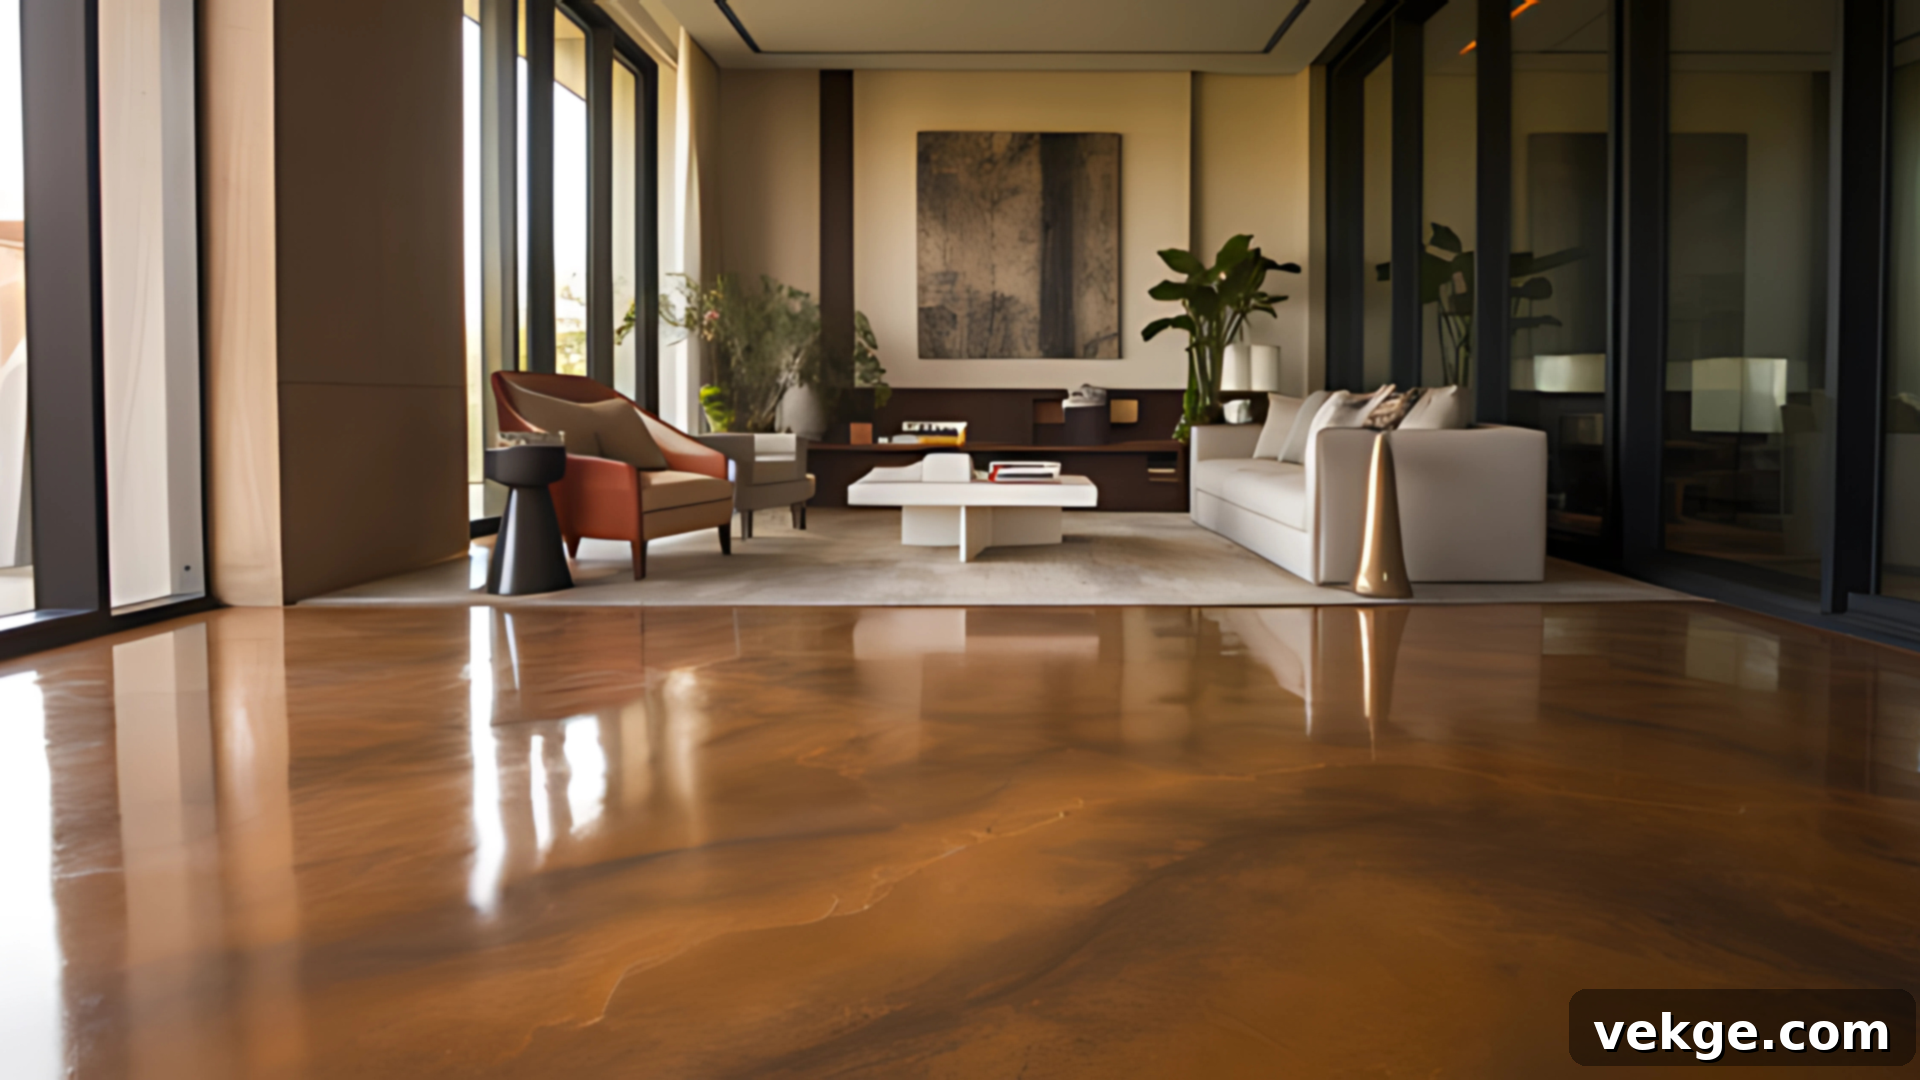
Transform Your Home: The Ultimate Guide to Residential Stained Concrete Floors
Are you tired of those dull, uninspiring gray concrete floors that leave your space feeling cold, industrial, or simply unfinished? Many homeowners share this sentiment, seeking a cost-effective yet impactful way to elevate their living environments.
From basements and garages to patios and walkways, the desire to enhance these utilitarian spaces without a hefty investment is common. This is precisely where the remarkable potential of residential stained concrete floors comes into play, offering a transformative solution that blends style with durability.
In this comprehensive guide, we will delve deep into the world of concrete staining. You’ll gain a clear understanding of what staining entails, uncover the compelling reasons why it’s such an effective flooring choice, and receive a detailed, step-by-step walkthrough of the application process. Furthermore, we’ll equip you with easy-to-follow care tips, inspire you with diverse design ideas, provide transparent cost insights, and highlight common pitfalls to avoid for a successful project.
If you’re ready to give your concrete surfaces a vibrant, fresh, and uniquely personal look with an option that is both simple to achieve and inherently stylish, then let’s embark on this journey together. You’ll soon discover that achieving stunning stained concrete floors is often much easier and more rewarding than you might initially imagine.
Unlock the Benefits of Stained Concrete Floors for Your Home
Staining residential concrete floors involves applying a specialized solution directly to the concrete surface. Depending on the type of stain, this solution either chemically reacts with the concrete’s minerals or penetrates its pores, creating rich, translucent, and permanent colors. Unlike paint, which merely coats the surface, concrete stain becomes an integral part of the concrete, meaning it won’t peel, chip, or flake over time. This process effectively transforms plain, utilitarian concrete into a stylish, durable, and unique floor that enhances any space.
Here are some of the compelling advantages that make stained concrete a top choice for residential applications:
- Natural and Unique Aesthetic: Stained concrete boasts a sophisticated, mottled, or variegated appearance that can beautifully mimic high-end materials like natural stone, marble, or even aged leather. Because of the unique way stains interact with each concrete slab, no two floors are exactly alike, offering a truly one-of-a-kind look.
- Exceptional Durability and Longevity: The color in stained concrete floors is not a superficial layer but rather a permanent infusion. This results in a finish that resists fading, peeling, and chipping, standing up exceptionally well to daily wear and tear. When properly sealed and maintained, stained concrete floors can last for decades, often outliving other flooring options.
- Effortless Low Maintenance: One of the most appealing benefits of stained concrete is its ease of care. These floors are non-porous when sealed, making them resistant to dirt, dust, and allergens. Simple sweeping or damp mopping with a mild, pH-neutral cleaner is typically all that’s needed to keep them looking pristine, significantly reducing cleaning time and effort.
- Cost-Effectiveness: Compared to the material and installation costs of alternative flooring options like tile, hardwood, or natural stone, stained concrete is remarkably budget-friendly. By utilizing your existing concrete slab, you save on demolition and new material expenses, making it an economically smart choice for home renovations.
- Eco-Friendly Attributes: Staining concrete is an environmentally conscious decision. It repurposes an existing structure (your concrete slab), thereby reducing waste. Many modern stains and sealers are low in Volatile Organic Compounds (VOCs), contributing to better indoor air quality and a reduced environmental footprint.
- Ideal for High-Traffic Areas: Due to their inherent strength and resistance to abrasion, stained concrete floors are perfectly suited for areas with heavy foot traffic, both indoors and outdoors. They are a robust solution for living rooms, kitchens, hallways, entryways, garages, and outdoor patios, maintaining their beauty even under constant use.
- Versatile Design Potential: Beyond their natural elegance, stained concrete floors offer immense creative freedom. With a wide spectrum of colors and various application techniques, you can achieve virtually any design vision, from contemporary minimalist to rustic charm.
The ability to customize both color and finish ensures that stained concrete can seamlessly integrate with or even define your home’s aesthetic. Let’s explore the different types of concrete stains available to help you achieve your desired look.
Exploring the Types of Concrete Stains
The choice of concrete stain plays a pivotal role in the final appearance of your floor. Each type offers distinct characteristics in terms of color palette, application, and the resulting aesthetic. Understanding these differences will help you select the best option for your project and desired outcome.
- Acid-Based Stains: These traditional stains are renowned for their organic, mottled, and translucent finish. Acid stains contain metallic salts that chemically react with the free lime and minerals present in the concrete. This reaction creates permanent, non-fading colors that are often described as earthy and natural, ranging from rich browns, tans, and deep rusts to subtle greens and blues. The final color is highly dependent on the concrete’s composition, age, and porosity, making each floor truly unique and impossible to perfectly replicate. They are ideal for achieving a natural stone or aged patina look.
- Water-Based Stains: Offering a broader spectrum of vibrant colors, water-based stains are a popular choice when more consistent and predictable results are desired. Unlike acid stains, they do not rely on a chemical reaction but instead penetrate the concrete’s pores to deposit pigment. This allows for a much wider range of hues, including bright blues, grays, and even pastels. They provide a more uniform color application and are an excellent option for areas where acid stains might not react well or for achieving specific, bolder color schemes.
-
Acetone Dyes & Metallic Stains: While integral colors are mixed into new concrete during the pouring stage, acetone dyes and metallic stains are topical applications for existing concrete, offering distinct decorative effects.
- Acetone Dyes: These fast-drying, solvent-based dyes produce incredibly vibrant, rich, and translucent colors. They penetrate the concrete surface to create intense hues, making them ideal for intricate decorative work, custom designs, or achieving very specific, bold shades that acid stains cannot provide. They dry quickly, allowing for rapid application of multiple colors or patterns.
- Metallic Stains: Formulated with metallic particles, these stains create a shimmering, three-dimensional effect that adds a touch of modern sophistication. They come in various metallic shades and can be used to achieve unique, high-end looks, often used in contemporary settings or for feature areas.
Each stain type has its own distinct character and best-use scenarios. From the soft, natural tones achieved through chemical reactions to the vibrant, custom finishes possible with dyes and water-based options, there’s a concrete stain perfectly suited to bring your unique design goals to life.
Step-by-Step Guide to Achieving Beautiful Residential Stained Concrete Floors
Transforming your plain concrete floor into a stunning, stained surface is a rewarding process that is manageable for most DIY enthusiasts when approached methodically. This detailed guide will walk you through each essential step, from meticulous preparation to the final sealing, ensuring a durable, beautiful, and long-lasting finish.
Essential Tools and Materials Required
Before you begin, gathering all necessary tools and materials is crucial. Having everything at hand will prevent delays and ensure a smooth, efficient workflow for each stage of the project. Here’s a comprehensive list of what you’ll need:
- Concrete Stain: Choose your preferred acid-based or water-based concrete stain, ensuring sufficient quantity for your area and desired number of coats.
- Cleaning Equipment: A pressure washer or a high-pressure garden hose for deep cleaning. For interior spaces, a commercial floor scrubber may be required.
- Surface Preparation: Degreaser specifically formulated for concrete, and a neutralizer (essential for acid stains).
- Application Tools: An acid-resistant or airless paint sprayer for even and controlled stain application. For acid stains, ensure your sprayer components are acid-resistant.
- Protection Materials: Painter’s tape (high-quality, low-tack), water-resistant construction paper or plastic sheeting to protect adjacent walls, trim, landscaping, and furniture.
- Crack Repair: Concrete crack sealant to address any imperfections in the slab.
- Safety Gear: Always wear appropriate personal protective equipment, including chemical-resistant gloves, safety goggles, and a respirator (especially crucial for acid stains and indoor applications).
- Scrubbing Tools: An acid brush or a stiff nylon scrub brush for thorough cleaning and neutralizing.
- Rinsing and Wiping: Clean white cloths or soft rags for testing and cleanup.
- Concrete Sealer: A high-quality concrete sealer suitable for your chosen stain type and desired finish (e.g., matte, satin, high-gloss, interior, exterior).
Organize your tools and materials within easy reach in your work area, allowing you to transition seamlessly from one step to the next.
Step 1: Meticulously Clean and Prepare the Concrete Surface
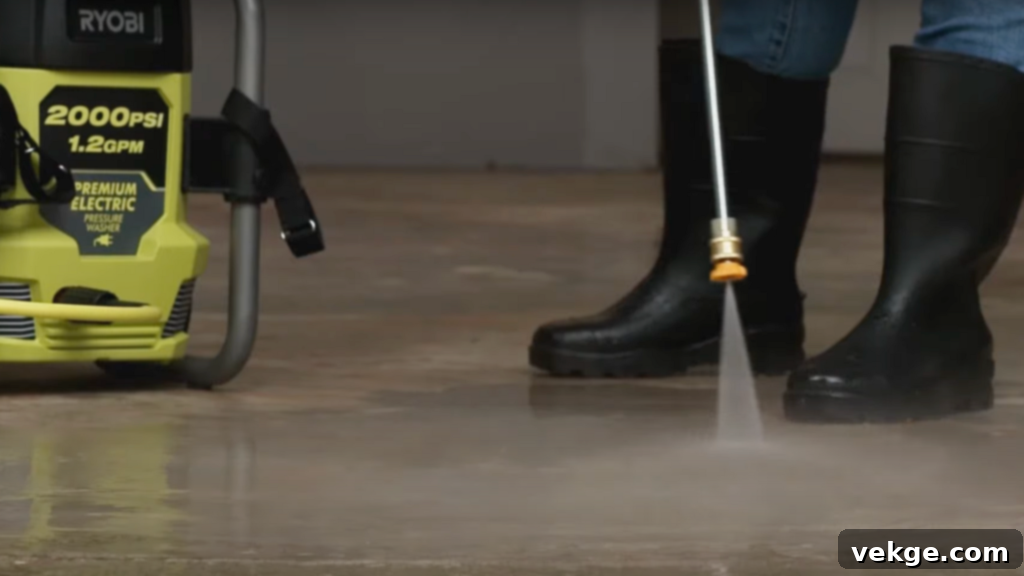
Surface preparation is the most critical step for a successful stained concrete floor. Begin by thoroughly sweeping and mopping the entire area to remove all loose dirt, dust, and debris. For deeply embedded grime, oil stains, or existing sealers/paint, use a pressure washer (for outdoor areas) or a stiff-bristled scrub brush with a powerful concrete degreaser (for indoor areas). Ensure all contaminants are completely removed, as they can prevent the stain from penetrating evenly and reacting properly.
After cleaning, inspect the concrete surface closely for any cracks, divots, or imperfections. Fill these with a high-quality concrete crack sealant or repair compound, ensuring they are flush with the existing surface. Allow the repairs to dry and cure completely according to the manufacturer’s instructions.
Finally, rinse the surface thoroughly to remove any cleaning residues. A clean, dry, and uniformly porous surface is absolutely essential for achieving an even, long-lasting, and beautiful stained finish.
Step 2: Thoroughly Mask Off the Surrounding Areas

Protecting surrounding surfaces from stain overspray or drips is crucial, as concrete stain is permanent and extremely difficult, if not impossible, to remove from unintended areas. Use high-quality painter’s tape along the baseboards, walls, and any adjacent flooring. Secure water-resistant construction paper, plastic sheeting, or drop cloths over entire walls, trim, cabinets, landscaping, and any furniture you cannot move from the area.
Take your time to ensure all corners and edges are precisely taped, pressing the tape down firmly to create a tight seal and prevent any leaks or smudges. A little extra effort in this step will save you significant cleanup time and potential damage later on.
Step 3: Carefully Apply the Concrete Stain
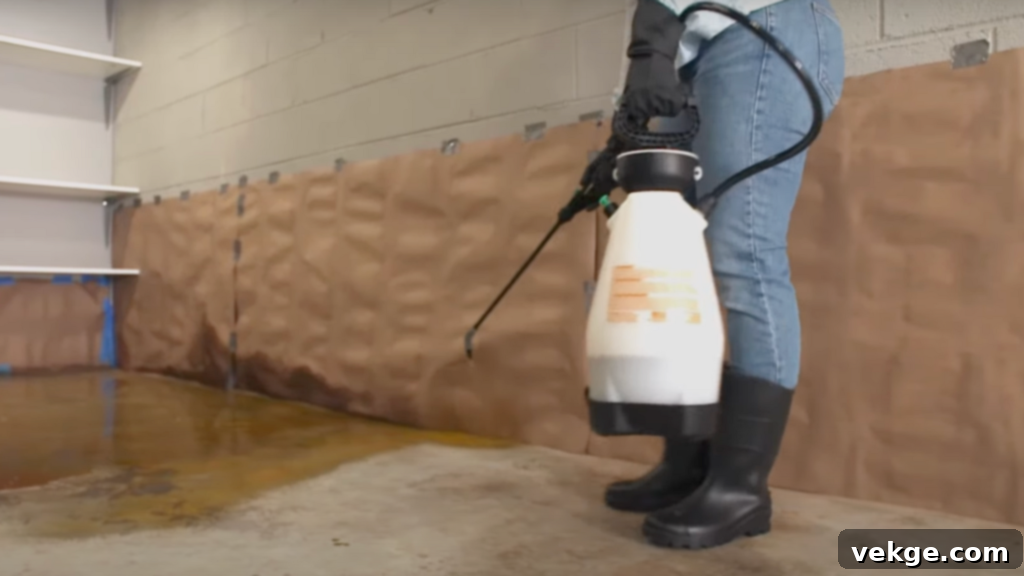
Before beginning, put on all your safety gear: gloves, goggles, and a respirator. If working indoors, ensure adequate ventilation by opening windows or using fans. Carefully pour the chosen stain into your acid-resistant sprayer. It’s often beneficial to perform a small test patch in an inconspicuous area first to verify the color and reaction.
Begin applying the stain in one corner of the room, working your way towards the exit to avoid stepping on freshly stained areas. Apply the stain in smooth, even, sweeping motions, ensuring uniform coverage without creating puddles. Overlap each pass slightly to prevent streaks. For a more mottled look with acid stains, you might vary the application pressure or use a hand pump sprayer for more control. Allow the first coat to dry completely, typically for several hours. If you desire a deeper or richer color, apply a second coat, following the same technique after the first is fully dry.
Step 4: Allow the Stain to Fully React and Develop Color
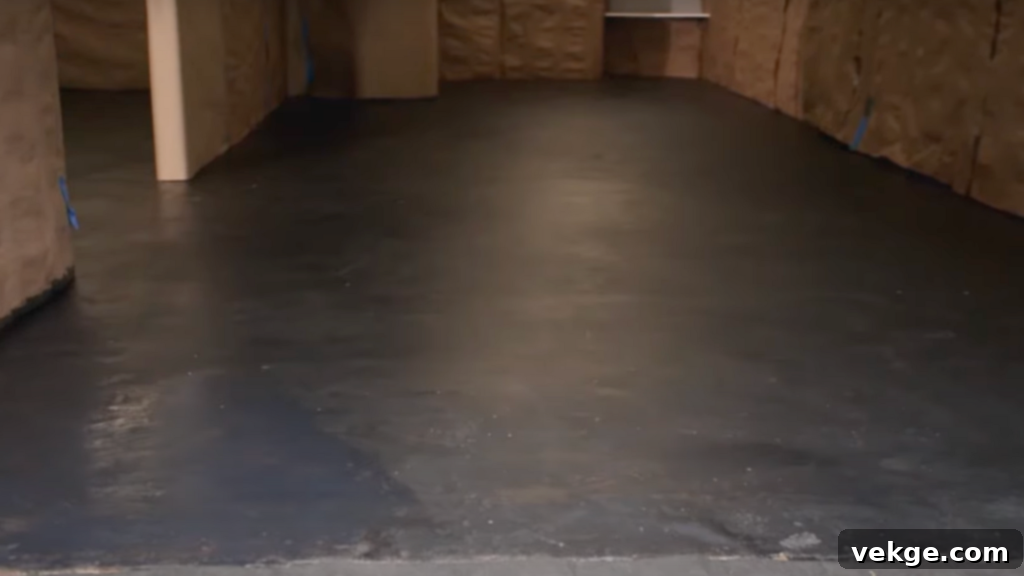
This phase is crucial, especially for acid-based stains. After application, the stain needs time to fully react with the minerals in the concrete. Leave the stained surface undisturbed for a minimum of 6 to 8 hours, and sometimes up to 24 hours, to allow the color to deeply bond and develop within the concrete’s pores. This chemical reaction is what produces the rich, permanent, and often variegated finish that stained concrete is known for.
During this period, it is imperative to avoid walking on the floor or touching it, as any disturbance could disrupt the chemical process and result in an uneven or compromised finish. Refer to your specific product’s instructions for the precise reaction time recommended.
Step 5: Clean and Neutralize the Stained Surface
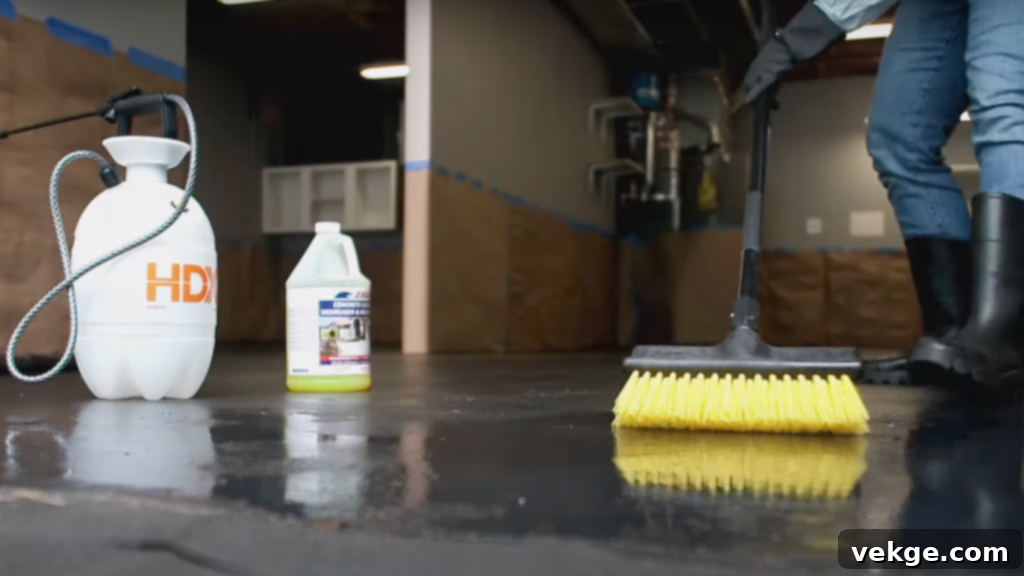
Once the stain has fully reacted and developed its color, it’s time to clean the surface thoroughly. For acid stains, this involves neutralizing the concrete. Apply a concrete neutralizer solution (often a mixture of ammonia or baking soda and water, or a specialized commercial product) evenly across the floor. Scrub the surface vigorously with an acid brush or stiff nylon scrub brush to remove any unreacted stain residue and to halt the chemical process.
Rinse the entire area extensively with clean water, using a wet/dry vacuum to pick up the wastewater, especially indoors. Proper disposal of this acidic wastewater is important and may require neutralization before draining. To check for complete residue removal, wipe a clean white cloth over a dry section of the floor. If the cloth picks up any color or chalky residue, rinse and scrub again. Repeat this testing until the cloth remains perfectly clean, indicating the surface is ready for sealing.
Step 6: Apply the Protective Sealer to the Surface
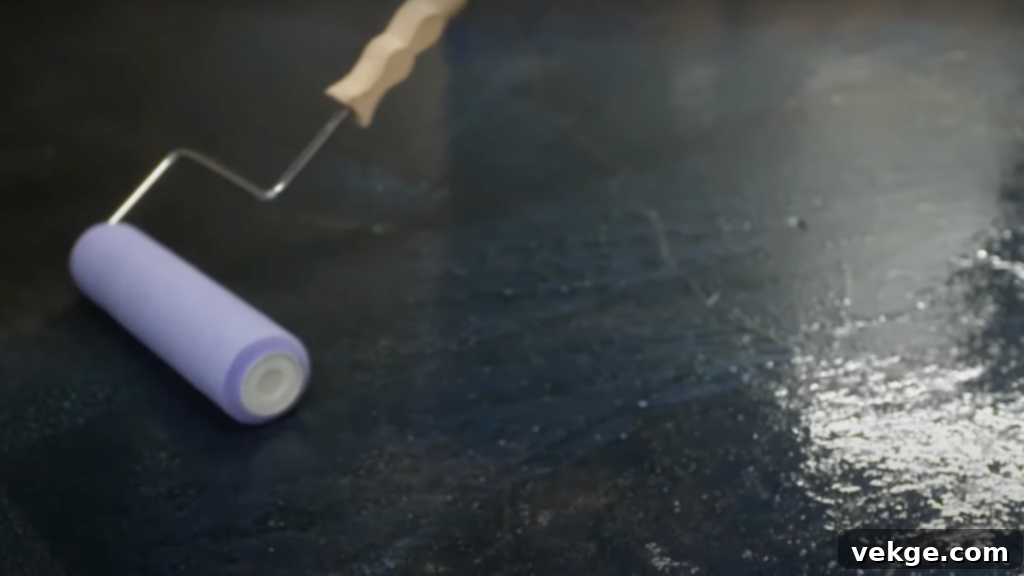
Once the concrete surface is completely dry and free of any residue, the final crucial step is to apply a high-quality concrete sealer. The sealer protects the stained finish from abrasion, moisture, stains, and UV damage, while also enhancing its color and sheen. Choose a sealer based on your desired gloss level and the functional requirements of your space.
- For a subtle, elegant look and enhanced slip resistance, opt for a matte or satin finish sealer, often preferred for interior residential areas.
- For a more dramatic, reflective appearance and maximum protection, particularly for outdoor patios, garages, or decorative floors, a high-gloss sealer would be ideal.
- Consider acrylic sealers for good UV resistance and easy reapplication, or polyurethane/epoxy for superior durability in high-traffic or chemical-prone areas.
Apply the sealer evenly using a roller with a suitable nap or a low-pressure sprayer, working in thin, uniform coats to avoid bubbles or streaks. Allow each coat to dry completely according to the manufacturer’s instructions before applying subsequent coats. Typically, two thin coats are better than one thick coat. Full drying may take anywhere from 24 to 48 hours before light foot traffic is permitted.
Step 7: Ensure Final Drying and Full Curing Time
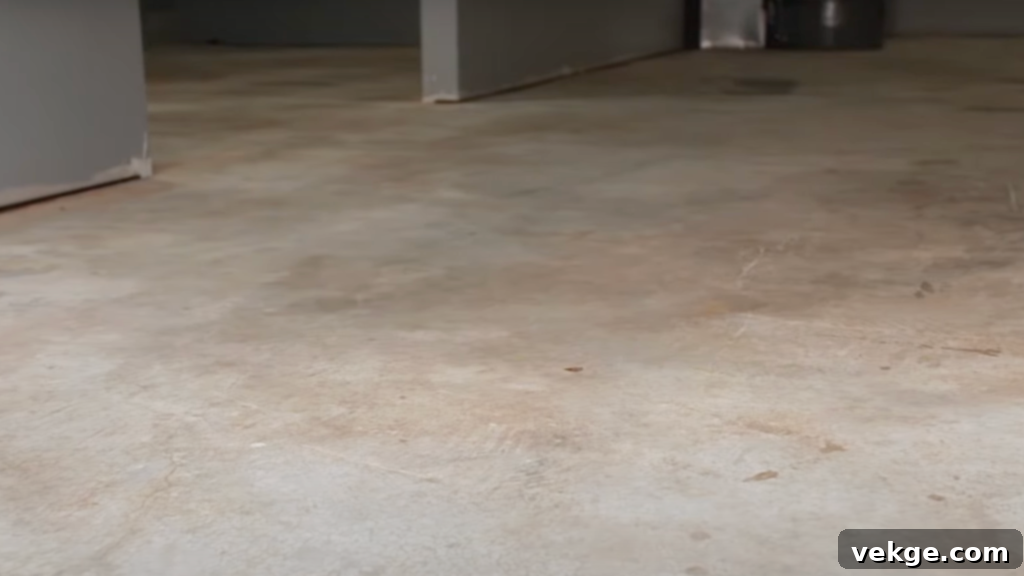
The final and most crucial step for the long-term durability of your stained concrete floor is to allow for adequate drying and full curing. While the surface may feel dry to the touch within 24-48 hours, the sealer (and stain, to some extent) continues to cure and harden for a longer period, often between 48 to 72 hours, and sometimes up to a week for heavy use. During this critical time, it is vital to keep off the floor completely, or at least limit traffic significantly.
This patience ensures that the stain has fully bonded with the concrete and the sealer has achieved its maximum hardness and protective qualities. Once fully cured, your new floor will boast a stunning, durable finish that is highly resistant to daily wear, stains, and moisture, ready to withstand the demands of residential use for many years to come.
For a more detailed visual walkthrough of the process, consider watching the video tutorial below:
DIY vs. Professional Hire: Making the Right Choice for Your Concrete Staining Project
Deciding whether to tackle concrete staining yourself or hire a professional is a key decision that impacts the project’s cost, timeline, and final outcome. This choice typically hinges on your personal experience level, the specific tools you have access to, and the complexity and scale of your concrete staining aspirations.
DIY concrete staining is an attractive option for homeowners with a bit of handy experience, especially for smaller or less intricate projects such as a basic patio, a simple walkway, or a garage floor. Opting for DIY can lead to significant cost savings on labor. However, it requires a substantial investment of your time, a willingness to learn about proper surface preparation, precise stain application techniques, and effective sealing. Safety precautions, especially when working with chemicals, are paramount.
Conversely, hiring a professional becomes a more sensible and often superior choice for larger areas, high-traffic zones that demand impeccable durability, or when your design vision includes intricate patterns, multiple colors, or advanced decorative techniques. Professionals bring invaluable experience, access to commercial-grade equipment, and a deeper understanding of concrete chemistry and various stain types. Their expertise often results in a faster project completion, a more flawless finish, and significantly fewer chances of costly mistakes.
Here’s what to keep in mind when weighing your options:
- Skill Level & Experience: DIY is viable if you are comfortable operating sprayers, precisely mixing solutions, meticulously preparing surfaces, and safely handling chemicals. Professionals possess specialized knowledge to manage unexpected challenges like stubborn stains or uneven concrete reactivity.
- Tool & Equipment Access: Professionals already own specialized, high-performance tools such as industrial grinders, pressure washers, and professional-grade sprayers. For DIYers, renting or purchasing these tools can add a considerable, sometimes prohibitive, expense to the project’s overall cost.
- Project Scope & Complexity: Simple, single-color applications on small, well-conditioned surfaces are suitable for DIY. However, large areas, projects requiring extensive crack repair, or those involving intricate designs (like faux wood or multi-toned marbling) often demand the precision and expertise that only an experienced professional can provide.
- Timeline & Efficiency: A DIY project typically requires more time, particularly for beginners who need to learn and execute each step carefully. Professionals, with their experience and specialized tools, can often complete the job efficiently, sometimes in a day or two, minimizing disruption to your home life.
- Guaranteed Results & Warranties: Professional contractors often offer warranties on their work, providing peace of mind regarding the quality and longevity of your stained concrete. With DIY, you are solely responsible for the outcome, and rectifying errors can be costly and time-consuming.
If you possess the confidence, time, and the project is straightforward, a DIY approach can be incredibly rewarding. However, for complex finishes, extensive areas, or if you simply prefer professional-grade results with less personal effort, investing in a reputable contractor will typically yield better long-term satisfaction and a superior finish.
Cost Breakdown: DIY Concrete Staining vs. Professional Services
Understanding the financial implications is critical when planning your concrete staining project. This comparison table outlines the typical cost variations and important factors that influence pricing for both DIY endeavors and hiring professional services.
| Aspect | DIY Concrete Staining | Professional Concrete Staining |
|---|---|---|
| Basic Pricing Range | $2–$4 per sq. ft. (materials, basic tool rental) | $4–$12 per sq. ft. (includes labor, materials, specialized equipment) |
| Design Complexity | Simple, single-color designs are most affordable. Complex patterns add material cost and significant time. | More intricate designs (e.g., marbled effects, multi-color, custom stencils) significantly increase professional costs due to labor and specialized skills. |
| Floor Condition | Extensive surface prep (cleaning, degreasing, crack repair, old coating removal) adds to DIY material cost and time. | Professional services typically include all necessary repairs and preparation, which are factored into the overall quote. |
| Stain Type | Water-based stains are generally less expensive per gallon than acid stains. Dyes might vary. | Cost can vary based on the specific stain type used (acid-based, water-based, acetone dyes, metallic) and required quantity. |
| Labor Costs | No direct labor costs, but your time invested has an implicit value. | Labor is a significant component of the total cost, covering skilled application, preparation, and project management. |
| Maintenance Costs | Requires periodic DIY resealing (material cost only) and routine cleaning. | May include professional resealing services, periodic cleaning, and potential warranties. |
| Equipment Costs | Purchase or rental of sprayer, safety gear, brushes, pressure washer. | Professionals use their own commercial-grade equipment, included in service cost. |
| Potential for Errors | Higher risk of costly mistakes, requiring additional materials and time for correction. | Lower risk of errors due to expertise, leading to more predictable and higher-quality results. |
Ultimately, the decision between DIY and professional staining will depend on your budget, comfort with hands-on work, and the specific aesthetic and durability you wish to achieve. Carefully consider all these factors to make the best choice for your home improvement project.
Inspiring Design Styles for Residential Stained Concrete Floors
Stained concrete offers much more than just a robust and easy-to-maintain surface; it unlocks a vast realm of design possibilities that can perfectly complement any home aesthetic. With the right techniques and color choices, you can create looks that range from subtly sophisticated to dramatically bold, tailored precisely to your personal style. Many of these finishes artfully mimic the appearance of more expensive materials like natural stone, luxurious marble, or warm hardwood, all while retaining the inherent durability, low maintenance, and cost-effectiveness of concrete.
Here are some of the most popular and visually striking design styles frequently employed for residential stained concrete floors:
- Marbled Finish: This elegant style creates swirling, organic patterns that beautifully replicate the sophisticated veining and depth of genuine marble. Achieving a marbled effect often involves applying multiple stain colors, sometimes with water dilution, and allowing them to react or blend naturally on the surface. This look is particularly stunning in entryways, formal dining rooms, kitchens, or master bathrooms, instantly elevating the space with a high-end, artistic feel.
- Faux Wood Appearance: Imagine the warmth and timeless appeal of hardwood floors, but with the unparalleled durability and ease of maintenance of concrete. Faux wood techniques involve carefully scoring the concrete surface to create plank-like patterns, followed by the application of wood-toned stains (typically browns, grays, or tans). The result is an incredibly realistic wood grain effect that is perfect for living rooms, basements, or areas prone to moisture where real wood would be impractical.
- Geometric Patterns & Borders: For those who prefer a more contemporary or architectural aesthetic, geometric patterns offer a sleek and modern twist. This style involves using painter’s tape or stencils to create sharp lines, squares, diamonds, or repeating shapes. Different stain colors can then be applied within these defined areas, creating a dynamic, structured design. Geometric patterns are highly effective in open-concept living spaces, lofts, home offices, or anywhere you want to introduce a crisp, modern edge. Borders can also be added around the perimeter of a room to frame the central design.
- Inlays and Decorative Elements: To truly personalize your stained concrete floor, consider incorporating inlays or decorative elements. This advanced technique involves embedding materials like polished stone chips, colored glass, metal strips, or even specific aggregates into the concrete before the staining process. These elements can be used to create custom logos, intricate medallions, unique patterns, or even functional markers. The stain then enhances the surrounding concrete, creating a cohesive and highly customized floor that makes a powerful statement.
- Solid Color with Texture: While often associated with mottling, stained concrete can also achieve a more uniform, rich color. This style emphasizes the inherent texture and subtle imperfections of the concrete itself, offering a minimalist yet profound aesthetic. By using a single, consistent application of a water-based stain or carefully applied acid stain, the floor achieves a clean, modern look that highlights the raw beauty of the material, often enhanced by the specific sealer chosen.
Each of these styles brings a unique character to your space, all while preserving the core benefits of stained concrete: exceptional strength, resilience, and ease of cleaning.
Essential Maintenance Tips for Your Residential Stained Concrete Floors
Maintaining the beauty and longevity of your stained concrete floors is remarkably straightforward, requiring only a simple, consistent routine. Adopting good habits and performing occasional preventive measures will significantly extend the life of your finish, keeping it looking fresh and vibrant for many years, while also helping you avoid costly repairs down the line.
Here are a few easy-to-follow tips to ensure your residential stained concrete floors remain in pristine condition:
- Daily or Bi-Weekly Sweeping/Dusting: The most fundamental step is to regularly remove dirt, dust, and abrasive debris. Use a soft-bristle broom, a dry dust mop, or a vacuum cleaner with a soft floor attachment. Fine grit and particles can act like sandpaper underfoot, gradually scratching the sealer and dulling the finish over time.
- Weekly Damp Mopping: For a deeper clean, damp mop your floors at least once a week. Use a mild, pH-balanced cleaner specifically designed for concrete or stone, mixed with water. Avoid harsh chemical cleaners, abrasive scrubbers, or anything containing bleach, ammonia, or acids. These aggressive chemicals can degrade the protective sealer, strip waxes, and potentially damage the stain itself. Always rinse thoroughly with clean water to remove any cleaning solution residue.
- Prompt Spill Clean-Up: Stained concrete floors, particularly when properly sealed, are highly resistant to stains. However, it’s crucial to wipe up spills immediately, especially those from acidic substances (like vinegar, citrus juice, or wine) or oils. Allowing spills to sit can increase the risk of etching or staining the sealer, potentially compromising the appearance of your floor.
- Regular Resealing (Every 1–3 Years): The sealer is your floor’s protective shield. Over time, it will naturally wear down, especially in high-traffic areas or outdoor environments exposed to UV rays and weather. Plan to reseal your concrete floors every 1 to 3 years. High-traffic zones, like entryways or kitchens, might require more frequent resealing, while less used areas could go longer. A good indicator that resealing is needed is when water no longer beads on the surface.
- Address Minor Damage Promptly: If you notice light scratches, scuffs, or areas where the sealer appears dull, it’s often possible to perform spot touch-ups. For minor scratches, a thin coat of matching sealer or even a compatible floor wax/polish can sometimes restore the sheen. For deeper scratches or small areas where the stain itself is compromised, light sanding and a small reapplication of stain and sealer might be necessary, followed by re-sealing the affected area.
- Use Protective Measures: Prevent damage before it happens. Place felt pads under all furniture legs to avoid scratches and scuffs. Use area rugs or mats in entryways and other high-traffic zones to trap dirt and minimize wear. For garage floors, consider using drip pans under vehicles to catch oil and fluid leaks.
With just a little proactive upkeep and attention, your beautiful residential stained concrete floors will remain strong, stylish, and remarkably easy to live with, providing a durable and attractive surface for many years to come.
Exploring Alternatives to Residential Stained Concrete Floors
While stained concrete offers a unique blend of aesthetics, durability, and cost-effectiveness, it might not be the perfect fit for every homeowner or every specific application. If you’re exploring different textures, finishes, or require alternative levels of durability or specific performance characteristics, a range of other concrete flooring options are available to consider.
Here’s a concise comparison of popular alternatives that offer distinct looks and functionalities compared to traditional stained concrete floors:
- Polished Concrete: This option involves grinding the concrete surface with progressively finer abrasive tools, similar to sanding wood, until it achieves a smooth, incredibly dense, and highly reflective finish. Unlike stained concrete, which uses a topical application, polished concrete is the concrete itself, densified and honed. It’s sleek, modern, exceptionally durable, and very consistent in color (unless dyes are introduced during the polishing process). It’s an excellent choice for homes seeking a minimalist, industrial, or contemporary style, and it offers superior abrasion resistance and a virtually maintenance-free surface once complete.
- Epoxy Coatings: Epoxy flooring systems involve applying multiple layers of a protective, resin-based coating over the concrete surface. This creates a seamless, non-porous, and incredibly robust layer that is highly resistant to stains, chemicals, oil, and heavy impact. Epoxy comes in an extensive array of colors, often incorporating decorative flakes or metallic pigments for custom effects. It’s an ideal solution for garages, basements, utility rooms, or kitchens where extreme durability, chemical resistance, and a wide range of aesthetic options are prioritized. However, it can be slippery when wet and may show scratches over time.
- Stamped Concrete: Primarily used for outdoor applications like patios, driveways, pool decks, and walkways, stamped concrete involves pressing patterns and textures into wet concrete before it fully cures. These patterns are designed to convincingly mimic the appearance of natural stone, brick, slate, or even wood. Stamped concrete is then typically colored with integral colors, release agents, or topical stains and sealed to enhance its realism and durability. It offers a cost-effective way to achieve the look of premium paving materials with the structural integrity of concrete.
- Concrete Overlay Systems: Overlays are thin, polymer-modified cementitious coatings applied on top of existing concrete. They are a fantastic solution for rejuvenating old, worn, or slightly damaged concrete slabs without the need for complete removal and replacement. Once applied, overlays can be stained, polished, textured, stamped, or colored in a multitude of ways to achieve virtually any desired look. They offer immense versatility, allowing for creative design while providing a fresh, new surface for customization. Overlays can vary in thickness and performance based on their specific formulation.
Each of these alternatives offers distinct advantages in terms of aesthetic appeal, performance characteristics, and maintenance requirements. If stained concrete doesn’t quite align with your specific needs or vision, one of these options might provide the perfect balance of style, durability, and upkeep for your home.
Common Mistakes to Avoid for Flawless Stained Concrete Floors
Even seemingly straightforward concrete staining projects can encounter issues if planning and execution are not meticulous. Overlooking certain details or rushing through steps can significantly impact the final appearance and long-term durability of your floor. Being aware of these common, yet often overlooked, mistakes can save you considerable time, effort, and money, ensuring your stained concrete project is a success.
- Choosing the Wrong Stain Type for Your Concrete: Not all concrete is created equal, especially when it comes to acid stains. Acid stains rely on a chemical reaction with the free lime in the concrete, meaning older, heavily sealed, or non-reactive concrete won’t achieve the desired mottling. Water-based stains or dyes might be better for such surfaces. Always perform a small test patch in an inconspicuous area to assess how your specific concrete reacts to the chosen stain before committing to the entire project. This prevents unexpected color variations or a lack of color development.
- Applying Stain to an Improperly Prepared or Overly Wet Surface: Surface preparation is paramount. Any grease, oil, paint, existing sealers, or dirt will prevent the stain from penetrating or reacting properly, leading to uneven color, blotchiness, or poor adhesion. Furthermore, applying stain to concrete that is too wet can dilute the stain, causing streaks, inconsistent color, and reduced vibrancy. Ensure the concrete is immaculately clean, completely dry, and free of any residue before application.
- Skipping a Test Patch: This is a critical step that many DIYers are tempted to skip. Always apply your chosen stain (and sealer) to a small, hidden area (e.g., in a closet or corner that will be covered) or on a scrap piece of concrete. This allows you to confirm the color, reaction, and overall appearance on your specific concrete before undertaking the entire floor, helping you avoid significant surprises and potential dissatisfaction.
- Using the Wrong Sprayer or Tools: Standard garden sprayers or paint sprayers may not be suitable for concrete stains, especially acid-based ones. Acid stains can corrode metal components, leading to sprayer failure and uneven application. Always use an acid-resistant plastic sprayer or an airless sprayer specified for concrete stains. Similarly, ensure all brushes, rollers, and cleaning equipment are compatible with the chemicals you are using.
- Underestimating Drying and Curing Times: Patience is a virtue in concrete staining. Rushing through the drying times between coats, or before neutralizing, cleaning, and sealing, can lead to numerous problems. Inadequate drying can result in trapped moisture, poor stain penetration, or a cloudy sealer. Insufficient curing of the sealer can cause it to peel, wear prematurely, or fail to provide adequate protection. Always adhere strictly to the manufacturer’s recommended drying and curing times for each product.
- Inadequate Ventilation and Safety Precautions: Working with concrete stains and sealers, particularly solvent-based or acid products, involves chemicals that can emit fumes. Always ensure proper ventilation, especially indoors, by opening windows and using fans. Crucially, wear all recommended personal protective equipment (respirator, gloves, eye protection) throughout the entire process to safeguard your health.
By taking the time to meticulously plan, properly prepare, conduct test patches, use the correct tools, and strictly follow product instructions and safety guidelines, you can confidently avoid these common mistakes and achieve a stunning, professional-looking stained concrete floor that lasts.
Conclusion: Embrace the Beauty and Durability of Stained Concrete
As you’ve now discovered, residential stained concrete floors offer an incredibly versatile and rewarding solution for transforming plain, uninspired concrete into surfaces that are both highly functional and aesthetically captivating. Whether your goal is to revitalize a basement, upgrade a garage, or enhance an outdoor patio, the journey from mundane to magnificent is well within reach.
We’ve explored the myriad benefits that stained concrete provides, from its natural, long-lasting beauty and low maintenance requirements to its cost-effectiveness and eco-friendly attributes. You now understand the differences between various stain types and have a detailed, step-by-step guide to navigate the process, whether you choose the satisfaction of a DIY project or the assured expertise of a professional.
From my own experience and extensive research, the cornerstone of a successful stained concrete project lies in thorough surface preparation, meticulous application of the stain, precise neutralization, and the critical step of proper sealing. Coupled with consistent, basic upkeep, these elements ensure that your floors not only look exceptional upon completion but also maintain their integrity and beauty for many years to come.
Ready to bring new life to your home’s concrete surfaces? The knowledge and inspiration provided here should empower you to embark on your staining project with confidence. Still seeking more innovative ideas to elevate your living spaces? We encourage you to explore other insightful blogs and resources on our website for simple, smart, and stylish ways to continuously upgrade your home. There’s always something new to learn and discover in the world of home improvement.
