Transform Your Home: The Ultimate Guide to Stunning Painted Floors & DIY Ideas
Painting your floors has rapidly become one of the most popular and cost-effective ways to revitalize any room in your home. It’s a versatile solution that works across various floor types, offering an incredible opportunity to inject new life and personality into your living spaces without the hefty price tag or extensive labor often associated with traditional flooring replacements.
Imagine transforming a dull, dated floor into a vibrant centerpiece or a serene backdrop with just a few coats of paint. From refreshing existing colors to crafting intricate patterns and unique designs, painted floors unlock a world of creative possibilities. This comprehensive guide will walk you through the transformative power of floor painting, offering a wealth of inspiring ideas, practical tips on what to do and what to avoid, and compelling reasons why a painted floor might be the perfect choice for your next home improvement project. Get ready to embark on your floor makeover journey!
Why Painting Your Floors is a Smart Home Improvement Idea
When you’re looking to refresh your home’s aesthetic without undertaking a major renovation or breaking your budget, painting your floors offers an unbeatable solution. Instead of the significant expense and disruption of ripping out old, worn-out flooring, a well-executed paint job can make them look absolutely brand new, adding immense value and style to your property.
One of the greatest advantages of painted floors is their incredible versatility. You can paint almost any surface, from the classic charm of wooden floors and the industrial appeal of concrete in basements or garages, to even old, tired tiles – provided you use the right preparation and paint type. This makes it an accessible DIY project that many homeowners can tackle over a weekend, saving on professional installation costs.
Beyond the practical benefits, floor painting puts you firmly in control of your home’s design narrative. Unlike limited pre-made flooring options, painted floors allow for boundless customization. Want a calm, oceanic blue for a tranquil bedroom retreat? Or perhaps a cheerful, bright yellow to energize your kitchen? The color palette is entirely yours. You can experiment with captivating patterns like timeless checkerboards, modern stripes, or even custom stenciled designs. This level of personalization ensures your floors perfectly match your specific vision, reflecting your unique style and complementing your existing decor seamlessly.
In addition to their aesthetic appeal, painted floors are remarkably easy to maintain. A quick sweep or mop is often all it takes to keep them sparkling clean, making them ideal for high-traffic areas or homes with pets and children. Lighter paint colors can also significantly brighten up a room, reflecting more natural light and making smaller spaces feel larger and more open. With proper application and care, your beautifully painted floors can remain a cherished feature in your home for many years, offering both durability and a fresh, personalized touch.
Essential Tools & Materials You’ll Need to Paint Your Floor
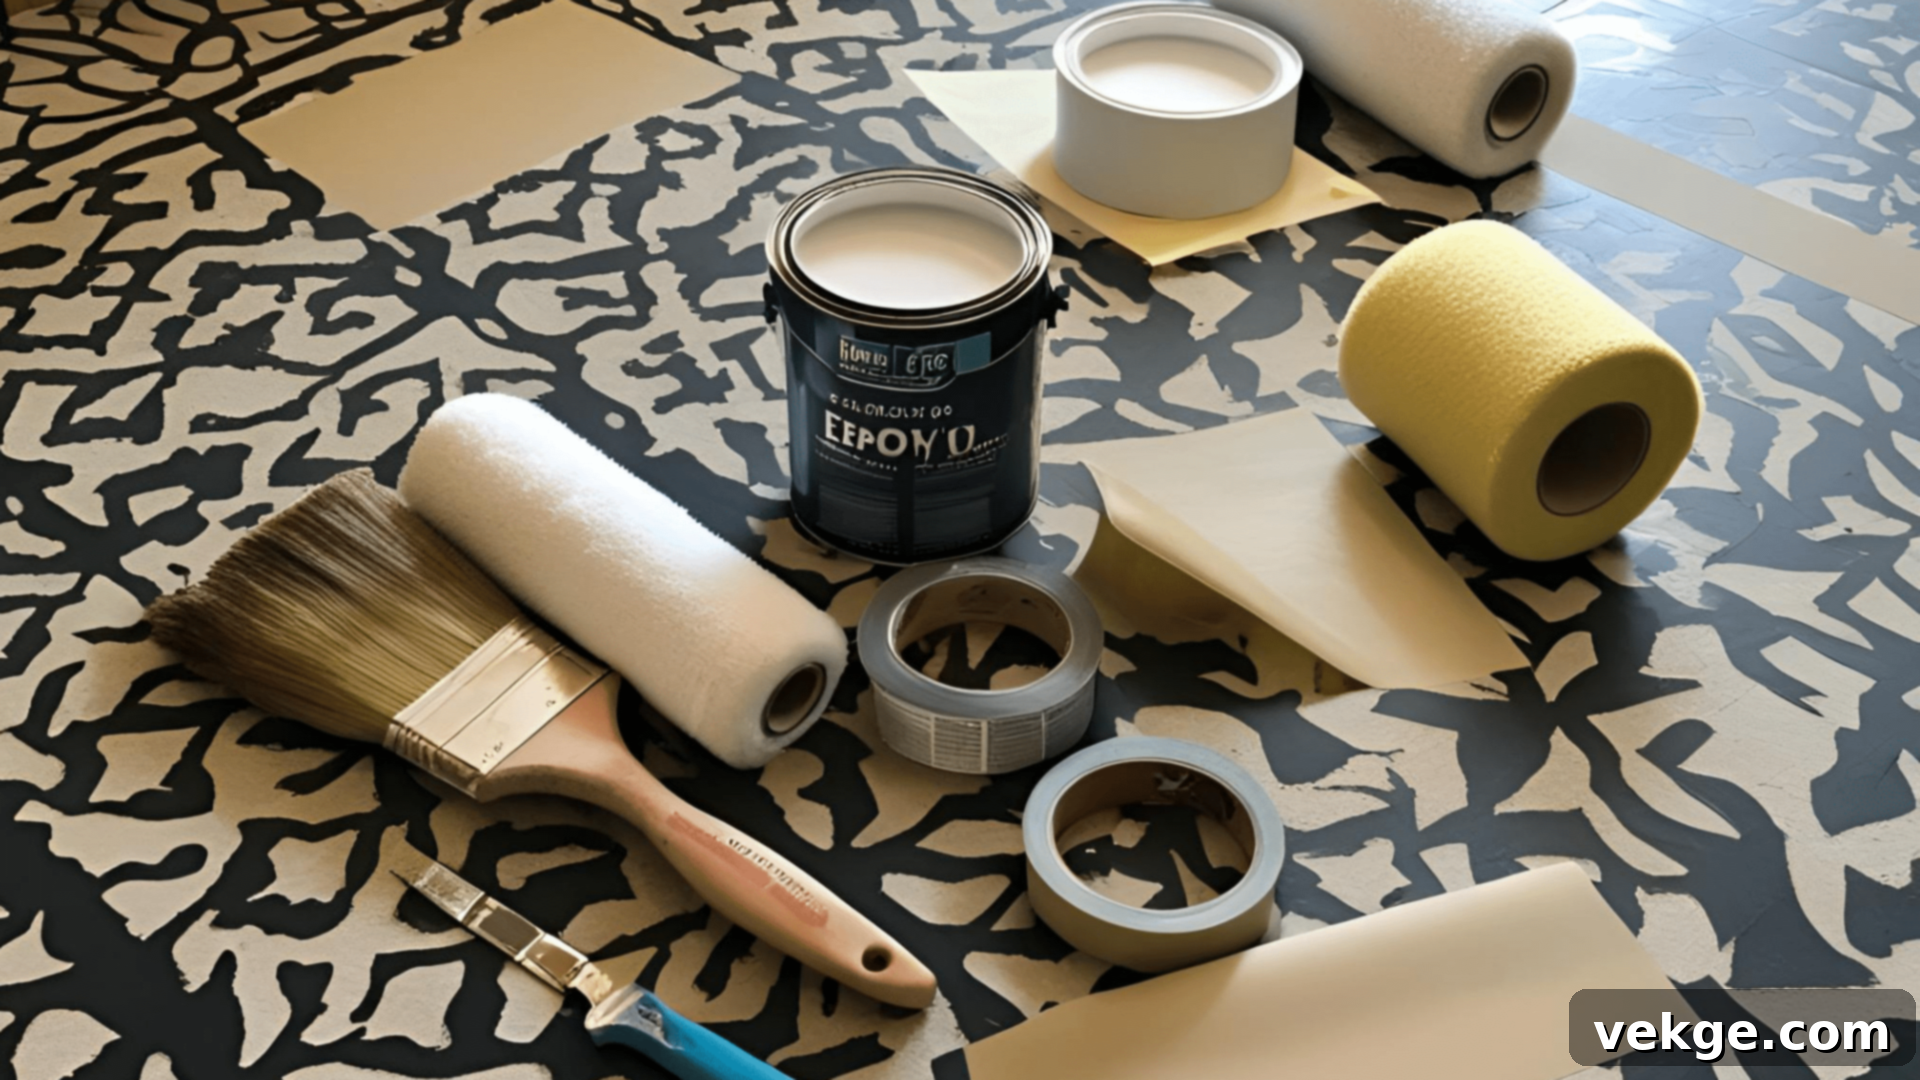
Before you even pick up a brush, ensuring you have the right tools and materials is crucial for a successful floor painting project. The type of paint you choose will depend heavily on your floor’s surface and the desired finish:
- Epoxy Paint: Best for high-traffic, durable surfaces like concrete in garages, basements, or workshops. It offers excellent resistance to chemicals, abrasions, and moisture.
- Porch & Floor Enamel: Ideal for wooden and tiled floors, providing a hard, glossy, and durable finish that withstands foot traffic and everyday wear.
- Chalk Paint: A popular choice for a rustic or distressed look on wood or laminate, offering a matte finish. Remember, chalk paint requires a protective topcoat for durability on floors.
- Latex or Acrylic Floor Paint: A general-purpose option for various surfaces, offering good coverage and ease of application.
Beyond the paint itself, here are the essential tools:
- Brushes: High-quality angled brushes are indispensable for cutting in along edges, corners, and intricate detailing.
- Rollers: Choose roller covers appropriate for your paint type and floor surface (e.g., short nap for smooth surfaces, medium nap for slightly textured floors). Rollers provide efficient and even coverage for large areas.
- Extension Pole: Attaching your roller to an extension pole saves your back and speeds up the painting process.
- Painter’s Tape: Crucial for creating clean, crisp lines, protecting adjacent surfaces, and masking off patterns. Opt for high-quality tape that won’t bleed or leave residue.
- Drop Cloths/Plastic Sheeting: Absolutely vital for protecting baseboards, walls, furniture, and any other surfaces you don’t want painted.
- Cleaning Supplies: Degreaser, broom, vacuum cleaner, mop, and buckets are necessary for thorough floor preparation.
- Sandpaper/Sander: For light sanding to create a good “tooth” for paint adhesion, especially on glossy or previously finished floors.
- Floor Primer: A good quality primer is often essential to improve paint adhesion, block stains, and ensure a uniform topcoat, especially when changing colors dramatically or painting over challenging surfaces.
- Safety Gear: Don’t forget gloves, a respirator mask (especially when working with oil-based paints or in poorly ventilated areas), and safety goggles to protect yourself during the entire process.
- Stencils: If you plan on decorative patterns, stencils can help achieve consistent designs.
- Measuring Tape, Ruler, Pencil/Chalk Line: For precise layout and marking of patterns.
Having all these items ready before you start will ensure a smooth and efficient painting experience.
Popular Floor Painting Ideas to Inspire Your Next Project
There are countless creative ways to paint your floors, each offering a distinct aesthetic and mood to your room. Here are some popular ideas to spark your imagination and help you decide on the perfect look for your space:
1. Checkerboard Pattern
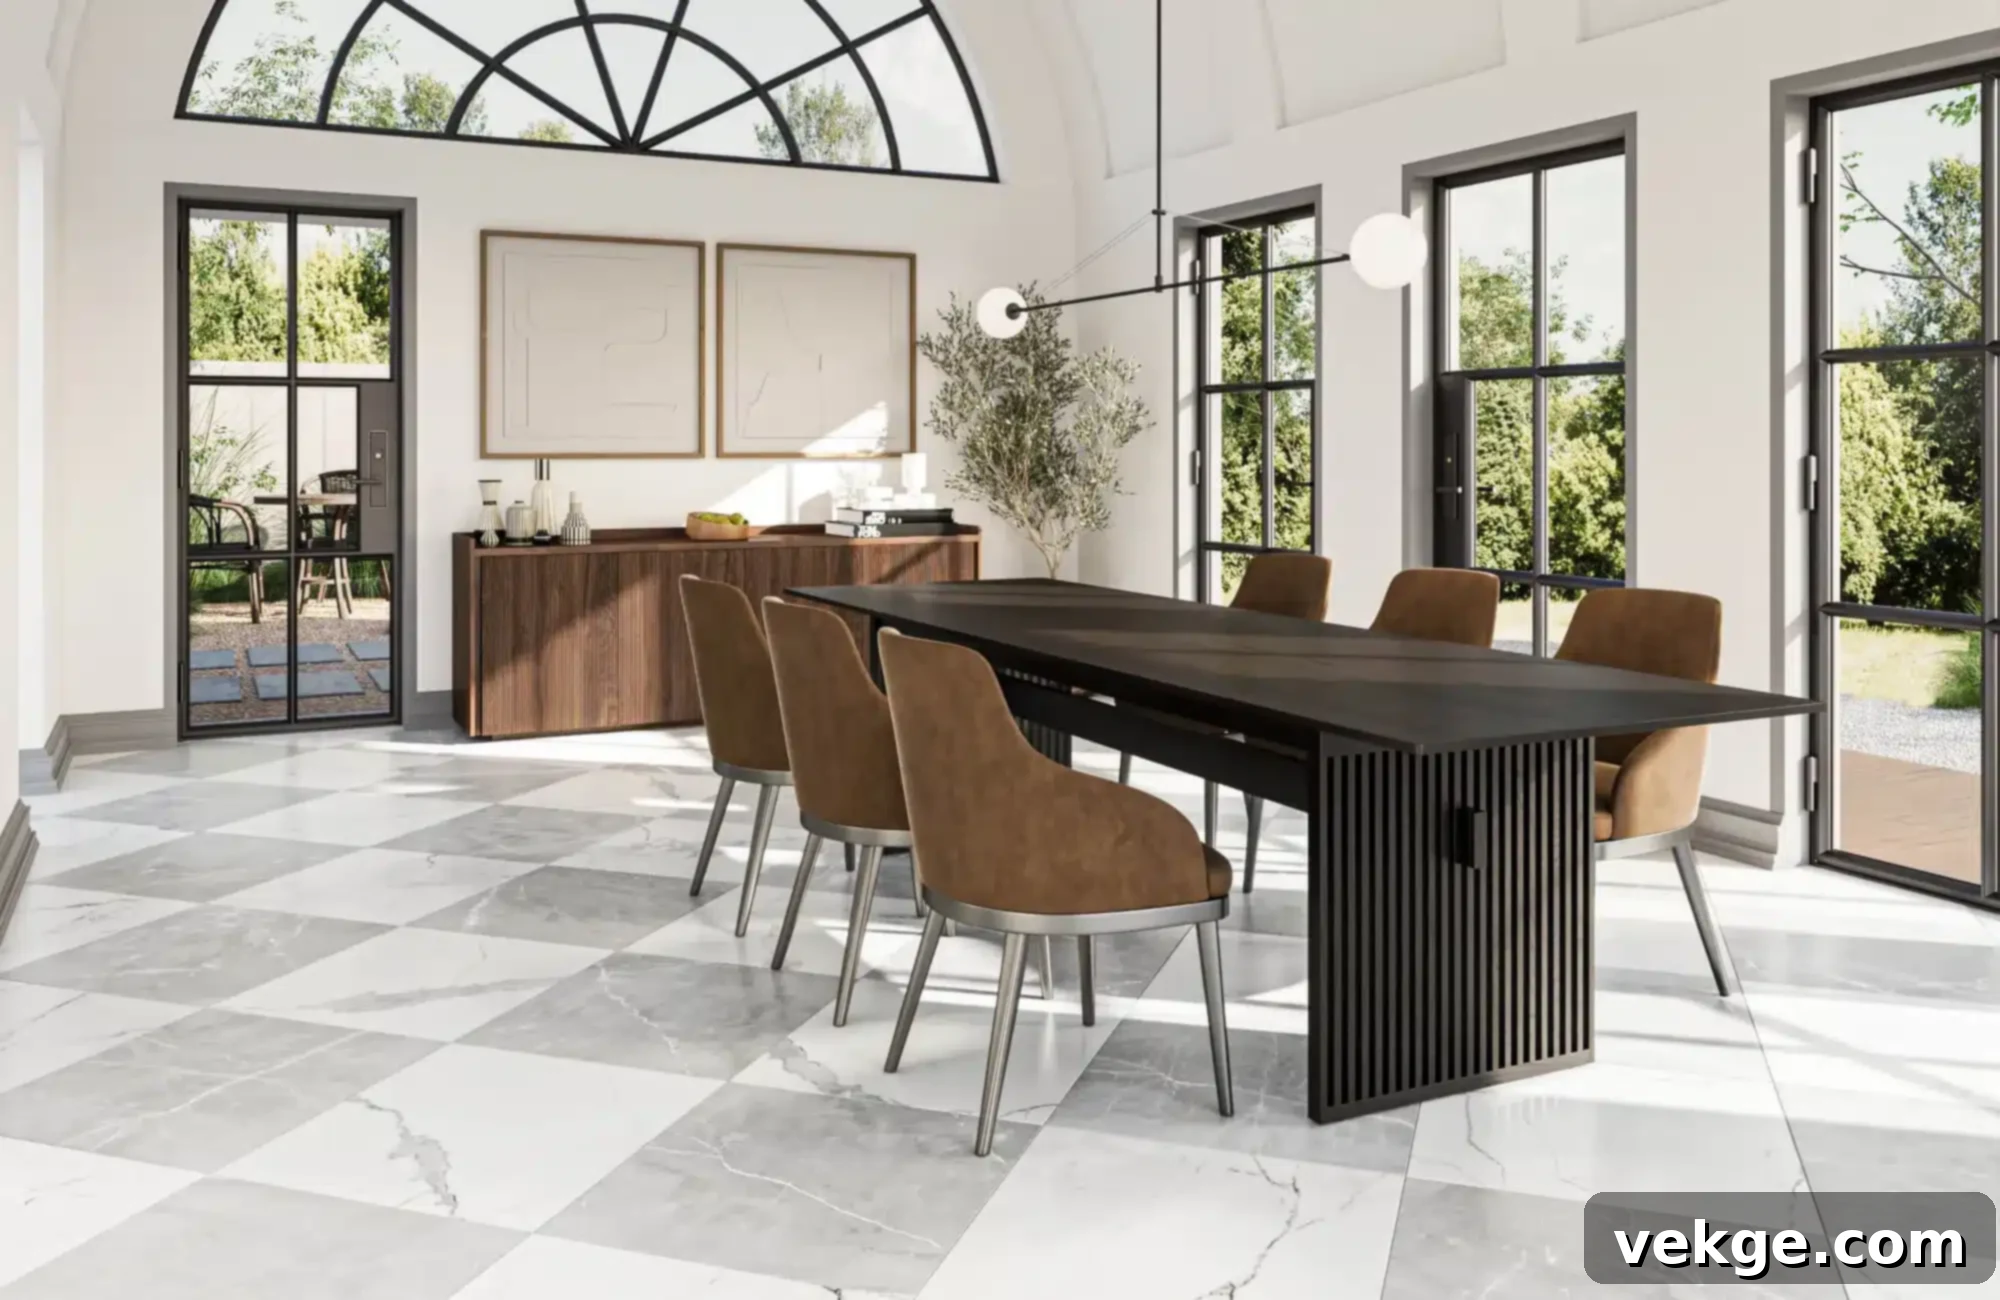
A checkerboard floor design is a timeless classic that never goes out of style. It instantly adds a playful yet sophisticated charm, making a strong visual statement in any room. This pattern works exceptionally well in entryways, kitchens, bathrooms, laundry rooms, or any space where you want to create a focal point and add architectural interest. Depending on your chosen colors, a checkerboard can effortlessly complement both vintage and modern decor schemes.
While the iconic black and white combination is traditionally popular, don’t shy away from experimenting with softer pastels, bold primary colors, or even various shades of neutral tones for a more subtle or contemporary look. Painting a checkerboard floor requires careful planning and a good amount of patience, but the striking, transformative result is a truly rewarding and cost-effective alternative to new patterned flooring.
How to Create a Checkerboard Floor Pattern:
- Begin by thoroughly cleaning the floor, removing all dirt, dust, and debris. Allow it to dry completely.
- Apply a suitable primer if necessary, especially if you’re painting over a challenging surface or making a significant color change.
- Paint the entire floor with your chosen base color (usually the lighter shade). Ensure even coverage and allow it to dry fully, preferably overnight.
- Carefully measure and mark a precise grid of equal-sized squares across the floor using a pencil and ruler or a chalk line for accuracy.
- Use high-quality painter’s tape to meticulously outline the squares that will be painted in the second color, pressing down firmly to prevent bleed-through.
- Carefully paint the marked squares with your second color. Apply two thin coats if needed, allowing adequate drying time between coats.
- Allow the paint to dry completely before gently removing the painter’s tape to reveal crisp, clean lines.
- Once fully dry, apply a clear, durable sealant to protect the finish from wear and tear, ensuring longevity.
2. Geometric Patterns
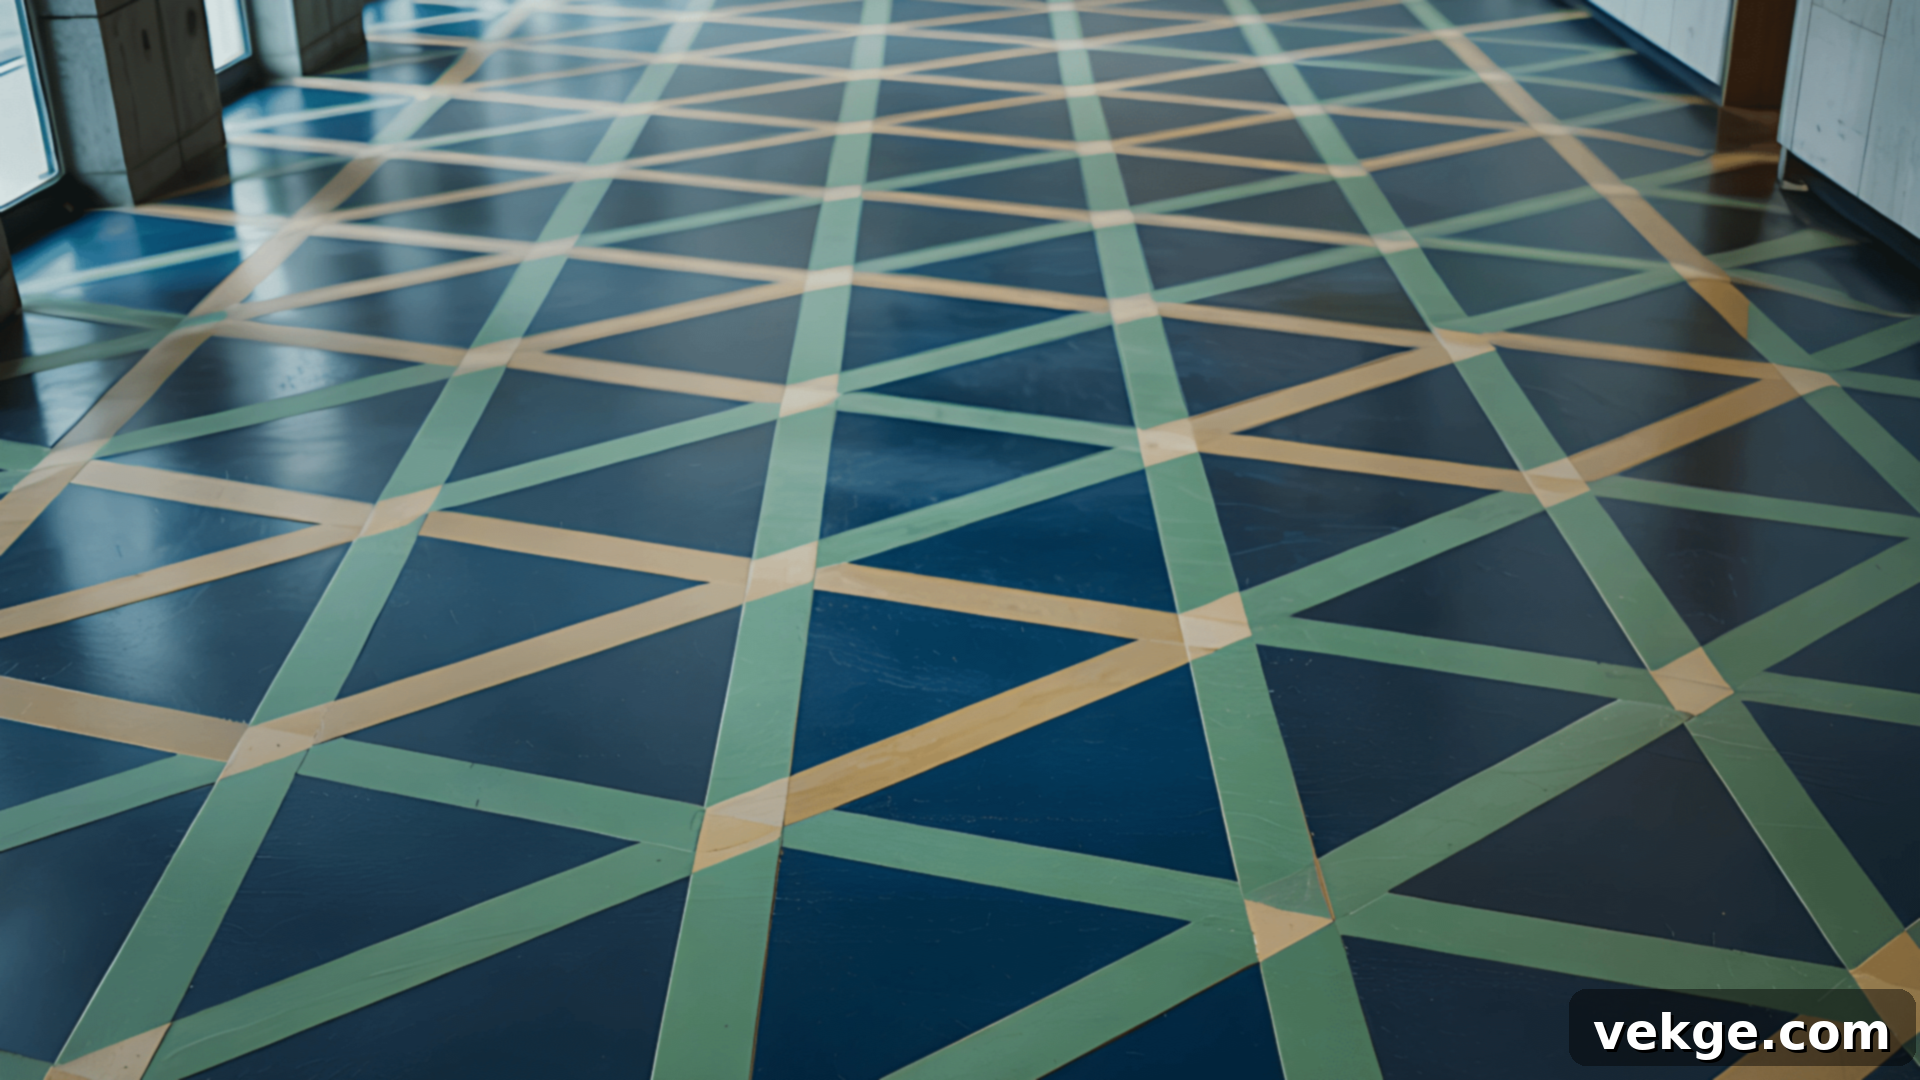
Geometric patterns are a fantastic way to infuse a modern, dynamic, and artistic vibe into your floors. Shapes like triangles, hexagons, chevrons, or abstract interlocking designs can add an energetic and sophisticated feel to any room. These patterns are particularly effective in areas like living rooms, kitchens, home offices, or hallways, bringing a creative and contemporary touch to the space. You can opt for a minimalist approach with just a few bold shapes or create a more complex, intricate design to truly make a statement. The beauty of geometric patterns lies in their versatility, allowing for endless color combinations and scale variations.
How to Create Geometric Patterns on Your Floor:
- Thoroughly clean and prepare the floor as you would for any painting project, ensuring it’s free of dust and debris.
- Carefully plan and mark out your geometric pattern on the floor using a tape measure. You can draw the design lightly with a pencil or chalk.
- Ensure your shapes are evenly spaced and aligned according to your design vision.
- Apply high-quality painter’s tape along the lines of each shape. Press the tape down firmly to ensure sharp, clean edges and prevent paint from bleeding underneath.
- Paint inside the taped-off sections using smooth, even strokes for consistent coverage. Apply multiple thin coats rather than one thick coat.
- Allow the paint to dry fully between coats and before removing the tape. Patience here is key to achieving pristine lines.
- Once the paint is completely dry, carefully peel off the painter’s tape to reveal your crisp geometric design.
- If needed, use a small artist’s brush to touch up any edges that require a bit more definition.
- Finish with a clear, durable topcoat to protect your design, enhance its longevity, and add a professional, glossy or matte finish.
3. Graphic Painted Floors
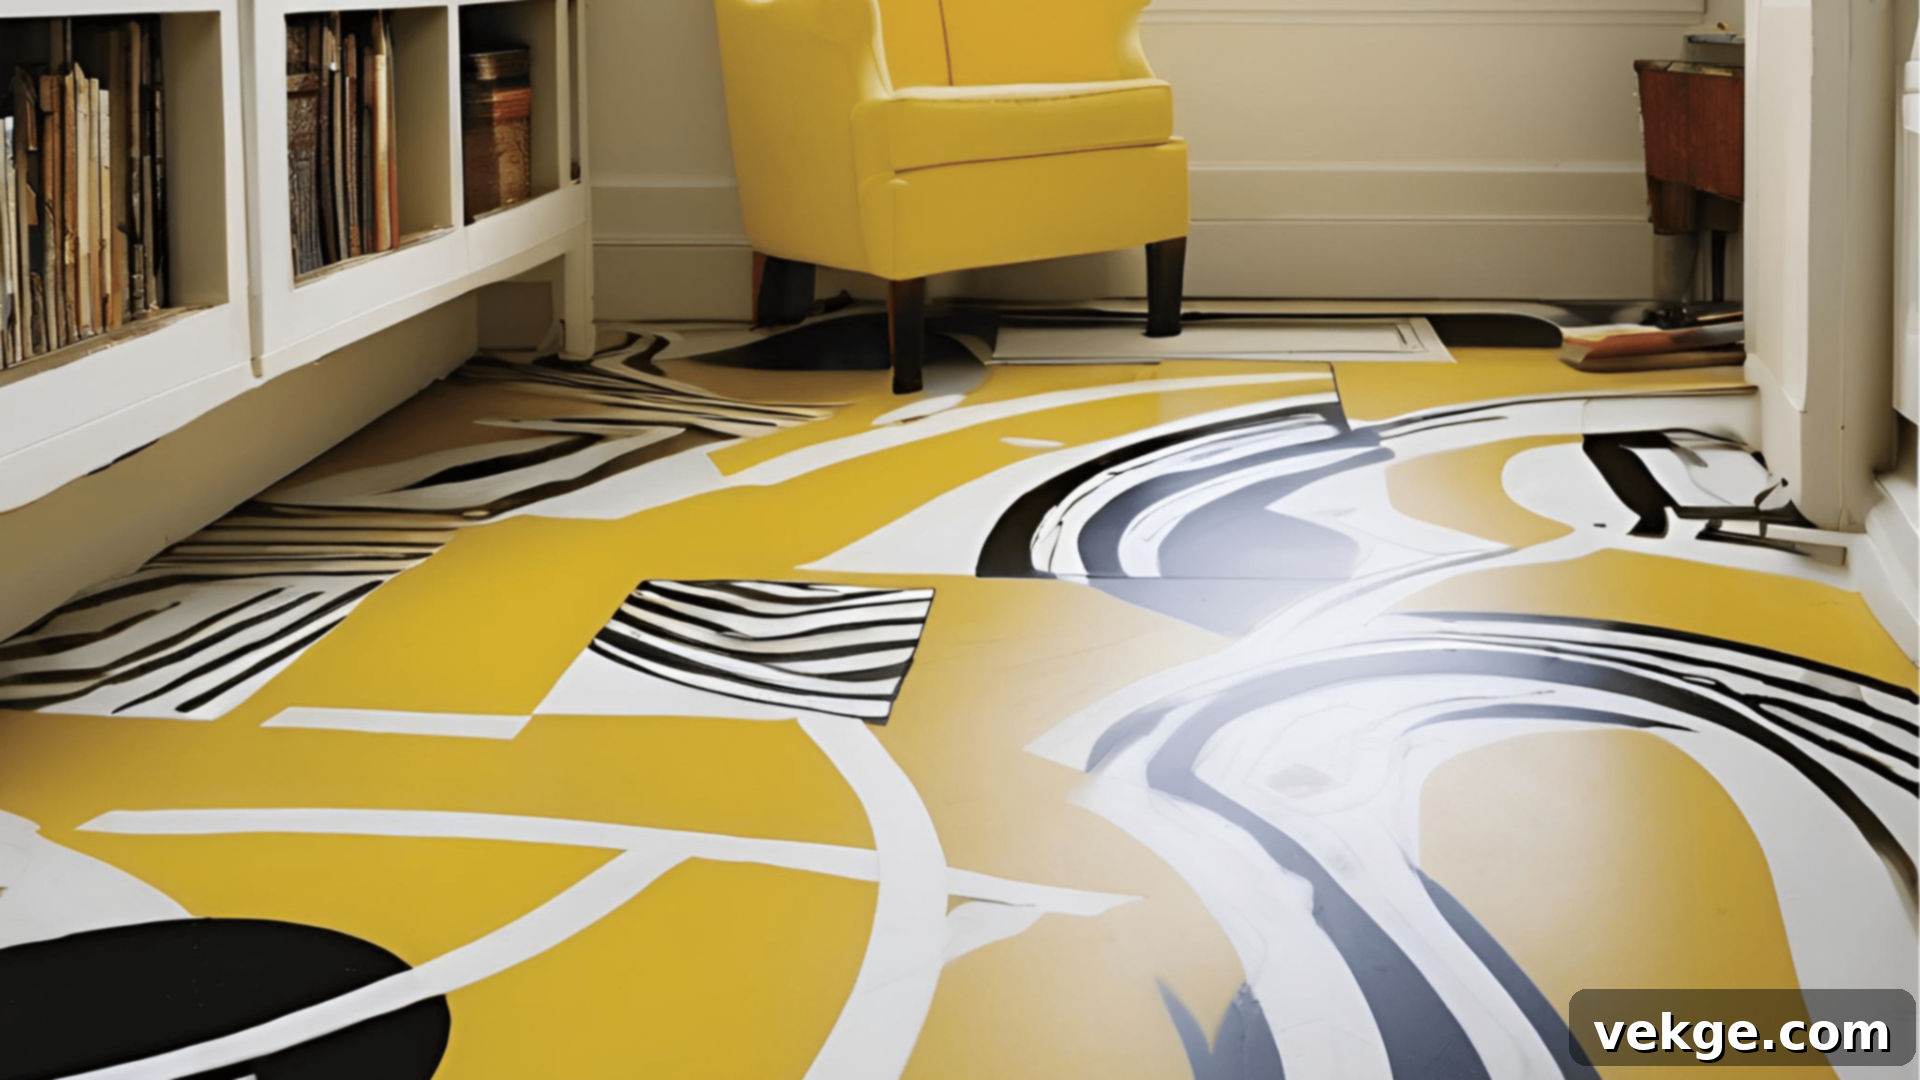
Graphic painted floors are an exciting and impactful way to introduce bold, creative designs that make your floors a true standout feature in your home. This style offers endless possibilities, transforming an ordinary floor into a work of art. Patterns such as wide stripes, dynamic zigzags, delicate floral motifs, or custom freehand illustrations can become captivating elements, dictating the mood and style of the entire room.
For a precise, professional look, stencils are an excellent tool. However, if you’re feeling adventurous, freehand designs can offer a unique, artistic touch. Whatever pattern you choose, graphic painted floors enable you to infuse your space with a deeply personalized aesthetic that reflects your individual taste and creativity, setting a distinctive tone for the room.
How to Create Graphic Painted Floors:
- First, decide on your specific graphic design: whether it’s bold stripes, energetic zigzags, intricate floral patterns, or a completely custom design.
- Prepare the floor by cleaning it thoroughly and sanding lightly if necessary to promote optimal paint adhesion. Apply a primer if required for your chosen paint type and surface.
- Using a tape measure, ruler, and pencil, carefully measure and mark your chosen design onto the floor. Precision in this step is vital for a professional finish.
- Apply high-quality painter’s tape along the outlines of your design to ensure perfectly clean and sharp edges.
- Apply the base color of your design using a roller or brush, ensuring even coverage. Allow this layer to dry completely according to manufacturer instructions.
- Carefully add subsequent colors or intricate details, allowing each layer to dry fully before applying the next to prevent smudging or bleeding.
- Once all paint layers are completely dry, carefully and slowly remove the painter’s tape to reveal your crisp graphic design.
- Finally, apply a clear, durable sealant or topcoat to protect your design from wear, enhance its lifespan, and provide a lasting finish. Allow it to cure fully.
4. Mosaic or Tile Illusions
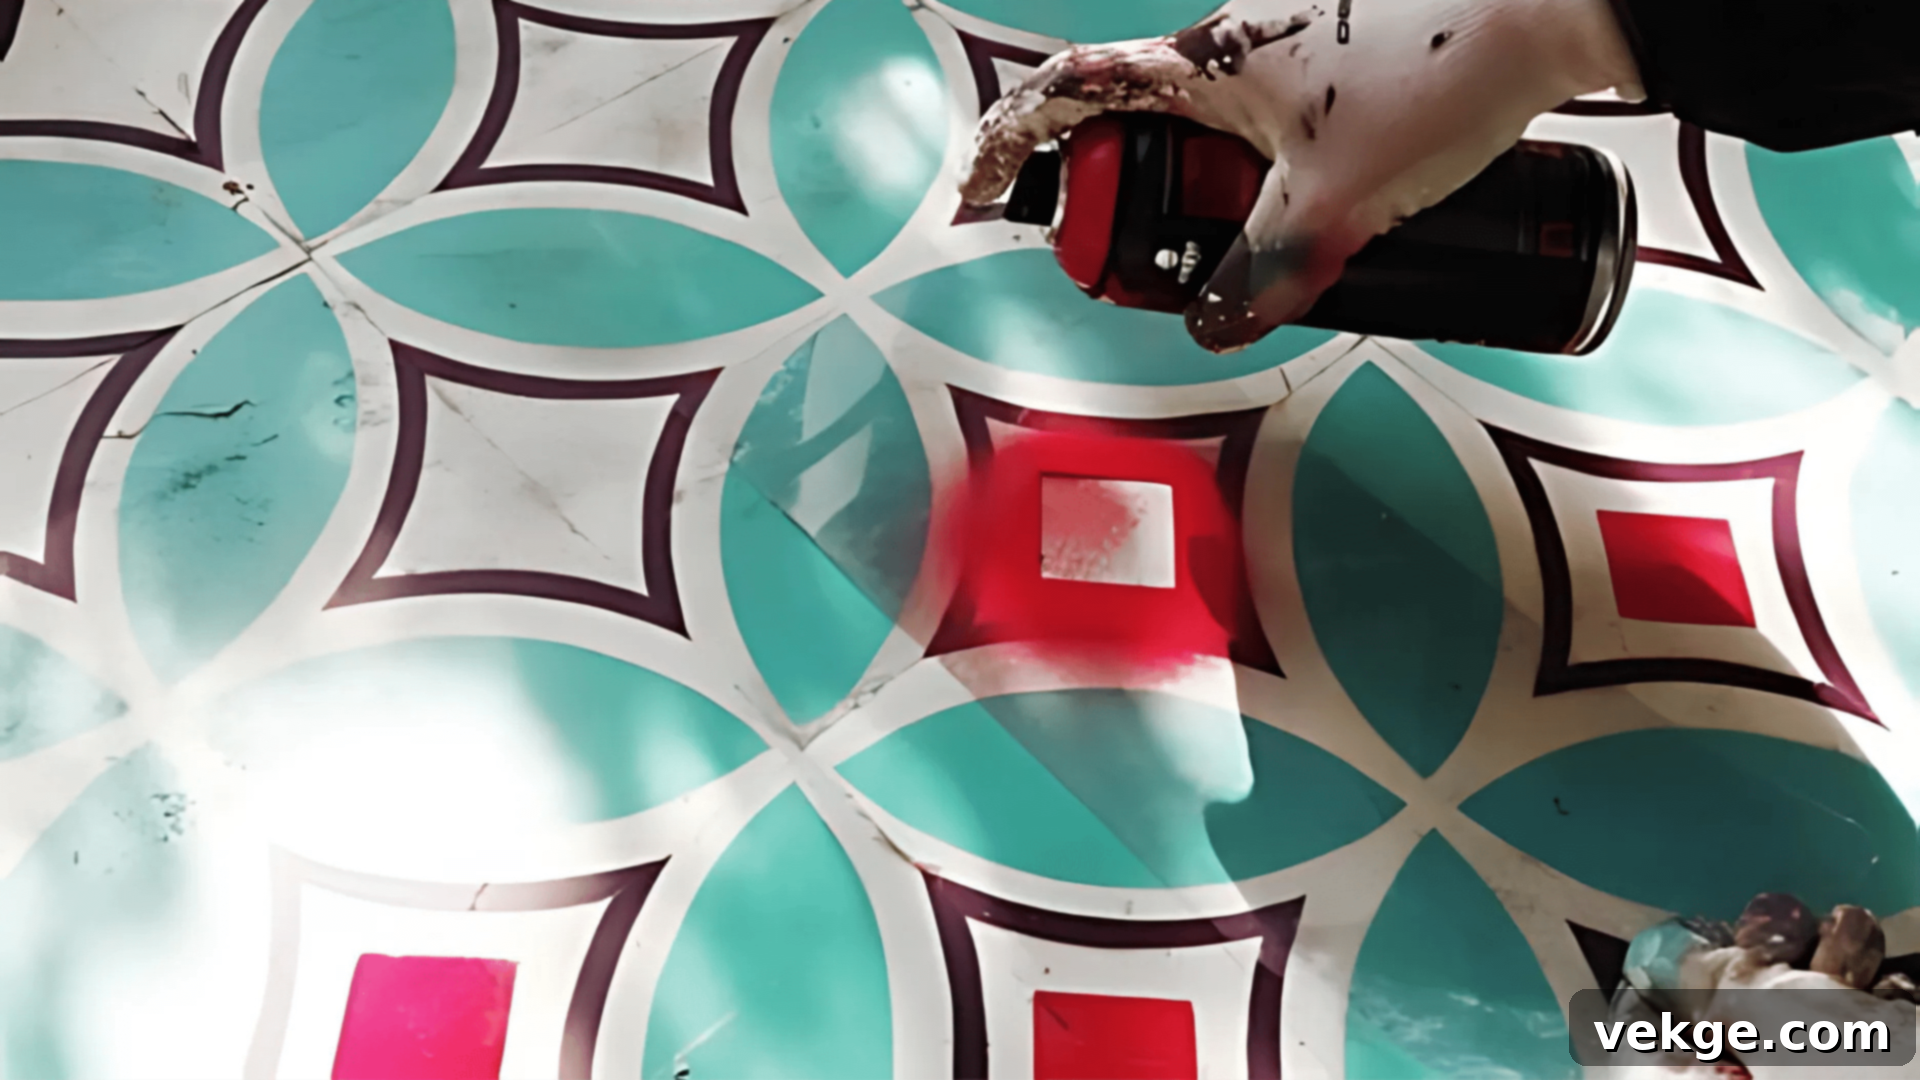
Creating the captivating look of mosaic or traditional tiles with paint is a brilliantly simple and cost-effective way to add significant style and character to your floors. This method allows you to mimic the intricate beauty and vibrant textures of real mosaic tiles or the clean lines of ceramic tiles without the expense, weight, or complexity of actual tile installation. Whether you opt for pre-made stencils for consistency or choose to paint by hand for a more artisanal touch, this approach lets you imbue a room with a unique, lively, and highly personalized ambiance, all while being incredibly budget-friendly.
Mosaic or tile illusions are particularly effective in spaces like bathrooms, sunrooms, patios, or kitchens, where they can make a room feel more open, colorful, and architecturally interesting. They are also an excellent choice for entryways or hallways, offering a welcoming splash of creativity and giving your home a distinctive first impression.
How to Create Mosaic Tile Illusions:
- Select your desired pattern or design, deciding whether you’ll achieve it using stencils for uniformity or paint freehand for a unique touch.
- Clean the floor meticulously to remove any dirt, dust, or grease. Lightly sand the surface if necessary to ensure better paint adhesion.
- Using a pencil or chalk, lightly mark out your design on the floor, ensuring spacing and alignment are accurate.
- Apply painter’s tape to outline the “grout lines” or the distinct sections of your design, ensuring sharp and clean edges for each “tile.”
- Paint the design, using a small brush for intricate details and a roller for larger, more uniform areas. Choose colors that complement your room’s aesthetic.
- Allow each layer of paint to dry completely before applying another coat or moving on to an adjacent section to prevent colors from bleeding.
- Once the paint is thoroughly dry, carefully peel off the painter’s tape to reveal your clean-edged mosaic or tile pattern.
- Finally, apply a clear, durable sealant or topcoat to protect the design from foot traffic and moisture, ensuring it looks fresh and vibrant for years. Allow it to cure fully before use.
5. Solid Colors and Subtle Patterns
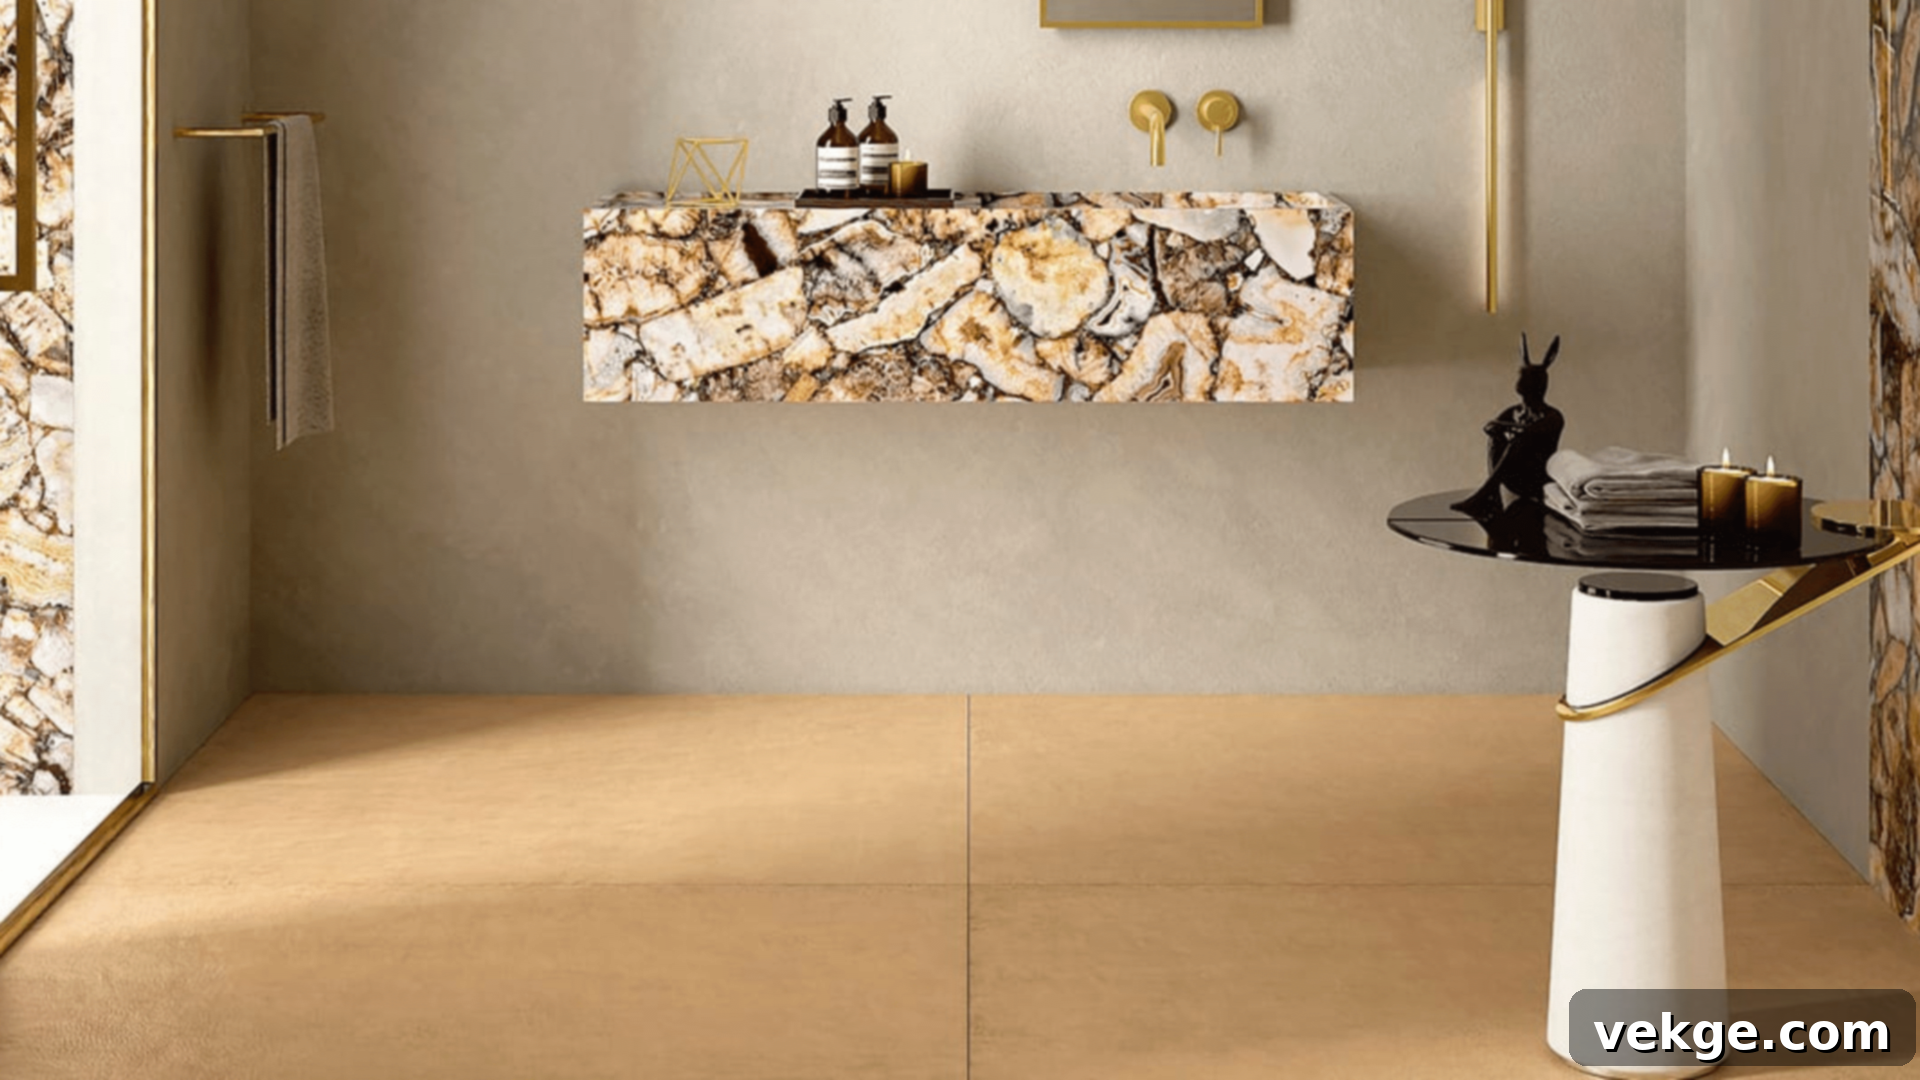
Solid-color floors are an excellent choice for maintaining a sense of simplicity, elegance, and sophistication, especially within minimalist or contemporary design schemes. A monochrome floor can instantly impart a feeling of calm, order, and spaciousness, making any room feel clean, expansive, and uncluttered. It serves as a versatile foundation that seamlessly complements a wide array of furniture styles and decor choices, ensuring your space feels cohesive and balanced. Furthermore, solid-color floors are incredibly easy to maintain and offer a timeless appeal.
To add a touch of interest without overwhelming the space, consider incorporating subtle textures or accents. This could involve a gentle gradient effect, where colors subtly shift from one shade to another, or light, tone-on-tone patterns (like a faint geometric or striped stencil) that blend harmoniously into the base color. These subtle details add depth and visual intrigue, elevating the floor from merely functional to a thoughtfully designed element of the room.
How to Create Solid Colors and Subtle Patterns:
- Carefully select a solid color that perfectly aligns with the desired style, mood, and existing decor of the room.
- Thoroughly clean the floor to remove all dirt, dust, and grease. Lightly sand the surface if necessary to ensure optimal paint adhesion and a smooth finish.
- Apply a high-quality primer and allow it to dry completely according to the manufacturer’s instructions. This step is crucial for even color application and durability.
- Paint the entire floor with your chosen solid color, using a roller for smooth, even coverage. Work in manageable sections to maintain a wet edge and avoid lap marks.
- Allow the first coat to dry fully before applying a second coat. Two thin coats are always better than one thick coat for durability and a professional finish.
- If adding subtle patterns, carefully apply them using stencils or light hand-painting techniques after the solid color is completely dry. Use a slightly different shade of the same color for a tone-on-tone effect.
- Once all paint layers are thoroughly dry, apply a clear, durable protective finish (sealant or topcoat) to seal the floor, protect it from wear, and ensure its longevity.
6. Marble Effect
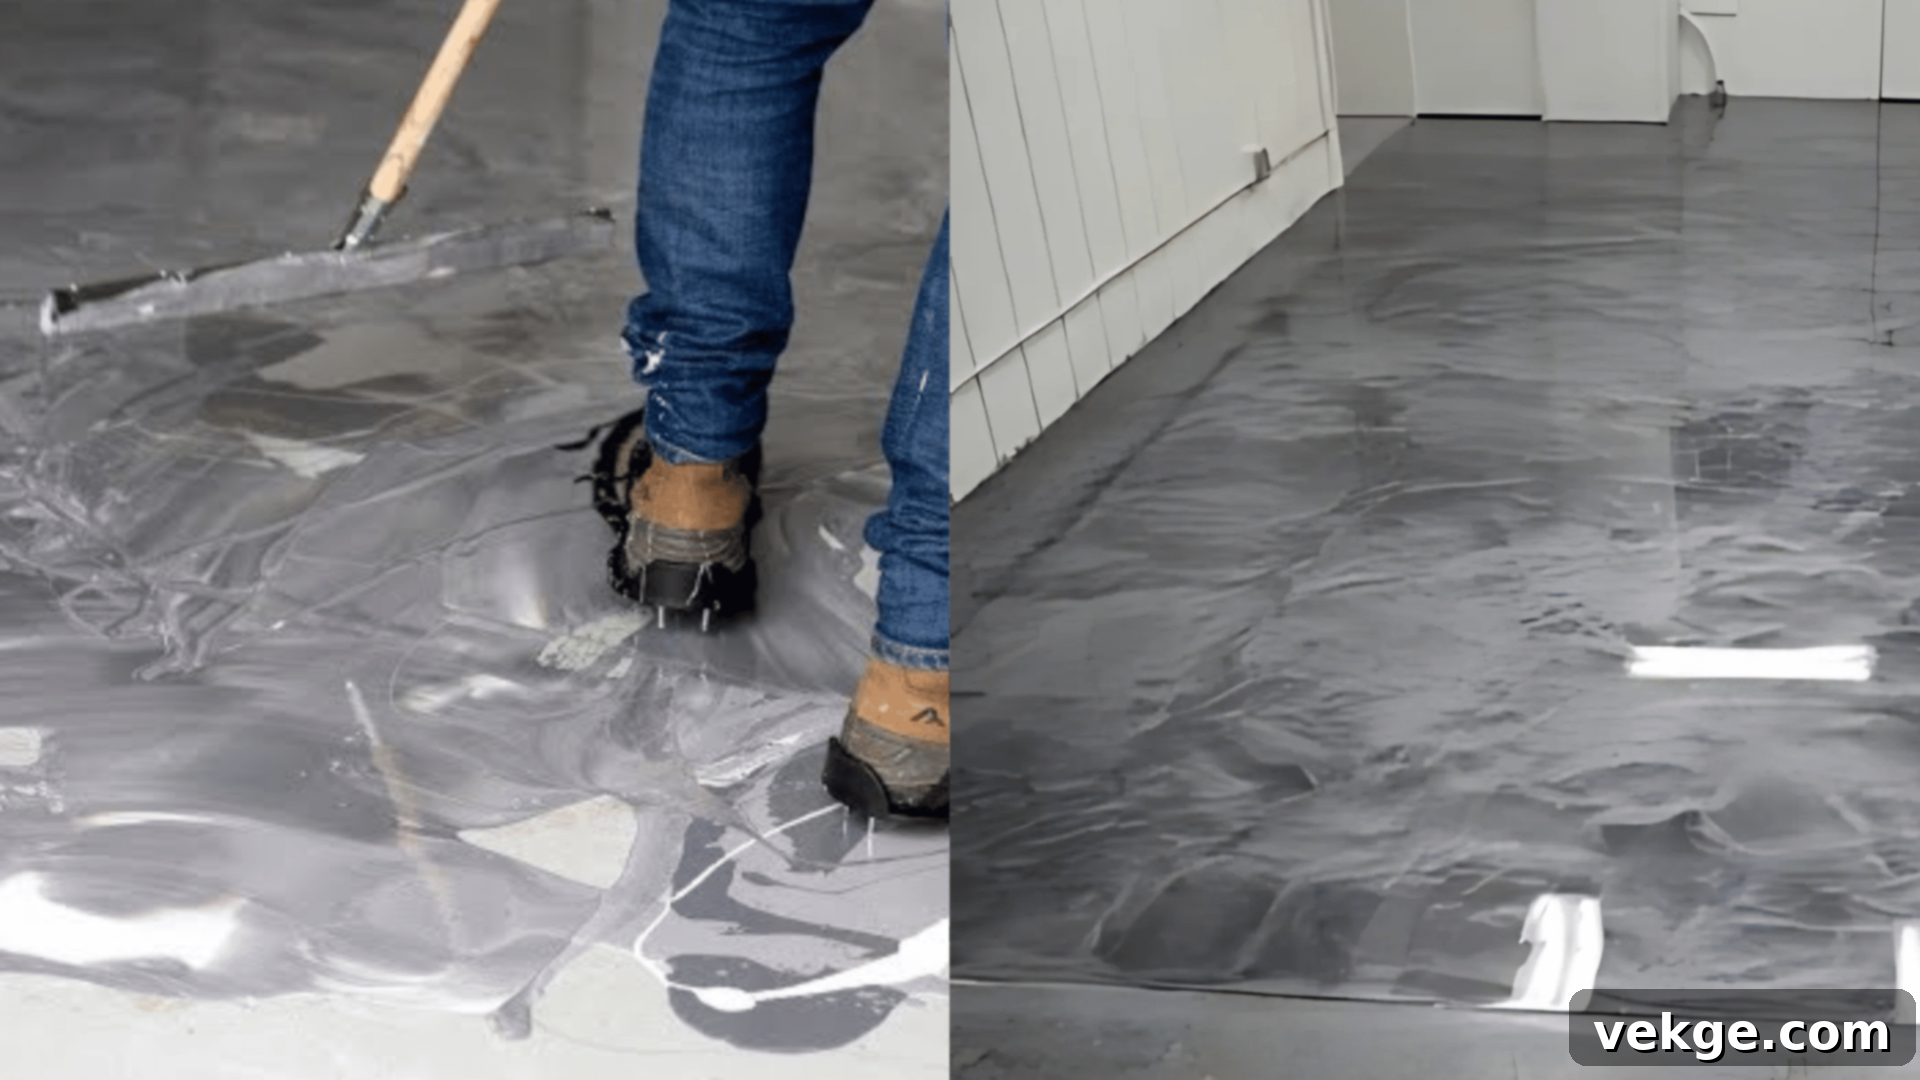
Achieving a stunning marble effect on your floor can instantly elevate the aesthetic of any room, imparting a sophisticated and luxurious sheen without the prohibitive cost and weight of genuine marble slabs. By skillfully blending various shades of gray, white, and subtle hints of black, you can meticulously recreate the intricate veining and ethereal depth that characterizes natural marble. This faux finish is perfect for adding a touch of high-end elegance and opulent luxury to your home, particularly in areas like bathrooms, grand entryways, or formal living rooms.
The beauty of a painted marble pattern lies in its versatility; it can be as understated or as dramatically bold as you desire, allowing for full customization to fit your specific design vision. It’s an accessible and remarkably effective way to upgrade your space, offering a chic, high-end look that is both visually striking and surprisingly durable with proper sealing.
How to Create a Marble Effect:
- Select your primary colors for the marble look, typically shades of white, light gray, medium gray, and a touch of black for depth.
- Thoroughly clean the floor and sand it lightly if needed to ensure a smooth surface and optimal paint adhesion.
- Apply a suitable primer to help the paint stick evenly and let it dry completely according to manufacturer instructions.
- Paint the entire floor with your chosen base color (usually white or a very light gray). Ensure an even, opaque coat and allow it to dry fully.
- Working in manageable sections, use a damp natural sponge, crinkled plastic wrap, or a soft rag to lightly dab and swirl different shades of gray onto the base color. Blend them gently while the paint is still wet to create soft, natural-looking veins.
- Introduce a tiny amount of black paint with a fine brush or sponge to create subtle, sharper veins and add depth, blending it gently into the gray and white areas. Step back frequently to assess the overall effect.
- Once you are satisfied with the marble effect, allow the paint to dry completely. This may take longer due to the layering and blending.
- Finish by applying a clear, high-gloss (or satin, if preferred) sealant or topcoat. This will protect the floor, enhance the marble effect, and make it easy to clean.
7. Faux Rugs
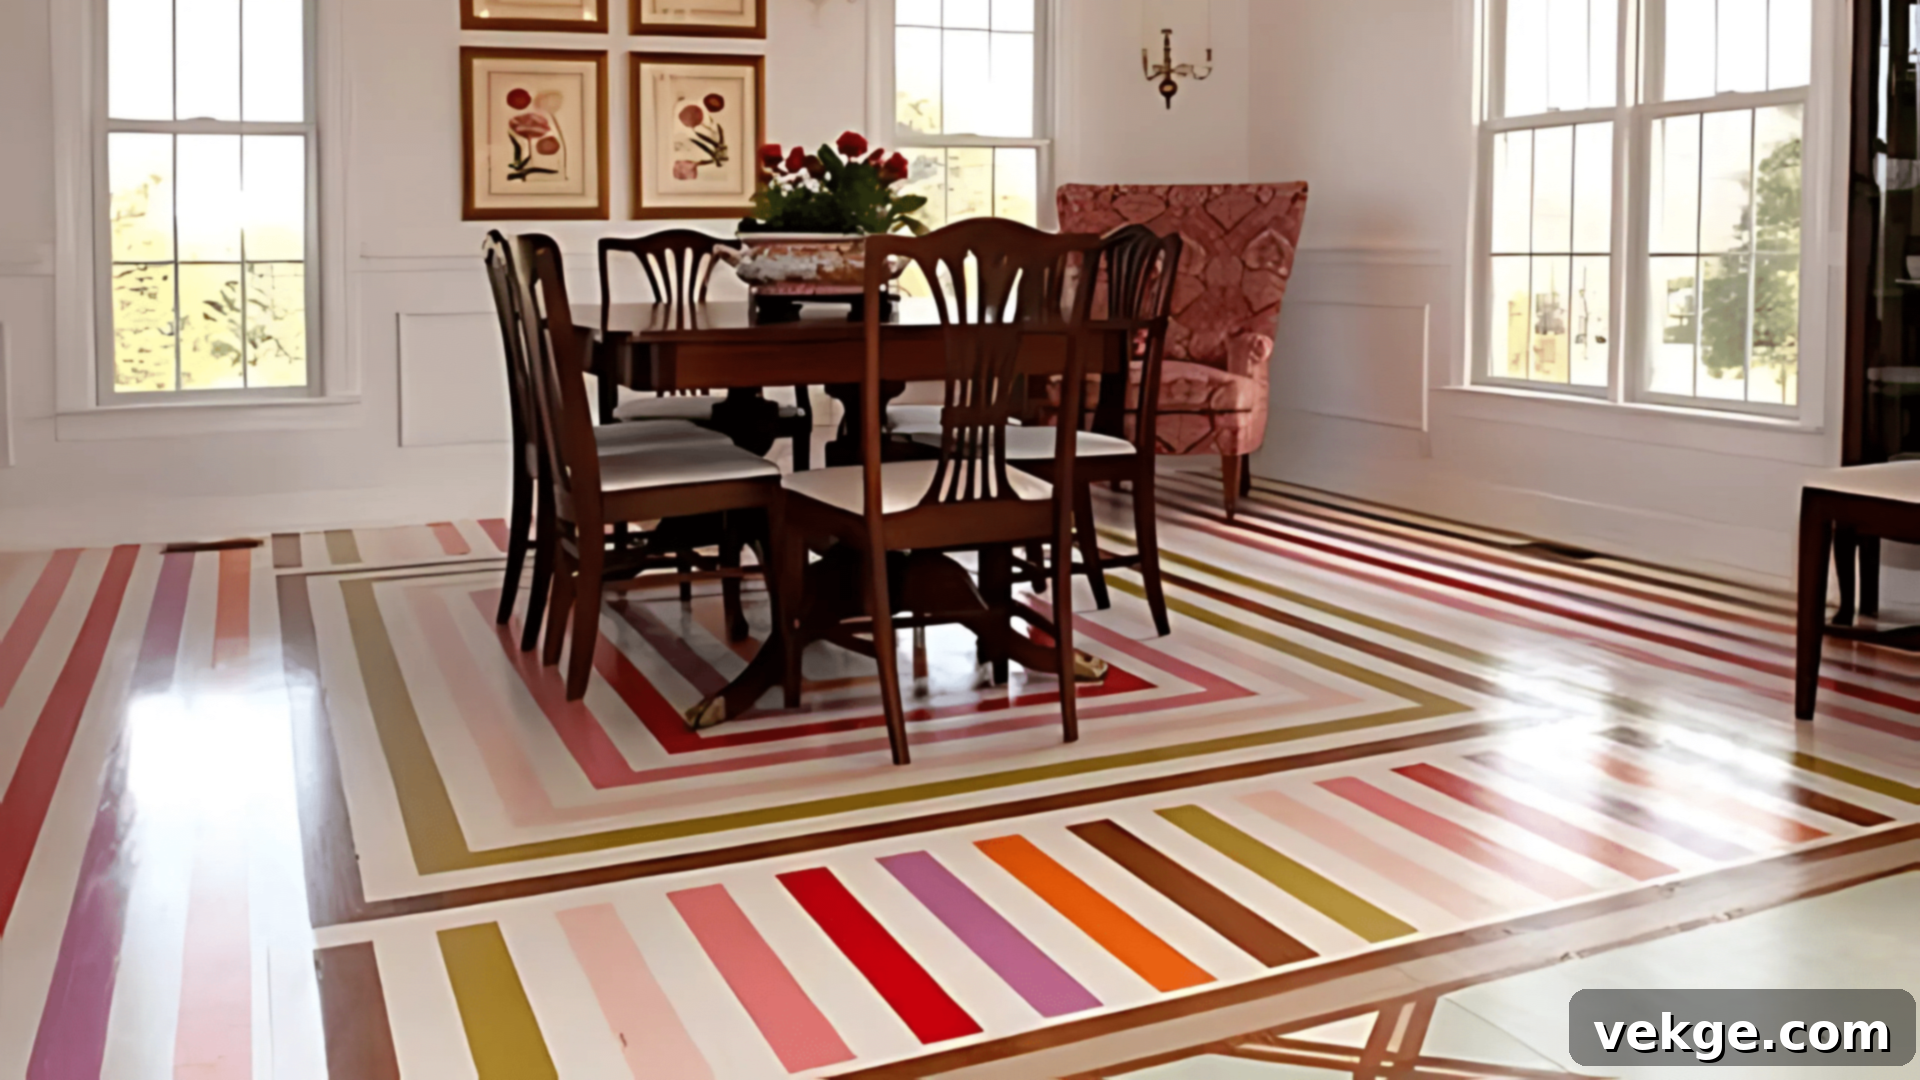
Painting a faux rug directly onto your floor is a clever and stylish way to add a distinct design element to a room without the practical drawbacks of a real rug. Unlike traditional rugs, a painted rug won’t collect dust, slip, or require specialized cleaning, making it a highly functional and hygienic choice. You can strategically paint a rug design in the center of a room, under a dining table, or in a seating area to define a zone, add warmth, or simply introduce a striking visual feature that sets the space apart.
The design possibilities for faux rugs are limitless. You could opt for an elaborate Persian-inspired pattern, complete with intricate details and a rich color palette, to infuse a sense of timeless elegance. Alternatively, geometric patterns such as bold squares, clean stripes, or dynamic chevrons can create a modern, minimalist, or contemporary feel. The freedom to choose any style, size, and color ensures that your painted rug perfectly complements your room’s decor and your personal aesthetic.
How to Paint a Faux Rug:
- Begin by selecting a pattern and color scheme for your faux rug that harmonizes with your room’s existing style, whether it’s a classic Persian design or modern geometric shapes.
- Thoroughly clean the floor, removing all dirt and dust. Lightly sand the area if needed to ensure optimal paint adhesion and a smooth base.
- Carefully measure and mark the desired location and dimensions of your faux rug on the floor, ensuring it is perfectly centered and appropriately sized for the space.
- Use high-quality painter’s tape to meticulously outline the shape of your rug. Press the tape down firmly to create sharp, clean edges and prevent paint bleed.
- Paint the base color of your faux rug using a roller or brush, ensuring even and consistent coverage within the taped area. Allow this coat to dry completely.
- Once the base coat is dry, carefully add your chosen designs or borders onto the rug area. Use stencils for intricate patterns or painter’s tape for stripes and geometric shapes.
- Allow each layer of paint (for borders or patterns) to dry fully before adding subsequent colors or removing tape to prevent smudging.
- Finally, apply a clear, durable sealant or topcoat over the entire faux rug area to protect the design from foot traffic, enhance its longevity, and provide a polished finish.
8. Chevron Entryway
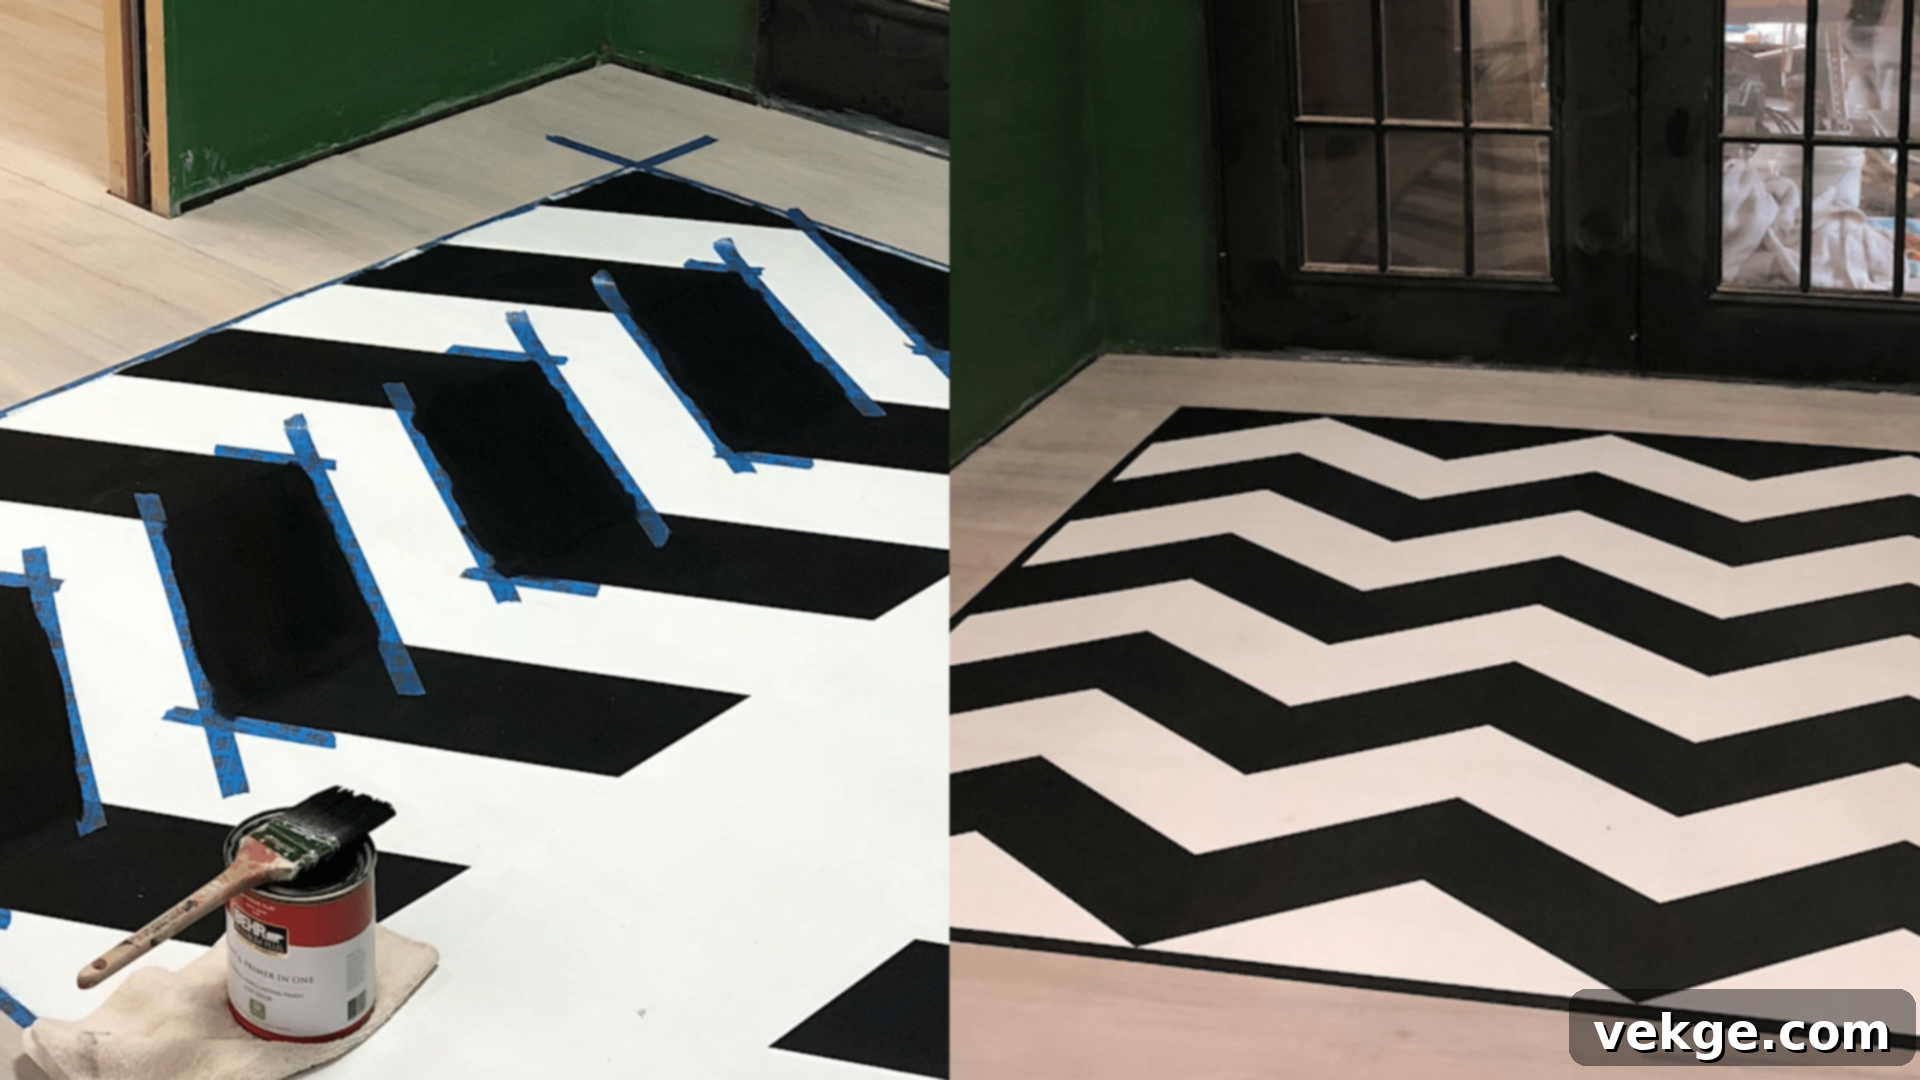
A chevron pattern in your entryway offers an immediate and impactful way to create a stylish and welcoming first impression. The distinctive zigzag design is inherently eye-catching and modern, injecting personality and dynamic movement into what can often be a utilitarian space. By using contrasting colors, such as classic black and white, or more subtle, complementary shades like muted grays and beiges, you can perfectly tailor the chevron pattern to match your home’s existing aesthetic.
Beyond its visual appeal, a chevron pattern cleverly helps to guide the eye, creating an illusion of depth and making the entryway feel more open and expansive. It’s an exceptionally effective and simple technique to add flair and character to a smaller space without making it feel cluttered or overwhelmed, ensuring a memorable welcome for all who enter your home.
How to Paint a Chevron Pattern in an Entryway:
- Choose two colors that complement each other and your home’s decor. High-contrast options like black and white offer a bold statement, while soft tones like gray and beige create a more understated elegance.
- Clean the entryway floor thoroughly, removing all dirt and dust. Lightly sand the surface if needed to ensure proper paint adhesion.
- Using a measuring tape and pencil, carefully mark the width and height of each chevron stripe on the floor. Precision in this step is crucial for a uniform pattern.
- Apply high-quality painter’s tape to meticulously outline the zigzag lines of your chevron pattern. Ensure the tape is pressed down firmly along all edges to create sharp, clean lines and prevent paint bleed.
- Paint the first color within the designated chevron shapes using a roller or brush. Apply thin, even coats, and allow this layer to dry completely according to manufacturer instructions.
- Once the first color is thoroughly dry, carefully fill in the remaining sections with your second color. Allow each subsequent layer to dry completely before proceeding.
- After all paint is completely dry, carefully and slowly remove the painter’s tape to reveal your crisp, perfectly defined chevron pattern.
- Finish by applying a clear, durable sealer or topcoat. This will protect the paint from foot traffic, enhance its longevity, and maintain its fresh, vibrant appearance.
9. Rustic or Weathered Look
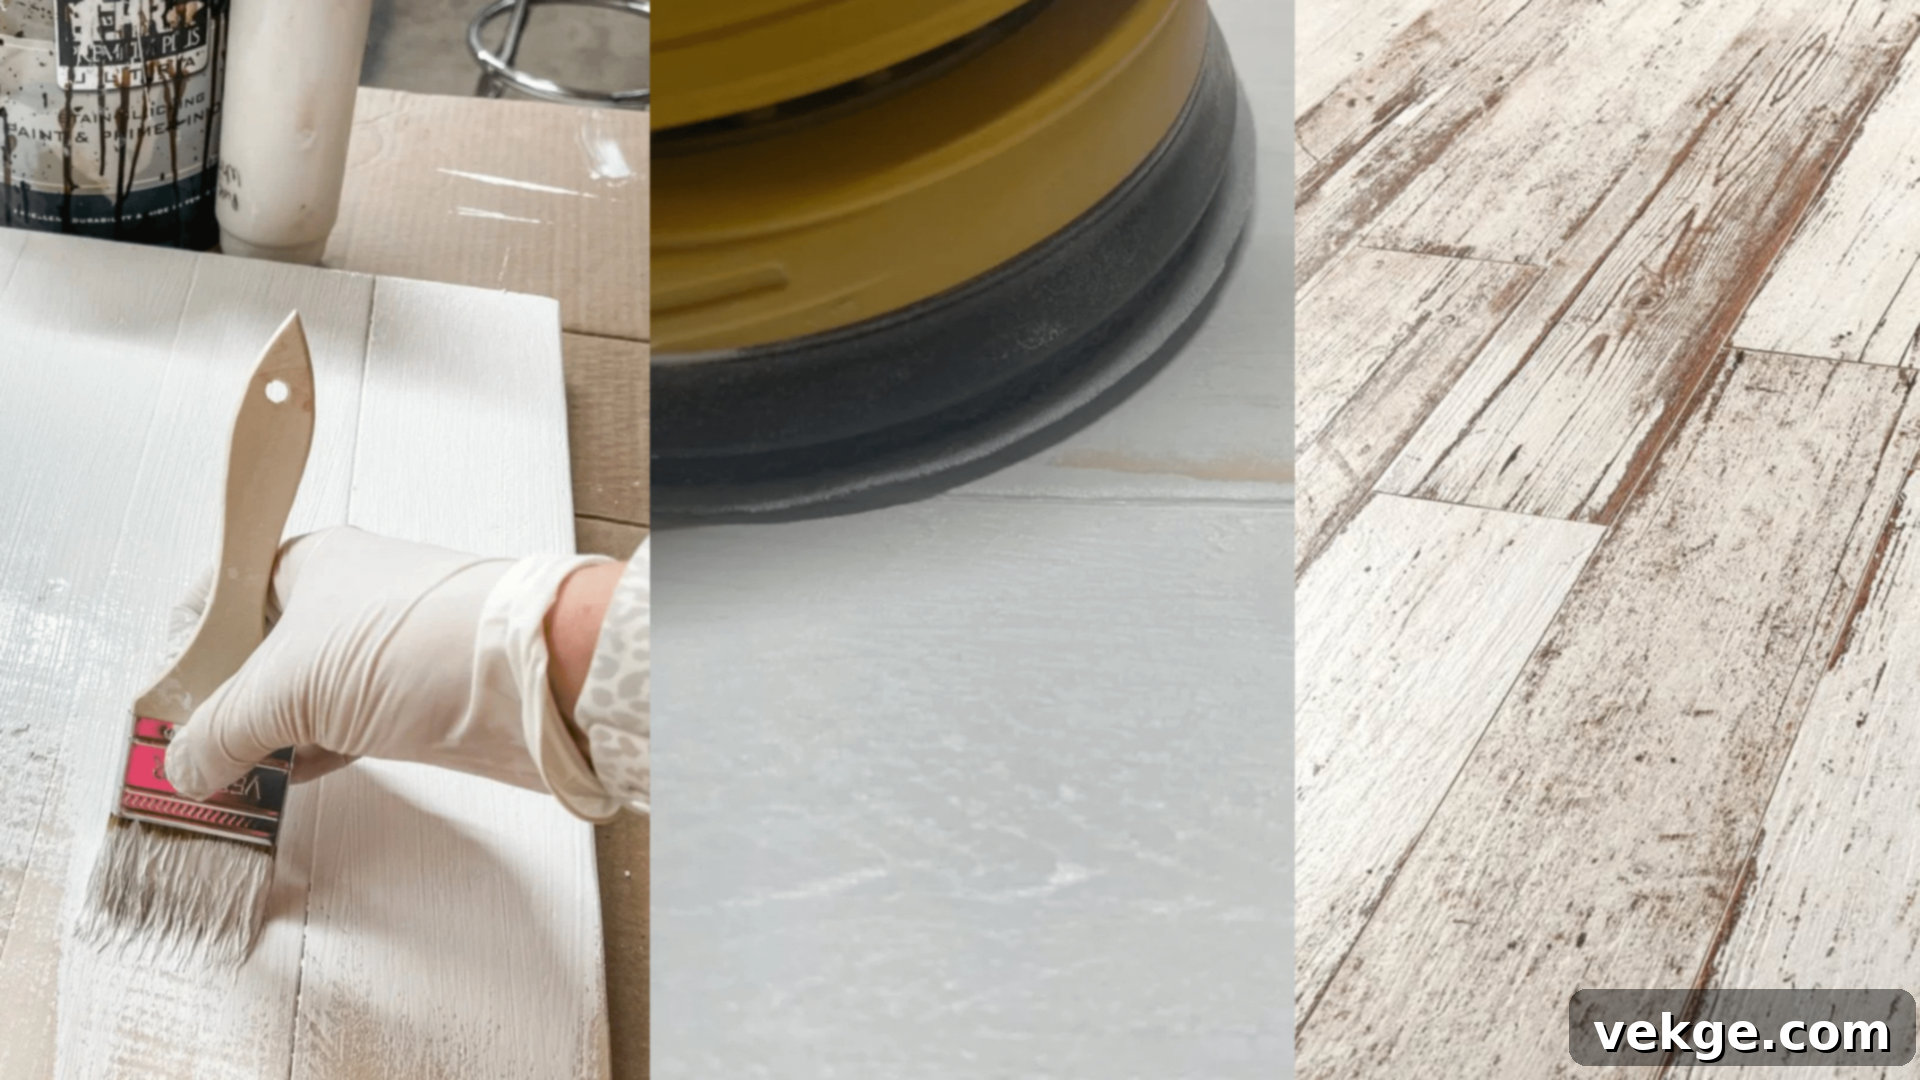
A rustic or weathered look on your floor immediately imparts a cozy, inviting, and timeless old-fashioned charm to any room. This technique artfully mimics the appearance of natural wear and tear over time, creating a sense of history and adding undeniable warmth and character. It’s a perfect style for spaces aiming for a farmhouse, cottage, shabby chic, or industrial aesthetic, establishing a comfortable and lived-in atmosphere that feels genuinely authentic. The inherent beauty of this style lies in its imperfections; subtle distressing, minor scuffs, and variations in texture only enhance its appeal.
You have full creative control to make the weathered effect as subtle or as boldly distressed as you desire, depending on the intensity of your sanding and layering techniques. A painted floor with a rustic finish will effortlessly make your room feel warm, homely, and full of unique personality.
How to Create a Rustic or Weathered Look:
- Begin by thoroughly sweeping and cleaning the floor to remove all dirt, dust, and any loose debris.
- Lightly sand the floor surface to create a “tooth” for the paint to adhere to, ensuring a longer-lasting finish.
- Paint the entire floor with a light base color, such as an off-white, light gray, or pale beige. Allow this coat to dry completely.
- Once the base coat is dry, apply a darker contrasting color, such as a deep brown, charcoal gray, or muted blue. Do not aim for full coverage; apply it sparingly or in a way that allows the base color to peek through in areas.
- While the darker paint is still slightly wet (or after it dries, for a more dramatic effect), use a sanding block or steel wool to lightly distress various areas. Focus on edges, corners, and high-traffic spots where natural wear would occur.
- Step back and assess the look. If needed, apply more dark paint in certain areas and distress again until you achieve your desired level of rustic charm and weathered appearance.
- Once you are completely satisfied with the distressed look and all paint is dry, apply a clear, durable sealer or topcoat to protect the finish. Allow it to dry fully and cure before walking on it.
10. A Tiled Border
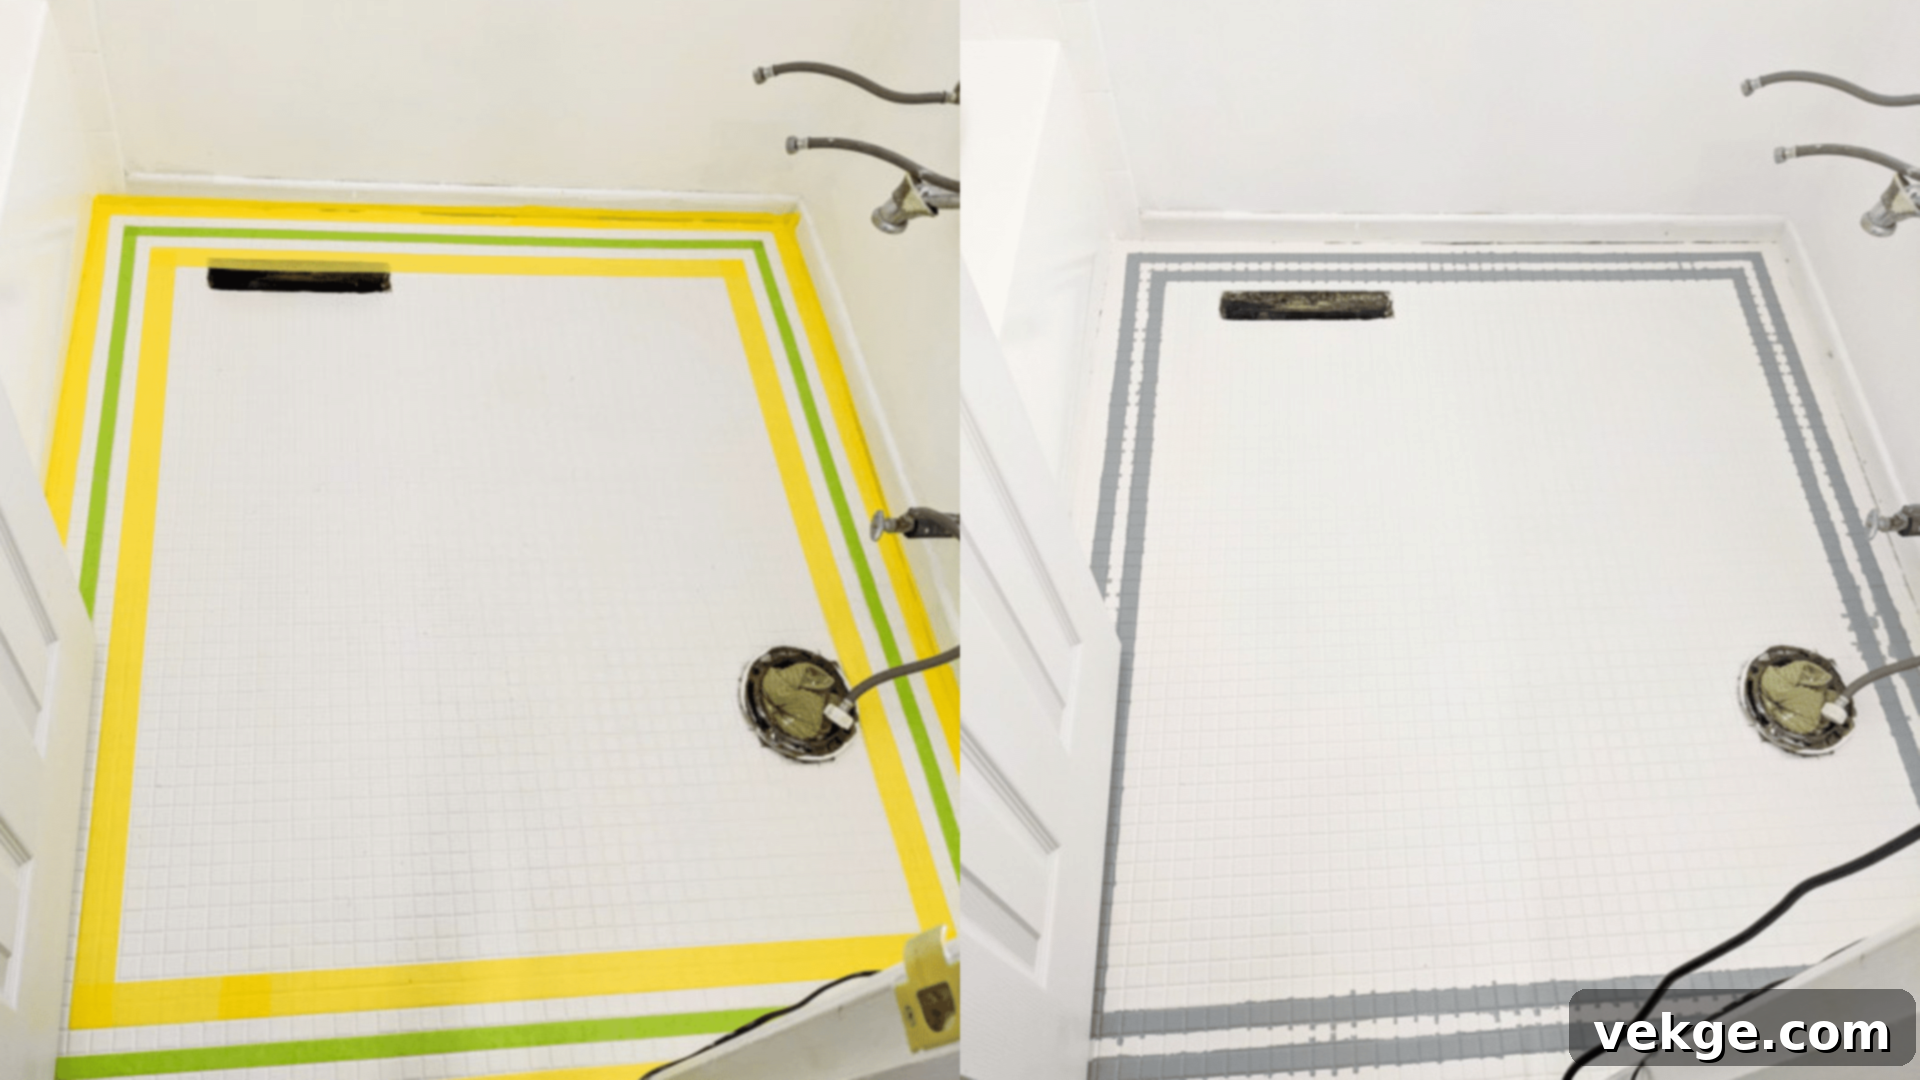
Adding a painted tiled border is a wonderfully simple yet effective way to introduce a touch of refined style and architectural detail to any room. This technique allows you to elegantly highlight the perimeter of your floor without the commitment or expense of covering the entire space. By meticulously painting a decorative border around the room, you can effortlessly create a sophisticated look that beautifully mimics the intricate patterns of real decorative tiles. This approach is particularly perfect for high-impact areas like entryways, hallways, or kitchens, where a subtle design can make a significant difference.
You have the flexibility to keep the border design simple and monochromatic for a subtle touch, or unleash your creativity with vibrant patterns and multiple colors for a more dramatic statement. This is a quick, affordable, and impactful way to make your floor stand out and add visual interest while maintaining an open, airy, and fresh feel throughout the room.
How to Paint Tiled Borders:
- Begin by choosing your desired colors and patterns for the border. Consider whether you want a single color, a geometric design, or a stenciled motif.
- Thoroughly clean the floor, ensuring it is free of all dirt, dust, and debris. Allow it to dry completely.
- Using a measuring tape, ruler, and pencil, carefully measure and mark the exact width and placement of where you want the border to go around the room’s perimeter.
- Apply high-quality painter’s tape along the marked lines, both on the inside and outside of your border area, to ensure perfectly clean and crisp edges. Press the tape down firmly.
- Paint the border with your chosen color(s) or pattern, applying even coats with a brush or small roller. Allow each coat to dry completely before applying subsequent layers.
- Once the paint is thoroughly dry, carefully and slowly remove the painter’s tape to reveal your beautifully defined tiled border.
- Finish by applying a clear, durable protective sealant or topcoat over the painted border. This will shield it from foot traffic and wear, keeping it looking great for years to come.
11. Trellis Patterns
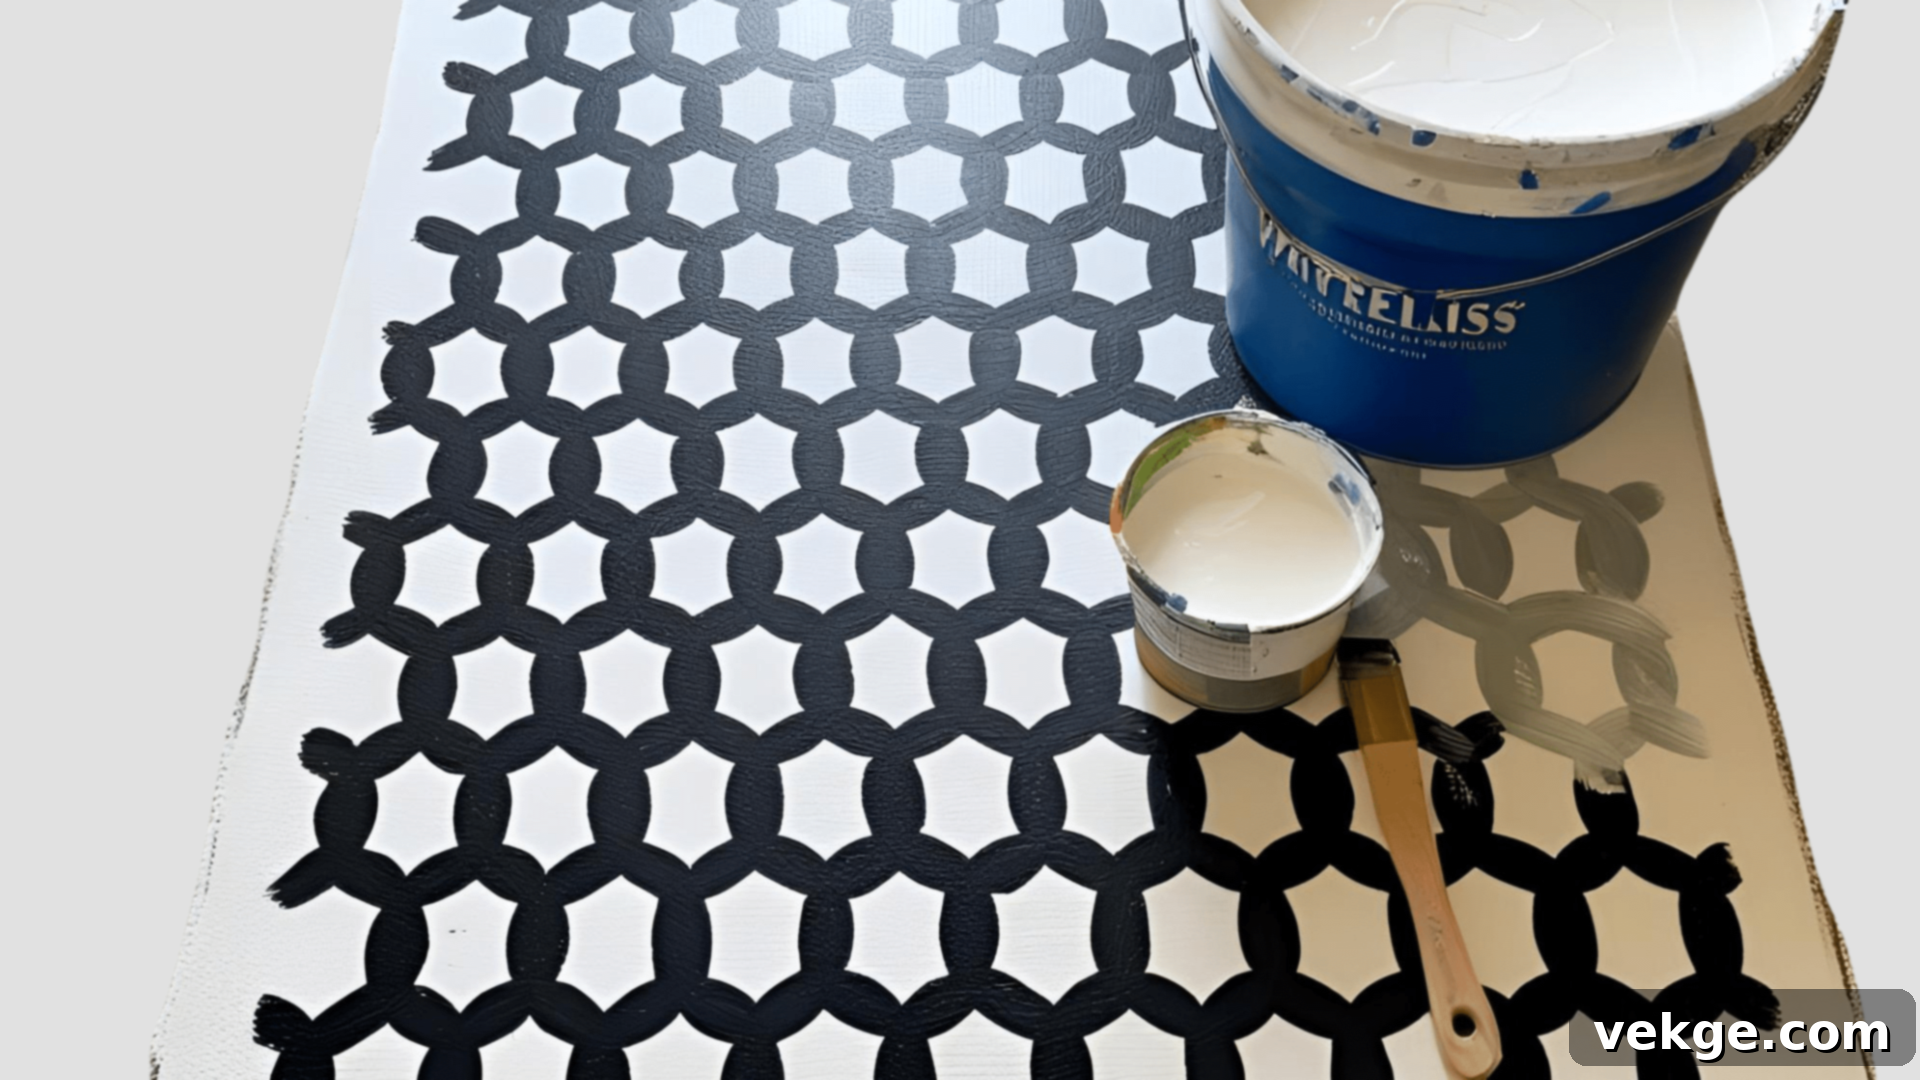
A trellis pattern, often reminiscent of garden latticework, instantly adds a sophisticated, elegant, and exceptionally clean look to any room. It’s a classic and adaptable design that can make the floor feel more expansive, visually cohesive, and inherently inviting. A lattice or trellis pattern, especially executed in soft, muted, or neutral tones such as beige, light gray, or white, lends the space a fresh, contemporary, and airy vibe without being overly bold or distracting. The understated elegance of this design ensures it complements a variety of decor styles.
This style works particularly well in communal areas like living rooms, serene spaces such as bedrooms, or even transition zones like hallways. It subtly elevates the floor from a mere surface to a refined focal point, adding texture and visual interest in a refined manner.
How to Paint a Trellis Pattern:
- Choose soft, neutral colors for your trellis design, such as various shades of beige, light gray, off-white, or muted pastels. These colors typically create the most elegant and versatile trellis effect.
- Thoroughly clean and prepare the floor for painting, ensuring it is free of all dirt, dust, and grease for optimal paint adhesion.
- Using a pencil, ruler, and measuring tape, lightly mark out the grid or diamond pattern for your trellis design on the floor. Ensure consistent spacing and symmetry.
- Apply high-quality painter’s tape along all the lines and edges of your pattern to ensure neat, crisp lines. Press the tape down very firmly to prevent any paint from bleeding underneath.
- First, paint the background color of your floor, ensuring even coverage. Allow this layer to dry completely according to the manufacturer’s instructions.
- Once the background is dry, carefully paint the trellis design in your chosen contrasting or complementary color, using a brush or small roller. Pay close attention to keeping the lines clean and even.
- Allow each layer of paint to dry thoroughly before applying more paint or moving to adjacent sections. Patience is crucial for a clean finish.
- When all paint is completely dry, carefully and slowly remove the painter’s tape to reveal your intricate trellis pattern.
- Finally, apply a clear, durable sealer or topcoat to protect the floor from wear and tear, enhancing its longevity and providing a professional, polished finish.
12. Tartan Plaid
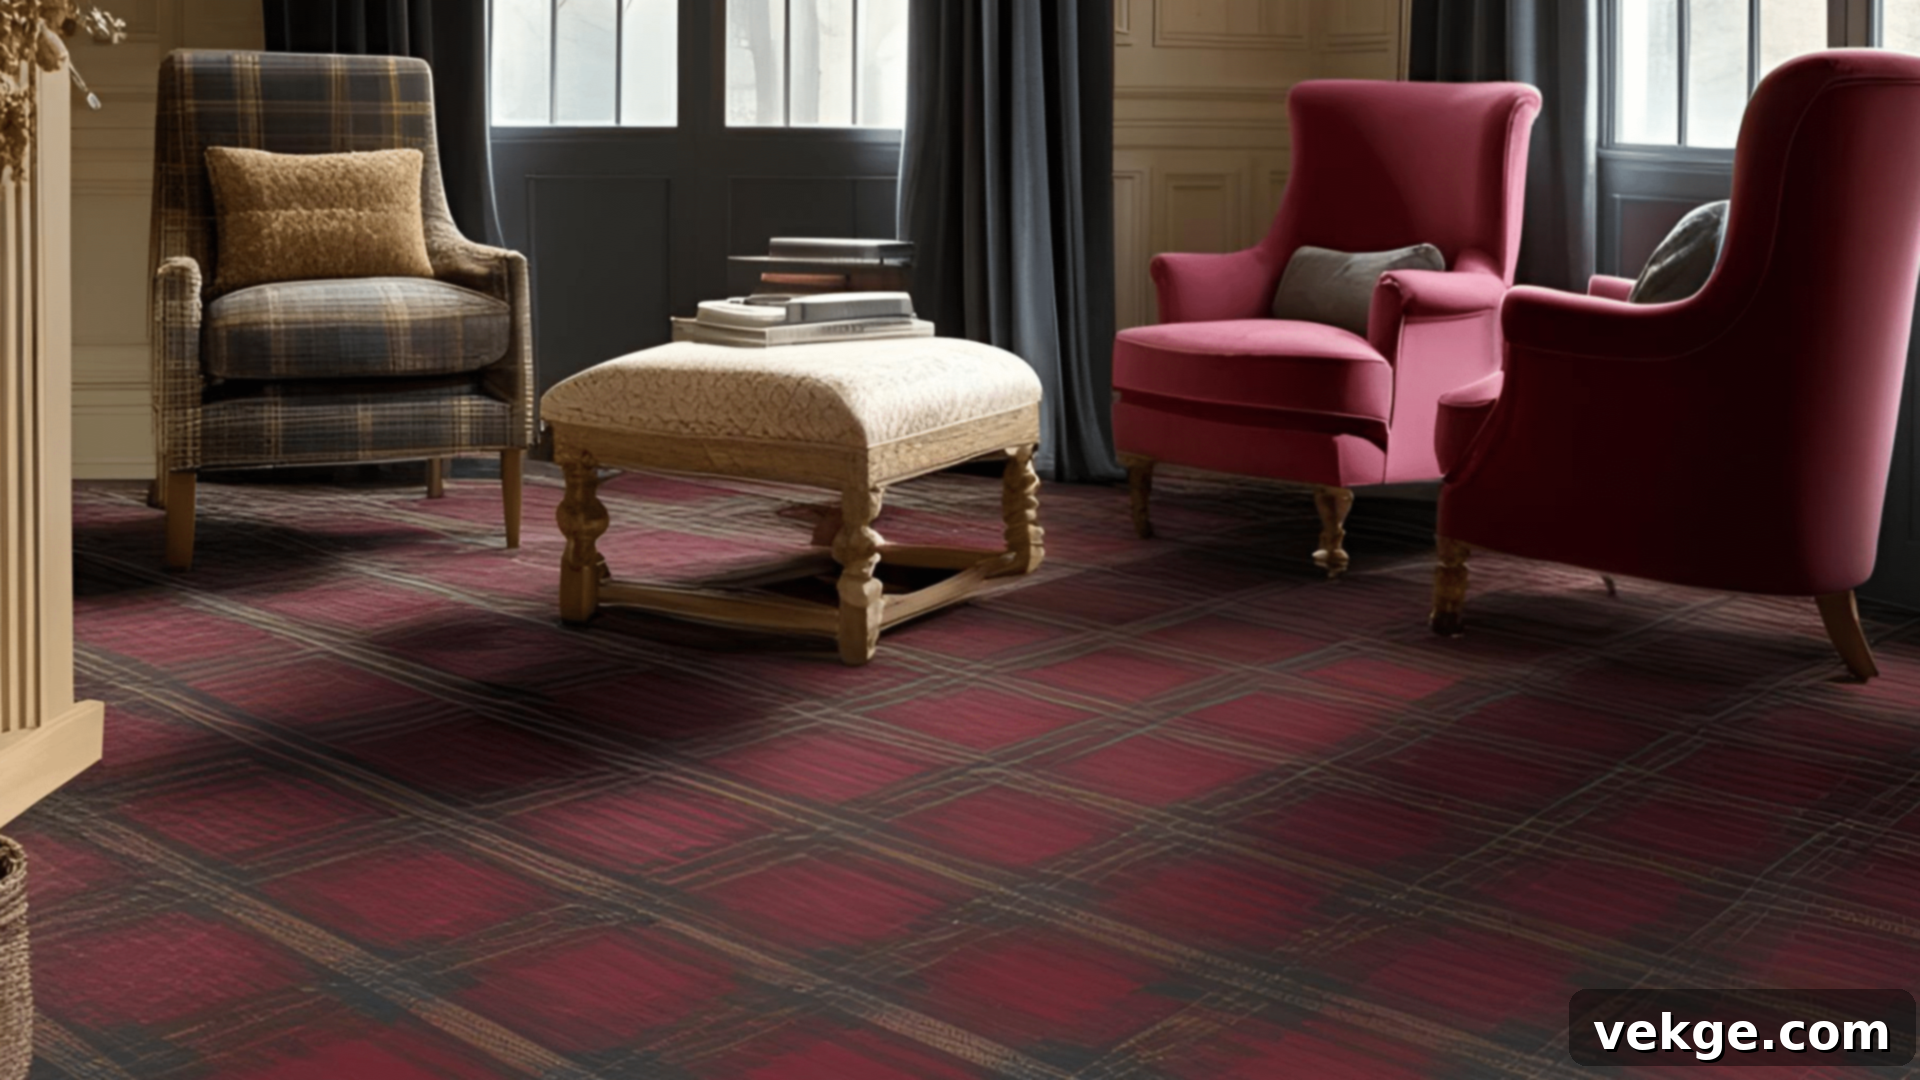
A tartan plaid pattern brings an instant sense of cozy warmth, timeless tradition, and sophisticated character to any room. The classic design, characterized by its distinctive crisscrossing horizontal and vertical bands in varying widths and colors, adds depth, texture, and undeniable charm to the floor. Tartan plaid works perfectly in spaces where you want to evoke a sense of heritage, comfort, and inviting hospitality, such as living rooms, studies, bedrooms, or even welcoming entryways.
The pattern is bold enough to make a significant statement, yet its inherent structure allows it to blend harmoniously with other decor elements. You can embrace traditional color schemes featuring rich reds, deep greens, and blues for an authentic look, or experiment with more muted, contemporary tones like grays, creams, and soft browns for a softer, modern interpretation of this beloved classic.
How to Paint a Tartan Plaid Pattern:
- Begin by selecting your desired plaid design colors. Traditional options include red, green, and blue, but feel free to experiment with any combination that suits your style.
- Thoroughly clean and prepare the floor surface to ensure optimal paint adhesion and a smooth base for your detailed design.
- Using a pencil and ruler, meticulously mark out the lines for your plaid pattern. Start with the widest stripes, then the medium, and finally the narrowest, ensuring precise spacing and alignment.
- Apply high-quality painter’s tape to create straight, clean stripes for your first set of lines (e.g., all the horizontal lines). Press the tape down very firmly to prevent paint bleed.
- Paint the wider stripes first, allowing each coat to dry completely. Then, tape off and paint the thinner stripes, carefully building up your plaid pattern.
- Apply multiple thin layers of paint as needed for opaque coverage, allowing each coat to dry fully before applying the next or moving to an adjacent section.
- Once all paint layers are completely dry, carefully and slowly remove the painter’s tape to reveal your intricate tartan plaid design.
- Finish with a clear, durable sealer or topcoat. This protective layer will shield your tartan plaid design from wear, enhance its vibrancy, and ensure its longevity.
13. High-Gloss, High-Contrast
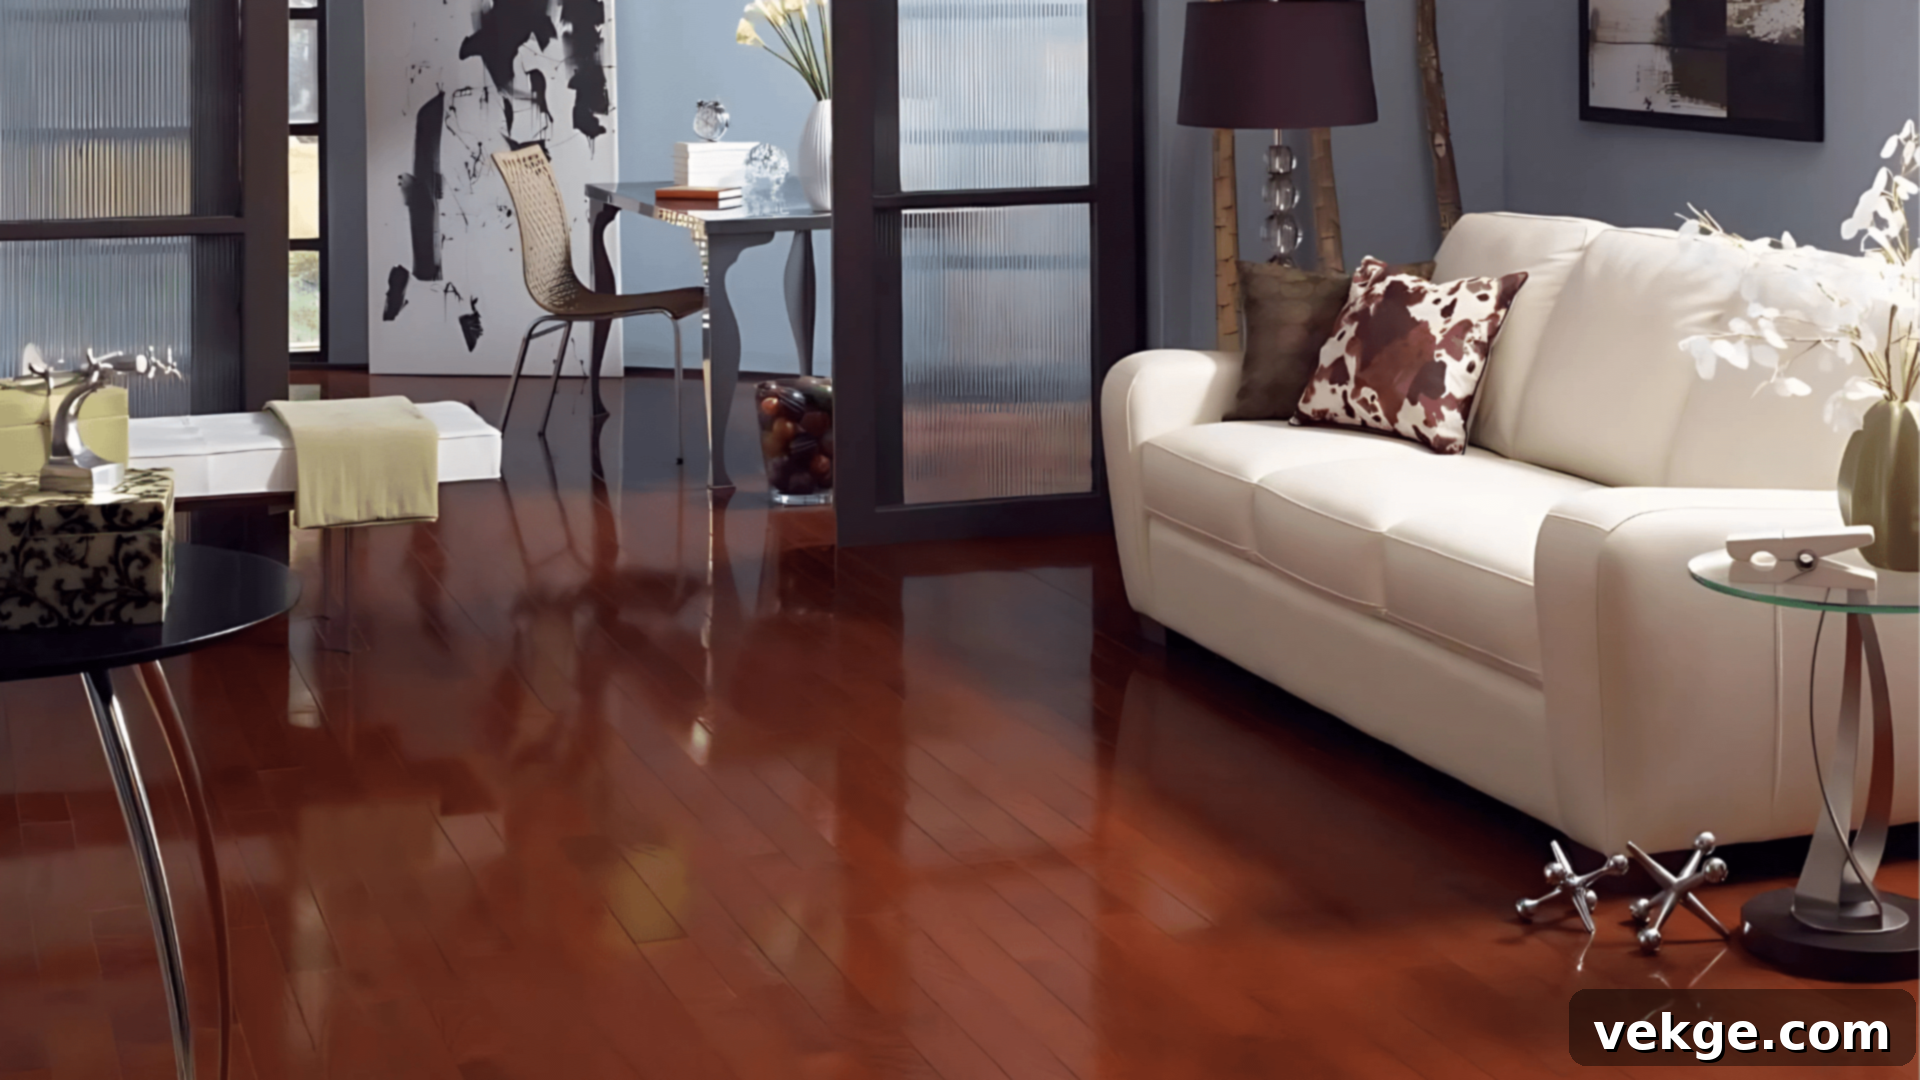
A high-gloss, high-contrast floor, particularly when achieved with a robust resin finish, instantly imbues your space with a sleek, undeniably polished, and ultra-modern aesthetic. Resin provides an exceptionally shiny, incredibly durable, and effortlessly smooth surface that dramatically enhances the visual impact of contrasting dark and light colors. This dynamic interplay makes the floor a captivating focal point that immediately commands attention.
The highly reflective, smooth surface not only creates a luxurious ambiance but also amplifies the brightness of the room by bouncing natural and artificial light around. This bold and sophisticated design works exceptionally well in contemporary urban spaces such as modern living rooms, minimalist kitchens, stylish entryways, or even chic home offices. It delivers a clean, almost mirror-like appearance that is both visually stunning and highly impactful, elevating the entire room’s design.
How to Create a High-Gloss, High-Contrast Resin Floor:
- Select two distinct contrasting colors that will create a dramatic effect, such as classic black and bright white, or sophisticated dark gray and crisp light gray.
- Thoroughly clean the floor, removing all dirt, grease, and dust. Lightly sand the surface if needed to create an optimal profile for resin adhesion.
- Apply a primer specifically formulated to be compatible with resin applications and your floor type. Allow it to dry completely according to the manufacturer’s instructions.
- Paint the floor with your chosen darker base color first, ensuring even and opaque coverage. Allow this coat to dry completely before applying the second color.
- Using high-quality painter’s tape, meticulously define the straight, clean lines or shapes where the two contrasting colors will meet. Press the tape down firmly.
- Apply the lighter contrasting color, ensuring a clean application within the taped areas. Allow all paint layers to dry completely before proceeding to the resin application.
- Carefully mix the two-part epoxy resin according to the manufacturer’s precise instructions. Accuracy in mixing is crucial for proper curing and a flawless finish.
- Apply a thin, even layer of the mixed resin over the entire painted floor, using a squeegee or roller designed for resin application. Work quickly and efficiently to ensure an even, glossy coat.
- Allow the resin to cure fully as per the manufacturer’s specific instructions. This curing process is critical for achieving maximum hardness and durability. Avoid walking on the floor until it is completely cured.
14. Ombre Effect
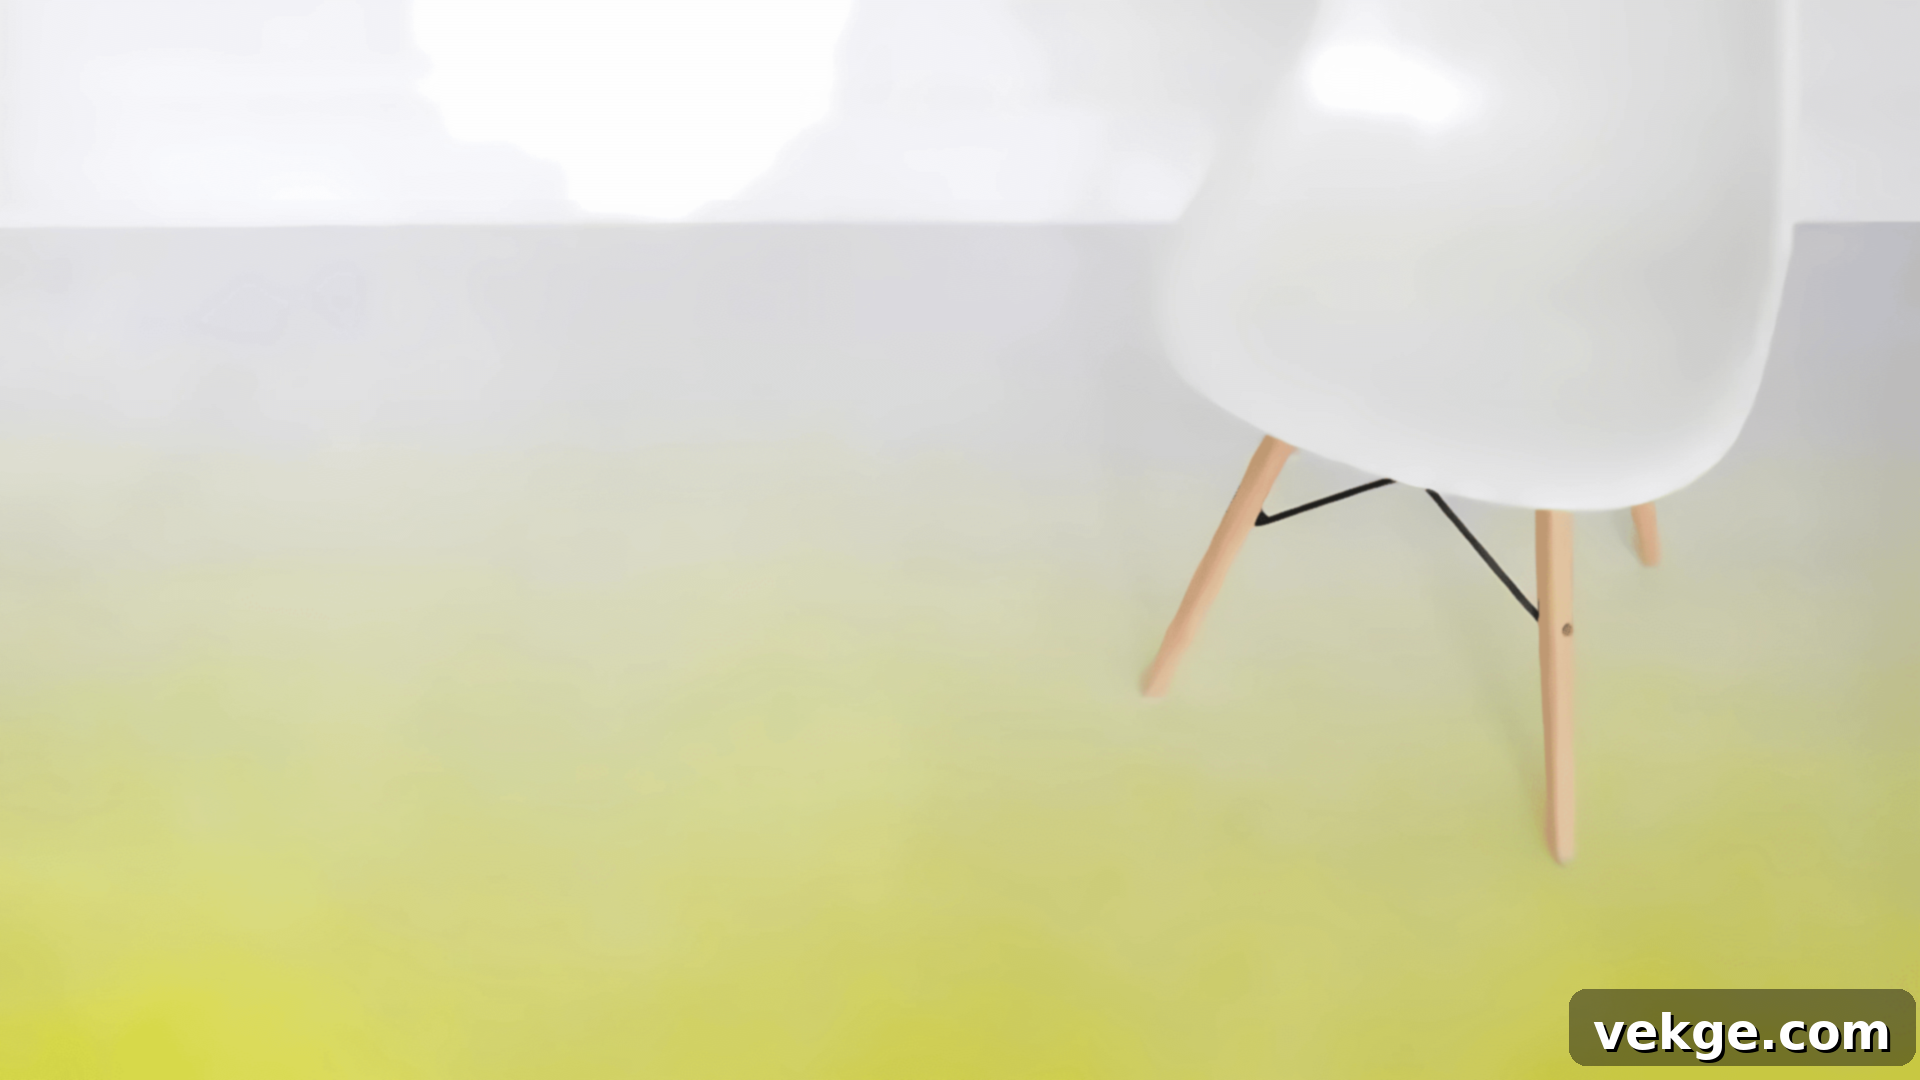
An ombre effect on your floor creates a beautifully smooth, gradual transition from one color to another, or from a lighter to a darker shade of the same color. This sophisticated gradient offers a soft, elegant, and visually appealing look that can add incredible depth and a sense of seamless flow to your space. It’s a particularly effective style for spaces where you want to evoke a tranquil, artistic, or ethereal ambiance.
This design is great for bedrooms, creating a calming retreat; for bathrooms, adding a spa-like feel; or in living rooms, providing a unique and subtle focal point. The ombre effect draws the eye across the room, enhancing the perception of space and adding a modern, artful dimension to your floor.
How to Create an Ombre Floor:
- Thoroughly clean and prepare the floor, ensuring it is smooth, dry, and free from any dust or debris. Apply a primer if necessary.
- Choose two or more colors that blend harmoniously together to create a smooth transition. Consider using shades from the same color family for a subtle effect, or complementary colors for more drama.
- Begin by applying the lighter color at one end of the floor. Then, gradually transition to the darker shade (or your next color) towards the other end. Work in small sections.
- While the paint is still wet, use a clean, dry sponge or a blending brush to gently blend the two colors together at their meeting point, creating a seamless gradient effect.
- Allow each blended section or layer to dry completely before applying additional coats or refining the blend. This may require multiple passes for a perfect transition.
- Once the desired ombre effect is achieved and all paint is thoroughly dry, apply a clear, durable topcoat or sealant to protect the design and enhance its longevity.
15. Cloud Effect

A cloud effect painted on your floor is an ethereal and enchanting design choice that creates a serene, dreamlike, and incredibly tranquil atmosphere. This soft, whimsical pattern is perfect for spaces where you want to foster a sense of calm, peace, and gentle relaxation. It’s an ideal choice for bedrooms, contributing to a restful environment; nurseries, providing a soothing backdrop for little ones; or any room where you desire a quiet and tranquil retreat away from the everyday hustle.
Soft pastel shades, such as pale blues, gentle grays, delicate pinks, and subtle lavenders, are perfectly suited for this design. These colors blend beautifully to mimic the organic, swirling formations of clouds, making the floor feel soft, airy, and truly unique.
How to Create a Cloud Effect:
- Thoroughly clean the floor and apply a light base color, such as crisp white or a very pale blue, across the entire surface. Allow this base coat to dry completely.
- Using a natural sea sponge, a crumpled rag, or a soft, dry brush, begin to lightly dab and swirl other complementary light colors (e.g., soft pink, lavender, pale gray, or a slightly deeper blue) onto the base coat.
- Gently blend the edges of these colors together with a clean, dry brush or sponge, using soft, circular motions to mimic the wispy, organic look of natural clouds.
- Step back frequently to assess the overall effect and add more layers or blend further until you achieve your desired ethereal cloud pattern.
- Allow the paint to dry completely. Once dry, apply a clear, durable topcoat or sealant to protect the delicate design and ensure the longevity of your tranquil floor.
16. Brick Wall Effect
Creating the illusion of a classic brick wall on your floor is an innovative way to introduce a rugged, industrial, or charming rustic feel into your interior space. This distinctive design adds significant texture, visual depth, and a unique architectural aesthetic that can dramatically transform the character of a room. It’s an excellent choice for infusing an urban loft-style apartment with character, enhancing the raw appeal of an industrial-themed kitchen, or adding a touch of rustic warmth to an entryway or mudroom.
The brick wall effect offers the visual appeal of exposed brick without the associated structural challenges, weight, or cost. It creates a grounded, authentic look that can perfectly complement raw materials like wood, metal, and concrete, making your floor a strong design statement.
How to Create a Brick Wall Effect:
- Thoroughly clean and prepare the floor surface, ensuring it is free of all dirt, dust, and debris. Apply a primer if necessary for optimal adhesion.
- Using high-quality painter’s tape, meticulously outline the “grout lines” of your brick pattern. Ensure consistent brick size and spacing for a realistic look. Press the tape down very firmly.
- Apply a base color for the “grout,” which is usually a warm, neutral tone like light gray, beige, or off-white. Allow this coat to dry completely before proceeding.
- Once the grout color is dry, paint the individual “bricks.” You can use a stencil for uniformity or freehand paint them with a darker, brick-red, brown, or burnt orange color.
- To enhance the natural brick look, you can blend slightly different shades of brick color within individual bricks or dab on a second color while the first is wet.
- Allow all paint layers to dry completely. Then, carefully and slowly remove the painter’s tape to reveal the brick and grout lines.
- Finish with a clear, durable topcoat or sealant to protect the design from foot traffic, ensuring its longevity and maintaining its rugged charm.
17. Stained Glass Effect
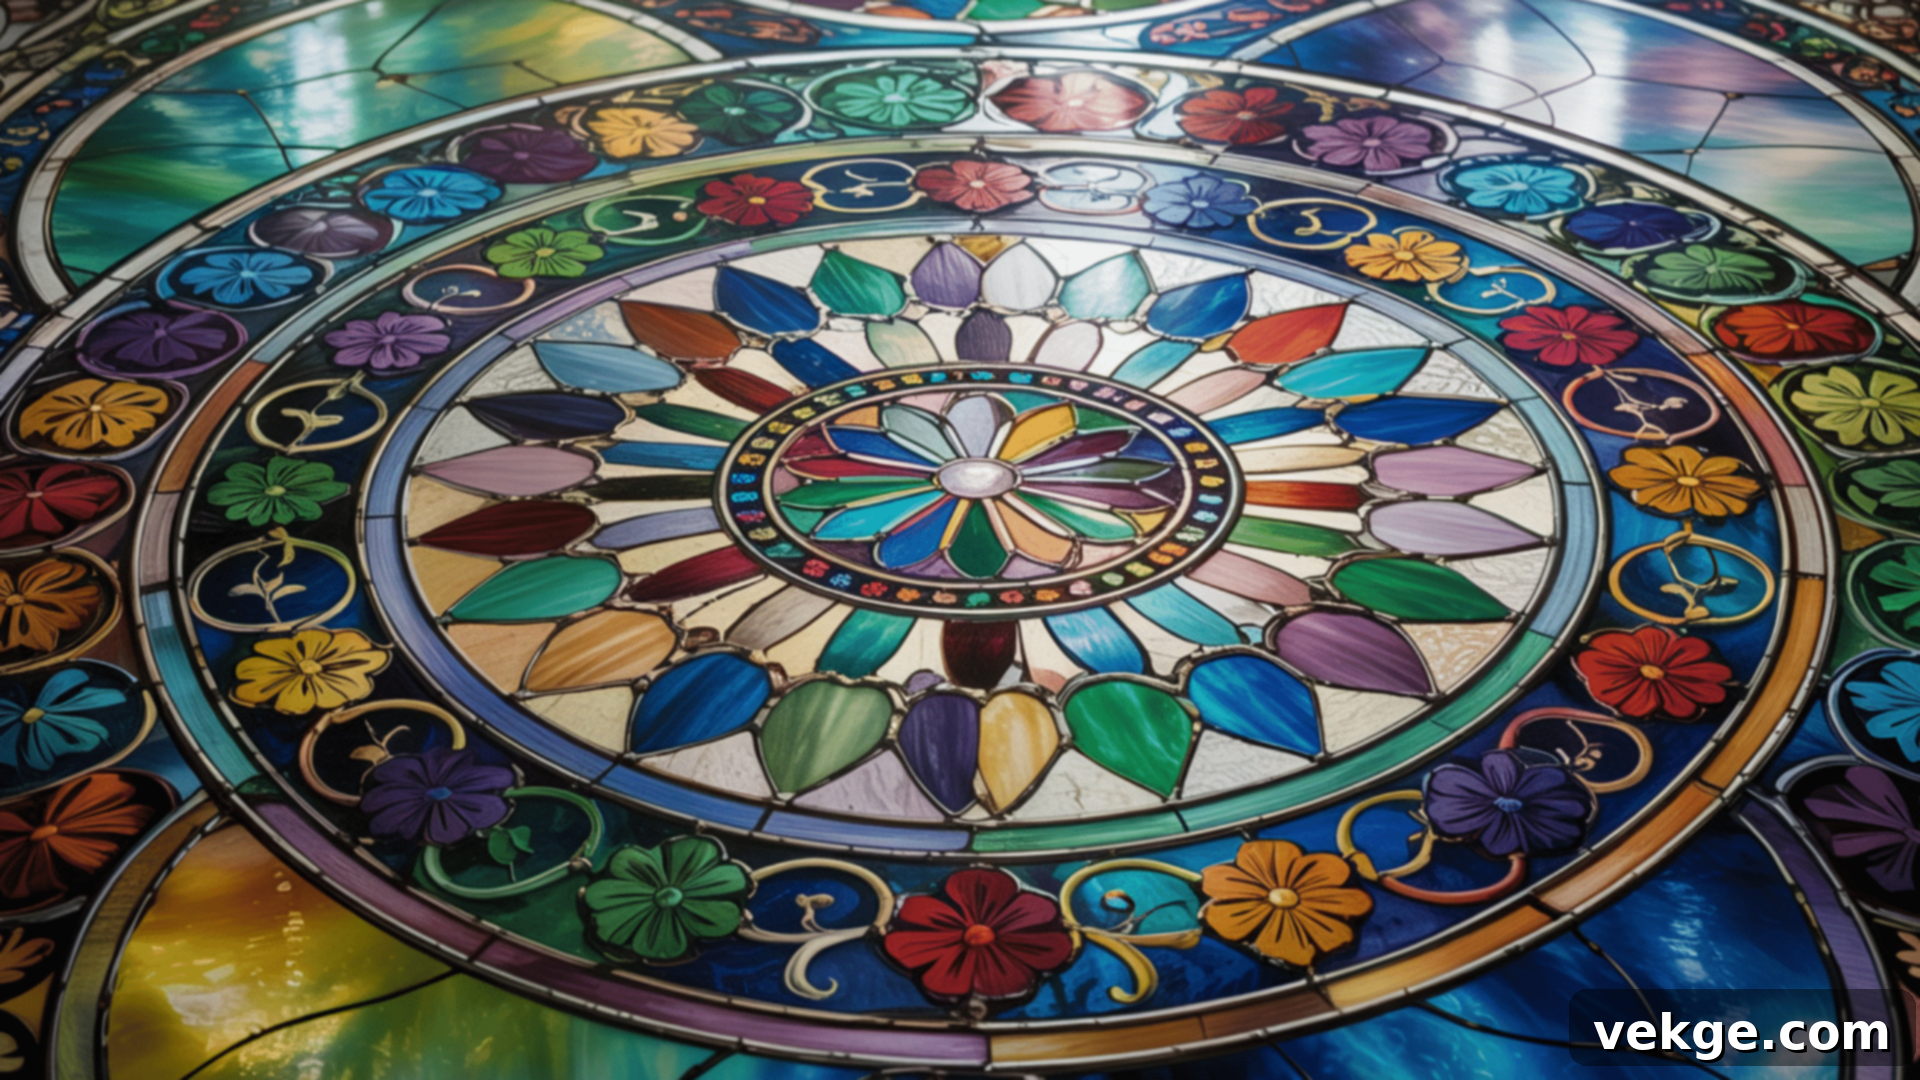
A stained glass effect on your floor can create an absolutely stunning, vibrant, and artistic focal point that dramatically transforms the ambiance of any room. This visually rich design mimics the captivating beauty of traditional stained glass windows, with their kaleidoscopic array of brilliant colors and intricate geometric shapes. It’s an extraordinary choice for creative spaces like living rooms where you want to spark conversation, eclectic entryways, or inspiring art studios, injecting a powerful dose of color and unique artistic flair.
The stained glass effect allows you to play with light and color in a truly unique way, making the floor a dynamic and ever-changing element as light shifts throughout the day. It’s a bold statement that showcases artistic courage and provides a magnificent, custom-designed touch to your home.
How to Create a Stained Glass Effect:
- Thoroughly clean and prepare the floor surface. Ensure it is perfectly smooth, dry, and free from any dust or debris. Apply a primer if necessary.
- Using high-quality painter’s tape, meticulously outline the sections of your design, mimicking the distinct shapes and lead lines of stained glass panes. Consider geometric patterns or organic curves.
- Paint each individual section with bright, bold, and contrasting colors. Aim for vibrant hues that will pop and create a jewel-toned effect.
- Allow each color to dry fully and completely before applying another color to an adjacent section. This prevents colors from bleeding into one another and maintains crisp lines.
- Once all the colorful sections are dry, carefully remove the painter’s tape. Then, use a fine brush and black paint to create strong, defining lines around each “pane,” mimicking the lead outlines of stained glass.
- Allow the black lines to dry completely.
- Finally, apply a clear, high-gloss sealant or topcoat over the entire design. This will protect the vibrant colors, enhance their depth, and provide a polished, glass-like finish.
18. Farmhouse Plank Effect
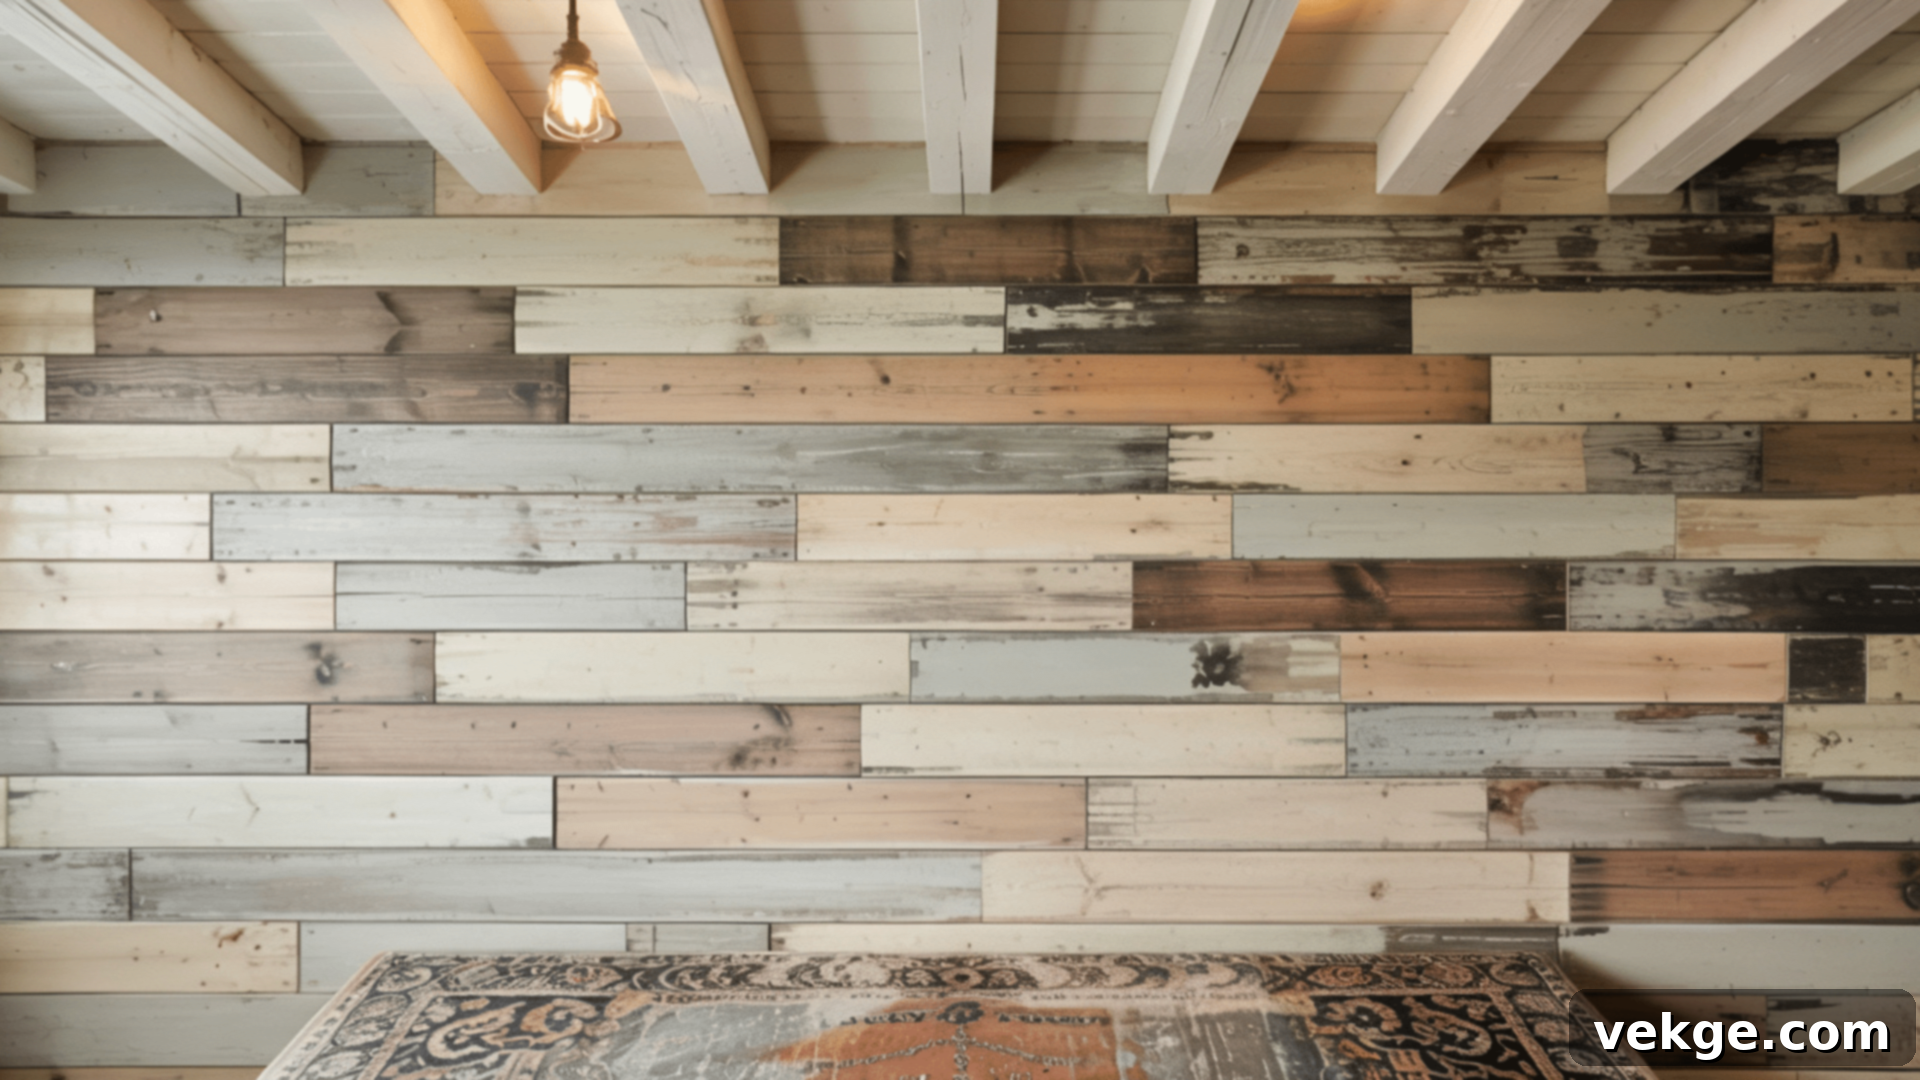
Creating the authentic look of rustic wooden planks on your floor with paint is a charming and effective way to instantly infuse your space with a warm, inviting, and quintessential farmhouse-inspired feel. This style is incredibly popular for its ability to bring a cozy, lived-in, and homey vibe to various rooms without the cost or complex installation of real wood flooring. It’s particularly well-suited for kitchens, dining rooms, living rooms, or any area where you desire to create an atmosphere of relaxed comfort and timeless country charm.
The farmhouse plank effect can be customized with various shades and subtle textures, allowing you to mimic different wood types and levels of distressing, creating a truly unique and personalized foundation for your room’s decor.
How to Create a Farmhouse Plank Effect:
- Thoroughly clean the floor, ensuring it is free of all dirt, dust, and grease. Apply a primer if necessary for optimal paint adhesion and an even base.
- Using a measuring tape and pencil, carefully mark out lines on the floor to mimic the width and length of traditional wooden planks. Ensure consistent spacing.
- Apply high-quality painter’s tape along these marked lines to create sharp, straight divisions that will represent the “gaps” between your wooden planks. Press the tape down firmly.
- Paint the “planks” with your chosen shades of brown, gray, or light tan. Consider using a few slightly different shades to create a more natural, varied wood look.
- While the paint is still wet (or after it dries, for a different effect), use a dry brush, sponge, or specialized wood graining tool to add a subtle wood-grain texture to each “plank.”
- Allow the paint to dry fully. If applying multiple colors for a varied plank look, ensure each color layer is dry before adding the next.
- Once all paint is completely dry, carefully and slowly remove the painter’s tape to reveal your distinct farmhouse plank effect.
- Finally, apply a durable protective sealer or topcoat over the entire floor. This will protect the paint from foot traffic and wear, ensuring your faux planks maintain their rustic charm for years.
19. Drip Painting Effect
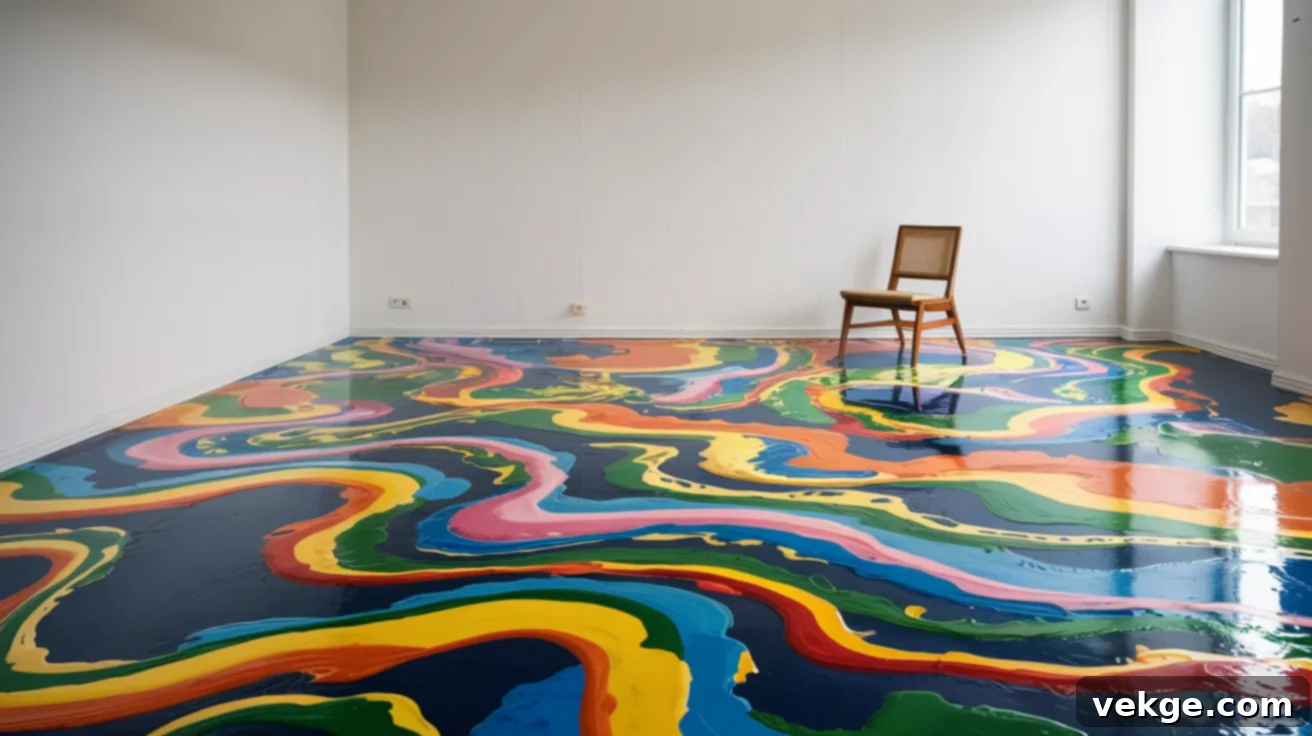
The drip painting effect is an incredibly artistic and abstract technique that injects a bold, spontaneous, and avant-garde look into your floor. Inspired by modern art movements, this style allows for a unique expression of creativity, making your floor a dynamic and unconventional centerpiece. It’s perfectly suited for creative spaces such as home offices, art studios, recreational rooms, or any area where you want to make a powerful statement and express a distinctive, artistic flair.
This effect thrives on controlled chaos, with paint intentionally allowed to drip and flow, creating organic lines, intriguing textures, and captivating color interactions. It’s a design choice that truly pushes boundaries and transforms the floor into an immersive piece of abstract art.
How to Create a Drip Painting Effect:
- Thoroughly clean and prepare the floor surface, ensuring it is smooth, dry, and free from any dust or debris. Apply a base coat color if desired, such as white or black, and let it dry completely.
- Protect surrounding areas, including walls and furniture, meticulously with drop cloths and painter’s tape, as this technique can be messy.
- Choose a variety of colors that will create your desired artistic effect. Use different brushes, droppers, squeeze bottles, or even pour paint directly from cans onto the floor.
- Let the paint naturally drip, flow, and spread across the surface, creating spontaneous and organic patterns. You can gently tilt the floor (if possible) or use a brush to guide some drips.
- Allow the paint to dry completely. This might take longer depending on the thickness of the drips.
- Once the first layer is dry, you can add additional layers of drips in different colors or directions to build up depth and complexity in your abstract design.
- Finish with a clear, durable topcoat or sealant to protect the artwork from foot traffic and wear, preserving your unique drip painting for years to come.
20. Patchwork Quilt Effect
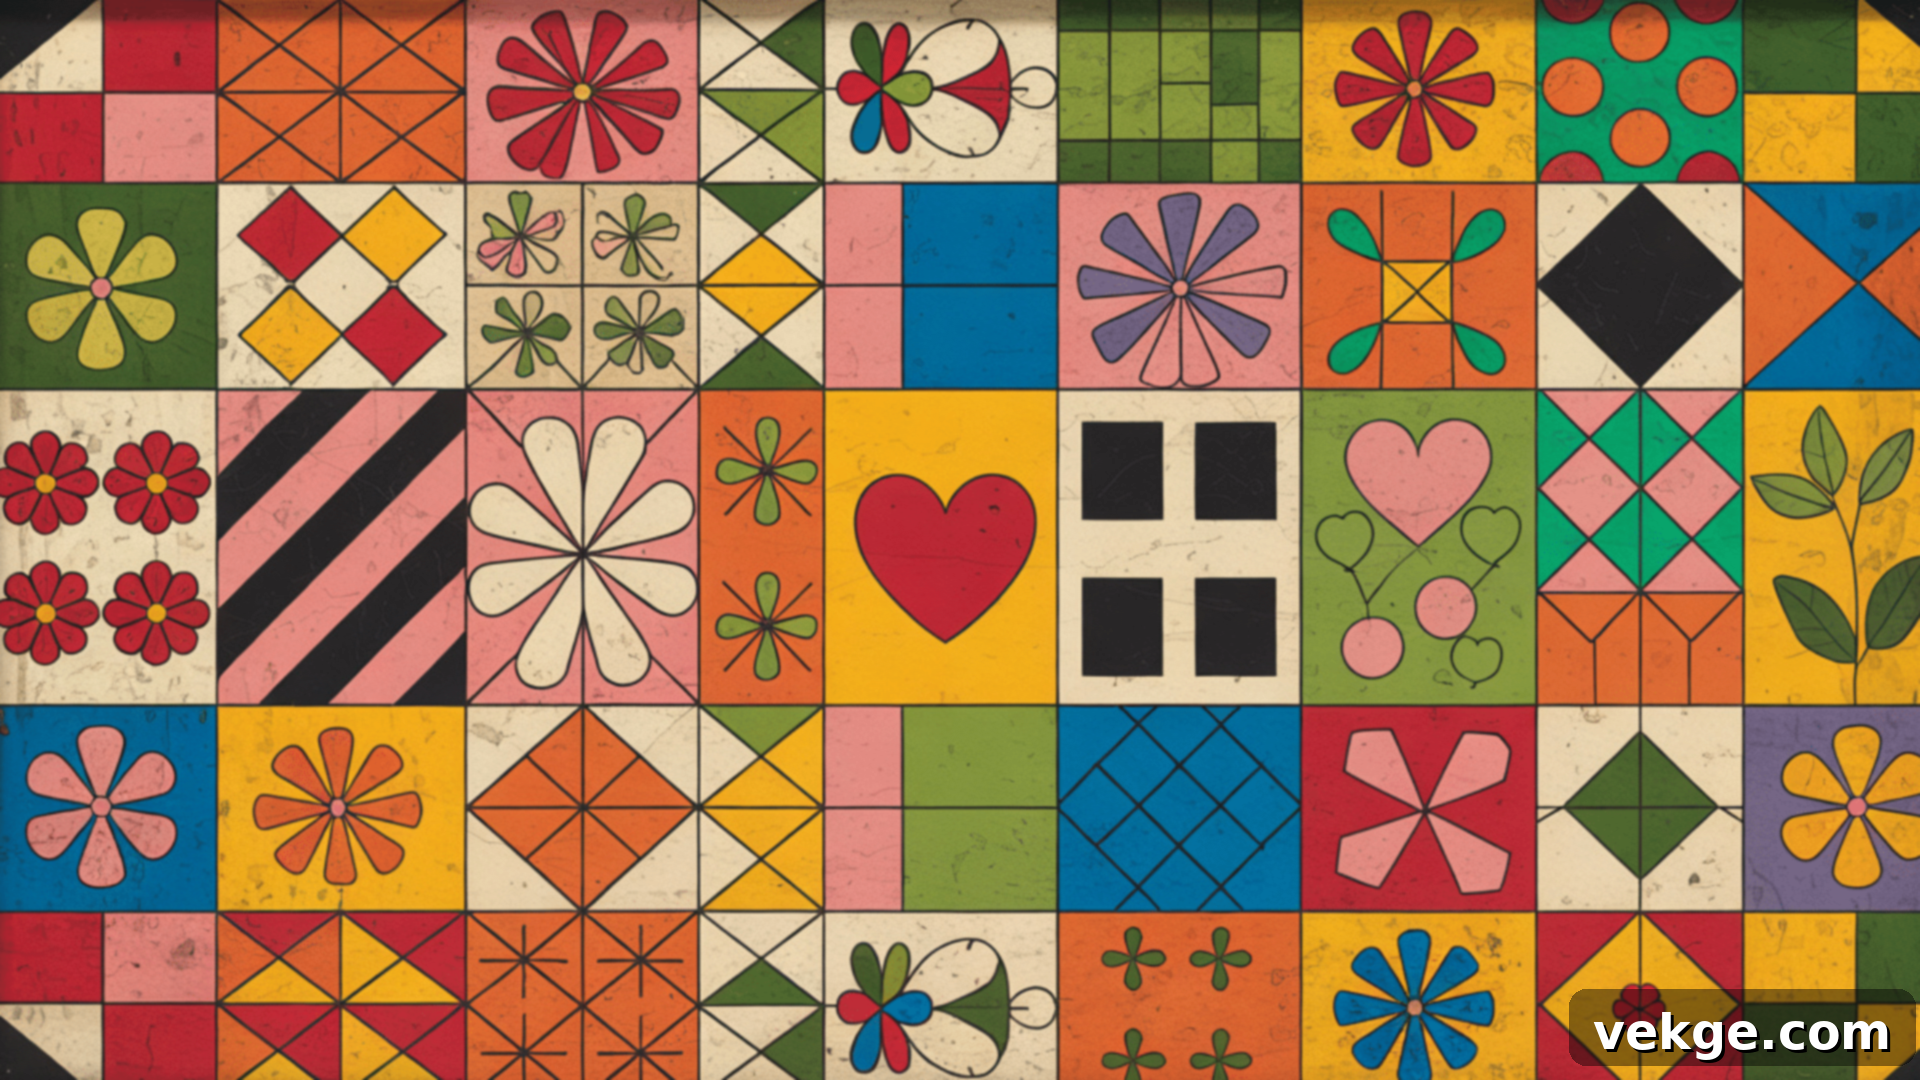
A patchwork quilt effect on the floor is an utterly charming and heartwarming design choice that instantly adds a cozy, homely, and eclectic feel to any room. This creative technique allows you to simulate the appearance of a beautifully pieced-together quilt, with its array of different colors, patterns, and textures, directly onto your floor. It’s a wonderfully versatile style, perfect for injecting a sense of warmth and inviting character into kitchens, bedrooms, nurseries, or entryways that crave a unique and comforting touch.
By combining various patterns like stripes, polka dots, checkerboards, or solid blocks of color, you can craft a floor that tells a story and exudes handmade charm. The patchwork effect is a celebration of individuality and creativity, making your floor a truly bespoke element of your home.
How to Create a Patchwork Quilt Effect:
- Thoroughly clean and prepare the floor surface, ensuring it is smooth, dry, and free from any dust or debris. Apply a base primer if needed.
- Using a pencil, ruler, and measuring tape, meticulously draw out the grid for each “patch” on the floor. Decide on the size and arrangement of your squares or rectangles.
- Carefully apply painter’s tape around the edges of each individual “patch” to ensure clean lines between them. You can work on alternating patches to allow for drying time.
- Paint each patch with a different pattern or solid color. Mix and match designs like stripes, polka dots, checkerboard patterns, or various solid hues to create a true patchwork look.
- Allow each painted section to dry completely before removing the tape or painting an adjacent patch to prevent smudging or color bleeding.
- Once all the patches are painted and thoroughly dry, carefully remove all the painter’s tape.
- Finally, apply a durable protective sealant or topcoat over the entire floor. This will shield the intricate design from foot traffic, enhance its longevity, and provide a cohesive finish.
DIY or Professional Help: Which is Right for Your Floor Painting Project?
Deciding whether to tackle a floor painting project yourself or hire a professional is a key decision. This table offers a balanced comparison of both options, outlining the pros and cons to help you determine the best approach for your specific needs, budget, and desired outcome.
| DIY (Do-It-Yourself) | Professional Help |
|---|---|
| More affordable as you save significantly on labor costs. | Experts complete the job efficiently and with meticulous attention to detail. |
| You retain full creative control over every aspect of the design and process. | Guaranteed high-quality finish with minimal risk of mistakes or imperfections. |
| Work at your own pace and schedule, fitting the project into your lifestyle. | Professionals utilize specialized tools and equipment for superior results. |
| Ideal for smaller projects, creative experimentation, or if you enjoy hands-on work. | Best suited for larger, complex designs, or entire home floor transformations. |
| Can be a fun, rewarding, and deeply satisfying personal accomplishment. | Significantly reduces time and effort required from your side. |
| Requires considerable time and effort, especially for larger or intricate designs. | Can be more expensive due to labor, expertise, and material costs. |
| You may need to acquire new skills, learn techniques, and troubleshoot challenges. | May offer less direct control over daily design decisions once the project begins. |
| The final finish might not match the durability or perfection of a professional job. | You might need to wait for their availability, extending the project timeline. |
| Physically demanding work, especially for extensive floor areas, potentially causing fatigue. | Scheduling and coordination can sometimes be a lengthy process. |
| Higher chance of making errors, leading to touch-ups or rework if not careful. | Precise communication is essential to ensure their vision aligns with yours. |
Essential Tips for a Successful Floor Painting Project
To ensure your floor painting project yields beautiful, long-lasting results, keep these crucial tips in mind:
- Master the Tape: Always use high-quality painter’s tape around the edges, baseboards, and corners. Press it down firmly with a putty knife or your finger to seal the edge, preventing paint bleed and helping you achieve clean, razor-sharp lines.
- Mind the Climate: Avoid painting when the temperature is extreme (too hot or too cold) or when humidity levels are very high. High heat can cause paint to dry too quickly, leading to brush marks, uneven coverage, or poor adhesion. High humidity can prolong drying times and affect curing. Always check the paint manufacturer’s recommended temperature and humidity range.
- Test, Test, Test: Before committing to the entire floor, always test your chosen paint and primer in a small, inconspicuous area. This allows you to see how the color looks in your room’s lighting, how well the paint adheres to your specific floor type, and how it cures. It’s a small step that can save you from big headaches.
- Double Down on Protection: Once the paint is completely dry and cured, apply at least two layers of a clear, durable protective finish (a good quality polyurethane or epoxy topcoat). This is vital for sealing the painted surface, providing enhanced durability, and making it resistant to scratches, scuffs, and general wear and tear, significantly extending the life of your painted floor.
- Ventilate for Victory: Ensure the room is exceptionally well-ventilated throughout the entire painting and drying process. Open windows and doors, and use fans to circulate air. This helps the paint dry properly, reduces the concentration of fumes (which can be harmful), and prevents lingering odors.
By diligently following these tips, your floor painting project is much more likely to turn out beautifully, providing a stunning and durable finish for years to come!
Maintenance and Care for Your Beautifully Painted Floors
Proper maintenance is key to preserving the beauty and longevity of your painted floors. Gentle, consistent care will ensure your stunning new finish remains vibrant and protected for years to come:
- Regular Cleaning: Sweep or vacuum the floor regularly to remove dirt, dust, and abrasive particles. Gritty debris can act like sandpaper, scratching the painted surface over time. For vacuuming, use a soft brush attachment.
- Immediate Spill Cleanup: If you spill anything, wipe it up immediately with a soft, clean cloth. Allowing liquids to sit can lead to staining or even compromise the paint or sealant over time.
- Damp Mop, Not Soaked: When it’s time to mop, use a damp (not soaking wet) mop. Excess water can weaken the paint, cause bubbling, or lead to adhesion issues. Always wring out your mop thoroughly before touching the floor.
- Choose Mild Cleaners: For routine cleaning, opt for a mild, pH-neutral, non-abrasive floor cleaner that is safe for painted surfaces. Avoid harsh chemicals, ammonia-based cleaners, or strong detergents, as these can dull the finish or strip the protective sealant.
- Avoid Abrasive Tools: Never use rough scrubbers, steel wool, abrasive sponges, or stiff-bristled brushes on your painted floors. These will inevitably scratch and damage the finish. Stick to soft mops, microfiber cloths, or gentle sponges.
- Use Furniture Pads: Place felt pads or rubber protectors under the legs of all furniture, especially chairs and tables that are frequently moved. This prevents scratches and dents.
- Allow to Dry Completely: After cleaning, always ensure the floor dries completely before allowing foot traffic. Walking on a damp painted floor can leave marks or even compromise the finish.
- Periodic Re-sealing: Depending on traffic and wear, consider reapplying a protective clear topcoat every few years to refresh the finish and provide renewed protection.
By adhering to these simple maintenance guidelines, your painted floors will continue to look fantastic and withstand daily life with grace.
Common Mistakes to Avoid When Painting Floors
Even with the best intentions, certain missteps can jeopardize your floor painting project. Being aware of these common mistakes will help you achieve a flawless and durable finish:
- Skipping Proper Preparation (Especially Sanding): This is perhaps the most critical mistake. Not thoroughly cleaning, degreasing, and lightly sanding the floor first is a recipe for disaster. Paint needs a “tooth” to adhere properly. Without it, the paint will likely peel, chip, or flake off quickly, especially in high-traffic areas. Always sand lightly to create a rough surface for the paint to grab onto.
- Using the Wrong Type of Paint: Do not use standard wall paint for your floors. Wall paint is not formulated to withstand the heavy foot traffic, abrasion, and moisture that floors endure. Always select paint specifically designed for floors (e.g., porch and floor enamel, epoxy paint, or specialized floor paint) as it contains binders and resins for superior durability and adhesion.
- Rushing Between Coats or During Drying: Patience is paramount. Applying a new coat of paint or walking on the floor before the previous coat is completely dry can lead to streaks, uneven color, tackiness, or even lifting of the paint. Always adhere to the manufacturer’s recommended drying and recoating times, even if it means waiting longer.
- Neglecting the Protective Sealant: Finishing your painted floor without applying a clear, durable protective sealant or topcoat is a major oversight. This sealant acts as a crucial barrier, protecting the paint from moisture, spills, scuffs, and the daily wear and tear of foot traffic. Without it, your beautiful painted finish will degrade much faster.
- Overloading the Roller or Brush: Applying too much paint to your roller or brush at once can result in drips, unsightly puddles, uneven coverage, and a textured finish. Instead, use a light hand, load your tools moderately, and apply thin, even layers. This allows for better control, smoother application, and prevents drips.
Conclusion: Unlock Your Floor’s Potential
Painting your floors is an incredibly effective, transformative, and often budget-friendly way to completely refresh and personalize the look of any room in your home. It’s a versatile home improvement project that offers immense creative freedom, whether you choose to embark on a rewarding DIY journey or entrust the task to a skilled professional.
With an abundance of design possibilities, from sophisticated solid colors and subtle patterns to bold geometric designs, classic checkerboards, and luxurious marble effects, there’s a painted floor idea to suit every taste and style. The key to a successful and long-lasting finish lies in taking your time, meticulously following proper preparation steps, using the right tools and materials, and diligently avoiding common mistakes.
No matter which floor painting idea you choose or whether you opt for DIY or professional assistance, you’ll be astonished at how dramatically a newly painted floor can alter the ambiance and perceived value of your space. Ready to inject fresh energy and style into your home? Don’t hesitate. Go ahead and plan your floor painting project today to create a stunning, unique, and truly revitalized look in your living environment!
