Transform Your Kitchen: The Ultimate DIY Backsplash Installation Guide
Are you tired of looking at your outdated or bland kitchen walls? Do you dream of a fresh, modern look but feel overwhelmed by the potential costs and complexity of a professional renovation? I understand that feeling perfectly. For months, I postponed installing a backsplash in my own kitchen, convinced it required specialized skills, expensive tools, and a hefty contractor bill. The quotes I received were certainly a blow to my budget.
However, what I discovered might surprise you: you can absolutely install a beautiful, durable backsplash on your own, typically over a single weekend. This isn’t just about saving money; it’s about empowering yourself to create a space you love, with your own hands. I’ve distilled the entire process into easy-to-follow steps that anyone can master, even if you’re new to home improvement. Forget fancy tools – you’ll only need basic supplies readily available at your local hardware store.
In this comprehensive guide, I’ll walk you through everything you need to know to transform your kitchen walls from dull to dazzling. Not only will you save hundreds, potentially thousands, of dollars compared to hiring a professional, but you’ll also gain invaluable skills and a deep sense of satisfaction. Let’s get started on giving your kitchen the stunning upgrade it deserves!
How Much Does a DIY Kitchen Backsplash Project Cost?
Budget is a primary concern for most home improvement projects, and a DIY backsplash offers significant savings. The total expense for materials and essential tools typically ranges from $100 to $500. This cost can vary based on the size of your kitchen, the type of tiles you choose, and whether you already own some of the necessary tools. Let’s break down the typical expenditures:
Basic Materials:
- Tiles: This is often the largest variable. Expect to pay $3 to $15 per square foot for ceramic, porcelain, or glass tiles. Natural stone or more intricate designs can go higher. Look for sales or end-of-line stock to find great deals.
- Grout: A 10-pound bag typically costs $15 to $25. Pre-mixed options might be slightly more but save time and effort. Choose sanded grout for wider joints (1/8 inch or more) and unsanded for narrower ones.
- Tile Adhesive (Mastic or Thin-set Mortar): A bucket generally runs $20 to $30. Ensure your adhesive is compatible with your chosen tile type. Mastic is great for ceramic/porcelain, while thin-set mortar is required for glass, natural stone, or in wet areas.
- Tile Spacers: A pack costs $3 to $5. These small plastic crosses ensure uniform grout lines, which are crucial for a professional look. Buy extra to avoid running out mid-project.
- Caulk: $5 to $8 per tube. You’ll need this to seal the edges where your backsplash meets the countertop and cabinets, providing a watertight and finished look.
Essential Tools (One-Time Investment):
- Tile Cutter or Wet Saw: A manual tile cutter is $30 to $50 and suitable for most ceramic or porcelain tiles. For larger projects, glass tiles, or more intricate cuts, renting a wet saw for $40-$60/day or buying a basic one for $80-$150 might be worthwhile.
- Notched Trowel: $10 to $15. The size of the notches determines the amount of adhesive applied, which is critical for good adhesion.
- Level (Spirit or Laser): $8 to $30. Essential for ensuring your tile rows are perfectly straight and level. A laser level makes this process even easier.
- Measuring Tape: $5 to $10. For accurate measurements of your wall and tiles.
- Grout Float: $8 to $12. A rubber-faced tool designed for pushing grout into the tile joints evenly.
- Sponge & Buckets: $5 to $10. For cleaning excess grout from the tile surface. You’ll need a few sponges and at least two buckets for rinsing.
Extra Items for Safety and Cleanup:
- Safety Gear (Goggles, Gloves): $15 to $25. Protect your eyes from tile chips and your hands from adhesive and grout.
- Painter’s Tape and Drop Cloths: $10 to $20. To protect countertops, cabinets, and flooring from adhesive and grout.
When you compare this DIY cost to professional installation, which typically ranges from $500 to $1,500 (or more, depending on location and tile choice), the savings are substantial. By doing it yourself, you can save anywhere from 50% to 80%. Plus, the tools you purchase are yours to keep and can be used for future home improvement projects, making them a wise long-term investment!
Pro Tip: Always buy about 10-15% more tiles than your calculated square footage to account for cuts, breakage, and future repairs. Also, check your local hardware stores for sales; often, you can find excellent deals on discontinued or clearance tiles.
Benefits of Installing Your Own Kitchen Backsplash
Deciding to tackle your kitchen backsplash project yourself offers a multitude of rewards that extend far beyond just financial savings. From my own experience and that of countless others, the benefits are truly transformative:
Significant Financial Savings
As mentioned, the cost difference between DIY and professional installation is striking. When I installed my own backsplash, my total outlay was around $300, a stark contrast to the $1,000+ quotes I received from contractors. This direct saving frees up your budget for other home improvements or simply to enjoy. Furthermore, the tools you buy become part of your home toolkit, ready for your next project, multiplying your initial investment’s value. You also avoid extra charges for rush jobs or specific scheduling demands.
Immense Personal Satisfaction and Pride
There’s a unique joy that comes from stepping back and admiring a beautiful space you’ve created with your own hands. Every morning, seeing my finished backsplash brings a smile to my face, not just because it looks good, but because I know the effort and care I put into it. When friends or family visit and learn I did it myself, their genuine surprise and compliments are incredibly gratifying. This feeling of accomplishment and pride is truly priceless and cannot be bought.
Complete Creative Control
Doing it yourself means you are the designer and the installer. You have complete control over every decision, from the exact tile pattern and grout color to the starting point and layout. I even changed my pattern halfway through when I realized a different design would look better – something a contractor might charge extra for, or even refuse. There are no worker schedules to accommodate, no pressure to finish quickly, and no compromises. Each tile goes exactly where you want it, ensuring the final result perfectly matches your vision.
Valuable Skill Development
Installing a backsplash is an excellent entry point into the world of DIY home improvement. It teaches you more than just how to lay tiles; you’ll gain practical experience in surface preparation, accurate measuring, using various tools (from trowels to tile cutters), and achieving a professional finish. These newly acquired skills are transferable to many other home projects. For example, my backsplash experience gave me the confidence to re-grout my bathroom tiles last month, saving me more money. Each successful project builds your confidence and makes the next one easier and more enjoyable.
Important Reminder: While the desire to see the finished product is strong, remember that taking your time to do it right will always yield better results than rushing. Your kitchen, and your effort, deserve nothing less than your best!
Essential Tools & Materials for Your DIY Kitchen Backsplash Project
Having the right tools and materials on hand before you start is crucial for a smooth and successful backsplash installation. Here’s a detailed list of what you’ll need, differentiating between reusable tools and consumable materials:
| Essential Tools (Reusable) | Description & Purpose | Consumable Materials | Description & Purpose |
|---|---|---|---|
| Measuring tape | For accurate measurements of the wall area and individual tiles. | Tiles | Your chosen design element. Buy 10-15% extra. |
| Notched trowel | Spreads tile adhesive evenly, creating ridges for strong bonding. Different notch sizes for different tiles. | Tile adhesive (e.g., mastic, thin-set) | Secures tiles to the wall. Select based on tile type and location. |
| Level (Spirit or Laser) | Ensures your tile rows are perfectly horizontal and vertical for a professional look. | Tile spacers | Small plastic crosses/T-shapes for uniform grout lines. |
| Tile Cutter (Manual or Wet Saw) | For making straight and precise cuts on tiles. A wet saw is best for glass/stone. | Grout (sanded or unsanded) | Fills the gaps between tiles, providing structural integrity and a finished look. Pre-mixed is convenient. |
| Tile nippers | Useful for making small, irregular cuts or notches around outlets. | Grout sealer (optional but recommended) | Protects grout from stains and moisture, especially in kitchens. |
| Diamond file or Sandpaper | To smooth rough or sharp edges after cutting tiles for a clean finish. | Protective paper or plastic sheets | To cover countertops, flooring, and cabinets from adhesive/grout splashes. |
| Sponge & Buckets (2-3) | For cleaning excess grout from tile surfaces during and after application. | Painter’s tape | Secures drop cloths and defines clean edges on walls/cabinets. |
| Grout float | A rubber-faced tool used to press grout firmly into the joints. | Caulk (silicone or acrylic latex) | Seals gaps where the backsplash meets the countertop, cabinets, and corners. |
| Utility knife or Scraper | For cleaning up dried adhesive/grout, or trimming protective sheets. | Degreaser/Cleaner | To thoroughly clean the wall surface before tile application. |
| Safety glasses & gloves | Essential personal protective equipment for all stages of the project. | Drop cloths | Large sheets to protect floors and countertops from spills. |
By gathering these items before you begin, you’ll minimize interruptions and ensure your tiling process is as efficient and enjoyable as possible.
Step-by-Step Guide to Install a DIY Kitchen Backsplash
Ready to transform your kitchen? Follow these detailed steps to successfully install your new DIY backsplash. Patience and careful attention to each stage will lead to a professional-looking finish.
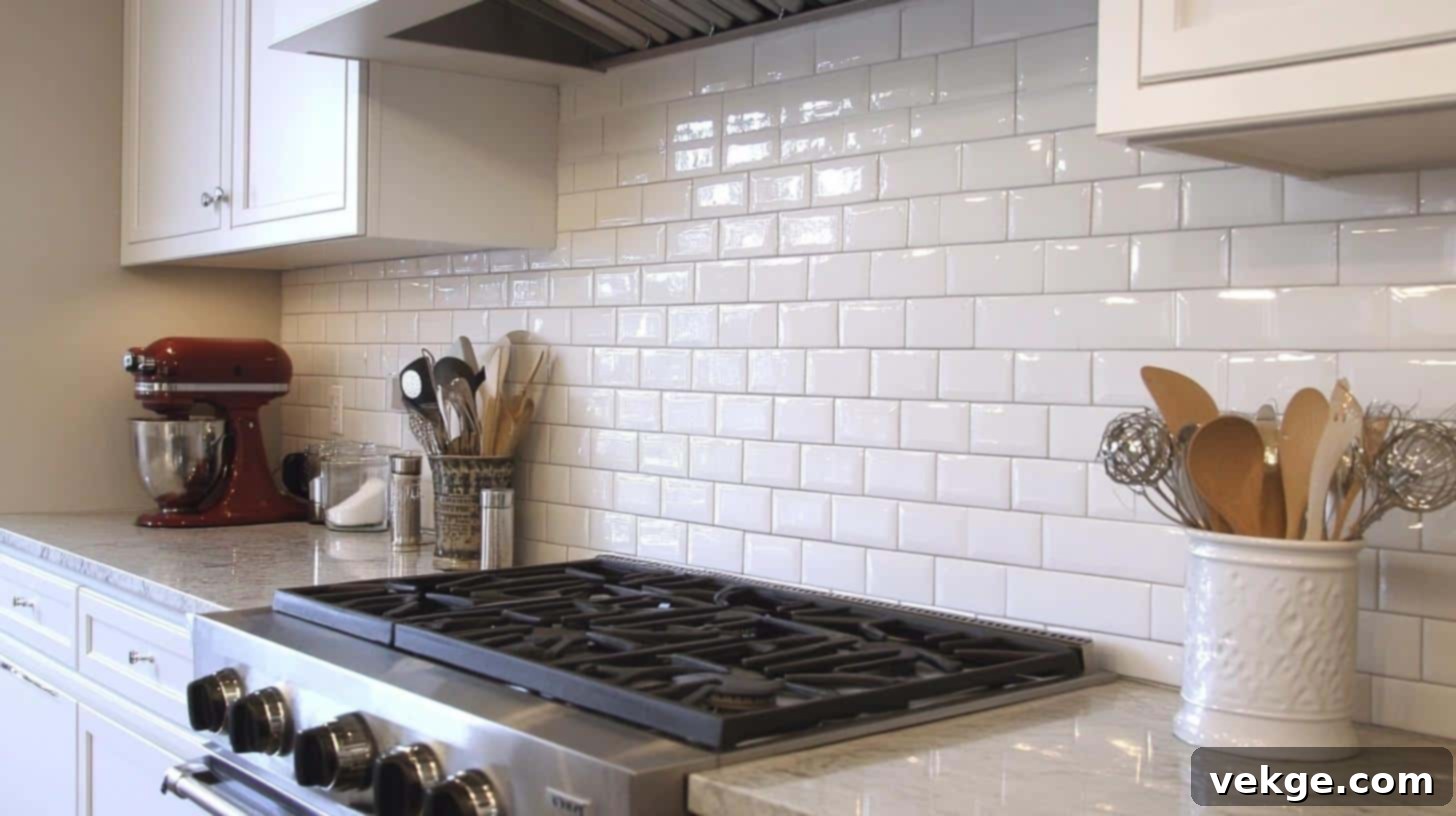
Step 1: Measure and Plan the Layout
- Measure Accurately: Use a measuring tape to determine the exact height and width of the wall area where the backsplash will be installed. Multiply these measurements to calculate the total square footage needed, then add 10-15% for cuts, mistakes, and future repairs.
- Dry-Fit Your Tiles: Lay out your chosen tiles on a flat surface, such as your countertop or the floor, exactly as they will appear on the wall. This crucial step helps you visualize the pattern, determine your starting point, and identify potential challenges around windows, cabinets, and electrical outlets. Aim to avoid very small “sliver” cuts at the edges, which can look unprofessional. Adjust your layout by shifting the pattern slightly or finding a central starting point that balances cuts on both ends. Consider drawing a centerline on the wall.
- Mark Guidelines: Use a level and a pencil to draw a straight, level line on the wall where your first row of tiles will sit. This is typically just above the countertop. For areas that aren’t perfectly level (common in older homes), you might need to use shims under your first row of tiles or adjust your layout to hide slight discrepancies.
Step 2: Prepare the Surface
- Clean Thoroughly: The wall surface must be clean, dry, and free of grease or debris for the adhesive to bond properly. Use a degreaser or a strong soap and water solution to scrub the entire area. Rinse well and allow it to dry completely.
- Repair and Smooth: Inspect the wall for any bumps, holes, or loose paint. Sand down any raised areas and fill holes with spackle or joint compound, ensuring the surface is as flat and smooth as possible. Uneven surfaces will make tile installation challenging and result in an unprofessional finish.
- Protect Surrounding Areas: Use painter’s tape to protect adjacent walls, cabinets, and the countertop. Apply tape at least 1 cm (about 3/8 inch) from the wall edge where the backsplash will meet. Avoid taping directly against the wall edge; leaving a small gap will make cleanup easier once the tiles are set and prevent adhesive from curing to the tape. Lay down drop cloths on your countertop and floor.
- Remove Outlet Covers: For safety and a clean installation, turn off the power at the breaker and remove all outlet and switch covers. Loosen the screws holding the outlets/switches so they can be pulled forward slightly after the tiles are installed, allowing the cover plates to sit flush.
Step 3: Choose and Gather Materials
- Select Your Tile: Your tile choice heavily influences the final look. Ceramic tiles are budget-friendly and versatile, porcelain is highly durable, glass tiles offer a sleek, modern aesthetic, and natural stone provides a unique, earthy feel. Consider maintenance requirements and your kitchen’s overall design.
- Match Adhesive to Tile: This is critical! For ceramic or porcelain tiles in a dry area, pre-mixed mastic adhesive is often suitable and easy to use. However, for glass tiles (which can show adhesive through them), natural stone (which can be discolored by mastic), or in areas exposed to more moisture, a white thin-set mortar is usually the best choice. Read the adhesive manufacturer’s recommendations carefully.
- Select Grout: Choose sanded grout for wider grout lines (1/8 inch or more) as the sand prevents shrinkage and cracking. For narrower joints (less than 1/8 inch), unsanded grout is appropriate. Consider the color; a contrasting color can highlight the tile pattern, while a matching color creates a more seamless look.
- Spacers: Ensure you have enough spacers of the correct size to maintain consistent grout lines throughout your project. Smaller tiles typically require smaller spacers.
Step 4: Apply the Adhesive
- Work in Sections: Don’t try to cover the entire wall at once. Apply adhesive to a manageable area, typically enough for 2-3 rows of tiles or about a 2×2 foot section, so it doesn’t dry before you place your tiles.
- Spread Evenly: Use the flat side of your notched trowel to spread a uniform layer of adhesive over your working section. Then, turn the trowel to its notched side and comb through the adhesive, holding it at a consistent 45-degree angle. This creates even ridges, which are essential for strong tile bonding and proper adhesive coverage. Consistent ridges help ensure air pockets are eliminated when the tile is pressed on.
Step 5: Install the Tiles
- Establish Your Starting Point: Begin tiling from your pre-measured center point or the most visually prominent area of the backsplash, such as directly above the stove. Work outwards from this point.
- Press and Twist: Gently press each tile firmly into the adhesive, twisting it slightly back and forth. This ensures maximum contact between the tile and the adhesive, squeezing out any trapped air.
- Use Spacers: Place tile spacers between each tile as you go to maintain uniform grout lines. Consistent spacing is vital for a professional appearance.
- Check for Level and Plumb: Continuously check your alignment with a laser or spirit level every few rows. Make immediate adjustments if tiles shift or begin to go off-level. It’s much easier to fix a crooked tile when the adhesive is wet.
Step 6: Cut Tiles as Needed
- Measure and Mark: For areas around outlets, switches, or edges, carefully measure the required dimensions directly on the tile. Use a pencil or marker to draw precise cut lines. Double-check all measurements before cutting.
- Choose the Right Tool: Use a wet saw for straight cuts, especially for ceramic, porcelain, or glass tiles. A wet saw keeps the blade cool and minimizes chipping. For small notches, intricate curves, or adjustments around outlets, tile nippers are invaluable.
- Smooth Edges: After cutting, use a diamond file or fine-grit sandpaper to smooth any rough or sharp edges. This provides a cleaner finish and makes the tiles safer to handle.
- Dry-Fit Cut Tiles: Always dry-fit cut tiles in their intended spot before applying adhesive. This ensures accuracy and saves you from wasting tiles due to incorrect cuts.
Step 7: Grout the Tiles
- Allow Adhesive to Cure: This is a critical step – do NOT grout until the tile adhesive has fully cured. This typically takes 24 hours, but always refer to the adhesive manufacturer’s instructions. Grouting too early can lead to tiles shifting or grout failure.
- Apply Grout: If using powdered grout, mix it according to the manufacturer’s directions to a peanut butter-like consistency. If using pre-mixed, you’re ready to go. Scoop a generous amount of grout onto your rubber grout float. Holding the float at a 45-degree angle, press the grout firmly into the spaces between the tiles, moving diagonally across the grout lines. This technique helps to push the grout deep into the joints and minimizes pulling it back out.
- Remove Excess: After applying grout to a section, use the edge of the grout float, held at a steeper angle (around 90 degrees), to scrape off excess grout from the tile faces. Continue working in manageable sections.
Step 8: Clean and Shape Grout Lines
- Initial Wipe: After the grout has started to “set up” or firm up (this can be anywhere from 15 minutes to an hour, depending on humidity and grout type – check manufacturer recommendations), begin to clean the tile surface. Use a damp (not soaking wet) sponge to gently wipe away the grout haze. Move the sponge in a circular motion, being careful not to dig grout out of the joints.
- Shape Joints: As you wipe, you can also use a rounded tool (like a popsicle stick, a specific grout shaping tool, or even your gloved finger) to smooth and shape the grout lines, creating a uniform, professional concave appearance.
- Rinse Frequently: Rinse your sponge frequently in clean water (using two buckets is ideal: one for initial rinse, one for final clean water) to avoid spreading grout residue back onto the tiles. Allow the grout to cure for another 24-48 hours before proceeding.
Step 9: Seal and Finish
- Final Cleaning: Once the grout has completely dried and cured (again, follow manufacturer’s instructions, typically 24-48 hours), use a soft, clean cloth to buff away any remaining grout haze or dust from the tile surface. You might need a specialized grout haze remover for stubborn residue.
- Apply Grout Sealer: This step is optional but highly recommended, especially for porous grout or in high-moisture/high-splatter areas like a kitchen. Grout sealer penetrates the grout, making it resistant to water and stains. Apply the sealer according to the product instructions, usually with a small brush or applicator, wiping off any excess from the tiles immediately. Allow sufficient drying time.
- Caulk the Edges: Apply a bead of caulk where the backsplash meets the countertop and any adjacent cabinets. This creates a waterproof seal and a clean, finished look. Use painter’s tape to create crisp caulk lines if needed.
- Reinstall Outlets: Reinstall all outlet covers, pushing the outlets forward so they sit flush with the new tile surface before screwing the covers back on.
- Remove Protection: Carefully remove all painter’s tape, drop cloths, and protective coverings. Step back and admire your beautiful, newly installed DIY kitchen backsplash!
For a detailed visual tutorial on how to install DIY Kitchen Tile Backsplash, check out the video below:
How to Maintain Your DIY Kitchen Backsplash for Lasting Beauty
Once your beautiful new backsplash is installed, proper maintenance is key to keeping it looking pristine for years to come. Here are essential tips to ensure its longevity and cleanliness:
- Daily Wipes: Make it a habit to wipe down tiles with warm water and a mild dish soap solution daily. This prevents grease, food splatters, and dust from building up, making deeper cleaning easier.
- Regular Grout Cleaning: Once a month, clean grout lines with a soft-bristled brush (an old toothbrush works wonders) and a gentle cleaner. This helps prevent discoloration and mold growth, keeping your grout looking bright.
- Natural Cleaning Solutions: For tougher stains, a solution of equal parts white vinegar and water can be effective. Spray it on, let it sit for a few minutes, then scrub and rinse. However, avoid acidic cleaners on natural stone tiles or unsealed grout, as they can cause damage.
- Avoid Harsh Chemicals: Steer clear of abrasive cleaners, steel wool, or harsh chemicals like bleach (unless specifically recommended for your tile/grout type). These can scratch tile surfaces, erode grout, or strip sealants.
- Check for Loose Tiles/Grout: Every six months or so, visually inspect your backsplash. Check for any loose tiles or crumbling grout. Addressing these issues promptly can prevent larger problems and water damage.
- Re-seal Grout Annually: Even if you used a sealer initially, grout sealants wear down over time, especially in high-traffic kitchen areas. Reapply grout sealer yearly (or as per product instructions) to maintain its protective barrier against water and stains.
- Manage Cooking Oils: Be mindful of splatters from cooking oils and sauces. Wipe them up immediately, especially from unsealed areas or porous tiles, to prevent staining.
- Spot Test Cleaners: Before applying any new cleaning product to your entire backsplash, test it on a small, inconspicuous area first. This ensures it won’t discolor or damage your tiles or grout.
- No Abrasive Pads: Use only soft cloths or sponges for cleaning. Abrasive pads can scratch polished tile surfaces or wear down grout.
- Store Extra Tiles: Keep a small box of your leftover tiles in storage. If a tile ever gets damaged, you’ll have a perfect match for an easy repair.
By following these simple maintenance steps, your DIY kitchen backsplash will remain a beautiful and functional focal point in your home for years to come.
Inspiration Gallery: Completed DIY Backsplash Projects
Seeing real-world examples can be incredibly motivating and help spark ideas for your own project. Looking at successful DIY transformations certainly helped me visualize my own kitchen’s potential. Here are a few standout backsplash designs completed by fellow DIY enthusiasts, showcasing different styles and approaches:
1. Classic Subway Style: Sarah’s Timeless Kitchen
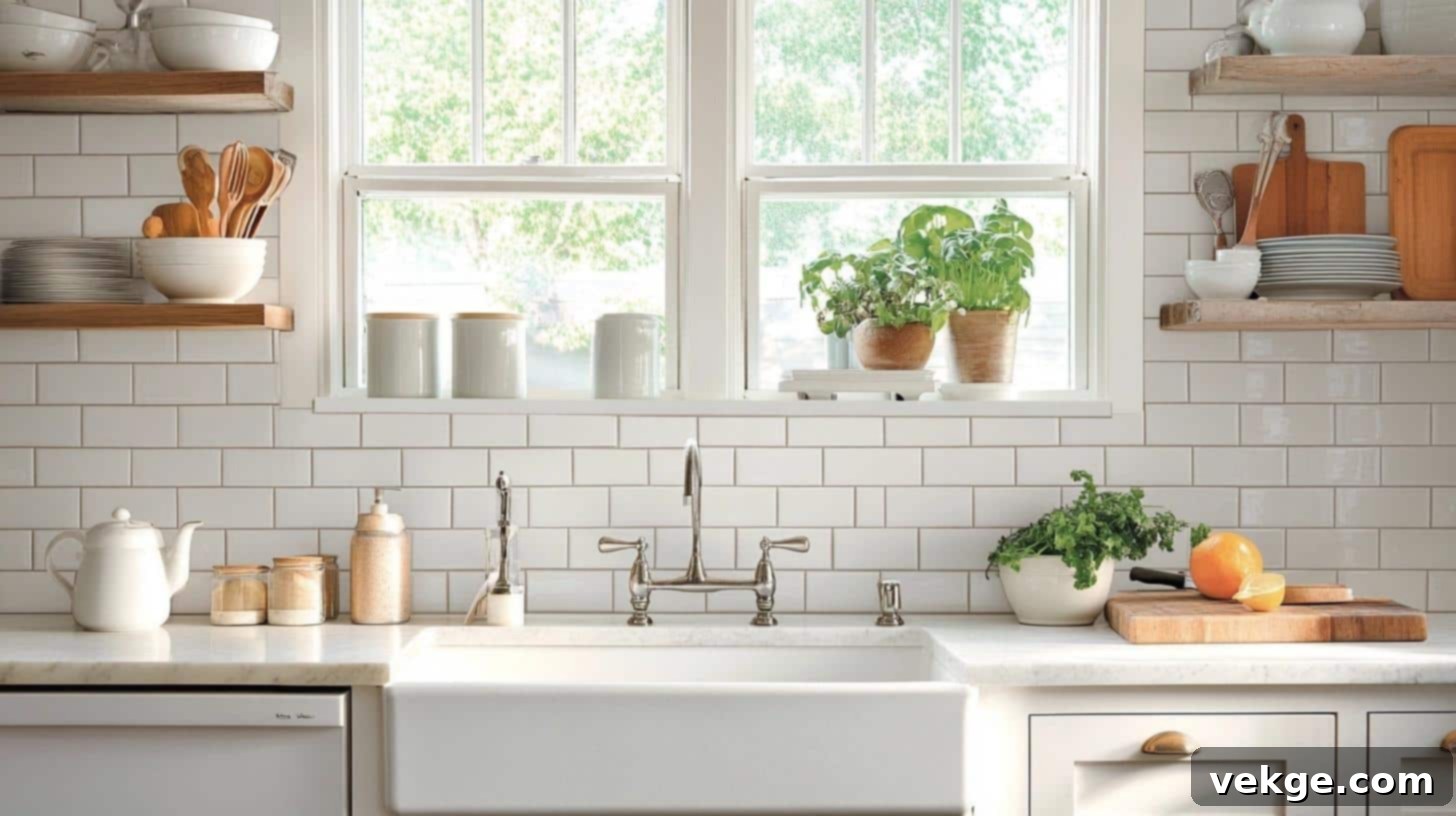
Sarah’s charming cottage kitchen perfectly demonstrates how a simple, classic design can create a stunning and fresh look. Her choice of white subway tiles reflects morning light beautifully, making the space feel brighter and more open. This project is a testament to the enduring appeal and versatility of subway tiles.
- Total Project Cost: Approximately $200 (excluding basic tools she already owned)
- Materials Breakdown:
- 40 square feet of classic white ceramic subway tiles: $120
- Adhesive, grout, and spacers: $80
Key Success Points & Learning:
- Phased Approach: Sarah wisely spread her project over two weekends. Weekend 1 was dedicated to meticulous prep work, including wall cleaning, repairs, and careful layout planning (dry-fitting and marking guidelines). Weekend 2 focused on the actual tile installation and grouting, preventing burnout and ensuring attention to detail.
- Efficient Pattern: She opted for a traditional straight lay pattern, which is forgiving and relatively faster for first-time tilers.
- Grout Choice: A light gray grout was chosen to subtly highlight the rectangular shape of the subway tiles without being too stark, adding a touch of depth.
Sarah’s Tips for Aspiring Tilers:
- “Always start from a clearly defined center point or a visually dominant area to ensure symmetry, especially in visible sections.”
- “Keep your tiles perfectly level as you go; even small deviations become very noticeable over a long run.”
- “Use spacers between every tile. Don’t eyeball it – consistency is key for beautiful grout lines.”
- “Don’t procrastinate on grout haze cleanup. Wipe it away as soon as the grout starts to firm up; waiting too long makes it much harder to remove.”
2. Mixed Materials: Tom’s Modern & Textured Backsplash
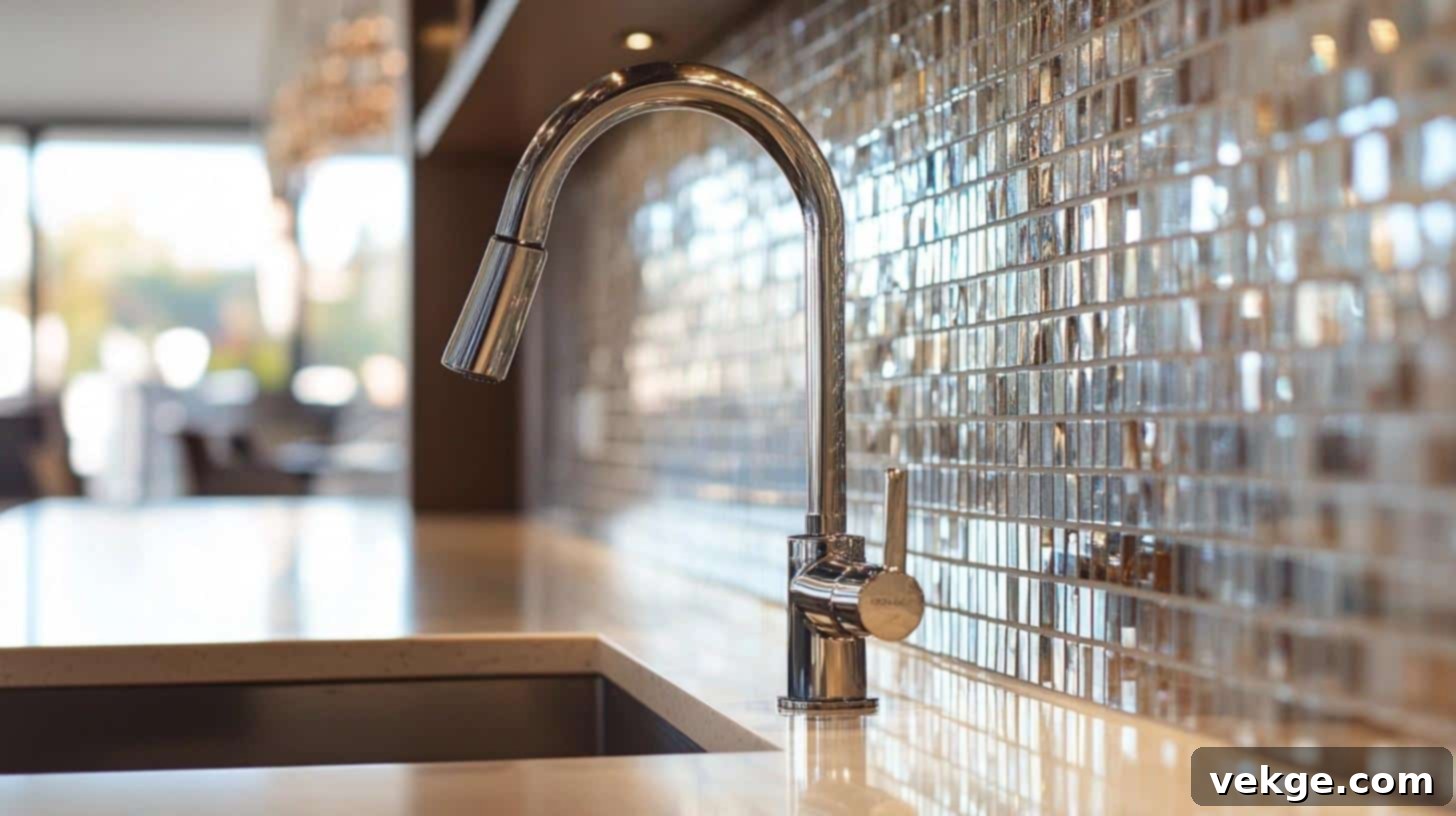
Tom’s contemporary kitchen showcases how creatively mixing different tile materials can add incredible visual interest and depth without making the space feel cluttered. His combination of sleek glass tiles and contrasting ceramic accents creates a sophisticated and dynamic backsplash that instantly catches the eye.
Project Breakdown & Savings:
- Glass accent tiles: $200 (more expensive but used sparingly)
- Complementary ceramic field tiles: $100
- Tools and setting supplies: $50
- Total DIY Cost: $350
- Estimated Professional Cost: $1,150 (due to mixed materials and complexity)
- Total Savings: Over $800!
Tom’s Smart Design & Installation Choices:
- Sample Testing: Before committing, Tom purchased small sample pieces of various glass and ceramic tiles. He laid them out on his countertop to test different combinations and see how they interacted with his existing cabinets and lighting.
- Pattern Mapping: He carefully mapped out the transition points between the glass and ceramic sections, ensuring a harmonious flow. This required precise measurements and planning of cuts.
- Specialized Adhesive: Knowing glass tiles can be translucent, he used a white, non-sanded thin-set mortar designed specifically for glass, which prevented discoloration and ensured strong adhesion.
- Matching Grout: A grout color that subtly matched the lighter tones in both the glass and ceramic tiles was selected to unify the different materials.
3. Geometric Patterns: Linda’s Hexagon Focal Point
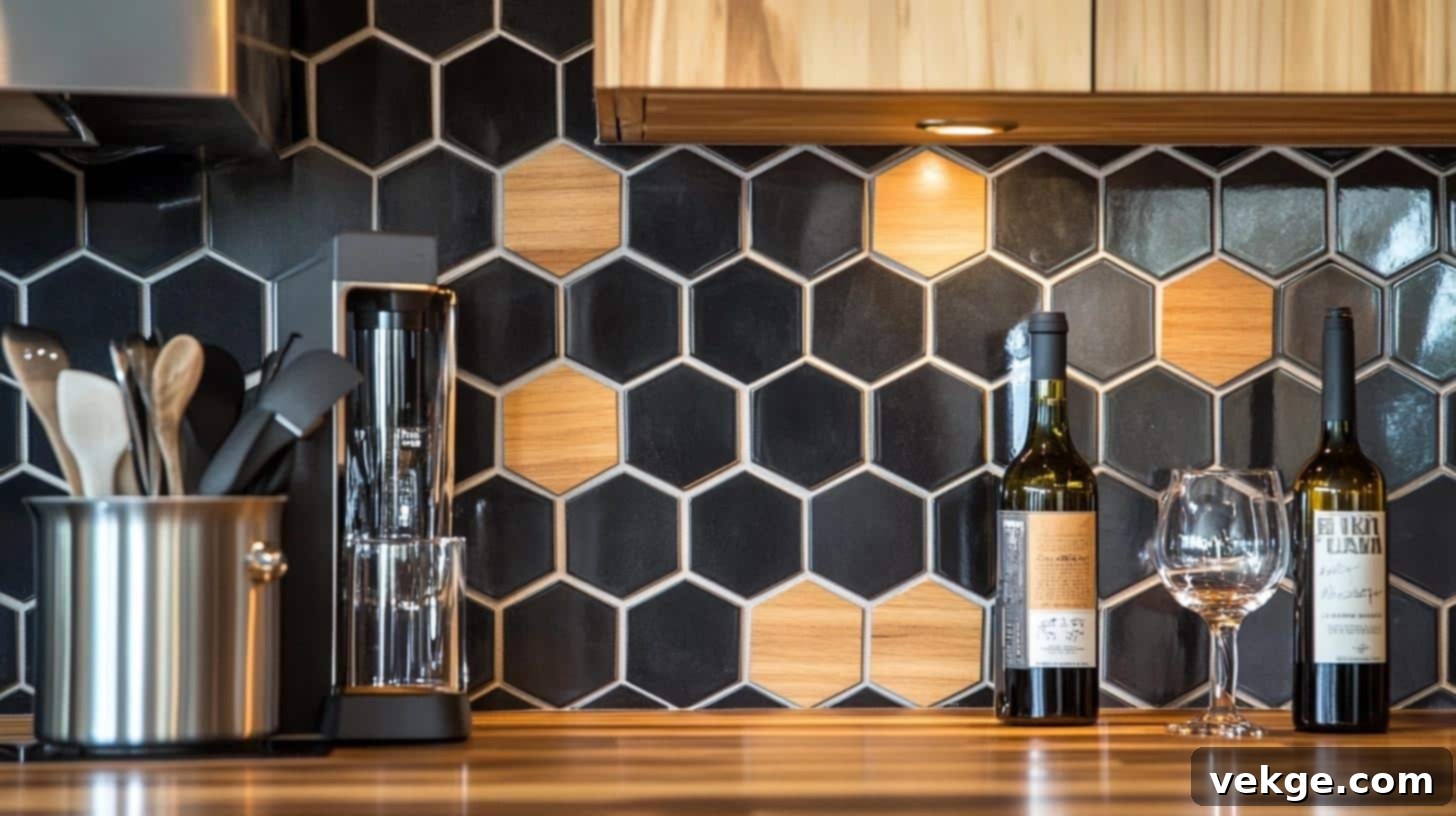
Linda’s kitchen features a captivating hexagon tile design that transforms her backsplash into a true artistic focal point. This project demonstrates that even intricate geometric patterns are achievable for a DIYer with meticulous planning and patience. The clean lines and unique shape add significant character to her kitchen.
Linda’s Detailed Design Process:
- Full-Size Template: She started by drawing the full hexagon pattern on a large sheet of kraft paper, scaled to her backsplash area. This allowed her to visualize the final look and make adjustments.
- Exact Tile Count: Based on her template, she accurately calculated the exact number of full and partial hexagon tiles needed, minimizing waste.
- Wall Markings: Precisely marked center points and reference lines on the wall using a laser level, ensuring the pattern would be perfectly aligned.
- Cardboard Templates: For complex cuts around outlets or edges, she created small cardboard templates first, then transferred them to the actual tiles.
Cost Breakdown for Linda’s Project:
- Hexagon tiles (porcelain): $175
- Setting materials (adhesive, grout, spacers): $60
- Specialty tools (wet saw rental, nippers): $40
- Total: $275
Linda’s Installation Tips for Complex Patterns:
- “For patterns like hexagons, always start from the bottom center and work your way up and out. This creates a strong base and helps maintain symmetry.”
- “A laser level is your best friend. Project those horizontal and vertical lines to keep your pattern straight and true.”
- “Once you’ve cut all your edge tiles for a section, apply adhesive and install them all at once to maintain momentum and consistency.”
- “Take progress photos! They help you review your work, spot potential issues, and serve as a fantastic record of your accomplishment.”
These inspiring real-world projects powerfully illustrate that good planning, careful execution, and attention to detail are the keys to a successful DIY backsplash. Each transformation brings unique style and significant savings, proving that you too can achieve professional results on a budget.
Wrapping It Up: Your Kitchen’s Transformation Awaits!
Embarking on a DIY backsplash project might seem daunting at first, but as you’ve seen, it’s an incredibly rewarding endeavor. I remember feeling nervous about tackling tile work myself, much like you might be feeling now. However, after guiding many readers through their home projects – from stylish backsplashes to functional storage benches – I am confident that you possess the ability and patience to achieve this, too.
The steps outlined in this guide are more than just instructions; they are your pathway to significant savings and the acquisition of valuable skills that will serve you in countless future home improvement endeavors. Imagine the pride you’ll feel every time you walk into your kitchen, knowing that its stunning new look is a direct result of your own dedication and effort. This isn’t just about updating a space; it’s about making your home truly your own, filled with personal touches that reflect your style and hard work.
Are you ready to begin your backsplash project? Start by gathering all your materials and tools. Take your time with measurements and planning, as these foundational steps are crucial for a smooth installation. Remember, there’s no need to rush; quality work takes patience and care. The beauty of DIY lies in setting your own pace and enjoying the process.
I would love to hear about your progress, see your kitchen’s new look, or answer any questions you might have along the way! Please feel free to leave a comment below and share your experience. Your journey to a beautiful, updated kitchen starts now!
