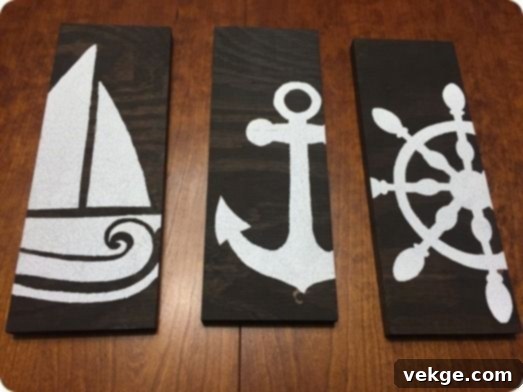
DIY Nautical Decor Ideas: Transform Your Home into a Coastal Oasis
Do you find yourself dreaming of the gentle sound of waves, the refreshing sea breeze, and the timeless charm of a beachfront cottage? If you love all things beachy and coastal, then incorporating nautical decor into your living space is an absolutely brilliant way to infuse your home with that serene, vacation-like atmosphere. This popular design theme brings a sense of calm, adventure, and classic elegance, making it perfect for both indoor and outdoor settings. But you might be wondering, is it practical and easy to achieve, or will it demand a significant chunk of your time and energy?
The exciting news is that creating a nautical-themed home doesn’t have to be a complex or expensive endeavor. We’ve got you covered with a collection of inspiring and achievable nautical decor ideas that are perfect for DIY enthusiasts. Many of these projects are not only simple and fun to make, but they also promote sustainability by utilizing recycled items and easily available, often inexpensive, materials. You can find most of the supplies you’ll need at local craft stores, hardware shops, or even online retailers. Best of all, some truly authentic elements can be gathered directly from a peaceful stroll along the beach, adding a personal touch that store-bought items simply can’t replicate.
Embracing a coastal aesthetic means more than just throwing a few seashells around. It’s about creating a cohesive, inviting, and refreshing environment that reflects the beauty and tranquility of the ocean. From welcoming entryways to cozy living spaces and charming outdoor nooks, these DIY projects will help you transform every corner of your home into a beautiful, beach-inspired sanctuary. Get ready to unleash your creativity and dive into these fantastic ideas for bringing the spirit of the sea right to your doorstep!
1. Welcome Guests with a Stylish Round Rope Mat for The Entrance
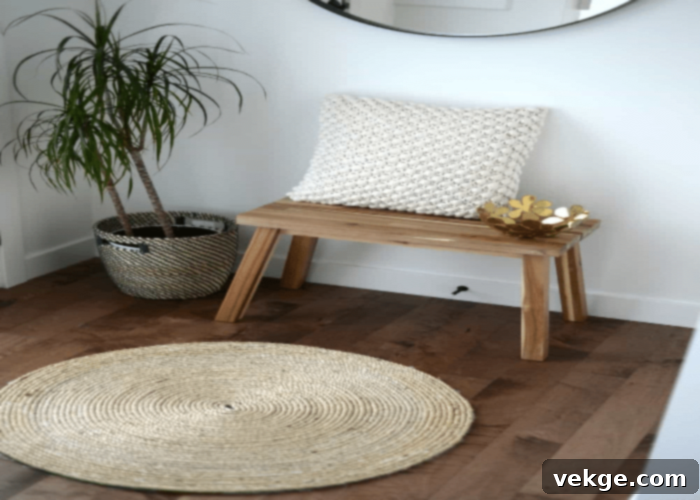
The entrance to your home is the first impression guests receive, so why not make it count with a charming and rustic rope mat? This elegant yet simple nautical decor idea instantly sets a welcoming coastal tone. For this DIY project, you’ll need a good length of natural fiber rope on a spool, choosing a thickness that suits your desired look – a thicker rope creates a more substantial, rugged mat, while a thinner rope offers a finer, more intricate design. You’ll also need a thick, durable fabric like canvas or felt for the backing, a sharp utility knife or strong scissors, heavy-duty needle and thread, and a reliable silicone adhesive.
To begin, cut your backing fabric into a perfect circle of your desired mat diameter. This will serve as the sturdy foundation for your rope mat. Next, starting from the center, begin coiling your rope tightly, creating concentric circles. As you coil, apply the silicone adhesive generously to the underside of the rope and press it firmly onto the fabric backing. Continue this process, ensuring each coil of rope is snugly fitted against the previous one, until you reach the edge of your fabric circle. Once the adhesive is dry, you can further secure the rope to the fabric by stitching around the perimeter or through the coils in a few places for extra durability. For an authentic touch, consider using a black marker to draw subtle nautical symbols like anchors or compass roses on some of the rope sections.
This round rope mat is a fabulous way to introduce a nautical theme right at your doorstep. Beyond the entrance, you can scale down this idea to create smaller, equally charming round nautical tea coasters for your coffee table or dining area. Imagine enjoying your morning coffee on a coaster that brings the beach right to your living room! This project is not only satisfying to make but also highly functional and aesthetically pleasing.
2. Create Coastal Ambiance with Fishermen Net and Mason Jars
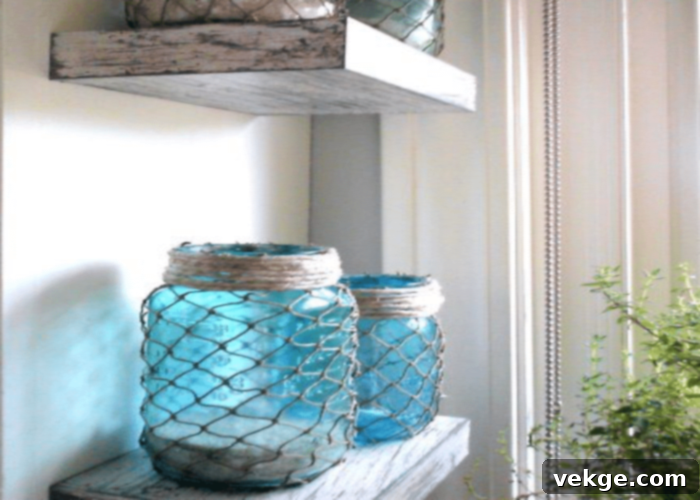
If you’re looking to create a striking and captivating coastal look for your shelves, mantels, or even as hanging lanterns, this nautical decor idea featuring fishermen’s netting and mason jars is an absolute stunner. It evokes images of seaside villages and rustic fishing boats, adding an authentic touch to any room. What do you need for this enchanting display? Start with a selection of colored mason jars – blue, green, and clear jars work beautifully to mimic the hues of the ocean. Fishermen’s netting, which you can often find at craft stores or online, is the other essential component. Additional supplies include sharp scissors, natural hemp twine, strong craft glue (a hot glue gun works wonders here), and a length of decorative rope.
The charm of this DIY project lies in its simplicity. Begin by carefully wrapping the fishermen’s netting around the body of each mason jar. You can allow the netting to drape loosely for a more weathered, authentic look, or pull it taut for a neater finish. Secure the netting in place with small dots of glue, ensuring it adheres well without becoming too visible. Once the netting is secure, take a piece of your chosen decorative rope and wrap it tightly around the neck of the jar, securing it with glue. This not only adds an extra layer of texture but also neatly finishes the top edge of the netting. For an even more magical effect, place battery-operated fairy lights or LED tealight candles inside the jars. When lit, they cast a warm, inviting glow through the netting, creating a truly mesmerizing coastal ambiance. These net-wrapped mason jars make for trendy and versatile decor, perfect for any room, from a cozy bedroom to a bustling living area or even as charming centerpieces for outdoor gatherings.
3. Craft a Rustic Charm with a Nautical Rope Vase
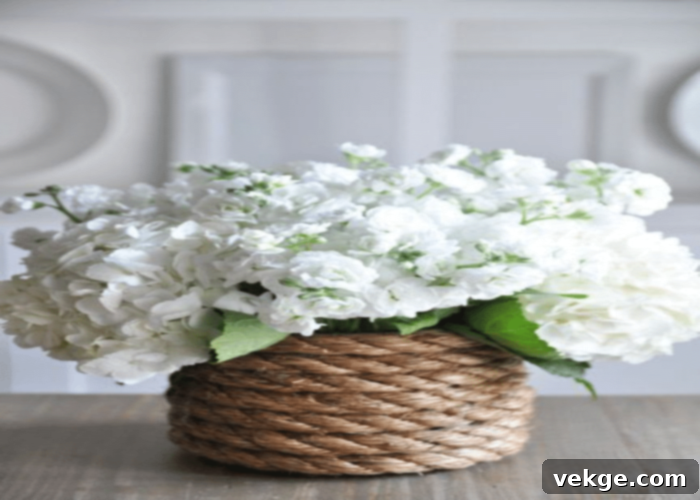
Continuing our theme of repurposing and bringing the sea indoors, this nautical decor idea allows you to create an attractive rope vase with minimal effort and cost. It’s an excellent way to use leftover rope from other projects, like our round rope mat, making it both economical and sustainable. For this project, you’ll need an empty tin can (e.g., from canned vegetables or coffee) – recycling these common kitchen items is a fantastic way to contribute to an eco-friendly home. You’ll also need a length of rope (jute, sisal, or cotton rope all work beautifully for different textures) and strong adhesive, preferably a hot glue gun for quick and secure bonding.
The process is wonderfully straightforward. Start by ensuring your tin can is clean and dry. Apply a line of hot glue to the bottom edge of the can and begin wrapping your rope tightly around it, pressing each coil firmly against the previous one. Continue to apply glue in small sections as you wrap, moving upwards until the entire exterior of the tin can is completely covered in rope. Ensure there are no gaps and that the rope is wrapped evenly for a polished look. Once the glue has set, the rope-covered can is ready to serve as the exterior of your vase. Next, simply place a small glass jar or bottle inside the rope-wrapped can. This inner container will hold water for your flowers, keeping the rope dry and protected. Fill it with water and adorn it with your favorite natural floral beauties – think white hydrangeas, blue delphiniums, or even simple green foliage – to dramatically amp up the natural, coastal look of your space. This rustic rope vase makes a charming centerpiece or an inviting accent on any shelf or table.
4. Illuminate with a Charming Driftwood Candle Holder
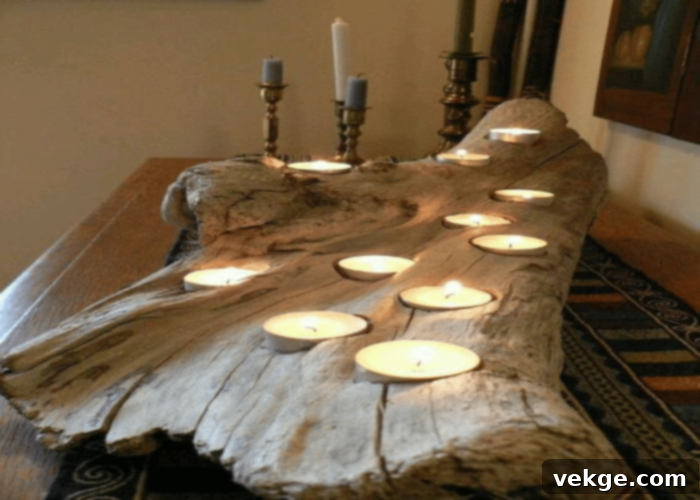
Nothing says “coastal rustic” quite like driftwood, and transforming these natural treasures into a beautiful candle holder is a fantastic way to bring an organic, beach-found element into your home. If you’re fortunate enough to live near the coast, you can embark on a treasure hunt to collect unique driftwood pieces directly from the beach – just remember to clean them thoroughly before use. Otherwise, high-quality driftwood pieces can be conveniently ordered online for this captivating nautical decor idea. For this project, you will need your chosen piece(s) of driftwood and a power drill with a spade bit or a hole saw bit that matches the diameter of your chosen candles.
Once you have your driftwood, carefully plan where you want your candles to sit. Consider the natural shape and contours of the wood to create an aesthetically pleasing arrangement. With a steady hand, use your drilling machine to create shallow holes in the driftwood. The depth of the holes should be enough to securely hold your candles but not so deep that they disappear completely. A pack of tealight candles or small votives works perfectly here, casting a soft, inviting glow. Place the candles gently into the drilled locations on the driftwood, and step back to witness the amazing transformation. The flickering candlelight against the weathered, textured wood creates a warm, atmospheric display that instantly enhances the coastal mood of your space. This driftwood candle holder is perfect for a mantelpiece, a dining table centerpiece, or even as a unique addition to your outdoor patio, bringing the tranquility of a beach bonfire indoors.
5. A Lighthouse from Recycled Table Legs: A Beacon of Style
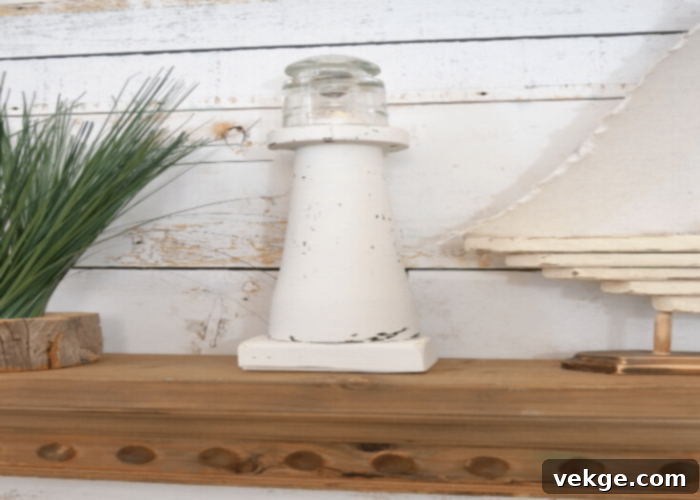
Lighthouses stand as timeless symbols of guidance, hope, and the enduring spirit of the sea. Bringing this iconic structure into your home is a fantastic way to embrace the full charm of nautical decor. Do you happen to have an old wooden table with elegant, spindle-shaped legs that you were considering discarding? Hold on! We have the perfect upcycling idea that will transform one of those legs into a charming miniature lighthouse, adding a unique focal point to your home. This project is not only creative but also incredibly satisfying, turning potential waste into a beautiful piece of art.
To create your lighthouse, carefully remove one of the table legs. Start by sanding the leg smooth, ensuring there are no splinters or rough patches. Then, apply a coat of primer, followed by a crisp white or classic red and white striped paint scheme, characteristic of traditional lighthouses. For added detail, you can use a fine brush to paint small “windows” or a railing design near the top. Once the paint is completely dry, you’ll need to create the “lantern” top. Secure a sturdy glass jar (a Mason jar or a small decorative lantern works well) onto the very top of the table leg. You can use strong adhesive or even a small wooden base plate attached to the leg and then to the jar for extra stability. Inside the glass jar, place a battery-powered candle or a small LED puck light. This provides a safe, realistic flickering glow that mimics the beacon of a true lighthouse without any fire hazard. Position your newly crafted lighthouse on a bookshelf, a side table, or even as a whimsical garden accent to guide the way to your coastal-themed haven.
6. Cultivate Coastal Charm with Sea Shell Planters
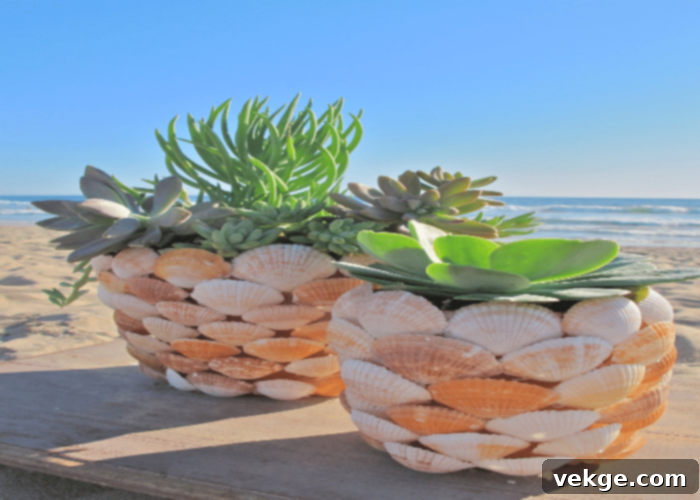
Bring the delicate beauty of the ocean’s treasures into your botanical displays with this exquisite idea: transforming ordinary planters into stunning sea shell masterpieces. This nautical decor concept is a fantastic way to infuse a natural, exotic beach look into your indoor or outdoor plant arrangements. Collecting seashells can be a delightful activity in itself, whether you find them on a beach vacation or purchase a mixed bag from a craft supply store. The variety of shapes, sizes, and colors of shells allows for endless creative possibilities.
To begin, ensure your chosen shells are clean and dry. Using a strong adhesive, such as a hot glue gun or marine-grade epoxy, carefully stick the seashells to the exterior of your regular planters and potted plants. You can choose to cover the entire surface of the planter for a completely transformed look, or create specific patterns and designs. For larger planters, utilize bigger, more prominent shells to cover more area quickly and create a bold statement. For smaller pots, the tiny, intricate shells that children often collect from the seashore can be meticulously placed to add delicate detail. Think about arranging them in overlapping patterns, or creating a mosaic effect. To dramatically enhance the coastal look, pair your newly adorned planters with plants that evoke a tropical or seaside feel, such as succulents, air plants, or a miniature palm tree. The combination of living greenery and natural shells creates a vibrant, organic display that is truly captivating and brings a breath of fresh, sea air to any space.
7. Design Personalized Charm with DIY Nautical Coasters
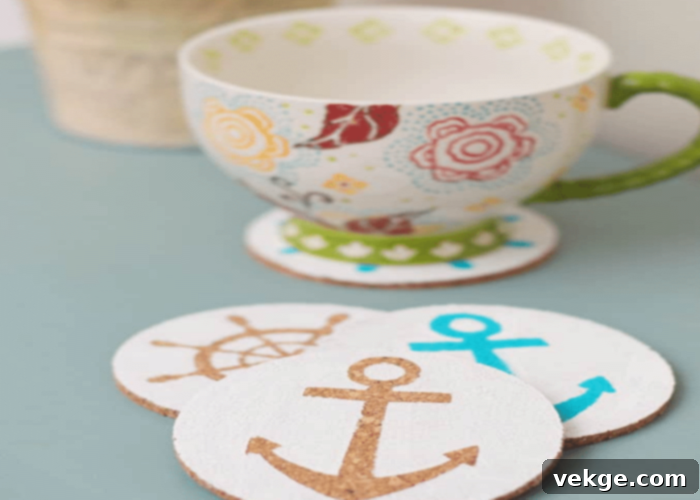
Protecting your furniture while adding a touch of personalized coastal charm has never been easier or more enjoyable! We have a brilliant and practical idea for infusing a coastal getup onto your tables with custom-made DIY nautical coasters. These handmade pieces not only serve a functional purpose but also add a unique decorative accent that guests are sure to admire. To start this fun project, gather some sturdy driftwood circular pieces, wood slices, or even plain cork coasters as your base. The natural texture of wood slices particularly complements the rustic nautical theme.
Once you have your coaster blanks, the real fun begins. Arm yourself with a set of permanent marker pens in various colors, or acrylic paints and fine brushes if you prefer more vibrant designs. Now, let your imagination sail! Sketch various iconic nautical symbols onto the surface of each coaster. Think classic anchors, elegant sailboats, whimsical mermaids, intricate compass roses, sturdy ship’s wheels, or even a simple lighthouse silhouette. You can find countless examples and inspiration online if you need a little creative boost. For an extra special touch, involve your kids in this DIY project; they’ll love getting creative and decorating their own coasters, making it a wonderful family activity. Once your designs are complete and dry, it’s crucial to seal them with a clear, waterproof sealant or varnish. This will protect your artwork from condensation and spills, ensuring your beautiful nautical coasters remain vibrant and functional for years to come. These coasters make perfect gifts or a charming addition to your own home, bringing a personalized touch of the sea to every sip.
8. Enhance Your Space with a Unique Driftwood Mirror
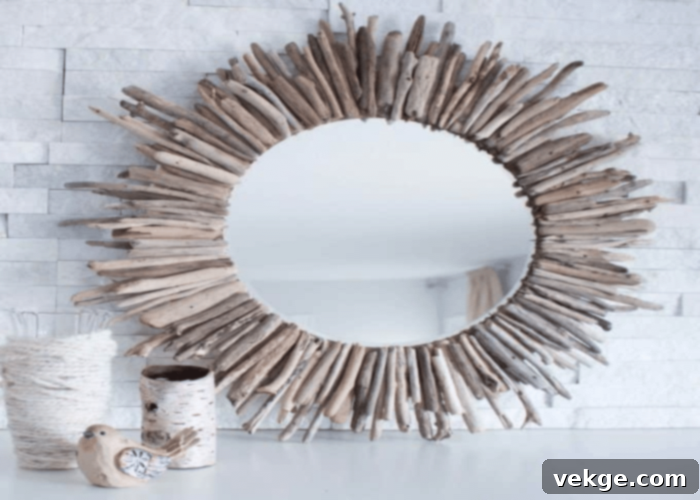
Mirrors are not just functional items; they are powerful decorative elements that can dramatically impact the perceived size and light of a room. When framed with natural elements, they become stunning focal points. This nautical decor idea to perfect your coastal look involves creating a captivating driftwood mirror. The beauty of this project lies in embracing the natural imperfections and unique shapes of small driftwood pieces of different sizes. In fact, non-uniform pieces translate into a more chic, organic, and genuinely gorgeous look, giving your mirror a one-of-a-kind artisanal appeal. The rustic appearance of the driftwood frame can instantly transition any space, adding warmth, texture, and a strong connection to the natural world.
To craft your driftwood mirror, you’ll need a plain mirror (round or rectangular works well), a sturdy backing board for mounting the driftwood (if the mirror frame isn’t wide enough), and a collection of driftwood pieces. A strong adhesive, such as wood glue or construction adhesive, will be essential. Start by arranging your driftwood pieces around the mirror, experimenting with different configurations until you achieve a design you love. Don’t be afraid to overlap pieces or let them extend beyond the edge of the mirror for a more dynamic effect. Once satisfied with the layout, glue each piece securely in place. Allow ample drying time for the adhesive to cure completely before hanging. This same creative idea can be brilliantly applied to your photo frames and wall pictures, creating a cohesive, beach-inspired gallery wall. Imagine a collection of cherished memories framed by the raw, natural beauty of driftwood, instantly transporting you and your guests to a peaceful seaside escape.
9. Set Sail with a Charming DIY Sailboat
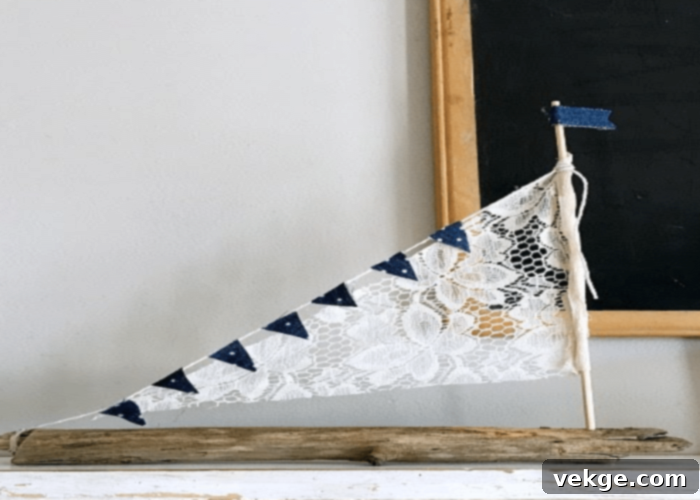
No nautical decor theme is truly complete without the quintessential symbol of seafaring adventure: a sailboat. Creating your own DIY sailboat is a delightful project that allows for personal expression and results in a charming, handcrafted piece that will undoubtedly become a conversation starter. For making this adorable boat, you’ll need a few key supplies: a sturdy piece of driftwood to serve as the hull (choose a piece with a relatively flat base for stability), a cotton string for rigging, a wooden dowel for the mast, a hot glue gun, a drill with a small bit, some decorative lace fabric for the main sail, and a small piece of denim fabric for the smaller pennant sails.
Begin by preparing your mast. If you’re recycling lace fabric, cut it into a triangular or rectangular shape that will form your main sail. Neatly glue the edges of the lace fabric to the dowel, ensuring it hangs tautly. For the hull, drill a small hole into the center of the driftwood piece, making sure the hole is just wide enough for your dowel to fit snugly. Apply a generous amount of hot glue into the drilled hole and insert the dowel with the lace sail, holding it steady until the glue sets and the mast is firmly upright. Next, take your denim fabric and cut a few small triangular pieces; these will be your pennant sails. Glue these denim triangles at even intervals along a length of cotton string. Once dry, tie one end of this cotton string (with the pennants) to the top of your dowel mast and secure the other end with glue to the driftwood hull, creating the illusion of realistic rigging. You can add more cotton strings to mimic ropes and lines for a more detailed look. This handcrafted sailboat is a perfect addition to a bookshelf, a display cabinet, or as a centerpiece, constantly reminding you of the open seas and adventurous journeys.
10. Coastal Vignettes: Styling Your Nautical Decor
While individual DIY projects are fun, the true magic of nautical decor lies in how you arrange and display your creations. Creating small “coastal vignettes” or themed displays throughout your home can significantly enhance the overall seaside atmosphere. Think about grouping items with similar textures, colors, or themes together to tell a story. For instance, combine your driftwood candle holder with a few carefully chosen seashells, a piece of sea glass, and a small, smooth river stone on a tray for a serene display on a coffee table. Similarly, your rope vase filled with faux coral or dried sea oats would look stunning next to a stack of blue and white striped books and a framed photo of a beach scene.
Consider the color palette inherent to coastal design: crisp whites, deep blues, sandy beiges, and natural greens. Incorporate these colors through throw pillows, blankets, or even painted furniture. Don’t be afraid to mix and match textures—the rough tactile feel of rope and driftwood contrasts beautifully with smooth glass and polished shells. Adding elements like striped textiles (think navy and white stripes), anchors, ship’s wheels, and even vintage maps can further cement your theme. These small, thoughtful arrangements elevate your DIY efforts and create a curated, professional look without the high price tag. Remember, the goal is to evoke the feeling of being by the sea, so keep things light, airy, and uncluttered to maintain that refreshing coastal breeze within your home.
Conclusion: Sail Away with Your Own Coastal Masterpiece
As you can see, you don’t need to acquire real-life boats, towering lighthouses, or exotic sea creatures to extend a beautiful coastal feel to your home. The enchanting allure of the seaside can be effortlessly achieved by thoughtfully incorporating some key beach-related elements. Simple materials like sturdy ropes, intriguing fishing nets, delicate seashells, weathered driftwood, and reclaimed wood pieces can be transformed into stunning, personalized decor items. Our curated collection of ideas offers a collation of the easiest and most effective methods for you to create the ultimate coastal look and feel, all while embracing the joy of DIY and the principles of recycling and sustainability.
Embracing nautical decor is about more than just aesthetics; it’s about bringing a sense of tranquility, adventure, and natural beauty into your everyday life. Each handmade piece tells a story and adds character that store-bought items simply cannot replicate. From welcoming your guests with a handcrafted rope mat to illuminating your evenings with a driftwood candle holder, every project contributes to creating a harmonious and refreshing environment. We hope these ideas have inspired you to embark on your own creative journey. Liked our nautical decor ideas? We would absolutely love to see your creations! Share pictures of how well these ideas suit your space on social media, or even better, share a few good-looking beachfront aesthetic ideas of your own below in the comments section. Let’s inspire each other to create homes that truly reflect the calming and invigorating spirit of the ocean!
