Elevate Your Outdoor Living: The Ultimate Guide to Horizontal Deck Skirting
Thinking about enhancing your deck’s appearance and functionality? Deck skirting is a fantastic way to transform your outdoor space, providing both aesthetic appeal and practical benefits. It elegantly conceals the often-unattractive area beneath your deck, creating a polished, finished look for your home.
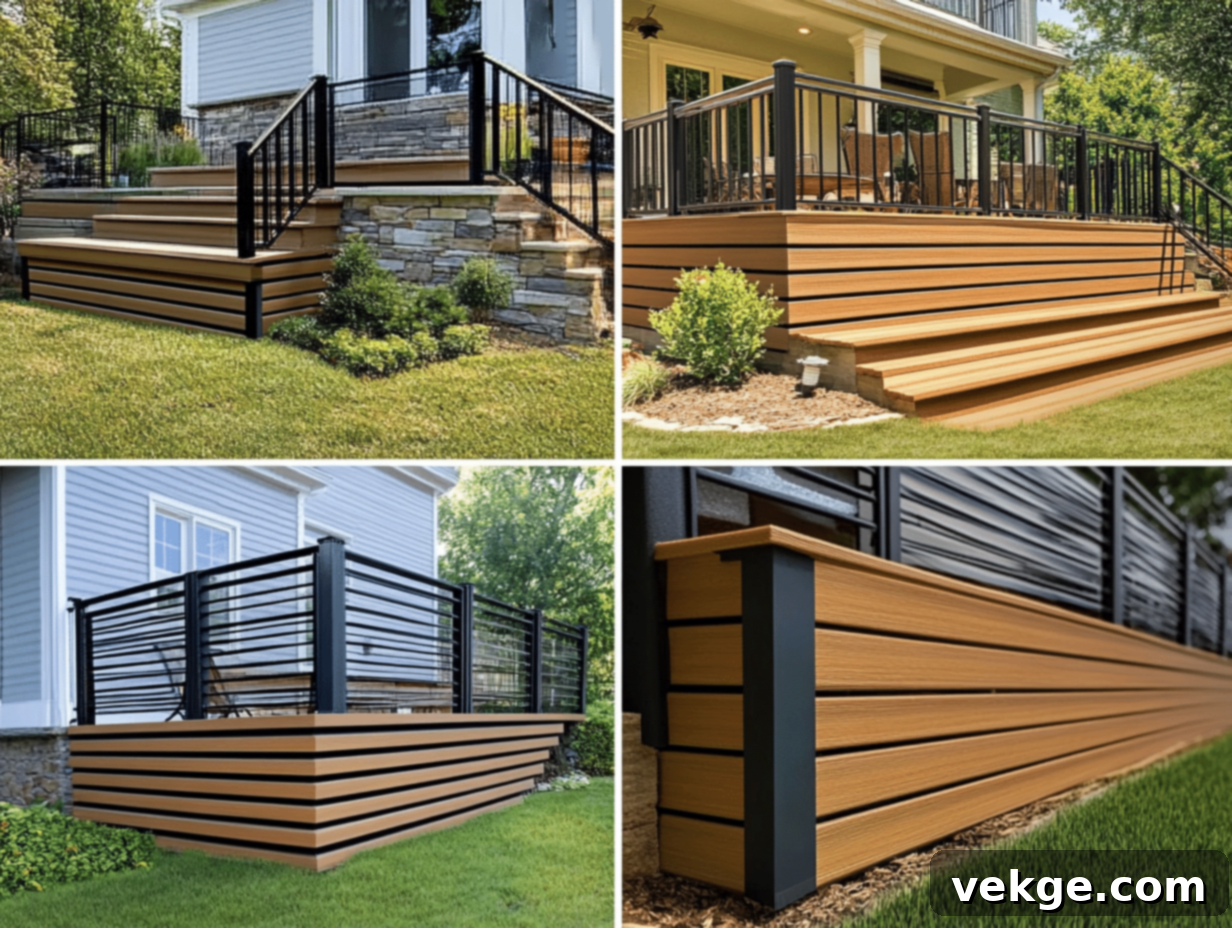
This comprehensive guide delves into the world of horizontal deck skirting, offering you a complete overview of design options, material choices, and step-by-step installation instructions. Unlike vertical designs where boards run perpendicular to the ground, horizontal deck skirting features boards placed side-by-side, running parallel to the ground. This distinctive style is renowned for making decks appear wider, more grounded, and effortlessly modern, perfectly complementing a variety of architectural styles.
In this detailed resource, you’ll discover:
- Easy-to-follow, step-by-step installation tips to ensure a successful DIY project.
- Inspiring design ideas tailored to various aesthetic preferences and home styles.
- Essential maintenance basics to guarantee your deck skirting remains beautiful and functional for years to come.
I’ve structured this guide with clear, concise instructions and practical advice, drawn from extensive experience. By the time you reach the end, you’ll possess all the knowledge and confidence needed to embark on your horizontal deck skirting project, creating an outdoor oasis you’ll love for years.
Choosing the Perfect Material for Your Horizontal Deck Skirting
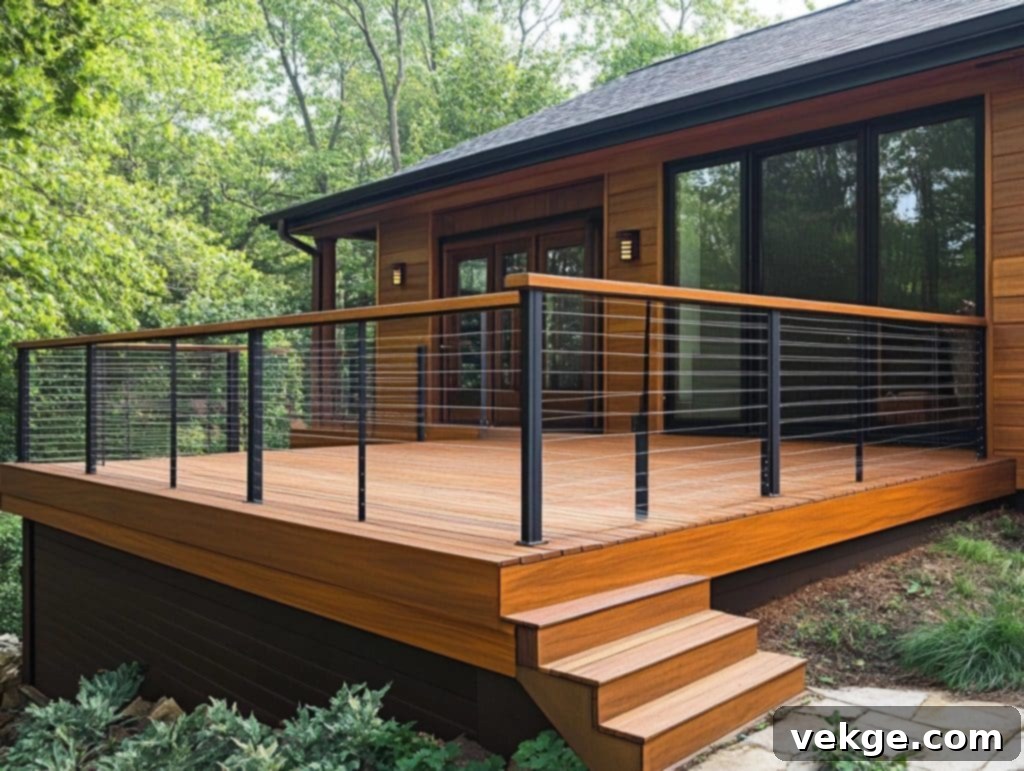
The material you select for your deck skirting is crucial, influencing not only its aesthetic appeal but also its longevity and maintenance requirements. Each option presents unique characteristics in terms of durability, cost, and visual texture. Understanding these differences will empower you to make an informed decision that best suits your home’s style, local climate, and personal budget.
Wood Skirting: Natural Beauty and Classic Charm
Wood remains a perennially popular choice for deck skirting, valued for its natural warmth and versatility. Its organic beauty blends seamlessly with outdoor environments, offering a timeless look that can be customized with stains or paints.
Common Wood Types for Skirting:
- Cedar: Highly prized for its natural resistance to rot, decay, and insect infestation. Cedar is a durable softwood that weathers beautifully, often developing an attractive silvery-gray patina over time if left unstained. It’s a long-lasting option that requires less chemical treatment.
- Pine: An economical and readily available option, especially pressure-treated pine, which offers enhanced resistance to moisture and pests. While budget-friendly, pine requires more diligent maintenance, including regular sealing and painting or staining, to protect it from the elements and maintain its appearance.
- Redwood: Similar to cedar in its natural resistance to insects and rot, redwood boasts a rich, deep color that adds elegance to any deck. It’s known for its stability and minimal warping, making it an excellent, albeit often more expensive, choice for enduring skirting.
Essential Wood Skirting Maintenance:
- Sealing/Staining: To protect wood from moisture and UV damage, apply a high-quality sealant or stain every 2-3 years, or as recommended by the product manufacturer. This helps prevent rot, mildew, and color fading.
- Annual Inspection: Conduct a yearly check for any loose boards, nails, or screws. Address any signs of wear, damage, or pest activity promptly.
- Water Damage Control: Repair any areas showing signs of water damage, such as swelling or discoloration, without delay to prevent further deterioration.
- Regular Cleaning: Annually clean your wood skirting with a mild soap and water solution, using a soft brush to remove dirt, grime, and mildew. Avoid high-pressure washers, which can damage wood fibers.
Composite Skirting: Low Maintenance, High Durability
Crafted from a blend of recycled plastic and wood fibers, composite materials offer a compelling alternative to traditional wood. They are engineered for exceptional durability and minimal upkeep, making them ideal for homeowners seeking a beautiful, long-lasting solution without the demanding maintenance schedule of wood.
Key Benefits of Composite Skirting:
- Minimal Upkeep: Unlike wood, composite skirting never requires painting, staining, or sealing. A simple wash with soap and water is usually enough to keep it looking new.
- Exceptional Durability: Composite materials are engineered to resist rotting, warping, splitting, and insect damage, providing superior performance in diverse climates.
- Color Stability: Modern composite boards are designed to retain their color vibrantly for many years, resisting fading from sun exposure.
- Extended Lifespan: With an impressive lifespan often exceeding 25 years, composite skirting offers excellent long-term value and peace of mind.
Cost Considerations for Composite:
- Higher Upfront Investment: The initial purchase price for composite materials is typically higher than that of natural wood.
- Reduced Long-Term Costs: This higher initial cost is often offset by significantly lower yearly maintenance expenses and less frequent need for repairs or replacement over its extensive lifespan.
Metal Skirting: Modern Appeal and Robust Protection
For a distinct, contemporary, or even industrial aesthetic, metal skirting provides a robust and stylish option. It offers exceptional durability and a sleek finish that can dramatically alter your deck’s character.
Popular Metal Options:
- Aluminum: A lightweight and naturally corrosion-resistant metal, aluminum skirting is an excellent choice for areas prone to moisture. It’s easy to work with and available in various finishes.
- Steel: For superior strength and long-lasting performance, steel skirting (often galvanized or coated) stands up remarkably well to impacts and harsh weather.
- Corrugated Panels: These textured metal sheets add a unique visual element and can contribute to a modern farm or industrial chic look. They are very durable and come in various colors.
Advantages and Considerations for Metal Skirting:
- Pest and Rot Proof: Metal is impervious to rot, decay, and insect damage, offering unparalleled protection against common issues affecting wood.
- Weather Resilience: It handles extreme weather conditions, from heavy rain to intense sun, with exceptional resilience.
- Easy to Clean: Metal surfaces are typically very easy to clean with a quick spray or wipe.
- Design Versatility: Available in a wide array of colors, finishes, and profiles, allowing for significant design customization.
- Potential for Dents: While strong, thinner metal panels can potentially dent if subjected to hard impacts, which is a factor to consider in high-traffic areas.
Step-by-Step Installation of Horizontal Deck Skirting
Installing horizontal deck skirting can be a rewarding DIY project that significantly upgrades your outdoor living space. Having completed numerous installations myself, I can assure you that with careful planning and adherence to these detailed steps, you’ll achieve professional-looking results.
Tools and Materials You’ll Need:
Before you begin, gather all necessary tools and materials to ensure a smooth and efficient installation process:
- Measuring Tape: For precise measurements of your deck perimeter and height.
- Level: Essential for ensuring your frame and skirting boards are perfectly straight and plumb.
- Saw: A circular saw is ideal for long, straight cuts; a miter saw offers precision for angled cuts. A hand saw can work for smaller adjustments.
- Drill and Screws: Use exterior-grade screws (e.g., galvanized or stainless steel) designed for outdoor use to prevent rust and ensure secure fastening.
- Skirting Material: Your chosen material (wood, composite, metal panels). Ensure you have enough, accounting for cuts and potential mistakes.
- 2×4 Lumber for Framing: Pressure-treated lumber is highly recommended for the frame, as it will be in contact with the ground and exposed to moisture.
- Pencil: For marking cuts and measurements.
- Safety Gear: Always wear gloves to protect your hands, safety goggles to shield your eyes from debris, and hearing protection when operating power tools.
- Concrete Blocks or Pavers: To keep the bottom of your wooden frame off the ground, preventing rot.
- Spacers: Small shims or tile spacers (1/8-inch recommended) to ensure consistent gaps between horizontal boards for ventilation and aesthetic appeal.
- Vent Covers: To allow airflow while keeping pests out.
1. Accurate Measurement and Calculation
Precision is paramount. Start by thoroughly measuring the area where the skirting will be installed. This step ensures you purchase the correct amount of material and plan your cuts accurately.
- Measure Each Side: Carefully measure the length of each side of your deck that requires skirting.
- Determine Height: Measure the vertical distance from the ground to the underside of your deck frame. Take measurements at multiple points along each side to account for uneven ground. Use the average or highest measurement as a baseline, knowing you’ll adjust for ground variations later.
- Note Obstacles: Identify and mark any areas where pipes, vents, stairs, or other permanent fixtures protrude from under the deck. These will require custom cuts.
Pro Tip: Always add 10-15% extra to your total material measurements. This accounts for waste from cuts, potential mismeasurements, or future repairs, saving you a trip back to the hardware store.
2. Constructing the Support Frame
The frame is the backbone of your skirting, providing the structure to which your chosen material will attach. A sturdy, level frame is critical for a professional finish.
- Install Corner Posts: Begin by installing vertical 2×4 (or larger, depending on deck height) pressure-treated posts at each corner of the deck. Ensure these posts are perfectly plumb using your level.
- Attach Top and Bottom Rails: Secure horizontal 2×4 pressure-treated lumber between the corner posts. Install one along the top, just under the deck’s rim joist, and another along the bottom, resting on concrete blocks or pavers.
- Add Vertical Supports: Space additional vertical 2×4 supports every 4 to 6 feet along the length of the frame. These supports provide rigidity and attachment points for your skirting boards.
- Level and Secure: Double-check all frame components with your level to ensure they are straight and plumb before fully securing them with exterior-grade screws.
Important: Any wood in direct contact with the ground must be pressure-treated to prevent rot. Place the bottom frame rails on concrete blocks or pavers to elevate them slightly off the soil, further protecting them from moisture.
3. Planning for Essential Ventilation
Adequate ventilation beneath your deck is crucial to prevent moisture buildup, which can lead to mold, mildew, and rot. Incorporate ventilation early in your design.
- Mark Vent Locations: Plan to install vent openings approximately every 8-10 linear feet along the skirting perimeter. Consider placement that integrates well with your overall design.
- Pre-Cut Openings: Before installing your skirting boards, cut out the necessary openings in your chosen material for the vent covers. It’s much easier to do this on individual boards or panels before they are attached to the frame.
- Select Matching Vent Covers: Choose vent covers that complement your skirting material and color. These covers will prevent pests from entering while allowing air to circulate.
4. Preparing Your Skirting Boards/Panels
Once your frame is ready and ventilation spots are marked, prepare your individual skirting components.
- Cut to Length: Measure and cut each skirting board or panel to the precise length required for its section of the frame. Remember to account for any corner treatments or overlaps.
- Smooth Edges: Sand any rough or sharp edges on wood or composite boards for a cleaner finish and to prevent splinters. For metal, carefully file down any burrs.
- Pre-Drill Holes (if necessary): For certain materials like dense hardwoods or metal, pre-drilling pilot holes can prevent splitting or make screw installation easier.
- Apply Sealant/Finish (for wood): If using wood and planning to seal or stain it, apply the first coat now before installation. This ensures even coverage on all sides, including cut ends, and protects the wood immediately.
Safety Note: Always wear safety glasses when operating saws and drills. Gloves are also recommended when handling lumber to prevent splinters.
5. Installing the Skirting Boards
This is where your deck’s transformation truly begins. Work methodically to ensure a consistent and appealing finish.
- Start at a Corner: Begin installing your first board at one corner of your deck. This provides a strong starting point and helps maintain alignment.
- Install Bottom Board First: Place your first board at the bottom of the frame, ensuring it is level and properly spaced from the ground (allowing for slight expansion/contraction or ground settling).
- Use Spacers for Gaps: For horizontal wood or composite boards, use uniform spacers (e.g., 1/8-inch) between each row to ensure even gaps. These gaps are vital for airflow and accommodate material expansion.
- Check Level Frequently: After installing every few boards, pause to check their level and alignment. Small adjustments early on prevent larger problems later.
- Work Your Way Up: Continue installing boards, moving upwards towards the deck surface. Ensure each board is securely fastened to the vertical frame supports.
Remember: Consistent spacing and level installation are key to a professional and aesthetically pleasing result. Don’t rush this step.
6. Navigating Obstacles and Irregularities
You’ll likely encounter obstacles like pipes or vents. Here’s how to handle them cleanly:
- Mark and Measure: Hold the skirting board against the obstacle and carefully mark its exact position and dimensions on the board.
- Cut Precisely: Use a jigsaw or appropriate saw to cut a hole in the board that is slightly larger than the obstacle. This allows for slight movement and ease of installation.
- Use Finishing Trim: For pipes, consider using split flanges or escutcheon plates that can be placed around the pipe to cover any gaps and create a neat finish. For vents, simply secure your pre-cut vent covers over the opening.
7. The Finishing Touches
Once all boards are installed, a few final steps will complete your project.
- Apply Corner Trim: Install trim pieces at the outside corners of your skirting. This hides any cut edges and provides a clean, finished appearance. You can use matching wood, composite, or metal trim.
- Fill Screw Holes: For wood or composite skirting, use exterior-grade wood putty or color-matched screw caps to conceal visible screw heads for a smoother look.
- Clean Up: Wipe down any marks, dust, or residue from the installation process.
- Final Fastener Check: Go around your entire skirting and ensure all screws are tight and secure.
Addressing Common Installation Problems and Their Solutions:
Even with careful planning, minor issues can arise. Here’s how to troubleshoot common problems:
- Uneven Ground: If you have significantly uneven ground, you can level it by adding a layer of gravel under your bottom frame rail, or by digging small trenches for the higher spots. Alternatively, adjust the length of individual skirting boards or trim the bottom edge to follow the ground contour for a custom fit.
- Boards Don’t Line Up: This often stems from inaccurate measurements or a frame that isn’t perfectly level. Double-check your measurements. If the frame is slightly off, you may need to shim boards or make small, precise cuts to maintain alignment.
- Gaps Are Too Big/Small: Inconsistent gaps indicate irregular use of spacers. For gaps that are too large, you might need to re-cut and replace boards, or use wider trim pieces to mask the issue. Too-small gaps can lead to buckling due to expansion; ensure adequate spacing, especially for wood and composite.
Tips for a Successful Skirting Project:
- Choose the Right Day: Work on a calm, dry day with mild temperatures. Extreme heat or cold can affect material handling and wood expansion/contraction.
- Enlist Help: Having a second pair of hands to hold long boards, especially during framing and initial board installation, can make the job significantly easier and safer.
- Take Breaks: Step back periodically to assess your progress from a distance. This helps you spot alignment issues or design inconsistencies early on.
- Prioritize Straight Cuts: Use guides with your saw to ensure all cuts are perfectly straight, which is essential for seamless horizontal lines.
- Maintain Cleanliness: Clean up debris as you go. A tidy workspace is a safer and more efficient workspace.
Final Checks Before Declaring Victory:
Before putting your tools away, perform these last inspections:
- Visual Walk-Around: Walk the entire perimeter of your deck, inspecting the skirting from all angles. Look for any misalignments, loose boards, or unfinished details.
- Ventilation Check: Confirm that all vent spaces are clear and functioning correctly, allowing for proper airflow.
- Stability Test: Gently push on various sections of the skirting to ensure everything is solid and nothing wobbles.
- Final Cleaning: Give the entire skirting a final wipe-down to remove any remaining dirt, dust, or fingerprints.
Future Access: If you anticipate needing access to the space under your deck for storage or maintenance, consider building one or more sections of your skirting as removable panels, secured with easily accessible screws or latches instead of permanent fasteners.
Why Choose Horizontal Deck Skirting? A Blend of Style and Functionality
The addition of deck skirting is more than a mere aesthetic upgrade; it’s a significant investment in your home’s outdoor functionality and overall curb appeal. Horizontal skirting, in particular, offers a unique set of benefits that make it a compelling choice for many homeowners. Its distinct side-to-side pattern creates clean, contemporary lines that visually expand your deck, giving it a broader, more integrated appearance that feels grounded and modern. This design choice harmonizes beautifully with various architectural styles, from minimalist to traditional.
Functional Advantages of Horizontal Deck Skirting
Beyond its visual appeal, horizontal deck skirting provides a range of practical benefits that enhance your outdoor living experience and protect your investment:
1. Enhanced Privacy and Concealed Storage
- By enclosing the under-deck area, horizontal skirting transforms what was once an open, often messy space into a discreet and usable storage zone. This is ideal for stowing away gardening tools, seasonal furniture cushions, or children’s outdoor toys.
- The continuous lines of horizontal boards create a seamless barrier, ensuring that clutter remains out of sight, contributing to a tidier and more organized yard.
- It effectively hides unsightly support posts, plumbing, or electrical conduits, providing a clean, finished border that elevates your entire outdoor landscape.
- When properly designed, the enclosed storage space can help keep stored items dry and protected from the elements year-round.
2. Improved Ventilation and Moisture Control
- Strategic spacing between horizontal boards, combined with well-placed vent covers, allows for optimal natural airflow patterns beneath the deck.
- This consistent movement of fresh air is critical in reducing the risk of mold, mildew, and fungal growth on the deck’s structural components, especially in humid environments.
- Good air circulation helps wooden joists and beams dry quickly after rain or snow, significantly extending their lifespan and preventing rot.
- In warmer months, planned ventilation gaps help dissipate trapped summer heat, making the under-deck area less conducive to moisture accumulation.
- By preventing moisture from becoming trapped, the overall integrity of your deck foundation and substructure is better preserved.
3. Effective Protection Against Pests
- A well-installed horizontal deck skirting acts as a physical barrier, effectively blocking entry for small animals and rodents like squirrels, raccoons, and skunks, preventing them from nesting under your deck.
- Proper installation, ensuring minimal gaps and secure attachments, deters larger pests from finding shelter in this protected space.
- It discourages stray animals from using the under-deck area as a convenient, sheltered hangout, maintaining the cleanliness and hygiene of your yard.
- The continuous barrier also limits access for various insects, reducing the likelihood of them establishing colonies close to your home’s foundation.
- The design allows for essential airflow while maintaining a robust barrier against unwanted critters.
4. Structural Protection from the Elements
- Deck skirting provides a crucial layer of protection for the vulnerable support posts, joists, and beams from harsh weather conditions throughout the year.
- It shields sensitive wooden components from direct exposure to intense UV rays, which can cause wood to dry, crack, and warp over time.
- Rain, snow, and splashing water are deflected by the skirting, preventing them from directly impacting and saturating the structural elements, thereby reducing the risk of rot and deterioration.
- With reduced exposure to the elements, the deck foundation remains more stable and experiences less wear and tear, contributing to its overall longevity.
- While protecting the structure, a removable skirting section can also make regular maintenance checks on the foundation and supports easier, ensuring any issues are caught early.
Optimizing Under-Deck Air Flow:
- To achieve ideal air movement, aim for a consistent 1/8-inch gap between each horizontal board. This small, deliberate spacing allows for continuous air circulation.
- Regularly ensure the ground beneath your deck remains clear of debris, leaves, or overgrown vegetation, as these can obstruct airflow and trap moisture.
- Inspect and clean any installed vent covers at least twice a year to prevent blockages from dirt, dust, or insect nests, which can impede ventilation efficiency.
Horizontal vs. Vertical Deck Skirting: Finding Your Ideal Match
The choice between horizontal and vertical deck skirting profoundly impacts both the visual appeal and practical considerations of your outdoor space. While both styles offer the core benefits of concealment and protection, their aesthetic and functional nuances cater to different needs and preferences. Let’s delve into a clear comparison to help you decide which is right for your home.
| Aspect | Horizontal Skirting | Vertical Skirting |
|---|---|---|
| Ease of Installation | Generally simpler due to long, continuous board runs. | May require more precise cuts and adjustments, especially on uneven terrain. |
| Water Drainage | Excellent; water runs off boards efficiently, minimizing pooling. | Standard, but vertical gaps can sometimes trap water or debris if not properly designed. |
| Visual Effect on Yard Size | Creates an illusion of a wider, more expansive yard, grounding the deck. | Draws the eye upwards, making the deck appear taller rather than wider. |
| Repair Simplicity | Repairs are often straightforward, as individual boards can be replaced. | Can be more challenging, sometimes requiring removal of adjacent boards for access. |
| Suitability for Sloped Ground | Can be challenging to install on significant slopes due to maintaining level lines. | Often works better on uneven or sloped ground as vertical lines can naturally follow contours. |
| Under-Deck Cleanliness | Effectively conceals the area and helps keep it clean from debris and pests. | Similarly conceals the area and helps keep it clean and protected. |
Visual Impact Comparison
Each skirting style profoundly influences the perceived scale and character of your deck and yard:
- Horizontal boards emphasize width, creating long, unbroken lines that can make your deck appear more expansive and established. This style subtly draws the eye across the landscape.
- Conversely, vertical boards draw the eye upwards, creating an impression of height and grandness for your deck. This can be beneficial for lower decks that you wish to appear taller.
- Horizontal patterns are often favored in modern, contemporary, and minimalist home designs, where clean lines and a sense of breadth are desired. They blend naturally with low-slung, expansive architecture.
- Vertical layouts tend to complement traditional, craftsman, or colonial home styles, echoing architectural elements found in window frames or siding. They provide a more classic, stately feel.
- The continuous nature of horizontal lines typically creates a more integrated and unified look with the deck’s top surface and surrounding landscape, offering a sleek transition.
Practical Installation and Maintenance Considerations
Installation Process:
- Horizontal boards often prove easier to install, as cutting uniform lengths and aligning them across the frame can be less complex than dealing with varied vertical heights, especially on level ground.
- Vertical boards typically require more backing support or additional framing components to secure each individual board from top to bottom, which can add to material and labor costs.
- In general, horizontal styles might incur slightly lower installation costs due to simpler cutting and less complex framing requirements.
- Vertical designs may demand extra cutting and fitting, particularly when dealing with slopes or intricate patterns, potentially increasing installation time and cost.
Long-Term Maintenance:
- One of the standout benefits of horizontal boards is how effectively water runs off their surfaces. This prevents pooling and reduces the potential for water damage, rot, or mildew buildup.
- While vertical boards generally drain well, depending on spacing and material, they might occasionally collect less dirt and debris between gaps.
- Regardless of style, both horizontal and vertical skirting require regular cleaning to maintain their aesthetic appeal and structural integrity.
- Should a board become damaged, replacing an individual horizontal board is often a simpler task than replacing a vertical one, which might be interlocked or require more extensive dismantling.
Recommendations for Your Deck Skirting Choice
Based on Your Desired Style and Aesthetics:
- Opt for horizontal skirting if your goal is to make your deck appear wider, more grounded, and to create a modern, expansive outdoor living area.
- Choose vertical skirting if you wish to emphasize the height of your deck and create a taller, more imposing presence in your yard.
- If ease of upkeep and simpler potential repairs are a high priority, horizontal designs often present a more straightforward solution.
- For homes with significantly sloped yards, vertical skirting may be a more practical and visually coherent choice, as it can adapt better to changing ground levels.
Based on Your Budget:
- Horizontal designs can sometimes use fewer materials, especially for the supporting frame, which may lead to lower upfront costs.
- Vertical styles might necessitate extra backing support or more intricate framing, potentially increasing material expenses.
- Both styles are versatile and can be achieved with a range of materials—wood, metal, or composite—allowing flexibility to fit various budget points.
- Always factor in the long-term care and maintenance costs associated with your chosen material and style when evaluating the total investment.
Based on Your Deck’s Setting and Surroundings:
- Consider how the skirting style will harmonize with your home’s main architectural design and existing exterior finishes.
- Think about the shape, size, and landscaping of your yard. Horizontal lines can make smaller yards feel larger, while vertical lines can complement tall trees or fences.
- Observe what your neighbors have done. While not a rule, maintaining a consistent aesthetic in a neighborhood can enhance overall property values.
- Visualize how your outdoor furniture and decor will interact with the chosen skirting style to ensure a cohesive outdoor environment.
Creative Horizontal Deck Skirting Ideas to Inspire Your Outdoor Space
Are you ready to truly elevate your deck’s appearance and transform the often-overlooked space beneath it? Let me share some exceptional horizontal deck skirting ideas that combine beauty, functionality, and enduring appeal. I’ve explored various styles over the years, and these options consistently deliver outstanding results, allowing you to create a unique and inviting outdoor sanctuary.
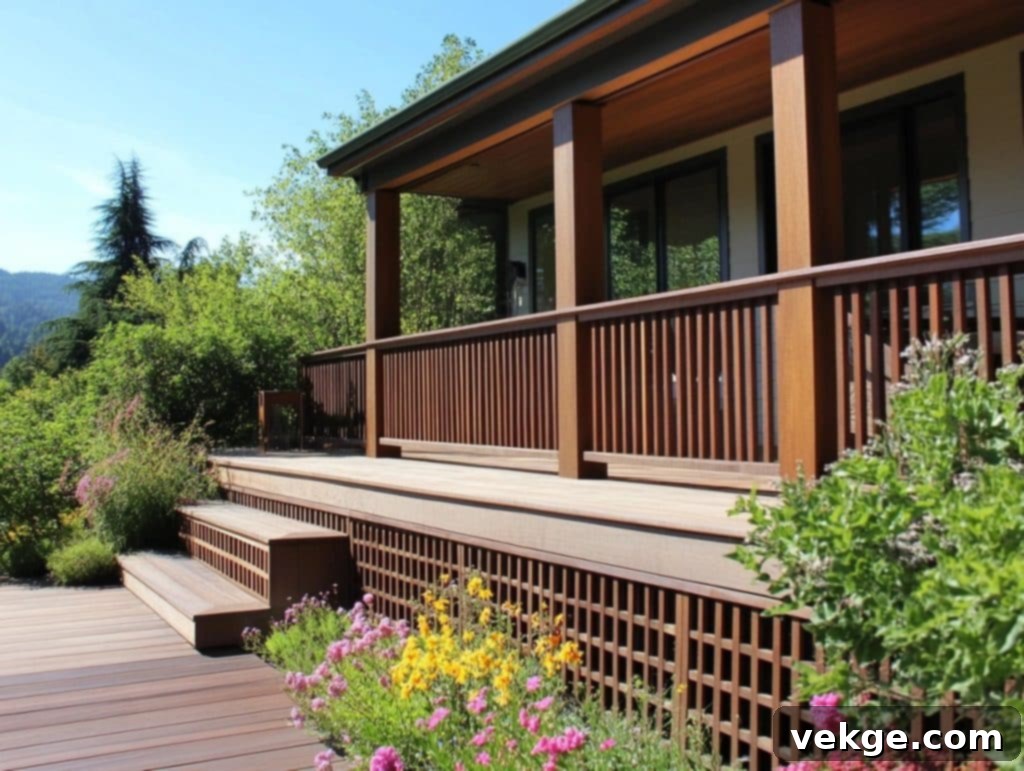
1. Classic Wood Lattice for Timeless Charm
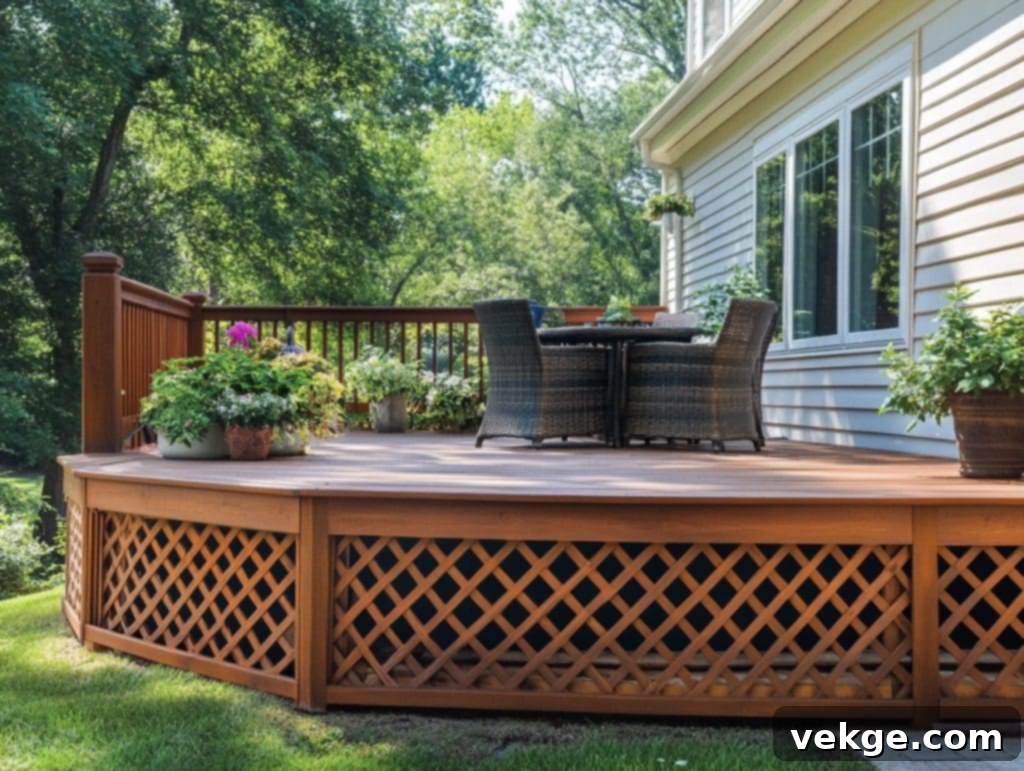
The tried-and-true wood lattice provides a clean, traditional look that effortlessly enhances almost any deck style. I particularly appreciate its ability to offer excellent airflow, crucial for preventing moisture buildup, while effectively obscuring the under-deck area. Its paintable surface allows for easy customization to perfectly match your deck, house, or surrounding landscape.
Unique Features & Benefits:
- Simplified Installation: Often available in pre-made panels, making installation quick and straightforward.
- Superior Airflow: The open grid design naturally promotes vital air circulation, which is essential for preserving the deck’s substructure.
- Customizable Aesthetics: Can be painted or stained in any color to perfectly complement your home’s exterior palette.
- Effortless Repairs: Damaged sections are typically easy to replace, minimizing maintenance effort and cost.
2. Horizontal Cedar Planks for Modern Elegance
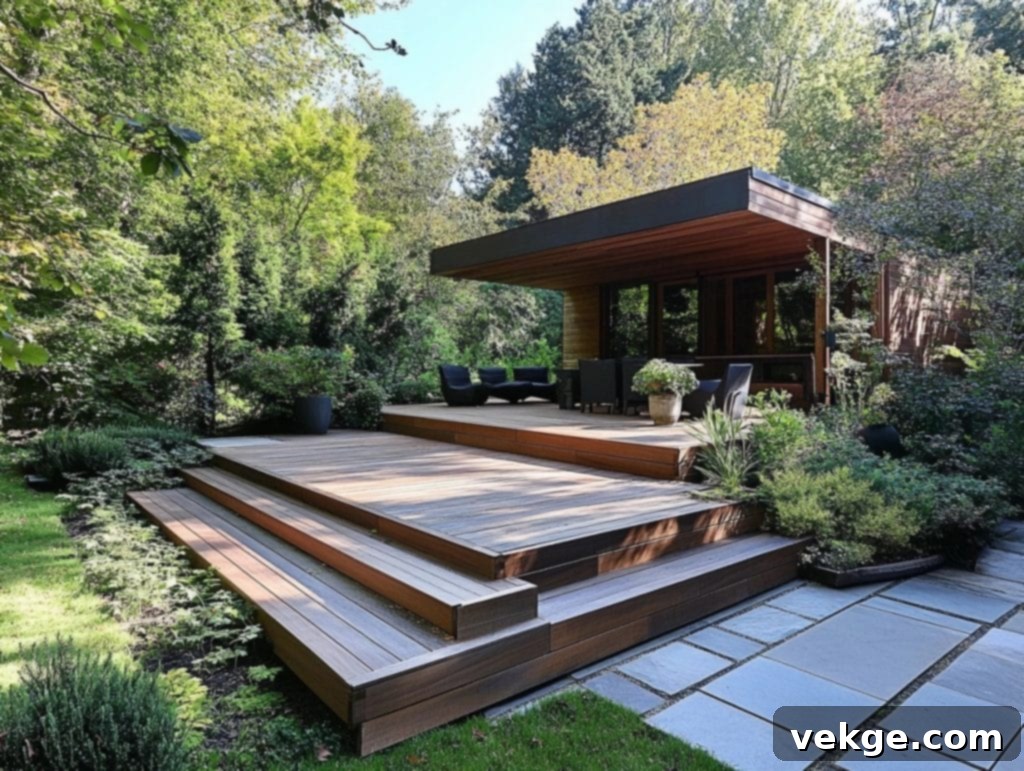
Laying cedar planks side-by-side creates a truly modern, sleek, and minimalist look. The distinctive natural wood grain of cedar adds a captivating visual texture, while its inherent properties make it an excellent choice for outdoor applications. Plus, the subtle, fresh aroma of cedar enhances the outdoor ambiance.
Unique Features & Benefits:
- Natural Pest Deterrent: Cedar naturally resists insects and decay, reducing the need for chemical treatments.
- Superior Weather Resistance: Highly durable against various weather conditions, ensuring longevity and stability.
- Graceful Aging: If left unstained, cedar gracefully ages to a beautiful, soft silvery-gray patina, adding character.
- Low Maintenance: Requires less intensive care compared to other wood types, particularly when properly sealed.
3. Metal Panel Design for Contemporary Edge
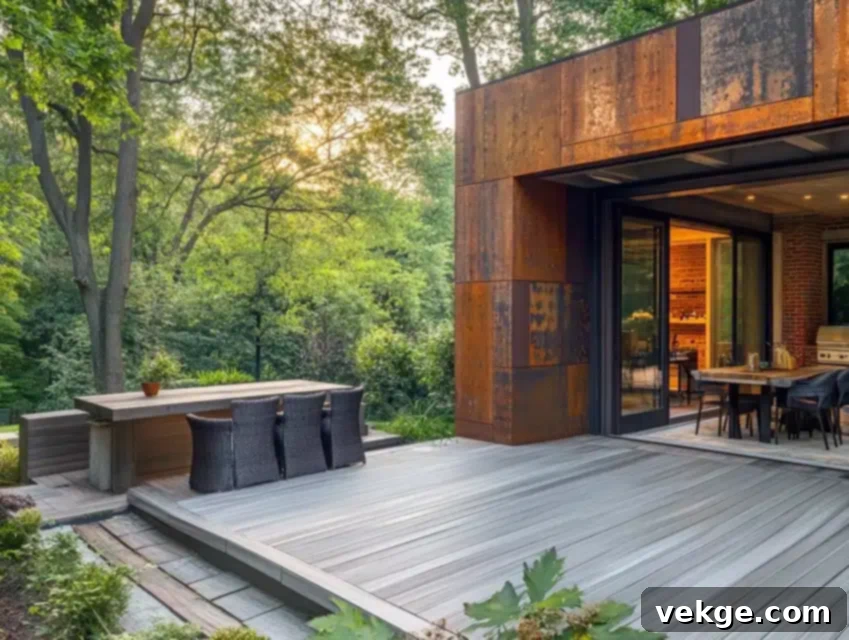
Sheet metal panels introduce a distinctive modern twist to deck skirting, offering both impressive strength and long-term durability. This option allows for significant customization, with a wide range of patterns, colors, and finishes available to perfectly match or contrast with your home’s exterior, creating a truly unique look.
Unique Features & Benefits:
- Rust-Resistant Options: Many metal panels come with advanced coatings that offer excellent protection against rust and corrosion, ideal for all climates.
- Diverse Pattern Choices: From sleek flat sheets to perforated or textured designs, metal offers unparalleled versatility in visual patterns.
- Extreme Weather Durability: Metal stands up exceptionally well to harsh weather, including strong winds, heavy rain, and intense sun.
- Minimal Upkeep: Requires very little maintenance beyond occasional cleaning to keep it looking pristine.
4. Composite Board Layout for Enduring Beauty
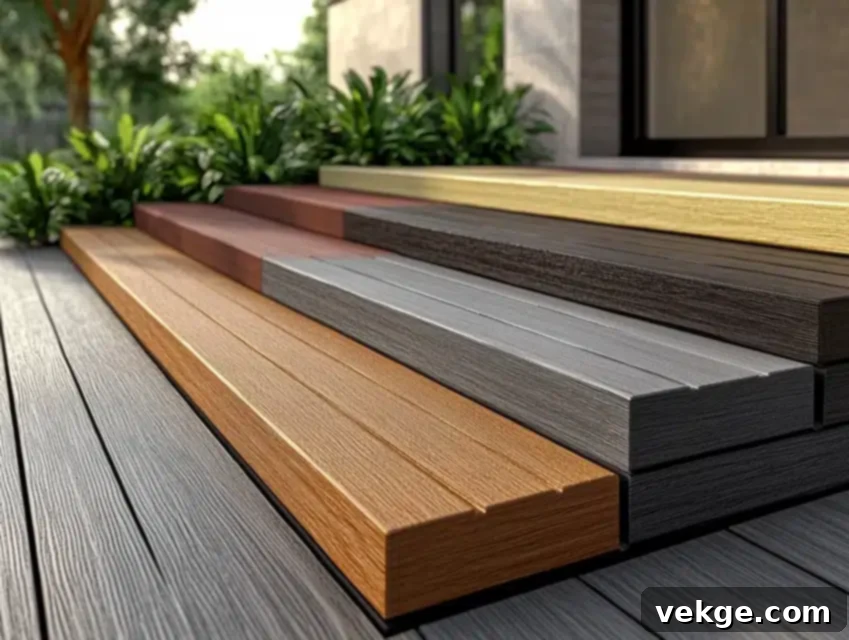
Composed of recycled materials, composite boards deliver the sought-after aesthetic of natural wood without the demanding maintenance. They are an eco-friendly and practical choice, available in a broad spectrum of colors and finishes, guaranteed not to rot, crack, or splinter over time.
Unique Features & Benefits:
- No Painting or Staining: Eliminates the recurring chore of painting, staining, or sealing, saving time and money.
- Splinter and Warp Resistant: Engineered to resist common wood problems like splitting, warping, and insect damage.
- Fade-Resistant Colors: Advanced formulations ensure colors remain vibrant and resist fading from prolonged sun exposure.
- Effortless Cleaning: A simple rinse with soap and water is all that’s typically needed to maintain its appearance.
5. Natural Stone Veneer for Organic Integration
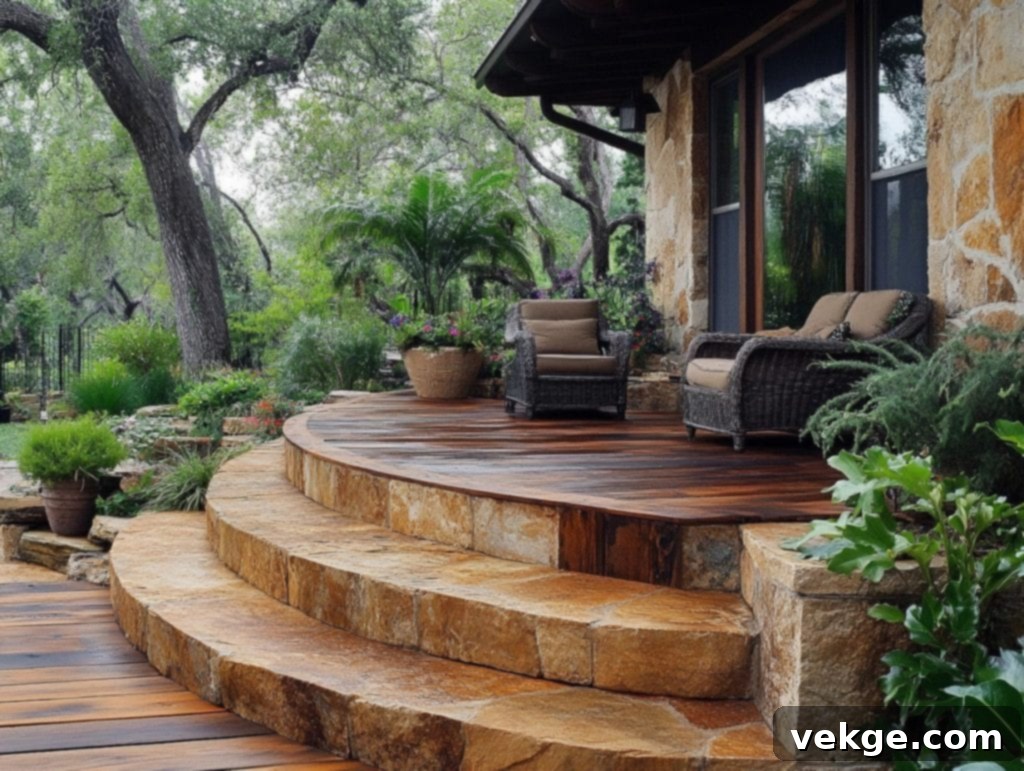
Incorporating stone veneer panels imbues your deck with a sophisticated touch of nature, creating a sense of permanence and grounding. This option works exceptionally well with existing garden landscapes, making your deck appear as though it has always been an integral part of your outdoor environment.
Unique Features & Benefits:
- Unique Craftsmanship: Each stone pattern is distinct, ensuring a one-of-a-kind, authentic look for your deck.
- Textural Richness: Adds significant texture and depth, creating visual interest and a luxurious feel.
- Seamless Landscape Integration: Harmonizes beautifully with natural landscaping elements, enhancing overall garden design.
- Exceptional Durability: Stone is incredibly long-lasting and resistant to virtually all weather conditions and pests.
6. Bamboo Roll Screens for an Eco-Chic Vibe
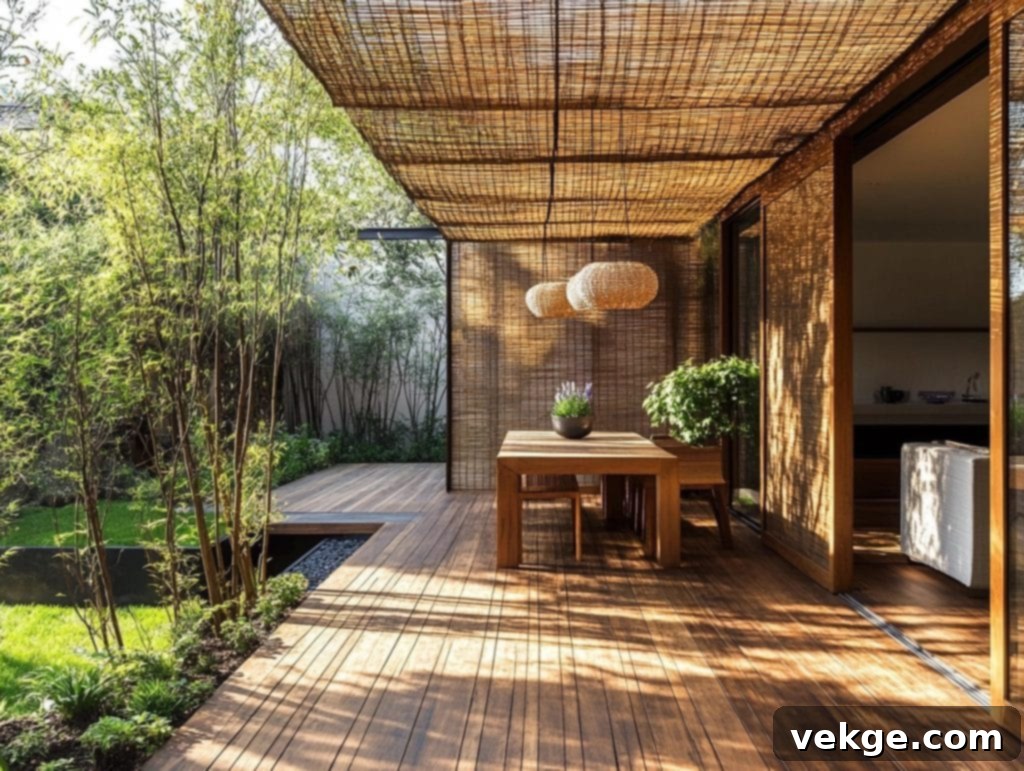
Lightweight, renewable, and environmentally friendly, bamboo roll screens offer a distinctive natural and tropical aesthetic. They are an ideal choice if you’re seeking an unconventional skirting solution that is both visually appealing and kind to the planet, providing a unique texture and warmth.
Unique Features & Benefits:
- Rapid Installation: Bamboo rolls are typically easy and quick to install, often simply unrolling and attaching to a frame.
- Sustainable Material: An excellent choice for environmentally conscious homeowners, as bamboo is a fast-growing, renewable resource.
- Gentle Light Filtering: Provides a soft, dappled light effect under the deck while still maintaining privacy and concealment.
- Convenient Access: Can be easily rolled up or removed for quick access to the under-deck area whenever needed.
7. PVC Board Design for Ultimate Durability
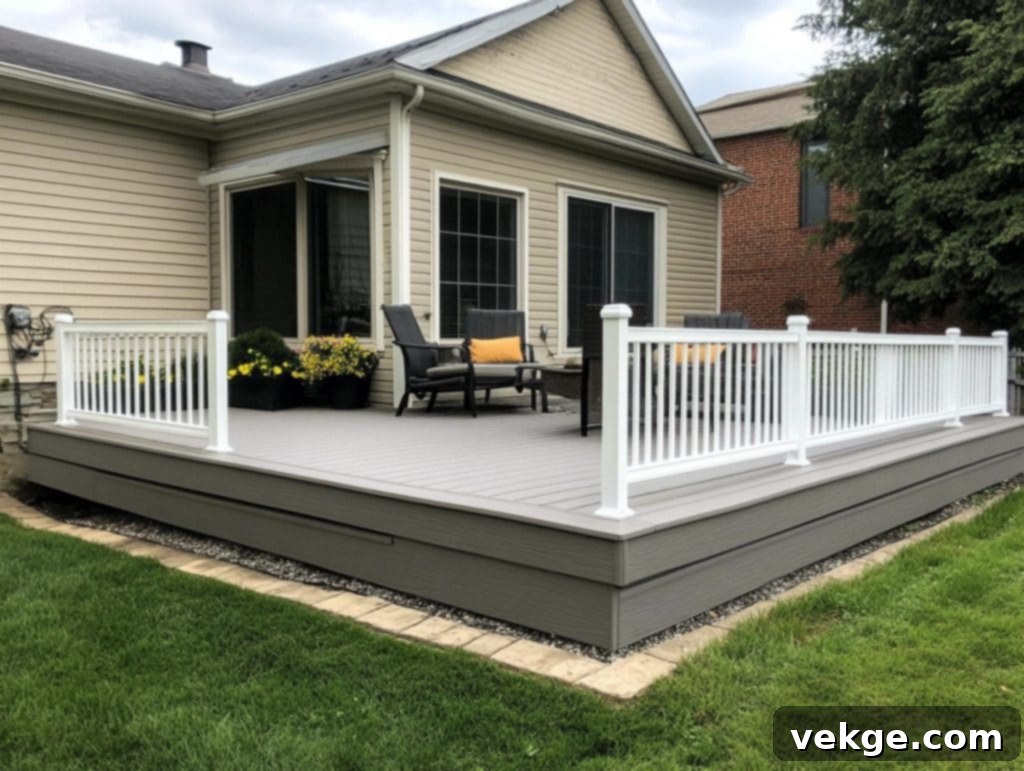
PVC boards are the perfect solution for homeowners prioritizing maximum durability and minimal maintenance. They are completely impervious to rot, moisture, and insect damage, making them an incredibly resilient choice. A simple hose-down is all that’s required to keep them looking impeccable year after year.
Unique Features & Benefits:
- Total Moisture Resistance: Unaffected by humidity, rain, or snow, making them ideal for any climate.
- Zero Painting Required: Their color is integral, eliminating the need for periodic painting or staining.
- No Cracking or Splitting: PVC maintains its structural integrity without the common issues seen in wood.
- Remarkably Easy to Clean: Non-porous surface makes cleaning a breeze, preventing dirt and mildew adhesion.
8. Corrugated Metal Sheets for Industrial Chic
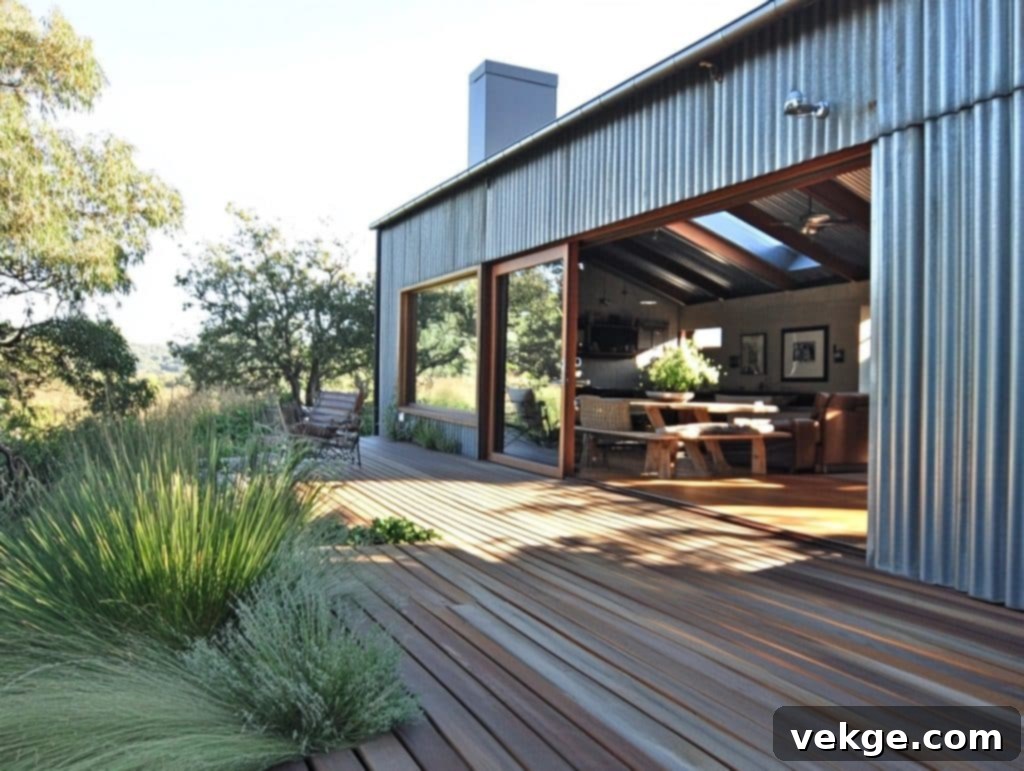
These distinctive metal sheets infuse your deck with a charming industrial or modern farm-style appeal. They are incredibly strong and durable, and their iconic wavy pattern creates intriguing shadows and visual depth that shift throughout the day, adding dynamic interest to your outdoor space.
Unique Features & Benefits:
- Exceptional Strength: Highly robust and resistant to impact, ensuring long-term structural integrity.
- Dynamic Visuals: The corrugated texture creates fascinating light and shadow play, constantly evolving with the sun.
- Variety of Color Options: Available in numerous colors and finishes, from rustic galvanized to sleek painted surfaces.
- Fast Installation: Large panels mean quicker coverage, streamlining the installation process.
9. Privacy Screen Panels for Discreet Elegance
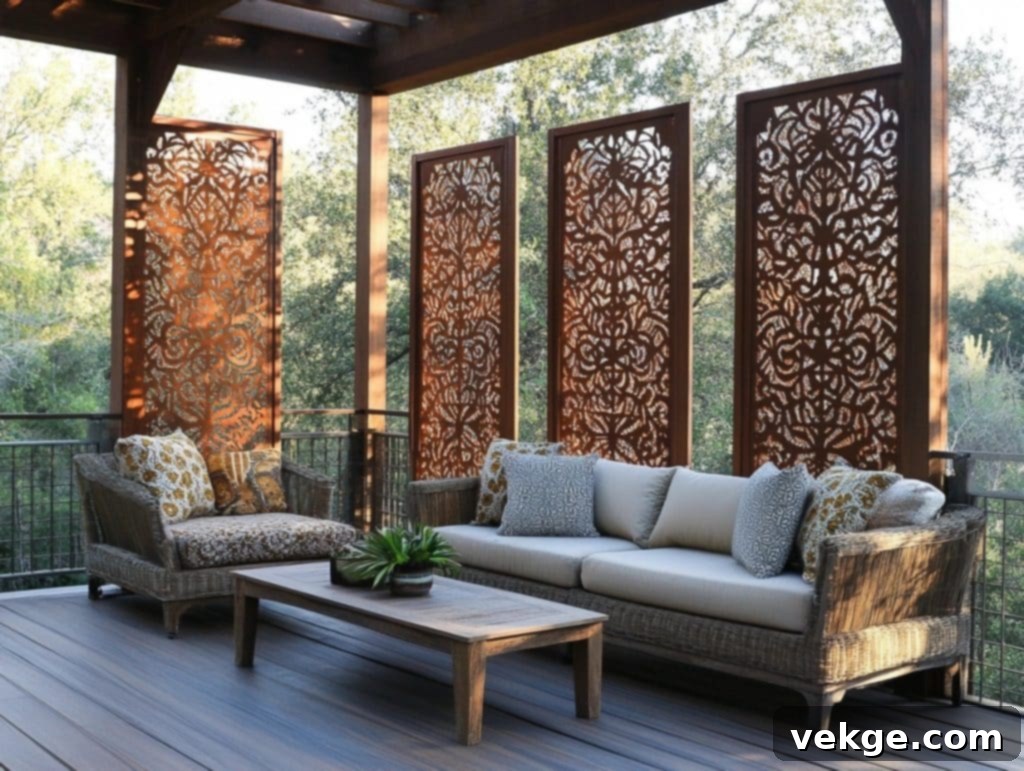
Dedicated privacy screen panels offer a sophisticated way to keep the under-deck area completely hidden while contributing significantly to your deck’s aesthetic. These panels come in a vast array of styles, from simple, solid designs to intricate laser-cut patterns, allowing you to choose one that perfectly matches your desired level of privacy and decorative flair.
Unique Features & Benefits:
- Total Concealment: Provides complete privacy for the under-deck area, hiding storage and structural elements.
- Extensive Pattern Options: Available in a wide range of decorative patterns, allowing for high customization.
- Easy Removability: Many designs are engineered for easy removal, providing convenient access to the space beneath.
- Integrated Ventilation: Often designed with clever perforations or spacing that allows for adequate airflow without sacrificing privacy.
10. Mixed Material Approach for Bespoke Design
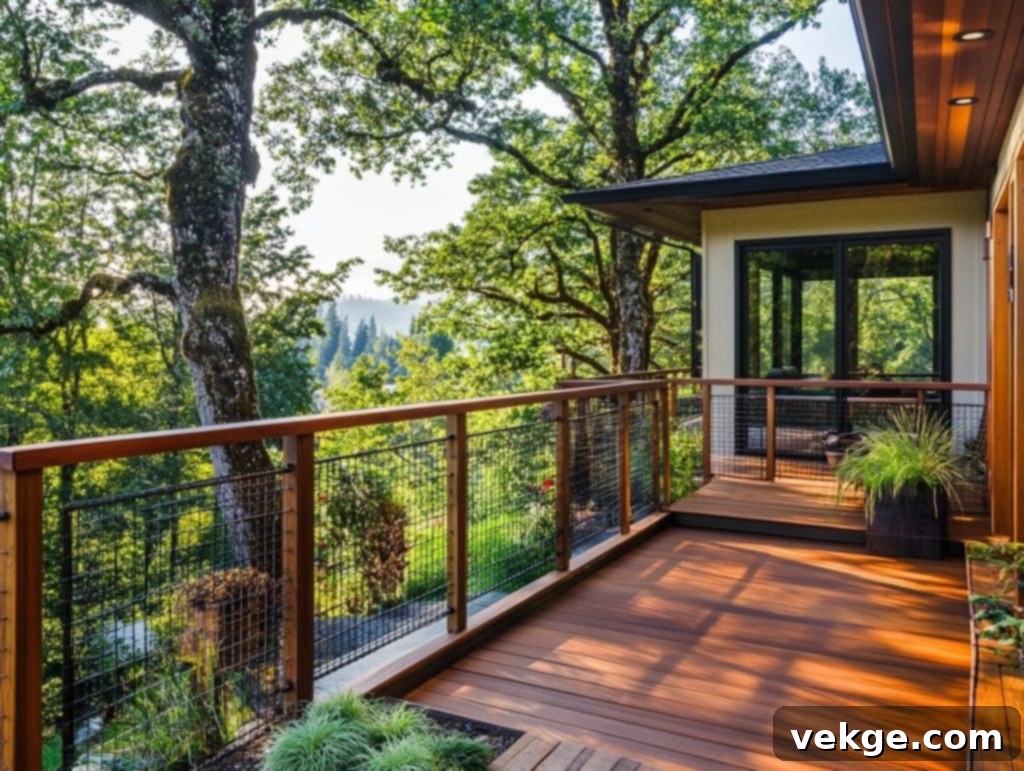
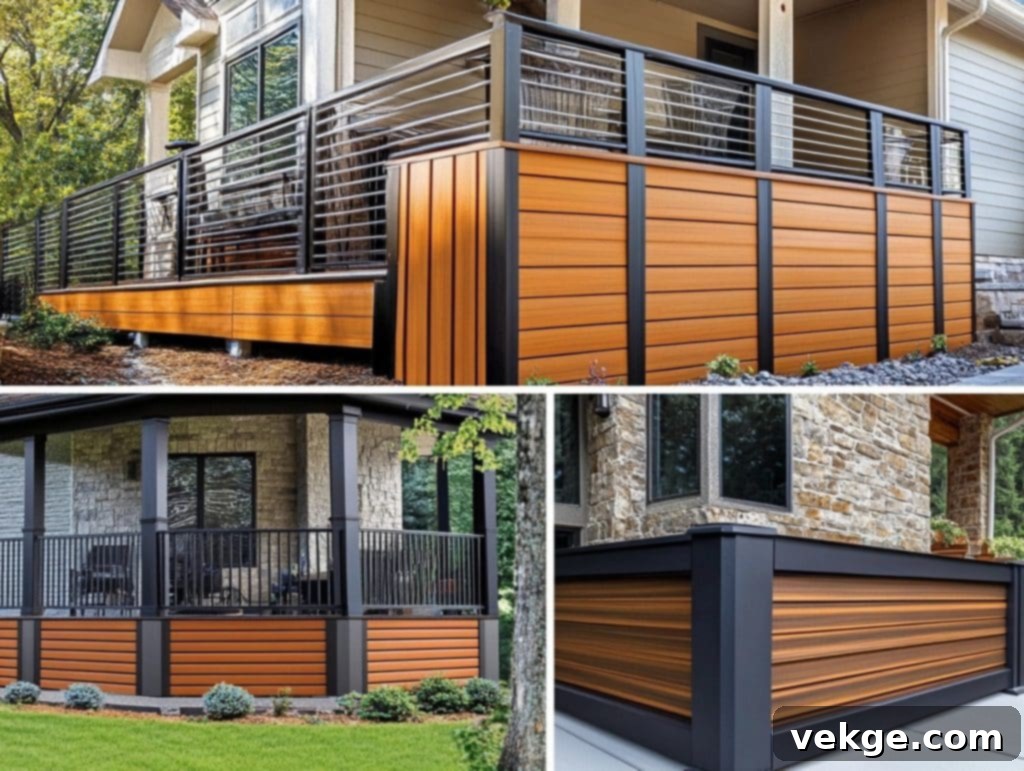
Why limit yourself to just one material when you can combine them to create something truly extraordinary? A mixed-material approach, such as blending horizontal wood planks with metal accents or a stone veneer base with composite panels, offers unparalleled opportunities for custom design. This is your chance to unleash creativity and craft a deck skirting that is uniquely yours, reflecting your personal style and enhancing your home’s character.
Unique Features & Benefits:
- Unlimited Customization: Design possibilities are endless, allowing for a truly personalized and unique look.
- Striking Visual Appeal: Combines different textures and colors for a rich, multi-dimensional aesthetic that stands out.
- Flexible Repairs: If one material gets damaged, only that specific section needs attention, often simplifying repairs.
- Elevated Property Value: A custom, high-quality mixed-material design makes your deck a focal point and enhances overall curb appeal.
Remember, the most suitable horizontal deck skirting idea will ultimately depend on your deck’s existing style, your home’s architecture, your personal design preferences, and the amount of time and effort you’re willing to dedicate to upkeep. Choose a design that not only meets your practical needs but also brings you joy every time you step into your beautiful outdoor space!
Conclusion: The Enduring Benefits of Horizontal Deck Skirting
Horizontal deck skirting is far more than a simple cosmetic addition; it’s a strategic enhancement that significantly elevates the style, functionality, and longevity of your outdoor living area. By elegantly concealing the under-deck space, it provides a polished finish, shields your deck’s vital structural components, deters pests, and ensures crucial airflow, preventing moisture-related issues.
The array of material options—from the natural allure of wood to the low-maintenance resilience of composite and the modern edge of metal—means there’s a perfect solution to match every home’s aesthetic, budget, and desired level of upkeep. The distinctive horizontal alignment is particularly adept at making your deck appear wider and more integrated into your landscape, offering a contemporary and grounded look.
When weighing horizontal against vertical skirting, remember that horizontal styles often offer simpler installation, superior water drainage, and a visual effect that expands your space. This can also translate to a more cost-effective installation process and easier long-term maintenance.
Now equipped with comprehensive knowledge, from material selection to step-by-step installation and inspiring design ideas, you are ready to embark on your own deck skirting project. Begin by accurately measuring your space and thoughtfully selecting the materials and design that best align with your vision. Your transformed outdoor space awaits!
Looking for more ways to perfect your outdoor oasis? Explore my other guides on essential deck maintenance routines, innovative outdoor lighting solutions, and creative deck rail designs to complete your dream backyard. Don’t forget to share photos of your completed horizontal deck skirting project in the comments below – I’d love to see your amazing transformations!
Frequently Asked Questions About Horizontal Deck Skirting
Should Deck Skirts Be Horizontal or Vertical?
The choice between horizontal and vertical deck skirting largely depends on your aesthetic goals and specific site conditions. Choose horizontal skirting if you desire a look that makes your deck appear wider and more expansive, or if you prioritize ease of installation and excellent water runoff. Opt for vertical skirting if you aim to make your deck appear taller, or if your yard has significant slopes or uneven ground, where vertical boards can more easily accommodate grade changes.
What Materials Can I Use for Deck Skirting?
You have a variety of excellent material options for deck skirting, each offering unique benefits. Popular choices include: Wood (such as naturally rot-resistant cedar, economical pine, or durable redwood), Composite boards (made from recycled plastic and wood fibers, offering low maintenance), and Metal panels (like lightweight aluminum or strong steel, available in various finishes). Each material provides different levels of durability, aesthetic appeal, and budget considerations.
How Do I Enclose the Underside of a Deck?
To effectively enclose the underside of a deck, begin by installing a sturdy support frame using pressure-treated lumber around the perimeter of your deck. Ensure the bottom frame members rest on concrete blocks or pavers to prevent direct ground contact and rot. Once the frame is secure and level, attach your chosen skirting material to the frame. Remember to leave small, consistent gaps between horizontal boards for essential airflow, or incorporate dedicated vent covers. Additionally, consider building one or more sections with easily removable screws or hinges to create convenient access doors for under-deck storage or maintenance.
