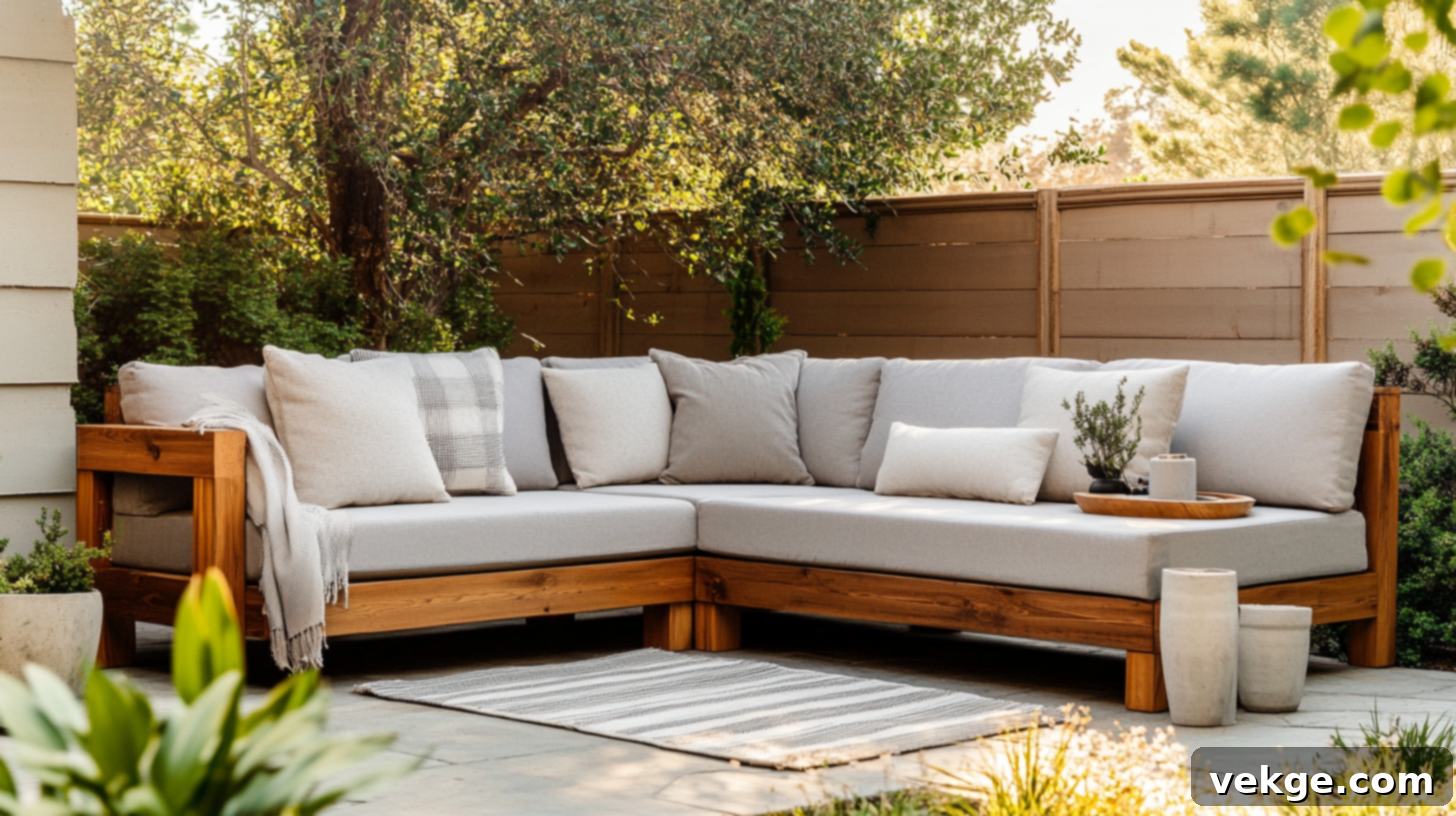
Build Your Own Outdoor Sectional: A Comprehensive DIY Guide for Custom Patio Furniture
Imagine relaxing on your patio, surrounded by comfortable seating that perfectly complements your outdoor space. If you’ve ever dreamt of such a scene but found store-bought sectionals lacking in size, style, or quality, you’re not alone. The generic options often fall short, leaving you to compromise on your vision for the ideal outdoor oasis.
This is precisely why building your own DIY outdoor sectional can be a game-changer. It offers unparalleled freedom to design a piece that fits your specific dimensions, aesthetic preferences, and functional needs. From the exact length and depth to the choice of color and overall layout, you’re in complete control. No more settling for “close enough”—you create furniture that truly belongs.
Beyond the practical benefits, there’s a unique satisfaction that comes from crafting something with your own hands. It’s a rewarding hands-on project that culminates in a tangible, beautiful piece of furniture you can proudly display and enjoy. This guide will walk you through every step of the process, making it simple and accessible for even beginner woodworkers. We’ll cover everything you need to know to construct a durable, stylish, and supremely comfortable outdoor sectional that genuinely feels like yours.
Why Choose a DIY Outdoor Sectional Over Store-Bought Options?
Opting to build your own outdoor sectional offers a multitude of advantages that ready-made furniture simply cannot match. When you purchase a pre-fabricated sectional, you’re often constrained by its standard dimensions and fixed configurations. This can be particularly problematic if you have an irregularly shaped patio, a cozy balcony, or a large deck that demands a specific layout.
Custom Fit for Any Space: One of the most significant benefits of a DIY approach is the ability to customize every dimension. You can precisely measure your outdoor area and design a sectional that fits perfectly—whether you need to work around existing plants, integrate it with a built-in fire pit, or maximize seating in a narrow space. This ensures efficient use of your outdoor living area without awkward gaps or cramped corners.
Personalized Design and Aesthetics: Beyond size, DIY allows you to dictate the entire design and finish. You’re not limited to a few fabric choices or standard wood tones. You can select wood species that match your home’s exterior, apply a stain or paint color that ties into your outdoor decor, and choose cushions that reflect your personal style. This level of personalization ensures your outdoor sectional is a unique reflection of your taste, not just another mass-produced item.
Cost-Effectiveness and Quality Control: Building your own furniture often proves to be more budget-friendly than buying high-quality, custom pieces. By sourcing materials yourself, you can control expenses and choose components that offer excellent value. Furthermore, you have complete control over the quality of the construction. You can use durable lumber, strong fasteners, and proven joinery techniques to ensure your sectional is built to last through many seasons, a level of assurance not always guaranteed with store-bought items.
The Satisfaction of Creation: Perhaps most importantly, there’s an immense sense of accomplishment that comes with creating something functional and beautiful with your own hands. Each cut, screw, and stroke of paint contributes to a piece of furniture that you not only own but truly understand from the ground up. This connection to your handmade furniture enhances your enjoyment of your outdoor space, turning a simple seating arrangement into a cherished part of your home.
What You’ll Need: Tools and Materials for Your Project
Before you begin the exciting process of building your custom outdoor sectional, taking the time to gather all necessary tools and materials will ensure a smooth and efficient workflow. This preparation phase is crucial for avoiding interruptions and making the construction enjoyable. You’ll find that most of the required items are common in any well-equipped home workshop, focusing on basic woodworking tools and readily available lumber.
Essential Tools for Building Your DIY Sectional
For this project, you’ll need a selection of tools designed for accurate cutting, secure fastening, and smooth finishing. Having these on hand will streamline your build and help you achieve professional-looking results. Remember to always prioritize safety by wearing appropriate protective gear like safety glasses and gloves.
- Miter Saw or Circular Saw: A miter saw is ideal for making precise straight and angled cuts, which are essential for seat frames and backrests. If a miter saw isn’t available, a circular saw paired with a straight edge or speed square can also achieve accurate cuts.
- Power Drill and Impact Driver: These are indispensable for pre-drilling holes to prevent wood splitting and driving screws securely. An impact driver is particularly useful for driving long screws quickly and efficiently.
- Orbital Sander: A sander is vital for smoothing rough edges, preparing surfaces for staining or painting, and ensuring a comfortable finish. Start with a coarser grit and move to finer grits for the best results.
- Tape Measure: Absolutely critical for accurate measurements to ensure all your pieces fit together perfectly.
- Carpenter’s Square (Speed Square or Framing Square): Used to ensure all your cuts and assembled corners are perfectly square, preventing a wobbly or uneven sectional.
- Clamps: Essential for holding wood pieces firmly in place while you drill and fasten them, ensuring stability and accuracy during assembly.
- Pencils or Markers: For marking cut lines and screw placements on your lumber.
- Safety Glasses and Gloves: Non-negotiable safety gear to protect your eyes from sawdust and splinters, and your hands from injury.
Materials List for Your Outdoor Sectional Project
The core of your outdoor sectional will be built from readily available lumber, complemented by weather-resistant fasteners and finishing products. The table below outlines the primary materials you’ll need, along with their purpose and helpful tips for selection.
| Item | Purpose / Tip |
|---|---|
| 2×4 Lumber | The primary structural wood for the frame, legs, and supports. Choose pressure-treated for longevity, or cedar/redwood for natural resistance. |
| Exterior Screws | High-quality, weather-resistant screws (e.g., galvanized or stainless steel) are crucial for strong, long-lasting joints that won’t rust. |
| Wood Stain or Paint | Adds color, enhances aesthetics, and provides a protective barrier against moisture, UV rays, and general outdoor wear. Ensure it’s rated for exterior use. |
| Sandpaper | Various grits (e.g., 80-grit for rough shaping, 120-grit for general smoothing, 220-grit for fine finishing) to prepare wood surfaces. |
| Paint Brushes/Rollers | For smooth and even application of stain, paint, or protective sealants. |
| Wood Filler (Optional) | Useful for filling small gaps, knot holes, or minor imperfections in the wood before finishing, creating a more polished look. |
| Outdoor Cushions | Adds essential comfort and style. Look for weather-resistant fabrics (e.g., acrylic, polyester) that are UV-stable and quick-drying. |
| Extra Wood (if available) | Handy for creating optional add-ons like armrests, cup holders, small tables, or internal storage compartments. |
| Secondhand Materials | Consider checking local listings (Craigslist, Facebook Marketplace) or lumberyard offcut bins for discounted or unused materials to reduce costs. |
When selecting your lumber, consider its placement. Pressure-treated lumber is excellent for outdoor use due to its resistance to rot and insects, but it needs time to dry thoroughly (often several weeks to months) before it can be stained or painted. Cedar or redwood are naturally resistant to decay and insects, offer beautiful natural grains, and can be stained or sealed immediately. While these can be more expensive, their natural beauty and durability make them popular choices for outdoor furniture. Always choose straight boards with minimal knots and cracks for the strongest and most attractive result.
Choosing the Right Plans for Your Custom Outdoor Sectional
Before you make a single cut, finding the right building plans is crucial for a successful DIY outdoor sectional project. The internet is a treasure trove of free plans, ranging from simple designs perfect for beginners to more intricate builds for experienced woodworkers. Taking the time to select plans that match your skill level, desired aesthetic, and specific space requirements will save you considerable time and frustration down the line.
Evaluate Complexity and Joinery: Many plans will detail the type of joinery used. Some popular methods include:
- Pocket Holes: These create strong, hidden joints using a special jig. They result in a very clean, screw-free appearance, but require a pocket hole jig and a bit more precision.
- Butt Joints with Screws: This is the simplest method, where two pieces of wood are joined end-to-end or side-to-end and secured with screws. While visible, this method is quick, strong, and highly beginner-friendly, especially when pre-drilling and using strong exterior screws.
- Lap Joints or Dado Joints: These involve cutting recesses into the wood to create stronger, interlocking connections. They offer excellent strength but require more advanced cutting tools and techniques. For most DIY outdoor sectionals, simple butt joints or pocket holes are perfectly adequate.
If you’re looking for a quicker build with minimal specialized tools, opt for plans that utilize simpler butt joints. If a clean, fastener-free look is paramount and you’re comfortable with a pocket hole jig, those plans are an excellent choice.
Consider Shape and Configuration: Outdoor sectionals come in various configurations to suit different spaces:
- L-shaped layouts: Ideal for corners or defining distinct zones on a larger patio.
- U-shaped layouts: Great for creating an intimate gathering space, perfect for conversation or around a fire pit.
- Straight bench-style seating: Offers flexibility, allowing you to combine multiple benches for a custom length or arrange them in different ways.
- Modular designs: Some plans offer individual modules that can be rearranged or added to over time, providing ultimate flexibility.
Measure your patio or deck thoroughly and visualize how you intend to use the space. Do you need a cozy corner for two, or ample seating for a large family and guests? This will guide your choice of layout.
Read Reviews and Look for Detailed Instructions: When browsing plans online, look for those that include clear diagrams, detailed cut lists, and step-by-step instructions with accompanying photographs. Reading comments or reviews from others who have built the project can also offer valuable insights and tips. A good plan will specify lumber dimensions, screw types, and finishing suggestions.
By carefully selecting plans that align with your capabilities and vision, you’ll set yourself up for a rewarding and successful DIY outdoor sectional project. Remember, even a simple plan can be customized with your choice of finish and cushions to create a high-end look.
Outdoor Sectional: Step-by-Step Guide to Building Your Custom Furniture
This comprehensive guide breaks down the construction of your outdoor sectional into easy-to-follow steps. We’ll demystify each stage, ensuring that even if you’re new to woodworking, you can build a sturdy and attractive piece of furniture without stress. You don’t need fancy tools or advanced skills—just a bit of patience, attention to detail, and a willingness to learn. Follow along, and you’ll see your vision come to life, piece by piece.
Step 1: Accurately Cut the Wood Pieces
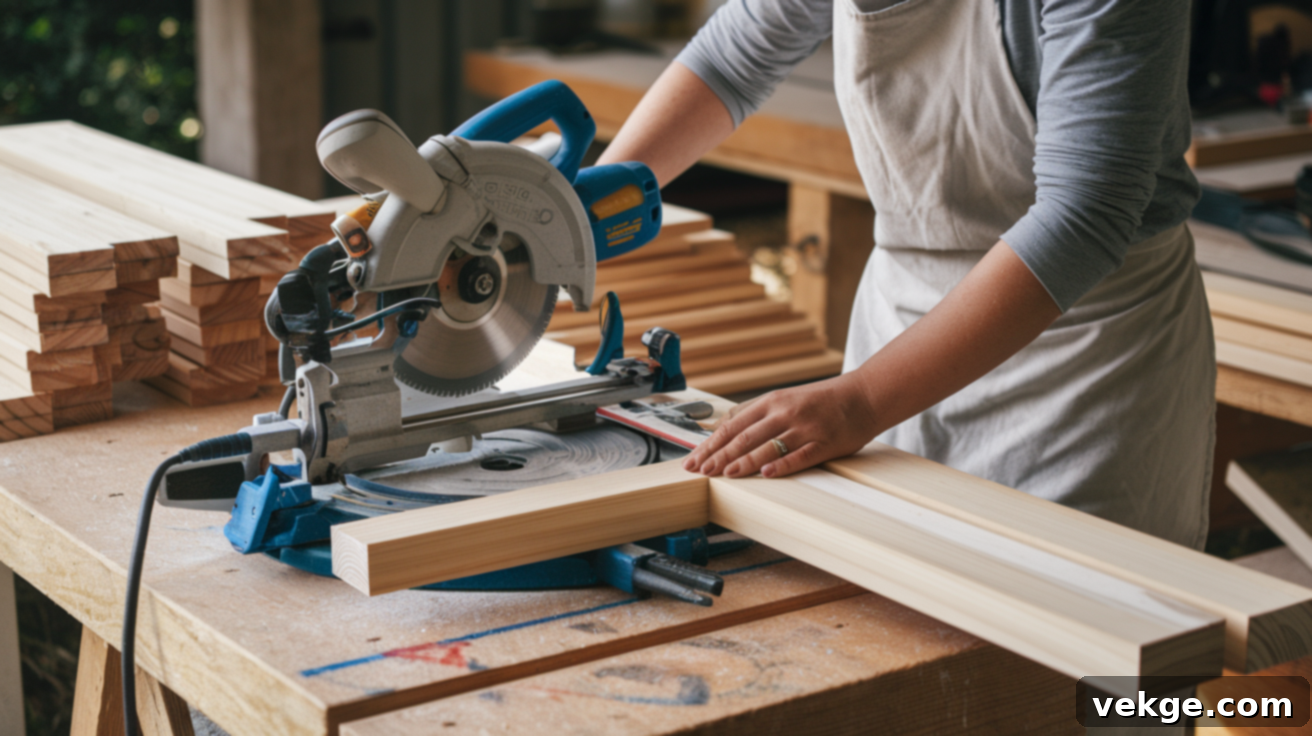
Begin by meticulously reviewing your chosen plan and ensuring all your measurements are accurate. This is the foundation of your entire project, so precision here is paramount. Use a tape measure and a pencil or chalk to carefully mark each cut line on your lumber. Double-check every measurement before making a cut to avoid costly mistakes.
A miter saw is highly recommended for its ability to produce smooth, straight, and precise angled cuts, which are often necessary for seat frames, backrests, and potentially armrests. If you’re using a circular saw, use a guide or speed square to ensure your cuts are perfectly straight. Cut all the necessary pieces according to your plan before you begin assembly. Once cut, group similar pieces together (e.g., all leg pieces, all seat supports) to keep your workspace organized and make the assembly process much faster and less confusing.
Step 2: Assemble the Main Frame
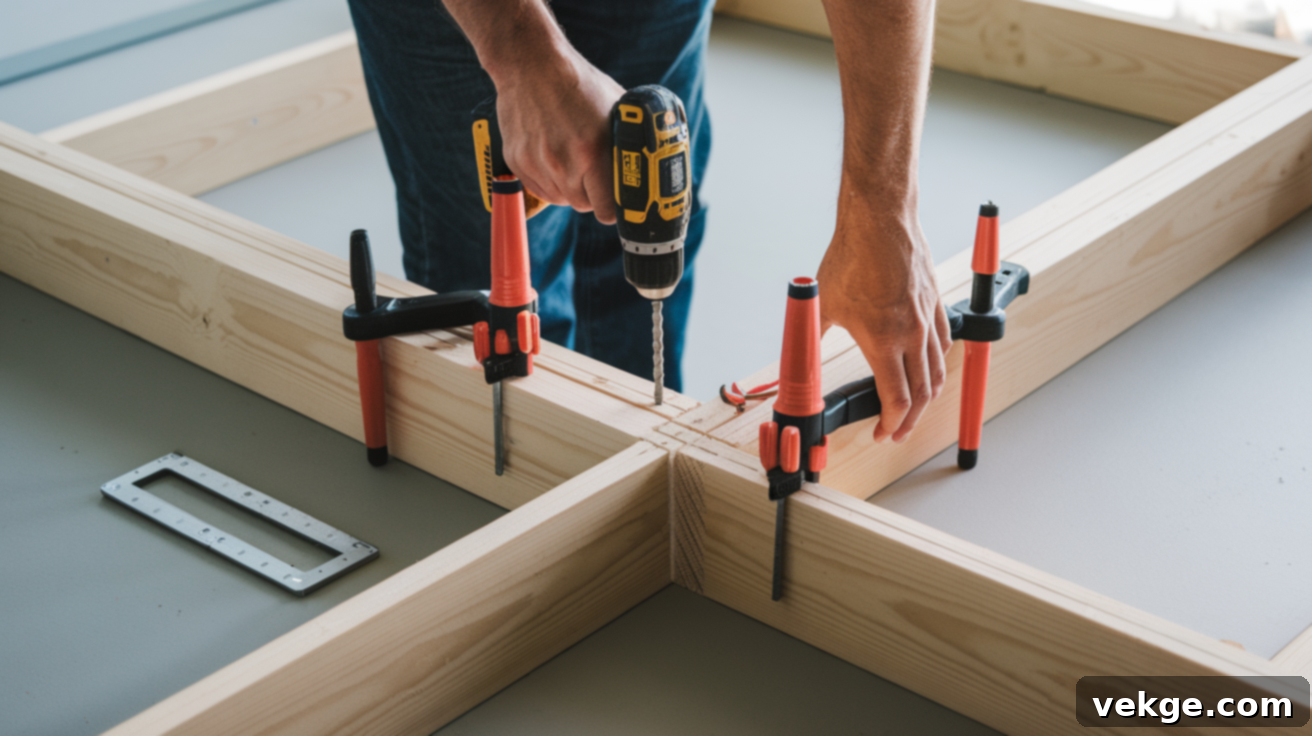
Start by constructing the outer frame of each sectional module. Lay out the cut pieces on a flat, level surface, such as a workbench or a garage floor, making sure they align correctly according to your plan. Use clamps to hold the boards firmly in place as you attach them. This prevents movement and ensures accurate joinery.
When fastening with screws, always pre-drill pilot holes. This small but crucial step prevents the wood from splitting, especially near the ends or edges of the boards, and makes driving screws much easier. Use a carpenter’s square to ensure that all your corners are perfectly square (90 degrees). Square corners are essential for a level, stable, and aesthetically pleasing frame. If anything appears misaligned, stop, readjust, and double-check before proceeding. You can typically build the shorter side frames first, then connect them with the longer front and back boards. Once all connections are tight and secure, you’ll have a solid and stable base for your sectional.
Step 3: Add Internal Supports and Backrest Structure
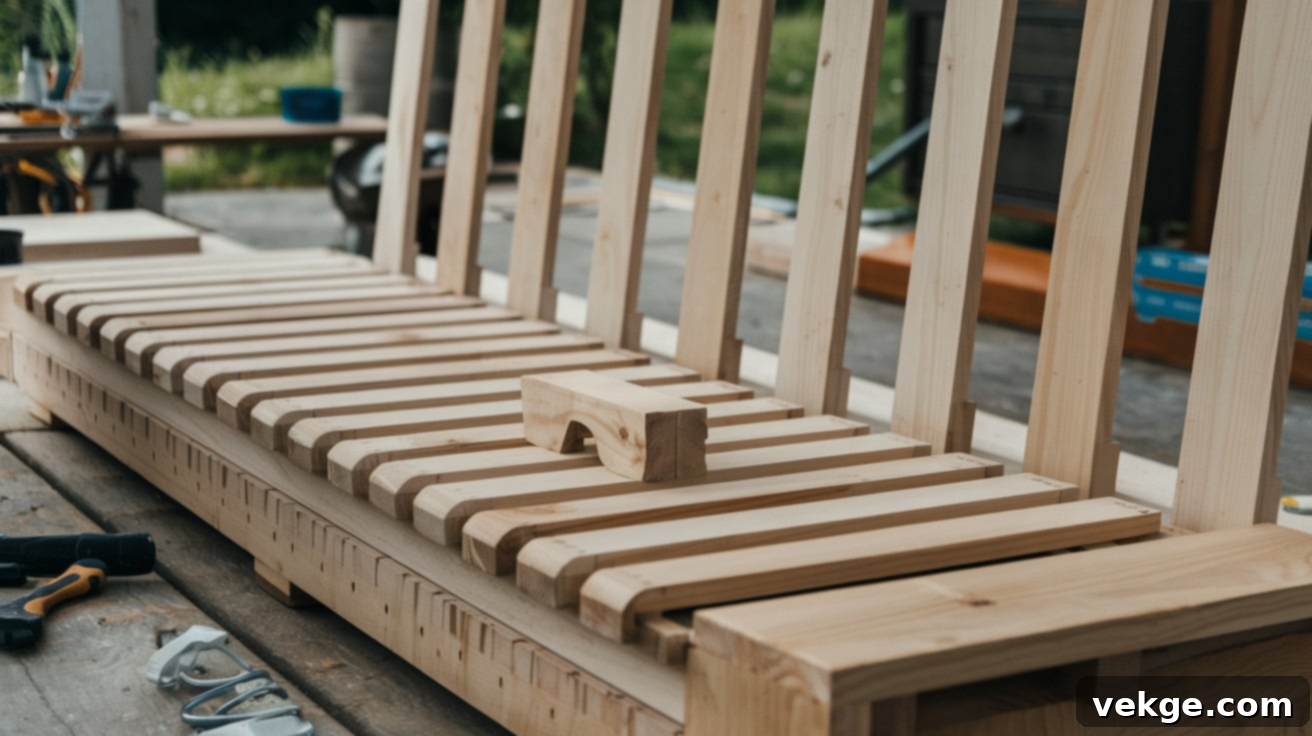
With the main frame assembled, it’s time to add the internal supports that will hold your cushions and the backrest structure. Begin by attaching the seat slats across the top of the frame. These slats provide the necessary support for your outdoor cushions. It’s important to space them evenly, typically about 1/2 to 1 inch apart. This spacing is not only for support but also allows water to drain effectively, preventing moisture buildup and prolonging the life of both your sectional and cushions. A scrap piece of wood cut to the desired spacing can be used as a spacer block to ensure consistent gaps.
Next, attach the back support pieces. Depending on your design, these can be vertical for a more upright seat or slightly tilted for a relaxed, lounging feel. Ensure these pieces are securely fastened to the frame using long, exterior-grade screws for maximum strength. If you notice any wobbling or instability in the backrest, consider adding corner braces or extra blocking to reinforce the structure. The goal is a firm, comfortable backrest that will withstand regular use.
Step 4: Sand and Prepare the Wood for Finishing
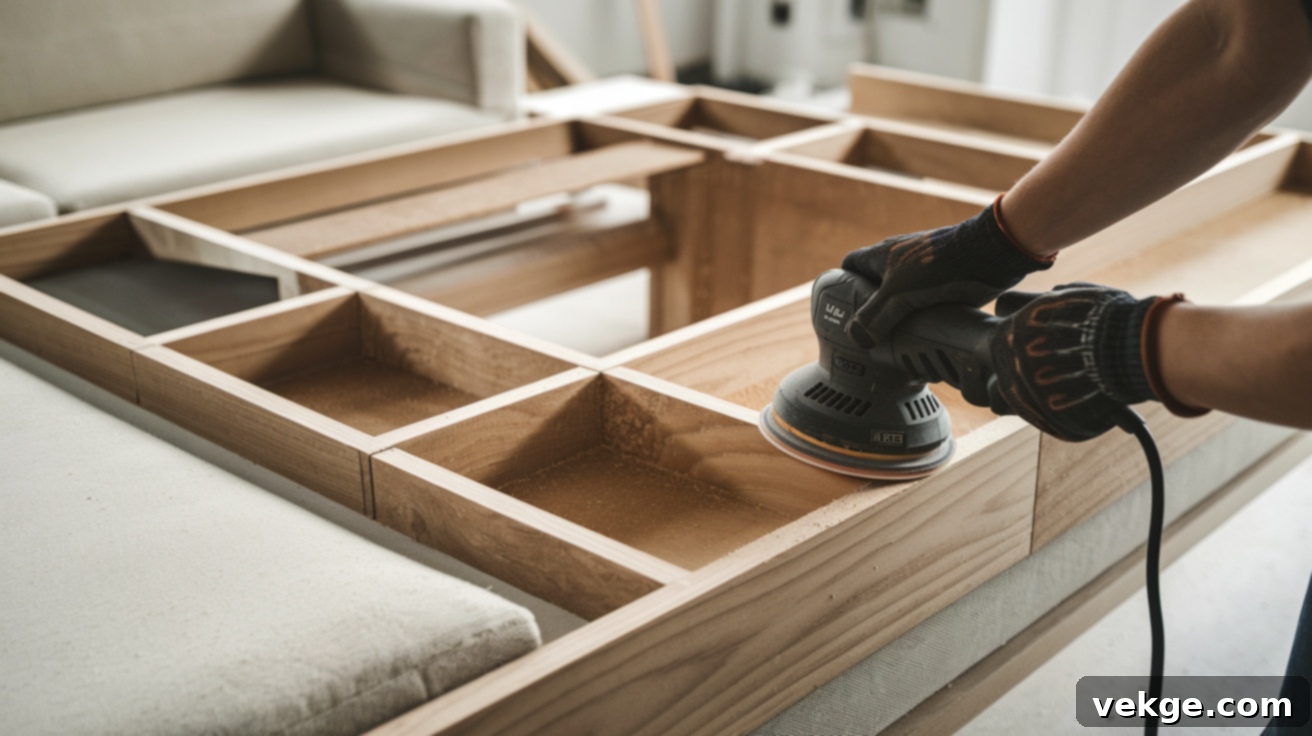
This step, while sometimes tedious, is absolutely crucial for both the safety and aesthetic appeal of your finished sectional. Thorough sanding makes the wood comfortable to touch, prevents splinters, and ensures a smooth surface for an even finish. Start with a coarser grit sandpaper (around 80-grit) using an orbital sander to quickly remove any rough spots, sharp edges, and major imperfections. Pay close attention to all exposed surfaces, especially where you or your guests will be sitting or leaning.
Once the initial rough sanding is complete, switch to a finer grit (120-grit, then 180-grit, and finally 220-grit if you desire a super-smooth finish). Work your way around the entire sectional, including between the seat slats and all corners and edges. Use your hands to feel the wood surface—your fingertips can often detect rough spots that your eyes might miss. If you encounter any small holes, minor cracks, or prominent knots, now is the time to fill them with exterior-grade wood filler. Allow the filler to dry completely, then sand it smooth. Before moving to the next step, thoroughly wipe down the entire sectional with a damp cloth or tack cloth to remove all sawdust and debris.
Step 5: Apply Stain or Paint for Protection and Style
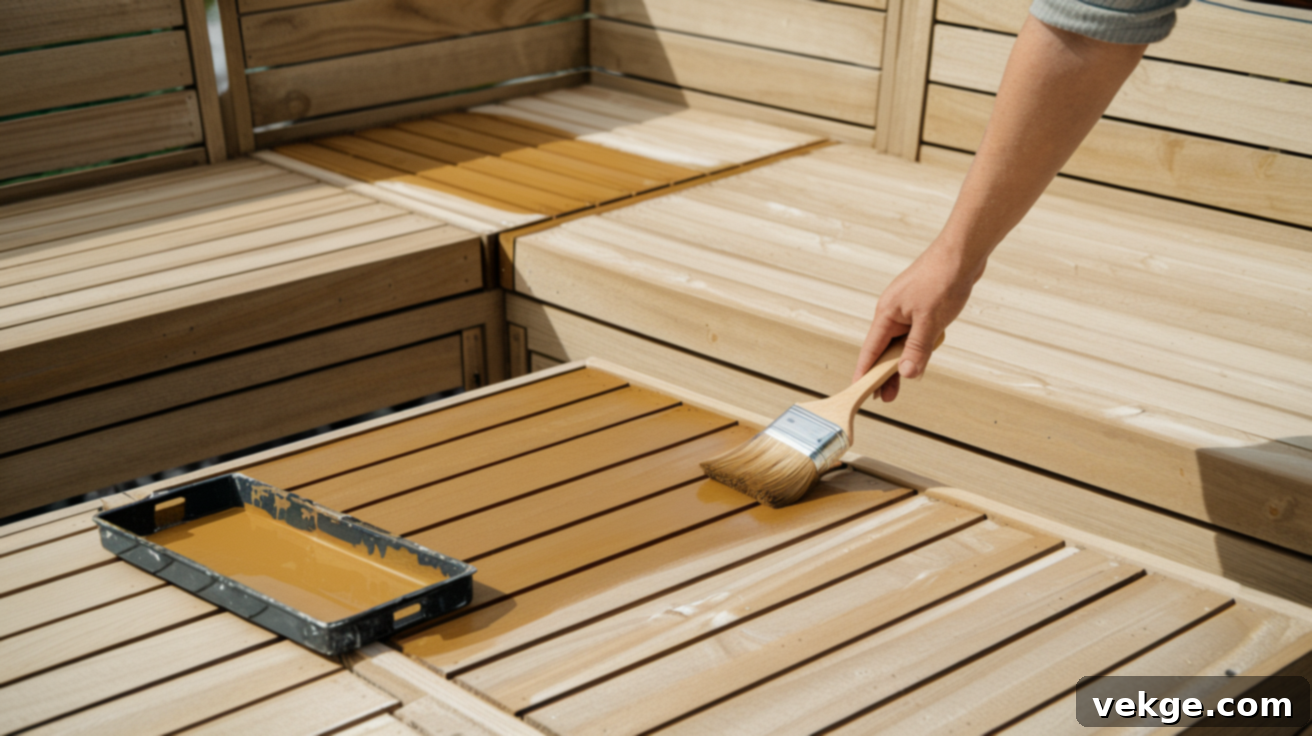
Now comes the creative and protective phase: applying your chosen finish. You have two main options:
- Wood Stain: Stain allows the natural grain and character of the wood to show through while adding color and UV protection. Apply it with a brush or rag, allowing it to penetrate the wood for a few minutes before wiping off any excess. This ensures an even, rich color. Stains also offer excellent moisture resistance.
- Exterior Paint: If you prefer a solid color or a bolder look, exterior paint is a great choice. For best results, especially on softer woods like pine, apply a coat of exterior primer first. This helps the paint adhere better and provides a more durable finish. Apply paint with a brush or roller, aiming for smooth, even coats. You will likely need two coats for full, opaque coverage.
Regardless of your choice, ensure you use products specifically designed for outdoor use, as they contain UV inhibitors and mildew resistance. Allow each coat to dry completely according to the manufacturer’s instructions before applying the next coat. It’s best to let the final coat cure for at least 24-48 hours (or longer in humid conditions) before placing the sectional outdoors or adding cushions. This ensures the finish is fully hardened and protected.
Step 6: Final Assembly and Enjoying Your Creation
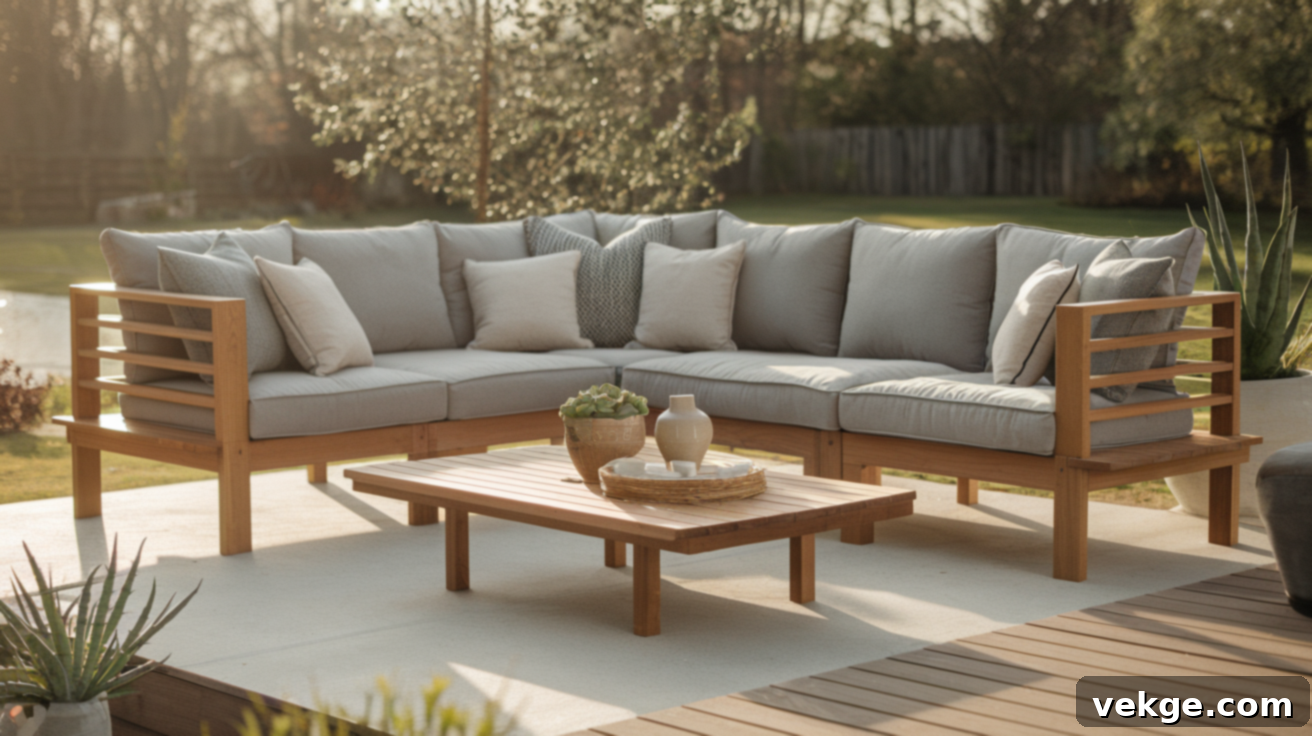
Once the stain or paint has thoroughly dried and cured, and your beautiful outdoor cushions are ready, it’s time for the grand reveal! Carefully move your sectional modules to their desired location on your patio or deck. If your design is modular, connect the sections as planned to form your L-shape, U-shape, or extended bench. Take a moment to step back and admire what you’ve built with your own hands.
Before inviting guests, perform a final inspection. Check all screws to ensure they are tight and secure. Gently test the stability of each section—if anything feels loose or wobbly, reinforce it with additional screws or braces. Place your outdoor cushions, ensuring they fit snugly and are comfortable. If your cushions tend to slide, consider adding non-slip mats or simple ties to secure them to the frame. Wipe down any remaining dust or fingerprints to present a clean, inviting seating area.
Now, add your personal touches! Throw pillows, a cozy outdoor blanket, or a small side table can elevate the comfort and style of your new outdoor living space. Your custom-built outdoor sectional is now ready to host countless hours of relaxation, conversation, and enjoyment with family and friends. This isn’t just a piece of furniture; it’s a testament to your creativity and effort.
Optional Add-Ons and Customizations to Enhance Your Sectional
Once the main frame of your DIY outdoor sectional is complete and functional, you have a fantastic opportunity to further customize it with thoughtful add-ons. These small enhancements can significantly boost both comfort and utility, transforming your basic sectional into a truly bespoke piece of outdoor furniture. Consider how you typically use your patio or deck and what additional features would make your outdoor living experience even better. Even with a few leftover pieces of lumber, you can create integrated elements that not only look cohesive but also serve a practical purpose.
Here are a few simple yet impactful ideas you can incorporate:
- Integrated Armrests: Simple armrests make the seating much more comfortable and provide a convenient surface to place a drink, a book, or your phone. They can be built as extensions of the vertical frame supports or as separate, small box-like structures attached to the ends of your sectional.
- Built-in Storage Compartments: Maximize functionality by adding a hinged lid to one of the seat sections to create a hidden storage box. This is perfect for stowing away outdoor cushions, gardening tools, pool supplies, or children’s toys, keeping your patio tidy and organized.
- Matching Side Tables or Coffee Bench: Use leftover wood to construct a small, freestanding side table or a low coffee bench that matches the style and finish of your sectional. This ensures a consistent aesthetic and provides additional surface space for snacks, drinks, or decor.
- Wheels or Adjustable Levelers: If you anticipate needing to move your sectional frequently for cleaning, rearranging, or seasonal storage, consider adding heavy-duty outdoor wheels (with locks) to the bottom of the legs. Alternatively, adjustable furniture levelers can be installed to compensate for uneven patio surfaces, ensuring your sectional always sits perfectly stable.
- Cushion Ties or Brackets: To prevent your beautiful outdoor cushions from sliding around or blowing away on windy days, install simple fabric ties or small L-brackets (discreetly placed) on the underside of the cushions and attach them to the sectional frame.
- Cup Holders: For ultimate relaxation, consider cutting circular holes into solid armrests or a small attached side table to create built-in cup holders, keeping beverages secure and within easy reach.
You don’t need to implement every idea. Just choose one or two customizations that truly resonate with your lifestyle and space. Even a single addition can make a significant difference in how you interact with and enjoy your custom-built outdoor sectional.
How to Weatherproof Your Outdoor Sectional for Longevity
To ensure your custom-built outdoor sectional remains beautiful and functional for many seasons to come, proper weatherproofing is absolutely essential. Outdoor elements like sun, rain, humidity, and temperature fluctuations can quickly take a toll on wood and fabrics if left unprotected. Investing a little extra effort in weatherproofing will significantly extend the life and appearance of your furniture.
Wood Protection:
- Exterior Stain or Sealer: Even if you used pressure-treated lumber, applying a high-quality exterior stain or clear sealer is crucial. These products create a barrier against moisture penetration, prevent UV damage (which causes fading and graying), and inhibit the growth of mildew and fungi. Reapply the stain or sealer every 1-3 years, depending on your climate and the product’s recommendations. Regular reapplication is the single most important step for wood longevity.
- Paint for Full Coverage: If you opted for exterior paint, ensure you used a primer first and applied at least two coats. Paint provides an opaque protective layer. Monitor for chips or peeling and touch up as needed to maintain the protective seal.
- Elevation from Ground: Ensure the sectional’s legs are not in direct contact with damp ground, as this can lead to rot. Small plastic feet or glides can be added to the bottom of the legs to lift them slightly and prevent moisture wicking.
Cushion Care:
- Outdoor-Specific Fabrics: Always choose cushions made from outdoor-rated fabrics like Sunbrella, Olefin, or solution-dyed acrylic. These materials are inherently resistant to UV fading, water, and mildew.
- Regular Cleaning: Clean your cushions periodically according to the manufacturer’s instructions to remove dirt, pollen, and environmental buildup. This prevents mildew stains and keeps them looking fresh.
- Strategic Storage: While outdoor cushions are designed to withstand elements, storing them in a dry, covered area (like a deck box or garage) when not in use or during harsh weather (heavy rain, snow, prolonged intense sun) will dramatically extend their lifespan and maintain their vibrant colors.
Protective Covers:
For ultimate protection, consider investing in a breathable, waterproof outdoor furniture cover. These covers shield your entire sectional from rain, snow, dust, debris, and intense UV rays, especially during off-seasons or extended periods of non-use. Look for covers that fit snugly and have vents to prevent condensation buildup, which can lead to mildew.
By following these weatherproofing tips, you’ll safeguard your DIY outdoor sectional against the elements, ensuring it remains a comfortable and attractive centerpiece of your outdoor living space for many years to come.
Conclusion: Enjoying Your Handcrafted Outdoor Oasis
You’ve journeyed through the entire process of building your own outdoor sectional, transforming raw materials into a functional and beautiful piece of furniture. We’ve covered every crucial step, from the initial planning and precise cutting of wood, through the secure assembly of the frame and supports, to the meticulous sanding, protective finishing, and smart weatherproofing. You’ve also explored various optional add-ons to enhance both comfort and utility, tailoring your sectional even further to your lifestyle.
The true value of this project extends far beyond mere cost savings. It lies in the empowerment of creation—the satisfaction of shaping something with your own hands, infusing it with personal touches, and making it perfectly suited for your unique outdoor space. No more trying to fit a square peg into a round hole with generic, mass-produced furniture. Your DIY sectional is a testament to your vision and effort.
This isn’t just a place to sit; it’s a handmade anchor for countless memories, from quiet morning coffees to lively evening gatherings. It’s a piece of your home that you built, and that personal connection makes it infinitely more special. So, gather your loved ones, sink into your custom-built comfort, and savor the satisfaction of a project well done.
Inspired to tackle more home improvement projects? Explore our other comprehensive DIY guides for practical builds and creative solutions that can transform your living spaces.
