Unlock Your Creativity: 40+ Easy No-Sew Fabric Crafts for Home Decor, Fashion & More
Do you love the idea of crafting with beautiful fabrics but don’t own a sewing machine? Perhaps you’ve always felt limited by the need for needles and thread, believing fabric projects were too complicated or required specialized equipment. You’re not alone! Many aspiring crafters share this misconception, but I’m here to show you a delightful and surprisingly simple alternative.
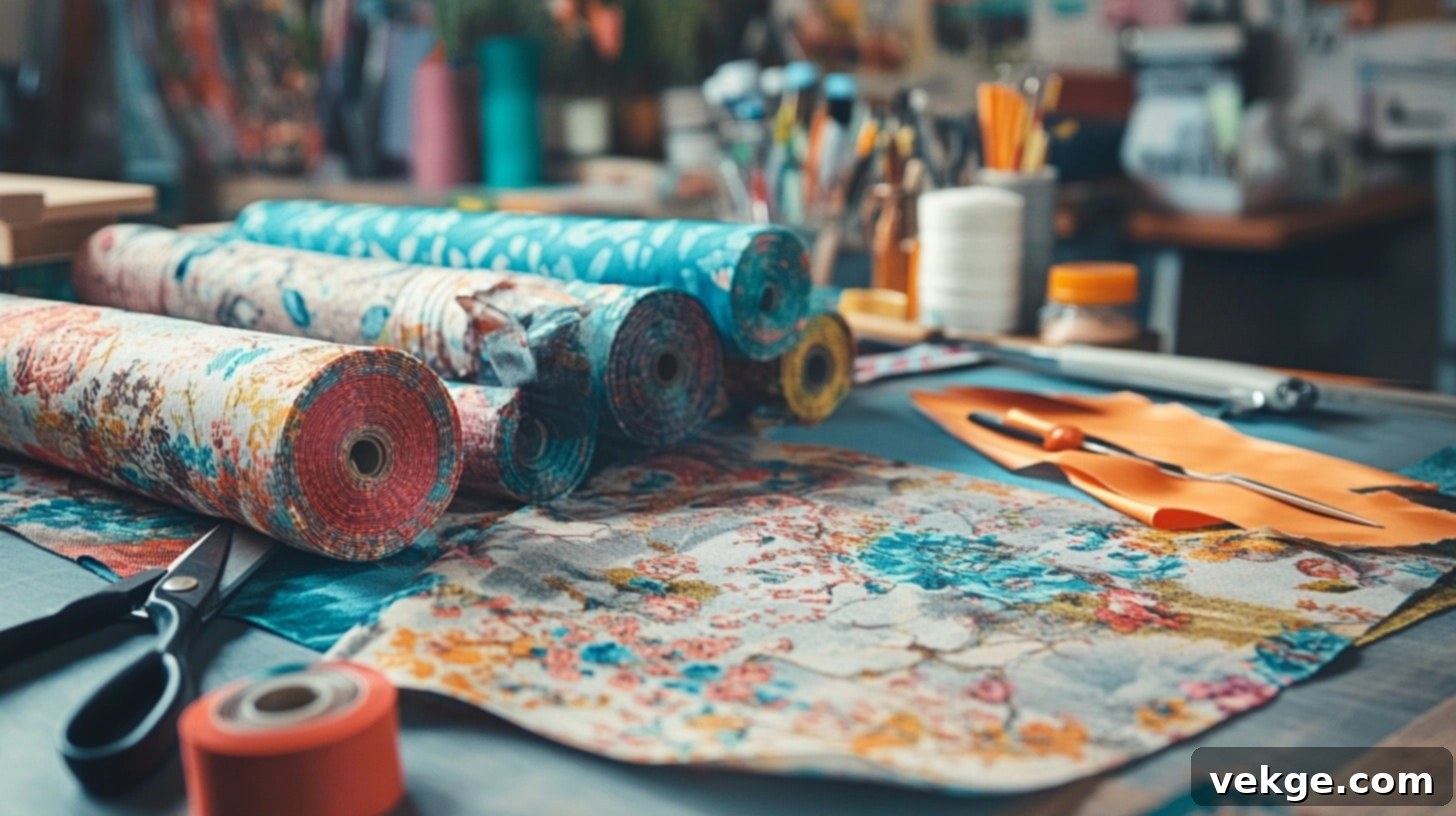
Welcome to the world of no-sew fabric projects – a fantastic way to transform ordinary fabric into extraordinary creations without threading a single needle. This guide is your ultimate resource, packed with 40 creative and simple fabric crafts that anyone can complete, often in just a few hours. These projects are perfect for utilizing those charming leftover fabric pieces from previous endeavors, or when you simply need a quick, satisfying creative break.
From cozy, personalized pillow covers that instantly refresh a room to stylish wall art that makes a statement, and even chic wearable accessories, you’ll discover a diverse range of projects. Each one is designed to be accessible, regardless of your crafting experience, and offers a wonderful opportunity to express your unique style. Let’s embark on this exciting journey together and turn your fabric stash into something truly wonderful – absolutely no sewing required!
Top Fun No-Sew Fabric Crafts to Try
Home Decor Projects
1. Fabric-Covered Canvas Art
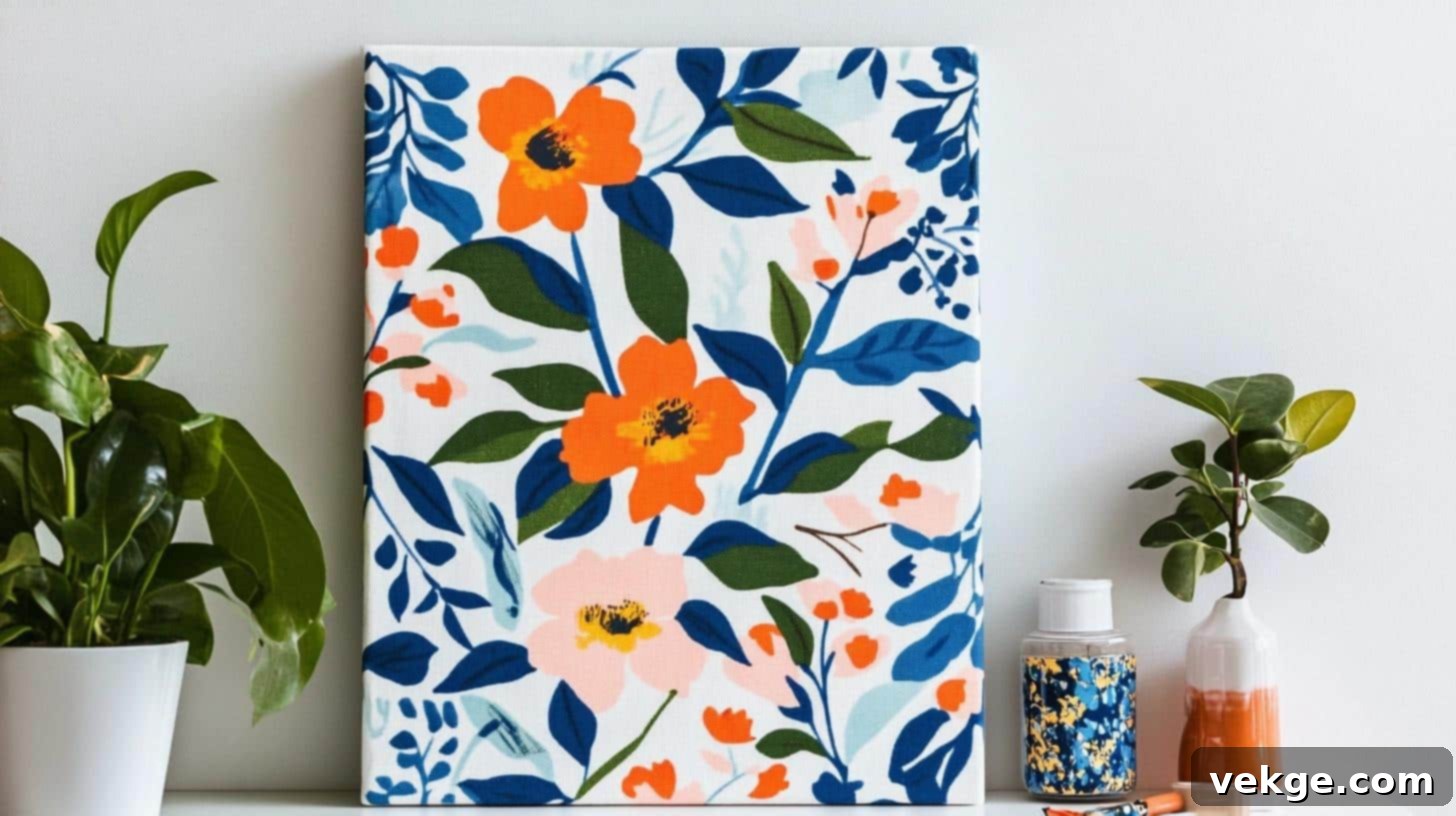
Transform a blank canvas into a personalized piece of art with your favorite fabric. This project is incredibly simple, making it perfect for beginners, and allows you to instantly match your wall decor to any room’s aesthetic. It’s also an excellent way to refresh old canvases or showcase a beautiful fabric pattern you adore.
Materials Table:
| Material | Estimated Cost |
|---|---|
| Blank canvas (16″x20″) | $8-12 |
| Fabric piece (4″ larger than canvas) | $5-15 |
| Fabric scissors | $8 |
| Staple gun with staples | $16 |
| Iron (optional) | Already owned |
- Total estimated cost: $37-51
- Time: 30-45 minutes
- Difficulty: Beginner
Instructions:
- Prep Work: Iron your chosen fabric if needed to remove any wrinkles. Lay the fabric face-down on a clean, flat surface, then center the blank canvas on top.
- First Securing: Pull one side of the fabric tautly over the canvas frame and staple it securely. Repeat this process with the opposite side, ensuring the fabric remains tight and smooth across the front of the canvas.
- Complete Securing: Carefully fold the corners of the fabric neatly, just like wrapping a present, to create crisp edges. Then, pull and staple the remaining two sides of the fabric over the canvas frame, making sure there are no loose areas.
2. No-Sew Pillow Covers
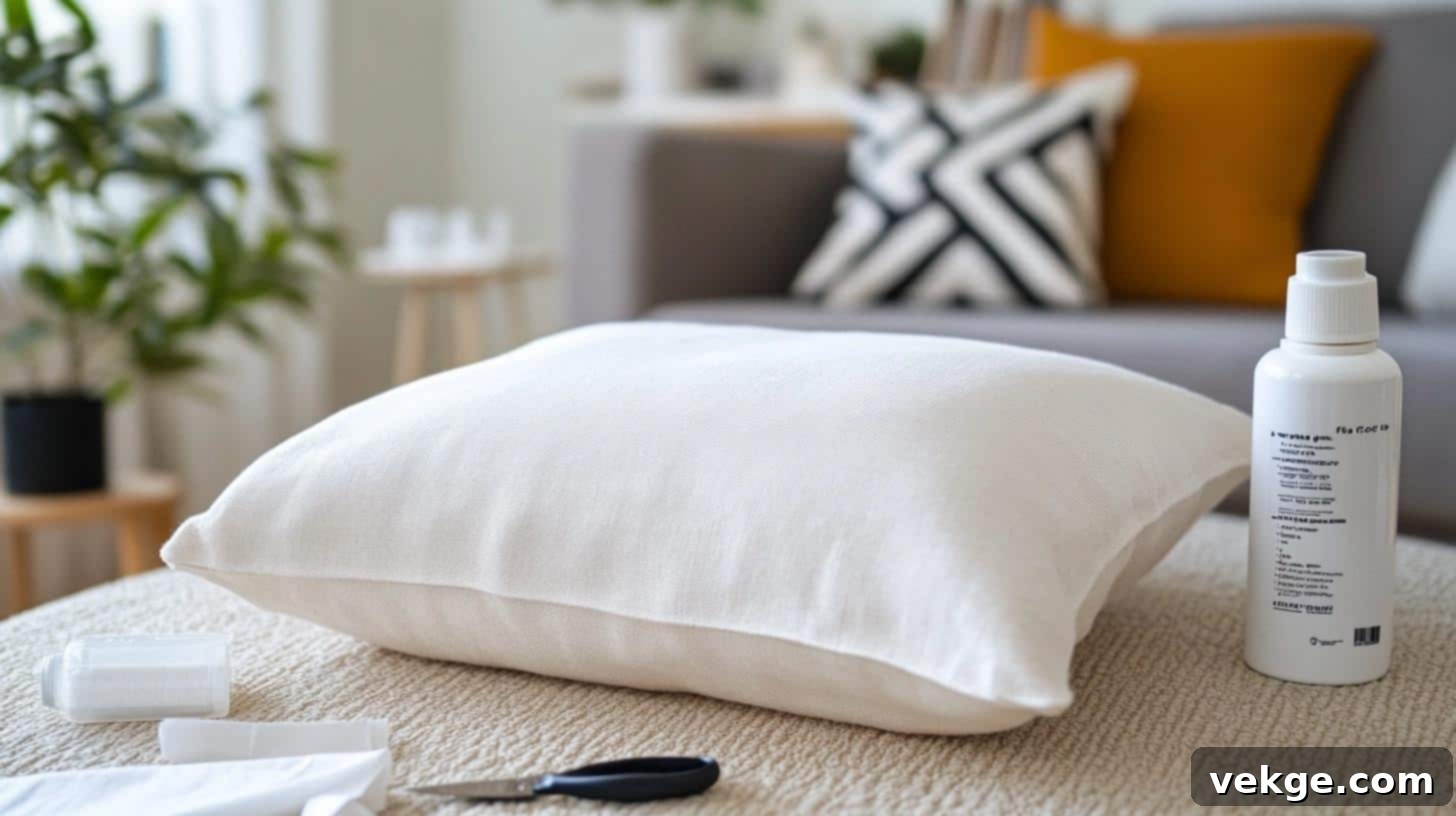
Give your old throw pillows a fresh new look or create custom ones to match your decor perfectly. These no-sew pillow covers are quick to make, allowing you to easily change your home’s ambiance with different fabrics for every season or mood. Fabric glue creates strong, lasting seams without a stitch.
Materials Table:
| Material | Estimated Cost |
|---|---|
| 1-yard fabric | $8-15 |
| Fabric scissors & ruler | $11 |
| Fabric glue | $6 |
| Pillow insert | $5-10 |
- Total estimated cost: $30-42
- Time: 20-30 minutes
- Difficulty: Beginner
Instructions:
- Prep Work: Measure your pillow insert and cut your fabric to size, adding 2 inches to both the length and width for seam allowance. Fold and press all four edges inward twice, about 1/2 inch each time, to create clean hems.
- Assembly: Apply a thin line of fabric glue along all folded edges except for one of the shorter sides. Press the glued edges firmly to secure them, ensuring the fabric adheres well.
- Finishing: Once the glued edges are dry and secure, insert your pillow through the unglued open side. Finally, seal the last open edge with fabric glue, pressing firmly until it holds.
3. DIY Fabric Wall Hangings
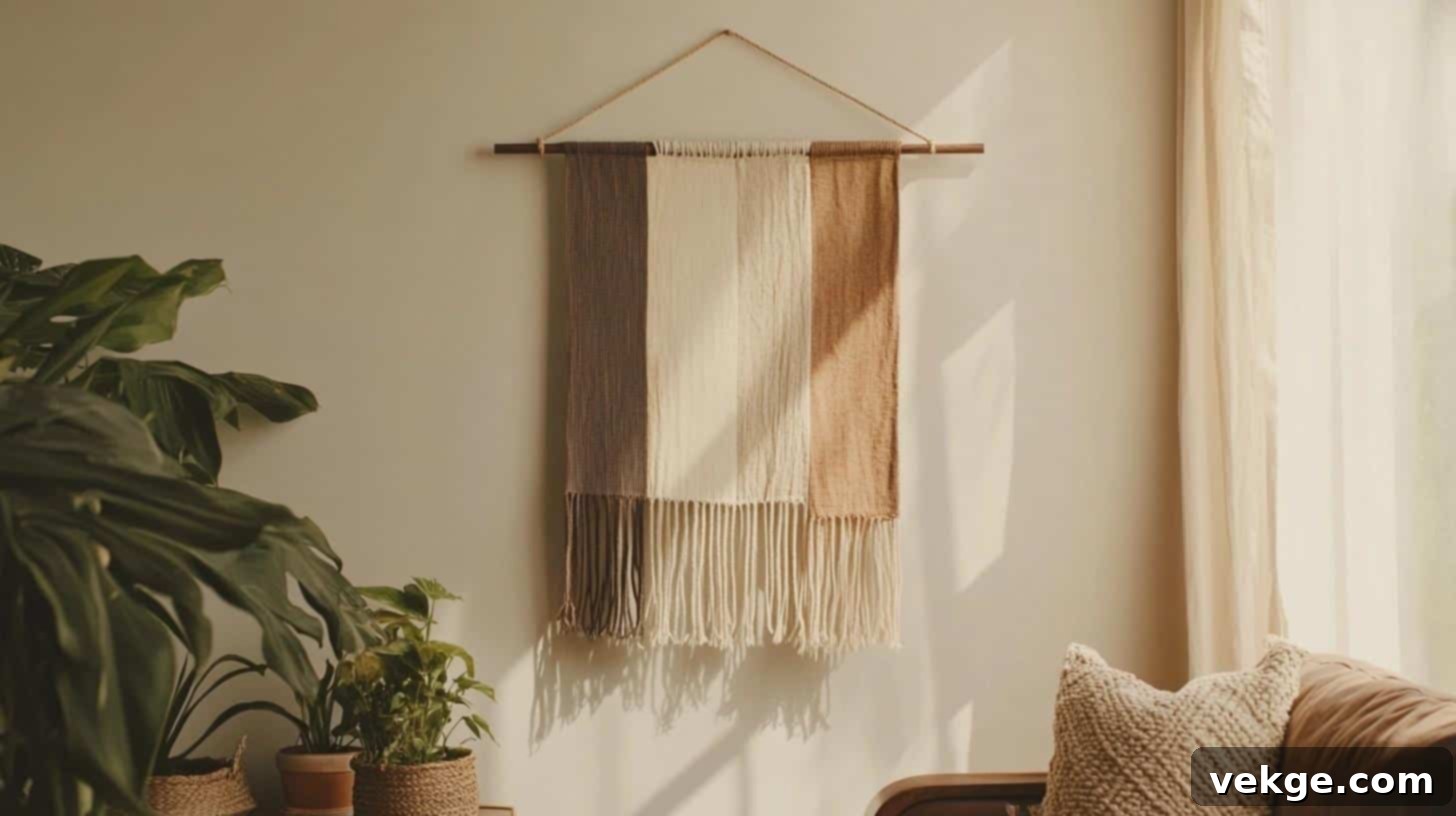
Add bohemian charm or a splash of color to any room with these custom fabric wall hangings. Using a wooden dowel and various fabric scraps, you can create a unique piece of art that reflects your style. This project is an excellent way to use up smaller fabric remnants and experiment with different textures and patterns.
Materials Table:
| Material | Estimated Cost |
|---|---|
| Wooden dowel | $3-5 |
| Fabric pieces | $10-20 |
| Basic supplies (scissors/glue) | $14 |
| Hanging materials (twine/hooks) | $9 |
- Total estimated cost: $36-48
- Time: 45-60 minutes
- Difficulty: Beginner
Instructions:
- Preparation: Cut your chosen fabrics into strips of varying lengths and widths. For each strip, create a top casing by folding the top edge over by about an inch and securing it with fabric glue.
- Assembly: Once the glue on the casings is completely dry, thread all the fabric strips onto the wooden dowel, arranging them as desired and spacing them evenly for a balanced look.
- Hanging: Cut a piece of twine or strong string and tie each end securely to the ends of the dowel. Install appropriate hooks on your wall, then hang your beautiful new fabric creation.
4. Fabric Wall Art with Embroidery Hoop
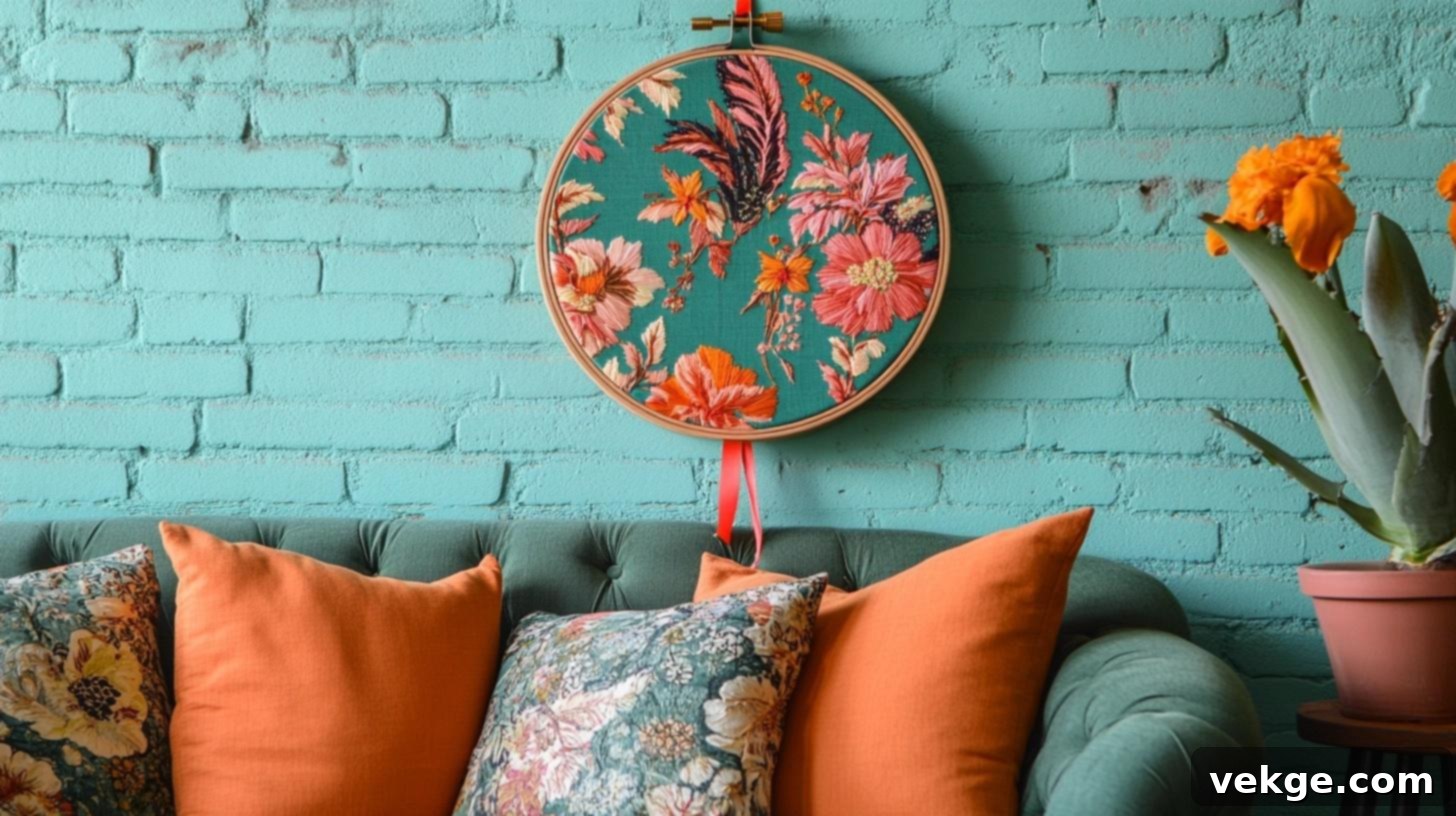
Simple yet elegant, this project turns an embroidery hoop into a charming frame for your favorite fabric. It’s a fantastic way to display a beautiful pattern or a small piece of sentimental fabric. These hoops can be hung individually or grouped together for a stunning gallery wall effect, adding texture and visual interest.
Materials Table:
| Material | Estimated Cost |
|---|---|
| Embroidery hoop (8-12 inch) | $4-6 |
| Decorative fabric | $5-10 |
| Fabric scissors | $8 |
| Hot glue gun & glue | $8 |
| Ribbon for hanging | $3 |
- Total Estimated Cost: $28-35
- Time: 20 minutes
- Difficulty: Beginner
Instructions:
- Prep Work: Separate the inner and outer rings of your embroidery hoop. Cut your decorative fabric into a circular shape that is approximately 4 inches larger in diameter than your hoop.
- Assembly: Place your chosen fabric over the inner ring of the hoop, then carefully position the outer ring over the fabric and inner ring. Tighten the screw on the outer ring, pulling the fabric taut and smoothing out any wrinkles as you go.
- Finishing: Trim the excess fabric around the back of the hoop, leaving about 1 inch. Apply hot glue to the inner hoop and press the excess fabric firmly against it to secure. Finally, attach a ribbon to the hoop screw for easy hanging.
5. No-Sew Fabric Storage Bins
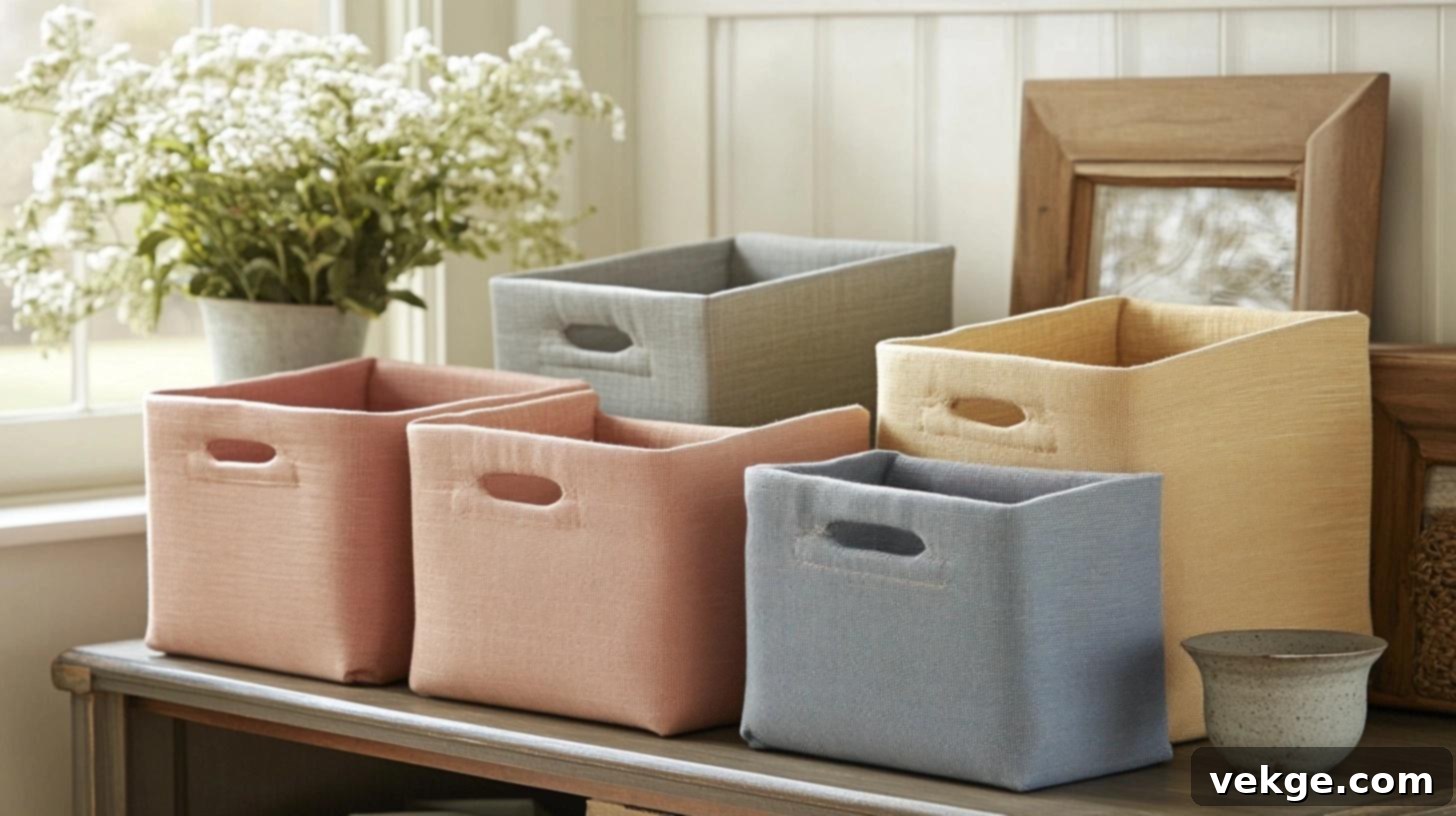
Organize your space with custom-made fabric storage bins! These sturdy, stylish bins are perfect for tidying up shelves, drawers, or kids’ rooms. Using heavy fabric and fusible interfacing, you can create durable organizers that match your decor and help keep clutter at bay. They are surprisingly easy to construct without any sewing.
Materials Table:
| Material | Estimated Cost |
|---|---|
| Heavy fabric (1 yard) | $12-15 |
| Fusible interfacing | $6 |
| Fabric scissors | $8 |
| Iron | Already owned |
| Fabric glue | $6 |
- Total Estimated Cost: $32-35
- Time: 45 minutes
- Difficulty: Intermediate
Instructions:
- Preparation: Cut your heavy fabric and fusible interfacing into the required panels: one for the base and four for the sides of your bin. Carefully iron the fusible interfacing to the back of each fabric piece according to the interfacing manufacturer’s instructions.
- Structure: Fold and glue the edges of each panel for a clean, finished look. Then, carefully connect the side panels to each other using strong fabric glue, ensuring square corners and a firm bond.
- Completion: Once the side panels are securely joined, attach the base panel to the bottom of the structure. Finally, fold the top edge of the bin inward by about an inch and glue it down to create a neatly finished top rim.
6. Fabric Bunting or Garland
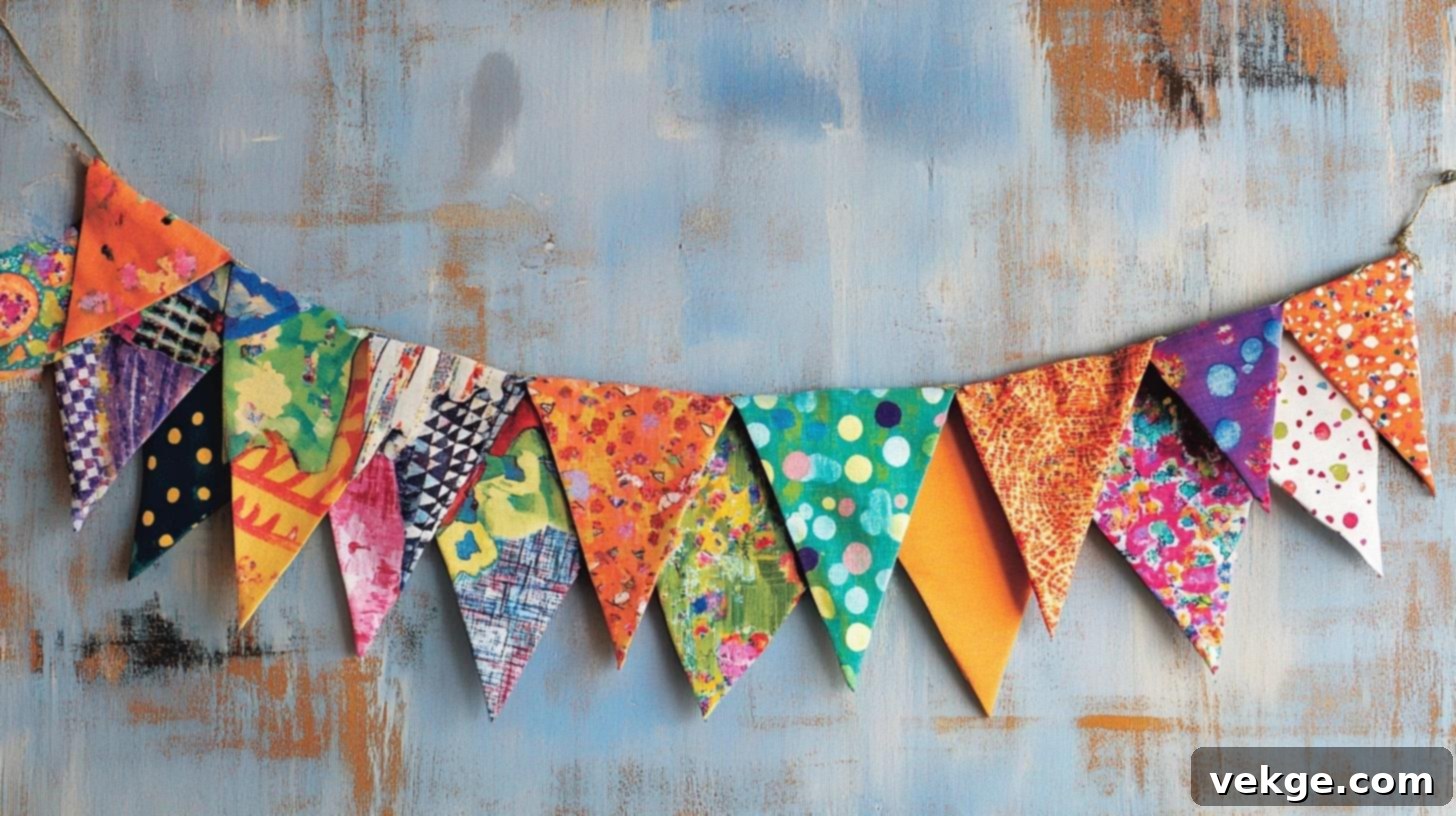
Brighten up any celebration or simply add a festive touch to a room with this charming fabric bunting. It’s an excellent project for using up small fabric scraps and can be customized for any holiday, birthday, or just everyday cheer. The use of bias tape or ribbon makes assembly simple and gives it a professional finish.
Materials Table:
| Material | Estimated Cost |
|---|---|
| Assorted fabric scraps | $8-12 |
| Bias tape or ribbon | $5 |
| Fabric scissors | $8 |
| Fabric glue | $6 |
| Measuring tape | $3 |
- Total Estimated Cost: $30-34
- Time: 30 minutes
- Difficulty: Beginner
Instructions:
- Prep: Choose your fabric scraps and cut them into triangular flag shapes. A good starting size is 8 inches wide by 10 inches tall. You can create a reusable cardboard template for consistency.
- Assembly: Take each fabric triangle and fold its top edge over the bias tape or ribbon, ensuring the tape is centered along the folded edge. Secure this fold firmly in place with fabric glue.
- Final: Continue attaching triangles along the bias tape, spacing them evenly to create your desired look. Allow the fabric glue to dry completely before hanging your festive bunting.
7. Fabric-Covered Lampshade

Revamp an old lampshade or personalize a new one with a fabric covering. This project allows you to perfectly match your lamps to your room’s decor, giving them a high-end, custom look without the expense. Choosing a light-colored fabric ensures that the light still shines through beautifully.
Materials Table:
| Material | Estimated Cost |
|---|---|
| Plain lampshade | $15-20 |
| Light-colored fabric | $10-15 |
| Spray adhesive | $8 |
| Fabric scissors | $8 |
| Ribbon trim (optional) | $5 |
- Total Estimated Cost: $46-56
- Time: 40 minutes
- Difficulty: Intermediate
Instructions:
- Preparation: Lay your fabric flat. Roll the lampshade over the fabric to measure the exact amount needed, then cut the fabric, adding approximately 1 inch extra on all sides for wrapping.
- Coverage: Apply an even coat of spray adhesive to a section of the lampshade. Carefully unroll the fabric around the shade, smoothing it as you go to avoid wrinkles or air bubbles. Work in sections if necessary.
- Edges: Once the fabric is completely adhered, fold any excess fabric neatly inside the top and bottom edges of the lampshade. Secure these folds with fabric glue. If desired, add a decorative ribbon trim around the top and bottom edges for a polished finish.
8. Fabric Coasters
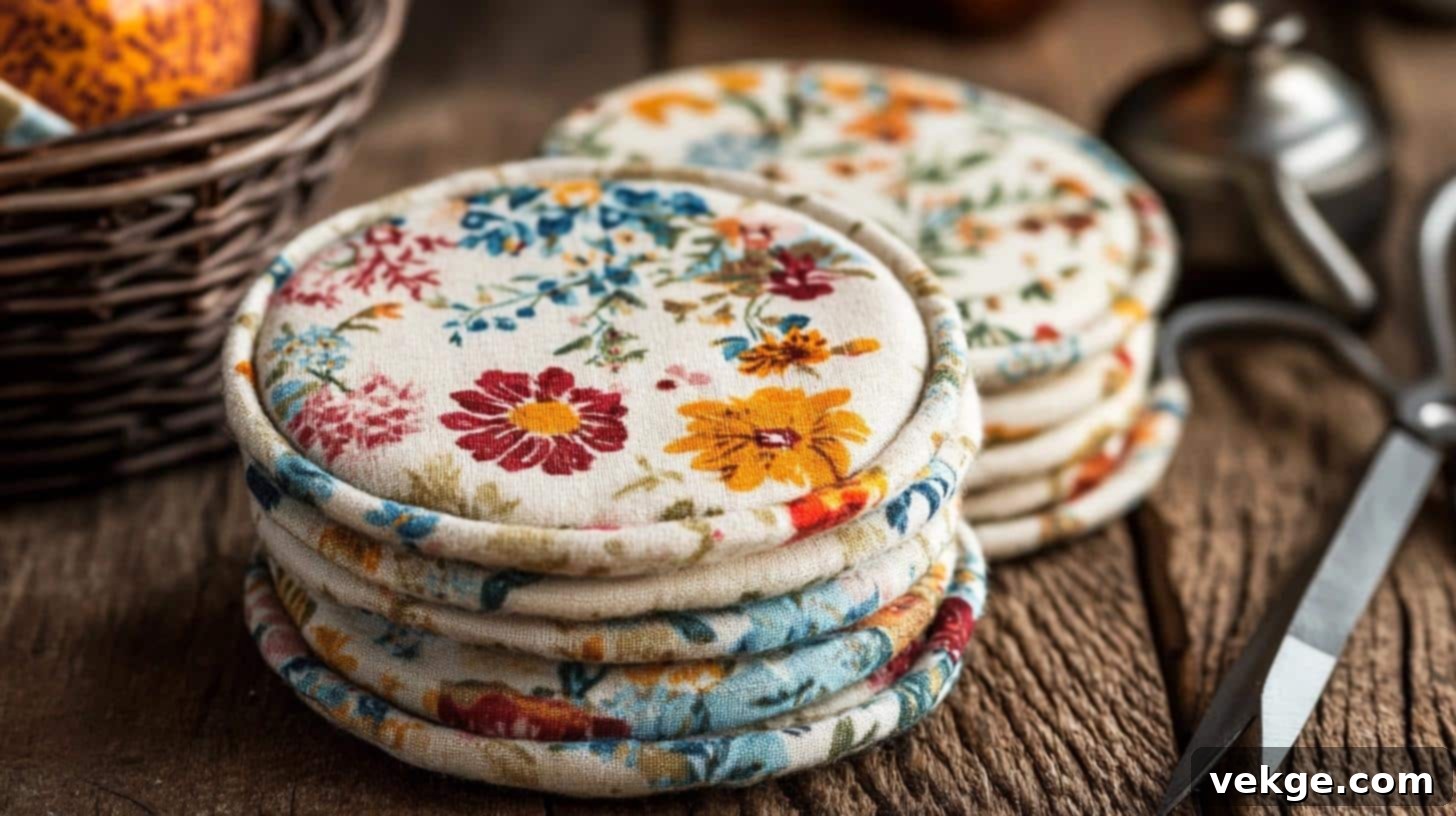
Protect your surfaces with stylish, handmade fabric coasters. These are quick to make, super practical, and another excellent way to use up small fabric scraps. Choose coordinating fabrics to create a set that adds a charming touch to your coffee table or dining area. They also make thoughtful, personalized gifts.
Materials Table:
| Material | Estimated Cost |
|---|---|
| Cotton fabric | $6-8 |
| Felt sheets | $4 |
| Fabric scissors | $8 |
| Fabric glue | $6 |
| Circle template | $3 |
- Total Estimated Cost: $27-29
- Time: 25 minutes
- Difficulty: Beginner
Instructions:
- Cutting: Using a 4-inch circle template, cut out circles from your cotton fabric. Then, cut slightly smaller circles (e.g., 3.75 inches) from the felt sheets to serve as the coaster bases.
- Assembly: Apply a thin, even layer of fabric glue to one side of a felt circle. Carefully center and press a fabric circle on top of the felt, ensuring it adheres smoothly. Fold the edges of the fabric circle underneath the felt and glue them down for a clean finish.
- Finishing: Press firmly on the entire coaster to ensure all layers are securely bonded, and then let it dry completely. Repeat these steps for the desired number of coasters to complete your set.
9. Decorative Fabric Wrapped Mason Jars
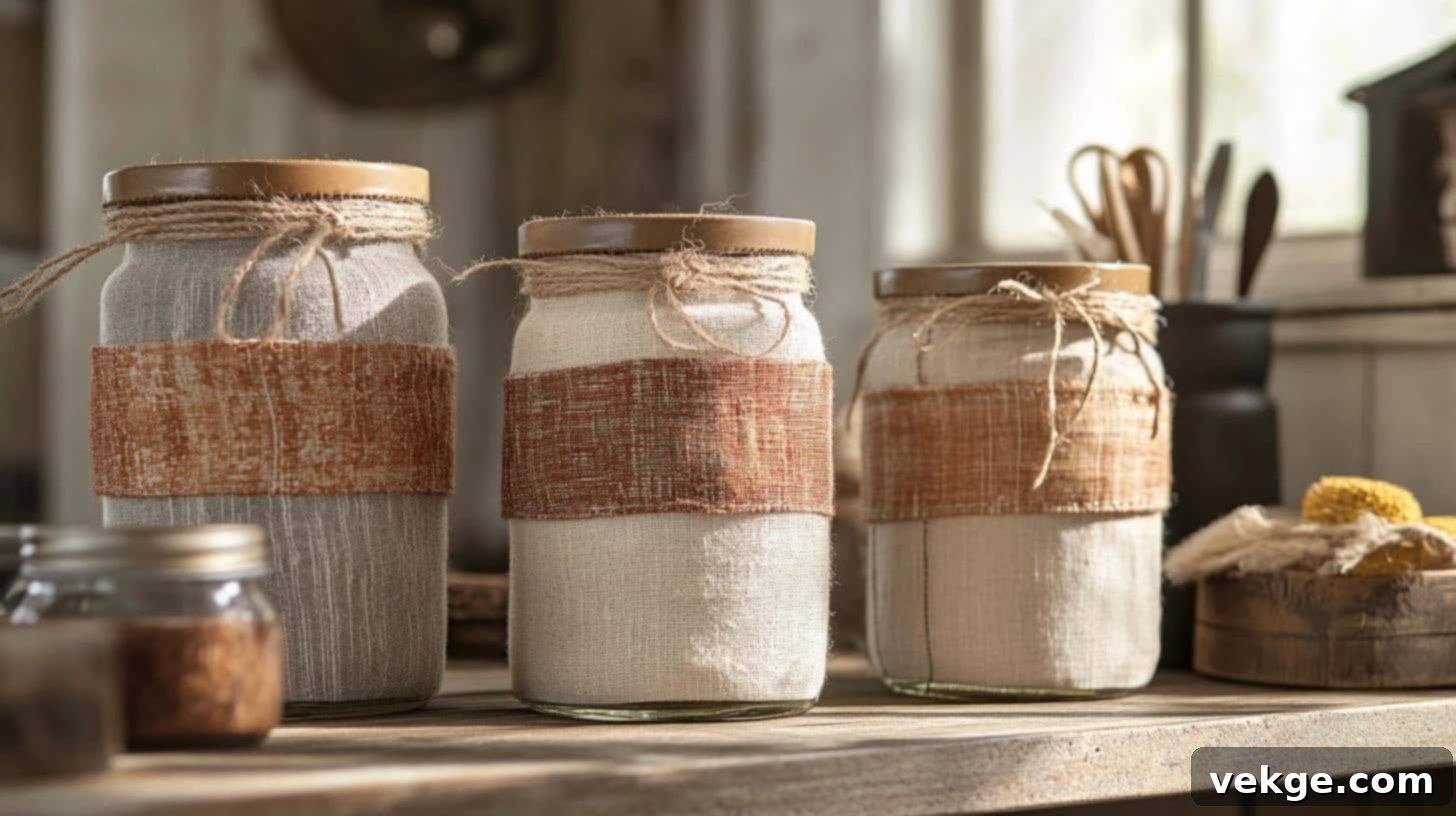
Give plain mason jars a charming rustic or decorative upgrade by wrapping them in fabric. These wrapped jars can be used for flower vases, candle holders, utensil caddies, or simply as decorative accents. This craft is incredibly versatile and allows you to match your jars to any holiday, event, or room theme.
Materials Table:
| Material | Estimated Cost |
|---|---|
| Mason jars (3-pack) | $6-8 |
| Cotton fabric scraps | $5-7 |
| Twine or ribbon | $4 |
| Fabric glue | $6 |
| Scissors | $8 |
- Total Estimated Cost: $29-33
- Time: 15 minutes
- Difficulty: Beginner
Instructions:
- Prep: Ensure your mason jars are clean and dry. Measure the height and circumference of each jar. Cut your cotton fabric into strips that are slightly taller than the jar and long enough to wrap around the jar with about a 1-inch overlap.
- Wrapping: Apply a thin, even layer of fabric glue to a section of the jar. Carefully wrap the fabric strip around the jar, smoothing it out as you go to prevent bubbles or wrinkles. Secure the overlapping edge with more glue.
- Finish: Once the fabric is securely glued, add a decorative touch by wrapping twine or ribbon around the neck of the jar. Trim any excess fabric edges at the top or bottom for a tidy appearance.
10. Fabric Bulletin Board
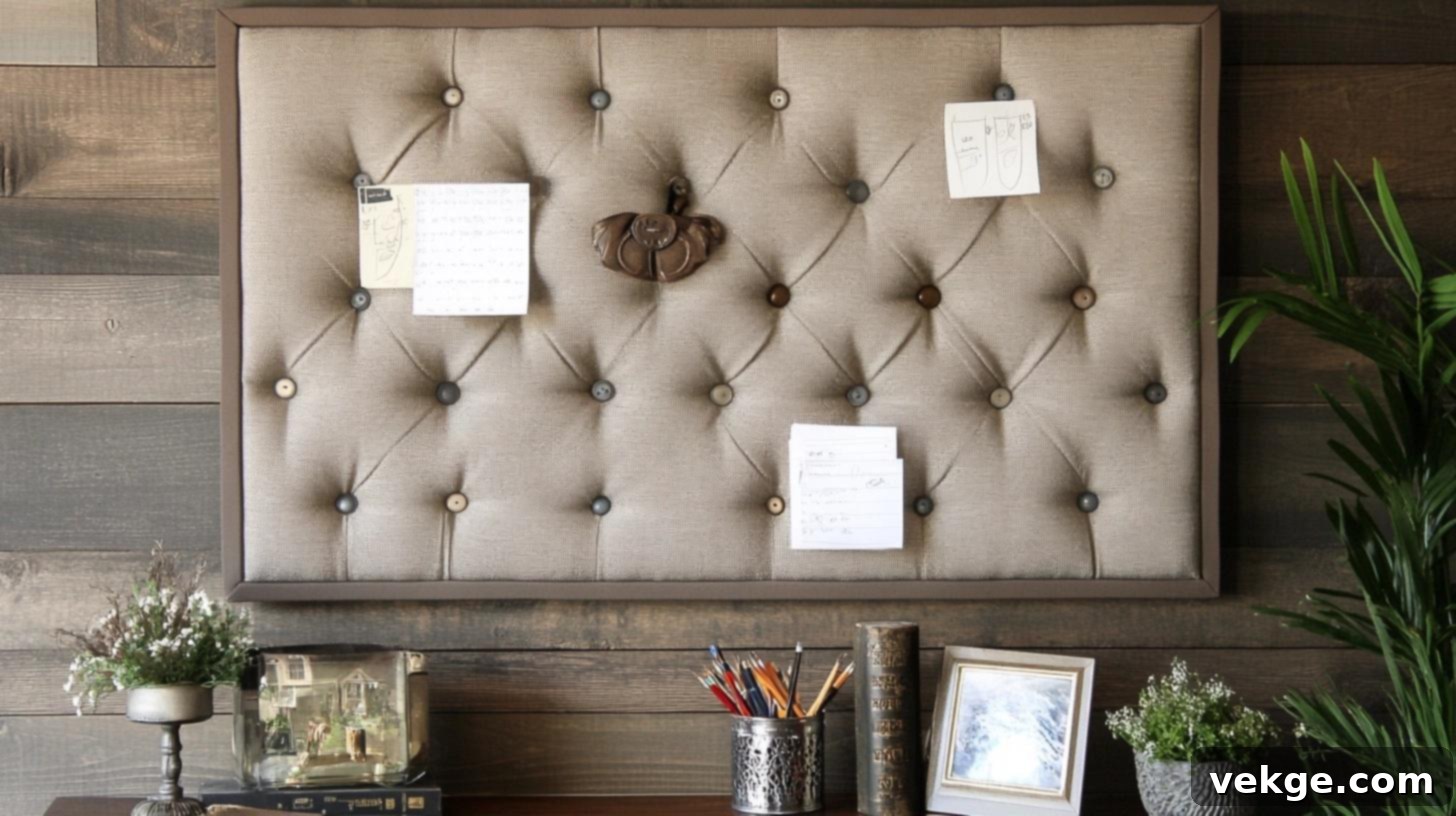
Upgrade a plain corkboard into a stylish and functional fabric-covered bulletin board. This project adds a soft touch to your office or kitchen and helps keep important notes and photos organized. Choose a fabric that complements your room’s decor to create a truly integrated look. The batting adds a padded, luxurious feel.
Materials Table:
| Material | Estimated Cost |
|---|---|
| Corkboard | $12-15 |
| Main fabric | $8-12 |
| Batting/padding | $6 |
| Staple gun with staples | $16 |
| Decorative buttons | $5 |
- Total Estimated Cost: $47-54
- Time: 35 minutes
- Difficulty: Beginner
Instructions:
- Layering: Lay your chosen main fabric face down on a clean, flat surface. Place the batting or padding evenly on top of the fabric. Finally, position the cork board on top of the batting, ensuring it is centered.
- Securing: Starting with the middle of one side, pull the fabric and batting tightly over the edge of the cork board and secure with staples from your staple gun. Work your way around the board, stapling the sides first, then carefully folding and stapling the corners neatly to create a clean finish.
- Decorating: Once the fabric is fully secured, consider adding decorative buttons at the intersections of any folds or simply evenly spaced for aesthetic appeal. Finally, mount your newly decorated bulletin board on the wall.
11. Fabric Flower Wall Decor
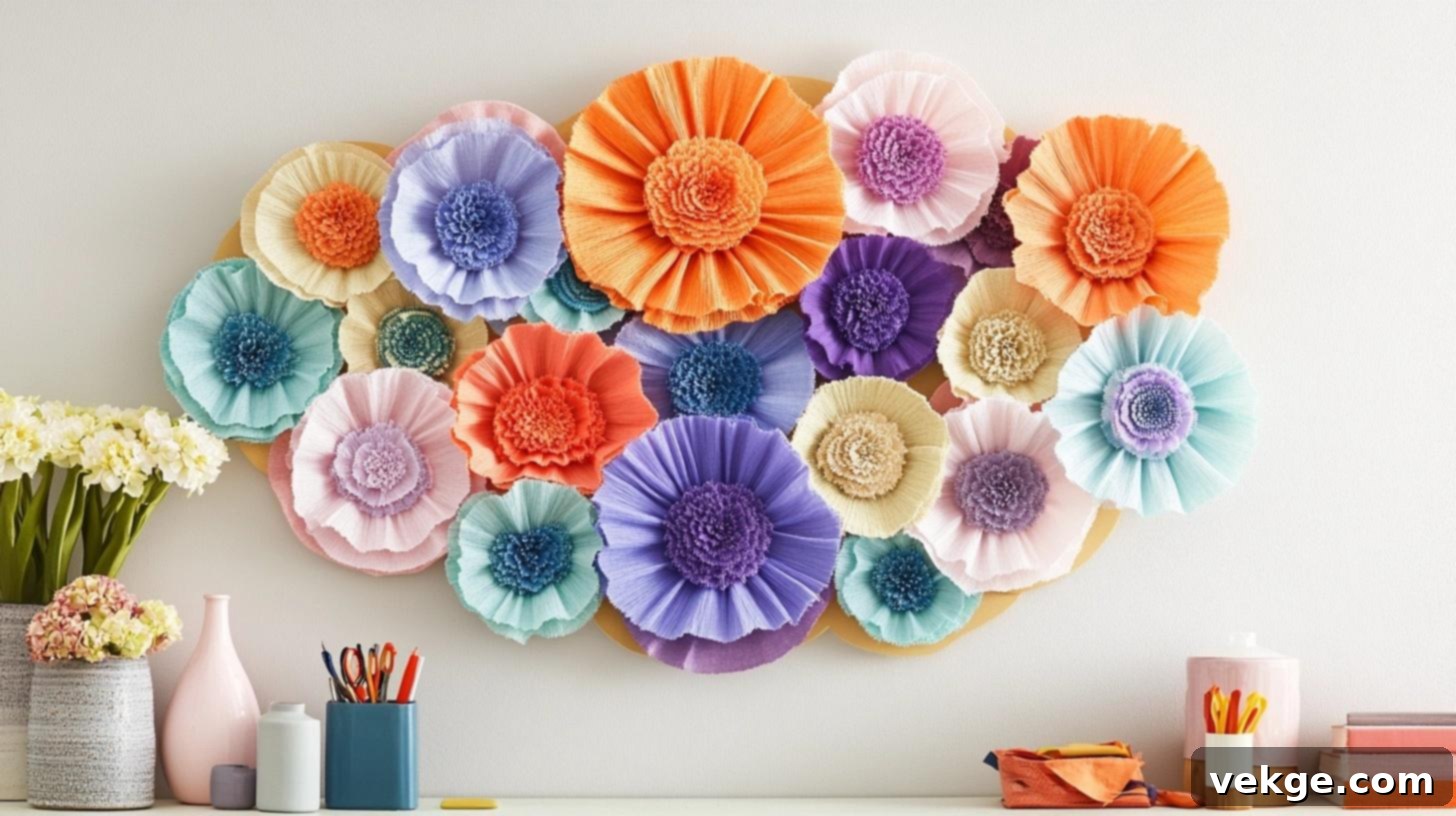
Create a stunning focal point with a dimensional fabric flower wall decor piece. This project uses various fabric colors and textures to build beautiful, layered flowers that add depth and artistry to any wall. It’s an imaginative way to use fabric scraps and create a custom art piece that truly pops.
Materials Table:
| Material | Estimated Cost |
|---|---|
| Fabric (various colors) | $12-15 |
| Circular base (foam/cardboard) | $5 |
| Hot glue gun & glue | $8 |
| Scissors | $8 |
| Mounting strips | $5 |
- Total Estimated Cost: $38-41
- Time: 45 minutes
- Difficulty: Intermediate
Instructions:
- Preparation: Cut your chosen fabrics into numerous circles of different sizes to create petals. For each circle, fold it in half, then in half again (into quarters) to create a petal shape.
- Formation: Begin creating your flowers by gluing the folded fabric circles in layers, starting with the largest circles at the base and progressively adding smaller ones towards the center to build a full, dimensional flower.
- Mounting: Once your fabric flowers are formed, arrange them aesthetically on a circular foam or cardboard base. Secure each flower firmly to the base with hot glue. Finally, attach mounting strips or a hanger to the back of the base for easy wall display.
12. No-Sew Table Runner
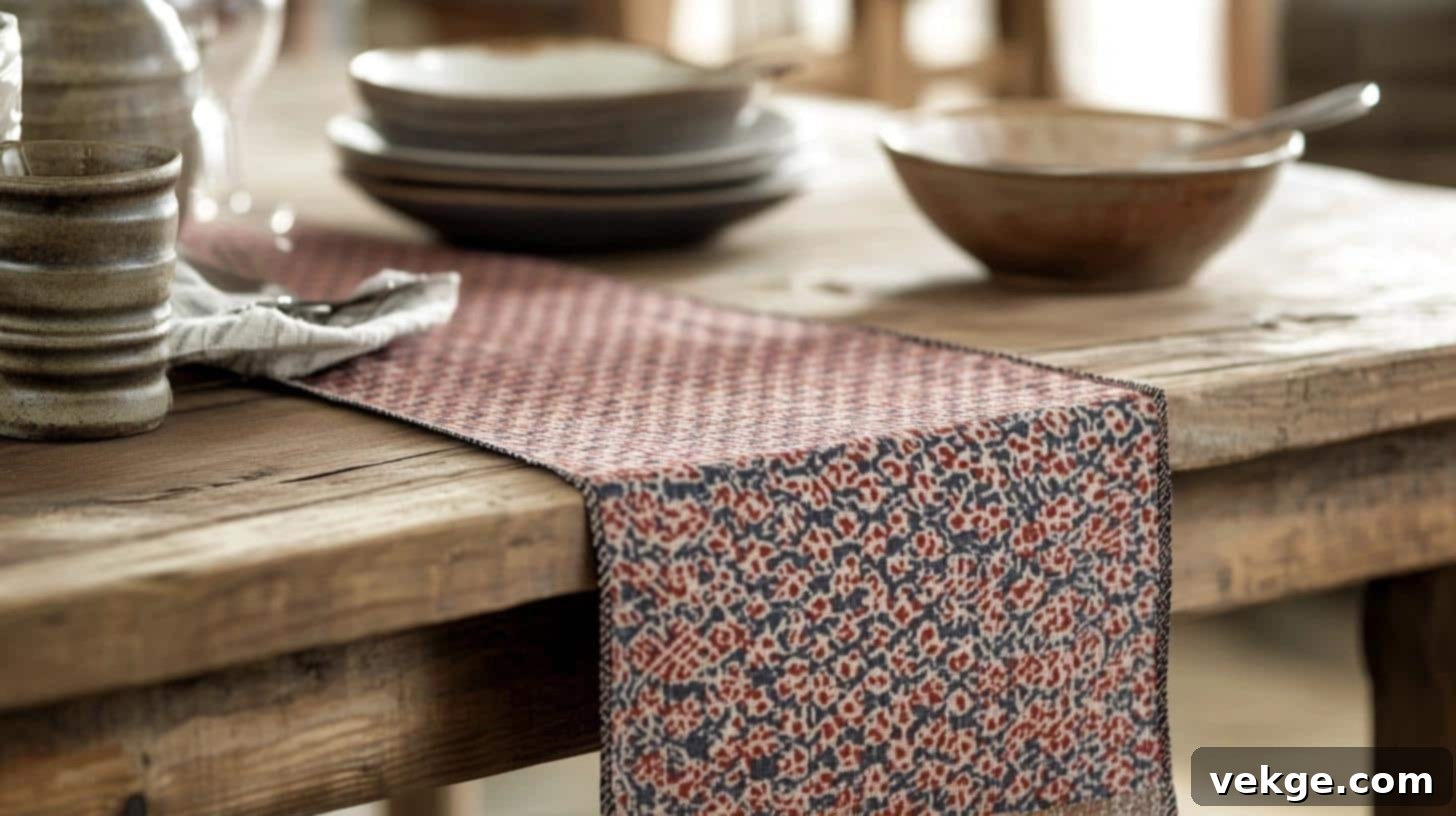
Add a touch of elegance or festive flair to your dining table with a custom no-sew table runner. This project is incredibly simple, utilizing hem tape to create clean, finished edges. You can choose any fabric to match your seasonal decor or everyday style, making it a versatile and budget-friendly home accent.
Materials Table:
| Material | Estimated Cost |
|---|---|
| Main fabric | $10-12 |
| Hem tape | $5 |
| Iron | Already owned |
| Scissors | $8 |
| Measuring tape | $3 |
- Total Estimated Cost: $26-28
- Time: 30 minutes
- Difficulty: Beginner
Instructions:
- Measuring: Determine the desired finished length of your table runner and cut your fabric, adding 2 inches to this length (1 inch for each end hem). For the width, add 1 inch (1/2 inch for each side hem).
- Edging: Fold each raw edge of the fabric inward by 1/2 inch and press it flat with an iron. Then, place a strip of hem tape along each folded edge. Fold the fabric over the hem tape again, creating a double-folded hem.
- Finishing: Carefully iron all edges firmly. The heat from the iron will activate the hem tape, creating a secure and clean no-sew hem. Press firmly for several seconds on each section to ensure proper adhesion.
13. Fabric Drawer Organizers
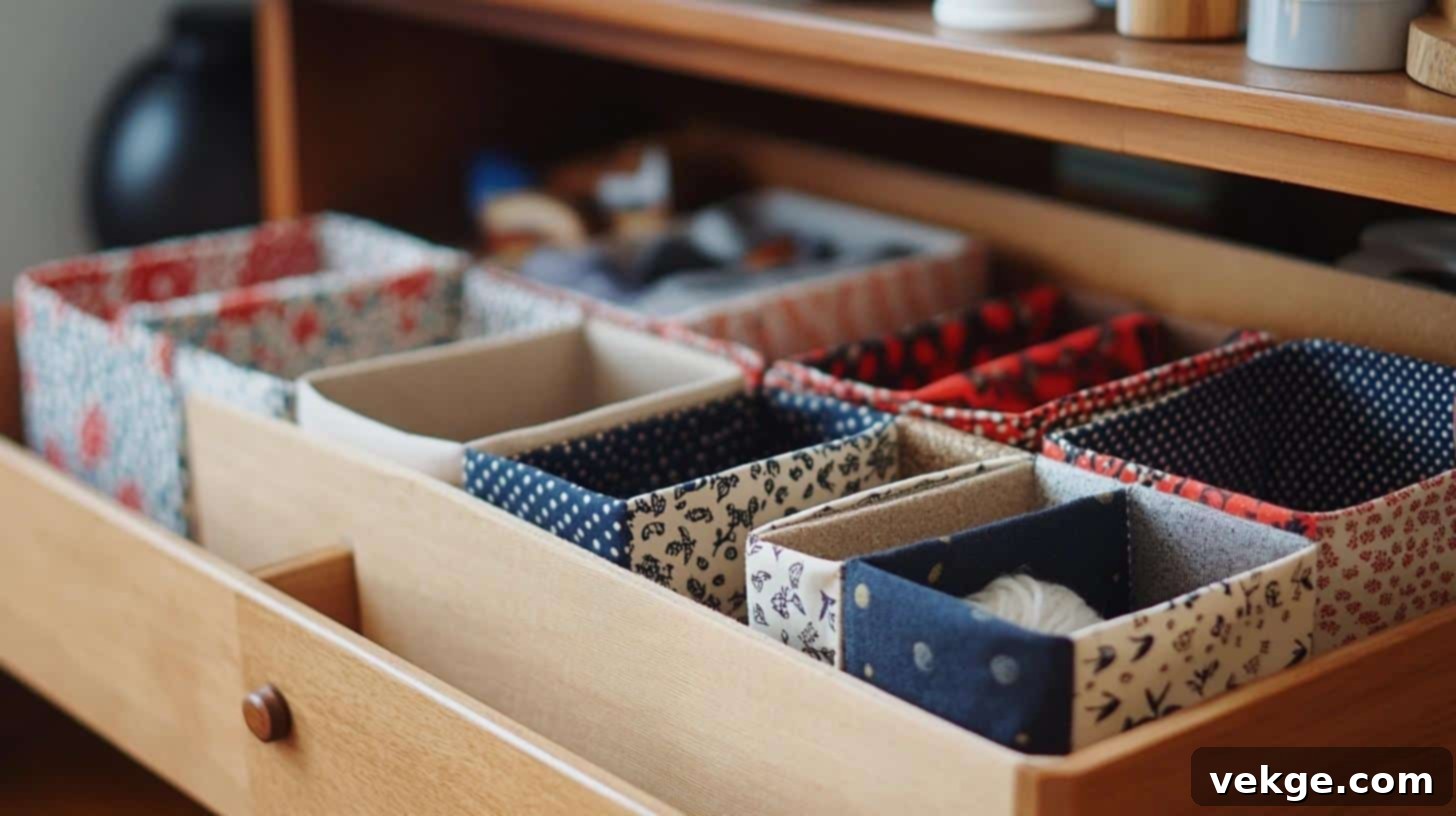
Say goodbye to cluttered drawers with these easy-to-make fabric drawer organizers. By covering heavy cardboard with fabric, you can create custom-sized compartments perfect for socks, intimates, craft supplies, or office items. This project is a practical way to add a pop of color and organization to any drawer in your home.
Materials Table:
| Material | Estimated Cost |
|---|---|
| Cotton fabric | $8-10 |
| Heavy cardboard | $3 |
| Fabric glue | $6 |
| Scissors | $8 |
| Ruler | $3 |
- Total Estimated Cost: $28-30
- Time: 40 minutes
- Difficulty: Beginner
Instructions:
- Structure: Measure your drawer and determine the size of the organizer. Cut the heavy cardboard into panels for the bottom and all four sides of your organizer.
- Coverage: For each cardboard panel, cut a piece of cotton fabric slightly larger (about 1 inch extra on each side). Apply fabric glue to the cardboard, then carefully wrap the fabric around each panel, gluing the edges to the back for a neat finish.
- Assembly: Once all the panels are covered and the glue is mostly dry, connect the covered side panels to the covered base panel with strong fabric glue, forming a sturdy box shape. Hold sections together until they are secure.
Fashion Accessories
14. No-Sew Fabric Hair Bows
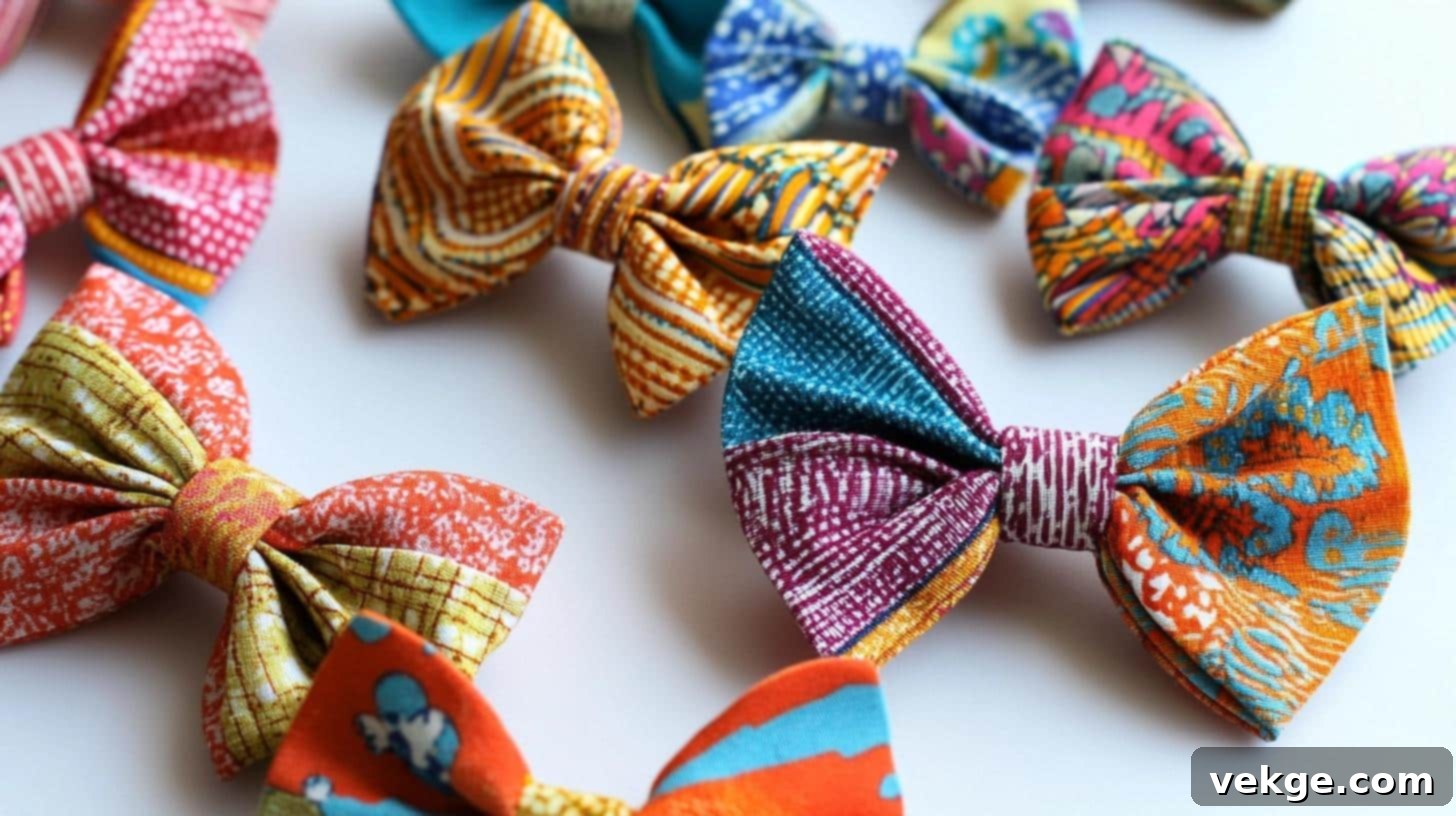
Quick, cute, and endlessly customizable, no-sew fabric hair bows are a perfect project for any skill level. Use ribbon or fabric strips to create charming bows for yourself or as adorable gifts. You can experiment with different fabric patterns and sizes to match any outfit or occasion, adding a personal touch to your hair accessories.
Materials Table:
| Material | Estimated Cost |
|---|---|
| Ribbon or fabric strips | $5-7 |
| Hair clips/elastics | $4 |
| Fabric glue | $6 |
| Scissors | $8 |
| Lighter (optional for ribbon) | Already owned |
- Total Estimated Cost: $23-25
- Time: 15 minutes
- Difficulty: Beginner
Instructions:
- Formation: Cut a fabric strip (e.g., 8×3 inches for a standard bow) and a smaller strip (e.g., 3×1 inch for the center). Fold the larger piece into a figure-eight or butterfly shape, securing the middle with a dab of fabric glue.
- Center: Take the smaller strip, wrap it tightly around the pinched middle of the figure-eight, and secure the ends on the back with fabric glue to create the bow’s center.
- Attachment: Once the bow is fully formed and dry, glue the completed bow securely onto the flat side of a hair clip or onto a hair elastic. If using ribbon, you can carefully singe the ends with a lighter to prevent fraying.
15. Fabric Scrunchies
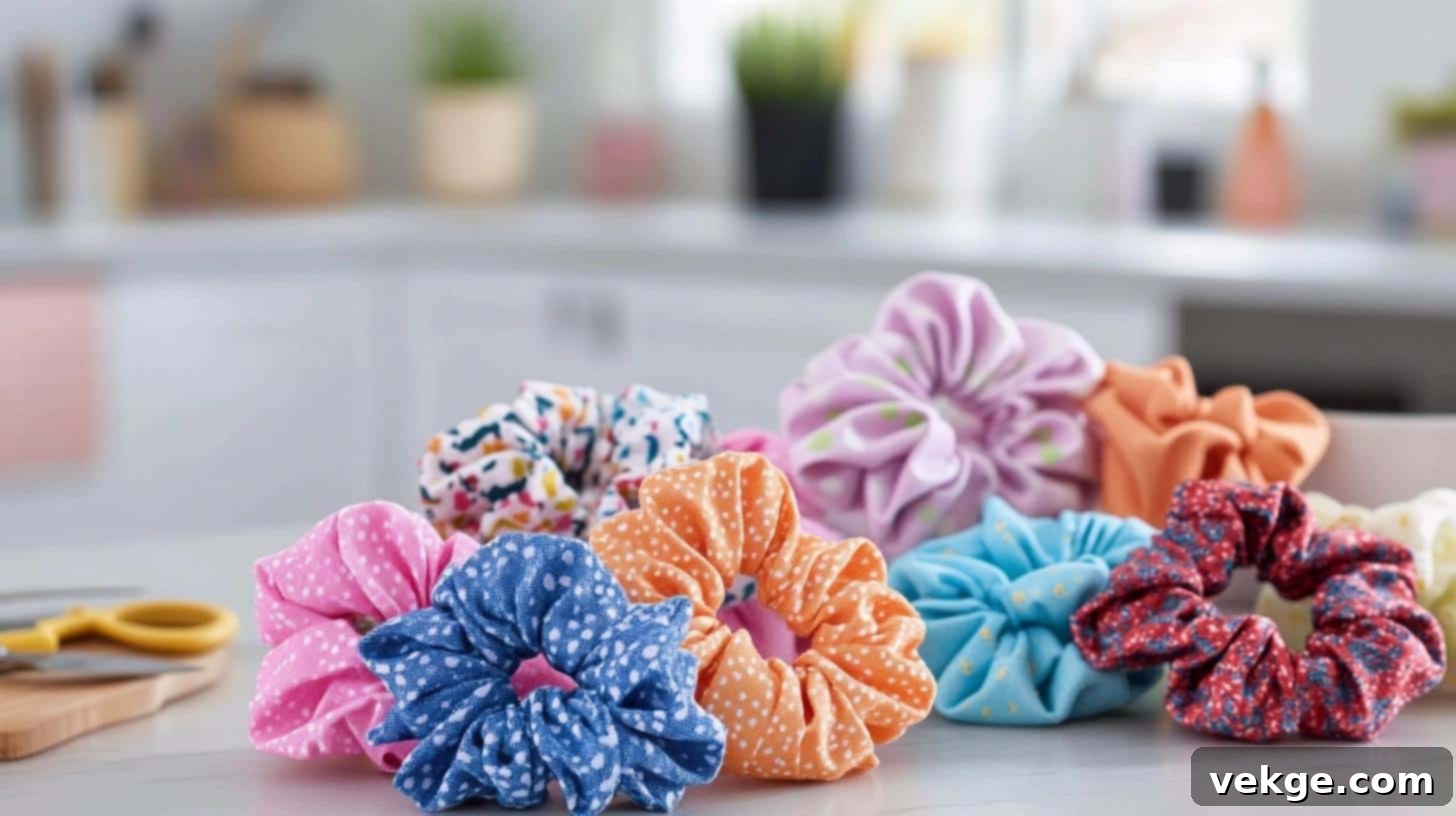
Bring back the 90s trend or simply make practical hair ties with custom fabric scrunchies. This no-sew version is incredibly fast and fun, allowing you to create a collection of scrunchies in various colors and patterns. They are gentle on hair and make excellent gifts or party favors.
Materials Table:
| Material | Estimated Cost |
|---|---|
| Light fabric | $6-8 |
| Hair elastics | $3 |
| Fabric glue | $6 |
| Scissors | $8 |
| Ruler | $3 |
- Total Estimated Cost: $26-28
- Time: 20 minutes
- Difficulty: Beginner
Instructions:
- Preparation: Cut a strip of light fabric, approximately 18 inches long by 4 inches wide. Fold the fabric strip in half lengthwise with the “good” sides facing out. Apply a thin line of fabric glue along the long raw edge and press firmly to create a fabric tube.
- Formation: Once the glue is dry, use a safety pin or bodkin to thread a hair elastic through the fabric tube. Pull the elastic all the way through until both ends of the elastic are exposed, then tie or glue the elastic ends together securely.
- Finishing: Now, tuck one raw fabric end inside the other, creating a neat seam. Apply fabric glue to this connection point and press firmly to secure, completing your scrunchie.
16. No-Sew Bandanas
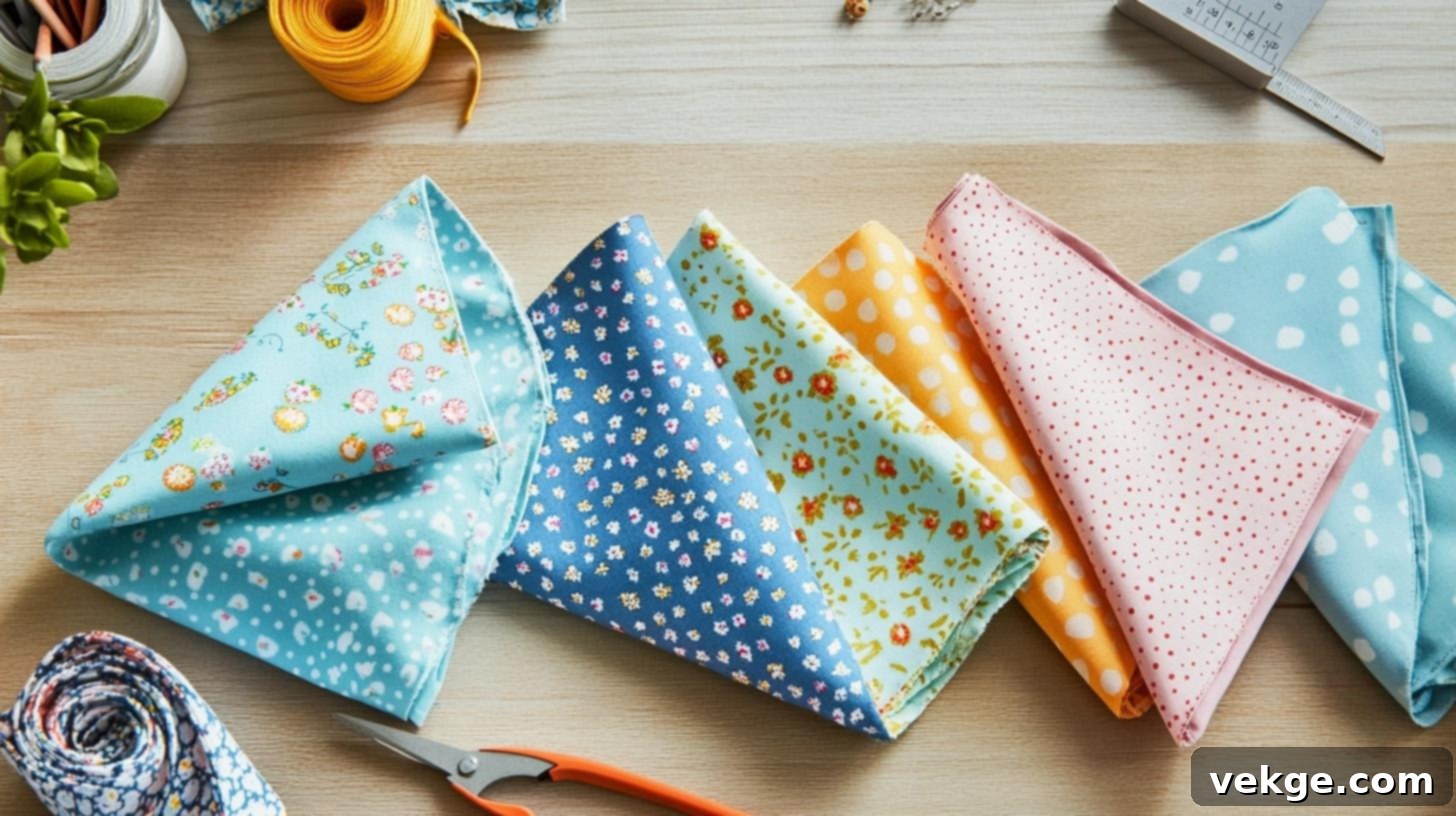
Create custom bandanas for stylish hair accessories, pet scarves, or functional neckwear. This project is as simple as cutting and gluing, perfect for beginners looking to add personal touches to their wardrobe or accessories. Choose fun patterns to make them truly unique!
Materials Table:
| Material | Estimated Cost |
|---|---|
| Square fabric (22×22 inches) | $8-10 |
| Fabric glue | $6 |
| Scissors | $8 |
| Iron | Already owned |
| Ruler | $3 |
- Total Estimated Cost: $25-27
- Time: 15 minutes
- Difficulty: Beginner
Instructions:
- Edge Prep: Ensure your fabric is a perfect square (e.g., 22×22 inches). Fold each raw edge inward by about 1/4 inch and press it flat with an iron to create a crisp, clean hem.
- Securing: Apply a thin, continuous line of fabric glue along the inside of each folded edge. Press the folded edge firmly onto the main fabric, ensuring a strong bond and smooth finish.
- Setting: Once all edges are glued, use your iron to press over the glued hems again. This heat helps to speed up the glue drying process and ensures that all corners are neat and securely sealed, preventing fraying.
17. No-Sew Fabric Statement Necklace
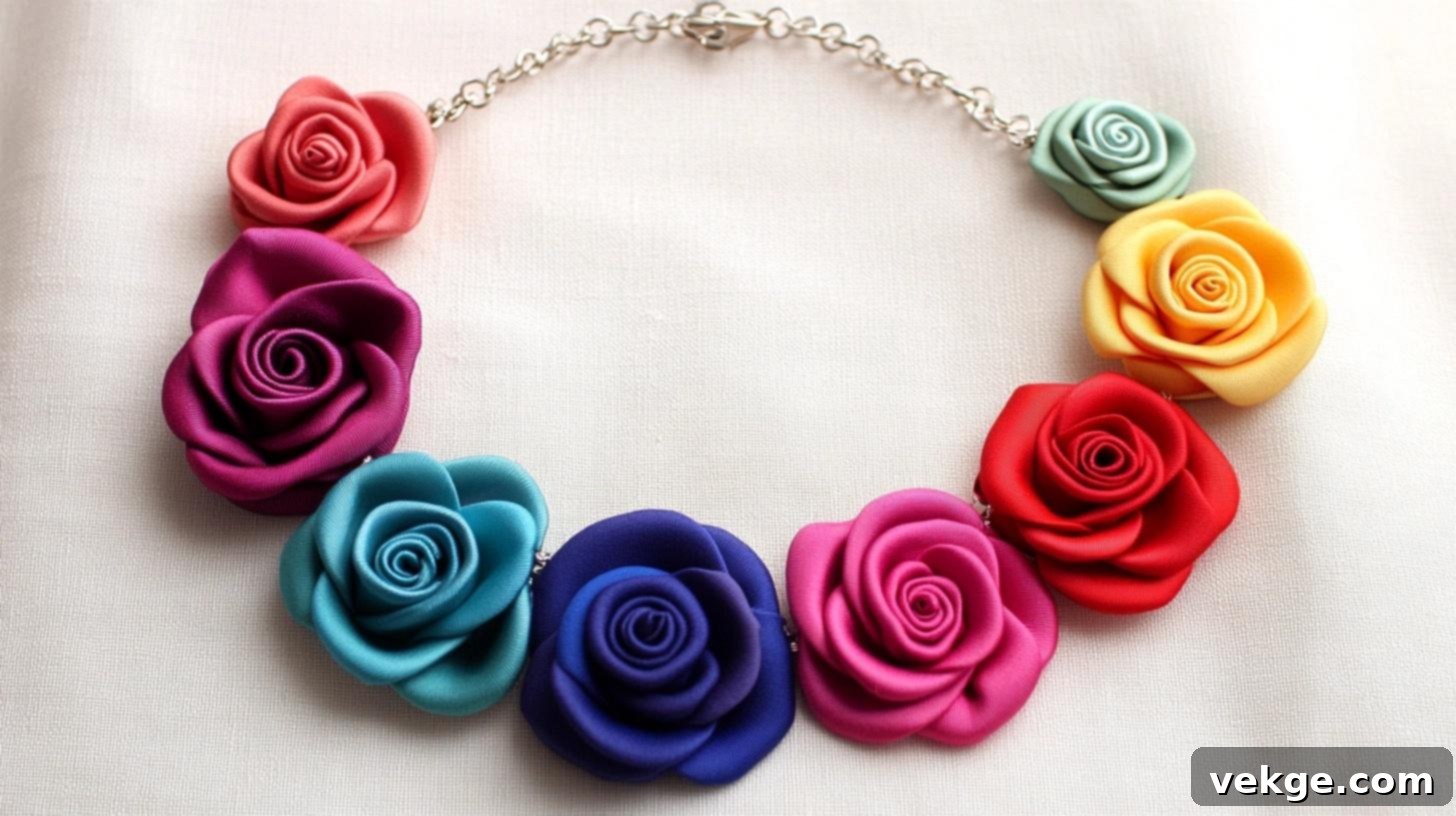
Craft a unique and eye-catching statement necklace using fabric scraps. This project is a fantastic way to add a pop of color and texture to any outfit, transforming small pieces of fabric into wearable art. Experiment with different shapes, layers, and embellishments to create a truly one-of-a-kind accessory.
Materials Table:
| Material | Estimated Cost |
|---|---|
| Fabric strips/scraps | $5-7 |
| Chain or cord | $6 |
| Jump rings | $4 |
| Fabric glue | $6 |
| Scissors | $8 |
- Total Estimated Cost: $29-31
- Time: 35 minutes
- Difficulty: Intermediate
Instructions:
- Preparation: Cut your fabric scraps into small, desired shapes – you can roll them into small “flowers,” cut out leaf shapes, or simple geometric forms. Secure these shapes with fabric glue, allowing them to dry completely to hold their form.
- Assembly: Once the fabric pieces are dry and firm, carefully attach small jump rings to each fabric element. You might need to make a small hole with a sharp tool or simply glue the jump ring securely.
- Completion: Thread your prepared fabric pieces onto a chain or cord, spacing them evenly or arranging them in an appealing pattern to create your statement necklace. Secure the ends of the chain or cord with a clasp.
18. No-Sew Fabric Bracelet
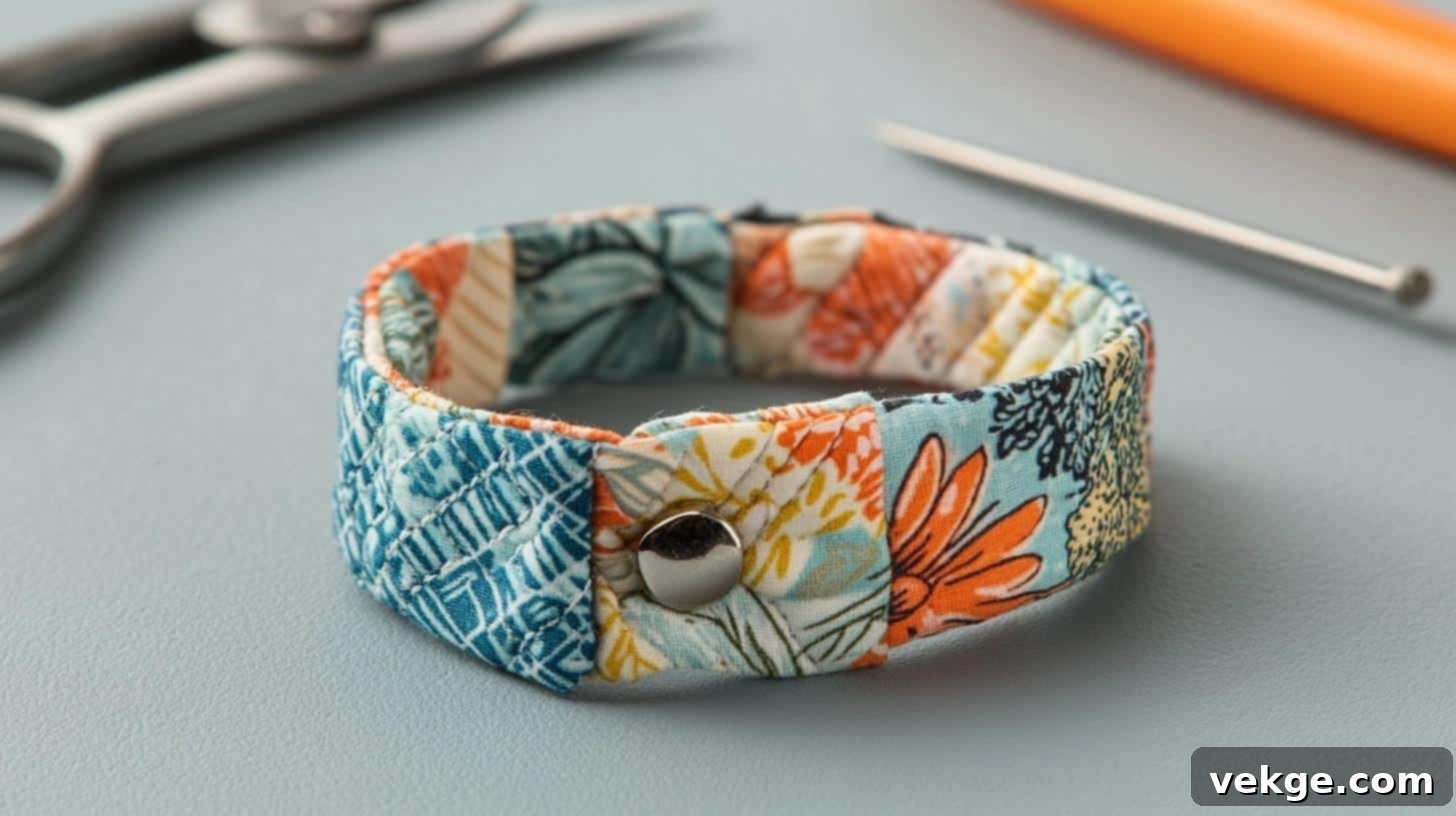
Design a personalized fabric bracelet that’s both fashionable and comfortable. This simple craft uses fabric scraps and snap closures, making it an ideal project for using up small remnants. Add a touch of interfacing for extra structure and durability, creating a unique accessory to match any outfit.
Materials Table:
| Material | Estimated Cost |
|---|---|
| Fabric scraps | $4-6 |
| Snap closures | $5 |
| Fabric glue | $6 |
| Scissors | $8 |
| Interfacing | $6 |
- Total Estimated Cost: $29-31
- Time: 25 minutes
- Difficulty: Beginner
Instructions:
- Structure: Measure your wrist to determine the desired length of your bracelet, adding about 1 inch for overlap. Cut your fabric and interfacing to this size, typically 1.5-2 inches wide.
- Reinforcement: Iron the interfacing to the back of your fabric strip according to the interfacing’s instructions to give it structure. Then, fold the long raw edges of the fabric inward and secure them with fabric glue for a neat finish.
- Finishing: Attach the snap closures to each end of the bracelet strip using fabric glue, ensuring they align properly for fastening. Allow the glue to dry completely and securely before wearing your new accessory.
19. Fabric Headband
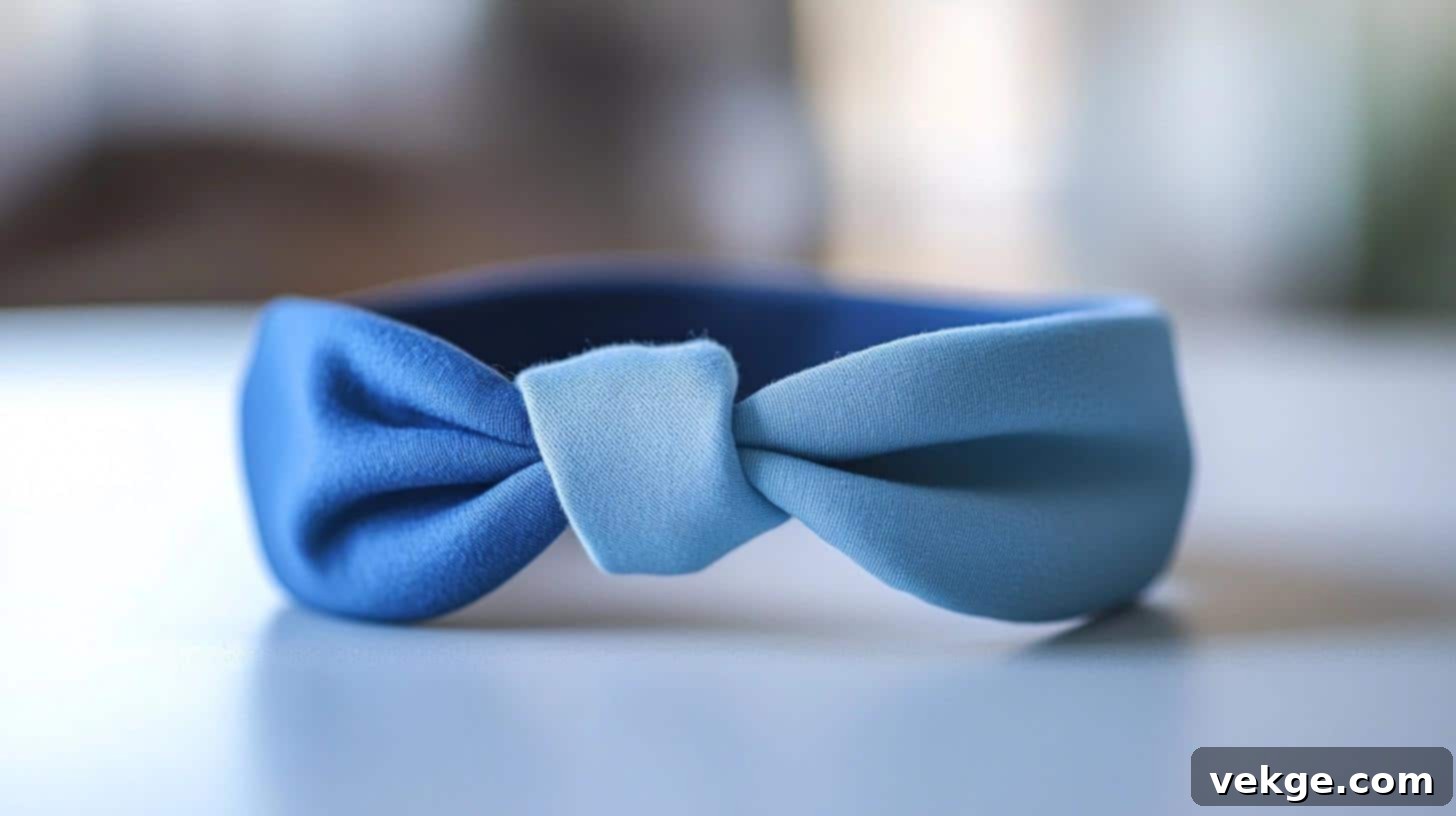
Create a comfortable and stylish fabric headband to keep your hair in place or add a fashionable accent. Stretchy fabric and elastic make this a quick and easy no-sew project. Choose a vibrant pattern or a soft solid to complement your wardrobe and elevate your everyday look with a handmade touch.
Materials Table:
| Material | Estimated Cost |
|---|---|
| Stretchy fabric | $6-8 |
| Elastic band | $4 |
| Fabric glue | $6 |
| Scissors | $8 |
| Measuring tape | $3 |
- Total Estimated Cost: $27-29
- Time: 20 minutes
- Difficulty: Beginner
Instructions:
- Measuring: Measure around your head where the headband will sit, then cut your stretchy fabric to that length, adding 2 inches for overlap. For the width, cut the fabric about 4-5 inches wide.
- Construction: Fold the fabric strip in half lengthwise, with the right sides out. Apply fabric glue along the raw long edge and press firmly to create a fabric tube. Then, insert your elastic band into the fabric tube, ensuring it’s not twisted.
- Closing: Bring the two ends of the fabric tube together, overlapping them by about an inch. Apply fabric glue to secure the ends, making sure to hide the seam inside the fold for a clean finish.
20. Fabric Brooches
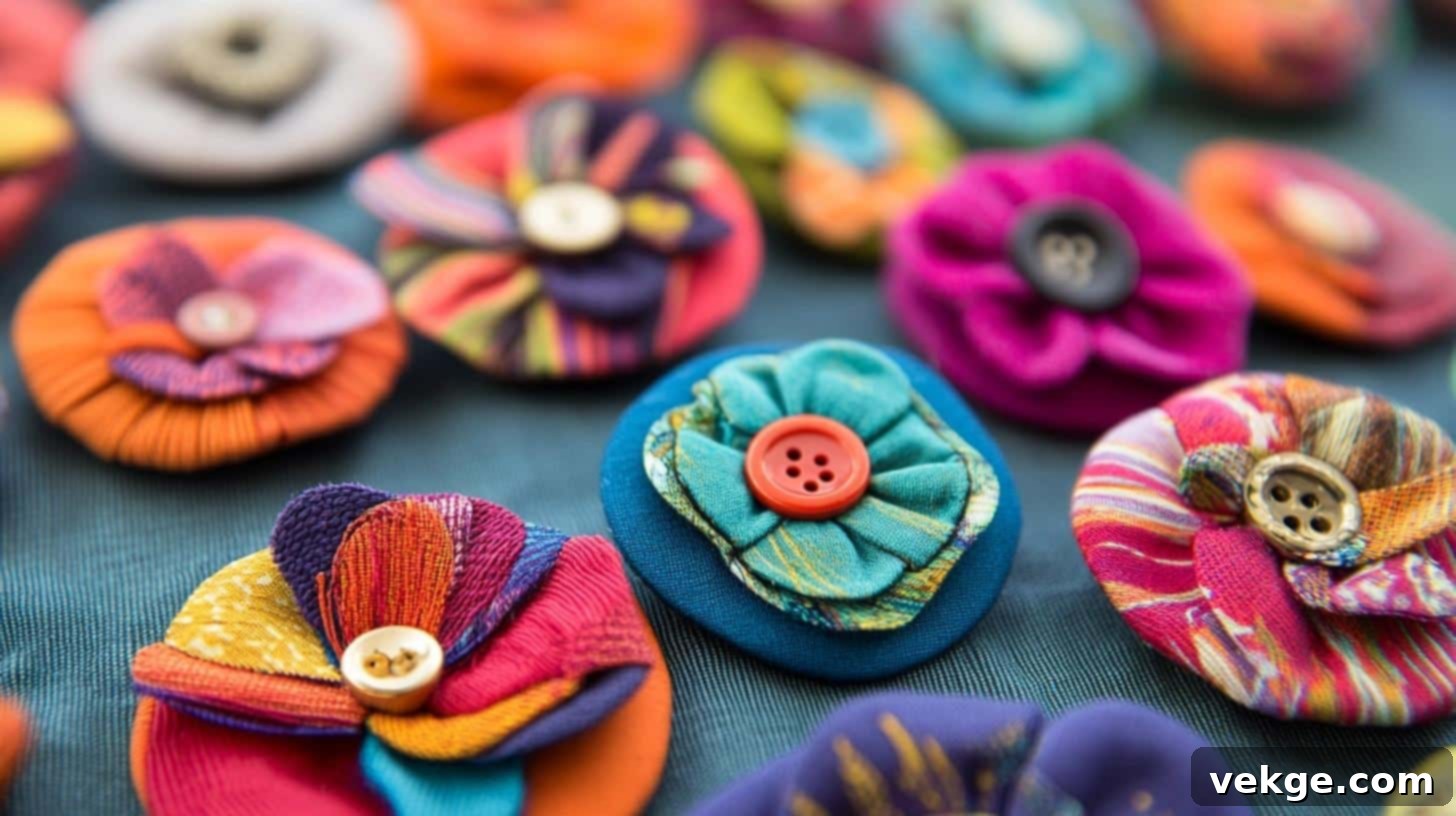
Adorn your jackets, bags, or hats with unique fabric brooches. These charming embellishments are perfect for using tiny fabric scraps and felt pieces. Layering different fabric circles creates a beautiful, dimensional flower-like effect, allowing you to add a personalized, handcrafted touch to any item.
Materials Table:
| Material | Estimated Cost |
|---|---|
| Fabric scraps | $4-6 |
| Brooch pins | $5 |
| Felt circles | $3 |
| Fabric glue | $6 |
| Scissors | $8 |
- Total Estimated Cost: $26-28
- Time: 25 minutes
- Difficulty: Beginner
Instructions:
- Creation: Cut various fabric scraps into circles of decreasing size. Layer these circles on top of each other, starting with the largest at the bottom. Pinch the center of the layered circles and secure it with a dab of fabric glue to create a flower-like shape.
- Base: Glue a small felt circle to the back of your fabric creation. This provides a stable base. Then, securely glue the brooch pin to the felt circle, ensuring it’s centered and firm.
- Details: For a finishing touch, glue a small fabric centerpiece, a decorative button, or a bead to the center of your layered fabric circles. Allow all glue to dry completely before wearing or attaching your brooch.
21. No-Sew Tote Bags
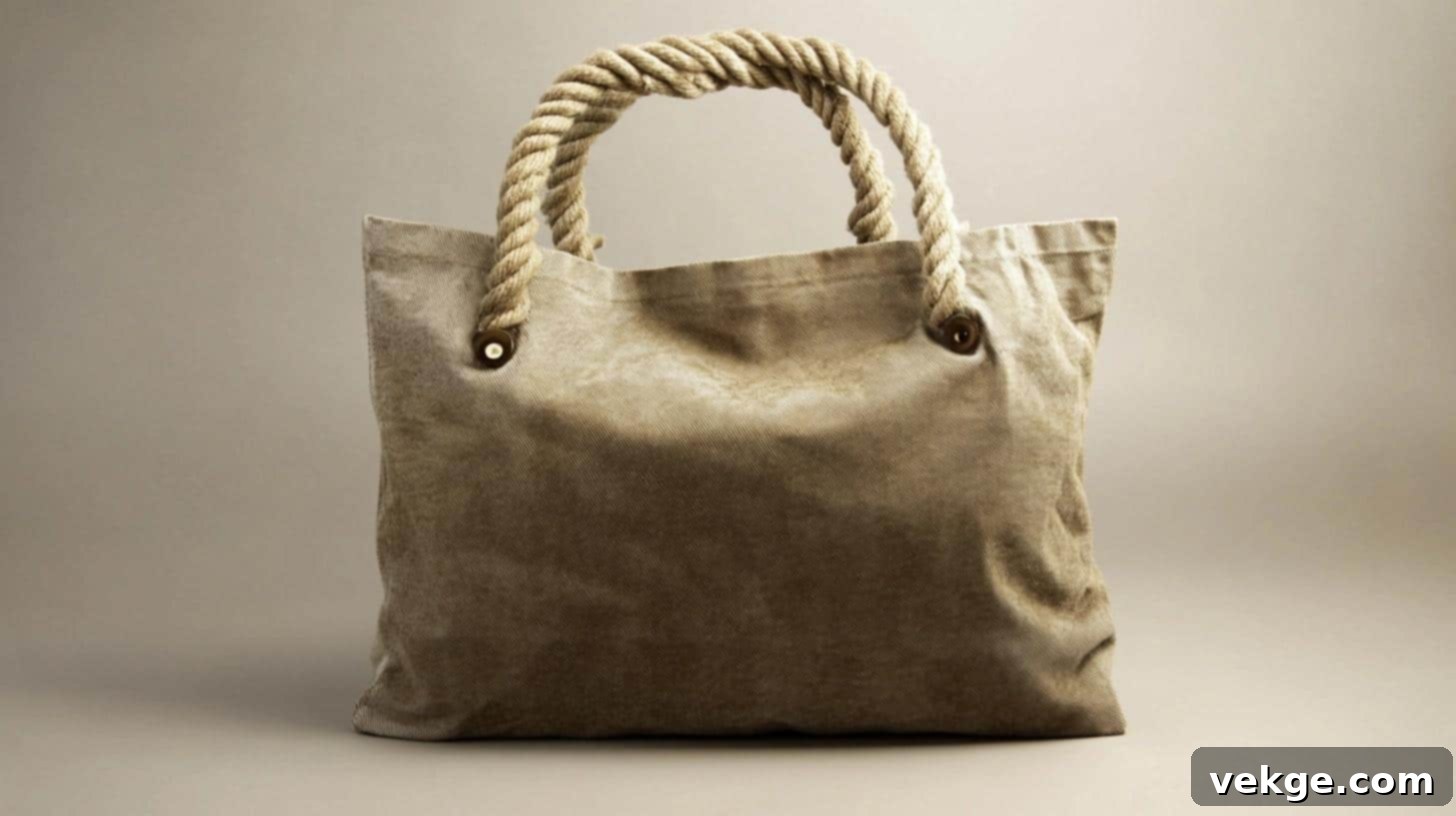
Craft practical and stylish tote bags without a single stitch! Perfect for groceries, beach trips, or everyday use, these bags can be customized with your favorite heavy fabrics. Adding grommets for handles not only reinforces the bag but also gives it a professional and durable finish, proving that no-sew can be robust.
Materials Table:
| Material | Estimated Cost |
|---|---|
| Heavy fabric (1 yard) | $12-15 |
| Fabric glue | $6 |
| Grommets kit | $8 |
| Rope for handles | $5 |
| Scissors | $8 |
- Total Estimated Cost: $39-42
- Time: 45 minutes
- Difficulty: Intermediate
Instructions:
- Structure: Cut your heavy fabric into two large rectangles for the front and back of your bag (or one large piece folded in half for a seamless bottom). Apply strong fabric glue along the side edges (and bottom if using two pieces), pressing them firmly together to create the bag’s main structure. Allow to dry completely.
- Strength: Along the top edge of your bag, fold the fabric down by about 1-2 inches to create a hem, securing it with glue. Use your grommets kit to install grommets where you want your handles to be. Reinforce these areas with extra fabric glued on the inside for added durability before installing grommets.
- Handles: Thread your chosen rope through the installed grommets. Knot the ends of the rope securely on the inside of the bag to create sturdy handles. Trim any excess rope for a neat finish.
22. No-Sew Clutch Purse
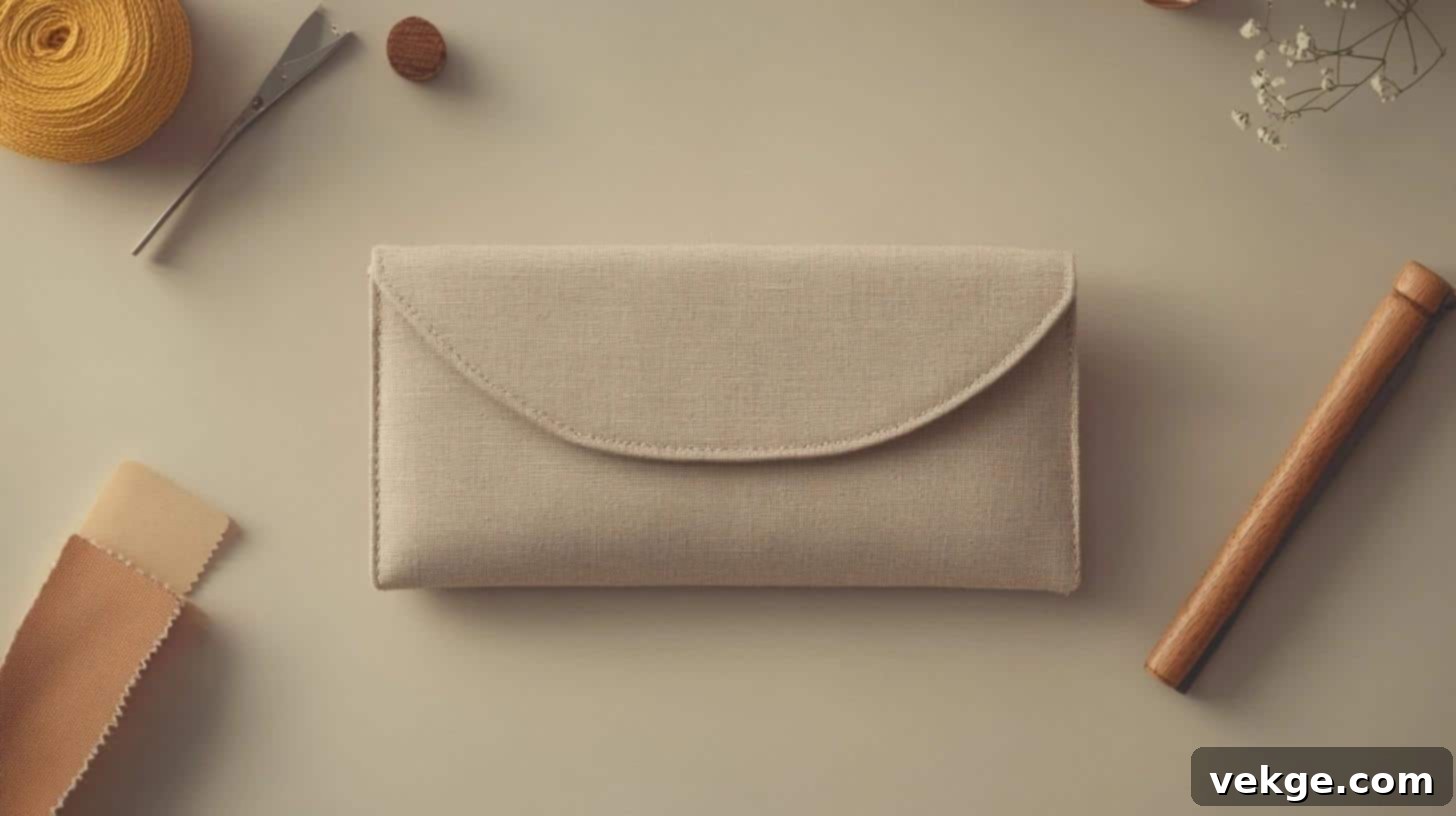
Craft a chic clutch purse without a sewing machine, perfect for a night out or as a stylish everyday accessory. Using fusible interfacing adds necessary structure, allowing your clutch to hold its shape beautifully. A magnetic snap closure ensures your belongings stay secure, making this a functional and fashionable no-sew project.
Materials Table:
| Material | Estimated Cost |
|---|---|
| Main fabric | $8-10 |
| Magnetic snap | $4 |
| Interfacing | $6 |
| Fabric glue | $6 |
| Scissors | $8 |
- Total Estimated Cost: $32-34
- Time: 40 minutes
- Difficulty: Intermediate
Instructions:
- Structure: Cut your main fabric and interfacing to your desired clutch size (e.g., one large rectangle that folds into the clutch). Iron the fusible interfacing to the back of your main fabric according to the interfacing’s instructions, giving the fabric body and stiffness.
- Formation: Fold the fabric to create the clutch shape (e.g., folding up the bottom third, then folding down the top third as a flap). Secure all raw edges with fabric glue, pressing firmly until they hold.
- Finishing: Following the magnetic snap’s instructions, attach one part of the snap to the inside of the top flap and the other part to the main body of the clutch, ensuring they align perfectly when closed. Let all glue dry completely.
Organizational and Practical Crafts
23. Fabric Keychain or Key Fob
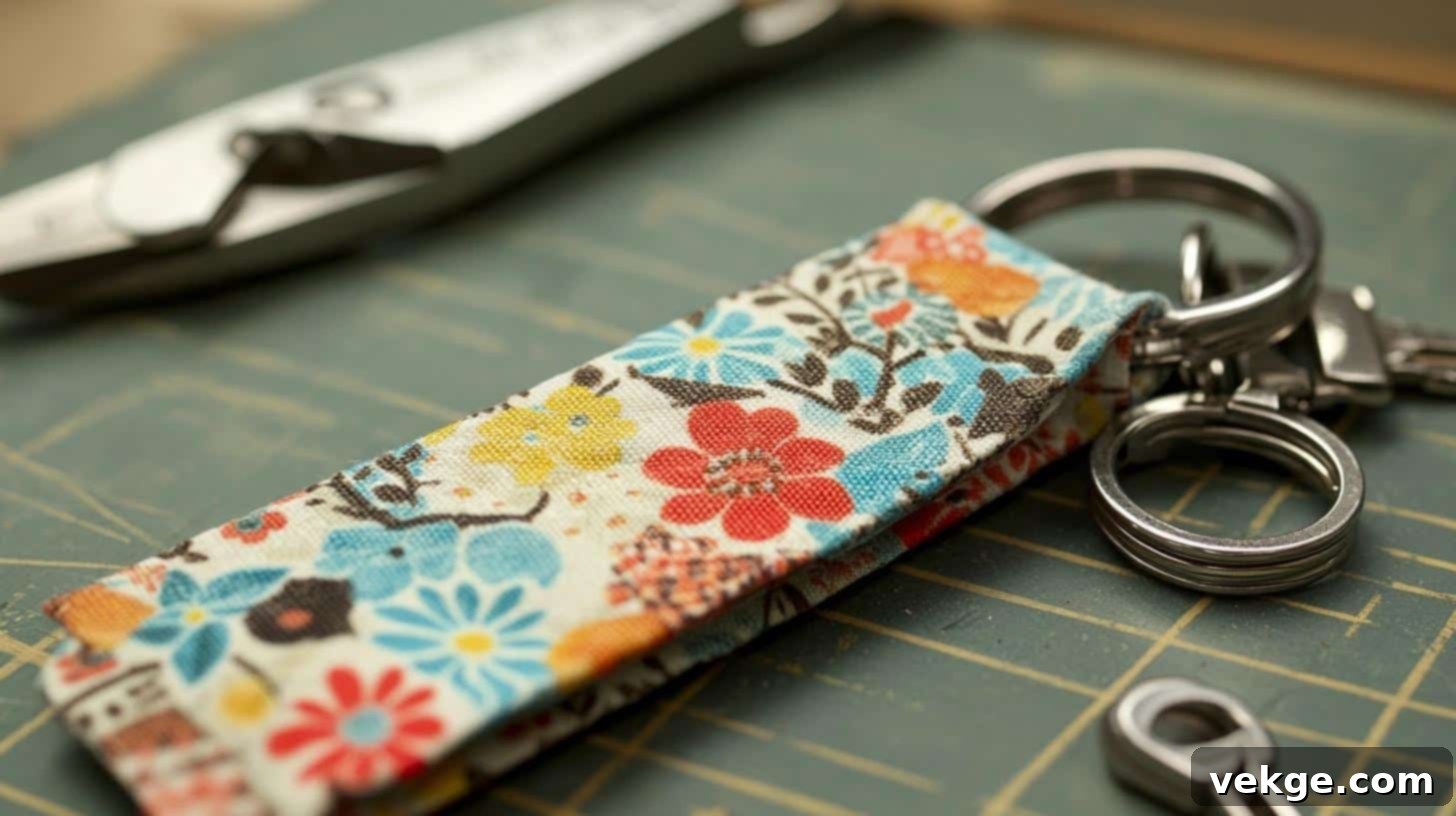
Keep your keys organized and stylish with a custom fabric keychain or key fob. This quick project is perfect for using up small, sturdy fabric scraps and requires minimal materials. Adding key fob hardware provides a professional finish and makes it durable for everyday use, proving practical items can be handmade too!
Materials Table:
| Material | Estimated Cost |
|---|---|
| Sturdy fabric | $4-5 |
| Key fob hardware | $6 |
| Fabric glue | $6 |
| Scissors | $8 |
| Interfacing | $4 |
| Pliers | Already owned |
- Total Estimated Cost: $28-29
- Time: 15 minutes
- Difficulty: Beginner
Instructions:
- Preparation: Cut your sturdy fabric and interfacing into strips, typically 6×2 inches. Iron the fusible interfacing to the back of your fabric strip, following the interfacing’s instructions, to add strength and prevent fraying.
- Structure: Fold the fabric strip in thirds lengthwise, ensuring the raw edges are tucked inside. Apply fabric glue along the length of the strip to secure these folds, creating a clean and thick strip.
- Hardware: Once the glue is dry, fold the strip in half and insert it into the key fob hardware. Use pliers to firmly squeeze the hardware shut, securing the fabric in place. Ensure the fabric is firmly clamped to prevent it from slipping out.
24. No-Sew Pencil Case
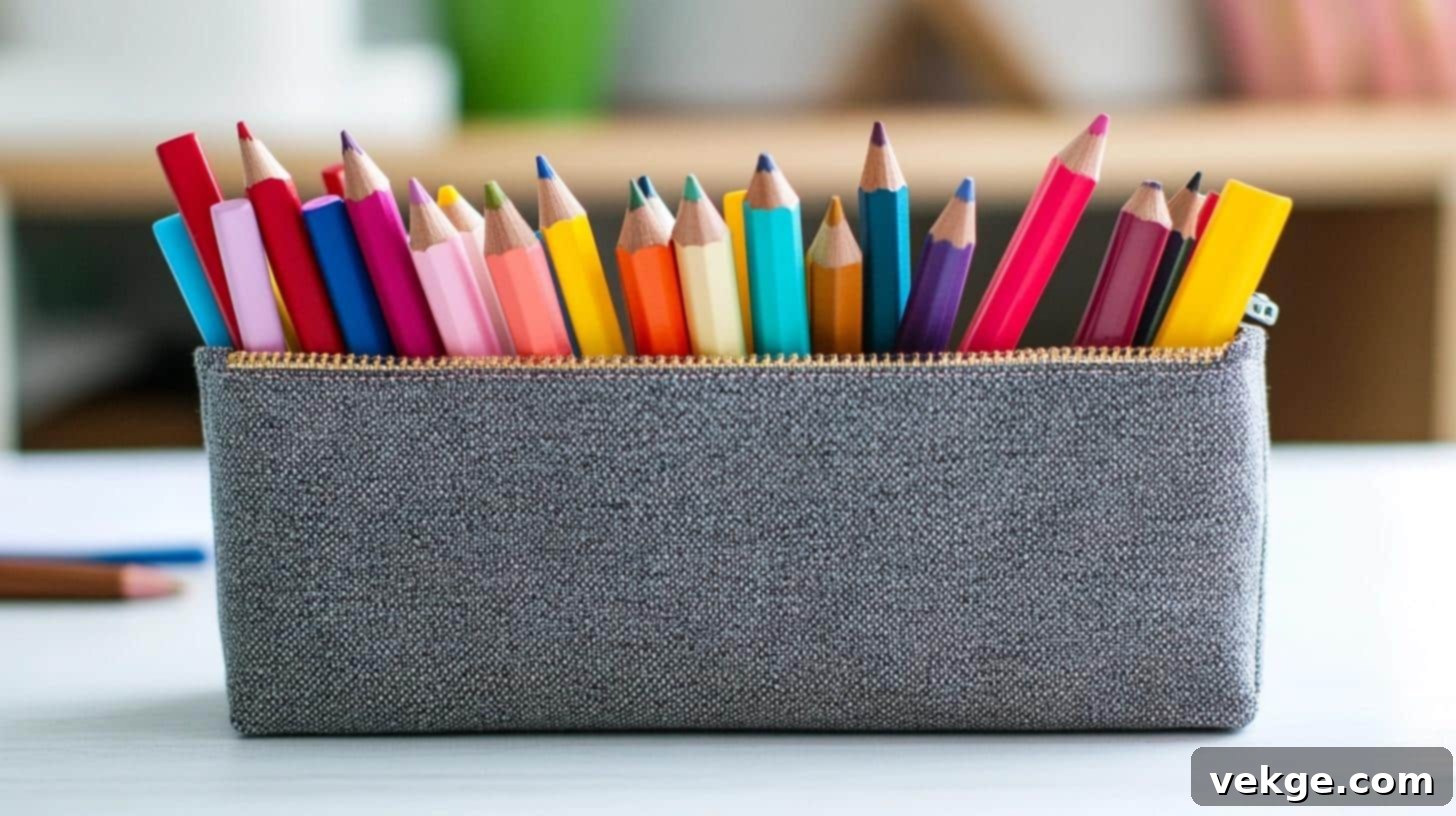
Organize pens, pencils, and small school supplies with a personalized no-sew pencil case. This project uses sturdy fabric, a zipper, and felt lining to create a durable and functional case. It’s a rewarding craft for students or anyone needing a tidy way to store their stationery, all without a sewing machine.
Materials Table:
| Material | Estimated Cost |
|---|---|
| Canvas or sturdy fabric | $6-8 |
| Zipper | $3 |
| Fabric glue | $6 |
| Scissors | $8 |
| Felt lining | $4 |
| Ruler | $3 |
- Total Estimated Cost: $30-32
- Time: 35 minutes
- Difficulty: Intermediate
Instructions:
- Cutting: Cut your canvas or sturdy fabric into a rectangle, approximately 9×6 inches. Cut a piece of felt slightly smaller (e.g., 8.5×5.5 inches) for the lining.
- Assembly: Carefully apply fabric glue along the long edges of the zipper tape. Position and press the fabric rectangle onto one side of the zipper tape, then the felt lining onto the other side, creating a zippered panel. Repeat for the other side of the zipper, ensuring the zipper opens and closes smoothly.
- Structure: Once the zipper is securely glued, fold the fabric/felt layers to create the pencil case shape. Apply fabric glue along the raw side edges, pressing firmly to create a sealed case. Allow ample time for the glue to dry completely before use.
25. No-Sew Bookmarks
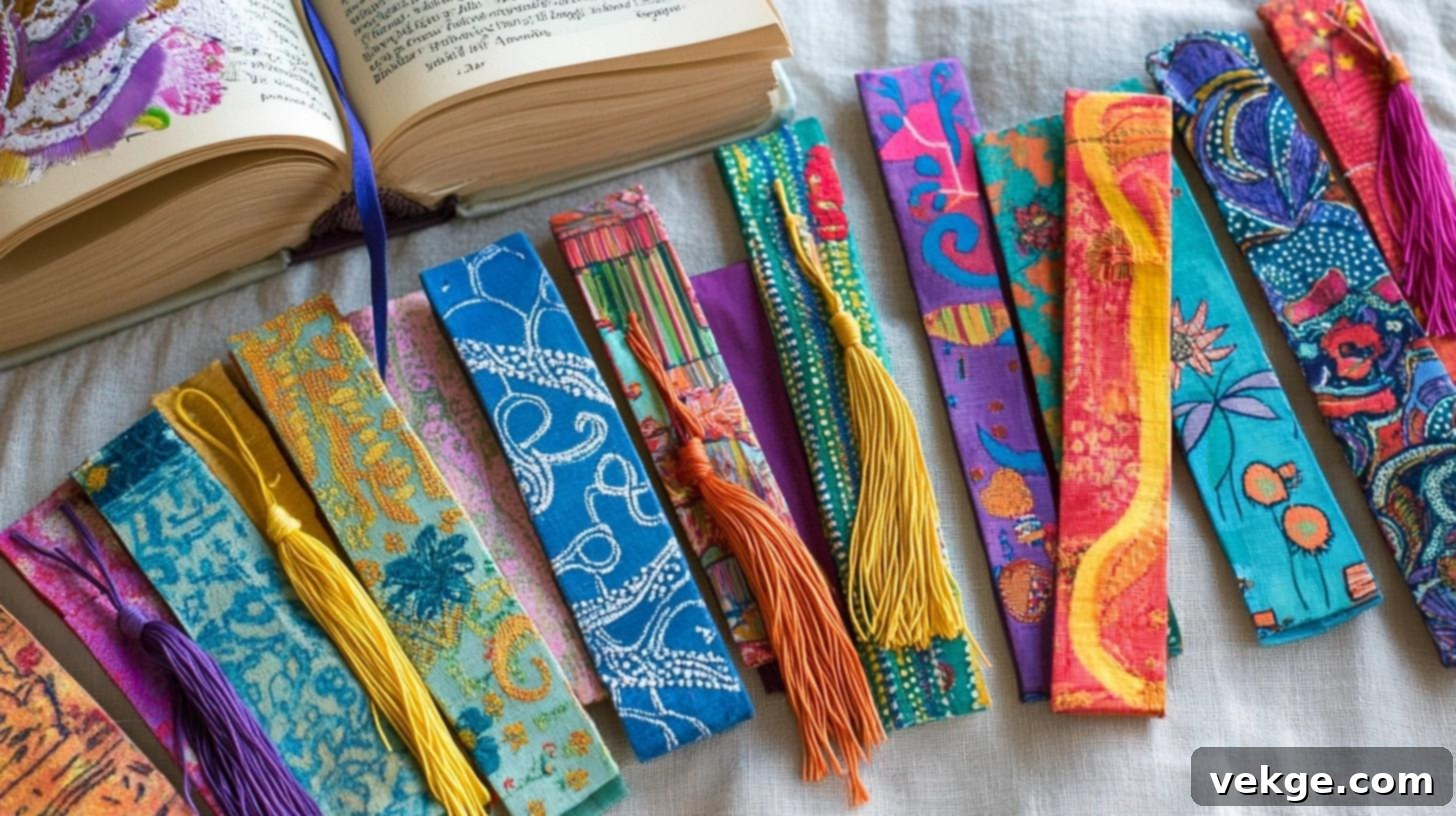
Keep your place in style with charming no-sew fabric bookmarks. This super-simple project is perfect for using small fabric scraps and is ideal for beginners or as a fun craft with kids. Add a ribbon or tassel for an extra decorative touch, making them great personalized gifts for fellow bookworms.
Materials Table:
| Material | Estimated Cost |
|---|---|
| Fabric scraps | $4-5 |
| Cardstock | $3 |
| Fabric glue | $6 |
| Scissors | $8 |
| Ribbon/tassels | $4 |
| Hole punch | Already owned |
- Total Estimated Cost: $25-26
- Time: 15 minutes
- Difficulty: Beginner
Instructions:
- Base: Cut the cardstock into your desired bookmark shape and size (e.g., 2×6 inches). Cut a piece of fabric slightly larger than your cardstock bookmark, leaving about 1/2 inch extra on all sides.
- Cover: Apply fabric glue to one side of the cardstock. Carefully center the fabric piece on top of the glued cardstock. Wrap the excess fabric edges around to the back of the cardstock and glue them down firmly for a clean finish.
- Finish: Once the glue is dry, use a hole punch to create a hole at the top center of your bookmark. Thread a piece of ribbon or a decorative tassel through the hole to complete your custom bookmark.
26. Fabric Jewelry Organizer
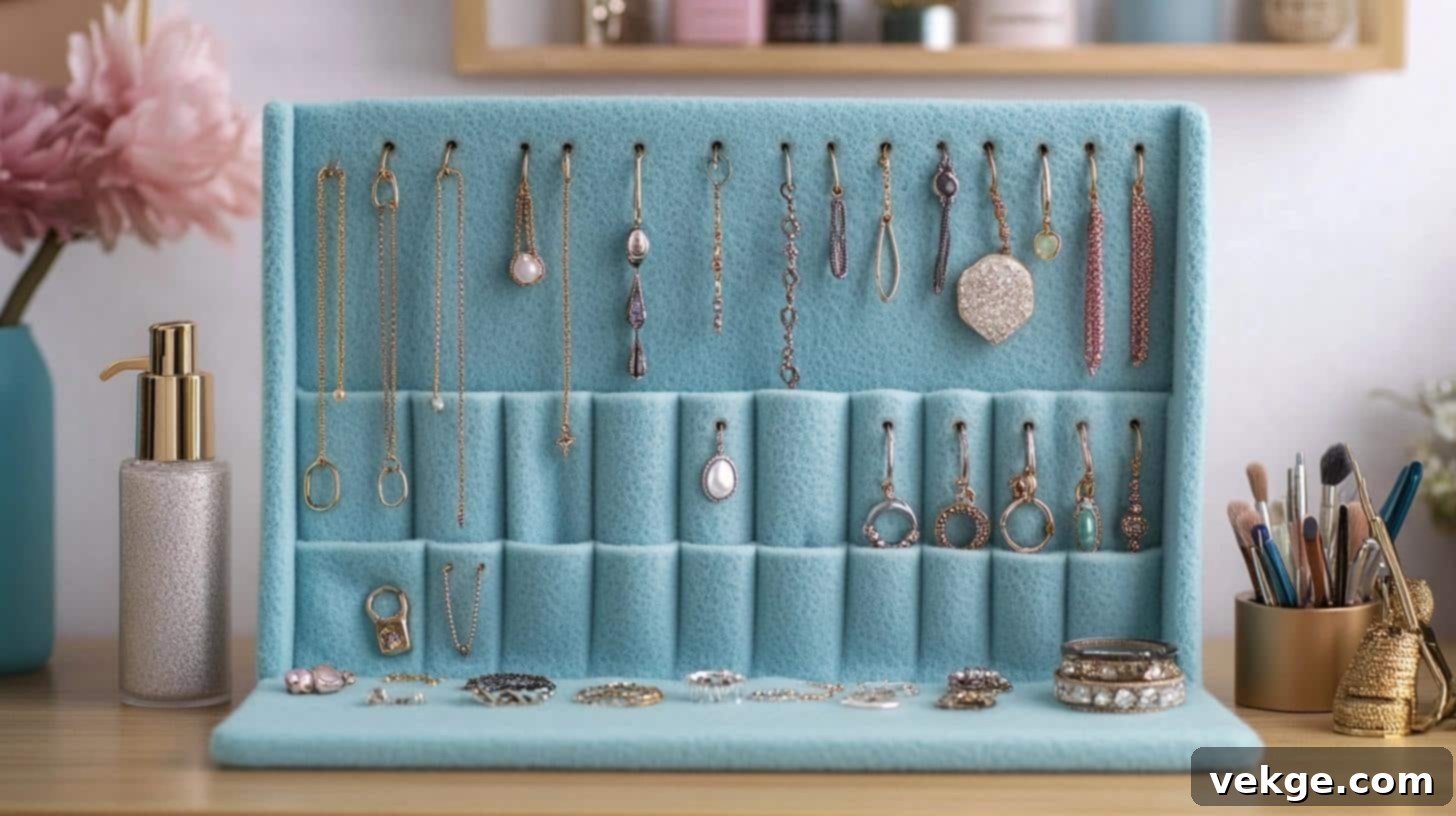
Keep your precious jewelry tangle-free and beautifully displayed with a custom fabric jewelry organizer. Using foam board as a sturdy base, you can create various pockets, loops, and hooks tailored to your collection. This project is a fantastic way to combine practicality with personalized style, making it easy to find your favorite pieces.
Materials Table:
| Material | Estimated Cost |
|---|---|
| Felt sheets | $6 |
| Foam board | $5 |
| Fabric for cover | $8-10 |
| Fabric glue | $6 |
| Scissors | $8 |
| Ribbon/hooks | $5 |
- Total Estimated Cost: $38-40
- Time: 50 minutes
- Difficulty: Intermediate
Instructions:
- Structure: Cut your foam board to the desired size for your organizer. Cover the entire foam board smoothly with your chosen main fabric, wrapping the edges to the back and securing them firmly with fabric glue.
- Sections: Cut felt sheets into various shapes and sizes to create pockets, loops, or strips for different types of jewelry. Plan out where you want each section to be on your covered foam board.
- Organization: Glue felt loops for earrings, small felt pockets for rings, and strips for holding necklaces to your main board. Add small hooks or a ribbon for hanging necklaces or bracelets. Secure all felt pieces firmly with fabric glue.
27. Fabric-Backed Clipboard
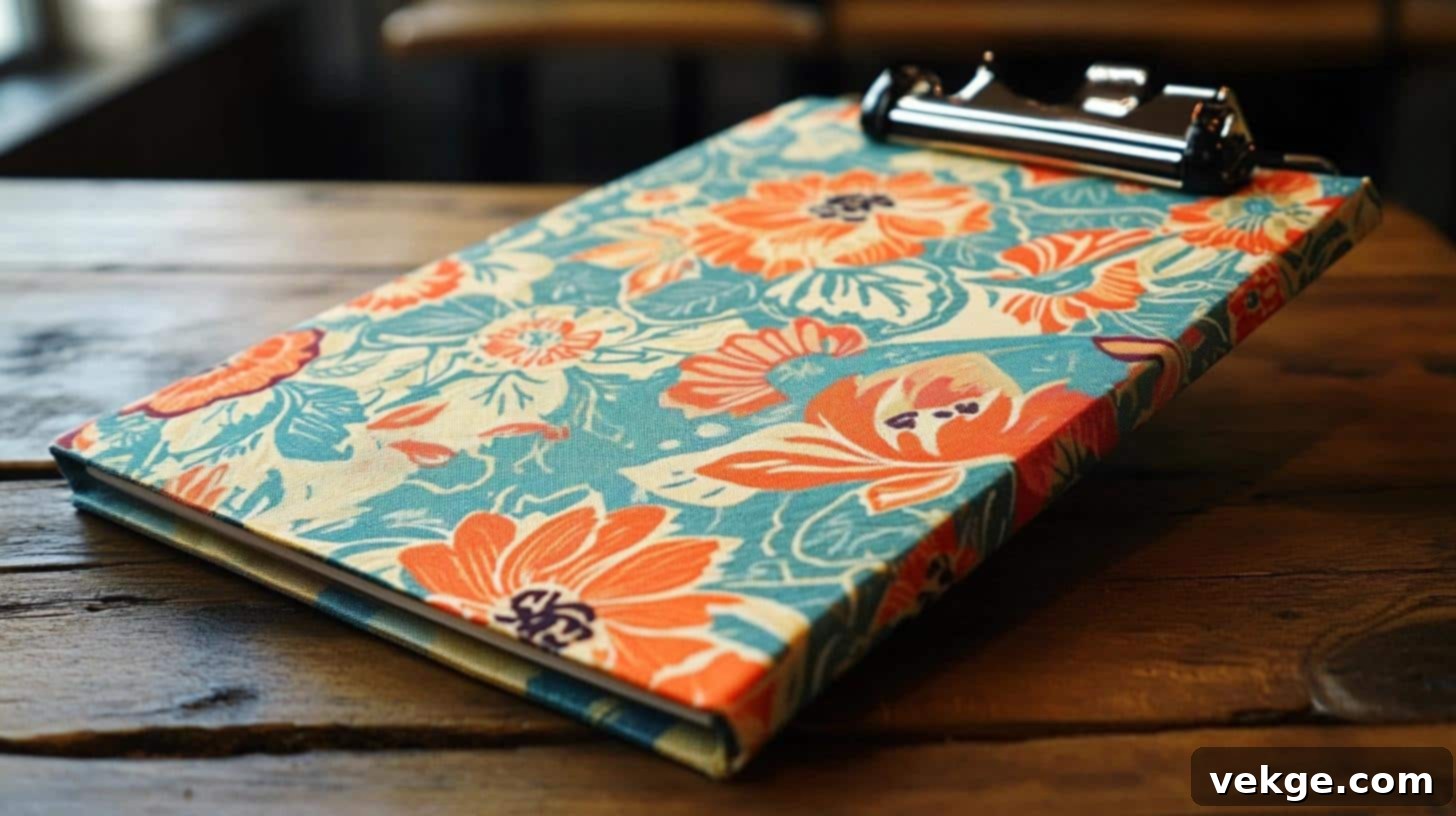
Personalize a plain clipboard into a stylish accessory for your workspace or home. Covering a clipboard with decorative fabric is a simple yet effective way to add a pop of color and pattern. Using Mod Podge or fabric glue creates a smooth, durable finish, while a clear sealant protects your creation for long-lasting use.
Materials Table:
| Material | Estimated Cost |
|---|---|
| Plain clipboard | $5 |
| Decorative fabric | $6-8 |
| Mod Podge/fabric glue | $6 |
| Scissors | $8 |
| Foam brush | $3 |
| Clear sealant | $5 |
- Total Estimated Cost: $33-35
- Time: 30 minutes
- Difficulty: Beginner
Instructions:
- Preparation: Cut your chosen decorative fabric slightly larger than the flat surface of your clipboard. Apply a thin, even layer of Mod Podge or fabric glue to the entire surface of the clipboard using a foam brush.
- Coverage: Carefully place the fabric onto the glued clipboard surface, starting from the center and smoothing outwards with your hands or a brayer to remove any air bubbles or wrinkles. Ensure it adheres smoothly.
- Finishing: Once the fabric is completely adhered, trim any excess fabric around the edges of the clipboard with sharp scissors. Allow the glue to dry, then apply a layer or two of clear sealant over the fabric to protect it from wear and tear.
28. No-Sew Reusable Fabric Gift Wrap
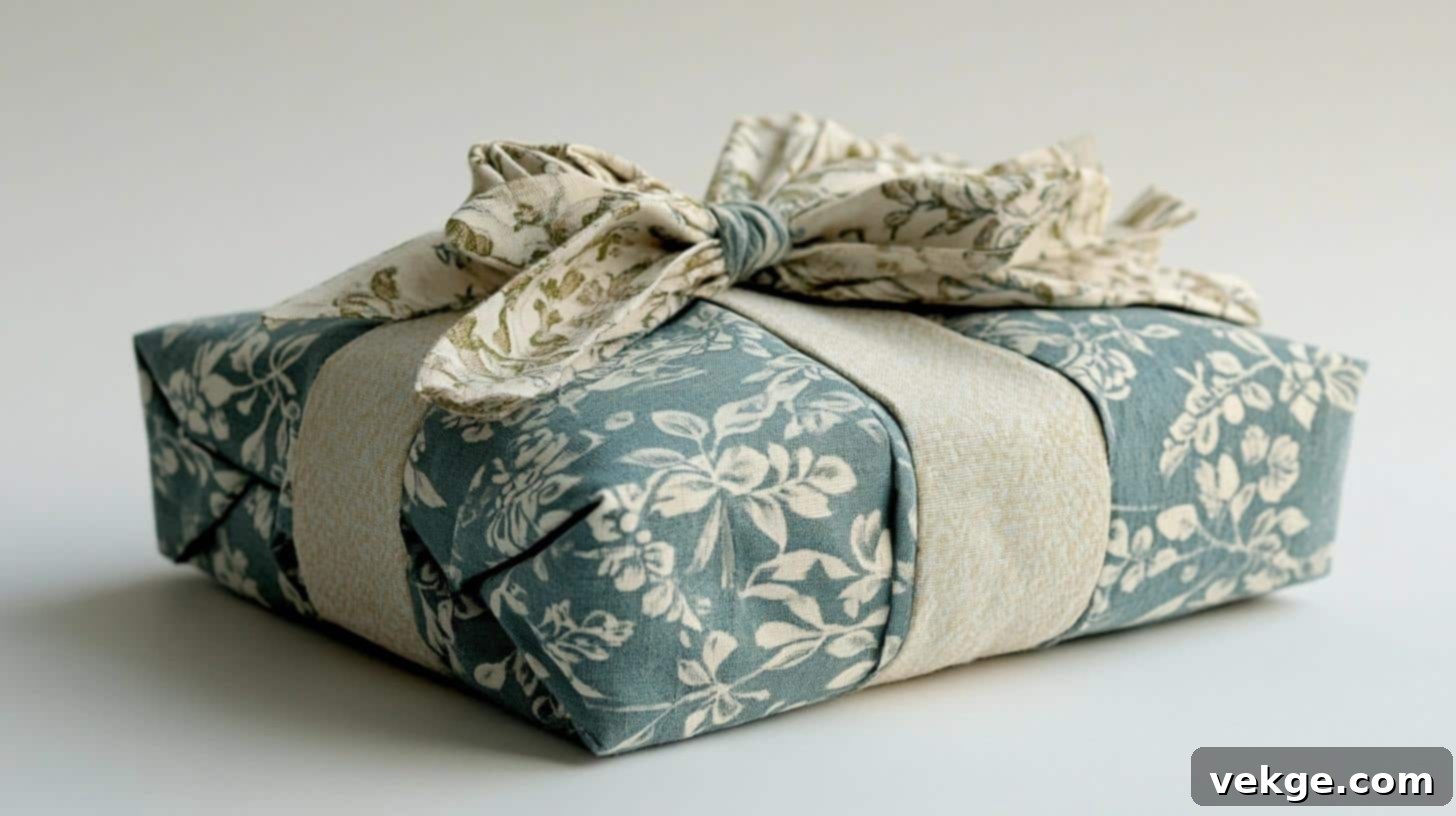
Embrace sustainable gifting with elegant no-sew reusable fabric gift wrap, inspired by the Japanese Furoshiki tradition. This eco-friendly alternative to paper wrap is not only beautiful but also adds an extra layer of thoughtfulness to your gifts. Simple glued hems prevent fraying, creating a polished finish that can be reused countless times.
Materials Table:
| Material | Estimated Cost |
|---|---|
| Light fabric | $8-10 |
| Ribbon/cord | $5 |
| Fabric glue | $6 |
| Scissors | $8 |
| Iron | Already owned |
| Gift tags | $4 |
- Total Estimated Cost: $31-33
- Time: 20 minutes
- Difficulty: Beginner
Instructions:
- Sizing: Choose light, soft fabrics for best draping. Cut your fabric into squares of various sizes to accommodate different gifts (a good starting size is 20×20 inches for medium gifts).
- Edges: To prevent fraying and create a neat look, fold each raw edge of your fabric square inward by about 1/2 inch, press, then fold again. Apply a thin line of fabric glue along this double-folded hem and press firmly to secure.
- Use: When wrapping a gift, place the item in the center of the fabric square. Gather the fabric corners, tie them in an elegant knot, and secure with a decorative ribbon or cord instead of tape. Add a small gift tag for a personal touch.
29. DIY Fabric Tissue Box Cover
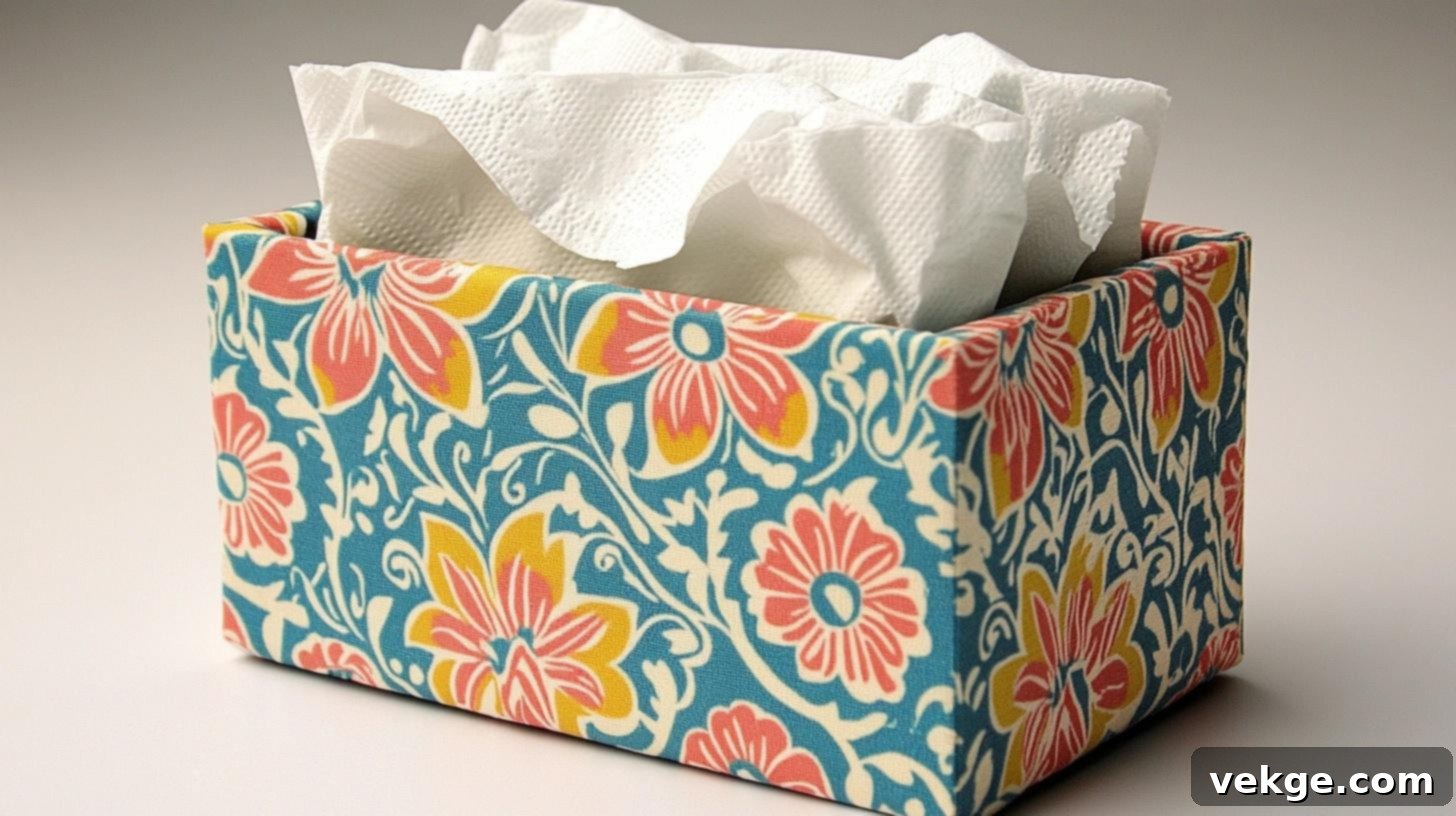
Hide unsightly tissue boxes with a stylish fabric cover that complements your home decor. This no-sew project uses stiff interfacing to give the cover structure, ensuring it sits neatly over your tissue box. It’s an easy way to elevate everyday items and add a custom, coordinated look to any room, from bathrooms to living spaces.
Materials Table:
| Material | Estimated Cost |
|---|---|
| Main fabric | $6-8 |
| Stiff interfacing | $6 |
| Fabric glue | $6 |
| Scissors | $8 |
| Measuring tape | $3 |
| Template | Free |
- Total Estimated Cost: $29-31
- Time: 40 minutes
- Difficulty: Intermediate
Instructions:
- Measure: Measure your tissue box carefully. Create a paper template for the cover, adding 1/2 inch all around the tissue box dimensions for seam allowance. Don’t forget to include the opening for the tissues.
- Structure: Cut your main fabric and stiff interfacing using your template. Glue the interfacing to the back of the fabric for added stability and shape, following the interfacing’s instructions.
- Assembly: Cut out the opening for the tissues in the top panel. Form the box shape by folding the fabric and gluing the side edges together. Fold and glue all raw edges, including around the tissue opening, for a neat and finished look.
30. DIY Fabric Desk Organizer
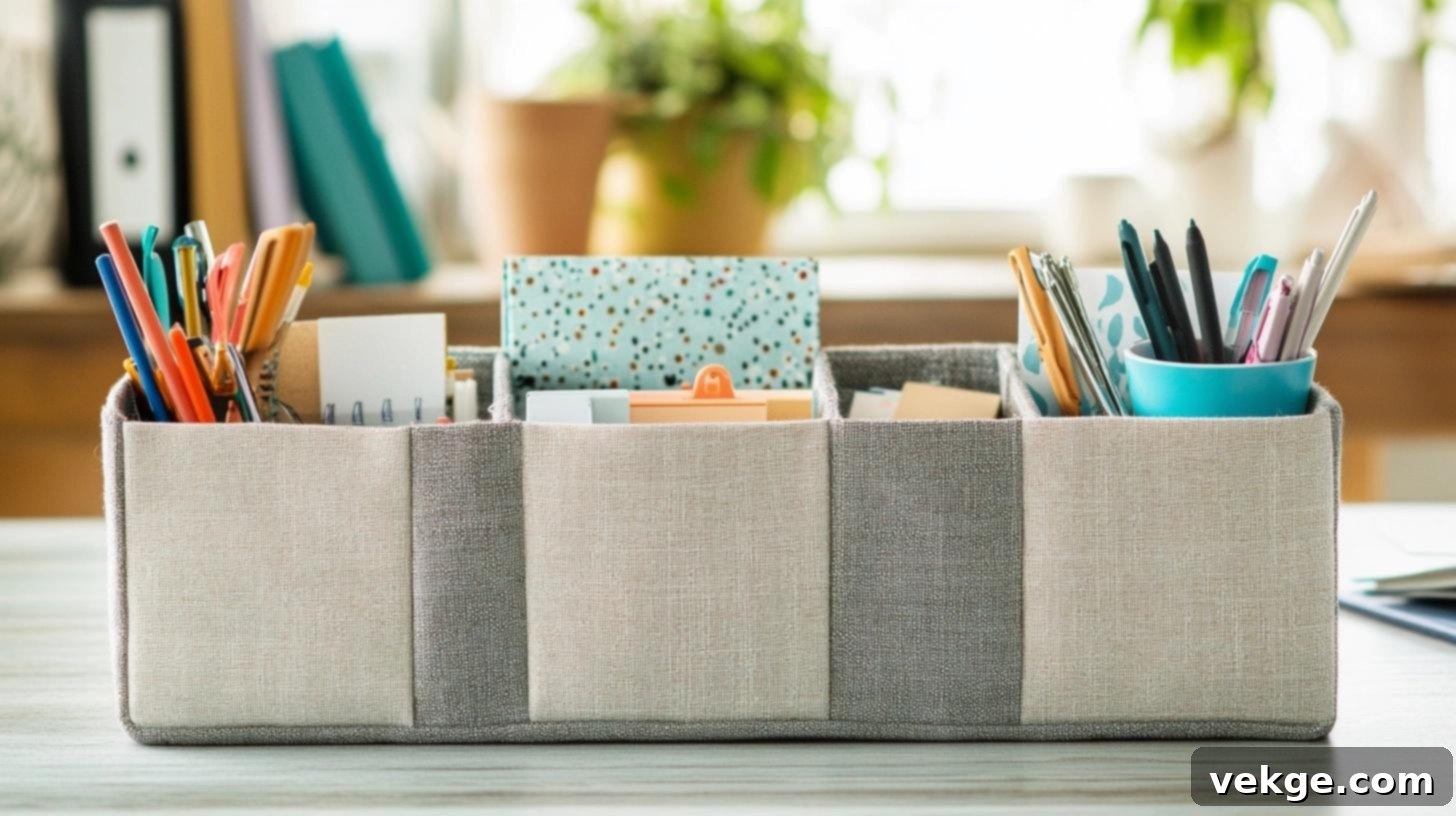
Tame desk clutter with a custom fabric desk organizer. Using heavy cardboard as the foundation, you can design various compartments tailored to your needs, all covered in attractive fabric. This project is a practical and creative way to personalize your workspace and keep everything tidy, from pens to paperclips, without any sewing.
Materials Table:
| Material | Estimated Cost |
|---|---|
| Sturdy fabric | $8-10 |
| Heavy cardboard | $4 |
| Fabric glue | $6 |
| Scissors | $8 |
| Ruler | $3 |
| Felt bottom | $4 |
- Total Estimated Cost: $33-35
- Time: 45 minutes
- Difficulty: Intermediate
Instructions:
- Structure: Design your organizer lay-out and cut heavy cardboard into panels for the base and all the internal dividers and compartments. Cover each cardboard panel neatly with your chosen sturdy fabric, securing the edges with fabric glue.
- Assembly: Once all panels are covered and dry, connect the sections with strong fabric glue to form your desired organizer shape. Add a piece of felt to the bottom of the entire organizer for stability and to prevent scratching surfaces.
- Finishing: Continue to customize by creating smaller pen holders, supply pockets, or additional dividers as needed, gluing them securely within the larger compartments. Ensure all glued sections are firmly pressed and allowed to dry.
Kids and Baby Crafts
31. No-Sew Fabric Dolls
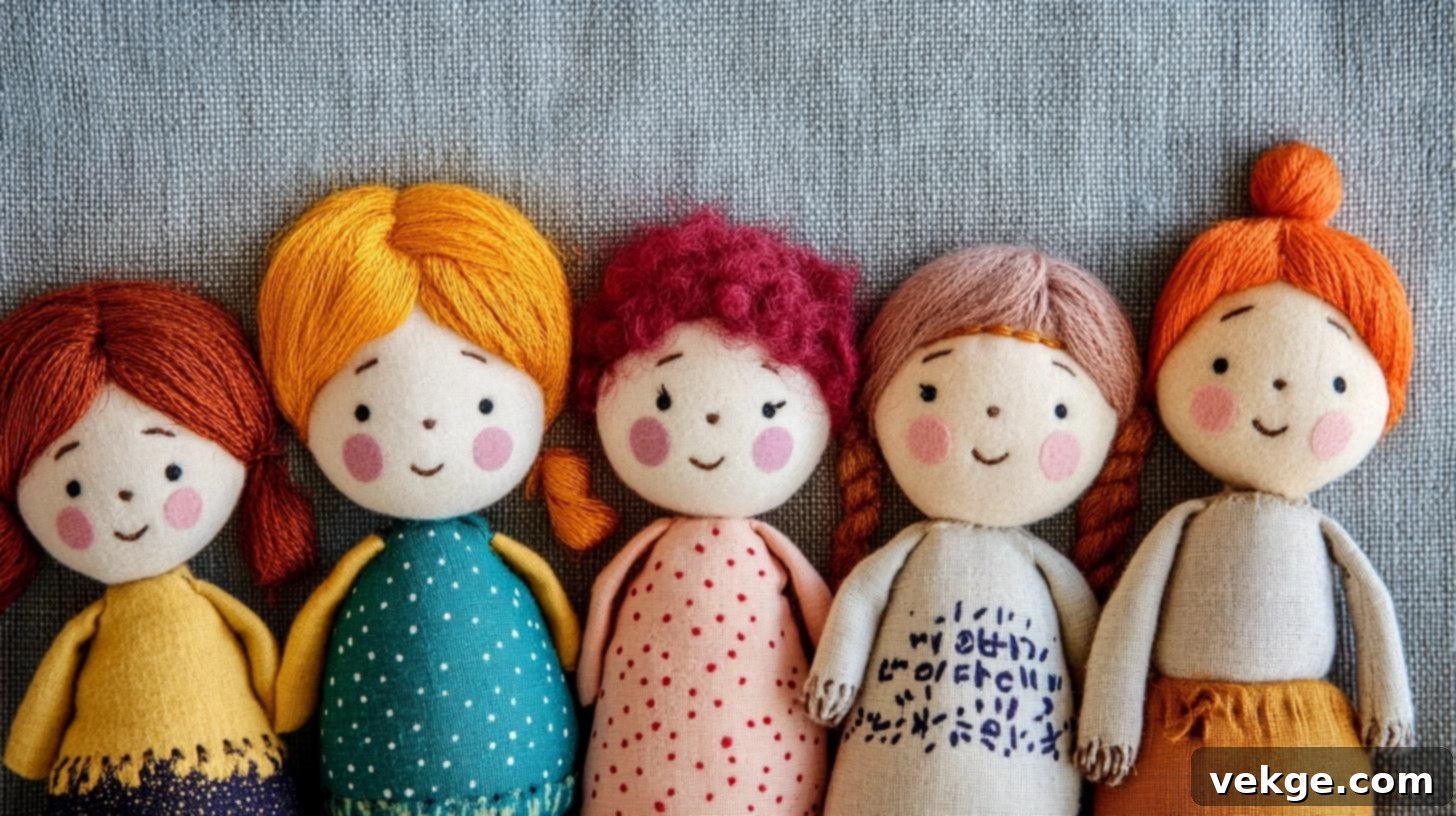
Create adorable, soft fabric dolls perfect for little ones without needing to sew a single stitch. This project is a wonderful way to use cotton fabric and felt scraps, resulting in cuddly companions. Customizing their faces with fabric markers and clothes with felt pieces makes each doll unique and full of character.
Materials Table:
| Material | Estimated Cost |
|---|---|
| Cotton fabric (main body) | $6-8 |
| Felt pieces (features) | $4 |
| Polyester filling | $5 |
| Fabric glue | $6 |
| Fabric markers | $8 |
| Scissors | $8 |
- Total Estimated Cost: $37-39
- Time: 50 minutes
- Difficulty: Intermediate
Instructions:
- Creation: Draw your doll’s body shape onto two pieces of cotton fabric (front and back). Cut them out. Apply fabric glue along the edges of one piece, then place the second piece on top, pressing firmly to secure. Leave a small opening (about 2 inches) for stuffing.
- Features: Once the glue is dry, gently turn the doll inside out (if desired for clean edges) or proceed with visible seams. Cut felt pieces for the doll’s face (eyes, nose, mouth), hair, and clothing elements. Glue these felt pieces securely onto the doll’s front.
- Completion: Begin stuffing the doll firmly with polyester filling through the opening. Once adequately stuffed, close the opening neatly with fabric glue. Add any final details, like blushing cheeks or specific patterns, with fabric markers.
32. Fabric Toy Storage Bags
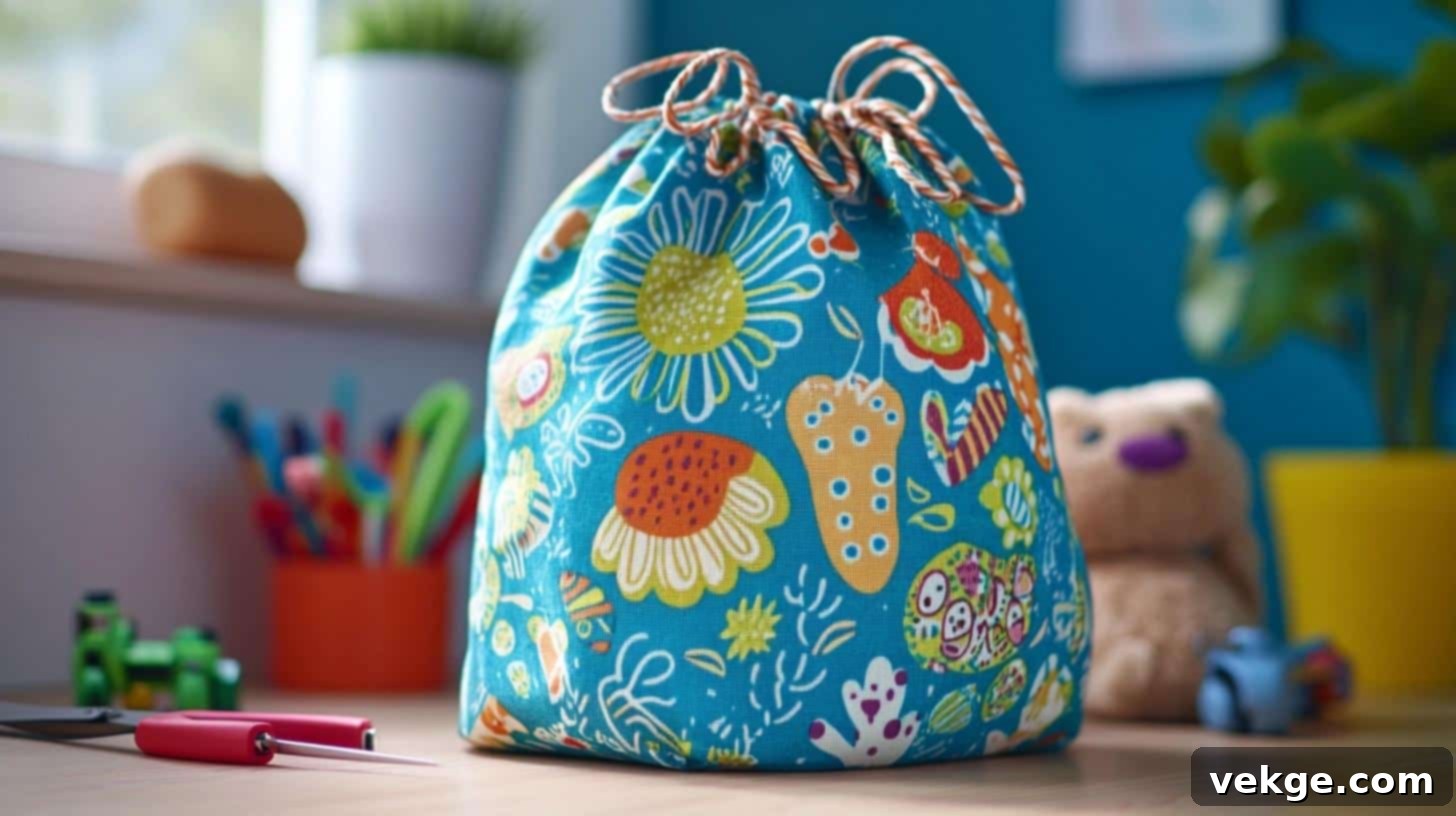
Keep kids’ playrooms tidy with these practical and adorable no-sew fabric toy storage bags. Made from sturdy fabric and featuring a drawstring closure, they are perfect for corralling blocks, small toys, or craft supplies. The addition of grommets ensures the drawstring channel is durable and long-lasting, even with frequent use.
Materials Table:
| Material | Estimated Cost |
|---|---|
| Sturdy fabric (1 yard) | $12-15 |
| Drawstring cord | $4 |
| Grommets kit | $8 |
| Fabric glue | $6 |
| Scissors | $8 |
- Total Estimated Cost: $38-41
- Time: 45 minutes
- Difficulty: Intermediate
Instructions:
- Structure: Cut a large fabric rectangle (e.g., 20×40 inches). Fold the fabric in half widthwise to create a bag shape. Apply strong fabric glue along the side edges, pressing firmly to create sealed seams for the bag.
- Top Channel: At the top open edge of the bag, fold the fabric down by about 1.5-2 inches to create a channel for the drawstring. Secure this fold with fabric glue, ensuring a clear path for the cord.
- Finishing: Once the top channel is dry, use your grommets kit to insert grommets at each end of the channel, near the top corners. Thread your drawstring cord through the channel, and tie the ends securely together to complete your toy storage bag.
33. DIY Play Mat or Blanket
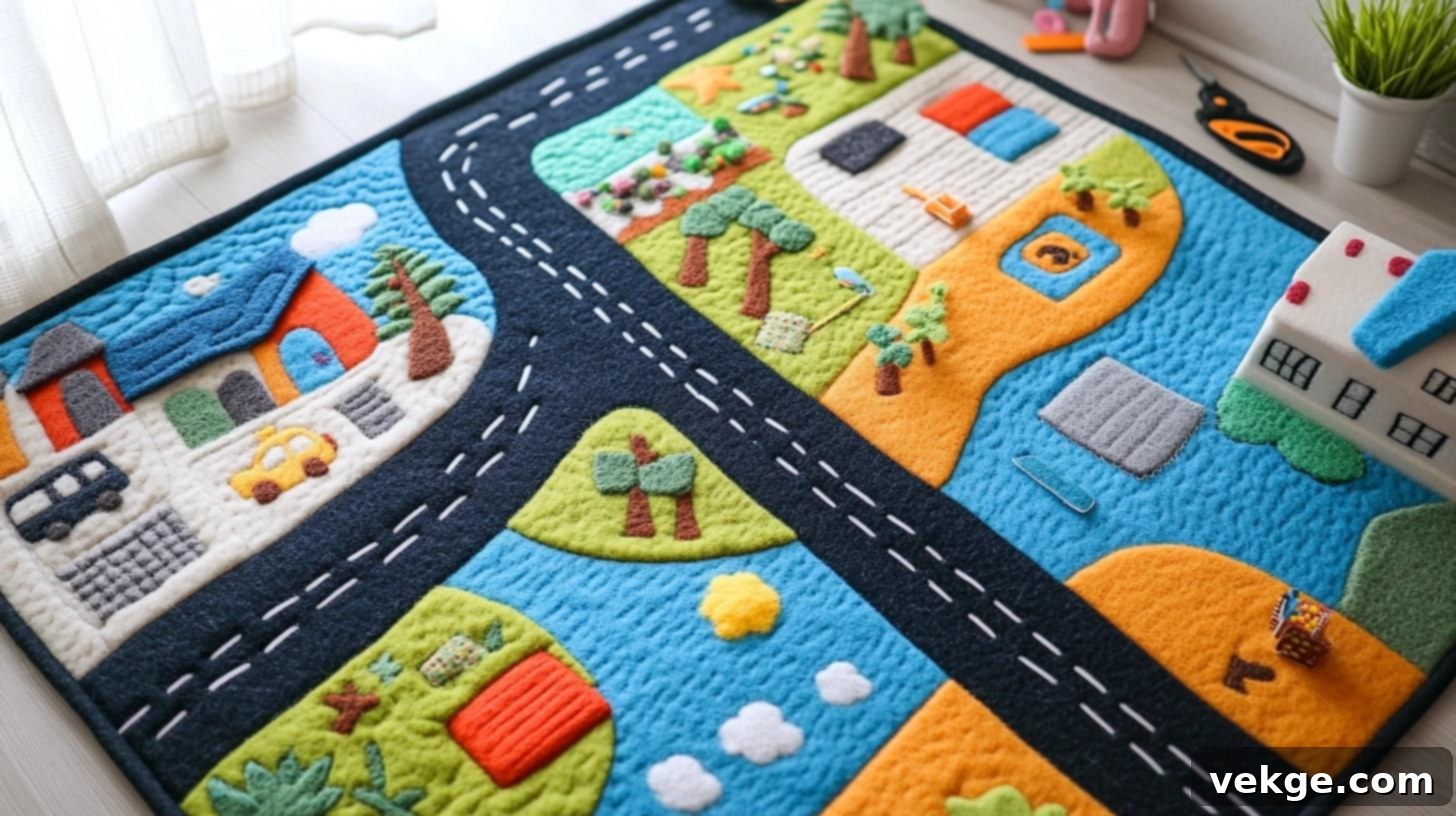
Create a soft and engaging play mat or blanket for little ones with this no-sew project. Layering soft fabric with a fleece backing makes it cozy and durable, while felt decorations can transform it into an interactive car mat, an alphabet learning tool, or a playful scene. It’s a thoughtful, handmade gift that encourages imaginative play.
Materials Table:
| Material | Estimated Cost |
|---|---|
| Soft fabric (2 yards) | $16-20 |
| Fleece backing | $12-15 |
| Fabric glue | $6 |
| Felt pieces (decorations) | $5 |
| Scissors | $8 |
| Ruler/measuring tape | $3 |
- Total Estimated Cost: $50-57
- Time: 60 minutes
- Difficulty: Intermediate
Instructions:
- Base Creation: Lay your soft main fabric flat, then place the fleece backing on top, ensuring both pieces are cut to the same desired size. Fold the raw edges of both fabrics together inward (about 1 inch) and secure them firmly with fabric glue all around the perimeter to create a clean, soft edge.
- Road Design: Cut black felt strips of varying widths and shapes to create roads, curves, intersections, or even railway tracks. Arrange them on your play mat design, then glue them securely in place using fabric glue.
- Details: Enhance your play mat by adding colorful felt shapes for houses, trees, ponds, or even numbers and letters for a learning game. Glue these details onto the mat, ensuring they are flat and secure for safe play.
34. Fabric Puppets
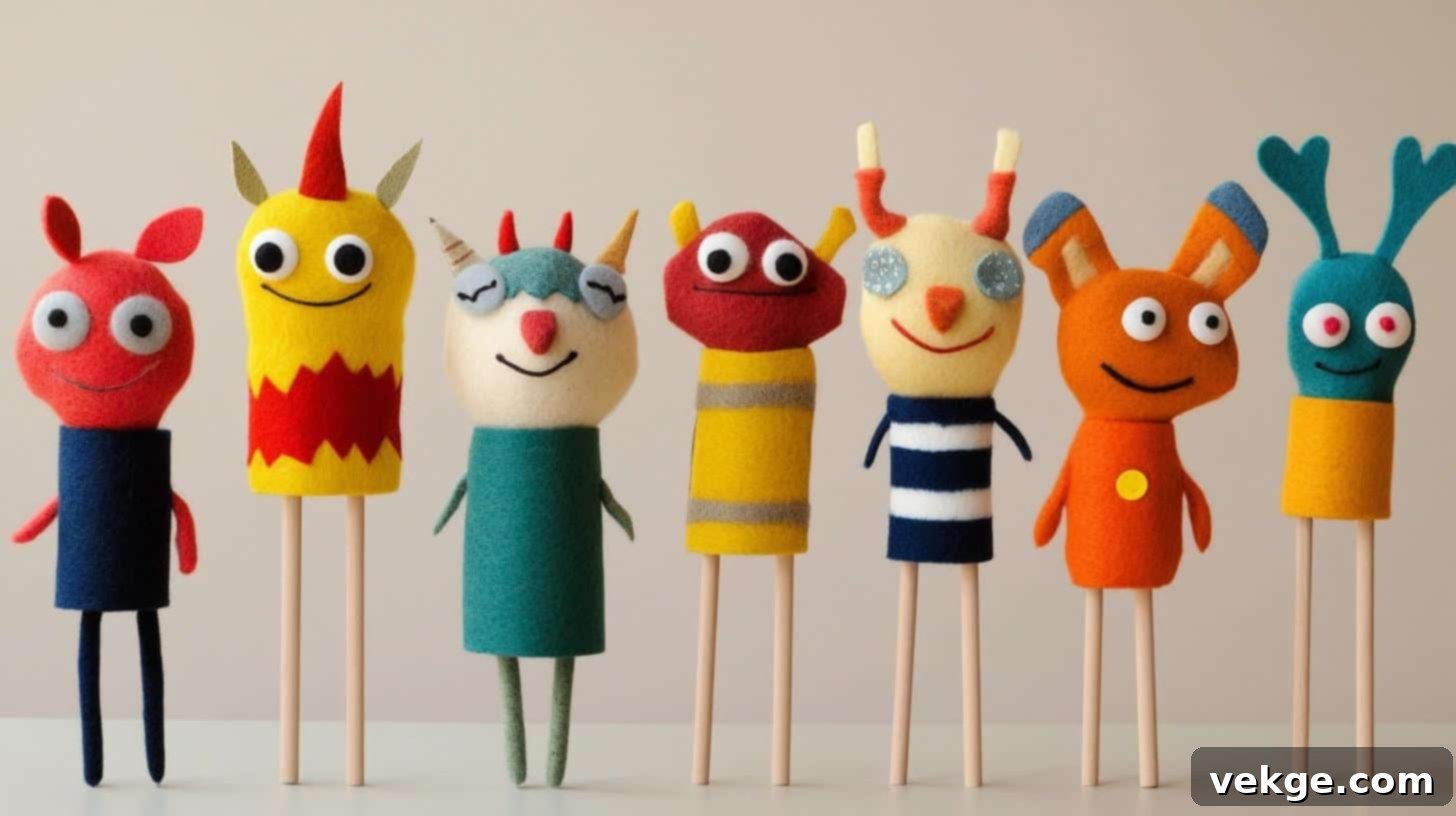
Spark imagination with easy-to-make no-sew fabric puppets. Using felt sheets and craft sticks, kids can create their own characters – animals, people, or fantastical monsters. This project is not only fun to make but also encourages storytelling and creative play, perfect for quiet afternoons or group activities.
Materials Table:
| Material | Estimated Cost |
|---|---|
| Felt sheets (various colors) | $8-10 |
| Googly eyes | $3 |
| Fabric glue | $6 |
| Craft sticks | $3 |
| Scissors | $8 |
| Decorative items (buttons, ribbons) | $5 |
- Total Estimated Cost: $33-35
- Time: 30 minutes
- Difficulty: Beginner
Instructions:
- Character Building: Choose your felt colors and cut out two identical pieces for your puppet’s body shape (e.g., animal, person, monster). These will form the front and back of the puppet.
- Features: Before joining the main body pieces, glue on all the facial features and decorative elements to one side of the felt. Add googly eyes, felt pieces for mouths, ears, tails, or clothing, securing them firmly with fabric glue.
- Assembly: Place a craft stick between the two identical felt body pieces. Apply fabric glue along the edges of one felt piece (avoiding the stick area) and press the second piece on top, ensuring the stick is securely sandwiched. Add any final decorations like buttons or ribbons.
35. No-Sew Fabric Building Blocks
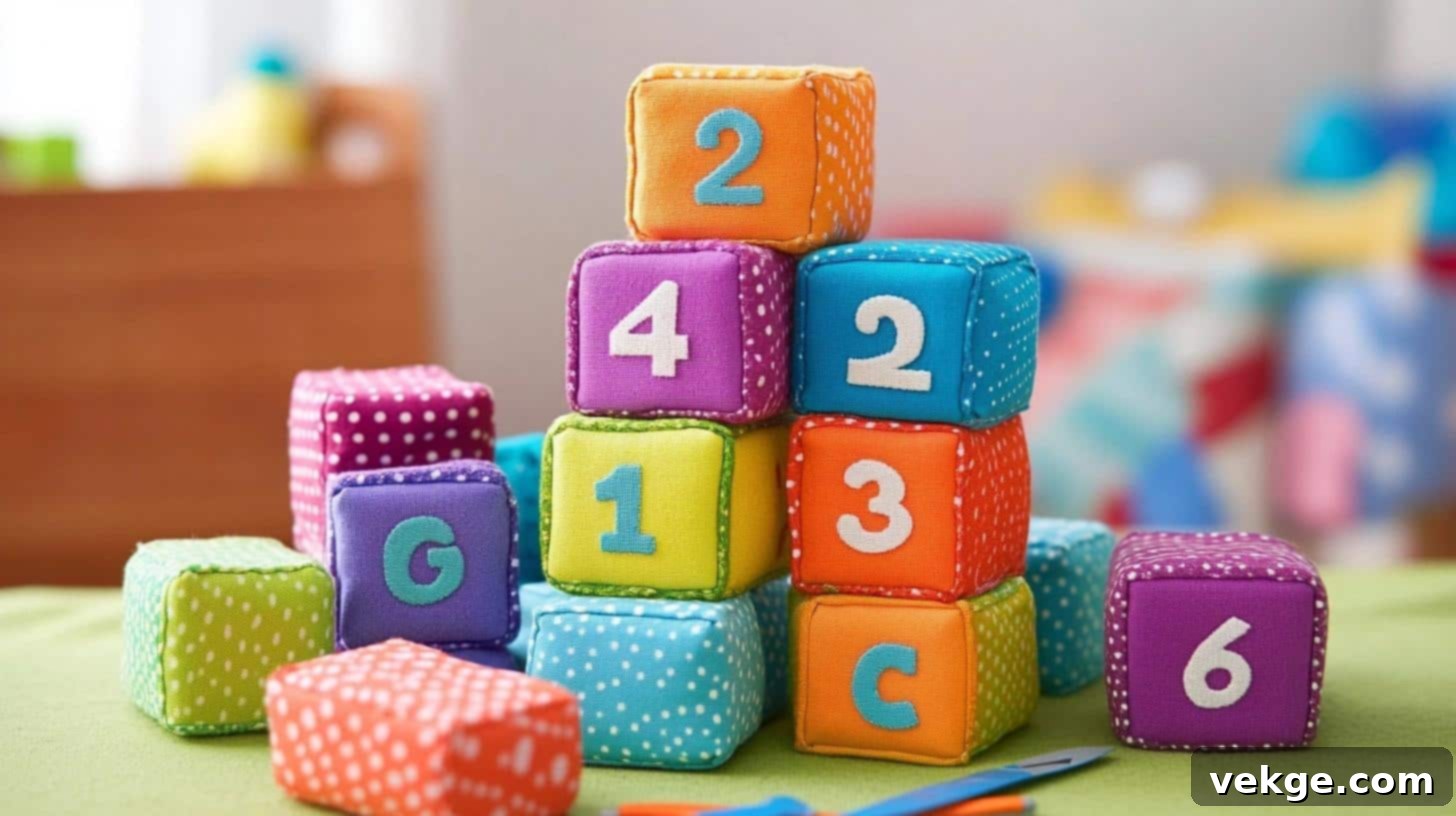
These soft, safe, and engaging no-sew fabric building blocks are perfect for toddlers and young children. By covering foam cubes with colorful cotton fabric, you can create a tactile toy that’s easy to grasp and won’t hurt if thrown. Add numbers, letters, or shapes to each face for an educational twist, fostering early learning through play.
Materials Table:
| Material | Estimated Cost |
|---|---|
| Cotton fabric | $8-10 |
| Foam cubes | $10 |
| Fabric glue | $6 |
| Scissors | $8 |
| Number/letter stickers | $5 |
- Total Estimated Cost: $37-39
- Time: 40 minutes
- Difficulty: Beginner
Instructions:
- Preparation: Measure each face of your foam cube. Cut cotton fabric squares that are slightly larger than each cube face, leaving about 1/2 inch extra on all sides for wrapping.
- Coverage: Apply fabric glue to one face of a foam cube. Carefully center and press a fabric square onto it, then wrap the excess fabric edges around to the inside of the cube and glue them down. Repeat for all six faces of each cube, ensuring a smooth, tight cover.
- Learning: Once the fabric is securely glued and dry, add an educational element. Use number or letter stickers, or cut out felt shapes and glue them to each face of the fabric blocks, creating interactive learning toys.
36. Fabric Animal Masks
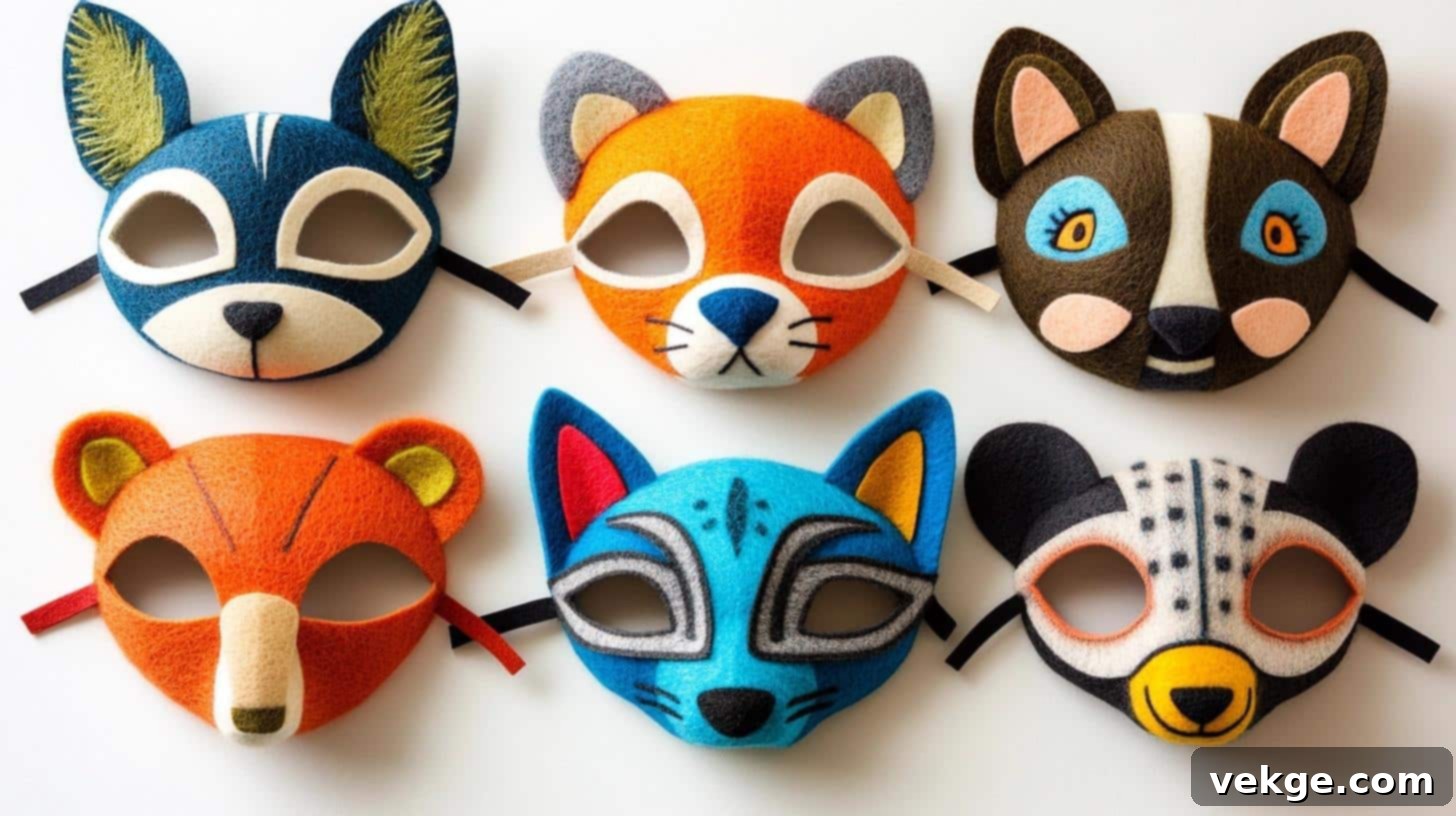
Let kids transform into their favorite animals with these fun and easy no-sew fabric animal masks. Made from soft felt sheets, these masks are comfortable to wear and allow for endless imaginative play. Customize them with various felt colors and decorative items to create a menagerie of characters for dress-up or costume parties.
Materials Table:
| Material | Estimated Cost |
|---|---|
| Felt sheets (multiple colors) | $8-10 |
| Elastic band | $4 |
| Fabric glue | $6 |
| Scissors | $8 |
| Decorative items (optional) | $5 |
| Template paper | $3 |
- Total Estimated Cost: $34-36
- Time: 30 minutes
- Difficulty: Beginner
Instructions:
- Design: Find or draw an animal face template (e.g., fox, cat, bear). Cut the main mask shape from a felt sheet. Then, cut out additional felt pieces for facial features like eyes (remember to cut holes for vision), nose, whiskers, and ears.
- Features: Layer and glue the different felt pieces onto the main mask shape to create the animal’s face. Secure googly eyes, felt noses, and any other decorative elements with fabric glue.
- Fitting: Cut two small slits on each side of the mask. Thread an elastic band through these slits and tie the ends securely behind the mask. Test the fit on a child’s head for comfort, adjusting the elastic as needed.
Holiday and Seasonal Decor
37. Fabric Pumpkins
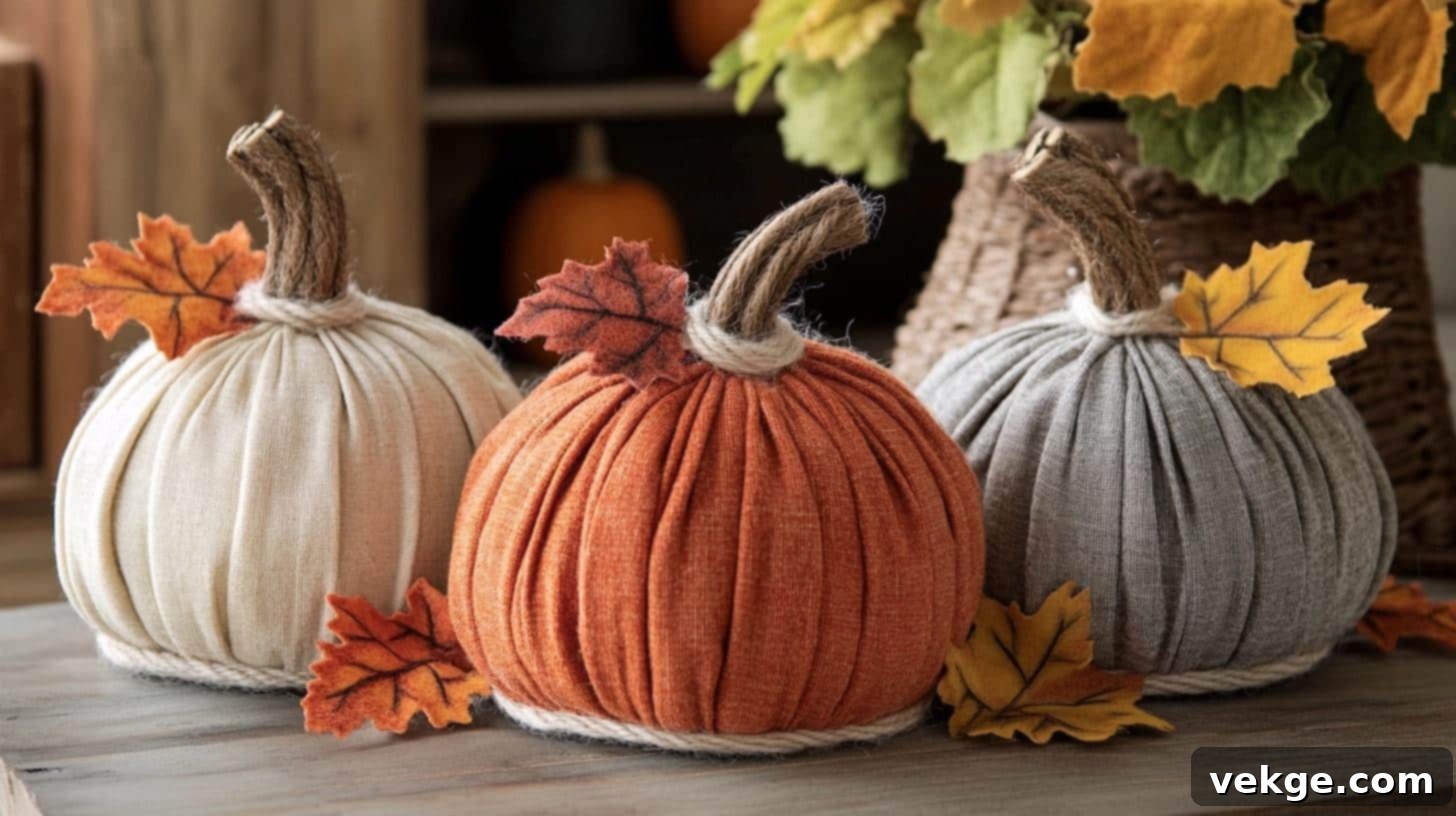
Embrace autumn and Halloween with adorable no-sew fabric pumpkins. These charming decorations are made by shaping fabric circles around polyester filling, creating soft, plush pumpkins. Adding small sticks for stems, green felt leaves, and twine for texture gives them a rustic, seasonal appeal, perfect for mantelpieces or tabletops.
Materials Table:
| Material | Estimated Cost |
|---|---|
| Orange fabric (or choice) | $8-10 |
| Polyester filling | $5 |
| Twine or raffia | $4 |
| Fabric glue | $6 |
| Scissors | $8 |
| Small sticks (stems) | Free |
| Green felt (leaves) | $3 |
- Total Estimated Cost: $34-36
- Time: 40 minutes
- Difficulty: Intermediate
Instructions:
- Formation: Cut a large fabric circle (e.g., 20-inch diameter for a medium pumpkin). Run a continuous line of gathering glue (or a strong fabric glue applied in dots) around the raw edge of the fabric circle. Leave a small section unglued for stuffing.
- Stuffing: Carefully pull the glued edges to gather the fabric, forming a sphere-like shape. Fill the fabric sphere firmly with polyester stuffing. Once adequately stuffed, close the remaining opening with glue, ensuring it’s securely sealed.
- Details: Insert a small stick into the top center of the fabric sphere to act as the pumpkin’s stem. Cut a few leaf shapes from green felt and glue them around the base of the stem. Finally, wrap twine or raffia around the pumpkin, tucking it into the creases, for added texture and a realistic pumpkin appearance.
38. Fabric Wreaths for Any Season
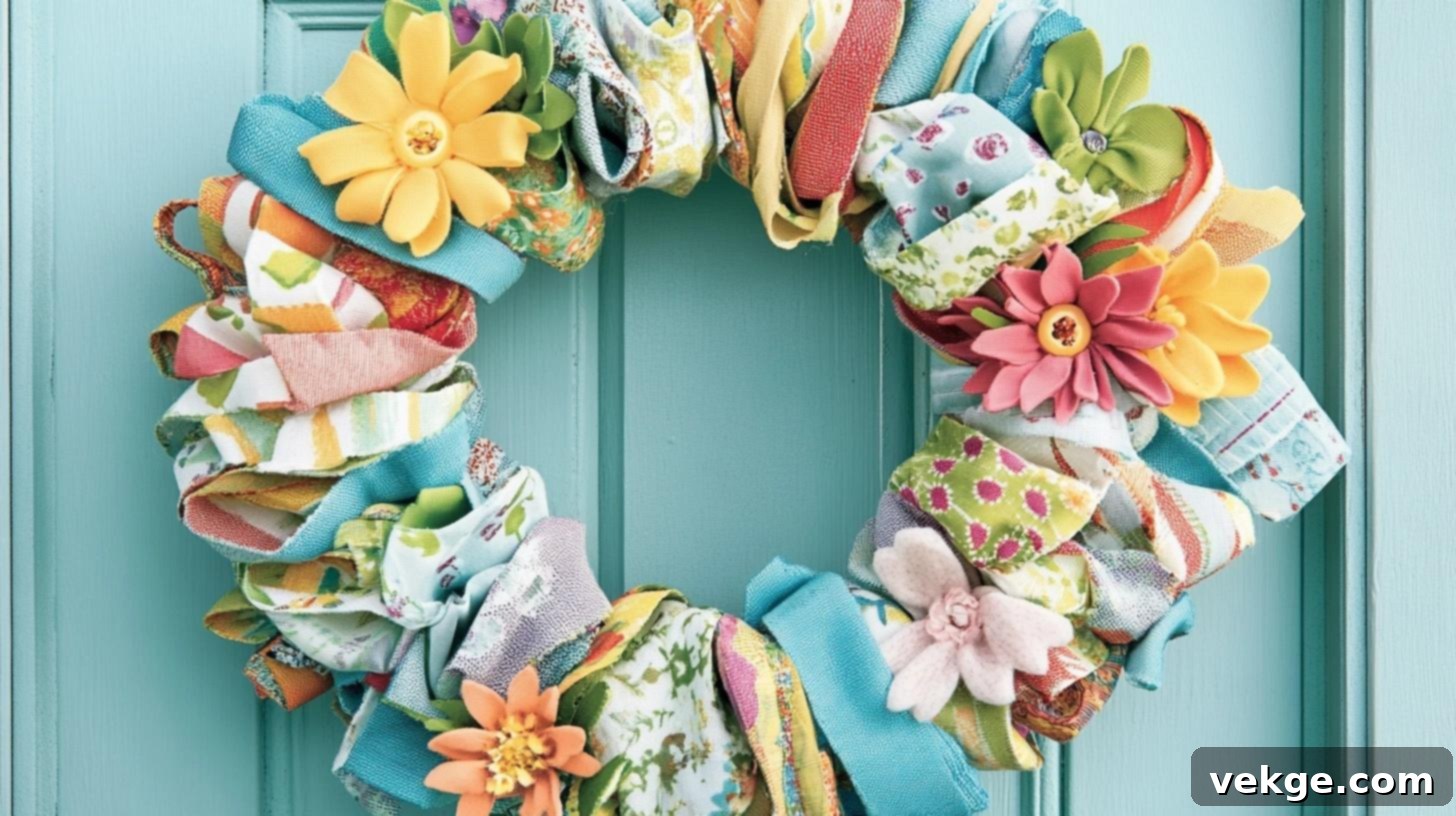
Adorn your door with a beautiful no-sew fabric wreath, easily customizable for any season or holiday. By tying or gluing fabric strips around a foam wreath form, you can create a full, textured, and inviting decoration. Change the fabric colors and add seasonal embellishments to effortlessly update your home’s exterior throughout the year.
Materials Table:
| Material | Estimated Cost |
|---|---|
| Foam wreath form | $8 |
| Fabric strips (2-3 colors) | $10-12 |
| Fabric glue | $6 |
| Scissors | $8 |
| Wire for hanging | $3 |
| Seasonal decorations | $6 |
- Total Estimated Cost: $41-43
- Time: 60 minutes
- Difficulty: Intermediate
Instructions:
- Base: Cut your chosen fabrics into strips, typically 2 inches wide by 6 inches long. Begin tying or gluing these strips tightly around the foam wreath form, pushing them close together to completely cover the form.
- Layering: Once the first layer of fabric strips is applied, add a second or third color of strips, placing them between the first layer or on top, to create a fuller and more vibrant wreath.
- Seasonal: Once your fabric base is complete, add themed decorations specific to the season. For spring, add faux flowers; for fall, small artificial leaves or berries; for winter, pinecones or ornaments. Attach a wire loop to the back for hanging.
39. Halloween Fabric Door Sign
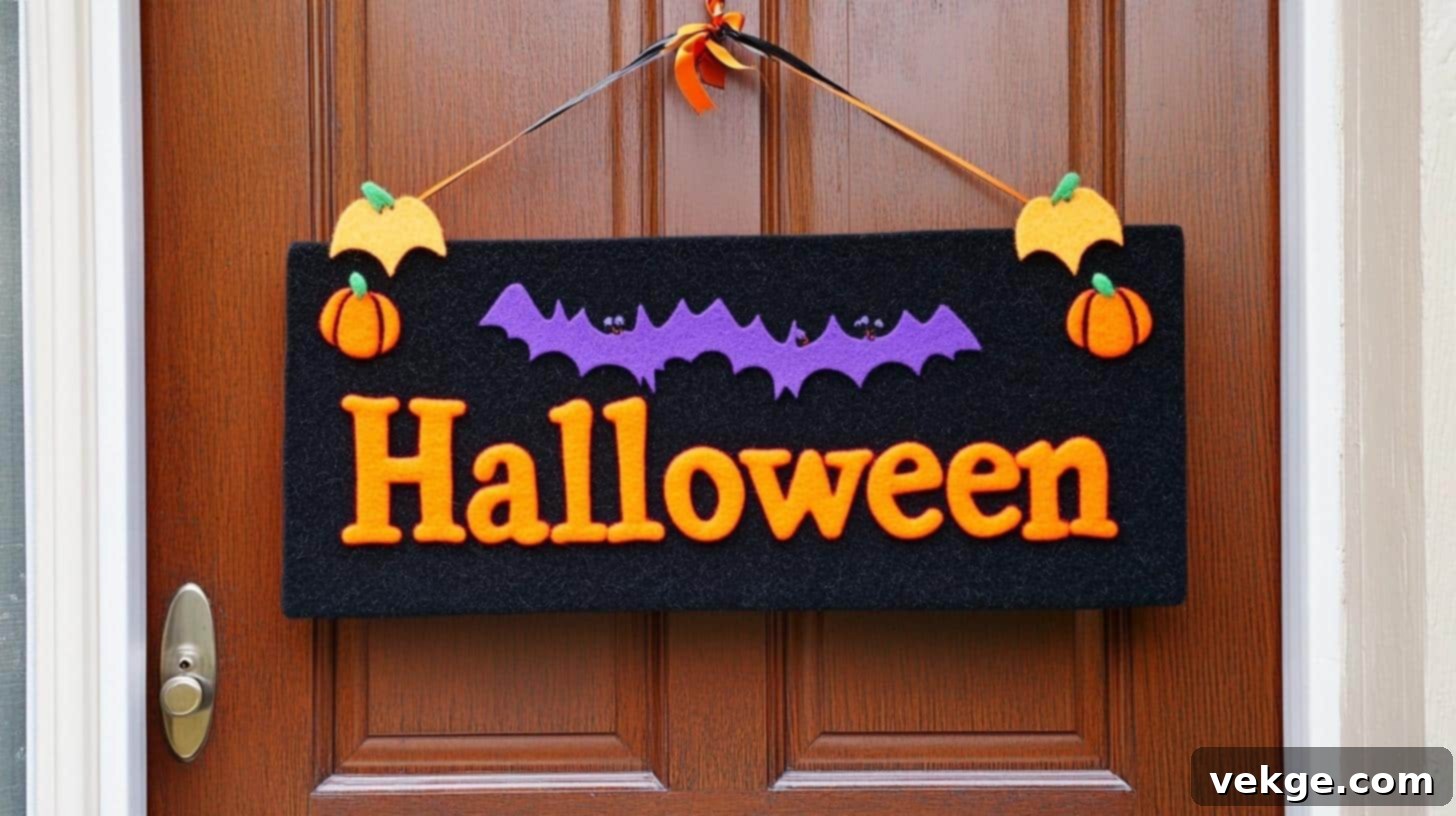
Welcome trick-or-treaters with a spooky yet charming no-sew Halloween fabric door sign. Using felt sheets as a base, you can easily cut out festive shapes and letters to create a custom message. This quick craft adds a personalized, festive touch to your home’s exterior, perfect for getting into the Halloween spirit.
Materials Table:
| Material | Estimated Cost |
|---|---|
| Black felt background | $6 |
| Orange/purple accent felt | $6 |
| Fabric glue | $6 |
| Scissors | $8 |
| Letter template | Free |
| Decorative ribbon | $4 |
- Total Estimated Cost: $30
- Time: 30 minutes
- Difficulty: Beginner
Instructions:
- Base: Cut a large piece of black felt into your desired sign shape (e.g., a rectangle, an oval, or a spooky silhouette like a ghost or bat).
- Text: Using a letter template, cut out your desired Halloween message (e.g., “Boo!”, “Happy Halloween”) from orange or purple accent felt. Arrange these letters on your black felt base and glue them securely in place.
- Finishing: Enhance your sign by adding additional Halloween designs cut from felt, such as spiders, pumpkins, or witch hats. Finally, attach a decorative ribbon loop to the top of the sign with strong fabric glue for easy hanging on your door.
40. Fabric Easter Eggs
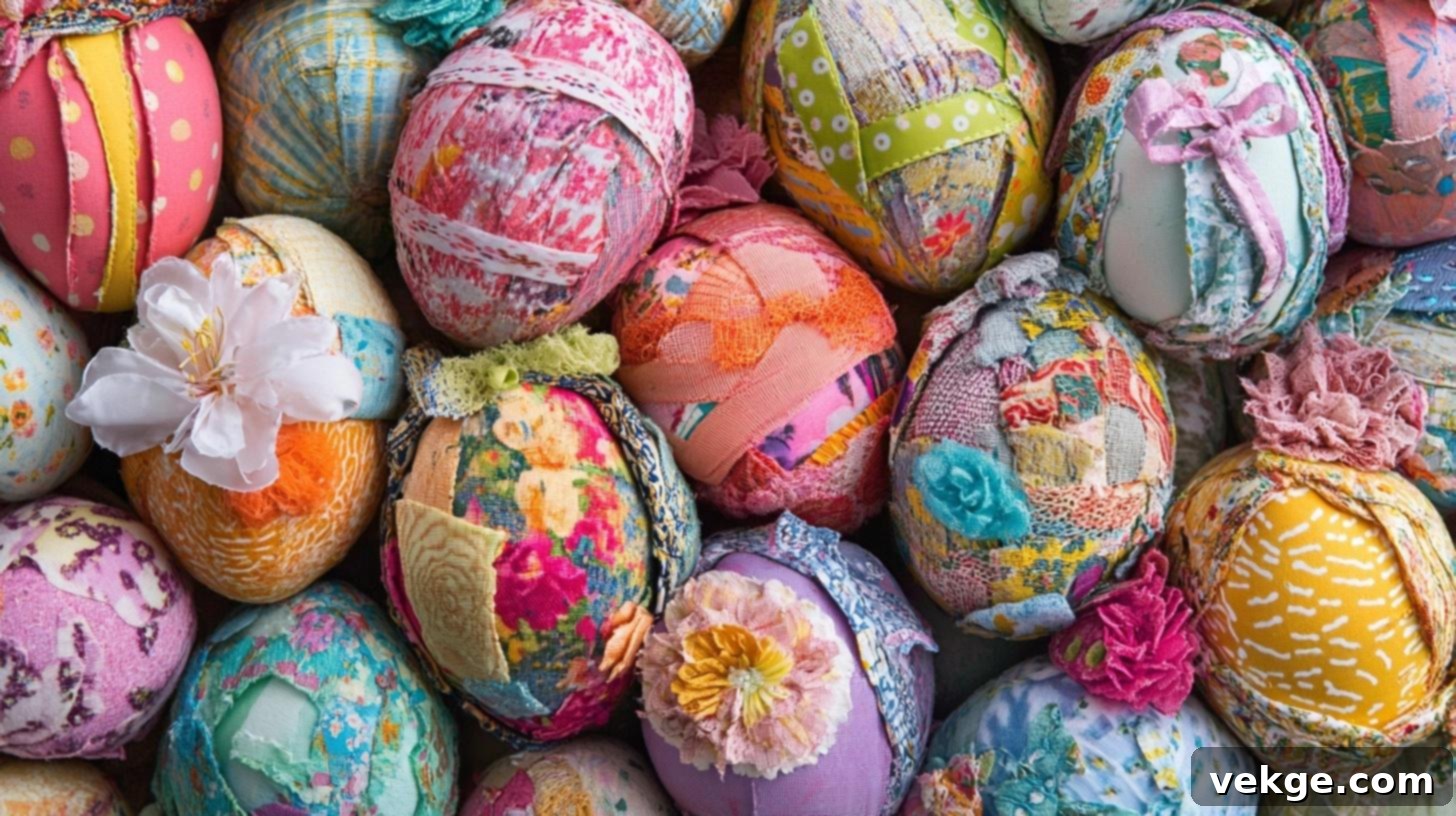
Create beautiful and lasting Easter decorations with no-sew fabric-covered Styrofoam eggs. This craft is a delightful way to use up small fabric scraps, transforming them into vibrant, patterned eggs perfect for centerpieces, baskets, or mantel displays. Add ribbons or trims for extra flair, making each egg a unique piece of festive art.
Materials Table:
| Material | Estimated Cost |
|---|---|
| Styrofoam eggs | $6 |
| Fabric scraps | $5 |
| Fabric glue | $6 |
| Scissors | $8 |
| Ribbons/trims | $4 |
| Small decorative items | $5 |
- Total Estimated Cost: $34
- Time: 35 minutes
- Difficulty: Beginner
Instructions:
- Preparation: Cut your fabric scraps into small strips or squares. These pieces should be large enough to wrap around a section of the Styrofoam egg, allowing for some overlap.
- Coverage: Apply a small amount of fabric glue to a section of the Styrofoam egg. Carefully smooth a fabric strip or square over the glued area, pressing firmly to adhere. Continue this process, overlapping fabric pieces slightly, until the entire egg is covered.
- Decorating: Once the fabric is securely glued and dry, add ribbons, small fabric flowers, or dots of glitter for extra flair. You can also use fine trim to cover any visible seams between fabric pieces for a polished finish.
Making No-Sew Crafts Last: Quick Guide to Durability
Creating beautiful no-sew fabric crafts is incredibly rewarding, and with a few simple techniques, you can ensure your handmade items stand the test of time. Follow these essential tips to maximize the durability and longevity of your projects.
- Smart Glue Use: The success of any no-sew project heavily relies on the adhesive you choose. Always select a fabric glue specifically designed for textiles, as it remains flexible after drying, preventing cracking. For more rigid pieces or quick bonds, a hot glue gun can be effective, but be mindful of its heat. Apply thin, even layers of glue; too much can make the fabric stiff or seep through. Crucially, allow adequate drying time—often 24 hours—before handling or using the item. For areas that will experience stress, like handles or seams, consider double-bonding by applying glue, pressing, letting it dry, and then applying a second, thinner layer for extra reinforcement.
- Edge Protection: Raw fabric edges are prone to fraying, which can quickly ruin a project. To prevent this, fold edges inward twice (creating a double hem) and press them firmly with an iron before applying glue. This technique encloses the raw edge. Alternatively, for a decorative and practical solution, use pinking shears for zig-zag cuts that inherently resist fraying. For areas that cannot be folded, a liquid fray-stop product can be applied. Always reinforce corners with an extra dab of glue, as these are common stress points.
- Material Matters: The type of fabric you choose significantly impacts the craft’s durability and suitability. Heavy-duty fabrics like canvas or denim are ideal for projects like tote bags or storage bins that require structure and resilience. Medium-weight cottons are versatile for decor items like pillow covers or wall art. Light fabrics are best for delicate accessories like hair bows. For projects needing extra stiffness or shape, always incorporate fusible interfacing. Matching the fabric to the project’s intended use and ensuring good material quality from the start will yield far better and longer-lasting results.
- Care Tips: Proper care is vital for extending the life of your no-sew creations. Avoid machine washing whenever possible. Instead, spot clean gently with a damp cloth and mild soap. If an item needs more thorough cleaning, a gentle hand wash in cool water is preferable, avoiding excessive soaking which can weaken glue bonds. Always air dry flat to maintain shape and prevent fabric warping or glue softening. Store your finished crafts in a cool, dry place away from direct sunlight, and handle glued areas with care. Keep any leftover fabric scraps and matching glue on hand for easy touch-ups or repairs.
- Quick Tests: Patience and preliminary testing can save you from frustration. Before fully committing to a project, test your glue on a small, inconspicuous fabric scrap to check adhesion and drying time. Once the project is assembled, gently perform a “pull test” on glued seams and edges to ensure they are securely bonded before adding weight or using the item. Allow all glue to dry for at least 24 hours, or even longer, especially for items that will be handled frequently. A strong, well-set bond from the beginning is the best way to ensure your beautiful creations last.
Remember: Good preparation + proper drying time = lasting results.
Essential Care Tips: Cleaning and Repairs for Your No-Sew Crafts
Ensuring your beloved no-sew crafts remain beautiful and functional for years to come doesn’t have to be a complicated task. With a focus on gentle care and proactive maintenance, you can easily preserve the integrity and appearance of your handmade treasures. Here’s a detailed guide on how to keep your items looking fresh and easily fix minor wear and tear.
Smart Cleaning Solutions
When your no-sew creations need a refresh, always lean towards gentle cleaning methods. The harsh agitation and high temperatures of a washing machine can severely compromise glue bonds and distort fabric shapes. Instead, opt for hand washing in cool or lukewarm water using a mild, pH-neutral soap. Submerge your item briefly rather than allowing it to soak for extended periods, as prolonged exposure to water can weaken adhesives. Gently squeeze out excess water, being careful not to wring or twist the fabric, which could stretch or damage the glued areas.
After washing, reshape your item carefully to its original form and lay it flat on a clean, absorbent towel to air dry. Avoid hanging wet items as the weight of the water can cause stretching. Keep your drying crafts away from direct heat sources like radiators or sunlight, as intense heat can cause fabric colors to fade, warp the material, or reactivate and soften the fabric glue, potentially leading to seams coming undone. Patience during the drying process is key to maintaining the craft’s shape and bond integrity.
Repair and Maintain
Think of your crafting supplies as a dedicated first-aid kit for your creations. It’s highly beneficial to keep any leftover fabric scraps from your projects, along with matching fabric glue, readily accessible. These materials will be invaluable for quick, seamless repairs.
Make it a habit to regularly inspect your no-sew items for any early signs of wear and tear. Look for loose edges, fraying fabric, or any areas where the glue bond might seem weakened. Addressing these small issues immediately is crucial; a minor fix performed promptly can prevent a small problem from escalating into a larger, more challenging repair later on. For items that are frequently handled or exposed to stress, such as tote bags or pencil cases, consider a monthly check of all glued areas. A five-minute repair today, done with precision and the right adhesive, can significantly extend your project’s lifespan by months, if not years, ensuring you continue to enjoy your handcrafted pieces.
Conclusion
Throughout this comprehensive guide, I’ve had the pleasure of sharing over 40 diverse and delightful no-sew fabric crafts. My intention was to demonstrate that the world of fabric crafting is vibrant, accessible, and incredibly rewarding for everyone, regardless of whether you own a sewing machine or possess advanced stitching skills. These projects, ranging from simple bookmarks to intricate wall art and practical accessories, stand as a testament to the fact that you can create beautiful, functional, and personalized items using just fabric, glue, and a sprinkle of imagination.
The beauty of no-sew crafting lies in its simplicity and versatility. There’s no intimidating learning curve, no specialized equipment to invest in, and a low barrier to entry for anyone eager to get creative. Start with the easiest projects, like designing vibrant fabric flowers or charming bookmarks, to build your confidence. As your skills grow and your comfort with different adhesives and fabrics increases, challenge yourself with more elaborate creations such as decorative pillow covers, sturdy tote bags, or unique home decor pieces. Each project offers a new learning experience, deepening your understanding of how different fabrics behave and the magic of fabric adhesives.
I genuinely believe that the joy of crafting lies not just in the finished product, but in the creative journey itself – the selection of fabrics, the thoughtful assembly, and the satisfaction of bringing an idea to life with your own hands. I would absolutely love to see what wonderful creations you bring into existence! Please don’t hesitate to share your finished projects online, using relevant hashtags so others can be inspired. If you encounter any challenges or have questions along the way, reach out – the crafting community is always eager to help. And if these ideas have sparked your creative spirit, consider passing this guide on to friends or family who might also discover the immense pleasure of no-sew fabric crafting.
So, let your imagination take flight! Your fabric stash is more than just scraps; it’s a treasure trove waiting to be transformed into something truly wonderful, functional, and uniquely yours. Let’s get creative!
Frequently Asked Questions About No-Sew Fabric Crafts
What Can I Use to Hold the Fabric Together without Sewing?
There are several effective options for holding fabric together without sewing, each suited for different types of projects:
- Fabric Glue: This is the most versatile option. Look for glues specifically labeled for fabric, as they remain flexible after drying and are often washable. They are excellent for permanent bonds on seams, hems, and appliques.
- Hem Tape: Also known as fusible web or iron-on adhesive, hem tape creates a strong, flat bond when activated with heat from an iron. It’s perfect for creating crisp hems on garments, curtains, or table runners.
- Fusible Webbing: Similar to hem tape but often available in larger sheets, fusible webbing is great for bonding larger flat surfaces, such as covering a canvas with fabric or creating layered appliques.
- Hot Glue: While not always suitable for items that need to be soft or flexible, a hot glue gun provides an instant, strong bond for decorative elements, attaching embellishments, or structural components in projects like fabric storage bins or wreaths.
- Fabric Adhesives Sprays: These offer temporary or permanent bonds for larger areas, useful for covering lampshades or creating fabric-backed clipboards, ensuring a smooth, even application.
How Do I Ensure My No-Sew Crafts are Durable?
To maximize the durability of your no-sew fabric crafts, focus on these key practices:
- Use Quality Adhesive: Always choose a high-quality fabric glue appropriate for your project. Read reviews and product descriptions to ensure it’s suitable for the fabric type and intended use (e.g., washable, flexible).
- Proper Application: Apply glue evenly and in sufficient (but not excessive) amounts. Too little glue won’t hold, and too much can make the fabric stiff or show through.
- Allow Full Drying Time: This is critical. Most fabric glues require at least 24-72 hours to fully cure and achieve maximum bond strength. Resist the urge to handle or stress the item prematurely.
- Double-Bond Stress Points: For areas that will experience frequent stress or pulling, such as bag handles, corners of bins, or closures, apply glue, let it dry, and then apply a second thin layer for added reinforcement.
- Reinforce Edges: Prevent fraying and strengthen seams by folding raw edges inward twice before gluing, or use methods like pinking shears or liquid fray-stop products.
- Test Seams: After the glue has fully dried, gently pull on seams and edges to confirm they are securely bonded before putting the item into regular use.
- Material Choice: Select fabrics that are appropriate for the craft’s purpose. Heavy-duty fabrics (canvas, denim) are more durable for bags or organizers than delicate, thin materials.
Can I Wash No-Sew Fabric Crafts?
Whether you can wash a no-sew fabric craft largely depends on the type of fabric glue used and the fabric itself.
- Check Glue Instructions: Always refer to the specific fabric glue’s packaging for care instructions. Many modern fabric glues are designed to be machine washable (on a gentle cycle) or hand washable once fully cured. However, some glues are not meant for washing at all.
- Hand Washing is Best: Even if the glue is machine washable, hand washing is generally the safest and most recommended method for no-sew items. Use cool water and a mild detergent. Avoid harsh scrubbing or wringing.
- Avoid Soaking: Do not let no-sew items soak for long periods, as prolonged water exposure can weaken adhesive bonds. A quick dip and gentle cleaning are preferable.
- Air Dry Flat: Always air dry your no-sew crafts flat on a clean towel. Avoid machine drying, as the heat and tumbling can damage the glue bonds and distort the fabric. Keep away from direct sunlight or high heat during drying.
- Spot Cleaning: For minor stains, spot cleaning with a damp cloth and mild soap is often the best approach to avoid stressing the glued areas unnecessarily.
By following the glue manufacturer’s guidelines and opting for gentle care, you can help your no-sew fabric crafts maintain their beauty and integrity for a long time.
What are Some Kid-Friendly, No-Sew Fabric Crafts?
No-sew fabric crafts are fantastic for engaging children in creative activities, offering immediate gratification and a safe way to work with textiles. Here are some excellent kid-friendly options:
- Fabric Flowers: Kids can cut out various sized fabric circles and glue them into layers to create beautiful, dimensional flowers. These can be used to decorate headbands, hair clips, or simply as stand-alone decorations.
- No-Sew Superhero Capes: Using a large rectangle of felt or fleece, kids can decorate their own superhero capes with felt cut-outs of stars, lightning bolts, or their initial, all secured with fabric glue.
- Fabric Puppets: Simple hand puppets or stick puppets can be made from felt shapes, googly eyes, and fabric glue. They encourage imaginative play and storytelling.
- No-Sew Bookmarks: Covering cardboard or stiff felt with patterned fabric scraps and adding a ribbon or tassel makes a personalized bookmark that’s fun to make and use.
- Decorating Fabric Bags: Plain canvas tote bags can be decorated with fabric cut-outs (using fabric glue) or fabric markers, allowing kids to design their own shopping or library bags.
- Fabric Animal Masks: Similar to superhero capes, felt can be cut into animal shapes for masks, adding features like ears, noses, and whiskers with glue.
- Stuffed Toys (simple shapes): Using two identical felt or fleece shapes (like a star or heart), kids can glue the edges together, leave a small opening, stuff with batting, and then glue the opening closed to make soft, cuddly shapes.
These projects are excellent for developing fine motor skills, creativity, and a sense of accomplishment.
