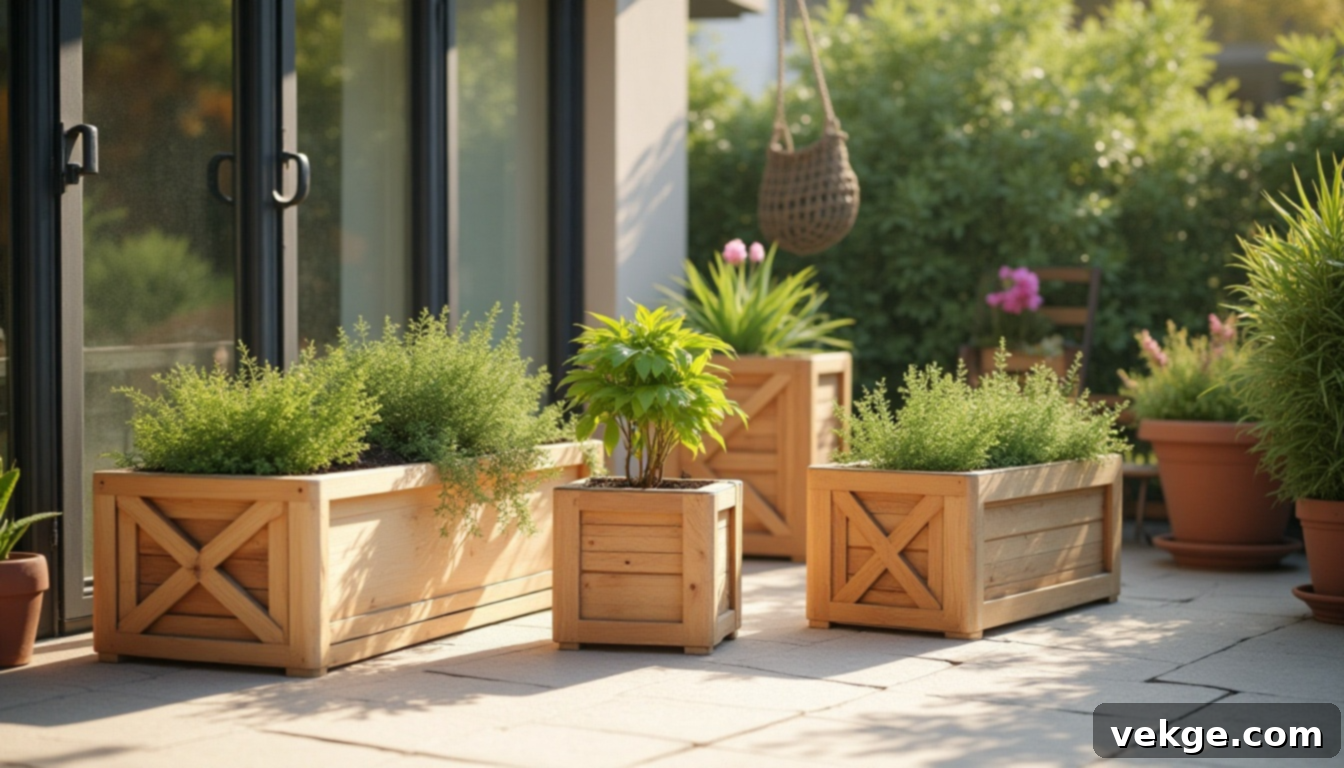
DIY Wooden Planters: Build Beautiful & Durable Boxes for Your Plants
There’s a unique satisfaction that comes from growing plants in something you’ve crafted with your own hands. DIY wooden planters are incredibly popular for all the right reasons: they are straightforward to build, remarkably budget-friendly, and add an unmistakable personal touch to any living space, whether indoors or out. If you’re tired of flimsy plastic pots or overpriced store-bought containers, you’ll discover just how accessible and rewarding this woodworking project can be.
In this comprehensive guide, I’ll walk you through the entire process, sharing my insights on selecting the perfect wood, providing a detailed step-by-step construction plan, and highlighting common mistakes to avoid. My goal is to equip you with all the knowledge needed to build practical, stylish, and long-lasting wooden planters. Take your time, enjoy the creative process, and get ready to transform your gardening experience.
Why Build Your Own Wooden Planter? Unlocking the Benefits
Creating your own wooden planter boxes is more than just a simple DIY task; it’s an opportunity to blend functionality with personal style, all while enjoying several key advantages. It’s one of my favorite weekend projects because it’s both achievable and incredibly rewarding, making any yard or home feel more personalized and inviting.
Cost-Effectiveness and Customization
One of the most significant benefits is the cost savings. Store-bought planters, especially those made from quality wood, can be surprisingly expensive. By building your own, you save money on materials and labor, often using reclaimed wood or affordable lumber. Furthermore, you gain complete control over the design. You can choose the exact size, shape, and aesthetic that perfectly complements your space, whether it’s a sprawling garden, a cozy patio, or a bright indoor corner. This level of customization is simply not available with off-the-shelf options.
Personal Satisfaction and Eco-Friendliness
There’s immense satisfaction in seeing your plants thrive in a container you’ve built yourself. It’s a tangible representation of your effort and creativity. For those passionate about sustainability, DIY planters offer an excellent opportunity to recycle and reuse. Utilizing reclaimed wood or lumber scraps reduces waste and gives old materials a new, beautiful purpose. It’s a hands-on way to engage with your environment and add a touch of handcrafted charm that plastic pots simply can’t replicate.
Getting Started: Choosing the Right Materials & Tools
Before you start cutting and assembling, selecting the appropriate wood and gathering your tools are crucial first steps. These choices will significantly impact the durability, appearance, and overall success of your DIY wooden planter project.
Selecting the Best Wood for Your Planter Box
The type of wood you choose is paramount, especially if your planter will be exposed to the elements. Durability, resistance to rot, and safety are key considerations.
- Cedar and Redwood: These are often considered the gold standard for outdoor planters. Both are naturally resistant to rot, decay, and insect infestation, meaning they will last significantly longer without needing extensive chemical treatments. Their natural oils provide excellent protection, and their attractive grain patterns weather beautifully over time. While a bit more expensive, their longevity makes them a worthwhile investment.
- Pine or Fir: More budget-friendly and widely available, pine and fir are good choices for quick projects or if you plan to paint or seal your planter extensively. They are not naturally rot-resistant, so thorough sealing and proper drainage are essential to extend their lifespan, especially outdoors.
- Reclaimed or Scrap Wood: If you’re on a tight budget or committed to eco-friendly practices, reclaimed wood from pallets, old fences, or leftover construction scraps can be fantastic. This option is often free and adds unique character. Always inspect reclaimed wood for nails, severe rot, or chemical stains. Sanding rough edges and ensuring the wood is structurally sound is vital before building.
- Avoid Pressure-Treated Wood for Edibles: While pressure-treated wood is designed for outdoor use and rot resistance, it often contains chemicals that can leach into the soil. For planters intended for growing edible plants (vegetables, herbs, fruits), it is strongly recommended to avoid pressure-treated lumber to ensure food safety. Stick to naturally resistant woods or untreated options that you can seal with food-safe finishes.
Essential Tools & Materials Checklist
Having the right tools on hand will make your building process smoother and more efficient. Here’s what you’ll need:
- Saw (Hand saw, Circular saw, or Miter saw): Essential for accurately cutting your wooden boards to size. A miter saw offers the most precision for clean, straight cuts.
- Drill: Necessary for drilling pilot holes and driving screws quickly and securely.
- Screwdriver or Drill Bit Set: To match your screws and ensure tight fastenings.
- Outdoor Wood Screws: Choose screws specifically designed for outdoor use (e.g., galvanized, stainless steel, or coated deck screws) to prevent rust and ensure the planter holds up against moisture.
- Tape Measure: For precise measurements of your boards. “Measure twice, cut once” is a golden rule here!
- Pencil: For clearly marking cut lines and drill points.
- Wood Glue (Outdoor-grade): Applied to joints, wood glue significantly increases the strength and stability of your planter box, providing a much stronger bond than screws alone.
- Sandpaper or Electric Sander: To smooth out rough edges and surfaces before finishing, ensuring a clean, professional look and preventing splinters.
- Clamps (Optional but Recommended): Woodworking clamps are invaluable for holding boards firmly in place while you drill and fasten, making assembly much easier, especially when working alone.
- Brad Nailer (Optional): Can speed up the initial assembly process by holding pieces together temporarily before screws are driven in.
Step-by-Step Guide to Crafting Your Wooden Planter Box
Ready to get building? This detailed guide will walk you through each step, ensuring you construct a sturdy, stylish, and functional planter box that perfectly fits your gardening needs and aesthetic.
Step 1. Prepare Your Boards: Measure & Cut with Precision
Accuracy here is key for a well-fitting planter. Begin by carefully measuring and marking your boards according to the desired dimensions of your planter. For example, to build a 30-inch long planter, you would typically cut two 30-inch pieces for the front and back, two shorter pieces (e.g., 11 inches) for the sides, and a bottom piece (e.g., 28 inches) that fits within the frame. Always double-check your measurements before making any cuts.
Use your chosen saw to cut the boards. If using a hand saw, ensure your cuts are straight. A miter saw will provide the cleanest and most accurate results. After cutting, lightly sand the ends of each board to remove any splinters and prepare the wood for a flush assembly.
Step 2. Drill Pilot Holes to Prevent Splitting
This is a critical step that many beginners overlook, leading to split wood. To prevent your boards from cracking when you drive in screws, drill pilot holes at the ends of your boards where they will connect. For the front and back panels, drill three evenly spaced pilot holes along each end, approximately ½ inch from the edge. The pilot hole should be slightly smaller in diameter than the screw threads. If working alone, clamps can be extremely helpful here to hold the pieces steady as you drill.
Step 3. Assemble the Sturdy Frame
Now it’s time to bring your planter to life. Apply a generous bead of outdoor-grade wood glue along the edges of the boards where they will join. Start by attaching the side pieces to the bottom board, aligning them carefully. Then, fasten the front and back panels to complete the frame, using the pre-drilled pilot holes as your guide. Use your outdoor wood screws to secure the connections firmly. As you assemble, frequently check that all angles are square using a speed square or tape measure to ensure your planter isn’t wobbly. Clamps can assist in holding pieces together tightly while the glue sets and you drive the screws.
Step 4. Ensure Proper Drainage: Drill Drainage Holes
Adequate drainage is paramount for plant health and planter longevity. Once your frame is assembled, flip the planter over. Using a standard drill bit (e.g., ½ to ¾ inch), drill at least three to five evenly spaced holes across the bottom board. These drainage holes are essential; they prevent water from pooling, which can lead to root rot for your plants and accelerate the decay of your wooden planter. This simple step makes a huge difference in the long-term success of your planter.
Step 5. Elevate and Protect: Add Feet and Liner
To further protect your planter from moisture and rot, elevate it slightly off the ground. Cut small blocks from your leftover wood scraps and screw one to each corner of the planter’s underside. These “feet” allow for air circulation and prevent direct contact with damp surfaces.
Next, line the inside bottom and sides of your planter with landscape fabric or a heavy-duty plastic liner. Landscape fabric allows water to drain while holding soil in place. If using plastic, make sure to poke several holes in the bottom of the liner itself, corresponding with your drainage holes. Secure the fabric or liner tightly against the inside walls using a staple gun. This lining acts as a barrier, protecting the wood from constant contact with moist soil and significantly extending its life.
Step 6. Finish for Durability & Aesthetics: Sand & Seal
With the construction complete, it’s time for the finishing touches. Sand all outer surfaces and edges thoroughly to eliminate rough spots and splinters. Start with a coarser grit sandpaper (e.g., 80-100 grit) to smooth major imperfections, then move to a finer grit (e.g., 150-220 grit) for a silky-smooth finish. A well-sanded surface is crucial for proper sealant adhesion.
If you plan to keep the natural wood look, apply a clear outdoor-grade wood sealant or polyurethane. If you prefer color, you can stain or paint the planter. Ensure you apply the chosen finish evenly to both the inside and outside surfaces, paying extra attention to the end grains and corners, which tend to absorb more moisture. Allow the finish to dry completely according to the manufacturer’s instructions before moving on.
Step 7. Populate Your Planter: Soil and Plants
Your beautiful new planter is almost ready for its green inhabitants! Start by adding a thin layer of pebbles or river rock to the bottom. While optional, this can enhance drainage and prevent the drainage holes from becoming clogged. Next, fill the planter about three-quarters full with high-quality potting soil suited for your chosen plants. Finally, carefully add your plants, arranging them as desired to give them ample space for root growth. Water the planter lightly, and place it in its new, carefully chosen home.
Watch the full build in action below to see each step come together visually:
Inspire Your Next Project: DIY Wood Planter Design Ideas
Beyond the basic box, there’s a world of DIY wooden planter designs to explore. I’ve curated a few easy-to-build ideas that cater to different styles and spaces, proving that with basic tools, you can create truly unique garden features.
1. Classic Raised Box Planter
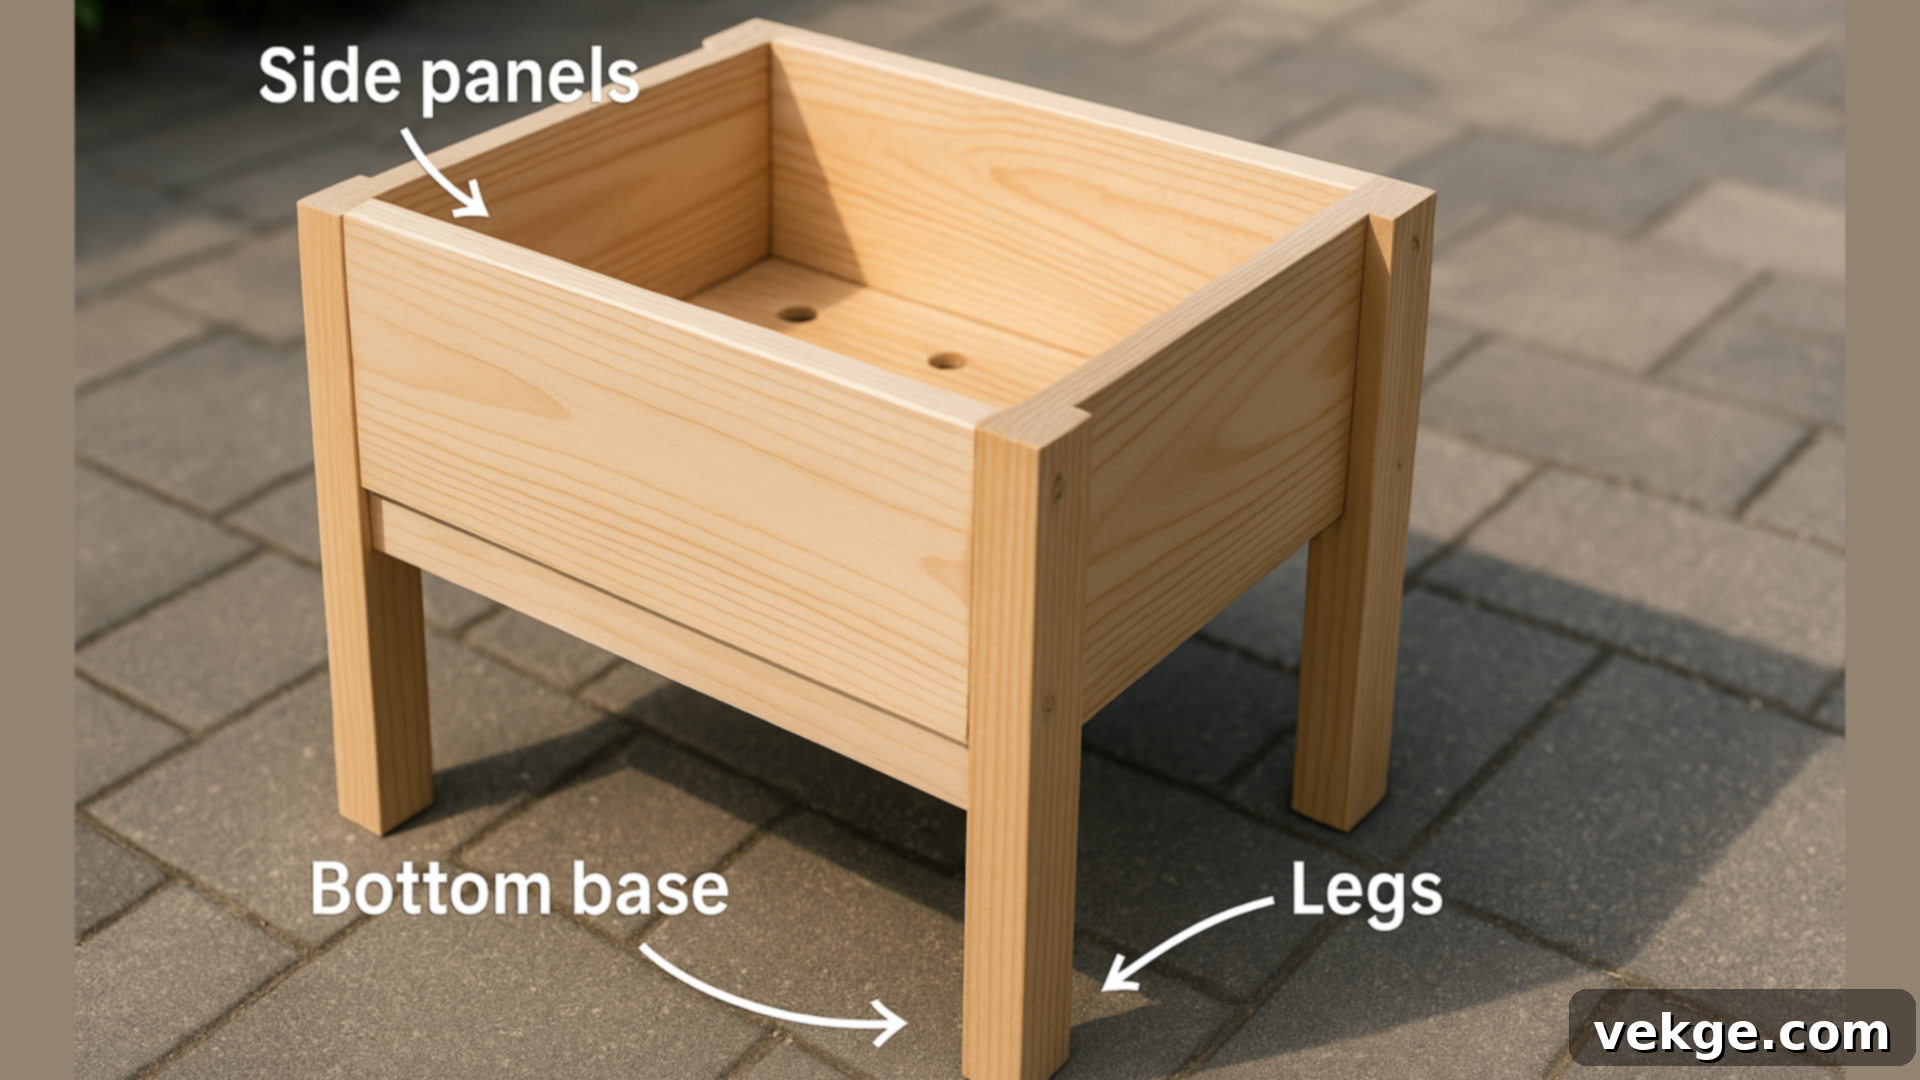
This timeless design features a simple four-sided box with a bottom, elevated by sturdy legs. It’s the most straightforward to construct, making it perfect for beginners. You cut your boards, screw the sides together, and then attach four legs to lift it off the ground, ensuring proper air circulation. Don’t forget those crucial drainage holes! This versatile planter is ideal for decks, patios, or any backyard spot, excellent for growing a variety of flowers, vegetables, or herbs. Lining or sealing is highly recommended for outdoor use.
2. Modern Planter with Decorative X-Trim
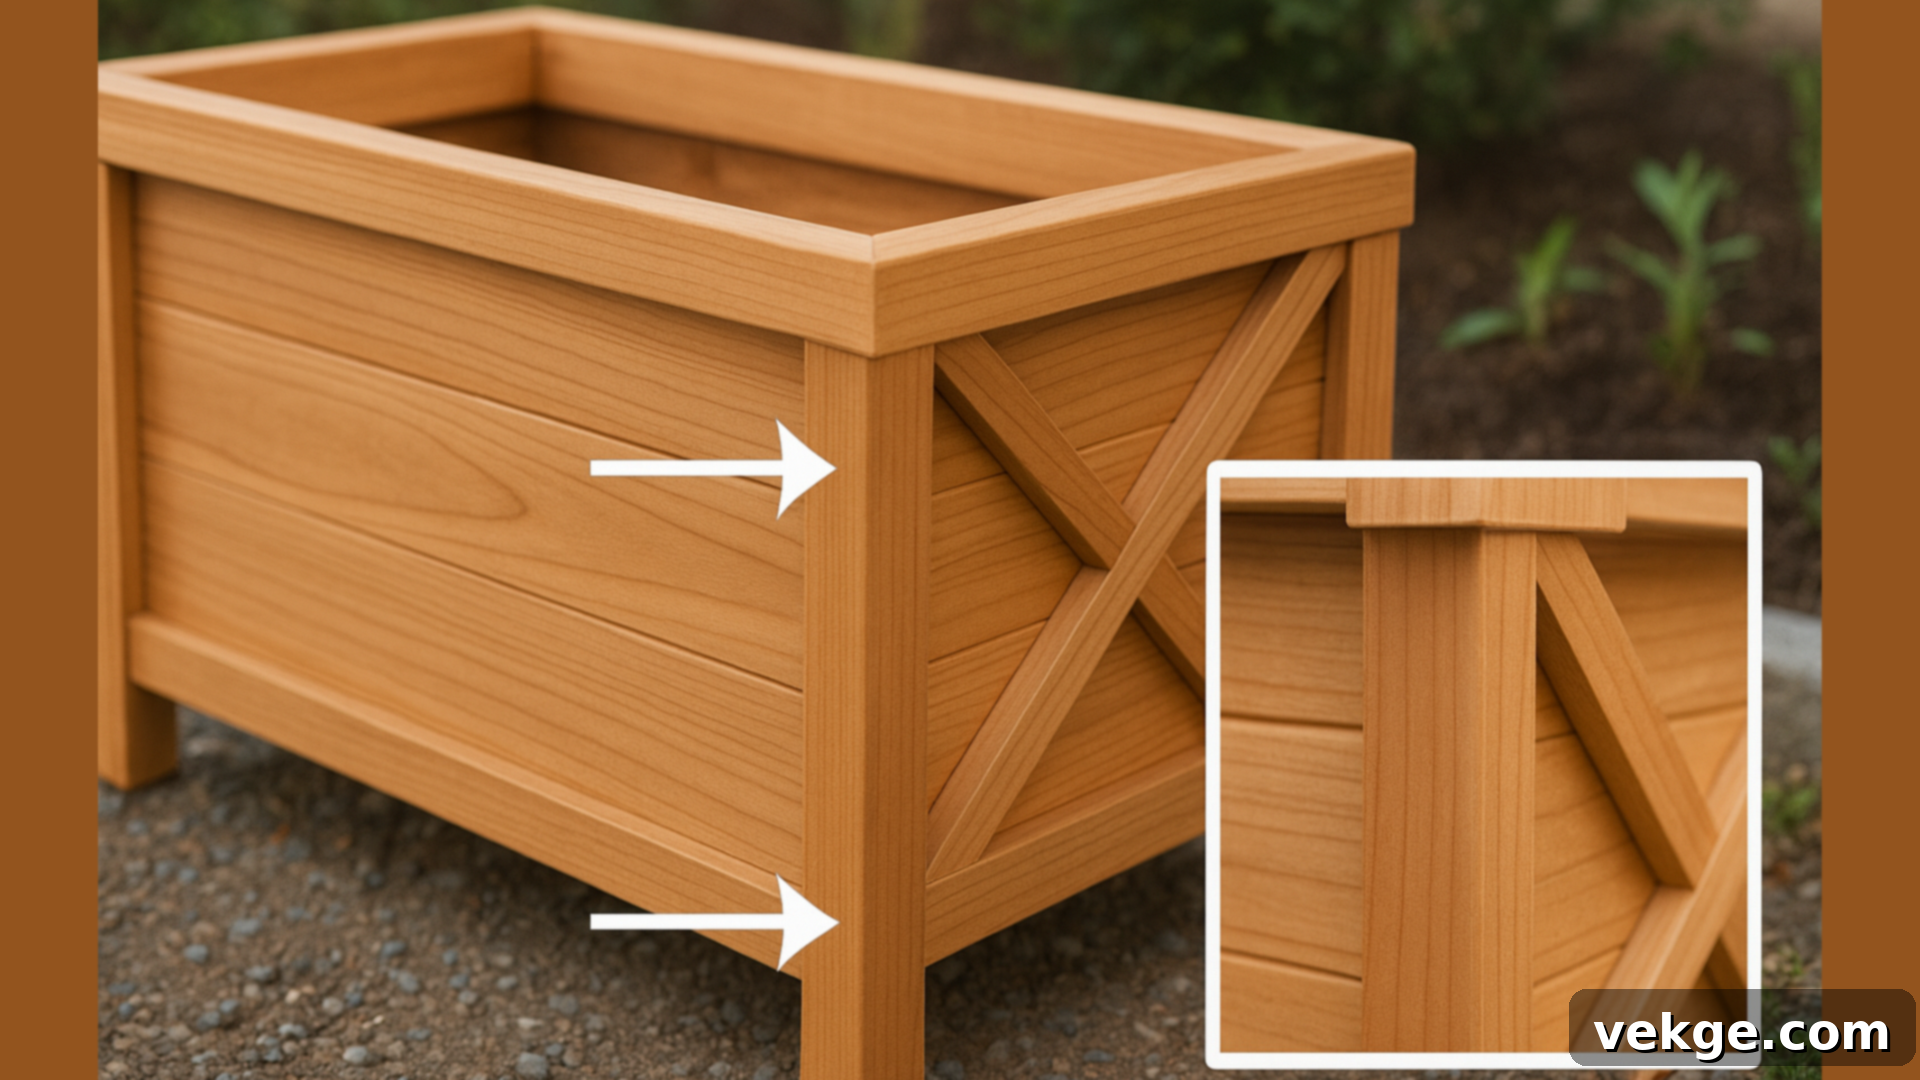
Elevate a basic rectangular planter by adding a bold “X” pattern to its sides for a contemporary flair. First, build your standard planter box. Then, measure and cut thin strips of wood (e.g., ½-inch thick) to create the “X” shape. Carefully miter the ends of these strips so they fit snugly against each other and the planter frame. Attach these trim pieces using wood glue and small brad nails or screws. This simple addition makes the planter look incredibly well-crafted and custom-made. Cedar or clean pine works wonderfully, and a dark stain can enhance its modern aesthetic. Imagine this piece flanking an entryway!
3. Eco-Friendly Scrap Wood Planter
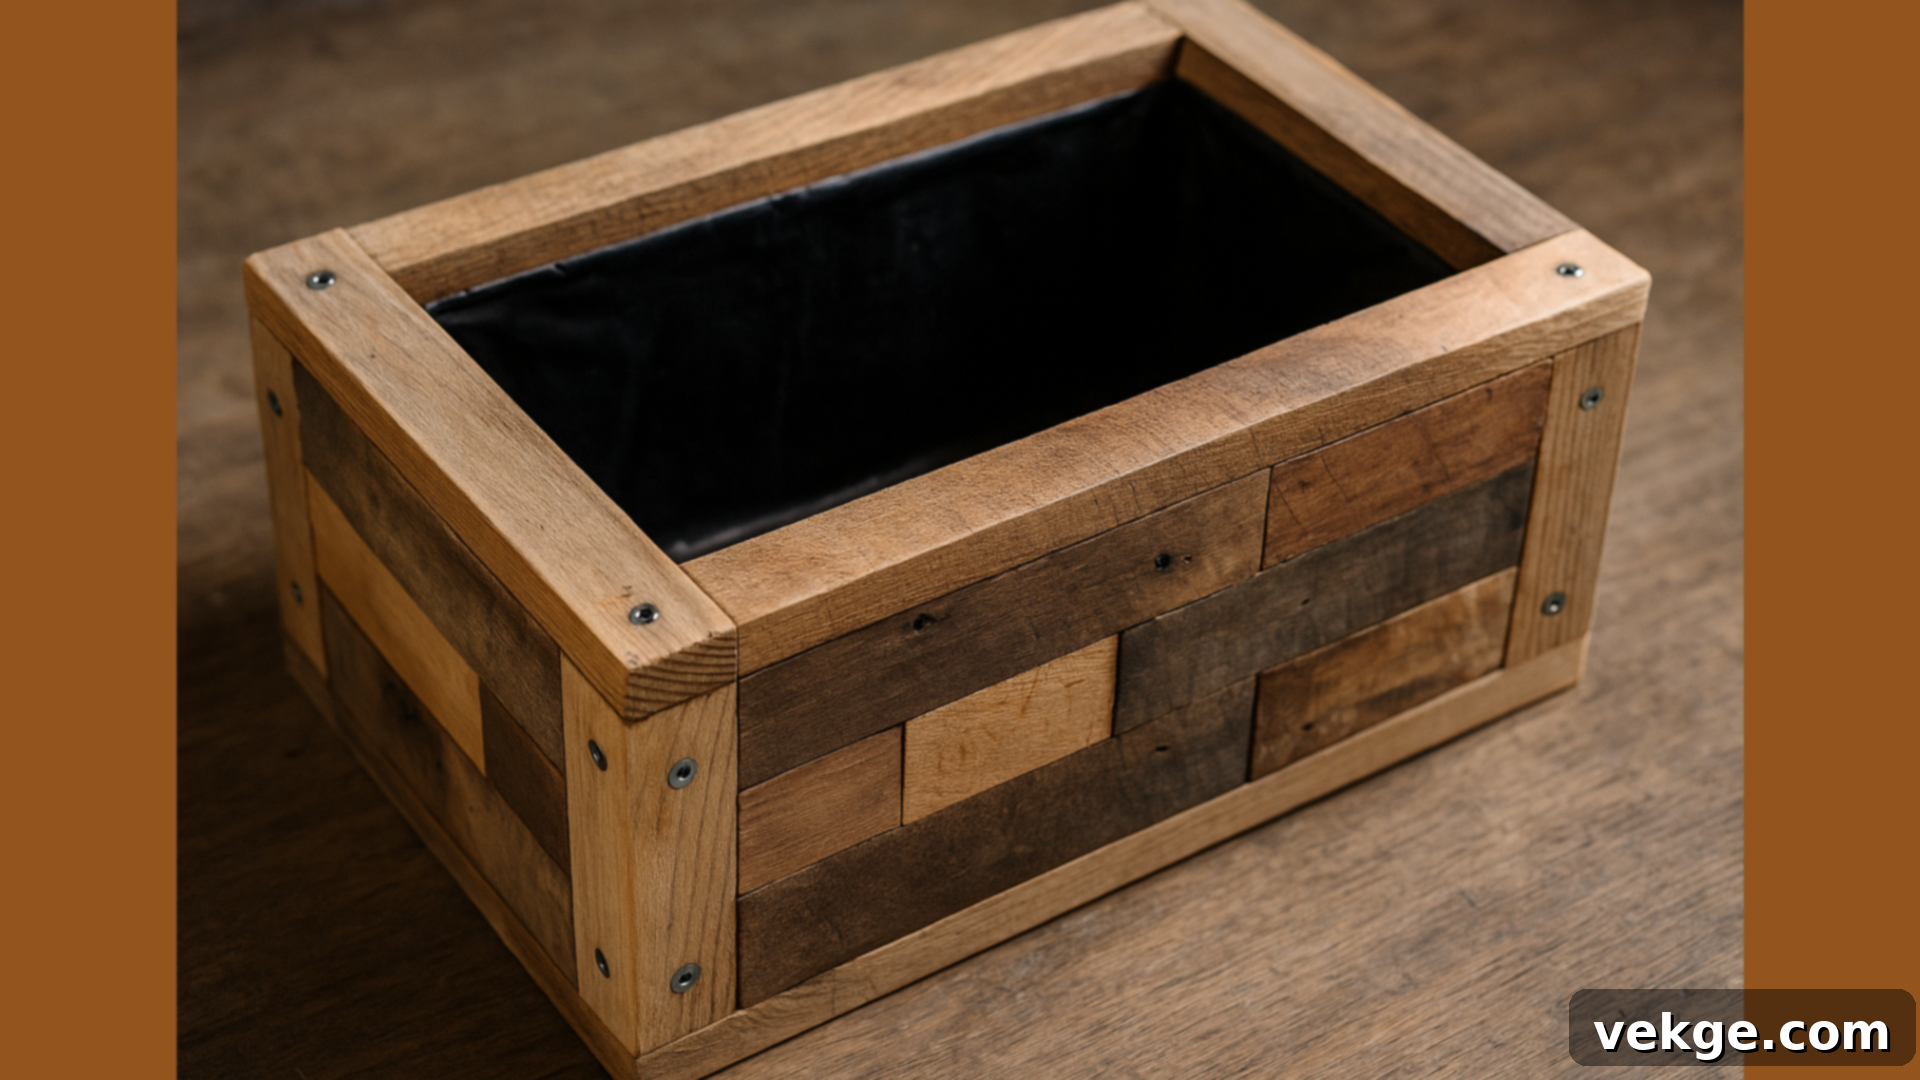
This project celebrates creativity and sustainability, perfect for utilizing leftover wood pieces from previous builds. Gather any straight cuts from old fence boards, pallet wood, or framing scraps. The beauty of a scrap wood planter lies in its eclectic charm; don’t worry if the pieces don’t perfectly match in type or shade, as the mix adds character and a rustic appeal. Construct a square or rectangular frame, securing the varied pieces tightly. You can line the inside with heavy-duty plastic to protect the mixed wood from moisture, especially if some pieces are less weather-resistant.
4. Space-Saving Tiered Herb Planter
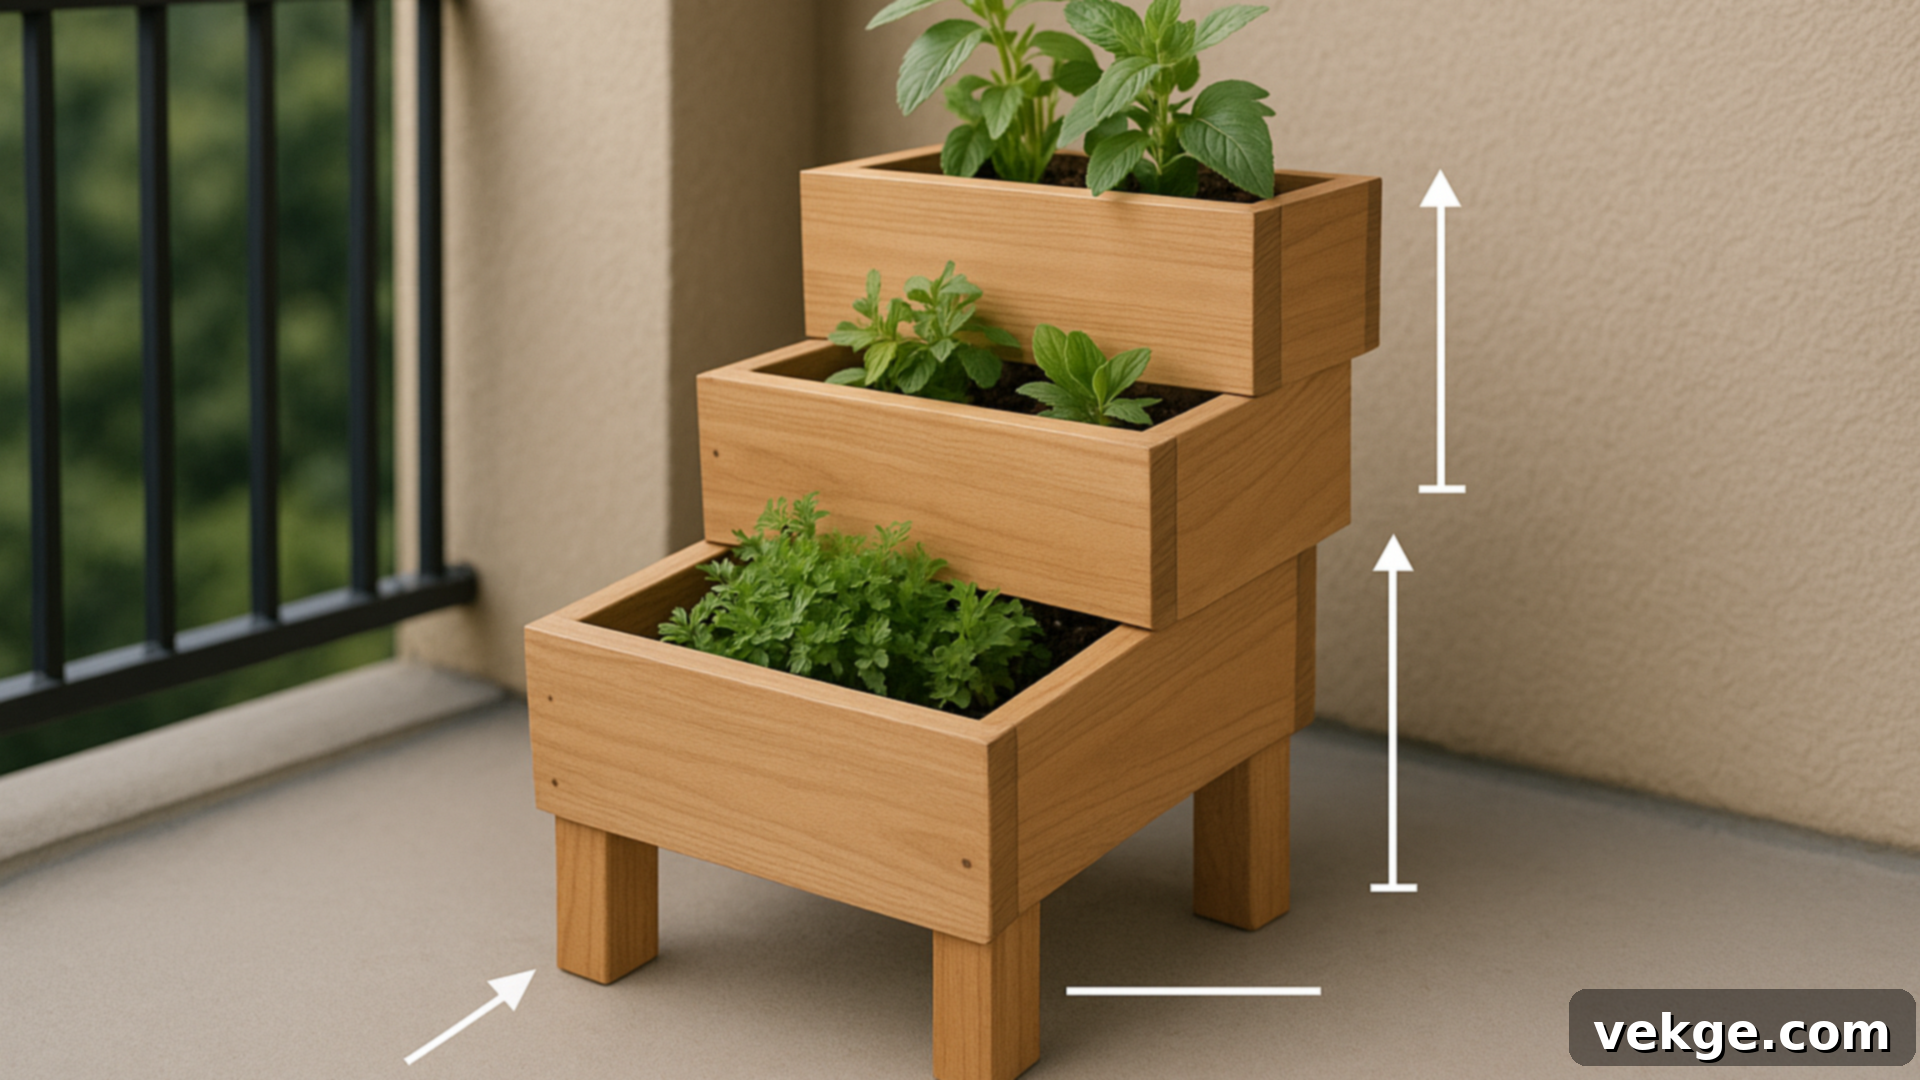
Ideal for gardeners with limited space, this design involves stacking smaller boxes to create vertical levels. Begin by constructing three to four shallow boxes, each slightly smaller than the one below it. Secure them at a slight angle, so each layer leans back, ensuring all rows of herbs receive ample sunlight and have room to grow. Screw the boxes together, checking for balance and stability as you go. This tiered setup is not only functional for maximizing plant yield but also creates an attractive focal point on a patio or balcony.
5. Functional Mounted Post Planter
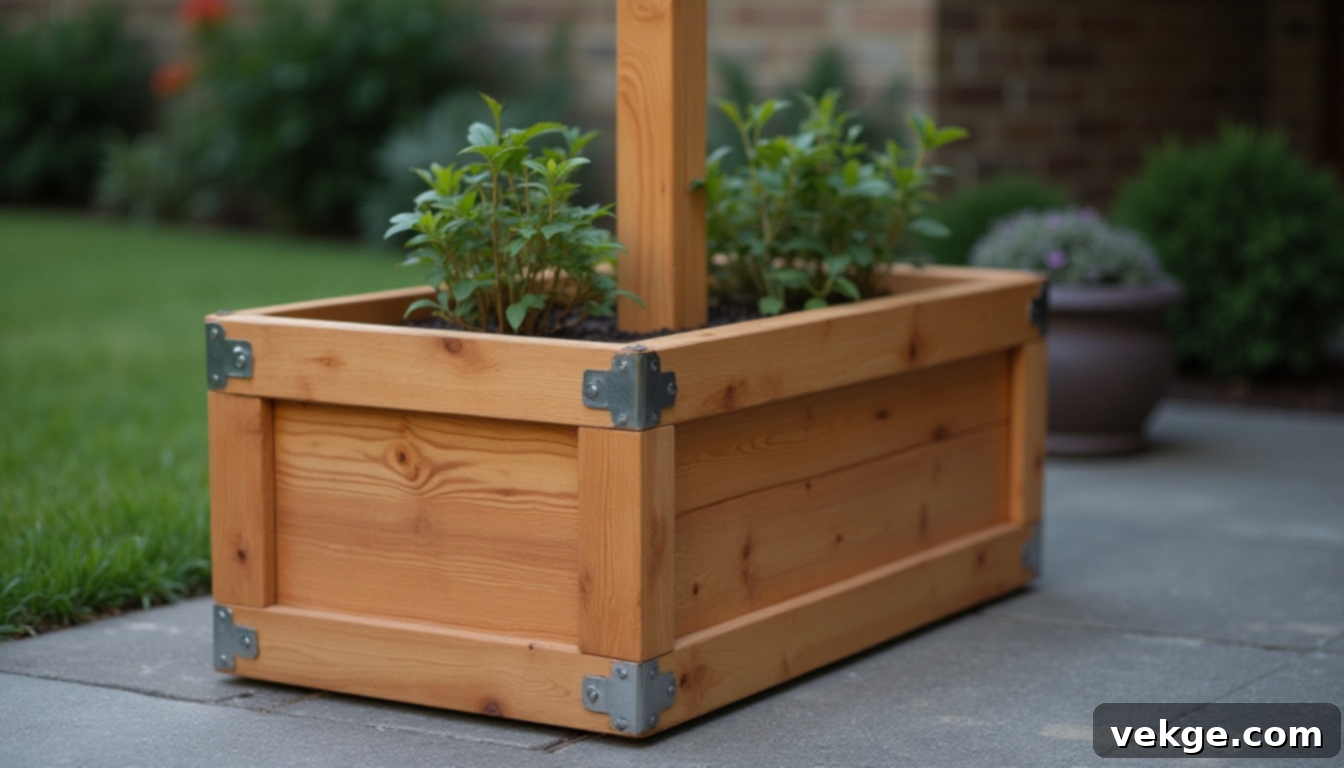
This innovative build combines a wooden planter box with a central post, creating a multi-functional garden feature. The integrated post can serve various purposes, such as holding a mailbox, a decorative lantern, or a welcoming hanging sign. Start by constructing a basic planter box, then design it to incorporate a sturdy, thick post either in the center or a back corner. The post should extend deep enough into the planter and be securely fastened with brackets and extra screws to ensure stability. This option makes a striking statement at entryways, along garden paths, or as a distinctive garden signpost.
Longevity & Care: Lining, Sealing & Maintenance Tips
To ensure your beautiful, handcrafted wooden planter stands the test of time and continues to enhance your space for many growing seasons, protecting it from moisture and wear is essential. These simple yet crucial steps can save you considerable time, money, and frustration in the long run.
The Importance of Lining Your Wooden Planter
Lining the interior of your planter creates a vital barrier between the moist soil and the wood, significantly extending its lifespan. You have a couple of options:
- Landscape Fabric: This permeable material allows water to drain freely while preventing soil from escaping through the drainage holes. It’s excellent for protecting the wood from direct soil contact without impeding water flow. Secure it tightly with a staple gun against the inside walls and bottom.
- Heavy-Duty Plastic Sheeting: For maximum moisture blockage, especially with less rot-resistant woods, plastic sheeting (like pond liner or thick garbage bags) can be used. If you choose plastic, remember to poke several drainage holes in the bottom of the liner itself, aligning them with the planter’s base holes. This ensures excess water can escape, preventing root rot and wood swelling.
Regardless of your choice, ensure the liner doesn’t block the drainage holes and fits snugly against the inside walls.
Sealing for Maximum Weather Protection
Exterior sealing is your planter’s first line of defense against the elements. It protects the wood from rain, harsh sunlight (UV rays), and general moisture, preventing warping, cracking, and premature decay.
- Clear Wood Sealers/Polyurethane: These products soak into the wood, forming a protective, water-resistant barrier while allowing the natural grain to show through. Apply multiple thin coats for optimal protection.
- Oil-Based Finishes: Oils penetrate deeply, nourishing the wood and enhancing its natural color while offering good water resistance. They might require more frequent reapplication.
- Stain and Paint: If you want to add color, you can first apply an exterior wood stain (which penetrates the wood and highlights the grain) or exterior paint (which offers a solid color coating). Always follow with a topcoat of sealant for added protection.
Apply your chosen finish evenly to all exterior surfaces, including the bottom and any feet. Reapply sealant as needed, typically annually or every two years, especially if your planter is in a harsh climate or receives full sun exposure all day.
Proactive Steps to Prevent Rot & Extend Lifespan
Beyond lining and sealing, a few ongoing maintenance practices will ensure your planter remains robust:
- Elevate with Feet: As mentioned in the build steps, lifting your planter slightly off the ground prevents direct contact with damp surfaces, allowing air to circulate freely underneath and significantly deterring rot from starting at the base.
- Regular Inspection and Re-sealing: Periodically check your planter for any signs of wear, especially on corners, edges, and the bottom. Re-apply sealant to these vulnerable areas as needed, or give the entire planter a fresh coat every couple of years.
- Keep Soil Away from Edges: When filling your planter, avoid piling soil too high against the wooden sides, especially if it’s unlined. This reduces constant moisture contact with the wood.
By integrating these simple lining, sealing, and maintenance tips, your DIY wooden planter will remain strong, beautiful, and functional for many seasons to come, a true testament to your craftsmanship.
Choosing the Right Home: Indoor vs. Outdoor Wood Planters
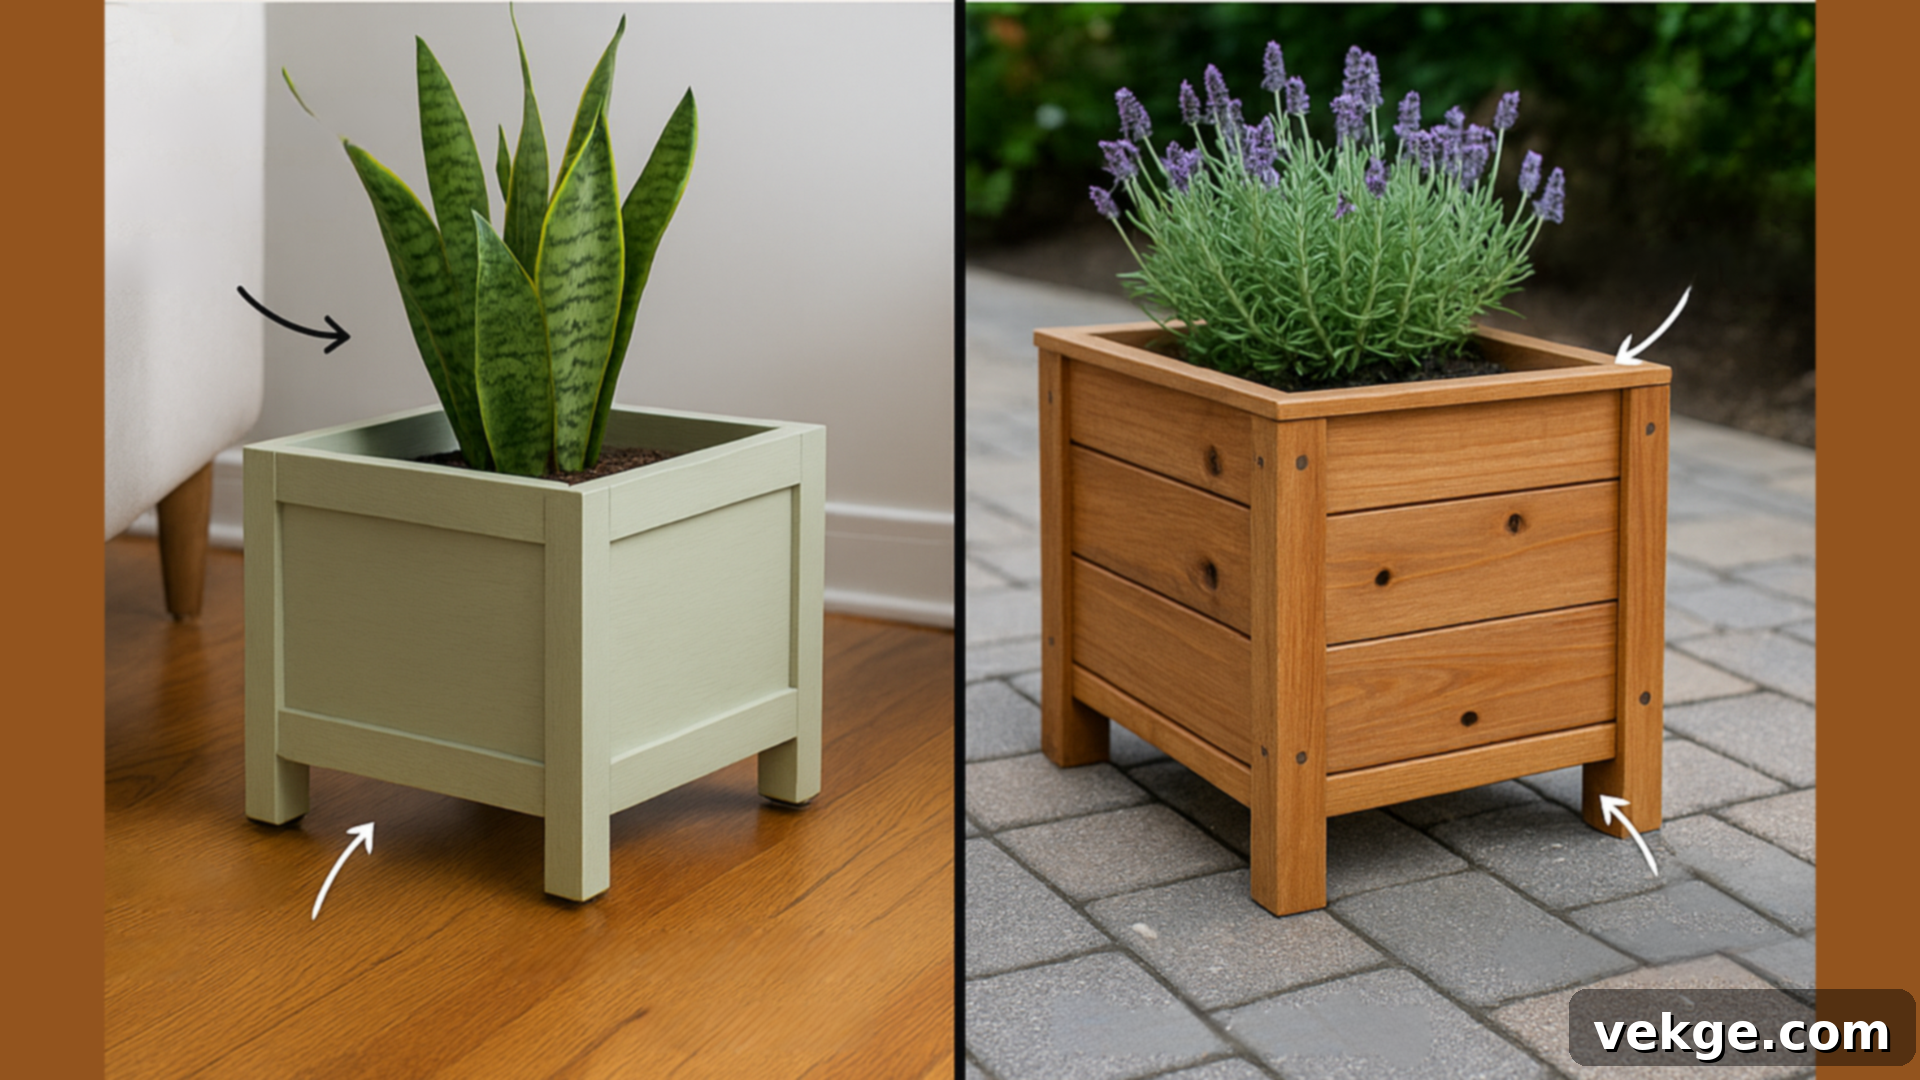
While the fundamental construction principles for wooden planters remain similar, key differences arise when designing for indoor versus outdoor environments. Understanding these distinctions is crucial for selecting the right materials, finishes, and features to ensure your planter thrives in its intended setting.
| Aspect | Indoor Wood Planters | Outdoor Wood Planters |
|---|---|---|
| Design Needs | Often designed with aesthetics as a primary focus. Drainage holes are usually avoided to protect indoor flooring; instead, use plastic inserts or inner pots with saucers. Finished edges and smooth surfaces are preferred for a neat, refined look. | Functionality and durability are paramount. Must include ample drainage holes to prevent waterlogging. Edges can be slightly rougher but must be thoroughly sealed for weather resistance. Raised feet are highly recommended. |
| Wood Types | Pine, oak, maple, birch, or bamboo are excellent choices. Untreated wood is generally preferred to maintain safe indoor air quality, especially for herbs or food plants. Aesthetic appeal (grain, color) can guide selection. | Cedar and redwood are superior choices due to their natural resistance to rot, decay, and insects. Untreated pine or fir can be used but require more rigorous sealing and maintenance to withstand outdoor conditions. Avoid pressure-treated wood for food plants. |
| Finishing Touches | Light stains, waxes, or paints are common for decorative purposes. Use felt pads or rubber feet underneath to protect floors from scratches and moisture. Interior liners or plastic pots are standard to manage watering. | Requires robust outdoor-grade sealants, stains, or paints to protect against moisture, UV rays, and temperature fluctuations. Re-application of sealants periodically is essential. Raised feet are critical for airflow and preventing ground contact rot. |
| Moisture Concerns | Less overall concern with proper care. The main focus is preventing water leakage onto floors. Using a waterproof liner or a plant tray is a simple and effective solution. | High concern due to constant exposure to rain, humidity, and ground moisture. Requires comprehensive sealing, robust drainage, and elevation to prevent wood rot and decay. |
| Use Case | Perfect for decorative houseplants, small herb gardens on windowsills, or adding a natural touch to living rooms and offices. Contributes to interior decor. | Ideal for vibrant garden beds, enhancing patios and decks, creating focal points in front yards, or growing a variety of vegetables and flowers. Designed to endure outdoor elements. |
Knowing these key differences empowers you to make informed decisions about the best design, materials, and finishing touches for your DIY wooden planter, ensuring it performs optimally in its intended environment, whether that’s gracing your living room or enriching your garden.
Common Pitfalls and How to Build Better Planters
Even with simple projects like building a wooden planter, small oversights can lead to big problems down the line. Learning from common mistakes can save you time, effort, and ensure your planter remains strong and beautiful for years. Here’s what to watch out for and how to avoid these pitfalls:
Essential Mistakes to Avoid for Durable Planters
- Skipping Drainage Holes: This is arguably the most common and detrimental mistake. Without adequate drainage, water accumulates at the bottom, leading to root rot for your plants and rapidly accelerating the decay of the wood. Always drill several well-sized holes in the base to allow excess water to flow out freely.
- Using Pressure-Treated Wood for Edible Plants or Indoors: While pressure-treated wood is designed for outdoor durability, it contains chemicals that can be harmful if they leach into soil, especially for food-producing plants. For indoor planters, these chemicals can affect air quality. Always opt for naturally resistant woods (like cedar or redwood) or untreated lumber for food gardens and indoor use.
- Neglecting to Seal All Surfaces (Especially Edges): Wood edges and end grains are like sponges, absorbing moisture far more rapidly than face grains. If you don’t thoroughly seal all sides – inside, outside, top, bottom, and especially the cut ends – water will penetrate, causing swelling, cracking, and soft spots. A complete and consistent sealant application is vital for longevity.
- Forgetting Pilot Holes Before Screwing: Driving screws directly into wood, especially near ends or with denser woods, often results in unsightly and weakening splits. Drilling a pilot hole (slightly smaller than the screw’s diameter) creates a path for the screw, preventing wood from splitting and ensuring a much stronger, cleaner joint.
- Not Squaring the Frame During Assembly: A planter that isn’t perfectly square from the start will likely be wobbly, unstable, and prone to structural failure. Regularly use a speed square or carpenter’s square during assembly to ensure all corners are at a true 90-degree angle. Clamps can help hold pieces square as you fasten them.
I’ve learned firsthand that rushing or skipping these seemingly small details can lead to disappointment later on. A little extra care during construction and finishing goes a long way in creating a planter that truly lasts.
Conclusion: Your Journey to a Greener Space Begins Now
Crafting your own DIY wooden planters is an incredibly rewarding endeavor, much easier and more enjoyable than you might initially imagine. Having built several planters myself, I can attest that once you grasp the basics—from selecting the right wood and following simple construction steps to implementing essential maintenance and avoiding common pitfalls—the entire process becomes wonderfully straightforward and immensely satisfying.
Now, it’s your turn to embrace the tools and create something that perfectly reflects your personal style and enhances your space. Take it one step at a time, savor the creative journey, and have fun watching your vision come to life. Should you need more guidance or inspiration for your next home improvement project, I’ll be here with more practical tips and guides.
Looking for more helpful ideas and detailed instructions like this? Explore my other blogs on the website for clear, actionable guides that will empower you in all your home and garden projects!
